Samsung Electronics Co STHA325 Dual-Mode Cellular Phone (AMPS/TDMA) User Manual 00 Cover
Samsung Electronics Co Ltd Dual-Mode Cellular Phone (AMPS/TDMA) 00 Cover
Contents
- 1. User Manual
- 2. Users Manual per CRN 7160
User Manual

Printed in Korea
Code No. : GH68-xxxxxA
English. 11/2002. Rev. 1.0
TDMA MOBILE
TELEPHONE
STH-A325
Draft version
(2002/10/30)
The reference page number
and index will updated when
the manual is complete.
* Some contents in this manual may differ from your phone depending on
the software of the phone or your service provider.
Please, be sure to read this
manual before using your phone.
And keep the manual after
reading it and use any time you
have a question.
www.samsungmobile.com

1
Contents
Unpacking. . . . . . . . . . . . . . . . . . . . . . . . . . . . . . . . . . 7
Your Phone
Phone Layout . . . . . . . . . . . . . . . . . . . . . . . . . . . . . . . . . 8
Display. . . . . . . . . . . . . . . . . . . . . . . . . . . . . . . . . . . . . 11
Getting Started
Installing the Battery . . . . . . . . . . . . . . . . . . . . . . . . . . 14
Charging the Battery . . . . . . . . . . . . . . . . . . . . . . . . . . 16
Switching the Phone On/Off . . . . . . . . . . . . . . . . . . . . . 18
Locking Your Phone . . . . . . . . . . . . . . . . . . . . . . . . . . . 19
Call Functions
Making a Call . . . . . . . . . . . . . . . . . . . . . . . . . . . . . . . . 20
Making a Call from the Phonebook . . . . . . . . . . . . . . . . 21
Redialing the Last Number . . . . . . . . . . . . . . . . . . . . . . 21
Adjusting the Volume . . . . . . . . . . . . . . . . . . . . . . . . . . 22
Answering a Call . . . . . . . . . . . . . . . . . . . . . . . . . . . . . 23
Viewing Missed Calls . . . . . . . . . . . . . . . . . . . . . . . . . . 24
Quickly Switching to Silent Mode . . . . . . . . . . . . . . . . . . 26
Selecting Functions and Options
Using the Soft Keys . . . . . . . . . . . . . . . . . . . . . . . . . . . . . . 27
Selecting Functions and Options . . . . . . . . . . . . . . . . . . . 28
Example: Setting the Display Language . . . . . . . . . . . . 29
Phonebook
Storing a Phone Number with a Name . . . . . . . . . . . . . 32
Speed Dialing by Memory Location . . . . . . . . . . . . . . . 33
Entry Options . . . . . . . . . . . . . . . . . . . . . . . . . . . . . . . . 34
Searching for a Number in the Phonebook . . . . . . . . . 37
Phonebook Options . . . . . . . . . . . . . . . . . . . . . . . . . . . 38
FCC RF EXPOSURE INFORMATION
In August 1996 the Federal Communications Commission (FCC) of
the United States with its action in Report and Order FCC 96-326
adopted an updated safety standard for human exposure to radio
frequency electromagnetic energy emitted by FCC regulated
transmitters. Those guidelines are consistent with the safety
standard previously set by both U.S. and international standards
bodies. The design of this phone complies with the FCC
guidelines and these international standards.
Use only the supplied or an approved antenna. Unauthorized
antennas, modifications, or attachments could impair call quality,
damage the phone, or result in violation of FCC regulations.
Do not use the phone with a damaged antenna. If a damaged
antenna comes into contact with the skin, a minor burn may
result. Please contact your local dealer for replacement antenna.
Body-worn Operation
This device was tested for typical body-worn operations with the
back of the phone kept 1.5 cm. from the body. To maintain
compliance with FCC RF exposure requirements, use only belt-
clips, holsters or similar accessories that maintain a 1.5 cm.
separation distance between the user's body and the back
of the phone. The use of belt-clips, holsters and similar
accessories should not contain metallic components in its
assembly. The use of accessories that do not satisfy these
requirements may not comply with FCC RF exposure
requirements, and should be avoided.
Contact your local dealer for optional accessory items.
Vehicle Mounted External Antenna (optional, if
available.)
A minimum separation distance of 7.9 inches (20cm) must be
maintained Between a person and the vehicle mounted external
antenna to satisfy FCC RF exposure requirements.
For more information about RF exposure, please visit the FCC
website at www.fcc.gov

Entering Text
Changing the Text Input Mode . . . . . . . . . . . . . . . . . . . 42
Using the T9 Mode . . . . . . . . . . . . . . . . . . . . . . . . . . . . 43
Using the Upper/Lower-case Character Mode . . . . . . . 44
Using the Number Mode . . . . . . . . . . . . . . . . . . . . . . . . . . 45
Options During a Call
Muting/Sending Key Tones . . . . . . . . . . . . . . . . . . . . . . 46
Searching for a Number in the Phonebook . . . . . . . . . . 47
Using the SMS Service . . . . . . . . . . . . . . . . . . . . . . . . 48
Making a Calling card call . . . . . . . . . . . . . . . . . . . . . . . . 48
Making a Private Voice Call . . . . . . . . . . . . . . . . . . . . . . . . 49
Putting a Call on Hold. . . . . . . . . . . . . . . . . . . . . . . . . . 49
Answering a Second Call . . . . . . . . . . . . . . . . . . . . . . . 50
Making a 3-way Conference Call . . . . . . . . . . . . . . . . . 51
Using the Menus
Accessing a Menu Function by Scrolling . . . . . . . . . . . 52
Accessing a Menu Function by Using its Shortcut . . . . 53
List of Menu Functions . . . . . . . . . . . . . . . . . . . . . . . . . 54
Call Records
Missed Calls (Menu 1.1) . . . . . . . . . . . . . . . . . . . . . . . . 58
Incoming Calls (Menu 1.2) . . . . . . . . . . . . . . . . . . . . . . 58
Outgoing Calls (Menu 1.3). . . . . . . . . . . . . . . . . . . . . . . 59
Call Time (Menu 1.4) . . . . . . . . . . . . . . . . . . . . . . . . . . . 59
Messages
Voice Mail (Menu 2.1). . . . . . . . . . . . . . . . . . . . . . . . . . 60
Read Messages (Menu 2.2) . . . . . . . . . . . . . . . . . . . . . 61
Write Messages (Menu 2.3) . . . . . . . . . . . . . . . . . . . . . 63
Preset Message List (Menu 2.4) . . . . . . . . . . . . . . . . . . 64
Setup (Menu 2.5) . . . . . . . . . . . . . . . . . . . . . . . . . . . . . 65
Picture Message (Menu 2.6). . . . . . . . . . . . . . . . . . . . . 66
Receiving Pictures, Ring Tones or Caller Line Icons . . . 68
3
2
Tones
Ring Tone (Menu 3.1) . . . . . . . . . . . . . . . . . . . . . . . . . . 71
Ring Volume (Menu 3.2) . . . . . . . . . . . . . . . . . . . . . . . . 71
Alert Type (Menu 3.3) . . . . . . . . . . . . . . . . . . . . . . . . . . 72
Keypad Tone (Menu 3.4) . . . . . . . . . . . . . . . . . . . . . . . . 72
Message Tone (Menu 3.5) . . . . . . . . . . . . . . . . . . . . . . 73
Error Tone (Menu 3.6) . . . . . . . . . . . . . . . . . . . . . . . . . . 73
Minute Minder (Menu 3.7) . . . . . . . . . . . . . . . . . . . . . . 74
Connect Tone (Menu 3.8) . . . . . . . . . . . . . . . . . . . . . . . 74
Function Sound (Menu 3.9) . . . . . . . . . . . . . . . . . . . . . . 75
Settings
Infrared Activate (Menu 4.1). . . . . . . . . . . . . . . . . . . . . 76
LCD Display Control (Menu 4.2). . . . . . . . . . . . . . . . . . . 77
Auto Redial (Menu 4.3) . . . . . . . . . . . . . . . . . . . . . . . . . 79
Active Folder (Menu 4.4). . . . . . . . . . . . . . . . . . . . . . . . 80
Language (Menu 4.5) . . . . . . . . . . . . . . . . . . . . . . . . . . 80
Reset Settings (Menu 4.6). . . . . . . . . . . . . . . . . . . . . . . 81
Calling card (Menu 4.7) . . . . . . . . . . . . . . . . . . . . . . . . 81
Short Cut Key (Menu 4.8) . . . . . . . . . . . . . . . . . . . . . . . 84
Organizer
Calendar (Menu 5.1) . . . . . . . . . . . . . . . . . . . . . . . . . . . 85
To Do List (Menu 5.2) . . . . . . . . . . . . . . . . . . . . . . . . . . 87
Time & Date (Menu 5.3) . . . . . . . . . . . . . . . . . . . . . . . . 89
Alarm (Menu 5.4) . . . . . . . . . . . . . . . . . . . . . . . . . . . . . 91
Calculator (Menu 5.5) . . . . . . . . . . . . . . . . . . . . . . . . . . 92
Security
Change Lock Code (Menu 6.1) . . . . . . . . . . . . . . . . . . . 93
Change Security Code (Menu 6.2). . . . . . . . . . . . . . . . . 93
Call Restriction (Menu 6.3) . . . . . . . . . . . . . . . . . . . . . . 94
SOS Call List (Menu 6.4) . . . . . . . . . . . . . . . . . . . . . . . . 95

5
4
Important Safety
Precautions
Read these guidelines before using your wireless
phone. Failure to comply with them may be
dangerous or illegal. For more detailed safety
information, see “Health and Safety Information” on
page 109.
Road Safety at All Times
Do not use a hand-held phone while driving; park the
vehicle first.
Switching Off When Refueling
Do not use the phone at a refueling point (service
station) or near fuels or chemicals.
Switching Off in Aircraft
Wireless phones can cause interference. Using them
in aircraft is both illegal and dangerous.
Switching Off in Hospitals
Switch off your phone near medical equipment.
Follow any regulations or rules in force.
Interference
All wireless phones may be subject to interference,
which could affect their performance.
Special Regulations
Meet any special regulations in force in any area and
always switch off your phone whenever it is
forbidden to use it, or when it may cause
interference or danger (in a hospital for example).
Network Services
Call Diverting (Menu 7.1) . . . . . . . . . . . . . . . . . . . . . . . 96
Call Waiting (Menu 7.2) . . . . . . . . . . . . . . . . . . . . . . . . 97
Network Selection (Menu 7.3) . . . . . . . . . . . . . . . . . . . 98
Voice Privacy (Menu 7.4) . . . . . . . . . . . . . . . . . . . . . . . 99
NAM Selection (Menu 7.5) . . . . . . . . . . . . . . . . . . . . . . 99
Set Service Code (Menu 7.6) . . . . . . . . . . . . . . . . . . . 100
Public System Selection (Menu 7.7) . . . . . . . . . . . . . . 101
Games . . . . . . . . . . . . . . . . . . . . . . . . . . . . . . . . . . . 102
Voice Functions
Voice Dial (Menu 10.1) . . . . . . . . . . . . . . . . . . . . . . . . 103
Voice Memo (Menu 10.2) . . . . . . . . . . . . . . . . . . . . . . 105
Solving Problems . . . . . . . . . . . . . . . . . . . . . . . . . . 107
Health and Safety Information . . . . . . . . . . . . . . . 109
Glossary. . . . . . . . . . . . . . . . . . . . . . . . . . . . . . . . . . 124
Index . . . . . . . . . . . . . . . . . . . . . . . . . . . . . . . . . . . . 127
Quick Reference Card . . . . . . . . . . . . . . . . . . . . . . 131
6
SSaaffeettyy QQuuiicckk GGuuiiddee
The illustrations above may look different from your
phone and accessories.
In addition, you can obtain the following accessories
for your phone from your local Samsung dealer:
•Hands-free kit
•Standard battery
• Cigarette lighter adapter
•Ear-microphone
• Leather case
7
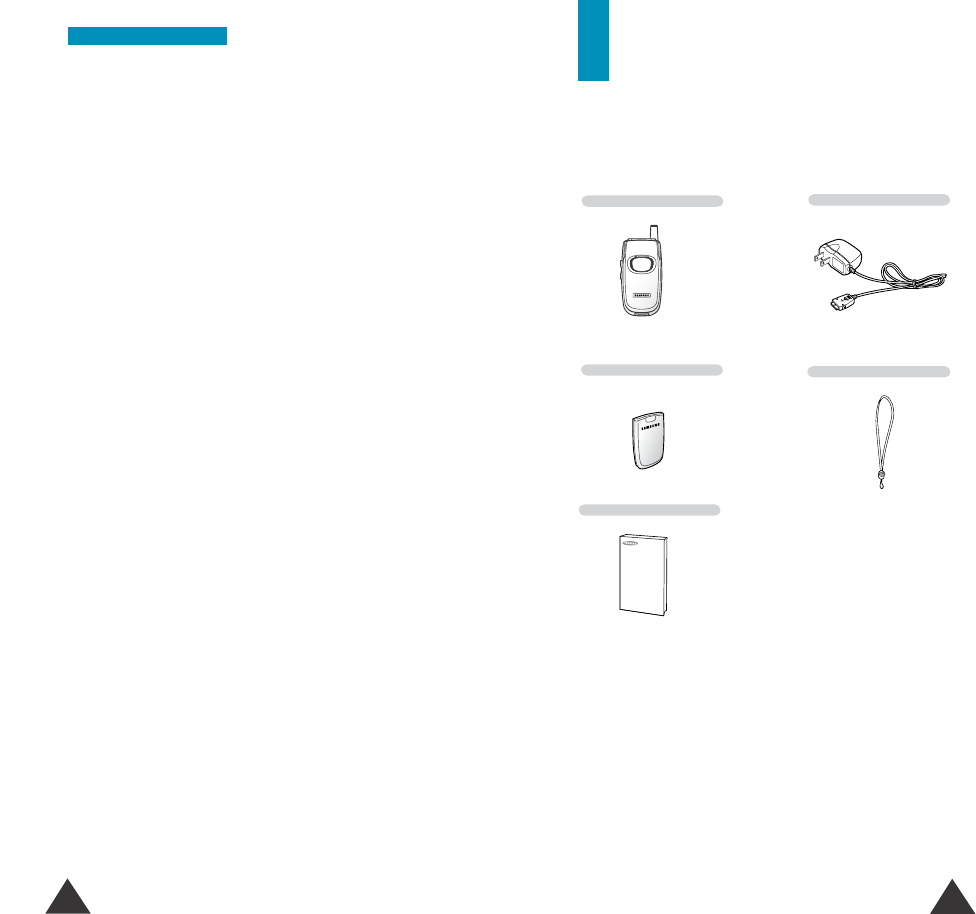
Travel Charger
Handset
User’s Manual
Radio frequency exposure information
In August 1996, the Federal Communications
Commission (FCC) of the U.S. adopted an updated
safety standard for human exposure to radio
frequency electromagnetic energy emitted by FCC
regulated transmitters. The design of this phone
complies with the FCC guidelines and these
international standards.
Sensible Use
Use only in the normal position (held to the ear).
Avoid unnecessary contact with the antenna when
the phone is switched on.
Accessories and Batteries
Use only Samsung-approved accessories and
batteries.
Qualified Service
Only qualified service personnel may install or repair
your phone.
Unpacking
Your package contains the following items:
Battery Hand Strap

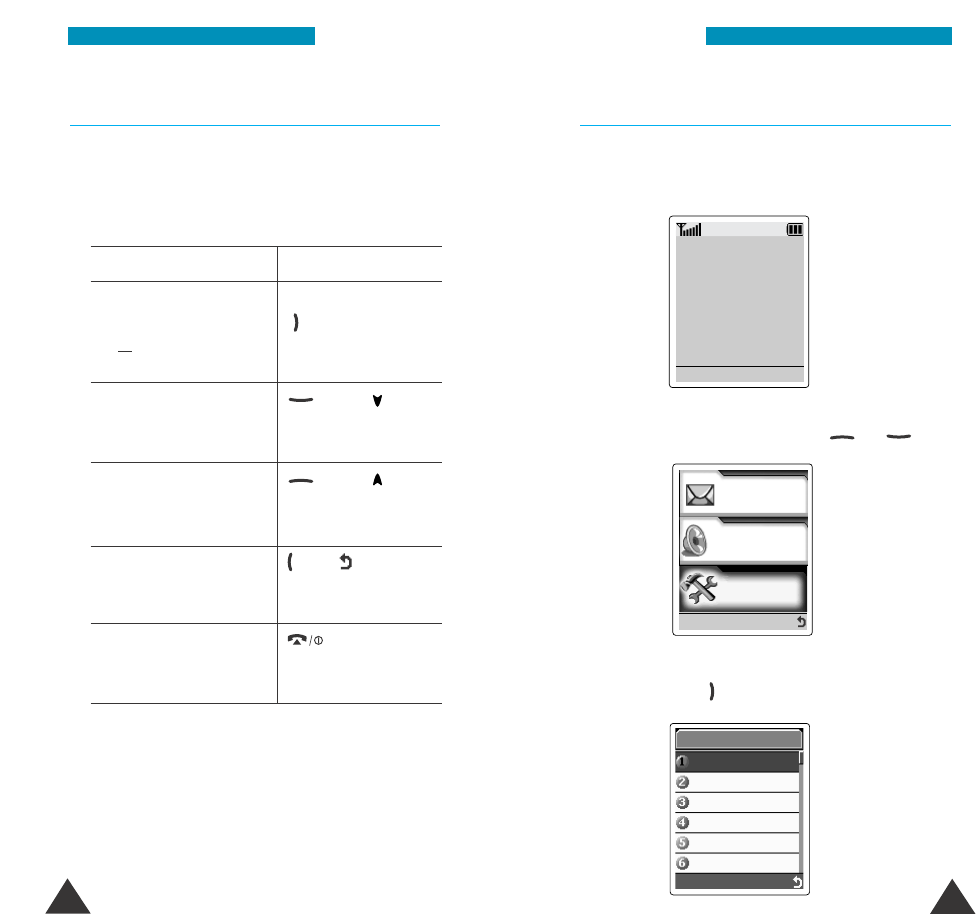
Key Description
Perform the functions indicated by the text
above them on the bottom line of the
display.
In menu mode, scroll through the menu
options and phonebook memory.
In idle mode, enter your favorite menus
directly. For more information about
shortcut keys, see page 83.
In menu mode, returns to the previous
menu level and selects the current menu
respectively.
In idle mode, enter your favorite menus
directly. For more information about
shortcut keys, see page 83.
When entering text, moves the cursor to
the left and to the right respectively.
Makes or answers a call.
In idle mode, enters the Last Call logs.
Also, redials the last number you dialed
when held down.
98
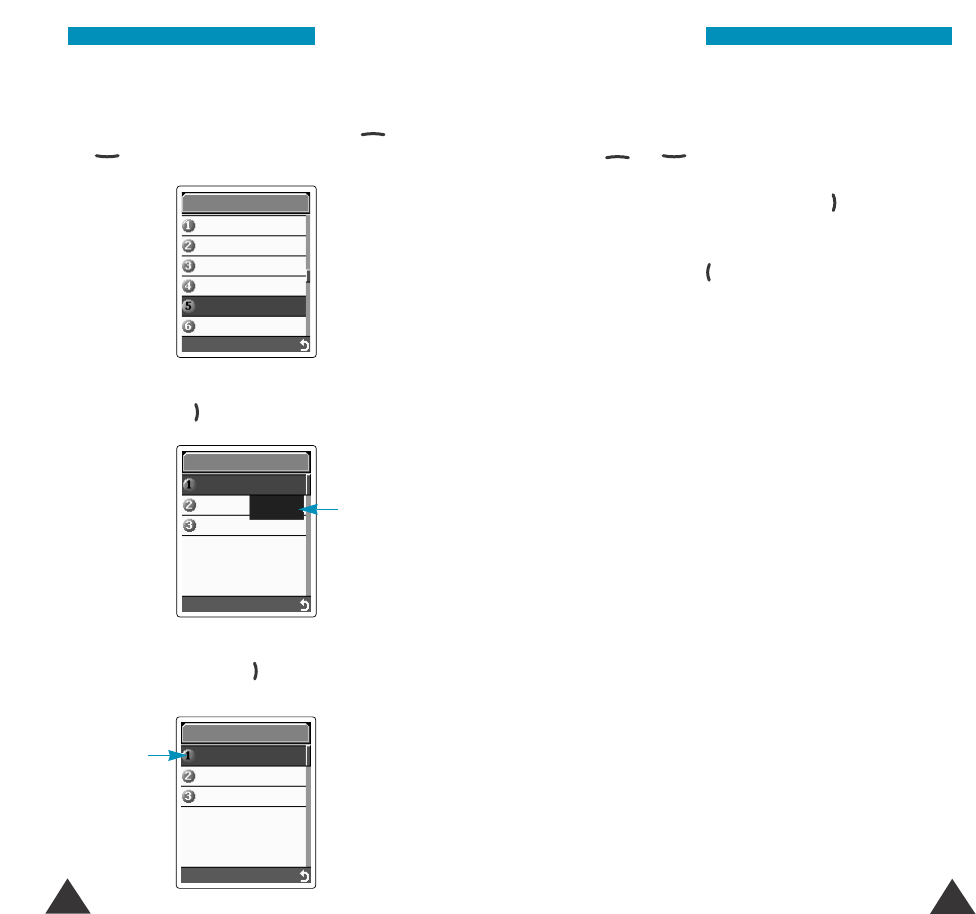
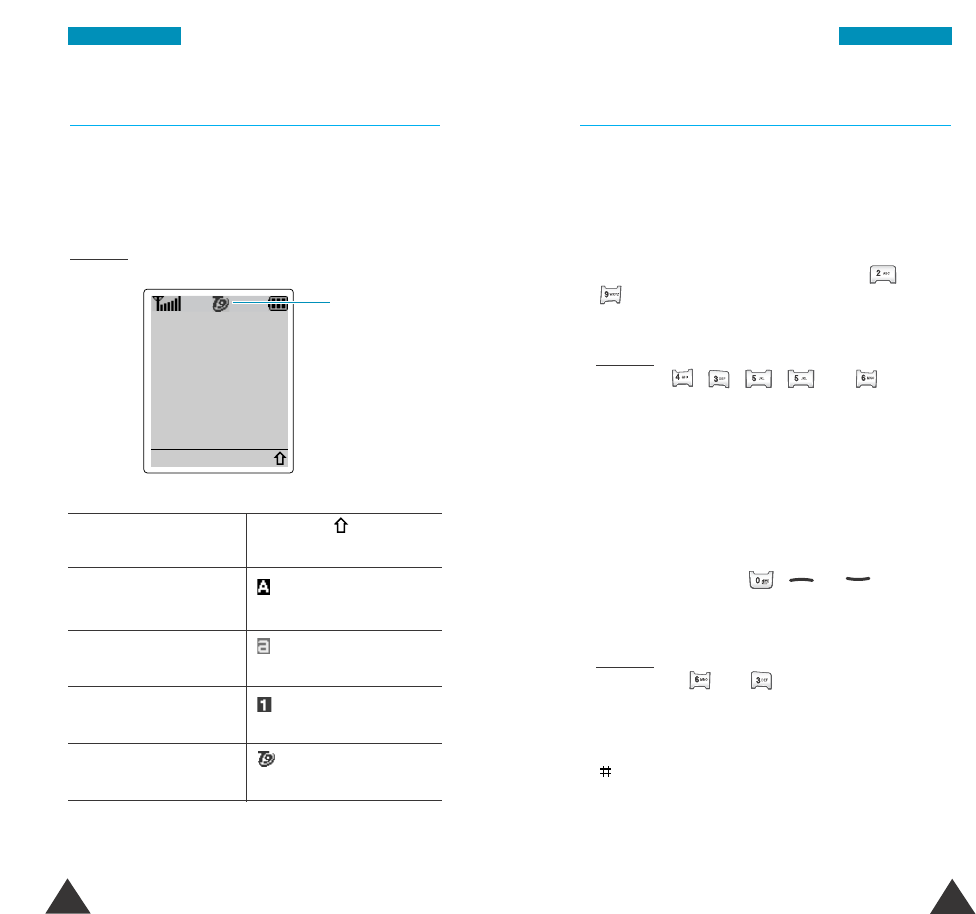
YYoouurr PPhhoonnee
Earpiece
Soft key (left)
Navigation keys
Display
Soft key (right)
Cancel/
correction key
Power on/off key
Alphanumeric
keys
Special function
keys
Dial/menu
confirmation key
Microphone
Your Phone
Phone Layout
The following illustrations show the main elements
of your phone.
Antenna
External display
Ear-microphone
jack
WAP Browser
Key
Volume keys
Folder
(soft keys)
Infrared port
Closed view
Open view

Display
Layout
The display comprises three areas.
Area Description
First line Displays various icons (see page 12).
Middle lines Display messages, instructions and
any information that you enter,
number to be dialed, for example.
Last line Shows the functions currently
assigned to the two soft keys.
11
10
YYoouurr PPhhoonneeYYoouurr PPhhoonnee
Key Description (continued...)
Deletes characters from the display.
In menu mode, returns to the previous
menu level.
In idle mode, quickly enters or exits silent
mode when held down.
Ends a call. Also switches the phone on
and off when held down.
In menu mode, cancels your input and
returns to idle mode.
In idle mode, allows you to quickly access
your voice mail box when held down.
Enter numbers, letters and some special
characters.
Enter special dial characters. Also use
these keys for various purposes in
different functions.
(on the side of the phone)
During a call, adjust the earpiece volume.
In idle mode with the folder open, adjust
the key volume.
In menu mode, scroll through the menu
options or Phonebook memory.
~
Icons
Text and
graphic area
Soft key
indications
Menu Names

13
12
YYoouurr PPhhoonneeYYoouurr PPhhoonnee
Icons
Icon Description
Shows the received signal strength. The
greater the number of bars, the better the
signal.
Appears when a call is in progress.
Appears when a new text message is
received.
Appears when silent mode is active and
when the Alert Type menu option (Menu
3.3) is set to Vibration or Vibra +
Melody.
Appears when you set an alarm.
Shows the level of your battery. The more
bars you see, the more power you have
left.
Appears when you are out of your home
area and have registered onto a different
network; when travelling in other countries,
for example.
Appears when a new voice mail message is
received.
Appears when you activate mute mode.
Appears when the IrDA port is active. For
details, see page 83.
Backlight
The display is illuminated by a backlight. When you
press any key or open the folder, the backlight
illuminates. It turns off if no key is pressed within a
given period of time, depending on the Back Light
option set in the Lcd Display Control menu.
To specify the length of time for which the backlight
is active, set the Back Light menu option (Menu
4.2.4); see page 77 for further details.
You can also set the phone to use the backlight only
during a specified period of time in the Auto Light
menu option (Menu 4.2.5); see page xx for further
details.
External Display
Your phone has an external display on the folder. It
indicates that you have an incoming call or a
message, and notifies you at the specified time
when you have set an alarm.
15
14
GGeettttiinngg SSttaarrtteedd
Getting Started
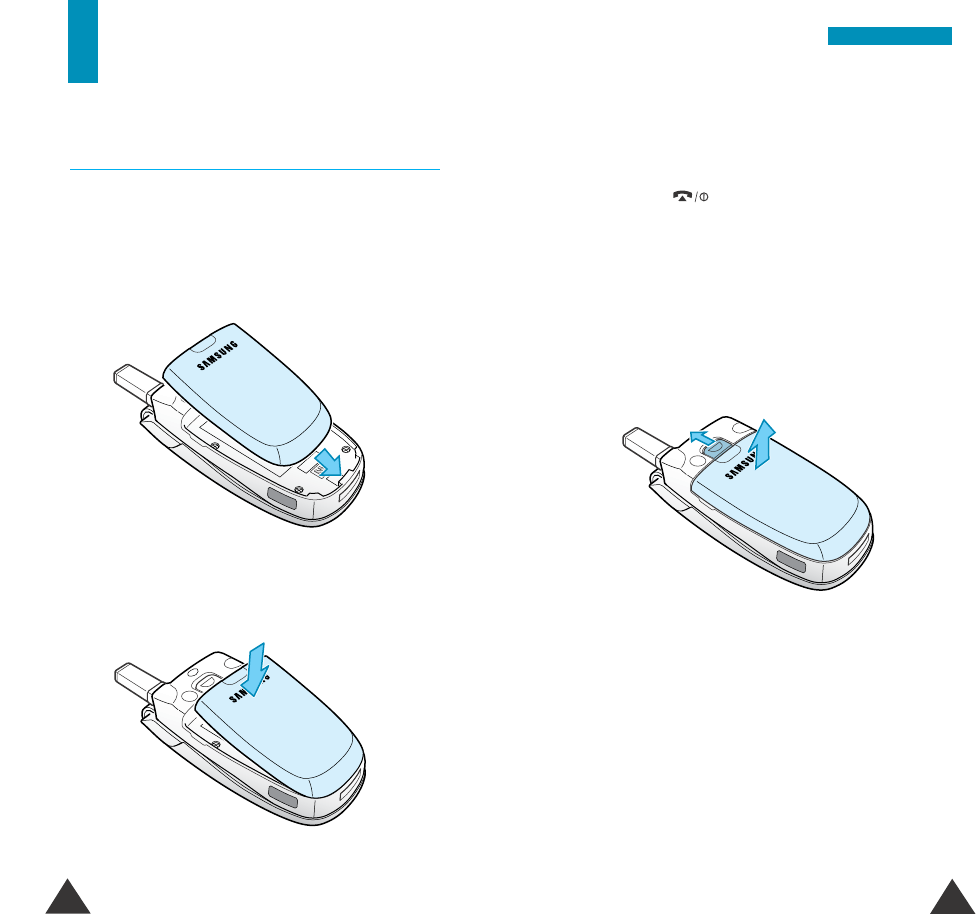
Installing the Battery
To Install the Battery
1. Insert the battery as shown to fit the tabs on the
battery into the notches on the bottom of the
phone.
2. Press down the battery until it clicks into place.
To Remove the Battery
1. If necessary, switch the phone off by holding
down the key until the power-off image
begins to play.
2. Remove the battery. To do so:
➀pull the catch above the battery upwards and
hold it in the position, then
➁take the battery out of the phone. It will
easily lift out.
➁
➀
17
16
GGeettttiinngg SSttaarrtteeddGGeettttiinngg SSttaarrtteedd
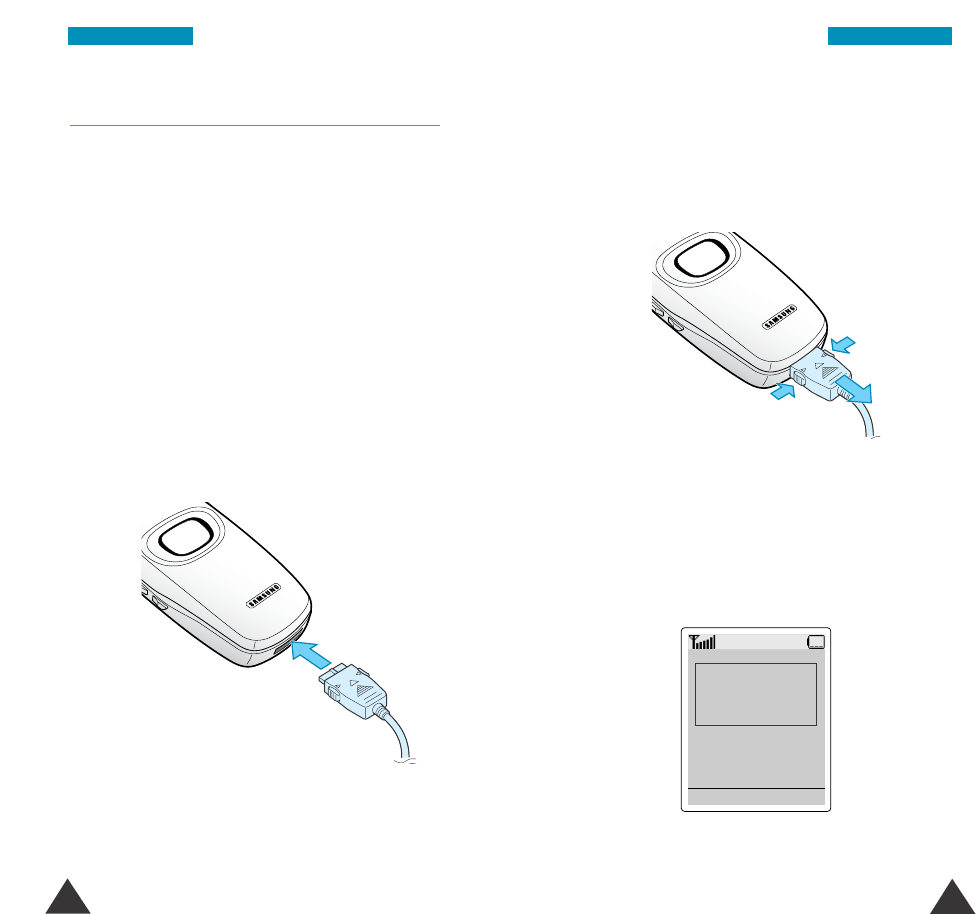
Charging the Battery
Your phone is powered by a rechargeable Li-Ion
battery. A travel charger is provided with your phone.
Use only approved batteries and chargers. Ask your
local Samsung dealer for further details.
The phone can be used while the battery is charging.
Note: You must fully charge the battery before using
your phone for the first time. A discharged
battery is fully recharged in approximately
200 minutes.
1. With the battery in position on the phone, plug
the connector of the travel charger into the jack at
the bottom of the phone.
2. Plug the charger into a standard AC wall outlet.
3. When charging is finished (the lamp on the
charger turns green), unplug the charger from the
power outlet and remove it from the phone by
squeezing the two tabs on the connector (➀) and
unplug the connector (➁).
Low Battery Indicator
When the battery is weak and only a few minutes of
talk time remain, you will hear a warning tone and
the following message will be repeated at regular
intervals on the display, along with the empty battery
icon:
When the battery becomes too weak for the phone
to operate, it switches off automatically.
**Warning**
Low Battery
Menu Names
➀
➀
➁
19
18
GGeettttiinngg SSttaarrtteeddGGeettttiinngg SSttaarrtteedd
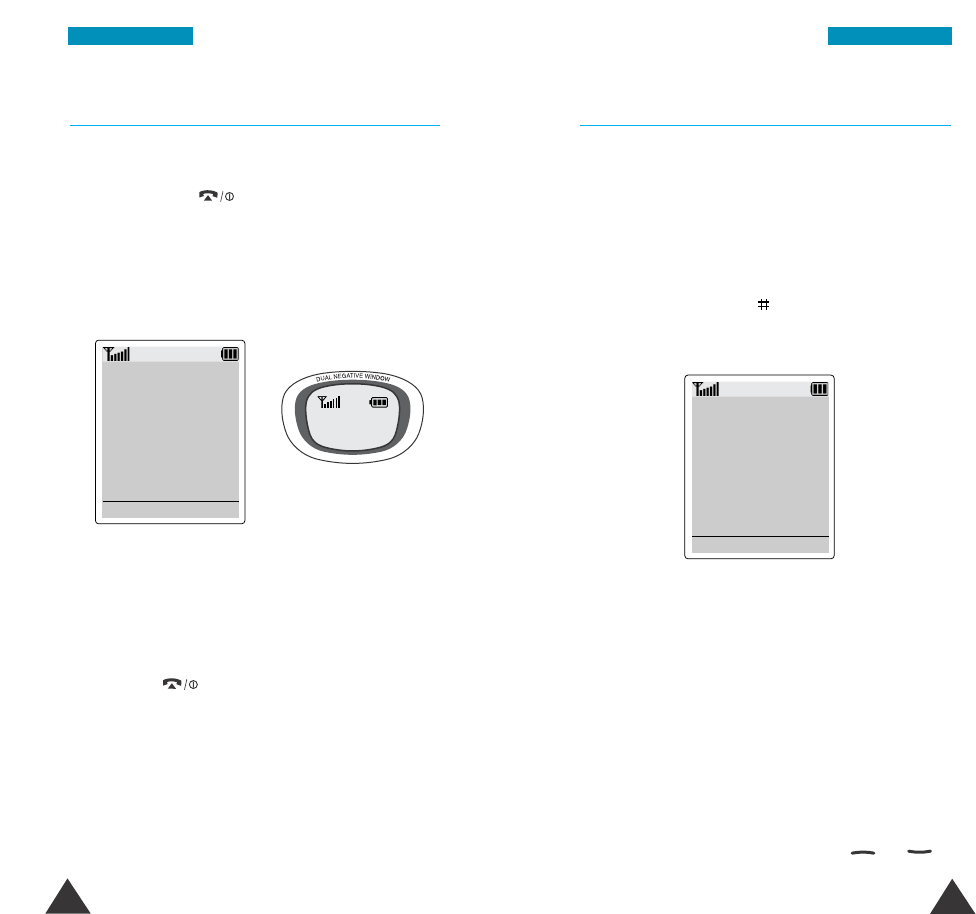
Switching the Phone On/Off
1. Open the folder.
2. Hold down the key for more than one
second to switch the phone on.
3. The phone searches for your service system.
When it finds the system, the idle screen,
illustrated below, appears on each display.
Service Provider
12:57
Sat 14 Mar
Menu Names
12:57
Sat/14
Note: To change the language, use the Language
menu option (Menu 4.5); for further details,
refer to page 80.
4. When you wish to switch the phone off, hold
down the key for more than two seconds.
Locking Your Phone
You can lock your phone to protect it against
unauthorized use. When your phone is locked, you
cannot use the phone’s features until you enter the
lock code.
To lock your phone:
Press and hold down the key for more than two
seconds in idle mode. “Phone Locked” appears on
the idle screen.
Service Provider
Phone Locked
Sat 14 Mar
Unlock SOS
To unlock the phone:
Press the Unlock soft key, enter the 4-digit lock
code and then press the OK soft key. Your phone’s
lock code is preset to “0000” at the factory. For
further details about the lock code, see page 92.
Even if the phone is locked, you can place an SOS
call to one of the emergency numbers stored in the
SOS Call List (Menu 6.4). See page 94 for further
details.
To place an SOS call, press the SOS soft key, select
an emergency number by pressing the or
key and press the Yes soft key.
20 21
CCaallll FFuunnccttiioonnss
Call Functions
Making a Call
When the idle screen is displayed, enter the area
code and phone number and press the key.
Note:
If you have set the Auto Redial menu option
(Menu 4.3) to ON (see page 79), the number is
automatically redialed up to ten times when the
person you called does not answer or is already
on the phone. If the network answers the call by
voice mail greeting, the phone will not attempt to
redial.
Correcting the Number
To clear Press the
the last digit Ckey.
displayed
any other digit or key until the cursor
in the number is immediately to the right of
the digit to be cleared. Press
the Ckey. You can also insert a
missing digit simply by
pressing the appropriate key.
the whole display Ckey and hold down for more
than two seconds.
Ending a Call
When you want to finish your call, briefly press and
release the key or close the folder.
Making a Call from the Phonebook
You can store the frequently-dialed phone numbers
with an appropriate name in the phone memory,
which is called Phonebook. You then simply select
the required name to recall the associated number.
For further details about the Phonebook feature, refer
to page 32.
Redialing the Last Number
The phone stores the last 10 numbers dialed.
To recall any of these numbers:
1. If you have typed any characters on the display,
press the key to return to idle mode.
2.
Press the key to display the last dialed
numbers.
3. Press the or key to scroll through the
numbers until the required number displays.
4. To Press the
dial the number key.
displayed
edit the number • Edit soft key and
change
displayed
the number, referring to
“Correcting the Number” for
details (see page 20).
• Save soft key to save the
number or
the key to
dial the number.
23
CCaallll FFuunnccttiioonnss
22
CCaallll FFuunnccttiioonnss
Adjusting the Volume
During a call, if you want to adjust the earpiece
volume, use the volume keys on the left side of the
phone.
Press the key to increase the volume level and the
key to decrease the level. The more bars you see,
the louder the sound is.
In idle mode with the folder open, you can adjust the
keypad tone volume using the and keys.
Answering a Call
When somebody calls you, the phone rings and the
following screens appears on each of the displays.
If the caller can be identified, the caller’s phone
number or name, if stored in your Phonebook, is
displayed.
1. Open the folder. Then, press the key or the
Accept soft key.
2. End the call by closing the folder or pressing the
key.
Note: You can answer a call while using the
Phonebook or menu features. The current
operation will be interrupted.
Accept
25
CCaallll FFuunnccttiioonnss
24
CCaallll FFuunnccttiioonnss
Viewing Missed Calls
If you are unable to answer a call for any reason, you
can find out who was calling you, provided that the
Caller Line Identification service is available, so that
you can call the person back, if necessary.
The number of missed calls is displayed on the idle
screen immediately after the call was missed.
To view the missed call immediately:
1. If the folder is closed, open it.
2. Press the View soft key.
The number corresponding to the most recent
missed call is displayed, if available.
3. To Press the
scroll through the or key.
missed calls
call the number key.
displayed
edit or delete a missed Options soft key
call number (refer to the
following page).
Editing a Missed Call Number
Note: If the caller’s number associated with the
missed call is not available, the Edit option is
not displayed.
1. Press the Options soft key.
2. If necessary, press the or key to
highlight the Edit option.
3. Press the Select soft key.
4. Change the number as required.
5. To... Press the...
call the number key.
store the number Save soft key and enter
the name and location
required (for further
details, refer to page 32).
Deleting a Missed Call
1. Press the Options soft key.
2. If necessary, press or key to highlight
the Delete option.
3. Press the Select soft key.
You can press the key at any time to exit the
Missed Call feature.
Note: You can access the Missed Call feature at
any time by selecting the Missed Calls menu
option (Menu 1.1); for further details, see page
58.
27
26
CCaallll FFuunnccttiioonnss
Quickly Switching to Silent Mode
You can quickly switch your phone to silent mode
with a touch of a key to mute the phone’s sound.
Press and hold the Ckey until the icon and
“Silent Mode” appears on the display. Your phone
goes to silent mode immediately.
In silent mode, your phone switches the sound
settings as listed below:
Option New setting
Alert Type (Menu 3.3)Vibration
Keypad Tone (Menu 3.4) off
Message Tone (Menu 3.5)Vibration
Error Tone (Menu 3.6)OFF
Minute Minder (Menu 3.7)OFF
Connect Tone (Menu 3.8)OFF
To exit silent mode, press and hold the Ckey again
until “Exit Silent Mode” appears.
This feature is convenient when you are in a hurry to
mute the phone sound, such as when in a theater.
Selecting Functions
and Options
Using the Soft keys
Your phone offers a set of functions that allow
you to customize your phone. These functions are
arranged in menus and sub-menus, accessed via the
two soft keys marked . Each menu and sub-
menu allows you to view and alter the settings of a
particular function.
The roles of the soft keys vary according to the
current context; the label on the bottom line of the
display just above each key indicates its current role.
Example:
Service Provider
12:57P
Sat 14 Mar
Menu Names
Press the left soft
key to enter menu
mode.
Press the right soft key to
search a Phonebook entry
by entering its name.
29
SSeelleeccttiinngg FFuunnccttiioonnss aanndd OOppttiioonnss
28
SSeelleeccttiinngg FFuunnccttiioonnss aanndd OOppttiioonnss
Selecting Functions and Options
To view the various functions/options available and
select the one required:
1. Press the appropriate soft key.
2. To Press the
select the: Select soft key or
•function displayed key.
or
•option highlighted
view the next function key or key on
or highlight the next the left side of the
option in a list phone.
move back to the key or key on
function or the left side of the
option in a list phone.
move back up one key, soft key or
level in the structure
C key.
exit the structure key.
without changing
the settings
In some functions, you may be asked for a lock code
or security code. Enter the required code and press
the OK soft key.
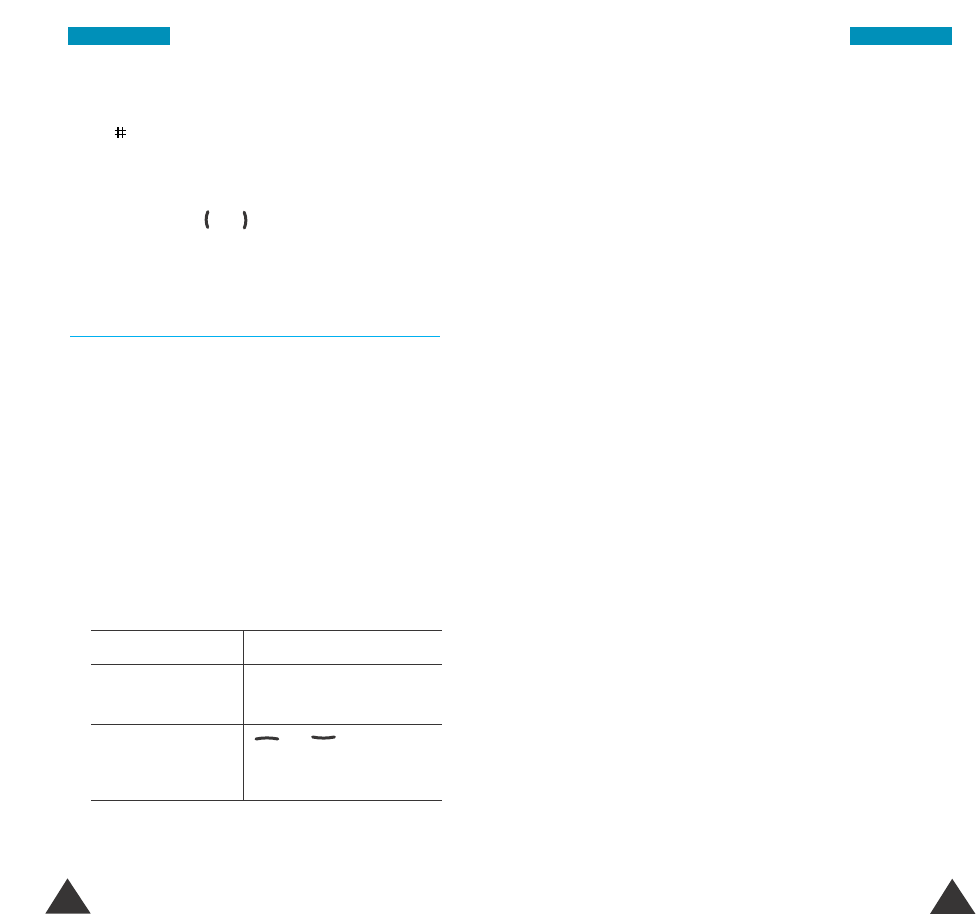
Example: Setting the Display Language
1. When the idle screen is displayed, press the
Menu soft key to enter menu mode.
Service Provider
12:57
Sat 14 Mar
Menu Names
Messages
Tones
Settings
Select 4
Settings
Infrared Act...
Lcd Display C...
Auto Redial
Active Folder
Language
Reset Settings
Select 4.1
3. To select the Settings menu, press the Select
soft key or the key.
2. Scroll through the menus until you reach the
Settings menu, by pressing the or key.
31
SSeelleeccttiinngg FFuunnccttiioonnss aanndd OOppttiioonnss
30
SSeelleeccttiinngg FFuunnccttiioonnss aanndd OOppttiioonnss
4. Scroll through the sub-menus until you reach the
Language sub-menu, by pressing the or
key.
Settings
Infrared Act...
Lcd Display C...
Auto Redial
Active Folder
Language
Reset Settings
Select 4.5
Language
Text Langua...
Voice L
Input Mode
Select 4.5.1
Text Language
English
Español
Português
Select 4.5.1.1
5. To select the Language menu, press the Select
soft key or the key.
6. When Text Language highlights, press the
Select soft key or the key. The current setting
is highlighted.
Current
language
Current
language
English
7. Scroll through the list of the languages until the
appropriate one is highlighted, by pressing the
or key.
8. Press the Select soft key or the key to confirm
your selection.
9. Press the Cor key twice to exit the menu
structure.

33
32
Phonebook
The Phonebook allows you to store frequently used
phone numbers and the associated names in your
phone to make it easy for you to make a call without
having to remember or enter the phone number. You
can store up to 500 (1 ~ 500) entries.
Storing a Phone Number with a Name
As soon as you start to enter a number, Save
appears above the left soft key to allow you to store
the number in the Phonebook.
1. Enter the number to be stored.
Note: If you make a mistake while entering a
number, correct it using the Ckey. For
further details, refer to page 21.
2. When you are sure that it is correct, press the
Save soft key.
3. Select a label of your number by pressing the
or key, and press the Select soft key.
The available labels are Home, Office, Mobile,
Pager, Fax and E-Mail.
4. Enter the corresponding name.
For information about how to enter characters,
see page 41.
5. Press the OK soft key.
The phone now prompts you to select a location
in the phone memory.
6. If necessary, press the Ckey to clear the
displayed number and enter a location number by
pressing the number keys.
7. Press the OK soft key. The entry is saved and the
display shows the name and number you just
have saved.
8. To make a call to the displayed number, press the
key.
To send an SMS message to the displayed
number, press the SMS soft key. See page 63
for further details about sending a message.
To access the Entry options, press the Options
soft key. See page 34 for further details.
9. Press the key to return to the idle screen.
Speed-dialing by Memory Location
Once you have stored phone numbers in the
Phonebook memory, you can dial them easily
whenever you want.
To speed dial the desired number:
For the 1-digit memory location number (1 through 9),
press and hold the appropriate digit down.
For the 2 or more-digit memory location number (10
through 500), press first digit(s) briefly and hold the
last digit down.
PPhhoonneebbooookk
35
34
PPhhoonneebbooookkPPhhoonneebbooookk
Add Number
This option allows you to store up to seven numbers
per entry by assigning them to different categories.
Note that you cannot duplicate same categories for
one entry. For example, you can only have one
number labeled “Mobile” for the selected entry.
Change Name
This option allows you to change the name for the
number. Clear the old name by pressing the Ckey
and enter a new name. For information about
entering characters, see page 41.
Change Number
This option allows you to change the number. Clear
the old number by pressing the C key and enter a
new number.
Change Type
This option allows you to change the label type of a
stored number. Note that you cannot duplicate same
categories for one entry. For example, you can only
have one number labeled “Mobile” for the selected
entry.
Caller Group
This option allows you to set the number as a
member of the caller group. Select a caller group
from the list. For more details about the Caller Group
feature, see page 38.
Note: If you enter the location number and press the
key, your phone displays the details on the
entry, such as name, number, location number
and label. If you have stored more than one
number for a name, scroll through the entry by
pressing the or key repeatedly.
Entry Options
When you are viewing an entry in the Phonebook,
Options appears above the right soft key to allow
you to access various entry options.
Accessing the Options
To access the Entry options:
1. While viewing a Phonebook entry, press the
Options soft key. The first available option is
highlighted.
2. To Press the
select the Select soft key.
highlighted option
highlight a or key until the
different option required option is
highlighted.
37
36
PPhhoonneebbooookkPPhhoonneebbooookk
Searching for a Number in the
Phonebook
1. When the idle screen is displayed, press the
Names soft key. You are asked to enter a name.
2. Enter the first few letters of the name that you
want to find and press the Search soft key.
Note: You can also scroll through all Phonebook
entries by pressing the Search soft key
directly.
The Phonebook entries are listed, starting with
the first entry matching your input.
3. To... Press the...
view the View soft key.
highlighted entry
select a or key different
entry until the required entry is
highlighted.
look for a name key labeled with the
starting with a required letter.
different letter
4. Once you have found the required entry, press the
key to dial the number.
To send an SMS message to the displayed
number, press the SMS soft key. See page 63
for further details about sending a message.
To access the Entry options, press the Options
soft key. See page 34 for further details.
Erase Number
This option allows you to erase a stored number. If
you saved two numbers under a name, only the
currently selected number will be erased. You are
asked to confirm that you wish to erase the number
by pressing the Yes soft key.
Erase Name
This option allows you to erase a name stored in the
Phonebook so that all numbers under the name are
erased. You are asked to confirm that you wish to
erase the name by pressing the Yes soft key.
Move
This option allows you to move a Phonebook entry to
another location. When prompted, enter the location
number to which you are moving the number, and
press the OK soft key.
Set Priority NO.
This option allows you to set the selected number as
a speed dial number for the entry if it has more than
one number. Press the Set soft key.
39
38
PPhhoonneebbooookkPPhhoonneebbooookk
Defining a caller group
Select the group to be defined and set the
appropriate options. The following options are
available:
Call ring tone: allows you to select the ring tone to
be used when you receive a voice call from a person
in the group.
SMS tone: allows you to select the ring tone to be
used when you receive a text message from a person
in the group.
Graphic: allows you to select the graphic icon to be
displayed when you receive a call from a person in
the group.
Group Name: allows you to assign a name to the
group; for further details about how to enter
characters, refer to page 41.
Assigning numbers to a group
1. View the required number in the Phonebook.
2. Press the Options soft key.
3. Select the Caller Group option.
4. Select the required group.
To remove a number from a group, select the No
Group option.
Phonebook Options
When you access your Phonebook by pressing the
Names soft key, Options appears above the right
soft key. This key allows you to enter the options for
the Phonebook.
Accessing the Options
1. In idle mode, press the Names soft key.
2. Press the Options soft key. The first available
option is highlighted.
3. To... Press the...
select the Select soft key.
highlighted option
highlight a or key until the
different option required option is
highlighted.
New Entry
This option allows you to create a new entry in the
Phonebook. For details about storing a phone
number, see page 32.
Caller Group
You can set the phone to ring by a specific ringer and
display a preselected graphic icon when a person
calls you. To do so, you need to:
• define your caller groups
• assign the numbers in the Phonebook to the
appropriate group

41
40
PPhhoonneebbooookk
Entering Text
When using your phone, you will often need to enter
text, for example, when storing a name in the
phonebook, entering a text message or scheduling
events in your calendar. You can enter alphanumeric
characters by using your phone’s keypad.
You are provided with the following text input
modes:
•T9 mode
This mode allows you to enter words with only
one keystroke per letter. Each key on the keypad
has more than one letter - when you press the
key once, J, K or L may be displayed. The T9
mode automatically compares your keystrokes
with an internal linguistic dictionary to determine
the correct word, thus requiring far fewer
keystrokes than the traditional upper/lower-case
character modes.
•Upper/lower-case character modes
These modes allow you to enter letters by
pressing the key labeled with the required letter
once, twice or three times until the letter displays.
•Number mode
This mode allows you to enter numbers.
Own Number
This function is a memory aid, which you can use to
check your own phone number if you need to do.
Memory Status
You can check the used memory and free memory
you have for the Phonebook. The display shows how
many entries are currently stored and can be saved
in future in the Phonebook.
Erase All
This option allows you to erase all of the Phonebook
entries.
When a confirming message appears, press the Yes
soft key to erase all Phonebook entries. To cancel,
press the Cancel soft key.
When prompted, enter the lock code. All entries in
the Phonebook are then erased.
43
EEnntteerriinngg TTeexxtt
42
EEnntteerriinngg TTeexxtt
To select... Press the soft key
until...
Upper-case characters is displayed.
See page 44.
Lower-case characters is displayed.
See page 44.
Numbers only is displayed.
See page 45.
The T9 mode is displayed.
See page 43.
160
Text input mode
indicator
Using the T9 Mode
The T9 predictive text input mode allows you to enter
any character using single keystrokes. This text input
mode is based on a built-in dictionary.
1. When you are in the T9 predictive text input mode,
start entering a word by pressing keys to
. Press each key only once for one
letter.
Example: to enter HELLO in the T9 mode, press
, , , and .
The word that you are typing appears on the
display. It may change with each key that you press.
2. Enter the whole word before editing or deleting
any keystrokes.
3. If the word is correct, start entering the next word.
Otherwise, press the , or key
repeatedly to display alternative word choices for
the keys that you have pressed.
Example: Both OF and ME have the key sequence
of and . The phone displays the
most commonly used choice first.
4. Put a space between each word by pressing the
key.
•To type words not found in the T9 mode, change
the text input mode to the upper/lower-case
character input mode.
Changing the Text Input Mode
When you are in a field that allows characters to be
entered, you will notice the text input mode indicator
on the display.
Example: When you are entering message text
l
OK
45
EEnntteerriinngg TTeexxtt
44
EEnntteerriinngg TTeexxtt
• To shift the case in the T9 mode, use the key.
• You can move the cursor by using the and
keys. To delete letters, press the C key. Press and
hold down the Ckey to clear the display.
Using the Upper/Lower-case Character
Mode
Use the keys to to enter your text.
1. Press the key labeled with the required letter:
• Once for the first letter
• Twice for the second letter
• And so on
Note: The cursor moves to the right when you press
a different key. When entering the same letter
twice or a different letter on the same key, just
wait for a few seconds for the cursor to move
automatically to the right and then select the
next letter.
2. Select other letters in the same way.
L E T ‘ S E A T .
• To enter full stops, hyphens or apostrophes, press
. The T9 mode applies grammar rules to ensure
that the correct punctuation is used.
Example: is used twice to display two
punctuation marks:
Refer to the table below for more information on the
characters available using the keys.
• To insert a space, press the key.
• You can move the cursor by using the and
keys. To delete letters, press the Ckey. Press and
hold down the Ckey to clear the display.
Using the Number Mode
The Number mode enables you to enter numbers in a
text message; entering a telephone number for
example. Press the keys corresponding to the
required digits before manually switching back to the
appropriate text input mode.
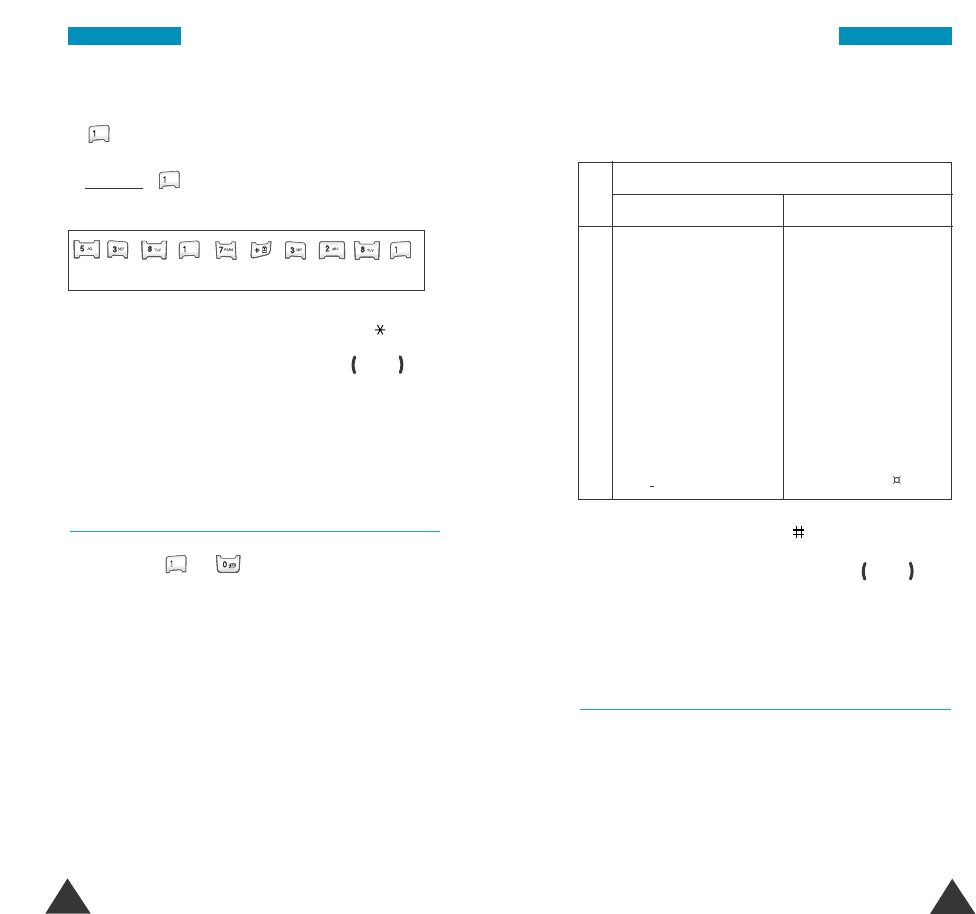
Key Characters in the Order Displayed
Upper Case Lower Case
1
2
3
4
5
6
7
8
9
0
*
Space 1
ABC2
DEF3
GHI 4
JKL5
MNO 6
PQRS7
TUV8
WX Y Z 9
0
*/+-=<>()
%& Φ Θ Ψ Π Σ Ξ
Space 1
abc2
def3
ghi 4
jkl5
mn o 6
pqrs7
†uv8
wx y z 9
0
.@#,:;!?‘
“¿§£$¥ ßΩ

47
OOppttiioonnss DDuurriinngg aa CCaallll
46
Options During a Call
Your phone provides a number of control functions that
you can use during a call.
Muting/Sending Key Tones
You can turn the key tones which were generated each
time you press a key off or on.
To turn the key tone off:
1. During a call, press the Options soft key.
2. Press the or key to select the Mute
Keys option. Now, the option is replaced with
Send Keys.
3. Press the OK soft key.
Your phone does not send the key tones. It allows
you to press keys without hearing annoying key
tones during a call.
To turn the key tone on:
1. During a call, press the Options soft key.
2. Press the or key to select the Send
Keys option. Now, the option is replaced with
Mute Keys.
3. Press the OK soft key.
Note: To communicate with answering machines or
computerized telephony systems, the Send
Keys option must be selected.
Searching for a Number in the
Phonebook
You can search for a number in the Phonebook during
a call.
1. During a call, press the Options soft key.
2. Press the or key to select the
Phonebook option.
3. Press the OK soft key.
The Phonebook entries are listed.
4. Enter the name that you wish to find.
If you enter the first few letters of the name, the
Phonebook entries are listed, starting with the
first entry matching your input. The entry is also
highlighted.
5. To view the highlighted entry, press the View soft
key.
For more detailed description of the Phonebook
feature, refer to page 32.
49
OOppttiioonnss DDuurriinngg aa CCaallll
48
OOppttiioonnss DDuurriinngg aa CCaallll
Using the SMS Service
If you receive an SMS (Short Message Service)
message during a call, the icon flashes on the
display. The SMS Service option enables you to use
this feature. You can also create and send an SMS
message during a call.
Read Messages: allows you to read the messages
that you have received.
Write Messages: allows you to write a message.
For further details about the SMS service, refer to
page 60.
Making a Calling Card Call
If you save the calling card information in the
Calling Card menu option (Menu 4.7), you can send
automatically the code number required for the
service when you make a call using the prepaid
calling card. Use the Callcard Service option.
For further details about making a calling card call,
refer to page 80.
Making a Private Voice Call
You can make the current call private so that nobody
eavesdrops your call.
1. During a call, press the Options soft key.
2. Press the or key to select the Voice
Privacy option.
3. Press the Select soft key.
4. Press the or key to select Activate or
Deactivate.
Select Activate to secure your call or Deactivate
not to do.
5. Press the Select soft key.
Putting a Call on Hold
You can make another call while you have a call in
progress, if this service is supported by the network.
Of two calls, one is active and the other is on hold
and you can switch between the calls.
Note: The procedure to put a call on hold may vary
depending on your network. For further details,
contact your service provider.
51
OOppttiioonnss DDuurriinngg aa CCaallll
50
OOppttiioonnss DDuurriinngg aa CCaallll
To make a call while you have a call in progress:
1. During a call, key in the phone number that you
wish to dial or look it up in the Phonebook.
2. Press the key to dial the second call. The first
call is automatically put on hold.
3. To switch between the two calls, simply press the
key.
4. To end the current call, press the key.
Answering a Second Call
You can answer an incoming call while you have a
call in progress, if this service is supported by the
network and you have set the Call Waiting menu
option (Menu 7.2) to Activate (see page 96). You
will be notified of an incoming call by a call waiting
tone.
To answer a call while you have a call in progress:
1. When you hear a call waiting tone, press the
key to answer the incoming call.
The first call is automatically put on hold.
2. To switch between the two calls, press the
key.
3. To end the current call, press the key.
Making a 3-way Conference Call
You can conduct conference calls with two separate
parties at the same time. A conference call is a
network service. For more information, contact your
service provider.
Note: The procedure may vary depending on your
network. Contact the service provider for
details.
1. Call the first participant in the normal way.
2. Call the second participant in the normal way.
The first call is automatically put on hold.
3. When the second person answer, press the
key to merge the calls.
4. End the conference call by closing the folder or
pressing the
key
.
During a conference call, if one of the callers hangs
up, you and the remaining caller will stay connected.
If the caller who initiated the call hangs up first, all
three parties are disconnected.
53
OOppttiioonnss DDuurriinngg aa CCaallll
52
Using the Menus
The phone offers a range of functions that allows
you to customize the phone to your needs. These
functions are arranged in menus and submenus.
The menus and submenus can be accessed by
scrolling or by using the shortcuts.
Accessing a Menu Function by Scrolling
1. In idle mode, press the Menu soft key to access
menu mode.
2. Press the or key to reach the desired
main menu, for example, Settings. Press the
Select soft key or the key to enter the menu.
3. If the menu contains any submenus, for example,
Language, find the one you want by pressing
the or key. Press the Select soft key or
the key to enter the submenu.
If the menu you selected has submenus, repeat
this step.
4. Press the or key to find the setting of
your choice. Press the Select soft key or the
key to confirm the selection.
Notes:
• You can return to the previous menu level by
pressing the Ckey or the key.
• You can exit the menu without changing the menu
settings by pressing the key.
Accessing a Menu Function by Using its
Shortcut
The menu items, such as menu, submenus and
setting options are numbered and can be quickly
accessed by using their shortcut number. The
shortcut number is shown at the bottom right next to
the soft key on the display.
Note: The numbers assigned to each menu function
are indicated on the list on page 54.
Back Light
OFF
Short
Long
Select 4.2.4.1
Shortcut number
1. In idle mode, press the Menu soft key.
2. Within three seconds, enter the first digit of the
shortcut number. Repeat this for each digit of the
shortcut number.
Example: Setting the Back Light option to Short
Press the Menu soft key, and enter 4, 2, 1, 2.
Menu for entering the menu, 4for Settings, 2for
LCD Display Control, 4for Back Light, 2 for
Short .
54
UUssiinngg tthhee MMeennuuss
55
UUssiinngg tthhee MMeennuuss
List of Menu Functions
The following illustration shows the menu structure
available and indicates the:
• number assigned to each option.
• page on which you can find a description of each
feature.
1. Call Records
1.1 Missed Calls
1.2 Incoming Calls
1.3 Outgoing Calls
1.4 Call Time
1.4.1 Last Call Time
1.4.2 Total Call Time
1.4.3 Display Call Time
1.4.4 Reset Timers
2. Messages
2.1 Voice Mail
2.1.1 Connect to
Voice Server
2.1.2 Voice Server
Number
2.2 Read Messages
2.2.1 New Inbox
2.2.2 Old Inbox
2.2.3 Outbox
2.2.4 Delete All
2.3 Write Messages
2.4 Preset Message List
2.5 Setup
2.6 Picture Messages
3. Tones
3.1 Ring Tone
3.2 Ring Volume
3.3 Alert Type
3.4 Keypad Tone
3.4.1 Volume
3.4.2 Key Sound
3.4.3 DTMF Length
3.5 Message Tone
3.6 Error Tone
3.7 Minute Minder
3.8 Connect Tone
3.9 Function Sound
4. Settings
4.1 Infrared Activate
4.2 LCD Display Control
4.2.1 Screen Mode
4.2.2 Select Image
4.2.3 Color Theme
4.2.4 Back Light
4.2.5 Auto Light
4.2.6 Contrast
4.3 Auto Redial
4.4 Active Folder
4.5 Language
4.5.1 Text Language
4.5.2 Voice Language
4.5.3 Input Mode
4.6 Reset Settings
4.7 Calling Card
4.8 Short Cut Key
Page 58
Page 60
Page 71
Page 77
57
UUssiinngg tthhee MMeennuuss
56
UUssiinngg tthhee MMeennuuss
5. Organizer
5.1 Calendar
5.2 To Do List
5.3 Time & Date
5.3.1 Set Time
5.3.2 Set Date
5.3.3 World Time
5.3.4 Format
5.4 Alarm
5.4.1 Alarm 1
5.4.2 Alarm 2
5.4.3 Alarm 3
5.4.4 Alarm Tones
5.5 Calculator
6. Security
6.1 Change Lock Code
6.2 Change Security Code
6.3 Call Restriction
6.3.1 restrict all
outgoing call
6.3.2 restrict all
incoming call
6.3.3 restrict outgoing call
6.4 SOS Call List
7. Network Services
7.1 Call Diverting1
7.1.1 Divert Always
7.1.2 Busy
7.2 Call Waiting1
7.3 Network Selection
7.3.1 Automatic
7.3.2 Manual
7.3.3 New Search
7.4 Voice Privacy
7.5 NAM Selection
7.6 Set Service Code
7.6.1 Call Diverting
7.6.2 Call Waiting
7.7 Public System Selection2
8. Games
8.1 AirShooting
8.2 SpaceWar
9. WWW Services
For further details on the WAP browser, refer to the WAP
Browser user’s guide supplied with the phone.
Page 92
Page 84
is shown when you set the service code in the Set Service Code
menu option (Menu 7.6).
may be unavailable depending on your service provider.
Page 95
2
1
Page 101
10. Voice Functions
10.1 Voice Dial
10.2 Voice Memo
Page xx

59
58
CCaallll RReeccoorrddss
Call Records
In this menu, you can view the:
• missed calls
• incoming calls
• outgoing calls
• call time
The number and name, if available, are displayed,
together with the date and time when the call was
made.
Note: Your phone can store up to ten numbers in
each record.
Missed Calls Menu 1.1
This option lets you view the last unanswered calls.
Pressing the Options soft key allows you to:
• edit the number, if available, and dial or save it in
the Phonebook.
• delete the call from the list.
Incoming Calls Menu 1.2
This option lets you view the last calls received.
Pressing the Options soft key allows you to:
• edit the number, if available, and dial or save it in
the Phonebook.
• delete the call from the list.
Outgoing Calls Menu 1.3
This option lets you view the last numbers dialed.
Pressing the Options soft key allows you to:
• edit the number and dial or save it in the
Phonebook.
• delete the call from the list.
Call Time Menu 1.4
This option lets you view the timers for calls made
and received.
Note: The actual time invoiced for calls by your
service provider may vary, depending on
network features, rounding-off for billing
purposes and so forth.
The following timers are available:
Last Call Time: shows the duration of the last call.
Total Call Time: shows the total duration of all calls
made from or receive to your phone since the timer
was last reset using the Reset Timers option.
Display Call Time: allows you to set the phone to
display the call time when the call is made or
received. Select Enable to display the call time and
Disable not to display it.
Reset Timers: allows you to reset the call timers;
you must first enter the phone’s security code (see
page 93) and then press the OK soft key.
60 61
MMeessssaaggeess
Messages
The SMS (Short Message Service) function is a
network service and may not be supported by your
network. Messages can be sent by text, fax and
messaging systems, provided that these services are
supported by your network.
When you receive new text messages, the icon
appears on the top line of the display. If the message
memory is full, an error message is displayed and you
cannot receive any new message.
Your phone also has the function to allow you to
receive messages containing pictures, ring tones or
caller group icon. For details about receiving these
messages, see page 68.
Voice Mail Menu 2.1
This menu provides you with a way of accessing your
voice mailbox, if provided by your network.
Note: Please contact your service provider for more
information. Depending on the service
provider, you may be charged for accessing
the voice server.
Connect to Voice Server: Before using this
feature, you must enter the voice server number
obtained from your service provider (see menu
option 2.1.2). You can then select this option to listen
to your voice mails.
Note: You can connect to the voice mail server of
the service provider quickly by pressing and
holding down the key in idle mode.
Voice Server Number: allows you to change the
voice mail server number.
To Press the
enter the server number corresponding numeric
keys.
correct a digit Ckey.
save the entered number Save soft key.
Read Messages Menu 2.2
Three message boxes are available:
New Inbox: used to store the messages that you
have received but not read.
Old Inbox: used to store the messages that you
have received and read.
Outbox: used to store the messages that you have
already sent or will send.
1. Select the required box. The first message in the
box is displayed with the following information:
• message number
• message status; New, Old, Not Sent, Sent
If you have set the Delivery Ack menu option
to ON, the report is also shown; see page 66 for
further details.
•
date and time when the message was received
(Inboxes only)

63
MMeessssaaggeess
62
MMeessssaaggeess
2. Press the or key to select the message
you want to read.
3. To view the message, press the View soft key.
The screen shows the:
• sender’s phone number if the message was
sent, or recipient’s phone number
• message text
4. To scroll through the message text, press the
or key.
While you are viewing a message. you can choose
the following options, by pressing the Options soft
key.
Delete: allows you to delete the message.
Cut Number: allows you to extract a number from
the message text, so that you can call the number or
save it in the Phonebook.
Send: allows you to send the message that you have
received or saved. You can:
• send the message
• save and send the message
• save but not send the message
Edit And Send: allows you to edit a message for
sending.
Note: The available options may vary, depending on
the message status; New, Old, Not Sent or
Sent.
To delete all of the messages, you can select Delete
All (Menu 2.2.4).
Write Messages Menu 2.3
In this menu, you can write a text message and send
it to multiple destinations.
1. Press the or key to select one of the
five setting groups preset via the Setup menu
(Menu 2.5) and press the Select soft key.
For details on the setting groups, see page 65.
2. Enter your message and press the OK soft key. For
further information about how to enter characters,
see page 41.
3. Select one of the following options by pressing the
or key and press the Select soft key.
• Send Only: After transmission, the message
will be cleared.
• Save and Send: allows you to save a copy of
the message. When you read the message in
your Outbox, Sent displays to indicate the
message status.
• Save Only: allows you to save the message so
that it can be sent later. You do not take the
next step. When you read the message in your
Outbox, Not sent displays.
4. Select an Empty cell for the destination, phone
number or e-mail address, by pressing the or
key and press the Edit soft key.
5. Enter the desired destination and press the OK
soft key.

65
MMeessssaaggeess
64
MMeessssaaggeess
Setup Menu 2.5
In this menu, you can set up default information for
the SMS feature. A setting group is a collection of
settings required to send messages. Five setting
groups are available.
Select a setting group by pressing the or
key, and press the key or the Select soft key. Then,
set up the options for the group.
The available setup options are:
Setting Name: allows you to give a name to the
setting group currently being defined.
Callback Number: allows you to set the phone
number to which the recipient of your SMS message
may send you a reply message via your message
center, if the service is provided by the network.
Manual Ack: allows you to activate or deactivate the
manual acknowledgement function. When this
function is activated, the recipient can send you an
answer to your message by one touch of a number key.
Delivery Ack: allows you to activate or deactivate
the delivery acknowledgement function. When this
function is activated, the network informs you whether
or not your message has been read by the recipient.
Privacy: allows you to set the restriction feature.
When this option is set to Restricted, the recipient
must enter her/his password to see the message from
you. If you do not want to use the feature, select Not
Restricted.
Note: The Names soft key, which is visible when
you do not enter anything, allows you to
search for a number in your Phonebook.
6. If you want to send the message to multiple
destinations, repeat steps 4 and 5 as needed.
To delete an entered destination, select it from the
list and press the Delete soft key.
7. When you finish entering the destinations, press
the key to send the message.
Preset Message List Menu 2.4
Using this menu, you can preset up to five messages
that you send most frequently to retrieve when
writing a new message. Scroll through the list by
pressing the or key. When the required
message number highlights, press the Options soft
key.
The following options are available:
Edit: allows you to write a new message or edit the
selected preset message.
Note: For further information about how to enter
characters, refer to page 41.
Send Message: allows you to retrieve the selected
message for sending. Once you have completed the
message, you can send, save and send or simply save
it.
Delete: allows you to delete the selected message.

67
MMeessssaaggeess
66
MMeessssaaggeess
Edit Text*: allows you to edit text from the
message.
Rename: allows you to change the name of the
picture. For further details about entering characters,
see page 41.
Note: Each picture message is made of several text
messages. Therefore, sending one picture
message may cost more than sending one text
message.
*: unavailable when the selected picture is one of the preset pictures.
Urgency: allows you to set the urgency status of
messages. Bulk, Normal, Urgent and Very Urgent
are available.
Type: allows you to set the type of messages. The
available types are Text and E-mail.
Picture Message Menu 2.6
In this menu, you can send an SMS message
containing pictures. Your phone has 10 preset
pictures that can be replaced with pictures received
from the Internet or other phones.
Select a picture from the list and press the View soft
key. When the picture is displayed, press the Options
soft key. The following options are available:
Delete: deletes the picture. The preset picture will
be restored.
Text Reply*: allows you to send a text reply to the
sender.
Call Back*: allows you to call the sender back.
Cut Number*: allows you to extract a number from
the message, so that you can call the number or save
it in the Phonebook.
Send: allows you to send a picture message using
the selected picture. Note that the recipient's phone
must support the Picture Messaging feature.
69
MMeessssaaggeess
68
MMeessssaaggeess
Ring Tone
You may set a received tone as your phone’s ring tone.
You may save up to 5 tones.
When you receive a ring
tone message:
To Then
listen to the • press the Options soft
ring tone key.
• select Playback and
press the Select soft key.
• press the Stop soft key to
stop playing back.
save the ring tone • press the Options soft
key.
• select Save and press the
Select soft key.
• select a location and
press the Select soft key.
• select the Yes or No soft
key when the phone asks
if you want to set the ring
tone to the received tone.
discard the • press the Options soft
message key.
• select Discard and press
the Select soft key.
use the saved go to page 71.
ring tones
Receiving Pictures, Ring Tones, or Caller
Line Icons
When you receive a message from the Internet or
other phones, you will hear an alert beep and a text
notification will appear on the display; “Picture
Message,” “Ring Tone” or “Caller Line Icon.” You
have the option of saving these items in the phone’s
memory or discarding them.
Picture Message
You may send a received picture as an SMS message
to another phone that supports this feature. You may
save up to 10 pictures.
When you receive a picture
message:
To Then
view the picture press the View soft key.
save the picture • press the Options soft
key.
• select Save Picture and
press the Select soft key.
• select a preset picture to
be replaced and press the
Select soft key.
discard the • press the Options soft
picture key.
• select Discard and press
the Select soft key.
use the saved go to page 66.
pictures

71
70
MMeessssaaggeess
Tones
You can use the Tones feature to customize various
sound settings, such as the:
• ringer tone or melody, volume and type
• sounds made when you press a key, make an error
or receive a message
Ring Tone Menu 3.1
This option allows you to select the desired ringer
tone. You can choose from various preset tones. Also,
you can use the tones received from other sources,
such as the Internet or other phones.
Each time you select a tone, it sounds for a few
seconds.
Ring Volume Menu 3.2
This option allows you to adjust the volume level of
the ringer.
Press the or key to increase or decrease
the level. You can also use the or key on the
left side of the phone. The greater the number of bars
you see, the greater the volume is.
Caller Line Icon
You may use the icons as a graphic for a caller group.
You can save up to five icons. When the memory for
icons is full, you are allowed to select an old one to
replace. Note that the eight default icons cannot be
replaced by the downloaded ones.
When you receive a caller line icon message:
To Then
view the icon press the View soft key.
save the icon • press the Options soft
key.
• select Save and press the
Select soft key.
• if necessary, select an icon
to be replaced, and press
the Select soft key.
discard the icon • press the Options soft
key.
• select Discard and press
the Select soft key.
use the saved go to page 38.
icons

73
TToonneess
72
TToonneess
DTMF Length: the tone length setting enables you to
select Short or Long DTMF (dual-tone multi-
frequency) tones. DTMF tones are what your phone
transmits to access to teleservices, such as a bank
account. The system used by the bank or other
service determines if you need short or long DTMF. If
the service is digital which most are these days, short
DTMF tones will almost always work.
Message Tone Menu 3.5
This option allows you to select how the phone
informs you that a new message is received.
The following options are available:
Light Only: only the backlight of the display comes
on; the phone neither rings nor vibrates.
Vibration: the phone vibrates but does not ring.
Single Beep: the phone beeps once.
SMS Tone: the phone uses a tone.
Alert Type Menu 3.3
This option allows you to indicate how you are to be
informed of any incoming calls.
The following options are available:
Light Only: only the backlight of the display comes
on; the phone neither rings nor vibrates.
Melody: the phone rings using the ringer tone
selected via the Ring Tone menu option (Menu 3.1).
Vibration: the phone vibrates but does not ring.
Vibra+Melody: the phone first vibrates three times
and then starts ringing.
Keypad Tone Menu 3.4
In this menu, you can change the settings for the
sound that the phone makes when you press any key.
The following setting options are available:
Volume: you can adjust the volume level of the
keypad tone.
Key Sound: you can select the sound type of the
keypad tone. Select one from Pure Sound, Piano,
Person and Beep.

75
TToonneess
74
TToonneess
Error Tone Menu 3.6
This option allows you to select how the phone
informs you that you have made a mistake.
The following options are available:
OFF: the phone does not beep.
ON: the phone beeps to indicate an invalid entry.
Minute Minder Menu 3.7
This option allows you to specify whether the phone
must beep every minute during an outgoing call to
keep you informed of the length of your call.
The following options are available:
OFF: the phone does not beep.
ON: the phone beeps every minute.
Connect Tone Menu 3.8
You can set your phone to beep when your call is
connected to the remote phone or the remote phone
is ringing depending on your network.
The following options are available:
OFF: the phone does not beep.
ON: the phone beeps when your call is connected.
Function Sound Menu 3.9
In this menu, you can select ???????
77
SSeettttiinnggss
76
Settings
Many different features of your phone can be
customized to suit your preferences via the Settings
menu.
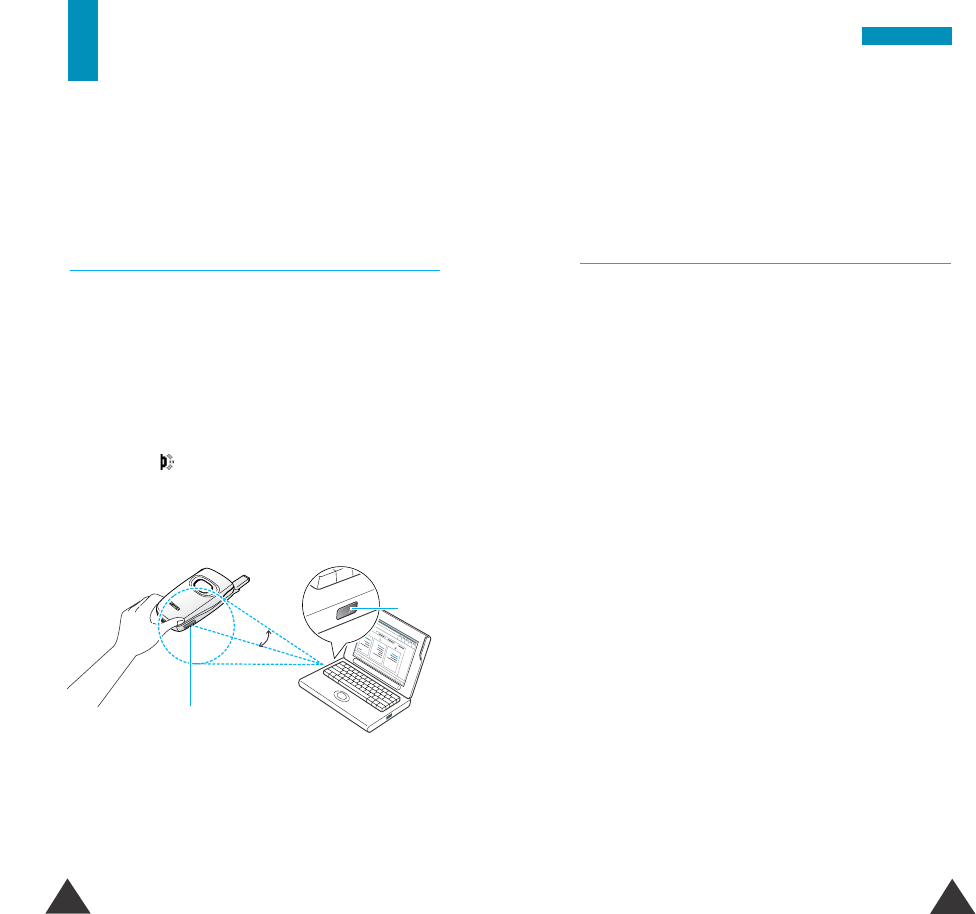
Infrared Activate Menu 4.1
This feature allows you to send or receive data/fax
through the infrared port. To use an infrared
connection, you must:
• configure and activate an IrDA-compliant infrared
port on your PC
• activate the infrared feature on the phone; the
IrDA icon ( ) appears on the top line of the
display
• align the IrDA port on the phone with the IrDA port
on your computer
Note: For the best performance, it is highly
recommended that you use a data link cable.
You can purchase one from your local
Samsung dealer.
LCD Display Control Menu 4.2
Using this menu option, you can set various settings
for the display.
Screen Mode
You can select the screen to be displayed in idle
mode.
The following options are available:
Normal: the display shows the service provider’s
name and the current time and date.
Calendar: the display shows the calendar of the
current month.
Image Display: the display shows the image
selected in the Select Image option.
Clock: the display shows the clock.
Select Image
This option allows you to select the image to be
displayed when you set the Screen mode option to
Image Display.
The connection is ready for data transmission.
If there is no communication between your phone
and the IrDA-compliant device within 30 seconds of
activating the feature, it is automatically deactivated.
15。
IrDA port
IrDA port

79
SSeettttiinnggss
78
SSeettttiinnggss
Enable: the backlight is used only during the
specified period of time. Set the time when the phone
will turn on the light and turn it off, using the
appropriate number keys.
Contrast
This option allows you to adjust the contrast of the
LCD screen to make it brighter or darker, by pressing
the or key. You can also use the or
key on the left side of the phone. Each time you slide
the key, you can see the LCD screen changing
according to the current value.
Auto Redial Menu 4.3
With the Auto Redial function, the phone makes up
to ten attempts to redial a phone number after an
unsuccessful call.
Note: The interval between two call attempts varies
depending on your network.
The following options are available:
OFF: the number is not redialed.
ON: the number is redialed automatically.
Color Theme
You can change the color setting of the display
components, such as text, soft key display area or the
menu names and icons. Five different color settings
are available.
Back Light
You can select whether or not the phone uses the
backlight. A marginal increase in standby/talk time
can be achieved by turning the backlight off.
The following options are available:
OFF: the backlight is not used.
Short: the backlight comes on when you press a key
or receive a call and switches off 10 seconds after
the last key is pressed.
Long: the backlight comes on when you press a key
or receive a call and switches off 20 seconds after
the last key is pressed.
Auto Light
Using this feature, you can specify the time period for
which the backlight is to be used. This feature helps
conserve your battery power.
The following options are available:
Disable: the backlight is used according to the
setting in the Back Light menu option (Menu 4.2.4);
see page 83.
SSeettttiinnggss

81
SSeettttiinnggss
80
SSeettttiinnggss
Reset Settings Menu 4.6
You can easily reset the menu settings to its factory
default status.
Enter the 4-digit security code and press the OK soft
key. The phone immediately resets all settings to
default status.
Note: The security code is preset to “0000.” To
change this code, refer to page 92.
Calling Card Menu 4.7
When you use a calling card for long distance calls,
you must send the service code and the card number
to the calling card service system. Using this menu,
you can save these calling card information to send
them automatically when you make calling card calls.
You can store up to 5 calling cards.
Enter the 4-digit security code and press the OK soft
key to access the Calling Card menu.
Saving Calling Card Information
1. Scroll to a calling card number by pressing the
or key and press the Select soft key.
2. If you want to set the card name, press the Select
soft key. Enter the name as needed.
For further details about entering characters, see
page 41.
Active Folder Menu 4.4
This option allows you to set the phone to start voice
dialing by opening the folder.
The following options are available:
Off: the phone does not use this feature.
Voice Dial: the phone use this feature. You need to use
the Act menu option in the Voice Dial menu (Menu
10.1) to activate the voice dialing.
For further details about the voice dialing feature, see
page xx.
Language Menu 4.5
In this menu, you can change the language for the
display or enable/disable the voice prompt.
The following options are available:
Text Language: you can select a language to be used
to display text from English, Español, and Português.
Voice Language: enable or disable the voice prompt
when using the voice functions. When this option is
disabled,
Input Mode: you can change the default text input
mode.

83
SSeettttiinnggss
82
SSeettttiinnggss
4. To return to idle mode, press the key.
Making Calls Using the Calling Card
Note: The following procedure may not apply to all
calling cards. Please look at the back of your
calling card or contact your phone company
for instructions.
1. Make a call to the calling card service system.
2. When you are connected, press the Options soft
key and select Callcard Service by pressing the
or key.
3. Press the OK soft key.
4. When you hear the prompting tone from the
service system, press the key to transmit the
card numbers.
5. Dial the number of the desired remote phone.
3. When you finish entering name, press the OK soft
key. The name is saved.
4. Press the key to move to the Card Number
menu, and press the Select soft key.
5. Enter the card number (and/or PIN if required) as
listed on the back of the calling card.
To enter a pause, “P” before the second number,
press and hold the key. The number after “P” will
be sent only by pressing the key when you
make a call with the calling card.
Note: The order of the numbers which you must
enter may vary depending on the dialing
sequence your card uses.
6. When you finish entering the number, press the OK
soft key.
7. To return to idle mode, press the key.
Selecting a Calling Card
You can set a default card to use for making a calling
card calls. The number stored in the selected card will
be sent when you make calling card calls.
1. Scroll to the desired calling card by pressing the
or key and press the Select soft key.
2. Select Set Default by pressing the or
key, and press the Select soft key.
3. The display shows the number saved for the calling
card. If you are satisfied, press the Set soft key.

85
84
SSeettttiinnggss
Organizer
The Organizer feature enables you to:
• view the calendar and organize your schedule
• define a list of things to do
• set the current date and time
•
set the alarm so that the phone rings at a specific
time, to remind you of an appointment, for example
• use the phone as a calculator
Calendar Menu 5.1
With the Calendar feature, you can:
• consult the calendar.
• write memos to keep track of your schedule and
trigger an alarm, if necessary.
Consulting the Calendar
When you select the Calendar menu option (Menu
5.1), the calendar is displayed. The following options
are available when you press the Options soft key.
Search all: displays all memos set, regardless of
the day and starting with the oldest. To scroll
through the memos, press the or key.
Delete all: allows you to delete all memos. You are
asked to confirm your selection.
Go to date: allows you to jump to a specific date.
Short Cut Key Menu 4.8
The navigation keys can also be used as shortcut
keys. In idle mode, they allows you to access specific
menu options directly.
Using this menu, you can change the shourcut
assignments on each key.
1. Select the key to be used as a shortcut key by
pressing the or key and press the
Select soft key:
• Key up
•Key down
• Key left
• Key right
2. Select the menu option to be assigned to the key
by pressing the or key and press the
Select soft key.
Note: To deactivate a shortcut key, select the None
option.

87
86
OOrrggaanniizzeerrOOrrggaanniizzeerr
Writing a Memo
To write or edit a memo on a specific date:
1. Select the required date on the calendar, by
pressing the navigation keys.
Note: Press the key to skip to the previous
month or the key to skip to the next
month.
2. Press the Select soft key.
An empty memo screen is displayed to allow you
to enter your memo.
3. Enter your memo and then press the OK soft key.
Note: For further details about how to enter
characters, refer to page 41.
You are asked if you wish to set an alarm.
4. If you want an alarm to ring on the chosen day,
press the Yes soft key.
Otherwise, press the No soft key.
5. If you pressed Yes, set the time for the alarm and
press the OK soft key.
The color of the date changes to green to indicate
that a memo exists.
Editing a Memo
If you select a day for which a memo already exists,
you can press the Edit soft key to edit the memo
displayed.
Note: For further details about how to enter
characters, refer to page 41.
Once you have finished editing the memo, press the
OK soft key. The following options are available
when you press the Options soft key:
Alarm: allows you to set the alarm to ring on the
chosen day.
Erase: allows you to delete the memo.
Copy to: allows you to copy the memo to another
date.
Move to: allows you to change the date and time of
the memo.
To Do List Menu 5.2
This feature allows you to:
• enter up a list of tasks to be done
• assign a priority and deadline to each task
• sort the tasks by priority and status mark
Creating the To Do List
To create the To Do List:
1. Press the New soft key.
2. Enter the first task.
Note: For further details about how to enter
characters, see page 41.
3. Press the OK soft key.
4.
Select high, normal or low priority by
pressing the
or key
and press the Select soft key.
89
88
OOrrggaanniizzeerrOOrrggaanniizzeerr
5. Enter your deadline. If you do not want to define
the deadline, press the Skip soft key.
6. Press the OK soft key to save the task.
Editing the To Do List
If tasks are already defined in the To Do List when you
select the To Do List menu option (Menu 5.2), the
current contents are displayed with the associated a
status mark
and priority ( for High,
for Normal
and for Low).
To Then
view the details • highlight the task.
for a specific task • press the View soft key.
change the status • highlight the task.
of a specific task • press the key to mark the
task as completed as of the
current date and time.
or
• highlight the task.
• press the Options soft key.
• select the Mark option.
• select the appropriate status.
create a new task • press the Options soft key.
• select the New option.
• enter the text, priority and
deadline for the task.
edit an existing • highlight the task.
task • press the Options soft key.
• select the Edit option.
• change the text, priority and
deadline for the task.
To... Then...
sort the existing • press the Options soft key.
tasks by priority • select the Sort option.
or status • select the sort criterion (High,
Low, Done, Undo).
copy a task • highlight the task.
• press the Options soft key.
• select the Copy option.
• change the text, priority and
deadline for the task as
1needed.
delete a task • highlight the task.
• press the Options soft key.
• select the Delete option.
delete all tasks • press the Options soft key.
• select the Delete all option.
• confirm the deletion by
pressing the OK soft key.
Time & Date Menu 5.3
This option allows you to change the current time and
date displayed. You can also check the current time
for Greenwich Mean Time (GMT) and 21 major cities
around the world.
The following options are available:
Set Time: allows you to enter the current time. You
can choose the time format via the Format menu
option (Menu 5.3.4).

91
OOrrggaanniizzeerr
90
OOrrggaanniizzeerr
Note: Before setting the time, you must specify your
time zone, via the World Time menu option
(Menu 5.3.3).
Set Date: allows you to enter the day, month and
year. You can change the date format via the Format
menu option (Menu 5.3.4).
World Time: allows you to check the current time
for Greenwich Mean Time (GMT) and 21 major cities
around the world, by using the and keys.
The screen shows the:
• city name.
• current date and time.
• time difference between the selected city and
your city if you have set the local time (see below
for further details) or GMT (by default).
To select your time zone:
1. Select the city corresponding to your time zone by
pressing the or key.
The local date and time are displayed.
2. Press the Set soft key.
Format: allows you to change the time and date
formats.
Time format: 24 Hours
12 Hours
Date format: YYYY/MM/DD (year/month/day)
DD/MM/YYYY (day/month/year)
MM/DD/YYYY (month/day/year)
Alarm Menu 5.4
You can set the alarm to ring at a specific time.
Note: To meet FAA safety guidelines, the alarm does
not work when the phone is off.
To set an alarm:
1. Select one of Alarm 1 ~3and press the Select
soft key.
2. Select the alarm frequency option and press the
Select soft key.
The following frequency options are available:
• Once Alarm: the alarm rings only once and is
then deactivated.
• Daily Alarm: the alarm rings every day at the
same time.
• Monday -> Friday: the alarm rings at the
same time on Monday to Friday.
• Monday -> Saturday: the alarm rings at the
same time on Monday to Saturday.
• Weekly Alarm: the alarm rings every week on
the same day and at the same time.
• Remove Alarm: deactivates the alarm.
3.
Enter the required time and press the OK soft key.
4. If you selected Weekly Alarm in step 2, select a
day of the week and the OK soft key.

93
92
OOrrggaanniizzeerr
To stop the alarm when it rings, open the folder and
press the Exit soft key.
You can select a melody for the alarm sets using the
Alarm Tones menu option (Menu 5.4.4).
Calculator Menu 5.5
Using this feature, you can use the phone as a
calculator. The calculator provides the basic
arithmetic functions; addition, subtraction,
multiplication and division.
1. Enter the first number using the numeric keys.
2. Press the right soft key until the required
arithmetic symbol appears; +(add), -(subtract),
*(multiply), /(divide).
3. Enter the second number.
4. Repeat steps 2 to 3 as many times as required.
Notes:
• To erase any mistakes or clear the display, press
the Ckey.
•
To include a decimal point or a bracket, press the
left soft key until the required symbol is displayed.
5. To get the result, press the key.
6. To end the calculation, press the key.
Security
The Security feature enables you to restrict the use
of your phone to the:
• people of your choice
• types of calls of your choice
Change Lock Code Menu 6.1
The lock code is a password for locking or unlocking
the phone. The lock code is preset to “0000” at the
factory. This menu allows you to change your current
lock code.
Before you can specify a new lock code, you must
enter the current code. Then, enter a new code and
enter it again to confirm.
Change Security Code Menu 6.2
The security code is used for restriction of the use of
your phone. The security code is preset to “0000” at
the factory. This menu allows you to change your
current security code.
Before you can specify a new security code, you
must enter the current code. Then, enter a new code
and enter it again to confirm.

95
SSeeccuurriittyy
94
SSeeccuurriittyy
Call Restriction Menu 6.3
The call restriction feature allows you to restrict your
calls.
Call restriction can be set up in the following ways:
restrict all outgoing call: calls cannot be made.
restrict all Incoming call: calls cannot be
received.
restrict outgoing call: calls to the phone numbers
which you have specified cannot be made. You can
set up to 10 phone numbers.
To restrict the all outgoing or all incoming calls:
1. Select restrict all outgoing call or restrict all
incoming call by pressing the or key,
and then press the Select soft key.
2. Select Enable to turn the feature on and press
the Select soft key.
If you want to set the restriction off, select
Disable.
3. Enter your security code and press the OK soft
key.
To set the phone numbers to be restricted:
1. Select restrict outgoing call by pressing the
or key and press the Select soft key.
2. Enter your security code and press the OK soft
key.
3. Select Edit, then press the OK soft key. If a
number has already been saved, this option
allows you to edit the number.
If you want to erase a saved number, select
Erase. When a confirming message displays,
press the Yes soft key.
4. Enter the phone number and press the OK soft
key.
The phone number is saved and now you cannot
make a call to that number.
SOS Call List Menu 6.4
Your phone provides emergency numbers for SOS
calls programmed by the service provider. Three
numbers can be manually dialed at any time even
though the phone is locked or all outgoing calls are
restricted.
To make an SOS call when the phone is locked, press
the Select soft key, select the desired number saved
in the SOS call list. Press the Call soft key to make a
call.

97
NNeettwwoorrkk SSeerrvviicceess
96
Network Services
These menu functions are network services.
Please contact your service provider to check their
availability and subscribe to them, if you wish.
Call Diverting Menu 7.1
Note: For using the Call Diverting service, you must
set the service code for it. Depending on the
Set Service Code setting, this menu may not
appear. For details, see page 99.
This network service enables incoming calls to be
rerouted to the number that you specify.
Example: You may wish to divert your business calls
to a colleague while you are on holiday.
Call diverting can be set up in the following ways:
1. Select the type of the call diverting options by
pressing the or key, and press the
Select soft key.
• Divert Always: all calls are diverted.
• Busy: calls are diverted if you are already
making another call.
• No Reply: calls are diverted if you do not
answer the phone.
• Unreachable: calls are diverted if you are not
in an area covered by your service provider.
• Cancel All : all call diverting options are
canceled.
2. When Activate is highlighted, press the Select
soft key.
3. Enter the number to which the calls are to be
diverted, and press the OK soft key.
Note: The Names soft key which is visible when
you do not enter anything allows you to
search for a number in your Phonebook.
The phone sends your setting to the network and
the network’s acknowledgement is displayed.
You can deactivate each call diverting setting by
selecting the Cancel option.
Call Waiting Menu 7.2
This network service enables you to be informed when
someone is trying to reach you during another call.
Note: For using the Call Waiting service, you must
set the service code for it. Depending on the
Set Service Code setting, this menu may not
appear. For details, see page 99.
The following options are available:
Activate: activates the Call Waiting feature. You can
answer an incoming call while you have a call in
progress. See page 50 for answering a waiting call.
Cancel: deactivates the Call Waiting feature.

99
NNeettwwoorrkk SSeerrvviicceess
98
NNeettwwoorrkk SSeerrvviicceess
Network Selection Menu 7.3
The Network Selection feature enables you to
indicate whether the network to used when roaming
outside your home area is selected automatically
or manually.
Note: You can select a network other than your
home network only if it has a valid roaming
agreement with your home network.
The following options are available:
Automatic: your phone automatically searches for a
network available to you and selects the appropriate
one. Every time you switch your phone on, this menu
resets to Automatic.
Manual: your phone searches for available
networks, then displays them. Press the or
key until the preferred network highlights and then
press the OK soft key.
New Search: your phone begins a new search for
new Private and Residential systems. When finding
the best new system, the phone displays it. Then you
can confirm by pressing the Select soft key, or start
another search by pressing the Next soft key.
Voice Privacy Menu 7.4
Used only in digital networks, Voice Privacy encrypts
the voice channel so that people cannot eavesdrop
on your call conversation. If you turn this feature on
and voice privacy becomes inactive for any reason
your phone displays “Voice privacy not active” and
beeps.
The following options are available:
Activate: turns this feature on. Your calls will be
secured.
Deactivate: turns this feature off.
Note: This feature may not be available in all areas.
Contact your service provider for details and
availability.
NAM Selection Menu 7.5
The service provider programs your phone with the
phone number and system information when your
phone is first activated. This is called a Number
Assignment Module (NAM).
For example, your phone can be activated in up to 4
different service areas each giving your phone a
different phone number or account.
Only one number can be active at a time. When you
select a phone number, you are also selecting which
system to be used as your home system. The first
phone number displayed with this menu is the
currently selected number.

101
NNeettwwoorrkk SSeerrvviicceess
100
NNeettwwoorrkk SSeerrvviicceess
Notes:
• It may not be necessary to have 4 NAMs for your
phone if your service provider has service or
roaming agreements for each area where you
wish to use your phone. Contact your service
provider for details.
• You need at least one active number to make a
call. You cannot change from one NAM to another
during a call.
Set Service Code Menu 7.6
For using the network services, such as the Call
Diverting and Call Waiting, you must set the service
codes supplied by your service provider with this
menu. For more information about the service code,
contact your service provider.
Call Diverting: allows you to set the codes for using
each of the options (Divert Always, Busy, No
Reply, Unreachable and Cancel All) available in
the Call Diverting menu.
Call Waiting: allows you to set the codes for using
each of the options (Activate and Cancel )
available in the Call Waiting menu.
After selecting the desired option, enter the service
code and press the OK soft key. The service code is
saved and the option will be selectable when you
access the appropriate menu.
Public System Selection Menu 7.7
Note: This menu may not be shown depending on
your service provider.
When your system leaves its home system, it is
roaming. Roaming is a feature which is only relevant
in areas where there are usually at least two service
providers which are referred to as “A” and “B” and
have valid roaming agreements. When the phone is
roaming, it can automatically search for home-type
systems (same type as your home system) or non-
home type systems (opposite type as your home
system). Also, your service provider has programmed
a list of preferred systems into your phone.
The system selection feature of your phone enables
you to choose how your phone will roam. The
following options are available:
Home Type: When service is not available in your
home system, it will search for a home type,
preferred first.
Non HomeType: When service is not available in
your home system, it will search for a non-home
type, preferred first.
AnySystem: When service is not available in your
home system, the phone searches for a preferred
system of either type, then a home type system, then
a non-home type system.
Home Only: The phone uses its home system only,
that is, it will not roam.

103
102
Games
You can enjoy two games with your phone;
AirShooting and SpaceWar.
Scroll to the desired game using the the and
keys and press the Select soft key.
The options for the game is displayed. To select an
option, press the corresponding number key. The
following options are available:
Newgame: starts a new game.
HighScore: shows the highest scores list. Up to 5
gamers can be ranked. Not all games have this
option.
Key Info.: provides you the help screen, showing the
key operation in the game.
Continue: allows you to continue the game you last
played.
Voice Functions
In this menu, you can use the phone’s voice features
such as:
• Voice Dial
• Voice Memo
Voice Dial MENU 10-1
When your phone is in digital mode, you can call up
to 20 stored entries by speaking the associated name
into the microphone. Using the Voice dialing feature
requires that you first program the phone to
recognize the name of the person you are calling.
Tips for Recording a Name
• Avoid recording similar names phonetically. If you
record a similar name to one already in the
memory, the phone requests another name.
• Speak clearly and naturally.
• The person who will use the phone should record
the name. The phone does not recognize the name
if the voice is different.
• Avoid too long or too short a name. Names with
two to 5 syllables are recommended.
•If this feature does not work properly, erase the
name, and try again with another name.
•Practice several times to obtain the best result.
•You can record up to 20 names. If you try to record
more than 20, the phone announces “Out of space
to store voice tags!.”

105
VVooiiccee FFuunnccttiioonnss
104
VVooiiccee FFuunnccttiioonnss
The following options are available:
Record: you can record name tags and allocate
them to numbers for voice dialling.
1. Say the name you want to use for voice dialling
after you hear a voice prompt. The phone stores
the name as a “first” sample, and then prompts
you to say the name again.
2. Respond to the prompt by repeating the name. The
phone saves the name as a second sample and
then requests the phone number and name.
3. Enter a number and press the OK soft key.
4. Enter a name and press the Save soft key.
For further details about entering characters, see
page xx.
Act: you can activates voice dialling.
1. You hear a voice guide and “Say Name” appears
on the display.
2. Say the voice tag clearly. The phone automatically
dials the number of a recognized voice tag.
If no match for the voice tag is found or
recognized, the phone may ask you to try again.
Note: If you set the Active Folder menu option (Menu
4.4) to Voice Dial, you can activates voice
dialling simply by opening the folder.
Delete one: allows you to delete a voice dial entry.
Play all: plays back all of the voice dial entries.
Delete all: deletes all of the voice dial entries.
Voice Memo MENU 10-2
Using this menu option, you can use the phone as a
recorder.
Notes:
• Your phone can record up to 10 memos, and each
memo can be up to 1 minute in length of time.
• Closing the folder while recording cancels your
recording.
• If you have an incoming call while recording a
voice memo or the call is disconnected while
recording phone conversation, the memo recorded
up to that point is saved with the stamp of the
current date and time.
• When you are out of the service area(“No Service”
is displayed) or in analog mode, a voice memo is
not correctly recorded. It is recommended that you
use this feature in digital mode in the service area.
The following options are available:
Record: you can record a memo.
Note: Recording voice conversations is illegal in
some countries. Make sure the other party has
stated its consent to being recorded.
1. The message “Recording” displays, along with
the timer.
2. Record a memo by speaking to the microphone.
3. To stop recording, press the Stop soft key.
You are asked to enter the title for the recorded
message.

107
106
VVooiiccee FFuunnccttiioonnss
4. Enter a title using the number keypad, then press
the Save soft key to save the recording. For
details about entering characters, see page 41.
If you do not enter a title, the memo is saved with
a label of Untitled.
Replay & Delete: you can play back a recorded
message and delete it, if you want.
1. When the display shows the title of the first
memo, press the or key to display the
memo you want to play back.
2. Press the Play soft key to play back the recorded
message currently displayed.
3. When you finish reviewing, press the Stop soft
key.
4. If you want to delete the memo, press the Delete
soft key.
5. When the phone confirms your selection, press
the Yes soft key.
If you do not want to delete the memo, press the
No soft key.
6. Repeat steps 1 through 5 as needed.
7. When you finish, press the key to return to
idle mode.
Edit Title: you can change the title of the selected
memo.
Solving Problems
Before contacting the after-sales service, perform the
following simple checks. They may save you the time
and expense of an unnecessary service call.
“No service”, “Network failure” or “Not done”
is displayed
• The network connection was lost. You may be in a
weak reception area, such as in a tunnel or
surrounded by buildings. Move and try again.
• You are trying to access an option for which you
have not taken out a subscription with your
service provider. Contact the service provider for
further details.
You have entered a number but it was not dialed
• Have you pressed the key?
• Are you accessing the right cellular network?
• You may have chosen to restrict outgoing calls.
Your correspondent cannot reach you
• Is your phone switched on (the key pressed
for more than one second)?
• Are you accessing the right cellular network?
• You may have chosen to restrict incoming calls.
• You may be in a weak signal area. More and try
again.

109
108
VVooiiccee FFuunnccttiioonnss
Your correspondent cannot hear you speaking
• Have you switched off the microphone (mute)?
• Are you holding the phone close enough to your
mouth? The microphone is located at the bottom
center of the phone.
The phone starts beeping and “**Warning**
Low Battery” flashes on the display
• The battery power is weak. Replace the battery
and recharge it.
The audio quality of the call is poor
• Check the signal strength indicator on the display
(); the number of bars indicates the signal
strength from strong ( ) to weak ( ).
• Try moving the phone slightly or moving closer to
a window if you are in a building.
No number is dialed when you recall a Phonebook
entry
• Check that the number has been stored correctly,
by using the Phonebook Search feature.
• Re-store the number, if necessary.
If the above guidelines do not help you to solve the
problem, take a note of:
• the model and serial numbers of your phone.
• your warranty details.
• a clear description of the problem.
Then contact your local dealer or Samsung
after-sales service.
Health and Safety
Information
Exposure to Radio Frequency (RF) Signals
Your mobile phone is a radio transmitter and receiver.
It is designed and manufactured not to exceed the
emission limits for exposure to radio frequency (RF)
energy set by the Federal Communications
Commission of the U.S. Government. These limits are
part of comprehensive guidelines and establish
permitted levels of RF energy for the general
population. Those guidelines are consistent with the
safety standard previously set by both U.S. and
international standards bodies:
• American National Standards Institute (ANSI)
IEEE. C95.1-1992
• National Council on Radiation Protection and
Measurement (NCRP). Report 86
• International Commission on Non-Ionizing
Radiation Protection (ICNIRP) 1996
• Ministry of Health (Canada), Safety Code 6.
The standards include a substantial safety margin
designed to assure the safety of all persons,
regardless of age and health.
The exposure standard for wireless mobile phones
employs a unit of measurement known as the
Specific Absorption Rate, or SAR. The SAR limit set
by the FCC is 1.6W/kg.*
*In the U.S. and Canada, the SAR limit for mobile phones used by
the public is 1.6 watts/kg(w/kg) averaged over on gram of tissue.
The standard incorporates a substantial margin of safety to give
additional protection for the public and to account for any
variations in measurements.

HHeeaalltthh aanndd SSaaffeettyy IInnffoorrmmaattiioonnHHeeaalltthh aanndd SSaaffeettyy IInnffoorrmmaattiioonn
111
110
Use of non-Samsung-approved accessories may
violate FCC RF exposure guidelines and should be
avoided.
For additional information concerning exposure to
radio frequency signals, see the following websites:
Federal Communications Commission (FCC) RF
Safety program (select “Information on Human
Exposure to RF Fields from Cellular and PCS Radio
Transmitters”):
http://www.fcc.gov/oet/rfsafety
Cellular Telecommunications Industry
Association (CTIA): http://www.wow-com.com
World Health Organization (WHO) International
Commission on Non-ionizing Radiation Protection
(select Qs & As):
http://www.who.int/emf
United Kingdom, National Radiological
Protection Board: http://www.nrpb.org.uk
U.S.Food and Drug Administration (FDA) Center
for Devices and Radiological Health:
http://www.fda.gov/cdrh/consumer/
Tests for SAR are conducted using standard
operating positions specified by the FCC with the
phone transmitting at its highest certified power
level in all tested frequency bands. Although the SAR
is determined at the highest certified power level,
the actual SAR level of the phone while operation
can be well below the maximum value. This is
because the phone is designed to operate at multiple
power levels so as to use only the power required to
reach the network. In general, the closer you are to a
wireless base station antenna, the lower the power
output.
Before a phone model is available for sale to the
public, it must be tested and certified to the FCC that
it does not exceed the limit established by the
government-adopted requirement for safe exposure.
The tests are performed in positions and locations
(e.g., at the ear and worn on the body) as required by
the FCC for each model. (Body-worn measurements
differ among phone models, depending upon
available accessories and FCC requirements). While
there may be differences between the SAR levels of
various phones and at various positions, they all
meet the government requirement for safety
exposure.
For body worn operation, to maintain compliance
with FCC RF exposure guidelines, use only Samsung-
approved accessories. When carrying the phone
while it is on, use the specific Samsung belt-clip that
has been tested for compliance.

HHeeaalltthh aanndd SSaaffeettyy IInnffoorrmmaattiioonnHHeeaalltthh aanndd SSaaffeettyy IInnffoorrmmaattiioonn
113
112
• Do not leave the battery in hot or cold places, such
as in a car in summer or winter conditions, as you
will reduce the capacity and lifetime of the battery.
Always try to keep the battery at room
temperature. A phone with a hot or cold battery
may temporarily not work, even when the battery
is fully charged. Li-ion batteries are particularly
affected by temperatures below 0 °C (32 °F).
• Do not short-circuit the battery. Accidental short-
circuiting can occur when a metallic object (coin,
clip or pen) causes a direct connection between
the + and – terminals of the battery (metal strips
on the battery), for example when you carry a
spare battery in a pocket or bag. Short-circuiting
the terminals may damage the battery or the
object causing the short-circuiting.
• Dispose of used batteries in accordance with local
regulations. Always recycle. Do not dispose of
batteries in a fire..
Precautions When Using Batteries
• Never use any charger or battery that is damaged
in any way.
• Use the battery only for its intended purpose.
• If you use the phone near the network’s base
station, it uses less power; talk and standby time
are greatly affected by the signal strength on the
cellular network and the parameters set by the
network operator.
• Battery charging time depends on the remaining
battery charge and the type of battery and charger
used. The battery can be charged and discharged
hundreds of times, but it will gradually wear out.
When the operation time (talk time and standby
time) is noticeably shorter than normal, it is time
to buy a new battery.
• If left unused, a fully charged battery will
discharge itself over time.
• Use only Samsung-approved batteries and
recharge your battery only with Samsung-approved
chargers. When a charger is not in use, disconnect
it from the power source. Do not leave the battery
connected to a charger for more than a week,
since overcharging may shorten its life.
• Extreme temperatures will affect the charging
capacity of your battery: it may require cooling or
warming first.

HHeeaalltthh aanndd SSaaffeettyy IInnffoorrmmaattiioonnHHeeaalltthh aanndd SSaaffeettyy IInnffoorrmmaattiioonn
115
114
Road Safety
Your wireless phone gives you the powerful ability to
communicate by voice, almost anywhere, anytime.
But an important responsibility accompanies the
benefits of wireless phones, one that every user
must uphold.
When driving a car, driving is your first responsibility.
When using your wireless phone behind the wheel of
a car, practice good common sense and remember
the following tips.
1. Get to know your wireless phone and its features,
such as speed dial and redial. If available, these
features help you to place your call without taking
your attention off the road.
2. When available, use a hands-free device. If
possible, add an extra layer of convenience and
safety to your wireless phone with one of the
many hands-free accessories available today.
3. Position your wireless phone within easy reach. Be
able to access your wireless phone without
removing your eyes from the road. If you get an
incoming call at an inconvenient time, let your
voice mail answer it for you.
4. Let the person you are speaking with know you are
driving; if necessary, suspend the call in heavy
traffic or hazardous weather conditions. Rain,
sleet, snow, ice and even heavy traffic can be
hazardous.
5. Do not take notes or look up phone numbers while
driving. Jotting down a To Do list or flipping
through your phonebook takes your attention away
from your primary responsibility, driving safely.
6. Dial sensibly and assess the traffic; if possible,
place calls when you are not moving or before
pulling into traffic. Try to plan calls when your car
will be stationary. If you need to make a call while
moving, dial only a few numbers, check the road
and your mirrors, then continue.
7. Do not engage in stressful or emotional
conversations that may be distracting. Make the
people with whom you are talking aware that you
are driving and suspend conversations that have
the potential to divert your attention from the
road.
8. Use your wireless phone to call for help. Dial the
emergency number in the case of fire, traffic
accident or medical emergencies. Remember, it is
a free call on your wireless phone!
9. Use your wireless phone to help others in
emergencies. If you see a car accident, crime in
progress or other serious emergency where lives
are in danger, call the emergency number, as you
would want others to do for you.

HHeeaalltthh aanndd SSaaffeettyy IInnffoorrmmaattiioonnHHeeaalltthh aanndd SSaaffeettyy IInnffoorrmmaattiioonn
117
116
10. Call roadside assistance or a special non-
emergency wireless assistance number when
necessary. If you see a broken-down vehicle
posing no serious hazard, a broken traffic signal,
a minor traffic accident where no one appears
injured, or a vehicle you know to be stolen, call
roadside assistance or any other special non-
emergency wireless number.
Operating Environment
Remember to follow any special regulations in force
in any area and always switch off your phone
whenever it is forbidden to use it, or when it may
cause interference or danger.
When connecting the phone or any accessory to
another device, read its user’s guide for detailed
safety instructions. Do not connect incompatible
products.
As with other mobile radio transmitting equipment,
users are advised that for the satisfactory operation
of the equipment and for the safety of personnel, it is
recommended that the equipment should only be
used in the normal operating position (held to your
ear with the antenna pointing over your shoulder).
Electronic Devices
Most modern electronic equipment is shielded from
radio frequency (RF) signals. However, certain
electronic equipment may not be shielded against
the RF signals from your wireless phone. Consult the
manufacturer to discuss alternatives.
Pacemakers
Pacemaker manufacturers recommend that a
minimum distance of 15 cm (6 inches) be maintained
between a wireless phone and a pacemaker to avoid
potential interference with the pacemaker. These
recommendations are consistent with the
independent research and recommendations of
Wireless Technology Research.
Persons with pacemakers:
• should always keep the phone more than 15 cm (6
inches) from their pacemaker when the phone is
switched on
• should not carry the phone in a breast pocket
• should use the ear opposite the pacemaker to
minimize potential interference
If you have any reason to suspect that interference is
taking place, switch off your phone immediately.
Hearing Aids
Some digital wireless phones may interfere with
some hearing aids. In the event of such interference,
you may wish to consult your hearing aid
manufacturer to discuss alternatives.

HHeeaalltthh aanndd SSaaffeettyy IInnffoorrmmaattiioonnHHeeaalltthh aanndd SSaaffeettyy IInnffoorrmmaattiioonn
119
118
Other Medical Devices
If you use any other personal medical devices,
consult the manufacturer of your device to determine
if it is adequately shielded from external RF energy.
Your physician may be able to assist you in obtaining
this information. Switch off your phone in health care
facilities when any regulations posted in these areas
instruct you to do so. Hospitals or health care
facilities may be using equipment that could be
sensitive to external RF energy.
Vehicles
RF signals may affect improperly installed or
inadequately shielded electronic systems in motor
vehicles. Check with the manufacturer or its
representative regarding your vehicle.
You should also consult the manufacturer of any
equipment that has been added to your vehicle.
Posted Facilities
Switch off your phone in any facility where posted
notices require you to do so.
Potentially Explosive Atmospheres
Switch off your phone when in any area with a
potentially explosive atmosphere and obey all signs
and instructions. Sparks in such areas could cause an
explosion or fire resulting in bodily injury or even
death.
Users are advised to switch off the phone while at a
refueling point (service station). Users are reminded
of the need to observe restrictions on the use of
radio equipment in fuel depots (fuel storage and
distribution areas), chemical plants or where blasting
operations are in progress.
Areas with a potentially explosive atmosphere are
often but not always clearly marked. They include
below deck on boats, chemical transfer or storage
facilities, vehicles using liquefied petroleum gas
(such as propane or butane), areas where the air
contains chemicals or particles, such as grain, dust
or metal powders, and any other area where you
would normally be advised to turn off your vehicle
engine.

HHeeaalltthh aanndd SSaaffeettyy IInnffoorrmmaattiioonnHHeeaalltthh aanndd SSaaffeettyy IInnffoorrmmaattiioonn
121
120
Emergency Calls
This phone, like any wireless phone, operates using
radio signals, wireless and landline networks as well
as user-programmed functions, which cannot
guarantee connection in all conditions. Therefore,
you should never rely solely on any wireless phone
for essential communications (medical emergencies,
for example).
Remember, to make or receive any calls the phone
must be switched on and in a service area with
adequate signal strength. Emergency calls may not
be possible on all wireless phone networks or when
certain network services and/or phone features are
in use. Check with local service providers.
To make an emergency call:
1. If the phone is not on, switch it on.
2. Key in the emergency number for your present
location. Emergency numbers vary by
location.
3. Press the <SEND> key.
If certain features are in use (call barring, for
example), you may first need to deactivate those
features before you can make an emergency call.
Consult this document and your local cellular service
provider.
When making an emergency call, remember to give
all the necessary information as accurately as
possible. Remember that your phone may be the only
means of communication at the scene of an accident;
do not cut off the call until given permission to do so.
Other Important Safety Information
• Only qualified personnel should service the phone
or install the phone in a vehicle. Faulty installation
or service may be dangerous and may invalidate
any warranty applicable to the device.
• Check regularly that all wireless phone equipment
in your vehicle is mounted and operating properly.
• Do not store or carry flammable liquids, gases or
explosive materials in the same compartment as
the phone, its parts or accessories.
• For vehicles equipped with an air bag, remember
that an air bag inflates with great force. Do not
place objects, including both installed or portable
wireless equipment in the area over the air bag or
in the air bag deployment area. If wireless
equipment is improperly installed and the air bag
inflates, serious injury could result.
• Switch off your phone before boarding an aircraft.
The use of wireless phones in aircraft may be
dangerous to the operation of the aircraft, and is
illegal.
• Failure to observe these instructions may lead to
the suspension or denial of telephone services to
the offender, or legal action, or both.

HHeeaalltthh aanndd SSaaffeettyy IInnffoorrmmaattiioonnHHeeaalltthh aanndd SSaaffeettyy IInnffoorrmmaattiioonn
123
122
Care and Maintenance
Your phone is a product of superior design and
craftsmanship and should be treated with care. The
suggestions below will help you fulfill any warranty
obligations and allow you to enjoy this product for
many years.
• Keep the phone and all its parts and accessories
out of the reach of small children’s.
• Keep the phone dry. Precipitation, humidity and
liquids contain minerals that will corrode
electronic circuits.
• Do not touch the phone with wet hands while it is
charging. Doing so may give you an electric shock
or damage the phone.
• Do not use or store the phone in dusty, dirty areas,
as its moving parts may be damaged.
• Do not store the phone in hot areas. High
temperatures can shorten the life of electronic
devices, damage batteries, and warp or melt
certain plastics.
• Do not store the phone in cold areas. When the
phone warms up to its normal operating
temperature, moisture can form inside the phone,
which may damage the phone’s electronic circuit
boards.
• Do not drop, knock or shake the phone. Rough
handling can break internal circuit boards.
• Do not use harsh chemicals, cleaning solvents or
strong detergents to clean the phone. Wipe it with
a soft cloth slightly dampened in a mild soap-and-
water solution.
• Do not paint the phone. Paint can clog the device’s
moving parts and prevent proper operation.
• Do not put the phone in or on heating devices,
such as a microwave oven, a stove or a radiator.
The phone may explode when overheated.
• Use only the supplied or an approved replacement
antenna. Unauthorized antennas or modified
accessories may damage the phone and violate
regulations governing radio devices.
• If the phone, battery, charger or any accessory is
not working properly, take it to your nearest
qualified service facility. The personnel there will
assist you, and if necessary, arrange for service.

125
124
Glossary
To help you understand the main technical terms and
abbreviations used in this booklet and take full
advantage of the features on your mobile phone,
here are a few definitions.
Antenna
A device for transmitting or receiving signals. The
size and shape of antennas is determined, in part, by
the frequency of the signal they receive. Wireless
phones and the base station must have antennas.
Call Diverting
Ability to reroute calls to another mobile or fixed
line.
Call Holding
Ability to put one call on standby while answering or
making another call; you can then switch between
the two calls, as required.
Calling Line Identification Services (Caller-ID)
Services allowing subscribers to view or block the
telephone numbers of callers.
Call Waiting
Ability to inform users that they have an incoming
call when engaged on another call.
Conference Calling
Ability to establish a conference call involving up to
two additional parties.
Hands-Free
A feature that permits a driver to use a wireless
phone without lifting or holding the handset - an
important safety feature for automobiles, tractors
and most other motorized vehicles.
LCD (Liquid Crystal Display)
Commonly used to refer to the screen display on the
wireless phone.
Phone Password
Lock code used to unlock the phone when you have
selected the option to lock it automatically each time
it switches on, and security code used to restrict the
use of your phone.
Roaming
Use of your phone when you are outside your home
area (when travelling for example).
SMS (Short Message Service)
Network service for sending and receiving messages
to and from another subscriber without having to
speak to the correspondent. The message created or
received can be displayed, received, edited or sent.
GGlloossssaarryy
127126
Soft Keys
Keys marked on the phone, the purpose of
which:
• varies according to the function that you are
currently using
• is indicated on the bottom line of the display just
above the corresponding key
TDMA
Time division multiple access (TDMA) is a digital
transmission technology that allows a number of
users to access a single radio-frequency (RF) channel
without interference by allocating unique time slots
to each user within each channel. The TDMA digital
transmission scheme multiplexes three signals over a
single channel. The current TDMA standard for
cellular divides a single channel into six time slots,
with each signal using two slots, providing a 3 to 1
gain in capacity over advanced mobile-phone service
(AMPS). Each caller is assigned a specific time slot
for transmission.
Voice Mail
A computerized answering service that answers a
call, plays a greeting and records a message.
GGlloossssaarryy
A
Accessories • 7
Adjusting volume • 23
Alarm (5.4) • 90
Alert Type (3.3) • 72
Answering
a call • 24
a second call • 50
Answer mode (4.5) • 79
Auto Redial (4.4) • 79
B
Backlight • 13; 77
Batteries
charging • 17
installing • 15
low battery indicator • 18
precautions • 112
removing • 16
C
Calculator (5.5) • 91
Calendar (5.1) • 84
Caller
group • 38
ID • 24
Calling Card (4.9) • 80
Calls
answering • 24
a second call • 50
conference • 51
diverting (7.1) • 95
ending • 21
holding • 49
incoming (1.2) • 58
making • 21
missed • 25; 58
outgoing (1.3) • 69
redialing • 22
automatically • 79
restriction (6.3) • 93
SOS (6.4)• 94
time (1.4) • 59
via the phonebook • 22
waiting (7.3) • 50; 96
Care • 124
Changing
lock code
(6.1)
• 92
security code (6.2) • 92
Characters
entering • 41
Charging batteries • 17
Composer
Melody (3.9) • 75
Conference calls • 51
Connect
to Voice Mail (2.1) • 60
tone (3.8) • 74
Contrast • 78
Correcting numbers • 21
Creating To do list • 86
D
Date
format (5.3.4) • 89
setting (5.3.2) • 89
Deleting
memos • 86
messages • 62
missed calls • 26
phonebook numbers • 36
tasks • 88
voice memo • 105
Display • 11
backlight • 77
contrast •78
external • 13
icons • 12
setting the
language (4.6) • 80
Diverting calls (7.1) • 95
Index
The index will be updated
when the manual is fixed.

129
E
Earpiece
adjusting the volume • 23
Editing
memos • 85
messages • 62
missed calls• 26
phonebook numbers • 35
To Do List • 87
Voice memo title • 106
Erasing
memos • 86
messages • 62
missed calls • 26
phonebook numbers • 36
tasks • 88
voice memo • 105
Error Tone (3.6) • 73
External display • 13
F
Functions
selecting • 29
G
Games (8) • 101
Greeting Message (4.1) • 77
Groups
caller • 38
H
Holding calls • 49
I
Icons
description • 12
ID, caller • 24
Identifying a caller • 24
Incoming Calls (1.2) • 58
K
Key tones
adjusting the volume • 23
muting • 46
sending • 46
Keys
description • 9
location • 8
navigation • 29
L
Language (4.6) • 80
Last number redialing • 22
Length of calls • 59; 74
Letters
entering • 41
Light Control (4.2)
backlight • 13; 77
service • 14; 78
Listening
voice mail • 60
voice memo • 105
Lock code • 92
Locking phone • 20
Low battery indicator • 18
M
Maintenance • 122
Melody Composer (3.9) • 75
Memory status • 40
Memos
calendar • 84
voice • 103
Menus
by scrolling • 52
by shortcut •53
list • 54
Message Tone (3.5) • 73
Messages
greeting (4.1) • 77
picture (2.6) • 66
preset (2.4) • 64
reading (2.2) • 61
setup (2.5) • 65
voice mail (2.1) • 60
writing (2.3) • 63
128
M
(continued)
Minute Minder (3.7) • 74
Missed calls (1.1) • 25; 58
Mute
key tones • 46
N
NAM, selecting (7.5) • 98
Names
entering • 41
options • 34
searching • 37
storing in the
phonebook • 32
Network Selection (7.3) • 97
Network Services (7) • 95
Number
correcting • 21
editing
missed call • 25; 58
phonebook • 35
erasing phonebook • 36
moving phonebook • 36
own • 40
redialing • 22
automatically • 79
searching •
37
storing in the
phonebook • 32
O
Options
selecting • 29
Organizer (5) • 84
Outgoing Calls (1.3) • 59
Own Number • 40
P
Phone
locking • 20
switching on/off • 19
Phonebook • 32
editing numbers • 35
erasing numbers • 36
moving numbers • 36
options • 38
searching • 37
storing numbers/names
• 32
Picture Messages (2.6) • 66
Preset Message List (2.4) •
64
Private call • 49; 98
Problem solving • 107
R
Read Messages (2.2) • 61
Recording,
voice memo • 103
Redialing
automatically • 79
last number • 22
Replaying,
voice memo • 105
Reset Settings (4.7) • 80
Restriction, call • 93
Ring
tone (3.2) • 71
type • 72
volume (3.1) • 71
Roaming • 97; 100
IInnddeexxIInnddeexx
131130
S
Safety
batteries • 112
information • 109
quick guide • 5
Schedule • 84
Searching Phonebook • 37;
47
Security code • 92
Selecting functions/options
• 28
Sending
key tones • 46
messages • 64
Service code (7.6) • 99
Service light • 14; 78
Setting
alarm (5.4) • 90
date (5.3.2) • 89
display language • 80
time (5.3.1) • 88
Settings
resetting (4.7) • 80
Shortcut (4.9) • 83
Silent mode • 27
SMS • 48, 60
Soft keys, using • 28
Solving problems • 107
Speed Dialing • 33
Switching on/off
phone • 19
T
Text input modes • 41
changing • 42
Text messages
reading • 61
sending • 63
Time
calls (1.4) • 59
format (5.3.4) • 89
setting (5.3.1) • 88
world (5.3.3) • 89
To Do List (5.2) • 86
Tone
connect (3.8) • 74
error (3.6) • 73
length (3.4) • 72
message (3.5) • 73
ring (3.2) • 71
Tones (3) • 71
Travel charger • 17
T9 mode • 43
V
Vibration • 72
Voice mail (2.1) • 60
Voice memo pad • 103
Voice Privacy (7.4) • 98
Voice Server Number
(2.1.2) • 61
Volume
adjusting • 23
ring (3.1) • 71
W
Waiting call • 50; 96
World Time (5.3.3) • 89
Write Messages (2.3) • 63
Writing memos • 85
IInnddeexx
TDMA Mobile Telephone STH-A325
Quick Reference Card
Switch On/Off Press and hold .
Make a Call ➀Key in the number.
➁Press .
End a Call Briefly press .
View Missed
Calls right
after they
were missed
➀Open the folder and
press the View soft
key.
➁Scroll through the
missed calls by
pressing the or
.
➂To return the call,
press .
Access the
Menu
Function
➀Press the Menu soft key.
➁Scroll through the list of
menus until you reach
the required menu by
pressing or .
➂Press the Select soft
key.
➃Scroll through the list of
options until the required
one is selected by
pressing the or .
➄Press the Select soft
key.
• Each of the two soft keys ( and )
performs the function indicated by the
text above it (bottom line on the display).

132
Answer a
Call Open the folder
or
Press .
Adjust the
Volume
Press or on the left
side of the phone.
Choose the
Alert Type
➀Select the Alert Type
menu option (3.3).
➁Select an option:
Light Only,Melody,
Vibration and Vibra+
Melody.
➂Press the Select soft
key to confirm.
Store
Numbers
in the
Phonebook
➀Key in the number.
➁Press the Save soft key.
➂Select a label and press
the Select soft key.
➃Enter the name, and press
the OK soft key.
➄ If necessary, change the
location.
➅Press the OK soft key.
Search for a
Number
in the
Phonebook
➀Press the Names soft key.
➁Enter the first few letters
of the name.
➂
Press the Search soft key.
➃To scroll through the
names, press or
.
➄To make a call, press .