Samsung Electronics Co SX10 Notebook PC User Manual AquilaC XP English v0 9
Samsung Electronics Co Ltd Notebook PC AquilaC XP English v0 9
UserManual.wiki
>
Samsung Electronics Co
>
SX10 User Manual
>
Users Manual 2
Contents
1.
Users Manual 1
2.
Users Manual 2
Users Manual 2
Navigation menu
Upload a User Manual
Namespaces
Wiki Guide
HTML
PDF
Info
Views
User Manual
Discussion / Help
Navigation
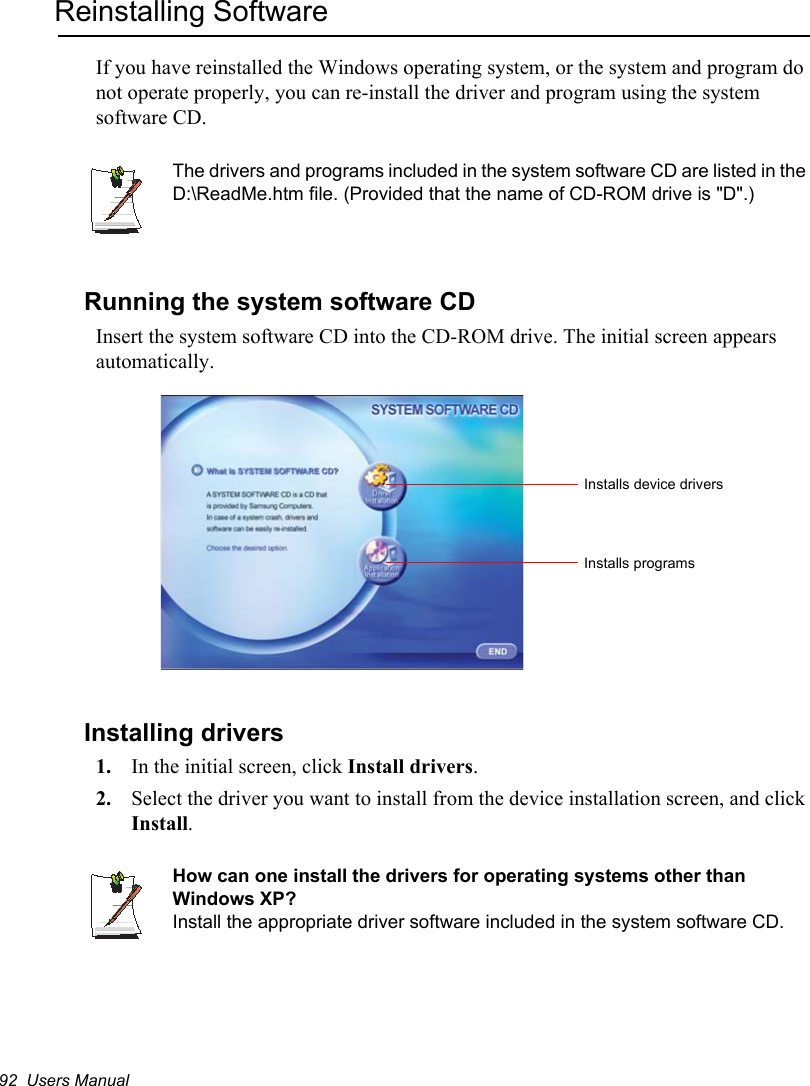
![56 Users ManualConfiguring the PasswordSetting the Supervisor PasswordBy configuring a supervisor password, you can restrict system access to authorized users only.1. Select the Security menu in the System Setup. To enter System Setup, see “Starting System Setup” on page 54.2. On the Set Supervisor Password item, press <Enter>.3. Enter a password, press <Enter>, re-enter the password for confirmation, and press <Enter> again.4. When a message confirming the password configuration appears in the [Setup Notice] window, press <Enter>.Setting the User PasswordYou can configure user passwords so that other users can use the system.Before configuring a user password, a supervisor password must have been configured.Users can start the system with their user password, but cannot enter into the System Setup.Deactivating the supervisor password also deactivates the user password.On the Set User Password item, press <Enter>, and complete step 3-4 of "Setting the Supervisor Password".Activating the Booting PasswordBefore activating the booting password, the supervisor password must have been configured.Set the Password on boot option to [Enabled]. From now on, system booting will not proceed without the password.](https://usermanual.wiki/Samsung-Electronics-Co/SX10.Users-Manual-2/User-Guide-317578-Page-3.png)
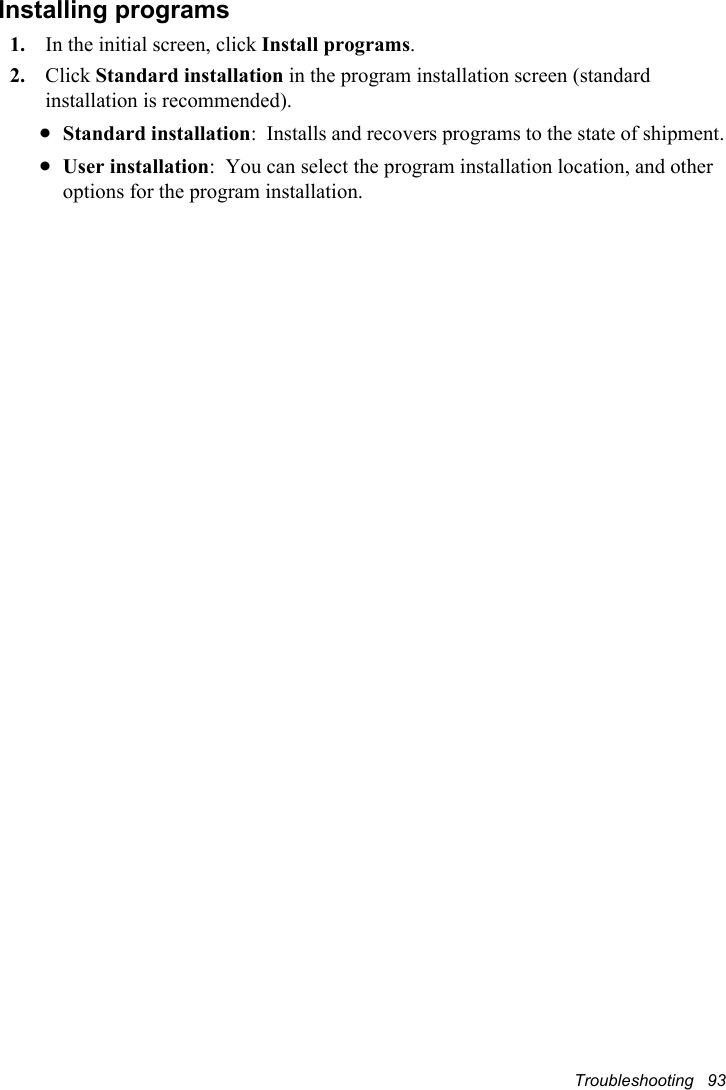
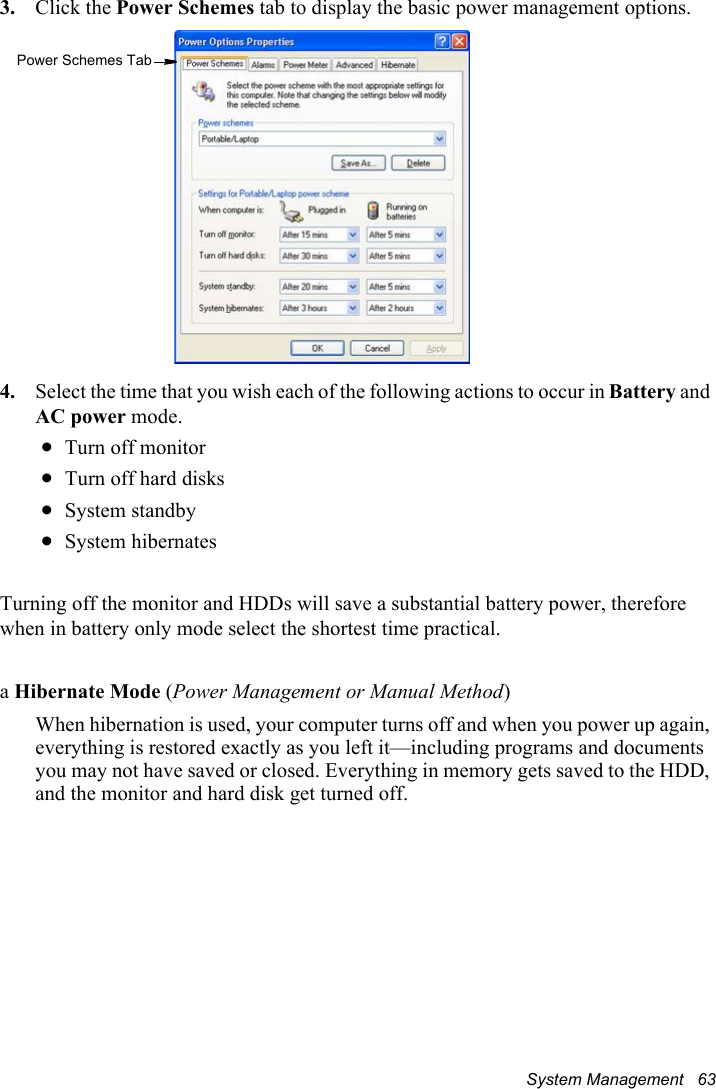
![58 Users ManualVideo Features and ConfigurationConfiguring Resolution and Color DepthScreen resolution is the number of pixels displayed on the screen. High resolution makes the overall screen area large, although individual items appear small. Color quality is determined by the number of bits used to represent a pixel on the screen. High color quality displays more number of colors on your screen.1. Select Start > Control Panel > Appearance and Themes > Change the screen resolution.2. Make changes on the Settings tab of the [Display Properties] dialog.3. When you have completed configuration, click Apply.It is recommended setting the resolution to 1024x768, and the number of colors to Highest (32bit).To change the number of colors displayed on a monitor, select an appropriate color quality.To change your screenresolution, move the sliderto select an appropriateresolution.](https://usermanual.wiki/Samsung-Electronics-Co/SX10.Users-Manual-2/User-Guide-317578-Page-5.png)
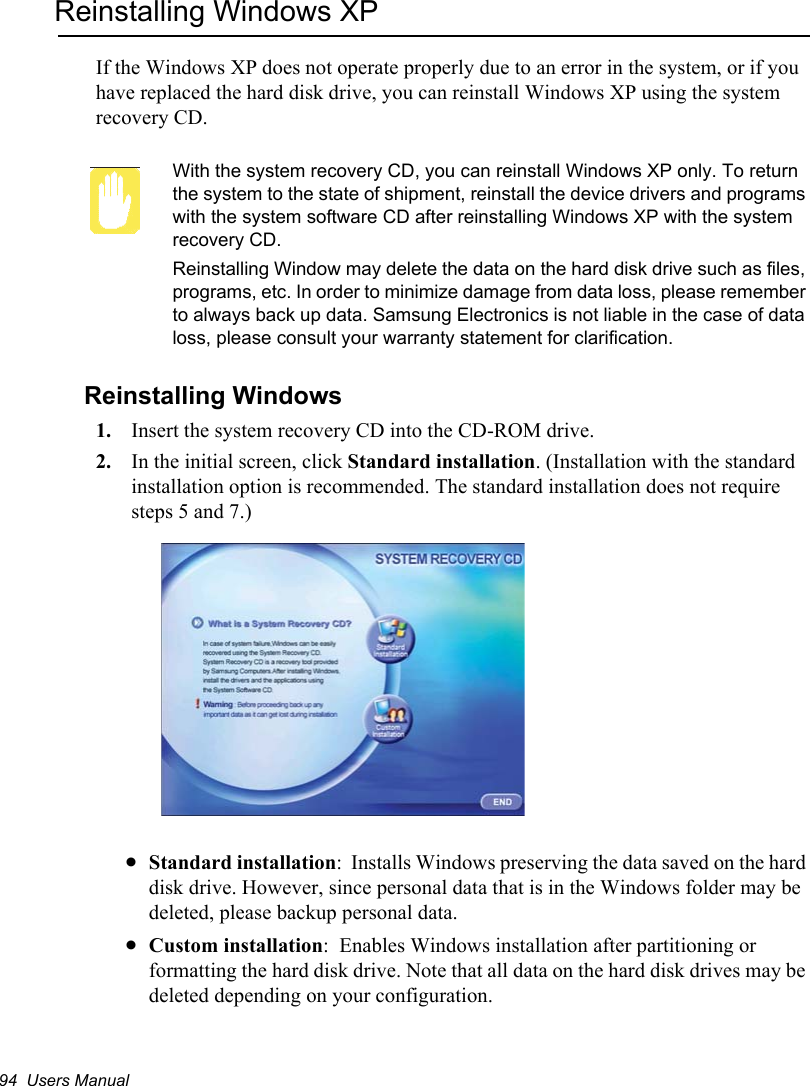
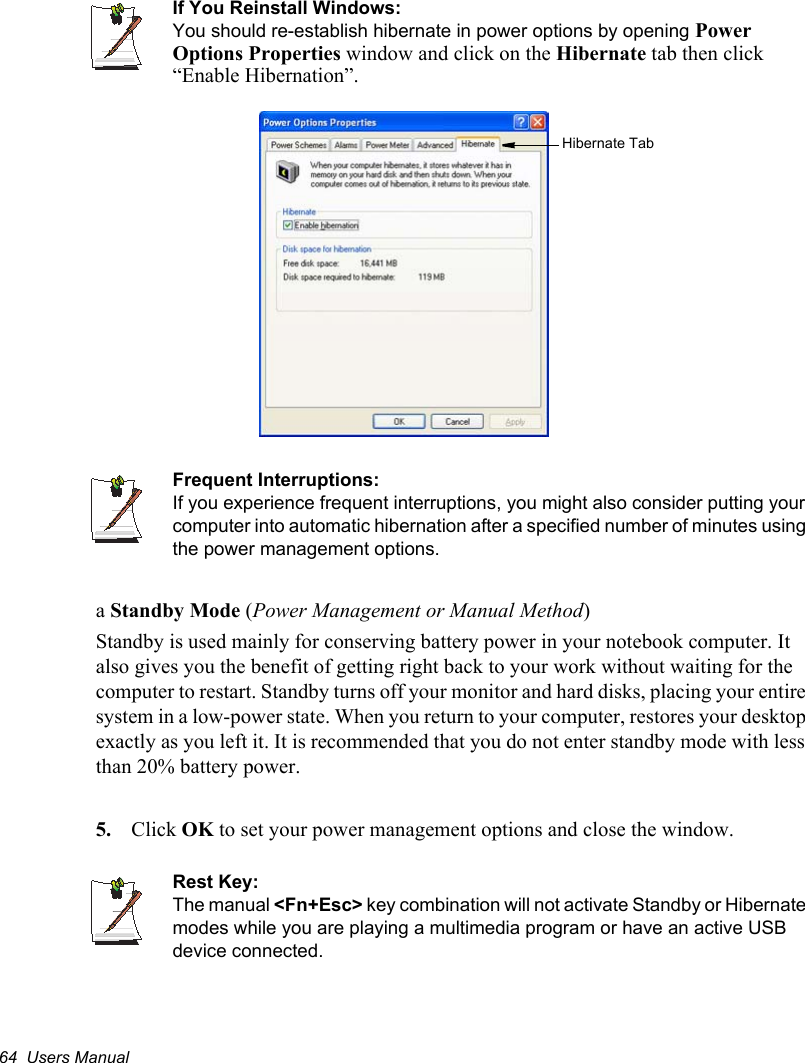
![Customizing Your Computer 59Adjusting the LCD BrightnessThere are 9 levels of LCD brightness (1: Dimmest ~ 9: Brightest). The default LCD brightness setting is level 5. Whenever you change the power source, the brightness level is changed to the following setting:xWhen operating on AC power : Level 9 (Brightest)xWhen operating on battery power : Level 3 (Slightly dimmer)Once the LCD brightness has been changed, the changed setting will be maintained after restarting the computer. When the power source is changed (AC to battery or battery to AC) while in operation, both the default brightness settings described above will be restored.You can adjust the LCD brightness by pressing <Fn+Up Arrow> or <Fn+Down Arrow> on the keyboard. SIC (Smart Inverter Control) FunctionSIC is a function that adjusts the LCD brightness automatically when the system is operating on battery power so that you can use the battery for a long time. SIC function is activated as a default. If you feel the screen is too dim, deactivate the SIC function following the procedures below. 1. Restart the system.2. Press <F2> key to run System Setup.3. Change the Smart Inverter Control item in Advanced menu to [Disabled].4. Use the screen brightness adjustment keys on the keyboard to adjust the LCD brightness to the comfortable level.](https://usermanual.wiki/Samsung-Electronics-Co/SX10.Users-Manual-2/User-Guide-317578-Page-6.png)

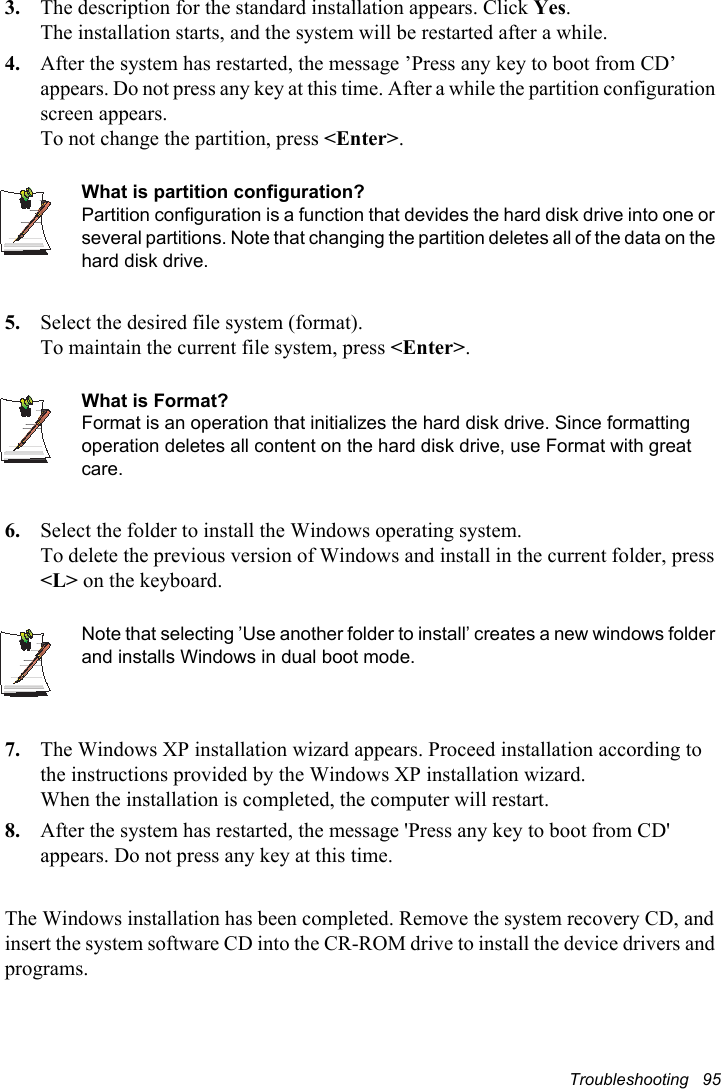
![72 Users ManualUsing the Hard DriveYour computer includes a removable IDE (integrated drive electronics) hard drive. The IDE hard drive can store the data and programs your computer uses. The drive plugs into a connector on the system board.The hard drive that comes with your computer has already been formatted. Do not format the hard drive. Doing so destroys all data contained on the drive. If you need to format a new drive, or want to erase all data on your existing hard drive, refer to the manual for your operating system.Installing/Reinstalling a HDDTo install a new HDD you should contact a Service Centre, replacement of the HDD is not a user task. You should follow the instructions below before the HDD is replaced.xBack up data files of your old hard drive.xFor system boot with CD-ROM, under the Boot menu in System setup, set Bootable CD Check to Enabled and set Boot Device Priority is ordered starting from the [DVD/CD-ROM].When you are ready to install the new HDD, use the Recovery CD-ROM to install the device driver.(Re)Installing Windows and Device DriversUse System Recovery CD to (re)install OS and System Software CD to (re)install device drivers. For details, see “Reinstalling Windows XP” on page 94 and ”Reinstalling Software” on page 92.](https://usermanual.wiki/Samsung-Electronics-Co/SX10.Users-Manual-2/User-Guide-317578-Page-19.png)
![Troubleshooting 81Questions and AnswersThis section provides information on possible problems, solutions and other references for system use.Windows Related Q1 The system does not shutdown properly.A When the system does not shutdown normally, press and hold the Power button until the system manually shuts off. If the Power-Saving Mode is configured into the Power button, press and hold for more than 4 seconds to shut the system off. When the system is turned on after such manual shutdown, Scandisk will run to check errors in the system. Q2 The system freezes during program operationA1 There is an error with the program currently being used. Press the <Ctrl>, <Alt>, and <Delete> keys simultaneously and click and Task in the [Windows Task Manager] window. A2 There is an error with the Windows OS. Reboot the system by using the Power button.](https://usermanual.wiki/Samsung-Electronics-Co/SX10.Users-Manual-2/User-Guide-317578-Page-28.png)