Samsung Electronics Co YPS5 DIGITAL AUDIO PLAYER User Manual YPS5 USA ENGLISH0 0 0703 1
Samsung Electronics Co Ltd DIGITAL AUDIO PLAYER YPS5 USA ENGLISH0 0 0703 1
Contents
- 1. USERS MANUAL 1
- 2. USERS MANUAL 2
USERS MANUAL 2
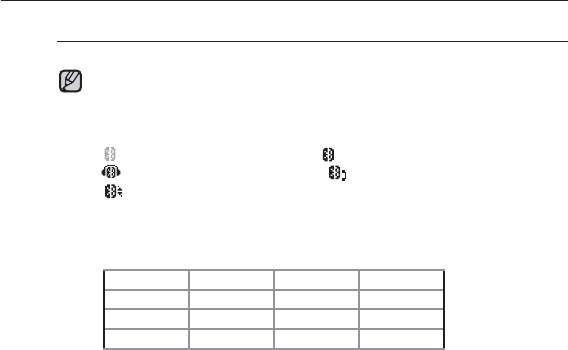
viewing Pictures _ 61
NOTE
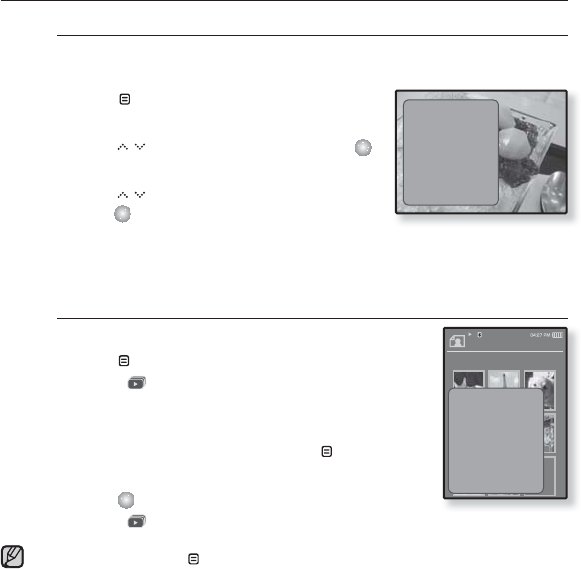
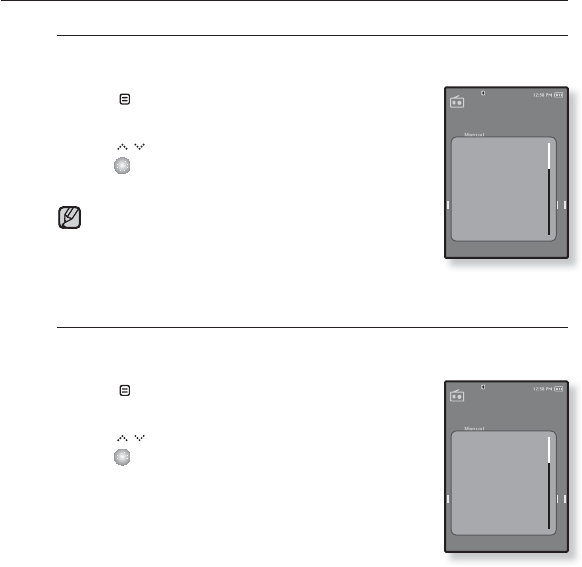
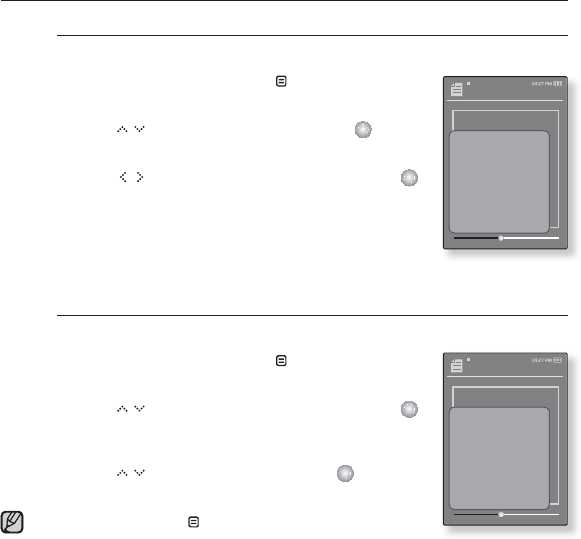
USING THE PICTURE MENU
To listen to music while viewing your picture
You can listen to the music that you last played while viewing your
picture.
1. Tap [ ] while viewing a picture.
The picture menu appears.
2. Tap [ ] to select <Music> and tap [ ].
The <Music> menu appears.
3. Tap [ ] to select a desired mode and
tap [ ].
<Off> : No background music is played while viewing a picture.
<On> : You can listen to the music that you last played while viewing your
picture.
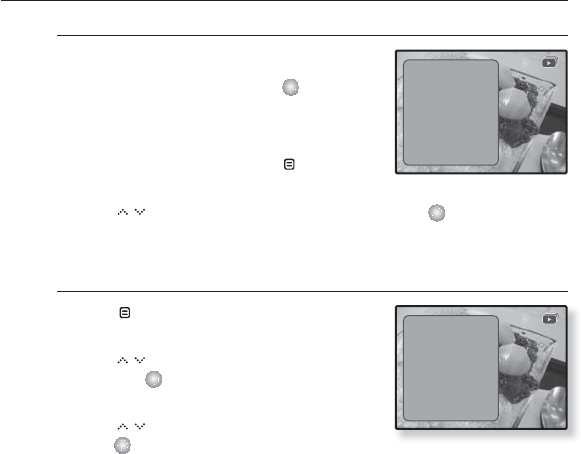
To watch a slideshow
How To 1
1. Tap [ ] while viewing a picture.
The [ ] icon on the screen appears on the screen,
and the slideshow will start.
How To 2
1. In the picture preview mode, tap [].
The Start Slideshow window appears.
2. Tap [ ].
The [ ] icon on the screen appears on the screen, and the slideshow will
start.
To exit the menu, tap [ ].
ŇŇ Ź
Music
Start Sildeshow
Slideshow Speed
Zoom
Rotate
Select as My Skin
Pictures 1/8
Picture Image 1
Start Slideshow
62 _ viewing Pictures
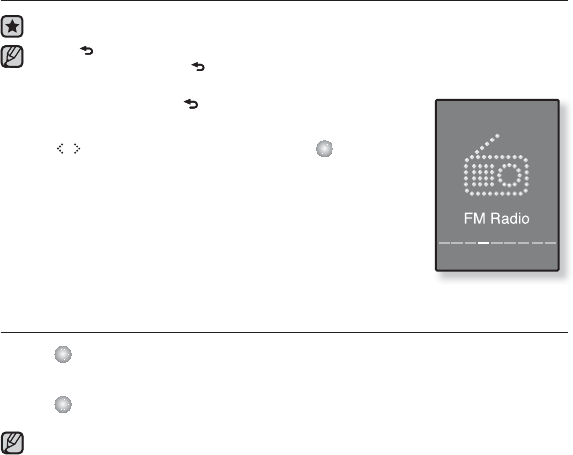
USING THE PICTURE MENU (Continued)
To stop the slideshow
How To 1
1. In the slideshow mode, tap [].
The slideshow stops.
How To 2
1. In the slideshow mode, tap [ ].
The Picture menu appears.
2. Tap [ ] to select <Stop Sildeshow> and tap [ ].
The slideshow stops.
To set the slideshow speed
1. Tap [ ] while viewing a picture.
The picture menu appears.
2. Tap [ ] to select <Slideshow Speed>
and tap [ ].
The <Slideshow Speed> menu appears.
3. Tap [ ] to select a desired speed and
tap [ ].
Select from <Fast>, <Normal>, and <Slow>.
ŇŇ Ź
Music
Stop Sildeshow
Slideshow Speed
Zoom
Rotate
Select as My Skin
ŇŇ Ź
Music
Start Sildeshow
Slideshow Speed
Zoom
Rotate
Select as My Skin

viewing Pictures _ 63
USING THE PICTURE MENU (Continued)
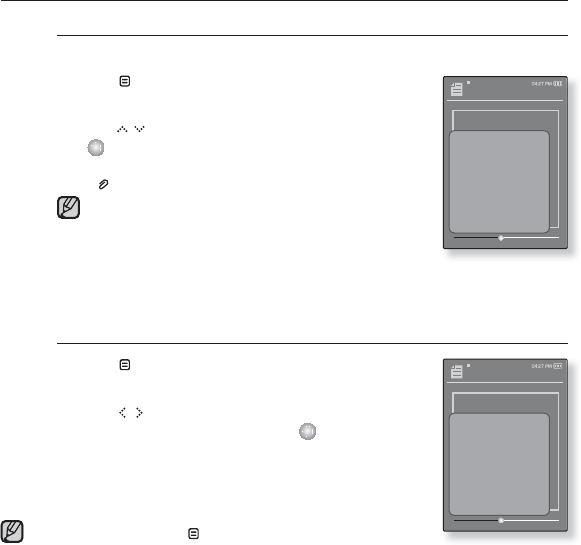
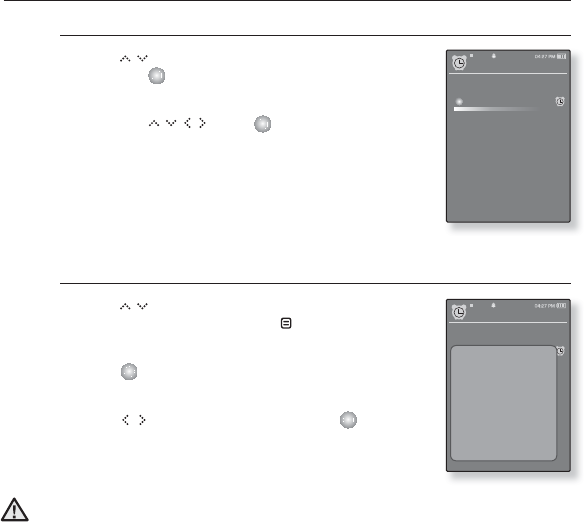
To enlarge a picture
You can zoom in a picture.
1. Tap [] while viewing a picture.
The picture menu appears.
2. Tap [ ] to select <Zoom> and tap [ ].
The <Zoom> menu appears.
3. Tap [ ] to select a desired zoom factor
and tap [ ].
Select from <100%>, <200%> and <300%>.
4. Tap [ ] to move to the portion of the picture to magnify.
To cancel the zooming
How To 1
1. Tap [ ] in an enlarged picture view.
This returns to the original size.
How To 2
1. Tap [ ] in an enlarged picture view.
The picture menu appears.
2. Tap [ ] to select <Zoom> and tap [ ].
The <Zoom> menu appears.
3. Tap [ ] to select <100%> and tap [ ].
This returns to the original size.
A big picture can be enlarged slowly.
Ň
Ż
Ź
Music
Start Sildeshow
Slideshow Speed
Zoom
Rotate
Select as My Skin
Ň
Ż
Ź
BGM
ŇŇŇŇŇŇ Ň ŇŇŇŇ
ŇŇŇŇŇŇ Ň ŇŇŇŇ
ŇŇŇ
ŇŇŇŇŇŇŇŇ ŇŇ
ŇŇŇŇŇ..
As Backgrun..
100%
200%
400%
NOTE

64 _ viewing Pictures
USING THE PICTURE MENU (Continued)
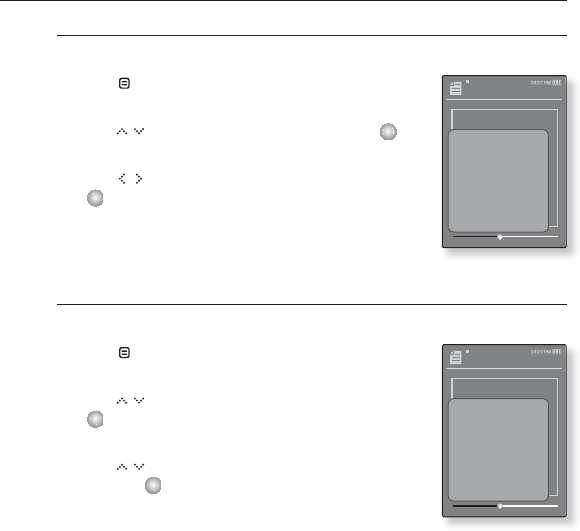
To rotate a picture
You can rotate a picture for your convenience.
1. Tap [ ] while viewing a picture.
The picture menu appears.
2.
Tap [ ] to select <Rotate> and tap [ ].
The <Rotate> menu appears.
3. Tap [ ] to select a desired angle and
tap [ ].
Select from <Left 90°>, <Right 90°>, and
<180>.
To set a picture as a background image
You can set a desired picture as a background image for the display window.
1. Select a picture fi le to set as a background
image and tap [ ].
The picture menu appears.
2.
Tap [ ] to select <Select as My Skin>
and tap [ ].
The save confi rmation window appears.
3.
Tap [ ] to select <Yes> and tap [ ].
The selected picture will be set to the background image.
If <My Skin> is selected from <Settings> ĺ <Menu Style> ĺ
<Menu Design>, the set image will be displayed.
Ň
Ż
Ź
Music
Start Sildeshow
Slideshow Speed
Zoom
Rotate
Select as My Skin
Ň
Ż
Ź
Music
Start Sildeshow
Slideshow Speed
Zoom
Rotate
Select as My Skin
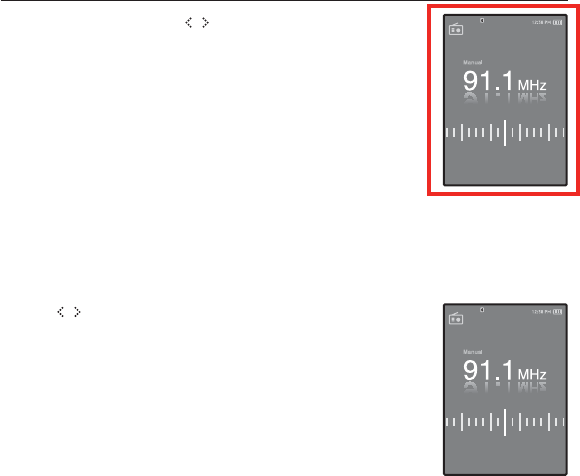
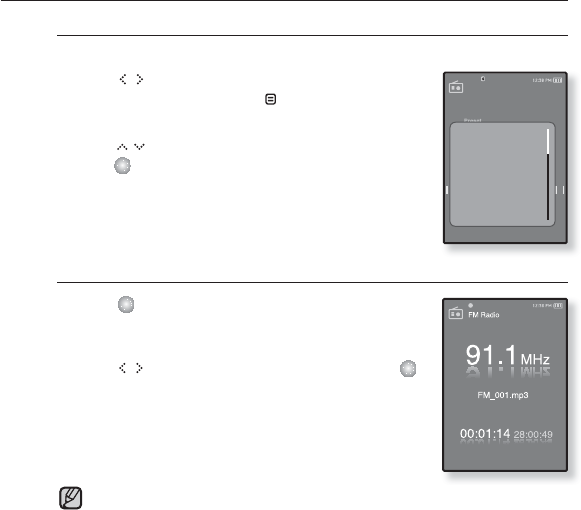
listening to FM radio _ 65
listening to FM radio
Before you start - Connect the earphones, then turn on the player, and check the battery.
Tap [ ] to move to the previous screen.
Press and briefl y hold [ ] to move to the main menu screen.
1. Press and briefl y hold [ ] to move to the main menu
screen.
2.
Tap [ ] to select <FM Radio> and tap [ ].
FM radio reception will start.
TO USE THE MUTE FUNCTION
1. Tap [ ] while listening to FM Radio.
Sound is muted.
2. Tap [ ] once again to resume listening.
Always connect your earphones to the player when searching or setting frequencies
and listening to FM Radio using the speaker or Bluetooth stereo headset.
The earphones serve as antennas to receive FM radio reception.
In poor reception areas, the player may not fi nd an available FM frequency.
NOTE
NOTE
66 _ listening to FM radio
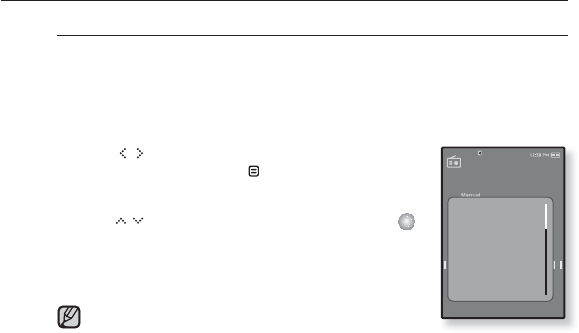
TO SEARCH FOR FM STATIONS
1. Press and briefl y hold [ ] and then release in Manual
mode.
<Searching> apprears.
The search will stop at the frequency nearest from the point the
button is released.
OR,
1. Tap [ ] to progress through the frequencies one by one
in Manual mode.
Moves to frequencies whenever the button is pressed.
Searching
listening to FM radio _ 67
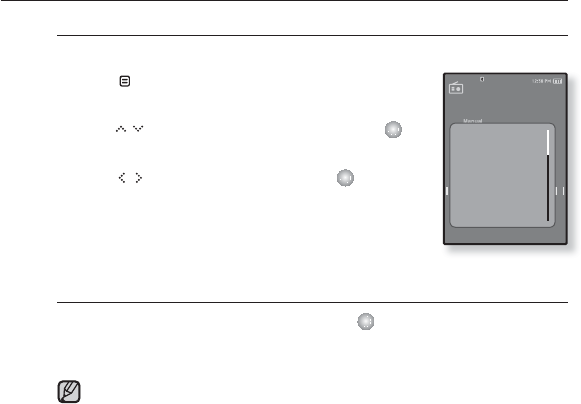
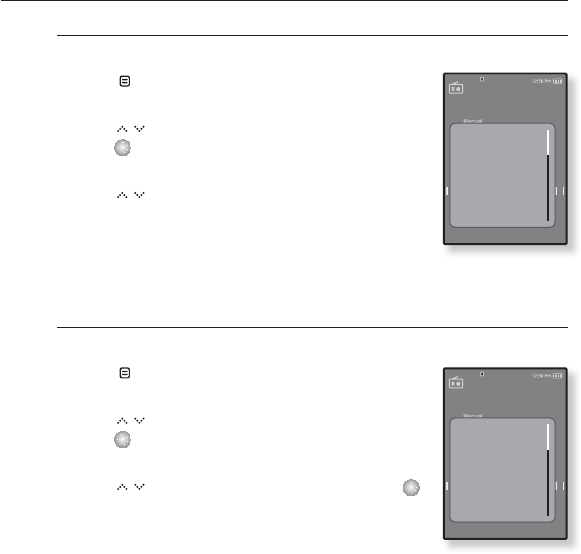
USING THE FM RADIO MENU
To switch to Preset Mode
Select this mode if you want to search through your saved FM presets
one preset at a time.
1. Tap [ ] in Manual mode.
The <FM Radio> menu appears.
2.
Tap [ ] to select <Go to Preset Mode> and
tap [ ].
You will see <Preset> on the screen.
If no preset frequencies are set, you will see <No
preset> and the player will not switch to Preset mode.
If <Default Set>is selected from<Settings>ĺ <System>,
any preset list will be lost.
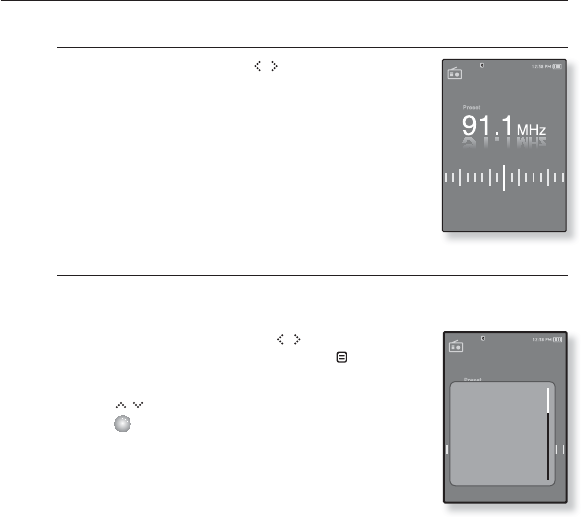
To switch to Manual Mode
Select this mode if you want to manually search through the FM band
one frequency at a time.
1. Tap [] in Preset mode.
The <FM Radio> menu appears.
2.
Tap [ ] to select <Go to Manual Mode> and
tap [ ].
You will see <Manual> on the screen.
NOTE
Go to Preset Mod
Add to Preset
Auto Preset
Start Recording
FM REC Quality
FM Sensitivity
FM Region
Go to Manual Mo
Delete from Pre..
Auto Preset
Start Recording
FM REC Quality
FM Sensitivity
FM Region
68 _ listening to FM radio
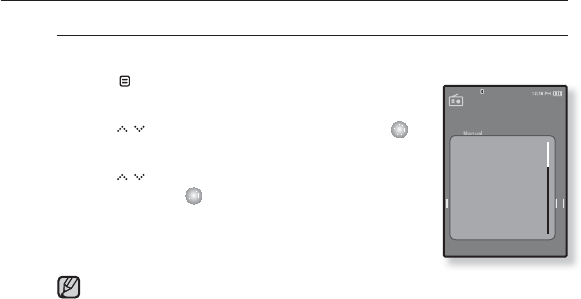
USING THE FM RADIO MENU (Continued)
To store stations in the preset memory
You can store up to 30 stations in your MP3 player’s memory and return
to them with the press of just one number. Have the MP3 player choose
only the stations you want using the manual process, or fi nd and store
the local stations automatically.
Manual - choose only the stations you want to store
1. Tap [] to select a frequency to preset in
Manual mode and tap [ ].
The <FM Radio> menu appears.
2.
Tap [ ] to select <Add to Preset> and tap [ ].
The selected frequency will be added to the preset list.
3.
To set a preset for other frequencies, follow 1-2
steps above.
If the same frequency is already set, the <This preset
already exists> message appears and the setting is
disabled.
NOTE
Go to Preset Mo..
Add to Preset
Auto Preset
Start Recording
FM REC Quality
FM Sensitivity
FM Region
listening to FM radio _ 69
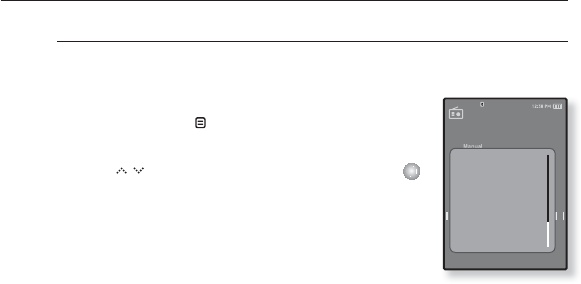
USING THE FM RADIO MENU (Continued)
To store stations in the preset memory (Continued)
Automatic – automatically store all the stations the player receives
1. Tap [ ] in FM Radio mode.
The <FM Radio> menu appears.
2.
Tap [ ] to select <Auto Preset> and tap [ ].
The confi rmation window appears.
3. Tap [ ] to select <Yes> and tap [ ]
.
<Auto Preset> will appear and up to 30 frequencies
are automatically set.
To cancel Auto Preset
If you want to cancel the auto preset, tap [ ] in the process.
The auto preset setting is canceled, and only frequencies set up to that point are
stored.
You may want to re-set the stored stations if you’re going to listen to your
MP3 player in a different city. To delete the preset stations and store new
ones, simply repeat the process.
Go to Preset Mo..
Add to Preset
Auto Preset
Start Recording
FM REC Quality
FM Sensitivity
FM Region
NOTE
70 _ listening to FM radio
USING THE FM RADIO MENU (Continued)
To listen to preset stations
While in Preset mode, tap [ ] to scroll through
preset stations.
You can listen to the stored radio frequency.
To delete a preset
Follow the steps below to delete frequencies while listening to FM
Radio.
1. While in Preset mode, tap [ ] to search for a
preset frequency to delete and tap [ ].
The <FM Radio> menu appears.
2. Tap [ ] to select <Delete from Preset> and
tap [ ].
The selected frequency will be deleted.
3. To delete other preset frequencies, follow 1-2
steps above.
Go to Manual M..
Delete from Prese
Auto Preset
Start Recording
FM REC Quality
FM Sensitivity
FM Region
listening to FM radio _ 71
USING THE FM RADIO MENU (Continued)
To record FM Radio broadcasting
You can record a FM radio program at any time while listening to the radio.
1. Tap [ ] to select a frequency to record in
FM Radio mode and tap [ ].
The <FM Radio> menu appears.
2. Tap [ ] to select <Start Recording> and
tap [ ].
An automatically created fi le name appears and the
recording starts.
To stop recording
1. Tap [ ] during the recording.
A message appears asking you if you want to listen to
the fi le you just recorded.
2. Tap [ ] to select <Yes> or <No> and tap [ ].
Selecting <Yes> will play the just recorded fi le.
Selecting <No> will not play the recorded fi le.
The recorded fi le is stored in <File Browser> ĺ
<Recorded Files> ĺ <FM Radio>.
You can store a maximum of 999 fi les for FM radio recording.
You can make a recording for about 30 hours (based on 128Kbps, 2GB)
The recording fi le name will be automatically specifi ed such as “FM_OOO.
mp3”. Where “FM” means FM radio recording and “000” is the recording fi le
number.
NOTE
Go to Manual M..
Delete from Pre..
Auto Preset
Start Recording
FM REC Quality
FM Sensitivity
FM Region
72 _ listening to FM radio
USING THE FM RADIO MENU (Continued)
To set the FM recording quality
You can choose the recording quality for FM radio.
1. Tap [ ] in FM Radio mode.
The <FM Radio> menu appears.
2. Tap [ ] to select <FM REC Quality> and
tap [ ].
The FM recording quality menu appears.
3. Tap [ ] to select a desired quality level.
Select from <Super High(192kbps)>, <High(160kbps)>
and <Normal(128kbps)>.
The higher the number is, the better the audio quality
and the larger the fi le size becomes.
To set the FM sensitivity
To receive more or fewer FM radio frequencies, adjust the FM sensitivity.
1. Tap [ ] in FM Radio mode.
The <FM Radio> menu appears.
2. Tap [ ] to select <FM Sensitivity> and
tap [ ].
The< FM Sensitivity> menu appears.
3. Tap [ ] to select the search level and tap [ ].
Select from <High>, <Middle> and <Low>.
If you select <High>, more frequencies will be
received.
Go to Manual M..
Delete from Pre..
Auto Preset
Start Recording
FM REC Quality
FM Sensitivity
FM Region
Go to Manual M..
Delete from Pre..
Auto Preset
Start Recording
FM REC Quality
FM Sensitivity
FM Region
listening to FM radio _ 73
USING THE FM RADIO MENU (Continued)
To set the the FM region
You can change an FM region setting in preparation for overseas travel.
1. Tap [ ] in FM Radio mode.
The <FM Radio> menu appears.
2. Tap [ ] to select <FM Region> and tap [ ].
The <FM Region> menu appears.
3. Tap [ ] to select your regional area for FM
radio and tap [ ].
Select from <Korea/US>, <Japan> and <Other
Countries>.
Your previously stored radio frequencies will be deleted when you change
the <FM Region> on your player.
Frequency range by region
- Korea/US: Search for FM frequencies in 100 kHz increments between
87.5 MHz~108.0 MHz.
- Japan: Search for FM frequencies in 100 kHz increments between 76.0
MHz~108.0 MHz.
- Other Countries: Search for FM frequencies in 50 kHz increments
between 87.50 MHz~108.00 MHz.
NOTE
Go to Manual M..
Delete from Pre..
Auto Preset
Start Recording
FM REC Quality
FM Sensitivity
FM Region
74 _ listening to FM radio
USING THE FM RADIO MENU (Continued)
To add to the alarm sound
You can add your FM radio to the alarm sound list, so it can be heard
the next time the alarm goes off. See page 86 to set the alarm.
1. Select a radio frequency to add to the alarm
sound and tap [].
The <FM Radio> menu appears.
2.
Tap [ ] to select <Add to Alarm> and tap [ ].
If you set the alarm sound to <FM Radio> in the alarm
setting, you can listen to FM radio. Pages 78 to 79
Delete from Pre..
Auto Preset
Start Recording
FM REC Quality
FM Sensitivity
FM Region
Add to Alarm
using the datacast _ 75
using the datacast
Using <Media Studio>, you can transfer blog information and fi les registered on
RSS to the player for your entertainment.
What is RSS?
RSS stands for Rich Site Summary or Really Simple Syndication. It is a xml-based data
transmission system used to deliver information on frequently updated web sites such as
news and blogs to users in a more convenient and easier way.
What is Datacasts?
You can automatically receive updated information without having to visit your frequently
visited news, blog and UCC sites every time.
Before you start - Media Studio must be installed on your PC. See page 34.
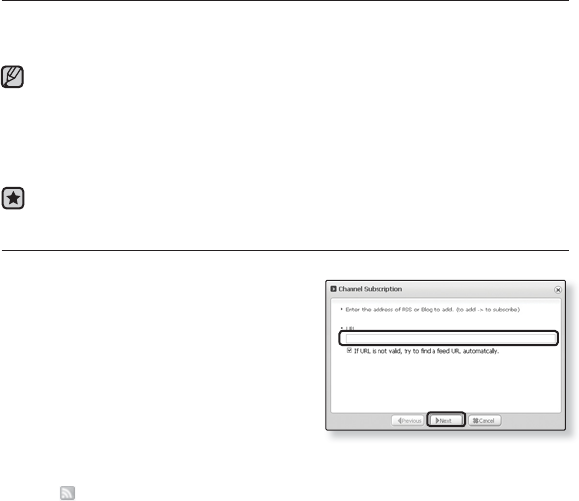
REGISTERING A CHANNEL
You can create a new channel by registering RSS-supported web sites or web pages.
1. Click the <Subscribe> on the bottom of
the <My Cast> of <Media Studio>.
2. Enter an address in the <URL> and Click
<ŹNext>.
when you copy an web address and click
<Subscribe>, the copied address is displayed
automatically in the <URL>.
The setting confi rmation window appears if the
Web address supports RSS.
3. Click <OK>.
The channel you want is registered.
The icon appears in My Cast for the registered channel
2
2
NOTE
76 _ using the datacast
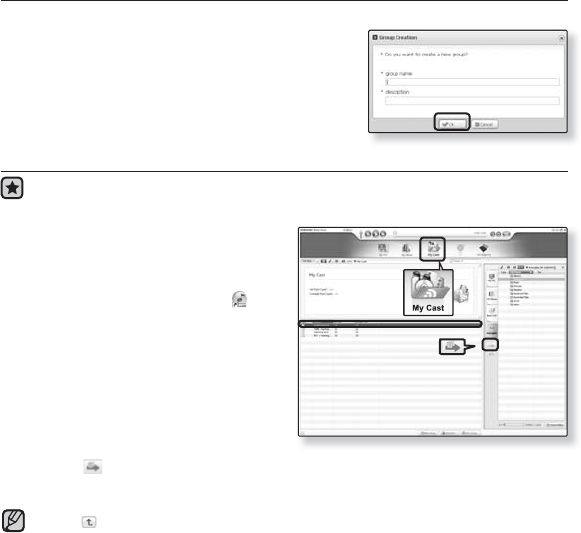
CREATING A NEW CHANNEL GROUP
You can create a new group to manage channels by the category.
1. Click <New Group> on the bottom of
<My Cast> of <Media Studio>.
2. Type in a group name and description and
click <OK>.
TRANSFERRING THE DATACAST FROM SAMSUNG MEDIA STUDIO
Before you start - Connect the player to your PC.
Media Studio must be installed on your PC. See page 34.
1. <Media Studio> will automatically start
when the player is connected to your
PC.
If the program does not start automatically,
double click the <Media Studio> icon
on the desktop.
2. Click <My Datacast> on the top of
<Media Studio>.
My Datacast group channel list appears.
3. Click a desired group channel.
4. Click a desired channel.
5. Select the post you want to transfer.
6. Click the icon.
The Post of the selected channel will be transferred to the player in <File Browser> ĺ
<Datacasts>.
Click on the top of <Media Studio> to move to the previous screen.
In <My Cast> of <Media Studio>, you can download only the post with attachment
to the player. However, the post with attachment may not be downloaded,
depending on the policy of the applicable website.
6
5
2
2
NOTE
using the datacast _ 77
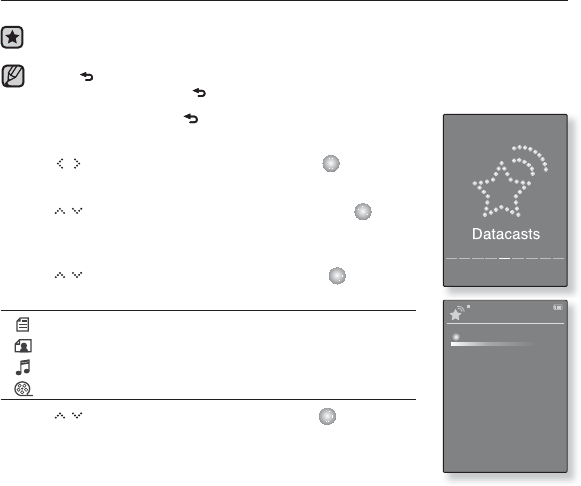
VIEWING DATACASTS
You can view channel posts added to <My Cast>.
Before you start - Transfer a desired channel post to to the player using <Media
Studio>. See page 76.
Tap [ ] to move to the previous screen.
Press and briefl y hold [ ] to move to the main menu screen.
1. Press and briefl y hold [ ] to move to the main menu
screen.
2. Tap [] to select <Datacasts> and tap [ ].
The Datacasts list appears.
3. Tap [ ] to select a desired channel and tap [ ].
GThe title is the same as that of the channel added to <My Cast>
in <Media Studio>.
4. Tap [ ] to select a desired post and tap [ ].
The fi le list appears.
icon : main text for the transferred post
icon : picture fi le
icon : music fi le
icon : video fi le
5. Tap [ ] to select a desired fi le and tap [ ].
File playback begins.
03:28 PM
Datacasts
My channel 1
My channel 2
My channel 3
My channel 4
NOTE
78 _ enjoying the prime pack
enjoying the prime pack
Prime Pack enables you to enjoy various functions such as reading text,
the alarm setting and viewing the calendar or world clock.
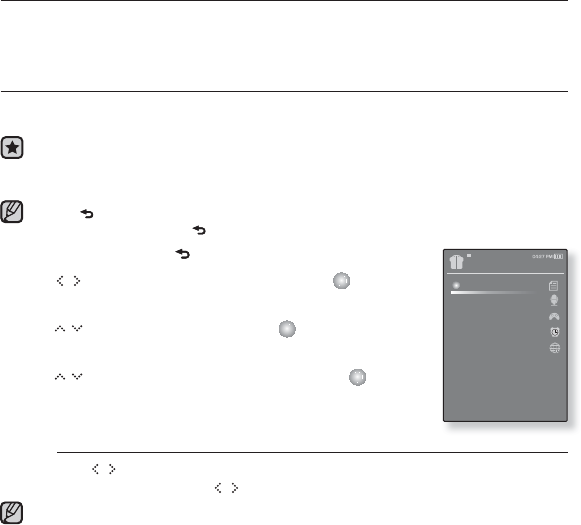
READING TEXT
Whether it’s a novel, the manuscript of a new story, or your research paper, your
mp3 player allows you to read it… all while listening to music!
Before you start - Turn on the player and check the battery.
Transfer text fi les to the player using <Media Studio>. See page 35.
Set a preferred text language for text in <Settings> ˧<Language> ˧
<Contents>. See page 28.
Tap [ ] to move to the previous screen.
Press and briefl y hold [ ] to move to the main menu screen.
1.
Press and briefl y hold [ ] to move to the main menu screen.
2. Tap [ ] to select <Prime Pack> and tap [ ].
The <Prime Pack> list appears.
3. Tap [ ] to select <Text> and tap [ ].
The text fi le list appears.
4. Tap [ ] to select a desired text fi le and tap [ ].
You will see the text on the screen.
To move to previous/next page
Tap [ ].
Press and briefl y hold [ ] to move continuously to the previous / next page.
You can also use the <File Browser>>to search for a text fi le.
Your mp3 player supports the TXT fi le format in Text mode.
NOTE
NOTE
Prime Pack
Text
Voice REC
Games
Alarm Settings
World Clock
Audio In
enjoying the prime pack_ 79
USING THE TEXT MENU
To listen to music while viewing your text
You can listen to the music that you last played while viewing your text.
1. In the text view mode, tap [ ].
The <Text> menu appears.
2. Tap [ ] to select <Music> and tap [ ].
The <Music> menu appears.
3. Tap [ ] to select a desired mode and tap [ ].
<Off> : No background music is played while viewing
your text.
<On> : You can listen to the music that you last played
while viewing your text.
To move to the fi rst page
Use this if you want to view the text from the fi rst page.
1. In the text view mode, tap [ ].
The <Text> menu appears.
2. Tap [ ] to select <Go 1st page> and tap [ ].
You will see the confi rmation window to move to the
fi rst page.
3. Tap [ ] to select <Yes> and tap [ ].
Moves to the fi rst page.
To exit the menu, tap [ ].
NOTE
Sam I Am
It's a common fantasy: rewind
your life, erase all the mistakes
and cringe-worthy moments and
start over with a clean slate. But
for Samantha Newly, the fantasy
is far too real.
45.40%
Music
Go to 1st Page
Add Bookmark
Go to Bookmark
Delete Bookmark
Font Size
Text Viewer Col..
Sam I Am
It's a common fantasy: rewind
your life, erase all the mistakes
and cringe-worthy moments and
start over with a clean slate. But
for Samantha Newly, the fantasy
is far too real.
45.40%
Music
Go to 1st Page
Add Bookmark
Go to Bookmark
Delete Bookmark
Font Size
Text Viewer Col..
80 _ enjoying the prime pack
USING THE TEXT MENU (Continued)
To set a bookmark
Set a bookmark to return to that point in the text at any time.
1. Tap [ ] while viewing a text.
The <Text> menu appears.
2. Tap [ ] to select <Add Bookmark> and tap
[ ].
The current text screen is set to a bookmark with the
[] symbol displayed on the top left corner.
The Overwrite window appears if there is a bookmark
previously set. If you select <Yes>, the previously set
bookmark is deleted and a new bookmark is added.
The bookmark can be set one for each text fi le, and
you can set a maximum of 50 bookmarks.
To move / remove the bookmark
1. Tap [ ] while viewing a text.
The <Text> menu appears.
2. Tap [ ] to select <Go to Bookmark> or
<Delete Bookmark> and tap [ ].
When you selected <Go to Bookmark> then it
will move to the selected bookmark and <Delete
Bookmark> will remove the selected bookmark from
the text fi le.
To exit the menu, tap [ ].
NOTE
NOTE
Sam I Am
It's a common fantasy: rewind
your life, erase all the mistakes
and cringe-worthy moments and
start over with a clean slate. But
for Samantha Newly, the fantasy
is far too real.
45.40%
Music
Go to 1st Page
Add Bookmark
Go to Bookmark
Delete Bookmark
Font Size
Text Viewer Col..
Sam I Am
It's a common fantasy: rewind
your life, erase all the mistakes
and cringe-worthy moments and
start over with a clean slate. But
for Samantha Newly, the fantasy
is far too real.
45.40%
Music
Go to 1st Page
Add Bookmark
Go to Bookmark
Delete Bookmark
Font Size
Text Viewer Col..
enjoying the prime pack_ 81
USING THE TEXT MENU (Continued)
To change the font size
You can change the font size of the text.
1. Tap [ ] while viewing a text.
The <Text> menu appears.
2. Tap [ ] to select <Font Size> and tap [ ].
The <Font Size> menu appears.
3. Tap [ ] to select a desired font size and tap
[ ].
Select from <Small>, <Normal> and <Large>.
To set the text viewer color
Choose what color you’d like the text to appear.
1. Tap [ ] while viewing a text.
The <Text> menu appears.
2. Tap [ ] to select <Text Viewer Color> and tap
[ ].
The <Text Viewer Color> menu appears.
3. Tap [ ] to select a desired text viewer color
and tap [ ].
Select from <Type 1> ~ <Type 6>.
Sam I Am
It's a common fantasy: rewind
your life, erase all the mistakes
and cringe-worthy moments and
start over with a clean slate. But
for Samantha Newly, the fantasy
is far too real.
45.40%
Music
Go to 1st Page
Add Bookmark
Go to Bookmark
Delete Bookmark
Font Size
Text Viewer Col..
Sam I Am
It's a common fantasy: rewind
your life, erase all the mistakes
and cringe-worthy moments and
start over with a clean slate. But
for Samantha Newly, the fantasy
is far too real.
45.40%
Music
Go to 1st Page
Add Bookmark
Go to Bookmark
Delete Bookmark
Font Size
Text Viewer Color
82 _ enjoying the prime pack
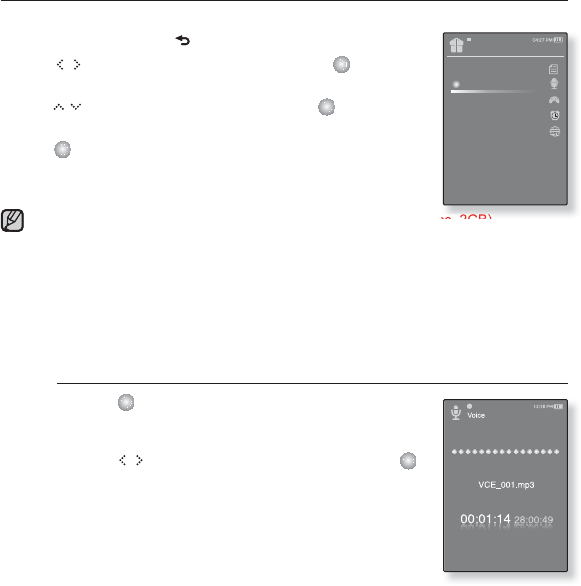
VOICE RECORDING
You can make voice recording.
1.
Press and briefl y hold [ ] to move to the main menu screen.
2. Tap [ ] to select <Prime Pack> and tap [ ].
The <Prime Pack> list appears.
3.
Tap [ ] to select <Voice REC> and tap [ ].
The fi le name is displayed and the recording window appears.
4.
Tap [ ].
Recording is started with displaying the fi le name to save.
You can make a recording for about 30 hours (based on 128Kbps, 2GB)
You can store a maximum of 999 fi les for voice recording.
The recording fi le name will be automatically specifi ed such as “VCE_OOO.mp3”.
Where “VCE” means voice recording and “000” is the recording fi le number.
Voice recording does not perform properly when the battery is low.
Do not put the microphone too close to or far distant from your mouth.
Otherwise, it can cause poor recording.
You can listen to the sound only via the earphone while you are recording.
To stop recording
1. Tap [ ] during the recording.
A message appears asking you if you want to listen to
the fi le you just recorded.
2. Tap [ ] to select <Yes> or <No> and tap [ ].
<Yes> will play the just recorded fi le.
<No> will not play the just recorded fi le.
The recorded fi le is stored in <File Browser> ĺ
<Recorded Files> ĺ <Voice>.
Prime Pack
Text
Voice REC
Games
Alarm Settings
World Clock
Audio In
NOTE

enjoying the prime pack_ 83
USING THE VOICE RECORDING MENU
To set the voice recording quality
You can select the voice recording quality.
1. Tap [ ] in the recording window.
The <Recording voice> menu appears.
2. Tap [ ] to select <Voice REC Quality> and
tap [ ].
The voice recording quality menu appears.
3. Tap [ ] to select a desired quality level.
Select from <Super High(128kbps)>, <High(96kbps)>
and <Normal(64kbps)>.
The higher the number is, the better the audio quality
and the larger the fi le size becomes.
To listen to the recorded fi les
You can listen to a previously recorded fi le.
1. Tap [ ] in the recording window.
The <Recording voice> menu appears.
2. Tap [ ] to select <Recorded Files> and tap
[ ].
The <Recorded fi les> list appears.
3. Tap [ ] to select a recorded fi le of your choice
and tap [ ].
The recorded fi le will start playing.
Voice REC Quality
Recorded Files
Voice REC Quality
Recorded Files
84 _ enjoying the prime pack
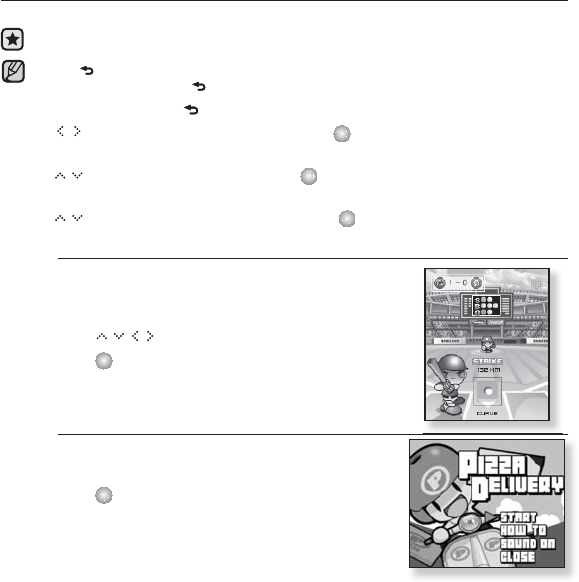
PLAYING VIDEO GAMES
Your mp3 player comes with the exciting games already loaded on!
Before you start - Connect the earphones, then turn on the player, and check the
battery.
Tap [ ] to move to the previous screen.
Press and briefl y hold [ ] to move to the main menu screen.
1. Press and briefl y hold [ ] to move to the main menu.
2. Tap [] to select <Prime Pack> and tap [ ].
The <Prime Pack> list appears.
3. Tap [ ] to select <Games> and tap [ ].
Tha game list appears.
4. Tap [ ] to select a desired game and tap [ ].
Baseball
Try to score against one of the league’s best
pitchers in this version of America’s favorite
pastime.
Tap [] to select a menu or function.
Tap [] to pitch or hit the ball.
Pizza Delivery
See if you can get the pizza delivered on time
and avoid the many obstacles along the way.
Tap [] to jump up.
NOTE
enjoying the prime pack_ 85
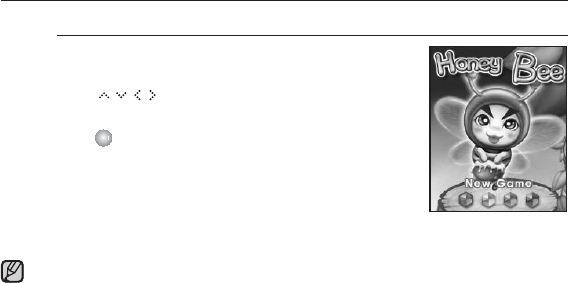
PLAYING VIDEO GAMES (Continued)
Honeybee
The is a puzzle game where you can match more
than 3 blocks to gain scores.
Use [] to select a menu or move the block
direction.
Tap [] to select or cancel.
For more imformation about the manipulation, see
the Help section.
The bundle games can be added or changed without notice.
NOTE
86 _ enjoying the prime pack
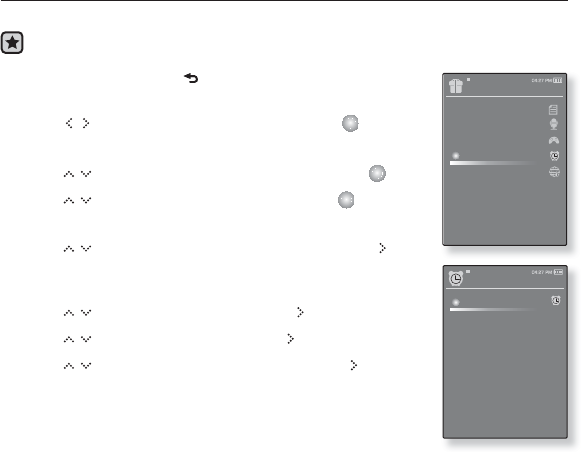
SETTING THE ALARM
This player has an alarm which can be set to go off at a scheduled time.
Before you start - Set the current date and time
1. Press and briefl y hold [ ] to move to the main menu
screen.
2. Tap [] to select <Prime Pack> and tap [ ].
The <Prime Pack> list appears.
3. Tap [ ] to select <Alarm Settings> and tap [ ].
4. Tap [ ] to select <New Alarm> and tap [ ].
The new alarm settings window appears
5. Tap [ ] to select an alarm frequency and tap [ ].
Select from <Once>, <Everyday>, <Mon~Fri>, <Mon~Sat>,
<Sat~Sun> and <Off>.
6. Tap [ ] to select <Hour> and tap [ ].
7. Tap [ ] to select <Min> and tap [ ].
8. Tap [ ] to select <AM> or <PM> and tap [ ].
Prime Pack
Text
Voice REC
Games
Alarm Settings
World Clock
Audio In
Alarm
New Alarm
enjoying the prime pack_ 87
SETTING THE ALARM (Continued)
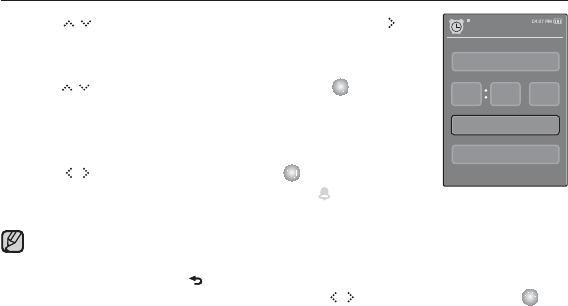
9. Tap [ ] to select an alarm sound and then tap [ ].
Select one from <Alarm Sound 1> through <Alarm Sound 3>,
music fi le added to the alarm sound and FM Radio.
10.
Tap [ ] to select an interval and then tap [ ].
Select one from <Interval : Off>, <Interval : 3min>,
<Interval : 5min> and <Interval : 10min>.
The save confi rmation window will appear.
11. Tap [ ] to select <Yes> and tap [ ].
When the alarm setting is done, the symbol ( ) will appear on
the top.
You can store up to 7 alarms.
The player will sound the alarm when it reaches the scheduled time.
To end the alarm, tap [ ].
When the confi rmation window appears, tap [ ] to select <Yes> and tap [ ].
You will return to the main menu.
NOTE
New Alarm Settings
Once
Interval : Off
08 00 AM
Ÿ
ź
Alarm Sound 1
88 _ enjoying the prime pack
SETTING THE ALARM (Continued)
To edit the alarm setting
1. Tap [ ] to select the alarm setting to change
and tap [ ].
The Alarm Settings window appears.
2. Use the [ ] and [ ] to edit the settings
you prefer.
To delete an alarm setting
1. Tap [ ] to select the alarm setting to delete in
the alarm list and then tap [ ].
The delete menu appears.
2. Tap [ ].
The Delete window appears.
3. Tap [ ] to select <Yes> and tap [ ].
The selected alarm will be deleted.
If the USB cable is connected to the player, the alarm function does not work.
CAUTION
Alarm
New Alarm
08:00 AM
Alarm
New Alarm
08:00 AM
Delete
enjoying the prime pack_ 89
VIEWING THE WORLD CLOCK
You can check the location and date/time of major world cities based on their
respective time zone.
Before you start - Set the current date and time
Set the time zone you want in the <Setting> ˧<Time> ˧<Time Zone>.
1. Press and briefl y hold [ ] to move to the main menu
screen.
2. Tap [] to select <Prime Pack> and tap [ ].
The <Prime Pack> list appears.
3. Tap [ ] to select <World Clock> and tap [ ].
The world clock screen appears.
4. Tap [ ] to select a time zone.
You can check local time of the following time zone.
(‘/’ indicates the standard time zone in the region)
Cave Verde / London, Lisbon / Roma, Paris, Berlin, Stockholm, Madrid, Frankfurt/ Athene,
Helsinki, Cairo, Ankara / Moscow, Riyadh / Abu Dhabi, Muscat / Tashkent, Ashkhabad /
Alma Ata, Kathmandu / Bangkok, Jakarta, Yangon / Hong Kong, Beijing, Manila, Singapore
/ Seoul, Tokyo, Pyongyang / Guam, Sydney, Brisbane / Okhotsk / Wellington, Oakland, Fiji /
Samoa, Midway / Honolulu, Hawaii, Tahiti / Alask / LA, San Francisco, Vancouver, Seattle /
Denver, Phonics, Salt Lake City / Chicago, Dallas, Houston, Mexico City / New York, Miami,
Washington DC, Montreal, Atlanta / Cracas, La Paz, Santiago / Buenos Aires, Brasilia, Sao
Paulo / Mid-Atlantic
Prime Pack
Text
Voice REC
Games
Alarm Settings
World Clock
Audio In
90 _ enjoying the prime pack
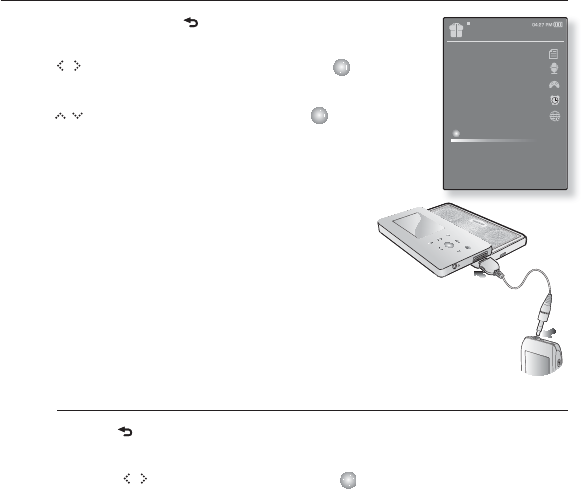
LISTENING TO MUSIC FROM EXTERNAL DEVICE
USING THE SPEAKER
1. Press and briefl y hold [ ] to move to the main menu
screen.
2. Tap [ ] to select <Prime Pack> and tap [ ].
The <Prime Pack> list appears.
3. Tap [ ] to select <Audio In> and tap [ ].
4. Connect the the Audio out port(or Line out) on the external
audio source to the USB connection port on the player
with the Line In cable.
You will see connection completion massage on the
screen.
5. Press the Start (or Play) button on the external
audio source to play the music.
If the speaker of the player is activated, you will listen
to music via the speaker and when you connect the
earphones, you will listen to music via the earphones.
To disconnect the External Device
1. Tap [ ].
You will see the audio input exit massage.
2. Tap [ ] to select <Yes> and tap [ ].
The audio input mode will be terminated.
3. Disconnect the player from the external audio source.
Prime Pack
Text
Voice REC
Games
Alarm Settings
World Clock
Audio In

using bluetooth_ 91
using bluetooth
Using Bluetooth wireless, you can connect your player wirelessly to other
Bluetooth devices and exchange data with them, talk hans-free or enjoy music
using a Bluetooth stereo headset.
Tap [ ] to move to the previous screen.
Press and briefl y hold [ ] to move to the main menu screen.
WHAT IS BLUETOOTH?
Bluetooth is an industry specifi cation that describes how Bluetooth-compliant
stereo headsets, mobile phones, and external devices can easily interconnect
with each other using a short wireless connection.
The Bluetooth device can cause a noise or malfunction, depending on the use
conditions.
Physical signal interference, for instance, if you hold the player in the hand and wear a
stereo headset in your ears, or if you hold the player in the one hand and take a mobile
phone in the other hand.
When a part of the body is in contact with the receiving/transmitting system of the
player or the stereo headset.
Electrical variation from electrical jamming by the wall, corner or offi ce partitioning.
Electrical interference from the same frequency-band devices including medical
equipment, microwave oven and wireless LAN.
When pairing the Bluetooth device with the player, make it within as short distance
as possible.
The farther the distance between player and stereo headset is, the worse the
quality is. If the distance exceeds the limit, the communications are disconnected.
NOTE

92 _ using bluetooth
WHAT IS BLUETOOTH? (Continued)
We do not recommend you use text and picture view modes while listening to
the music with the stereo headset or hands-free (mobile phone), or transferring
fi les as it can cause deterioration of both player performance and Bluetooth
communications.
Depending on the model of the stereo headset, fi les in less than 32 KHz can not be
played.
In poor reception-sensitivity areas such as inside an elevator or underground,
the Bluetooth connection may not work properly.
The maximum distance that enables wireless connection between the player and
the bluetooth is 10m. The connection will be automatically cut off if the distance is
out of this range. Even within this range, the sound quality may be deteriorated by
obstacles such as walls or doors.
When not in use, set the <Bluetooth Mode> to <Off>. If you stay in <On> for
<Bluetooth Mode>, the battery usable time is reduced.
The Bluetooth features of the player are optimized with Samsung products. If used with
third party products, the Bluetooth features may not work properly.
NOTE
using bluetooth_ 93
USING A BLUETOOTH STEREO HEADSET
You can use a Bluetooth stereo headset to let you enjoy music with high quality
stereo sound, all without wires!
Before you start - If the player has connected to a Bluetooth mobile phone or
external device, set off the connection fi rst.
Ensure that the Bluetooth device to connect is ready for pairing.
(refer to the device’s user manual)
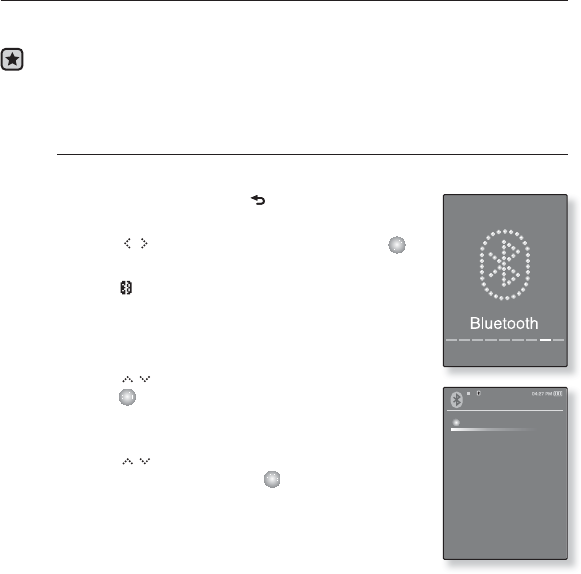
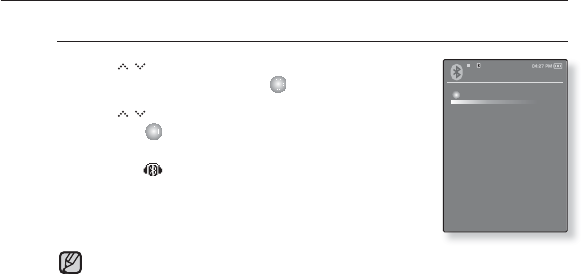
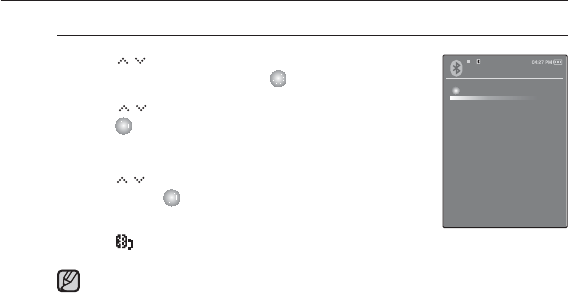
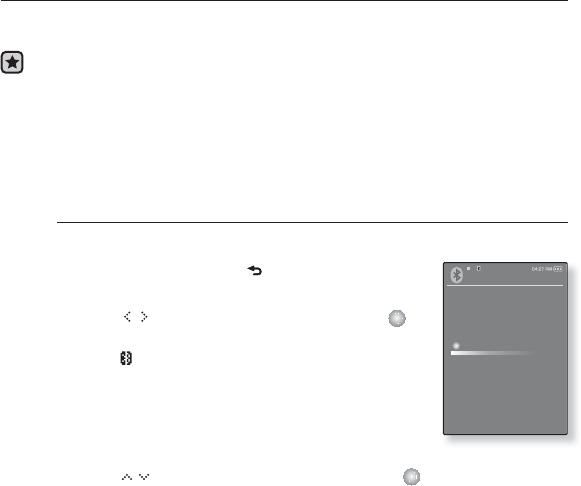
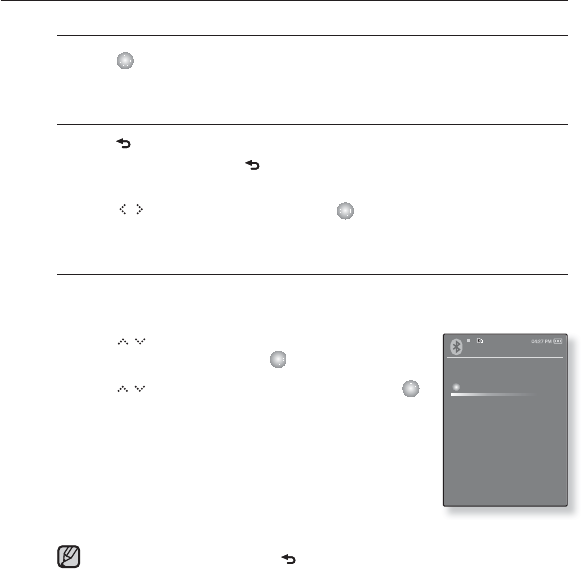
To register the Bluetooth Stereo Headset
(you only need to register it once)
1. Press and briefl y hold [ ] to move to the main
menu screen.
2. Tap [ ] to select <Bluetooth> and tap [ ].
The <Bluetooth Mode> is set to <On>.
The icon will light.
3. Set the stereo headset ready for pairing.
To set the headset ready for the pairing mode, refer to
the headset’s user manual.
4. Tap [ ] to select <Stereo Headset> and
tap [ ].
This player automatically starts search for any
Bluetooth stereo headset.
5. Tap [ ] to select the name of headset you
want to register and tap [ ].
The password input window appears if the password
for the headset is other than 0000. Refer to the
headset’s manual for the password.
The registration of the headset is completed.
Bluetooth
Stereo Headset
Mobile Phone
File Transfer
Bluetooth Mode
Bluetooth Settings
94 _ using bluetooth
USING A BLUETOOTH STEREO HEADSET (CONTINUED)
To register the Bluetooth Stereo Headset (continued)
You can use the Bluetooth function only when playing music and listening
to FM Radio. It is not supported while you are enjoying a video or playing
a game.
Description of the Bluetooth icon
: Bluetooth mode off : Bluetooth mode on
:Connected to a stereo headset :Connected to a mobile phone
: File transfer mode
If you want to turn off the Bluetooth function, set the Bluetooth Mode to
<Off> in <Bluetooth>
ĺ
<Bluetooth Mode>.
Bluetooth-compliant Headsets
Company Model Company Model
i.TECH Blueband SAMSUNG SBH100
Plantronics PULSAR 590A Jabra BT620s
MOTOROLA
HT820
Use only a Bluetooth-certifi ed stereo headset. Mono hands-free headsets
are not supported.
NOTE
using bluetooth_ 95
USING A BLUETOOTH STEREO HEADSET (CONTINUED)
To connect the registered Bluetooth stereo headset
1. Tap [ ] to select <Stereo Headset> in the
Bluetooth screen and tap [ ].
2. Tap [] to select a stereo headset to connect
and tap [ ].
When the connection is successfully done, you will
see the icon.
3. Play a fi le of your choice.
You can listen to the music using a stereo headset.
If you can’t fi nd the desired headset to connect, register it fi rst.
If you turn off the player or the headset, and then turn it on, the bluetooth
communication may be disconnected. If you want to listen to the music
again using the stereo headset, repeat the instructions above.
NOTE
Bluetooth
Stereo Headset
Mobile Phone
File Transfer
Bluetooth Mode
Bluetooth Settings
96 _ using bluetooth
USING A
BLUETOOTH
MOBILE PHONE
Before you start - If the player has connected to a Bluetooth stereo headset or
external device, set off the connection fi rst.
Ensure that the Bluetooth device to connect is ready for pairing.
(refer to the device’s user manual)
Set to <Discoverable> from <Bluetooth Settings> ĺ <Discover
option>. See page 108.
To register the Bluetooth mobile phone
(you only need to register it once)
1.
Press and briefl y hold [ ] to move to the main
menu screen.
2. Tap [ ] to select <Bluetooth> and tap [ ].
The <Bluetooth Mode> is set to <On>.
The icon will light.
3.
Search for YP-S5 in the mobile phone and make
connections between them.
If you renamed the YP-S5 player, search the new name.
In some mobile phones, the functions of search device and mobile
conversation (placing/receiving calls) can not work properly due to difference
of the hands-free system
If you press a button on the mobile phone or make or end a call under
Bluetooth connection between the player and the mobile phone, there may
occur noise from the player.
You are recommended to use English for the device name of a mobile phone.
Bluetooth-compliant Samsung Mobile Phones
Company Model Company Model
SAMSUNG D500 SAMSUNG D600
SAMSUNG D820 SAMSUNG D900
SAMSUNG
SPH-V6900, SPH-V7400 SAMSUNG SPH-V8900, SPH-V9000
Bluetooth
Stereo Headset
Mobile Phone
File Transfer
Bluetooth Mode
Bluetooth Settings
NOTE
using bluetooth_ 97
USING A BLUETOOTH MOBILE PHONE (Continued)
To register the
Bluetooth
mobile phone (Continued)
4.
Enter the password when the password input
window appears on the mobile phone.
5.
When you see <Pair?>,
tap [ ] to select <Yes> and tap [ ].
The PIN code (password) input window appears.
6.
Use
[ ]
and [ ] to enter the password
for the mobile phone to add to the player.
Make sure to enter the same password as that in step 6
above.
7. Use [ ] to move to <OK> and tap [ ].
The registration of the mobile phone is completed.
The password digits can differ, depending on the mobile phone. (refer to
the mobile phone’s user manual)
NOTE
Enter PIN code
98 _ using bluetooth
USING A BLUETOOTH MOBILE PHONE (Continued)
To connect to the registered Bluetooth mobile phone
1. Tap [ ] to select <Mobile Phone> in the
Bluetooth screen and tap [ ].
2.
Tap [ ] to select <Connect to Phone> and
tap [ ].
The phone number input window appears.
3. Tap [ ] to select the mobile phone to connect
to and tap
[ ].
When the connection is successfully done, you will see
the icon.
If you can’t fi nd a device to connect to, register the device with the player
fi rst.
The mobile phone connection can be set off if you turn off and restart the
player. If the connection is set off, refer to the steps above to connect
again.
NOTE
Mobile Phone
Connect to Phone
Call by Number
Call History
using bluetooth_ 99
USING A BLUETOOTH MOBILE PHONE (Continued)
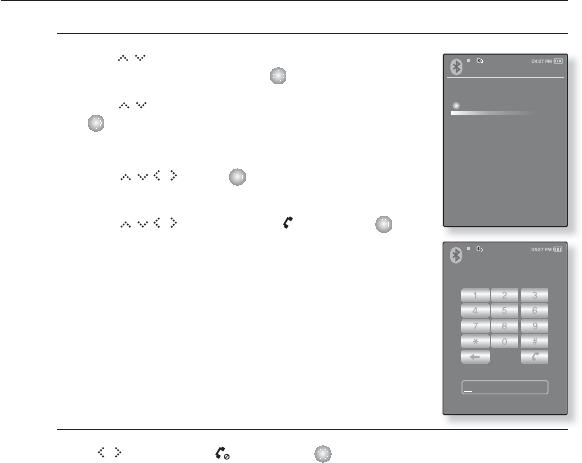
To make a call using the player
1. Tap [ ] to select <Mobile Phone> in the
Bluetooth screen and tap [ ].
2.
Tap [ ] to select <Call by Number> and tap
[ ].
The phone number input window appears.
3. Use [
]
and [ ] to enter the phone
number for the other person.
4. Use [] to move to < > and tap [ ].
You are now placing a call to the other person. Start
conversations if the other person answers the phone.
To end the phone call
Tap [ ] to select < > and tap [ ].
The call is hung up.
Mobile Phone
Connect to Phone
Call by Number
Call History
Mobile Phone
100 _ using bluetooth
USING A BLUETOOTH MOBILE PHONE (Continued)
To make a call using the phone number list
1. Tap [ ] to select <Mobile Phone> in the
Bluetooth screen and tap [ ].
2. Tap [] to select <Call History> and tap [ ].
The phone number list appears.
3. Tap [ ] to select a desired number and tap
[ ].
You are now placing a call to the other person. Start
conversations if the other person answers the phone.
To delete a phone number in the phone number list
1.
In the phone number list, tap [ ] to select the phone number to delete
and tap [ ].
2. Tap [ ] to select <Delete> and tap [ ].
If you want to delete all numbers in the phone number list, select <Delete All>.
The confi rmation window appears
3. Tap [ ] to select <Yes> and tap [ ].
The selected number will be deleted.
Mobile Phone
Connect to Phone
Call by Number
Call History
using bluetooth_ 101
USING A BLUETOOTH MOBILE PHONE (Continued)
To register an external device
1. You will see <Connect?> when you have an incoming call.
2. Tap [] to select <Yes> and tap [ ].
You can now make conversations.
To switch to the mobile phone while talking on the
hands-free device (YP-S5)
While talking on the hands-free device, tap [ ] to select < > and
tap [ ].
You can now make conversations on the mobile phone.
To switch to the hands-free device (YP-S5) while
talking on the mobile phone
While talking on the mobile phone, tap [ ] to select < > and
tap [ ].
You can now make conversations on the hands-free device.
To adjust the volume
While talking on the hands-free device, tap [ ] to adjust the volume.
You can select the volume from 0 to 30.
If you select
0
, you couldn’t hear the voice of the other person.
102 _ using bluetooth
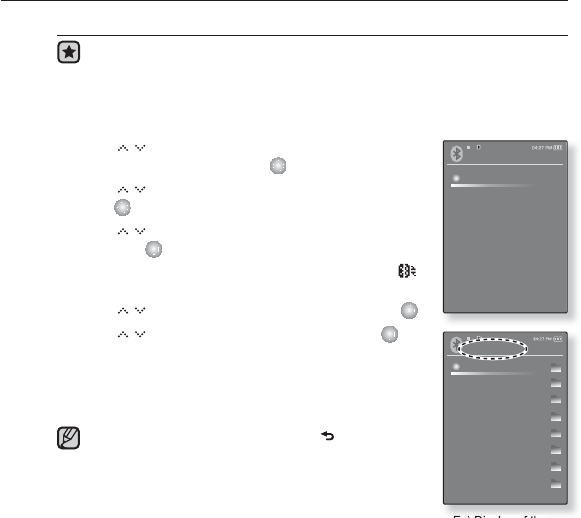
TRANSFERRING FILES
You can transfer music, picture and video fi les on Bluetooth-compliant external
devices MP3 player, PC, mobile phone, etc) to the player or vice versa.
Before you start - If the player has connected to a Bluetooth stereo headset or
mobile phone, set off the connection fi rst.
Ensure that the Bluetooth device to connect is ready for pairing.
(refer to the device’s user manual)
Check if the Bluetooth device to supports the fi le transfer function.
(refer to the device’s user manual)
Set <Discoverable> from <Bluetooth Settings> ĺ <Discover option>. See page 108.
Set <Search All> from <Bluetooth Settings> ĺ <Search Option>.
To register an external device
(you only need to register it once)
1.
Press and briefl y hold [ ] to move to the main
menu screen.
2. Tap [ ] to select <Bluetooth> and tap [ ].
The <Bluetooth Mode> is set to <On>.
The icon will light.
3. Set the external device ready for pairing.
For information on setting the external device ready for
pairing, refer to the device’s user manual
For YP-S5, set it to <Server Mode>. See page 106.
4.
Tap [ ] to select <File Transfer> and tap [ ].
Bluetooth
Stereo Headset
Mobile Phone
File Transfer
Bluetooth Mode
Bluetooth Settings
using bluetooth_ 103
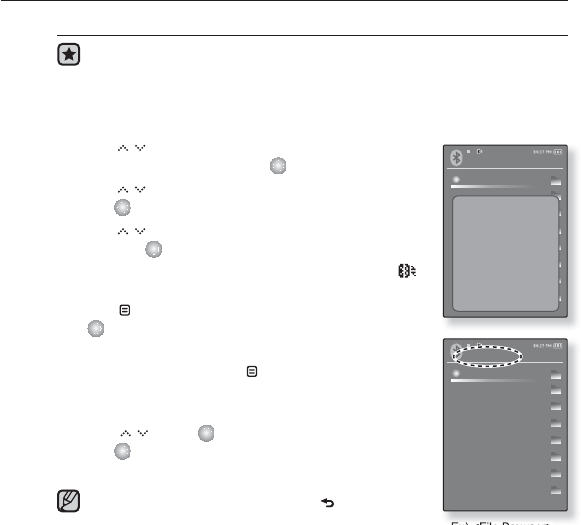
TRANSFERRING FILES (Continued)
To register an external device (Continued)
5. Tap [ ] to select <Connect to Device> and
tap [ ].
The device to be registered will be listed.
6.
Tap [ ] to select a device to register and tap
[ ]
.
The PIN code (password) input window appears.
7. Use [ ] and [ ] to enter the password
for the device to add to the player.
For the password, refer to the device’s user manual.
8.
Use [ ] to move to <OK> and tap [ ].
9. When you see <Pair?> on the external device,
tap [ ] to select <Yes> and tap [ ].
10. Enter the password when the password input
window appears on the external device.
You must enter the same password as that in step 7
above.
When done, you will see the fi le list of the external device
on the player’s display.
If you want to transfer fi les on the external device to the player, see step 5 at
page 104.
The password digits can differ, depending on the external device. (refer to
the device’s user manual)
NOTE
Bluetooth
Stereo Headset
Mobile Phone
File Transfer
Bluetooth Mode
Bluetooth Settings
Enter PIN code
104 _ using bluetooth
TRANSFERRING FILES (Continued)
To transfer a fi le on the external device to the player
Before you start - If you can’t fi nd the external device to connect to,
register it with the player fi rst. See page 102.
Ensure that the Bluetooth device to connect is ready for pairing. (refer to
the device’s user manual)
For YP-S5, set it to <Server Mode>. See page 106.
1. Tap [ ] to select <File Transfer> in the
Bluetooth screen and tap [ ].
2. Tap [] to select <Connect to Device> and
tap [ ].
3. Tap [] to select an external device to connect
and tap [ ].
When the connection is completed, you will see the
icon and folder list of the external device.
4. Tap [ ] to select a desired folder and tap [ ].
5. Tap [] to select a desired fi le and tap [ ].
The selected fi les on the external device will be
transferred to the player.
Files transferred to the player are saved in
<File Browser>
ĺ
<Received Files> folder.
When the fi le transfer is done, tap [ ] to exit the fi le
transfer mode. See page 106.
The connection can be set off if you turn off and
restart the player or external device.
If the connection is set off, refer to the steps above to
connect again.
DRM fi les (chargeable) can not be played on the player.
The display of the external device may differ depending
on the connected device.
NOTE
Ex) Display of the
<External Device>
File Transfer
Connect to Device
Server mode
External Device
Music
Playlists
Text s
Pictures
Video
Recorded Files
Received Files
Datacasts
using bluetooth_ 105
TRANSFERRING FILES (Continued)
To transfer a fi le on the player to the external device
Before you start - If you can’t fi nd the external device to connect to,
register it with the player fi rst. See page 102.
Ensure that the Bluetooth device to connect is ready for pairing. (refer to
the device’s user manual)
For YP-S5, set it to <Server Mode>. See page 106.
1. Tap [ ] to select <File Transfer> in the
Bluetooth screen and tap [ ].
2. Tap [] to select <Connect to Device> and
tap [ ].
3. Tap [] to select an external device to connect
and tap [ ].
When the connection is completed, you will see the
icon and a list of fi les on the external device.
4. Tap [ ] to select <Go to My Device> and tap
[ ].
You will see the <File Browser> screen of the player.
GEach time you press the [ ] button, the player switches
the display between <External Device> and <File
Browser> of the player.
5. Use [ ] and [ ] to select a desired fi le and
tap [ ].
The selected fi le will be transferred to the external device.
When the fi le transfer is done, tap [ ] to exit the fi le
transfer mode. See page 106.
DRM fi les (chargeable) can not be played on the
player.
NOTE Ex) <File Browser>
screen of the player
External Device
Music
Playlists
Text
Picture
Video
Recorded
Copied
Capture
Go to My Device
File Browser
Music
Text s
Pictures
Video
Playlists
Recorded Files
Datacasts
Received Files
106 _ using bluetooth
TRANSFERRING FILES (Continued)
To cancel transferring the fi le
1.
Tap [ ] during the transfer.
The fi le transfer is stopped.
To exit the fi le transfer mode
1.
Tap [ ] in the fi le list screen.
Each time you press the [ ] button, this will move to the previous screen and
you will see the File
2. Tap [ ] to select <Yes> and tap [ ].
Transfer close window.
To transfer a fi le on the player to the external device
If you want to transfer a fi le on the player to the external device, you
should fi rst set it ready for pairing.
1. Tap [] to select <File Transfer> in the
Bluetooth screen and tap [ ].
2.
Tap [ ] to select <Server Mode> and tap [ ].
The player switches to server mode.
3. Set an external device ready for connecting.
Refer to the device’s user manual.
4. When the connection is done, you will see the
connection message on the player.
You can transfer a fi le on the player to the external device.
To exit the Sever Mode, tap [ ].
File Transfer
Connect to Device
Server mode
NOTE
using bluetooth_ 107
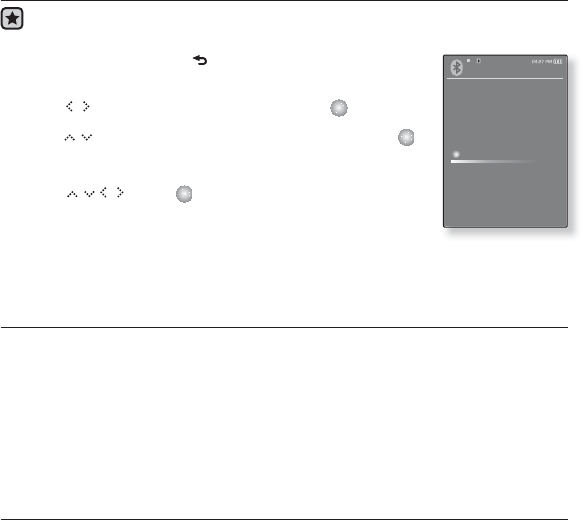
USING BLUETOOTH MENU
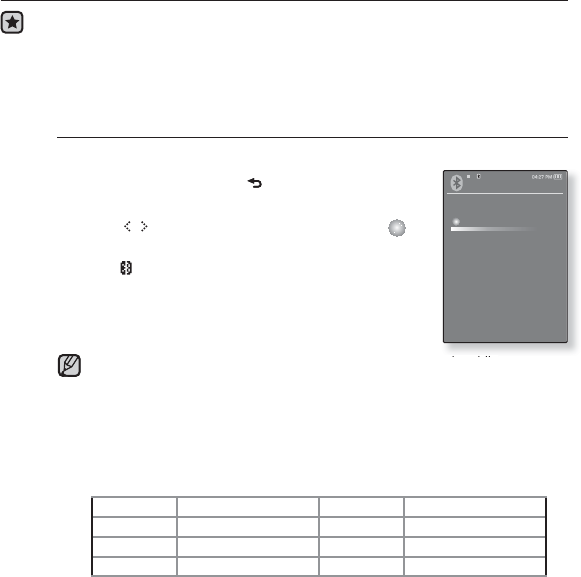
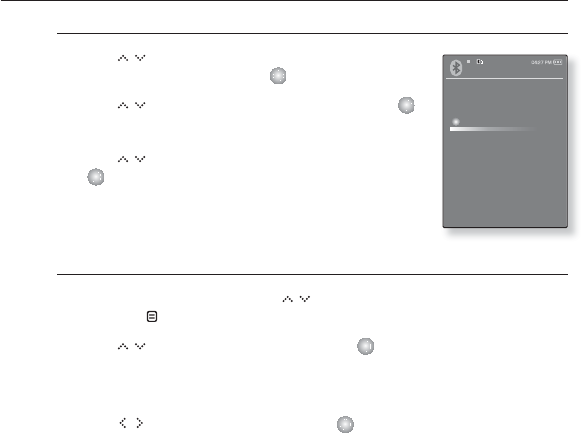
To disconnect the Bluetooth device
1. Tap [ ] in the Bluetooth screen.
The <Bluetooth> menu appears.
2. Tap [ ] to select <Disconnect> and tap [ ].
The Disconnection Confi rmation window appears.
3. Tap [ ] to select <Yes> and tap [ ].
The currently connected device will be disconnected.
To check the Bluetooth device connected
1. Tap [ ] in the Bluetooth screen.
The <Bluetooth> menu appears.
2.
Tap [ ] to select <Connected Device> and
tap [ ]
.
You can see information of the connected device.
Tap []to exit the menu.
NOTE
Bluetooth
Stereo Headset
Mobile Phone
File Transfer
Bluetooth Mode
Bluetooth Settings
Disconnect
Connected De..
Bluetooth
Stereo Headset
Mobile Phone
File Transfer
Bluetooth Mode
Bluetooth Settings
Disconnect
Connected De..
108 _ using bluetooth
BLUETOOTH SETTINGS
Before you start - Set <Bluetooth Mode> to <On>.
1. Press and briefl y hold [ ] to move to the main menu
screen.
2. Tap [] to select <Bluetooth> and tap [ ].
3. Tap [] to select <Bluetooth Settings> and tap [ ].
The Bluetooth Settings menu appears.
4. Use [ ] and [ ] to choose the settings you
prefer.
Bluetooth Setting Options
Discover Option : You can set to enable or disable an external device such as mobile
phone to detect this player. Select from <Discoverable> and <Non-Discoverable>.
Search Option : You can set search options for Bluetooth devices. <Search All>
searches for all possible devices such as Bluetooth stereo headset while <Search by
service> searches for the only selected device.
Search Timeout : You can select the search time period for a new device. Select one
from <10sec>, <20sec>, <30sec>, <45sec> and <60sec>.
Delete Device : You can delete a registered device in the player. See page 109.
Tap <Delete All> to delete all of the registered devices.
My Device Info. : You can check the name and address of your player.
Bluetooth
Stereo Headset
Mobile Phone
File Transfer
Bluetooth Mode
Bluetooth Settings
using bluetooth_ 109
BLUETOOTH SETTINGS (Continued)
To delete a Bluetooth device
1.
Tap [ ] to select <Delete Device> and tap [ ].
You will see the list of the registered devices.
2.
Tap
[ ]
to select a device to delete and tap [ ].
If you want to delete all of the registered devices, select
<Delete All>.
3. Tap [ ] to select <Yes> and tap [ ].
The selected device will be removed.
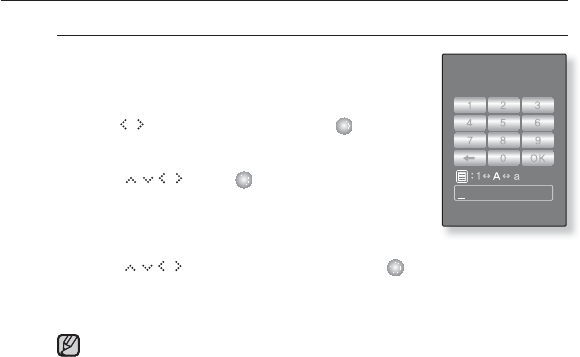
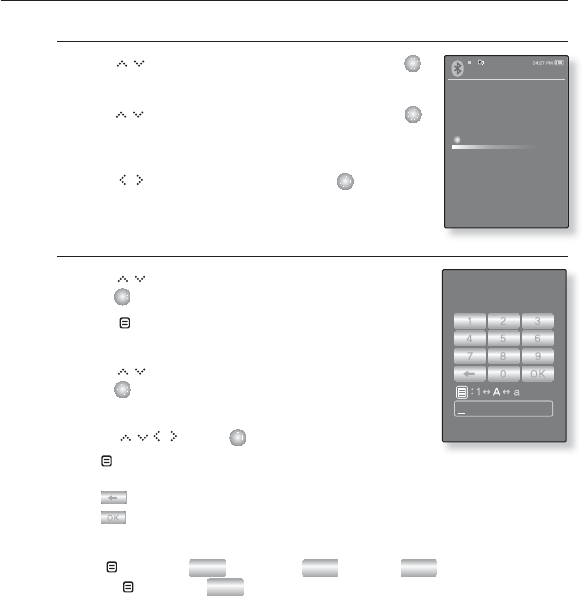
To rename a Bluetooth Device
1. Tap
[ ]
to select <My Device Info.> and
tap
[ ]
.
2. Tap [ ].
The My Device Info menu appears.
3. Tap [ ] to select <Edit Device Name> and
tap [ ].
The Edit Device Name window appears.
4. Use [ ] and [ ] to rename the device.
[ ] : The input mode switches from number to
uppercase English and to lowercase English.
[] : You can delete the characters one at a time.
[] : Confi rm your change.
E.g. To enter “YPS5”
-Move to the corresponding key icon and tap on it.
[ ] (once) ¨WXY (3 times) ¨PRS (once) ¨PRS (3 times)
¨[ ] (twice) ¨5(once)
Edit Device Na..
Bluetooth Settings
Discover Option
Search option
Search Timeout
Delete Device
My Device Inform..
110 _ upgrading fi rmware
upgrading fi rmware
Future upgrades may be available for this player to enhance performance and
compatibility.
1. Connect to http://www.samsung.com, select [SUPPORT] [DOWNLOAD
CENTER] and then select your player.
2. When the player page appears, select [Firmware] below the model name to
download the latest fi rmware.
3. Uncompress the downloaded fi le
onto your Desktop.
The uncompressed fi les will be
displayed.
4. Connect the player to your PC.
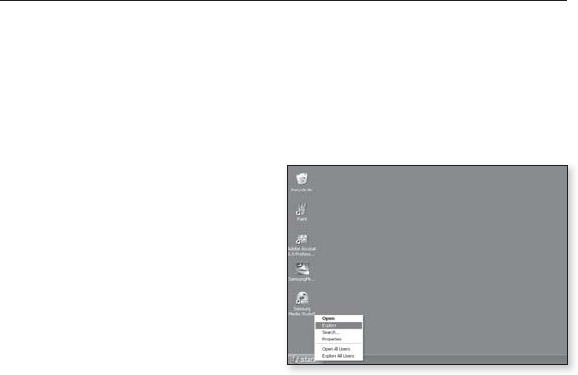
5. Right click on the Start button on the
bottom left of your PC’s screen, then
choose Explore to Open Windows
Explorer on your PC.
[S5] is displayed in Windows Explorer.
upgrading fi rmware _ 111
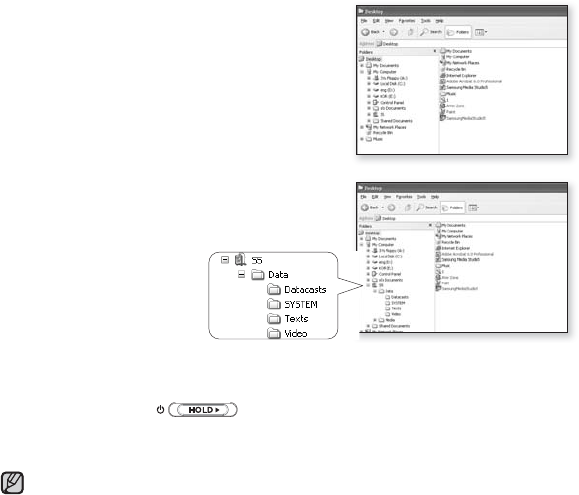
6. Locate and click on the Desktop icon in
Windows Explorer (left column).
The contents of the Desktop will appear in the
right column.
7. Locate and select the Firmware update fi les
(right column) and drag-and-drop it into the
folder of [S5][Data] [System].
8. After disconnecting USB plug, the player will be turned off automatically.
9. Slide and hold the switch in the opposite direction of the arrow.
The fi rmware will be upgraded.
When upgrading is complete, the player will be turned off automatically.
Check the battery charge status of the player. If the battery is not suffi ciently
charged, the fi rmware will not be upgraded.
You need to have at least 20MB of free space on the player for the upgrade.
NOTE
112 _ troubleshooting
troubleshooting
If you have a problem with your new mp3 player, check for a solution in
this list. If the problem persists, contact Samsung Customer Service at
1-800-SAMSUNG (1-800-726-7864).
PROBLEM SOLUTION
Power will not turn on.
•Power will not turn on if the battery is
completely drained. Recharge the battery and
turn the power on again.
•Press the Reset hole.
Buttons do not work.
•Check if the switch is in the
direction of the arrow position.
•Check if you pressed the right button, then
press again.
•Press the Reset hole.
The screen will not
turn on.
•The screen may not be visible under direct
sunlight.
• If <Display Off> is selected from <Settings>
ĺ <Display>, the screen display can be turned
off. Tap any button and see if it turns on.
However, Sliding the in the
opposite direction of the arrow when the HOLD
condition is on will not turn on the display.

troubleshooting _ 113
PROBLEM SOLUTION
Power is turning off.
•Check the battery status.
•
The power is automatically turned off when the
battery is completely drained. Recharge the battery.
•
If <Auto Power Off> is selected from
<Settings> ĺ<System>, the Power in the
pause mode will be turned off. Turn on the
Player.
Battery life differs from
the manual.
•The battery life can vary depending on the
sound mode and display setting.
•Battery life may be shortened when the player
is left for extended periods in low or high
temperatures.
Media Studio Program
Malfunction
•Check if your PC meets the basic system
requirements.
Connection to your PC
is disabled.
•Check if the USB plug is correctly connected
and try again.
•Press <Start> on the toolbar of your PC to run
Windows Update. Select Key Updates and
Service Packs, then update all. Reboot your
PC and reconnect.
The fi le transfer rate is
too slow.
•If you are running multiple programs including
<Media Studio> on your PC, the fi le transfer
rate will be slow. Exit unnecessary programs
and try transferring again.

114 _ troubleshooting
PROBLEM SOLUTION
Player isn’t playing.
•Check if the available fi le has been saved in
the memory.
•Check if the music fi le is damaged.
•Check if there is enough battery power.
File upload doesn’t
work.
•Check if the USB plug is securely connected.
Reconnect if necessary.
•Check if the memory is full.
•Press the Reset hole.
Files or data are
missing.
•Check if the USB plug has been disconnected
during fi le or data transmission. If this is
the case, it may cause serious damage not
only to fi les/data but also to the product. You
have to be extra cautious as Samsung is not
responsible for data loss.
Abnormal play time
display during play.
•Check if the fi le is in Variable Bit Rate (VBR)
format.
Abnormal display of fi le
name.
•Go to <Settings> ĺ<Language> ĺ
<Contents> in the main menu screen and set
an appropriate language.
The product is hot. •Heat may be generated during recharging. This
has no effect on the product life or functions.
A message appears
while watching a video.
•Try to download the video clip through Media
Studio again.

troubleshooting _ 115
PROBLEM SOLUTION
Bluetooth connections
could not be made.
•Check if the stereo headset is Bluetooth-
certifi ed. The mono hands-free headset is not
supported.
•The Bluetooth connection can be set off if
you turn off and turn on the player or stereo
headset. In this case, try to connect again.
•If you want to talk on your mobile phone, check
if you have set off the Bluetooth connections
between player and stereo headset.
•If you want to talk on your mobile phone,
check if you have set to <Discoverable> from
<Bluetooth Settings> ĺ<Discover Option>.
If set to <Non-Discoverable>, you can’t fi nd
the player on your mobile phone.
•The Bluetooth connection can be set off if you
turn off and restart the player, stereo headset
or mobile phone. In this case, make the
connection again.
116 _ appendix
appendix
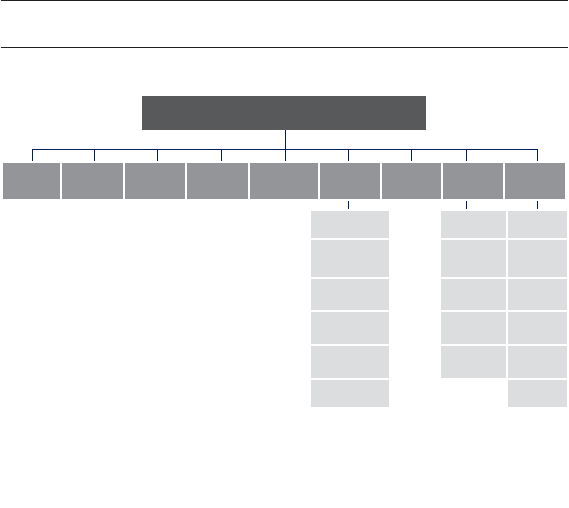
MENU TREE
Here’s a quick look at how the menus and functions are organized on your new
mp3 player.
Menu Select Screen
Music Videos Pictures FM
Radio Datacasts Prime
Pack
File
Browser Blutooth Settings
Text Stereo
Headset
Menu
Style
Voice REC Mobile
Phone Sound
Games File
Transfer Display
Alarm
Settings
Bluetooth
Mode Language
World Clock Bluetooth
Settings Time
Audio In System

appendix _ 117
PRODUCT SPECIFICATIONS
Model Name YP-S5
Rating DC 5.0V/ 500mA
Built-in Battery Power 600 mAh/ DC 3.7V
File Compatibility
AUDIO : MPEG1/2/2.5 Layer3 (8kbps~320kbps,
8kHz~48kHz) WMA(5kbps~320kbps,8kHz~48kHz),
AAC-LC
VIDEO : SVI (Video: MPEG4, Audio: MP3
(44.1kHZ, 128kbps), Resolution: 208X176, Frame
Rate: 15fps)
IMAGE : JPG (Progressive, Sequential Scan ning,
File Size: less than 3MB)
Supported Number of folders
and Files
Music File : Max. 4,000,
File : Max. 10,000 (Including music fi le/folder)
Earphone Output 20mW (16ȍ)
Output Frequency Range 20Hz~20KHz
Signal to Noise Ratio 90 dB with 20 KHz LPF(based on 1kHz 0 dB)
Play Time Earphone:
Maximum of 24 hours for music
playback, Maximum of 4 hours for video playback
Speaker: Maximum of 10 hours for music
playback, Maximum of 4 hours for video playback
(based on: MP3 128kbps, Volume: 15, Normal
Mode)
Temperature Range for
Operation
-5~35°C (23~95°F)
Case Plastic
Weight 2.79 oz
Dimensions (WxHxD) 1.83˝ X 3.78˝ X 0.59˝

118 _ appendix
Speaker Power Output 0.7W/Ch x 2Ch
Impedance 8ȍ
Frequency Range 400 Hz ~ 20 KHz
FM Radio
FM Frequency
87.5~108.0MHz FM T.H.D 1%
FM Signal to
Noise Ratio 55 dB FM Useable
Sensitiivity 38dB
Bluetooth
Frequency
Range:
Transmit/Receive :
2402~2480 MHz Module BTTZ0502SA
Spec Version
Supported 1.2
Transmission
Output
2.4 mW
Wireless System
Emission Type F1D
Power DC 3.7V
RF Power 0.02mW
Transmit Frequency 2402MHz ~ 2480MHz
Receive Frequency 2402MHz ~ 2480MHz
No. of channels 79 ch
Temperature -10°C~ +50°C (14 ~ 122°F)
Modulation System GFSK
Communication Mode Semi-duplex Operation
Humidity 95%
The contents of this Manual are subject to change without prior notice for further
improvement.

LICENSE
The product unit accompanying this user manual is licensed under certain
intellectual property rights of certain third parties. In particular, this product is
licensed under the following US patents : 5,991,715, 5,740,317, 4,972,484,
5,214,678, 5,323,396, 5,539,829, 5,606,618, 5,530,655, 5,777,992, 6,289,308,
5,610,985, 5,481,643, 5,544,247, 5,960,037, 6,023,490, 5,878,080, and under
US Published Patent Application
No. 2001-44713-A1.
This license is limited to private non-commercial use by end-user consumers for
licensed contents. No rights are granted for commercial use. The license does
not cover any product unit other than this product unit and the license does not
extend to any unli-censed product unit or process conforming to ISO/IEC 11172-
3 or ISO/IEC 13818-3 used or sold in combination with this product unit. The
license only covers the use of this product unit to encode and/or decode audio
fi les conforming to the ISO/IEC 11172-3 or ISO/IEC 13818-3. No rights are
granted under this license for product features or func-tions that do not conform
to the ISO/IEC 11172-3 or ISO/IEC 13818-3.

WARRANTY
Samsung warrants this product as free of defects in material, design and
workmanship for a period of twelve (12) months from the original date of
purchase.
If during the period of warranty this product proves defective under normal use
and service, you should return the product to the retailer from whom it was
originally purchased.
The liability of Samsung and its appointed maintenance company is limited to
the cost of repair and/or replacement of the unit under warranty.
Return of the product for defective reasons should be to the original purchaser;
however, Samsung Authorized Dealers and Authorized Service Centers will
comply with the warranty on the terms issued to purchasers in the country
concerned. For further information relating to the Authorized Service Centers
contact; 1-800-SAMSUNG (1-800-726-7864).
Www.Samsung.com
WARANTY CONDITIONS:
1. The warranty is only valid when the warranty card is properly completed,
and upon presentation of the proof of purchase consisting of original invoice
or sales slip confi rmation, indicating the date of purchase, dealer’s name,
model, serial No. and product number.
Samsung reserves the right to refuse warranty service if this information
has been removed or changed after the original purchase of the product
from the dealer.

WARRANTY (Continued)
2. Samsung’s obligations are to the repair of the defective part, and at its
discretion, replacement of the product (service exchange unit).
3. Warranty repairs must be carried out by an Authorized Samsung Dealer/
Service Center. No reimbursement will be made for repairs carried out by non
Samsung Centers, and warranty coverage will not be valid for any repairs or
damage caused by such repairs.
4. Repair or replacement under the terms of this warranty does not give right
to extension to or a new starting of the period of warranty. Repair or direct
replacement under the terms of this warranty may be fulfi lled with functionally
equivalent service exchange units.
5. The warranty is not applicable in cases other than defects in material, design
and workmanship.
The warranty does not cover the following:
-Periodic checks, maintenance, repair and replacement of parts due to
normal wear and tear.
-Abuse or misuse, including but not solely limited to the failure to use
this product for its normal purposed or in accordance with Samsung’s
instructions usage and maintenance.
-Use of the product in conjunction with accessories not approved by
Samsung for use with this product.

WARRANTY (Continued)
- Failure of the product arising from incorrect installation or use not
consistent with technical or safety standardsin current force, or failure to
comply with productmanual instructions.
- Accidents, Acts of God or any cause beyond the control of Samsung
caused by lightning, water, fi re, public disturbances and improper
ventilation.
- Unauthorized modifi cations carried out for the product to comply with
local or national technical standards in countries for which the Samsung
product was not originally designed.
- Repairs performed by non-authorized service centers such as opening of
the product by a non-authorized person.
- The model, serial No. and product number on the product has been
altered, deleted, removed or made illegible.
6. This warranty does not affect the consumer’s statutory rights nor the
consumers rights against the dealer from their purchase/sales agreement.

WARRANTY (Continued)
THERE ARE NO EXPRESS WARRANTIES OTHER THAN THOSE LISTED
AND DESCRIBED ABOVE, AND NO WARRANTIES WHETHER EXPRESS OR
IMPLIED, INCLUDING, BUT NOT LIMITED TO, ANY IMPLIED WARRANTIES
OF MERCHANTABILITY OR FITNESS FOR A PARTICULAR PURPOSE,
SHALL APPLY AFTER THE EXPRESS WARRANTY PERIODS STATED
ABOVE, AND NO OTHER EXPRESS WARRANTY OR GUARANTY GIVEN
BY ANY PERSON, FIRM OR CORPORATION WITH RESPECT TO THIS
PRODUCT SHALL BE BINDING ON SAMSUNG, SAMSUNG SHALL NOT
BE LIABLE FOR LOSS OF REVENUE OR PROFITS,FAILURE TO REALIZE
SAVINGS OR OTHER BENEFITS, OR ANY OTHER SPECIAL, INCIDENTAL
OR CONSEQUENTIAL DAMAGES CAUSED BY THE USE, MISUSE OR
INABILITY TO USE THIS PRODUCT, REGARDLESS OF THE LEGAL
THEORY ON WHICH THE CLAIM IS BASED, AND EVEN IF SAMSUNG HAS
BEEN ADVISED OF THE POSSIBILITY OF SUCH DAMAGES.
NOR SHALL RECOVERY OF ANY KIND AGAINST SAMSUNG BE GREATER
IN AMOUNT THAN THE PURCHASE PRICE OF THE PRODUCT SOLD BY
SAMSUNG AND CAUSING THE ALLEGED DAMAGE.
WITHOUT LIMITING THE FOREGOING,

WARRANTY (Continued)
PURCHASER ASSUMES ALL RISK AND LIABILITY FOR LOSS, DAMAGE
OR INJURY TO PURCHASER AND PURCHASER’S PROPERTY AND TO
OTHERS AND THEIR PROPERTY ARISING OUT OF THE USE, MISUSE OR
INABILITY TO USE THIS PRODUCT SOLD BY SAMSUNG NOT CAUSED
DIRECTLY BY THE NEGLIGENCE OF SAMSUNG.
THIS LIMITED WARRANTY SHALL NOT EXTEND TO ANYONE OTHER THAN
THE ORIGINAL PURCHASER OF THIS PRODUCT, IS NONTRANSFERABLE
AND STATES YOUR EXCLUSIVE REMEDY.
Some states do not allow limitations on how long an implied warranty lasts, or
the exclusion or limitation of incidental or consequential damages, so the above
limitations or exclusions may not apply to you.
This warranty gives you specifi c legal rights, and you may also have other rights
which vary from state to state.
This product is for personal use only, and is only for use in compliance with the
limitations of copyright and other laws.
To obtain warranty service, please contact SAMSUNG at: Samsung Electronics
America, Inc. 400 Valley Road, Suite 201 Mount Arlington, NJ 07856
1-800-SAMSUNG (1-800-726-7864)
www.Samsung.com 081299

REV.0.0
QUESTIONS OR COMMENTS?
COUNTRY CALL
OR VISIT US ONLINE AT
WRITE
IN THE US 800-SAMSUNG
(800-726-7864) www.samsung.com
Samsung Electronics America, Inc.
105 Challenger Road
Ridgefi eld Park, NJ 07660-0511