Samsung DVD V3500 User Manual DVD/VCR Manuals And Guides L0304190
SAMSUNG DVD/VCR Combo Manual L0304190 SAMSUNG DVD/VCR Combo Owner's Manual, SAMSUNG DVD/VCR Combo installation guides
User Manual: Samsung DVD-V3500 DVD-V3500 SAMSUNG DVD/VCR - Manuals and Guides View the owners manual for your SAMSUNG DVD/VCR #DVDV3500. Home:Electronics Parts:Samsung Parts:Samsung DVD/VCR Manual
Open the PDF directly: View PDF ![]() .
.
Page Count: 35
Instruction
Manual
DVD-V3500
1"
6&866_
I
ii,
_Hi-Fi
VIDEO www,samsungusa.com
WARNING:
TO PREVENT DAMAGE WHICH MAY RESULT iN
FiRE OR ELECTRIC SHOCK HAZARD, DO NOT
EXPOSE THiS APPLIANCE TO RAiN OR
MOISTURE.
WARNING:
TO AVOID HAZARDOUS EXPOSURE TO iNViSIBLE
LASER RADIATION, DO NOT OPEN OR
REMOVE/DEFEAT LASER TRANSPORT
PROTECTIVE HOUSING.
USER/INSTALLER CAUTION:
Your authority to operate this FCC certified equipment
could be voided if you make changes or medif_eedons
not expressly approved by the manufacturer, who is
responsible for compliance with Part f 5 FCC rules
NOTE TO CATV SYSTEM INSTALLER:
This reminder is provided to cal_ the CATV system
insta_ler's attention to Adicle 820*40 of the Nationa_
Electronic Code that provides guidelines for proper
grounding and, in padicu[ar, specifies that the cable
ground shall be connected to the grounding system of
the building, as close to the point of cable entry as
practical
Do N_ RE_ {:_tR
NO U_PABqV_ F_n_ Nm_
This symbol is intended to alert
the user to the presence of
uninsulatsd dangerous vogage
within the product's enclosure
that may be of sufficient
magnitude to constitute risk of
fire or e_ectdc shock.
This symbol is intended to alert
the user to the presence of
important operating and
maintenance instructions in the
literature accompanying this
product
Copy Notification
Federal law provides severe civi_ and criminal
penalties for the unauthorized reproduction,
distribution, or exhibition of copyrighted motion
pictures and videotspes (Title 17, United States
Code, Sections 50t and 506)
Macrovision Notification
This product incorporates copyright protection
technology that is protected by method claims of
certain U.S patents and other intellectual property
rights owned by Macrovision Corporation and other
rights owners. Use of this copyright protection
technology must be authorized by Macrovision
Corporation, and is intended for home and other
limited viewing uses only untsss othe_vise authorized
by Macrovision Colporation Reverse engineenng or
disassembly is prohibited
CAUTION:
To prevent fire, shock hazard, or annoying
interference, use only the recommended accessories
TO prevent e[ectdc shock, do not use this (polarized)
p_ug with an extension cord, receptacle, or other outlet
unless the blades can be fully insetted to prevent
b_ede exposure TO reduce the risk of e[ectdc shock,
do not remove the unit cover or back. There are no
serviceable pads inside Refer servicing to qualified
personnel only
CUIDADO:
Para prevenir incendio, desgo de choque, o
inter[erencia enfedosa, use solamente los accesoeds
recomendados Para prevenir electrochoque, no use
este enchufe (polarlzedo) con un cord6n de
extensidn, toma de cordente, o cualquier otra toma a
menos que los dientes puedan ser completamente
insertados para prevenir exposicidn de los dientes.
Para reducir et desgo de descarga eldctdca, no
remueva la cubieria o la parte posterior del equipo.
Dentro dot equipo no hay patios que requieren
servicio Didjase solamente a personal calificado
cuando requiera selvtsio
ATTENTION:
Pour @viter los incendis, risque de chocs, OU
inter[drences f&cheuses, employer seulement les
accessoires recommandds. Pour @vger les chocs
6Iectr_ques, ne pus employer cette pdse (poladsde)
avec une rallonge, une prise de courant ou une autre
sortie de courant & moins que los lames peuvent gtre
insdrdes _ fond pour rexposition des lames. Pour
rdduire los dsques de chocs electdques, ne pus rMirer
le couverde ou I'arridre du module II n'y a pus de
piece utilisable _ Bntddeur Ne faire effectuer
fentretien que par un personnel qualifi6
I. Read these instructions.
2. Keep these instructions.
3. Heed all warnings.
4. Follow all instructions.
5. Do not use this apparatus near water.
6. Clean only with dry cloth.
7. DO not block any ventilation openings. Install in accordance with the manufacturer's
instructions.
8. Do not install near any heat sources such as radiators, heat registers, or other
apparatus (including amplifiers) that produce heat.
9. Do not defeat the safety purpose of the polarized or grounding-type plug. A polarized
plug has two blades with one wider than the other. A grounding type plug has two
blades and a third grounding prong. The wide blade or the third prong are provided for
your safety. If the provided plug does not fit into your outlet, consult an electrician for
replacement of the obsolete outlet.
10. Protect the power cord from being from being walked on or pinched particularly at ptugs,
convenience receptacles, and the point where they exit from the apparatus.
11. Only use attachments/accessories specified by the manufacturer.
12. Use only with cart, stand, tripod, bracket, or table specified by the manufacturer, or sold
with the apparatus. When a used, caution when moving the cart!apparatus combination
to avoid injury from tip-over.
13. Unplug this apparatus. When a cari is used, use caution when moving the
cart/apparatus combination to avoid injury from tip-over.
14. Refer all servicing to qualified service personnek Servicing is required when the
apparatus has been damaged in any way, such as power-supply cord or plug is
damaged, liquid has been spilled or objects have fallen into the apparatus, the
apparatus has been exposed to rain or moisture, does not operate normally, or been
dropped.
• Safety............................................................... 3
•ImportantSafety Instructions .................................................. 3
• Welcome ............................................................. 7
• Feature Summary ........................................................... 7
• Unpack ................................................................... Y
• Disc Type and Characteristics ................................................. 8
• 1 - System Overview .................................................... 9
Front Panel Overview ........................................................ 9
Rear Panel ................................................................ 10
Front Panel Display .......................................................... 10
Remote Control Overview ..................................................... 11
klser t Batteges into Remote ................................................... 1 t
Using the TV Buttons on the Remote Control ..................................... 12
• 2 - Getting Started ...................................................... 13
• BasicConnections/Auto Setup ................................................. 13
• 3- Basic Operation ..................................................... 14
• DeckControlButtons ........................................................ 14
• Basic DVD Operalion ........................................................ 14
• Basic VCR Operation ........................................................ 15
• BasicTV Timer Operations .................................................... 16
• 4 - System Setup ............................................................. 16
On*Screen Menu Navigation ................................................... 16
Menu Language ............................................................ 17
Manual Clock Set ........................................................... 18
Tuner Band Setting .......................................................... 19
RF Output Channel .......................................................... 20
Auto Channel Memory ....................................................... 2t
Channel Add/Delete ......................................................... 22
Front Panel Dimmer ......................................................... 23
Auto Power Off ............................................................. 24
• 5 - DVD Setup ........................................................
• Disc Menu Language ......................................................
•Audio Language ..........................................................
•S/ibtitle Language .........................................................
•Digital Output .............................................................
•DTS ....................................................................
•Dynamic Compression .....................................................
•PCM Down Sampling ......................................................
•TV Aspect Ratio ..........................................................
•Black Level ..............................................................
•AgVideo Out .............................................................
• Parental .................................................................
25
25
25
26
27
28
29
30
31
32
33
34
• 6 - DVD Sound Setup ................................................... 35
•AN Receiver Connections .................................................... 35
• 7 - DVD Operations ....................................................
•Specia_Playback Fealures ..................................................
•DiSC Menu Navigation ......................................................
• EZ View .................................................................
•Tige/Chapter/Time Selection .................................................
•Angle View ..............................................................
•Subtitle .................................................................
•AiD B Repeat ............................................................
•Repeat Chapter/Title .......................................................
• Audio ...................................................................
•Bookmarks ..............................................................
•MP3/WMA Play ...........................................................
•Program Play & Random Play ...............................................
•Picture CD Playback .......................................................
•3D Sound ...............................................................
•Function (DVD) ...........................................................
• 8 - VCR Playback .....................................................
•SpecialVCR Playback Features ..............................................
• Tracking .................................................................
•Auto P_ay ................................................................
•S÷VHS Playback ..........................................................
•Variable Search System ....................................................
36
36
37
37
39
40
41
42
43
43
44
45
47
48
50
51
52
52
52
53
53
54
• 9 - VCR Recording ...................................................... 55
• Basic Recording ............................................................ 55
• Special Recording Features ................................................... 56
• One Touch Recording (OTR) .................................................. 57
• Record Speed .............................................................. 57
• 10 - Timer Recording .................................................... 58
• How to Set a Timer Recording ................................................. 58
• Function(VCR) .............................................................. 59
• Appendix A - Advanced Connections ....................................... 60
• S-Video/Component Video Connecttons (for DVD) .................................. 60
• Stereo Connecgons .......................................................... 61
• Monitor TV Connections ...................................................... 62
• Connecting Other Video Equipment ............................................. 63
• Appendix B - Help ...................................................... 64
• Technical Specgicagons ...................................................... 64
DVD+VCR Features
•Perfect compagbilgy to p_ayback DVDs, audio CDs, MP3 discs el VHS Tapes
• Enjoy a DVD movie whi_e recording a TV show to the VCR
• Auto Setup instantly finds the time al_d rdns chanl_el search
• RF inputs and o_tputs fo_ al_ kinds of TVs available
• Composite, S-Video, and Component Video outguls
•Universal remote provides the full operation on DVD+VCR
• OmScreen Program ( Eng_ish/Frel_ch/Spanish )
DVD Features
• IGbit video digital to analog converter and 27MHz advanced digital tiger
•Piayback of 96KHzJ24_bit sources
• DTS diggai output for DTS*enhanced DVDs
•Piayback MP3-CDs
VCR Features
• Hi-Fi Stereo VCR
• Superior slow motion and stop action (v_th 4 heads)
•Piayback of SWHS tapes w&h a bet{or than standard resol/_on
• tNTRO Scan, Zel_ Retom, and END Search
• 7*event/l month timer l_cording
• Time l_maining counter, real time counter
Note
*Discs which cannot be played w#J_this player _Abilit y to play back may depend on _ecording
•DVD_ROM - DVD_RAM condigons
• CD*ROM - CDV • DVD*R • DD*RW
• CDI - SVCD • DVD+RW,_RW
• HD layer of Super Audio CD
• CDGs play a/_dio only, not graphics
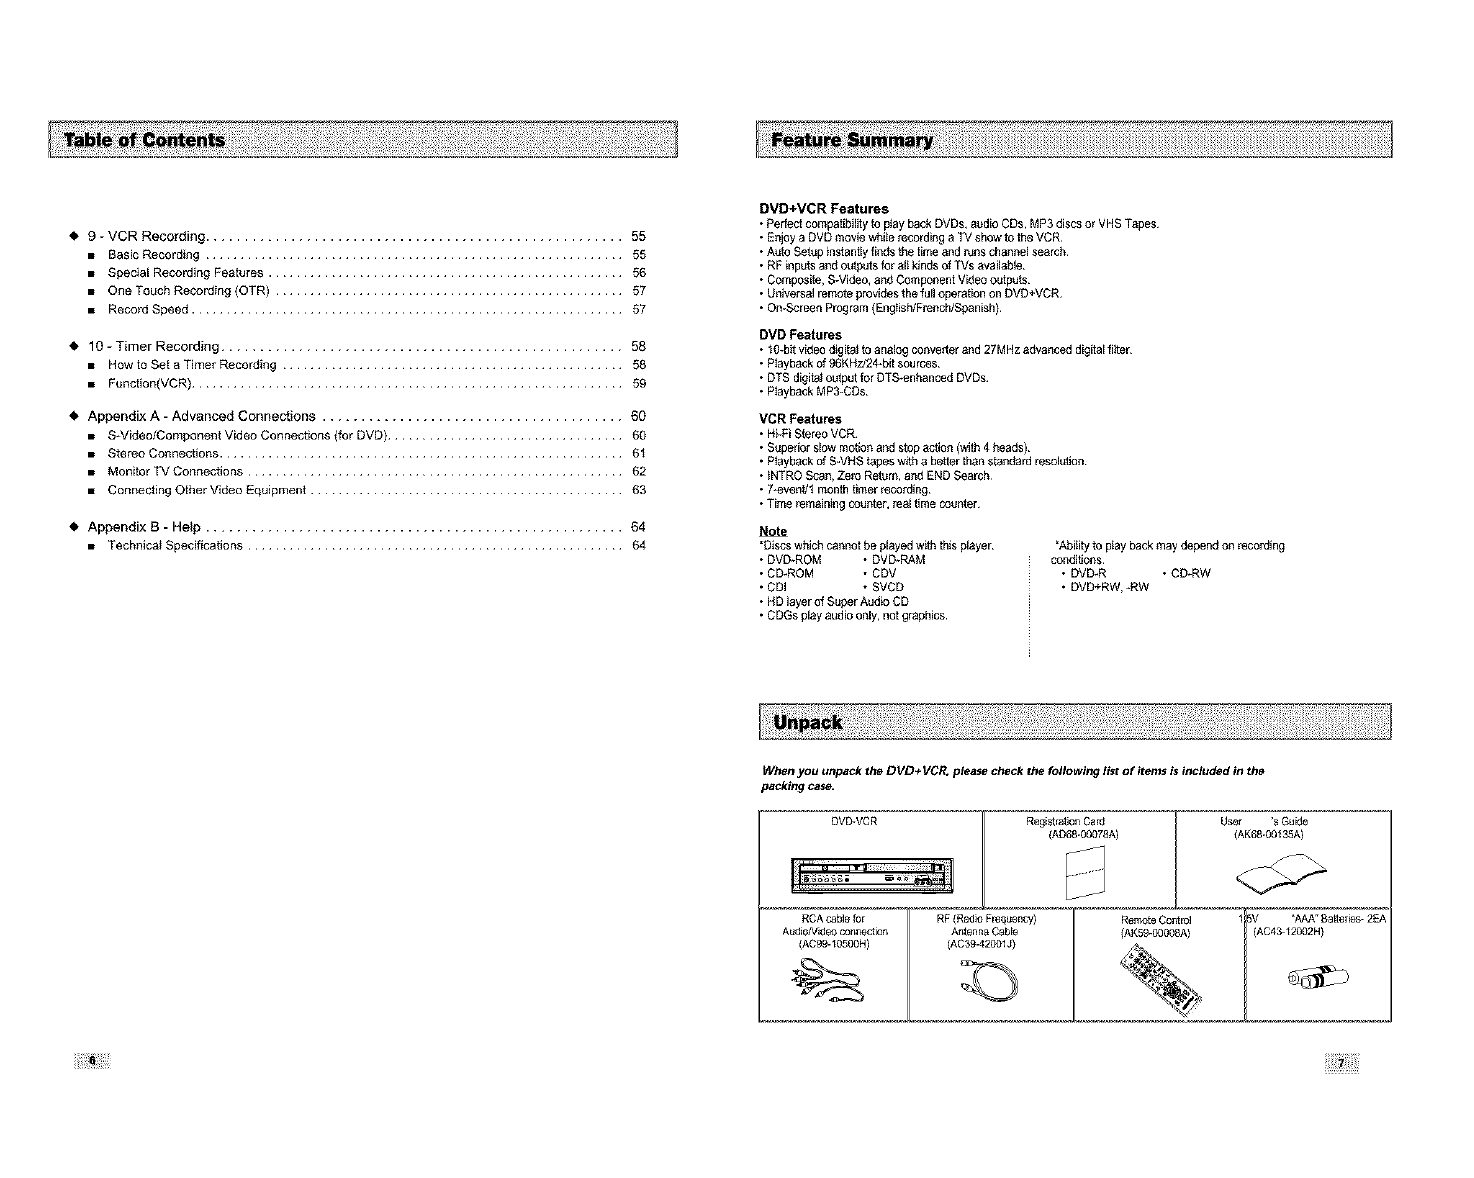
When you unpack the DVD+ VCR,please check the followinglist of items is includedin the
packingcase.
DV_VCR Regi_ration Ca_
(AD68-0O078A}
User 'sGu_e
{AK68-00135A}
RCACable for
AudioNideo cotlnect_3n
IAC99-10500H}
RF (Radio Flequency)
A£tenna CabEe
(AC39-42001J)
Remote Contlo]
(AK59-00008A)
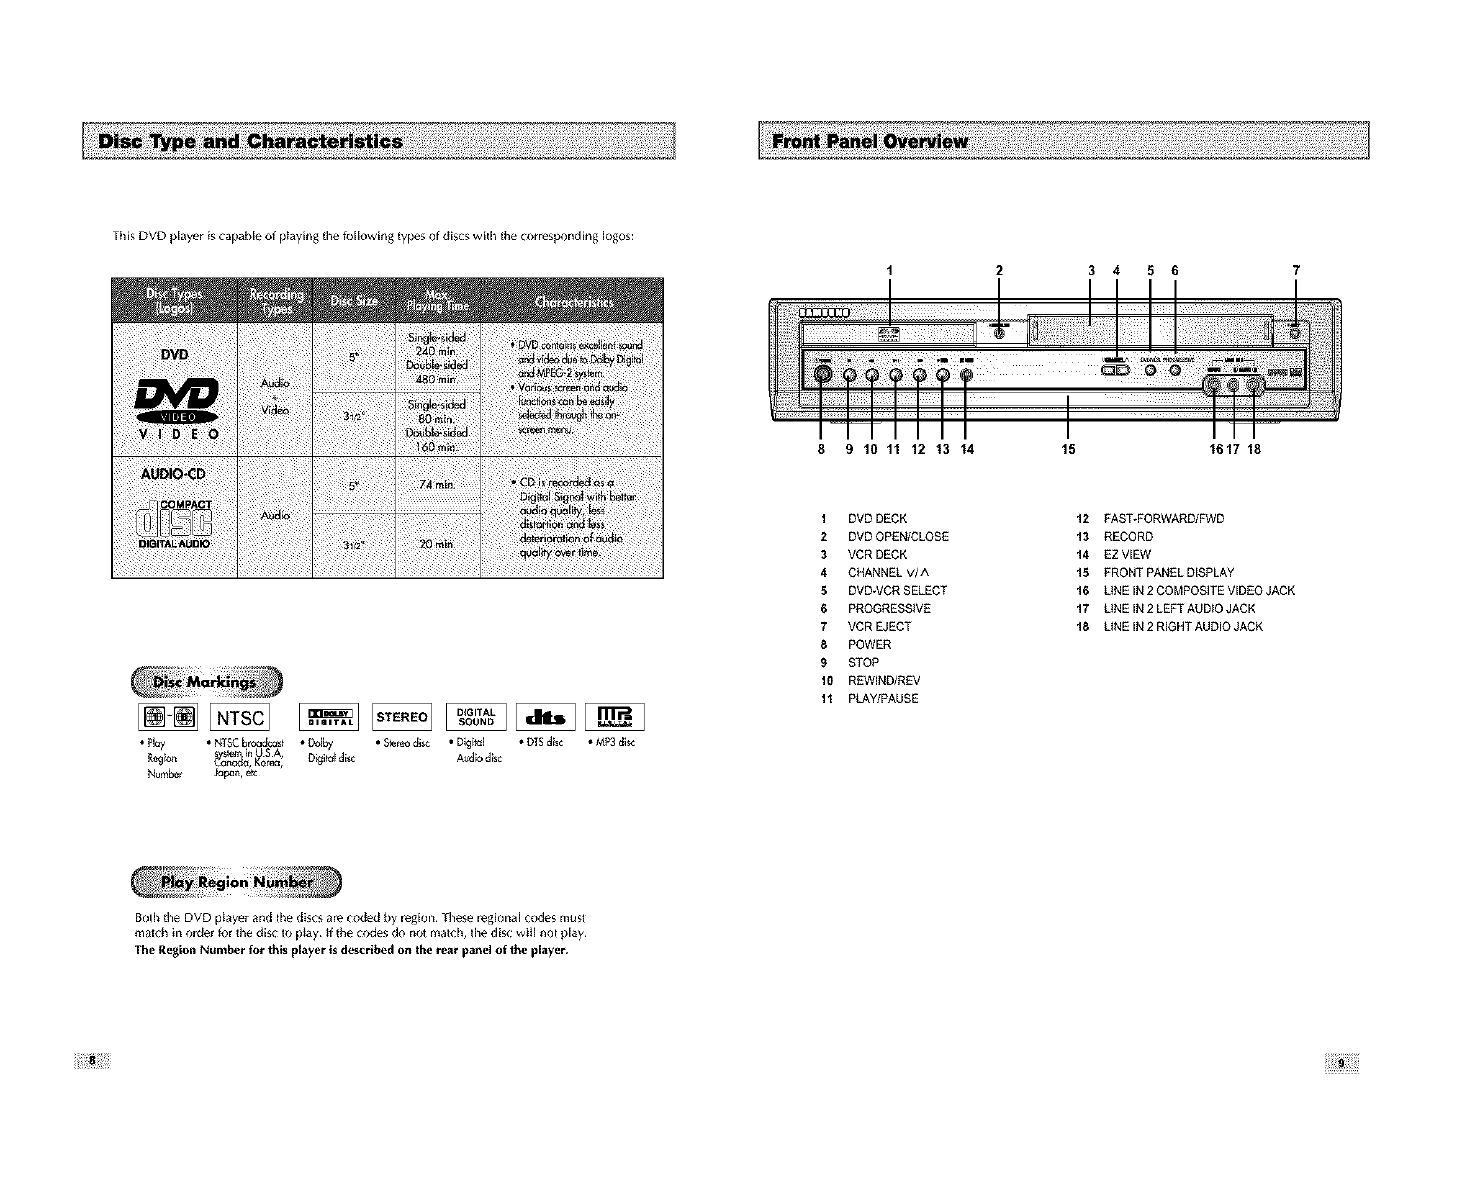
ThisDVDplayer_scapable of ptayfflg tile fo[[owfflg types of discs with the correspondfflg [egos:
iiiiiiiiiiiiiiiiiiiiiiii ii!!iiiiiiiiiii ii ii ii!ii i ! !
i ¸ DD i_
• Pl_y • NTSCbroadcc_st • b_by • Ster_ disc • D_g_ta] • DTSd_sc • M_ d_sc
s st _n SA,
R_ _, _o_, o_i_oldi_ A_d_od_
Number Japan, e_
Both tile DVD player and the d_scs are coded by regk;n These regk;na[ codes must
match _norde_ _r timedisc to play¸ If the codes do not match, timedisc witl not play
The Region Number for this player is described on the rear panel of the player.
8 9 10 11 12 '_3 '_4
1DVD DECK
2DVD OPEN/CLOSE
3VCR DECK
4CHANNEL V/A
SDVD-VCR SELECT
6 PROGRESSIVE
7VCR EJECT
8 POWER
9 STOP
10 REWIND/REV
11 PLAY/PAUSE
3 4 5 6
I
I
15 '_617 18
t2 FAST*FORWARD/FWD
t3 RECORD
t4 EZ VIEW
t5 FRONT PANEL DISPLAY
t6 LiNE IN 2 COMPOSITE VIDEO JACK
t7 LiNE IN 2 LEFTAUD_O JACK
t8 LtNE IN 2 RIGHT AUDIO JACK
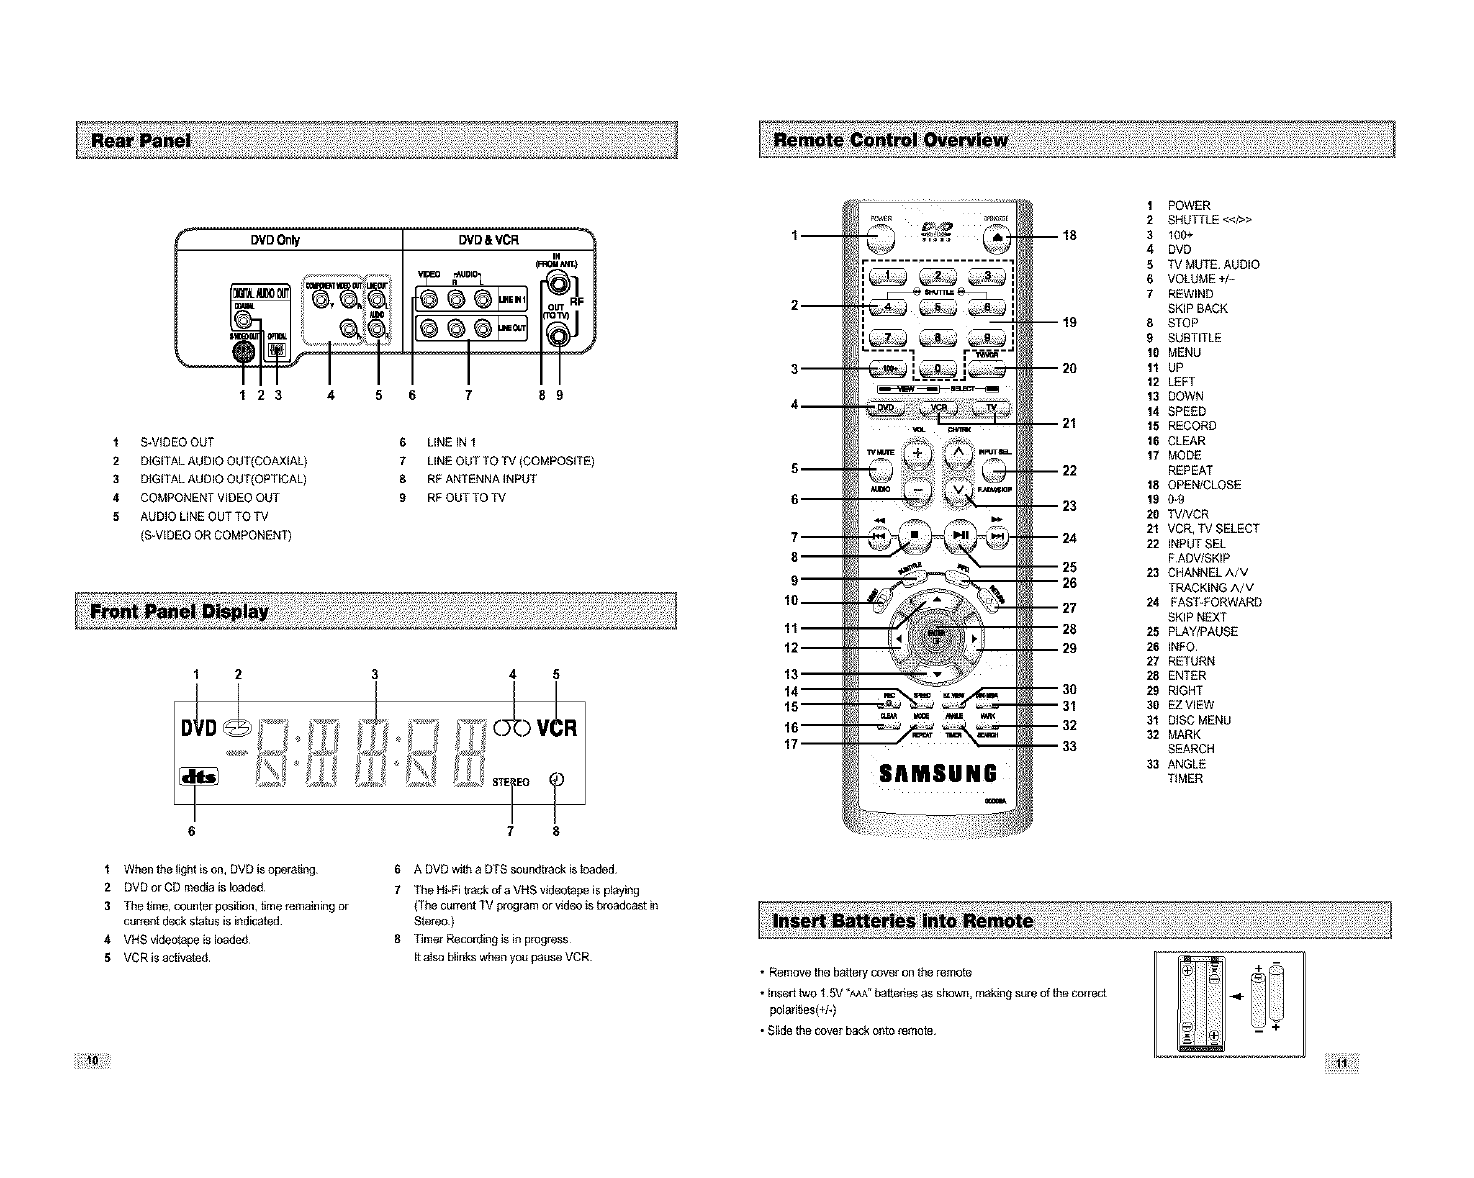
123 4 5 6 7 89
1S-VIDEOOUT 6 LINE IN 1
2 DIGITALAUDIO OUT(COAXIAL) 7LINEOUT TOTV (COMPOSITE)
3 DIGITALAUDIO OUT(OPTICAL) 8RF ANTENNAINPUT
4 COMPONENTVIDEO OUT B RPODT TO3"#
5 AUDIO LINEOUTTO TV
(S-VIDEOOR COMPONENT)
1 2 4 5
1Whenthe light ison, DVDis operating
2 DVD orCD mediais loaded
3Thet_me,counter position,lime _mtaning or
c_r_e_tdeck status istadicEtad
4 VHS videntapeis loaded¸
5 VCR isactivated¸
78
6 A DVD w&ha DTS sound'trackis loaded
7TheHi-Fi track of a VHS videotapeis playing
(ThecurrentTV programor videoisbroadcastin
Stereo¸)
8 Timer Recordingis in p_gress
Ittasoblinkswhenyou pauseVCR
ii 14
1--
2--
3--
4--
5--
7--
8--
9
10--
11--
12--
13
14--
15--
16--
• Remove the battery 6over on the remote
• taser_ two "_5V '<A_,_• batter, s _s sb_,_, ma_,taS st{ee of the coeeect
polalit_es(+/-)
• Slide the cover back onto i_mota
1POWER
2 SHUTTLE <<D>
3100+
4DVD
5TV MUTE AUDIO
6VOLUME +/-
7REWIND
SKiP BACK
B STOF'
9 SUETITLE
10 MENU
11 UP
12 LEFT
13 DOWN
14 SPEED
15 RECORD
16 CLEAR
17 MODE
REPEAT
18 OPEN/CLOSE
19 0-9
20 TVNCR
2/ VCR, TV SELECT
22 INPUT SEL
F ADVJSKIP
23 CHANNEL A/V
TRACKING A/V
24 FAST-FORWARD
SKIP NEXT
25 PLAWPADSE
26 INFO
27 RETURN
28 ENTER
2_ RIGNT
30 EZ VIEW
3/ DISC MENU
32 MARK
S_ARCR
33 ANGLE
TIMER
?@i;i;
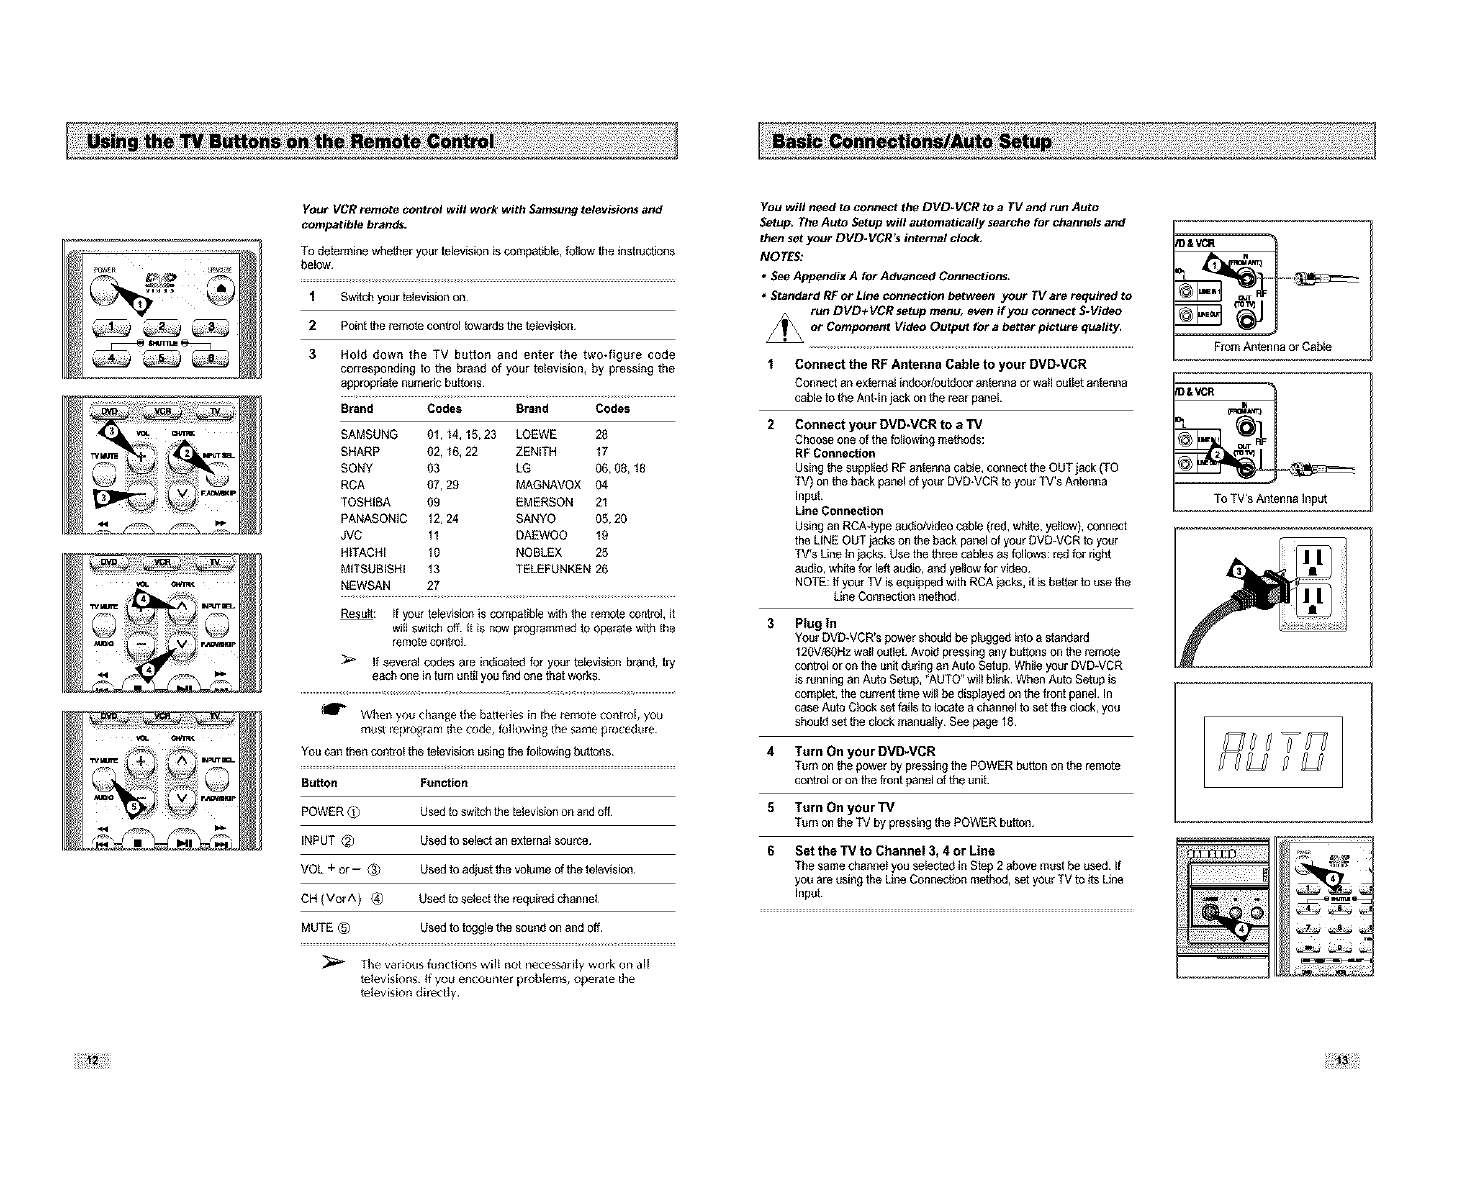
Your VCR remote control will work with Samsung televisiot_s and
compatible brands.
To dete_mthe whether you_ television is compahble, follow the instructions
below
1 Swgch your television on_
2Pointthe remotecontrol towardsthe thlevision
3
SHARP 02,16,22
SONY 03
BCA 07,29
TOSHIBA 09
PANASONIC 12,24
JVC 11
HiTACHi 10
MITSUBISHi 13
NEWSAN 27
Hold down the TV button and enter the two-figure code
coweagondiag to the brand of your television, by pressing the
appropag_ numedc buttons
Brand Codes Br'_nd Codes
SAMSUNG 01,14,15,23 LOEWE 26
ZENITH 17
LG 06,08, t8
MAGNAVOX 04
EMERSON 21
SANYO 05,20
DAEWOO 19
NOBLEX 25
TELEFUNKEN 26
_: If your telewsion is competiMe with the remote control it
wil switch off it is now programmed to operate w_ the
remote control
If several codes are indicated for your television bland, try
each one in turn until you bnd one that works
When you ¢ban_e the batlede_ in the remote cent rof, you
mu_t lep_ogram tile code, thlJowin_ tbe same procedure
YOU can then coofrot the television using the following buttons
Button Function
POWER
INPUT_
VOL +or--_._
CH(VGrA)
MUTE@
Used to switch the television on and off
Used to select an externat source
Used to adjust the vofume of the television¸
Used to select the _qui_d channe_
Used to toggle the sound on and off
The various functions wiff not necessarity work on aJ[
tofevis[ons if yot_ encounter problems, operate the
tofevls[on dlr_cgy
YOU will need to connect the DVD-VCR to a TV and run Auto
Setup, The Auto Setup will automatically seatche for channels and
then set your DVD.VCR's internal clock,
NOTES:
• See Appendix A for A_anced Connections,
•Standard RF Or Line connection between your TV are required to
run DVD+ VCR setup menu, even if you connect S-Video
_or Component Video Output for a better picture quality,
1 Connect the RP Antenna Cable to your DVD*VCR
Oonnect an e×_emal in6oodoutdoer antenna or wa_l outlet antenna
cahle to the Aofqn jack on the rear panel_
Connect your DVD*VCR to a TV
Choose one of the thllowth 0 methods:
RF Connection
Usthg the sogp_ied RF antenna cable, connect the OUT jack (TO
TV) on the back panel of your DVD+VCR to your TV's Antenna
Inpet
Line Connection
Using an RCA4ype au6io/video c_bie (red, white, yellow), connect
the LiNE OUT jacks on the back panel of your DVD_VCB to your
TV's Lthe th jacks Use the three cables as follows: red for right
audio, white for left audio, and yellow for video
NOTE: if your TV is equipped with BCA jacks, it is better to use the
Line Cennechon method
3 Plug In
You_ DVD-VCR's power shouid be plugged into a standard
120V/60Hz waft outlet Avoid pressing any buttons on the remote
control or on the unit dudag an Auto Setup While your BVD_VCR
is running an Auto Setup, "AUTO" will blink When Auto Setup is
compieb the current 6me w_ffbe displayed on the front panel In
case Auto Clock set f_ils to locate a channel to set the dock, you
should set the clock manually See page 18
4Turn On your DVD-VCR
Turn on the power by pl_ssiag the POWER butlon on the remote
control or on the front panel of the unit
5Turn On your TV
T_rn on the TV by pressing the POWER button
6 Set the 13/to Channel 3, 4 or Line
The same channel you selected inStep 2 above must be used If
you are using the Une Connechon method, set your TV to _ts Une
Input
a or Cable
&VCR _
To TV's Antenna Input
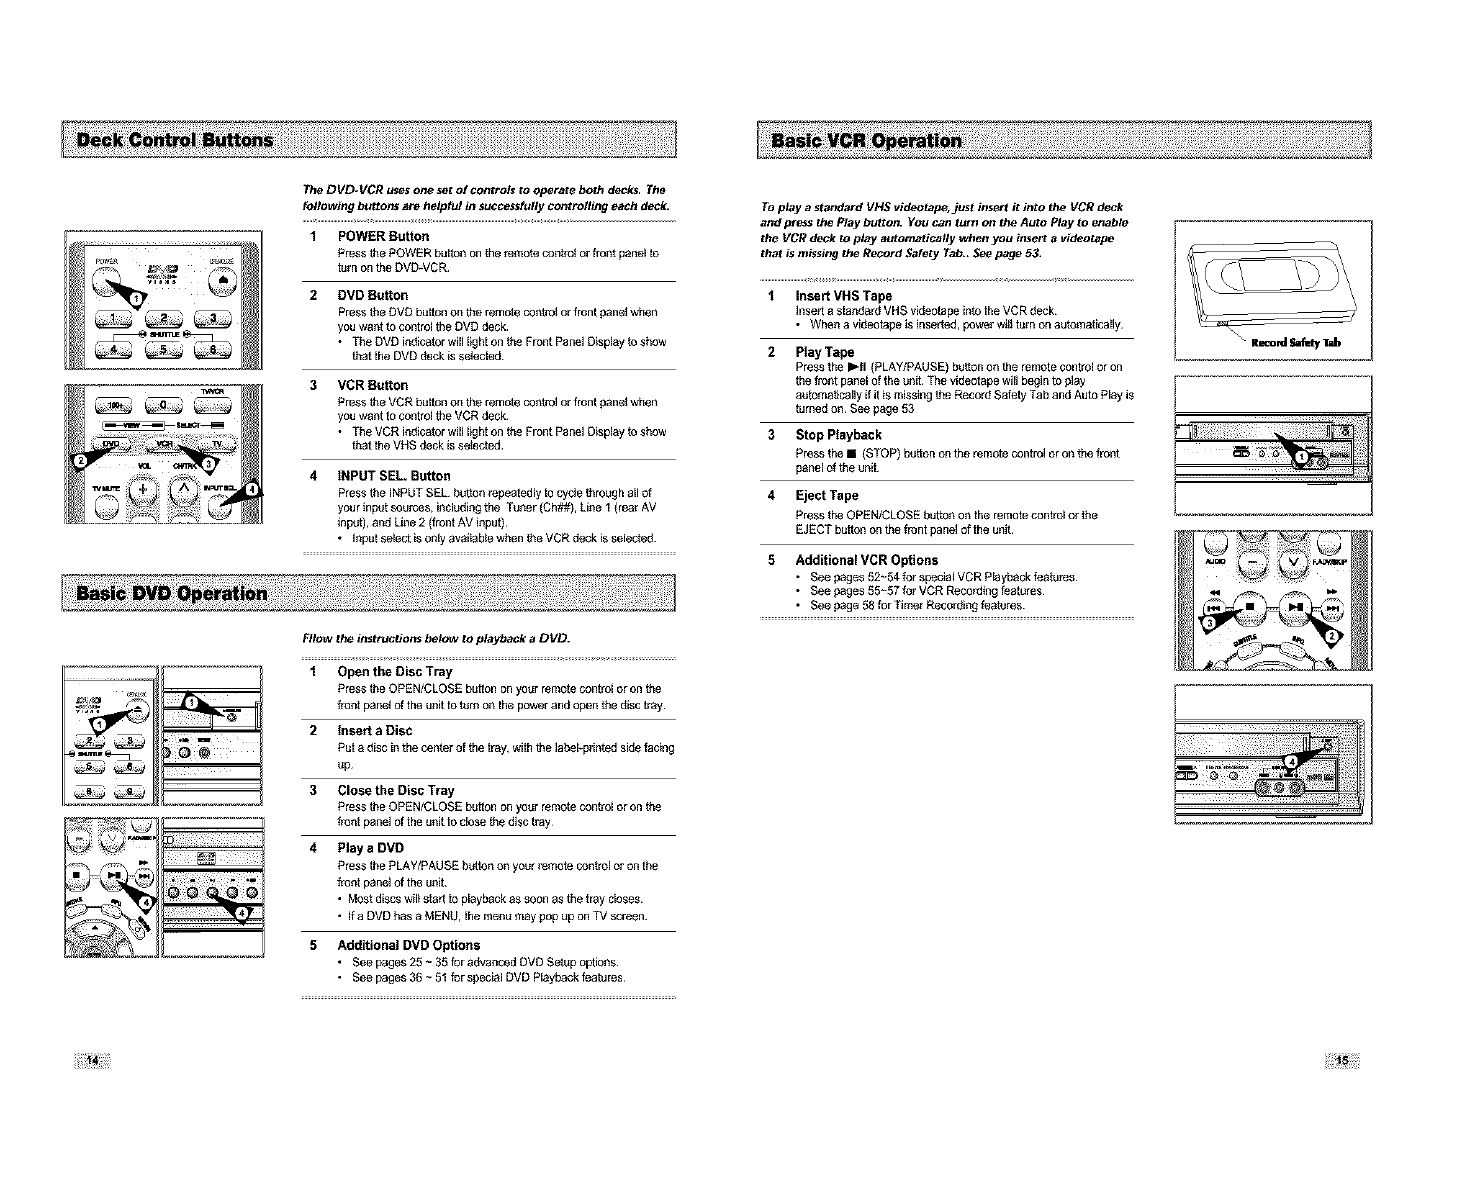
The DVD*VCR uses one set of controls to operate both decks, The
following buttons are helpful in successfully centre/ling each deck.
1 POWER Button
Press the POWER button on the _mote con_t or front pal_el to
turn on the DVD_VCR
2 DVD Button
Press the DVD button on the remote control or front pane_ when
you want to control the DVD deck
• The DVD indicator will light on the Front Panel Disptay {o show
that the DVD deck is selected
3 MCR Button
Press the VCR button on the remote control or front pane_ when
you want to control the VCR deck
• The VCR indicator will ligta on the Front Panel Disptay to show
that the VHS deck is seSected
4 INPUT SEL Button
Press the iNPUT SEL button _pestedly to cycle through all of
your inpul sources, inciudiag the Tuner (Ch##), Line 1 (real AV
thpul), al_d Line 2 (front AV input)
• thpst seleof is only available when the VCR deck is seiested.
FIIow the instructions below to playback a DVD.
1Open the Disc Tray
Press the OPEN/CLOSE button on your remote control or on the
f_ent panel of the unit to #Jrn on the power and open the disc tray
2tnse_ a Disc
Putadiscinthe centerof thetray, withthe labePpriofedsidefacing
up
3 Close the Disc Tray
Pressthe OPEN/CLOSEbutton on yourremotecontrol or onthe
front panel ofthe unitto closethe disctray¸
4 Play aDMD
Pressthe PLAY/PAUSEbuttonon your_mofe contrstor on the
front panelof the unit¸
•Mostdiscsw_l_start toplaybeckas soonas the tray closes
• tta DVDhasa MENU,themenu maypop up on TV screen¸
5 Additional DVD Options
• See beges 25 ~ 35 thr advanced DVD Setop options
• See beges 36 ~ 51 thr agecial DVD Ptaybeck featores
To play a standard VHS videotape, just insert it into the VCR deck
and press the Play button. YOU can turn on tl_ Auto Play to enable
the VCR deck to play automatically when you ir_ert a videotape
that is missing the Record Safety Tab,, See page 53,
1Insert VBS Tape
insert a standard VHS videotape into the VCR deck
• Whenavibeotapeisinserted, powelw_lHumonaulematically
2 Ptay Tape
Press the l-II (PLAY/PAUSE) button on the remote control or on
the front panel of the unit The videotape will begin to play
automatically if it is missing the Record Safety Tab and Auto Play is
turned on See page 53
3Stop Playback
Press the •(STOP) button on the remote control or on the front
pal_el of the uldt
4 Eject Tape
Press the OPEN/CLOSE button on the remote control or the
EJECT button on the front panel of the unit
5Additional VCR Options
• See pages 52~54 thr sbecial VCR Playbeck feabe_s
• See pages 55~57 fo_ VCR Reco_diag featores
• See page 58 thr Timer Reoordiag features
_4 ltt :
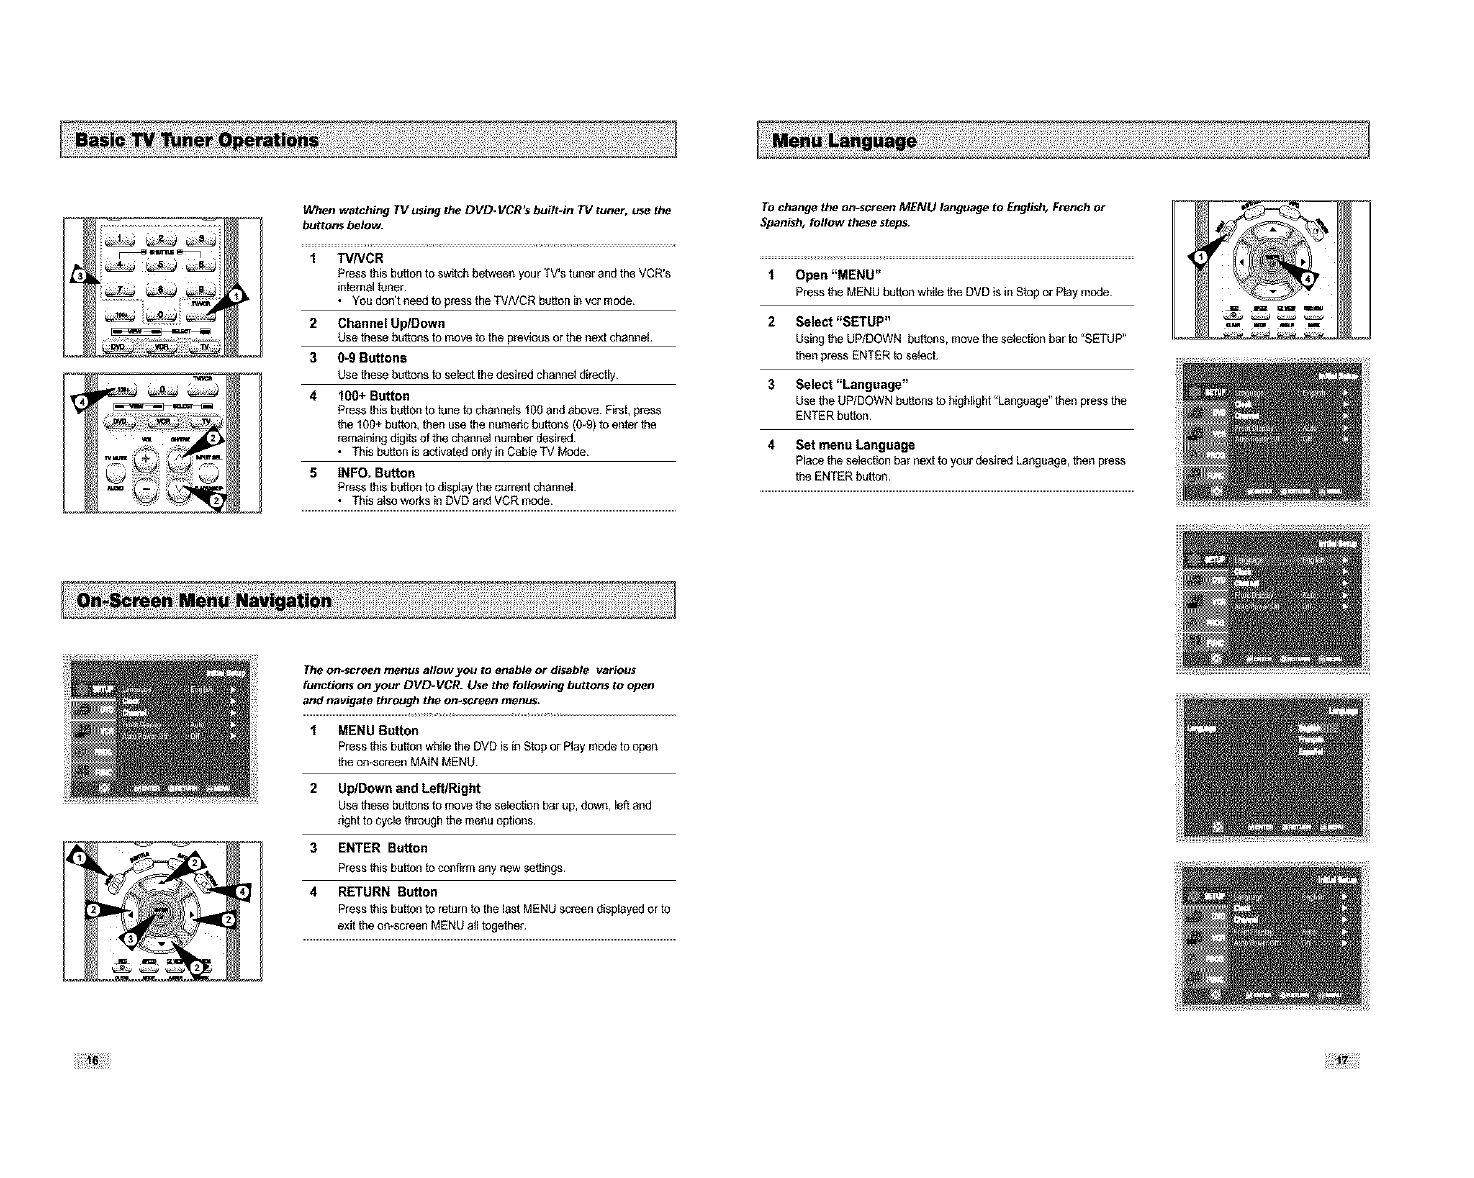
When watching TV using the DVD.VCR's built-M TV tuner, use the
buttons below.
1 TVNCR
Press this button to switch between your TV's tuner and the VCR's
internal tuner
• Youden'tneedtepresstheTVNCRbuttonil_vcrmode
2 Channel Up/Down
Use these buttons to move te the pl_vieus or the i_ext channel
3 0-9 Buttons
Use these buttons to select the desired channe_ dil_cgy
4 100+ Button
Press this button to tune to channels 100 and above First, press
the 100+ button, then use the numedc buttons (0-9) te enter the
remaining digits of the channel number desired
•This button is acgvated onty in Cable TV Mode
5tNFO. Button
Press this button to display the current channel
•This a{so works in DVD and VCR mode
To change the on-screen MENU language to English, French or
Spanish, follow these steps=
iOpen "MENU"
Press the MENU button wMle the DVD is in Stop or P_aymode
2 Select "SETUP"
Using the UP/DOWN buttons, move the seSecgon bar to "SETUP"
then press ENTER to select
3Select "Language"
Use the UP/DOWN buttons to highlight "Language" then press the
ENTER button
4Set menu Language
Place the selection bal next to your desired Language, then pl_ss
the ENTER button
The on-screen menus allow you to enable or disable various
functions on your DVD-VCR. Use the following buttons to open
and navigate through the on-screen menus,
iMENU Button
Press this button while the DVD is in Stop or Play mode to open
the on-screen MAIN MENU
2 Up/Down and LeftlRight
Use these buttons to move the selechon bar/_p, down, left and
right to cycle th_z_ughthe menu options
3 ENTER Button
Press this butten to conf_rnl any new seMngs
4RETURN Button
Press this button to return to the last MENU screen displayed or to
exit the omscreen MENU a_ltogether
't6 17
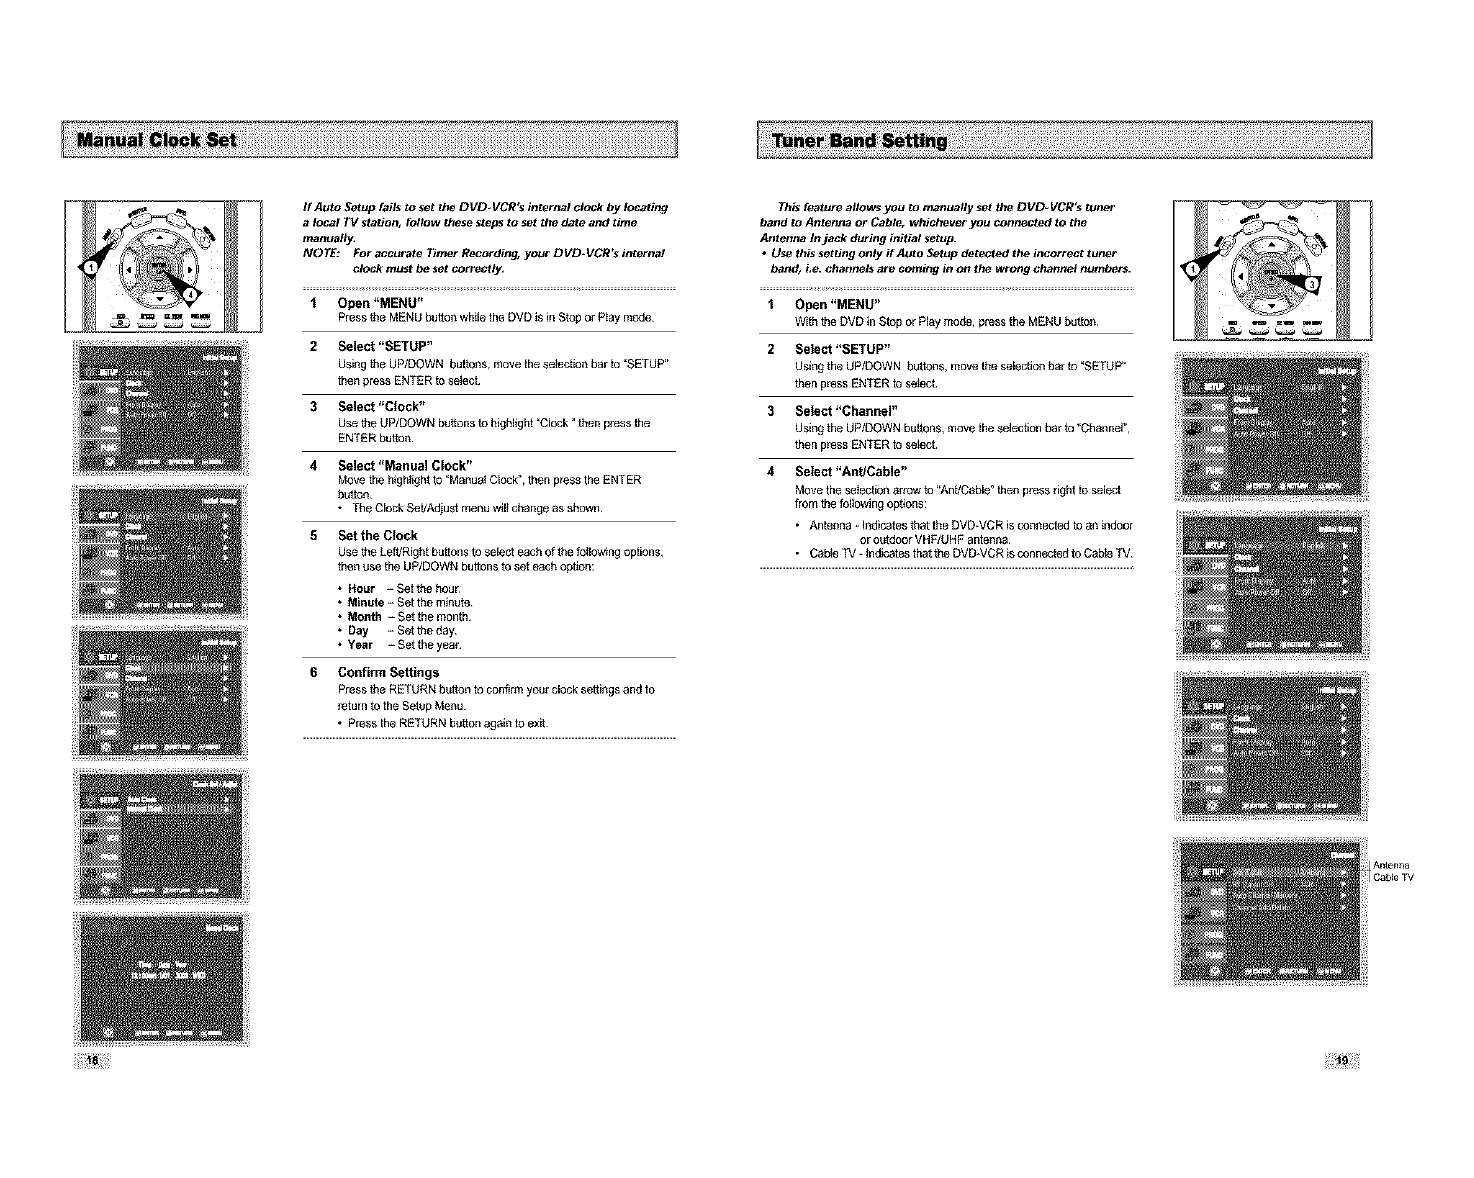
If Auto Setup fails to set the DVD.VCR's internal clock by locating
alocal TM station, follow these steps to set the date and time
manua_
NOTE: For accurate Timer Recording, your DVD.VCR's internal
clock must be set cortecMy,
IOpen "MENU"
Press the MENU button wMle the DVD is in Stop or P_aymode
2 Select "SETUP"
Using the UP/DOWN buttons, move the seSection bar to "SETUP"
then press ENTER to select
3Select "Clock"
Use the UP/DOWN buttons to higMigM "Clock" then pl_ss the
ENTER button
4Select "Manual Clock"
Move the higMight to "Manua_ Clock", then pl_ss the ENTER
button
• The Clock Set/AdiuM menu wil_change as shown
5Set the Clock
Use the Left/Right buttons to select each of the fotlowmg options,
then use the UP/DOWN buttons to set each option:
•Hour -Setthehour
•Minute -Set the minute
•Month -Set the month
•Day -Set the day
•Year -Settheyea_
6 Confirm Settings
Press the RETURN button to confirm your clock settings and to
_turn to the Setup Menu
• Press the RETURN button again to exit
This feature allows you to manually set the DVD- VCR's tuner
band to Antenna Or Cable, whichever you connected to the
Antenna In jack during initial setup.
•Use this setting only if Auto Setup detected the locotrect tuner
bend_ L_ channels are coming in On the wrong channel numbers.
1 Open "MENU"
With the DVD in Stop or Play mode, press the MENU button
2 Select "SETUP"
Using the UP/DOWN buttons, move the sele_on bar to "SETUP"
then pl_ss ENTER to seSect
3Select "Channel"
Using the UP/DOWN buttons, move the selection bar to "Channel",
then pl_ss ENTER to seSect
4 Select "Ant/Cable"
Move the selection arrow to "AUt/CabW' then pl_ss light to select
from the fol_owing ophons:
• Antenna thdicates that the DVD_VCR is connected to an indoor
or outdoor VHF/UHF antenna
•Cabie TV - thdicates that the DVD*VCR is connected to Cable TV
Antenna
Ca{)le TV
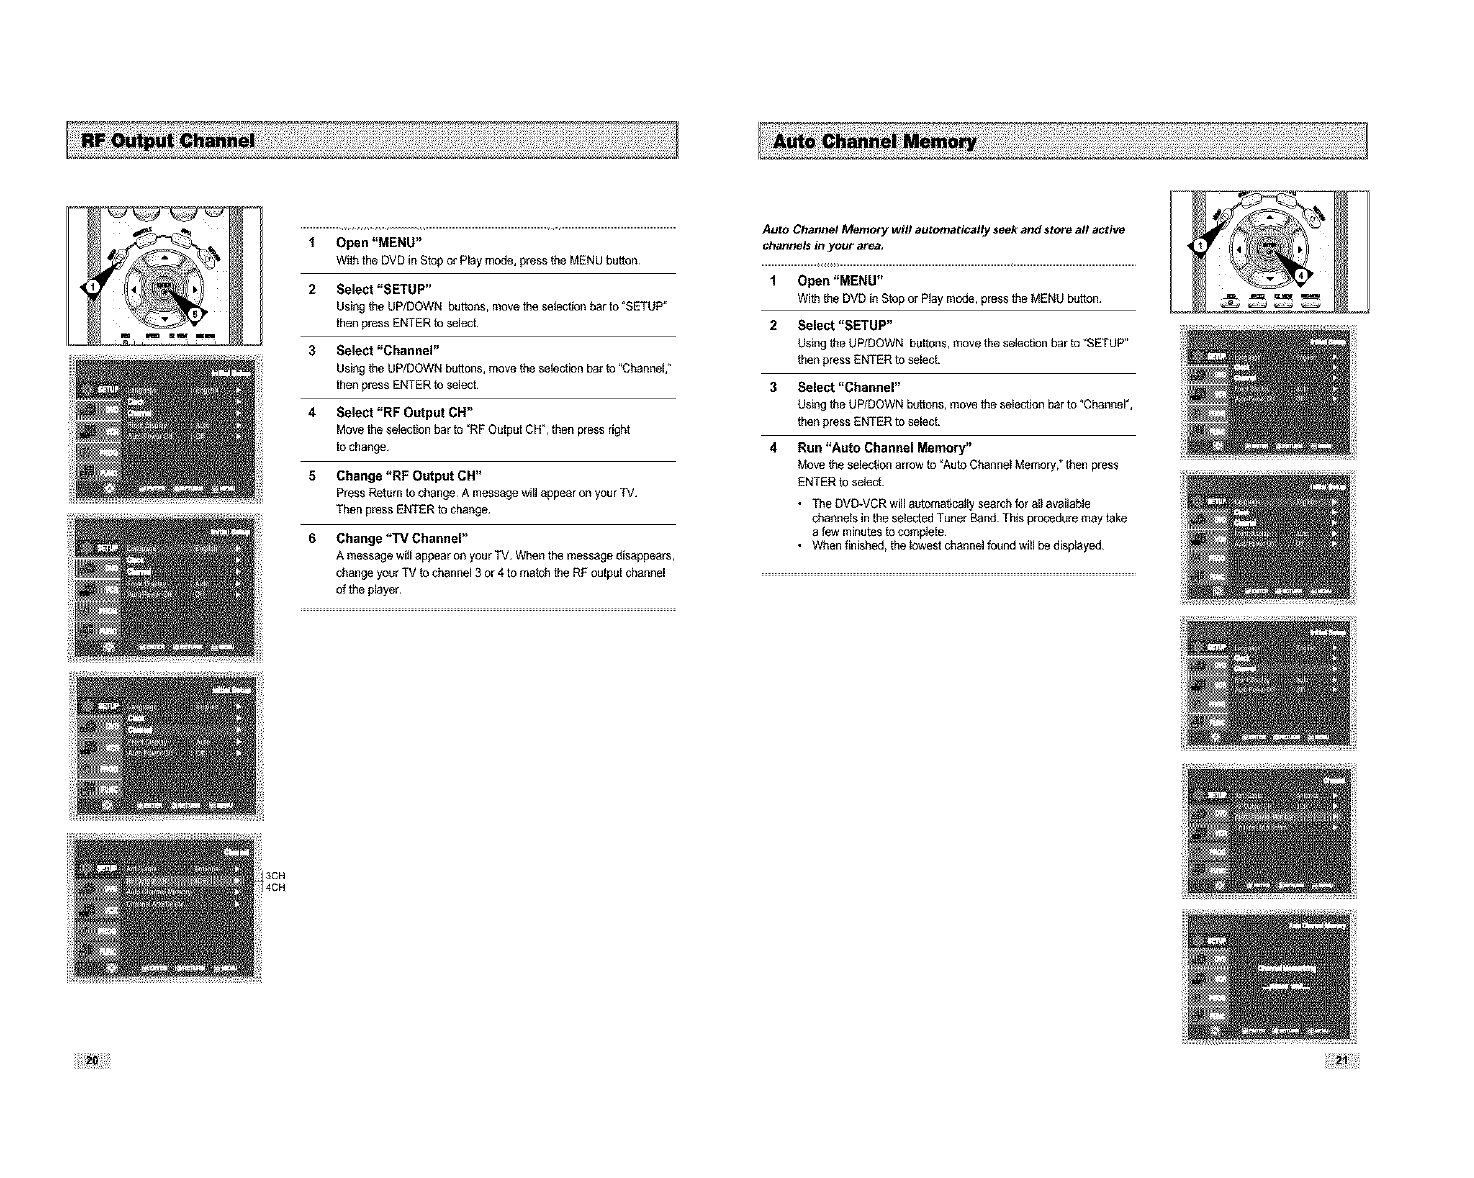
1Open "MENU"
With the DVD in Stop ol Play mode, press the MENU bution
2 Select "SETUP"
Using the UP/DOWN buttons, move the se_echon bar to "SETUP"
then press ENTER to select
3 Select "Channel"
Using the UP/DOWN buttons, move the selection ba_ to "Channel,"
then press ENTER to select
4Select "RF Output CH"
Move the selection bar to "RF Output CH", then press right
to change
5 Change "RF Output CH"
Press Return to change A message will appear on your TV
Then pl_ss ENTER to change
6 Change "33/Channel"
A message wiII appear on your TV When the message disappears,
Auto Channel Memory will automatically seek and store all active -"_"" ="1
channels in your area, I1Open "MENU"
WiththeDVDinStoporPiaymode, presstheMENUbutton _ _&_ _ _ _ ,_
2Select "SETUP"
Using the UP/DOWN buttons, move the selection bar to "SETUP"
then press ENTER to select
3Select "Channel"
Usthg the UP/DOWN buttons, move the selec_on bar to "ChanneF,
then press ENTER to select
4 Run "Auto Channel Memory"
Move the selection arrow to "Auto Channe_ Memory," then press
ENTER to select
•The DVD*VCR will automahca_ly search thl all available
channels in the selected Tuner Band This procedure may take
a few minutes to complete
• When finishag, the ioweM channel found will be displayag
changeyourTV to channel3 or4 tomatch the RF outputchannel ....................................................................................................................................................................................................................................................................
of theplayer¸
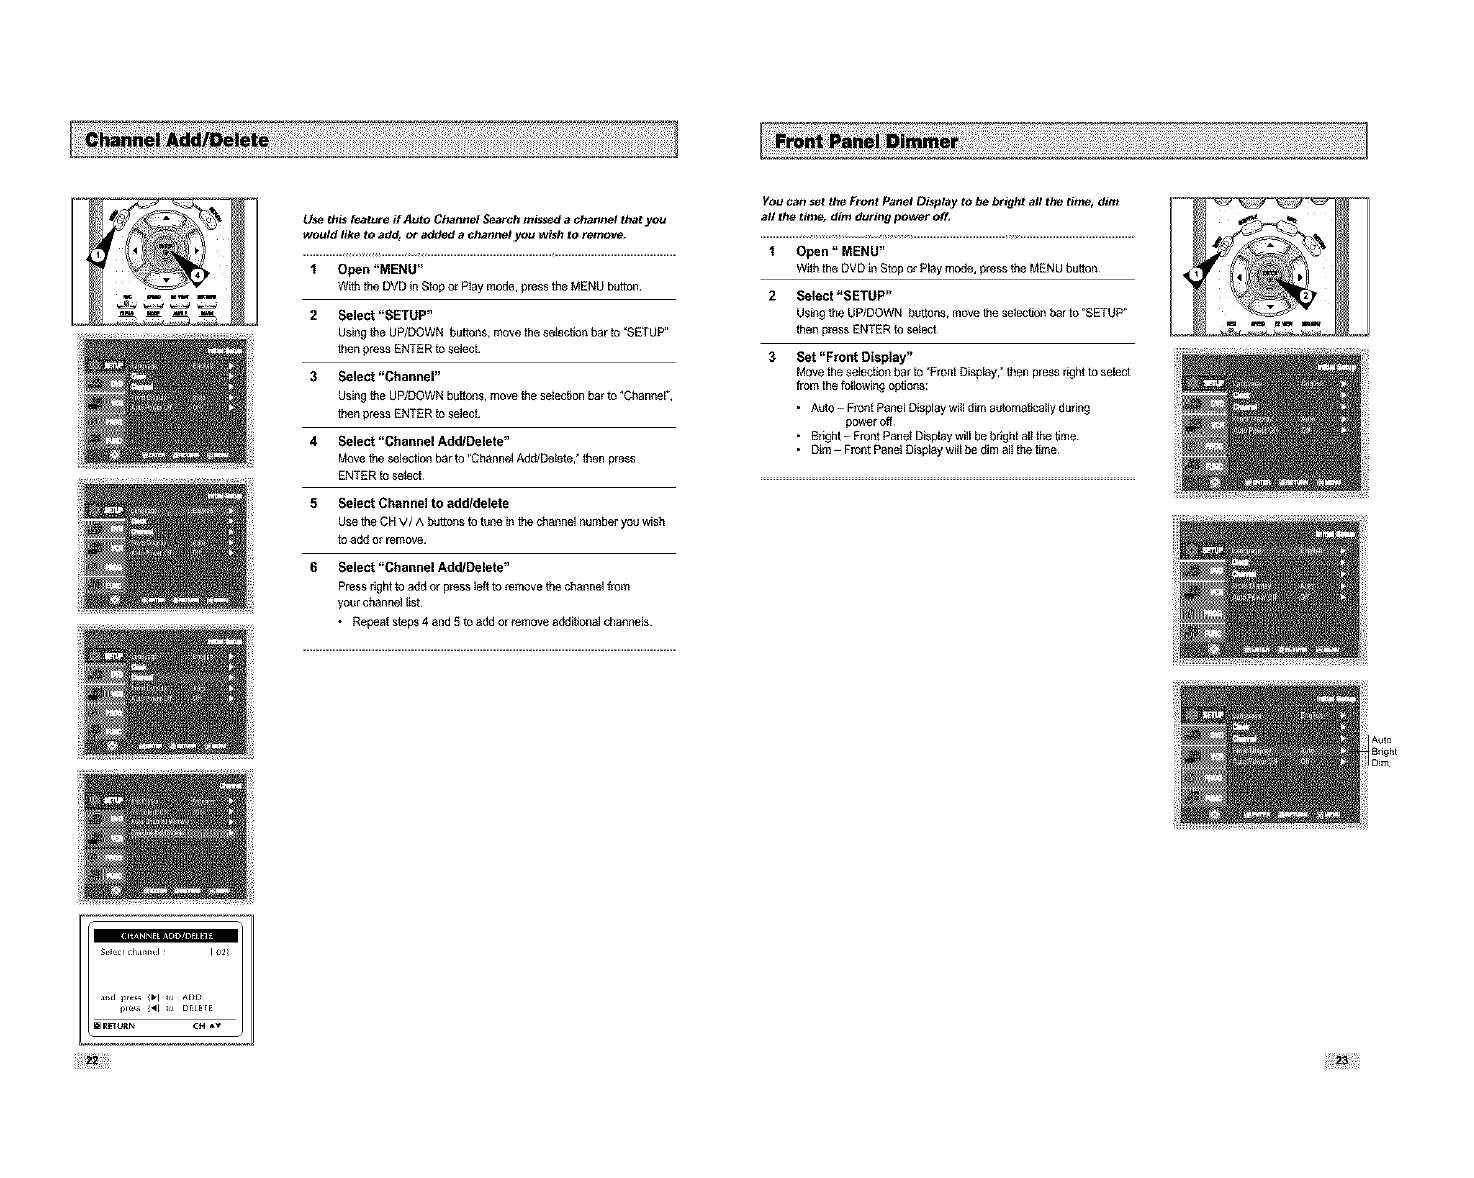
Use this feature if Auto Channel Search missed a channel that you
would like to add_ ot added a channel you wish to remove.
iOpen "MENU"
With the DVD in Stop el P_ay mode, press the MENU butthn
2 Select "SETUP"
Using the UP/DOWN buttons, move the selection bar to "SETUP"
then press ENTER to select
3 Select "Channel"
Using the UP/DOWN buttons, move the selection ba_to "ChanneF,
then press ENTER to select
4Select "Channel AddlDelete"
Move the selection bar to "Channel Add/DeSete,* then press
ENTER to seSect
5Select Channel to addldelete
Use the CH M/A buttons to t/_ne inthe channel number you wish
to add Orremove
6 Select "Channel AddlDelete"
Press right to add or pl_ss _ett to _move the channel f_om
yo/_r channel list
• Repeat steps 4 and 5 to add or _move additional chanl_eis
YOU can set the Front Panel Display to be bright all the time_ dim
all the time, dim during power off,
iOpen" MENU"
W_h the DVD in Stop el Play mode, press the MENU button
2 Select "SETUP"
Using the UP/DOWN buttons, move the selection bar to "SETUP"
then pl_ss ENTER to select
3 Set "Front Display"
Move the selection bar to 'Front Display, _then press right to select
from the following options:
•Auto -Fl_nt Panel Display will dim automatically dpeng
power off
•Bright - Front Pane_ Display will be bright all the time
• Dim - Front Panel Display will be dim all ttie time
Auto
B_ght
Dim
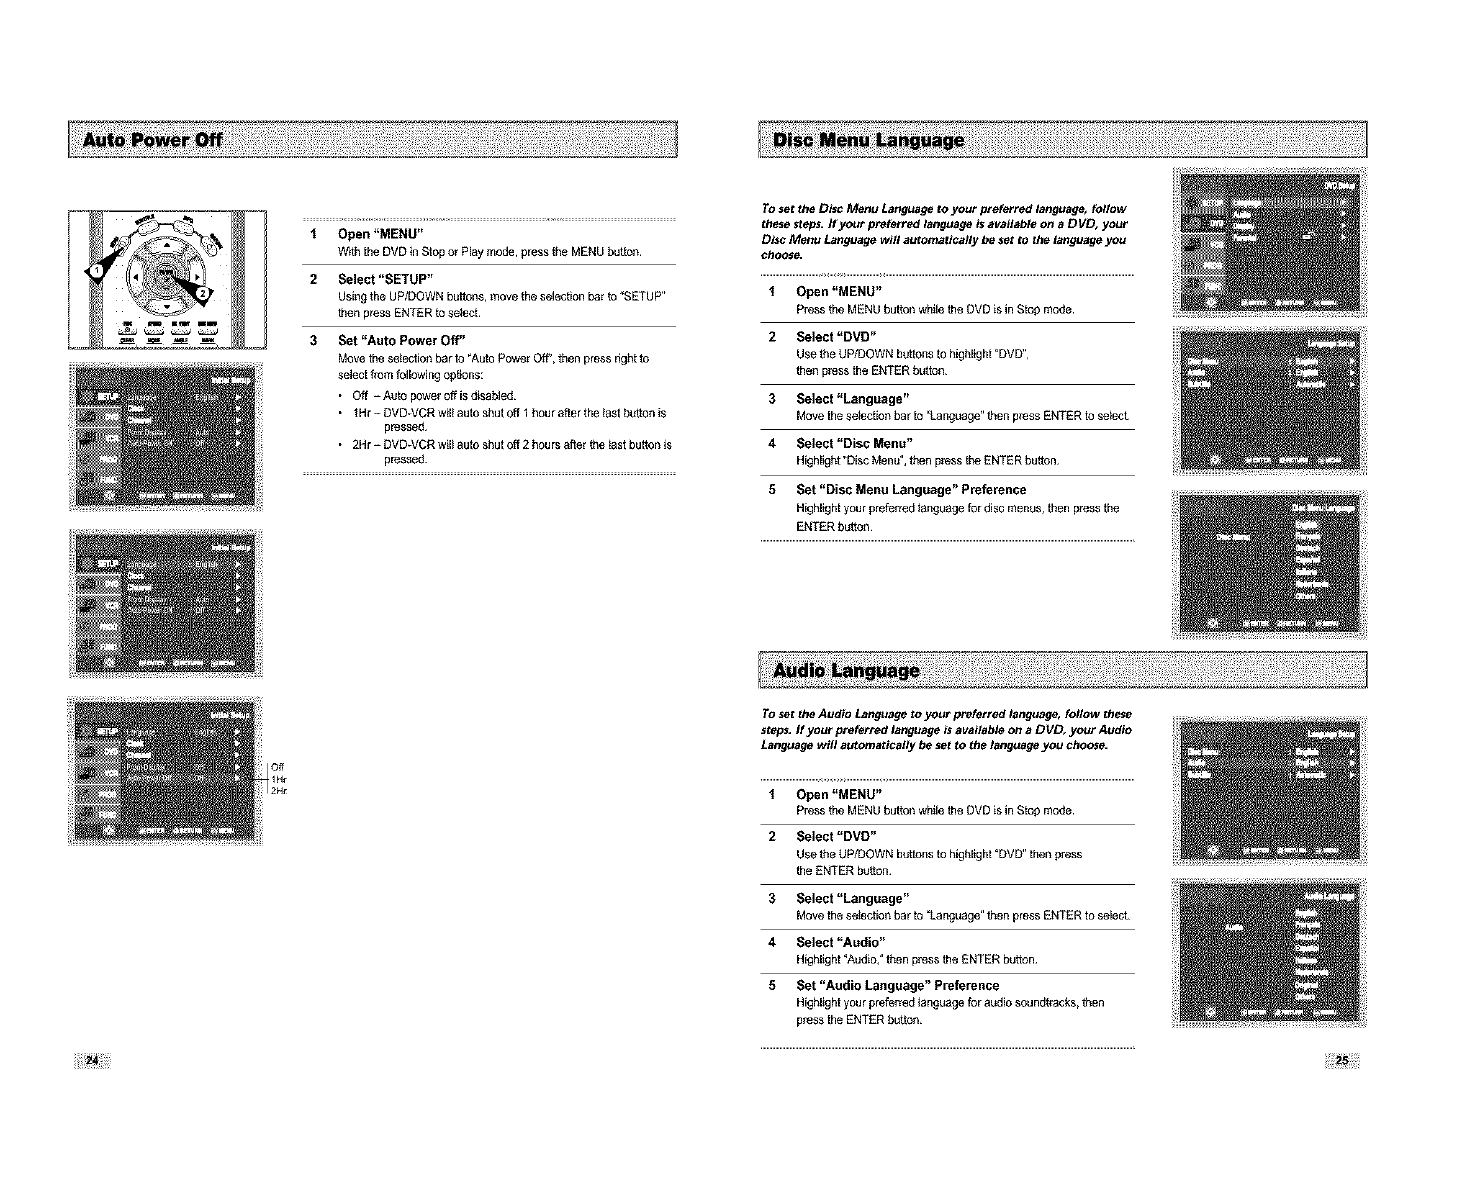
To set the Disc Menu Language to your preferred language_ follow
these steps, If your preferred language is available On a DVD_ your
Disc Menu Language will automatically be set to the language you
choose.
1 Open "MENU"
Press the MENU but{on whilethe DVD is inStop mode
2 Select "DVD"
Use the UP/DOWN buttons to highlight "DVD",
then pl_ss the ENTER button
3Select "Language"
Move the seSecgon bar to "Lang/zage" then pless ENTER to seSect
4 Select "Disc Menu"
Highlight "Disc Menu", then pless the ENTER button
5 Set "Disc Menu Language" Preference
Highlight your preferred _anguage for disc menus, then pl_ss the
ENTER button
oft
IHr
2H_
To set the Audio Language to your preferred language_ follow these
steps, If your preferred language is available on aDVD, your Audio
Language will automatically be set to the language you choose.
'_ Open "MENU"
Press the MENU but{on whilethe DVD is inStop mode
2 Select "DVD"
Usethe UP/DOWNbuttonsto highlight "DVD"then press
theENTERbutton
3
4
5
Select "Language"
Movethe seSecgonbarto "Lang/zage"then press ENTERto select
Select "Audio"
Highlight_Audio,_then p_ss theENTERbutton¸
Set "Audio Language" Preference
Highlightyour preferred_anguagefor audiosoundt_'acks,then
p_ss the ENTERbutton
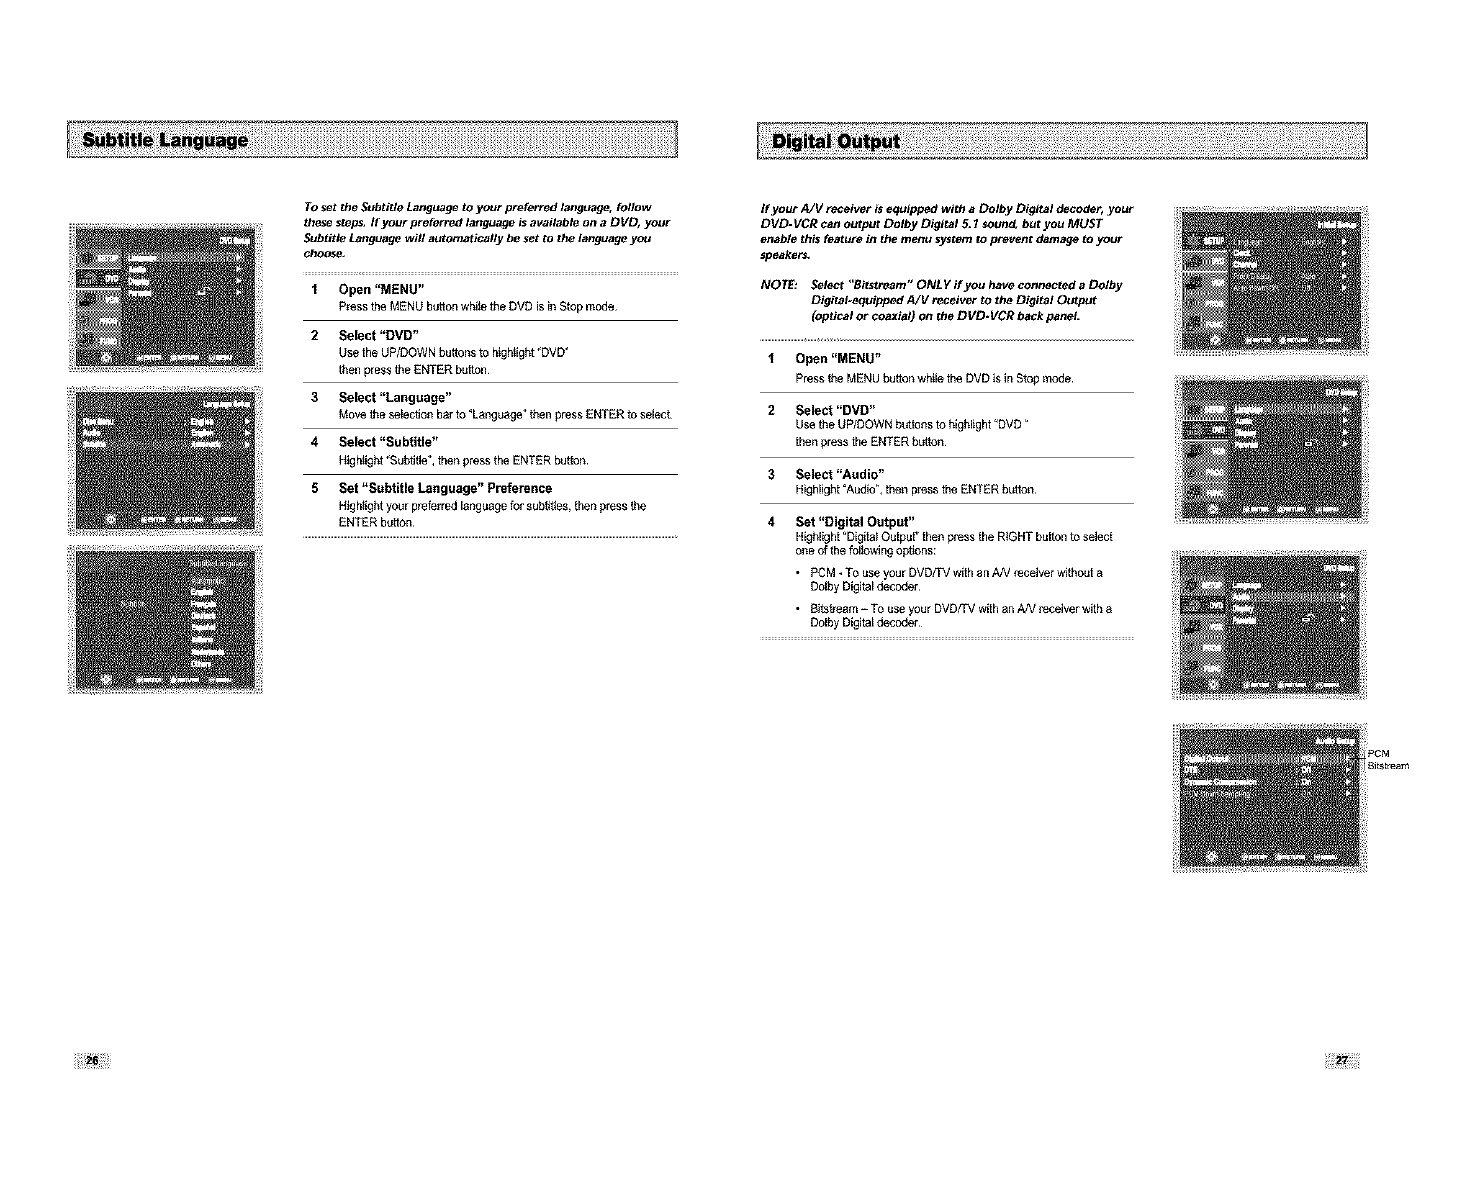
TO set the Subtitle Language to your preferred language, follow
these steps, M your preferred language is available on aDVD_ your
Subtitle Language will automaticall_v be set to the language you
choose,
1 Open "MENU"
P_ss the MENU button whi_ethe DVD is in Stop mode
2 Select "DVD"
Use the UP/DOWN buttons to higMight "DVD"
then press the ENTER button
3Select "Language"
Move the selec_on bar to "Language" then press ENTER to selec_
4Select "Subtitle"
Hig h_ight"SubhtJe", then press the ENTER button
5 Set "Subtitle Language" Preference
Hig h_ightyour pl_felred iaaguage for subht_es, then press the
ENTER bu_ton
If your AJV receiver is equipped with a Oolby Digital decoder, your
DVD- VCR can output Dolby Digital _I sound, but you MUST
enable this feature in the menu system to prevent damage to your
speaker_
NOTE: Select "Bitstteam" ONL Y ffyou have cormected a Dolby
Digitahequipped A/V receiver to the Digital Output
(optical ot coaxial) on the DVD-VCR beck panel.
iOpen "MENU"
Press the MENU button while the DVD is in Stop mode
2 Select "DVD"
Use the UP/DOWN buttons to highiig M "DVD"
then press the ENTER button
3Select "Audio"
Highlight "Audio", then pl_ss the ENTER button
4Set "Digital Output"
Highiig M "Digita_ Output" then press the R_GHT button to select
ol_e of the fol_owiag options:
•PCM _To use your DVD/TV wdh an A/V _ceiver w_thout a
Dolby Digital decoder
•B_tream -TO use your DVD/TV with an AN l_ceiver with a
Dolby Digital deGager
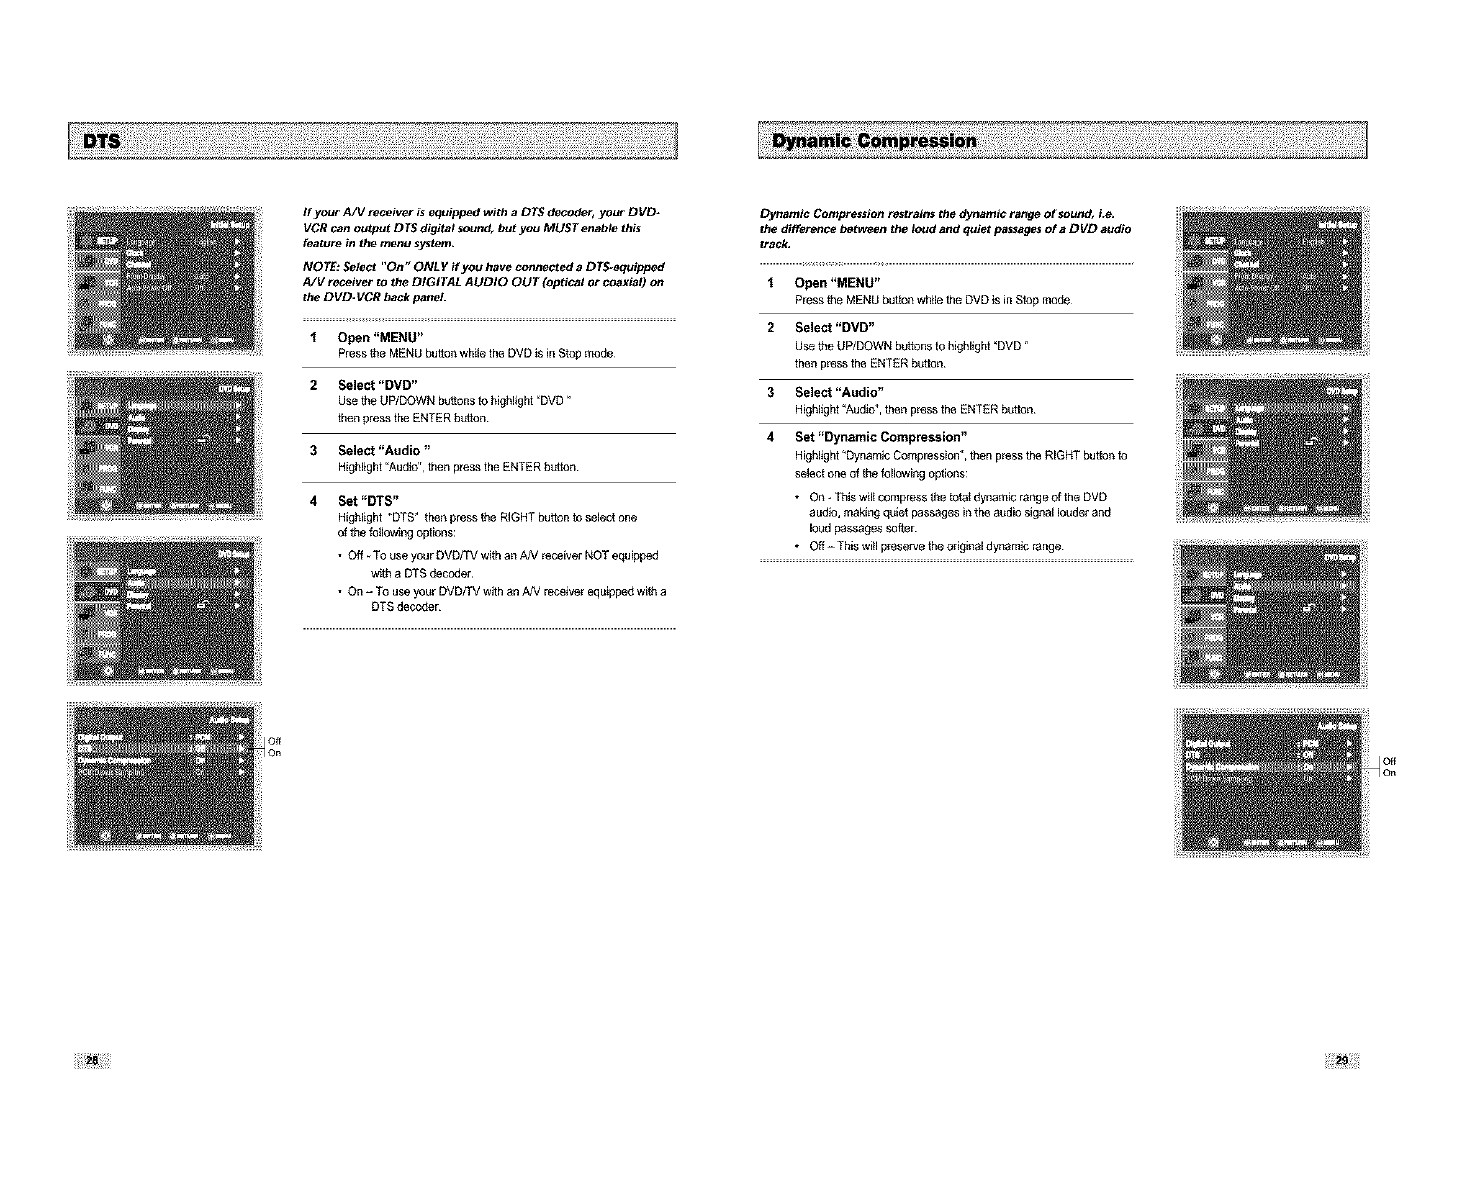
If your A/V receiver is equipped with a DTS decoder_ your DVD*
VCR can output D TS digital sound, but you MUST enable this
feature in the menu system.
NOTE: Select "On" ONLY if you have connected a D TS_equipped
A/V receiver to the DIGITAL AUDIO OUT (optical or coaxial) on
the DVD.VCR back panel.
iOpen "MENU"
PresstheMENUbutionwMlethe DVDis inStopmode
2 Select "DVD"
Usethe UP/DOWNbuttonsto highlight 'DVD"
then pressthe ENTERbutton
3Select "Audio"
HigMight"Audio",then pl_ss the ENTER button
4Set "DTS"
Highlight "DTS' then press the RIGHT button to select one
of the fotlow_ag options:
•Off To use your DVD/TV with an NV _ceiver NOT equipped
"Mth a DTS decoder
• On - To use your DVD/[V with an A/V receive_ equipped with a
DTS decoder.
Dynamic Compression restrains the dynamic range of sound, i.e,
the difference between the loud and quiet passages of a DVD audio
track,
iOpen "MENU"
Press the MENU button while the DVD is in Stop mode
2 Select "DVD"
Use the UP/DOWN buttons to higMight "DVD
then pl_ss the ENTER button
3Select "Audio"
Highlight "Audio", then pl_ss the ENTER button
4Set "Dynamic Compression"
Highlight "Dynamic Compression", then pl_ss the RIGHT button to
select one of the following options:
• On _This wil_ compress the thta_ dynamic raage of the DVD
audio, making quiet passages in the audio signal Ioage_ and
Ioag passages softer
•Off - TMs will p_eserve the odginal dynamic range
Off
On
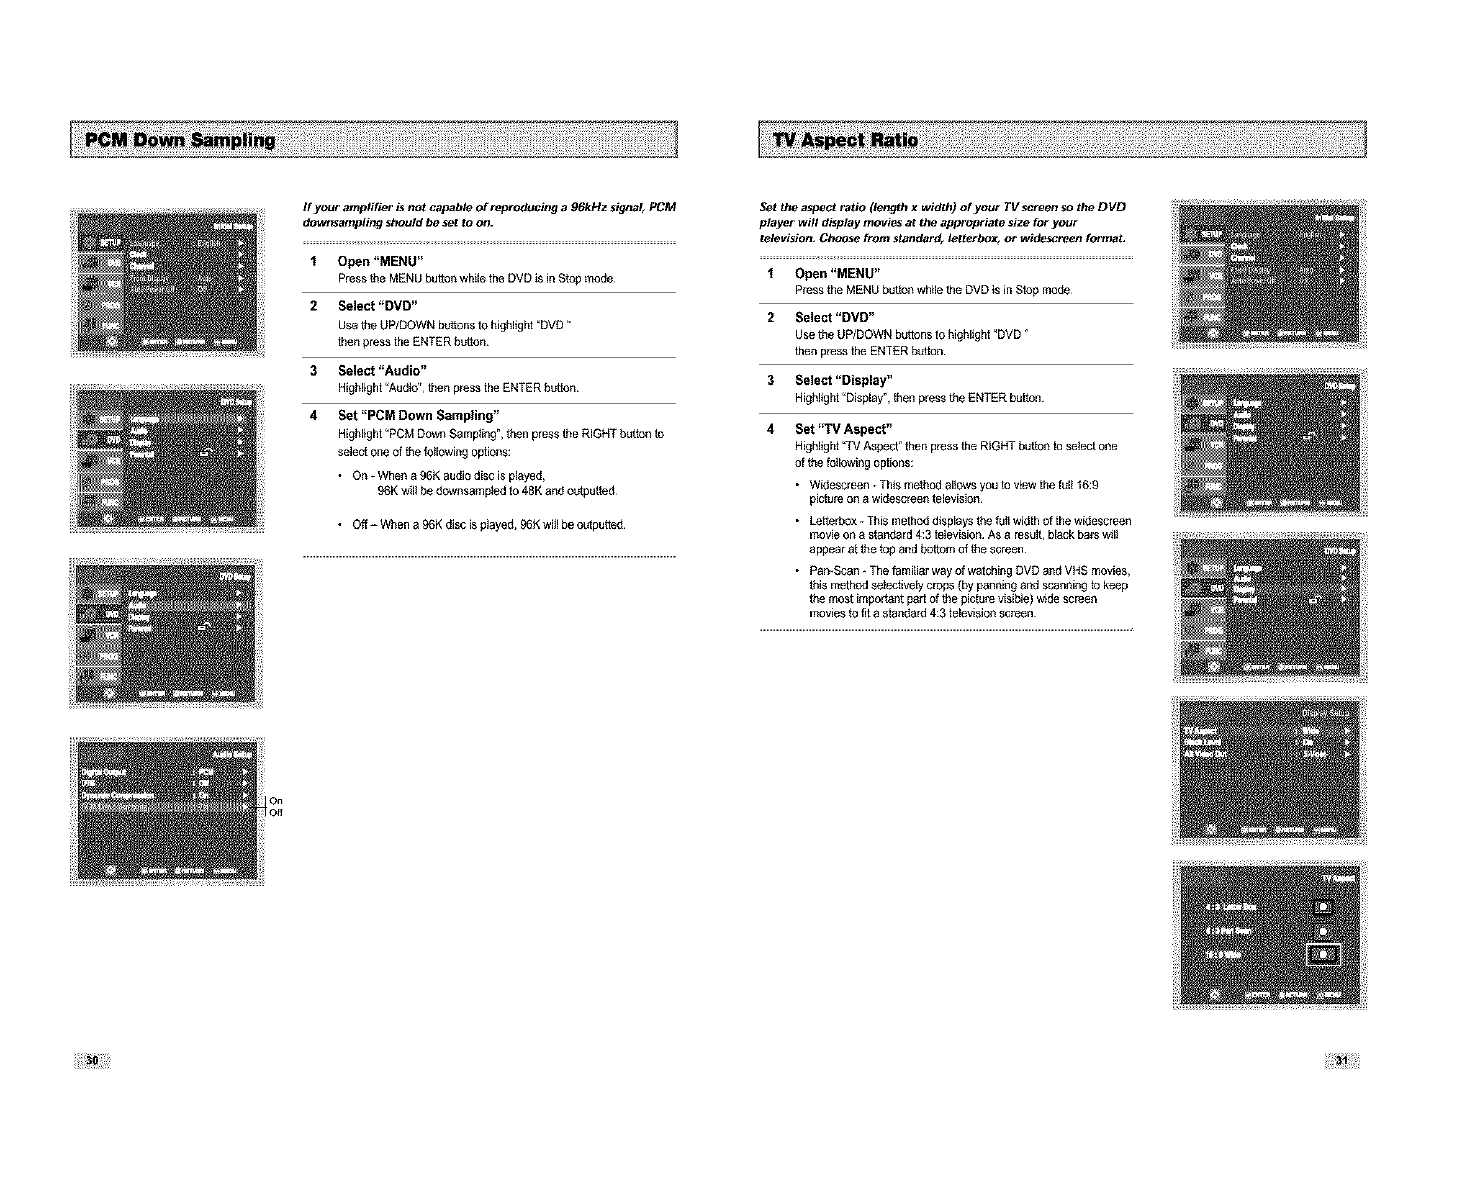
If your amplifier is not capable of reproducing a 96kHz signal_ PCM
downsampfing should be set to on.
iOpen "MENU"
Press the MENU button wMle the DVD is in Stop mode
2 Select "DVD"
Use the UP/DOWN b_tthns to highlight _DVD"
then press the ENTER button
3 Select "Audio"
Higbiight _Audio", then pl_ss the ENTER button
4 Set "PCM Down Sampling"
Highlight "PCM Down Sampling", then press the RIGHT button to
select one of the fotlowil_g options:
•On _When a 96K audio disc is played,
96K w_l_be downsamp_ed to 48K and old3ut_ed
• Off-Whena96Kdiscisplayed, 96Kwi_lbeelgputted
Set the aspect ratio (length x width) of your TV screen so the DVD
player will display movies at the appropriate size for }*our
television, Choose from standard_ fotterbox_ or widescreen formal
iOpen "MENU"
Press the MENU button while the DVD is in Stop mode
2 Select "DVD"
Use the UP/DOWN b_tons to highlight "DVD"
then pl_ss the ENTER button
3Select "Display"
Higbiight "Display _, then press the ENTER button
4 Set "TV Aspect"
Highlight "TV Aspect _then pl_ss the RIGHT button to seSectone
of the following options:
•Widescreen ÷This method allows you to view the fl_l_16:9
picture on a widescreen television
• Letterbo×.Tbismethoddisplaysthethtiwidthofthewidescreen
movie on a standard 4:3 television As a resug, black ba_ wil_
appear at the top a_d bottom of the screen
• PamScan * The familiar way of watching DVD and VHS movies,
this method selecgveiy crops (by panning and scanning to keep
the most important part of the pictu_ visible) w_de screen
movies to fit a standard 4:3 television screen
Io°;
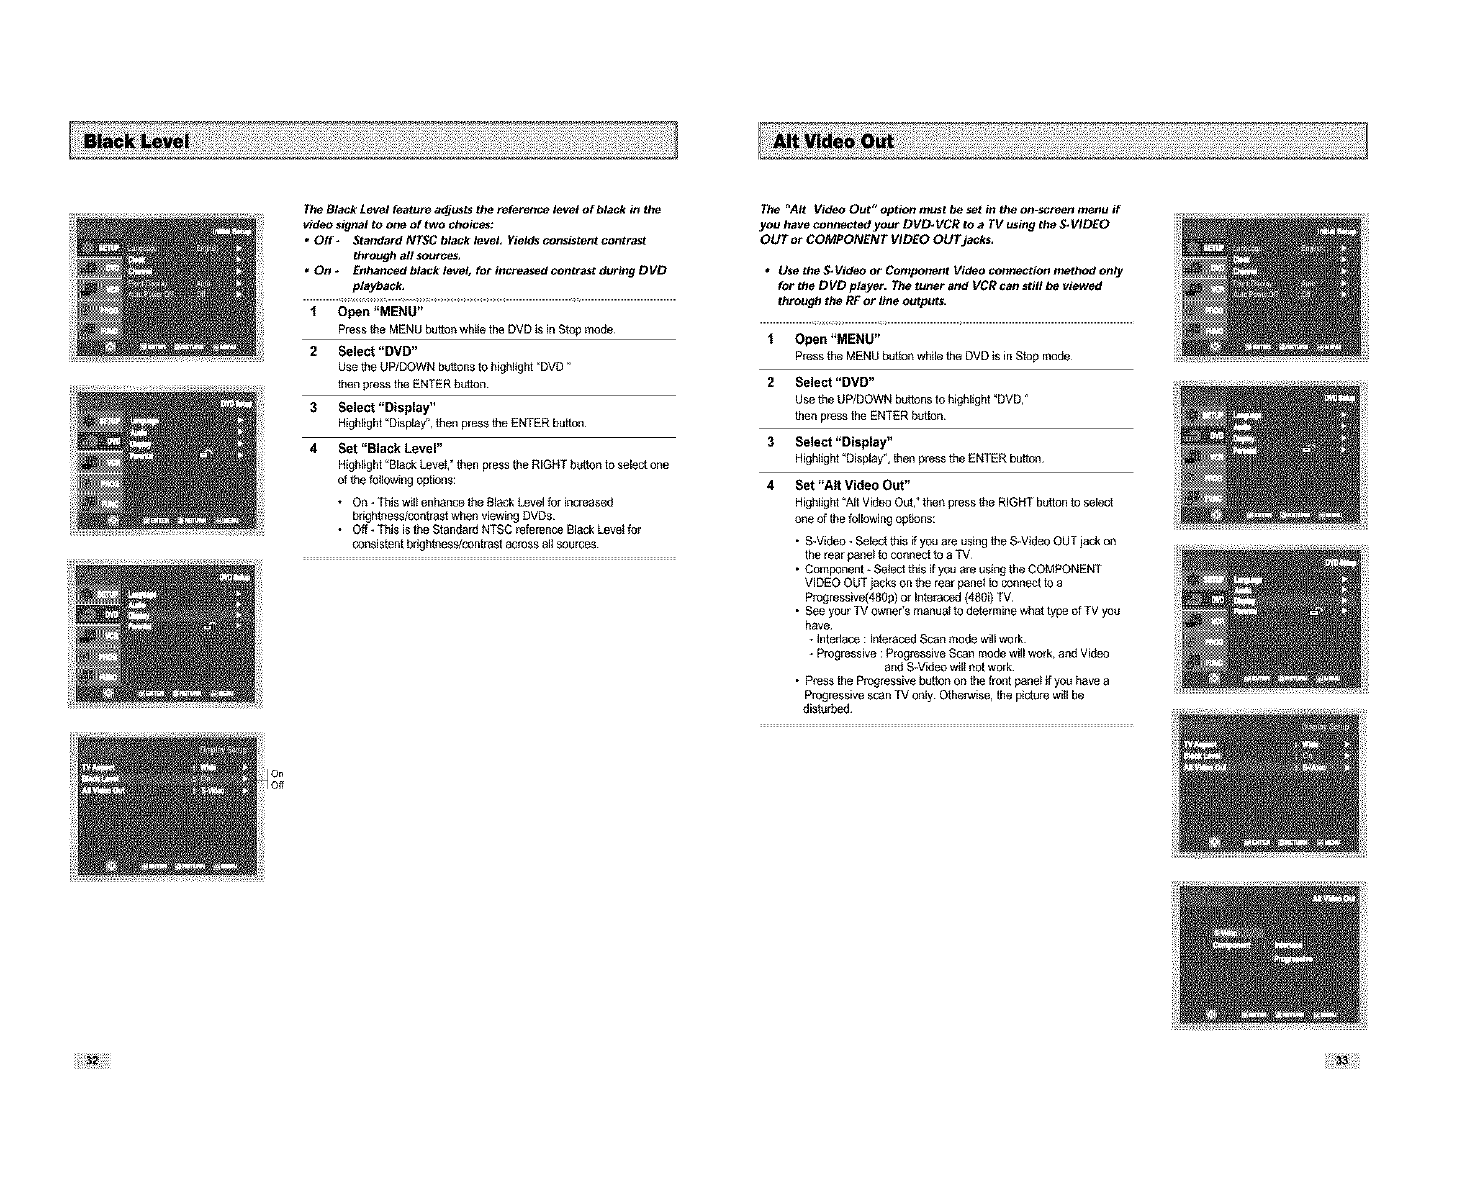
The Black Level feature adjusts the reference level of black in the
video signal to one of two choices:
•Off* Standard NTSC black level, Yields consistent contrast
through all sources,
• On * Enhanced black level, for increased contrast during DVD
playback,
iOpen "MENU"
Press the MENU button wMle the DVD is in Stop mode
2 Select "DVD"
Use the UP/DOWN buttons to highlight _DVD"
then press the ENTER button
3 Select "Display"
HigbiigM _Display", then press the ENTER button
4Set "Black Level"
Highlight "Black Leve_, _then press the RIGHT button to select one
of the following opgons:
• On - This wil_enhance the Black Level for increased
bifghthess/conttast when viewing DVDs
• Otf - This is the Standard NTSC l_thrence Black Level fol
consistent bifghthess/contraM across allsources
The "Air Video Out" option must be set in the on-screen menu if
you have connected your DVD.VCB to a TV using the S.VIDEO
OUT or COMPONENT 1/1DEC) OUT jacks,
•UsethoS.VideoorComponent Videoconnectionmethodonly
for the DVD player. The tunar and VCB can still be viewed
through the BF or line output&
iOpen "MENU"
Press the MENU button while the DVD is in Stop mode
2 Select "DVD"
Use the UP/DOWN buttons to bigblig M "DVD,"
then pl_ss the ENTER button
3Select "Display"
HigbiigM "Display _, then press the ENTER button
4Set "AIt Video Out"
HighiigM "Aif Video OUt," then press the RIGHT button to select
one of the following opgons:
• S-Video • Select this if you a_ usthg the S-Video OUT jack on
the rear panel to connect to a TV
• Component *Select this if you are Using the COMPONENT
VIDEO OUT jacks on the rear pane_ to connect to a
Progressive(_,SOp) ol Inte_aced (480i) TV
• See youz TV owner's manual to detelmine what type of TV you
have
÷ Inteiface : Inte_aced Scan mode will work
÷ Progressive : Pl_gressNe Scan mode will work, and Video
and SWideo will not work
• P_SS the Progressive button on the front panet if you have a
Progressive scan TV only Otherwise, the picture will be
disturbed
4°;
Rating Control is a password protected system that allows you to
block playback of DVDs based on their contenL The system uses an
eight level rating system.
•Myou try to play a DVD that exceeds the selected rating, an error
message will appear,
•Not all discs are rated.
1Open "MENU"
Press the MENU button while the DVD is in Stop mode
2 Select "DVD"
Use the UP/DOWN buttons to highlighl "DVD"
then press the ENTER button
3Select "Parental"
Highlight "Parental", then pl_ss the ENTER button
4Select "Use Password"
Highlight "Use Password," then press the RIGHT button to select
one of the thllowiag options:
• Off -NOpasswold is necessary to view a DVD or to chaage the
Rating Level NO additiona_ settings are necessary
• On ÷A password is necessary to view a DVD and to view the
Rating Level The menu will change as shown
NOTES:
• The grst time "Requag Password" is set to "Yes "you wijl be
pl_mpled to enter a new password
• Ifthe_EnterPasswold"screenappeal_,then"Require
Password" has abea0y been set to "Yes 'P{ease skip to Step 5
• There no Default Passweld
5 Enter Password
Use the numeric buttons (0-9) on the remote control to enter the
4_digit password¸
• Wdte your password down, aed keep it in a safe place in case
you need it to change your setaggs later¸
6Select "Rating Level"
Move the selection ba_to "Rating Level," then press ENTER to
select
7 Change Rating Level
Use the UP/DOWN buttons to seSect one of the following latiags:
• LevelSAbeif • LeveJ4
• Level 7 • LeveJ 3
• Level 6 • LeveJ 2
• Level 5 • Level f Kids Safe
AIJ ratings above the JeveJyou select wiJl alse be b$ocked, eg, if
you block Level 6, then Levels 7and 8 wit[ aJso be blocked
Press ENTER to confirm youz selection
• g you forgot your password, pl_ss power on from a cold start
with no disc in the unit Press the REW and FF buttons
simaganeously on the front pane_ fol 5 seconds The "l_set ok"
message w_lJappear Press the POWER button and the
DVD*VCR wilJ go to the "Auto Seep" mode (See page i 3)
To take full advantage of the movie theater experience that DVD
offers, you may want to connect your DVD- VCR to a complete
Surround Sound system, including an A/V Receiver and six
Surround Sound speakers.
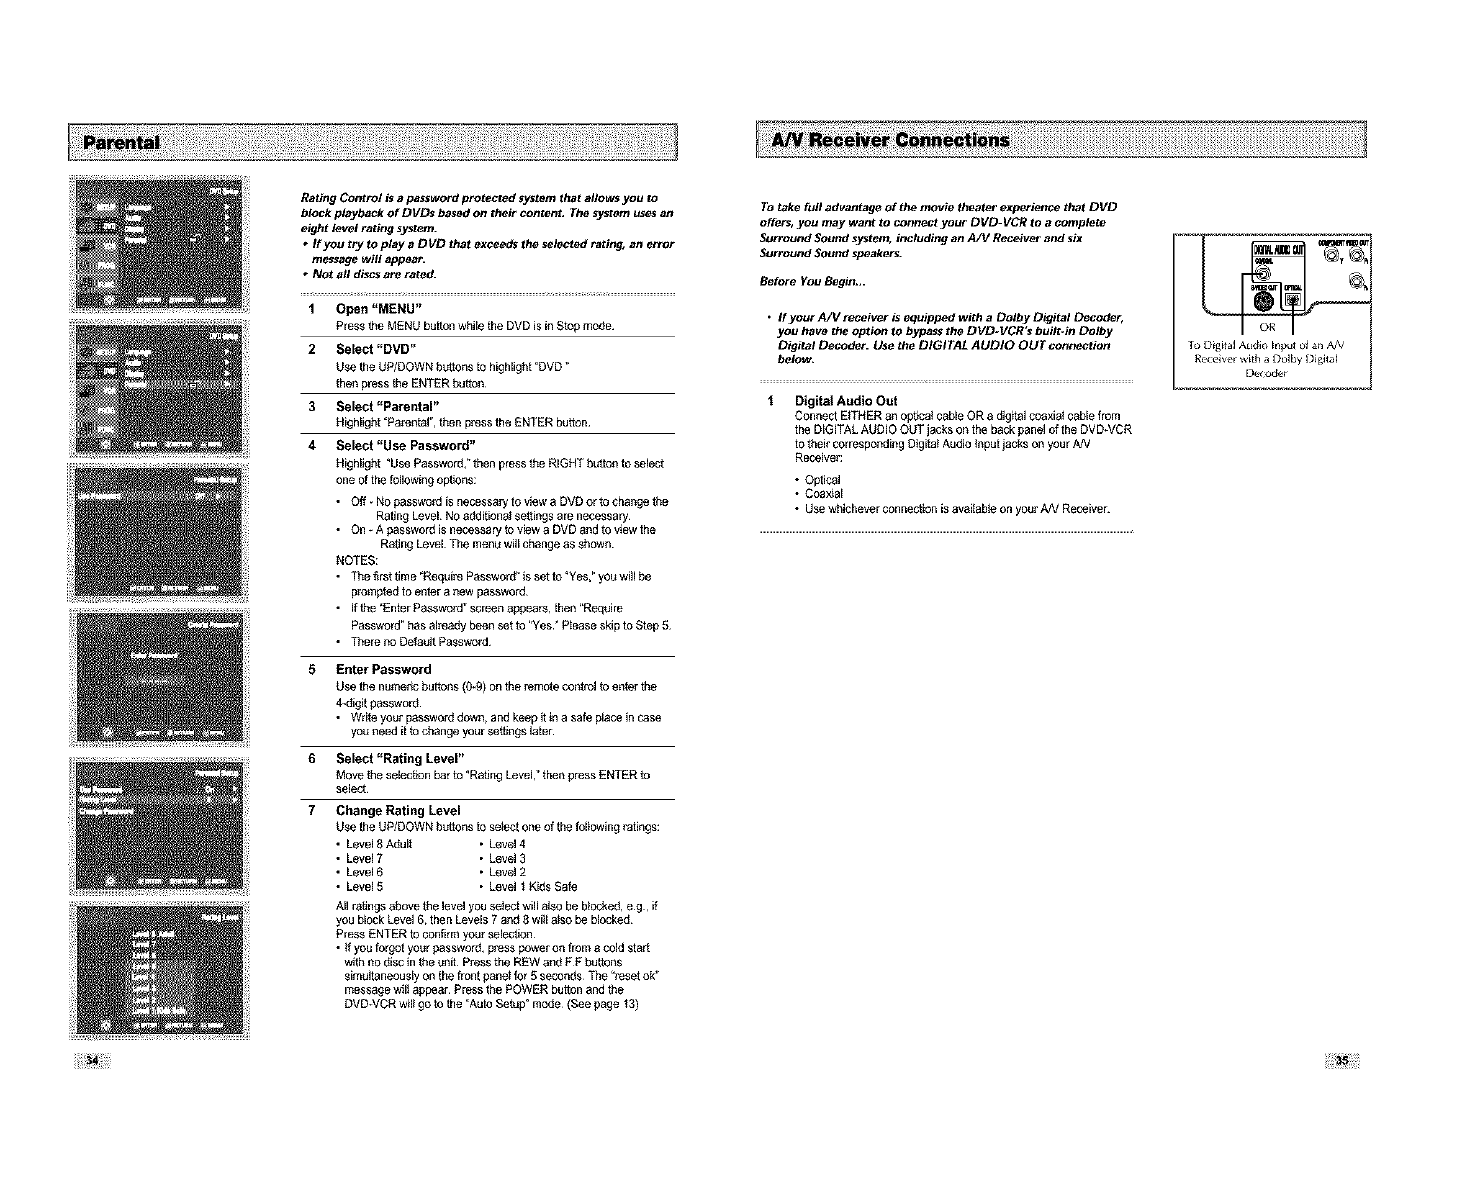
Before You Begin,,.
•Myour A/V receiver is equipped with a Dolby D_ital Decoder,
you have the option to bypass the DVD-VCR's built*in Dolby
Digital Decoder. Use the DIGITAL AUDIO OUT connection
below,
Digital Audio Out
Connect E_THER an ophcat cable OR a dig_l ccaxia_ cable from
the DIGITAL AUDIO OUT jacks on the back panel of the DVD*VCR
to thei_ corresponding Digifat Audio thbet jacks on your AN
Receivel:
• Optical
• Coaxial
• Use whichever connection is available on your AN ReceNeE
u_llwe_
lo Digital AlEdiO h/pul ul an AN
Rel_iver with a Do[by D_gita[
D_ifad_r
During DVD/CD playback you can select from the following
special playback options, TO resume normal playback, press the I_tt
(Play/Pause) button.
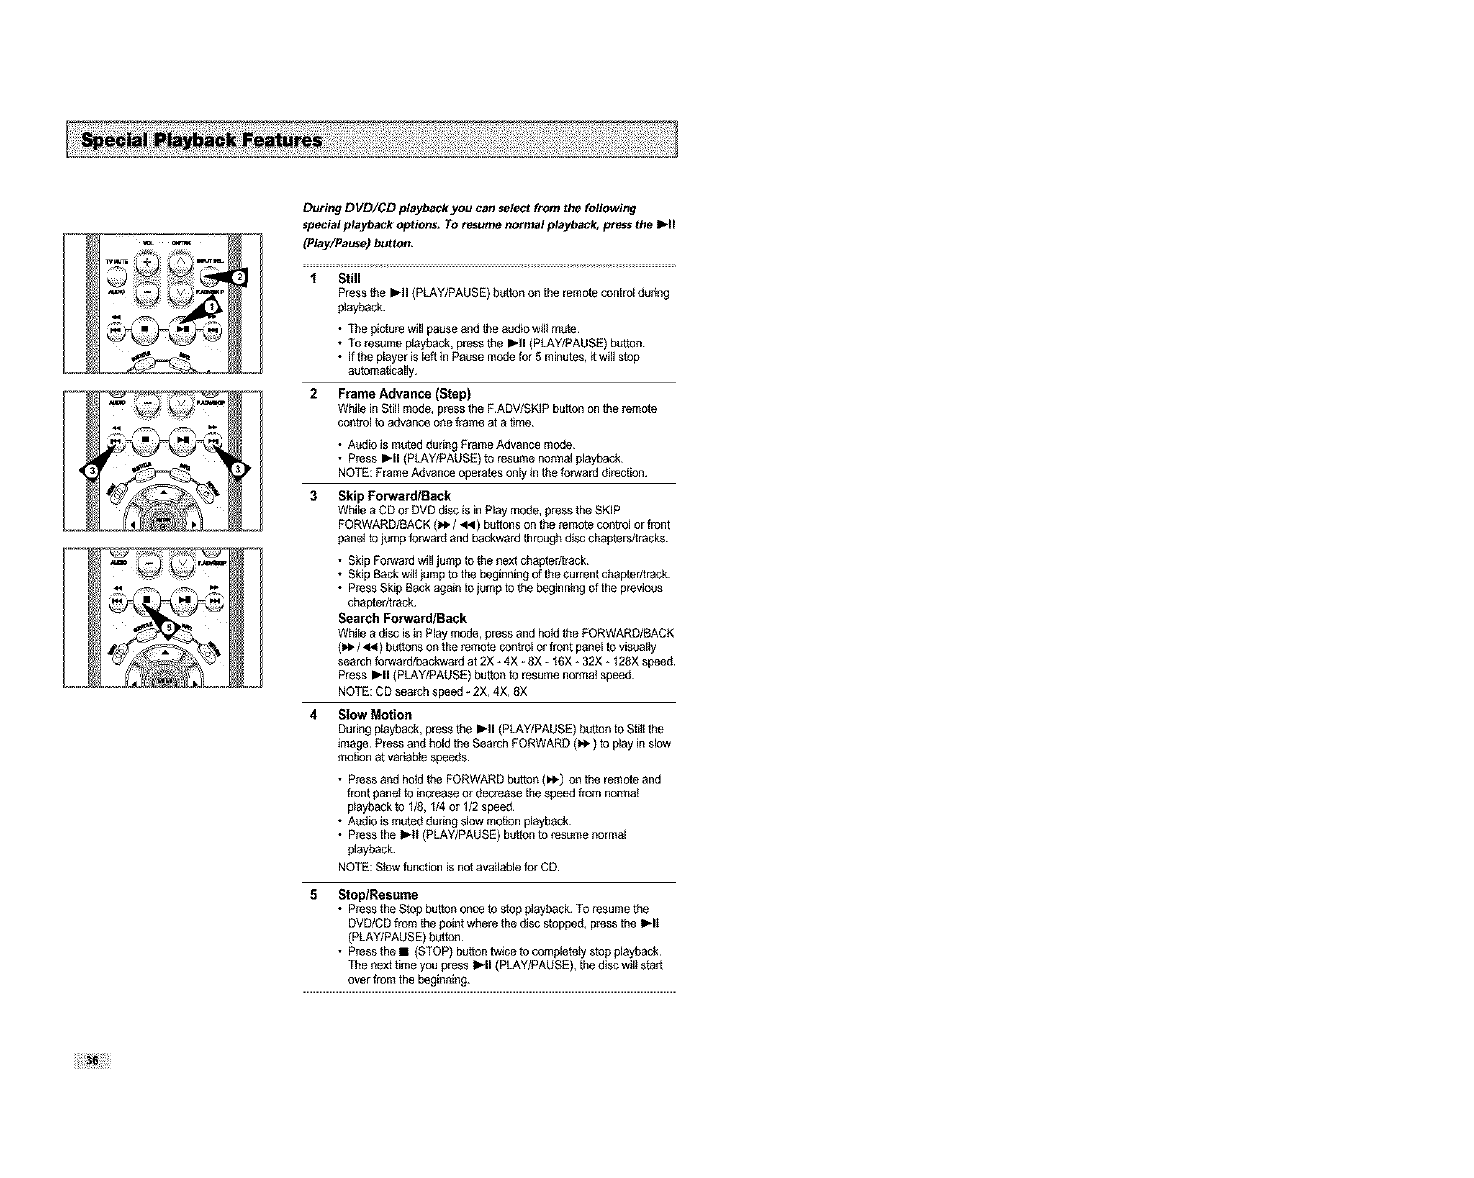
1Still
Press toe to-II (PLAY/PAUSE) button on the remote control during
playback
•The pictu_ will pause and the audio wil_mute
• To resume playback, press the _'tt {PLAY/PAUSE) button
• tt the player is left in Pa/_se mode for 5 minutes, _twill stop
autemakcatly
2 Frame Advance (Step)
While in Still mode, pl_ss the P ADV/SKIP button on tee remote
control te advance one f_me at a time
• Aodio ismuted duringFrameAdvancemode
• Press)-II {PLAY/PAUSE}te resumenormalplayback
NOTE:FrameAdvanceoperatesonlyin the forwardrii_ction
3Skip ForwardlBack
While a SD orDVD disc isinPlaymode.pressthe SKiP
FORWARD/BACK(_€-/ ,q, )buttonson the remotecontrol orfront
panelto jump forward and backwardthroughdisc cbaptersttracks
• SkipForwardwill jump tothe nextchapter/track
• SkipBackw_i_jump to the beginningof thecurrentchapter/track
• PressSkipBackagain to jump to the beginningof the p_vious
chapter/track
Search ForwaodlBack
While a disc isin Playmode,pressand hold theFORWARD/BACK
(_€-/._l ) buttons onthe _mofe controlorfront panelto visually
search forward/backwardat 2X _4X• 8X - fgx *32X*t28X speed
Press_-II (PLAY/PAUSE)buttonto resumenorma_speed¸
NOTE:CD sea_h speed_ 2X. 4X. 8X
4Slow Motion
Duringplayback,pressthe _-tt (PLAY/PAUSE)button to Still the
image¸Pressand boldthe SearchFORWARD(_._*)to play inslow
motion at variable speeds¸
• Pressand holdthe FORWARDbutton (='P0on the remoteand
front panelto increaseOrde3reasethe speed from norma_
p_aybackto 1/8, 1/4 or 1/2speed¸
• Aodio ismuted duringslow me,on playback¸
• Pressthe I_g (PLAY/PAUSE)ba_onto _sume normal
playback¸
NOTE:Stowfunction isnotavailablefor CD
5 StoplResume
• Press the Stop button once to step playback To resume the
DVD/CD from toe point where the disc stepped, pl_ss the I_1t
(PLAY/PAUSE) button
• Press the •(STOP) button twice to complatety stop playback
The next time you press I_11 (PLAY/PAUSE), the disc will start
over from the beginning.
Man}* DVDs feature their own menu systems, where you can select
Titles, Chapters_ Audio Tracks_ Subtitle$_ and special disc features_
such as movie trailer$_ and information on the cast. Use the_e
button5 to make SelectJotz$ Jn the Disc nlenu$.
1 DISC MENU
Pressto accessthe DVD'sDisc menu,if applicable
2Press A,V or • , • to nawgute through DVD's Disc menu
oplJons
•Press up, down, left and right to highlight menu choices¸
3 ENTER ButtOn
Press to make your seie_ons in the Disc menu.
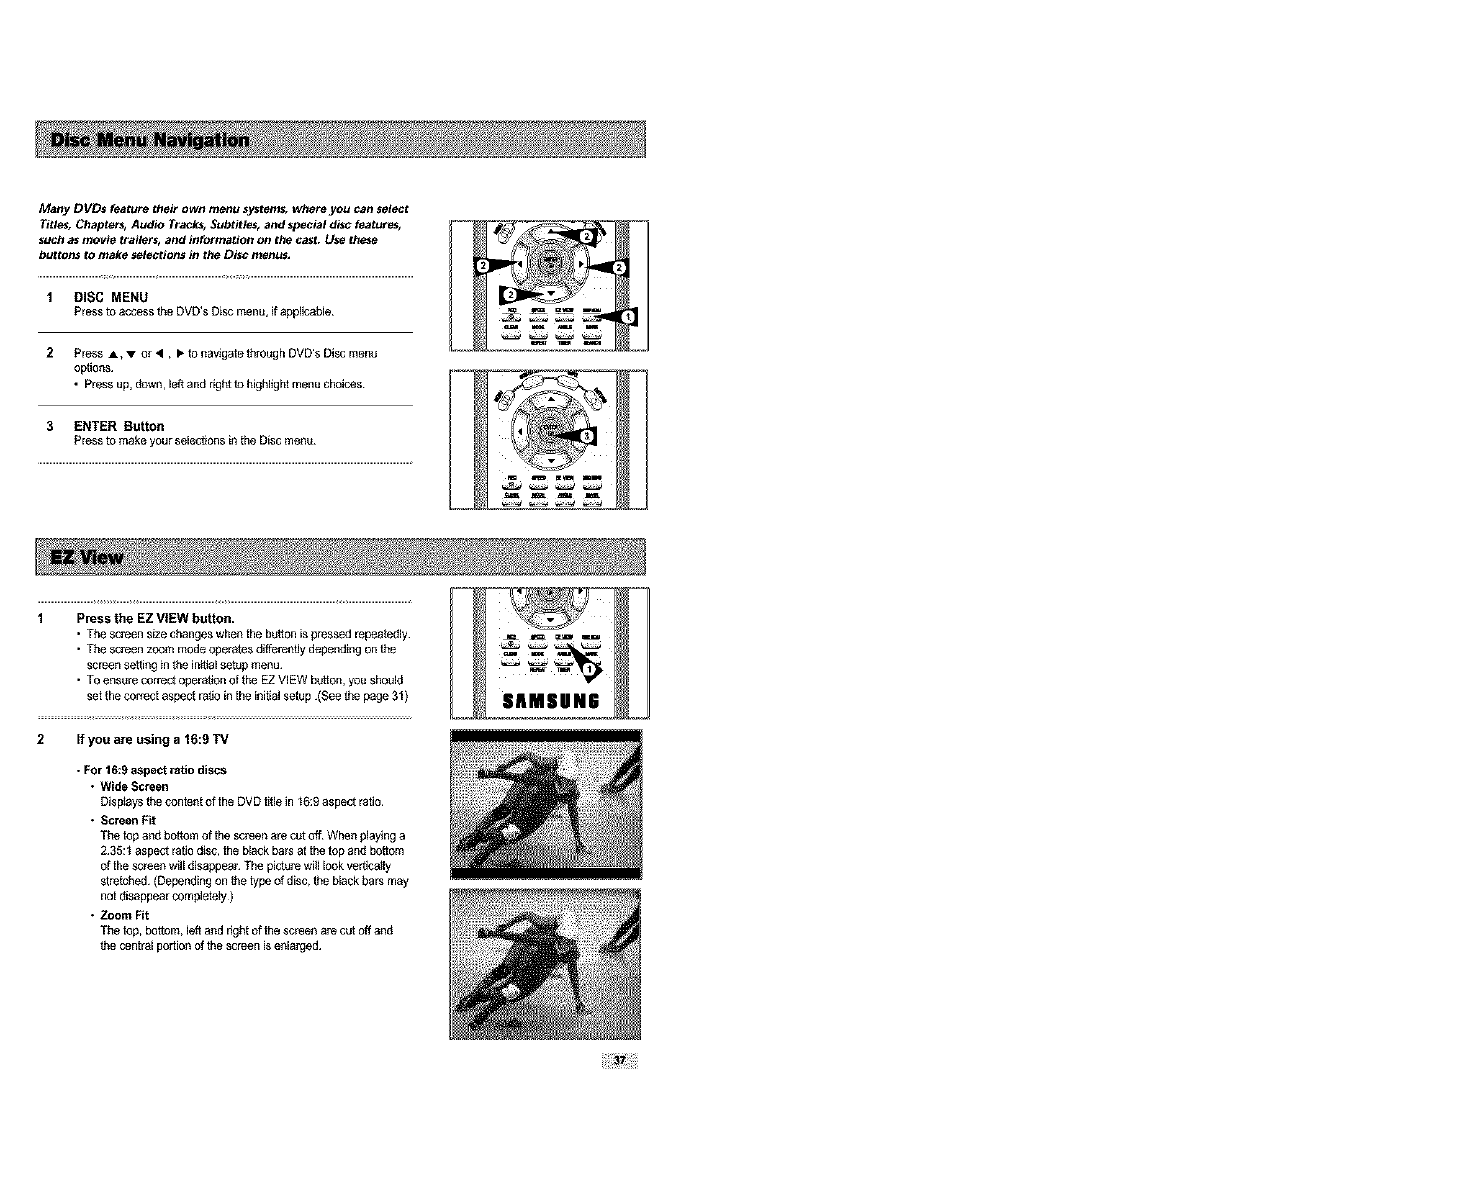
1 Press the EZ VIEW button.
•The screen size changes when the button is pressed repeatedly
• The screen zoom mode operates differently depending on the
screen sefting in the inlttal setdp menu
• TO ensure correct operation of the EZ ViEW button, you should
set the correct aspect ratio in the initial setup .(See the page 31)
2If you are using a 16:9 TV
- For 16:9 aspectratio discs
•WideScreen
DispSaysthecontentof theDVD titlein t6:9 aspect ratio
•ScreenFit
Thetopand bottomof the sc_en are cut off Whenplayinga
2¸35:1aspect ratiodisc,the black bo_ at the top and bottom
of thesc_en willdisappear¸Thepicturewilllook ver3ca_ly
stretched¸{Dependtogon thetype ofdisc,the black barsmay
notdisappearcompletely)
•ZoomPit
Thetop, bottom, left and dght of the screen arecut offand
thecentral portionof the screenis enlarged¸
• For 4:3 aspect ratio discs
•Normat Wide
Displays the content of the DVD tit_ein 16:9 aspect _tio
The pictu_ will look hpezoataliy stretched¸
•Screen Fit
The top and boffom of the screen a_ cut off and the full screen appears¸ The pictu_ will
leek vedical_y stretched¸
• Zoom Fit
The top, bottom, latt and dght of the screen are cut off and the ceofra_ posen of the sc_en
is enla_ed
• Vertical Fit
When a 4:3 DVD is viewed on a 16:9 TV, black bars wi_l appear at the left and dght of the
screen in order to prevent the picture from lOOking hopeontally stretched¸
3tf you are using a 4:3 TV
•For 16:9 aspect ratio discs
4:3 Letter Box
Displays the content Of the DVD t_e in 16:g aspect ratio
The black bars w_l_appear at the top and bottom of the screen¸
4:3 Pan Scan
The left and right of the screen are cut off and displays the central portion of the t6:9 screen¸
Screen Fit
The top and bottom of the screen a_ cut off and the full scion appears¸ The picture wil_look
vedically stretched¸
Zoom Fit
When a 4:3 DVD is viewed on a 16:9 TV, black bars w_l_appear at the left and right of the
screen inorder to prevent the picture from looking horizoatai_y stretched¸
•For 4:3 aspect ratio discs
Normat Screen
Displays the content of the DVD t_e in 4:3 aspect _tio
Screen Fit
The top and bottom of the scion are cut off and the thll screen appea_ The picture wou_d
look vestally stretched¸
Zoom Fd
The top, bottom, _offand right of the screen are cut off and the ceat_l perUon of the screen is
enlarged
This [unclion may hehave dffterent[y depending on the type of dis(:
TO view the current Title, Chapter/Track_ and counter position,
press the INFO, button during DVD playback. The Information
screen can also be used to quickly choose a title, chapter/track, or
playing time.
1 View the Display
Dedng DVDiCD playback, press the iNFO button on the
remote centre[
2 Select title
Use the UP/DOWN and LEFT/RIGHT buttons to seieat T_e, then
press the ENTER button to change among at[ available titles on the
disc
3Select Chapter or Track
Use the UP/DOWN and LEFT/RIGHT buttons to seieat Chapter or
Tlack, then press the ENTER buttonto change among aiI
available Chapters/Tracks on the disc
4 Select Counter Position
Use the UP/DOWN and LEFT/RIGHT buttons to select the counter
position thdicator, then use the numeric buttons (0*9) to enter the
desired counter position in the format H:MM:SS (H = Heu_'s,M =
Minutes, S = Seconds)
Then press the ENTER bugon to enter the desired counter
position
ro make the soeen disappear, press the [NFO button again
disc can have up to eight diffelent soundtlacks
prefer,turn them off from the screen A DVO disc can have
upto 32 d_erent subtYPes

Some DVD Movies provide you with various camera
angle views on the same scene while they are playing,
TO activate the feature press the ANGLE Button,
1Check for the Angle Icon
Press the Angfa button, you'll see the Angle icon when watchil_g a
DUD wd,h mu_ Angles available
2 View Angle Menu Options
When the Angle _con comes up on the screen press the ANGLE
button to see the Angle menu
3 Select an Angle option
Press the UP/DOWN buttons to selec_ a camera angle you wish to
see.
Some DVDs provide subtitles in one or more languages, You can
use the SUBTITLE button to quickly view and change settings.
1 Open Subtitle Menu
Dueling playback, press the SUBTITLE butlon
2 Set Subtitle Language
Use the LEFT/RIGHT buttons to select from the available subtile
_anguages
•SubdUe languages a_ represented by abb_viatJons
3 Activate Subtitles
Use the UP/DOWN buttons to thin On or Off sub.s
• The default is "On"
•Press {he ENTER button to confirm your selection
DVD
CD
A to B Repeat feature enables you to repeat the desired section
on aDVD Or CD. To activate, mark where to start(A) and where to
eta(B) of the section you want to watch,
Select A-B Repeat Function
Press the REPEAT button while in Play mode, then use the
Left/Right buttons to select A-B Repeal
• WhenyouselectA.BRepeat,"AJ'wil_hehigh]ighted
NOTE: The menu wii_ display '3"tack' in place of "Chapter" if you
are playing a CD
2 Mark the Starting Point
Press the ENTER button at the beginning of the segment you want
to repeat (Point A)
•Once you select Point "A", "B" wd_be highlighted
NOTE: The minimum A*B Repeal t_me is 5 seconds
3 Mark the Ending Point
Press the ENTER button again at the end of the segment you want
lo repeat (Point B)
•The segment will begin repealing in a cen_nuo/_s loop
4Cancel A-B Repeat
Press the REPEAT button to open the Repeal Menu, Use the
Left/Right buttons to highlight "Off," then press the ENTER bu_thn
YOU can repeat a single chapter or a complete title.
1Open Repeat Menu
PI_SS the REPEAT button while in Play mode to open the Repeat
menu
•The current Repeat mode w_llbe highlighted
2 Select "Chapter"
Use the LEFT/RIGHT buttons to select "Chapter"
•When yo/_ select Chapter Repeat, "Chapter" will be higMighted
3Repeat Chapter
P_ss the ENTER button to repeat the c/_rrent chapter or track
4Select "Title"
Use the LEFT/RIGHT buttons to select "TitJd'
•When yo/_ select TdJe Repeat, "T#Je" wdi be highlighted
5 Repeat Title
Press the ENTER button to repeat the title.
Multiple lenguage/audle setup options, such as Oolby Digital 5. I,
Dolby Pro Logic, or LPCM 2 Channel audio, are available on some
DVDs, You can use the AUDIO button to quickly view and select
the options available On a disc,
1Open the Audio Menu
Dudngplayback,pressthe AUDIObut!on onthe remotecontrol
2 Select DVD Audio Track
Use the LEFT/RIGHT butthns to select the desired language/audio
setup on the DVD
•Languages are represented by abbreviations, eg "ENG" for
"English "
DVD
CD
DVD
CD
Up to three Bookmarks can be inserted for a given DVD_ allowing
you to qUtoklyjLlmp tOyour favorite scene Or song.
1op nBookmarkMenu
During p_aybock, press the MARK button on the remote control
The "MARK _ heatter will be disp_ayett on the screen¸
2 Select Bookmark Placeholder
Use the LEFT/RIGHT buttons to move to one of the three bookraark
placeholders (- +_)
•The seSected placeholder will be higMightett
3Set the Bookmark
Keep on playing the DVD Upto the scene you want to bookmark,
then press the ENTER button The placeholder (-) will change to a
number (1, 2 or 3)
• YOU may continue to set up to three bookmarks
• Press the MARK button when complete
• Depending on the disc, the bookmark function may i_ot work
4 Play Bookmark
• During playbeck, pl_ss the MARK button on the remote control
• Use the LEFT/R_GHT buttons to move to a previously set
bookmark¸
• Press the PLAY/PAUSE button to play the bookmark¸
• Press the CLEAR button to cancel the bookmark¸
• Press the MARK button again to exit the Bookmark menu¸
When an MP3/WMA Disc is fiTserted into the DVD player, the first song file of
the first folder plays.
•if more than _vo file extensions are present, select the media of youz
choice
• To change the cuzrently playing media, press the STOP ( • ) button
tw}ce and then pl_ss the MENU button
• If no button on the remote contagler is pressed for 60 seconds, the menu
will disappear and the selec{ed ttem wiff be ptayeg.
MP3/WMA Play Function
t, When the first song file is playing, the music folder raenu will
appear on the right side of the screen¸
Up to 8 music folders can be displayed eta brae¸ If you have mo_
than 8 fo_de_ on a disc, press the LEFT/RIGHT buttons to bead
them up on the sc_en
2. Use the UP/DOWN buttons to select the desired music fofgal, then
press ENTER¸ Use the UP/DOWN hL_ons again to select a song
file Press ENTER to begin playback of the song file.
Program/Randomplayback
t, With the MP3 in Stop mode, pl_ss the MODE button to swttch
between the RANDOM and PROGRAM modes¸ See page 47 for
more intorm_on on these modes¸
•Pregsthe REP£AT button to hear only music continuously and
pregs it once agabl _ release¸
• PROGrAM/RANDOM play.ok cannot be used iithe di_ ................... _
con[abls more than two type_ et t_le extensions
CD-R MP3/WMA discs
When playing CD.R/MP3 or WMA discs, please fogow all the recommendations for CD*R above,
plus the comments below
• Your MP3 or WMA files should be ISO 9660 or JOUET format,
tSO 9660 format and Jotet MP3 or WMA ftes are compatible with Micresoths DOS and Windows,
and with Apple's Mac These two formats ale the most widely used
• When naming your MP3 or WMA flies do not exceed 8 characters, and place ".rap3, .wma"
as the file extension.
Gene_ name format of: T_e rap3 or T_e wma When composing your flfle, make sure that you
use g characters or less, have no spaces in the name, and avoid the _Jseof special cha_cte_
including: (,61,=,+)
•Use adecompression transfer rate of at least t28 Rbps when recording MP3 files.
Sound qual_ with MP3 flies basicaly depends on the rate of cornp_ssionrdecom p_ssion you
choose¸ Getting audio CD qualty sound requires an analog/dig_l samping _te, that is
conversion to MP3 format, of at least 129 Kbps and up to 160 Kbps However, choosing higher
rates, ike 192 Kbps or more, only rarely give be_er sound quai_
Conve_ely, fles with decompression rates below 128 Kbpa wil not be played propady
•Use adecompression transfer rate of at least 64Rbps when recording WMA files,
Sound quai_ with WMA flies basicaly depends on the rate of comp_ssionrdecom presston you
choose¸ Getting audio CD quaity sound requires an analogJdig_l samplng _te, that is
conversion to WMA format, of at least 64Kbps and up to 1g2Kbps
Conve_My, fles with decompression rates betow 64Kbps or ever 192Kbps wl_ net be p_ayed
property
•DOnottry recordingcopyrightprotectedMP3flies.
Certain"secudzed"flies areencrypted and code protectedto pl_veet itega] cegy_egThesefles
are of the toifowingtypes: Windows MediaTM (registeredtrade markof MicrosoftInc)and SDMF_
(registe_d trade markof TheSDMI Foundation)¸You cannotcopy suchflies¸
• Important: The aboverecommendabenscannot betaken as a guaranteethat the DVDplayerwil
play MP3 recoofiegs,or asan assuranceof soundquaity
You shouldnote that certaintechnologiesand methodsfor MP3 tie _cordieg onCD_Rsprevent
opgmalplaybackof theselies onyour DVDplayer(degradedsoundqualty and insome cases,
inablityof thep_ayerto _ad the Mes)
• This unit can piny a maximum of 500 flies and 300 folders per disc
Program Play (CD/MP3/WMA)
1, With the MP3 in Stop mode, press the MODE button
2. Use the LEFT/RIGHT buttons to setect PROGRAM
Press the ENTER button
3. Use the LEFT/RIGHT/UP/DOWN buttons to select the first back
to add to the program
Press the ENTER button The selection numbers appear inthe
Program Ozder box
4. Press the PLAY/PAUSE (_11) button
The disc wll be played in programmed order.
Random Play (CD/MP3/WMA)
1, With the MP3 in Stop mode, press the MODE button
2. Use the LEFT/RIGHT buttons to seieet RANDOM
Press the ENTER button
The disc wil be played in random o_der
• Depaegilg on the dis(, the Program and Random Piny
iuFl€flon$ may nOI work¸
•To re_lme normal play, p_ss the CL£AR bolon
• PRfoGRAM/RANDOM piay_cfl cannot be used i ilhe di_
¢on_tes mo_ than two types at file extensions
•Tbls unll can supporl a maximum at 99 programmed order¸
iiiii:::1::ii!:: ii iii111iiiiiii::_:2_iii!ii ;ii11:
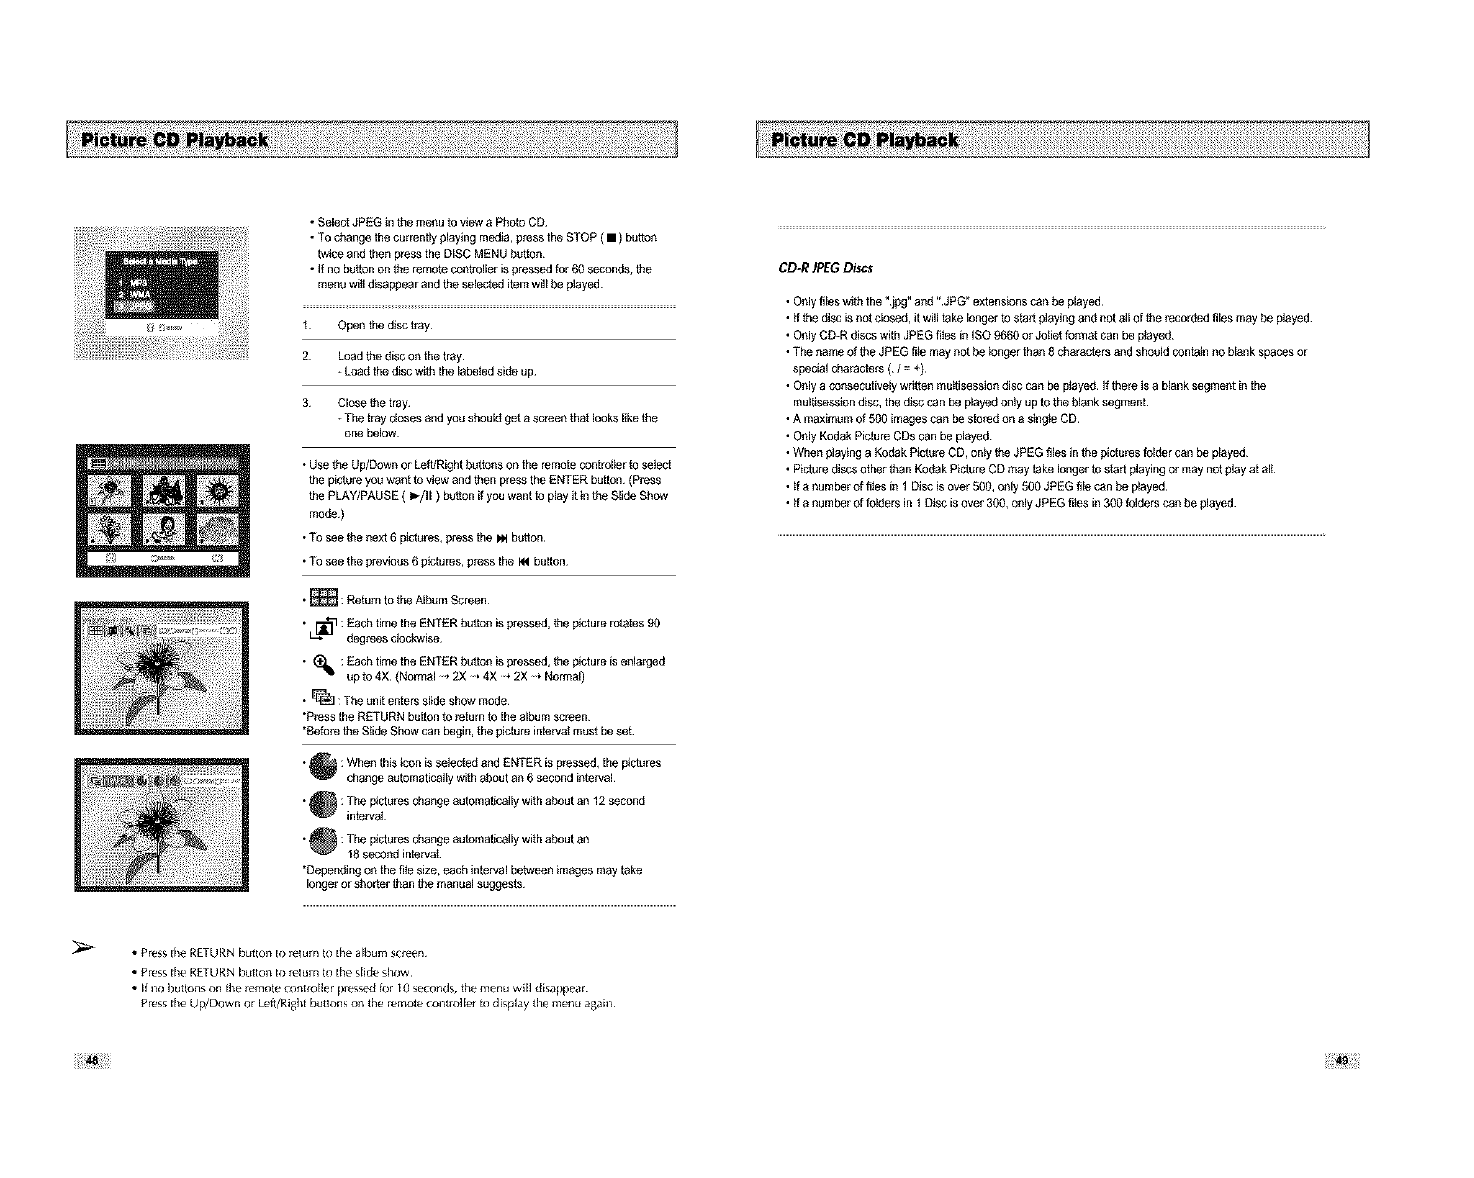
• SelectJPEGin the menuto view a PhotoCD
• To changethecu_renriyplaying media, pressthe STOP ( • ) button
twice and then pressthe DISCMENUbutton
• Ifno be_on onthe remotecontrctlerispressedfor 60 seconds,the
menuwilldisappearand the selecteditemwill be played.
t Open the disc b_y
2 Load the disc on the tray
÷ Load the disc w_th the labeled side up
3 Close the tray
÷ The tray closes and you should get a scl_en that looks like the
one below
• Use the Up/Down or Loft/Right buttons on the remote contrct_er to select
the picture you want to view and then press the ENTER button (Press
the PLAY/PAUSE ( I_/tt ) butthn if you want to play it in the Slide Show
mode)
• To see the next 6 pictures, press the Ill butthn
• To see the previous 6 pictures, press the I_1 button
• _ : Retain to the Album Screen
• _1 Each time the ENTER button is pressed, the picture rotates g0
degrees clockwise
• _. : Each time the ENTER button is pressed, the picture is enta_ged
up to4X (Normal .2)( ,4X 2X _Normal)
• _ : The unit enters slide show mode
•Pl_ss the RETURN button to l_turn to the album screen
•Befol_ the S_ide Show can begin, the picture intervat must be set
• _ : When this icon is selected ai_d ENTER is plessed, the pictures
change automatically with about an 6 second interval
• _ : The pictures change automatically with about an 12 second
inte_al
•: The pictures change automatically with about an
18 second inte_a_
•Depending on the ri_esize, each interval bel_veen images may take
[oagel or shorter than the manual suggests
• Press tile RETURN button Io letum to tae album screen
• Press tae RETURN _)_ttol_ Io return to tile slide show¸
• tt i_o buttons on the remote courtlier pre_ed _r l 0 secorldg, the menu w_[I disappear¸
Press tae U_Down or Leg/R_ht buttons on the remole contrct let _ d_play the menu again¸
CD-R ]PEG Discs
• Onlyriles with the"jpg" and "JPG" extensionsc_nbe played
• g _e disc is nut closed, it willtake longerto start playingand nct all of _e _coofed files may be played¸
•OnlyOD-Rdiscswith JPEG ritesin ISO9660orJofietformat can be p_ayed
•Thename ofthe JPEGritemay nutbe _ongerthan 8_aracthm and shouldcontainno blankspacesor
specialcha_ctem ( /= +)
•Onlya consecuriveiywr_en mu_session disc canbe p_ayedIfthere is a blanksegmentin the
mul_sessiondisclthedisc can be playedonly up tothe blanksegment¸
•A maximumof 500imagescan bestared on asingle CD
•Only KodakPictureCDs can be played¸
•Whenplaying a Kodak PictureCD,only theJPEG rilesin the pictamsfolder can be played¸
• Picturediscs otherthan Kodak PictureCD maytakelongerto startplaying or may_ct play at al_
•if a numbe_of ritesin 1Disc isover 5001only 500 JPEGrile can beplayed¸
•g a numberof foldersin _Disc isover 3001onlyJPEG ri_esin300 folderscan be played
iiiiiiiii_i!? _!ii!i_!iiii¸
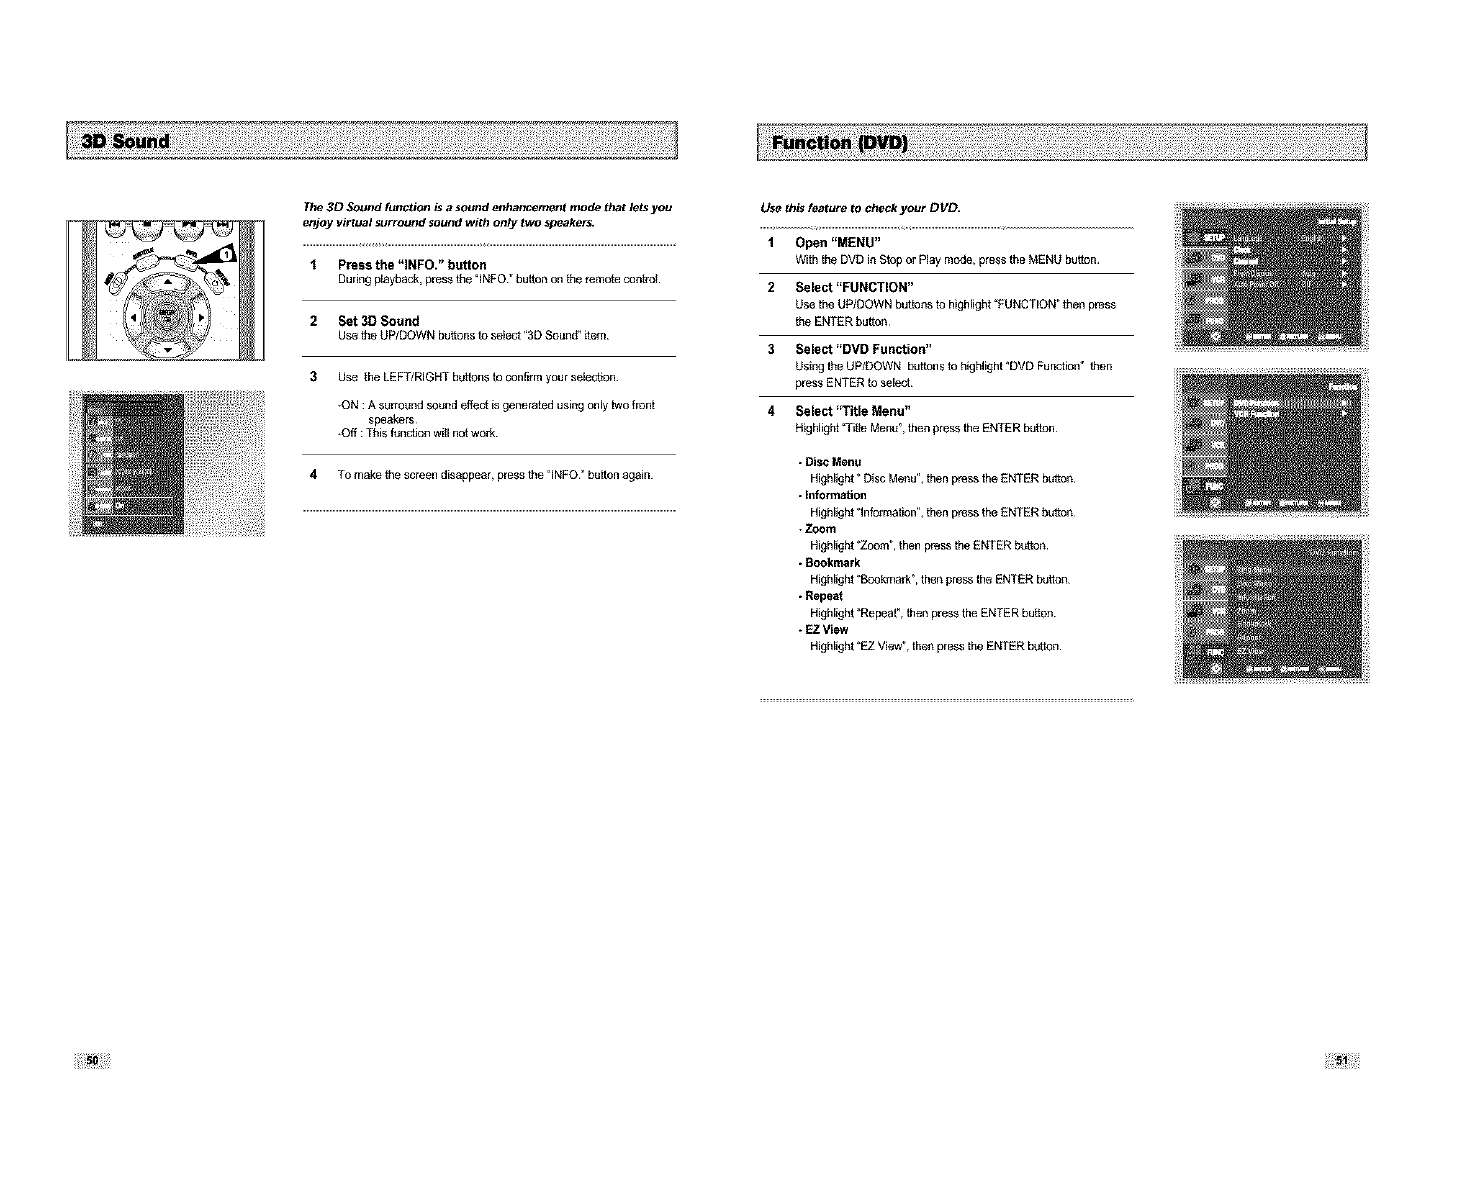
The 313 Sound function is a sound enhancement mode that lets you
enjoy virtual surround sound with only two speakers.
1Press the "INFO." button
During playback, press the gNFO" button o=1)he _mote con_t
2 Set 3D Sound
Use the UP/DOWN buttons to select "3D Sound" _tem
3Use the LEFT/RIGHT hugons to confirm your seie_on
+ON :A surround sou)_d effect is ge)_erated usi)_g only two front
speakers
+Off :This fu)_on witl not work
4To make the screen disappear, press the "INFO _ button again
Use this feature to check your DVD.
1Open "MENU"
With the DVD in Stop or Play mode, press the MENU button
2Select "FUNCTION"
Use the UP/DOWN buttons to highlight "FUNCTION" then press
the ENTER button
3Select "DVD Function"
Using the UP/DOWN buttons to highlight "DVD Function" then
press ENTER to select
4 Select "Title Menu"
HigNight q'it_e Men/P, then press the ENTER button
* Disc Menu
Highlight " Disc Menu", then press the ENTER button
-Information
Highlight 'lnfolmation", then press the ENTER button
+Zoom
Highlight "Zoom", then press the ENTER button
*Bookmark
Highlight "Bookmark", then press the ENTER button
- Repeat
Highlight "Repeat _, then press the ENTER button
-EZ View
Highlight "EZ View", then press the ENTER bL_thn
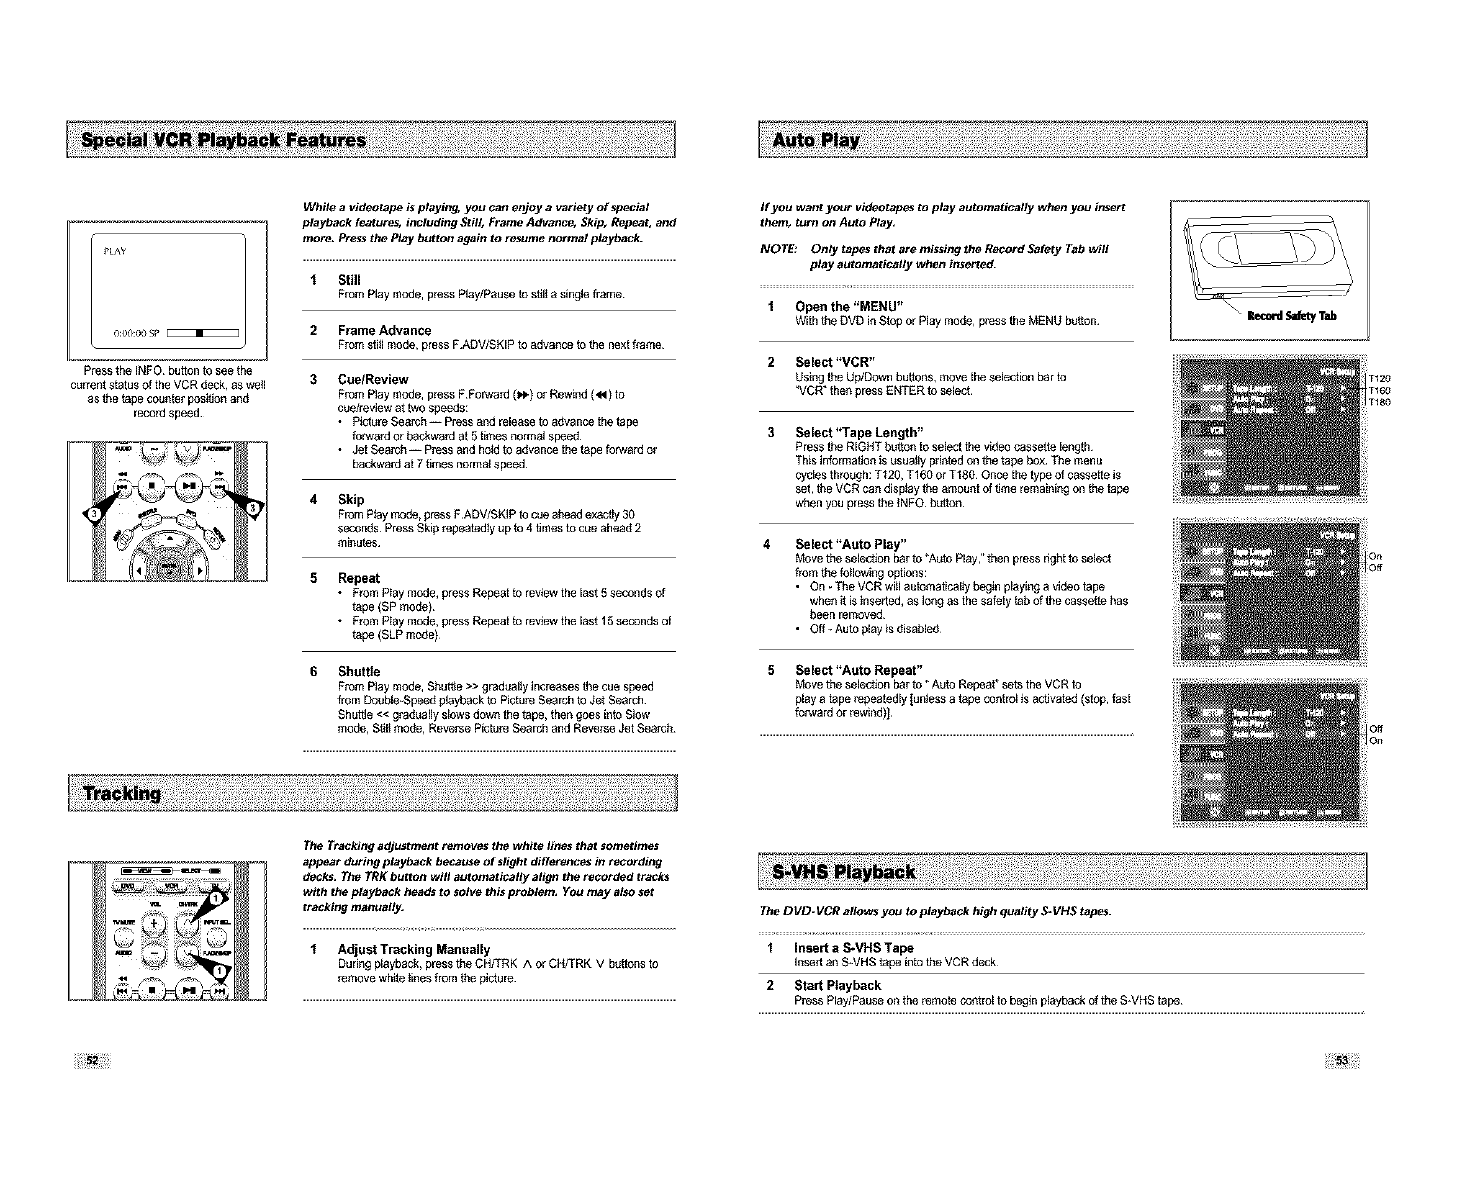
PLAY
O:O0:OOSP_
Press the INtO button to see the
c/_rrent status of the VCR deck, as we_l
as the tape counter pes_on and
reco_ speed¸
While a videotape is playing, you can enjoy a variety of special
playback features, including Still, Frame Advance, Skip, Repeat, and
more, Press the Play button again to resume normal playback.
1 Still
From Play mode, pl_ss Play/Pause to stdl a single frame
2 Frame Advance
From still mode, press FADV/SRIP to advance to the next flame
3 CuelReview
From Play mode, pl_ss F Forward (I,_) or Rewind (,_1) to
cue/review at two speeds:
• Picture Search -- Press and release to advance the tepe
forwald or backwald at 5 times normal speed
• Jet Search -- Press and ho_d to advance the tape forward or
backward at 7 times normal speed
4 Skip
From Play 1_3dth press F ADV/SKIP to cue ahead exactly 30
seconds Press Skip _peatedly/_p to 4 hines to o_e ahead 2
minutes
5 Repeat
•Fl_m P_aymede, press Repeat to rewew the late 5 seconds of
tape (SP mode)
•Fl_m Play mode, press Repeat to rewew the last 15 seconds of
tape (SLP mode)
6 Shuttle
From Play mode, ShutSe >> gredual_y increases the cue speed
from Double-Speed playback to Pictu_ Search to Jet Search
Shu_e << g_adeaily slows down the tape, then goes into Slow
mode, sgiI mode, Reverse Pictet_ Search and Revei_e Jet Search.
If you want your videotapes to play automatically when you ir_ert
them, turn on Auto Play,
NOTE: Only tapes that are missing the Record Safety Tab will
play automatically when inserted.
1 Open the "MENU"
With the DVD in Stop or Play mode, pl_ss the MENU button
2Select "VCR"
Using the Up/Down buttons, move the selection bar to
"VCR" then press ENTER to select
3Select "Tape Length"
Press the RIGHT button to select the video cassette length
This information is usually pdntad on the tape box The menu
cycles thl_ugh: T120, T160 or T180 Once the type of cassette is
set, the VCR can dispIay the amount of hme remaining on the tape
when you press the tNFO button
4Select "Auto Play"
Move the sele_on bar to "Auto Play," then press dght to select
f_em the thtiow_ng options:
• On -The VCR will autematicai_y begin playing a video tepe
when it is inserted, as long as the safety tab of the cassetta has
been removed
• Off ÷Auto play is disabted
5Select "Auto Repeat"
Move the sele_on bar to "Auto Repeat" sets the VCR to
play a tape l_peatedly [uctess a tape control is actJvtaed (stop, fast
forward or _wted)l
t120
t160
t180
3ff
3_
The Tracking adjustment removes the white lines that sometimes
--_ _ appear during playback because of sfight differer_es in recording
_ decks, The TRK button wilt automatically align the recorded tracks
wit,theplaybackh_d.to.o/.'_,.i. p.'obta....Y....._ya/*.set
F__tracking manually,
_,A,,°.tT°ck,°gMan°a,,y
During playback, press the CH/TRK A or CR/TRK v buttons to
_ f_ _ _ removewhdetteesfromthepictere
The DVD-VCR allows you to playback high quality ,%VHS tapes.
1Insert a S_VHS Tape
Insert an S_VHS tape into the VCR deck
2 Start Playback
Press Play/Pause on the l_mote control to begin playback of the S*VHS tape
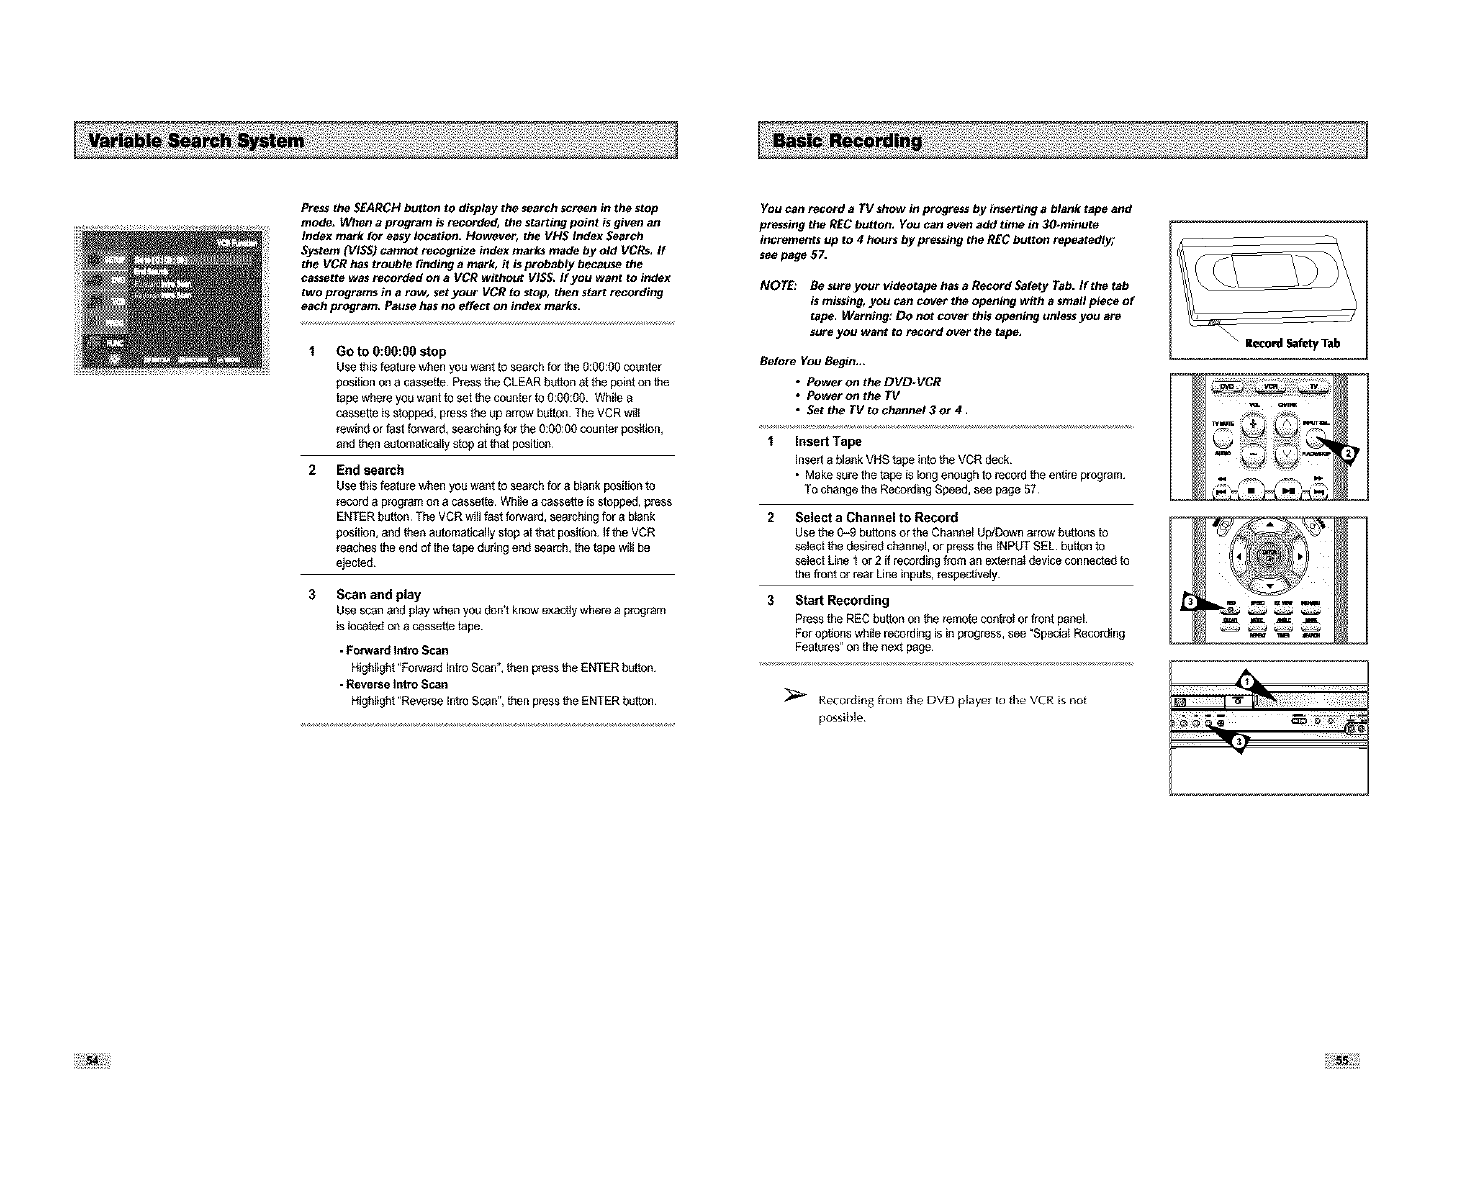
Press the SEARCH button to display the search screen in the stop
mode, When a program is recorded, the starting point is given an
Index mark for easy location. However, the VHS Index Search
System (VISS) canr_t recognize index marks made by old VCRs, If
the VCR has trozlbfa finding amark_ it is probably because the
cassette was recorded on aVCR without VISS. If yozl want to index
two programs in arow_ set yozlr VOR to stop, then start recording
each program. PaLtsehas no effect on index marks.
Go to O:00:00 stop
Use this feature when you want to seal_h for the 0:g0:00 counter
position on a cassette Press the CLEAR button at the point on the
tape whe_ you want to set the counter to thO0:O0 Whifa a
cassette is stopped, press the up arrow button The VCR wi_[
_wind or fast forward, searching fol the 0:00:00 countel postt_on,
alat then automstJcstiy stop at that pesigon
End search
Use this feature when you want to seal_h for a b_ank position to
_cord a p_gram on a c_ssatte While a cassette is stopped, press
ENTER button¸ The VCR wiil fast forwa_, sea_hthg far a blank
position, and then automsticaliy stop at that position¸ If the VCR
_aches the end of the tape during entt search, the tape wi_lbe
ejected
3 Scan and play
Use scan and play when you don't know exacgy where a pl_gram
is lecatett on a cassette tape
•Pop.vat tt Intl_ Scan
Highlight "Forward [ntro Scan", then press the ENTER button
• Reverse fatro Scan
Highlight "Reverse Intro Scan", then press the ENTER button¸
You can record a TV show in progress by ir_erting a blank tape and
pressing the REC button, You can even add time in 30*minzlte
increments up to 4 hours by pressing the REC button repeatedly;
see page 5Z
NOTE: Be sure your videotape has a Record Safety Tab. If the tab
is missiog_ you can cover the opening with a small piece of
tape. Warning: DO not cover this opening unless you ate
sure you want to record over the tape,
Before You Begin.,,
•Power on the DVD*VCR
•PowerontheTV
•Setthe TVtochannel3or4,
1 Insert Tape
insert a blank VHS tape into the VCR deck
• Make sure the tape is long enough to record the entire program
To change the Recording Speed, see page 57
2 Select a Channel to Record
Use the 0-9 buttons or the Channel Up/Down arrow buttons to
select the desired channel, or pl_ss the iNPUT SEL button to
select Line 1 or 2 if recording from an externai device connecfatt to
the front or rear Line inputs, _speciJvely
3 Start Recording
Press the REC button on the mmofe cong_t or front panel
For opgons whifa recordil_g is in progress, see "Specia_ Recording
Features" on the neat page
Recordln_ from the DVD player to the VCR is not
poss_hfa
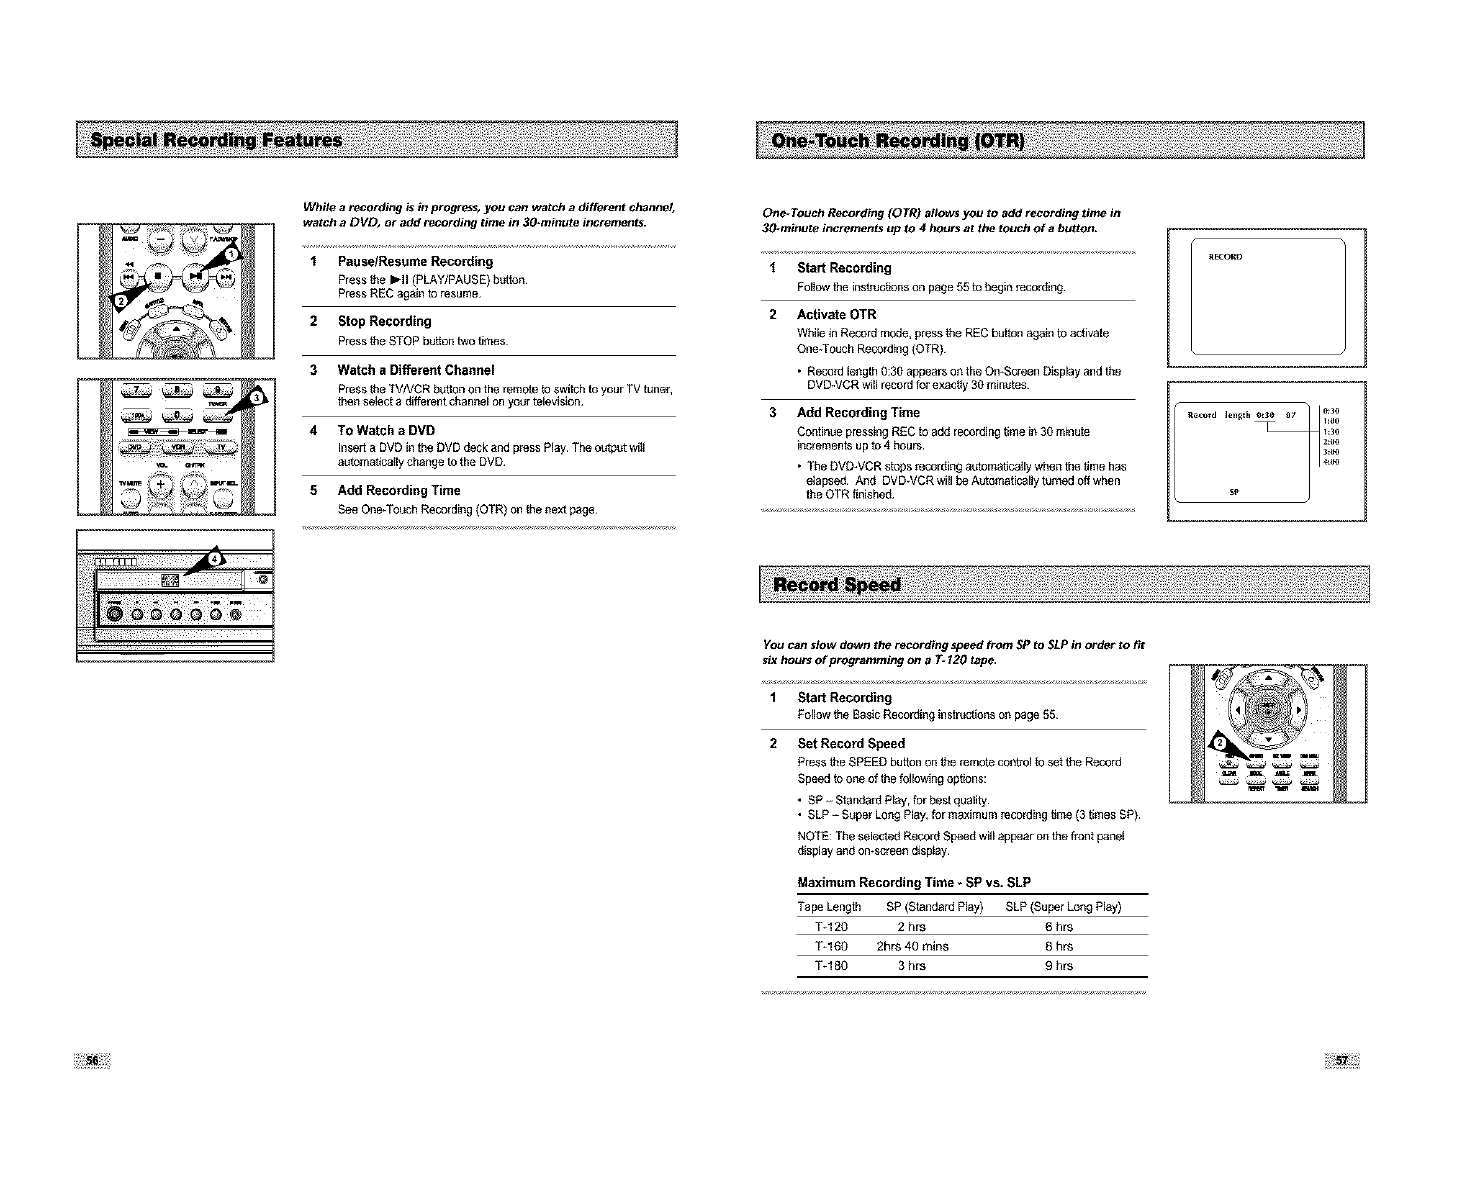
While a recording is in progress_ you can watch a different channel,
watch a DVD_ or add recording time in 3O.minute increments.
1Pause/Resume Recording
Press the I_tt (PLAY/PAUSE)button
Press REC again to resume
2 Stop Recording
Press the STOP button two fimes
3 Watch a Different Channel
Press the TV/VCR button on the remote to switch to your TV tither,
then select a different channel on your felevision
4TO Watch a DVD
Inserta DVD inthe DVDdeck and pl_ss Play The outputwill
autom_ca_ly cpeageto theDVD
5Add Recording Time
See One-TouchRecordiag(OTR) on thenextpage¸
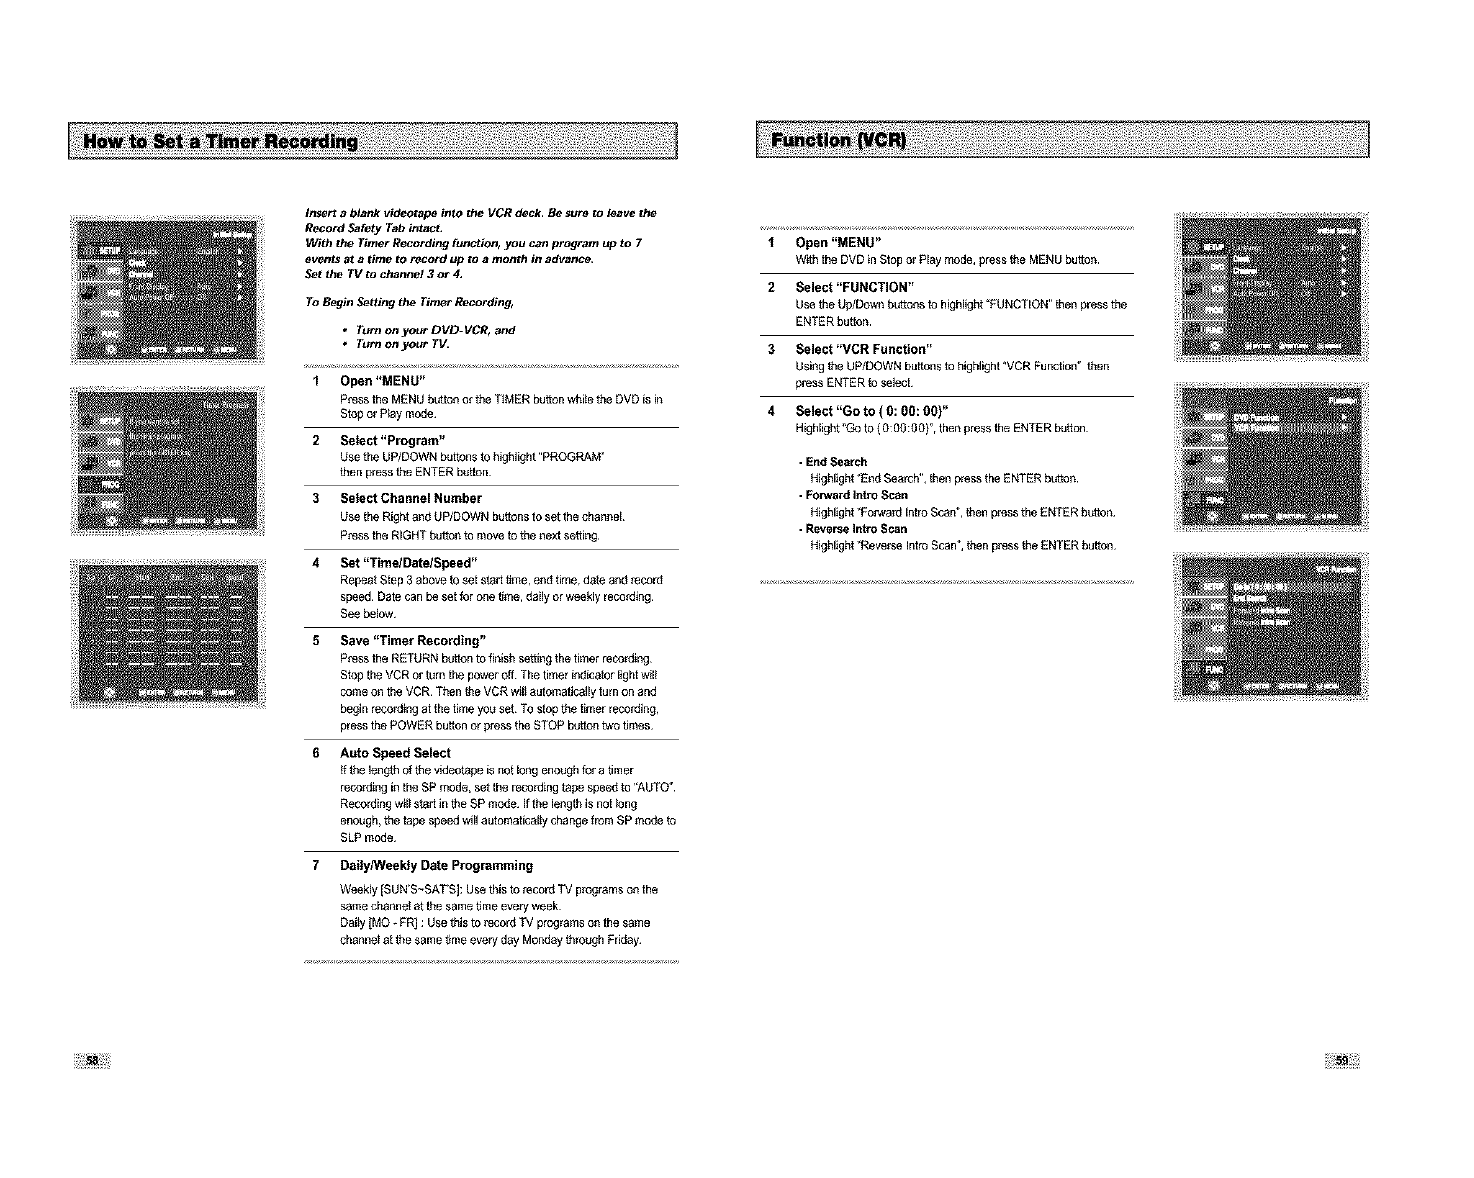
One- Touch Recording (O TR) allows you to add recording time in
30*minute increments up to 4 hours at the touch of abutton,
1Start Recording
Balthw the instrucfions on page 00 to begin _cordiag
2 Activate OTR
While in Record mode, press the REC button again to activate
One*Touch Recolding (OTR)
• Retold length 0:30 appears on the On+Screen Display and the
DVD-VCR will record for exacfiy 30 minutes
3Add Recording Time
Continue pressing REC to add recording time in 30 minute
il_crements up to 4 hours
• The DVD_VCR s_ags _ecordiag automafica_ly when the fime has
e_agsed And DVD-VCRwill beAutomaficallytumed off when
the OTR finished
1:oo
1=3o
2_o_
3=o_
!
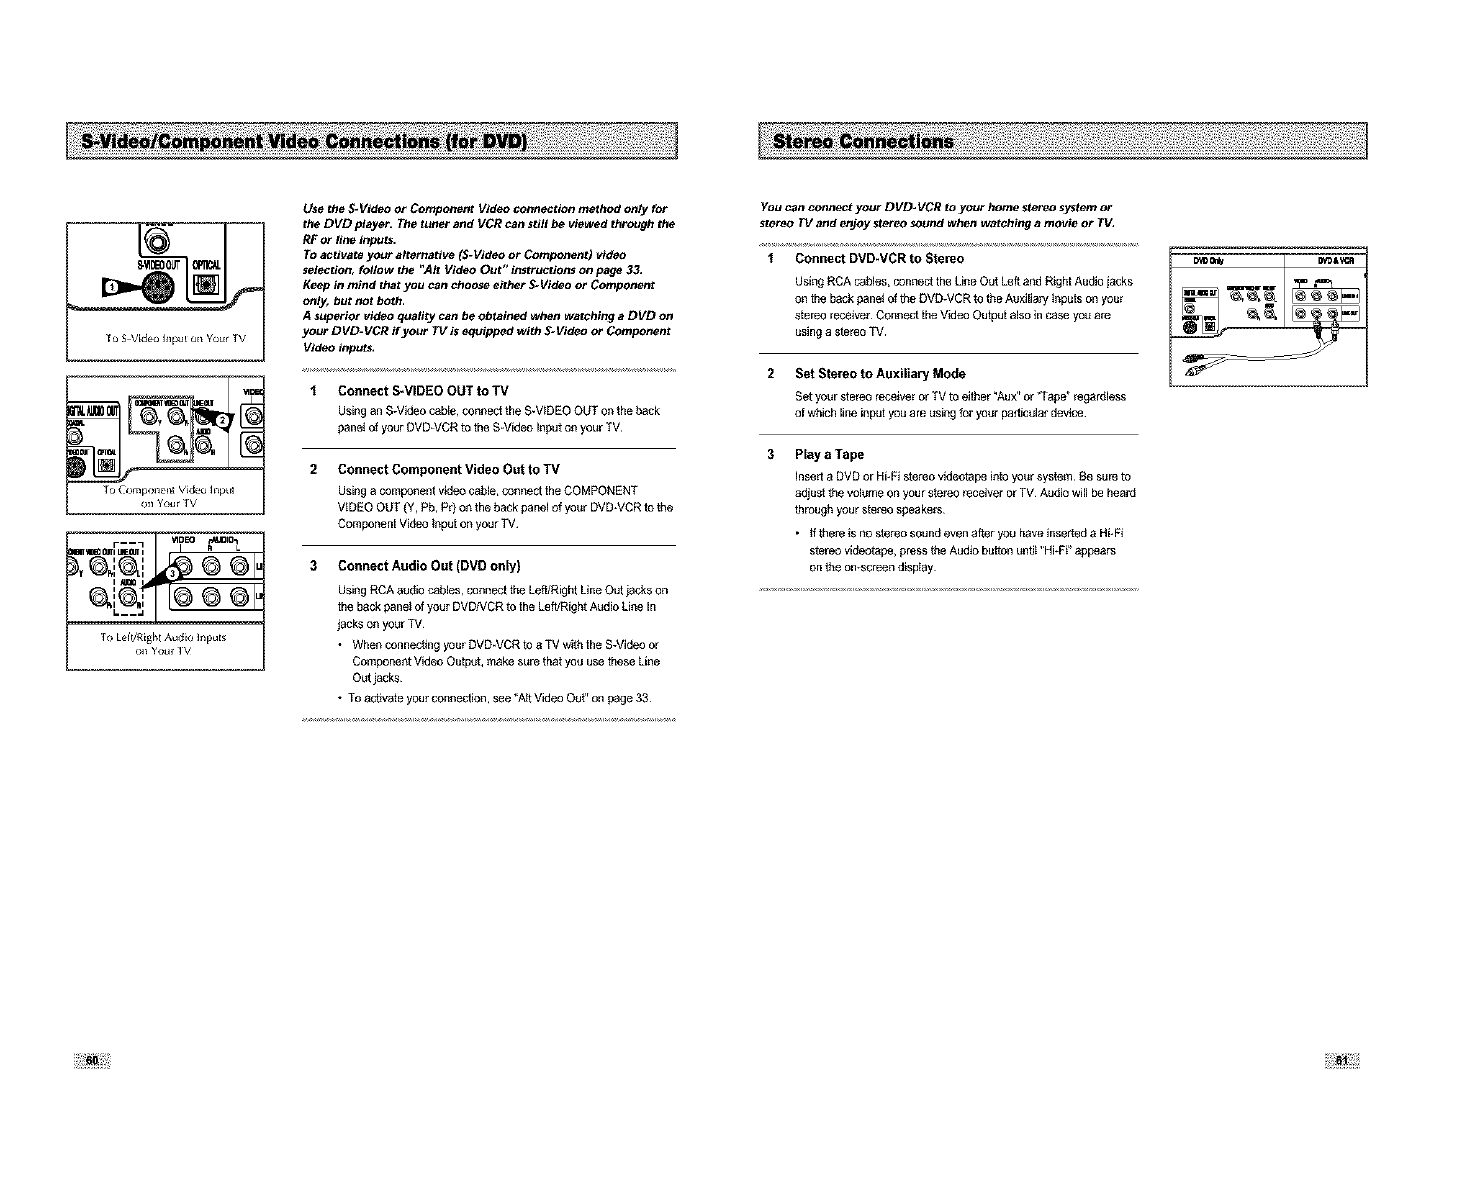
YOu can slow down the recording speed from SP to SLP in order to fit
six hours of programming on aT- 120 tape,
1 Start Recording
Follow the Basic Recording instmcfions on page 55
2 Set Record Speed
Press the SPEED button on the remote controJ _oset the Record
Speed _o one of the foliowiag agfions:
• SP - Standard Play, for best quality
• SLP -Super Long Play, for maximum recordiag fime (3 times SP)
NOTE: The selected Record Speett will appear on the font panel
ttisplay antt on+screen display
Maximum Recording Time -SP vs. SLP
Tape Length SP (Standard Play) SLP (Super Long Play)
T*120 2 hrs 6 hrs
T-160 2hrs 40 rains 8 hrs
T*180 3 hrs 9 hrs
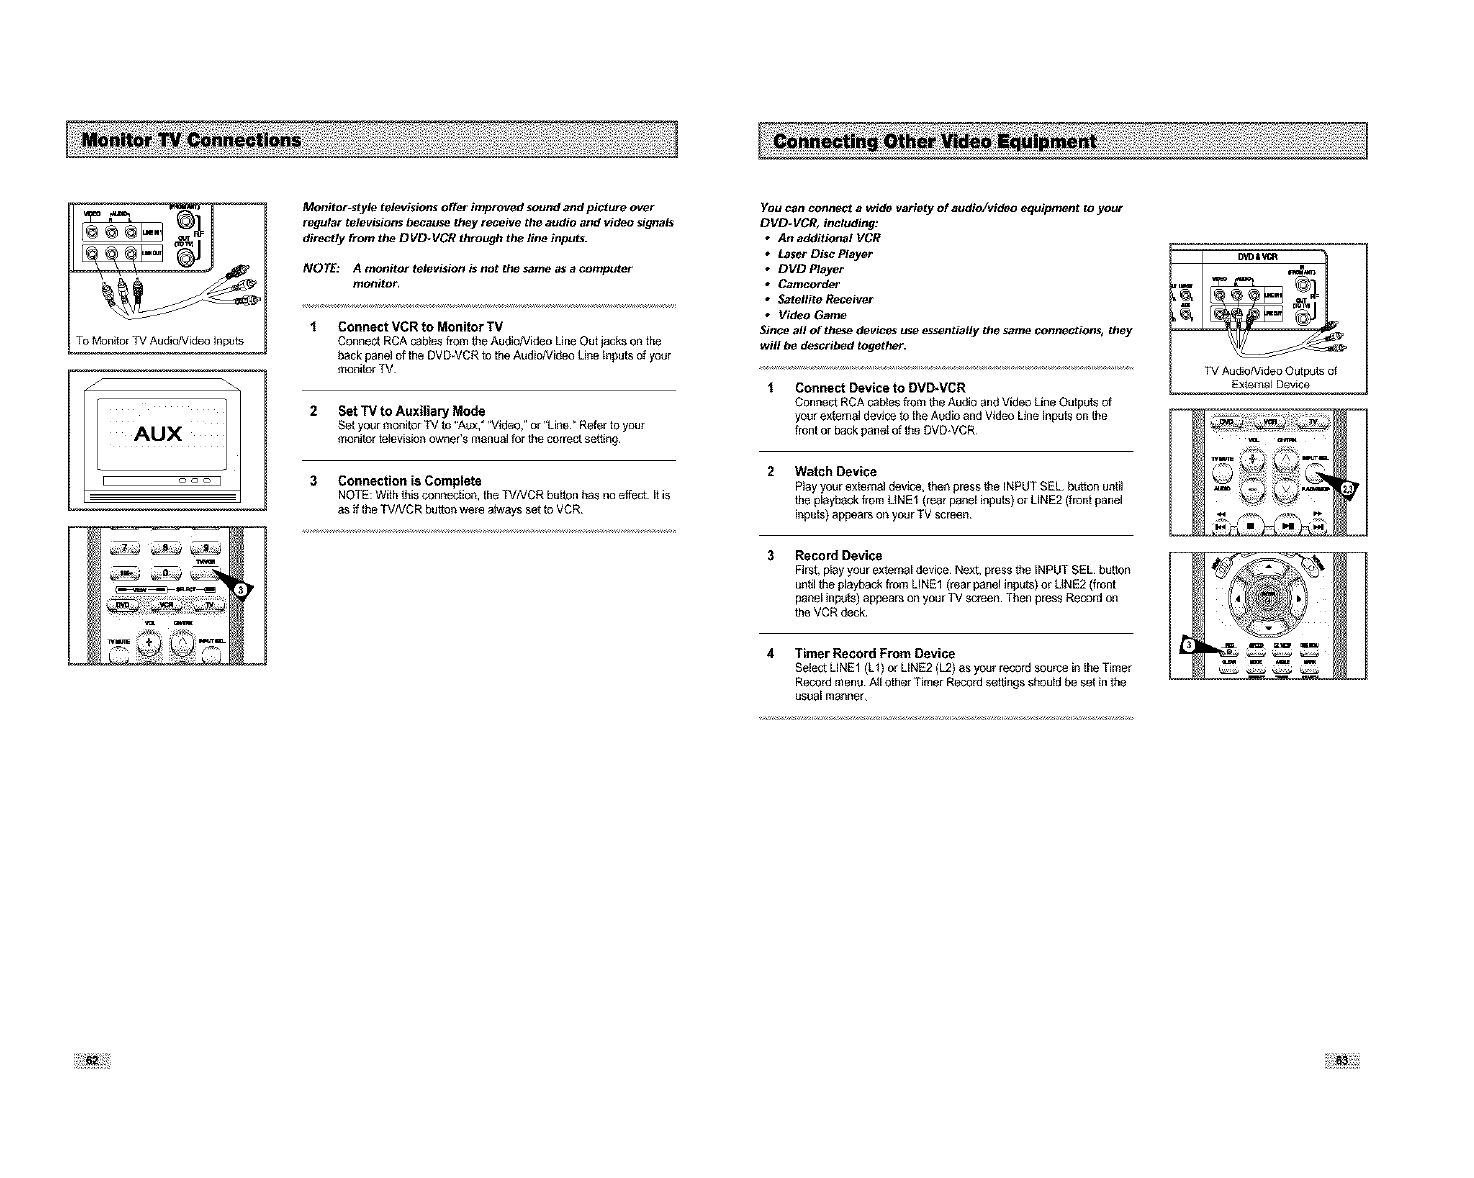
Insert a blank videotape into the VCR deck. Be sure to leave the
Record Safety Tab intact,
With the Timer Recording function_ you can program up to 7
events at a time to record up to a month in advance.
Set the TV to channel 3 or 4,
To Begin Setting the Timer Recording,
•Turn on your DVD-VCR_ and
•Turn On your _.
1 Open "MENU"
Pl_ss the MENU button ol the T_MER button whi_e the DVD is in
Stop o_ P_ay mode
2 Select "Program"
Use the UP/DOWN buttons to higMight "PROGRAM _
then press the ENTER button
3Select Channel Number
Use the Right and UP/DOWN bugons to set the chanl_el
P_ss the RIGHT petton to move to the next setting
4 Set "TimelDutelSpeed"
Repeal Step 3 above to set start gme, end time, date and l_cord
speed Date can be set for one gme, daily or weekly recolding
See below
5 Save "Timer Recording"
PI_SS the RETURN button to finish setting the timer reColding
Stop the VCR or tom the power off The timer indicator light w_l_
come on the VCR Then the VCR wil_automatically turn on and
begin recolding at the time you set TO stop the timer recording,
press the POWER button or press the STOP button two gmes
6Auto Speed Select
g the length of the videotape is not long enough for a timer
recolding in the SP mode, set the recolding tape speed to "AUTO"
Recording wil_ stod in the SP mode If the length is not _ong
enough, the tape speed will automatically change from SP mode to
SLP mode
7 Daily/Weekly Date Programming
Weekly [SUN'S~SAT'S]: Use this to record TV pl_grams on the
same ohanne_ at the same gme every week¸
Dai_y [MO * PR] : Use this to _cord TV prog_ms on the same
channe_ at the same gme every day Monday through Friday¸
'_ Open "MENU"
Wd_hthe DVD in Stop ol Play mode, press the MENU button
2Select "FUNCTION"
Use the Up/Down buttons to highlight "FUNCTION" then press the
ENTER button
3Select "VCR Function"
Using the UP/DOWN buttons to highlight "VCR Function" then
press ENTER to select
4Select "Go to ( 0: 00: 00)"
Highlight aGo to ( 0:0O:O 0)", then press the ENTER button
•End Search
Highlight "End Search", then press the ENTER button
• Fo_a_ Intn3 Scan
Highlight "Forward Intro Scan", then press the ENTER button¸
•Reverse thtro Scan
Highlight "Revere Intro Scan", then p_ss the ENTER petton
r__1 _IDEO_,JDIO_
:,==oc=[_o=[ .
TO kelt/RigM Audio Inp_Is
o_1yot_r 1',/
Use the S.Vide_ or Component Video connection method only for
the DVD player. The tuner and VCR can still be viewed through the
RF or line inputs.
To activate your alternative (S-Video or Compot_nt) video
selection, follow the "Air Video Out" instructions on page 33,
Keep in mind that you can choose either _Video or Component
only_ but not both,
Asuperior video quafity can be obtained when watching a DVD on
your DVD-VCR if your TV is equipped with _Videm or Component
Video inputs,
1 Connect S-VIDEO OUT to TV
Using an S-Video cable, connect the S_V_DEO OUT on the back
pane_ of your DVD*VCR to the S_Video Input on your TV
2Connect Component Video Oct to TM
Using a component video cable, connect the COMPONENT
VIDEO OUT (Y, Pb, PI) on the back panel of your DVD*VCR to the
Compol_ent Video _npot on your TV
3 Connect Audio Out (DVD only)
Using RCA audio cables, conl_ectthe Left/Right Line Out jacks on
the back panel of your DVD/VCR to the Left/Right Audio Line In
jacks on your TV
•When connec_ng your DVD_VCR tea TV with the S-Video or
Componeof Video Outpof, make sure that you use these Line
Oof jacks
•To a_vate your connection, see "A_t Video Ou_' on page 33
You can connect your DVD.VCR to your home stere=_system or
stereo TV and enjoy stereo sound when watching a movie or TV.
'_ Connect DVD-VCR to Stereo
Using RCA cables, connect the Lille Out Left and Right Audio jacks
on the back pane_of the DVD-VCR to the Auxiliary tnpots on your
stereo receiver¸ Connect the Video Output also in case you are
using a stereo TV
2 Set Stereo to Auxiliary Mode
Set your stereo receiver or TV to either "Aux" or "Tape" l_gaofiess
of which line input you are using for your po_cular device¸
3 Play aTape
Insert a DVD or Hi-Fi stereo videotepo iofo your system Be sure to
adjus_ the vctume on your ste_o _ceiver or TV Audio will be heaht
through your s_e_o speake_
•tfthere is no stereo sound even after you have inserted a Hi-Fi
stereo videotepo, press the Audio button untg "Hi*F£ appears
on the on+screen display
ToMonitorTV Audio/Video Inpufs
IAux
I ooo ]
Monitor-style televisions offer improved sound and picture over
regular televisions because they receive the audio and video signals
directly from the DVD*VCR through the line inputs.
NOTE: A monitor television is nat the same as a computer
monitor.
1Connect VCR to Monitor TV
Connect RCA cables f_m the AudioNideo Line Out jacks on the
back pane] of the DVD-VCR fo the A/_dtsNideo Lille _nputs of your
monitor TV
2 Set 1%' to Auxilia Pj Mode
Set your monitor TV to "Al_x,_"Video," or "Line" Refer to you_
monitor teSevision owner's manual for the correct setting
3 Connection is Complete
NOTE: With this connection, the TV/VCR button has no effect it is
as if the TWVCR button wel_ a_ways set to VCR
YOU can cotmect a wide variety of audio/video equipment to your
DVD.VCR, including:
An additional VCR
Laser Disc Player
DVD Player
Camcorder
Satellite Receiver
Video Game
Since all Of the_ devices use essentially the same connectiorL_, they
will he described together.
Connect Device to DVD,VCR
ConnectRCAcablesfi_mthe Audio and VideoLineOutputsof
your external deviceto theAudioand Video Line inputson the
front or backpane_of theDVD*VCR
2 Watch Device
Play your external device, then press the INPUT SEL button uofi]
the playback from UNEf (real panel inputs) or UNE2 (front panel
inputs) appears on your TV screen
3Record Device
First, play your external device Next, press the iNPUT SEL button
unal the ptsyhack from LINE1 (rear panel inputs) el UNE2 (front
panel inputs) appears on your TV screen Then press Record on
the VCR deck
4 Timer Record From Device
Setsct UNE1 (Lf) or UNE2 (L2) as your record source inthe Timer
Recold menu A_l ether Timer Recold settings shouSd be set in the
usual manlier
DVD&_CR m
TV AudioNideo Outputs of
External Device
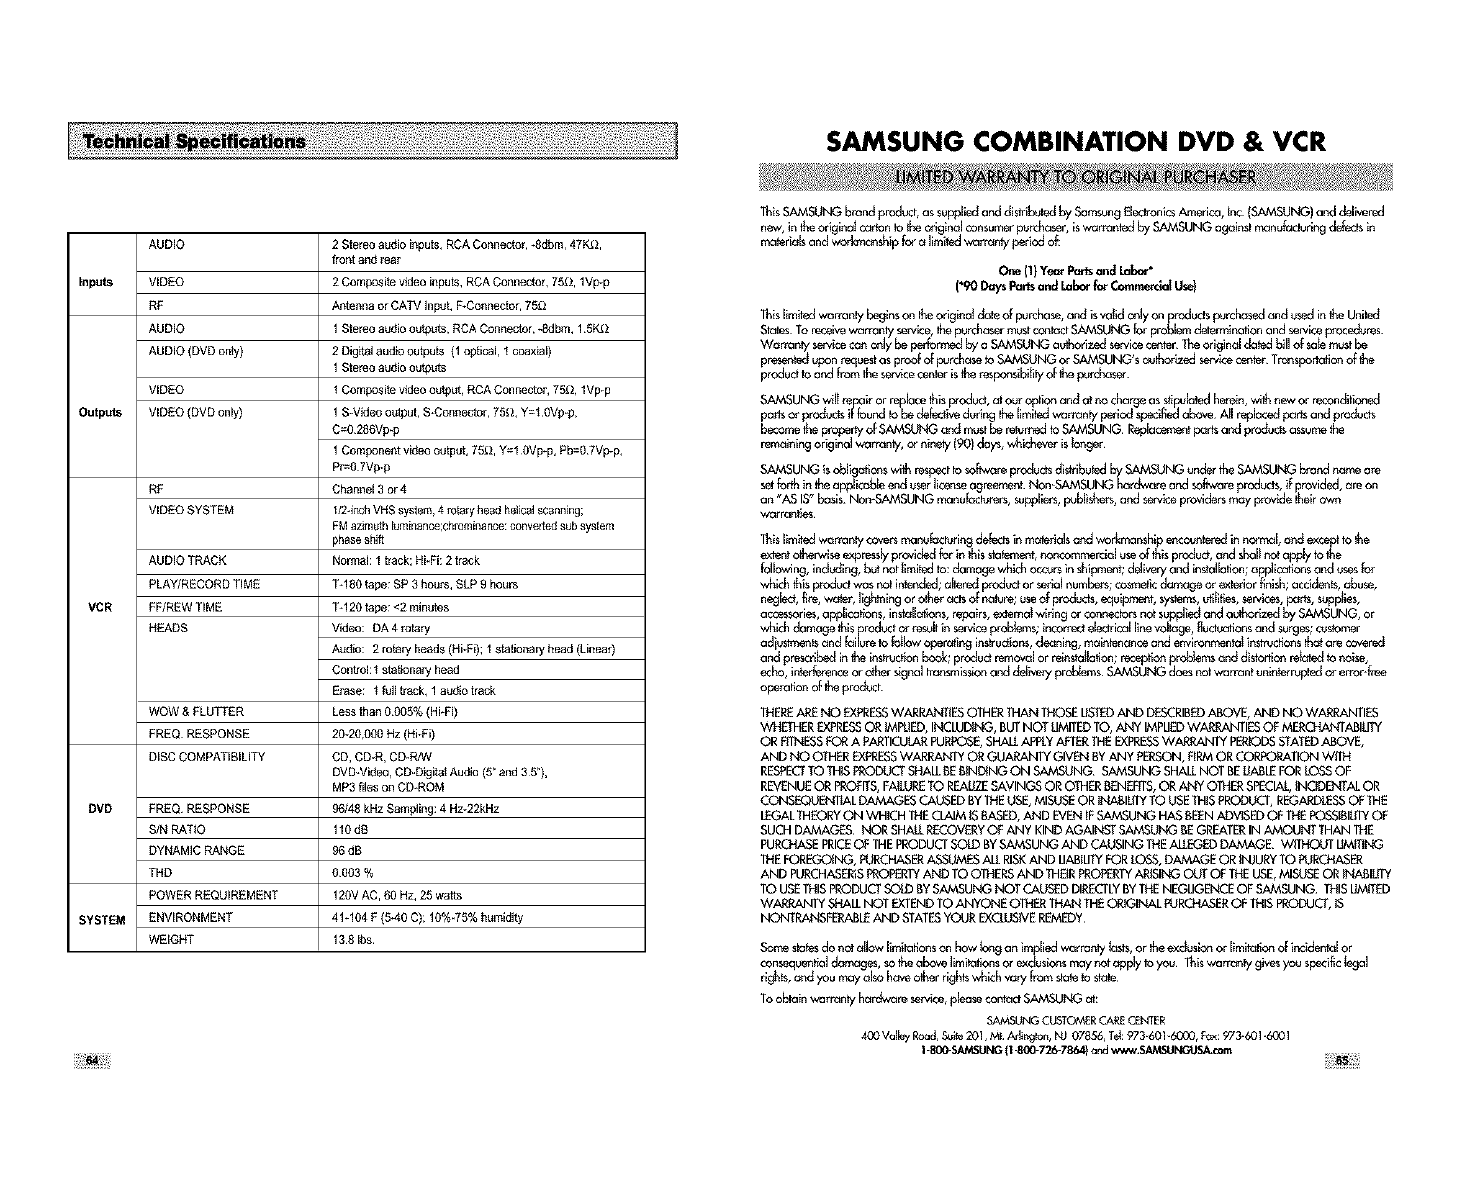
AUDIO
Inpu_ VIDEO
RF
AUDIO
AUDIO (DVD only)
VIDEO
Outputs VIDEO (DVD only)
RF
VIDEO SYSTEM
AUDIO TRACK
PLAY/RECORD TIME
VCR FHREW TIME
HEADS
WOW& FLUTTER
FREQRESPONSE
DISC COMPATIBILITY
DVD FREQRESPONSE
S/NRATiO
DYNAMIC RANGE
THD
POWER REQUIREMENT
SYSTEM ENVIRONMENT
WEIGHT
2 Stereoaudioinputs, RCAConnector,*8dbm,47KG,
front and l_ar
2 Compositewdeoinputs,RCAConnec_r, 7_, IVp-p
Antenna or CATV input, F-Connector,75_
1 Stereoaudiooutouts,RCAConnector,_Sdbm,15KG
2 Dig_l audio outputs (1optical f coaxtsl)
1 Stereoaudiooutouts
f Compositewdeo autout,RCAConnector, 75G, 1Vp_p
1 S-Videooutput,S-Connector,75_, Y=f0Vp.p,
C=0 286Vp_p
1 Componentvideooutput,7_2, Y=I 0Vp_p,Pb=0 7Vp-p,
Pr=0 7Vp_p
Channel 3or4
l/2edchVBS system,4 rotaryheadhelicalscanning;
FMazimuthluminance;chrominarice:convertedsubsystem
phaseshift
Normal:1 track;Hi-Fi:2 track
%180 tape:SP 3 hour, SLP g hours
T÷120tape:<2 minutes
Video: DA4 _tary
Audio: 2 rotaryheeds(Hi-Fi);1stahonaryhead (Linen0
Control:f stahonaryheed
Erase: f frill track, 1audio track
Lessthan 000S% (Hi-Fi)
20_20,000Hz(Hi÷Fi)
CD, CD-R,CD-R?_V
DVD_Video,CD-Digi_a_Audio(S"and 35"),
MP3fitsson CD*ROM
96148kHzSampling:4 Hz-22kHz
110dB
96dB
0¸003 %
120VAC, 60 Hz,2S watts
41+104F (540 C); 10%_7S%humidity
138 ibs
SAMSUNG COMBINATION DVD & VCR
ThisSAMSUNGbreed product,as suppliedand distribuledby SamsungEleclronicsAn_ica, Inc (SAMSUNG)and delivered
new, intheorigina__rton to the originc_lconsumerpurchaser,iswarranledby SAMSUNGag_insl m_nufactortsg defedsin
materialsand woAmanship _ a limited warrc_y psrtodof:
One (1}Yea_Partsand Labor"
('90 DaysRErtsand Labor"for CommerclatUse)
Thislimiled warranty beginson theoriginaldate of purchase,and isvalid only on productspurchasedand usedintheUnitod
Stc4esTo receivewc_rrantysewice,thepurchc_sermustconl_ctSAMSUNGfor problemdelermi_on oed serviceprocedures.
Wc_rmntyservicecan only be pe4ormedby a SAMSUNGauthorizedservicecenter¸Theodgin_l datedbill of sa_emustbe
presentodupon requ_l os proofof pvrchc_seto SAMSUNGor SAMSUNG'scuthorizedservicecenter¸Trensportattonof 1_
productto and from the servicecenteristheresponsibStyof 1_ purchaser.
SAMSUNGwiff repairor raplac_thisproduct,al our option c¢_dat no chc_rgeasstipulatedherein,with new or reconditioned
pa_ or pro_cts iffoued to be defectiveduring l_ limitedwarranty period specifiedabove¸All replacedp_ffs and products
becometheprape_ of SAMSUNGc_edmustbere_med to SAMSUNG Replacementp_rts and productsassumethe
rerr_intog origto_lwarmnly, or ntoely (90)days, whicheverisbn@r
SAMSUNGisobligaltonswith respectto sof_are productsdistributedbySAMSUNGundertheSAMSUNGbrand nccr_are
setforth in theapplicableend userlicenseagreement¸Non_SAMSUNGhc_rdw_reand softwareproductB if provided,ar_ on
an "AS IS"basis.Non_SAMSUNGmanufac_rers,suppliers,publishers,and serviceprovidersmay providetheirown
warrc_ties
Thislimitedwc_r_antycoversmanufacludngdefectsin matsrialsand workmanshipencounteredin norn_l, c¢_dexceptIo the
extentotherwiseeapressb,provided for in thisstatement,_ncommerctol useof thisproduct,and sholl notapPb"to the
_bwing, including,butnot_imitsdto:damagewhich occursin shipment;d_liveryand installation;appli_ons and uses_r
whichthisproductwas nol intended;c_lleredproductor serbl numbers;cosrr_ic dcmage or exterior finish;accidents,abuse,
neglect,fire,_, lightningor otheractsof _re; useof products,equipment,sys_ms,ul$1tsAservices,parts,s_pplies,
accessories,applications,inslalla_ns, repairs,ex_ma_widng or connectorsnol suppltsdand outhorizedby SAMSUNG,or
whichdamage thisproduct or _s_lt in serviceprob_ms; incorrectelectri_l linevoltoge,_u_ons and surges;customer
adiustmentsc_edf_ilure Io _low aperaltog inslrudions,cleaning, maintenanceand envlronmento_insfeJctionsthaiare covered
and pr_cribed intheinstructionbook; productremovalor reinstollafion;recaption_robbms c_eddistortion rolatedto noise,
echo,interferenceor other signaltmmsmissionand delive_ prob_ms SAMSUNG doesnol warrant uninterruptedor error-free
operationof thepr_bcL
THEREARENO EXPRESSWARRANTIESOTHERTHANTHOSEUSTEOAND DESCRIBEDABOVE,AND NO WARRANTIES
WHETHEREXPRESSOR IMPUED,INCLUDIF_, BUTNOT UMITEDTO, ANY IMPUEDWARRANTIESOF MERCHANTABILITY
OR FrlNESSFORA PARTICULARPURPOSE,SHALLAPPLYAFTERTHEEXPRESSWARRANIY PERIODSSTATL::DABOVE,
AND NO OTHEREXPRESSWARRANTYOR GUARANIY GIVBq BYANY PERSON,FIRMORCORPORATIONWITH
RESPECTTO THISPRODUCTSHALLREBIND{NOON SAMSUNG SAMSUNGSHALLNOT BEL_BLEFORLOSSOF
REVENUEOR PROFITS,FNLURETO REALbZESAVINGSOR OTHERBENEFITS,OR ANY OTHERSPECIAL,INCDENTALOR
CONSEQUENfllALDAMAGESCAUSEDBYTHEUSE,MISUSEOR _BIb'TY TO USETHISPRODUCT,REGARDLESSOFTHE
LEGALTHEORYON WHICHTHECLAIMISBASED,AND EVENtFSAM,SUNGHASBEENADVISEDOFTHEPOSS_BILffYOF
SUCHDAMAGES¸ NOR SHALLRECOVERYOF ANY KIND AGAINSTSAMSUNG BEGREATERIN AMOUNT THANTHE
PUR_ PRICEOF THEPRODUCtSOlD BYSAMSUNGAND CAUSINGTHEALLEGk*DDAMAGE¸ _ UMtTING
THEFOREGOING,PURCHASERASSUMESALLRISKAND UABIBTYFORLOSS,DAMAGE OR _ixUURYTO PURCHASER
AND PURCHASERISPROPERLYAND TO OTHERSAND THEIRPROPERTYARLSINGOUT OF THEUSE,MISUSEOR B'4ABILflY
TOUSETHISPRODUCTSOLDBYS,AMSUNGNOT CAUSEDDIRECTLYBYTHENEGUGENCEOF SAMSUNG THISUMtTED
WARRANTYSHALLNOT EXTENDTOANYONE OTHERTHANTHEOPJGINALPURCHASEROFTHISPRODU_, IS
NONTRANSFERABLEAND STATESYOUREXCLUSIVEREMEDY¸
Someslatesdo notallow limito_onson how bng an implied wermnty lestB or the exdustonor limil_honof inddenl_l or
consequentialdomages,solhe above limitofionsor exclusionsmay notapply toyou Thiswarr_ty givesyou specificb:jal
rights,and you may c_Isohere other rightswhich varyfromstototo stc4e
Toobtain warrenly hordw_re service,pleaseconradSAMSUNG c4:
SAMSUNGCLLSTOM_RCA_ CENTER
400 ValleyRoad,Suite201,Mt Adir_, NJ 07856,Tel:973-601-6000,Fax:973-601-6001
1-800-SAMSUNG(l 800-72/o-7864)and_,_v,S/_,SUIx_US_c_m !i!i;:i_::i!i
SAMSUNG ELECTRONICS AMERICA, INC.
HEADQUARTERS
105 Challenger Road, Ridgefield Park, N.J,
07660-0511
TEL:I-800-SAMSUNG
SERVICE DIVISION
400 Valley Road, Saite 201, Mount Arlington, NJ 07856
1-800-SAMSUNG (1-800-726-7864)
www,SAMSUNGUSA.com
ELECTRONICS
AK68-OO135A
