Samsung SRP 370G User Manual To The 6fdcb968 423c 4e7c 9a48 C11fd1831107
User Manual: Samsung SRP-370G to the manual
Open the PDF directly: View PDF ![]() .
.
Page Count: 33
Windows Driver Manual
SRP-370
Thermal Printer
Rev. 2.06
http://www.bixolon.com

SRP-370
Rev. 2.06
- 2 -
■ Table of Contents
1. Manual Information ........................................................................................................ 3
2. Operating System (OS) Environment ........................................................................... 3
3. Windows Driver Preparation ......................................................................................... 3
4. Windows Driver Installation .......................................................................................... 4
4-1 Installing on Windows XP / Server 2003 ..................................................................... 4
4-1-1 Via Serial Port or Parallel Port .............................................................................. 4
4-1-2 Via USB Port ........................................................................................................ 8
4-2 Installing on Windows VISTA / Server 2008 / 7 / 8 .................................................... 13
4-2-1 Via Serial Port or Parallel Port ............................................................................ 13
4-2-2 Via USB Port ...................................................................................................... 17
5. Windows Driver Settings ............................................................................................. 20
5-1 Paper ........................................................................................................................ 20
5-1-1 Paper Size .......................................................................................................... 21
5-1-2 Paper Type ......................................................................................................... 22
5-1-3 Copies ................................................................................................................ 22
5-1-4 Color ................................................................................................................... 22
5-2 Document Settings ................................................................................................... 23
5-2-1 Send Commands ................................................................................................ 23
5-2-2 Cash Drawer....................................................................................................... 24
5-2-3 Line Feed ........................................................................................................... 24
5-2-4 Cut ...................................................................................................................... 24
6. Windows Driver Specifications ................................................................................... 25
6-1 Fonts ......................................................................................................................... 25
6-2 Special Functions...................................................................................................... 26
6-3 Barcodes .................................................................................................................. 28
6-4 Two-Dimensional Barcodes ...................................................................................... 28
7. Use of Windows Driver ................................................................................................ 29
7-1 Use of Visual Basic ................................................................................................... 29
7-1-1 Windows Driver Selection ................................................................................... 29
7-1-2 Test Printing ........................................................................................................ 29
7-1-3 Barcode Printing ................................................................................................. 30
7-1-4 Two-Dimensional Barcode Printing ..................................................................... 30
7-2 Use of WordPad ....................................................................................................... 31
7-2-1 WordPad Environment Settings .......................................................................... 31
7-2-2 Text Printing ........................................................................................................ 31
7-2-3 Barcode Printing ................................................................................................. 32
7-2-4 Two-Dimensional Barcode Printing ..................................................................... 33

SRP-370
Rev. 2.06
- 3 -
1. Manual Information
This Windows Driver Installation Manual provides information on installation, detailed
specifications, and usage of the printer’s Windows Driver according to PC operating
system (OS).
We at BIXOLON maintain ongoing efforts to enhance and upgrade the functions and
quality of all our products. In following, product specifications and/or user manual content
may be changed without prior notice.
2. Operating System (OS) Environment
The following operating systems are supported for usage.
- Microsoft Windows XP (32bit/64bit)
- Microsoft Windows Server 2003 (32bit/64bit)
- Microsoft Windows Vista (32bit/64bit)
- Microsoft Windows Server 2008 (32bit/64bit)
- Microsoft Windows Server 2008R2 (64bit)
- Microsoft Windows 7 (32bit/64bit)
3. Windows Driver Preparation
The Windows Driver is included in the enclosed CD, and Latest file versions can be
downloaded from the BIXOLON website. (www.bixolon.com)
SRP-370
Rev. 2.06
- 4 -
4. Windows Driver Installation
4-1 Installing on Windows XP / Server 2003
4-1-1 Via Serial Port or Parallel Port
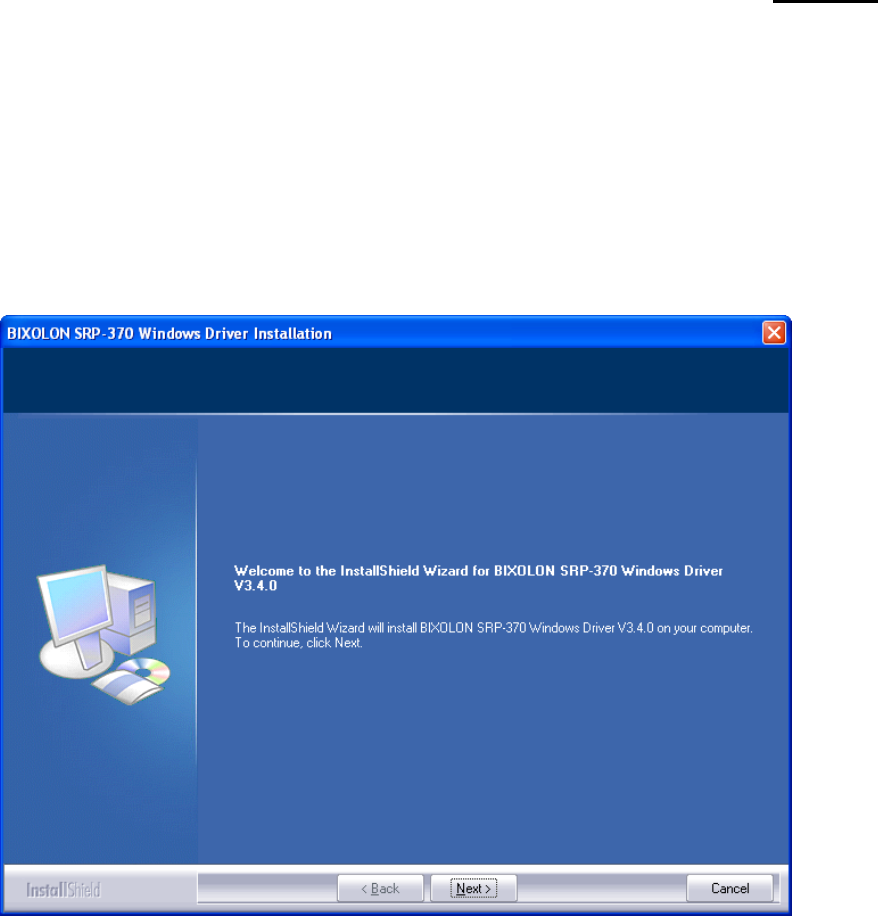
1) Double-click the Windows Driver installation file.
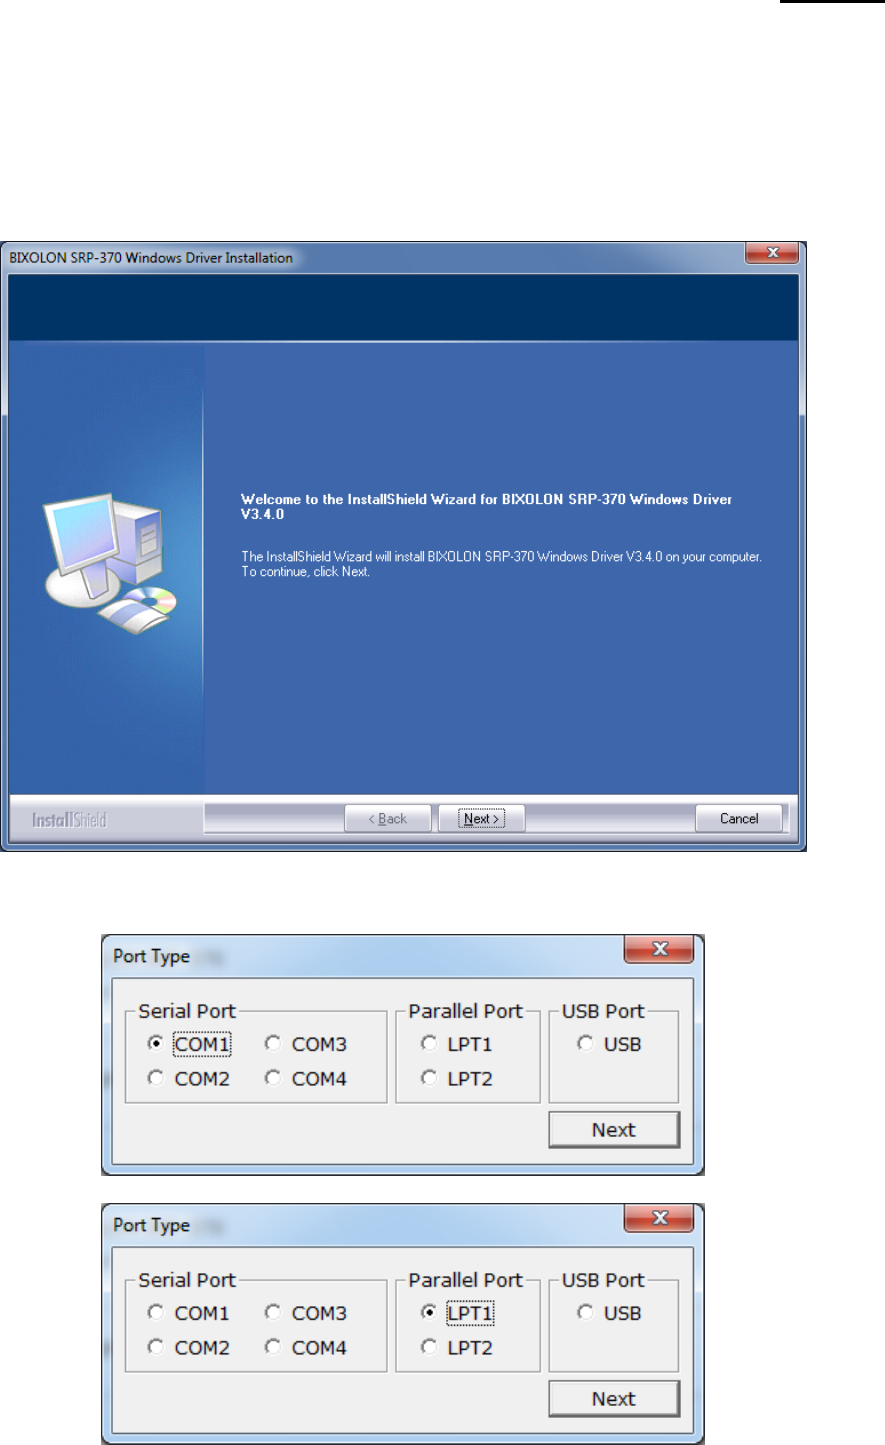
2) Click “Next”.
SRP-370
Rev. 2.06
- 5 -
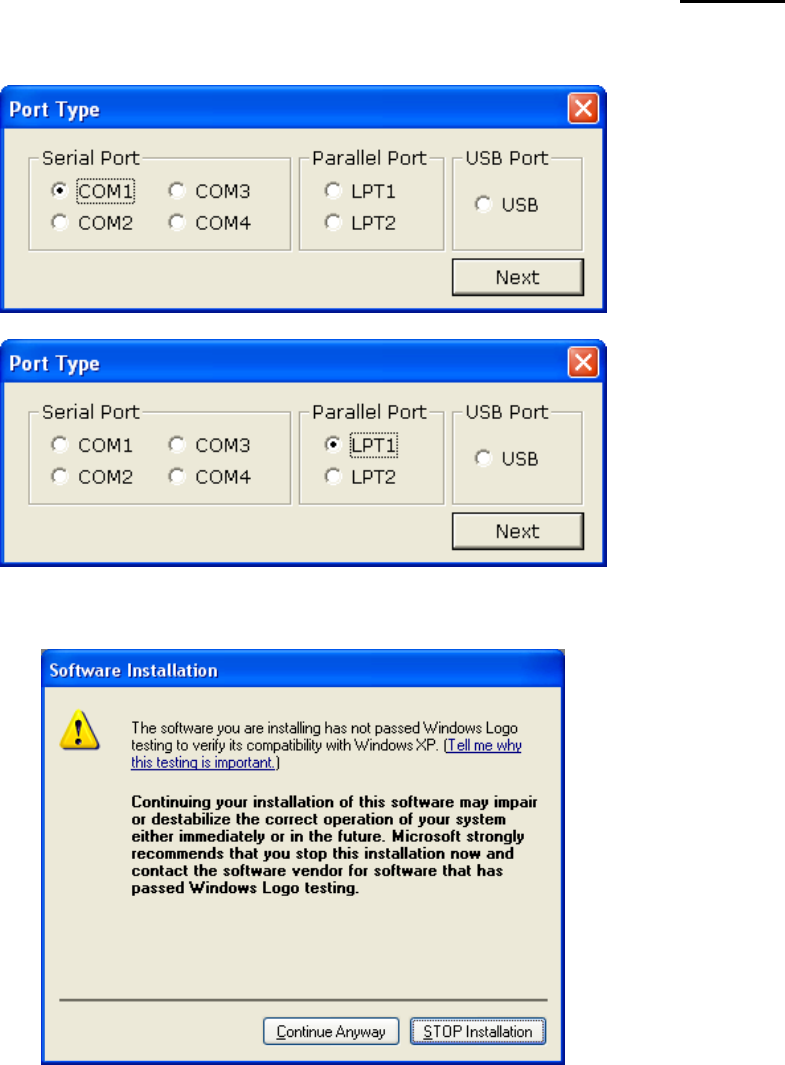
3) Select a COM port or LPT port to be used and then click “Next”
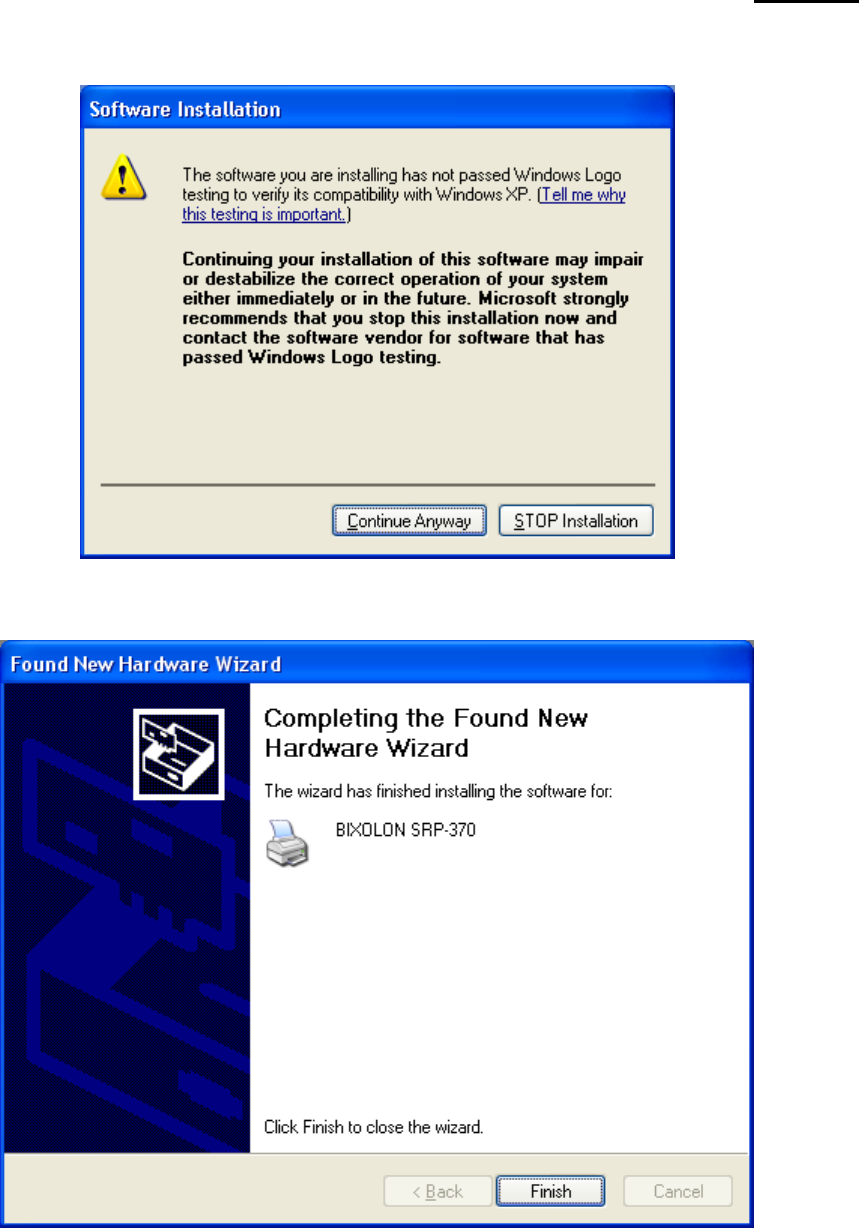
4) When the following message box appears, click “Continue Anyway”.
SRP-370
Rev. 2.06
- 6 -
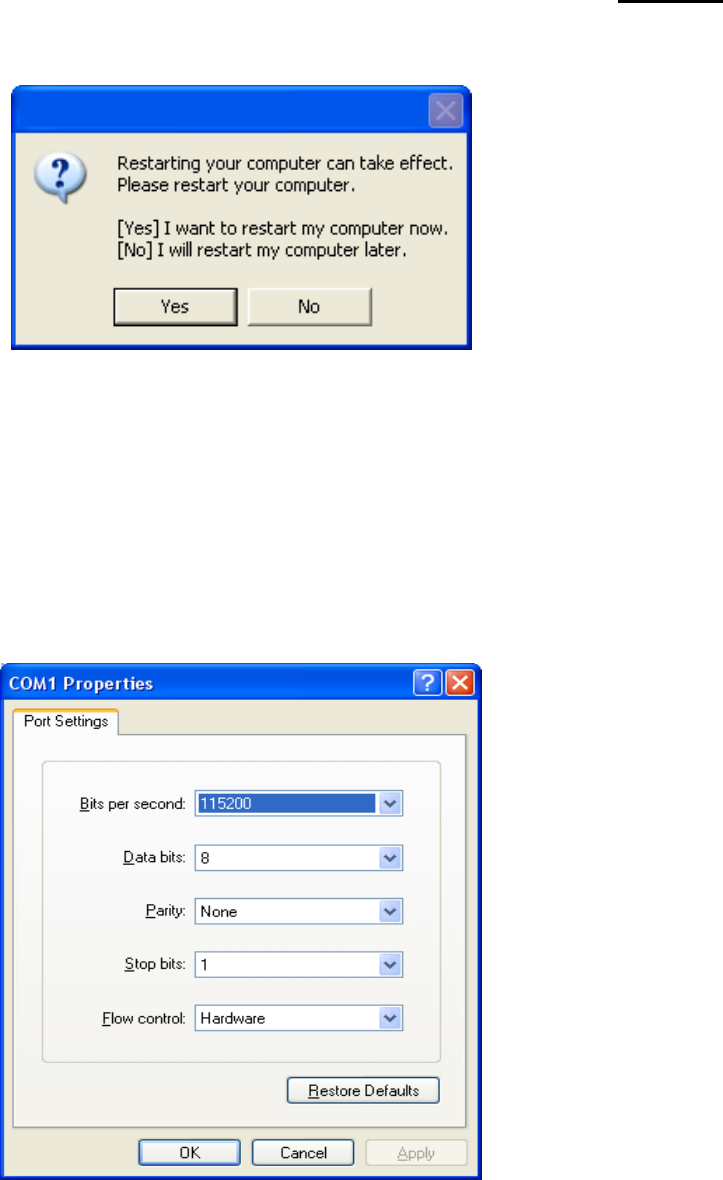
5) Click “Yes” to reboot the PC.
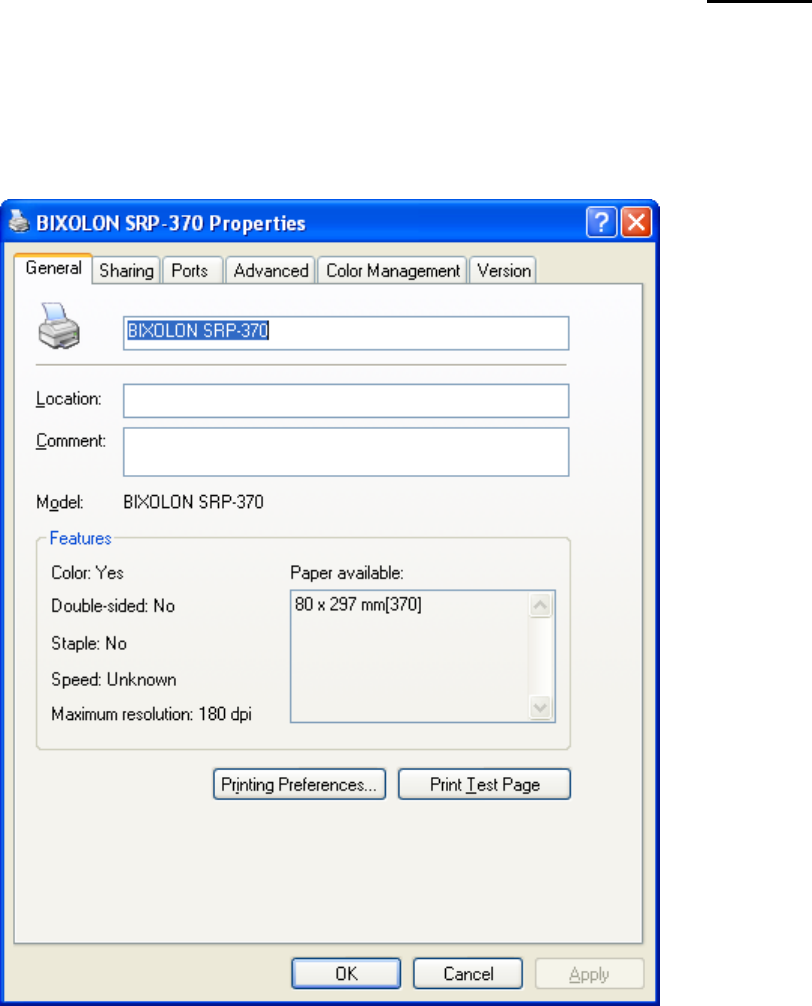
6) Open the printer properties window in the Windows OS.
※ Control Panel – Printers and Faxes.
7) In the “Ports” tab, click “Configure Port…”
※ Pass this step if you are using a parallel port.
8) Match the communication settings to those of the printer. The communication settings of
the printer can be performed by conducting a self-test.
※ Pass this step if you are using a parallel port.
SRP-370
Rev. 2.06
- 7 -
9) Click “Print Test Page” and check printing status. Proper installation of the driver is
indicated if the test page is printed normally.
SRP-370
Rev. 2.06
- 8 -
4-1-2 Via USB Port
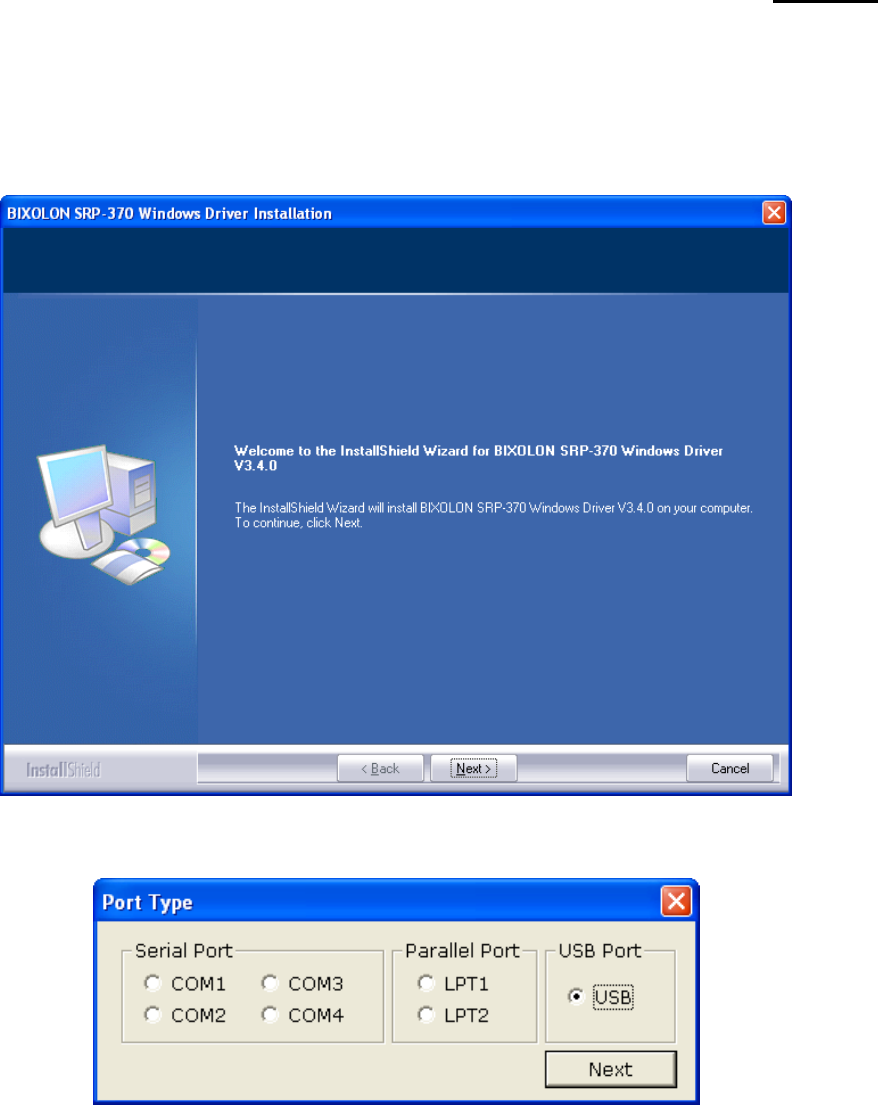
1) Double-click the Windows Driver installation file.
2) Click “Next”.
3) Select “USB” and then click “Next”.
SRP-370
Rev. 2.06
- 9 -
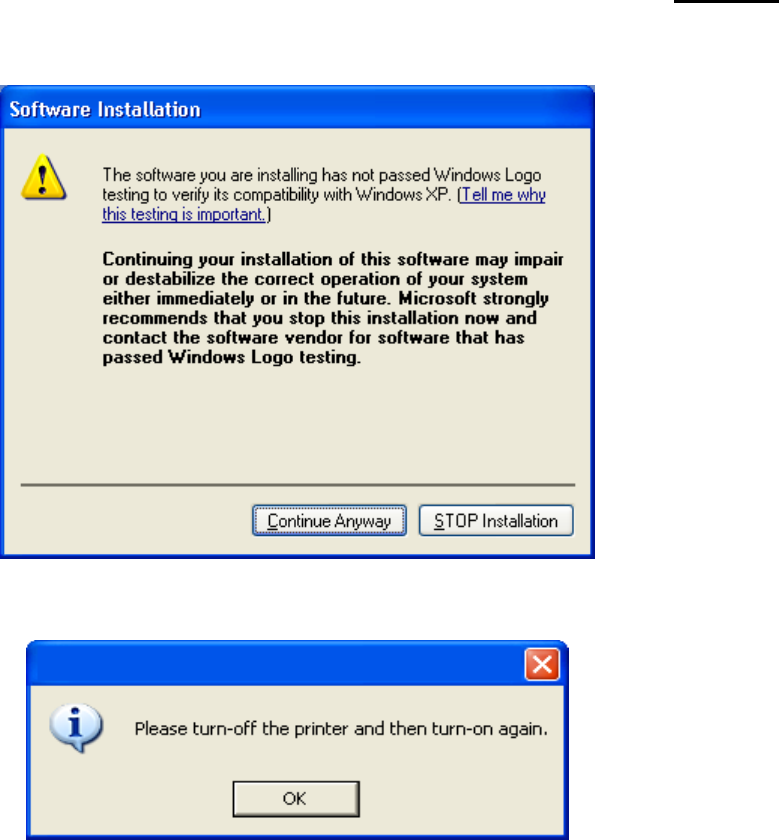
4) When the following message box appears, click “Continue Anyway”.
5) Click the “OK”.
6) Turn off the printer and then turn it on.
SRP-370
Rev. 2.06
- 10 -
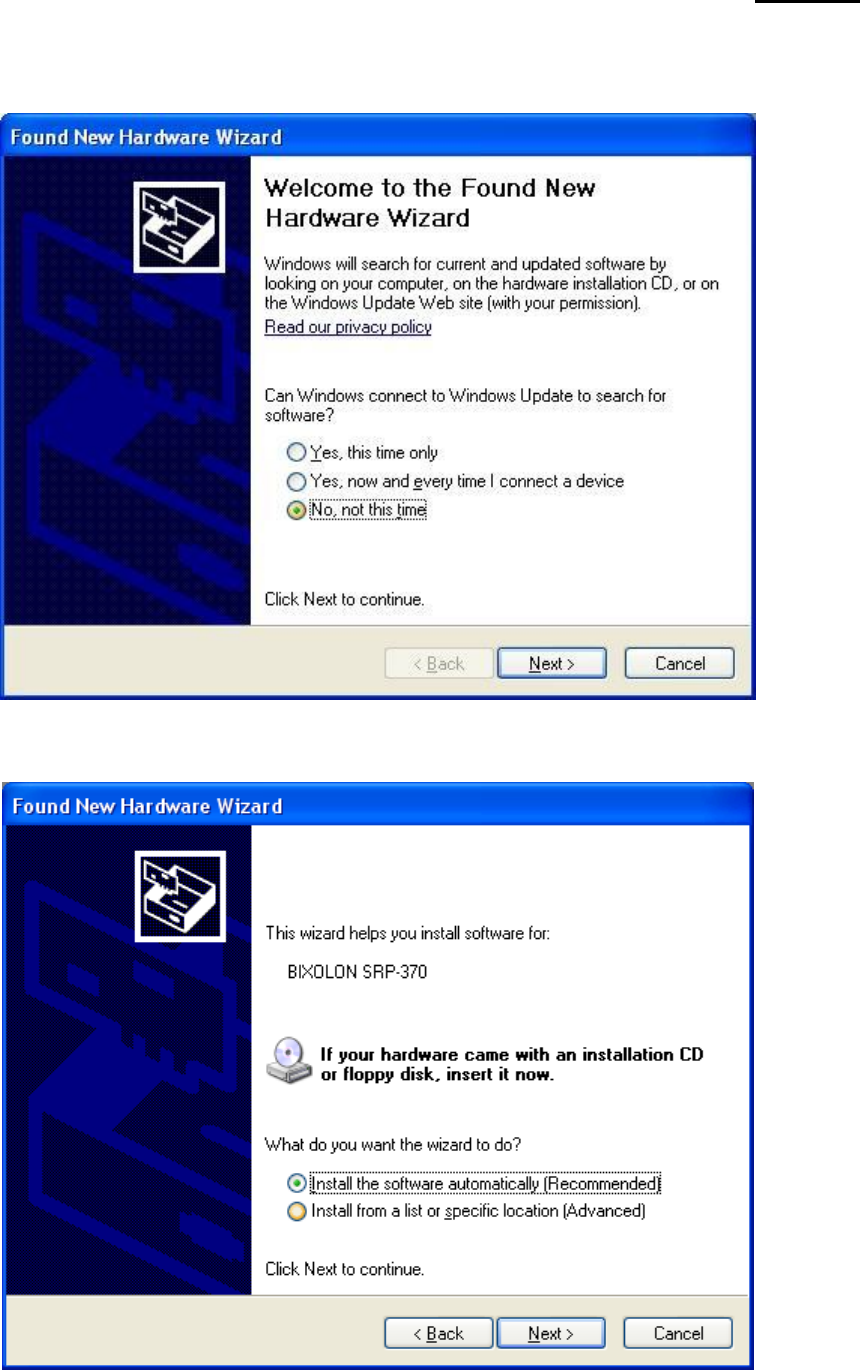
7) When the New Hardware Wizard appears for the installation of the Windows Driver,
select the option as shown below and click “Next”.
8) Click “Next”.
SRP-370
Rev. 2.06
- 11 -
9) When the following message box appears, click “Continue Anyway”.
10) Click “Finish”.
SRP-370
Rev. 2.06
- 12 -
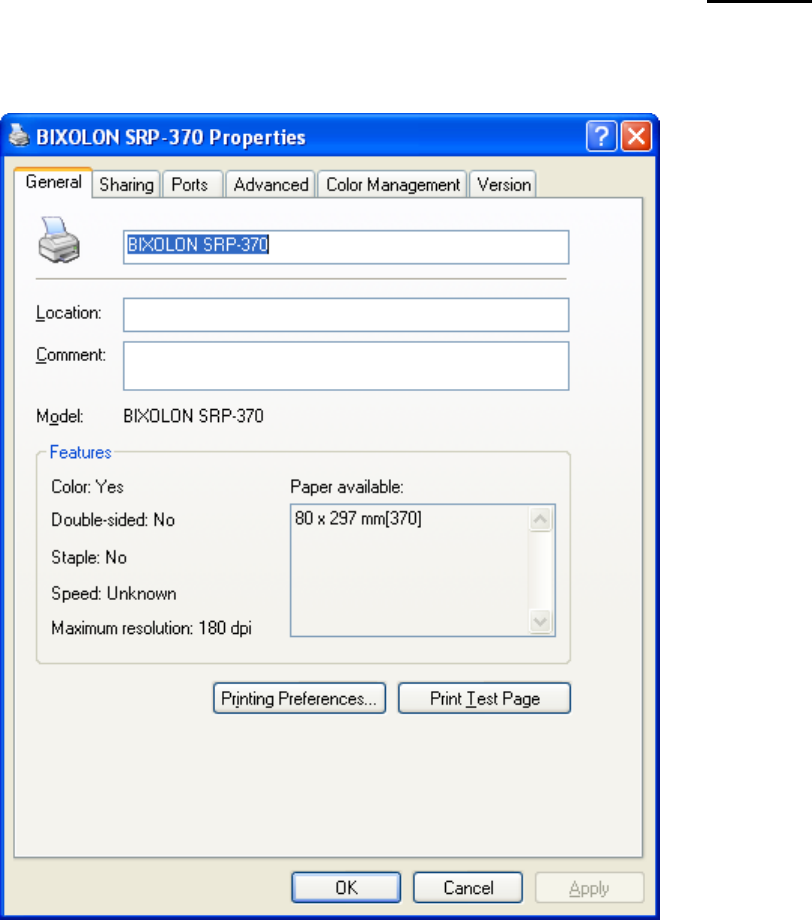
11) Open the printer properties window in the Windows OS.
※ Control Panel – Printers and Faxes.
12) Click “Print Test Page” and check printing status. Proper installation of the driver is
indicated if the test page is printed normally.
SRP-370
Rev. 2.06
- 13 -
4-2 Installing on Windows VISTA / Server 2008 / 7 / 8
4-2-1 Via Serial Port or Parallel Port
1) Double-click the Windows Driver installation file.
2) Click “Next”.
3) Select a COM port or LPT port to be used and then click “Next”.
SRP-370
Rev. 2.06
- 14 -
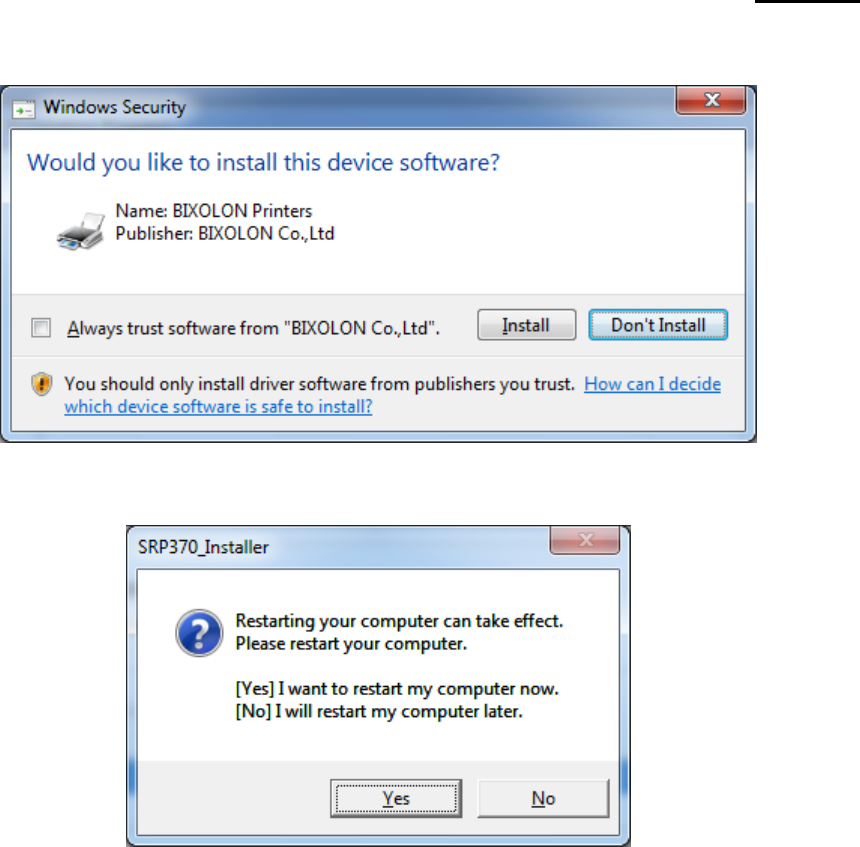
4) When the following message box appears, click “Install”.
5) Click “Yes” to reboot the PC.
SRP-370
Rev. 2.06
- 15 -
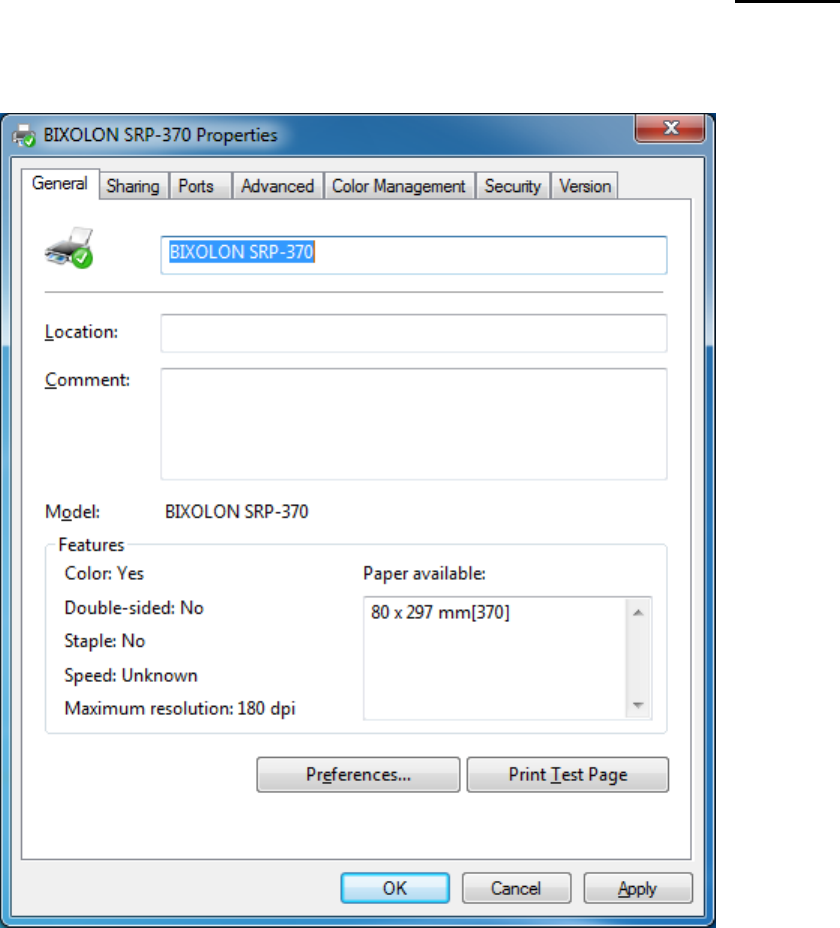
6) Open the printer properties window in the Windows OS.
※ Control Panel – Hardware and Sound – Device and Printers.
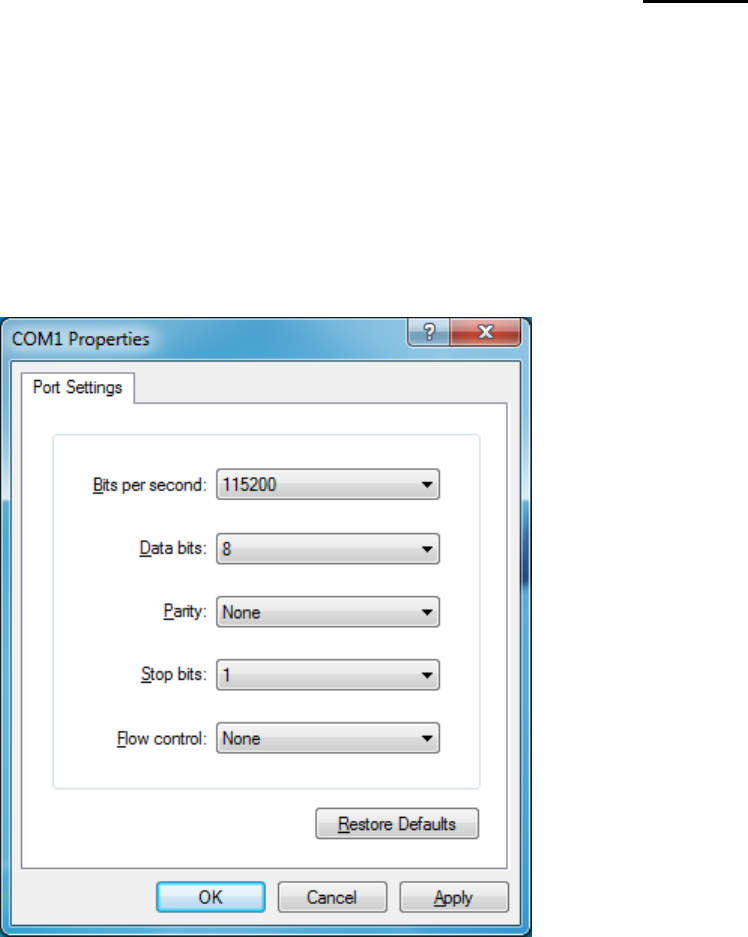
7) In the “Ports” tab, click “Configure Port…”
※ Pass this step if you are using a parallel port.
8) Match the communication settings to those of the printer. The communication settings of
the printer can be performed by conducting a self-test.
※ Pass this step if you are using a parallel port.
SRP-370
Rev. 2.06
- 16 -
9) Click “Print Test Page” and check printing status. Proper installation of the driver is
indicated if the test page is printed normally

SRP-370
Rev. 2.06
- 17 -
4-2-2 Via USB Port
1) Double-click the Windows Driver installation file.
2) Click “Next”.
3) Select “USB” and then click “Next”.
SRP-370
Rev. 2.06
- 18 -
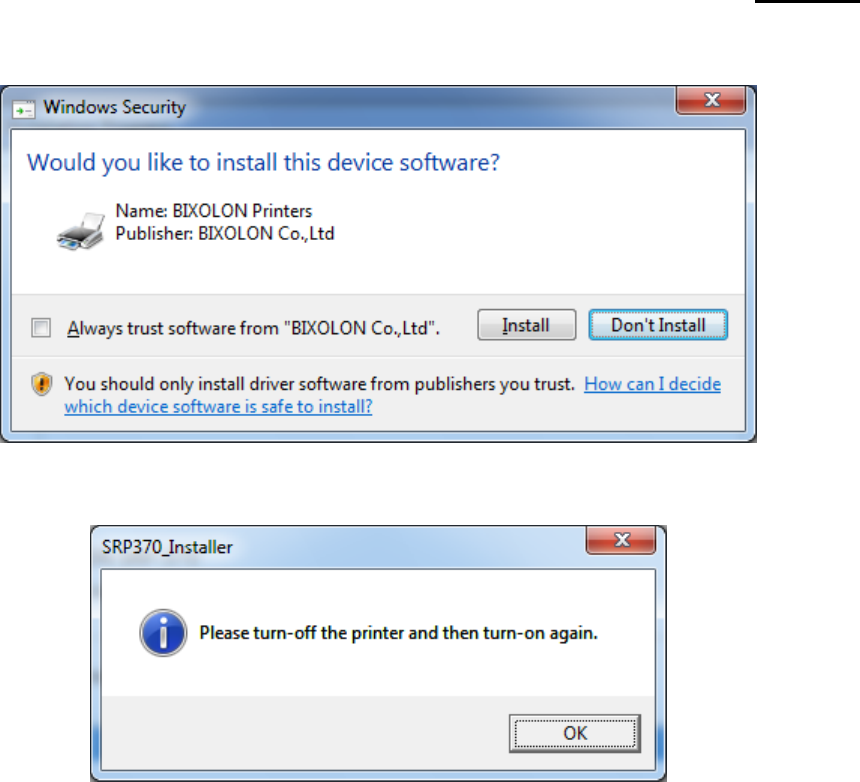
4) When the following message box appears, click “Install”.
5) Click the “OK”.
6) Turn off the printer and then turn it on. The printer driver will be installed automatically.
SRP-370
Rev. 2.06
- 19 -
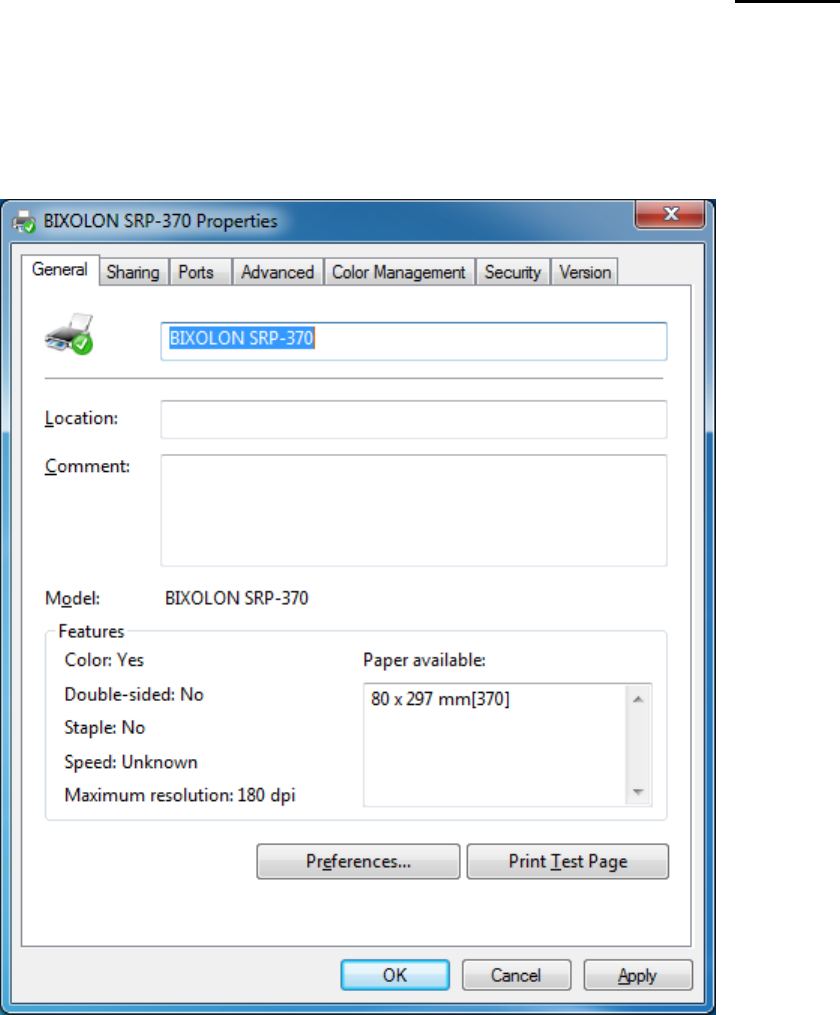
7) Open the printer properties window in the Windows OS.
※ Control Panel – Hardware and Sound – Device and Printers.
8) Click “Print Test Page” and check printing status. Proper installation of the driver is
indicated if the test page is printed normally.
SRP-370
Rev. 2.06
- 20 -
5. Windows Driver Settings
The following functions can be configured after installing the Windows driver.
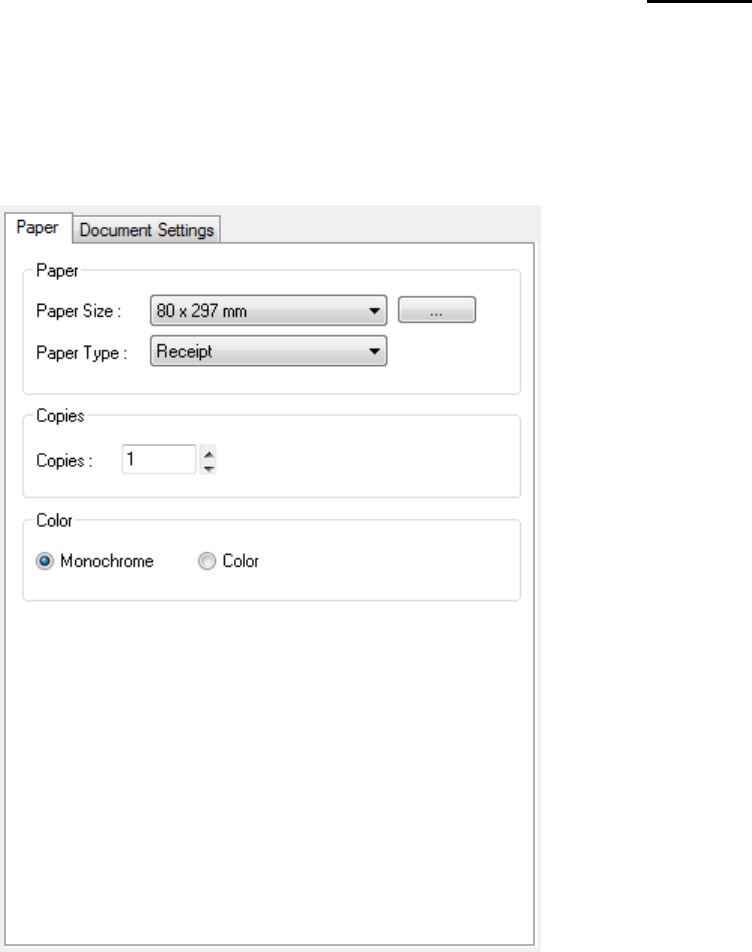
5-1 Paper
1) Open the Printer Properties window for the corresponding OS.
2) Click the “Preferences” button in the “General” tab.
3) Click “Paper” Tab.
SRP-370
Rev. 2.06
- 21 -
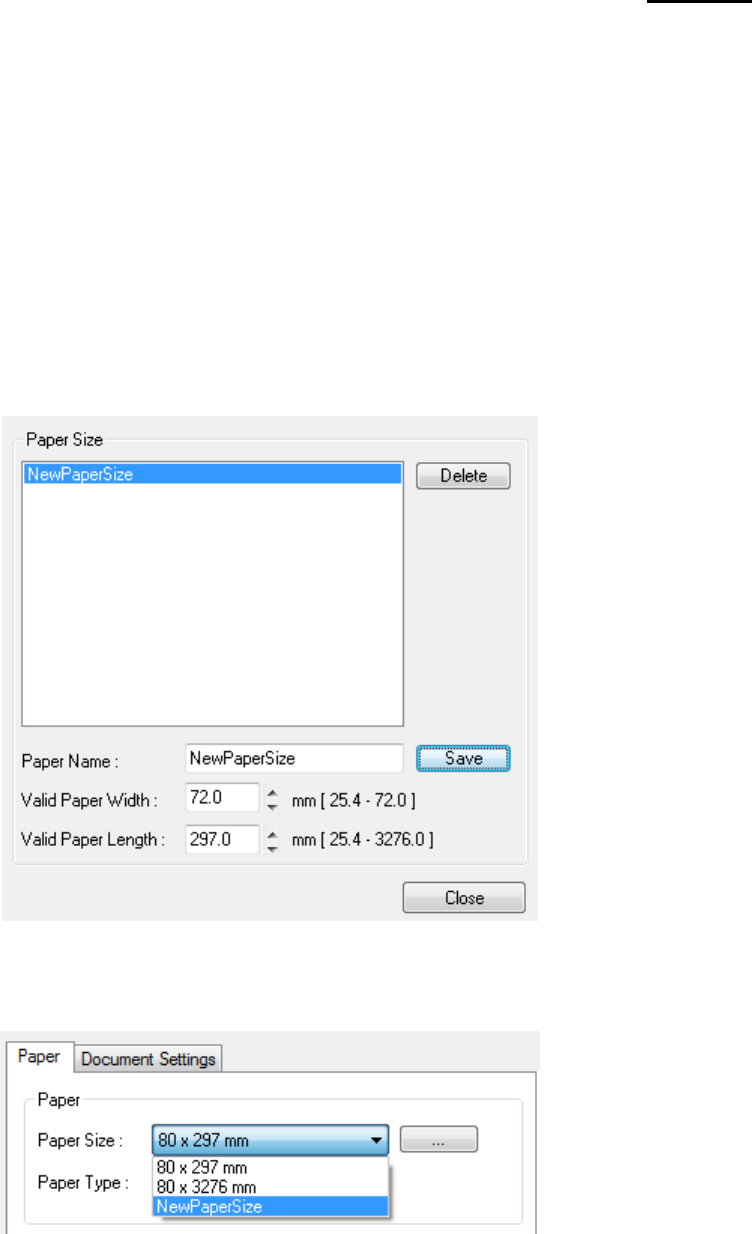
5-1-1 Paper Size
Paper size of 80 x 297 mm is selected by default, and the following sizes can be selected.
80 297 mm
80 3276 mm
If a custom paper size is required, click the “…” button to add or update a custom paper
size and then, click the “Save” button after specifying the paper width/length and a paper
name. If the specified paper name already exists on the system, you can update the paper
width/length.
Valid Paper Width
:
25.4 mm ~ 72.0 mm
Valid Paper Length
:
25.4 mm ~ 3276 mm
You can choose the new paper size on the “Paper Size” combo-box after adding a paper
size.
Delete button: Deletes the paper size selected in the list.
Save button: Adds a new paper size or update the paper size selected in the list if the
paper name already exists on the system.
SRP-370
Rev. 2.06
- 22 -
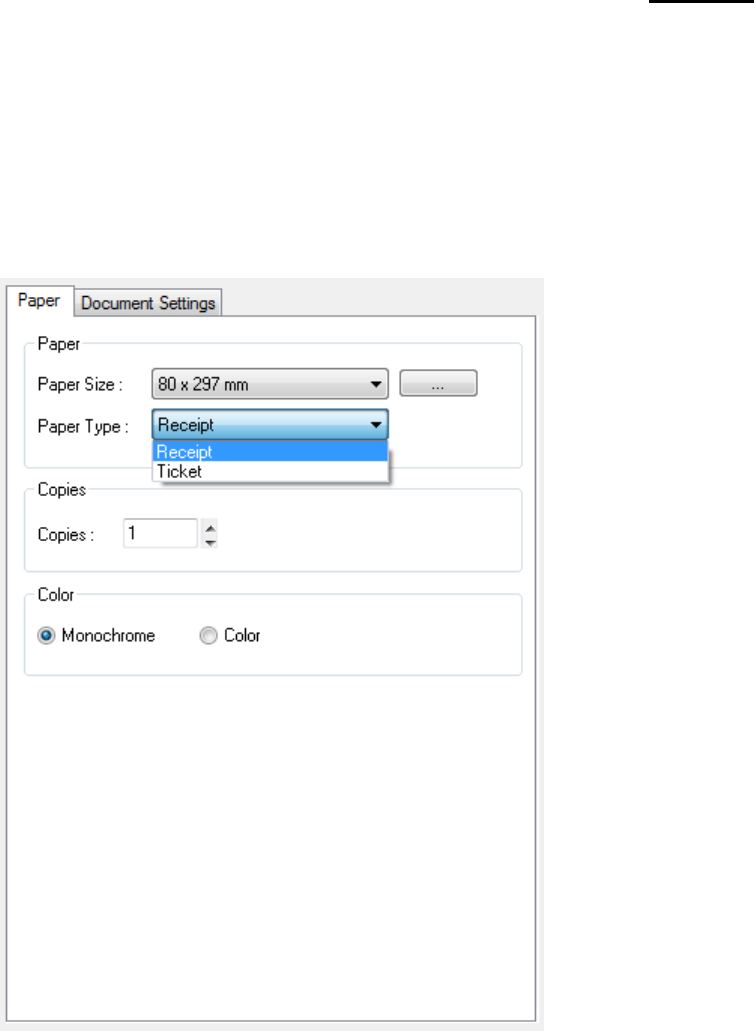
5-1-2 Paper Type
You can choose Receipt or Ticket as paper types. Receipt allows flexible paper length
according to the data length. Ticket print in fixed length even the print data is short. Default
setting is “Receipt”.
Receipt
:
Receipt allows flexible paper length according to the data length.
Ticket
:
Ticket print in fixed length even the print data is short.
5-1-3 Copies
Copies are printed by specifying the copy count. The copy count is set to 1 by default. Set
this value bigger than 1 to set the number of copies to print. The value should be within the
range of 1 to 255.
5-1-4 Color
The Color is set to Monochrome by default. Select Color if you are using two color thermal
paper (i.e. Red & Black).
SRP-370
Rev. 2.06
- 23 -
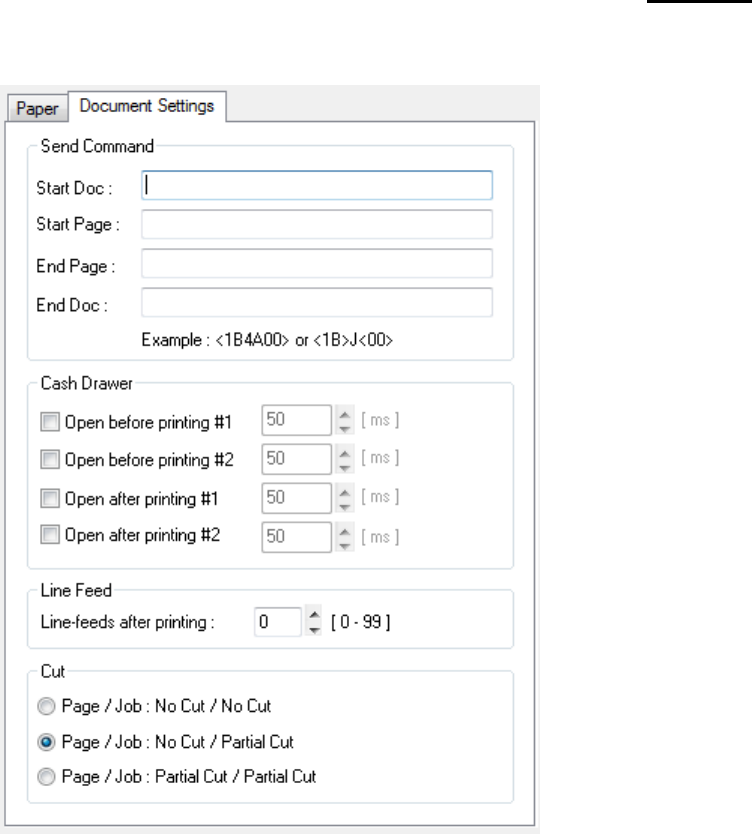
5-2 Document Settings
1) Open the Printer Properties window for the corresponding OS.
2) Click the “Preferences” or “Printing Preferences” button in the “General” tab.
3) Click “Document Settings” Tab.
5-2-1 Send Commands
The Windows driver serves to receive the content for print from an application and send it
to the printer. The “Send Commands” function allows for the addition of desired commands
at the start or end of the print content.
Start Doc
:
Addition of command at the beginning of the document.
Start Page
:
Addition of command at the beginning of the page.
End Page
:
Addition of command at the end of the page.
End Doc
:
Addition of command at the end of the document.
For more information on the hexadecimals that can be entered in “Start Doc”, “Start Page”,
“End Page” and “End Doc”, refer to the Control Commands Manual.

SRP-370
Rev. 2.06
- 24 -
5-2-2 Cash Drawer
To open a cash-drawer before printing, tick “Open before printing #1” or “Open before
printing #2” in the “Cash Drawer” and then click “OK”.
To open a cash-drawer after printing, tick “Open after printing #1” or “Open after printing
#2” in the “Cash Drawer” and then click “OK”.
5-2-3 Line Feed
Enter the number between 0 and 99 for adding blank lines at the end of printing.
5-2-4 Cut
Paper can be cut at the end of each page or each document (job).
Page/Job : No Cut / No Cut
:
Paper is not cut after printing.
Page/Job : No Cut / Partial Cut
:
Paper is cut at the end of each document (Job).
Page/Job : Partial Cut / Partial Cut
:
Paper is cut at the end of each page.

SRP-370
Rev. 2.06
- 25 -
6. Windows Driver Specifications
6-1 Fonts
The Windows Driver of the printer supports the fonts listed below.
Printing is done at faster speed when using the fonts below as opposed to the Windows
fonts of the OS.
Printer Fonts
Character Size (dot)
Sizes (point)
FontA1x1
FontA1x1[Ext.]
FontA1x1[255]
FontA1x1(12x24)
9.5
FontA1x2
FontA1x2[Ext.]
FontA1x2[255]
FontA1x2(12x48)
19
FontA2x1
FontA2x1[Ext.]
FontA2x1[255]
FontA2x1(24x24)
9.5
FontA2x2
FontA2x2[Ext.]
FontA2x2[255]
FontA2x2(24x48)
19
FontA2x4
FontA2x4[Ext.]
FontA2x4[255]
FontA2x4(24x96)
38.5
FontA4x2
FontA4x2[Ext.]
FontA4x2[255]
FontA4x2(48x48)
19
FontA4x4
FontA4x4[Ext.]
FontA4x4[255]
FontA4x4(48x96)
38.5
FontA4x8
FontA4x8[Ext.]
FontA4x8[255]
FontA4x8(48x192)
77
FontA8x4
FontA8x4[Ext.]
FontA8x4[255]
FontA8x4(96x96)
38.5
FontA8x8
FontA8x8[Ext.]
FontA8x8[255]
FontA8x8(96x192)
77
FontB1x1
FontB1x1[Ext.]
FontB1x1[255]
FontB1x1(9x17)
7
FontB1x2
FontB1x2[Ext.]
FontB1x2[255]
FontB1x2(9x34)
13.5
FontB2x1
FontB2x1[Ext.]
FontB2x1[255]
FontB2x1(18x17)
7
FontB2x2
FontB2x2[Ext.]
FontB2x2[255]
FontB2x2(18x34)
13.5
FontB2x4
FontB2x4[Ext.]
FontB2x4[255]
FontB2x4(18x68)
27
FontB4x2
FontB4x2[Ext.]
FontB4x2[255]
FontB4x2(36x34)
13.5
FontB4x4
FontB4x4[Ext.]
FontB4x4[255]
FontB4x4(36x68)
27
FontB4x8
FontB4x8[Ext.]
FontB4x8[255]
FontB4x8(36x136)
54.5
FontB8x4
FontB8x4[Ext.]
FontB8x4[255]
FontB8x4(72x68)
27
FontB8x8
FontB8x8[Ext.]
FontB8x8[255]
FontB8x8(72x136)
54.5
Printer Fonts are defined as follows.
1) FontA1x2
- ANSI Character code support (Code Page 1252)
- Character size (dot): 12 x 48 (double height)
- Sizes (point): 19
2) FontA1x2[Ext.]
- IBM expansion Character code support (Code Page 437)
- Character size (dot): 12 x 48 (double height)
- Sizes (point): 19
3) FontA1x2[255]
- Buyer exclusive code support (User Code Page)
- Character size (dot): 12 x 48 (double height)
- Sizes (point): 19

SRP-370
Rev. 2.06
- 26 -
6-2 Special Functions
The Windows Driver supports the special functions indicated below.
These special functions are available when using the characters after the “FontControl”
font is selected.
This function is not an ordinary character printing function. Take special care.
Character
Special Function
5
Prints HT (0 x 09)
6
Prints LF (0 x 0A)
7
Prints CR (0 x 0D)
a
Open Drawer 2 (50ms drive pulse width)
b
Open Drawer 2 (100ms drive pulse width)
c
Open Drawer 2 (150ms drive pulse width)
d
Open Drawer 2 (200ms drive pulse width)
e
Open Drawer 2 (250ms drive pulse width)
f
Open Drawer 2 (50ms drive pulse width) without feeding
g
Cut Receipt (partial cut) without paper feeding
i
Prints the NV graphic saved in the 00 address (Double Size)
j
Prints the NV graphic saved in the 01 address (Double Size)
k
Prints the NV graphic saved in the 02 address (Double Size)
l
Prints the NV graphic saved in the 03 address (Double Size)
m
Prints the NV graphic saved in the 04 address (Double Size)
p
Does not add HRI characters to the barcode
q
Adds HRI characters in Font A above the barcode
r
Adds HRI characters in Font A below the barcode
s
Adds HRI characters in Font B above the barcode
t
Adds HRI characters in Font B below the barcode
w
Aligns text to the left
x
Aligns text to the center
y
Aligns text to the right
A
Open Drawer 1 (50ms drive pulse width)
B
Open Drawer 1 (100ms drive pulse width)
C
Open Drawer 1 (150ms drive pulse width)
D
Open Drawer 1 (200ms drive pulse width)
E
Open Drawer 1 (250ms drive pulse width)
F
Open Drawer 1 (50ms drive pulse width) without feeding
G
Prints 1st NV bit image
H
Prints 2nd NV bit image
I
Prints 3rd NV bit image
J
Prints 4th NV bit image
K
Prints 5th NV bit image
P
Cut Receipt (partial cut)
R
Prints the NV graphic saved in the 00 address
S
Prints the NV graphic saved in the 01 address
T
Prints the NV graphic saved in the 02 address
U
Prints the NV graphic saved in the 03 address
V
Prints the NV graphic saved in the 04 address
SRP-370
Rev. 2.06
- 27 -
1) Sample Use
If the “FontControl” font is selected and 6 is entered, the “LF” (Line Feeding) operation is
activated. (does not entail the printing of the character “6)
2) “FontControl” Font Function
Printer Font for
Special Function
Function
Size (point/dot)
FontControl
Justification (Left/Center/Right)
Output HT, Output LF, Output CR
Barcode Printing
Print NV Graphic Data
(9.5 / 12x24)
Character
Special Function
[
Prints 1st NV bit image (Double Size)
]
Prints 2nd NV bit image (Double Size)
^
Prints 3rd NV bit image (Double Size)
_
Prints 4th NV bit image (Double Size)
`
Prints 5th NV bit image (Double Size)
SRP-370
Rev. 2.06
- 28 -
6-3 Barcodes
The Windows Driver supports the barcodes indicated below.
This function is available when entering barcode data after selecting “Printer Font Name”.
In addition, the “FontControl” font can be used to add HRI characters.
Printer Font Name
Size (Point)
Supported Characters
Codabar
20/40/60/80
Numeric: 0~9
Symbols: $, +, -, ., /, :
Letters: A~D
Code39
20/40/60/80
Numeric: 0~9
Symbols: $, +, -, ., /
Letters: A~Z
JAN13 (EAN)
20/40/60/80
Numeric: 0~9
JAN8 (EAN)
20/40/60/80
Numeric: 0~9
ITF
20/40/60/80
Numeric: 0~9
UPC-A
20/40/60/80
Numeric: 0~9
UPC-E
20/40/60/80
Numeric: 0~9
Code93
20/40/60/80
ASCII CODE: 0~127
Code128
20/40/60/80
ASCII CODE: 0~127
1) Sample Use
Select “Code39” and Size “20”, and then enter “1234”.
The barcode corresponding to “1234” is printed.
2) When Using Code128
Select “Code128” and Size “20”, and then enter “{B1234”.
The barcode corresponding to “1234” is printed.
When using “Code128”, characters, such as “{A”, “{B”, “{C”, should be included before
the input data.
6-4 Two-Dimensional Barcodes
The Windows Driver supports the following two-dimensional barcodes.
- PDF417
- QR Code
Usage is identical to that for the barcodes listed in 6-3.

SRP-370
Rev. 2.06
- 29 -
7. Use of Windows Driver
7-1 Use of Visual Basic
This section contains example codes to control the printer using Windows driver with
Visual Basic. Sample codes contained in the CD.
7-1-1 Windows Driver Selection
The following code is an example of the selection of the “BIXOLON SRP-370” Windows
Driver.
For Each prnPrinter In Printers
If prnPrinter.DeviceName = “BIXOLON SRP-370” Then
Set Printer = prnPrinter
Exit For
End If
Next
7-1-2 Test Printing
The following code is an example of the printing of Arial Test via the Windows font, and
FontA1x1Test via the printer font.
‘Print in Windows font
Printer.FontSize = 9
Printer.FontName = “Arial”
Printer.Print “Arial Test”
‘Print in printer font
Printer.FontSize = 9.5
Printer.FontName = “FontA1x1”
Printer.Print “FontA1x1Test”
Printer.EndDoc

SRP-370
Rev. 2.06
- 30 -
7-1-3 Barcode Printing
The following code is an example of the printing of the JAN8 (EAN) barcode.
'Print Bar Code.
Printer.FontSize = 20
Printer.FontName = "JAN8 (EAN)"
Printer.Print "1234567"
Printer.EndDoc
7-1-4 Two-Dimensional Barcode Printing
The following code is an example of the printing of the PDF417 two-dimensional barcode.
'Print Two-dimensional Codes.
Printer.FontSize = 9.5
Printer.FontName = "PDF417"
Printer.Print "Print Test PDF417"
Printer.EndDoc
SRP-370
Rev. 2.06
- 31 -
7-2 Use of WordPad
7-2-1 WordPad Environment Settings
After running WordPad and setting the following conditions, conduct a test.
- Select Printer
After selecting “Print” from the “File” menu, select the printer (BIXOLON SRP-370).
- Select Paper Size, Orientation, and Margins
After selecting “Page Setup” from the “File” menu, select the paper size, orientation,
and margins.
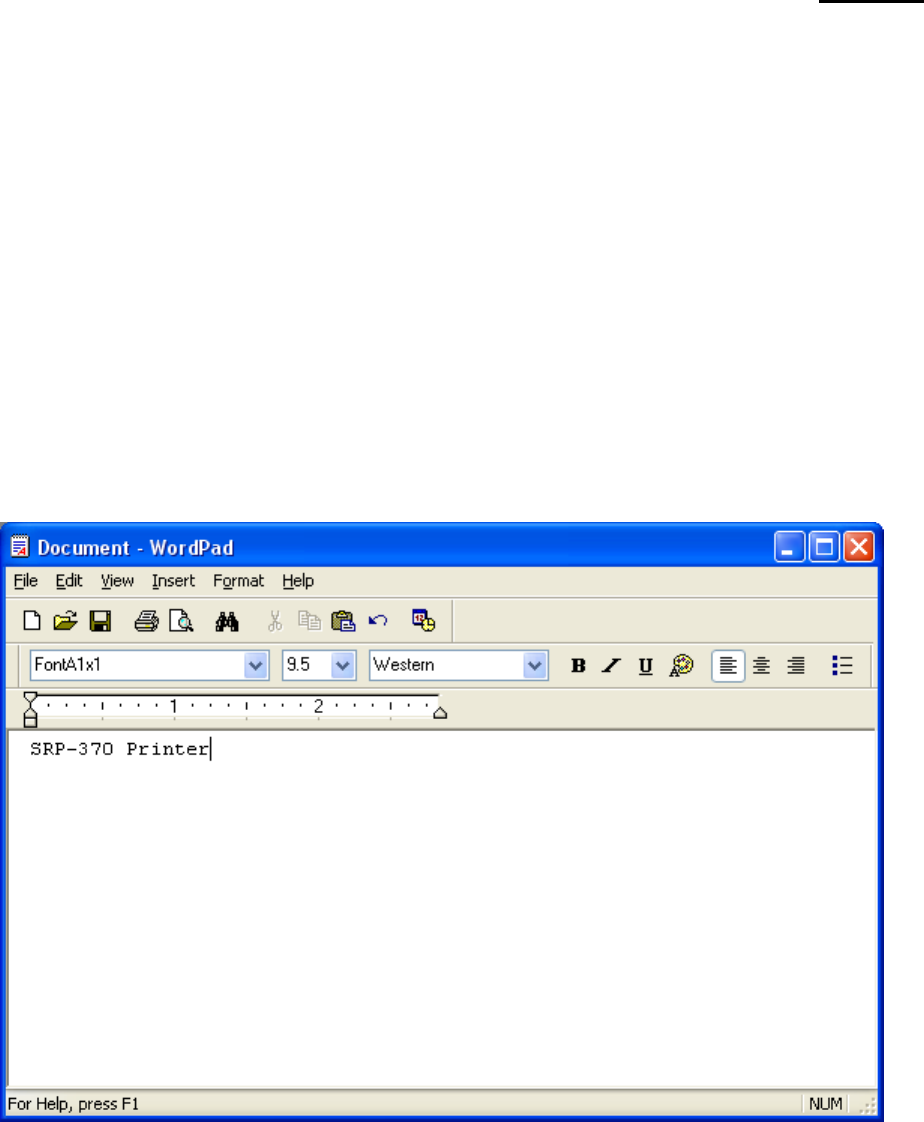
7-2-2 Text Printing
Use the Windows Driver of the printer to run a test.
1) Select the desired font from the Font menu (FontA1x1).
2) Select the desired font size (9.5).
3) Enter the text to be printed in WordPad.
4) Click the Print button in the toolbar to print.
SRP-370
Rev. 2.06
- 32 -
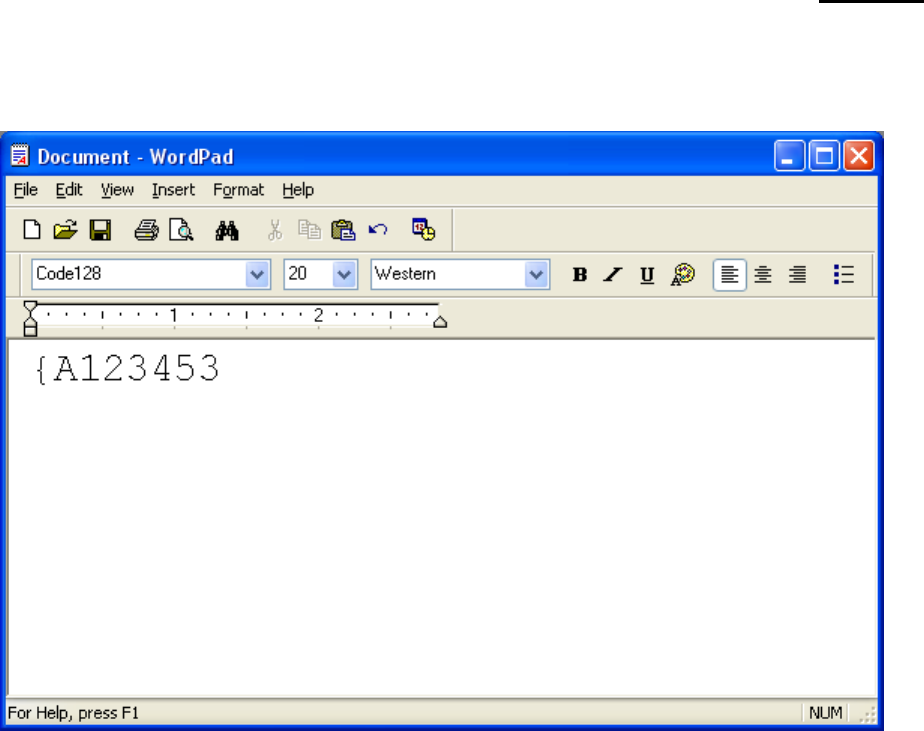
7-2-3 Barcode Printing
Use the Windows Driver of the printer to print the barcode.
1) Select the desired barcode from the Font menu (Code128).
2) Select the desired font size (20).
3) Enter “{A123453” in WordPad.
4) Click the Print button in the toolbar to print.
SRP-370
Rev. 2.06
- 33 -
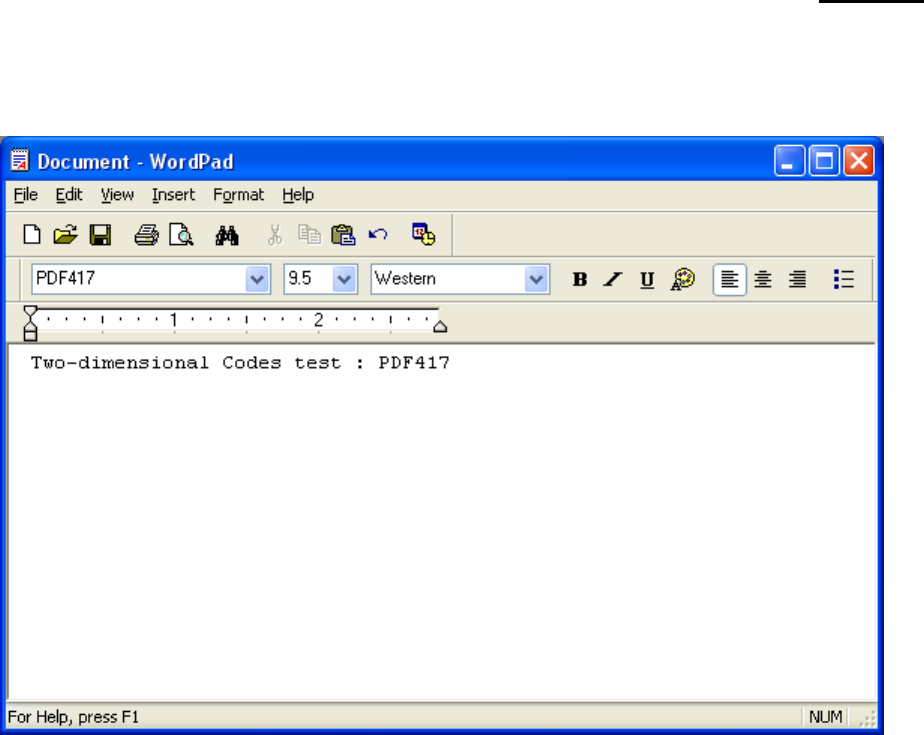
7-2-4 Two-Dimensional Barcode Printing
Use the Windows Driver of the printer to print the two-dimensional barcode.
1) Select the desired two-dimensional barcode from the Font menu (PDF417).
2) Select the desired font size (9.5).
3) Enter “Two-dimensional Codes Test: PDF417” in WordPad.
4) Click the Print button in the toolbar to print.
