Samsung Ps63A756T1M Users Manual BN68 01757A Eng.indb
Series P7 to the manual 7b9bb8b4-855a-4690-9e76-1a117bf5aaaa
2015-01-23
: Samsung Samsung-Ps63A756T1M-Users-Manual-279540 samsung-ps63a756t1m-users-manual-279540 samsung pdf
Open the PDF directly: View PDF ![]() .
.
Page Count: 337 [warning: Documents this large are best viewed by clicking the View PDF Link!]
imagine the possibilities
Thank you for purchasing this Samsung product.
To receive more complete service, please register
your product at
www.samsung.com/global/register
Model Serial No.
Contact SAMSUNG WORLD-WIDE
If you have any questions or comments relating to Samsung products, please contact the SAMSUNG customer care centre.
Plasma TV
user manual
Country Customer Care Centre Web Site
AUSTRIA 0810 - SAMSUNG(7267864, € 0.07/min) www.samsung.com/at
BELGIUM 02 201 2418 www.samsung.com/be
CZECH REPUBLIC 800 - SAMSUNG (800-726786) www.samsung.com/cz
Samsung Zrt., česká organizační složka, Oasis Florenc, Sokolovská394/17, 180 00, Praha 8
DENMARK 8 - SAMSUNG(7267864) www.samsung.com/dk
EIRE 0818 717 100 www.samsung.com/ie
ESTONIA 800-7267 www.samsung.ee
FINLAND
30 - 6227 515
www.samsung.com/fi
FRANCE 3260 'dites' SAMSUNG (€ 0,15/Min)
0825 08 65 65 (€ 0.15/Min) www.samsung.com/fr
GERMANY 01805 - SAMSUNG(7267864, € 0.14/Min) www.samsung.de
HUNGARY 06 - 80 - SAMSUNG(7267864) www.samsung.com/hu
ITALIA 800 - SAMSUNG(7267864) www.samsung.com/it
KAZAKHSTAN 8-10-800-500-55-500 www.samsung.com/kz_ru
KYRGYZSTAN 00-800-500-55-500
LATVIA 8000-7267 www.samsung.com/lv
LITHUANIA 8-800-77777 www.samsung.lt
LUXEMBURG 02 261 03 710 www.samsung.com/lu
NETHERLANDS 0900 - SAMSUNG(7267864, € 0.10/Min) www.samsung.com/nl
NORWAY 3 - SAMSUNG(7267864) www.samsung.com/no
POLAND 0 - 801 - 1SAMSUNG(172678)
022 - 607 - 93 - 33 www.samsung.com/pl
PORTUGAL 808 20 - SAMSUNG(7267864) www.samsung.com/pt
RUSSIA 8-800-555-55-55 www.samsung.ru
SLOVAKIA 0800 - SAMSUNG(7267864) www.samsung.com/sk
SPAIN 902 - 1 - SAMSUNG (902 172 678) www.samsung.com/es
SWEDEN 075 - SAMSUNG(726 78 64) www.samsung.com/se
Switzerland 0848 - SAMSUNG(7267864, CHF 0.08/min) www.samsung.com/ch
TADJIKISTAN 8-10-800-500-55-500
Turkey 444 77 11 www.samsung.com/tr
U.K 0845 SAMSUNG(7267864) www.samsung.com/uk
UKRAINE 8-800-502-0000 www.samsung.ua
UZBEKISTAN 8-10-800-500-55-500 www.samsung.com/kz_ru
BN68-01757A-Eng.indb 1 2008-09-24 오전 11:09:04
BN68-01757A-01
English - 2
© 2008 Samsung Electronics Co., Ltd. All rights reserved.
User Instructions
Screen Image retention
Do not display a still image (such as on a video game or when hooking up a PC to this PDP) on the plasma monitor panel for
more than 2 hours as it can cause screen image retention. This image retention is also known as “screen burn”. To avoid such
image retention, reduce the degree of brightness and contrast of the screen when displaying a still image.
Height
The PDP can normally operate only under 2000m in height. It might abnormally function at a place over 2000m in height so do
not install and operate there.
Heat on the top of the PDP TV
The top side of the product may be hot after long period of use as heat dissipates from the panel through the vent hole in the
upper part of the product. This is normal and does not indicate any defect or operation failure of the product. However, children
should be prevented from touching the upper part of the product.
The product is making a ‘cracking’ noise.
A ‘cracking’ noise may occur when the product contracts or expands due to a change of surrounding environment such as
temperature or humidity. This is normal and not a defect of the unit.
Cell Defects
The PDP uses a panel consisting of 1,230,000(SD-level) to 3,150,000(HD-level) pixels which require sophisticated technology
to produce. However, there may be few bright or dark pixels on the screen. These pixels will have no impact on the
performance of the product.
Avoid operating the TV at temperatures below 5°C(41°F)
A still image displayed too long may cause permanent damage to the PDP Panel.
Watching the PDP TV in 4:3 format for a long period of time may leave traces of borders displayed on
the left, right and centre of the screen caused by the difference of light emission on the screen. Playing a
DVD or a game console may cause similar effect to the screen. Damages caused by the above effect are
not covered by the Warranty.
Afterimage on the Screen.
Displaying still images from Video games and PC for longer than a certain period of time may produce partial afterimages.
To prevent this effect, reduce the ‘brightness’ and ‘contrast’ when displaying still images.
Warranty
- Warranty does not cover any damage caused by image retention.
- Burn-in is not covered by the warranty.
Installation
Be sure to contact an authorized service centre, when installing your set in a location with heavy dust, high or low
temperatures, high humidity, chemical substance and where it operates continually such as the airport, the train station etc.
Failure to do so may cause a serious damage to your set.
Digital TV (DVB-T) Notice
1. FUNCTIONALITIES RELATED TO DIGITAL TV (DVB) ARE ONLY AVAILABLE IN COUNTRIES OR AREAS WHERE
DVB-T (MPEG2 AND MPEG4 AVC) DIGITAL TERRESTRIAL SIGNALS ARE BROADCAST. DVB-T is the European
consortium standard for the broadcast transmission of digital terrestrial television. Please check with your local dealer
about the availability of DVB-T service in your area.
2. Although this TV set meets the current DVB-T standards as of [August, 2008], compatibility with future DVB-T digital
terrestrial broadcast cannot be guaranteed.
3. Some Digital TV functions may not be available or operate correctly in some countries or regions.
4. For more information, please contact your local SAMSUNG customer care centre.
Contact SAMSUNG WORLDWIDE
If you have any questions or comments relating to Samsung products, please contact the SAMSUNG
customer care centre. (See back cover for more informations.)
BN68-01757A-Eng.indb 2 2008-09-24 오전 11:09:04

Connecting and Preparing Your TV
User Instructions .................................................................2
Checking Parts ....................................................................4
Using the Stand-Base .........................................................4
How to assemble the Stand-Base
(depending on the model) ...................................................4
Viewing the Control Panel ...................................................5
Viewing the Connection Panel.............................................6
Remote Control ...................................................................8
Installing Batteries in the Remote Control ...........................9
Switching On and Off...........................................................9
Placing Your Television in Standby Mode ............................9
Viewing the Menus ............................................................10
Using the TOOLS Button ...................................................10
Using the Wheel button .....................................................10
Plug & Play Feature ..........................................................11
Channel Control
Storing Channels and channel .........................................11
Managing Channels ..........................................................14
Picture Control
Changing and Resetting the Picture Settings ....................15
Viewing Picture-in-Picture .................................................19
Setting up the TV with your PC .........................................19
PC Display .........................................................................20
Sound Control
Changing the Sound Standard ..........................................21
Selecting the Sound Mode ................................................22
Function Description
Conguring the Setup Menu ..............................................23
Setting the Time ................................................................26
Network Connection ..........................................................27
Network Setup ...................................................................29
Source List / Edit Name .....................................................31
Product Guide ...................................................................31
WISELINK Pro
Connecting a USB Device .................................................32
Using the WISELINK Pro Function ....................................33
Using and Sorting Photo List .............................................35
Viewing a Photo or Slide Show .........................................36
Using and Sorting the Music List .......................................38
Playing a Music .................................................................39
Using and Sorting the Movie List .......................................40
Playing a Movie File ..........................................................41
Deleting the Photo/Music/Movie File .................................42
Picture/Music Settings Using WISELINK Pro ....................43
Using the Setup Menu .......................................................43
■
■
■
■
■
■
■
■
■
■
■
■
■
■
■
■
■
■
■
■
■
■
■
■
■
■
■
■
■
■
■
■
■
■
■
■
■
■
■
WISELINK Pro-DLNA
Setting the DLNA Network .................................................44
Installing the DLNA Application .........................................44
Using the DLNA Application ..............................................46
Using the DLNA Function ..................................................49
Content Library
Activating the Content Library ...........................................50
Using the Content Library ..................................................51
Using Additional Content Using External USB Memory
Storage ..............................................................................52
About Anynet+
Connecting Anynet+ Devices ............................................53
Setting Up Anynet+............................................................54
Scanning and Switching between Anynet+ Devices..........54
Recording ..........................................................................55
Listening through a Receiver (Home theater) ...................56
Troubleshooting for Anynet+ ............................................56
InfoLive
Using InfoLive ....................................................................57
Using the Weather Service ................................................58
Using the News Service ....................................................58
Using the Stock Service ....................................................59
InfoLive Setup ...................................................................60
Recommendations for Use
Teletext Feature .................................................................61
Wall Mount Kit Specications (VESA) ...............................62
Auto Wall-Mount Adjustment (Sold separately) ................63
Preparing before installing Wall- Mount on the wall ..........64
Securing the TV to the Wall ...............................................64
Troubleshooting .................................................................65
Specications ....................................................................66
Additional Terms of Service ...............................................67
■
■
■
■
■
■
■
■
■
■
■
■
■
■
■
■
■
■
■
■
■
■
■
■
■
■
English
Contents
N O T
Symbol Press Note One-Touch Button TOOLS
English - 3
BN68-01757A-Eng.indb 3 2008-09-24 오전 11:09:04
English - 4
Connecting and Preparing Your TV
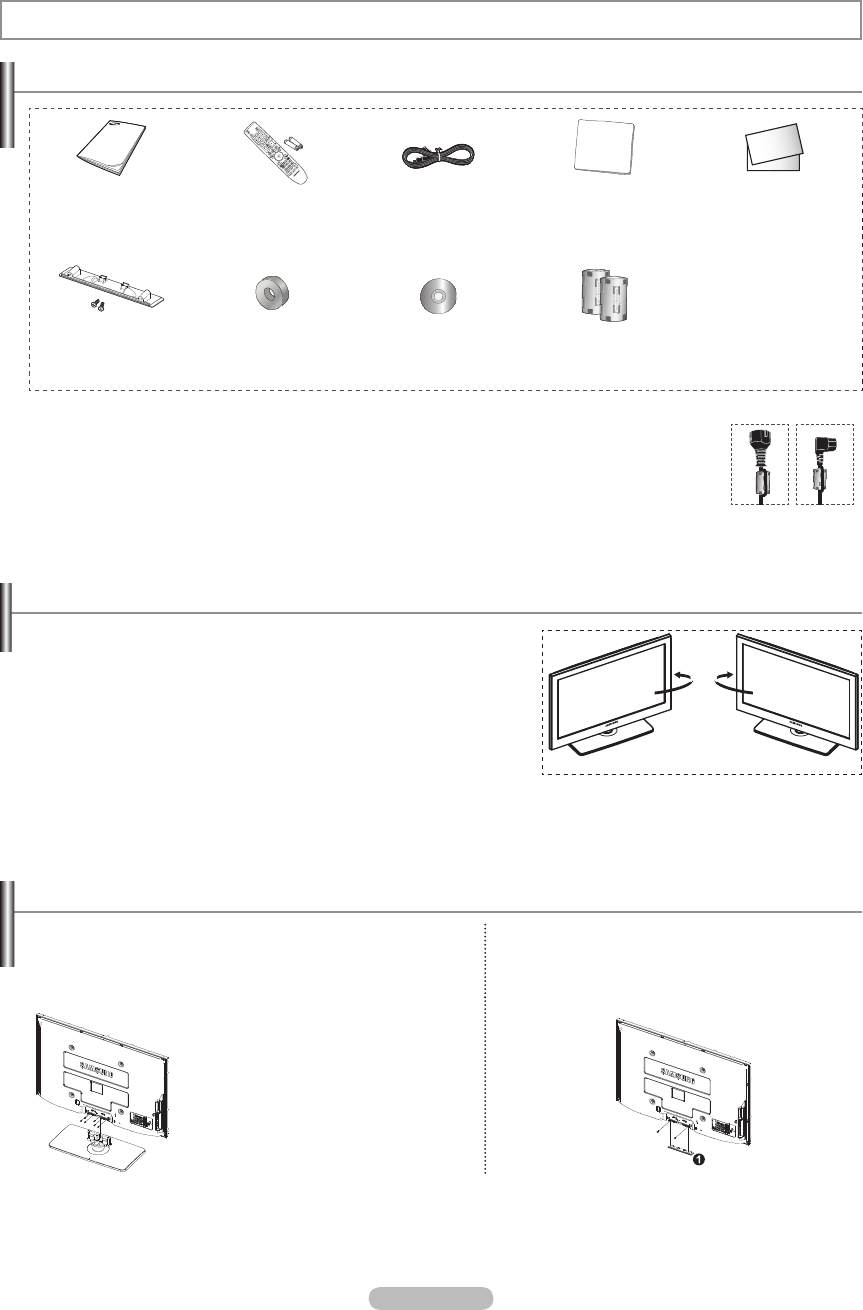
Using the Stand-Base
Two or more people should carry the PDP. Never lay the PDP on the floor
because of possible damage to the screen. Always keep the PDP upright.
The PDP can rotate 20 degrees in right and left directions.
N
N
How to assemble the Stand-Base (depending on the model)
Using the 6 screws for securing the stand base and the monitor, firmly
attach the monitor to the stand base.
(The exterior of the set may be different than the picture.)
In case of installing your TV on the wall, close the
cover (1) on the stand-base connection part using two
screws for hiding.
Warning
Firmly secure the stand to the TV
before moving it, as the stand may
fall and could cause serious injury.
Two or more people should carry the TV.
Never lay the TV on the floor because of
possible damage to the screen.
Always store the TV upright.
N
-20° ~ 20°
Checking Parts
Owner’s Instructions Remote Control/
AAA Batteries (2ea)
Power Cord Cloth-Clean Warranty Card/
Safety Guide Manual
(Not available in all locations)
Cover-Bottom / Screws (2ea)
(PS50A756)
Holder-Ring (4ea)
(Refer to page 64)
Program CD Ferrite Core for Power
Cord (2ea)
Ferrite Core (Power Cord)
The ferrite core is used to shield the cable from interference. When connecting a cable, open the ferrite
core and clip it around the cable near the plug.
N
BN68-01757A-Eng.indb 4 2008-09-24 오전 11:09:06
English - 5
Viewing the Control Panel
1
SOURCE
Toggles between all the available input sources
(TV, Ext1, Ext2, AV, S-Video, Component, PC, HDMI1,
HDMI2/DVI, HDMI3, HDMI4, USB, DLNA).
In the on-screen menu, use this button as you would
use the ENTER button on the remote control.
2
MENU
Press to see an on-screen menu of your TV’s features.
3
– +
Press to increase or decrease the volume. In the on-screen
menu, use the – + buttons as you would use the ◄
and ► buttons on the remote control.
4
C/P.
Press to change channels. In the on-screen menu, use
the C/P. buttons as you would use the ▲ and ▼
buttons on the remote control. You can use C/P.
button to turn on the TV without the remote control.
5
POWER INDICATOR
Blinks and turns off when the power is on and lights up in
stand-by mode.
6
REMOTE CONTROL SENSOR
Aim the remote control towards this spot on the TV.
N
7
SPEAKERS
8 (
POWER)
Touch the silver sensor below the ( ) mark to turn the TV
on and off.
The product colour and shape may vary depending on the model.
N
Front Panel buttons
Touch each button to
operate.
Silver sensor
BN68-01757F-Eng-1.indd 5 2008-09-24 오후 2:21:21
English - 6
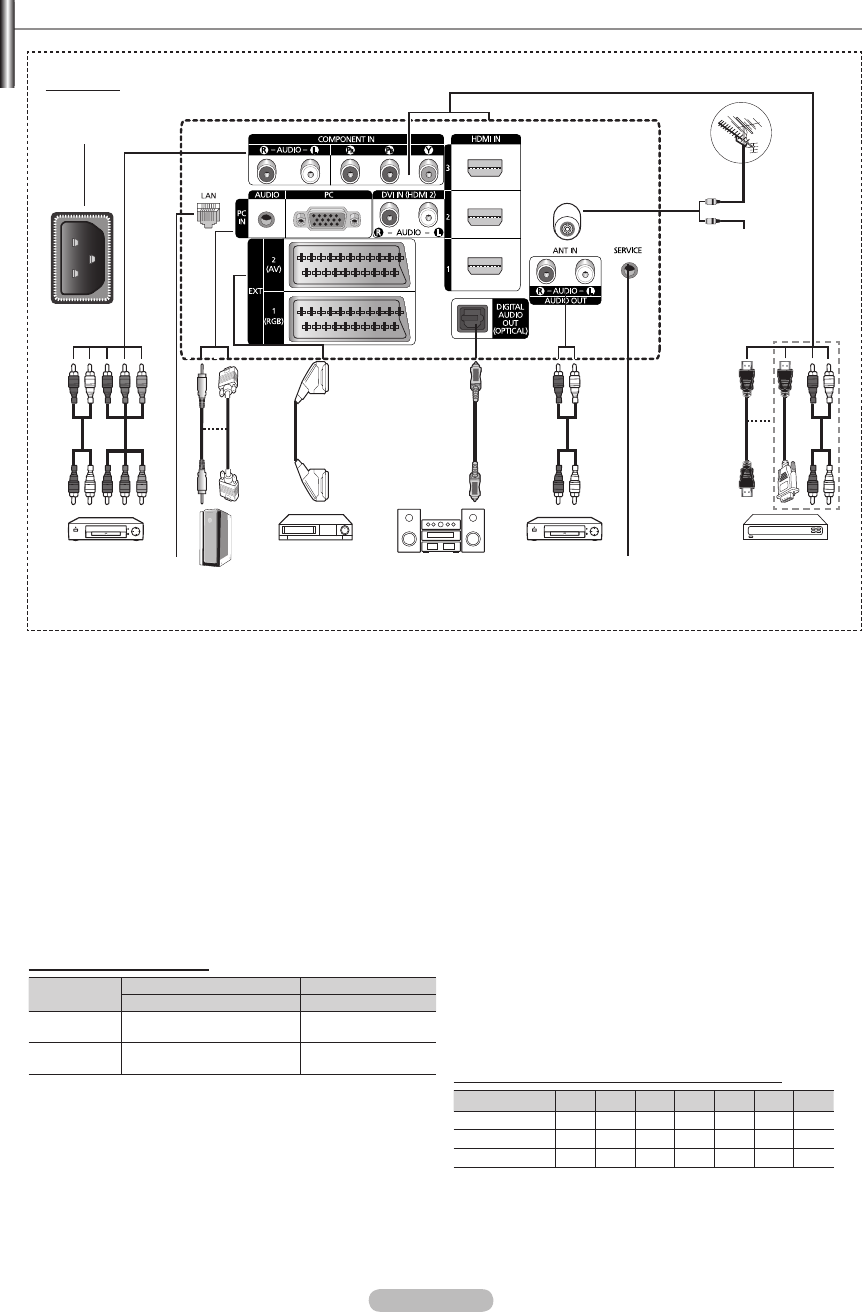
Viewing the Connection Panel
Whenever you connect an audio or video system to your set, ensure that all elements are switched off.
When connecting an external device, match the colour of the connection terminal to the cable.
N
N
Rear Panel
Cable Television
Network
or
or
or
1
5 7 96
0
83 4
The product colour and shape may vary depending on the model.
N
1
POWER IN
Connect the supplied power cord.
2
COMPONENT IN
Audio (AUDIO L/R) and video (Y/PB/PR) inputs for
Component.
3
LAN
Connect a LAN cable to this port to connect to the Network.
4
PC IN(PC) / AUDIO
Connect to the video and audio output jack on your PC.
5
EXT 1, EXT 2
Inputs or outputs for external devices, such as VCR, DVD,
video game device or video disc players.
Input/Output Specification
Connector Input Output
Video Audio(L/R) RGB Video + Audio(L/R)
EXT 1 ✔ ✔ ✔Only TV or DTV output is
available.
EXT 2 ✔ ✔Output you can choose.
6
DIGITAL AUDIO OUT (OPTICAL)
Connect to a Digital Audio Component.
7
AUDIO OUT(AUDIO R/L)
Connect RCA audio signals from the TV to an external
source, such as Audio equipment.
8
SERVICE
Connector for service.
9
HDMI IN 1, 2, 3
- No additional Audio connection is needed for an HDMI to
HDMI connection.
- When using an HDMI/DVI cable connection, you must
use the HDMI IN 2 jack.
What is HDMI?
- High Definition Multimedia interface allows the
transmission of high definition digital video data and
multiple channels of digital audio.
- The HDMI/DVI terminal supports DVI connection to
an extended device with the appropriate cable (not
supplied). The difference between HDMI and DVI is
that the HDMI device is smaller in size, has the HDCP
(High Bandwidth Digital Copy Protection) coding feature
installed, and supports multi - channel digital audio.
DVI IN(HDMI2) AUDIO L/R
DVI audio outputs for external devices.
0
ANT IN
75Ω Coaxial connector for Aerial/Cable Network.
Supported modes for HDMI/DVI and Component
480i 480p 576i 576p 720p 1080i 1080p
HDMI/DVI 50Hz XXXO O O O
HDMI/DVI 60Hz XOX X O O O
Component OOOOOOO
N
2
BN68-01757A-Eng.indb 6 2008-09-24 오전 11:09:09
English - 7
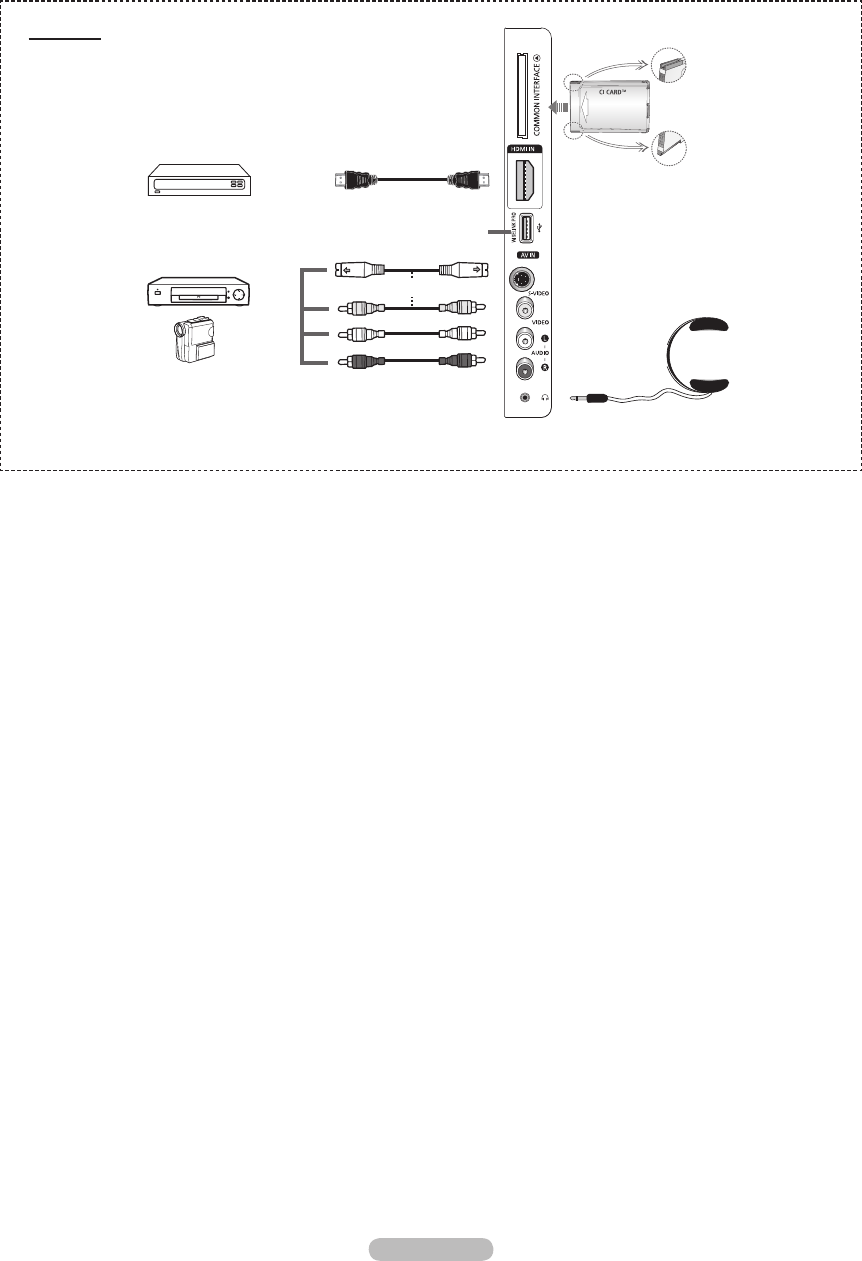
1
COMMON INTERFACE Slot
Insert CI (Common Interface) card into the slot.
(refer to page 25)
− When not inserting CI CARD in some channels, Scramble
Signal is displayed on the screen.
− The pairing information containing a telephone number, CI
CARD ID, Host ID, and other information will be displayed
in about 2~3 minutes. If an error message is displayed,
please contact your service provider.
− When the channel information configuration has finished,
the message Updating Completed is displayed, indicating
that the channel list is now updated.
Insert the CI-Card in the direction marked on it.
2
HDMI IN 4
Connect to the HDMI jack of a device with HDMI output.
3
WISELINK PRO
Connect a USB mass storage device to view and play photo
files (JPEG), audio files (MP3) and movie files.
You can connect to SAMSUNG’s network wirelessly.
4
S-VIDEO or VIDEO / AUDIO L/R
Video (S-Video or Video) and audio inputs for external
devices, such as a camcorder or VCR.
N
5
HEADPHONES JACK
You can connect a set of headphones if you wish to
watch a television programme without disturbing the
other people in the room.
Prolonged use of headphones at a high volume may
damage your hearing.
N
The product colour and shape may vary depending on the model.
N
Side Panel
or
4
5
3
2
1
4
BN68-01757A-Eng.indb 7 2008-09-24 오전 11:09:10
English - 8
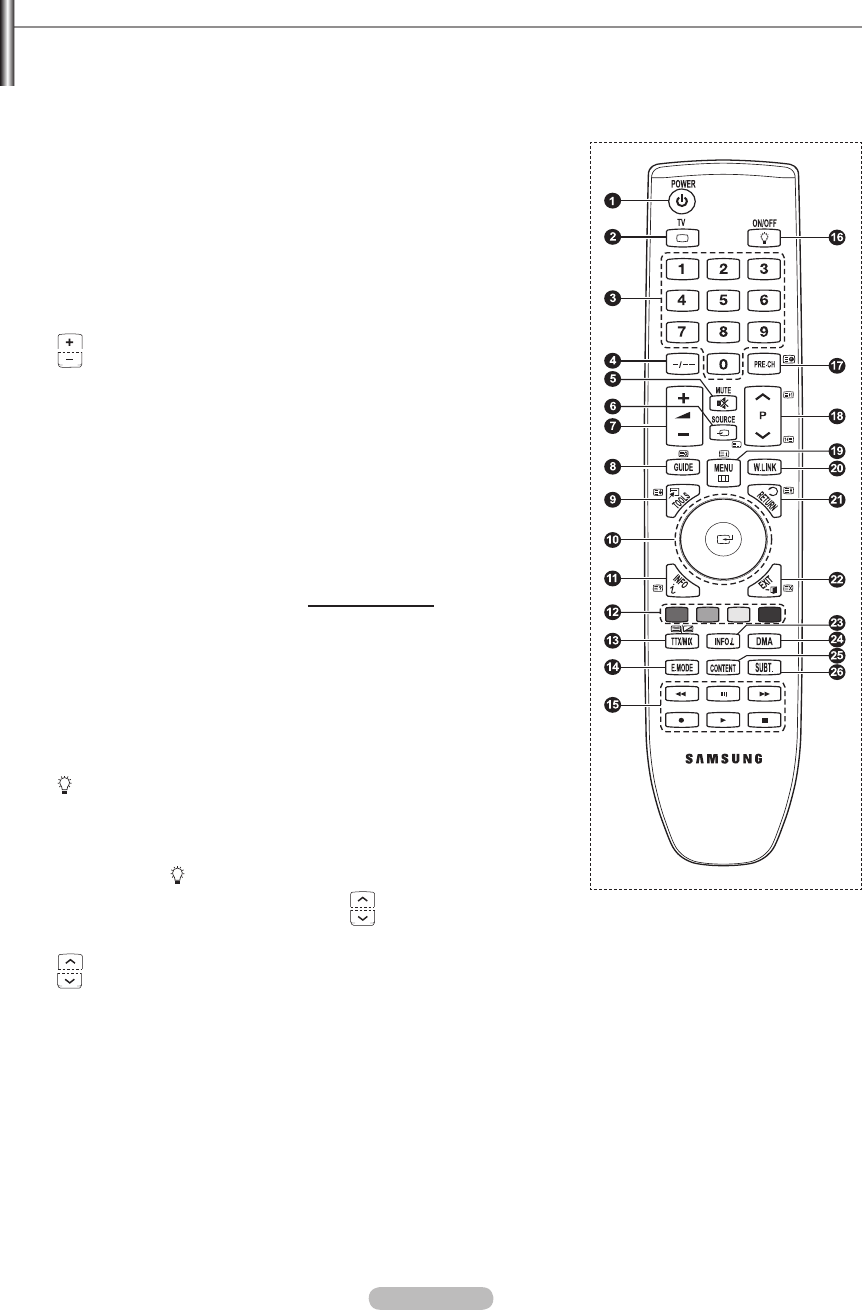
Remote Control
You can use the remote control up to a distance of about 23 feet from the TV.
The performance of the remote control may be affected by bright light.
N
1
POWER button
(turns the TV on and off)
2
Selects the TV mode directly.
3
Number buttons for direct channel
access
4
One or more digit channel selection
5
Temporary sound switch-off
6
Available source selection
7
Volume increase
Volume decrease
8
Electronic Program Guide (EPG)
display
9
Use to quickly select frequently used
functions.
0
Press the ▲ / ▼ / ◄ / ► sections of
the wheel button and Enter to select
on-screen menu items and change
menu values. You can navigate
up and down the menu, switch
channels and adjust the volume by
turning the wheel button.
!
Use to see information on the
current broadcast
@
Use these buttons in the Channel
list and WISELINK, etc.
$
Press to select the optional display
and sound modes for sports, cinema
and games.
%
Use these buttons in the Channel
list, WISELINK Pro and Anynet+.
^
ON/OFF
Press to backlight the buttons on the
remote. This function is convenient
for using at night or when the room
is dark. (Using the remote control
with the ON/OFF( ) light button set
to On will reduce the battery usage
time.)
&
Previous channel
*
Next channel
Previous channel
(
Displays the main on-screen menu
)
This function enables you to view
and play photo (JPEG) , audio
files (MP3) and movie files from an
external device.
a
Returns to the previous menu
b
Exit the on-screen menu
c
Press to use the News, Stock
Market and Weather Forecast
information services available over
the network.
d
Use this when connecting a
SAMSUNG DMA (Digital Media
Adapter) device through an HDMI
interface and switching to DMA
mode.
(The DMA button is optional.) For
more information on the operating
procedures, refer to the user manual
of the DMA. This button is available
when Anynet+(HDMI-CEC) is On
(see page 54)
e
This function enables you to view
Content Library.
f
Digital subtitle display
Teletext Functions
2
Exit from the teletext display
(depending on the model)
6
Teletext mode selection (LIST/
FLOF)
8
Teletext store
9
Teletext size
!
Teletext reveal
@
Fastext topic selection
#
Teletext display/mix both teletext
information and the normal
broadcast
&
Teletext sub page
*
P :Teletext next page
P :Teletext previous page
(
Teletext index
a
Teletext hold
b
Teletext cancel
BN68-01757A-Eng.indb 8 2008-09-24 오전 11:09:10
English - 9
Installing Batteries in the Remote Control
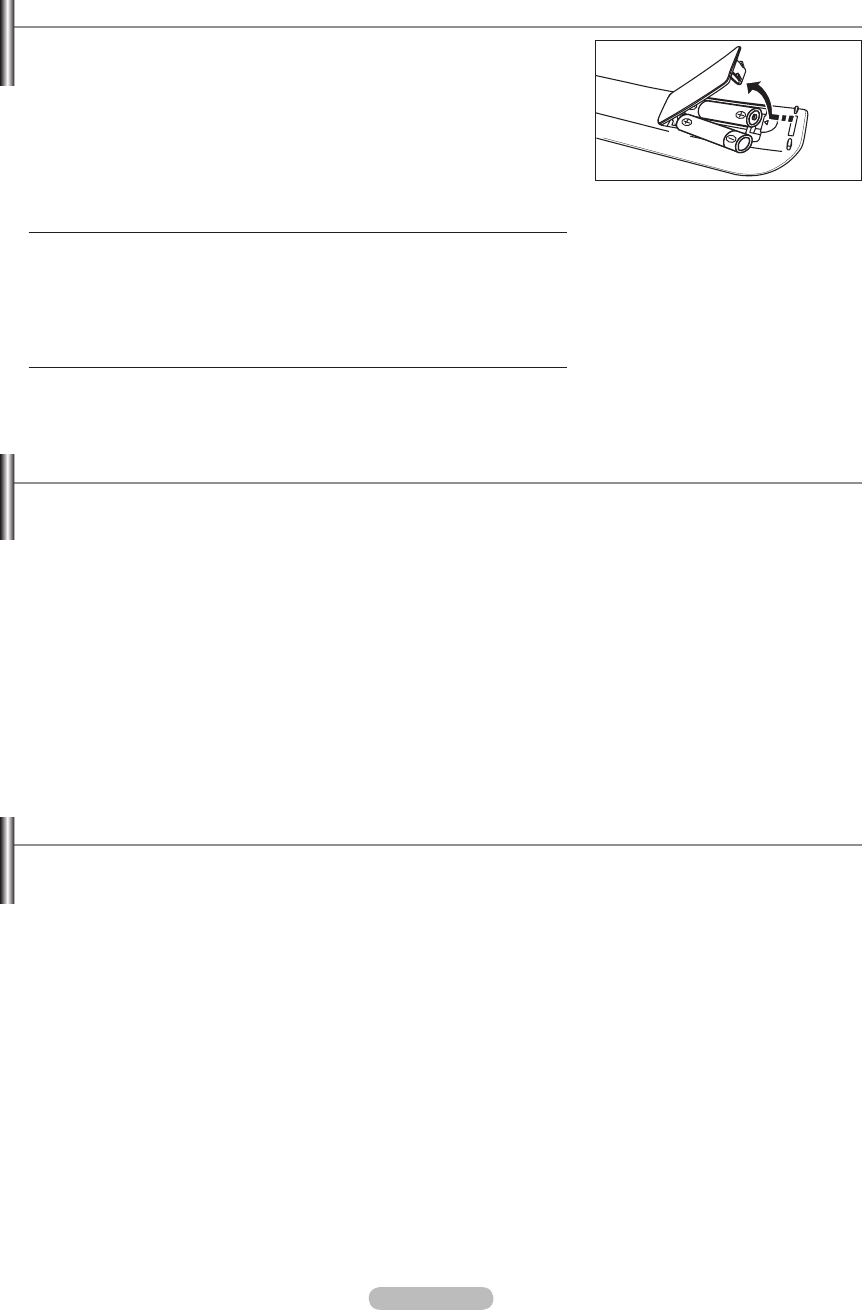
1.
Lift the cover at the back of the remote control upward as shown in the gure.
2. Install two AAA size batteries.
Make sure to match the ‘+’ and ‘–’ ends of the batteries with the diagram
inside the compartment.
3. Close the cover.
Remove the batteries and store them in a cool, dry place if you won’t be
using the remote control for a long time.
Using the remote control with the ON / OFF @ light button set to on will
reduce the battery usage time.
If the remote control doesn’t work, check the following:
1. Is the TV power on?
2. Are the plus and minus ends of the batteries reversed?
3. Are the batteries drained?
4. Is there a power outage or is the power cord unplugged?
5. Is there a special uorescent light or neon sign nearby?
N
Switching On and Off
The mains lead is attached to the rear of your set.
1. Plug the mains lead into an appropriate socket.
The standby indicator lights up on your set.
2. Press the POWERP button on your set.
You also can press the POWER
P
button or the TV button on the remote control to turn the TV on.
The programme that you were watching last is reselected automatically.
3. Press the numeric button (0~9) or channel up / down (< / >) button on the remote control or >C/P.
P
< button on your
set.
When you switch the set on for the very rst time, you will be asked to choose language in which the menus are to be
displayed.
4. To switch your set off, press the POWER
P
button again.
Placing Your Television in Standby Mode
Your set can be placed in standby mode in order to reduce the power consumption. The standby mode can be useful when you
wish to interrupt viewing temporarily (during a meal, for example).
1. Press the POWER
P
button on the remote control.
The screen is turned off and a red standby indicator appears on your set.
2. To switch your set back on, simply press the POWER
P
, numeric buttons (0~9), TV button or channel up / down (< / >)
button again.
Do not leave your set in standby mode for long periods of time (when you are away on holiday, for example). It is best to
unplug the set from the mains and aerial.
N
N
N
N
N
N
N
N
N
BN68-01757A-Eng.indb 9 2008-09-24 오전 11:09:10
English - 10
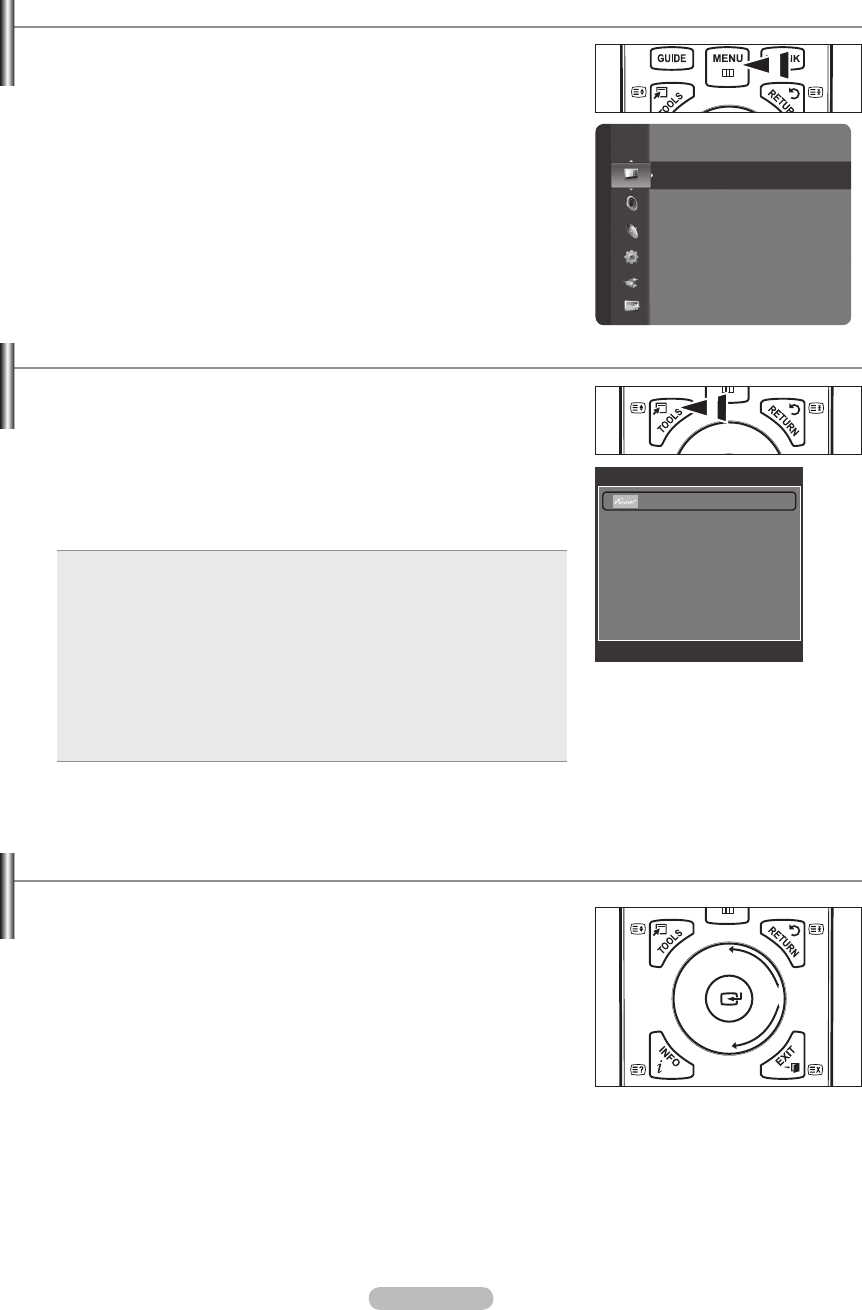
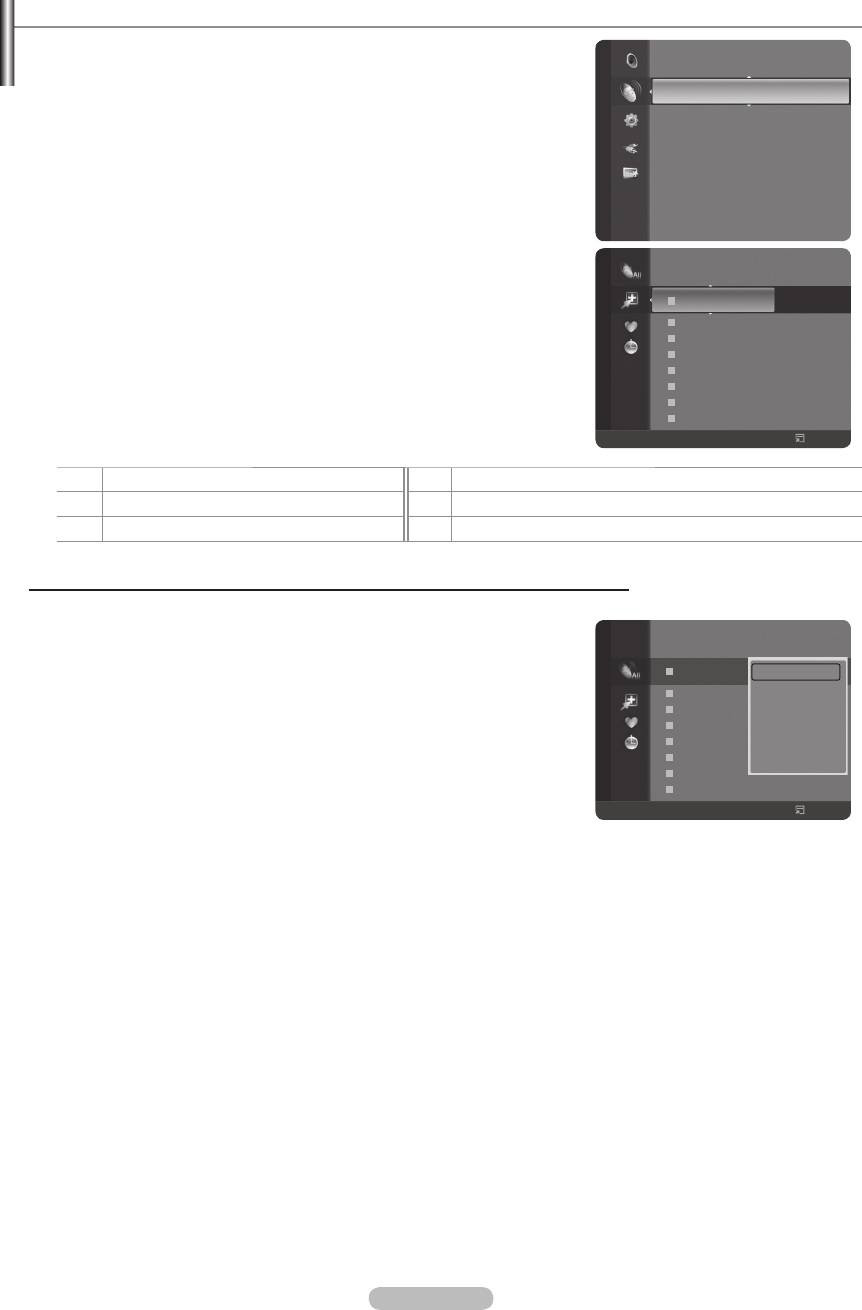
Viewing the Menus
1. With the power on, press the MENU button. The main menu appears on the
screen. The menu’s left side has icons: Picture, Sound, Channel, Setup, Input,
Application.
2. Press the ▲ or ▼ button to select one of the icons. Then press the ENTER
E
button to access the icon’s sub-menu.
3. Press the EXIT button to exit.
The on-screen menus disappear from the screen after about one minute.
Using the TOOLS Button
You can use the TOOLS button to select your frequently used functions quickly and
easily. The Tools menu changes depending on which external input mode you are
viewing.
1. Press the TOOLS button. The Tools menu will appear.
2. Press the ▲ or ▼ button to select a menu, then press the ENTER
E
button.
3. Press the ▲ / ▼ / ◄ / ► / ENTER
E
buttons to display, change, or use the
selected items. For a more detailed description of each function, refer to the
corresponding page.
Anynet+ (HDMI-CEC): see page 53
Picture Size: see page 17
Picture Mode: see page 15
Sound Mode: see page 21
Sleep Timer: see page 26
SRS TS XT: see page 21
Energy Saving: see page 25
Dual l ll: see page 22
PIP: see page 19
Auto Adjustment: see page 19
•
•
•
•
•
•
•
•
•
•
Using the Wheel button
To increase the channel number, turn the wheel clockwise when the Channel
Display is displayed. To decrease the channel number, turn the wheel
counterclockwise.
To turn the volume up, turn the wheel clockwise when the Volume
Control window is displayed. To turn the volume down, turn the wheel
counterclockwise.
To move to a lower menu, turn the wheel clockwise when the menu Display is
displayed. To move to a higher menu, turn the wheel counterclockwise.
N
Mode
:
Standard
Cell Light : 7
Contrast : 95
Brightness : 45
Sharpness : 50
Colour : 50
Tint (G / R) : G50 / R50
Detailed Settings
Picture
Tools
Anynet+ (HDMI-CEC)
Picture Size : Auto Wide
Picture Mode : Standard
Sound Mode : Custom
Sleep Timer : Off
SRS TS XT : Off
Energy Saving : Off
Dual l ll : Mono
U
Move
E
Enter
e
Exit
BN68-01757A-Eng.indb 10 2008-09-24 오전 11:09:11
English - 11
Plug & Play Feature
When the TV is initially powered on, basic settings proceed automatically and subsequently.
1. Press the POWER button on the remote control. The message The Menu
Language, Store Demo, Channels and Time will be set. is displayed.
2. Press the ENTER
E
button, then Select the OSD Language. menu is
automatically displayed. Press the ENTER
E
button.
3. Select the appropriate language by pressing the ▲ or ▼ button. Press the
ENTER
E
button to conrm your choice.
4. Press the ◄ or ► button to select Store Demo or Home Use, then the ENTER
E
button.
We recommend setting the TV to Home Use mode for the best picture in your home environment.
Store Demo mode is only intended for use in retail environments.
If the unit is accidentally set to Store Demo mode and you want to return to Home Use (Standard): Press the Volume
button on the TV. When the volume OSD is displayed, press and hold the MENU button on the TV for 5 seconds.
The Screen Saver is activated if there is no remote control key input for longer than 1 minute while Plug & Play is
running.
The Screen Saver is activated if there is no operating signal for longer than 15 minutes.
5. Press the ENTER
E
button. Select the appropriate country by pressing the ▲ or ▼ button. Press the ENTER
E
button to
conrm your choice.
6. Press the ▲ or ▼ button to select the channel source to memorize. Press the ENTER
E
button to select Start.
Digital & Analogue: Digital and Analogue channels.
Digital: Digital channels.
Analogue: Analogue channels.
The channel search will start and end automatically.
Press the ENTER
E
button at any time to interrupt the memorization process.
After all the available channels are stored, the message Set the Clock Mode. is displayed.
7. Press the ENTER
E
button. Press the ▲ or ▼ button to select Auto, then Press the ENTER
E
button.
If you select Manual, Set current date and time is displayed. (See page 26)
If you have received a digital signal, the time will be set automatically. If not, see page 26 to set the clock.
8. The message Enjoy your viewing is displayed. When you have nished, press the ENTER
E
button.
If you want to reset this feature...
1. Press the MENU button to display the menu. Press the ▲ or ▼ button to select
Setup, then press the ENTER
E
button.
2. Press the ENTER
E
button again to select Plug & Play.
3. Enter your 4 digit PIN number. The default PIN number of a new TV set is
‘0-0-0-0’.
If you want to change PIN number, refer to 23 page.
The Plug & Play feature is only available in the TV mode.
N
N
N
N
N
N
N
N
N
N
N
N
N
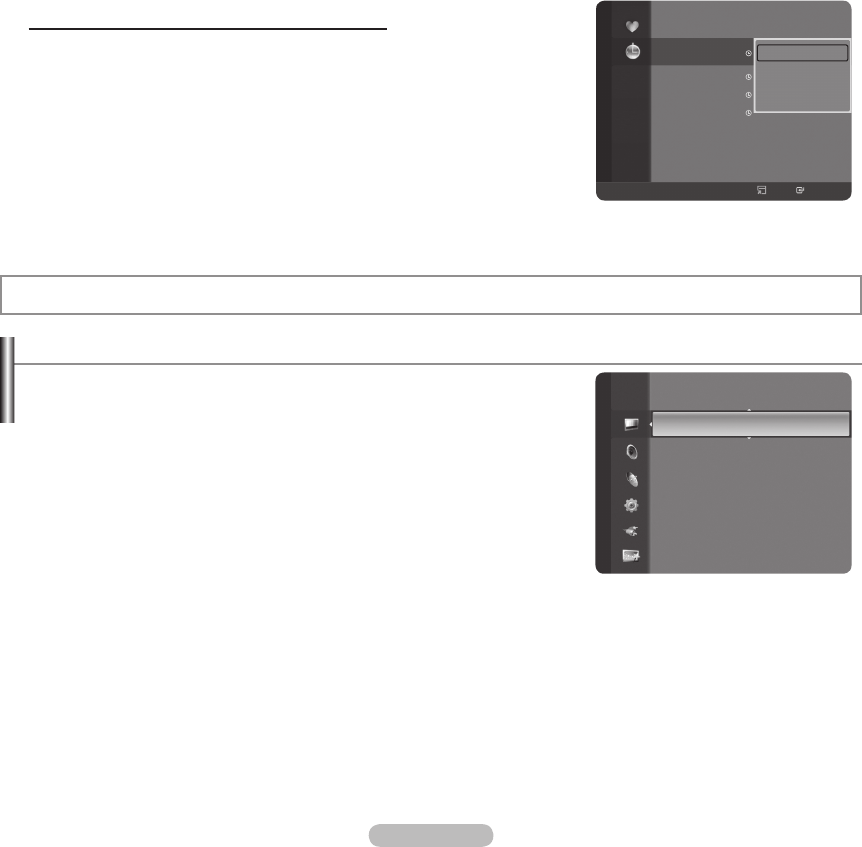
Channel Control
Storing Channels and channel
Country
Analogue Channel: You can change the country for analogue channels.
Digital Channel: You can change the country for digital channels.
The PIN number input screen appears. Enter your 4 digit PIN number.
❑
N
Setup
Plug & Play ►
Language : English
Time
Network Selection : Cable
Wireless Network Setup
Cable Network Setup
Child Lock : On
Change PIN
Channel
Country
►
Auto Store
Manual Store
Full Guide
Mini Guide
Default Guide : Mini Guide
Channel List
Channel Mode : Added Ch.
Plug & Play
The Menu Language, Store Demo, Channels and Time
will be set.
OK
E
Enter
BN68-01757A-Eng.indb 11 2008-09-24 오전 11:09:11
English - 12
Auto Store
You can scan for the frequency ranges available to you (and availability depends on your country). Automatically allocated
programme numbers may not correspond to actual or desired programme numbers.
Digital & Analogue: Digital and Analogue channels.
Digital: Digital channels.
Analogue: Analogue channels.
Scans for all channels with active broadcast stations and stores them in the TV’s memory.
If you want to stop Auto Store, press the ENTER
E
button.
The Stop Auto Store? message will be displayed.
Select Yes by pressing the ◄ or ► button, then press the ENTER
E
button.
If a channel is locked using the Child Lock function, the PIN input window appears.
Manual Store
Scans for a channel manually and stores it in the TV’s memory.
If a channel is locked using the Child Lock function, the PIN input window appears.
Digital Channel
Manual store for digital channels.
Channel: Set the Channel number using the ▲, ▼ or number (0~9) buttons.
Frequency: Set the frequency using the number buttons.
Bandwidth: Set the bandwidth using the ▲, ▼ or number (0~9) buttons.
When it has nished, channels are updated in the channel list.
Analogue Channel
Manual store for analogue channel.
Programme (Programme number to be assigned to a channel): Sets the programme number using the ▲, ▼ or number
(0~9) buttons.
ColourSystem→Auto/PAL/SECAM/NTSC4.43: Sets the colour system value using the ▲ or ▼ button.
Sound System → BG / DK / I / L: Sets the sound system value using the ▲ or ▼ button.
Channel (When you know the number of the channel to be stored): Press the ▲ or ▼ button to select C (Air channel) or S
(Cable channel). Press the ► button, then press the ▲, ▼ or number (0~9) buttons to select the required number.
You can also select the channel number directly by pressing the number (0~9) buttons.
If there is abnormal sound or no sound, reselect the sound standard required.
Search (When you do not know the channel numbers): Press the ▲ or ▼ button to start the search. The tuner scans the
frequency range until the rst channel or the channel that you selected is received on the screen.
Store (When you store the channel and associated programme number): Set to OK by pressing the ENTER
E
button.
Channel mode
P (Programme mode): When completing tuning, the broadcasting stations in your area have been assigned to position
numbers from P00 to P99. You can select a channel by entering the position number in this mode.
C (Air channel mode): You can select a channel by entering the assigned number to each air broadcasting station in
this mode.
S (Cable channel mode): You can select a channel by entering the assigned number for each cable channel in this
mode.
Full Guide / Mini Guide
The EPG (Electronic Programme Guide) information is provided by the broadcasters. Programme entries may appear blank
or out of date as a result of the information broadcast on a given channel. The display will dynamically update as soon as new
information becomes available.
For the detailed procedures on using Full Guide and Mini Guide, refer to
the descriptions on page 13.
You can also display the guide menu simply by pressing the GUIDE button.
(To congure the Default Guide, refer to the descriptions.)
Full Guide:
Displays the programme information as time ordered One hour segments. Two hours of programme information
is displayed which may be scrolled forwards or backwards in time.
Mini Guide:
The information of each programme is displayed by each line on the current channel Mini Guide screen from
the current programme onwards according to the programme starting time order.
❑
•
•
•
N
N
N
N
N
❑
N
N
•
•
•
N
•
•
•
•
N
N
•
•
N
-
-
-
❑
N
O
BN68-01757A-Eng.indb 12 2008-09-24 오전 11:09:11
English - 13
Default Guide
Mini Guide / Full Guide:
You can decide whether to display either the Mini
Guide or the Full Guide when the GUIDE button on the remote control is
pressed.
Channel List
For the detailed procedures on using the Channel List, refer to the descriptions
on pages 14~15.
Channel Mode
When the press the P >/< button, Channels will be switched within the selected channel list.
Added Ch.: Channels will be switched within the memorized channel list.
Favourite Ch.: Channels will be switched within the favourite channel list.
Fine Tune
If the reception is clear, you do not have to ne tune the channel, as this is done automatically during the search and store
operation. If the signal is weak or distorted, you may have to ne tune the channel manually.
Fine tuned channels that have been saved are marked with an asterisk * on the right-hand side of the channel number in
the channel banner.
To reset the ne-tuning, select Reset by pressing the ▲ or ▼ button and then press the ENTER
E
button.
Only Analogue TV channels can be ne tuned.
Signal Information
You can get information about the signal status.
If the signal status is poor, the Weak or No Signal message is displayed.
While viewing a Digital channel, this function can be selected.
The technical information for signal status is displayed.
- Frequency / Service ID / Multiplex / Network / Bit error level / Signal Strength
LNA→Off/On
If the TV is operating in a weak-signal area, the LNA (Low Noise Amplier) function can improve the reception
(a low-noise preamplier boosts the incoming signal).
While viewing an Analogue channel, this function can be selected.
Using the Full / Mini Guide
▲/▼/◄/►,
(ENTER)
Select a programme by pressing the ▲/▼/◄/► button.
If the next progrmme is selected, it is scheduled with the clock icon displayed. If the ENTER button is
pressed again, press the ▲/▼/◄/► button to select Cancel Schedules, the scheduling is canceled
with the clock icon gone.
For details about scheduling programmes, refer to the section.
RED Toggle between the Mini Guide or Full Guide.
GREEN Full Guide: Scroll backwards quickly (24 hours).
Mini Guide: Display next page quickly.
YELLOW Full Guide: Scroll forwards quickly (24 hours).
Mini Guide: Display previous page quickly.
BLUE Exit the guide.
INFO
INFO button for the detailed information. Channel Number, Running Time, Status Bar, Parental Level,
Video Quality Information (HD/SD), Sound Modes, Subtitle or Teletext, languages of Subtitle or Teletext
and brief summary of the highlighted programme are included on the detailed information. “…” will be
appeared if the summary is long.
❑
❑
❑
❑
N
N
N
❑
N
N
N
❑
N
Channel
Fine Tune
Signal Information
LNA : Off
►
Full Guide
DTV Cable 900 f tn 2:10 Tue 1 Jun
Freshmen On Campus
2:00 - 2:30
No Detailed Information
Today 2:00 - 3:00 3:00 - 4:00
Mint Extra
Loaded
Fresh 40 with Dynamite MC
The Distillery
Smash Hits! Sunday
900 f tn
901 ITV Play
902 Kerrang!
903 Kiss
903 oneword
903 Smash Hits!
▼
Street Hypn..
Kisstory
No Information
No Information
No Information
Freshmen O..
Watch
Information
Mini Guide
+24 Hours
Exit
Mini Guide DTV Cable 900 f tn
Street Hypnosis
Booze Britain
2:00
2:30
5:00
▼
Freshmen On Campus
Watch
Information
Full Guide
Next Page
Exit
BN68-01757A-Eng.indb 13 2008-09-24 오전 11:09:12
English - 14
Managing Channels
Using this menu, you can Add / Delete or set Favourite channels and use the
programme guide for digital broadcasts.
Select a channel in the All Channels, Added Channels ,Favourites or
Programmed screen by pressing the ▲ / ▼ buttons, and pressing the
ENTER
E
button. Then you can watch the selected channel.
All Channels:
Shows all currently available channels.
Added Channels:
Shows all added channels.
Favourites:
Shows all favourite channels.
Programmed:
Shows all current reserved programmes.
Using the Colour buttons with the Channel List
Red (Channel Type): Toggle between your TV, Radio, Data / Other and All.
Green (Zoom): Enlarges or shrinks a channel number.
Yellow (Select): Selects multiple channel lists.
TOOLS (Option): Displays the Delete (or Add), Add to Favourite (or Delete
from Favourite), Lock (or Unlock), Timer Viewing, Edit Channel Name,
Sort, Edit Channel Number, Select All, Deselect All or Auto Store menu.
(The Options menus may differ depending on the situation.)
Channel Status Display Icons
AAn Analogue channel. cA channel selected by pressing the yellow button.
♥
A channel set as a Favourite. (A programme currently being broadcast.
\A locked channel. )A reserved programme
Channel List Option Menu (in All Channels / Added Channels / Favourites)
Press the TOOLS button to use the option menu.
Option menu items may differ depending on the channel status.
Add / Delete
You can delete or add a channel to display the channels you want.
All deleted channels will be shown on All Channels menu.
A gray-coloured channel indicates the channel has been deleted.
The Add menu only appears for deleted channels.
You can also delete a channel to the Added Channels or Favourite menu
in the same manner.
Add to Favourite / Delete from Favourite
You can set channels you watch frequently as favourites.
The ♥ symbol will be displayed and the channel will be set as a favourite.
All favourite channels will be shown on Favourite menu.
Lock / Unlock
You can lock a channel so that the channel cannot be selected and viewed. This function is available only when the Child
Lock is set to on. (see page 23)
The PIN number input screen appears. Enter your 4 digit PIN number.
The default PIN number of a new TV set is 0-0-0-0. You can change the PIN, by selecting Change PIN from the menu.
The \ symbol will be displayed and the channel will be locked.
Timer Viewing
If you reserve a programme you want to watch, the channel is automatically switched to the reserved channel in the Channel
List; even when you are watching another channel. To reserve a programme , set the current time rst. (See page 26.)
Only memorized channels can be reserved.
You can set the channel, month, day, year, hour and minute directly by pressing the number buttons on the remote
control.
Reserving a programme will be shown on Programmed menu.
Digital Programme Guide and Viewing Reservation
When a digital channel is selected, and you press the ► button, the Programme Guide for the channel appears. You can
reserve a programme according to the procedures described above.
N
N
-
-
-
-
N
N
N
N
N
N
N
N
N
N
N
N
N
N
N
N
Channel
Mini Guide
Default Guide : Mini Guide
Channel List
Channel Mode : Added Ch.
Fine Tune
Signal Information
LNA : Off
824 UKTV Gold
825 UKTV style
A
1 C --
A
2 C
--
A
3
♥
C
--
A
4 C
--
A
5 C
--
A
6 C
--
A
7 C
--
A
8 C
--
Added Channels
All
Channel Type
Zoom
Select
Option
824 UKTV Gold
825 UKTV style
A
1 C --
A
2 C
--
A
3
C
--
A
4 C
--
A
5 C
--
A
6 C
--
A
7 C
--
A
8 C
--
All Channels
All
Channel Type
Zoom
Select
Option
Delete
Add to Favourite
Lock
Timer Viewing
Edit Channel Name
Sort
▼
BN68-01757A-Eng.indb 14 2008-09-24 오전 11:09:12
English - 15
Edit Channel Name (only analogue channel)
Channels can labeled so that their call letters appear whenever the channel is selected.
The names of digital broadcasting channels are automatically assigned and cannot be labeled.
Edit Channel Number (only digital channel)
You can also edit the channel number by pressing the number buttons on the remote control.
Sort
This operation allows you to change the programme numbers of the stored channels. This operation may be necessary after
using the auto store.
The function is only available in Analouge.
Select All / Deselect All
Select All: You can select all the channels in the channel list.
Deselect All: You can deselect all the selected channels in the channel list.
You can perform the add / delete, add to Favourites / delete from Favourites, or lock / unlock function for multiple
channels at the same time. Select the required channels and press the yellow button to set all the selected channels at
the same time.
The c mark appears to the left of the selected channels.
You can only select Deselect All when there is a selected channel.
Auto Store
For further details on setting up options, refer to page 11.
If a channel is locked using the Child Lock function, the PIN input window appears.
Channel List Option Menu (in Programmed )
You can view, modify or delete a reservation.
Press the TOOLS button to use the option menu.
Change Info: Select to change a viewing reservation.
Cancel Schedules: Select to cancel a viewing reservation.
Information: Select to view a viewing reservation. (You can also change
the reservation information.)
Select All: Select all reserved programmes.
N
N
•
•
N
N
N
N
N
N
Picture Control
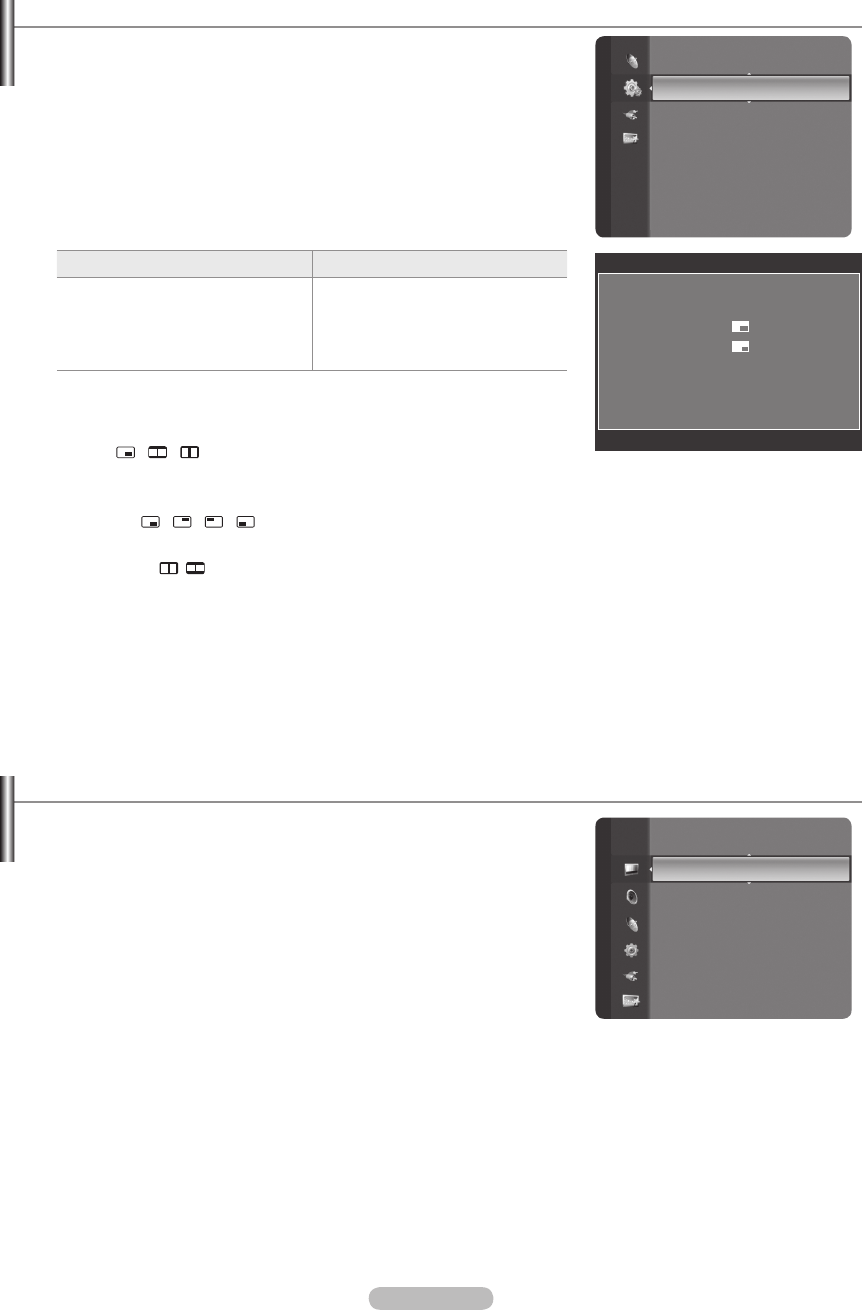
Changing and Resetting the Picture Settings
Mode
You can select the type of picture which best corresponds to your viewing
requirements.
Dynamic: Selects the picture for high-definition in a bright room.
Standard: Selects the picture for the optimum display in a normal
environment.
Movie: Selects the picture for viewing movies in a dark room.
Press the TOOLS button to display Tools menu.
You can also set the picture mode by selecting Tools→PictureMode.
Cell Light / Contrast / Brightness / Sharpness / Colour / Tint(G/R)
Your television has several setting options that allow you to control the picture quality.
Cell Light: Adjusts the pixel brightness. 10 is brightest.
Contrast: Adjusts the contrast level of the picture.
Brightness: Adjusts the brightness level of the picture.
Sharpness: Adjusts the edge definition of the picture.
Colour: Adjusts Colour saturation of the picture.
❑
T
❑
Programmed
1 / 1 / 2008
13:59 5 TV1 Quincy, M.E
18:59 2 TV3 The Equalizer
20:59 2 TV3 McMillan & Wife
21:59 2 TV3 M.Spillane’s mike Hammer
Change Info
Cancel Schedules
Information
Select All
All
Channel Type
Zoom
Select
Option
Information
Mode : Standard
►
Cell Light : 7
Contrast : 95
Brightness : 45
Sharpness : 50
Colour : 50
Tint(G/R) : G50 / R50
Detailed Settings
Picture
BN68-01757A-Eng.indb 15 2008-09-24 오전 11:09:12

English - 16
Tint(G/R): Adjusts the Colour tint of the picture.
Select a picture mode to be adjusted rst. The adjusted values are saved for each picture mode.
When you make changes to Cell Light, Contrast, Brightness, Sharpness, Colour or Tint(G/R), the OSD will be
adjusted accordingly.
In Analogue TV, Ext., AV, S-Video modes of the PAL system, you cannot use the Tint Function.
In PC mode, you can only make changes to Cell Light, Contrast and Brightness.
Settings can be adjusted and stored for each external device you have connected to an input of the TV.
The energy consumed during use can be signicantly reduced if the level of brightness of the picture is reduced, and then
this will reduce the overall running cost.
Detailed Settings
Samsung’s new TVs allow you to make even more precise picture settings than
previous models. See below to adjust detailed picture settings.
Detailed Settings is available in Standard or Movie mode.
In PC mode, you can only make changes to Dynamic Contrast, Gamma
and White Balance from among the Detailed Settings items.
BlackAdjust→Off/Low/Medium/High
You can select the black level on the screen to adjust the screen depth.
DynamicContrast→Off/Low/Medium/High
You can adjust the screen contrast so that the optimal contrast is provided.
Gamma
You can adjust the Primary Colour (Red, Green, Blue) Intensity.
Colour Space
Colour Space is a colour matrix composed of red, green and blue colours. Select your favourite Colour Space to experience
the most natural colour.
Auto: Auto Colour Space automatically adjusts to the most natural colour tone based on programme sources.
Native: Native Colour Space offers deep and rich colour tone.
Custom: Adjusts the colour range to suit your preference.
Customizing the Colour Space
Colour→Red/Green/Blue/Yellow/Cyan/Magenta
Adjusts the Colour range to suit your preference. Colour is available when Colour Space is set to Custom.
Red / Green / Blue: In Colour, you can adjust the RGB values for the selected colour.
Reset: Resets the colour space to the default values.
White Balance
You can adjust the colour temperature for more natural picture colours.
R-Offset / G-Offset / B-Offset / R-Gain / G-Gain / B-Gain: Changing the adjustment value will refresh the adjusted screen.
Reset: The previously adjusted white balance will be reset to the factory defaults.
Flesh Tone
You can emphasize the pink ‘esh tone’ in the picture.
Changing the adjustment value will refresh the adjusted screen.
EdgeEnhancement→Off/On
You can emphasize object boundaries in the picture.
xvYCC→Off/On
Setting the xvYCC mode to on increases detail and colour space when watching movies from an external device (i.e. DVD
player).
xvYCC is available when the picture mode is set to Movie, and the external input is set to HDMI or Component mode.
If xvYCC function is active, PIP cannot be selected.
Picture Options
In PC mode, you can only make changes to the Colour Tone, Size and
Screen Burn Protection from among the items in Picture Options.
Colour Tone→Cool2 / Cool1 / Normal / Warm1 / Warm2
You can select the most comfortable colour tone to your eyes.
The adjusted values are stored according to the selected Picture mode.
Warm1 or Warm2 is only activated when the picture mode is Movie.
N
N
N
N
N
N
❑
N
N
•
•
•
N
-
-
-
-
•
•
N
N
N
❑
N
N
N
Colour : 50
Tint (G / R) : G50 / R50
DetailedSettings ►
Picture Options
Picture Reset
Picture
Tint (G / R) : G50 / R50
Detailed Settings
PictureOptions ►
Picture Reset
Picture
BN68-01757A-Eng.indb 16 2008-09-24 오전 11:09:12

English - 17
Size
You can select the picture size which best corresponds to your viewing requirements.
Press the TOOLS button to display Tools menu.
You can also set the size by selecting Tools→PictureSize.
Auto Wide: Automatically adjusts the picture size to the 16:9 aspect ratio.
16:9: Adjusts the picture size to 16:9 appropriate for DVDs or wide broadcasting.
Wide Zoom: Magnify the size of the picture more than 4:3.
Zoom: Magnies the 16:9 wide picture (in the vertical direction) to t the screen size.
4:3: This is the default setting for a video movie or normal broadcasting.
Just Scan: Use the function to see the full image without any cutoff when HDMI (720p / 1080i / 1080p)
or Component (1080i / 1080p) signals are input.
Depending on the input source, the picture size options may vary.
The items available may differ depending on the selected mode.
In PC Mode, only 16:9 and 4:3 mode can be adjusted.
Settings can be adjusted and stored for each external device you have connected to an input of the TV.
Temporary image retention may occur when viewing a static image on the set for more than two hours.
Wide Zoom: Press the ► button to select Position, then press the ENTER
E
button. Press the ▲ or ▼ button to
move the screen up / down. Then press the ENTER
E
button.
Zoom: Press the ► button to select Position, then press the ENTER
E
button. Press the ▲ or ▼ button to move the
picture up and down. Then press the ENTER
E
button. Press the ► button to select Size, then press the ENTER
E
button. Press the ▲ or ▼ button to magnify or reduce the picture size in the vertical direction. Then press the
ENTER
E
button.
After selecting Just Scan in HDMI (1080i / 1080p) or Component (1080i / 1080p) mode: Select Position by pressing
the ◄ or ►button. Use the ▲, ▼, ◄ or ► button to move the picture.
Reset: Press the ◄ or ► button to select Reset, then press the ENTER
E
button. You can initialize the setting.
If you use the Just Scan function with HDMI 720p input, 1 line will be cut at the top, bottom, left and right as in the
overscan function.
When Double ( , ) mode has been set in PIP, the Picture Size cannot be set.
Screen Mode→16:9 / Wide Zoom / Zoom / 4:3
When setting the picture size to Auto Wide in a 16:9 wide TV, you can determine the picture size you want to see the 4:3
WSS (Wide Screen Service) image or nothing. Each individual European country requires different picture size so this function
is intended for users to select it.
16:9: Sets the picture to 16:9 wide mode.
Wide Zoom: Magnify the size of the picture more than 4:3.
Zoom: Magnify the size of the picture vertically on screen.
4:3: Sets the picture to 4:3 normal mode.
This function is available in Auto Wide mode.
This function is not available in PC, Component or HDMI mode.
Digital NR→Off / Low / Medium / High / Auto
If the broadcast signal received by your TV is weak, you can activate the Digital Noise Reduction feature to help reduce any
static and ghosting that may appear on the screen.
When the signal is weak, select one of the other options until the best picture is displayed.
DNIe→Off / Demo / On
This TV includes the DNIe function so as to provide a high visual quality. If you set DNIe to on, you can view the screen with
the DNIe feature activated. If you set the DNIe to Demo, you can view the applied DNIe and normal pictures on the screen, for
demonstration purposes. Using this function, you can view the difference in the visual quality.
DNIe™ (Digital Natural Image engine) DNIe™
This feature brings you more detailed image with 3D noise reduction, detail enhancement, contrast enhancement and white
enhancement. New image compensation Algorithm gives brighter, clearer, more detailed image to you. DNIe™ technology will
t every signal into your eyes.
This function is not available in Movie and Standard mode.
HDMI Black Level→Normal / Low
You can directly select the black level on the screen to adjust the screen depth.
This function is active only when the external input connects to HDMI (RGB signals).
T
•
•
•
•
•
•
N
N
N
N
N
N
N
N
N
N
N
•
•
•
•
N
N
N
N
N
N
BN68-01757A-Eng.indb 17 2008-09-24 오전 11:09:12

English - 18
Real100HzDemo→Off/On
You can get a clear distinction between Real 100Hz and 50Hz, especially when watching fast moving scenes. Therefore, when
seeing slow moving scenes, you will not be able to distinguish between Real 100Hz and 50Hz. Demo 100Hz works only with
50Hz signal. Real 100Hz demo mode is provided for shop demonstration with special pictures.
Movie Plus→Off / Low / Medium / High / Demo
You can view more natural skin and clear text even in fast moving scenes.
Use this function when watching movies.
This function is not available in Wide Zoom and Zoom modes.
This function is not available when PIP is set to On.
It is not supported in HDMI 1080p/24Hz, 25Hz, 30Hz mode.
Blue Only Mode→Off / On
This function is for AV device measurement experts. This function displays the blue signal only by removing the red and
green signals from the video signal so as to provide a Blue Filter effect that is used to adjust the Colour and Tint of video
equipment such as DVD players, Home Theaters, etc. Using this function, you can adjust the Colour and Tint to preferred
values appropriate to the signal level of each video device using the Red / Green / Blue / Cyan / Magenta / Yellow Colour Bar
Patterns, without using an additional Blue Filter.
Blue Only Mode is available when the picture mode is set to Movie or Standard.
Screen Burn Protection
To reduce the possibility of screen burn, this unit is equipped with screen burn prevention technology. This technology enables
you to set picture movement up/down (Vertical Line) and side to side (Horizontal Dot). The Time setting allows you to program
the time between movement of the picture in minutes.
Pixel Shift: Using this function, you can minutely move pixels on the PDP in horizontal or vertical direction to minimize after
image on the screen.
Set Pixel Shift to On by pressing the ▲ or ▼ button, then press the ENTER button.
Select the required option by pressing the ▲ or ▼ button, then press the ENTER button.
Available options: Horizontal Dot, Vertical Line, Time.
Optimum condition for pixel shift;
PC TV/Ext/AV/Component/HDMI
Horizontal Dot 4 4
Vertical Line 4 4
Time (minute) 4 2 min
The Pixel Shift value may differ depending on the monitor size (inches) and mode.
This function is not available in the Just Scan mode.
All White: This function helps remove after images on the screen by changing the colour of pixels to white. Use this
function when there are remaining after images or symbols on the screen especially when you displayed a still image on the
screen for a long time.
Scrolling: This function helps remove after images on the screen by moving all the pixels on the PDP according to a
pattern Use this function when there are remaining after images or symbols on the screen especially when you displayed a
still image on the screen for a long time.
Side Gray: When you watch TV with the screen ratio of 4:3, the screen is prevented from any damage by adjusting the
white balance on both extreme left and right sides.
Dark: When you set the screen ratio to 4:3, it darkens the left and right sides.
Light: When you set the screen ratio to 4:3, it brightens the left and right sides.
PictureReset→ResetPictureMode/Cancel
Resets all picture settings to the default values.
Select a picture mode to be reset. The reset is performed for each picture mode.
N
N
N
N
N
•
N
N
N
N
N
N
•
•
•
-
-
❑
N
BN68-01757A-Eng.indb 18 2008-09-24 오전 11:09:12
English - 19
Viewing Picture-in-Picture
You can display a sub picture within the main picture of set programme or video
input. In this way, you can watch the picture of set programme or video input from
any connected equipment while watching the main picture.
You may notice that the picture in the PIP window becomes slightly unnatural
when you use the main screen to view a game or karaoke.
Press the TOOLS button to display Tools menu.
You can also congure PIP related settings by selecting Tools→PIP.
PIP→Off / On
You can activate or deactivate the PIP function.
Main picture Sub picture
Component
HDMI 1, HDMI2/DVI, HDMI 3,
HDMI 4
PC
TV, Ext.1, Ext.2, AV
Source
You can select a source of the sub-picture.
Size → / /
You can select a size of the sub-picture.
If main picture is in HDMI mode, Size is available.
Position → / / /
You can select a position of the sub-picture.
In Double ( , ) mode, Position cannot be selected.
Channel
You can select a channel of the sub-picture only when the Source is set to TV.
Press the TOOLS button to display Tools menu.
You can also set the picture mode by selecting Tools→PIP
N
T
❑
N
N
T
Setting up the TV with your PC
Preset: Press the SOURCE button to select PC mode.
Auto Adjustment
Auto Adjustment allows the PC screen of set to self-adjust to the incoming PC
video signal. The values of ne, coarse and position are adjusted automatically.
This function does not work in DVI-HDMI mode.
Press the TOOLS button to display Tools menu.
You can also set the Auto Adjustment by selecting Tools→Auto
Adjustment.
Screen
Coarse / Fine:
The purpose of picture quality adjustment is to remove or reduce picture noise. If the noise is not removed
by Fine-tuning alone, then adjust the frequency as best as possible (Coarse) and Fine-tune again. After the noise has been
reduced, readjust the picture so that it is aligned on the center of screen.
PC Position:
Adjust the PC’s screen positioning if it does not t the TV screen.
Press the ▲ or ▼ button to adjusting the
Vertical-Position. Press the ◄ or ► button to adjust the Horizontal-Position.
Image Reset:
You can replace all image settings with the factory default values.
N
❑
N
T
❑
Setup
Entertainment : Off
Energy Saving : Off
PIP ►
Software Upgrade
Common Interface
PIP
PIP : On
Source : TV
Size :
Position :
Channel : ATV 11
L
Move
E
Enter
R
Return
Brightness : 45
Sharpness : 50
Auto Adjustment
►
Screen
Detailed Settings
Picture Options
Picture Reset
Picture
BN68-01757A-Eng.indb 19 2008-09-24 오전 11:09:13
English - 20
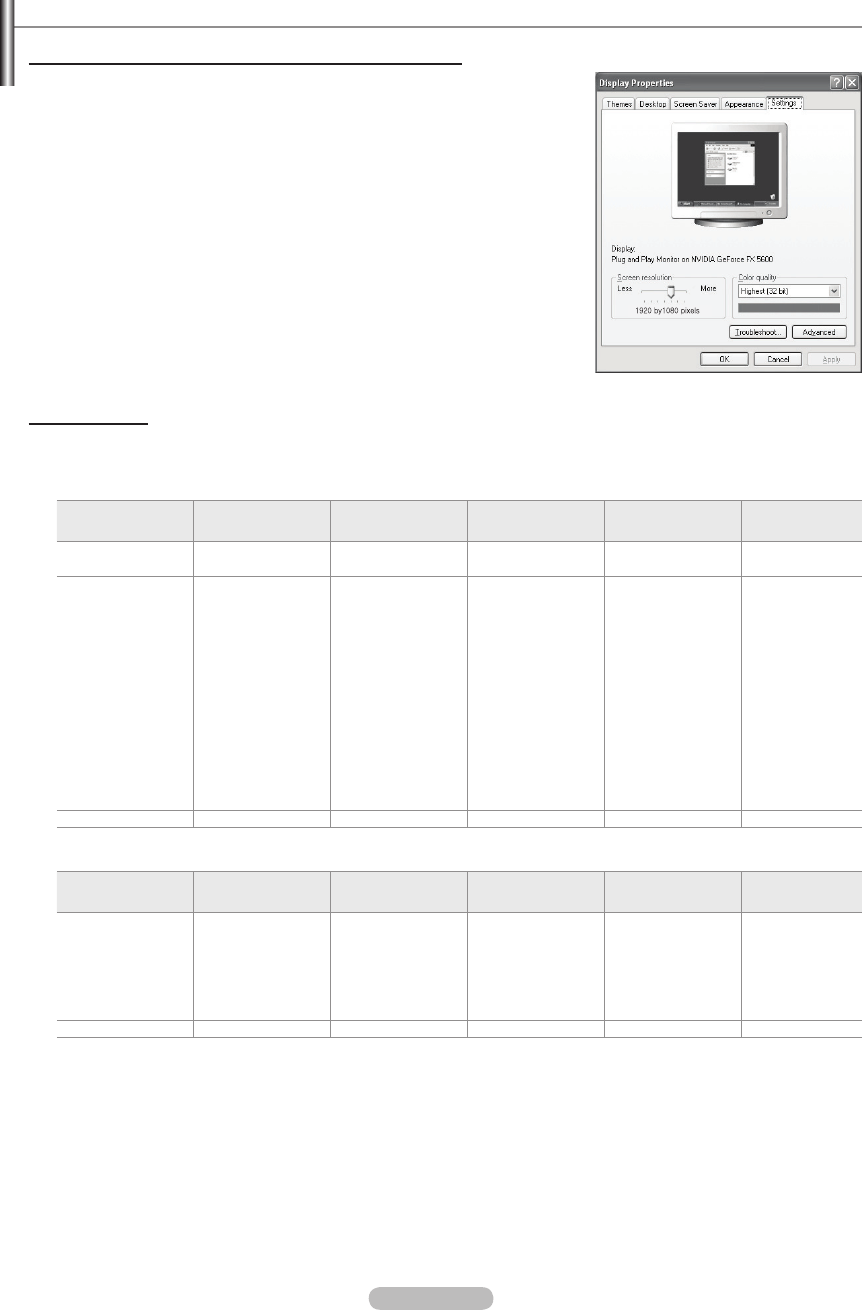
PC Display
Setting Up Your PC Software (Based on Windows XP)
The Windows display-settings for a typical computer are shown below. The actual
screens on your PC will probably be different, depending upon your particular
version of Windows and your particular video card. However, even if your actual
screens look different, the same basic set-up information will apply in almost all
cases. (If not, contact your computer manufacturer or Samsung Dealer.)
1. First, click on ‘Control Panel’ on the Windows start menu.
2. When the control panel window appears, click on ‘Appearance and Themes’
and a display dialog-box will appear.
3. When the control panel window appears, click on ‘Display’ and a display dialog-
box will appear.
4. Navigate to the ‘Settings’ tab on the display dialog-box.
The correct size setting (resolution)
Optimum: 1920 X 1080 pixels
If a vertical-frequency option exists on your display settings dialog box, the
correct value is ‘60’ or ‘60 Hz’. Otherwise, just click ‘OK’ and exit the dialog box.
Display Modes
Both screen position and size will vary depending on the type of PC monitor and its resolution.
The resolutions in the table are recommended.
D-Sub Input
Mode Resolution Horizontal
Frequency (kHz)
Vertical Frequency
(Hz)
Pixel Clock
Frequency (MHz)
Sync Polarity
(H / V)
IBM 640 x 350
720 x 400
31.469
31.469
70.086
70.087
25.175
28.322
+ / -
- / +
VESA
640 x 480
640 x 480
640 x 480
800 x 600
800 x 600
800 x 600
1024 x 768
1024 x 768
1024 x 768
1280 x 1024
1280 x 1024
1360 x 768
1600 x 1200
31.469
37.861
37.500
37.879
48.077
46.875
48.363
56.476
60.023
63.981
79.976
47.712
75.000
59.940
72.809
75.000
60.317
72.188
75.000
60.004
70.069
75.029
60.020
75.025
60.015
60.000
25.175
31.500
31.500
40.000
50.000
49.500
65.000
75.000
78.750
108.000
135.000
85.500
162.000
- / -
- / -
- / -
+ / +
+ / +
+ / +
- / -
- / -
+ / +
+ / +
+ / +
+ / +
+ / +
CVT 1920 x 1080RB 66.587 59.934 138.500 + / -
HDMI / DVI Input
Mode Resolution Horizontal
Frequency (kHz)
Vertical Frequency
(Hz)
Pixel Clock
Frequency (MHz)
Sync Polarity
(H / V)
VESA
640 x 480
800 x 600
1024 x 768
1280 x 1024
1360 x 768
1600 x 1200
31.469
37.879
48.363
63.981
47.712
75.000
59.940
60.317
60.004
60.020
60.015
60.000
25.175
40.000
65.000
108.000
85.500
162.000
- / -
+ / +
- / -
+ / +
+ / +
+ / +
CEA 1920 x 1080p 67.500 60.000 148.500 + / +
When using an HDMI / DVI cable connection, you must use the HDMI IN 2 jack.
The interlace mode is not supported.
The set might operate abnormally if a non-standard video format is selected.
Separate and Composite modes are supported. SOG is not supported.
Too long or low quality VGA cable can cause picture noise at high resolution modes (1920x1080).
N
N
N
N
N
BN68-01757A-Eng.indb 20 2008-09-24 오전 11:09:13
English - 21
Sound Control
Changing the Sound Standard
Mode→Standard/Music/Movie/Speech/Custom
You can select the type of special sound effect to be used when watching a
given broadcast.
Press the TOOLS button to display Tools menu.
You can also congure the sound mode by selecting Tools→Sound
Mode.
Equalizer
The sound settings can be adjusted to suit your personal preferences.
Mode: You can select a sound mode to suit your personal preferences.
Balance: Controls the balance between the right and left speakers.
100Hz / 300Hz / 1kHz / 3kHz / 10kHz (Bandwidth Adjustment): To adjust the level of different bandwidth frequencies
Reset: Resets the equalizer settings to the default values.
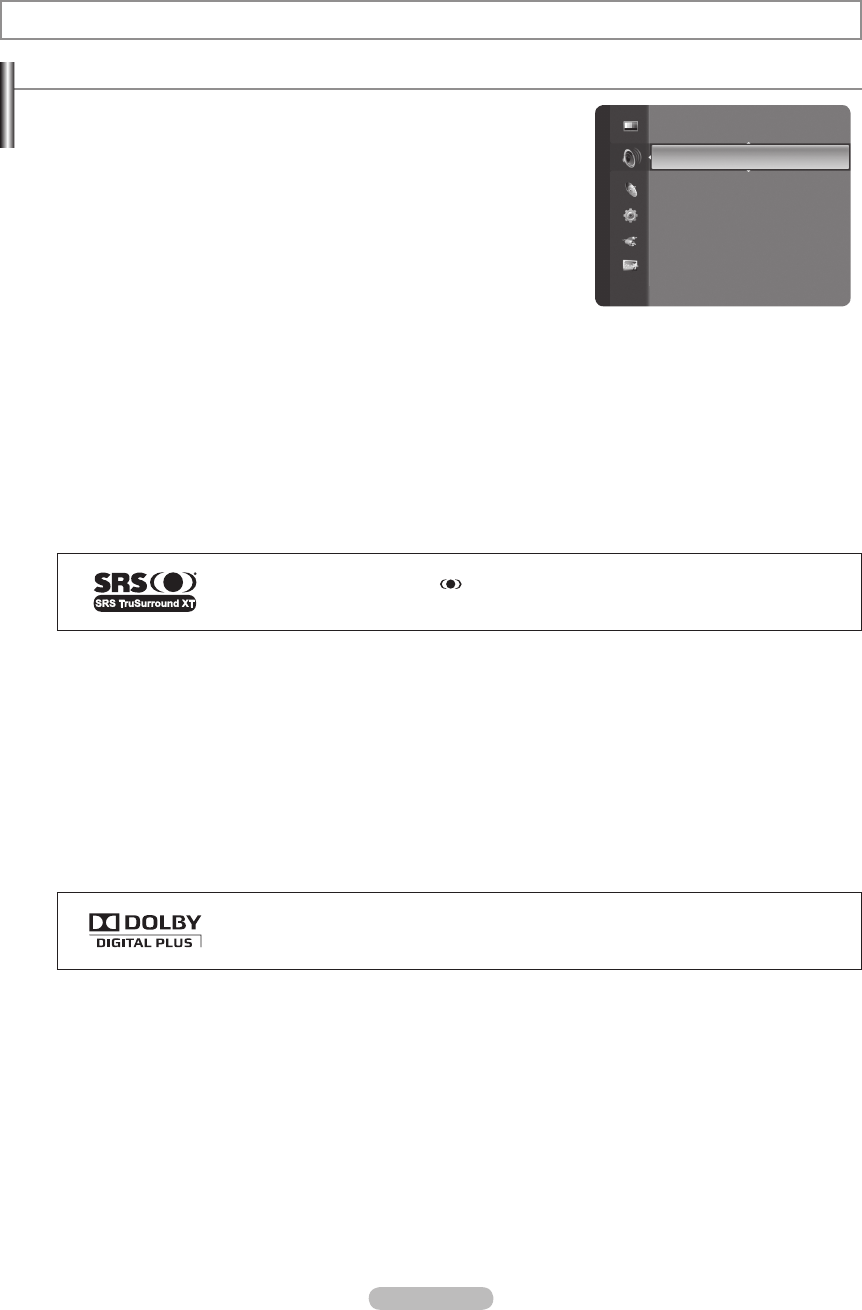
SRSTruSurroundXT→Off/On
TruSurround XT is a patented SRS technology that solves the problem of playing 5.1 multichannel content over two speakers.
TruSurround delivers a compelling, virtual surround sound experience through any two-speaker playback system, including
internal television speakers. It is fully compatible with all multichannel formats.
Press the TOOLS button to display Tools menu.
You can also set the SRS TruSurround XT by selecting Tools→SRSTSXT.
TruSurround XT, SRS and Symbol are trademarks of SRS Labs, Inc. TruSurround XT
technology is incorporated under license from SRS Labs, Inc.
Audio Language
You can change the default value for audio languages. Displays the language information for the incoming stream.
While viewing a digital channel, this function can be selected.
You can only select the language among the actual languages being broadcast.
AudioFormat→MPEG/DolbyDigital
When sound is emitted from both the main speaker and the audio receiver, a sound echo may occur due to the decoding
speed difference between the main speaker and the audio receiver. In this case, use the TV Speaker function.
While viewing a digital channel, this function can be selected.
You can only select the language among the actual languages being broadcast.
Manufactured under license from Dolby Laboratories.
Dolby and the double-D symbol are trademarks of Dolby Laboratories.
Audio Description
This is an auxiliary audio function that provides an additional audio track for visually challenged persons. This function handles
the Audio Stream for the AD (Audio Description), when it is sent along with the Main audio from the broadcaster. Users can
turn the Audio Description On or Off and control the volume.
AudioDescription→Off/On: Turn the audio description function on or off.
Volume: You can adjust the audio description volume.
Volume is active when Audio Description is set to On.
While viewing a Digital channel, this function can be selected.
❑
T
❑
❑
T
❑
N
N
❑
N
N
❑
N
N
Mode : Custom
►
Equalizer
SRS TruSurround XT : Off
Audio Language : ----
Audio Format : ----
Audio Description
Auto Volume : Off
Select Speaker : TV Speaker
Sound
BN68-01757A-Eng.indb 21 2008-09-24 오전 11:09:13
English - 22
Auto Volume→Off/On
Each broadcasting station has its own signal conditions, and so it is not easy
to adjust the volume every time the channel is changed. This feature lets you
automatically adjust the volume of the desired channel by lowering the sound
output when the modulation signal is high or by raising the sound output when
the modulation signal is low.
SelectSpeaker→ExternalSpeaker/TVSpeaker
If you want to hear the sound through separate speakers, cancel the internal
amplier.
The – +, MUTE buttons do not operate when the TV Speaker is set to Off.
If you select External Speaker in the Select Speaker menu, the sound settings will be limited.
TV's Internal Speakers Audio Out (Optical, L / R Out) to Sound System
TV / Ext. / AV / S-Video / Component / PC / HDMI TV / Ext. / AV / S-Video / Component / PC / HDMI
TV Speaker Speaker Output Sound Output
External Speaker Mute Sound Output
Video No Signal Mute Mute
Sound Select
When the PIP feature is activated, you can listen to the sound of the sub (PIP) picture.
Main: Used to listen to the sound of the main picture.
Sub: Used to listen to the sound of the sub picture.
Press the TOOLS button to display Tools menu.
You can also set the sound of the sub picture by selecting Tools→PIP→SoundSelect.
Sound Reset
Reset All / Reset Sound Mode / Cancel:
You can restore the Sound settings to the factory defaults.
❑
❑
N
N
❑
T
❑
Selecting the Sound Mode
You can set the sound mode in the Tools menu. When you set to Dual l ll, the
current sound mode is displayed on the screen.
Type of broadcast On-screen indication
NICAM
Stereo
Regular broadcast
(Standard audio) Mono (Normal use)
Regular + NICAM Mono
NICAM
Mono
(Normal)
NICAM-Stereo
NICAM
Stereo
Mono
(Normal)
NICAM Dual-I/II
NICAM
Dual-1
NICAM
Dual-2
Mono
(Normal)
A2
Stereo
Regular broadcast
(Standard audio) Mono (Normal use)
Bilingual or DUAL-I/II
Dual I Dual II
Stereo Stereo
Mono
(Forced mono)
If the stereo signal is weak and an automatic switching occurs, then switch to the mono.
This function is only activated in stereo sound signal. It is deactivated in mono sound signal.
This function is only available in TV mode.
N
N
N
Tools
Anynet+ (HDMI-CEC)
Picture Size : Auto Wide
Picture Mode : Standard
Sound Mode : Custom
Sleep Timer : Off
SRS TS XT : Off
Energy Saving : Off
Dual l ll ◄ Mono ►
U
Move
L
Adjust
e
Exit
Select Speaker : TV Speaker
Sound Select : Main
SoundReset ►
Sound
BN68-01757A-Eng.indb 22 2008-09-24 오전 11:09:13

English - 23
ConguringtheSetupMenu
Language
You can set the menu language.
ChildLock→Off/On
This feature allows you to prevent unauthorized users, such as children, from
watching unsuitable programmes by muting out video and audio.
Before the setup screen appears, the PIN number input screen appears.
Enter your 4 digit PIN number.
The default PIN number of a new TV set is 0-0-0-0. You can change the
PIN by selecting Change PIN from the menu.
You can lock some channels in Channel List. (refer to page 14)
Child Lock is available only in TV mode. .
Change PIN
You can change your personal ID number that is required to set up the TV.
Before the setup screen appears, the PIN number input screen appears. Enter your 4 digit PIN number.
The default PIN number of a new TV set is 0-0-0-0.
If you forget the PIN code, press the remote control buttons in the following sequence, which resets the PIN to 0-0-0-0:
POWER (Off), MUTE, 8, 2, 4, POWER (On).
ParentalLock→ParentalRating
This feature allows you to prevent unauthorized users, such as children, from watching unsuitable programmes by a 4-digit
PIN (Personal Identication Number) code that is dened by the user.
In the Parental Rating screen, congure the parental ratings.
Before the setup screen appears, the PIN number input screen appears. Enter your 4 digit PIN number.
The default PIN number of a new TV set is 0-0-0-0. You can change the PIN by selecting Change PIN from the menu.
When the parental ratings are set, the
\
symbol is displayed.
Allow All: Press to unlock all TV ratings.
Block All: Press to lock all TV ratings.
Subtitle
You can activate and deactivate the subtitles. Use this menu to set the Subtitle Mode. Normal under the menu is the basic
subtitle and Hard of hearing is the subtitle for a hearing-impaired person.
Subtitle→Off/On: Switches subtitles off or on.
Mode→Normal/Hardofhearing: Sets the subtitle mode.
Subtitle Language: Set the subtitle language.
If the programme you are watching does not support the Hard of hearing function, Normal automatically activates even
though Hard of hearing mode is selected.
English is the default in cases where the selected language is unavailable in the
broadcast.
You can select these options simply by pressing the SUBT. button on the
remote control.
Teletext Language
You can set the Teletext language by selecting the language type.
English is the default in cases where the selected language is unavailable in the broadcast.
❑
❑
N
N
N
N
❑
N
N
N
❑
-
N
N
N
N
❑
N
N
O
❑
N
Function Description
Setup
Plug & Play
Language : English ►
Time
Network Selection : Cable
Wireless Network Setup
Cable Network Setup
Child Lock : On
Change PIN
Parental Lock
BN68-01757A-Eng.indb 23 2008-09-24 오전 11:09:14
English - 24
Preference
Primary Audio Language / Secondary Audio Language / Primary Subtitle Language / Secondary Subtitle Language /
Primary Teletext Language / Secondary Teletext Language
Using this feature, users can select one of the languages. The language selected here is the default when the user selects a
channel.
If you change the language setting, the Subtitle Language, Audio Language, and the Teletext Language of the Language
menu are automatically changed to the selected language.
The Subtitle Language, Audio Language, and the Teletext Language of the Language menu show a list of languages
supported by the current channel and the selection is highlighted. If you change this language setting, the new selection is
only valid for the current channel. The changed setting does not change the setting of the Primary Subtitle Language, Primary
Audio Language, or the Primary Teletext Language of the Preference menu.
DigitalText→Disable/Enable
If the programme is broadcast with digital text, this feature is enabled.
MHEG (Multimedia and Hypermedia Information Coding Experts
Group)
An International standard for data encoding systems used in multimedia
and hypermedia. This is at a higher level than the MPEG system which
includes data-linking hypermedia such as still images, character service,
animation, graphic and video les as well as multimedia data. MHEG is
user runtime interaction technology and is being applied to various elds
including VOD (Video-On-Demand), ITV (Interactive TV), EC (Electronic
Commerce), tele-education, tele-conferencing, digital libraries and network
games.
LightEffect→Off/InStandby/WatchingTV/Always
You can turn on/off the blue LED on the front of TV according to the situation. Use it for saving power or when the LED dazzles
your eyes.
Off: The blue LED is always off.
In Standby: The blue LED lights while in Standby mode and it turns off when your TV is turned on.
Watching TV: The blue LED lights when watching TV and it turns off when your TV is turned off.
Always: The blue LED always lights.
Set the Light Effect to Off to reduce the power consumption.
Melody
Off / Low / Medium / High
The TV power on / off melody sound can be adjusted.
The Melody does not play
When no sound is output from the TV because the MUTE button has been pressed.
When no sound is output from the TV because the – (Volume) button has been pressed.
When the TV is turned off by Sleep Timer function.
Entertainment
The Entertainment mode enables you to select the optimal display and sound for sports, cinema and games.
Off: Switches the Entertainment function off.
Sports: Provides the optimal picture and sound quality for sports.
Cinema: Provides the optimal picture and sound quality for movie watching. You can experience a richer picture and
enhanced sound.
Game: Provides the optimal picture and sound quality for games. This mode accelerates the playing speed when
using an external game console connected to the TV.
If you set any of the three Entertainment modes to On, the settings will be locked and can not be adjusted. In addition,
Picture and Sound mode settings are not allowed. If you want to make Picture and Sound mode adjustments, the
Entertainment mode must be turned off.
The Entertainment settings are saved for each input source.
Entertainment mode is not activated in PC mode.
You can press the E.MODE button on the remote control repeatedly to change
the Entertainment setting.
❑
❑
N
❑
N
❑
N
-
-
-
❑
N
N
N
O
Setup
Teletext Language : ----
Preference
DigitalText :Enable ►
Light Effect : Watching TV
Wall-Mount Adjustment
Melody : Off
Entertainment : Off
Energy Saving : Off
PIP
Software Upgrade
BN68-01757A-Eng.indb 24 2008-09-24 오전 11:09:14
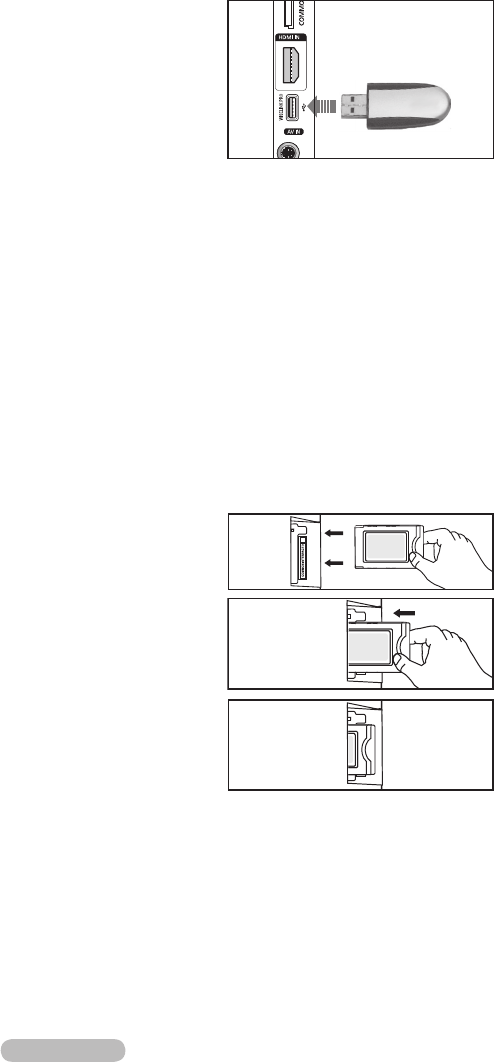
English - 25
Energy Saving
This feature adjusts the brightness of the TV in order to reduce power consumption. When watching TV at night, set the
Energy Saving mode option to High to reduce eye fatigue as well as power consumption.
Off: Turns off the energy saving function.
Low: Sets the TV to low energy saving mode.
Medium: Sets the TV to medium energy saving mode.
High: Sets the TV to high energy saving mode.
Press the TOOLS button to display Tools menu.
You can also set the Energy Saving option by selecting Tools→EnergySaving.
Software Upgrade
To keep your product up-to-date with new Digital Television features then
software upgrades are periodically broadcast as part of the normal Television
signal. It will automatically detect these signals and display the software
upgrade banner. You are given the option to install the upgrade.
By USB
Insert a USB drive containing the rmware upgrade into TV. Please be careful
to not disconnect the power or remove the USB drive while upgrades are being
applied. The TV will turn off and turn on automatically after completing the
rmware upgrade. Please check the rmware version after the upgrades are complete. When software is upgraded, video and
audio settings you have made will return to their default (factory) settings. We recommend you write down your settings so that
you can easily reset them after the upgrade.
By Channel
Upgrades the software using the broadcasting signal.
Standby Mode Upgrade
To continue software upgrade with master power on, Select On by pressing the ▲ or ▼ button. 45 minutes after entering
standby mode, a manual upgrade is automatically conducted. Since the power of the unit is turned on internally, the screen
may be on slightly for the product. This phenomenon may continue for more than 1 hour until the software upgrade is
completed.
Alternative Software
To display the software version information.
Common Interface
Installing the CI Card
a. Purchase the CI CAM module by visiting your nearest dealer or by phone.
b. Insert the CI CARD into the CAM in the direction of the arrow until it ts.
c. Insert the CAM with the CI CARD installed into the common interface slot.
Insert the CAM in the direction of the arrow, right up to the end so that it is
parallel with the slot.
d. Check if you can see a picture on a scrambled signal channel.
CI Menu
This enables the user to select from the CAM-provided menu.
Select the CI Menu based on the menu PC Card.
Application Info.
This contains information on CAM inserted in the CI slot and displays it.
The Application Info inserting is about the CI CARD. You can install the CAM
anytime whether the TV is ON or OFF.
1. Purchase the CI CAM module by visiting your nearest dealer or by phone.
2. Insert the CI CARD into the CAM in the direction of the arrow until it ts.
3. Insert the CAM with the CI CARD installed into the common interface slot. (Insert the CAM in the direction of the arrow, right
up to the end so that it is parallel with the slot.)
4. Check if you can see a picture on a scrambled signal channel.
❑
T
❑
❑
N
4
TV Side Panel
USB Drive
BN68-01757A-Eng.indb 25 2008-09-24 오전 11:09:14

English - 26
Setting the Time
Clock
Setting the clock is necessary in order to use the various timer features of the
TV.
The current time will appear every time you press the INFO button.
If you disconnect the power cord, you have to set the clock again.
Clock Mode
You can set up the current time manually or automatically.
Auto: Set the current time automatically using the time from the digital
broadcast.
Manual: Set the current time to a manually specied time.
Clock Set
You can set the current time manually.
Set up this item when you have set Clock Mode to Manual.
You can set the day, month, year, hour, minute directly by pressing the
number buttons on the remote control.
SleepTimer→Off/30min/60min/90min/120min/150min
/ 180 min
The sleep timer automatically shuts off the TV after a preset time (30, 60, 90,
120, 150 and 180 minutes).
The TV automatically switches to standby mode when the timer reaches 0.
To cancel the Sleep Timer function, select Off.
Press the TOOLS button to display Tools menu.
You can also set the sleep timer by selecting Tools→SleepTimer.
Timer 1 / Timer 2 / Timer 3
Three different on / off timer settings can be made.
On Time:
Set the hour, minute, and Activate / Inactivate.
(To activate timer with the setting you’ve chosen, set to Activate.)
Off Time:
Set the hour, minute, and Activate / Inactivate.
(To activate timer with the setting you’ve chosen, set to Activate.)
Volume:
Set the required volume level.
Contents:
When the On Timer is active, you can turn on a specic channel or play back contents such as photo or audio
les.
TV / USB: Select TV or USB. (Make sure that an USB device is connected to your TV.)
Antenna: Select ATV or DTV.
Channel: Select the desired channel.
Music: Select the folder containing MP3 les on the USB device.
Photo: Select the folder containing JPEG les on the USB device.
Repeat:
Select Once, Everyday, Mon~Fri, Mon~Sat, Sat~Sun, or Manual.
When Manual is selected, press the ► button to select the desired day of the week. Press the ENTER
E
button over the
desired day and the c mark will appear.
You must set the clock rst.
You can set the hour, minute and channel by pressing the number buttons on the remote control.
Auto Power Off
When you set the timer On, the television will eventually turn off, if no controls are operated for 3 hours after the TV was
turned on by the timer. This function is only available in timer On mode and prevents overheating, which may occur if a TV is
on for too long time.
❑
N
N
•
•
N
N
❑
N
N
T
❑
•
•
•
•
•
N
N
N
N
Setup
Plug & Play
Language : English
Time ►
Network Selection : Cable
Wireless Network Setup
Cable Network Setup
Child Lock : On
Change PIN
Parental Lock
Subtitle
Time
Clock : -- : -- ►
Sleep Timer : Off
Timer 1 : Inactivated
Timer 2 : Inactivated
Timer 3 : Inactivated
U
Move
E
Enter
R
Return
BN68-01757A-Eng.indb 26 2008-09-24 오전 11:09:14
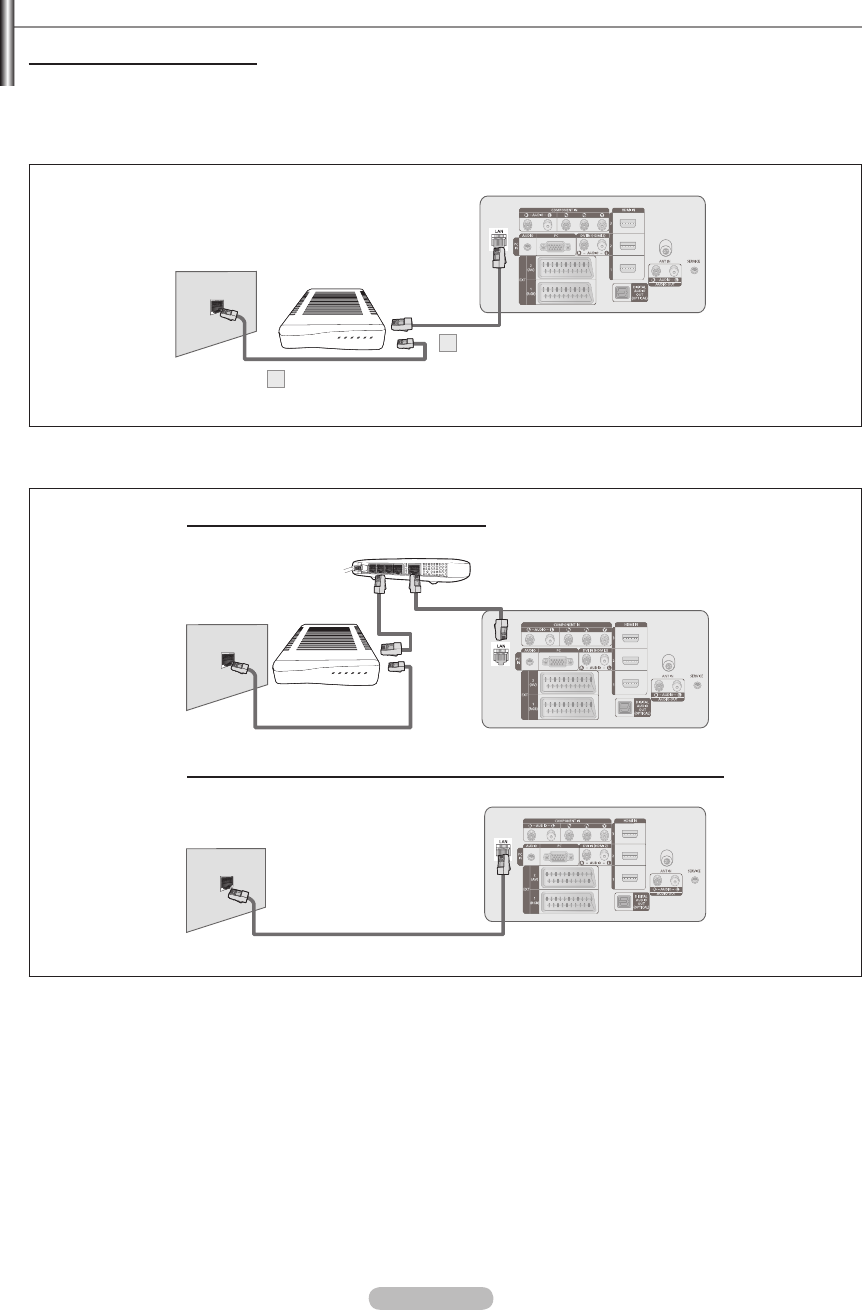
English - 27
Network Connection
Network Connection - Cable
Cable Connection for a DHCP Environment
The procedures to set up the network using Dynamic Host Conguration Protocol (DHCP) are described below. Since an IP
address, subnet mask, gateway, and DNS are automatically allocated when DHCP is selected, you do not have to enter them
manually.
1. Connect the [LAN] port on the rear panel of the TV and the external modem with a LAN Cable.
2. Connect the LAN port on the wall and the external modem with a Modem Cable.
The terminals (the position of the port and the type) of the external device may differ depending on the manufacturer.
If the IP address allocation by the DHCP server has failed, turn the external modem off, turn it on again after at least 10
seconds and then try again.
For the connections between the external modem and the Sharer (Router), refer to the owner’s manual of the corresponding
product.
You can connect the TV to the LAN directly without connecting it through a Sharer (Router).
You cannot use a manual-connection-type ADSL modem becaus;e it does not support DHCP. You have to use an automatic-
connection-type ADSL modem.
N
N
N
N
N
TV Rear Panel
The Modem Port
on the Wall
Modem Cable
2
External Modem
(ADSL/VDSL/Cable TV)
LAN Cable
1
You can connect the LAN port and the TV directly depending on your network status.
TV Rear Panel
LAN Cable
The LAN Port
on the Wall
You can connect the LAN via a Sharer (Router).
TV Rear Panel
The Modem Port
on the Wall
External Modem
(ADSL/VDSL/
Cable TV)
IP Sharer
LAN Cable
Modem Cable
LAN Cable
BN68-01757A-Eng.indb 27 2008-09-24 오전 11:09:16
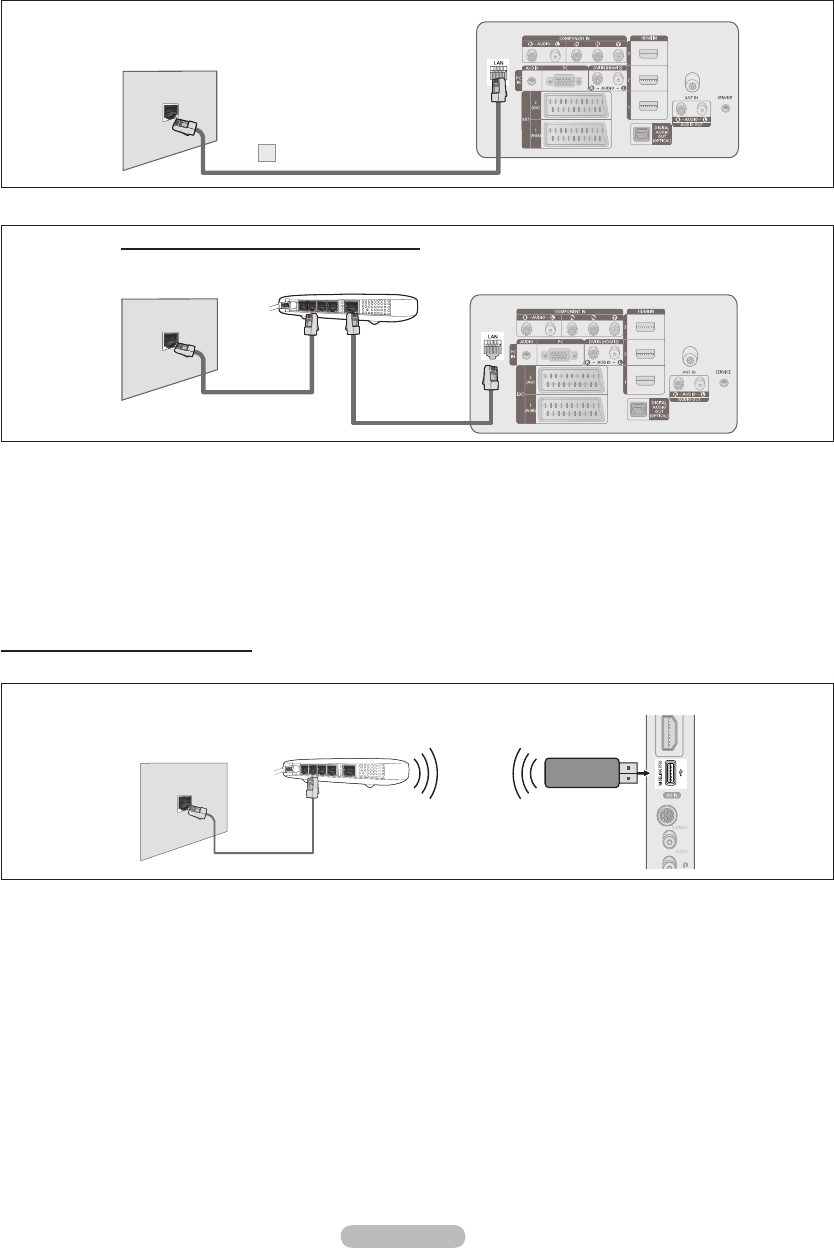
English - 28
LAN Connection for Static IP Environment
The procedures to set up the network using a static IP address are described below. You have to manually enter the IP
address, subnet mask, gateway, and DNS that are provided by your Internet Service Provider (ISP).
1. Connect the [LAN] port on the rear panel of the TV and the LAN port on the wall using the LAN cable.
The terminals (the position of the port and the type) of the external device may differ depending on the manufacturer.
If you are using a static IP address, your ISP will inform you of the IP address, subnet mask, gateway, and DNS. You must
enter these values to complete the network settings. If you do not know the values, ask your network administrator.
For the information on how to congure and connect a Sharer (Router), refer to the owner’s manual for the corresponding
product.
You can connect the TV to the LAN directly without connecting it through a Sharer (Router).
If you use an IP Sharer (IP Router) that supports DHCP, you can set up the device as either DHCP or static IP.
For the procedures to use a static IP address, ask your Internet Service Provider.
Network Connection - Wireless
You can connect to the network wirelessly through a wireless IP sharer.
1. Connect the ‘Samsung Wireless LAN Adapter for InfoLive’ into the Wiselink terminal of the TV.
You must use the ‘Samsung Wireless LAN Adapter for InfoLive’(WIS-08BG) to use a wireless network.
The ‘Samsung Wireless LAN Adapter for InfoLive’ is sold separately. Contact a Samsung Electronics agent or service center
for purchasing.
To use a wireless network, your TV must be connected to a wireless IP sharer.
If the wireless IP sharer supports DHCP, you TV can use a DHCP or static IP address to connect to the wireless network.
You must use a wireless IP sharer that supports IEEE 802.11 B or IEEE 802.11G.
If the wireless IP sharer allows you to turn on / off the Ping connection function, turn it on.
Set the wireless IP sharer to Infrastructure mode. Ad-hoc mode is not supported.
Select a channel for the wireless IP sharer that is not currently being used. If the channel set for the wireless IP sharer is
currently being used by another device nearby, this will result in interference and communications may fail.
When applying the security key for the AP (wireless IP sharer), only the following is supported.
1) Authentication Mode : WEP, WPAPSK, WPA2PSK
2) Encryption Type : WEP, TKIP, AES
If you apply a security system other than the systems listed above, it will not work with the TV.
N
N
N
N
N
N
N
N
N
N
N
N
N
N
N
TV Rear Panel
LAN Cable
1
The LAN Port
on the Wall
TV Rear Panel
LAN Cable
IP Sharer
LAN Cable
The LAN Port
on the Wall
You can connect the LAN via a Sharer (Router).
TV Side Panel
Samsung Wireless LAN
Adapter for InfoLive
LAN Cable
Wireless IP sharer
The LAN Port
on the Wall
BN68-01757A-Eng.indb 28 2008-09-24 오전 11:09:18
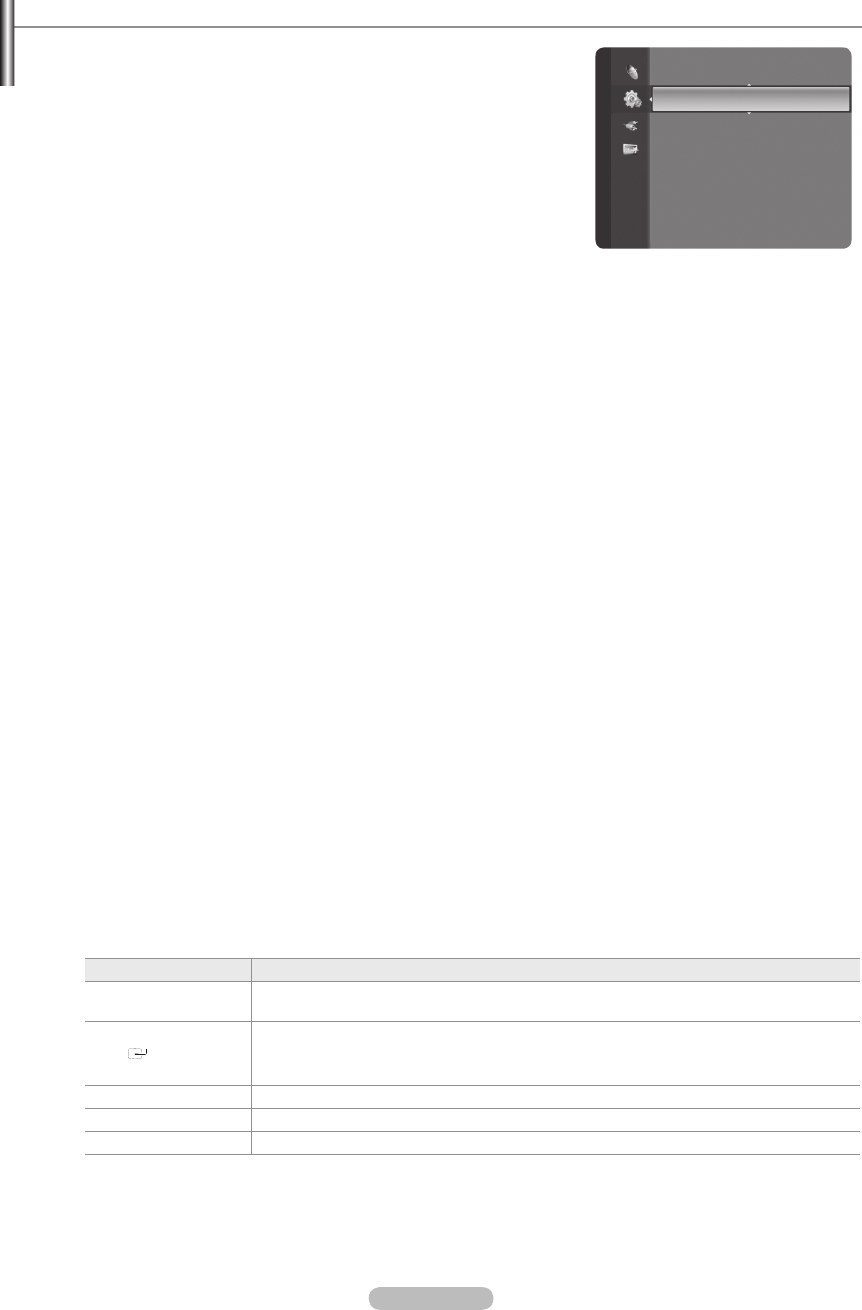
English - 29
Network Setup
Network Selection
Select Cable or Wireless as the method to connect to the network.
The menu is activated only if the ‘Samsung Wireless LAN Adapter’ for
InfoLive’ is connected.
Cable:
Connect to network using a cable.
Wireless:
Connect to network wirelessly.
Cable Network Setup
InternetProtocolSetup→AutoSetup/ManualSetup
Network Test:
You can test or conrm the network connection status after setting up the network.
When unable to connect to a wired network
If your Internet service provider has registered the MAC address of the device used to connect to the Internet for the rst
time and authenticates the MAC address each time you connect to the Internet, your TV may not be able to connect to
the Internet as the MAC address differs from that of the device (PC) used to connect to the Internet the rst time. In this
case, ask your Internet service provider about the procedures to connect devices other than your PC (such as your TV) to
the Internet. If your Internet service provider requires an ID or password to connect to the Internet (network), your TV may
not be able to connect to the Internet. In this case, you have to enter your ID or password when connecting to the Internet
using an Internet Sharer (Router).
The internet connection may fail due to a rewall problem. In this case, contact your Internet service provider. If you
cannot connect to the Internet even if you have followed the procedures of your Internet service provider, please contact a
Samsung Electronics Service Center.
Wireless Network Setup
InternetProtocolSetup→AutoSetup/ManualSetup
Network Test: You can test or confirm the network connection status after setting up the network.
When unable to connect to a wireless network
Your TV may fail to locate an AP that is congured as a private SSID type. In this case, please change the AP settings and
try again. If your Internet service provider has registered the MAC address of the device used to connect to the Internet
for the rst time and authenticates the MAC address each time you connect to the Internet, your TV may not be able to
connect to the Internet as the MAC address differs from that of the device (PC) used to connect to the Internet the rst
time. In this case, ask your Internet service provider about the procedures to connect devices other than your PC (such
as your TV) to the Internet. If you cannot connect to the Internet even if you have followed the procedures of your Internet
service provider, please contact a Samsung Electronics Service Center.
Select Access Point:
You can select the IP sharer to use when using a wireless network.
If a wireless Access Point is not in the Access Point list, press the Red button.
When the connection is made, you will be returned to the screen automatically.
If you selected an Access Point that requires security authentication, enter the security key.
If you have selected an Access Point with a security authentication:
The Security Key input screen appears.
Enter the security key and press the ENTERE button.
Using the Remote Control Buttons on the Security Key Input Screen.
Setup Screen can be different depending on the security types.
Button Operations
▲/▼/◄/►,
(Wheel)
Moves the selection up/down/left/right.
(ENTER)
Enters (Inputs) the selected character.
Red button
Switch between Upper- and Lower-Case Letters
Green button
You can delete an already entered character.
Blue button
Press this button to nish entering the security key.
❑
N
❑
N
❑
N
N
N
N
N
-
-
-
N
Setup
Language : English
Time
NetworkSelection :Cable ►
Wireless Network Setup
Cable Network Setup
Child Lock : On
Change PIN
Parental Lock
Subtitle
Teletext Language : - - - -
BN68-01757A-Eng.indb 29 2008-09-24 오전 11:09:19

English - 30
Cable Network Setup-Auto Setup
If you connect the LAN cable and it supports DHCP, the Internet Protocol (IP) Settings are automatically congured. Please check
if the LAN cable is connected. (See page 27)
1. Set Network Selection to Cable.
2. Select Cable Network Setup.
3. Set Internet Protocol Setup to Auto Setup.
4. Select Network Test to check the network connectivity.
Cable Network Setup-Manual Setup
To connect the TV to the LAN using a static IP address, you must set up the Internet Protocol (IP). Please check if the LAN cable is
connected. (See page 27)
1. Set Network Selection to Cable.
2. Select Cable Network Setup.
3. Set Internet Protocol Setup to Manual Setup.
4. Set up IP Address, Subnet Mask, Gateway and DNS Server.
Press the number buttons on the remote control when you set the Network manually.
5. Select Network Test to check the network connectivity.
Wireless Network Setup-Auto Setup
The menu is activated only if the ‘Samsung Wireless LAN Adapter for InfoLive’ is connected. (See page 28)
If you connect the LAN cable and it supports DHCP, the Internet Protocol (IP) Settings are automatically congured. The wireless
IP sharer to be connected to this product must support DHCP.
1. Set Network Selection to Wireless.
2. Select Wireless Network Setup.
3. Set Internet Protocol Setup to Auto Setup.
4. Select an AP through Select Access Point.
5. Select Network Test to check the network connectivity.
Wireless Network Setup-Manual Setup
The menu is activated only if the ‘Samsung Wireless LAN Adapter for InfoLive’ is connected. (See page 28)
1. Set Network Selection to Wireless.
2. Select Wireless Network Setup.
3. Set Internet Protocol Setup to Manual Setup.
4. Select an AP through Select Access Point.
5. Select Network Test to check the network connectivity.
N
BN68-01757A-Eng.indb 30 2008-09-24 오전 11:09:19
English - 31
Source List / Edit Name
Source List
Use to select TV or other external input sources such as DVD players or Cable
Box / Satellite receivers (Set-Top Box) connected to the TV. Use to select the
input source of your choice.
TV, Ext.1, Ext.2, AV, S-Video, Component, PC, HDMI1, HDMI2 / DVI,
HDMI3, HDMI4, USB, DLNA.
You can choose only those external devices that are connected to the TV.
In the Source List, connected inputs will be highlighted and sorted to the
top. Inputs that are not connected will be sorted to the bottom.
Using the Colour buttons on the remote with the Source list
Red (Refresh): Refreshes the connecting external devices.
TOOLS (Option): Displays the Edit Name and Information menus.
Press the SOURCE button on the remote control to view an external signal
source. TV mode can be selected by pressing the TV button, number
buttons (0~9), and the P < / > button on the remote control.
Edit Name
VCR / DVD / Cable STB / Satellite STB / PVR STB / AV Receiver / Game / Camcorder / PC / TV / IPTV / Blu-Ray / HD
DVD / DMA
Name the device connected to the input jacks to make your input source selection easier.
When a PC with a resolution of 1920 x 1080@60Hz is connected to the HDMI IN 2 port, you should set the HDMI2 / DVI
mode to PC in the Edit Name of the Input mode.
❑
N
N
-
-
O
❑
N
Product Guide
The Product Guide gives you information on the most important features of this TV.
1. Press the MENU button to display the menu. Press the ▲ or ▼ button to select
Application, then press the ENTER
E
button.
2. Press the ▲ or ▼ button to select Product Guide, then press the ENTER
E
button.
3. Press the ◄ or ► button to select a Guide (Picture Quality, Entertainment or
Connectivity) and press the ENTER
E
button.
4. You can navigate the Product Guide screen by using the ◄ and ► buttons.
Picture Quality Full HD 1080p
Ultra FilterBright
Real 100Hz(50") / 100Hz Dual Scan(63")
Entertainment InfoLive
Content Library
Entertainment Mode
Connectivity WISELINK Pro
DLNA
4HDMI
Anynet+
5. Press the EXIT button to exit.
Source List
Edit Name
Input Application
Content Library
InfoLive
ProductGuide ►
BN68-01757A-Eng.indb 31 2008-09-24 오전 11:09:20
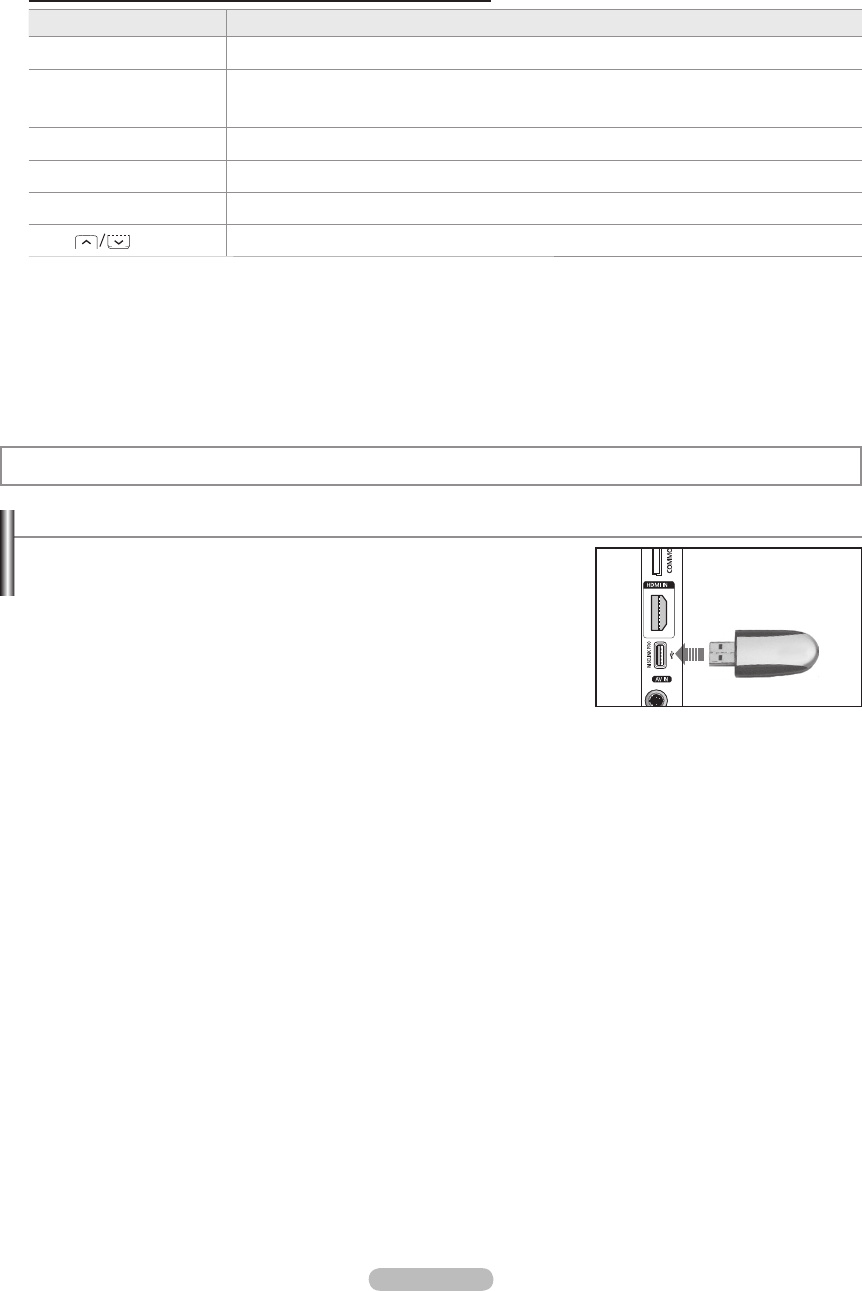
English - 32
WISELINK Pro
Connecting a USB Device
1. Press the POWER button to turn the TV on.
2. Connect a USB device containing photo, music and/or movie les to the
WISELINK jack (USB jack) on the side of the TV.
If you enter the WISELINK Pro mode with no USB device connected the
message ‘No external storage device found. Check the connection status.’
will appear. In this case, insert the USB device, exit the screen by pressing
the W.LINK button on the remote control and enter the WISELINK Pro screen
again.
MTP (Media Transfer Protocol) is not supported.
The le system only supports FAT16/32 (The NTFS le system is not supported).
Certain types of USB Digital camera and audio devices may not be compatible with this TV.
WISELINK Pro only supports USB Mass Storage Class devices (MSC). MSC is a Mass Storage Class Bulk-Only Transport
device. Examples of MSC are Thumb drives and Flash Card Readers (Both USB HDD and HUB are not supported.)
Please connect directly to the USB port of your TV. If you are using a separate cable connection, there may be a USB
compatibility problem.
Before connecting your device to the TV, please back up your les to prevent them from damage or loss of data. SAMSUNG is
not responsible for any data le damage or data loss.
Do not disconnect the USB device while it is loading.
MSC supports MP3 and JPEG les, while a PTP device supports JPEG les only.
The sequential JPEG format is supported.
The higher the resolution of the image, the longer it takes to display on the screen.
The maximum supported JPEG resolution is 15360X8640 pixels.
For unsupported or corrupted les, the Not Supported File Format message is displayed.
If the number of photo les exceeds 4000 (or the number of music les exceeds 3000), any les exceeding the 4000 limit may
not be displayed in the Photo List (or Music List).
MP3 les with DRM that have been downloaded from a non-free site cannot be played. Digital Rights Management (DRM)
is a technology that supports the creation of content, the distribution and management of the content in an integrated and
comprehensive way, including the protection of the rights and interests of the content providers, the prevention of the illegal
copying of contents, as well as managing billings and settlements.
When moving to a photo, loading may take a few seconds. At this point, the loading icon will appear at the screen.
N
N
N
N
N
N
N
N
N
N
N
N
N
N
N
N
Using the Remote Control Button in Product Guide Menu
Button Operations
Yellow button Shows the contents of the Product Guide sequentially. (AutoPlay)
▲/▼/◄/►
(Wheel) Move the cursor and select an item.
ENTER
E
Select the currently selected item.
RETURN Return to the previous menu.
EXIT Stop the current function and return to the Product Guide main menu.
P
,
PRE-CH Stop Product Guide mode and Returns to TV mode
4
TV Side Panel
USB Drive
BN68-01757A-Eng.indb 32 2008-09-24 오전 11:09:20

English - 33
Using the WISELINK Pro Function
This function enables you to view and listen to photo, music and/or movie les saved on a USB Mass Storage Class (MSC) device.
Entering the WISELINK Pro Menu
1. Press the MENU button. Press the ▲ or ▼ button to select Application, then
press the ENTER
E
button.
2. Press the ▲ or ▼ button to select WISELINK Pro, then press the ENTER
E
button.
The WISELINK Pro menu is displayed.
Press the W.LINK button on the remote control to display the WISELINK
Pro menu.
Press the SOURCE button on the remote control repeatedly to select USB
or DLNA, then press the ENTER
E
button.
3. Press the Red button, then press the ▲ or ▼ button to select the
corresponding USB Memory Device (i.e. if connected through a hub). Press the
ENTER
E
button.
This function differs depending on the USB Memory Device/ DLNA device
connected to TV.
The selected USB device name appears at the bottom left of the screen.
4. Press the ◄ or ► button to select an icon (Photo, Music, Movie, Setup), then
press the ENTER
E
button. To exit WISELINK Pro mode, press the W.LINK
button on the remote control.
You can enjoy game movies. (Not support game program)
Removing a USB Memory Device Safely
You can remove the device safely from the TV.
1. Press the TOOLS button in the WISELINK Pro le list screen, or while a
SlideShow or music le is being played.
2. Press the ▲ or ▼ button to select Remove Safely, then press the ENTER
E
button.
3. Remove the USB device from the TV.
N
O
O
N
N
N
Photo
SUM
Device
Favourites Settings
Select
Jump
Option
image_1.jpg
Month : Jan
Date : Jan.01.2008
Color : Gray
Composition :
Folder : P-other
Favourites : ★ ★ ★
Preference
Monthly
Timeline
Jan Nov
▲
▲
Play Current Group
Delete
Information
Remove Safely
WISELINK Pro
Photo
SUM
Device
Return
Music Setup
PHOTO
SUM
851.98MB/995.00MB Free
Movie
BN68-01757A-Eng.indb 33 2008-09-24 오전 11:09:21

English - 34
Screen Display
1. Currently selected le: The currently selected le is highlighted. Photo and movie les are displayed as thumbnail images.
2. Information Window: Shows information about the currently selected le. There is a separate information window for photo and
movie les only. For music les, the le information is also displayed in the location where the le is displayed.
3. Current Sort Standard: This eld shows the current standard for sorting les. Press the ▲ or ▼ button to change the standard
for sorting les.
4. View Groups: Shows the sorting groups. The sorting group including the currently selected photo is highlighted.
5. Current Device: Shows the currently selected device name. Press the Red button to select a device.
6. Item Selection Information: Shows the number of photos that are selected by pressing the Yellow button.
7. Help Items
Red (Device) button: Selects a connected device.
Green (Favourites Settings) button: Changes the Favourites Settings for the selected le. Press this button repeatedly
until the desired value appears.
Yellow (Select) button: Selects le from the le list. Selected les are marked with a symbol c. Press the yellow button
again to cancel a le selection.
πµ (Jump) button: Jumps to the previous sorting group/Jumps to the next sorting group.
TOOLS
(Option) button: Displays the option menus. (The option menu changes according to the current status.)
•
•
•
•
•
Using the Remote Control Button in WISELINK Pro Menu
Button Operations
▲/▼/◄/►
(Wheel) Move the cursor and select an item.
ENTER
E
Select the currently selected item.
While playing a slide show, movie, or music le:
- Pressing the ENTER
E
button during play pauses the play.
- Pressing the ENTER
E
button during pause resumes the play.
Play or pause the Slide Show or Music le.
RETURN Return to the previous menu.
TOOLS Run various functions from the Photo, Music and Movie menus.
Stop the current slide show, Music or Movie le.
Jump to previous group/Jump to next group.
INFO Show le information.
W.LINK Exit WISELINK Pro mode.
EXIT Stop the current function and return to the WISELINK Pro main menu.
Photo
SUM
Device
Favourites Settings
Select
Jump
Option
image_1.jpg
Month : Jan
Date : Jan.01.2008
Color : Gray
Composition :
Folder : P-other
Favourites :
★ ★ ★
Preference
Monthly
Timeline
Jan Nov
▲
1File(s) Selected
2 6
1
3 4
5 7
BN68-01757A-Eng.indb 34 2008-09-24 오전 11:09:22
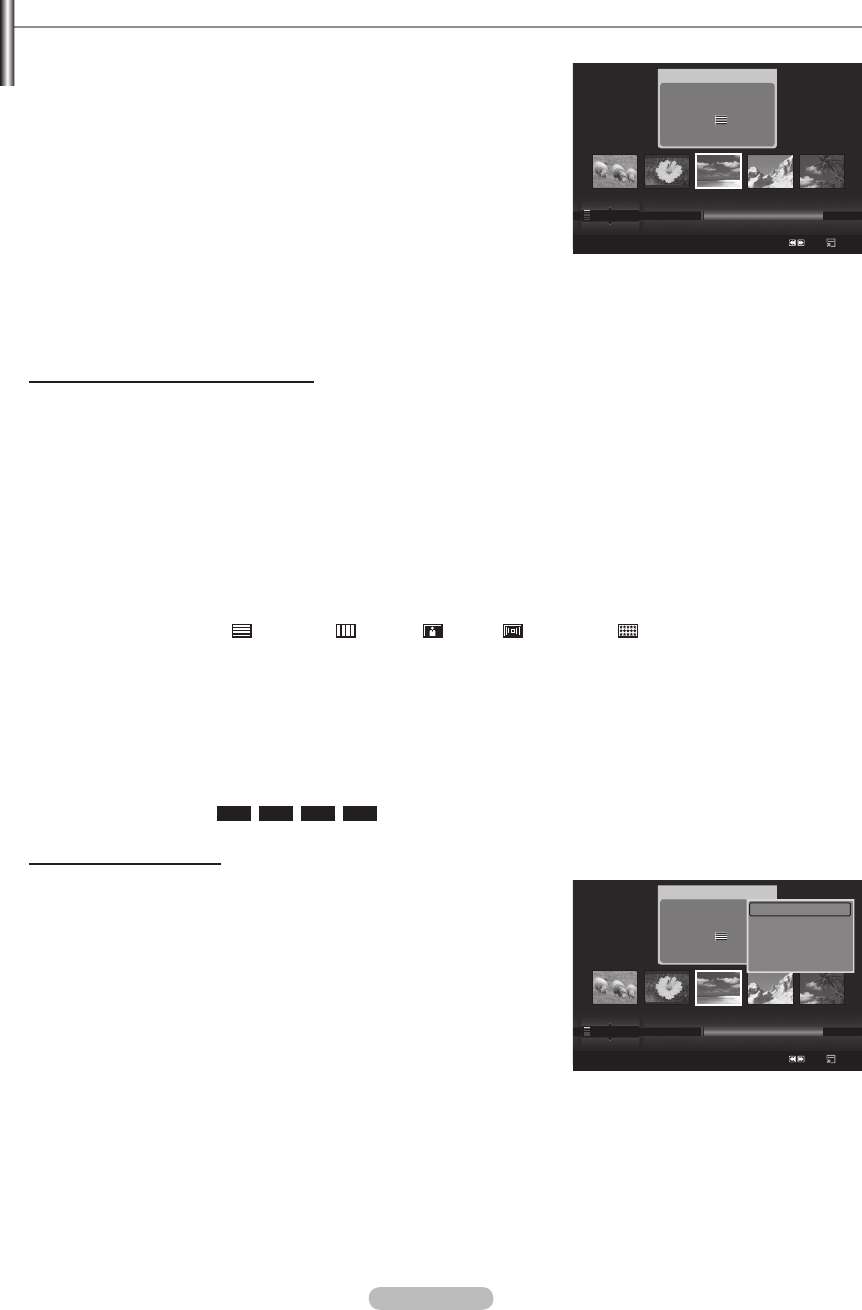
English - 35
Using and Sorting Photo List
You can sort photos in the Photo List by a particular standard.
1. Press the ▲ or ▼ button to select a sorting standard in the Photo list.
The photos are sorted according to the newly selected sorting standard.
To move to the previous/next group, press the
π
(REW) or
µ
(FF)
button.
2. Press the
∂
(Play)/ENTER
E
button to start the Slide Show in the order
selected by the user.
The information of a photo le is automatically set.
The Color and Composition information extracted from a photo le
may be different from the user’s expectations.
Photo information is automatically set. You can change the Color,
Composition, and Favourites.
Photos for which information cannot be displayed are set as
Unclassied.
PTP does not support folder sort mode.
Sorting Standard for the Photo List
Monthly
It sorts and shows photos in the le by month. It sorts only by month (from January to December) regardless of year.
Timeline
It sorts and shows photos by date. It sorts by year and month from the earliest photo.
Color
It sorts photos by color. You can change the photo color information.
Color options: Red, Yellow, Green, Blue, Magenta, Black, Gray, Unclassied.
Composition
It sorts photos by composition. You can change the compositional information of photos.
Composition options: (horizontal), (vertical), (object), (perspective), (pattern), Unclassied.
Folder
It sorts photos by folder. If there are many folders in USB, the photos les are shown in order in each folder. The photo le in
the Root folder is shown rst and the others are shown in alphabetical order by name.
Preference
It Sorts photos by preference (Favourites). You can change the photo preferences.
Changing the Favourites Settings.
Select the desired photo in the Photo list, then press the Green button repeatedly until the desired setting appears.
Favourites options:
★ ★ ★
,
★ ★ ★
,
★ ★ ★
,
★ ★ ★
Photo List Option Menu
Slide Show
Using this menu, you can play a SlideShow using the photo les on the USB
memory device.
Play Current Group
Using this menu, you can play a SlideShow using only the photo les in the
currently selected sorting group.
Delete
Using this menu, you can delete the selected photo les.
Change Group
You can change the Color and Composition information of photo les.
The group information of the current le is updated and the le is moved to the new group.
To change the information of multiple les, select the les you want by pressing the yellow button.
N
N
N
N
N
N
N
N
N
N
N
N
N
Photo
SUM
Device
Favourites Settings
Select
Jump
Option
image_1.jpg
Month : Jan
Date : Jan.01.2008
Color : Gray
Composition :
Folder : P-other
Favourites : ★ ★ ★
Preference
Monthly
Timeline
Jan Nov
▲
Photo
SUM
Device
Favourites Settings
Select
Jump
Option
image_1.jpg
Month : Jan
Date : Jan.01.2008
Color : Gray
Composition :
Folder : P-other
Favourites : ★ ★ ★
Preference
Monthly
Timeline
Jan Nov
▲
Slide Show
Play Current Group
Delete
Information
▼
BN68-01757A-Eng.indb 35 2008-09-24 오전 11:09:23
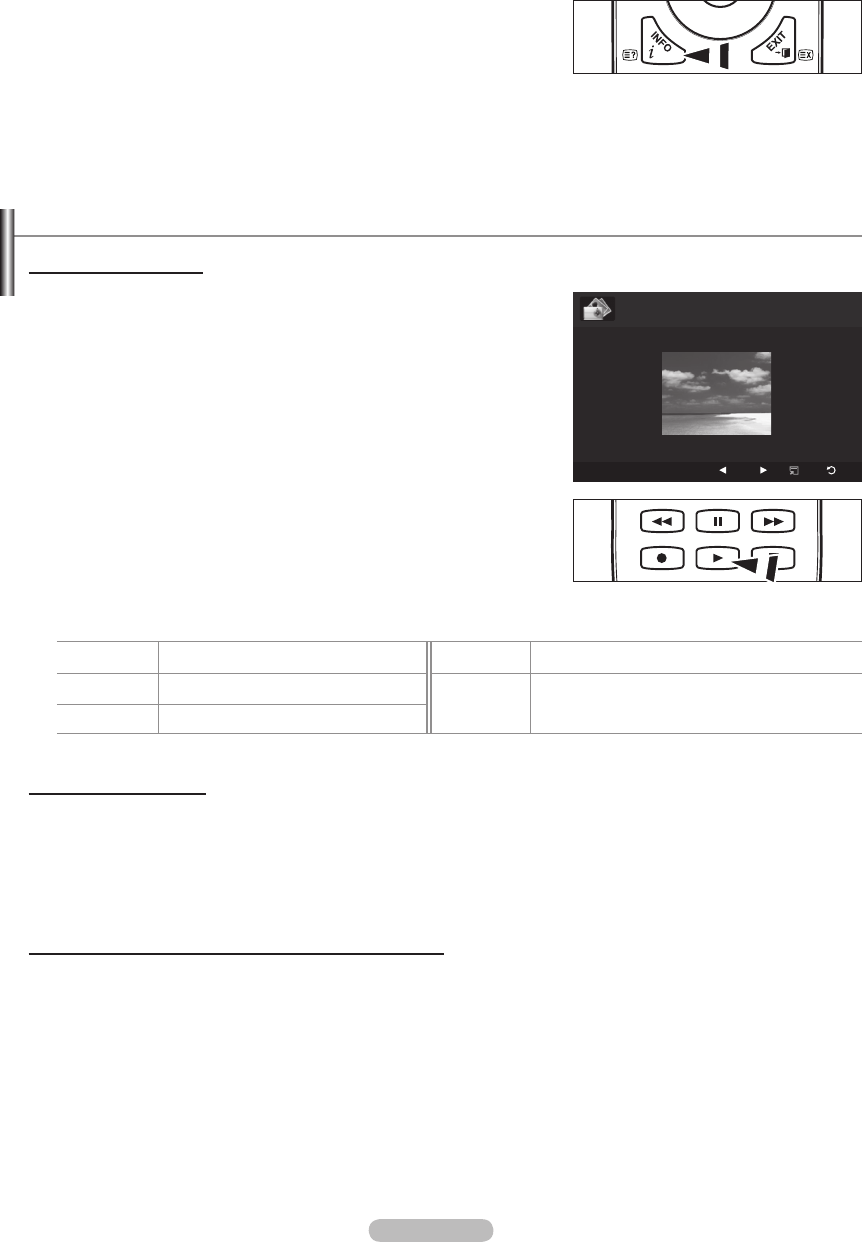
English - 36
Information
The photo le information including the name, the size, the resolution, the date modied and the path is displayed.
You can view the information of photo les during a SlideShow using the same procedures.
Alternatively, select a photo from the photo list and press the INFO button
to view the information.
Remove Safely
You can remove the device safely from the TV.
N
O
Viewing a Photo or Slide Show
Viewing a Slide Show
1. Press the ◄ or ► button to select the desired photo in the Photo list.
2. Press the TOOLS button.
3. Press the ▲ or ▼ button to select Slide Show, then press the ENTER
E
button.
All les in the photo list will be used for the Slide Show.
During the slide show, les are displayed in order from the currently shown
le.
The Slide Show progresses in the order sorted in the Photo list.
Music les can be automatically played during the Slide Show if the
Background Music is set to On. (Refer to page 37).
While a photo list is displayed, press the
∂
(Play)/ENTER
E
button
on the remote control to start slide show.
SlideShow Control Buttons
ENTER
E
Play/Pauses the Slide Show.
∫
Exit Slide Show and return to the photo list.
∂
Play the Slide Show. TOOLS Run various functions from the Photo menus.
∑
Pause the Slide Show.
π
/
µ
Change the SlideShow playing speed.
Playing current group
1. Press the ▲ or ▼ button to select a sorting standard. (Monthly, Timeline, Color, Composition, Folder, Preference)
2. Press the
π
(REW) or
µ
(FF) button to select the desired group.
3. Press the TOOLS button.
4. Press the ▲ or ▼ button to select Play Current Group, then press the ENTER
E
button.
Only the photos in the sorting group including the selected les will be used for the Slide Show.
ToperformaSlideShowwithonlytheselectedles
1. Press the ◄ or ► button to select the desired photo in the Photo list.
2 . Press the yellow button. Repeat the above operation to select multiple photos.
The
c
mark appears to the left of the selected photo.
If you select one le, the SlideShow will not be performed.
To deselect all selected les, press the TOOLS button and select Deselect All.
3. Press the
∂
(Play)/ENTER
E
button.
The selected les will be used for the Slide Show.
N
N
N
N
O
N
N
N
N
N
N
SUM
E
Pause
Previous
Next
Option
Return
►
Normal
20/22 image_1.jpg 440x440 2.0KB 2008/1/1
BN68-01757A-Eng.indb 36 2008-09-24 오전 11:09:23

English - 37
Slide Show Option Menu
Stop Slide Show / Start Slide Show
You can start or stop a SlideShow.
Rotate
You can rotate photos saved on a USB memory device.
Whenever you press the ◄ button, it rotates by 270˚, 180˚, 90˚, and 0˚.
Whenever you press the ► button, it rotates by 90˚, 180˚, 270˚, and 0˚.
Zoom
You can magnify photos saved on a USB memory device. (x1 → x2 → x4)
To move the enlarged photo image, press the ENTER
E
button, then
press the ▲/▼/◄/► buttons. Note that when the enlarged picture
is smaller than the original screen size, the location change function
doesn’t work.
The enlarged le is not saved.
If you have select Rotate, the Zoom deactivated.
Slide Show Speed
You can select the slide show speed.
You can select the Slide Show speed only during a slide show.
You can also change the speed of the Slide Show by pressing the
π
(REW) or
µ
(FF) button during the Slide Show.
BackgroundMusic→On/Off
If you set Background Music to On, the background music will be played when viewing photos one by one or in a Slide
Show.
If you set Background Music to On, a screen appears immediately where you can set the Background Music.
To use this feature, there must be music and photo les stored on the USB device.
Background Music Setting
You can select background music when watching a SlideShow.
If you turn off the Background Music, even if the Background Music Settings have been set up, the background music
will not be played.
Loading music les is needed to change BGM mode. Play music les in music category to load.
BGMMode→Mood/SelectedFile/Shufe
BGMMood→Energetic/Rhythmical/Sad/Exciting/Calm
If you set BGM Mode to Mood, you can select a mood.
You cannot select a mood not part of the music les on the USB memory device.
Select Music File
If you set BGM Mode to Selected File, you can select a music le.
Picture Setting / Sound Setting
Refer to page 43.
Information
The photo le information is displayed.
Remove Safely
You can remove the device safely from the TV.
N
N
N
N
N
N
N
N
N
•
•
N
N
•
N
Tools
Stop Slide Show
Rotate
Zoom
Slide Show Speed : Normal
Background Music : Off
Background Music Setting
Picture Setting
Sound Setting
Information
U
Move
E
Enter
e
Exit
BN68-01757A-Eng.indb 37 2008-09-24 오전 11:09:23
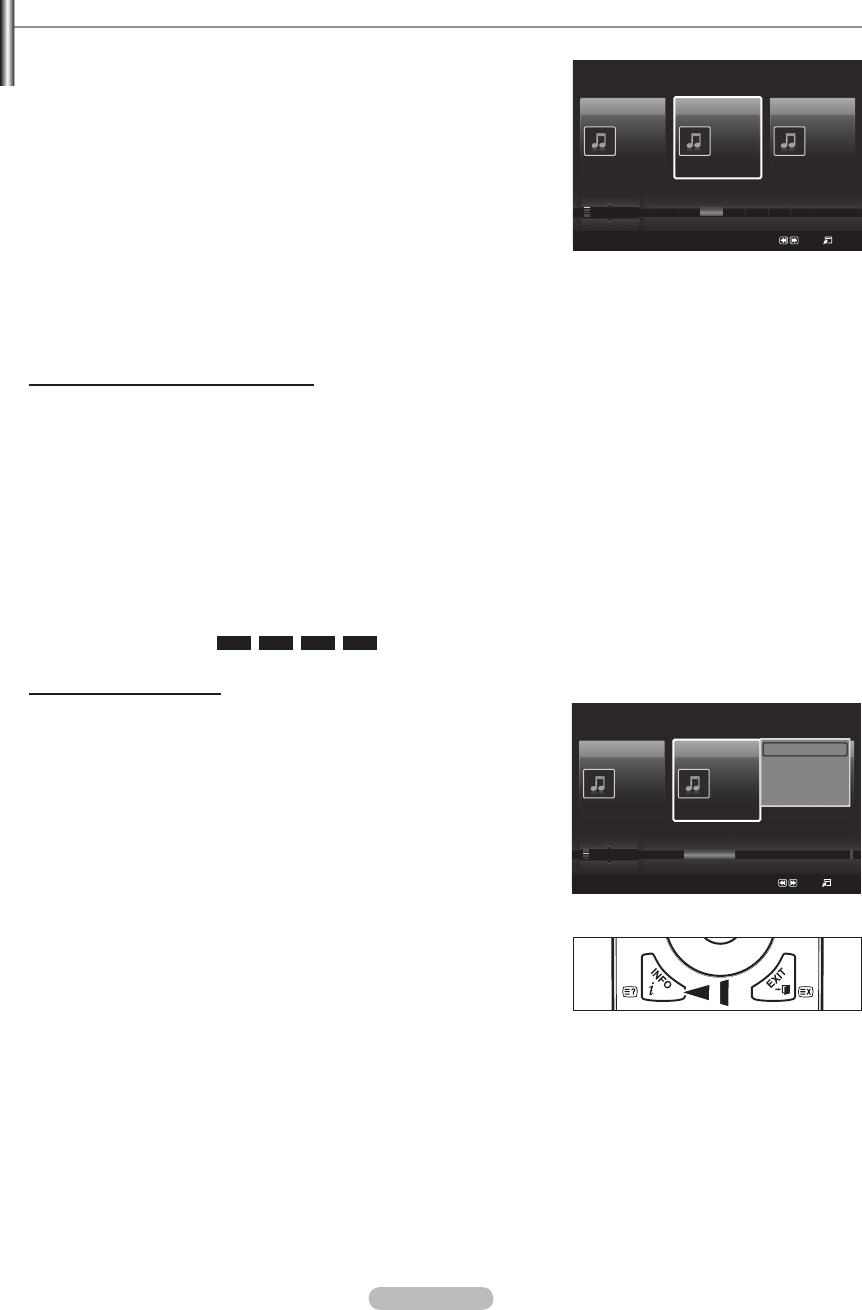
English - 38
Using and Sorting the Music List
You can sort music les in the Music List by a particular standard.
1. Press the ▲ or ▼ button to select a sorting standard in the Music list.
Music les are sorted according to the newly selected sorting standard.
To move to the previous/next group, press the
π
(REW) or
µ
(FF)
button.
2. Press the ENTER
E
button to start playing music in the order selected by
the user.
The information of the music les is automatically set.
The Mood information extracted from a music le may differ from the
expectations of the user.
Music information is automatically set. You can change the Mood and
Favourites.
Music les for which information cannot be displayed are set to Unclassied.
If there is no title information for a music le, the lename is displayed.
If no information is available for the Genre, Artist, Album, or Year, the corresponding item is displayed as blank.
Sorting Standard for the Music List
Title: It sorts the Music titles in alphabetical order, and shows the music file.
Artist: It sorts the music file by artist in alphabetical order.
Mood: It sorts music files by the mood. You can change the music mood information.
Mood options: Energetic, Rhythmical, Sad, Exciting, Calm, Unclassied
Genre: It sorts music files by the genre.
Folder: It sorts music files by the folder. If there are many folders in USB, the files are shown in order in each folder.
The music file in the Root folder is shown first and the others are shown in alphabetical order by name.
Preference: It sorts music files by preference (Favourites). You can change the music files preferences.
Changing the Favourites Settings
Select the desired music le in the Music list, then press the Green button repeatedly until the desired setting appears.
To change the information of multiple les, select les by pressing the yellow button.
Favourites options:
★ ★ ★
,
★ ★ ★
,
★ ★ ★
,
★ ★ ★
Music List Option Menu
Play Current Group: Using this menu, you can only play music files in
the currently selected sorting group.
Delete: Using this menu, you can delete the selected music files.
Change Group: You can change the mood information of music files.
The group information of the current file is updated and the file is
moved to the new group.
To change the information of multiple les, select les by pressing the
yellow button.
Information: The music file information including the name, the size,
the date modified and the path is displayed.
You can view the information of music les during a SlideShow using
the same procedures.
Alternatively, select a music le from the music list and press the INFO
button to view the information.
Remove Safely: You can remove the device safely from the TV.
N
N
N
N
N
N
N
N
N
N
N
N
N
N
O
Music
SUM
Device
Favourites Settings
Select
Jump
Option
Preference
Title
Artist
Energetic ★ ★ ★
Jee
Album 1
2005
Pop
Thanks
Sad ★ ★ ★
Darby
Album 2
2005
Pop
I Love You
Calm ★ ★ ★
Catherine
Album 3
2005
Pop
Better than yesterday
F G H I J L P S T V
▲
Music
SUM
Device
Favourites Settings
Select
Jump
Option
Artist
Mood
Genre
Sad ★ ★ ★
Jee
Album 1
2005
Pop
Thanks
Sad ★ ★ ★
Darby
Album 2
2005
Pop
I Love You
Exciting ★ ★ ★
Catherine
Album 3
2005
Pop
Better than yesterday
Rhythmical Sad Exciting Calm ...
▲
Play Current Group
Delete
Change Group
Information
▼
BN68-01757A-Eng.indb 38 2008-09-24 오전 11:09:24
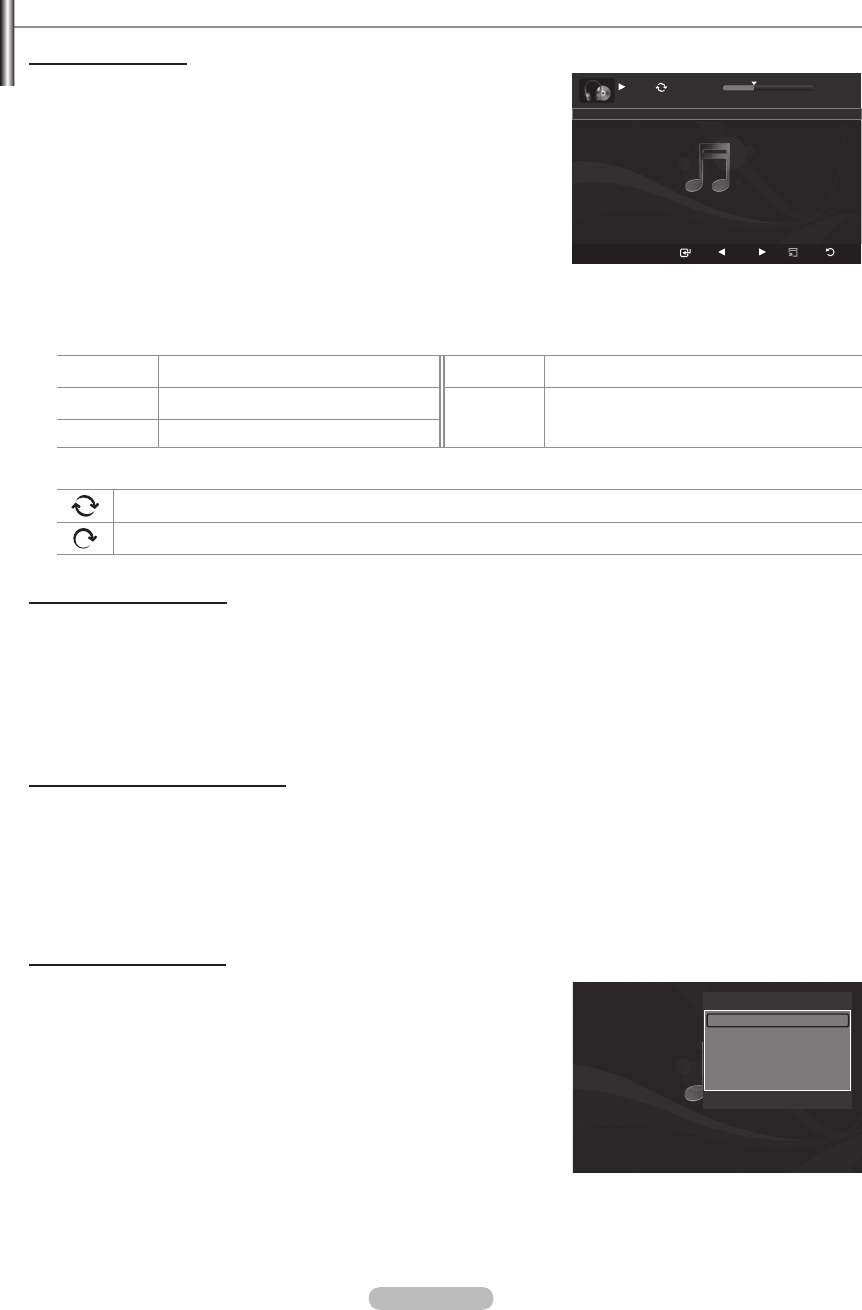
English - 39
Playing a Music
Playingamusicle
1. Pressing the ◄ or ► button to select a music le to be played.
2. Press the
∂
(Play)/ENTER
E
button.
This menu only shows les with the MP3 le extension. Files with other
le extensions are not displayed, even if they are saved on the same
USB device.
π
(REW) or
µ
(FF) buttons do not function during play.
The selected le is displayed at the top with its playing time.
To adjust the music volume, press the volume button on the remote
control. To mute the sound, press the MUTE button on the remote
control.
The playing duration of a music le may be displayed as ‘00:00:00’ if its playing time information is not found at the start of
the le.
Music Play Control Buttons
ENTER
E
Play/Pauses the music le.
∫
Exit play mode and return to the music list.
∂
Play the music le TOOLS Run various functions from the Music menus.
∑
Pause the music le
Music function information icon
When all music les in the folder (or the selected le) are repeated. Repeat Mode is On.
When all music les in the folder (or the selected le) are played once. Repeat Mode is Off.
Playing the music group
1. Press the ▲ or ▼ button to select a sorting standard.
(Title, Artist, Mood, Genre, Folder, Preference)
2. Press the
π
(REW) or
µ
(FF) button to select the desired group.
3. Press the TOOLS button.
4. Press the ▲ or ▼ button to select Play Current Group, then press the ENTER
E
button.
The music les in the sorting group including the selected le are played.
Playingtheselectedmusicles
1. Press the ◄ or ► button to select the desired music le in the music list.
2. Press the yellow button. Repeat the above operation to select multiple music les.
The
c
mark appears to the left of the selected music le.
3. Press the
∂
(Play)/ENTER
E
button.
Only the selected le is played.
Music Play Option Menu
RepeatMode→On/Off
You can play music les repeatedly.
Picture Setting / Sound Setting
Refer to page 43.
Information
The music le information is displayed.
Remove Safely
You can remove the device safely from the TV.
N
N
N
N
N
N
N
N
N
N
SUM
Pause
Previous
Next
Option
Return
7/14 00:01:15 00:05:41
I Love You
Tools
Repeat Mode
◄ On ►
Picture Setting
Sound Setting
Information
Remove Safely
U
Move
L
Adjust
e
Exit
BN68-01757A-Eng.indb 39 2008-09-24 오전 11:09:24
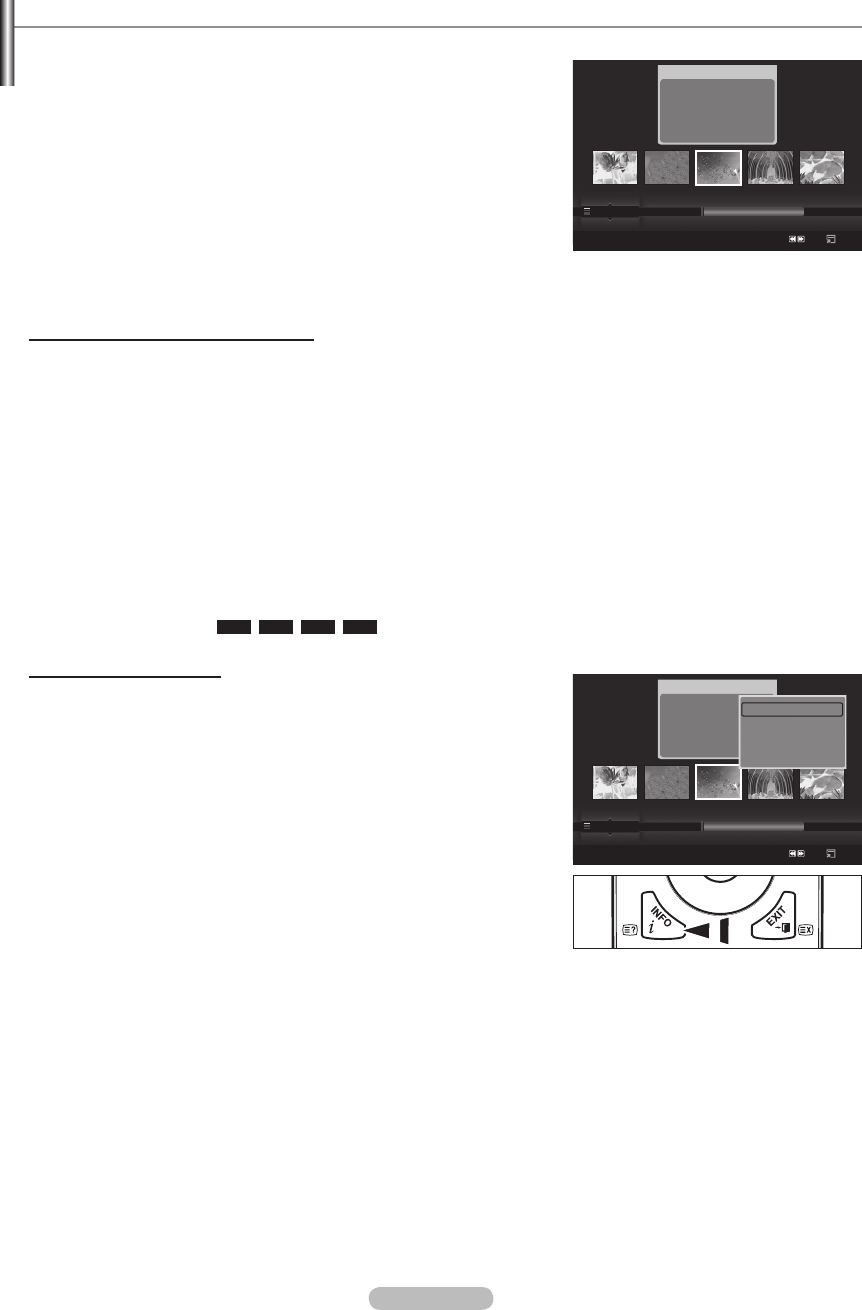
English - 40
Using and Sorting the Movie List
You can sort movies in the Movie List by a particular standard.
1. Press the ▲ or ▼ button to select a sorting standard in the Movie list.
The movie les are sorted according to the newly selected sorting
standard.
To move to the previous/next group, press the
π
(REW) or
µ
(FF)
button.
Movie doesn't support subtitles.
(for example, not support smi, srt and sub les, etc and not support
subtitles included in movie les)
2. Press the
∂
(Play)/ENTER
E
button to play the movie in the order
selected by the user.
The movies are sorted according to the newly selected sorting standard.
Movie information is automatically set. You can change the Favorites.
Sorting Standard for the Movie List
Title
It sorts and displays the Movie titles in symbol/Number/alphabet/special order.
Timeline
It sorts and shows movies by date. It sorts by year and month from the earliest movie.
Folder
If there are many folders in USB, the movies les are shown in order in each folder. The movie le in the Root folder is shown
rst and the others are shown in alphabetical order by name.
Preference
It sorts movies by preference. (favourites) You can change the movie preferences.
Changing the Favourites Settings
Select the desired movie le in the movie list, then press the Green button repeatedly until the desired setting appears.
Favourites options:
★ ★ ★
,
★ ★ ★
,
★ ★ ★
,
★ ★ ★
Movie List Option Menu
Play Current Group
Using this menu, you can only play movie les in the currently selected
sorting group.
Delete
Using this menu, you can delete the selected movie les.
Information
The movie le information including the order of the le in the current
directory, the name, the size, the date modied and the path is displayed.
Alternatively, select a movie le from the movie list and press the INFO
button to view the information.
Remove Safely
You can remove the device safely from the TV.
N
N
N
N
N
N
N
O
Movie
SUM
Device
Favourites Settings
Select
Jump
Option
movie_1.jpg
Date : Jan.01.2008
Folder : movie-folder
Favourites : ★ ★ ★
Preference
Title
Timeline
A M
SYMBOL
▲
□
ENG
Movie
SUM
Device
Favourites Settings
Select
Jump
Option
movie_1.jpg
Date : Jan.01.2008
Folder : movie-folder
Favourites : ★ ★ ★
Preference
Title
Timeline
A M
SYMBOL
▲
□
ENG
Play Current Group
Delete
Information
Remove Safely
BN68-01757A-Eng.indb 40 2008-09-24 오전 11:09:25
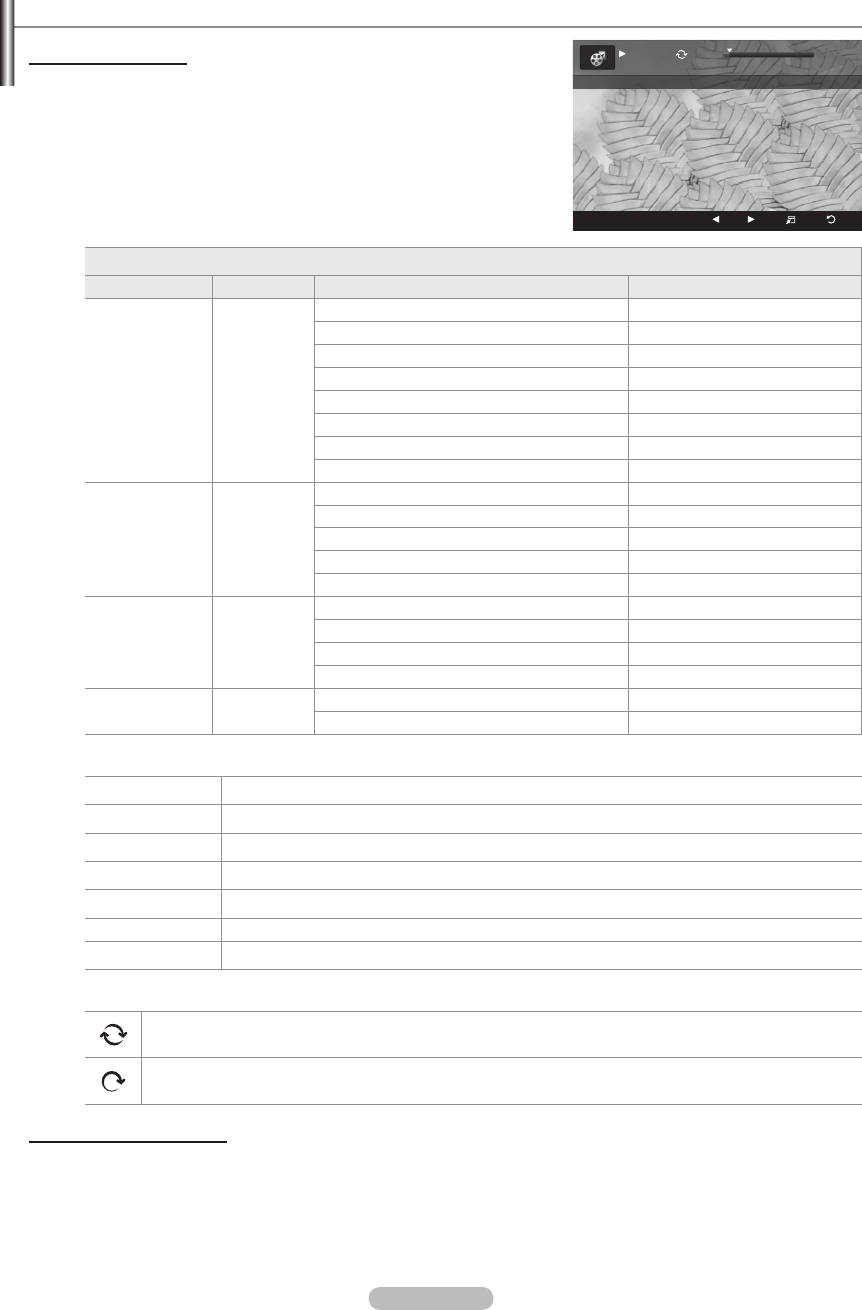
English - 41
Playing a Movie File
Playingamoviele
1. Pressing the ◄ or ► button to select a movie to be played.
2. Press the
∂
(Play)/ENTER
E
button.
The selected le is played.
The selected le is displayed at the top with its playing time.
The playing duration of a movie le may be displayed as ‘00:00:00’ if its
playing time information is not found at the start of the le.
Supported Video Formats
Video Codec
File Extention Container Video Decoder Max Resolution Sti
*.avi AVI
XviD 720x576
MPEG1 720x576
MPEG2 720x576
H.264 BP 1920x1088
H.264 BP 1920x1088
H.264 HP 1920x1088
MPEG-4 SP 720x576
MPEG-4 ASP 720x576
*.mp4 MP4
H.264 BP 1920x1088
H.264 MP 1920x1088
H.264 HP 1920x1088
MPEG-4 SP 720x576
MPEG-4 ASP 720x576
*.mpg
PS
MPEG1 (Program Stream) 1920x1088
*.mpeg MPEG2 (Program Stream) 1920x1088
*.vro MPEG2 VOB 1920x1088
*.vob MPEG2 VRO 1920x1088
others
(ts) TS MPEG2 (Transport Stream) 1920x1088
H.264 (Transport Stream) 1920x1088
Video Play Control Buttons
ENTER
E
Play/Pauses the movie le
∂
Play the movie le
∑
Pause the movie le
∫
Exit play mode and return to the movie list.
TOOLS Run various functions from the movie menus.
◄/► Skip forwards or backwards through the movie le in 20 second intervals.
▲/▼ Move to the rst or last view of the current le.
Movie function information icon
When all movie les in the folder (or the selected le) are repeated.
Repeat Mode is On.
When all movie les in the folder (or the selected le) are played once.
Repeat Mode is Off.
Playing the movie group
1. Press the ▲ or ▼ button to select a sorting standard. (Title, Timeline, Folder, Preference)
2. Press the π (REW) or µ (FF) button to select the desired group.
3. Press the TOOLS button.
4. Press the ▲ or ▼ button to select Play Current Group, then press the ENTER
E
button.
N
N
N
N
N
N
SUM
E
Pause
-20sec
+20sec
Option
Return
1/5 00:00:48 00:23:05
ABC.avi
BN68-01757A-Eng.indb 41 2008-09-24 오전 11:09:25
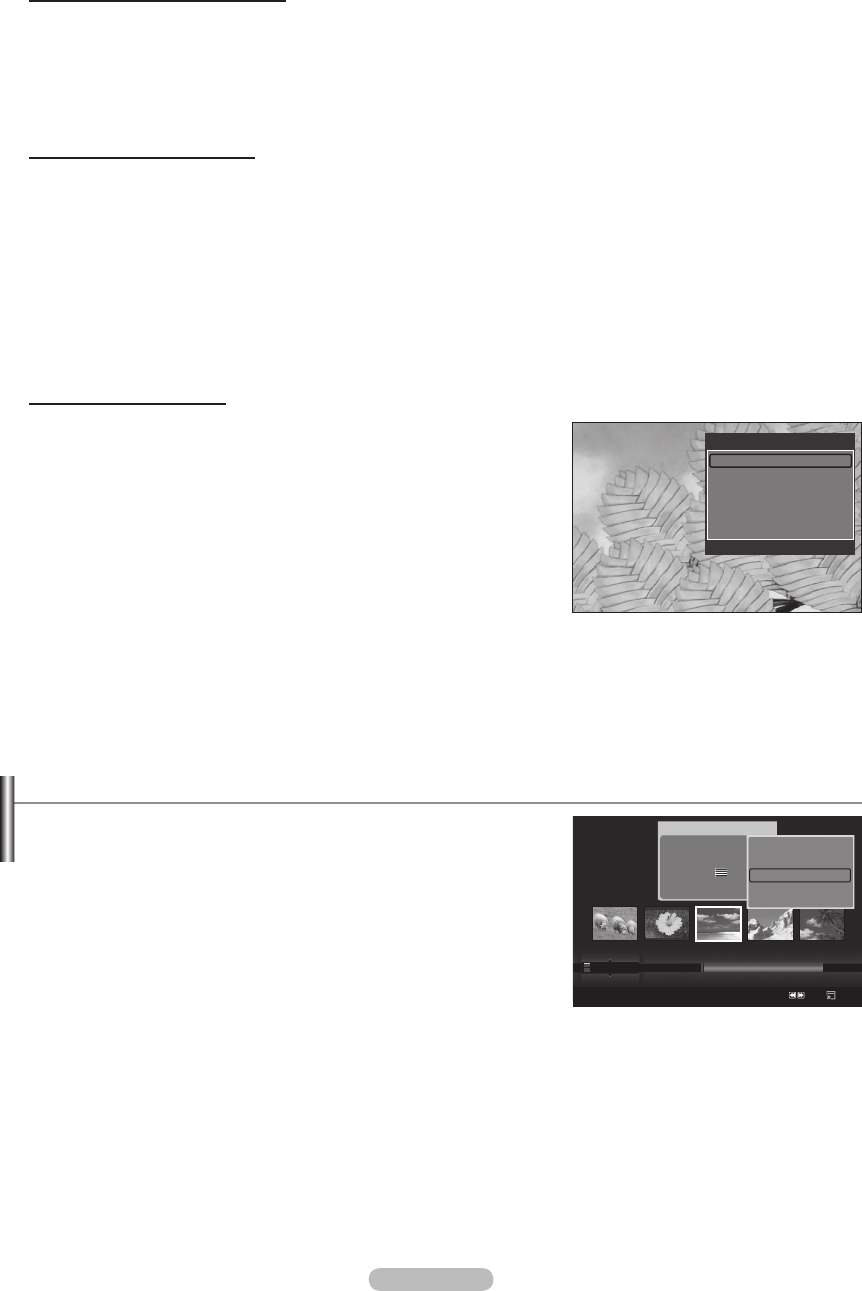
English - 42
Playingtheselectedmovieles
1. Press the ◄ or ► button to select the desired movie le in the movie list.
2. Press the yellow button. Repeat the above operation to select multiple movie les.
The cmark appears to the left of the selected movie le.
3. Press the ∂ (Play)/ENTER
E
button.
Only the selected le is played.
Playing movie continuously
If you exit playing movie, playing it continuously later is possible.
With Play continuously function, you can watch movie without watching again from beginning or bothering searching.
1. Select movie le you want to Play continuously by pressing ◄ or ► button from the Movie List.
2. Press the ∂ (Play)/ENTER
E
button.
3. Select play continuously by pressing Blue button.
Movie will begin to play from where it was stopped being played.
If Cont. movie play help function was set On, a pop-up message will appear when you play movie le you want to Play
continuously. (Refer to page 43)
4. To exit WISELINK Pro mode, press the W.LINK button on the remote control.
Movie Play Option Menu
Repeat Mode
You can play the movie repeatedly.
Picture Setting / Sound Setting
Refer to page 43.
Picture Size
Fit: Play video at the TV screen size.
Original: Play video at the original size.
Information
The movie le information is displayed.
Remove Safely
You can remove the device safely from the TV.
N
N
N
N
•
•
Deleting the Photo/Music/Movie File
1. Press the ◄ or ► button to select the desired le in the Photo/Music/Movie
list.
To delete multiple les, select les by pressing the yellow button.
2. Press the TOOLS button.
3. Press the ▲ or ▼ button to select Delete (or Delete Selected File), then
press the ENTER
E
button.
4. Press the ◄ or ► button to select OK, then press the ENTER
E
button.
The le is deleted.
When a read-only le is deleted, the ThisFileisread-onlyle.Delete
it? message appear.
Read-only les among multiple les cannot be deleted.
If you select Cancel, the deletion is cancelled.
While removing les, don’t remove the USB memory device.
You cannot remove the PTP-connected digital camera picture les.
You cannot recover deleted photo/music/movie les.
N
N
N
N
N
N
N
N
Tools
Repeat Mode ◄ On ►
Picture Setting
Sound Setting
Picture Size : Fit
Information
Remove Safely
U
Move
L
Adjust
e
Exit
Photo
SUM
Device
Favourites Settings
Select
Jump
Option
image_1.jpg
Month : Jan
Date : Jan.01.2008
Color : Gray
Composition :
Folder : P-other
Favourites : ★ ★ ★
Preference
Monthly
Timeline
Jan Nov
▲
Slide Show
Play Current Group
Delete
Information
▼
BN68-01757A-Eng.indb 42 2008-09-24 오전 11:09:26
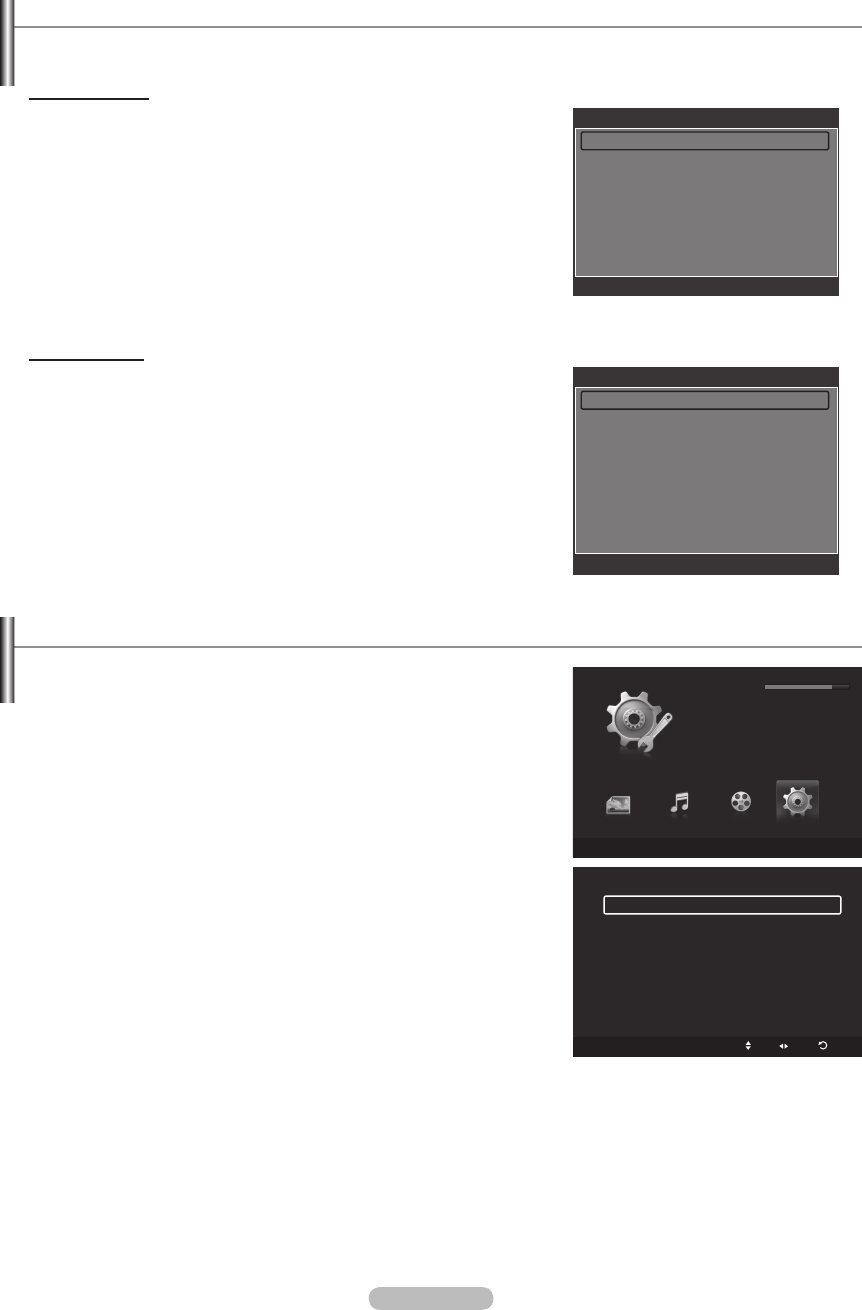
English - 43
Picture/Music Settings Using WISELINK Pro
When watching a SlideShow or listening to music using WISELINK Pro, you can set the picture and sound.
Picture Setting
1. Press the TOOLS button during a Slide Show or while music is playing.
2. Press the ▲ or ▼ button to select Picture Setting.
3. Press the ◄ or ► button to select the Picture Mode (Dynamic, Standard,
or Movie).
4. Press the ▲ or ▼ button to move to an item. (Contrast, Brightness, Color,
Dynamic Contrast, Black Adjust, or Reset)
Select Reset to initialize the picture settings.
5. Press the ◄ or ► button to adjust the settings.
For more information on the picture settings, refer to pages 15~18.
Sound Setting
1. Press the TOOLS button during a Slide Show or while music is playing.
2. Press the ▲ or ▼ button to select Sound Setting.
3. Press the ◄ o r ► button to select the Sound Mode. (Standard, Music,
Movie, Speech, or Custom)
4. Press the ▲ or ▼ button to move to an item.
Select Reset to initialize the sound settings.
5. Press the ◄ or ► button to adjust the settings.
For more information on the sound settings, refer to page 21~22.
Using the Setup Menu
Setup displays the user settings of the WISELINK Pro menu.
1. Press the W.LINK button on the remote control to display the WISELINK
Pro menu.
2. Press the ◄ or ► button to select Setup, then press the ENTER
E
button.
3. Press the ▲ or ▼ button to select the desired option.
4 . Press the ◄ or ► button to select the option, then press the ENTER
E
button.
To exit WISELINK Pro mode, press the W.LINK button on the remote
control.
SlideShowSpeed→Fast/Slow/Normal
Select to control the slide show speed.
MusicRepeatMode→On/Off
Select to repeatedly play music les.
MovieRepeatMode→On/Off
Select to repeatedly play movie les.
Cont. movie play help
→On/Off
Select to display the help pop-up message for continuous movie playback.
ScreenSaverRunTime→1min/3min/5min
Select to set the waiting time before the screen saver appears.
Information
Select to viewing the information of the connected device.
Remove Safely
You can remove the device safely from the TV.
N
N
N
N
N
Setup
SUM
Device
Move Adjust
Return
Slide Show Speed ◄ Normal ►
Music Repeat Mode : On
Movie Repeat Mode : On
Cont. movie play help : On
Screen Saver Run Time : 3 min
Information
Remove Safely
WISELINK Pro
Photo
SUM
Device
e
Exit
Music Setup
SETUP
SUM
851.98MB/995.00MB Free
Movie
Picture Setting
Picture Mode ◄ Standard ►
Contrast : 90
Brightness : 45
Color : 50
Dynamic Contrast : Off
Black Adjust : Off
Reset
U
Move
L
Adjust
E
Enter
R
Return
Sound Setting
Sound Mode ◄ Custom ►
Balance : L50 R50
100Hz : 0
300Hz : 0
1KHz : 0
3KHz : 0
10KHz : 0
Reset
U
Move
L
Adjust
E
Enter
R
Return
BN68-01757A-Eng.indb 43 2008-09-24 오전 11:09:26
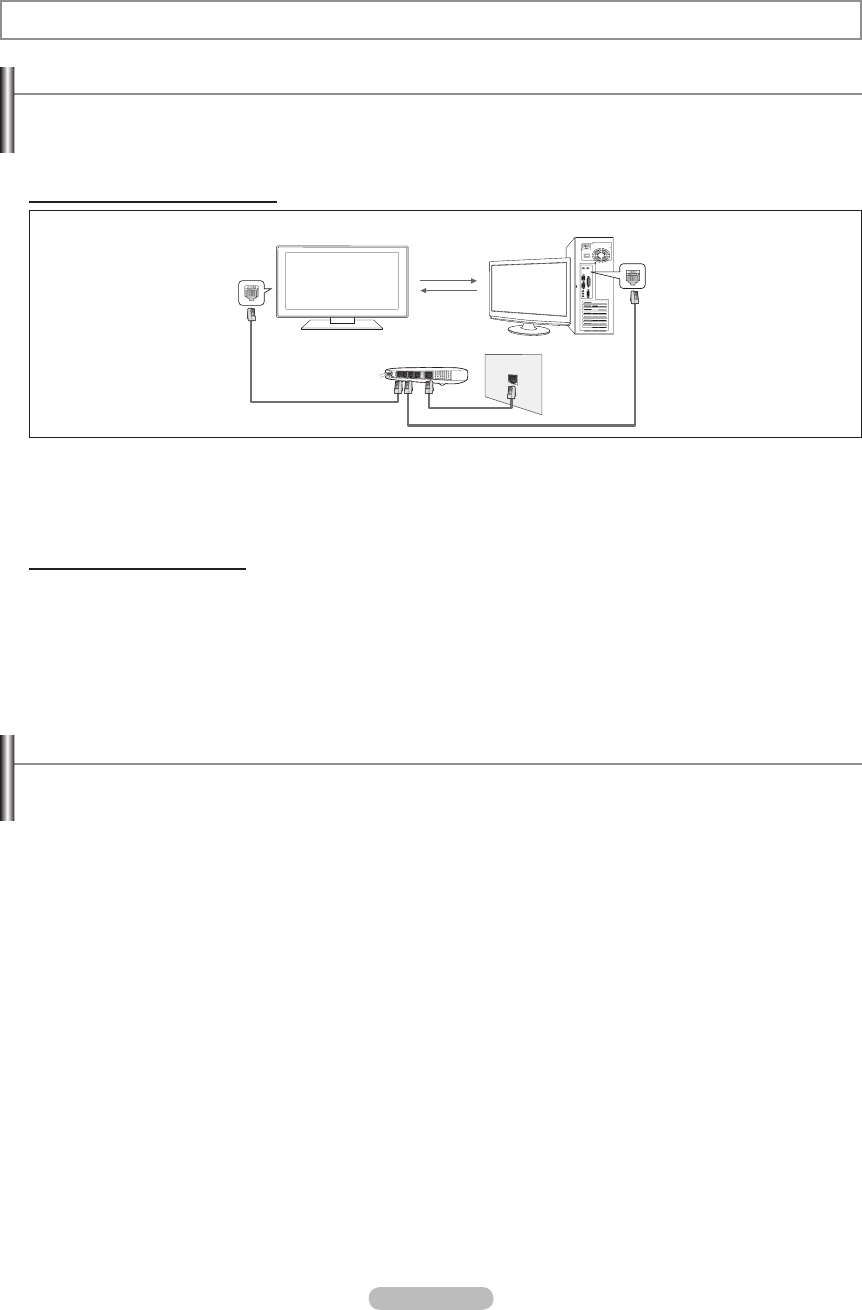
English - 44
WISELINK Pro-DLNA
Setting the DLNA Network
DLNA allows you to watch videos and pictures saved on your PC on your TV through a network connection in Wiselink Pro mode.
This removes the need to copy them to a USB storage device and then connect the device to your TV. To use DLNA, the TV must
be connected to the network and the DLNA application must be installed on your PC.
Network Connections Diagram
1. Connect the [LAN] port on the rear panel of the TV to the external modem with a LAN Cable.
2. Connect the PC to which the “DLNA PC Share Manager” programme will be installed and the external modem using a LAN
cable.
3. Connect the LAN port on the wall and the external modem with a Modem Cable.
Connecting to the Network
1. When connecting to the network is complete, set up the network on the TV.
A Wireless Internet connection does not support DLNA.
Three parts(subnet address) before the TV and PC IP addresses should be same. The last part (host address) should be
changed. (e.g. IP Address: 123.456.789.** )
2. Run a Network Test to check the network settings.
Installing the DLNA Application
To play content on the PC on the TV, you have to rst install the application.
System Requirements
1. Insert the Programme CD supplied with this TV into your PC.
2. 20MB of free hard disk space is needed for the programme installation.
If you share les, up to 20MB of hard disk drive space is required for each 100 les.
If you cancel le sharing, the hard disk drive space used for the thumbnail information is also freed.
Supported Formats
1. Image: JPEG (jpg, jpeg)
2. Audio: MP3 (mp3)
3. Video: MPEG1(mpg, mpeg), MPEG2 PS/TS(mpg, mpeg, trp, ts, tp), divx(mpg, mpeg, avi), MPEG4/H.264 (mpg, mpeg)
N
N
N
N
TV
External Modem
(ADSL/VDSL/Cable TV)
LAN
PC
LAN
1
2
3
BN68-01757A-Eng.indb 44 2008-09-24 오전 11:09:27
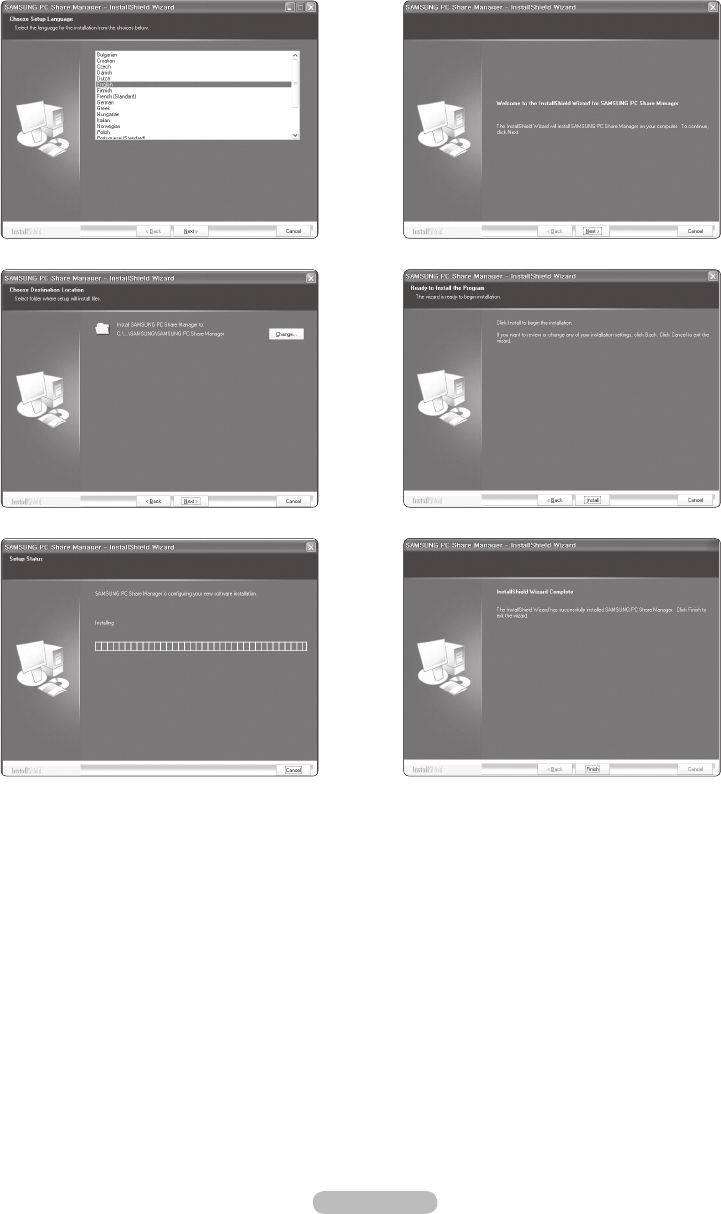
English - 45
Install the application
1. Run the Setup.exe le on the Programme CD supplied with the product.
Alternatively, you can download the le from www.samsung.com.
2. Install the SAMSUNG PC Share Manager as shown in the gures below.
► ►
► ►
►
3. When the installation is complete, the PC Share Manager icon appears on your Desktop.
Double-click the icon to run the programme.
N
N
BN68-01757A-Eng.indb 45 2008-09-24 오전 11:09:28
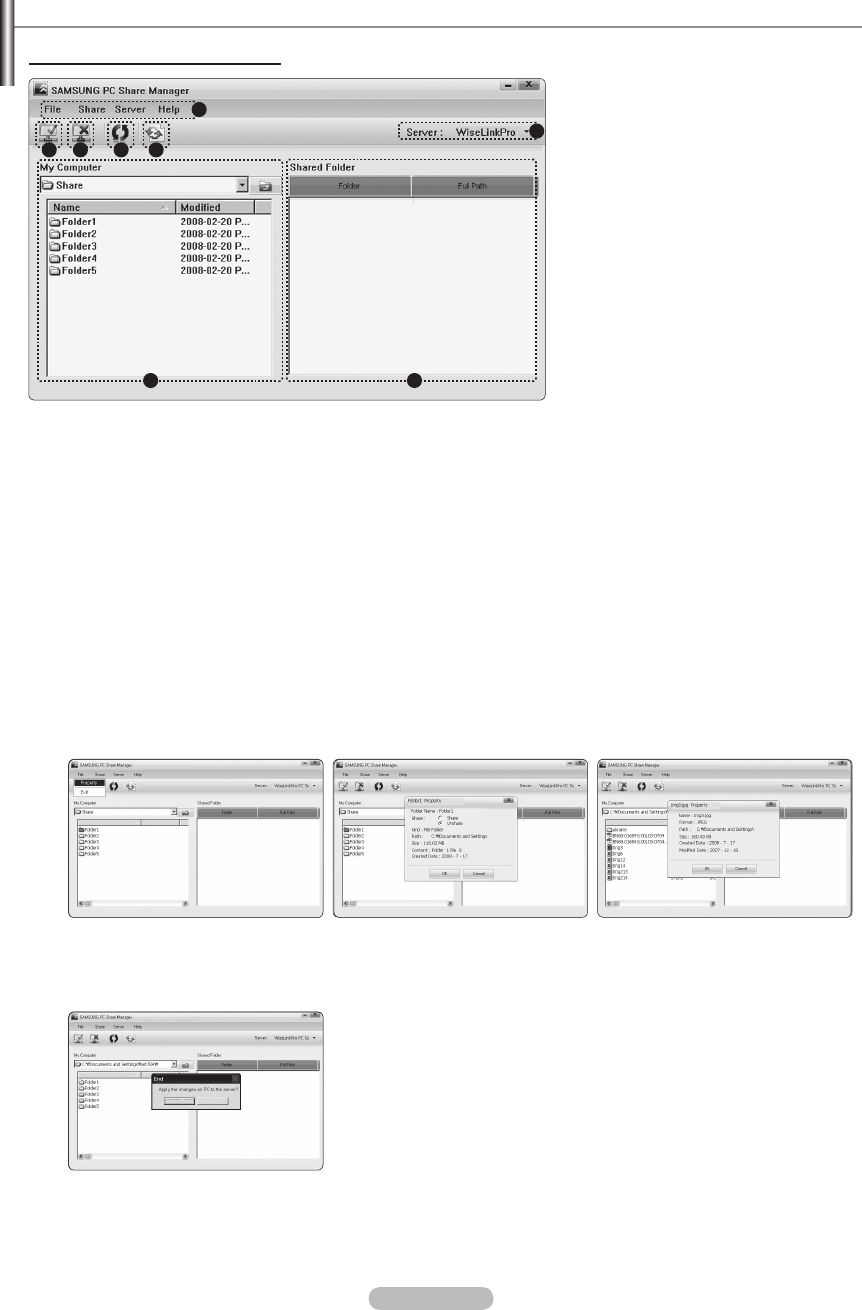
English - 46
Using the DLNA Application
The Programme Screen Layout
1. Menus: The following application menus are provided : File, Share, Server, and Help.
2. Click to share the selected PC server folder.
3. Click to cancel sharing.
4. Click to refresh the PC folder and les.
5. Click to synchronize the share status.
6. The folders and les of the PC to be shared are listed.
7. Folders shared by the user are listed.
8. PC server name shown on the device list of the WISELINK Pro: Click to change the name.
File
Property: Shows information on the selected file or folder.
Method 1: Select a le or folder and select the File menu and then select the Property sub-menu.
Method 2: Select a le or folder, right-click over the selected le or folder and then select Property from the pop-up menu.
<Method 1> <Method 2>
Name ModiedName Name
Name
Yes No
Name ModiedName Name
Name
Yes No
Name ModiedName Name
Name
Yes No
Exit: Exits the DLNA application.
If you select Exit without applying the changes after changing the shared status, a message will appear asking if you want to
apply the changed settings to the PC. Select Yes to apply the changes and exit the application.
Name ModiedName Name
Name
Yes No
❑
-
-
1
2 3 4 5
6 7
8
BN68-01757A-Eng.indb 46 2008-09-24 오전 11:09:29
English - 47
Share
Sharing a Folder
You can share a folder from your PC to the TV. The maximum number of folders that can be shared is 32.
Your PC will operate as a server to the TV.
Method 1: Select a folder in My Computer, select the Share menu and then select the Share Folder sub-menu.
Method 2: Select a folder in My Computer, right-click over the selected folder and then select Share Folder from the pop-
up menu.
Method 3: Locate the mouse pointer over a folder in the My Computer folder list in the left pane and drag&drop the folder
into the Shared Folders pane. If a message appears asking you to conrm the shared folder, select Yes.
<Method 1> <Method 2> <Method 3>
Cancelling a Shared Folder
You can cancel a shared folder on your PC. Select a folder from the Shared Folder pane and select Unshare Folder.
Method 1: Select a folder from the Shared Folder pane, select the Share menu and then select Unshare Folder.
Method 2: Select a folder from the Shared Folder pane, right-click over the selected folder and then select Unshare Folder
from the pop-up menu.
Method 3: Locate the mouse pointer over a folder in the Shared Folder pane and drag&drop the folder into the My
Computer pane. If a message appears asking you to conrm the cancelation, select Yes.
<Method 1> <Method 2> <Method 3>
Applying the Current Settings
Perform this when synchronization is necessary due to a new shared folder or canceling a shared folder. The Set Changed
State menu applies changes to shared folders to the data saved with the PC share programme.
Since applying changes to the internal data is a time-consuming process, this function enables users to apply changes to the
data only when required.
Until the Set Changed State menu is selected, the changed state of the shared folder is not applied to the server.
Changes to the shared folders are not applied to your PC until you select the Set Changed State menu.
Method 1: Select the Share menu and select the Refresh DB sub-menu.
Method 2: Click the Set Changed State icon.
❑
N
-
-
-
-
-
-
-
-
BN68-01757A-Eng.indb 47 2008-09-24 오전 11:09:29
English - 48
Setting the Access Permission
To enable the TV to nd your PC, the TV must be set to Set Device Policy in the Access Permission Settings window. In
addition, the PC server and the TV must be on the same subnet.
Method: Select the Share menu and select Set Device Policy. Rejected items are represented in gray. You can change the
access permissions by using the Allow Accept / Deny button. To delete an item, select the item and select Delete Item.
Server
Server
You can run or stop using your PC as a server.
Start Server at Windows start
You can determine whether to start the PC server automatically when Windows starts.
Change server name
You can rename the PC server. Enter a new name and click OK. The new name will appear at the top right of the window and
will appear on the TV.
Help
Version
The programme version information message box appears.
-
❑
❑
BN68-01757A-Eng.indb 48 2008-09-24 오전 11:09:29
English - 49
Using the DLNA Function
Using the DLNA Menu
DLNA (Digital Living Network Alliance) enables content saved on a DLNA server
(usually your PC) connected to your TV or over a network to be played.
Wiselink Pro enables playing content saved on a USB memory device connected
to the TV, while DLNA enables playing content saved on a DLNA server (your
PC) connected to your TV or over the network. The procedures to use the
content are the same as those for WISELINK Pro.
If you install the PC share manager programme supplied with the TV onto a PC,
you can have the PC perform the role of a DLNA server over the network.
1. Press the W.LINK button on the remote control to display the DLNA menu.
2. Press the ◄ or ►button to select an icon (Photo, Music, Movie, Setup), then
press the ENTER
E
button.
To exit DLNA mode, press the W.LINK button on the remote control.
Photo
Photo List option menu
Sorting Photo List/Viewing the Information/Rotating the Photo le/Viewing a Slide Show
During a Slide Show option menu
Play & Pause/Slide Show Speed/Zoom/Rotate
Music
Music List option menu
Sorting Music List/Viewing the Information/Playing a music le
Music Play Option Menu
Play & Pause/Repeat Mode
Movie
Movie List option menu
Sorting Movie List/Viewing the Information/Playing a Movie le
Movie Play Option Menu
Play & Pause/Repeat Mode
Setup
Slide Show Speed/Music Repeat Mode/Movie Repeat Mode/Screen Saver Run Time/Information
DLNA does not support the following functions.
The Background Music and Background Music Setting functions.
Sorting les by preference in the Photo, Music, and Movie folders.
The Change Group Info function.
The Delete function.
The Safe Remove function.
The π (REW)/µ (FF) button functions while a movie is playing.
The Skip (◄/► button) or Pause function may not work while a movie is playing for the DLNA of other manufacturers,
depending on the corresponding content information.
The playing time may not be displayed while a movie is playing.
N
❑
❑
❑
❑
N
-
-
-
-
-
-
N
N
WISELINK Pro
Photo
SUM
Device
e
Exit
Music Setup
PHOTO
DLNA : Server
Movie
BN68-01757A-Eng.indb 49 2008-09-24 오전 11:09:30
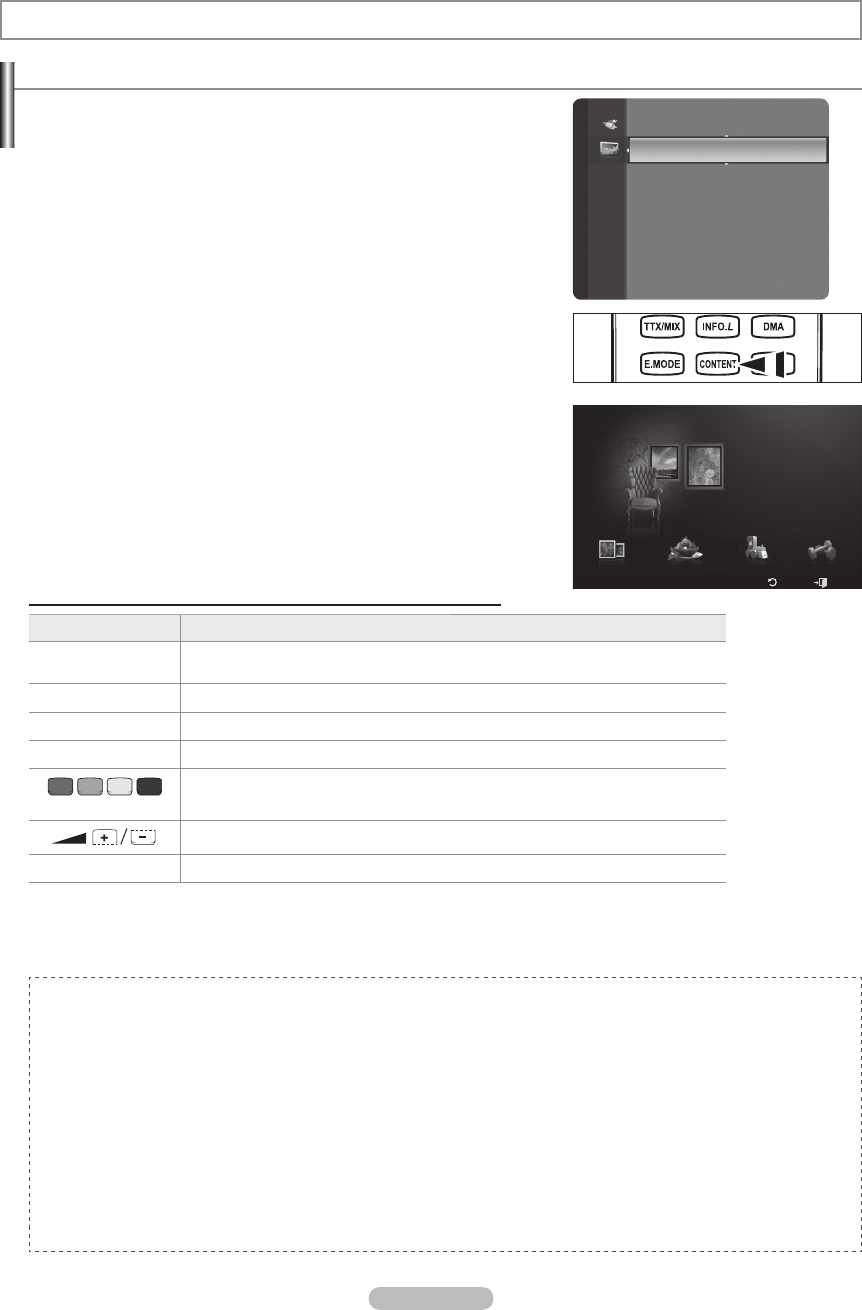
English - 50
Activating the Content Library
The Content Library enables you to view or play the built-in contents on the TV
or stored on your USB device. The Delete, Move and Update functions will not
work with the built-in content on the TV.
1. Press the MENU button. Press the ▲ or ▼ button to select Application,
then press the ENTER
E
button.
2. Press the ▲ or ▼ button to select Content Library, then press the
ENTER
E
button.
The Content Library main menu is displayed.
Press the CONTENT button on the remote control to display the Content
Library main menu.
3. Press the ◄ or ► button to select an icon (Gallery, Cooking, Children,
Fitness), then press the ENTER
E
button.
The selected item will be run.
Refer to the explanation for the button in the display when the user uses
the button while content is running.
Using the Remote Control Button in Content Library Menu
Button Operations
▲/▼/◄/►
(Wheel) Move the cursor and select an item.
ENTER
E
Select the currently selected item.
RETURN Return to the previous menu.
EXIT Stop the current function and return to the Content Library main menu.
(colour button) Button that provide functions are described on the corresponding page.
You can control the volume of the played content.
CONTENT Exit Content Library mode.
If you press the Volume or MUTE button, no OSD is displayed, but the function operates accordingly.
CONTENTS LIBRARY CONTAINS TEXT, GRAPHICS, IMAGES, MULTIMEDIA, AND OTHER MATERIALS FOR
INFORMATIONAL AND PROMOTIONAL PURPOSES ONLY. MATERIALS IN CONTENTS LIBRARY HAS BEEN
MODIFIED AND KEEPS BEING REVISED AND UPDATED. THE MATERIALS IN THE CONTENTS LIBRARY MAY NOT
BE SUITABLE FOR ALL AUDIENCES.
INFORMATION IN THE CONTENTS LIBRARY IS PROVIDED “AS IS.” ALTHOUGH THE INFORMATION PROVIDED
TO YOU IN THE CONTENTS LIBRARY IS OBTAINED OR COMPLIED FROM SOURCES WE BELIEVE TO BE
RELIABLE, SAMSUNG CANNOT AND DOES NOT GUARANTEE THE ACCURACY, VALIDITY, TIMELINESS OR
COMPLETENESS OF ANY INFORMATION OR DATA MADE AVAILABLE TO YOU FOR ANY PARTICULAR PURPOSE.
UNDER NO CIRCUMSTANCES, INCLUDING NEGLIGENCE, SHALL SAMSUNG BE HELD LIABLE, WHETHER IN
CONTRACT OR TORT, FOR ANY DIRECT, INDIRECT, INCIDENTAL, SPECIAL OR CONSEQUENTIAL DAMAGES,
ATTORNEY FEES, EXPENSES, OR ANY OTHER DAMAGES WHATSOEVER ARISING OUT OF, OR IN CONNECTION
WITH, ANY INFORMATION CONTAINED IN, OR THE USE OF, THE CONTENTS LIBRARY, EVEN IF ADVISED OF THE
POSSIBILITY OF SUCH DAMAGES.
N
N
N
N
N
N
Content Library
Application
WISELINK Pro
Anynet+ (HDMI-CEC)
ContentLibrary ►
InfoLive
Product Guide
Setup
USB
Return
Exit
Cooking Children Fitness
Gallery
Gallery
Content Library
BN68-01757A-Eng.indb 50 2008-09-24 오전 11:09:30
English - 51
Using the Content Library
Gallery
Art/Relaxation/Party:
This function plays a SlideShow with high resolution images and background music and produces
various atmospheres. Using the Gallery function of the TV, you can change your home atmosphere.
Press the yellow button to playback all imageries.
There is default music for each for the Art, Relaxation, and Party options.
Press INFO button to see the credit and detail information in English for the imagery. Press INFO button again or press
► button for the credit information to go away (currently, the credit supports English only).
The copyrights of the Gallery contents and all issues related to them are reserved by Gallery Player, Inc.
For additional Gallery contents, check for information through www.samsung.com. Please refer to the Using Additional
Content Using External USB Memory Storage section to see how to play additional imagery.
Cooking
Starters/Main Courses/Desserts:
You can view various recipes that you can then easily follow step by step. Enjoy these
contents which give you great ideas for meals.
The recipes introduced in the Cooking contents on the Samsung TV are based on recipes published by Anness
Publishing.
The copyrights of the Cooking contents and all issues related to them are reserved by Practical Pictures.
Children
Story/Song/Play:
This is educational and interactive content that children can watch repeatedly. Enjoy existing stories,
songs and plays with the Boowa and Kwala characters.
The copyrights of the Children contents and issues related to them are reserved by UpToTen.
Fitness
Basic Stretches/Massage:
This is benecial health management content that provides stretching and massage exercises
that can be enjoyed by the whole family.
This is benecial health management content that provides stretching and massage exercises that can be enjoyed by the
whole family. The Basic Stretches contents for the Samsung TV are based on the book Stretching by Suzanne Martin
which is published by DK and the Massage contents are based on the books published by Anness Publishing.
The copyrights to Basic Stretches are reserved by the DK Publishing Company. The copyrights to the Massage content
are reserved by Practical Pictures. All issues related to copyrights are reserved by the corresponding company.
Using the Remote Control Button in Fitness menu
Button Operations
◄/►
(Wheel) View to previous step/View to next step
ENTER
E
Play or pause (in Basic and Advanced Stretches)
Screen Saver Run Time
Select to set the waiting time before the screen saver appears.
Press the yellow button to select Setup in the Content Library main menu.
❑
N
N
N
N
N
❑
N
N
❑
N
❑
N
N
❑
BN68-01757A-Eng.indb 51 2008-09-24 오전 11:09:30
English - 52
Using Additional Content Using External USB Memory Storage
You can download contents onto a USB memory device and play them on your TV. (The contents on the external USB device are
played directly without being copied to the built-in Flash memory of the TV.)
Playing and Exiting New Content
1. Press the Red button in the Content Library main menu.
The USB Browser main screen is displayed.
A list of les saved on the USB device is displayed.
2. Press the ▲ or ▼ button to move to the le (or folder) you want to play. Press
the ENTER
E
button.
The selected content is played.
The use of contents is the same as in using the TV memory contents.
To return to the USB browser main screen, press the EXIT button.
Content Library only supports USB Mass Storage Class devices (MSC).
MSC is a Mass Storage Class Bulk-Only Transport device. Examples of
MSC are Thumb drives and Flash Card Readers (Both USB HDD and
HUB are not supported.)
Downloading New Contents
New content other than the built-in contents will be provided via the Samsung.
com website with or without charge.
Downloading Content
1. Visit the www.samsung.com website and open the Content Library page.
2. Enter the product number (UDN, Unique Device Number) when it is asked.
3. Select a content item in the Contents Download page.
4. Download the contents onto the USB memory device.
Content Library only supports USB Mass Storage Class devices (MSC). MSC is a Mass Storage Class Bulk-Only
Transport device. Examples of MSC are Thumb drives and Flash Card Readers (Both USB HDD and HUB are not
supported.)
5. Go to Content Library main menu by pressing CONTENT button or choosing Content Library (Menu → Application →
Content Library)
6. Plug the USB memory into USB port on the side of the TV.
Finding a product number (Unique Device Number, UDN)
1. Insert the USB memory into the USB port on the side of the TV.
2. In the USB Browser main screen, press the Green button (Show UDN).
3. The 18-digit number on the screen is the product code.
Provided Content
Additional contents are available on www.samsung.com.
N
N
N
N
N
N
N
-
Setup
USB
Return
Exit
Cooking Children Fitness
Gallery
Gallery
Content Library
TV Memory
Show UDN
Return
Content Library
USB
<<
1/1
>>
Fitness
Children
Cooking
Gallery
Living
Children
▼ ▲
Others
Sub Item : 2
BN68-01757A-Eng.indb 52 2008-09-24 오전 11:09:30
English - 53
Connecting Anynet+ Devices
Anynet+ is a function that enables you to control all connected Samsung devices that support Anynet+ with your Samsung TV’s
remote.
The Anynet+ system can be used only with Samsung devices that have the Anynet+ feature. To be sure your Samsung device has
this feature, check if there is an Anynet+ logo on it.
To connect to a TV
1. Connect the [HDMI 1], [HDMI 2], [HDMI 3] or [HDMI 4] jack on the TV and the HDMI OUT jack of the corresponding Anynet+
device using an HDMI cable.
To connect to Home Theater
1. Connect the [HDMI 1], [HDMI 2], [HDMI 3] or [HDMI 4] jack on the TV and the HDMI OUT jack of the corresponding Anynet+
device using an HDMI cable.
2. Connect the HDMI IN jack of the home theater and the HDMI OUT jack of the corresponding Anynet+ device using an HDMI
cable.
Connect the Optical cable between the Digital Audio Out (Optical) jack on your TV and the Digital Audio Input on the Home
Theater.
When following the connection above, the Optical jack only outputs 2 channel audio. You will only hear sound from the Home
Theater’s Front Left and Right speakers and the subwoofer. If you want to hear 5.1 channel audio, connect the Digital Audio
Out (Optical) jack on the DVD player or Cable/Satellite Box (ie Anynet Device 1 or 2) directly to the Ampli er or Home Theater,
not the TV.
Connect only one Home Theater.
You can connect an Anynet+ device using the HDMI 1.3 cable. Some HDMI cables may not support Anynet+ functions.
Anynet+ works when the AV device supporting Anynet+ is in the Standby or On status.
Anynet+ supports up to 12 AV devices in total. Note that you can connect up to 3 devices of the same type.
N
N
N
N
N
N
About Anynet+
Anynet+
Device 1
Anynet+
Device 2
Anynet+
Device 3
TV
HDMI 1.3 Cable HDMI 1.3 Cable HDMI 1.3 Cable HDMI 1.3 Cable
Anynet+
Device 4
TV
Anynet+ Device 1
Anynet+ Device 2 Anynet+ Device 3
HDMI 1.3 Cable
HDMI 1.3 Cable
HDMI 1.3 Cable
HDMI 1.3 Cable
Home Theatre
Anynet+ Device 4
HDMI 1.3 Cable
Optical Cable
BN68-01757A-Eng.indb 53 2008-09-24 오전 11:09:31
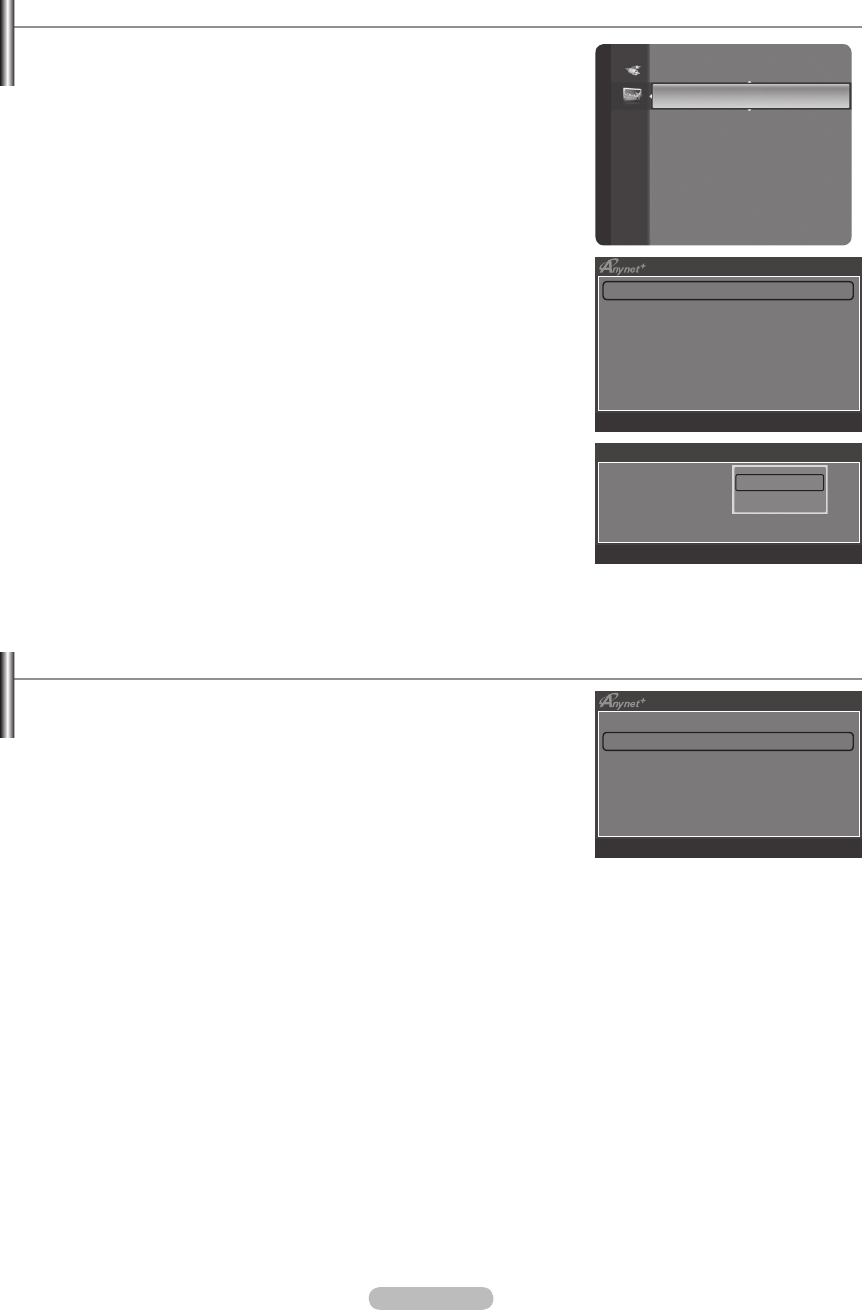
English - 54
Setting Up Anynet+
Anynet+(HDMI-CEC)
Tools→Anynet+(HDMI-CEC) performs the same function.
Setup
Anynet+(HDMI-CEC)→Off/On: To use the Anynet+ Function, Anynet+
(HDMI-CEC) must be set to On.
When the Anynet+ (HDMI-CEC) function is disabled, all the Anynet+
related operations are deactivated.
AutoTurnOff→No/Yes: Setting an Anynet+ Device to turn Off
Automatically when the TV is Turned Off
The active source on the TV remote must be set to TV to use the
Anynet+ function.
If you set Auto Turn Off to Yes, connected external devices are also
turned off when the TV is turned off. If an external device is still recording,
it may or may not turn off.
❑
•
N
•
N
N
Scanning and Switching between Anynet+ Devices
1. Press the TOOLS button. Press the ENTER
E
button to select Anynet+
(HDMI-CEC).
2. Press the ▲ or ▼ button to select Device List, then press the ENTER
E
button.
Anynet+ devices connected to the TV are listed. If you cannot nd a device
you want, press the red button to scan for devices.
Only when you set Anynet+ (HDMI-CEC) to On in the Setup menu, the
Device List menu appears.
3. Press the ▲ or ▼ button to select to a particular device and press the
ENTER
E
button. It is switched to the selected device.
Switching to the selected devices may take up to 2 minutes. You cannot cancel the operation during the switching operation.
The time required to scan for devices is determined by the number of connected devices.
When the device scan is complete, the number of devices found are not displayed.
Although the TV automatically searches the device list when the TV is turned on via the power button, devices connected to
the TV when the TV is on or under some conditions are not automatically displayed in the device list. Press the red button to
search for the connected device.
If you have selected external input mode by pressing the SOURCE button, you cannot use the Anynet+ function. Make sure to
switch to an Anynet+ device by using the Device List.
N
N
N
N
N
N
N
Application
WISELINK Pro
Anynet+(HDMI-CEC) ►
Content Library
InfoLive
Product Guide
Device List
Setup
U
Move
E
Enter
R
Return
View TV
Device List
Recording : DVDR
DVDR Operation
Receiver : On
Setup
U
Move
E
Enter
R
Return
Anynet+ (HDMI-CEC) : ON
Auto Turn Off : Yes
U
Move
E
Enter
R
Return
Set up
Off
On
BN68-01757A-Eng.indb 54 2008-09-24 오전 11:09:32
English - 55
Anynet+ Menu
The Anynet+ menu changes depending on the type and status of the Anynet+ devices connected to the TV.
Anynet+ Menu Description
View TV Anynet+ mode changes to TV broadcast mode.
Device List Shows the Anynet+ device list.
(device_name) Menu Shows the connected device menus. E.g. If a DVD recorder is connected, the disc menu of
the DVD recorder will appear.
(device_name) Operation Shows the play menu of the connected device. E.g. If a DVD recorder is connected, the play
menu of the DVD recorder will appear.
Record: (*recorder) Starts recording immediately using the recorder. (This is only available for devices that
support the recording function.)
(*recorder) Reserve Recording Enables reserving a recording for the recorder. (This is only available for devices that support
the recording reservation function.)
Stop Recording: (*recorder) Stops recording.
Receiver Sound is played through the receiver.
If more than one recording device is connected, they are displayed as (*recorder) and if only one recording device is
connected, it will be represented as (*device_name).
TV Remote Control Buttons Available in Anynet+ Mode
Device Type Operating Status Available Buttons
Anynet+ Device
After switching to the device, when
the menu of the corresponding
device is displayed on the screen.
Numeric buttons
▲/▼/◄/►/ENTER
E
buttons
Colour buttons / EXIT button
After switching to the device, while
playing a le
π
(Backward search) /
µ
(Forward search)
∫
(Stop) /
∂
(Play) /
∑
(Pause)
Device with built-
in Tuner
After switching to the device, when
you are watching a TV programme P / button
Audio Device When Receiver is activated VOL / button
MUTE button
The Anynet+ function only works when the active source on the TV remote control is set to TV.
The
∏
button works only while in the recordable state.
You cannot control Anynet+ devices using the buttons on the TV. You can control Anynet+ devices only using the TV remote
control.
The TV remote control may not work under certain conditions. In this case, reselect the Anynet+ device.
The Anynet+ functions do not operate with other manufacturers’ products.
The
π
,
µ
operations may differ depending on the device.
Recording
You can make a recording of a TV programme using a Samsung recorder.
1. Press the TOOLS button. Press the ENTER
E
button to select Anynet+
(HDMI-CEC).
2. Press the ▲ or ▼ button to select Recording: (device_name), then press the
ENTER
E
button. Recording begins.
When there is more than one recording device
When multiple recording devices are connected, the recording devices are
listed. Press the ▲ or ▼ button to select a recording device and press the
ENTER
E
button. Recording begins.
When the recording device is not displayed
Select Device List and press the red button to search devices.
3. Press the EXIT button to exit.
You can record the source streams by selecting Recording: (device_name).
Pressing the
∏
button will record whatever you are currently watching. If you are watching video from another device, the video
from the device is recorded.
Before recording, check whether the antenna jack is properly connected to the recording device. To properly connect an
antenna to a recording device, refer to the recording device’s users manual.
N
N
N
N
N
N
N
N
N
N
N
N
View TV
Device List
Recording : DVDR
DVDR Operation
Receiver : On
Setup
U
Move
E
Enter
R
Return
BN68-01757A-Eng.indb 55 2008-09-24 오전 11:09:32
English - 56
Listening through a Receiver (Home theater)
You can listen to sound through a receiver instead of the TV speaker.
1. Press the TOOLS button. Press the ENTER
E
button to select Anynet+
(HDMI-CEC).
2. Press the ▲ or ▼ button to select Receiver. Press the ◄ or ► button to select
On or Off.
3. Press the EXIT button to exit.
If your receiver supports audio only, it may not appear in the device list.
The receiver will work when you have properly connected the Optical IN jack of
the receiver to the Optical Out jack of the TV.
When the receiver (home theater) is set to On, you can hear sound output from the TV’s Optical jack. When the TV is
displaying a DTV(air) signal, the TV will send out 5.1 channel sound to the Home theater receiver. When the source is a digital
component such as a DVD and is connected to the TV via HDMI, only 2 channel sound will be heard from the Home Theater
receiver.
When using the WISELINK Pro feature, sound may not output properly through the receiver.
When listening through the receiver, there are restrictions for using the PIP and audio-related (MTS, Preferred language)
menus.
If there is a power interruption to the TV when the Receiver is set to On (by disconnecting the power cord or a power failure),
the Select Speaker may be set to External Speaker when you turn the TV on again. (see page 22)
Troubleshooting for Anynet+
Symptom Solution
Anynet+ does not work. Check if the device is an Anynet+ device. The Anynet+ system supports Anynet+ devices only.
Connect only one receiver (home theater).
Check if the Anynet+ device power cord is properly connected.
Check the Anynet+ device’s Video/Audio/HDMI 1.3 cable connections.
Check whether Anynet+ (HDMI-CEC) is set to On in the Anynet+ setup menu.
Check whether the TV remote control is in TV mode.
Check whether it is Anynet+ exclusive remote control.
Anynet+ doesn’t work in certain situations. (Searching channels, Operating WISELINK Pro, Plug
& Play, etc.)
When connecting or removing the HDMI 1.3 cable, please make sure to search devices again or
turn your TV off and on again.
Check if the Anynet+ Function of Anynet+ device is set on.
•
•
•
•
•
•
•
•
•
•
I want to start Anynet+.Check if the Anynet+ device is properly connected to the TV and check if the Anynet+ (HDMI-
CEC) is set to On in the Anynet+ Setup menu.
Press the TV button on the TV remote control to switch to TV. Then press the TOOLS button to
show the Anynet+ menu and select a menu you want.
•
•
I want to exit Anynet+.Select View TV in the Anynet+ menu.
Press the SOURCE button on the TV remote control and select a device other than Anynet+
devices.
(Note that the channel button operates only when a tuner-embedded Anynet+ device is not
connected.)
•
•
•
The message Connecting
to Anynet+ device...
appears on the screen.
You cannot use the remote control when you are conguring Anynet+ or switching to a view
mode.
Use the remote control when the Anynet+ setting or switching to view mode is complete.
•
•
The Anynet+ device does
not play. You cannot use the play function when Plug & Play is in progress.
The connected device is
not displayed. Check whether or not the device supports Anynet+ functions.
Check whether or not the HDMI 1.3 cable is properly connected.
Check whether Anynet+ (HDMI-CEC) is set to On in the Anynet+ setup menu.
Search Anynet+ devices again.
You can connect an Anynet+ device using the HDMI 1.3 cable only. Some HDMI cables may not
support Anynet+ functions.
If it is terminated by an abnormal situation such as disconnecting the HDMI cable or power cord
or a power failure, please repeat the device scan.
•
•
•
•
•
•
The TV programme cannot
be recorded. Check whether the antenna jack on the recording device is properly connected.
The TV sound is not output
through the receiver. Connect the optical cable between TV and the receiver.
N
N
N
N
N
N
View TV
Device List
Recording : DVDR
DVDR Operation
Receiver ◄ On ►
Setup
U
Move
L
Adjust
R
Return
BN68-01757A-Eng.indb 56 2008-09-24 오전 11:09:32
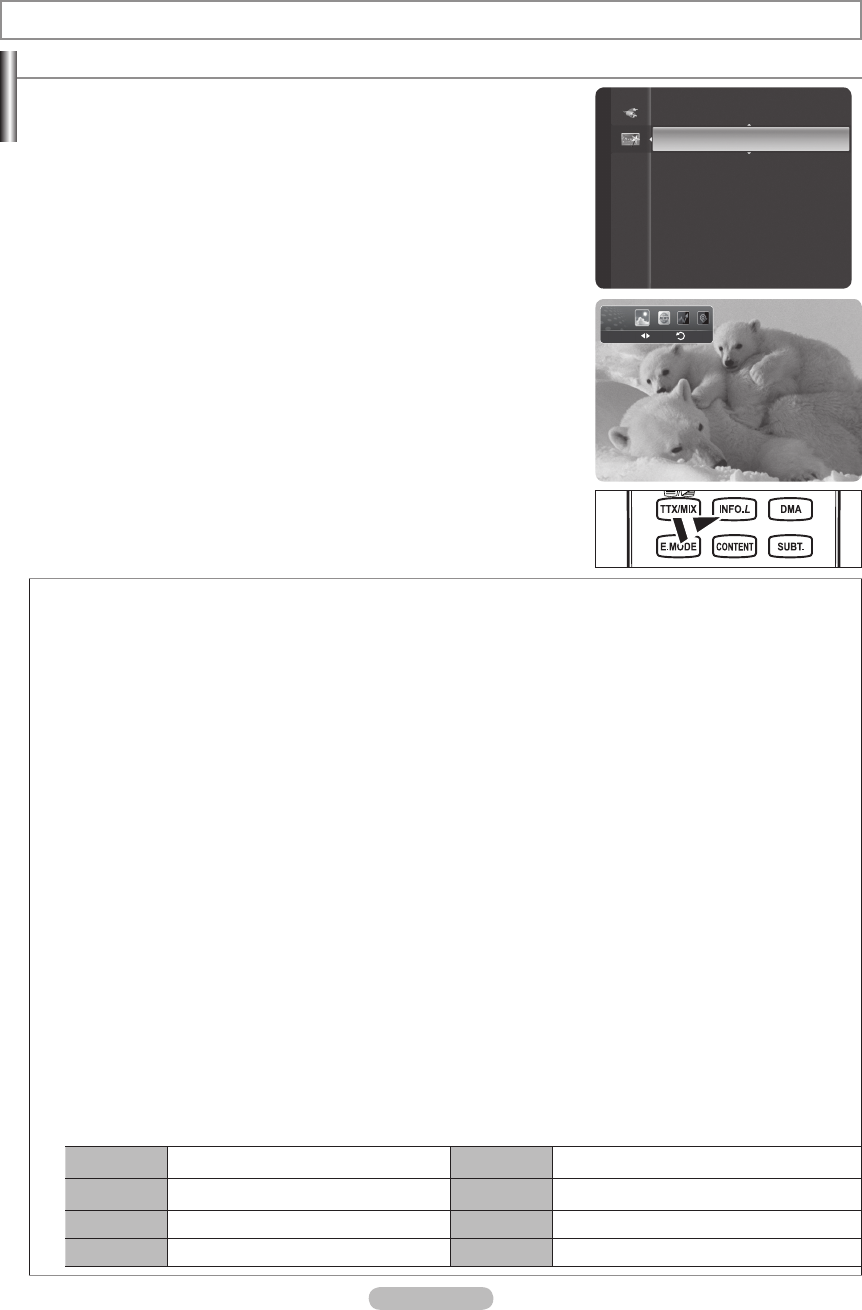
English - 57
Using InfoLive
You can view news, stock market and weather information services using SAMSUNG’s
InfoLive service.
Set up the network. (Refer to pages 27~28)
InfoLive is available only in UK, France, Germany, Italy, Spain, Norway, Sweden,
Denmark, Finland and Russia. Country is selected depending on the country
which is set in Plug & Play.
1. Press the MENU button to display the menu.
Press the ▲ or ▼ button to select Application, then press the ENTER
E
button.
2. Press the ▲ or ▼ button to select InfoLive, then press the ENTER
E
button.
3. Press the ◄ or ► button to select a service (Weather, News, Stocks or Setup)
and press the ENTER
E
button.
You can select and view more than one service at the same time only for
‘News (without detailed information)’, ‘Weather-Today’s Weather’, and
‘Stocks-Favorite Stocks, Market Summary’.
Press the
INFO.L
button on the remote control to display the InfoLive menu.
ALL THE MATERIALS AVAILABLE THROUGH INFOLIVE [‘INFOLIVE CONTENT’] ARE THE PROPERTY OF THE
ORIGINATOR OF THE CONTENT [“CONTENT OWNER’] AND/OR ITS AFFILIATES OR LICENSORS, AND ARE PROTECTED
BY COPYRIGHT, TRADEMARK, AND OTHER INTELLECTUAL PROPERTY LAWS. ALL INFOLIVE CONTENT IS PROVIDED
SOLELY FOR YOUR PERSONAL NONCOMMERCIAL USE. YOU MAY NOT USE ANY INFOLIVE CONTENT IN A MANNER
THAT CONSTITUTES AN INFRINGEMENT OF THE CONTENT OWNERS’ RIGHTS OR THAT HAS NOT BEEN AUTHORIZED
BY THE CONTENT OWNER. MORE SPECIFICALLY, UNLESS EXPLICITLY AUTHORIZED IN THIS DISCLAIMER OR BY
THE CONTENT OWNER, YOU MAY NOT MODIFY, COPY, REPRODUCE, REPUBLISH, UPLOAD, POST, TRANSMIT,
TRANSLATE, SELL, CREATE DERIVATIVE WORKS, EXPLOIT, OR DISTRIBUTE IN ANY MANNER OR MEDIUM
(INCLUDING BY EMAIL OR OTHER ELECTRONIC MEANS) ANY INFOLIVE CONTENT OR ANY OTHER MATERIAL FROM
THE INFOLIVE SERVICE. CONTENT PROVIDED CONTENT OWNERS IN CONNECTION WITH THE INFOLIVE SERVICE
MAY BE TIME-DELAYED AS SPECIFIED BY THE CONTENT OWNER AND/OR ITS AFFILIATES.
INFOLIVE IS PROVIDED THROUGH AGREEMENT BETWEEN SAMSUNG AND THE CONTENT OWNER. INFOLIVE MAY
BE TERMINATED OR INTERUPTED AT ANY TIME BY EITHER SAMSUNG OR THE CONTENT PROVIDER OR THROUGH
TERMINATION OF THE AGREEMENT BETWEEN THEM. UNDER NO CIRCUMSTANCES, INCLUDING NEGLIGENCE,
SHALL SAMSUNG OR THE CONTENT PROVIDER BE HELD LIABLE, WHETHER IN CONTRACT OR TORT, FOR ANY
DIRECT, INDIRECT, INCIDENTAL, SPECIAL OR CONSEQUENTIAL DAMAGES, ATTORNEY FEES, EXPENSES, OR
ANY OTHER DAMAGES WHATSOEVER ARISING OUT OF, OR IN CONNECTION WITH, SUCH TERMINATION OR
INTERUPTION. SINCE CONTENT TRANSMITTED VIA INFOLIVE IS RECEIVED BY MEANS OF NETWORKS AND
TRANSMISSION FACILITIES OVER WHICH SAMSUNG HAS NO CONTROL, SAMSUNG EXPRESSLY DISCLAIMS ANY
RESPONSIBILITY OR LIABILITY FOR ANY INTERRUPTION OR SUSPENSION OF INTERLINK SERVICE OR FOR THE
ABSENCE OF CONTENT RESULTING THEREFROM. INFORMATION IN THE INFOLIVE IS PROVIDED “AS IS,”AND
CONSEQUENTLY, SAMSUNG DOES NOT WARRANT THE INFORMATION SO PROVIDED, EITHER EXPRESSLY OR
IMPLIEDLY, FOR ANY PARTICULAR PURPOSE; AND SAMSUNG EXPRESSLY DISCLAIMS ANY IMPLIED WARRANTIES,
INCLUDING BUT NOT LIMITED TO, WARRANTIES OF MERCHANTABILITY OR FITNESS FOR A PARTICULAR PURPOSE.
SAMSUNG DOES NOT GUARANTEE THE ACCURACY, VALIDITY, TIMELINESS, LEGALITY, OR COMPLETENESS OF ANY
INFORMATION OR DATA MADE AVAILABLE THROUGH INFOLIVE FOR ANY PARTICULAR PURPOSE AND UNDER NO
CIRCUMSTANCES, INCLUDING NEGLIGENCE, SHALL SAMSUNG BE HELD LIABLE, WHETHER IN CONTRACT OR TORT,
FOR ANY DIRECT, INDIRECT, INCIDENTAL, SPECIAL OR CONSEQUENTIAL DAMAGES, ATTORNEY FEES, EXPENSES,
OR ANY OTHER DAMAGES WHATSOEVER ARISING OUT OF, OR IN CONNECTION WITH, ANY INFORMATION
CONTAINED IN, OR AS A RESULT OF THE USE OF INFOLIVE BY YOU OR ANY THIRD PARTY, EVEN IF ADVISED OF THE
POSSIBILITY OF SUCH DAMAGES.
ACCESS TO INFOLIVE IS SUBJECT TO THE YAHOO’S TERMS OF SERVICE AVAILABLE ON PAGE 67.
YAHOO TERMS OF SERVICE IN **LANGUAGE** ARE AVAILABLE ON THE WEB AT **ADDRESS**.
French http://fr.docs.yahoo.com/info/utos.html Swedish http://se.docs.yahoo.com/seterms.html
German http://de.docs.yahoo.com/info/utos.html Danish http://dk.docs.yahoo.com/termsofservice.html
Italian http://it.docs.yahoo.com/info/utos.html Finnish http://.docs.yahoo.com/info/terms/?fr=sfp
Spanish http://es.docs.yahoo.com/info/utos.html
N
N
N
N
N
O
InfoLive
Application
Anynet+ (HDMI-CEC)
Content Library
InfoLive
Product Guide
Weather Return
Move
BN68-01757A-Eng.indb 57 2008-09-24 오전 11:09:33

English - 58
Using the News Service
The news provider may be changed in the future.
1. Press the INFO.L button on the remote control.
2. Press the ◄ or ► button to move to the News service and press the ENTER
E
button.
Press the ENTER
E
button to view the detailed article.
Press the ◄ or ► button to view the previous or next article.
3. Press the Red button while using the service to change the News service Option.
4. Press ▲ or ▼ button and select News service option.
The News service option changes depending on the provided web service.
To exit the News service, press the Blue button.
To exit the InfoLive service, press the EXIT button.
N
N
N
N
N
N
Using the Weather Service
1. Press the INFO.L button on the remote control.
2. Press the ◄ or ► button to move to the Weather service and press the
ENTER
E
button.
Set up the Region
3. Press the Yellow button. Press the ▲ or ▼ button to select the initial letter (A~Z) of
the location you want, then press the ENTER
E
button.
4. Press the ► button to move to the Category. Press the ▲ or ▼ button to select
the location you want and press the ENTER
E
button.
You can check the weather of the selected region.
Set up Weather Option
5. Press the Red button while using the service to change the Weather service
option.
6. Press ▲ or ▼ button and select Weather option.
To exit the Weather service, press the Blue button.
To exit the InfoLive service, press the EXIT button.
N
N
N
GM turns 100 with focus on future
Enter Options Close
GM turns 100 with focus on future
Options
Politics
Business
News
Entertainment
Sports
Select Return
Sarreguemines
-00°C
Options Location Close
Sarreguemines
-00°C
Options
Today’s Weather
Weekly Forecast
ReturnSelect
Weather Return
Move
Weather Return
Move
News Return
Move
News Return
Move
BN68-01757A-Eng.indb 58 2008-09-24 오전 11:09:34
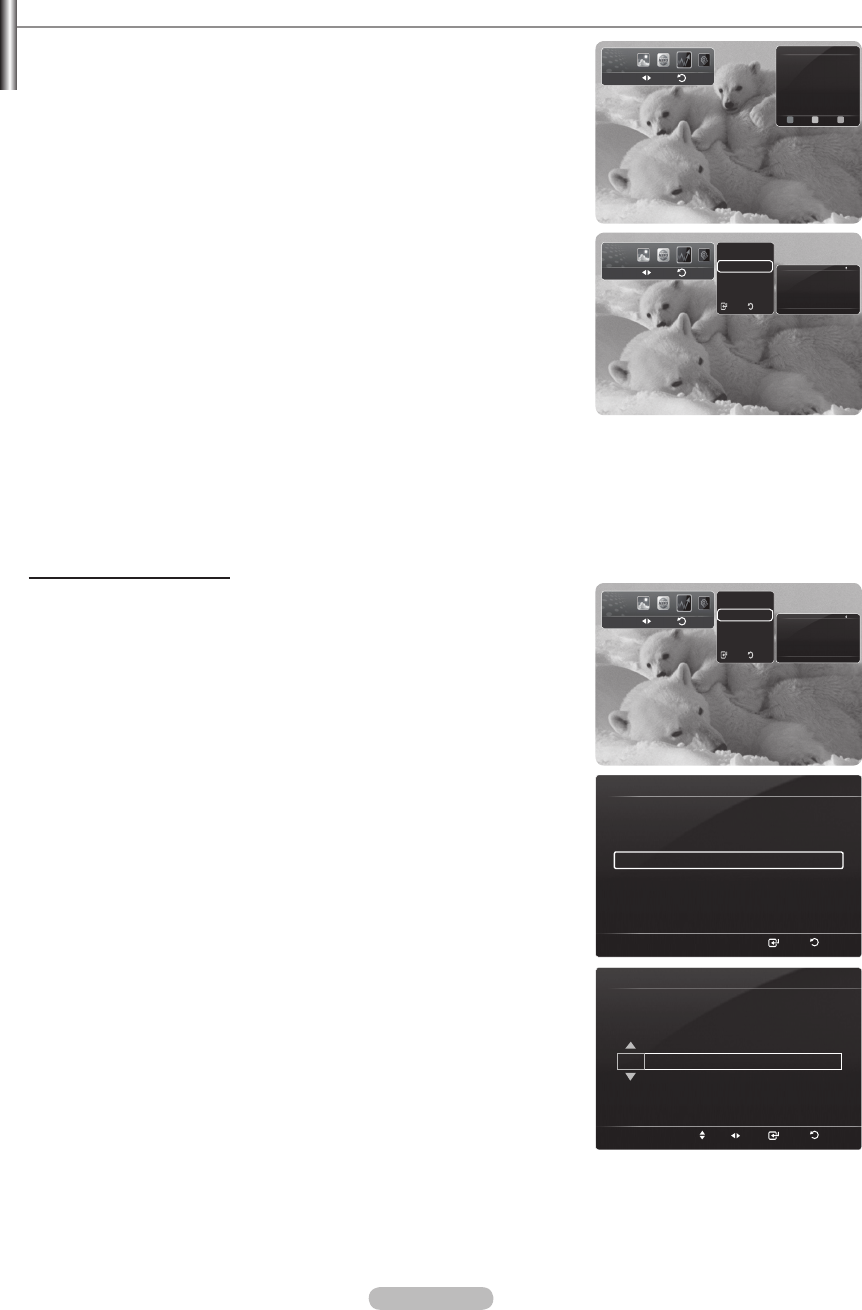
English - 59
Using the Stock Service
1. Press the INFO.L button on the remote control.
2. Press the ◄ or ► button to move to the Stocks service and press the ENTER
E
button.
3. Press the Red button while using the service to change the Stocks service option.
4. Press ▲ or ▼ button and select Stocks service option, then press the ENTER
E
button.
Stock quotes delayed up to 20 minutes. The delay time can vary depending on
country.
To exit the Stocks service, press the Blue button.
To exit the InfoLive service, press the EXIT button.
Favorite Stocks: The Favorite stock information is displayed. You can set up the
Favorite Stocks by pressing the Yellow button.
Market Summary: Major indices are toggled and the entire index, amount of up or
down, and % are displayed.
Stocks & News: The Favorite stock information and major indices and Financial
news are displayed.
N
N
N
Setting Favorite Stocks Items
1. Press the Yellow button when Favorite Stocks or Stocks & News is selected.
2. Press the ▲ or ▼ button to select the exchange market you want and press the
ENTERE
button.
The set Favorite Stocks screen appears.
3. Press the ◄, ►, ▲ or ▼ button to enter stock symbol. Then press the ENTER
E
button.
The result is displayed.
You can check the stock symbols by newspaper or Internet.
4. Press the ENTER
E
button to set a favourite stock.
The selected stock is set as a Favorite Stock.
To delete your favourite stocks
Press the Green button when Favorite Stocks or Stocks & News is selected.
Press the ▲ or ▼ button to select a stocks, then press the ENTER
E
button.
The
c
mark will disappear to the left of the stock name. Press the RETURN
button.
N
N
N
N
N
No Favorite Stocks
Quotes delayed at least 20 minutes.
Data provided by interastive Data.
Options Favorite Close
Options
Favorite Stocks
Market Summary
Stocks & News
ReturnSelect
Options
Favorite Stocks
Market Summary
Stocks & News
ReturnSelect
Set Favorite Stocks
Select
Return
Select the exchange market.
O London Stock Exchange
Set Favorite Stocks
Adjust
Move Select
Return
Enter stock symbol.
Stocks Return
Move
Stocks Return
Move
Stocks Return
Move
Quotes delayed at least 20 minutes.
Brought to you by Yahoo! Finance
12/24 Mon 15:00 Updated 1/2
AAAAAA $0.000,000 ▲ $000,000 +00,00%
BBBBBB $0.000,000 ▲ $000,000 +00,00%
CCCCCC $0.000,000 ▲ $000,000 +00,00%
DDDDDD $0.000,000 $000,000 +00,00%
EEEEEE $0.000,000 ▼ $000,000 -00,00%
– – – – – – help area – – – – – –
Quotes delayed at least 15 minutes.
Brought to you by Yahoo! Finance
12/24 Mon 15:00 Updated 1/2
AAAAAA $0.000,000 ▲ $000,000 +00,00%
BBBBBB $0.000,000 ▲ $000,000 +00,00%
CCCCCC $0.000,000 ▲ $000,000 +00,00%
DDDDDD $0.000,000 $000,000 +00,00%
EEEEEE $0.000,000 ▼ $000,000 -00,00%
– – – – – – help area – – – – – –
BN68-01757A-Eng.indb 59 2008-09-24 오전 11:09:34
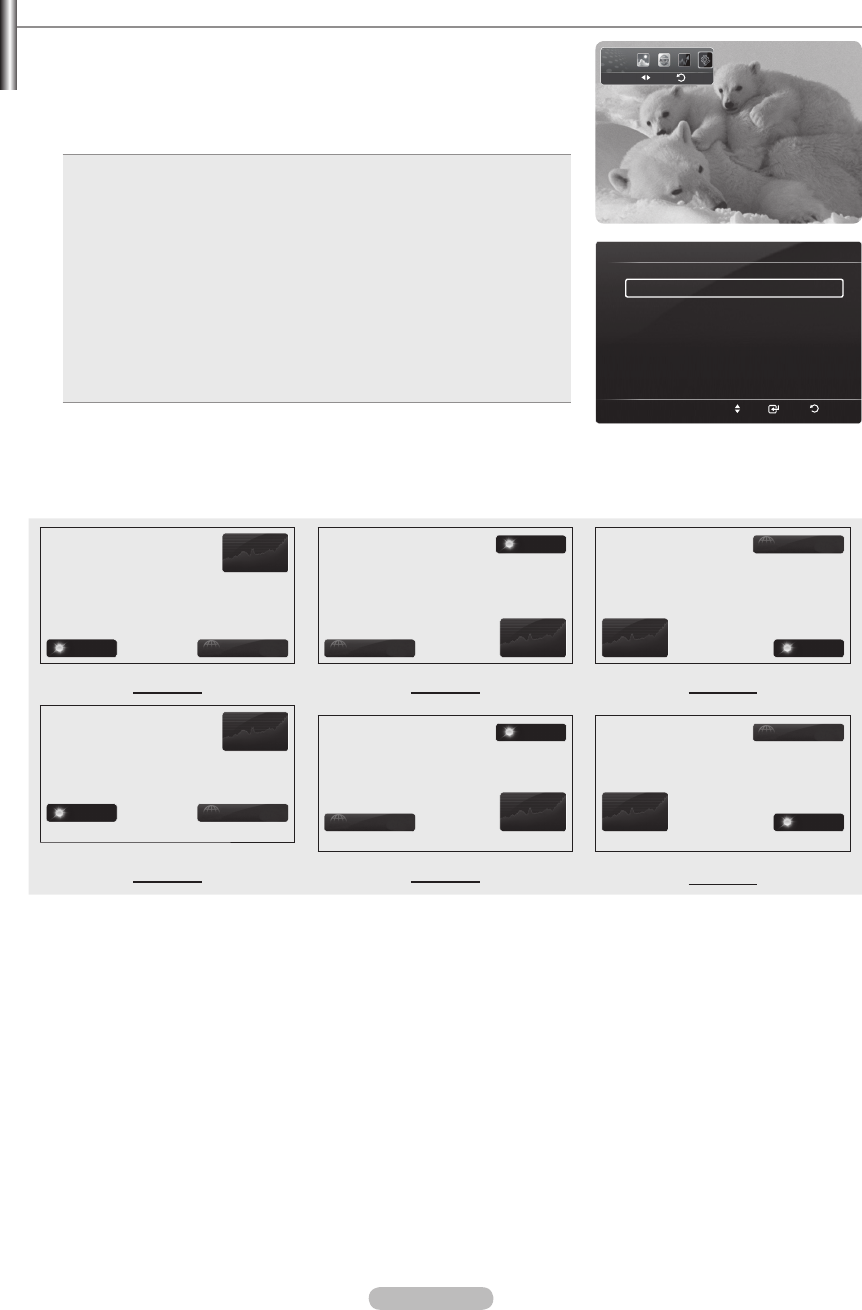
English - 60
InfoLive Setup
1. Press the INFO.L button on the remote control.
2. Press the ◄ or ► button to select Setup, then press the ENTER
E
button.
3. Press the ▲ or ▼ button to select the desired option. (Auto Launch, Display
Time, Font Size, Background Color, InfoLive’s Position)
4. Press the ▲ or ▼ button to select an option, then press the ENTER
E
button.
Auto Launch: Determines whether to launch InfoLink automatically
when the TV is turned on. You can select either Off or On.
Display Time: Determines the time to display the service on the TV
screen. You can select :10 minutes, 20 minutes, 1 hour, or Always.
Font Size: You can select letter size Standard or Large through
InfoLink service.
Background Colour: You can select the Background Colours (black,
blue, red, grean, gray) of InfoLink service. The colour is applied to each
service, option and setup window.
InfoLink’s Position: You can set the position of each InfoLink service
on the screen. You can select from six preset InfoLink positions
(Position 1~Position 6).
•
•
•
•
•
To exit the Setup service, press the RETURN button.
To exit the InfoLive service, press the EXIT button.
InfoLive’s Position
Stocks
Weather News
Weather
News Stocks
News
Stocks Weather
Position 1 Position 2 Position 3
Stocks
Weather News
Weather
News Stocks
News
Stocks Weather
Position 4 Position 5 Position 6
N
N
InfoLive’s Setup
Move Select
Return
Auto Launch : Off
Display Time : 10 minutes
Font Size : Standard
Background Color : Black
InfoLive’s Position
Setup Return
Move
BN68-01757A-Eng.indb 60 2008-09-24 오전 11:09:35
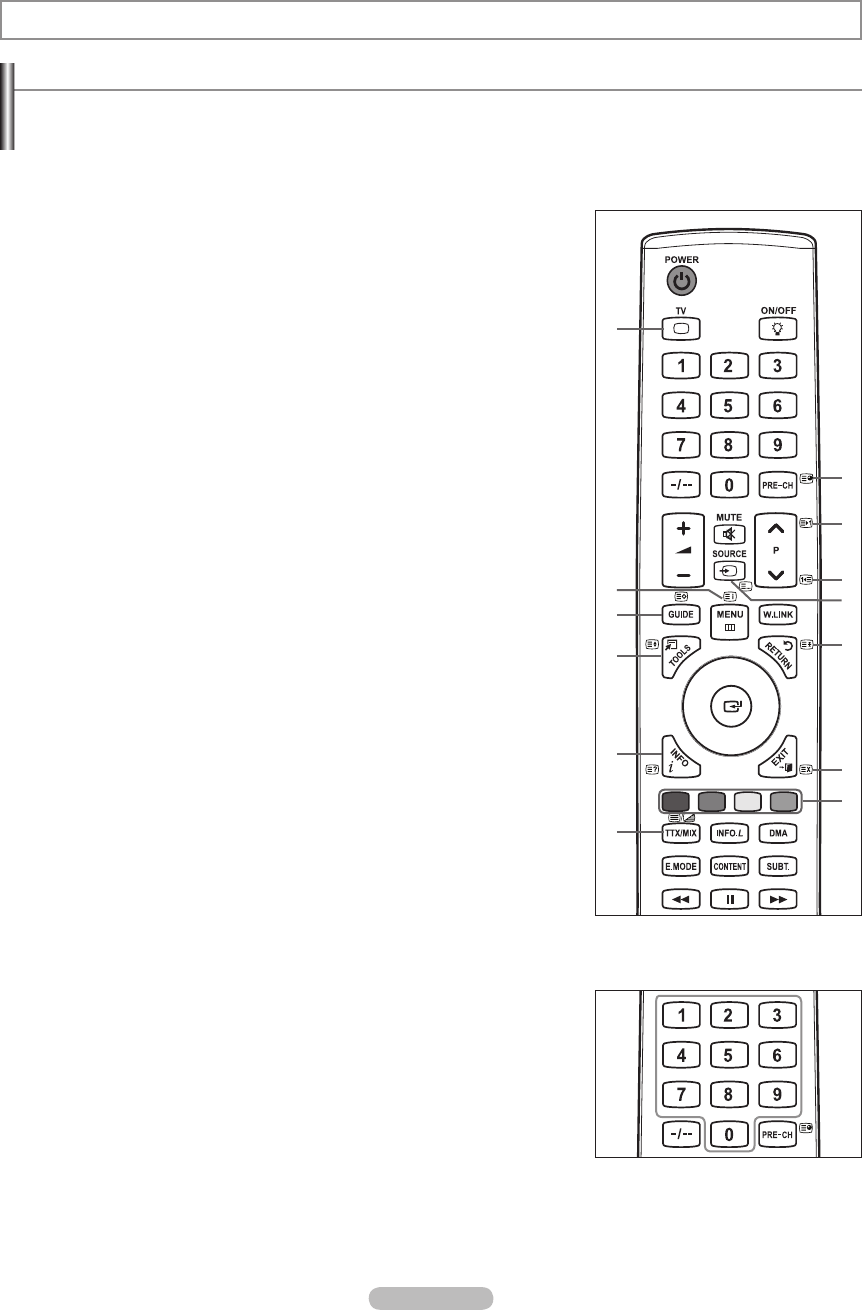
English - 61
Recommendations for Use
Teletext Feature
Most television stations provide written information services via Teletext. The index page of the teletext service gives you
information on how to use the service. In addition, you can select various options to suit your requirements by using the remote
control buttons.
For teletext information to be displayed correctly, channel reception must be stable. Otherwise, information may be missing or
some pages may not be displayed.
1
: (exit)
Exit from the teletext display.
2
6 (index)
Used to display the index (contents) page at any time while you are viewing
teletext.
3
8 (store)
Used to store the teletext pages.
4
4 (size)
Press to display the double-size letters in the upper half of the screen. For lower
half of the screen, press it again. To display normal screen, press it once again.
5
5 (reveal)
Used to display the hidden text (answers to quiz games, for example). To display
normal screen, press it again.
6
/ (teletext on/mix)
Press to activate teletext mode after selecting the channel providing the teletext
service. Press it twice to overlap the teletext with the current broadcasting screen.
7
1 (sub-page)
Used to display the available sub-page.
8
2 (page up)
Used to display the next teletext page.
9
3 (page down)
Used to display the previous teletext page.
0
0 (mode)
Press to select the teletext mode (LIST/FLOF). If you press it in the LIST mode,
it switches into the List save mode. In the List save mode, you can save teletext
page into list using the 8(store) button.
!
9 (hold)
Used to hold the display on a given page if the selected page is linked with several
secondary pages which follow on automatically. To resume, press it again.
@
7 (cancel)
Used to display the broadcast when searching for a page.
#
Colour buttons (red/green/yellow/blue)
If the FASTEXT system is used by a broadcasting company, the different topics
covered on a teletext page are colour-coded and can be selected by pressing the
coloured buttons. Press one of them corresponding to the required. The page is
displayed with other coloured information that can be selected in the same way. To
display the previous or next page, press the corresponding coloured button.
You can change teletext pages by pressing the numeric buttons on the remote
control.
N
N
1
3
4
5
6
2
7
8
9
0
!
@
#
BN68-01757A-Eng.indb 61 2008-09-24 오전 11:09:35

English - 62
The teletext pages are organized according to six categories:
Part Contents
ASelected page number.
B Broadcasting channel identity.
CCurrent page number or search indications.
D Date and time.
EText.
FStatus information.
FASTEXT information.
Teletext information is often divided between several pages displayed in sequence,
which can be accessed by:
Entering the page number
Selecting a title in a list
Selecting a coloured heading (FASTEXT system)
Press the TV button to exit from the teletext display.
N
-
-
-
O
WallMountKitSpecications(VESA)
Install your wall mount on a solid wall perpendicular to the oor.
When attaching to other building materials, please contact your nearest dealer.
If installed on a ceiling or slanted wall, it may fall and result in severe personal injury.
Product Family inch VESA Spec. (A * B) Standard
Screw Quantity
LCD-TV
23 ~ 26 200 * 100 M4
4
32 ~ 40 200 * 200 M6
46 ~ 52 400 * 400
600 * 400
M8
57 700 * 400
(No VESA)
57 ~ 70 800 * 400
80 ~ 1400 * 800
PDP-TV
42 ~ 58 400 * 400
600 * 400
M8
4
63 676 * 407
(No VESA) 6
63 ~ 70 800 * 400 4
80 ~ 1400 * 800 4
We provided the standard dimensions for wall mount kits as shown in the table above.
When purchasing our wall mount kit, a detailed installation manual and all parts necessary for assembly are provided.
Do not use screws longer than the standard dimension, as they may cause damage to the inside of the TV set.
For wall mounts that do not comply with the VESA standard screw specifications, the length of the screws may differ
depending on their specifications.
Do not use screws that do not comply with the VESA standard screw specifications.
Do not use fasten the screws too strongly, this may damage the product or cause the product to fall, leading to personal injury.
Samsung is not liable for these kinds of accidents.
Samsung is not liable for product damage or personal injury when a non-VESA or non-specified wall mount is used or the
consumer fails to follow the product installation instructions.
Our 57” and 63” models do not comply with VESA Specifications. Therefore, you should use our dedicated wall mount kit for
this model.
Do not exceed 15 degrees tilt when mounting this TV.
Do not install your Wall Mount Kit while your TV is turned on.
It may result in personal injury due to electric shock.
N
N
N
N
N
N
N
N
BN68-01757A-Eng.indb 62 2008-09-24 오전 11:09:35
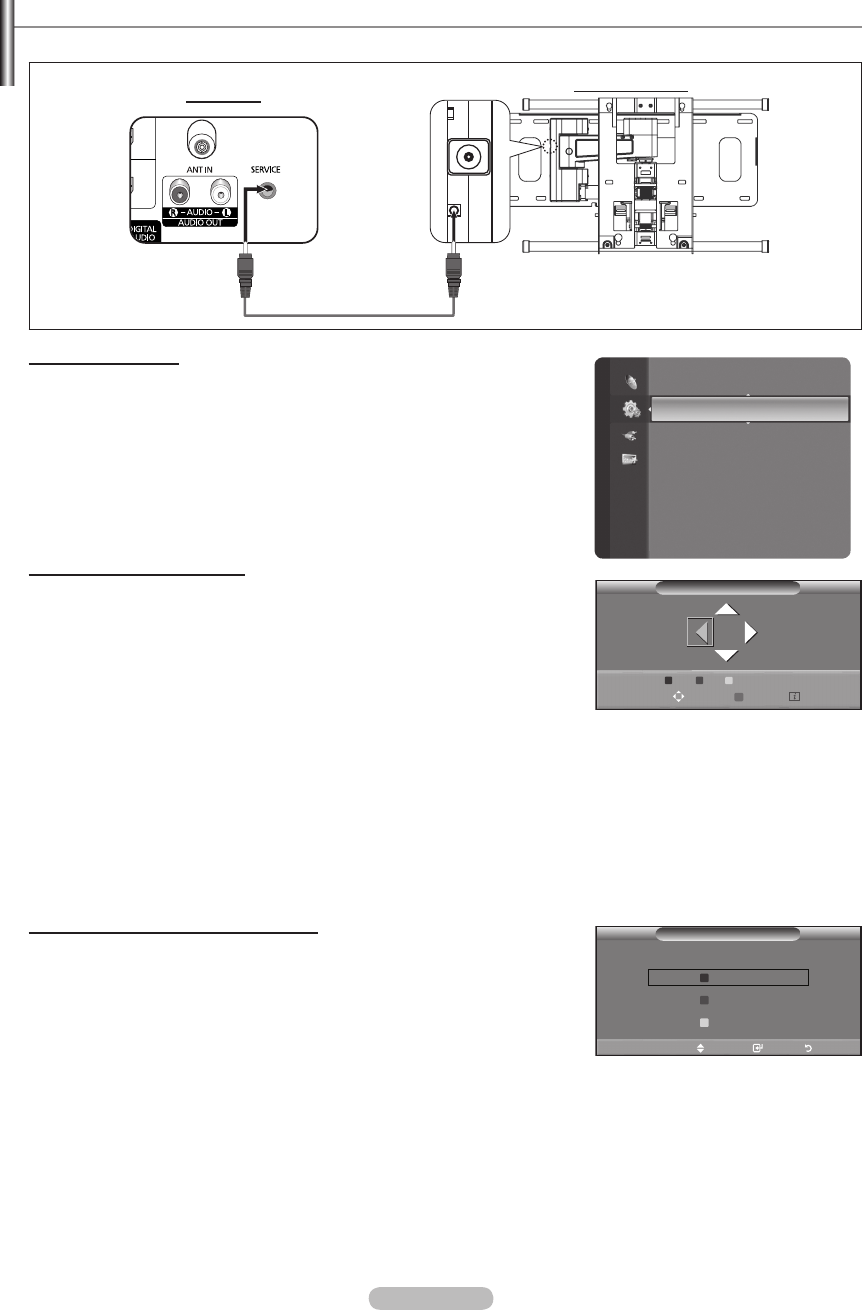
English - 63
Auto Wall-Mount Adjustment (Sold separately) (Depending on the model)
Once the auto wall mount is installed, your TV’s position can be easily adjusted.
Entering the menu
1. Press the ▲, ▼, ◄ or ► button on your remote control.
The Wall Mount Adjustment screen is displayed.
If the Auto Wall-Mount screen is not displayed when clicking on a direction
button while watching your TV, use the menu to display that screen.
Press the MENU button to display the menu. Press the ▲ or ▼ button to
select Setup, then press the ENTER
E
button.
Press the ▲ or ▼ button to select Wall-Mount Adjustment, then press
the ENTER
E
button.
Remembering the Position
2. Adjust to the desired position using the ▲,▼,◄,► buttons.
If you press an arrow button when no OSD is displayed on the TV screen,
the Adjustment screen appears.
Press the INFO button to reset. Press the ◄ or ► button to select Yes,
then press the ENTER
E
button. The position is initialized to the default
setting.
3. Press the blue button. Press the ▲ and ▼ buttons to select a save mode from
either Position 1, Position 2 or Position 3 in order to save the current position.
To not save the current position, press the RETURN button.
When selecting a save mode, you cannot use the Colour buttons.
4. Press the ENTER
E
button to save.
When Position1 is selected, the message Current position saved as Position1 is displayed.
5. Press the ENTER
E
button.
The saved Position appears on the left side of the OSD.
Moving to the remembered position
1. Complete Step 1 of Entering the menu.
2. Pressing a Colour (Red, Green, Yellow) button moves the auto wall mount to the
saved position.
You can move the wall mount to one of the 3 pre-set positions by pressing
the Red (Position 1), Green (Position 2) or Yellow (Position 3) buttons.
If you adjust the Position after moving to a pre-set position, the position
display will disappear.
For installation, refer to the Installation Manual provided with the wall mount.
For product installation and the installation and moving of the wall mount, make sure to consult a specialized installation
company.
This installation manual is to be used when attaching the wall mount to a wall. When attaching to other building materials,
please contact your nearest dealer.
The auto wall mount will not work when Anynet+ or WISELINK Pro is operating.
N
N
-
-
N
N
N
O
N
N
N
N
N
N
N
N
Setup
Digital Text : Enable
Light Effect : Watching TV
Wall-Mount Adjustment ►
Melody : Off
Entertainment : Off
Energy Saving : Off
PIP
Software Upgrade
Common Interface
Wall-Mount Adjustment
Position 1 2 3
Adjust Save Centre
Save
Select a mode to save.
Move Enter Return
Position1
Position2
Position3
Serial Cable(1P to 1P)(Not supplied)
Rear Panel Auto Wall-Mount
BN68-01757A-Eng.indb 63 2008-09-24 오전 11:09:36
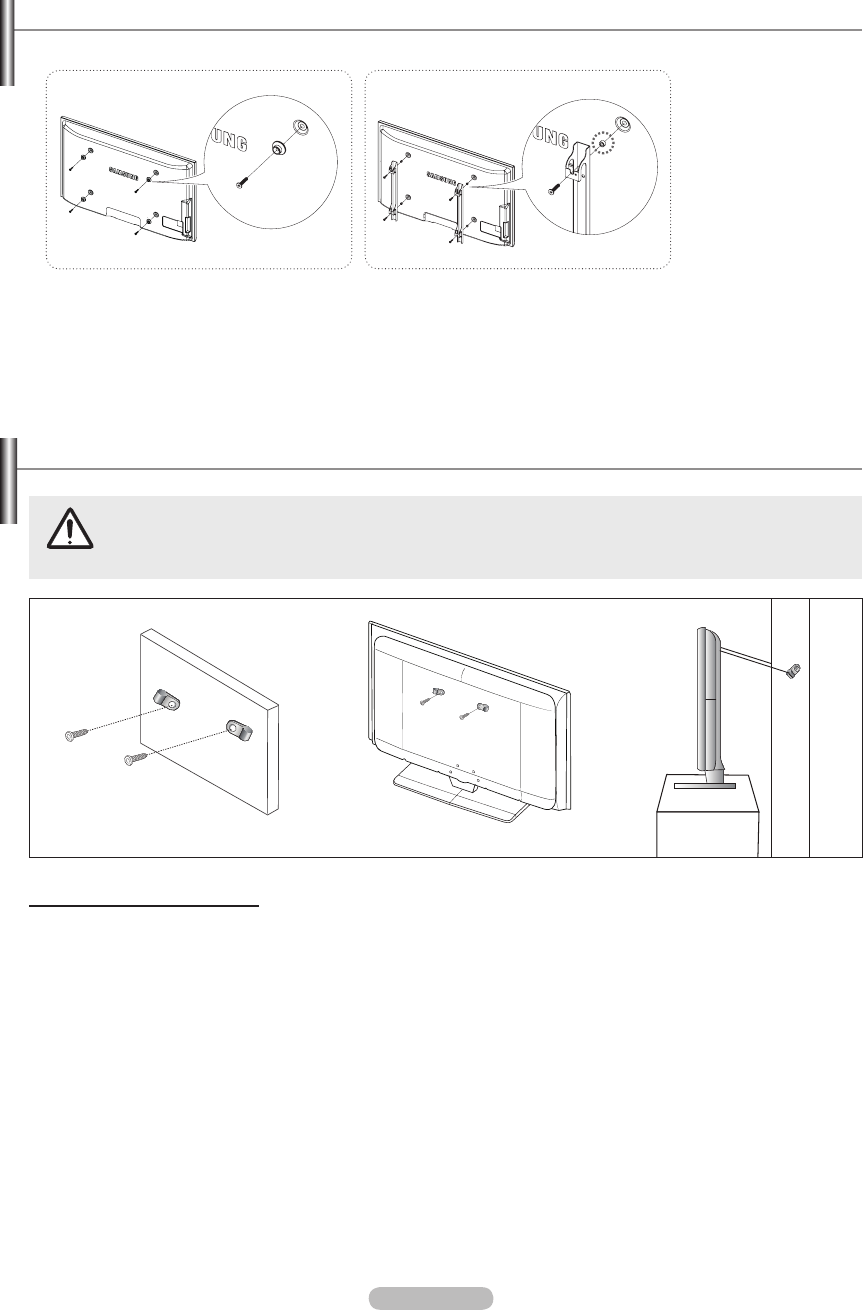
English - 64
Preparing before installing Wall- Mount on the wall
1. Install Wall Mount with the torque range of 15kgf·cm or less. Make sure that parts can be damaged if the torque is out of the
specied range.
2. Accessory Kit contains Holder–Ring [①] for installing other company’s Wall-Mount on Samsung TV. (Case B)
Case A. Installing SAMSUNG Wall-Mount Case B. Installing other company’s Wall-Mount
Pulling, pushing, or climbing on the TV may cause the TV to fall. In particular, ensure your children do not hang
over or destabilize the TV; doing so may cause the TV to tip over, causing serious injuries or death. Follow all
safety precautions provided on the included Safety Flyer. For added stability, install the anti-fall device for safety
purposes, as follows.
To avoid the TV from falling:
1. Put the screws into the clamps and rmly fasten them onto the wall. Conrm that the screws have been rmly installed onto
the wall.
You may need additional material such as an anchor depending on the type of wall.
Since the necessary clamps, screws, and string are not supplied, please purchase these additionally.
2. Remove the screws from the center back of the TV, put the screws into the clamps, and then fasten the screws onto the TV
again.
Screws may not be supplied with the product. In this case, Screws are sold separately.
3. Connect the clamps xed onto the TV and the clamps xed onto the wall with a strong string and then tie the string tightly.
Install the TV near to the wall so that it does not fall backwards
.
It is safe to connect the string so that the clamps fixed on the wall are equal to or lower than the clamps fixed on the TV.
Untie the string before moving the TV.
4. Verify all connections are properly secured. Periodically check connections for any sign of fatigue for failure. If you have any
doubt about the security of your connections,contact a professional installer.
N
N
N
N
N
N
경고 주의
경고 주의
Securing the TV to the Wall
Wall Wall
BN68-01757A-Eng.indb 64 2008-09-24 오전 11:09:37
English - 65
Troubleshooting
Before contacting the Samsung after-sales service, perform the following simple checks.
If you cannot solve the problem using the instructions below, note the model and serial number of the television and contact your
local dealer.
No sound or picture Check that the mains lead has been connected to a wall socket.
Check that you have pressed the button on your set.
Check the picture contrast and brightness settings.
Check the volume.
Check if Select Speaker is set to External Speaker.
•
•
•
•
•
Normal picture but no sound Check the volume.
Check whether the MUTEM button has been pressed on the remote control.
•
•
No picture or black and white
picture
Adjust the colour settings.
Check that the broadcast system selected is correct.
•
•
Sound and picture interference Try to identify the electrical appliance that is affecting the television, then move it further
away.
Plug the television into a different main socket.
•
•
Blurred or snowy picture,
distorted sound
Check the direction, location and connections of your aerial.
This interference often occurs due to the use of an indoor aerial.
•
•
Remote control malfunctions Replace the remote control batteries.
Clean the upper edge of the remote control (transmission window).
Check that the + and – ends of the batteries are inserted correctly.
Check that the batteries are drained.
•
•
•
•
Screen is black and power
indicator light blinks steadily
On your computer check; Power, Signal Cable.
Move the computer’s mouse or press any key on the keyboard.
On your equipment check (STB, DVD, etc) ; Power, Signal Cable.
The TV is using its power management system.
Press the Source button on the panel or remote control.
Turn the TV off and on.
•
•
•
•
•
•
The damaged picture appears in
the corner of the screen.
If Just Scan is selected in some external devices, the damaged picture may appear in the
corner of the screen. This symptom is caused by external devices, not TV.
•
The "Resets all settings to
the default values" message
appears.
This appears when you press and hold the EXIT button for a while. The product settings
are reset to the factory defaults.
•
BN68-01757F-Eng-3.indd 65 2008-09-24 오후 1:06:01

English - 66
Specications
The descriptions and characteristics in this booklet are given for information purposes only and are subject to modification without
notice.
Model Name PS50A756 PS63A756
Screen Size (Diagonal) 50 inch 63 inch
PC Resolution (Optimum) 1920 x 1080 @ 60 Hz 1920 x 1080 @ 60 Hz
Sound (Output) 10 W x 2 15 W x 2
Dimension (WxHxD)
Body
With stand 1240 x 766 x 96 mm
1240 x 830 x 315 mm 1531 x 932 x 99 mm
1531 x 1005 x 418 mm
Weight
Body
With stand 39 kg
44 kg 67 kg
84 kg
Environmental Considerations
Operating Temperature
Operating Humidity
Storage Temperature
Storage Humidity
50 °F to 104 °F (10 °C to 40 °C)
10% to 80%, non-condensing
-4 °F to 113 °F (-20 °C to 45 °C)
5% to 95%, non-condensing
This device is a Class B digital apparatus.
Design and specications are subject to change without prior notice.
For the power supply and Power Consumption, refer to the label attached to the product.
N
N
N
BN68-01757A-Eng.indb 66 2008-09-24 오전 11:09:37

Additional Terms of Service
1. ACCEPTANCE OF TERMS
Welcome to Yahoo! UK & Ireland. Yahoo! UK Limited (“Yahoo!”) provides its service to you, subject to the following Terms
of Service (“TOS”), which may be updated by Yahoo! from time to time without notice to you. You should review the TOS
periodically for changes at: http://uk.docs.yahoo.com/info/terms.html.
In addition, when using particular Yahoo! services, you and Yahoo! shall be subject to any guidelines and rules applicable
to such services which may be posted by Yahoo! from time to time. All such guides and rules are hereby incorporated by
reference into the TOS. In most cases the guides and rules are specic to a particular part of the Service and will assist you
in applying the TOS to that part, but to the extent of any inconsistency between the TOS and any guide or rule, the TOS will
prevail. Yahoo! may also offer services from time to time that are governed by other terms of service. In such cases the other
terms of service will be posted on the relevant service to which they apply.
2. DESCRIPTION OF SERVICE
Yahoo! currently provides users with access to a rich collection of on-line resources, including, various communications
tools, online forums, shopping services, personalised content and branded programming through its network of properties
(the “Service”). Unless explicitly stated otherwise, any new features that augment or enhance the current Service, including
the release of new Yahoo! properties, shall be subject to the TOS. You acknowledge and agree that the Service is provided
“AS IS” and that Yahoo! assumes no responsibility for the timeliness, deletion, mis-delivery or failure to store any user
communications or personalisation settings.
In order to use the Service, you must obtain access to the World Wide Web, either directly or through devices that access
web-based content, and pay any service and/or telephony fees associated with such access. In addition, you must provide
all equipment necessary to make such connection to the World Wide Web, including a computer and modem or other access
device. Please be aware that Yahoo! has created certain areas on the Service that contain adult or mature content. You must
be at least 18 years of age to access and view such areas.
3. YOUR REGISTRATION OBLIGATIONS AND SUPERVISING CHILDREN
In consideration of your use of the Service, you agree to: (a) provide true, accurate, current and complete information about
yourself as prompted by the Service’s registration form (such information being the “Registration Data”) and (b) maintain and
promptly update the Registration Data to keep it true, accurate, current and complete. If you provide any information that is
untrue, inaccurate, not current or incomplete, or Yahoo! has reasonable grounds to suspect that such information is untrue,
inaccurate, not current or incomplete, Yahoo! has the right to suspend or terminate your account and refuse any and all
current or future use of the Service (or any portion thereof).
Yahoo! is concerned about the safety and privacy of all its users, particularly children. For this reason, parents who wish to
allow their children access to the Service should assist them in setting up any relevant accounts and supervise their access
to the Service. By allowing your child access to the Service, they will be able to access all of the Services including, email,
message boards, groups, instant messages and chat (among others). Please remember that the Service is designed to appeal
to a broad audience. Accordingly, as the legal guardian, it is your responsibility to determine whether any of the Services
and/or Content (as dened in Section 6 below) are appropriate for your child.
4. YAHOO! PRIVACY POLICY
Registration Data and certain other information about you is subject to our Privacy Policy. For more information, please see
our full privacy policy at http://privacy.yahoo.com/privacy/uk
5. MEMBER ACCOUNT, PASSWORD AND SECURITY
You will receive a password and account designation upon completing the Service’s registration process. You are responsible
for maintaining the condentiality of the password and account, and are fully responsible for all activities that occur under your
password or account. You agree to (a) immediately notify Yahoo! of any unauthorised use of your password or account and
any other breach of security, and (b) ensure that you exit from your account at the end of each session. Yahoo! cannot and will
not be liable for any loss or damage arising from your failure to comply with this Section 5.
6. MEMBER CONDUCT
You acknowledge that all information, data, text, software, music, sound, photographs, graphics, video, messages and other
materials (“Content”), whether publicly posted or privately transmitted, are the sole responsibility of the person from which
such Content originated. This means that you, and not Yahoo! are entirely responsible for all Content that you upload, post,
email or otherwise transmit via the Service. Yahoo! does not control the Content posted via the Service and, as such, does not
guarantee the accuracy, integrity or quality of such Content. You acknowledge that by using the Service, you may be exposed
to Content that is offensive, indecent or objectionable. Under no circumstances will Yahoo! be liable in any way for any
Content, including, but not limited to, for any errors or omissions in any Content, or for any loss or damage of any kind incurred
as a result of the use of any Content posted, emailed or otherwise transmitted via the Service.
You agree to not use the Service to:
a. upload, post, email or otherwise transmit any Content that is unlawful, harmful, threatening, abusive, harassing,
tortious, defamatory, vulgar, obscene, libellous, invasive of another’s privacy, hateful, or racially, ethnically or otherwise
objectionable;
b. harm minors in any way;
c. impersonate any person or entity, including, but not limited to, a Yahoo! official, forum leader, guide or host, or falsely
state or otherwise misrepresent your affiliation with a person or entity;
d. forge headers or otherwise manipulate identifiers in order to disguise the origin of any Content transmitted through the
Service;
e. upload, post, email or otherwise transmit any Content that you do not have a right to transmit under any law or under
contractual or fiduciary relationships (such as inside information, proprietary and confidential information learned or
disclosed as part of employment relationships or under nondisclosure agreements);
BN68-01757A-Eng.indb 67 2008-09-24 오전 11:09:37
f. upload, post, email or otherwise transmit any Content that infringes any patent, trademark, trade secret, copyright or
other proprietary rights (“Rights”) of any party;
g. upload, post, email or otherwise transmit any unsolicited or unauthorised advertising, promotional materials, “junk mail,”
“spam,” “chain letters,” “pyramid schemes,” or any other form of solicitation, except in those areas (such as shopping
rooms) that are designated for such purpose;
h. upload, post, email or otherwise transmit any material that contains software viruses or any other computer code, files
or programs designed to interrupt, damage, destroy or limit the functionality of any computer software or hardware or
telecommunications equipment;
i. disrupt the normal flow of dialogue, cause a screen to “scroll” faster than other users of the Service are able to type, or
otherwise act in a manner that negatively affects other users’ ability to engage in real time exchanges;
j. interfere with or disrupt the Service or servers or networks connected to the Service, or disobey any requirements,
procedures, policies or regulations of networks connected to the Service;
k. intentionally or unintentionally violate any applicable law or regulation including, but not limited to, regulations
promulgated by any securities exchange;
l. “stalk” or otherwise harass another; or
m. extract, collect, process, combine or store personal data about other users.
You acknowledge that Yahoo! has no obligation to monitor Content. Yahoo! and its designees shall have the right (but not the
obligation) in their sole discretion to refuse, move or remove any Content that is available via the Service that violates the TOS
or is otherwise objectionable. You agree that you must evaluate, and bear all risks associated with, the use of any Content,
including any reliance on the accuracy, completeness, or usefulness of such Content.
You agree that Yahoo! may access, preserve, and disclose your account information and Content: (a) to its afliated
companies worldwide for the purpose of providing the Content to you in an efcient manner; (b) for the purpose of properly
administering your account in accordance with the standard operating procedures of Yahoo! or its afliated companies; and (c)
if required to do so by law or in the good faith belief that any such access, preservation or disclosure is reasonably necessary
to: (i) comply with legal process; (ii) enforce the TOS; (iii) respond to claims that any Content violates the rights of third-parties;
(iv) respond to your requests for customer service; or (v) protect the rights, property, or personal safety of Yahoo!, its users
and the public.
You acknowledge that the technical processing and transmission of the Service, including your Content, may involve
transmissions over various networks and changes to conform and adapt to technical requirements of connecting networks or
devices. Yahoo! reserves the right to terminate your access to some or all parts of its Service if you withdraw your consent in
this paragraph at any time.
7. SPECIAL ADMONITIONS FOR INTERNATIONAL USE
Recognising the global nature of the Internet, you agree to comply with all local laws and rules regarding online conduct
and acceptable Content. Specically, you agree to comply with all applicable laws regarding the transmission of technical
data exported from the United Kingdom, the United States and the country in which you reside (if different from the
aforementioned). When you are on any international Yahoo! property, you are bound by the Terms of Service and applicable
laws governing that Yahoo! property.
8. PUBLIC CONTENT POSTED TO YAHOO!
a. For purposes of the TOS, “publicly accessible areas” of the Service are those accessible by the general public. By way
of example, a publicly accessible area of the Service would include public Yahoo! Groups, Yahoo! Answers and Yahoo!
Message Boards, but would not include unlisted Yahoo! Groups or private Yahoo! communication services such as
Yahoo! Mail or Yahoo! Messenger. You acknowledge that you are solely responsible for any personal data or information
that you choose to disclose and make publicly accessible via the Service, and that under no circumstances will Yahoo!
be liable in any way for the disclosure and public accessibility of such personal data or information. You acknowledge
that any personal data or information (or any other Content) posted to publicly accessible areas may remain publicly
accessible indefinitely.
b. With respect to Content you elect to post for inclusion in publicly accessible areas of Yahoo! Groups or that consists
of photos or other graphics you elect to post to any other publicly accessible area of the Service, you grant Yahoo! a
world-wide, royalty free and non-exclusive licence to reproduce, modify, adapt and publish such Content on the Service
solely for the purpose of displaying, distributing and promoting the specific Yahoo! Group to which such Content was
submitted, or, in the case of photos or graphics, solely for the purpose for which such photo or graphic was submitted to
the Service. This licence exists only for as long as you elect to continue to include such Content on the Service and shall
be terminated at the time you delete such Content from the Service.
c. With respect to all other Content you elect to post to other publicly accessible areas of the Service, you grant Yahoo! the
royalty-free, perpetual, irrevocable, non-exclusive and fully sub-licensable right and licence to use, reproduce, modify,
adapt, publish, translate, create derivative works from, distribute, perform and display such Content (in whole or part)
worldwide and/or to incorporate it in other works in any form, media, or technology now known or later developed.
9. INDEMNITY
You agree to indemnify and hold Yahoo! and its subsidiaries, afliates, ofcers, agents, co-branders and other partners, and
employees, harmless from any claim or demand, including reasonable attorneys’ fees, made by any third party due to or
arising out of Content you submit, post to or transmit through the Service, your use of the Service, your connection to the
Service, your violation of the TOS, or your violation of any rights of another.
10. NO RESALE OF SERVICE
You agree not to reproduce, duplicate, copy, sell, resell or exploit for any commercial purposes, any portion of the Service, use
of the Service, or access to the Service.
BN68-01757A-Eng.indb 68 2008-09-24 오전 11:09:37
11. GENERAL PRACTICES REGARDING USE AND STORAGE
You acknowledge that Yahoo! may establish general practices and limits concerning use of the Service, including with out
limitation the maximum number of days that email messages, message board postings or other uploaded Content will be
retained by the Service, the maximum number of email messages that may be sent from or received by an account on
the Service, the maximum size of any email message that may be sent from or received by an account on the Service,
the maximum disk space that will be allotted on Yahoo’s servers on your behalf, and the maximum number of times (and
the maximum duration for which) you may access the Service in a given period of time. You agree that Yahoo! has no
responsibility or liability for the deletion or failure to store any messages and other communications or other Content
maintained or transmitted by the Service. You acknowledge that Yahoo! reserves the right to log off accounts that are inactive
for an extended period of time. You further acknowledge that Yahoo! reserves the right to change these general practices and
limits at any time, in its sole discretion, with or without notice.
12. MODIFICATIONS TO SERVICE
Yahoo! reserves the right at any time and from time to time to modify or discontinue, temporarily or permanently, the Service
(or any part thereof) with or without notice. You agree that Yahoo! shall not be liable to you or to any third party for any
modication, suspension or discontinuance of the Service.
13. TERMINATION
You agree that Yahoo! in its sole discretion, may terminate your password, account (or any part thereof) or use of t he
Service, and remove and discard any Content within the Service, for any reason, including, without limitation, for lack of use
or if Yahoo! believes that you have violated or acted inconsistently with the letter or spirit of the TOS. Yahoo! may also in
its sole discretion and at any time discontinue providing the Service, or any part thereof, with or without notice. You agree
that any termination of your access to the Service under any provision of this TOS may be effected without prior notice, and
acknowledge and agree that Yahoo! may immediately deactivate or delete your account and all related information and les
in your account and/or bar any further access to such les or the Service. Further, you agree that Yahoo! shall not be liable to
you or any third-party for any termination of your access to the Service.
14. DEALINGS WITH ADVERTISERS AND MERCHANTS
Your correspondence or business dealings with, or participation in promotions of, advertisers and merchants found on or
through the Service, including payment and delivery of related goods or services, and any other terms, conditions, warranties
or representations associated with such dealings, are solely between you and such advertiser or merchant. To the fullest
extent permitted by applicable law, you agree that: (a) Yahoo! shall not be responsible or liable for any loss or damage of
any kind incurred as the result of any such dealings or as the result of the presence of such advertisers and merchants on
the Service, and (b) any orders placed by you on, and any product specications and product availability appearing on,
the Service (including, without limitation, Yahoo! Shopping) are subject to conrmation by, and the terms and conditions of
business of, the relevant Merchant.
15. LINKS
The Service may provide, or third parties may provide, links to other World Wide Web sites or resources. Because Yahoo!
has no control over such sites and resources, you acknowledge and agree that Yahoo! is not responsible for the availability of
such external sites or resources, and does not endorse and is not responsible or liable for any Content, advertising, products,
or other materials on or available from such sites or resources. You further acknowledge and agree that Yahoo! shall not be
responsible or liable, directly or indirectly, for any damage or loss caused or alleged to be caused by or in connection with use
of or reliance on any such Content, goods or services available on or through any such site or resource.
16. YAHOO’S PROPRIETARY RIGHTS
You acknowledge and agree that the Service and any necessary software used in connection with the Service (“Software
“) contain proprietary and condential information that is protected by applicable intellectual property and other laws. You
further acknowledge and agree that Content contained in sponsor advertisements or information presented to you through
the Service or advertisers is protected by copyrights, trademarks, service marks, patents or other proprietary rights and laws.
Except as expressly authorised by Yahoo! or advertisers, you agree not to modify, rent, lease, loan, sell, distribute or create
derivative works based on the Service or the Software, in whole or in part.
Yahoo! grants you a personal, non-transferable and non-exclusive right and licence to use the object code of its Software
on a single computer; provided that you do not (and do not allow any third party to) copy, modify, create a derivative work
of, reverse engineer, reverse assemble or otherwise attempt to discover any source code, sell, assign, sublicence, grant a
security interest in or otherwise transfer any right in the Software. The foregoing is subject to applicable statute and other
express law. You agree not to modify the Software in any manner or form, or to use modied versions of the Software,
including (without limitation) for the purpose of obtaining unauthorised access to the Service. You agree not to access the
Service by any means other than through the interface that is provided by Yahoo! for use in accessing the Service.
17. DISCLAIMERS
YOU EXPRESSLY ACKNOWLEDGE AND AGREE THAT:
a. YOUR USE OF THE SERVICE IS AT YOUR SOLE RISK. THE SERVICE IS PROVIDED ON AN “AS IS” AND “AS
AVAILABLE” BASIS. TO TH E FULLEST EXTENT PERMITTED BY APPLICABLE LAW, YAHOO! EXPRESSLY
DISCLAIMS ALL WARRANTIES, CONDITIONS AND OTHER TERMS OF ANY KIND, WHETHER EXPRESS OR
IMPLIED, INCLUDING, BUT NOT LIMITED TO ANY IMPLIED TERM OF MERCHANTABILITY, SATISFACTORY Q
UALITY, FITNESS FOR A PARTICULAR PURPOSE, AND ANY TERM AS TO THE PROVISION OF SERVICES TO
A STANDARD OF REASONABLE CARE AND SKILL OR AS TO NON-INFRINGEMENT OF ANY INTELLECTUAL
PROPERTY RIGHT.
b. YAHOO! MAKES NO WARRANTY OR REPRESENTATION THAT (i) THE SERVICE WILL MEET YOUR
REQUIREMENTS, (ii) THE SERVICE WILL BE UNINTERRUPTED, TIMELY, SECURE, OR ERROR-FREE, (iii) THE
RESULTS THAT MAY BE OBTAINED FROM THE USE OF THE SERVICE WIL L BE ACCURATE OR RELIABLE, (iv)
THE QUALITY OF ANY PRODUCTS, SERVICES, INFORMATION, OR OTHER MATERIAL PURCHASED OR OBTA
INED BY YOU THROUGH THE SERVICE WILL MEET YOUR EXPECTATIONS, AND (V) ANY ERRORS IN THE
SOFTWARE WILL BE CORRECTED.
BN68-01757A-Eng.indb 69 2008-09-24 오전 11:09:37
C. ANY MATERIAL DOWNLOADED OR OTHERWISE OBTAINED THROUGH THE USE OF THE SERVICE IS DONE
AT YOUR OWN DISCRETION AND RIS K AND THAT YOU WILL BE SOLELY RESPONSIBLE FOR ANY DAMAGE
TO YOUR COMPUTER SYSTEM OR LOSS OF DATA THAT RESULTS FROM THE DOWNLOAD OF ANY SUCH
MATERIAL.
D. NO ADVICE OR INFORMATION, WHETHER ORAL OR WRITTEN, OBTAINED BY YOU FROM YAHOO! OR THROUGH
OR FROM THE SERVICE SHALL CREATE ANY WARRANTY OR OTHER OBLIGATION NOT EXPRESSLY STATED IN
THE TOS.
18. LIMITATION OF LIABILITY
YOU EXPRESSLY ACKNOWLEDGE AND AGREE THAT YAHOO! SHALL NOT BE LIABLE FOR ANY DIRECT, INDIRECT,
INCIDENTAL, SPECIAL, CONSEQUENTIAL OR EXEMPLARY DAMAGES, INCLUDING BUT NOT LIMITED TO, DAMAGES
FOR LOSS OF PROFITS, GOODWILL, USE, DATA OR OTHER INTANGIBLE LOSSES (EVEN IF YAHOO! HAS BEEN
ADVISED OF THE POSSIBILITY OF SUCH DAMAGES), RESULTING FROM: (i) THE USE OR THE INABILITY TO
USE THE SERVICE; (ii) THE COST OF PROCUREMENT OF SUBSTITUTE GOODS AND SERVICES RESULTING
FROM ANY GOODS, DATA, INFORMATION OR SERVICES PURCHASED OR OBTAINED OR MESSAGES RECEIVED
OR TRANSACTIONS ENTERED INTO THROUGH OR FROM THE SERVICE; (iii) UNAUTHORIZED ACCESS TO OR
ALTERATION OF YOUR TRANSMISSIONS OR DATA; (iv) STATEMENTS OR CONDUCT OF ANY THIRD PARTY ON THE
SERVICE; OR (v) ANY OTHER MATTER RELATING TO THE SERVICE.
YOU AGREE THAT REGARDLESS OF ANY STATUTE OR LAW TO THE CONTRARY, ANY CLAIM OR CAUSE OF ACTION
ARISING OUT OF OR RELA TED TO USE OF THE SERVICE OF THESE TOS MUST BE FILED WITHIN ONE (1) YEAR
AFTER SUCH CLAIM OR CAUSE OF ACTION AROSE OR BE FOREVER BARRED.
19. EXCLUSIONS AND LIMITATIONS
SOME JURISDICTIONS DO NOT ALLOW THE EXCLUSION OF CERTAIN WARRANTIES OR THE LIMITATION OR
EXCLUSION OF LIABILITY FOR INCIDENTAL OR CONSEQUENTIAL DAMAGES. ACCORDINGLY, SOME OF THE ABOVE
LIMITATIONS OF SECTIONS 17 AND 18 MAY NOT APPLY TO YOU.
IN PARTICULAR, NOTHING IN THESE TOS SHALL AFFECT THE STATUTORY RIGHTS OF ANY CONSUMER OR
EXCLUDE OR RESTRICT ANY LIA BIITY FOR DEATH OR PERSONAL INJURY ARISING FROM THE NEGLIGENCE OR
FRAUD OF YAHOO!.
20. SPECIAL ADMONITION FOR SERVICES RELATING TO FINANCIAL MATTERS
If you intend to create or join any service, receive or request any news, messages, alerts or other information from the Service
concerning companies, stock quotes, investments or securities, please read the above Sections 17 and 18 again. They go
doubly for you. In addition, for this type of information particularly, the phrase “Let the investor beware” is apt. The Service is
provided for informational purposes only, and no Content included in the Service is intended for trading or investing purposes.
Yahoo! shall not be responsible or liable for the accuracy, usefulness or availability of any information transmitted via the
Service, and shall not be responsible or liable for any trading or investment decisions made based on such information.
21. NOTICE
Notices to you may be made via either email or regular mail. The Service may also provide notices of changes to the TOS or
other matters by displaying notices or links to notices to you generally on the Service.
22. TRADEMARK INFORMATION
Yahoo!, the Yahoo! logo, Yahoo! in Chinese Characters, Yahooligans!, the Yahooligans! logo, YAHOO! KIDS, Yahoo! Kids
logo, the “Jumpin Y Guy” logo, Do you Yahoo!?, Y!, Y! stylised, My Yahoo!, Eyeballs design, Homework Answers, The
Scoop, Get Local, the Worlds Favorite Internet Guide, the Sunglasses design, e Café Yahoo!, Viaweb, Shop Find, EZSpree,
EZWheels, I Shops, Permission Marketing, Yoyodyne, Get Rich Click, and Geocities trademarks and service marks, and
other Yahoo! logos and product and service names are trademarks of Yahoo! Inc. (the “Yahoo! Marks”). Without Yahoo’s prior
permission, you agree not to display or use in any manner, the Yahoo! Marks.
23. COPYRIGHTS and COPYRIGHT AGENTS
Yahoo! respects the intellectual property of others, and we ask our users to do the same. If you believe that any of your
intellectual property rights have been infringed on the Service, please go to our copyright policy to report the problem.
24. GENERAL INFORMATION
These TOS (including the guides and rules referred to herein) constitute the entire agreement between you and Yahoo! and
govern your use of the Service, superseding any prior agreements between you and Yahoo! You also may be subject to
additional terms and conditions that may apply when you use afliate services, third-party content or third-party software. The
TOS and the relationship between you and Yahoo! shall be governed by the laws of England. You and Yahoo! agree to submit
to the exclusive jurisdiction of the English courts. Any failure by Yahoo! to exercise or enforce any right or provision of the TOS
shall not constitute a waiver of such right or provision. If any provision of the TOS is found by a court of competent jurisdiction
to be invalid, the parties nevertheless agree that the court should endeavour to give effect to the parties’ intentions as reected
in the provision, and the other provisions of the TOS remain in full force and effect.
Neither you nor Yahoo! may assign or transfer any rights or obligations under these TOS without the prior written consent of
the other party, except that Yahoo! shall be entitled to assign or transfer any or all of its rights and obligations (without your
prior consent) to any of its afliated companies.
The section titles in the TOS are for convenience only and have no legal or contractual effect. No Right of Survivorship and
Non-Transferability. You agree that your Yahoo! account is non-transferable and any rights to your Yahoo! ID or contents
within your account terminate upon your death. Any free account that has not been used for a certain period of time may be
terminated and all contents therein permanently deleted in line with Yahoo!’s policy.
25. VIOLATIONS
Please report any violations of the TOS to Yahoo! Customer Care.
BN68-01757A-Eng.indb 70 2008-09-24 오전 11:09:37
This page is intentionally
left blank.
BN68-01757A-Eng.indb 71 2008-09-24 오전 11:09:37

Correct Disposal of This Product
(Waste Electrical & Electronic Equipment)
(Applicable in the European Union and other European countries with
separate collection systems)
This marking shown on the product or its literature, indicates that it
should not be disposed with other household wastes at the end of its
working life.
To prevent possible harm to the environment or human health from
uncontrolled waste disposal, please separate this from other types of
wastes and recycle it responsibly to promote the sustainable reuse of
material resources.
Household users should contact either the retailer where they
purchased this product, or their local government office, for details
of where and how they can take this item for environmentally safe
recycling.
Business users should contact their supplier and check the terms and
conditions of the purchase contract. This product should not be mixed
with other commercial wastes for disposal.
BN68-01757A-Eng.indb 72 2008-09-24 오전 11:09:37
Français - 2
Instructions d’utilisation
Rémanence à l’écran
Ne figez pas d’images (telle qu’une image de jeu vidéo ou de PC branché à l’écran à plasma) sur l’écran du moniteur à
plasma pendant plus de deux heures car cela peut entraîner une rémanence à l’écran. Cette rémanence est également
appelée “brûlure d’écran”. Pour éviter la rémanence, réduisez le niveau de contraste ou de luminosité de l’écran lorsque vous
affichez une image figée.
Hauteur
L’écran à plasma est normalement conçu pour être utilisé à une altitude inférieure à 2000 m. Il peut fonctionner de façon
anormale au-dessus de 2000 m d’altitude. Ne l’installez pas et ne le faites donc pas fonctionner dans ces conditions.
Chaleur diffusée sur la partie supérieure du téléviseur à plasma
Le dessus de l’appareil peut chauffer en cas d’utilisation prolongée, car la chaleur s’échappe du panneau par le trou d’
aération situé dans la partie supérieure du produit. Ce phénomène est normal et n’indique aucunement la présence d’un
défaut ou d’un dysfonctionnement. Il convient cependant d’empêcher les enfants de toucher à la partie supérieure de l’écran.
Le produit fait un bruit de “claquement”.
Ce bruit de “claquement” risque d’être perceptible lorsque le produit se contracte ou s’étend suite à un changement du milieu
ambiant, tel que la température ou l’humidité. Ce phénomène est normal et ne constitue pas un défaut.
Défauts de cellule
L’écran à plasma utilise un panneau constitué de 1 230 000 (niveau SD) à 3 150 000 (niveau HD) pixels dont la fabrication
fait appel à une technologie avancée. Il se peut toutefois que des points clairs ou sombres apparaissent à l’écran. Ils n’ont
aucune incidence sur la performance du produit.
Evitez d’utiliser le téléviseur à plasma à des températures inférieures à 5°C (41°F).
Une image figée affichée pendant une période prolongée peut endommager définitivement l’écran PDP.Visionner
pendant longtemps le téléviseur à plasma en format 4/3 risque de laisser apparaître des traces de
bordures sur la gauche, sur la droite et au centre de l’écran. Ces traces sont dues à la différence de
luminosité sur l’écran. Lire un DVD ou un jeu vidéo sur console risque de provoquer un effet similaire sur
l’écran. Les dommages provoqués par l’effet susmentionné ne sont pas couverts par la garantie.
Rémanence de l’image à l’écran.
Une rémanence partielle de l’image peut éventuellement se produire si des images figées de jeux vidéo et d’un PC restent
affichées pendant un certain temps. Pour empêcher ce phénomène, réduisez la luminosité et le contraste en cas d’affichage
d’images figées.
Garantie
- La garantie ne couvre pas les dommages causés par la rémanence.
- Les brûlures ne sont pas couvertes par la garantie.
Installation
Contacter un centre de service agréé si le téléviseur est destiné à une installation dans des endroits exposés à la poussière,
à des températures faibles ou élevées, à une forte humidité, à des substances chimiques et s’il a été prévu pour fonctionner
en permanence, comme dans des aéroports, des gares ferroviaires, etc. Le non-respect de ce qui précède peut gravement
endommager le téléviseur.
Avertissement concernant les téléviseurs numériques (DVB-T)
1. LES FONCTIONS RELATIVES À LA TÉLÉVISION NUMÉRIQUE (DVB) NE SONT DISPONIBLES QUE DANS LES
PAYS OU RÉGIONS OÙ DES SIGNAUX TERRESTRES NUMÉRIQUES DE TYPE DVB-T (MPEG2 er MPEG4 AVC)
SONT DIFFUSÉS. DVB-T est le standard du consortium européen pour la diffusion de signaux terrestres de télévision
numérique. Consultez votre distributeur local pour savoir si des services DVB-T sont disponibles dans votre région.
2. Bien que ce téléviseur soit conforme à la norme DVB-T (août 2008), il n’est pas garanti qu’il soit compatible avec les
futures émissions terrestres numériques DVB-T.
3. Il se peut que certaines fonctions de TV numérique ne soient pas disponibles ou ne fonctionnent pas correctement dans
certains pays ou certaines régions.
4. Pour plus d’informations, contactez votre service client de SAMSUNG.
Comment contacter Samsung dans le monde
Si vous avez des suggestions ou des questions concernant les produits Samsung, veuillez contacter le Service
Consommateurs Samsung.(Voir la quatrième de couverture pour plus d’informations.)
© 2008 Samsung Electronics Co., Ltd. All rights reserved.
BN68-01757A-Fre.indb 2 2008-9-24 15:04:20

N O T
Symbole Appuyez sur Remarque Bouton tactile Bouton TOOL
Français - 3
Branchement et installation de votre téléviseur
Instructions d’utilisation .......................................................2
Vérication des pièces ........................................................4
Utilisation de la base-support ..............................................4
Assemblage de la base-support
(en fonction du modèle) .......................................................4
Présentation du panneau de commande ............................5
Présentation du panneau de branchement .........................6
Télécommande ....................................................................8
Insertion des piles dans la télécommande ..........................9
Mise en marche et arrêt ......................................................9
Mise en mode veille de votre téléviseur ..............................9
Afchage des menus .........................................................10
Utilisation du bouton TOOLS. ............................................10
Utilisation du cercle de boutons ........................................10
Fonction Plug & Play .........................................................11
Gestion des canaux
Mémorisation des chaînes ................................................11
Gestion des chaînes ..........................................................14
Réglage de l’image
Modication et rétablissement des paramètres d’image ...15
Visualisation d’une image dans l’image.............................19
Conguration du téléviseur avec le PC .............................19
Ecran du PC ......................................................................20
Réglage du son
Changement de la norme Son ..........................................21
Sélection du mode Son .....................................................22
Description des fonctions
Utilisation du menu Setup .................................................23
Réglage de l’heure ............................................................26
Connexion réseau .............................................................27
Conguration du réseau ....................................................29
Liste Source / Modif. Nom .................................................31
Guide Produit ....................................................................31
WISELINK Pro
Connexion d’un périphérique USB ....................................32
Utilisation de la fonction WISELINK Pro ............................33
Utilisation et tri de la liste des photos ................................35
Visualisation d’une photo ou d’un diaporama ...................36
Utilisation et tri de la Liste musicale ..................................38
Lecture de musique ...........................................................39
Utilisation et tri de la Liste des lms ..................................40
Lecture d’un chier lm ....................................................41
Suppression d’un chier photo/musical/lm .....................42
Réglage des paramètres d’image/audio à l’aide de
WISELINK Pro ...................................................................43
Utilisation du menu Conguration .....................................43
■
■
■
■
■
■
■
■
■
■
■
■
■
■
■
■
■
■
■
■
■
■
■
■
■
■
■
■
■
■
■
■
■
■
■
■
■
■
■
WISELINK Pro-DLNA
Dénition du réseau DLNA ................................................44
Installation de l’application DLNA ......................................44
Utilisation de l’application DLNA ........................................46
Utilisation de la fonction DLNA ..........................................49
Content Library
Activation de la Content Library .......................................50
Utilisation de la bibliothèque de contenu ...........................51
Utilisation de contenu supplémentaire à l’aide d’une
unité de stockage USB externe .........................................52
A propos de Anynet+
Connexion d’appareils Anynet+ .........................................53
Conguration d’Anynet+ ....................................................54
Recherche d’appareils Anynet+ et basculement entre des
appareils ............................................................................54
Enregistrement ..................................................................55
Ecoute via un récepteur (home cinéma) ...........................56
Dépannage d’Anynet+ .......................................................56
InfoLive
Utilisation d’InfoLive ..........................................................57
Utilisation du service Météo ..............................................58
Utilisation du service Actualités .........................................58
Utilisation du service La Bourse ........................................59
Conguration d’InfoLive .....................................................60
Conseils d’utilisation
Fonction Télétexte .............................................................61
Caractéristiques du kit de xation murale (VESA) ............62
Réglage de la xation murale automatique (vendue
séparément) ......................................................................63
Préparation avant l’installation d’un dispositif de xation
murale ...............................................................................64
Montage mural du téléviseur .............................................64
Dépannage ........................................................................65
Caractéristiques ................................................................66
■
■
■
■
■
■
■
■
■
■
■
■
■
■
■
■
■
■
■
■
■
■
■
■
■
Français
Sommaire
BN68-01757A-Fre.indb 3 2008-9-24 15:04:20
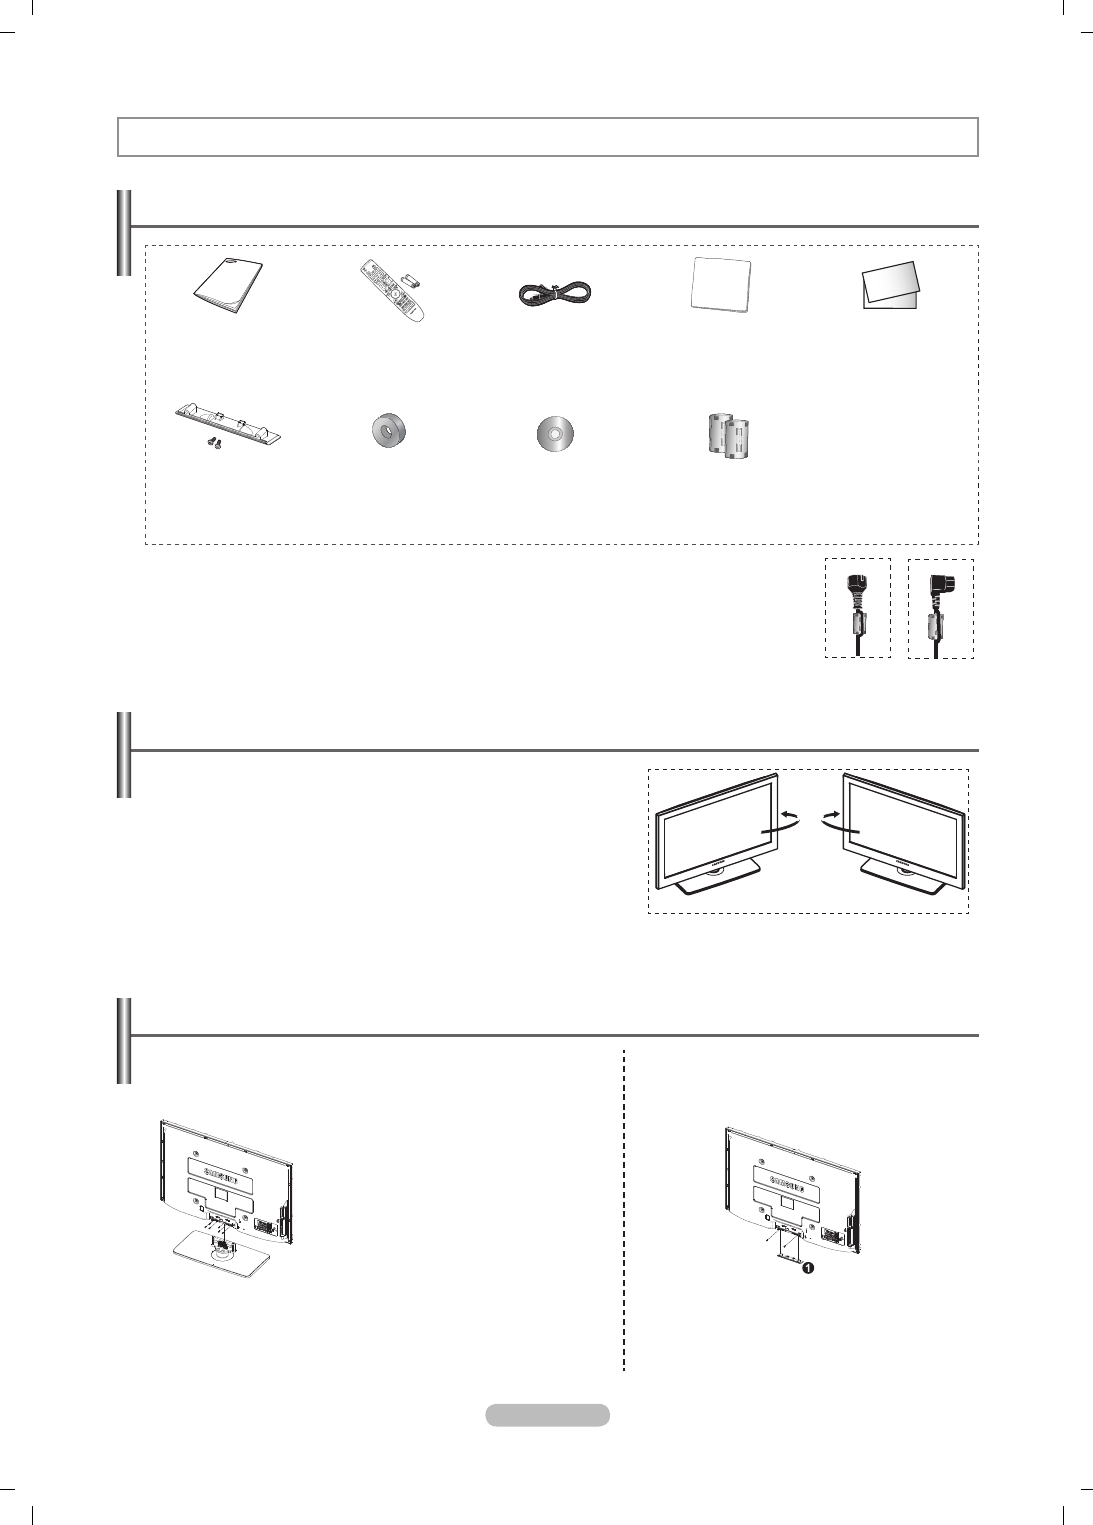
Français - 4
Assemblage de la base-support (en fonction du modèle)
Au moyen des 6 vis permettant de solidariser la base-support et le TV,
fixez fermement le TV à la base-support.
(L’aspect extérieur de votre téléviseur peut différer de celui présenté à l’
image.)
Si vous fixez le téléviseur au mur, Refermez le
couvercle (1) de la pièce de connexion de la base-
support à l’aide des deux vis.
Avertissement
Fixez fermement le socle au téléviseur
avant de déplacer ce dernier. Il pourrait
tomber et provoquer de graves dommages.
Le téléviseur doit être soulevé par
plusieurs personnes. Ne posez jamais
le téléviseur sur le sol car cela pourrait
l’endommager.
Conservez toujours le téléviseur en
position verticale.
N
Vérification des pièces
Manuel d'utilisation Télécommande/
Piles AAA (2ea)
Cordon d'alimentation
Chiffon de nettoyage
Carte de garantie/ Manuel
de sécurité (Non disponible
dans tous les pays)
Capot inférieur / Vis (2ea)
(PS50A756)
Anneau de support (4ea)
(reportez-vous à la page 64)
CD du programme
Tore magnétique pour
cordon d’alimentation
(2ea)
Utilisation de la base-support
L’écran à plasma doit être soulevé par plusieurs personnes. Ne posez
jamais l’écran à plasma sur le sol, car cela pourrait l’endommager.
Conservez toujours l’écran en position verticale.
Le PDP peut pivoter de 20 degrés vers la droite et la gauche.
N
N
Branchement et installation de votre téléviseur
-20° ~ 20°
Tore magnétique (Cordon d'alimentation)
Le blindage magnétique sert à protéger les câbles des interférences. Lors de la connexion d’un
câble, ouvrez le blindage magnétique et rabattez-le autour du câble près de la prise.
N
BN68-01757A-Fre.indb 4 2008-9-24 15:04:24
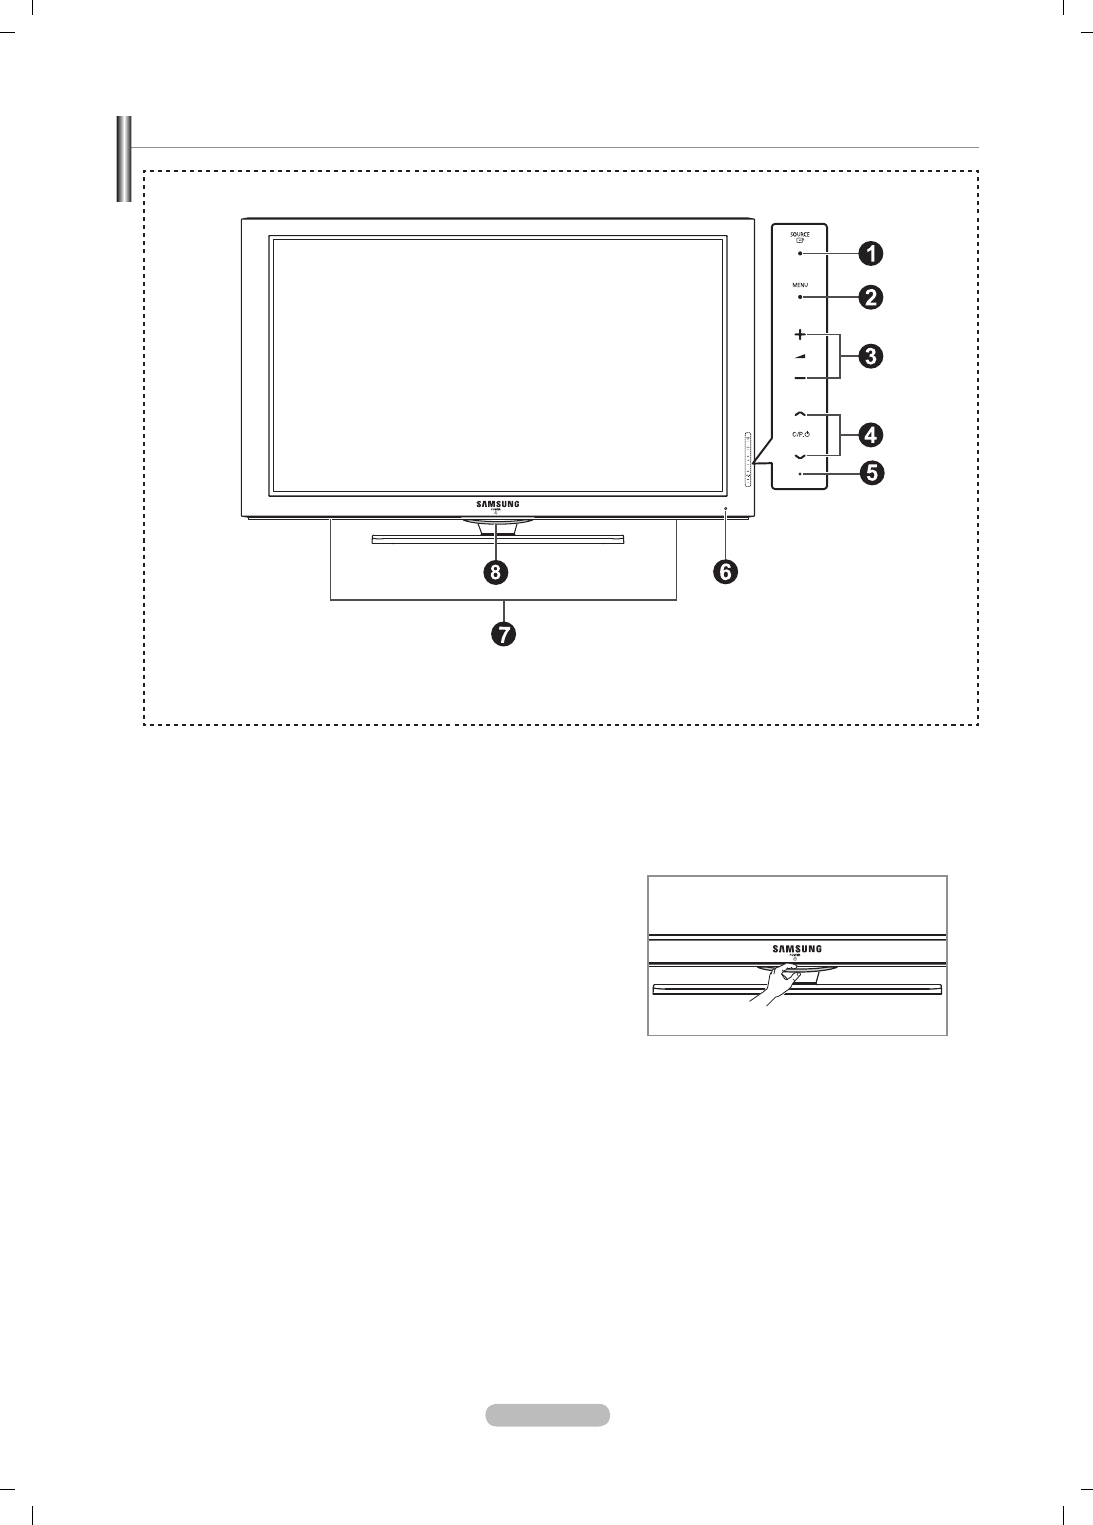
Français - 5
Présentation du panneau de commande
La couleur et la forme du produit peuvent varier en fonction du modèle.
N
Boutons en façade
Touchez les boutons
pour les actionner.
1
SOURCE
E
Permet de basculer entre les sources d'entrée disponibles
(TV, Ext1, Ext2, AV, S-Video, Component, PC, HDMI1,
HDMI2/DVI, HDMI3, HDMI4, USB, DLNA).
Dans le menu à l'écran, ce bouton a la même fonction
que le bouton ENTER de la télécommande.
2
MENU
Permet d’afcher le menu des fonctions de votre téléviseur
sur l’écran.
3
–
=
+
Appuyez pour augmenter ou réduire le volume. Dans le
menu afché à l’écran, utilisez les boutons
–
=
+
de la
même façon que les boutons ◄ et ► de la télécommande.
4
<
C/P.
P
>
Permet de changer de canal. Dans le menu afché à l’
écran, utilisez les boutons
<
C/P.
P
>
de la même
façon que les boutons ▲ et ▼ de la télécommande. Le
bouton
<
C/P.
P
>
vous permet d'allumer le téléviseur
sans votre télécommande.
5
TÉMOIN D’ALIMENTATION
Clignote et s’éteint lorsqu’il est sous tension et
s’allume en mode Veille.
6
CAPTEUR DE LA TÉLÉCOMMANDE
Dirigez la télécommande vers ce point du téléviseur.
N
7
HAUT-PARLEUR
8
P
(POWER)
Touchez le capteur argenté sous la marque (
P
) pour
mettre le téléviseur sous et hors tension.
Capteur argenté
BN68-01757A-Fre.indb 5 2008-9-24 15:04:24

Français - 6
Présentation du panneau de branchement
En cas de branchement d’un système audio ou vidéo sur le téléviseur, vérifiez que tous les appareils sont éteints.
Lorsque vous branchez un périphérique externe, faites correspondre les couleurs de la borne de connexion et du câble.
N
N
Panneau arrière
Télévision câblée
Réseau
ou
ou
ou
1
5 7 96
0
83 4
La couleur et la forme du produit peuvent varier en fonction du modèle.
N
1
ENTREE ALIMENTATION
Permet de raccorder le cordon d’alimentation fourni.
2
COMPONENT IN
Entrées audio (AUDIO G/D) et vidéo (Y/PB/PR) pour
Composant.
3
LAN
Connectez un câble réseau à ce port pour connecter le
téléviseur au réseau.
4
PC IN (PC) / AUDIO
Pour raccorder la prise de sortie vidéo et audio de votre
PC.
5
EXT 1, EXT 2
Entrées ou sorties pour périphériques tels que des
magnétoscopes, des lecteurs DVD, des consoles de jeux
vidéo ou des lecteurs de vidéodisques.
Spécifications entrée/sortie
Connecteur Entrée Sortie
Vidéo Audio (G/D) RGB Vidéo + Audio (G/D)
EXT 1 ✔ ✔ ✔Seule la sortie TV ou
DTV est disponible.
EXT 2 ✔ ✔Sortie que vous pouvez
sélectionner.
6
DIGITAL AUDIO OUT (OPTICAL)
A connecter à un composant audio numérique.
7
AUDIO OUT(AUDIO R/L)
Connectez les signales audio RCA de la TV à une
source externe, telle qu’un équipement audio.
8
SERVICE
− Prise pour tests.
9
HDMI IN 1,2,3
− Aucune connexion audio supplémentaire n’est
nécessaire pour une connexion HDMI - HDMI.
− Lorsque vous utilisez une connexion avec câble HDMI/
DVI, vous devez utiliser la borne HDMI IN2.
Qu’est-ce que HDMI?
−
High Definition Multimedia interface permet la
transmission de données vidéo numériques haute
définition et plusieurs canaux de son numérique.
− Le terminal HDMI/DVI prend en charge la connexion DVI
vers un périphérique raccordé avec le câble adéquat
(non fourni). La différence entre HDMI et DVI est que
le périphérique HDMI est plus petit, est équipé de la
fonction de codage HDCP (High Bandwidth Digital Copy
Protection), et gère le son numérique multicanal.
DVI IN (HDMI 2) AUDIO R/L
Sorties audio DVI pour périphériques externes.
0
ANT IN
Connecteur coaxial 75Ω pour réseau câblé/hertzien.
Modes pris en charge pour HDMI/DVI et Component
480i 480p 576i 576p 720p 1080i 1080p
HDMI/DVI 50Hz X X X O O O O
HDMI/DVI 60Hz X O X X O O O
Component O O O O O O O
N
2
BN68-01757A-Fre.indb 6 2008-9-24 15:04:28
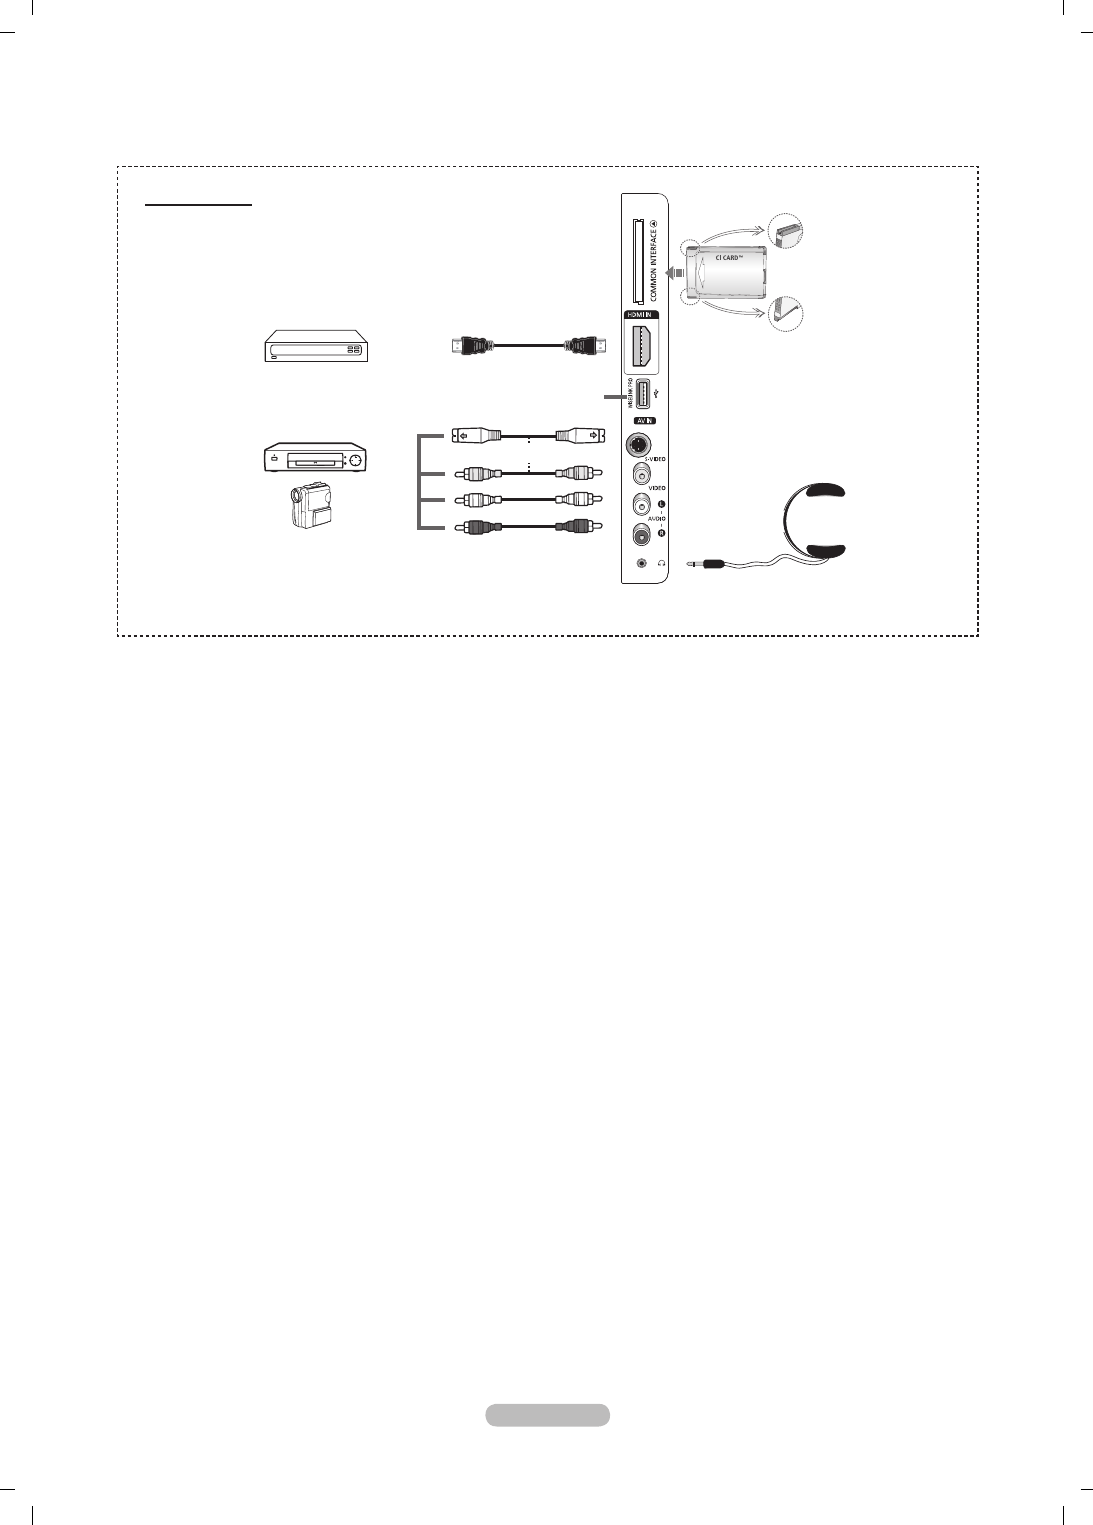
Français - 7
La couleur et la forme du produit peuvent varier en fonction du modèle.
N
Panneau latéral
ou
4
5
3
2
1
4
1
Logement pour COMMON INTERFACE
Insérez la carte d’interface commune dans ce logement.
(reportez-vous à la page 25)
− Si vous n’insérez pas la carte d’int erface commune
dans certaines chaînes, Signal brouillé s’affiche sur l’
écran.
− Les informations de pairage contenant un numéro de
téléphone, l’ID de la carte d’interface commune, l’ID de l’hôte
et d’autres informations s’afficheront dans les 2 ou 3 minutes.
Si un message d’erreur s’affiche, contactez votre prestataire
de service.
− Lorsque la configuration des informations sur les canaux
est terminée, le message Mise à jour terminée s’affiche,
indiquant que la liste des canaux est dorénavant mise à
jour.
Insérez la carte d’interface commune dans le sens
indiqué sur celle-ci.
2
HDMI IN 4
A connecter à la prise HDMI d’un périphérique équipé d’une
sortie HDMI.
3
WISELINK PRO
Connectez un périphérique de stockage de masse USB pour
afficher des photos (JPEG) et écouter des fichiers audio
(MP3) et vidéo.
Vous pouvez vous connecter au réseau SAMSUNG sans fil.
4
S-VIDEO ou VIDEO / AUDIO L/R
Entrées audio et vidéo (S-Vidéo ou Vidéo) pour périphériques
externes, tels qu’un caméscope ou un magnétoscope.
N
5
PRISE CASQUE
Vous pouvez brancher un casque si vous souhaitez
regarder la télévision sans déranger les autres
personnes présentes dans la pièce.
L’utilisation prolongée d’un casque à un niveau
sonore élevé peut endommager l’ouïe.
N
BN68-01757A-Fre.indb 7 2008-9-24 15:04:30
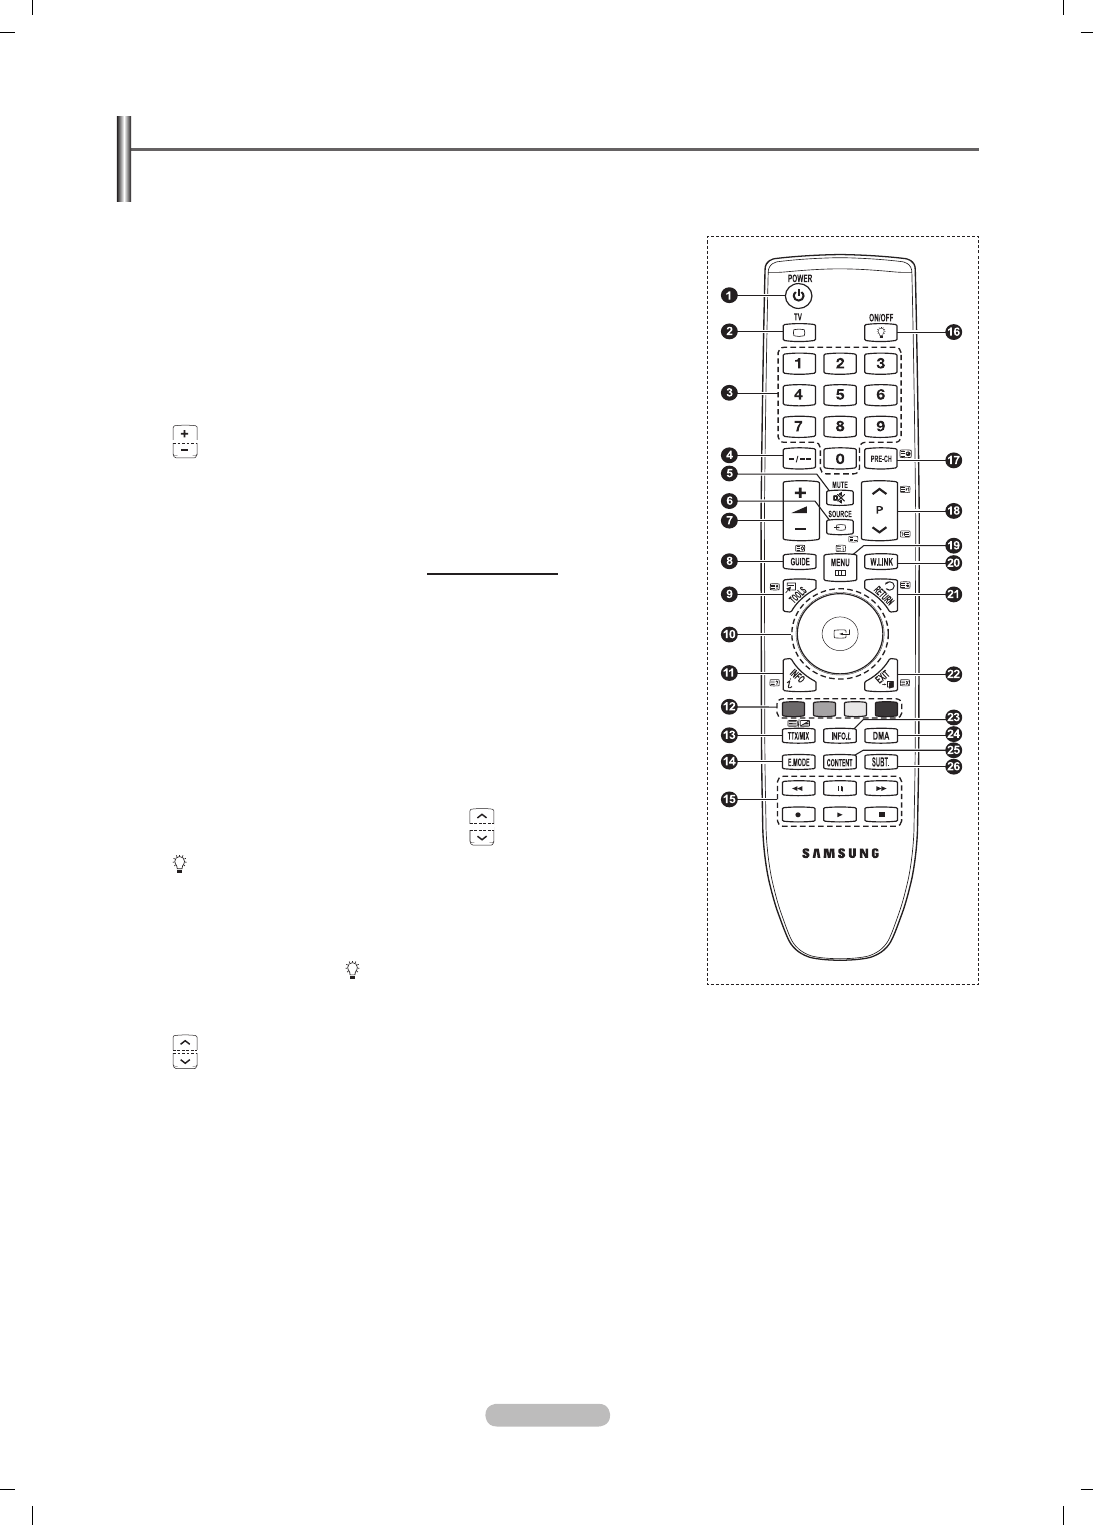
Français - 8
1
Bouton POWER
(permet d'allumer et d'éteindre le
téléviseur)
2
Permet de sélectionner directement
le mode TV.
3
Pavé numérique pour l'accès direct
aux chaînes
4
Sélection de chaînes à un ou
plusieurs chiffres
5
Suppression temporaire du son
6
Sélection de la source disponible
7
Augmentation du volume
Réduction du volume
8
Affichage EPG (Guide électronique
des programmes)
9
Permet de sélectionner rapidement
les fonctions fréquemment utilisées.
0
Appuyez sur les sections Haut/Bas/
Gauche/Droite de la roue et sur
ENTER pour sélectionner les options
de menu à l'écran et en changer les
valeurs. En faisant tourner la roue,
vous pouvez vous déplacer dans les
menus, changer de chaîne et régler
le volume.
!
Permet d'afficher les informations
relatives au programme en cours
@
Utilisez ces boutons dans la Liste
des chaînes, WISELINK Pro, etc.
$
Appuyez sur cette touche pour
sélectionner l'affichage et les modes
son en option pour le sport, le
cinéma et les jeux.
%
Utilisez ces boutons dans la liste des
chaînes, WISELINK Pro et Anynet+.
^
ON/OFF
Permet d'activer l'éclairage des
boutons de la télécommande.Cette
fonction est pratique la nuit ou
lorsqu'il fait sombre dans la pièce.
(Utiliser la télécommande avec le
bouton lumineux ON/OFF ( ) réglé
sur Marche permet de réduire la
durée d'utilisation de la pile.)
&
Chaîne précédente
*
Chaîne suivante
Chaîne précédente
(
Permet d'afficher le menu principal à
l'écran
)
Cette fonction permet d'afficher des
photos (JPEG) et d'écouter des
fichiers audio (MP3) et vidéo à partir
d'un périphérique externe.
a
Permet de revenir au menu
précédent
b
Permet de quitter le menu affiché à
l'écran
c
Appuyez sur ce bouton pour utiliser
les services d'actualités, informations
boursières et météo disponibles sur
le réseau.
d
Utilisez ce paramètre lorsque vous
connectez un appareil SAMSUNG
DMA (Digital Media Adapter) via
une interface HDMI et basculez en
mode DMA. (Le bouton DMA est en
option.) Pour plus d’informations sur
les procédures de fonctionnement,
reportez-vous au manuel d’utilisation
de l’appareil DMA. Ce bouton est
disponible si la fonction Anynet+
(HDMI-CEC) est Marche (voir page
54).
e
Cette fonction vous permet d'afficher
Content Library.
f
Affichage numérique des sous-titres
Fonctions télétexte
2
Permet de quitter l'affichage télétexte
(en fonction du modèle)
6
Sélection du mode Télétexte (LIST/
FLOF)
8
émorisation du télétexte
9
Taille du télétexte
!
Activation du télétexte
@
Sélection des rubriques Fastext
#
Affichage télétexte/informations
relatives au télétexte et programme
normal
&
Page secondaire télétexte
*
P : page télétexte uivante
P : page télétexte précédente
(
Index du télétexte
a
Pause télétexte
b
Annulation du télétexte
Télécommande
Vous pouvez utiliser la télécommande à une distance maximale du téléviseur d’environ 7 m.
Une lumière intense peut affecter le bon fonctionnement de la télécommande.
N
BN68-01757A-Fre.indb 8 2008-9-24 15:04:31
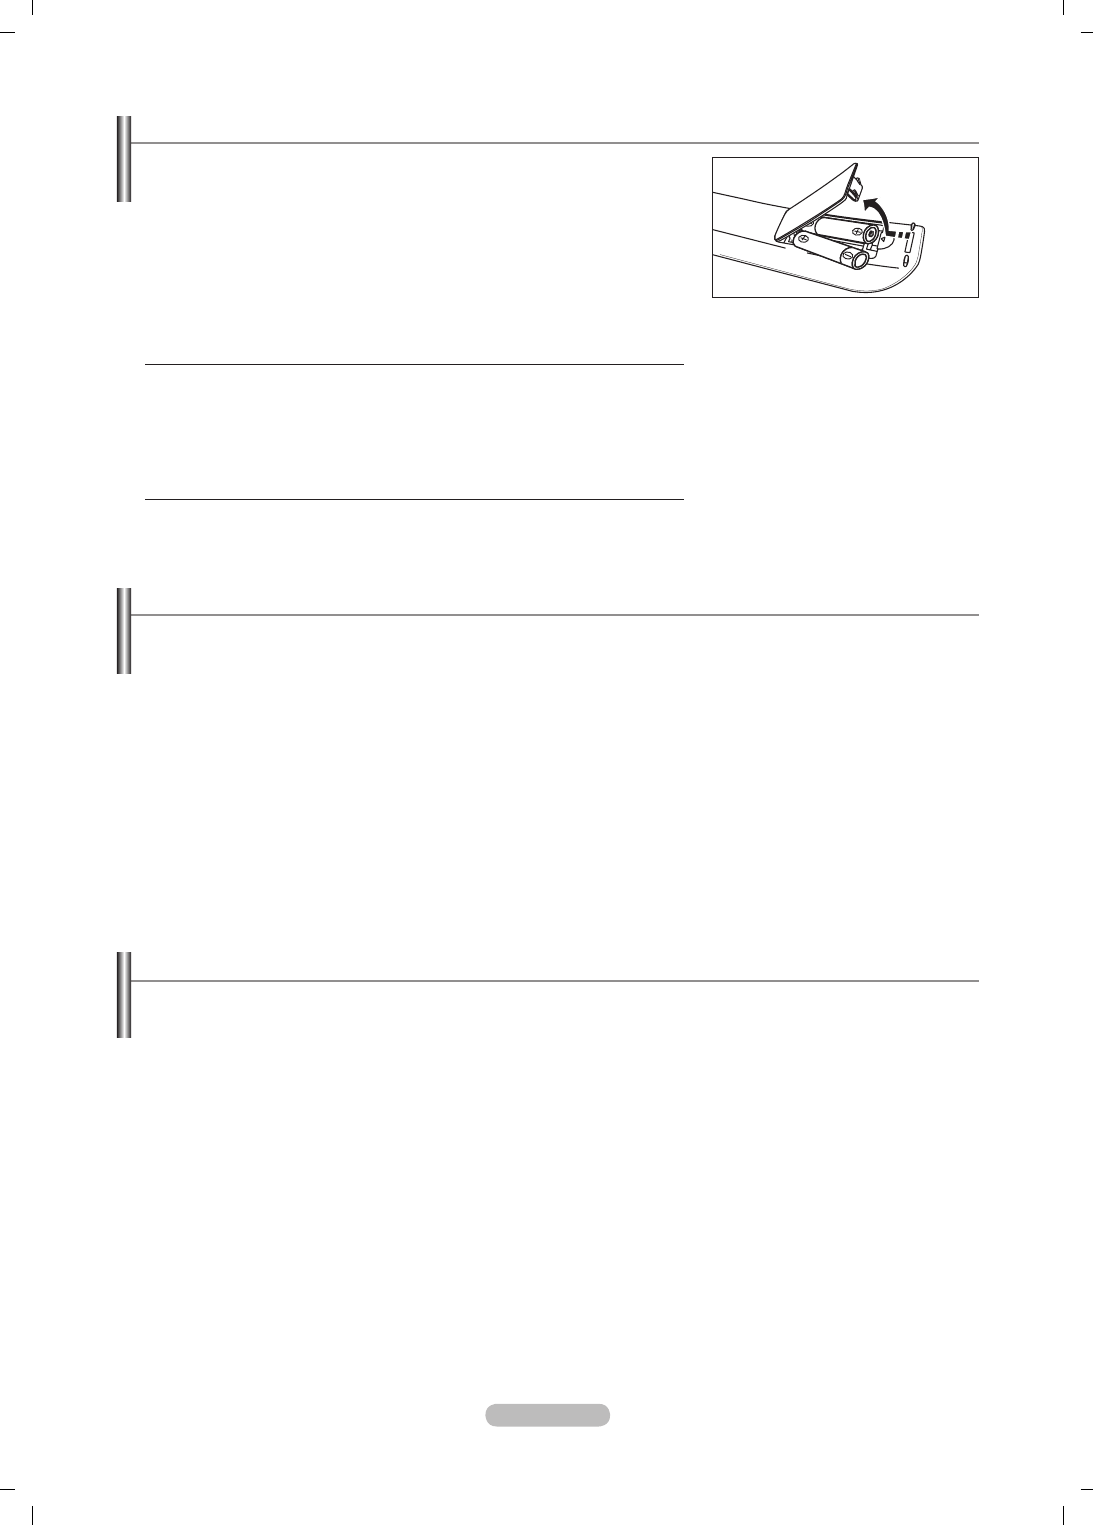
Français - 9
Insertion des piles dans la télécommande
1. Soulevez le couvercle situé à l’arrière de la télécommande comme indiqué sur
la gure.
2. Placez deux piles AAA.
Assurez-vous de faire correspondre les bornes “+” et “-” des piles avec le
schéma situé à l’intérieur du compartiment.
3. Refermez le couvercle comme indiqué sur la gure.
Retirez les piles et stockez-les dans un endroit frais et sec si vous n’utilisez
pas la télécommande pendant longtemps.
Utiliser la télécommande avec le bouton lumineux ON/OFF @ réglé sur
Marche permet de réduire la durée d'utilisation de la pile.
Si la télécommande ne fonctionne pas Vériez les éléments suivants :
1. Le téléviseur est-il sous tension?
2. Les bornes + et - des piles ne sont-elles pas inversées?
3. Les piles sont-elles déchargées ?
4. Le cordon d’alimentation est-il débranché ou y a-t-il une panne de courant?
5. Une lampe fluorescente ou néon est-elle allumée à proximité?
N
Mise en marche et arrêt
Le câble relié au secteur est xé à l'arrière du téléviseur/moniteur.
1. Branchez le cordon d'alimentation sur une prise secteur appropriée.
Le voyant de veille s'allume sur le téléviseur.
2. Appuyez sur le bouton POWER P de votre téléviseur.
Vous pouvez également appuyer sur le bouton POWER P ou sur le bouton TV de votre télécommande pour allumer le
téléviseur.
3. Appuyez sur le bouton numérique (de 0 à 9) ou le bouton canal suivant/précédent (< / >) de la télécommande ou sur le
bouton >C/P.
P
< de votre téléviseur.
Lorsque vous allumez le téléviseur pour la première fois, vous devrez choisir la langue dans laquelle vous souhaitez que
les menus s'afchent.
4. Pour éteindre votre téléviseur, appuyez de nouveau sur le bouton POWER
P
.
Mise en mode veille de votre téléviseur
Vous pouvez mettre votre téléviseur en mode Veille an de réduire la consommation électrique. Le mode veille peut être utile si
vous souhaitez éteindre votre téléviseur temporairement (pendant un repas par exemple).
1. Appuyez sur le bouton POWER
P
de la télécommande.
L'écran s'éteint et un voyant de veille rouge apparaît sur votre téléviseur.
2. Pour rallumer le téléviseur, appuyez de nouveau sur le bouton POWER
P
, les boutons numériques (de 0 à 9), le bouton TV
ou les boutons canal suivant/précédent (< / >).
Ne laissez pas le téléviseur en mode Veille pendant de longues périodes (lorsque vous êtes en vacances par exemple). Il
est conseillé de débrancher le téléviseur du secteur et de l'antenne.
N
N
N
N
N
N
N
N
BN68-01757A-Fre.indb 9 2008-9-24 15:04:31
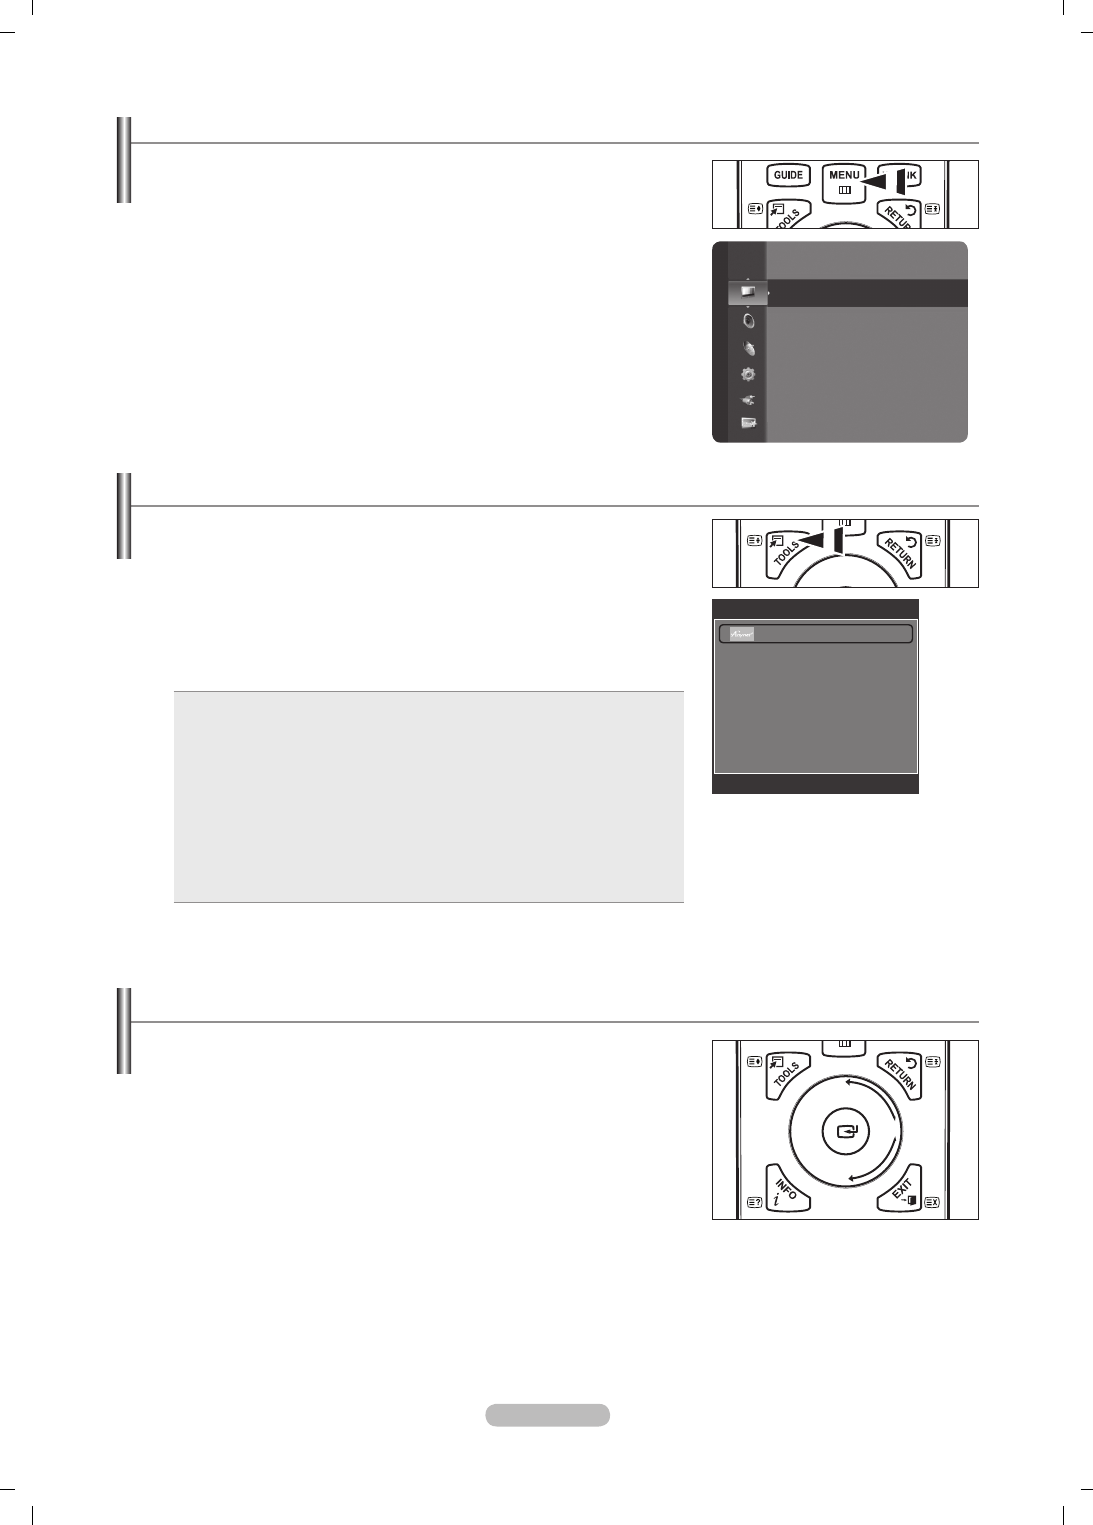
Français - 10
Afchage des menus
1. Une fois l’appareil allumé, appuyez sur le bouton MENU. Le menu principal
apparaît à l'écran. Plusieurs icônes s’afchent sur le côté gauche du menu :
Image, Son, Chaîne, Conguration, Entrée, Application.
2. Appuyez sur le bouton ▲ ou ▼ pour sélectionner l'une des icônes. Appuyez
ensuite sur ENTER
E
pour accéder au sous-menu de l'icône.
3. Appuyez sur le bouton EXIT pour quitter le menu.
Les menus disparaissent de l'écran après environ une minute.
Utilisation du bouton TOOLS
Vous pouvez utiliser le bouton TOOLS pour sélectionner simplement et rapidement
les fonctions que vous utilisez le plus souvent. Le menu Outils change en fonction
du mode d'entrée externe afché.
1. Appuyez sur le bouton TOOLS. Le menu Outils s'afche.
2. Appuyez sur le bouton ▲ ou ▼ pour sélectionner un menu.
3. Appuyez sur les boutons ▲/▼/◄/►/ ENTER
E
pour afcher,changer ou
utiliser les éléments sélectionnés. Pour une description plus détaillée de chaque
fonction, reportez-vous à la page correspondante.
Anynet+ (HDMI-CEC): voir page 53
Format de l'image: voir page 17
Mode Image: voir page 15
Mode Son: voir page 21
Veille: voir page 26
SRS TS XT: voir page 21
Mode éco.: voir page25
Dual l ll: voir page 22
PIP: voir page 19
Réglage Automatique: voir page 19
•
•
•
•
•
•
•
•
•
•
Utilisation du cercle de boutons
Pour passer à la chaîne suivante lorsque vous êtes en mode d'affichage des
chaînes, faites tourner la molette dans le sens des aiguilles d'une montre.
Pour passer à la chaîne précédente, faites tourner la molette dans le sens
inverse des aiguilles d'une montre.
Pour augmenter le volume lorsque la fenêtre de réglage du volume est
affichée, faites tourner la molette dans le sens des aiguilles d'une montre.
Pour baisser le volume, faites tourner la molette dans le sens inverse des
aiguilles d'une montre.
Pour sélectionner un sous-menu lorsque vous êtes en mode d'affichage des
menus, faites tourner la molette dans le sens des aiguilles d'une montre.
Pour remonter dans l'arborescence des menus, faites tourner la molette dans
le sens inverse des aiguilles d'une montre.
N
Mode
:
Standard
Lum. Cellules : 7
Contraste : 95
Luminosité : 45
Netteté : 50
Couleur : 50
Teinte (V/R) : V50/R50
Réglages des détails
Image
Outils
Anynet+ (HDMI-CEC)
Format de l'image : 16/9 auto
Mode Image : Standard
Mode Son : Personnel
Veille : Arrêt
SRS TS XT : Arrêt
Mode éco. : Arrêt
Dual l ll : Mono
U
Déplacer
E
Entrer
e
Quitter
BN68-01757A-Fre.indb 10 2008-9-24 15:04:32

Français - 11
Fonction Plug & Play
Lorsque vous allumez le téléviseur pour la première fois, des réglages de base s’effectuent l’un après l’autre de manière
automatique.
1. Appuyez sur le bouton POWER de la télécommande. Le message The Menu
Language, Store Demo, Channels and Time will be set. s’afche.
2. Appuyez sur le bouton ENTER
E
. Le menu Select the OSD Language.
s’afche automatiquement. Appuyez sur le bouton ENTER
E
.
3. Sélectionnez la langue appropriée en appuyant sur le bouton ▲ ou ▼. Appuyez
sur le bouton ENTER
E
pour conrmer votre choix.
4. Appuyez sur le bouton ◄ ou ► pour sélectionner Enr. démo ou Util. domicile, puis appuyez sur le bouton ENTER
E
.
Nous recommandons de régler la télévision sur le mode Util. domicile pour une meilleure qualité d’image dans votre
environnement personnel. Le mode
Enr. démo n’est prévu que pour un usage en magasin.
Si l’unité est accidentellement réglée sur le mode Enr. démo et que vous souhaitez revenir au mode Util. domicile
(Standard): Appuyez sur le bouton Volume du téléviseur. Lorsque l’OSD du volume s’afche, appuyez pendant
5 secondes sur le bouton MENU du téléviseur.
L'écran de veille est activé si aucune touche de la télécommande n'est actionnée pendant plus d'une minute lorsque le
mode Plug & Play est en cours d'exécution.
L'écran de veille est activé si aucun signal de fonctionnement n'est reçu pendant plus de 15 minutes.
5. Appuyez sur le bouton ENTER
E
. Sélectionnez le pays approprié en appuyant sur le bouton ▲ ou ▼. Appuyez sur le bouton
ENTER
E
pour conrmer votre choix.
6. Appuyez sur le bouton ▲ ou ▼ pour sélectionner la source de chaîne à mémoriser. Appuyez sur le bouton ENTER
E
pour
sélectionner Démarrer.
Numérique et Analogique: Chaînes numériques et analogiques.
Numérique: Chaînes numériques.
Analogique: Chaînes analogiques.
La recherche de canaux démarrera et se terminera automatiquement.
Appuyez sur le bouton ENTER
E
à tout moment pour interrompre la mémorisation.
Une fois que tous les canaux disponibles sont mémorisés, le message Dénit le mode Horlogs. s’afche.
7. Appuyez sur le bouton ENTER
E
. Appuyez sur le bouton ▲ ou ▼ pour sélectionner Auto., puis appuyez sur le bouton
ENTER
E
.
Si vous sélectionnez Manuel, le message Dénit la date et I'heure s’afche. (Reportez-vous à la page 26)
Si vous avez reçu un signal numérique, l’heure sera automatiquement réglée. Sinon, reportez-vous à la page 26 pour
régler l’horloge.
8. Le message Protez de votre visionnage s’afche. Lorsque vous avez terminé, appuyez sur le bouton ENTER
E
.
Si vous souhaitez réinitialiser cette fonction...
1. Appuyez sur le bouton MENU pour afcher le menu. Appuyez sur le bouton ▲
ou ▼ pour sélectionner Conguration, puis appuyez sur le bouton ENTER
E
.
2. Appuyez de nouveau sur le bouton ENTER
E
pour sélectionner Plug & Play.
3. Entrez votre code PIN à quatre chiffres. Le code PIN par défaut d’un nouveau
téléviseur est “0-0-0-0”.
Si vous souhaitez changer ce code PIN, reportez-vous à la page 23.
La fonction Plug & Play est uniquement disponible en mode TV.
N
N
N
N
N
N
N
N
N
N
N
N
N
Mémorisation des chaînes
Pays
Canal analogique: Permet de changer de pays pour les chaînes
analogiques.
Canal numérique: Permet de changer de pays
pour les chaînes
numériques.
L’écran de saisie du code PIN apparaît. Entrez votre code PIN à quatre chiffres.
❑
N
Gestion des canaux
Conguration
Plug & Play ►
Langue : Français
Horloge
Sélection du réseau : Câble
Configuration du réseau sans fil
Configuration internet
Verrouillage Canal : Marche
Modifier PIN
Canal
Pays
►
Mémorisation Auto
Mémorisation Manuelle
Guide Complet
Mini Guide
Par défaut : Mini Guide
Liste des chaînes
Mode Canal : Chaînes ajoutées
Plug & Play
The Menu Language, Store Demo, Channels and Time
will be set.
OK
E
Entrer
BN68-01757A-Fre.indb 11 2008-9-24 15:04:33

Français - 12
Mémorisation Auto
Vous pouvez chercher les plages de fréquence disponibles par balayage (leur disponibilité dépend de votre pays). Il est
possible que les numéros de programme attribués automatiquement ne correspondent pas aux numéros de programme
souhaités ou réels.
Numérique et Analogique: Chaînes numériques et analogiques.
Numérique: Chaînes numériques.
Analogique: Chaînes analogiques.
Cherche toutes les chaînes avec des stations de diffusion active et les enregistre dans la mémoire du téléviseur.
Si vous voulez arrêter la mémorisation automatique, appuyez sur le bouton ENTER
E
.
Le message Arrêter le programme automatique ? s’afche.
Sélectionnez Oui en appuyant sur le bouton ◄ ou ►, puis appuyez sur le bouton ENTER
E
.
Si une chaîne est verrouillée par la fonction Verrouillage Canal, la fenêtre de saisie du code PIN s’afche.
Mémorisation Manuelle
Permet de chercher manuellement une chaîne et de l’enregistrer dans la mémoire du téléviseur.
Si une chaîne est verrouillée par la fonction Verrouillage Canal, la fenêtre de saisie du code PIN s’afche.
Canal numérique
Enregistrement manuel de chaînes numériques.
Canal: Sélectionnez le numéro de chaîne à l’aide des boutons ▲, ▼ ou des chiffres (0-9).
Fréquence: Sélectionnez la fréquence à l’aide des chiffres.
Bande passante: Sélectionnez la bande passante à l’aide des boutons ▲, ▼ ou des chiffres (0-9).
Au terme de la recherche, les chaînes de la liste sont mises à jour.
Canal analogique
Enregistrement manuel de chaînes analogiques.
Programme (numéro de programme à attribuer à une chaîne): Sélectionnez le numéro de chaîne à l’aide des boutons ▲,
▼ ou des chiffres (0-9).
Système de Couleur → Auto. / PAL / SECAM / NTSC4.43: Sélectionnez le système de couleurs à l’aide des boutons
▲ ou ▼.
Système Sonore → BG / DK / I / L: Sélectionnez le système audio à l’aide des boutons ▲ ou ▼.
Canal (si vous connaissez le numéro de la chaîne à mémoriser): Appuyez sur le bouton ▲ ou ▼ pour sélectionner C (canal
hertzien) ou S (canal câblé). Appuyez sur le bouton ►, puis sur le bouton ▲ ou ▼ ou un chiffre (0-9) pour sélectionner le
numéro de votre choix.
Vous pouvez également sélectionner le numéro de chaîne directement en appuyant sur le pavé numérique (0-9).
Si aucun son ne sort ou si celui-ci est anormal, sélectionnez à nouveau la norme son requise.
Recherche (lorsque vous ne connaissez pas les numéros de chaîne): Appuyez sur le bouton ▲ ou ▼ pour lancer la
recherche. Le syntoniseur balaie la plage de fréquences jusqu’à ce que vous receviez la première chaîne ou la chaîne que
vous avez sélectionnée à l’écran.
Mémoriser (Permet de mémoriser la chaîne et le numéro de programme correspondant): Sélectionnez OK en appuyant
sur le bouton ENTER
E
.
Mode des chaînes
P (Mode Programme): A la n du réglage, des numéros de position compris entre P00 et P99 sont attribués aux
stations de radiodiffusion de votre région. Dans ce mode, vous pouvez sélectionner un canal en saisissant son
numéro de position.
C (Mode chaîne hertzienne): dans ce mode, vous pouvez sélectionner un canal en saisissant le numéro attribué à
chacune des stations de télédiffusion.
S (Mode chaîne câblée): dans ce mode, vous pouvez sélectionner une chaîne en saisissant le numéro attribué à
chacune des chaînes câblées.
Guide Complet / Mini Guide
Les informations relatives au Guide de programme électronique (EPG) sont fournies par les émetteurs. Les entrées de
programmes peuvent apparaître en blanc ou ne pas être à jour en raison de l’information diffusée sur un canal donné.
L’afchage fera une mise à jour automatique dès qu’une nouvelle information sera disponible.
Pour obtenir plus de détails sur les procédures d’utilisation du Mini Guide
et du Guide Complet, reportez-vous aux descriptions de la page 13.
Vous pouvez aussi afcher le guide en appuyant simplement sur le bouton
GUIDE. (Pour congurer le Par défaut, reportez-vous aux descriptions.)
Guide Complet
: Afche le programme heure par heure. Deux heures de programme sont afchées et vous pouvez faire
déler le programme en avançant ou en remontant dans le temps.
Mini Guide
: Les informations de chaque programme sont afchées ligne par ligne sur l’écran Mini-guide de la chaîne
actuelle, en commençant par le programme en cours, dans l’ordre des heures de début des programmes.
❑
•
•
•
N
N
N
N
N
❑
N
N
•
•
•
N
•
•
•
•
N
N
•
•
N
-
-
-
❑
N
O
BN68-01757A-Fre.indb 12 2008-9-24 15:04:33

Français - 13
Par défaut
Mini Guide /
Guide Complet: Vous pouvez choisir d’afcher soit le Mini Guide soit
le Guide Complet lorsque vous appuyez sur le bouton GUIDE de la télécommande.
Liste des chaînes
Pour obtenir plus de détails sur les procédures d’utilisation de la Liste des
chaînes, reportez-vous aux descriptions des pages 14 ~15.
Mode Canal
Appuyez sur le bouton P >/<, L’ordre des chaînes afchées change.
Chaînes ajoutées
: L’ordre des chaînes change dans la liste des chaînes
mémorisées.
Favoris
: L’ordre des chaînes change dans la liste des chaînes favorites.
Réglage n
Si la réception est nette, vous n’avez pas besoin d’effectuer un réglage n du canal, car cette opération s’effectue
automatiquement pendant la recherche et la mémorisation. Si le signal est faible ou déformé, vous pouvez être amené à
effectuer manuellement un réglage n du canal.
Les canaux réglés et mémorisés sont repérés par un astérisque * placé à droite de leur numéro dans la bannière des
canaux.
Pour réinitialiser le réglage, sélectionnez Réinitialiser à l’aide du bouton ▲ ou ▼, puis appuyez sur le bouton ENTERE
.
La syntonisation ne est possible uniquement avec les chaînes analogiques.
Informations de signal
Vous pouvez obtenir des informations relatives à l’état du signal.
Si l'état du signal est faible, le message Signaux Faibles ou Inexistants s'afche.
Cette fonction peut être sélectionnée pendant que vous regardez une chaîne numérique.
Les informations techniques concernant l'état du signal sont afchées.
- Fréquence / ID de service/Multiplex/Réseau/Niveau d’erreurs binaires/Force du signal
LNA → Arrêt / Marche
Si la télévision fonctionne dans une zone où le signal est faible, la fonction LNA (Low Noise Amplier) peut parfois améliorer
la réception (un préamplicateur à faible bruit augmente le signal d’arrivée).
Cette fonction peut être sélectionnée pendant que vous regardez une chaîne analogique.
Utilisation du guide complet/mini-guide
▲/▼/◄/►,
(ENTER)
Sélectionnez un programme en appuyant sur le bouton (▲/▼/◄/►).
Si le programme suivant est sélectionné, il est réglé avec l'icône de l'horloge affiché. Si vous appuyez
à nouveau sur le bouton ENTER, puis sur (▲/▼/◄/►) pour sélectionner Annuler horaires, la
programmation est annulée et l'icône de l'horloge disparaît.
Pour plus d'informations sur la programmation des programmes, reportez-vous à la section.
ROUGE
Basculer entre Mini Guide et Guide
C
omplet.
VERT Guide Complet: Reculer rapidement (24 heures).
Mini Guide: Afficher rapidement la page suivante.
JAUNE Guide Complet: Avancer rapidement (24 heures).
Mini Guide
: Afficher rapidement la page précédente.
BLEU Quitter le guide.
INFO
Le bouton INFO permet d'obtenir des informations détaillées. Numéro de canal, temps de
fonctionnement du programme, barre d'état, niveau de contrôle parental, informations sur la qualité
vidéo (HD/SD), modes sonores, sous-titres ou Teletext, Langue des sous-titres ou du Teletext et bref
résumé du programme surligné font partie des informations supplémentaires. “…” apparaîtra si le
résumé est long.
❑
❑
❑
❑
N
N
N
❑
N
N
N
❑
N
Canal
Réglage fin
Informations de signal
LNA : Arrêt
►
Guide Complet
DTV Cable 900 f tn 2:10 Tue 1 Jun
Freshmen Marche Campus
2:00 - 2:30
No Detailed Information
Aujourd’hui 2:00 - 3:00 3:00 - 4:00
Mint Extra
Loaded
Fresh 40 with Dynamite MC
The Distillery
Smash Hits! Sunday
900 f tn
901 ITV Sélection
902 Kerrang!
903 Kiss
903 oneword
903 Smash Hits!
▼
Street Hypn...
Kisstory
Pas d’information
Pas d’information
Pas d’information
Freshmen O...
Voir
Information
Mini Guide
+24 Heures
Quitter
Mini Guide DTV Câble 900 f tn
Street Hypnosis
Booze Britain
2:00
2:30
5:00
▼
Freshmen Marche Campus
Voir
Information
Guide Complet
Page suiv.
Quitter
BN68-01757A-Fre.indb 13 2008-9-24 15:04:34

Français - 14
Gestion des chaînes
Ce menu permet d’ajouter/supprimer ou dénir des chaînes favorites et d’utiliser le
guide des programmes pour les émissions numériques.
Sélectionnez une chaîne dans l'écran Tous Tous les canaux, Chaînes
ajoutées, Favoris ou Programmé en appuyant sur les boutons
▲ / ▼, puis sur le bouton ENTER
E
.
Tous les canaux
: Affiche toutes les chaînes actuellement disponibles.
Canaux ajoutés
: Affiche toutes les chaînes ajoutées.
Favoris
: Affiche toutes les chaînes favorites.
Programmé
:
Afche tous les programmes actuellement réservés.
Utilisation des boutons de couleur dans la liste des chaînes
Rouge (Type de chaîne): Permet de basculer entre TV, Radio, Donn/autre
et Tous.
Vert (Zoom): Agrandit ou réduit une chaîne.
Jaune (Sélectionner): Sélectionne des listes de chaînes.
TOOLS (Option) : Afche le menu Supprimer (ou Ajouter), Ajouter aux
favoris (ou Supprimer des favoris), Verrouil. (ou Déverr.), Ecoute
programmée, Modi. nom de chaîne, Tri des canaux, Modi. nom de
chaîne, Sélectionner tout, Désélectionner tout ou Mémorisation Auto.
(Les menus Options peuvent varier en fonction de la situation.)
Icônes d’état des chaînes
AChaîne analogique. cChaîne sélectionnée en appuyant sur le bouton jaune.
♥
Chaîne dénie comme Favorite. (Programme en cours de diffusion.
\Chaîne verrouillée. )Programme réservé
Menu d’options de la liste des chaînes (dans Tous les canaux / Canaux ajoutés / Favoris)
Appuyez sur le bouton TOOLS pour utiliser le menu d’options.
Les éléments du menu Options peuvent varier selon la chaîne.
Ajouter / Supprimé
Vous pouvez supprimer ou ajouter une chaîne an d’afcher les chaînes de votre choix.
Toutes les chaînes supprimées apparaîtront dans le menu Tous les canaux.
Une chaîne grisée est une chaîne qui a été supprimée.
Le menu
Ajouter
apparaît uniquement pour les chaînes supprimées.
De la même manière, vous pouvez également ajouter une chaîne au menu
Canaux ajoutés ou Favoris.
Ajouter aux favoris / Supprimer des favoris
Vous pouvez dénir comme favorites les chaînes que vous regardez souvent.
Le symbole ♥ s’afche et la chaîne est dénie comme favorite.
Toutes les chaînes favorites apparaîtront dans le menu Favoris.
Verrouil. / Déverr.
Vous pouvez verrouiller une chaîne an qu’elle ne puisse pas être sélectionnée ni visualisée. Cette fonction n’est disponible
que lorsque la fonction Verrouillage Canal est à Marche. (Voir page 23)
L’écran de saisie du code PIN apparaît. Entrez votre code PIN à quatre chiffres.
Le code PIN par défaut d’un nouveau téléviseur est “0-0-0-0”. Vous pouvez modier le code PIN en sélectionnant
Modier PIN dans le menu.
Le symbole \ s’afche et la chaîne est verrouillée.
Ecoute programmée
Si vous réservez un programme que vous souhaitez regarder, la chaîne bascule automatiquement vers la chaîne réservée
dans la liste de chaînes, même lorsque vous êtes en train de regarder une autre chaîne. Pour réserver un programme, réglez
d’abord l’heure actuelle. (reportez-vous à la page 26)
Seules les chaînes mémorisées peuvent être sélectionnées.
Vous pouvez régler directement la chaîne, le mois, le jour, l’heure et les minutes à l’aide du pavé numérique de la
télécommande.
Toutes les chaînes supprimées apparaîtront dans le menu Programmé.
Guide des programmes numérique et afchage des réservations
Lorsqu’une chaîne numérique est sélectionnée et que vous appuyez sur le bouton ►, le Guide des programmes de la
chaîne apparaît. Vous pouvez réserver un programme en suivant les procédures décrites ci-dessus.
N
N
-
-
-
-
N
N
N
N
N
N
N
N
N
N
N
N
N
N
N
N
Canal
Mini Guide
Par défaut : Mini Guide
Liste des chaînes
Mode Canal : Chaînes ajoutées
Réglage fin
Informations de signal
LNA : Arrêt
824 UKTV Gold
825 UKTV style
A
1 C --
A
2 C
--
A
3
♥
C
--
A
4 C
--
A
5 C
--
A
6 C
--
A
7 C
--
A
8 C
--
Chaînes ajoutées
Tous
Type de canal
Zoom
Sélection
Option
824 UKTV Gold
825 UKTV style
A
1 C --
A
2 C
--
A
3
C
--
A
4 C
--
A
5 C
--
A
6 C
--
A
7 C
--
A
8 C
--
Tous les canaux
Tous
Type de canal
Zoom
Sélection
Option
Supprimer
Ajouter aux favoris
Verrouil.
Ecoute programmée
Modifi. nom de chaîne
Tri des canaux
▼
BN68-01757A-Fre.indb 14 2008-9-24 15:04:35
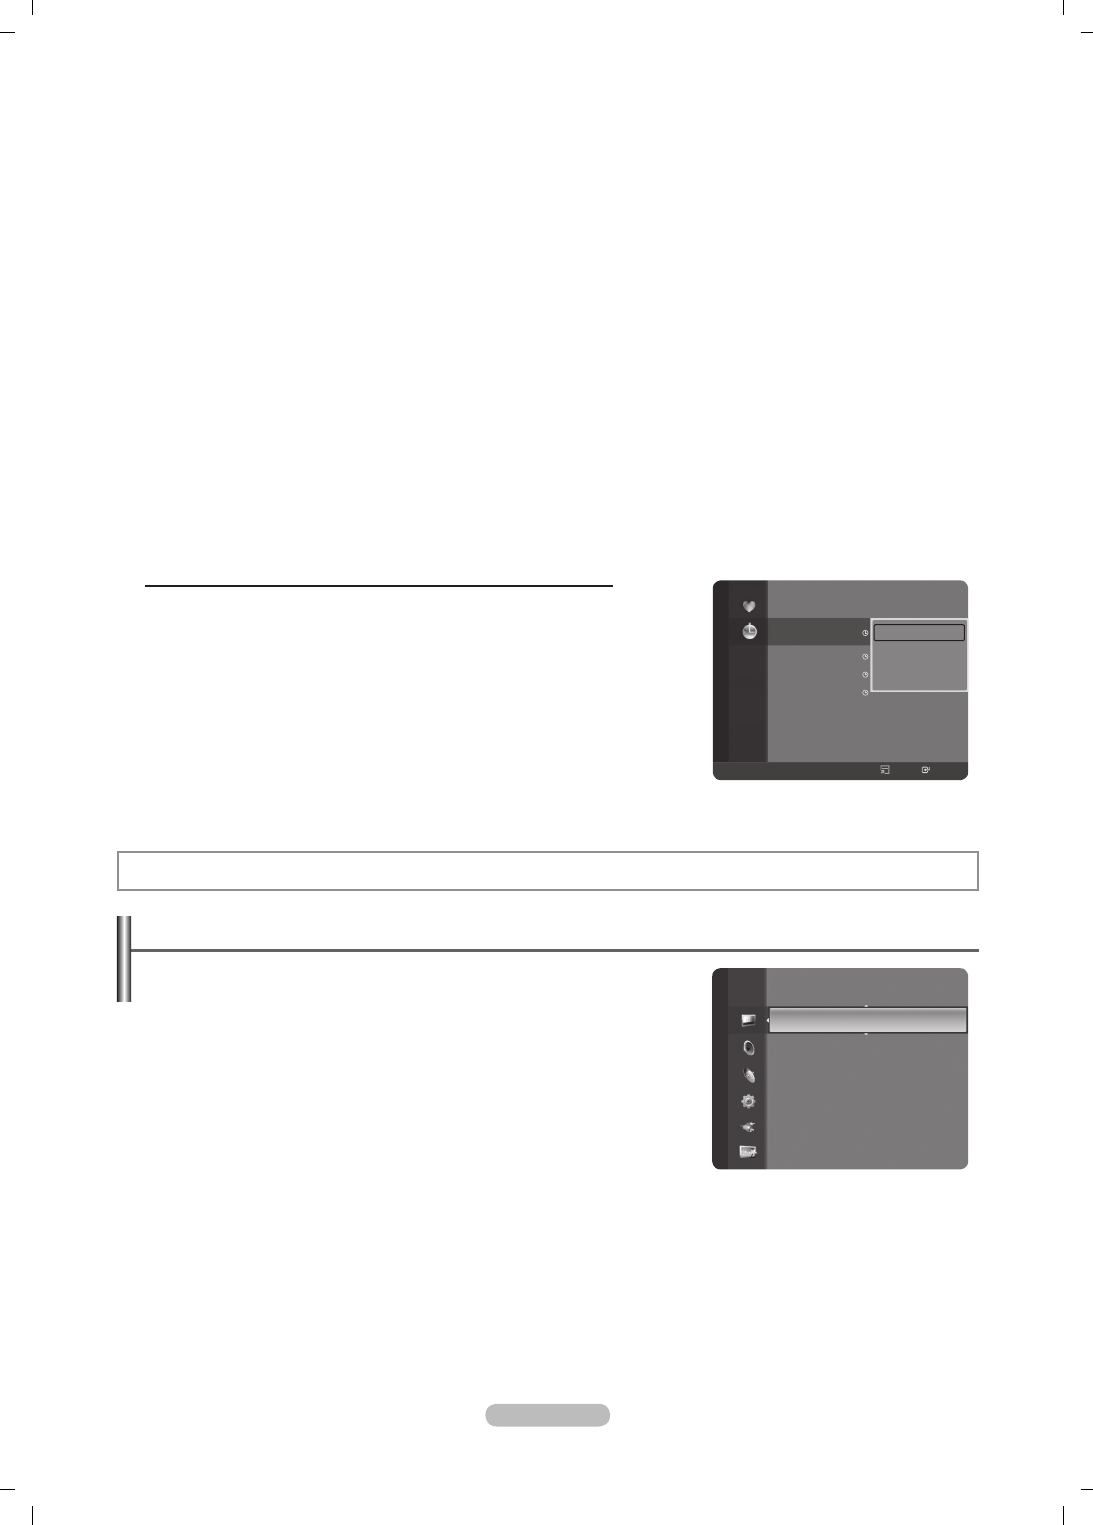
Français - 15
Modifi. nom de chaîne (chaîne analogique uniquement)
Les chaînes peuvent recevoir un libellé qui s’afchera chaque fois que la chaîne est sélectionnée.
Les chaînes numériques ont des noms qui leur sont automatiquement attribués et ne peuvent pas être modiés.
Modif. numéro chaîne (chaîne numérique uniquement)
Vous pouvez également modier le numéro de chaîne à l’aide du pavé numérique de la télécommande.
Tri des canaux
Cette opération vous permet de changer les numéros de programme des canaux mémorisés. Cette opération peut s’avérer
nécessaire après l’utilisation de la mémorisation automatique.
Cette fonction n'est disponible qu'en mode analogique.
Sélectionner tout / Désélectionner tout
Sélectionner tout: Vous pouvez sélectionner toutes les chaînes de la liste des chaînes.
Désélectionner tout: Vous pouvez désélectionner toutes les chaînes sélectionnées dans la liste des chaînes.
Vous pouvez appliquer les fonctions Ajouter/Supprimer, Ajouter aux favoris/Supprimer des favoris, ou Verrouil./
Déverrouiller à plusieurs chaînes à la fois. Sélectionnez les chaînes voulues et appuyez sur le bouton jaune pour traiter
toutes les chaînes sélectionnées à la fois.
La marque c s’afche à gauche des chaînes sélectionnées.
La fonction Désélectionner tout n’est disponible que si au moins une chaîne est sélectionnée.
Mémorisation Auto
Pour plus d’informations concernant le réglage des options, reportez-vous à la page 11.
Si une chaîne est verrouillée par la fonction Verrouillage Canal, la fenêtre de saisie du code PIN s’afche.
Menu d’options de la liste des chaînes (dans Programmé)
Vous pouvez voir, modier ou supprimer une réservation.
Appuyez sur le bouton TOOLS pour utiliser le menu d’options.
Infos modif.
: Permet de modifier une réservation.
Annuler progr.
: Permet d’annuler une réservation.
Information
: Permet de visualiser une réservation (et d’en changer les
données).
Sélectionner tout
: Sélectionne tous les programmes réservés.
N
N
•
•
N
N
N
N
N
N
Réglage de l’image
Modification et rétablissement des paramètres d’image
Mode
Vous pouvez sélectionner le type d’image qui correspond le mieux à vos
exigences d’afchage.
Dynamique
: Sélectionne l’image pour un affichage haute définition dans une
pièce claire.
Standard
: Sélectionne l’image pour un affichage optimal dans un
environnement normal.
Cinéma
: Sélectionne l’image pour un affichage agréable de films dans une
pièce sombre.
Appuyez sur le bouton TOOLS pour afcher le menu Outils.
Vous pouvez également dénir le mode d’image en sélectionnant Outils → Mode Image.
Lum. Cellules / Contraste / Luminosité / Netteté / Couleur / Teinte(V/R)
Votre téléviseur dispose de plusieurs options qui vous permettent de régler la qualité de l’image.
Lum. Cellules: Règle la luminosité des pixels. 10 est la valeur la plus élevée.
Contraste
: Règle le contraste de l’image.
Luminosité
: Règle le niveau de luminosité de l’image.
Netteté
: Règle la définition des bords de l’image.
Couleur
: Règle la saturation de couleur de l’image.
❑
T
❑
Programmé
1 / 1 / 2008
13:59 5 TV1 Quincy, M.E
18:59 2 TV3 The Equalizer
20:59 2 TV3 McMillan & Wife
21:59 2 TV3 M.Spillane’s mike Hammer
Infos modif.
Annuler progr.
Information
Sélectionner tout
All
Type de canal
Zoom
Sélection
Option
Information
Mode : Standard
►
Lum. Cellules : 7
Contraste : 95
Luminosité : 45
Netteté : 50
Couleur : 50
Teinte(V/R) : V50 / R50
Réglages des détails
Image
BN68-01757A-Fre.indb 15 2008-9-24 15:04:35

Français - 16
Teinte(V/R)
: Règle la teinte de couleur de l’image.
Sélectionnez un mode d’image à ajuster. Les valeurs ajustées sont enregistrées pour tous les modes d’image.
Lorsque vous modiez les paramètres Lum. Cellules, Contraste, Luminosité, Netteté, Couleur ou Teinte(
V
/R), l’écran
se modie en conséquence.
En mode Analog TV, Ext., AV, S-Video du système PAL, vous ne pouvez pas utiliser la fonction Teinte.
En mode PC, vous ne pouvez modier que les options Lum. Cellules, Contraste et Luminosité.
Vous pouvez effectuer des réglages pour chaque appareil externe connecté à une entrée du téléviseur et les enregistrer.
L’énergie consommée pendant le fonctionnement peut être sensiblement réduite en baissant le niveau de luminosité de
l’image. Cela réduira le coût de fonctionnement général.
Réglages des détails
Les nouveaux téléviseurs Samsung permettent d’effectuer des réglages
d’image encore plus précis que les modèles précédents. Ce qui suit explique
comment régler les paramètres détaillés de l’image.
Réglages des détails est disponible dans les modes Standard et
Cinéma.
En mode PC, vous ne pouvez modier que les options Contraste Dynam.,
Gamma et Balance blancs parmi les Réglages des détails.
Réglage des noirs → Arrêt / Bas / Moyen / Elevé
Vous pouvez choisir le niveau de noir sur l’écran pour régler la profondeur de
l’écran.
Contraste Dynam.
→ Arrêt / Bas / Moyen / Elevé
Vous pouvez régler le contraste de l’écran pour obtenir un contraste optimal.
Gamma
Vous pouvez régler l’intensité des couleurs primaires (rouge, vert, bleu).
Espace couleur
Un espace de couleur est une matrice de couleurs composée de rouge, de vert et de bleu. Sélectionnez votre espace de
couleur préféré et appréciez la couleur la plus naturelle.
Auto.: règle automatiquement la nuance de couleur naturelle sur la base des programmes sources.
Natif: offre une nuance de couleur foncée et riche.
Personnel: règle la gamme de couleurs en fonction de vos préférences
Personnalisation de l’espace de couleur
Couleur → Rouge / Vert / Bleu / Jaune / Cyan / Magenta
Permet de régler la gamme de couleurs en fonction de vos préférences Couleur est disponible lorsque l”option
Espace couleur est dénie sur Personnalisé.
Rouge / Vert / Bleu: Dans Couleur, vous pouvez régler les valeurs RVB de la couleur sélectionnée.
Réinit.: rétablit les valeurs par défaut de l’espace de couleur.
Balance blancs
Vous pouvez régler la température des couleurs pour que celles-ci soient plus naturelles.
Aj. Rouge / Aj. Vert / Aj. Bleu / Regl. Rouge / Regl. vert / Regl. bleu: La modication des valeurs de réglage permet
d’actualiser l’écran que vous venez de retoucher.
Réinit.: l’équilibrage du blanc réglé précédemment est ramené à sa valeur par défaut.
Carnation
Vous pouvez accentuer le ''ton chair'' de l’image.
La modication des valeurs de réglage permet d’actualiser l’écran que vous venez de retoucher.
Amélioration des bords → Arrêt / Marche
Vous pouvez faire ressortir la bordure des objets sur l’image.
xvYCC → Arrêt / Marche
L’activation du mode xvYCC augmente les détails et l’espace de couleur lorsque vous regardez des lms depuis un
périphérique externe (ex. : lecteur DVD).
xvYCC est disponible lorsque le mode d’image est déni sur Cinéma et la sortie externe sur le mode HDMI ou
Composant.
Si la fonction xvYCC est active, la fonction PIP ne peut pas être sélectionnée.
Options d'image
En mode PC, vous ne pouvez modier que les options Nuance Coul.,
Format et Protec brûl. ècran Protection dans le menu Options d'image.
Nuance Coul.
→ Froide2 / Froide1 / Normal / Chaude1 / Chaude2
Vous pouvez sélectionner la nuance de couleur la plus agréable au regard.
Les valeurs réglées sont mémorisées en fonction du mode Image
sélectionné.
Chaude1 ou Chaude2 ne sont activées que lorsque le mode d’image est
Cinéma.
N
N
N
N
N
N
❑
N
N
•
•
•
N
-
-
-
-
•
•
N
N
N
❑
N
N
N
Couleur : 50
Teinte (R / G) : V50 / R50
Réglages des détails ►
Options d'image
Réinitialisation de l’image
Image
Teinte (V/R) : V50 / R50
Réglages des détails
Options d'image ►
Réinitialisation de l’image
Image
BN68-01757A-Fre.indb 16 2008-9-24 15:04:36

Français - 17
Format
Vous pouvez sélectionner la taille d’image qui correspond le mieux à vos besoins d’afchage.
Appuyez sur le bouton TOOLS pour afcher le menu Outils.
Vous pouvez également dénir la taille en sélectionnant Outils → Format de l'image.
16/9 auto: Règle automatiquement la taille de l’image au format 16:9.
16:9: Règle la taille de l’image sur 16:9 de façon appropriée pour les DVD ou la diffusion au format cinémascope.
Zoom large: Agrandit l’image à une taille supérieure à 4:3.
Zoom: Agrandit l’image en 16:9 (dans la direction verticale) pour l’adapter à la taille de l’écran.
4:3: C’est le paramètre par défaut pour un lm cinéma ou de la diffusion normale.
Scan uniquement: Utilisez la fonction pour voir l’intégralité de l’image sans coupure lors de les signaux HDMI (720p/1080i/
1080p) ou Component (1080i/1080p) sont entrés.
Les options de taille de l’image peuvent varier en fonction de la source d’entrée.
Les éléments disponibles peuvent varier en fonction du mode sélectionné.
En mode PC, seuls les modes 16:9 et 4:3 peuvent être sélectionnés.
Vous pouvez effectuer des réglages pour chaque appareil externe connecté à une entrée du téléviseur et les
enregistrer.
Une rémanence temporaire peut se produire lorsque vous afchez une image statique pendant une ou deux heures sur
l’écran du téléviseur.
Zoom large: Appuyez sur le bouton ► pour sélectionner Position, puis appuyez sur le bouton ENTER
E
. Utilisez le
bouton ▲ ou ▼ pour déplacer l’écran vers le haut ou le bas. Appuyez ensuite sur le bouton ENTER
E
.
Zoom: Appuyez sur le bouton ► pour sélectionner Position, puis appuyez sur le bouton ENTER
E
. Appuyez le
bouton ▲ ou ▼ pour déplacer l’image vers le haut et vers le bas. Appuyez ensuite sur le bouton ENTER
E
. Appuyez
sur le bouton ► pour sélectionner
Taille
, puis appuyez sur le bouton ENTER
E
. Appuyez sur le bouton ▲ ou ▼ pour
agrandir ou réduire la hauteur de l’image. Appuyez ensuite sur le bouton ENTER
E
.
Après avoir sélectionné l’option Scan uniquement en mode HDMI (1080i/1080p) ou Component (1080i/1080p):
Sélectionnez Position à l’aide du bouton ◄ ou ►. Utilisez le bouton ▲, ▼, ◄ ou ► pour déplacer l’image.
Réinitialiser: Appuyez sur le bouton ◄ ou ► pour sélectionner Réinitialiser, puis appuyez sur le bouton ENTER
E
.
Vous pouvez initialiser le réglage.
Si vous utilisez la fonction Scan uniquement avec l’entrée HDMI 720p, une ligne sera coupée en haut, en bas, à
gauche et à droite, comme avec la fonction overscan.
Lorsque le mode Double ( , ) a été déni dans PIP, le paramètre Format de l’image ne peut pas être réglé.
Mode écran → 16:9 /
Zoom large
/ Zoom / 4:3
Lorsque vous xez la taille de l’image à 16/9 auto sur un téléviseur 16:9, vous pouvez déterminer la taille selon laquelle vous
voulez afcher une image 4:3 WSS (Wide Screen Service, service d’écran large) ou rien. Chaque pays européen emploie une
taille d’image ; cette fonction permet aux utilisateurs de sélectionner la leur.
16:9: Règle l’image en mode large, c’est-à-dire en 16:9.
Zoom large: Agrandit l’image à une taille supérieure à 4:3.
Zoom: agrandit la taille de l’image sur l’écran dans le sens vertical.
4:3: règle l’image en mode normal, c’est-à-dire en 4:3.
Cette fonction n’est disponible qu’en mode 16/9 auto.
Cette fonction n’est pas disponible en mode PC, Composante ou HDMI.
NR numérique → Arrêt / Bas / Moyen / Elevé / Auto.
Si le signal de radiodiffusion reçu est faible, vous pouvez activer la fonction Digital Noise Reduction pour favoriser la réduction
d’images fantômes ou statiques qui peuvent apparaître à l’écran.
Lorsque le signal est faible, sélectionnez une autre option jusqu’à obtention de la meilleure image possible.
DNIe → Arrêt / Démo / Marche
Pour offrir une grande qualité d’image, ce téléviseur est doté de la fonction DNIe. Si vous dénissez l’option DNIe sur On,
la fonction DNIe sera activée à l’écran. Lorsque vous activez le mode Démo de la fonction DNIe, une image normale et
une image avec la fonction DNIe appliquée s’afchent à l’écran à des ns de démonstration. Cette fonction vous permet de
constater la différence de qualité d’afchage.
DNIe™ (Digital Natural Image engine) DNIe™
Cette fonction vous offre une image plus détaillée tout en permettant une réduction de bruit 3D et une amélioration des détails,
des contrastes et des blancs. Le nouvel algorithme de compensation d’images vous offre une image plus lumineuse, plus
claire et plus détaillée. La technologie DNIe™ adapte tous les signaux à votre vue, quels qu’ils soient.
Cette fonction n’est pas disponible en mode Cinéma ni Standard.
Niv. noir HDMI → Normal / Bas
Vous pouvez directement choisir le niveau de noir sur l’écran pour régler la profondeur de l’écran.
Cette fonction n’est active que lorsque l’entrée externe se connecte à HDMI (signaux RVB).
T
•
•
•
•
•
•
N
N
N
N
N
N
N
N
N
N
N
•
•
•
•
N
N
N
N
N
N
BN68-01757A-Fre.indb 17 2008-9-24 15:04:36
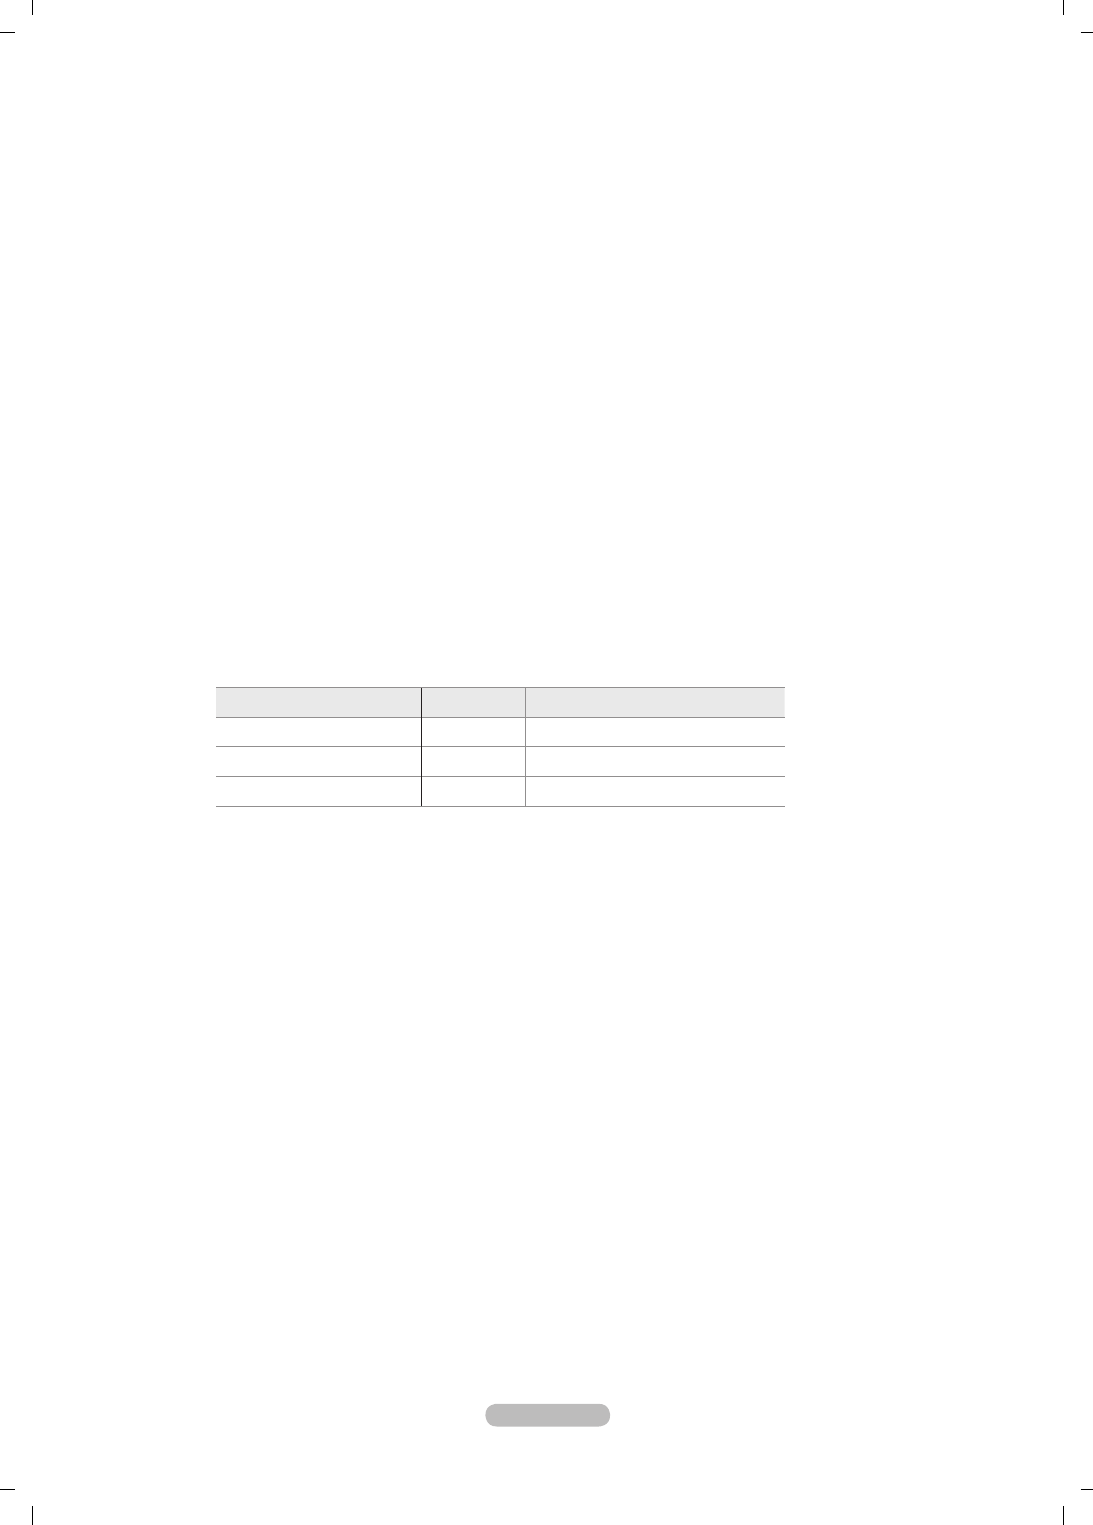
Français - 18
Démo 100Hz réel→ Arrêt / Marche
Vous pouvez clairement voir la différence entre Démo 100Hz réel et 50 Hz, surtout lorsque vous regardez des scènes
rapides. Lorsqu’une image lente est affichée, vous ne serez pas en mesure de faire la distinction entre Démo 100Hz réel
et 50Hz. La fonction Démo 100Hz n’est disponible qu’avec un signal 50Hz. Le mode Démo 100Hz réel est fourni pour des
démonstrations en magasin avec des images spéciales.
Movi
e Plus →
Arrêt
/ Bas / Moyen / Elevé / Démo
Vous pourrez apprécier des images plus naturelles et des textes plus nets et ce, même dans les scènes rapides.
Utilisez cette fonction lorsque vous regardez un film.
Cette fonction n’est pas disponible dans les Zoom large large et Zoom.
Cette fonction n'est pas disponible lorsque PIP est défini sur Marche.
Elle n'est pas prise en charge en mode HDMI 1080p/24 Hz, 25Hz, 30Hz.
Mode bleu uniquement → Arrêt / Marche
Cette fonction est destinée aux spécialistes de mesure des appareils AV. Cette fonction affiche le signal bleu en supprimant
simplement les signaux rouge et vert du signal vidéo, de manière à fournir un effet Filtre bleu utilisé pour régler la couleur et
la teinte de l'équipement vidéo, tel que des lecteurs de DVD, systèmes de cinéma à domicile, etc. Cette fonction permet de
régler la couleur et la teinte sur des valeurs appropriées au niveau de signal de chaque dispositif vidéo à l'aide des modèles
de barres de couleurs Rouge/Vert/Bleu/Cyan/Magenta/Jaune, sans utiliser de filtre bleu supplémentaire.
Mode bleu uniquement n'est disponible que si le mode Image est déni sur Cinéma ou Standard.
Protec brûl. ècran
Pour réduire le risque de brûlure d'écran, cet écran est équipé d'une technologie de prévention des brûlures. Cette fonction
permet de régler le mouvement de l'image de bas en haut (ligne verticale) et de gauche à droite (point horizontal). Le réglage
de l'horloge permet de programmer en quelques minutes la durée séparant les mouvements de l'image.
Modif. pixel: Cette fonction permet de déplacer les pixels sur l'écran dans le sens vertical ou horizontal, afin d'éviter une
image résiduelle sur l'écran.
Appuyez sur le bouton ▲ or ▼ pour activer (Marche) la fonction Modif. pixel, puis sur ENTER.
Sélectionnez l'option souhaitée en appuyant sur le bouton ▲ or ▼, puis sur ENTER.
Options disponibles: Nbre point horizont., Nbre ligne vertic.,Horloge.
Conditions optimales pour la modification des pixels.
PC TV/Ext/AV/Composant/HDMI
Nbre point horizont. 4 4
Nbre ligne vertic. 4 4
Horloge (minutes) 4 2 min
La valeur de Pixel Shift peut changer selon le mode et la taille du moniteur (pouces).
Cette fonction n'est pas disponible en mode Scan uniquement.
Ecran blanc: cette fonction contribue à supprimer les images résiduelles à l'écran en modifiant la couleur des pixels
pour les rendre blancs. Utilisez cette fonction lorsque des images résiduelles ou des symboles apparaissent à l'écran, en
particulier lorsque vous affichez une image fixe à l'écran pendant une longue période.
Défilement: cette fonction contribue à supprimer les images résiduelles à l'écran en déplaçant tous les pixels sur l'écran
à plasma, selon un motif prédéfini. Utilisez cette fonction lorsque des images résiduelles ou des symboles apparaissent à
l'écran, en particulier lorsque vous affichez une image fixe à l'écran pendant une longue période.
Gris de bord: si vous regardez la télévision dans un rapport d'écran 4:3, l'écran est protégé contre tout dommage grâce à
l'ajustement de la balance des blancs sur les côtés gauche et droit.
Sombre: si le rapport d'écran est défini sur 4:3, les bords gauche et droit sont assombris.
Clair: si le rapport d'écran est défini sur 4:3, les bords gauche et droit sont éclaircis.
Réinitialisation de l’image → Réinitial. mode image / Annuler
Rétablit toutes les valeurs par défaut de l’image.
Sélectionnez un mode d’image à rétablir. La fonction de réinitialisation est exécutée pour chaque mode d’image.
N
N
N
N
N
•
N
N
N
N
N
N
•
•
•
-
-
❑
N
BN68-01757A-Fre.indb 18 2008-9-24 15:04:36
Français - 19
Visualisation d’une image dans l’image
Vous pouvez afcher une image secondaire dans l’image principale du programme
télévisé ou de l’entrée vidéo. De cette manière, vous pouvez regarder ou surveiller
le programme télévisé ou l’entrée vidéo depuis n’importe quel équipement branché
tout en regardant l’image principale.
Il est possible que l’image dans la fenêtre PIP devienne légèrement moins
naturelle lorsque vous utilisez l’écran principale pour un jeu ou un karaoké.
Appuyez sur le bouton TOOLS pour afcher le menu Outils.
Vous pouvez également congurer les paramètres PIP en sélectionnant
Outils → PIP.
PIP → Arrêt / Marche
Vous pouvez activer ou désactiver la fonction PIP.
Image principale Image secondaire
Component
HDMI 1, HDMI2/DVI, HDMI 3,
HDMI 4
PC
TV, Ext.1, Ext.2, AV
Source
Vous pouvez sélectionner la source de l’image secondaire.
Format → / /
Vous pouvez sélectionner la taille de l’image secondaire.
Si l’image principale est en mode HDMI, l’option Format n’est pas accessible.
Position → / / /
Vous pouvez sélectionner la position de l’image secondaire.
En mode Double ( , ), l’option Position ne peut pas être sélectionnée.
Canal
Vous ne pouvez sélectionner une chaîne de l’image secondaire que si la Source est dénie sur TV.
Appuyez sur le bouton TOOLS pour afcher le menu Outils.
Vous pouvez également dénir le mode Image en sélectionnant Outils → PIP.
N
T
❑
N
N
T
Conguration
Divertissement : Arrêt
Mode éco. : Arrêt
PIP ►
Mise à niveau du logiciel
Interface commune
PIP
PIP : Marche
Source : TV
Format :
Position :
Canal : ATV 11
L
Déplacer
E
Entrer
R
Retour
Configuration du téléviseur avec le PC
Préréglage : Appuyez sur le bouton SOURCE pour sélectionner le mode PC.
Réglage Automatique
Le réglage automatique permet à l’écran PC afché sur le téléviseur d’être
ajusté automatiquement en fonction du signal vidéo PC. Les valeurs des options
Regl. Prec, Regl. Base et Position sont dénies automatiquement.
Cette fonction ne s’applique pas en mode DVI-HDMI.
Appuyez sur le bouton TOOLS pour afcher le menu Outils.
Vous pouvez également dénir le réglage automatique en sélectionnant
Outils → Réglage Automatique.
Ecran
Regl. Base
/
Regl. Prec: Lorsque vous réglez la qualité de l’image, l’objectif est d’éliminer ou de réduire les parasites
visuels. Si ces parasites ne sont pas éliminés uniquement avec une syntonisation ne (Fine-tuning), réglez la fréquence
du mieux que vous pouvez (Coarse), puis effectuez à nouveau une syntonisation plus ne. Une fois les parasites réduits,
effectuez un nouveau réglage de l’image pour l’aligner au centre de l’écran.
PC Position
: Réglez la position de l’écran du PC si elle ne convient pas à l’écran du téléviseur. Appuyez sur le bouton
▲ ou ▼ pour régler la position verticale. Appuyez sur le bouton ◄ ou ► pour régler la position horizontale.
Réinitialiser Image
: Vous pouvez rétablir les valeurs par défaut de tous les réglages d’image.
N
❑
N
T
❑
Rétroéclairage : 45
Netteté : 50
Réglage Automatique
►
Ecran
Réglages des détails
Options d'image
Réinitialisation de l’image
Image
BN68-01757A-Fre.indb 19 2008-9-24 15:04:37
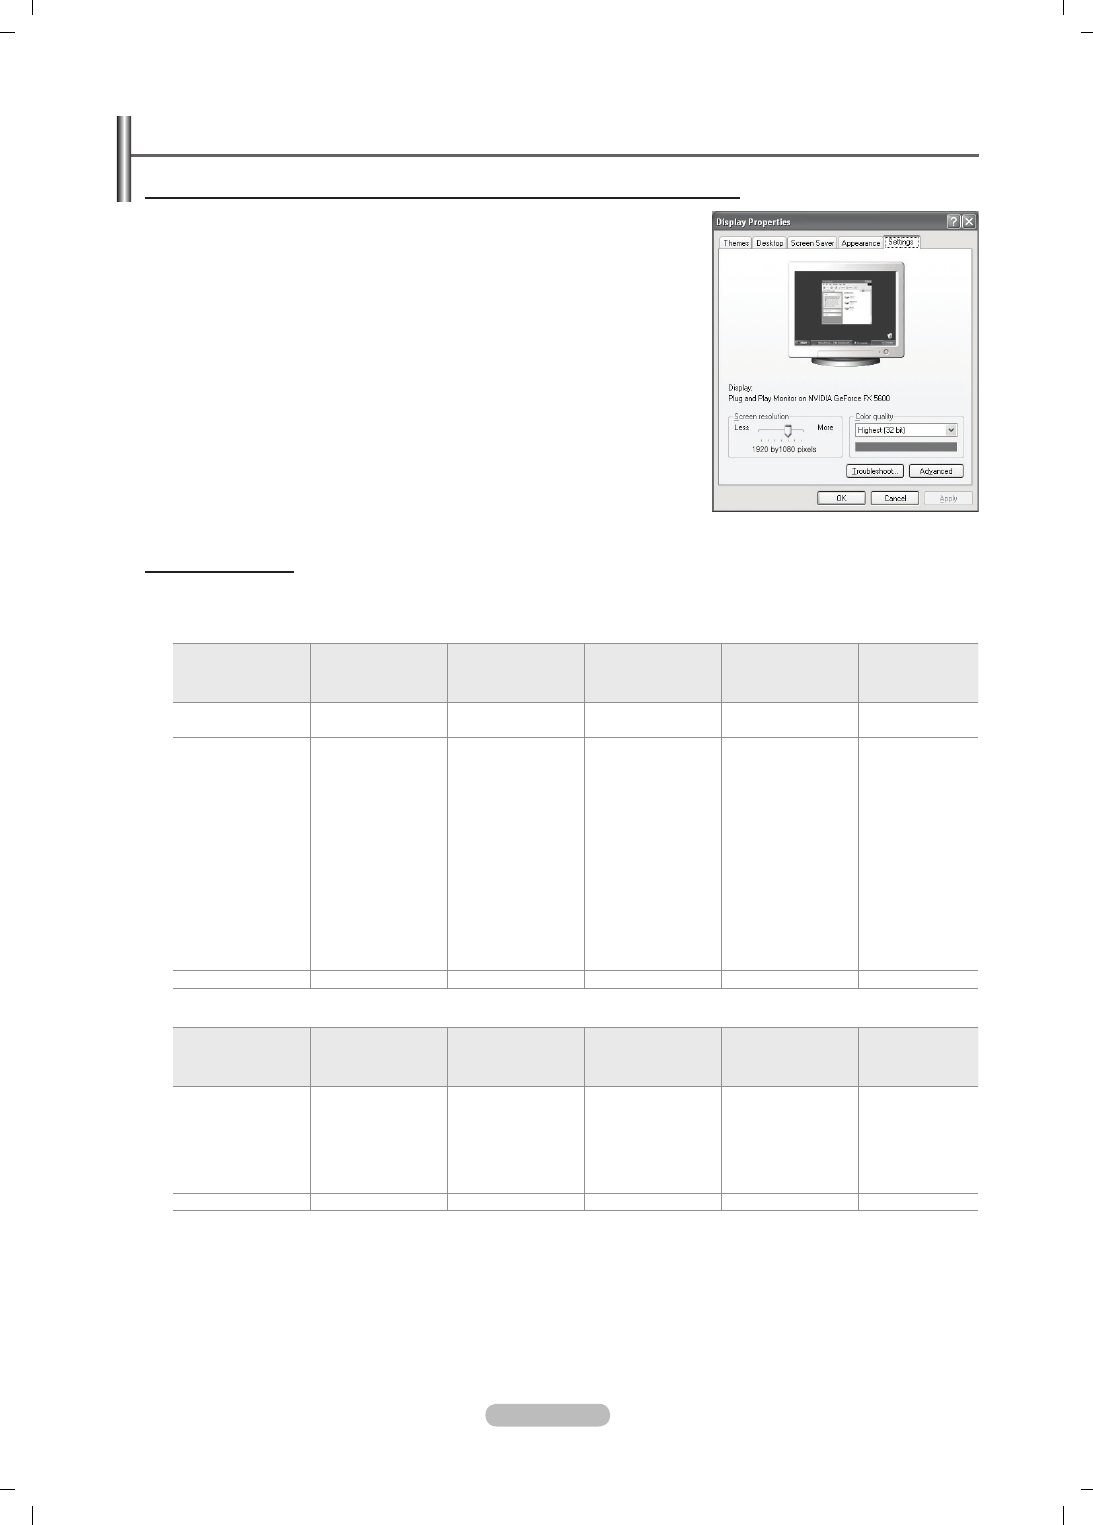
Français - 20
Ecran du PC
Conguration de votre logiciel PC (instructions basées sur Windows XP)
Les paramètres d’afchage Windows indiqués ci-dessous sont ceux d’un ordinateur
type. L’écran de votre PC sera probablement différent, selon votre version de
Windows et votre carte vidéo. Cependant, même si les afchages diffèrent, les
informations de conguration de base s’appliquent dans la plupart des cas. Dans
le cas contraire, contactez le fabricant de votre ordinateur ou votre revendeur
Samsung.
1. Cliquez sur ‘Panneau de conguration” dans le menu Démarrer de Windows.
2. Lorsque vous êtes sur l’écran du panneau de conguration, cliquez sur
“Apparence et thèmes” et une boîte de dialogue apparaît.
3. Cliquez sur “Afchage”. Une boîte de dialogue vous propose des options
d’afchage.
4. Sélectionnez l’onglet ‘Paramètres’ dans la boîte de dialogue Propriétés de
l’Afchage.
Réglage correct de la taille (résolution)
Optimal : 1920 x 1080 pixels.
S’il existe une option de fréquence verticale sur votre boîte de dialogue des
paramètres d’afchage, la valeur correcte est “60” ou “60Hz”. Sinon, cliquez
simplement sur “OK” pour quitter la boîte de dialogue.
Modes d’afchage
La taille et la position de l’écran varient en fonction du type d’écran du PC et de sa résolution.
Les résolutions indiquées dans le tableau sont recommandées.
Entrée D-Sub
Mode Résolution Fréquence
horizontale (kHz)
Fréquence verticale
(Hz)
Fréquence
d’horloge pixels
(MHz)
Polarité
synchronisée
(H/V)
IBM 640 x 350
720 x 400
31.469
31.469
70.086
70.087
25.175
28.322
+ / -
- / +
VESA
640 x 480
640 x 480
640 x 480
800 x 600
800 x 600
800 x 600
1024 x 768
1024 x 768
1024 x 768
1280 x 1024
1280 x 1024
1360 x 768
1600 x 1200
31.469
37.861
37.500
37.879
48.077
46.875
48.363
56.476
60.023
63.981
79.976
47.712
75.000
59.940
72.809
75.000
60.317
72.188
75.000
60.004
70.069
75.029
60.020
75.025
60.015
60.000
25.175
31.500
31.500
40.000
50.000
49.500
65.000
75.000
78.750
108.000
135.000
85.500
162.000
- / -
- / -
- / -
+ / +
+ / +
+ / +
- / -
- / -
+ / +
+ / +
+ / +
+ / +
+ / +
CVT 1920 x 1080 RB 66.587 59.934 138.500 + / -
Entrée HDMI/DVI
Mode Résolution Fréquence
horizontale (kHz)
Fréquence verticale
(Hz)
Fréquence
d’horloge pixels
(MHz)
Polarité
synchronisée
(H/V)
VESA
640 x 480
800 x 600
1024 x 768
1280 x 1024
1360 x 768
1600 x 1200
31.469
37.879
48.363
63.981
47.712
75.000
59.940
60.317
60.004
60.020
60.015
60.000
25.175
40.000
65.000
108.000
85.500
162.000
- / -
+ / +
- / -
+ / +
+ / +
+ / +
CEA 1920 x 1080p 67.500 60.000 148.500 + / +
Lorsque vous utilisez une connexion avec câble HDMI/DVI, vous devez utiliser la borne HDMI IN2.
Le mode entrelacé n’est pas pris en charge.
Le téléviseur peut fonctionner de façon anormale si un format vidéo non standard est sélectionné.
Les modes Separate (Séparé) et Composite (Composite) sont pris en charge. SOG (SVSV) n’est pas pris en charge.
Un câble VGA trop long ou de qualité médiocre peut être source de parasites visuels dans les modes haute résolution
(1 920 x 1 080).
N
N
N
N
N
BN68-01757A-Fre.indb 20 2008-9-24 15:04:37
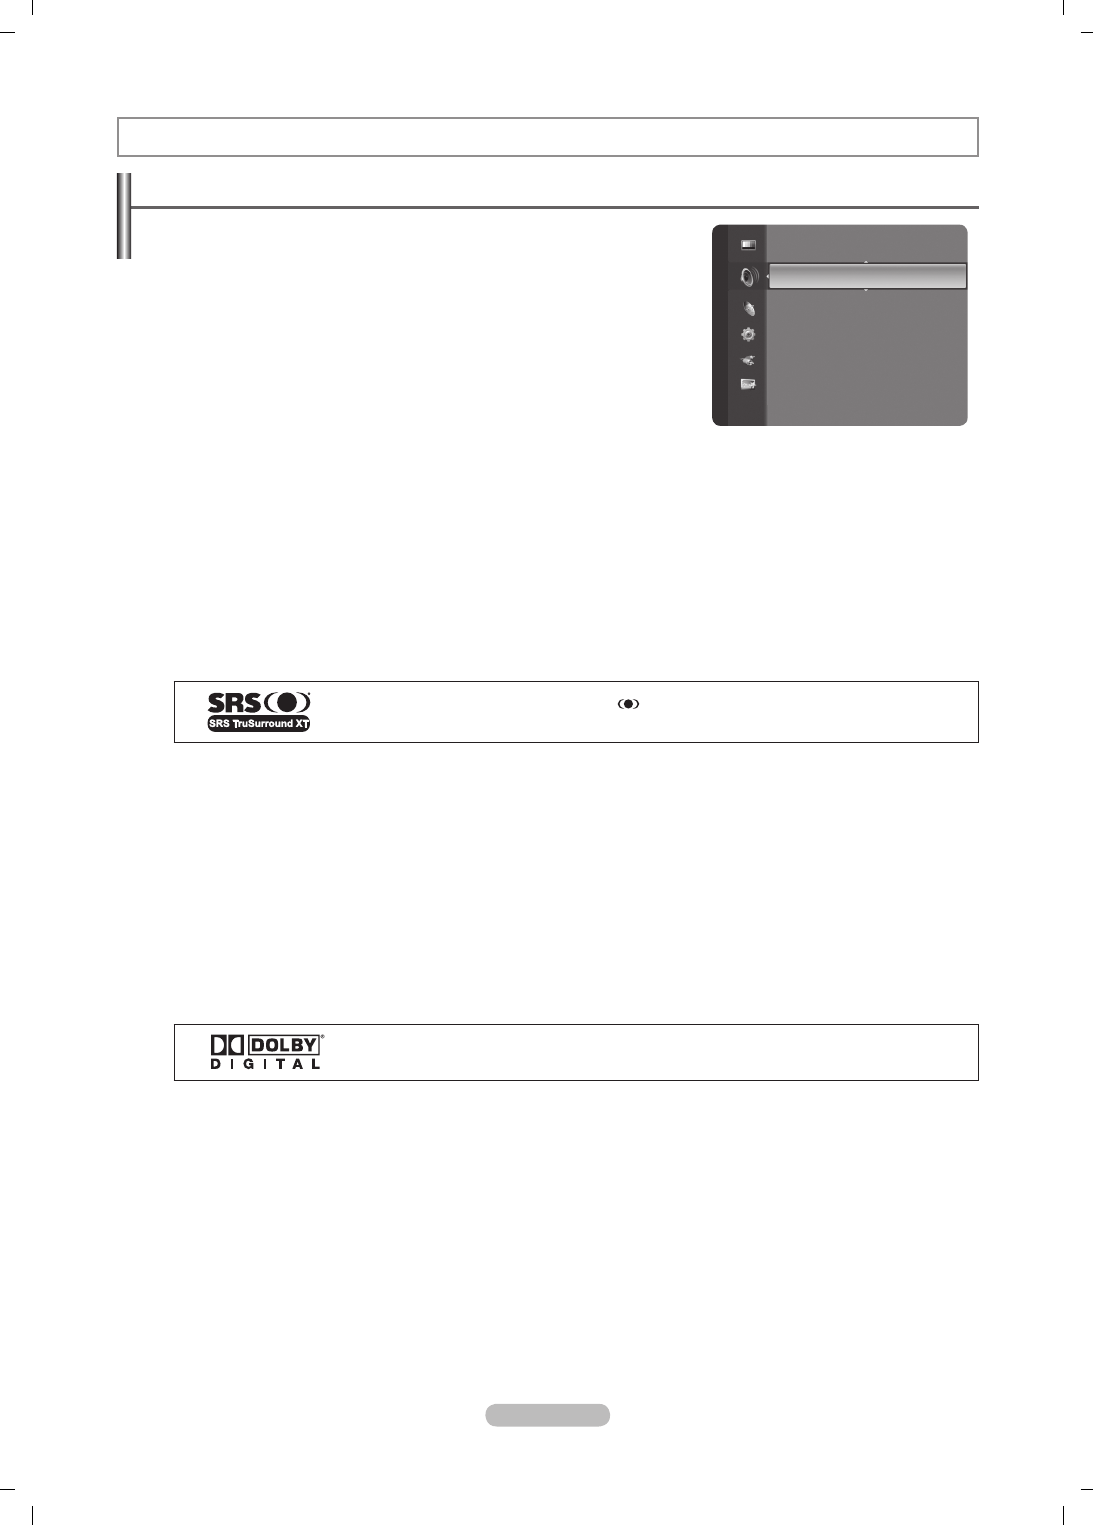
Français - 21
Réglage du son
Changement de la norme Son
Mode → Standard / Musique / Cinéma / Parole / Personnel
Vous pouvez sélectionner le type d’effet sonore souhaité lorsque vous regardez
un programme donné.
Appuyez sur le bouton TOOLS pour afcher le menu Outils. Vous pouvez
également dénir le mode audio en sélectionnant Outils → Mode Son.
Egaliseur
Les paramètres du son peuvent être réglés selon vos préférences personnelles.
Mode
: Vous pouvez sélectionner un mode sonore à votre convenance.
Balance
: Définit la balance entre les haut-parleurs droit et gauche.
100Hz / 300Hz / 1kHz / 3kHz / 10kHz
(Réglage de la bande passante): Permet de régler le niveau de fréquences de la
bande passante.
Reset
: rétablit les valeurs par défaut de l’égaliseur.
SRS TruSurround XT → Arrêt / Marche
Le TruSurround XT est une technologie SRS brevetée qui remédie au problème de la lecture du contenu d’un disque
multicanal 5,1 sur deux haut-parleurs. Le TurSurround produit un son surround virtuel fascinant au moyen de n’importe quel
système de lecture à deux haut-parleurs, dont les haut-parleurs internes du téléviseur. Il s’adapte parfaitement à tous les
formats multicanaux.
Appuyez sur le bouton TOOLS pour afcher le menu Outils. Vous pouvez également dénir l’option SRS TruSurround
XT en sélectionnant Outils → SRS TS XT.
TruSurround XT, SRS et le symbole sont des marques de SRS Labs, Inc. La
technologie TruSurround XT est protégée par la licence de SRS Labs, Inc.
Langue audio
Vous pouvez modier la langue par défaut des sous-titres et de l’audio. Afche les informations relatives à la langue pour le
ot d’entrée.
Cette fonction peut être sélectionnée pendant que vous regardez une chaîne numérique.
Vous pouvez sélectionner la langue uniquement parmi les langues en cours de diffusion.
Format Audio → MPEG / Dolby Digital
Lorsque le son est émis à la fois par le haut-parleur principal et le récepteur audio, un effet d’écho peut se produire en raison
de la différence de vitesse de décodage entre le haut-parleur principal et le récepteur audio. Dans ce cas, utilisez la fonction
Haut-parleur TV.
Cette fonction peut être sélectionnée pendant que vous regardez une chaîne numérique.
Vous pouvez sélectionner la langue uniquement parmi les langues en cours de diffusion.
Fabriqué sous licence de Dolby Laboratories. Dolby et le symbole du double D sont des
marques déposées des laboratoires Dolby.
Description audio
Il s’agit d’une fonction audio auxiliaire qui fournit une piste audio supplémentaire à l’intention des personnes malvoyantes.
Cette fonction traite le ux audio relatif à la Description audio (AD) lorsqu’il est envoyé avec le son principal par le
radiodiffuseur. Les utilisateurs peuvent activer ou désactiver la description audio et régler le volume.
Description audio
→ Arrêt / Marche: Active ou désactive la fonction de description audio.
Volume
: Permet d’ajuster le volume de la description audio.
Volume est actif lorsque Description audio est déni à Marche.
Cette fonction peut être sélectionnée pendant que vous regardez une chaîne numérique.
❑
T
❑
❑
T
❑
N
N
❑
N
N
❑
N
N
Mode : Personnel
►
Egaliseur
SRS TruSurround XT : Arrêt
Langue audio : ----
Format Audio : ----
Description audio
Auto Volume : Arrêt
Sélection Haut-parleur : Haut-parleur TV
align
BN68-01757A-Fre.indb 21 2008-9-24 15:04:38
Français - 22
Sélection du mode Son
Vous pouvez congurer le mode sonore dans le menu Outils. Lorsque vous réglez cette
option sur Dual l ll, le mode sonore actuel est afché à l’écran.
Type de programme
Indication à l'écran Indication à l’écran
NICAM
stéréo
Programme normal
(Audio standard) Mono (Usage normal)
Normal + Mono NICAM NICAM Mono
(Normal)
NICAM Stéréo NICAM
stéréo
Mono
(Normal)
NICAM DUAL-I/II NICAM
dual 1 NICAM
dual 2
Mono
(Normal)
A2
stéréo
Programme normal
(Audio standard) Mono (Usage normal)
Bilingue ou DUAL-I/II Dual I Dual II
Stéréo Stéréo Mono
(Mono forcé)
Si le signal stéréo est faible et qu’une permutation automatique se produit, passez alors en Mono.
Cette fonction n’est activée qu’en son stéréo. Elle est désactivée en mode mono.
Cette fonction n’est disponible qu’en mode TV.
N
N
N
Volume auto → Arrêt / Marche
Chaque station de télédiffusion possède ses propres conditions de signal et
il n’est donc pas facile de régler le volume chaque fois que vous changez de
chaîne. Cette fonction vous permet de régler automatiquement le volume du
canal désiré en réduisant la puissance sonore lorsque le signal de modulation
est élevé ou en augmentant la puissance sonore lorsque le signal de modulation
est faible.
Sélection Haut-parleur → Haut-parleur externe/Haut-parleur TV
Pour entendre le son par l’intermédiaire d’enceintes séparées, désactivez l’
amplicateur interne.
Les boutons – +, MUTE ne fonctionnent pas lorsque la fonction Haut-parleur TV est réglée sur Arrêt.
Si vous sélectionnez Haut-parleur externe dans le menu Haut-parleur externe, les paramètres de son sont limités.
Haut-parleurs internes du téléviseur Sortie audio (Optique, Sortie G/D) vers système audio
TV / Ext. / AV / S-Video / Component / PC / HDMI TV / Ext. / AV / S-Video / Component / PC / HDMI
Haut-parleur TV Sortie enceinte Sortie son
Haut-parleur externe Silence Sortie son
Absence de signal vidéo Silence Silence
Sélection du son
Lorsque la fonction PIP est activée, vous pouvez écouter le son accompagnant l’image secondaire.
Principal
: pour écouter le son accompagnant l’image principale.
Secondaire: pour écouter le son accompagnant l’image secondaire.
Appuyez sur le bouton TOOLS pour afcher le menu Outils. Vous pouvez également dénir le son de l’image secondaire
en sélectionnant Outils → PIP → Sélection du son.
Réinitialisation du son
Réinitial. tout / Réinitial. mode son / Annuler: Vous pouvez ramener tous les réglages mémorisés à leur valeur par défaut.
❑
❑
N
N
❑
T
❑
Sélection Haut-parleur : Haut-parleur TV
Sélection du son : Principal
Réinitialisation du son
►
Son
Outils
Anynet+ (HDMI-CEC)
Format de l'image : Larg. auto
Image Mode : Standard
Son Mode : Personnel
Veille : Arrêt
SRS TS XT : Arrêt
Mode éco. : Arrêt
Dual l ll ◄ Mono ►
U
Déplacer
L
Régler
e
Quitter
BN68-01757A-Fre.indb 22 2008-9-24 15:04:38
Français - 23
Utilisation du menu Setup
Langue
Vous pouvez sélectionner la langue des menus.
Verrouillage Canal → Arrêt / Marche
Cette fonction permet d’empêcher que des utilisateurs non autorisés, tels que
des enfants, regardent des programmes inappropriés, en désactivant la vidéo et
l’audio.
Avant que l’écran de conguration s’afche, l’écran de saisie du code PIN
apparaît. Entrez votre code PIN à quatre chiffres.
Le code PIN par défaut d’un nouveau téléviseur est “0-0-0-0”. Vous pouvez
modier le code PIN en sélectionnant Modier PIN dans le menu.
Vous pouvez verrouiller certaines chaînes dans la liste des chaînes. (reportez-vous à la page 14)
Verrouillage Canal est uniquement disponible en mode TV.
Modier PIN
Vous pouvez changer le code personnel demandé pour pouvoir congurer le téléviseur.
Avant que l’écran de conguration s’afche, l’écran de saisie du code PIN apparaît. Entrez votre code PIN à quatre
chiffres.
Le code PIN par défaut d’un nouveau téléviseur est 0-0-0-0.
Si vous avez oublié le code, appuyez sur les boutons de la télécommande dans l’ordre suivant, ce qui remet le code à
0-0-0-0: POWER (Arrêt), MUTE, 8, 2, 4, POWER (Marche).
Verrouillage parental → Classement parental
Cette fonction permet d’empêcher certains utilisateurs, par exemple des enfants, de regarder des émissions inappropriées, en
les protégeant à l’aide d’un code de 4 chiffres déni par l’utilisateur.
Dans l’écran Classement parental, congurez la signalétique.
Avant que l’écran de conguration s’afche, l’écran de saisie du code PIN apparaît. Entrez votre code PIN à quatre
chiffres.
Le code PIN par défaut d’un nouveau téléviseur est 0-0-0-0. Vous pouvez modier le code PIN en sélectionnant Modier
PIN dans le menu.
Une fois la signalétique dénie, le symbole “
\
” s’afche.
Autor.tout: est uniquement disponible en mode TV.
Bloq. tout: n’est pas disponible lorsque le mode PIP est activé.
Sous-titres
Vous pouvez activer ou désactiver la fonction sous-titres. Utilisez ce menu pour congurer le mode des sous-titres. “Normal”
sélectionne les sous-titres de base ; “Malentendants” sélectionne les sous-titres pour personnes malentendantes.
Sous-titres → Arrêt / Marche: Active ou désactive les sous-titres.
Mode → Normal / Malentendants: Configure le mode des sous-titres.
Langue des sous-titres: Configure la langue des sous-titres.
Si le programme visionné n’offre pas de fonction “Malentendants”, le mode Normal est automatiquement activé même si le
mode Malentendants est sélectionné.
L’anglais est la langue par défaut si la langue sélectionnée n’est pas disponible.
Vous pouvez sélectionner ces options en appuyant sur le bouton SUBT. de la télécommande.
Langue du télétexte
Vous pouvez dénir la langue du télétexte en sélectionnant le type de langue.
L’anglais est la langue par défaut si la langue sélectionnée n’est pas
disponible.
❑
❑
N
N
N
N
❑
N
N
N
❑
-
N
N
N
N
N
❑
N
N
N
❑
N
Description des fonctions
Conguration
Plug & Play
Langue : Français ►
Horloge
Sélection du réseau : Câble
Configuration du réseau sans fil
Configuration internet
Verrouillage Canal : Marche
Modifier PIN
Verrouillage parental
BN68-01757A-Fre.indb 23 2008-9-24 15:04:38
Français - 24
Préférence
Première Langue Audio/Deuxième Langue Audio/Langue princ. sous-titres/Langue sec. sous-titres/Première Langue
Télétexte/Deuxième Langue Télétexte
Cette fonction permet de sélectionner une des langues disponibles. La langue sélectionnée ici est la Langue par défaut
lorsque l’utilisateur sélectionne un canal.
Si vous changez la langue, les options Langue des sous-titres, Langue audio et Langue du télétexte du menu Langue sont
automatiquement modiées en conséquence.
Les options Langue des sous-titres, Langue audio et Langue du télétexte du menu Langue présentent une liste des languaes
prises en charge par la chaîne actuelle et la langue sélectionnée est mise en surbrillance. Si vous modiez le réglage des
langues, la nouvelle sélection n’est valable que pour le canal actuel. Le nouveau réglage n’affecte pas la langue des sous-
titres principale, la langue audio principale ni la langue télétexte principale sélectionnées dans le menu de préférences.
Texte numérique → Désactiver / Active
Si le programme est diffusé avec du texte numérique, cette fonction est activée.
MHEG (Multimedia and Hypermedia Information Coding Experts
Group)
Norme internationale pour les systèmes de codage des données utilisés avec
le multimédia et l’hypermédia. Niveau supérieur à celui du système MPEG, qui
inclut de l’hypermédia à liaison de données tel que des images xes, le service
de caractères, l’animation, les chiers graphiques et vidéo et les données
multimédia. MHEG est une technologie utilisateur d’interaction de durée
d’utilisation appliquée à divers domaines, dont la vidéo à la demande (VOD),
la télévision interactive (ITV), le commerce électronique, la téléformation, la
téléconférence, les bibliothèques numériques et les jeux en réseau.
Effet lumineux → Arrêt / En veille/En marche/Toujours
Vous pouvez allumer/éteindre la LED bleue à l'avant de votre téléviseur en fonction de la situation. Recourez à cette fonction
pour économiser de l'énergie ou lorsque la LED fatigue vos yeux.
Arrêt: TLa LED bleue est toujours éteinte.
En veille: La LED bleue est allumée en mode veille et éteinte quand le téléviseur est sous tension.
En marche: La LED bleue est allumée quand vous regardez la télévision et éteinte quand le téléviseur est hors tension.
Toujours: La LED bleue est toujours allumée.
Réglez la fonction Effet lumineux sur Arrêt pour réduire la consommation électrique.
Mélodie
Arrêt
/ Bas / Moyen / Elevé
La mélodie de mise sous/hors tension du téléviseur peut être ajustée.
Aucune mélodie n’est lue dans les cas suivants:
Aucun son n’est émis par le téléviseur car le bouton MUTE a été enfoncé.
Aucun son n'est émis par le téléviseur car le bouton – (Volume) a été enfoncé.
Lorsque le téléviseur est éteint par la fonction Veille.
Divertissement
Le mode Divertissement permet de sélectionner les valeurs d’afchage et de son optimales pour le sport, le cinéma et les
jeux.
Arrêt: désactive la fonction Divertissement.
Sports: fournit une qualité d’image et de son optimale pour le sport.
Cinéma: fournit une qualité d’image et de son optimale pour regarder un film. Vous pouvez profiter d’une image plus belle et
d’un son encore meilleur.
Jeu: fournit une qualité d’image et de son optimale pour les jeux. Ce mode accélère la vitesse de lecture lorsqu’une console
de jeu est connectée au téléviseur.
Si vous activez l’un des trois modes Divertissement, les paramètres seront verrouillés, empêchant toute modication. Les
réglages de mode d’image et de mode audio sont en outre indisponibles. Si vous souhaitez régler les mode d’image et audio,
le mode Divertissement doit être désactivé.
Les réglages du mode Divertissement sont enregistrés séparément pour chaque source d’entrée.
Le mode Divertissement n'est pas activé en mode PC.
Vous pouvez appuyer plusieurs fois sur le bouton E.MODE de la télécommande
pour modier le paramètre Divertissement.
❑
❑
N
❑
N
❑
N
-
-
-
❑
N
N
N
O
Conguration
Langue du télétexte : ----
Préférence
Texte numérique : Activer ►
Effet lumineux : LED act. marche
Ajustement fixation murale
Mélodie : Arrêt
Divertissement : Arrêt
Mode éco. : Arrêt
PIP
Mise à niveau du logiciel
BN68-01757A-Fre.indb 24 2008-9-24 15:04:39

Français - 25
Mode éco.
Cette fonction règle la luminosité du téléviseur an de réduire la consommation d’énergie. Lorsque vous regardez la
télévision le soir, réglez l’option du mode Mode éco. sur Elevé pour reposer vos yeux et réduire la consommation d’énergie.
Arrêt: Désactive la fonction d’économie d’énergie.
Bas: Met le téléviseur en mode d’économie d’énergie basse.
Moyen: Met le téléviseur en mode d’économie d’énergie moyenne.
Elevé: Met le téléviseur en mode d’économie d’énergie élevée.
Appuyez sur le bouton TOOLS pour afcher le menu Outils. Vous pouvez également dénir l’option d’économie d’énergie en
sélectionnant Outils → Mode éco..
Mise à niveau du logiciel
Pour garder le produit à jour avec les options Digital Television, les mises à jour
logiciel sont régulièrement diffusées dans le signal télévision normal. Le téléviseur
détecte automatiquement ces signaux et afche le bandeau de mise à jour logiciel.
Vous avez le choix d’installer ou non la mise à jour.
USB
Insérez dans le téléviseur un lecteur USB contenant la mise à niveau du
microprogramme. Veillez à ne pas couper l’alimentation ni retirer le lecteur
USB pendant l’application des mises à niveau. Une fois la mise à niveau du
micrologiciel terminée, le téléviseur se met automatiquement hors puis sous
tension. Vériez la version du micrologiciel une fois les mises à niveau terminées.
Lorsque le logiciel est mis à niveau, les paramètres vidéo et audio dénis reprennent leur valeur par défaut (d’usine). Nous
vous recommandons de noter vos réglages pour les rétablir facilement après la mise à niveau.
Canal
Met à niveau le logiciel en utilisant le signal diffusé.
Mise à niveau en mode Veille
Pour poursuivre la mise à jour du logiciel en gardant le téléviseur sous tension, sélectionnez Marche (Actif) en appuyant sur
le bouton ▲ ou ▼. 45 minutes après que le mode veille a été activé, une mise à jour manuelle est réalisée automatiquement.
Etant donné que le courant est activé de façon interne, l'écran peut s'allumer brièvement pour le produit. Le phénomène peut
se poursuivre durant une heure jusqu’à ce que la mise à jour logiciel soit terminée.
Autre logiciel
Afche des informations sur la version du logiciel.
Interface commune
Installation de la carte d’interface commune (CI)
a. Achetez le module CI CAM en vous rendant chez le revendeur le plus proche
ou par téléphone.
b. Insérez la CI CARD dans la CAM dans la direction indiquée par la èche
jusqu'à ce qu'elle soit emboîtée.
c. érez la CAM avec la CI CARD installée dans la fente de l'interface commune.
Insérez la CAM dans la direction indiquée par la èche, juste au-dessus de
l'extrémité, pour qu'elle soit parallèle à la fente.
d. Vériez si une image est visible sur un canal à signal brouillé
Menu CI
Cela aide l’utilisateur à sélectionner un élément du menu pris en charge par CAM.
Sélectionnez le menu CI dans le menu PC Card.
Infos sur l’application
Contient des informations relatives à la CAM insérée dans la fente CI et les
afche.
Les Application Info concernent la CI CARD. Vous pouvez installer la CAM que le téléviseur soit allumé ou éteint.
1. Achetez le module CI CAM en vous rendant chez le revendeur le plus proche ou par téléphone.
2. Insérez la CI CARD dans la CAM dans la direction indiquée par la èche jusqu’à ce qu’elle soit emboîtée.
3. Insérez la CAM avec la CI CARD installée dans la fente de l’interface commune. (Insérez la CAM dans la direction indiquée
par la èche, juste au-dessus de l’extrémité pour qu’elle soit parallèle à la fente.)
4. Vériez si une image est visible sur un canal à signal brouillé.
❑
T
❑
❑
N
4
Lecteur USB
PPanneau latéral du
téléviseur
BN68-01757A-Fre.indb 25 2008-9-24 15:04:39
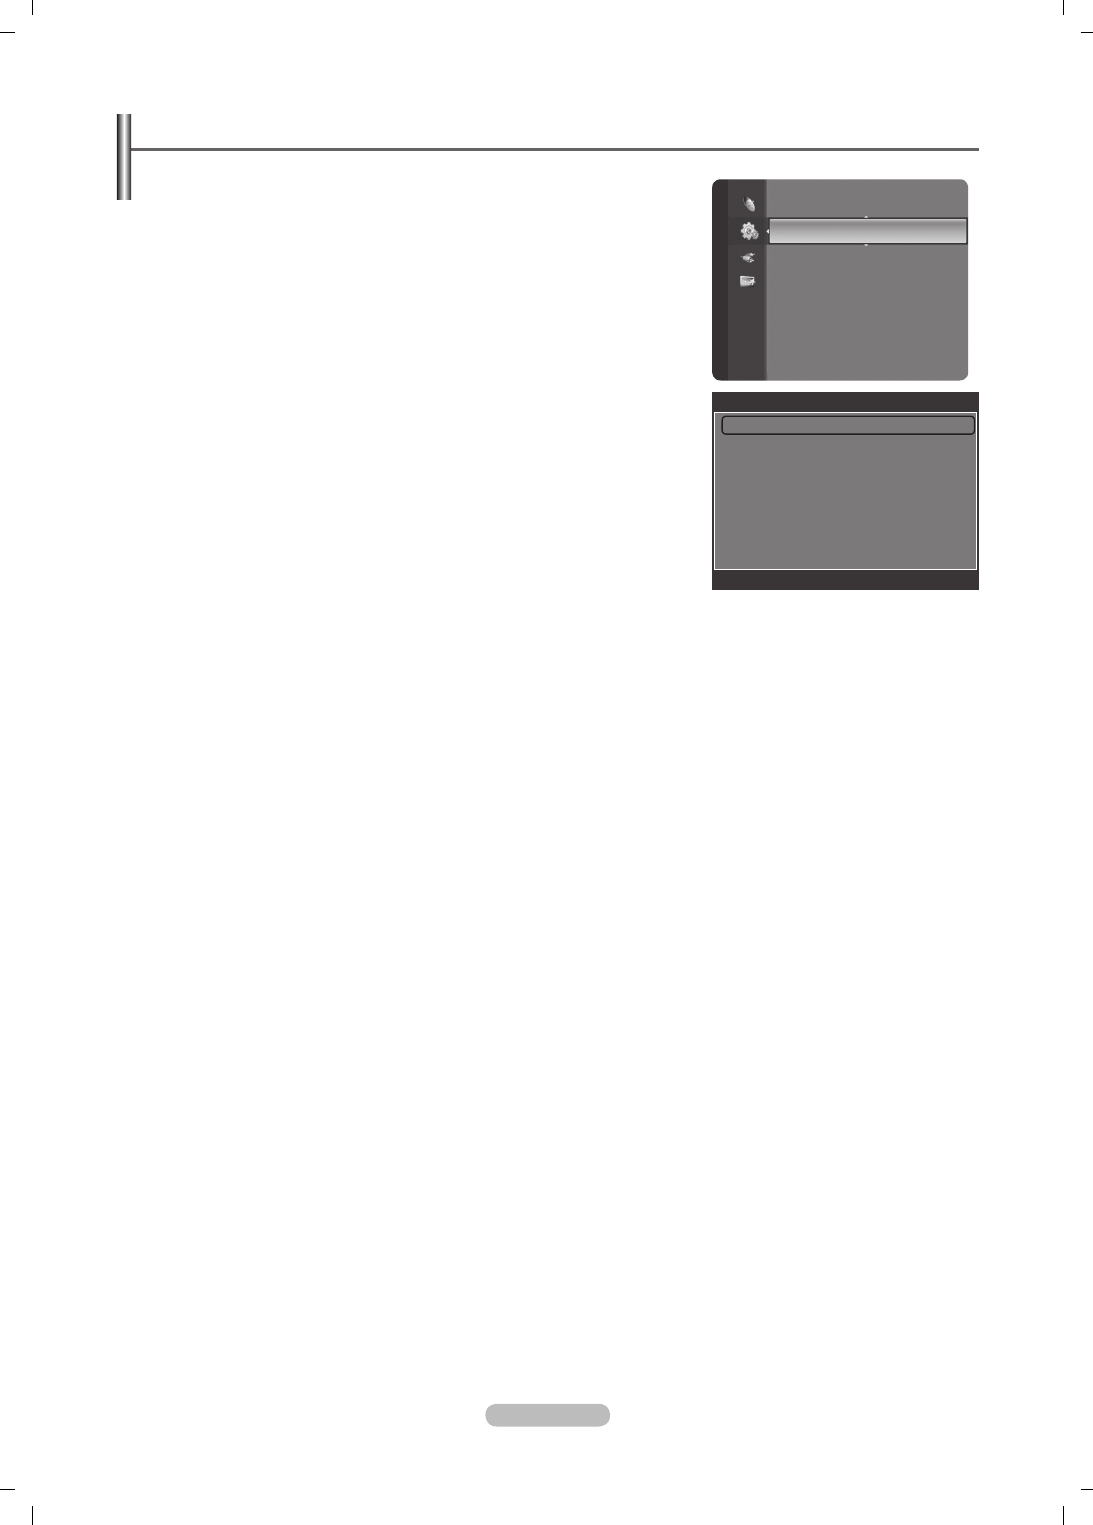
Français - 26
Réglage de l’heure
Horloge
Le réglage de l’horloge est nécessaire pour utiliser les différentes fonctions de
la minuterie de la télévision.
L’heure actuelle s’afche à chaque fois que vous appuyez sur le bouton
INFO.
Si vous débranchez le cordon d’alimentation, vous devrez régler à nouveau
l’horloge.
Mode Horloge
Vous pouvez dénir l’heure actuelle manuellement ou automatiquement.
Auto.: Règle automatiquement l’heure en fonction de signaux diffusés.
Manuel: Permet de régler l’heure manuellement.
Réglage. Horloge
Vous pouvez dénir l’heure actuelle.
Sélectionnez cette option lorsque Mode Horloge est à Manuel.
Vous pouvez régler directement le mois, le jour, les heures et les minutes en
appuyant sur les boutons numériques de la télécommande.
Veille → Arrêt / 30 min. / 60 min. / 90 min. / 120 min. / 150 min. /
180 min.
La minuterie de mise en veille coupe automatiquement la télévision après une
durée préréglée (30, 60, 90, 120, 150 ou 180 minutes).
Le téléviseur passe automatiquement en mode veille lorsque le minuteur atteint 0.
Pour annuler la fonction Veille, sélectionnez Arrêt.
Appuyez sur le bouton TOOLS pour afcher le menu Outils. Vous pouvez également dénir la minuterie de veille d’image
en sélectionnant Outils → Veille.
Minuteur 1 / Minuteur 2 / Minuteur 3
Trois réglages différents de mise en marche/arrêt peuvent être dénis.
Période d'activation:
Sélectionnez les heures et les minutes et l’action activer/désactiver.
(Pour activer le minuteur selon les réglages dénis, choisissez Activer.)
Période de désactivation:
Sélectionnez les heures et les minutes et l’action activer/désactiver.
(Pour activer le minuteur selon les réglages dénis, choisissez Activer.)
Volume:
Sélectionnez le niveau de volume désiré.
Contenu:
Lorsque la fonction
Période d'activation
est active, vous pouvez activer un canal spécique ou lire un contenu
spécique tel qu’une photo ou des chiers audio.
TV / USB: Sélectionnez TV ou USB. (Assurez-vous que le périphérique USB est branché sur le téléviseur.)
Antenne: Sélectionnez ATV ou DTV.
Canal: Sélectionnez la chaîne désirée.
Musique: Sélectionnez le dossier contenant des chiers MP3 sur le périphérique USB.
Photo: Sélectionnez le dossier contenant des chiers JPEG sur le périphérique USB.
Répétition:
Sélectionnez Une fois, Ts jours, Lun - Ven, Lun - Sam, Sam - Dim ou Manuel.
Lorsque Manuel est sélectionné, appuyez sur le bouton ► pour sélectionner le jour de la semaine. Appuyez sur le bouton
ENTER
E
sur le jour de votre choix. Le symbole c apparaît alors.
Vous devez préalablement régler l’horloge.
Vous pouvez régler les heures, les minutes et les chaînes directement à l’aide du pavé numérique de la télécommande.
Mise hors tension automatique
Lorsque vous dénissez la minuterie sur On, le téléviseur s’éteint si aucune commande n’est activée dans les 3 heures qui
suivent la mise sous tension. Cette fonction est disponible uniquement lorsque la minuterie est dénie sur On ; elle permet
d’éviter toute surchauffe occasionnée par une utilisation prolongée du téléviseur.
N
N
•
•
N
N
❑
N
N
T
❑
•
•
•
•
•
N
N
N
N
Conguration
Plug & Play
Langue : Français
Horloge ►
Sélection du réseau : Câble
Configuration du réseau sans fil
Configuration internet
Verrouillage Canal : Marche
Modifier PIN
Verrouillage parental
Sous-titres
Horloge
Horloge : -- : -- ►
Veille : Arrêt
Minuteur 1 : Désactivé
Minuteur 2 : Désactivé
Minuteur 3 : Désactivé
U
Déplacer
E
Entrer
R
Retour
BN68-01757A-Fre.indb 26 2008-9-24 15:04:40
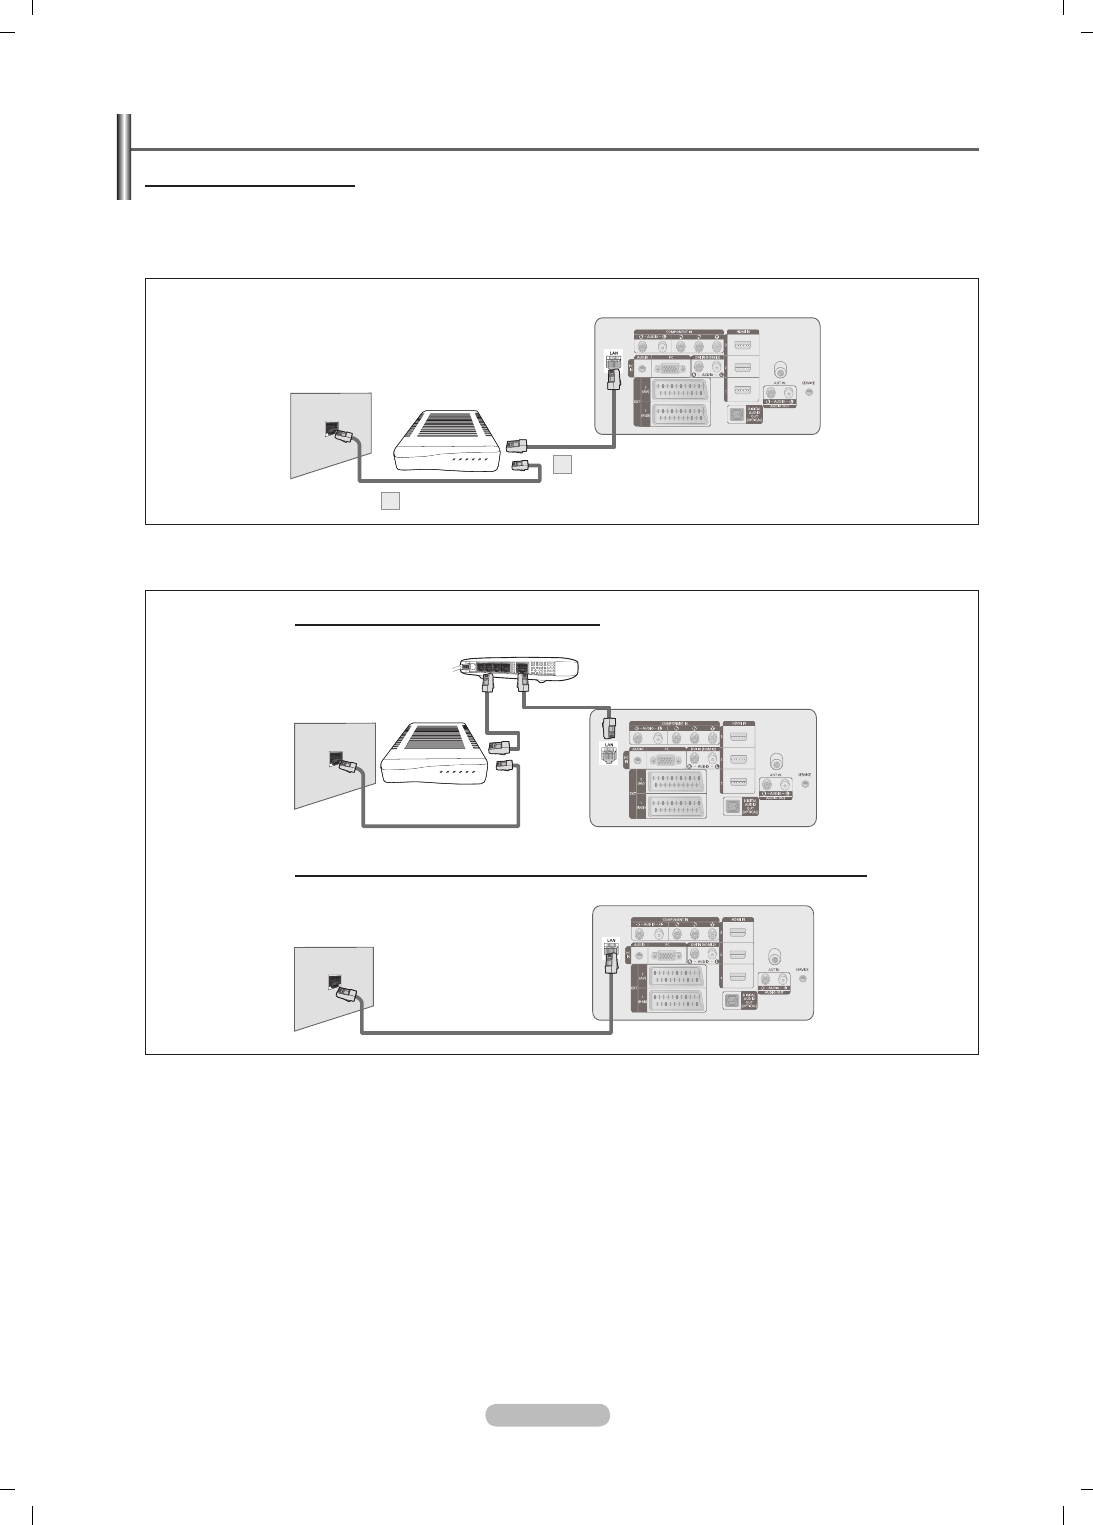
Français - 27
Connexion réseau
Connexion réseau - Câble
Connexion p
ar câble pour un environnement DHCP
Les paragraphes qui suivent décrivent les procédures à suivre pour congurer le réseau avec le protocole DHCP (Dynamic
Host Conguration Protocol). Étant donné qu’une adresse IP, un masque de sous-réseau, une passerelle et un serveur DNS
sont automatiquement attribués lorsque DHCP est sélectionné, vous ne devez pas les spécier manuellement.
1. Raccordez le port [LAN] à l’arrière du téléviseur et le modem externe à l’aide d’un câble LAN.
2. Raccordez le connecteur LAN mural et le modem externe à l’aide d’un câble modem.
Les connecteurs (position et type de port) de l’appareil externe peuvent varier selon le fabricant.
Si l’allocation de l’adresse IP par le serveur DHCP échoue, éteignez le modem externe, rallumez-le après au moins 10
secondes et réessayez.
Pour les raccordements entre le modem externe et le routeur (Sharer), reportez-vous à la documentation du produit
correspondant.
Vous pouvez connecter le téléviseur directement au réseau sans passer par un routeur.
Vous ne pouvez pas utiliser un modem ADSL à connexion manuelle, car celui-ci ne prend pas en charge DHCP. Vous devez
utiliser un modem ADSL à connexion automatique.
N
N
N
N
N
Panneau arrière du téléviseur
Connecteur
modem mural
Câble modem
2
Modem externe (ADSL /
VDSL / Cable TV)
Câble LAN
1
Selon votre réseau, vous pouvez raccorder directement le connecteur LAN et le téléviseur.
Panneau arrière du téléviseur
Câble LAN
Connecteur
modem mural
Vous pouvez connecter le réseau via un routeur.
Panneau arrière du téléviseur
Connecteur
modem mural
Modem externe (ADSL /
VDSL / Cable TV)
Routeur IP
Câble LAN
Câble modem
Câble LAN
BN68-01757A-Fre.indb 27 2008-9-24 15:04:44
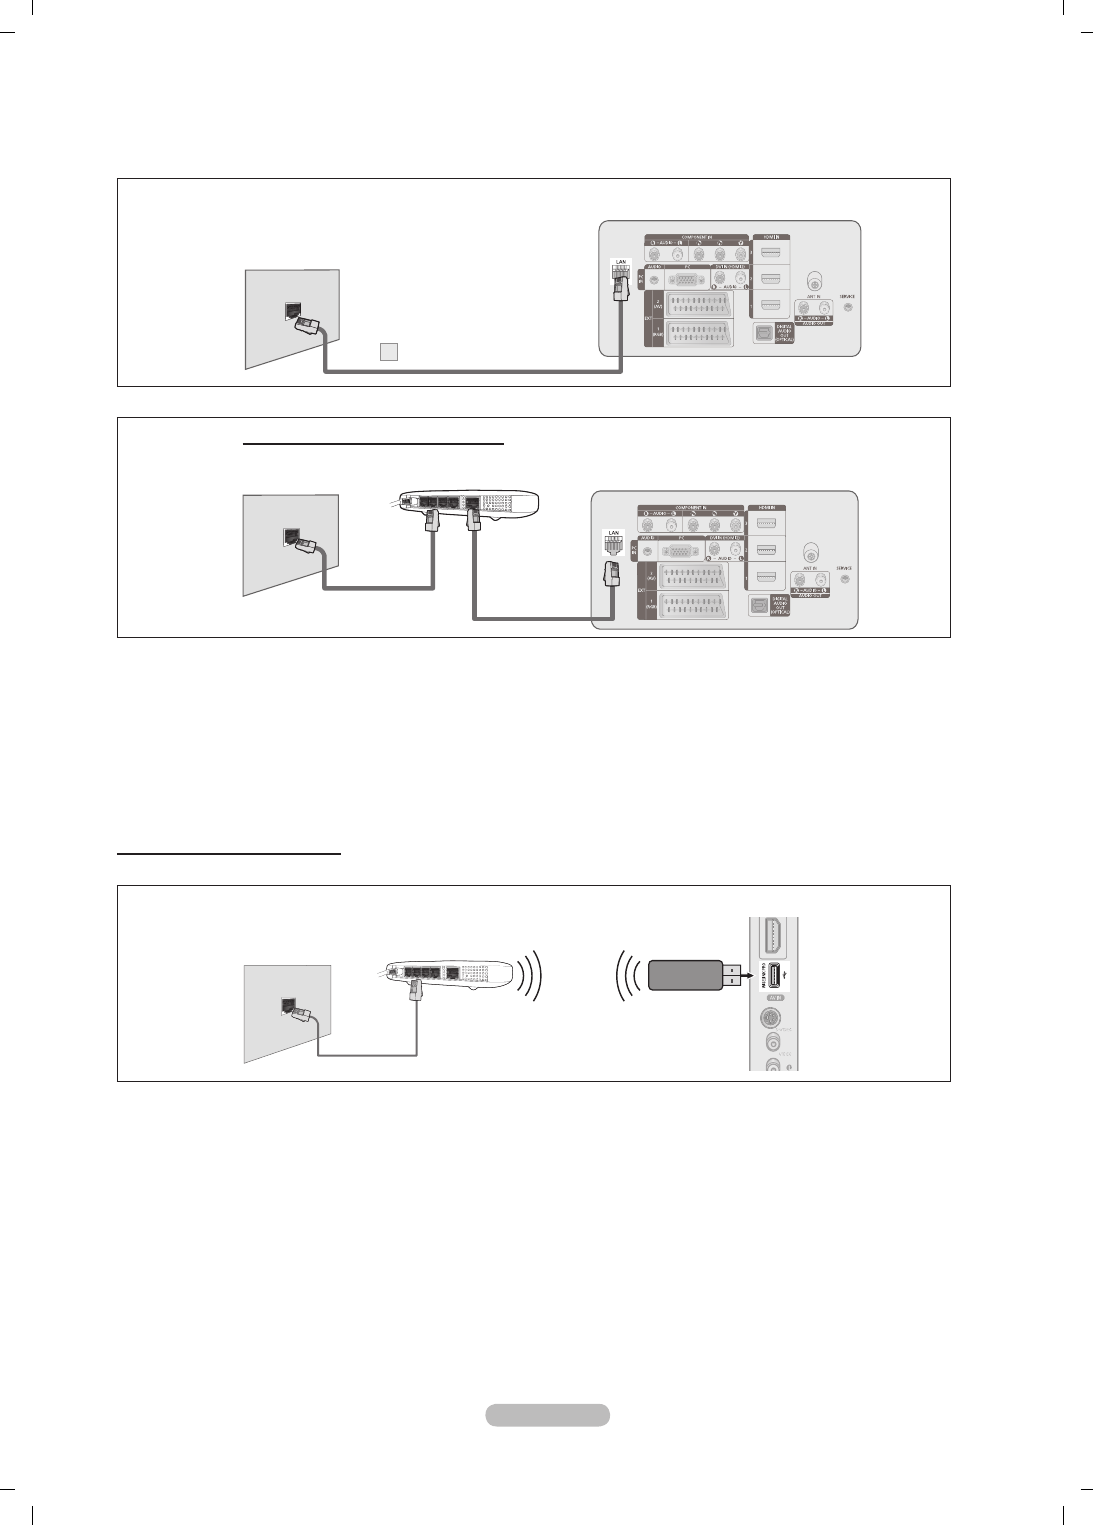
Français - 28
Connexion LAN pour un environnement IP statique
Les paragraphes qui suivent décrivent les procédures à suivre pour congurer le réseau avec une adresse IP statique. Vous devez
entrer manuellement l’adresse IP, le masque de sous-réseau, la passerelle et le serveur DNS de votre fournisseur d’accès.
1. Raccordez le port [LAN] à l’arrière du téléviseur et le connecteur LAN à l’aide d’un câble LAN.
Les connecteurs (position et type de port) de l’appareil externe peuvent varier selon le fabricant.
Si vous utilisez une adresse IP statique, votre fournisseur d’accès vous communiquera l’adresse IP, le masque de sous-
réseau, la passerelle et le serveur DNS appropriés. Vous devez entrer ces valeurs pour effectuer la conguration réseau. Si
vous ne connaissez pas ces valeurs, consultez votre administrateur de réseau.
Pour la conguration et le raccordement d’un routeur (Sharer), reportez-vous à la documentation du produit correspondant.
Vous pouvez connecter le téléviseur directement au réseau sans passer par un routeur.
Si vous utilisez un routeur IP prenant en charge le protocole DHCP, vous pouvez congurer l’appareil comme utilisant DHCP
ou une adresse IP statique.
Pour les procédures à suivre si vous utilisez une adresse IP statique, consultez votre fournisseur d’accès.
Connexion réseau - Sans l
Vous pouvez vous connecter au réseau sans l au travers d’un routeur IP sans l.
1. Branchez ‘Samsung Wireless LAN Adapter for InfoLive’ sur le connecteur Wiselink du téléviseur.
Vous devez employer ‘Samsung Wireless LAN Adapter for InfoLive’(WIS-08BG) pour utiliser un réseau sans l.
L’adaptateur ‘Samsung Wireless LAN Adapter for InfoLive’ est vendu séparément. Pour vous le procurer, contactez un agent
ou un centre de services Samsung Electronics.
Pour utiliser un réseau sans l, vous devez connecter le téléviseur à un routeur IP sans l.
Si ce routeur prend en charge le protocole DHCP, le téléviseur peut utiliser DHCP ou une adresse IP statique pour se
connecter au réseau sans l.
Vous devez utiliser un routeur IP sans l prenant en charge IEEE 802.11 B ou IEEE 802.11G.
Si le routeur IP sans l vous permet de désactiver/activer la fonction de connexion Ping, activez-la.
Réglez le routeur IP sans l en mode Infrastructure. Le mode Ad-hoc n’est pas pris en charge.
Sélectionnez un canal inutilisé pour le routeur IP sans l. Si le canal affecté au routeur IP sans l est actuellement utilisé par
un autre périphérique dans le voisinage, il y aura des interférences et la communication peut échouer.
Pour la clé de sécurité du routeur IP, les options suivantes sont obligatoires.
1) Authentication Mode : WEP, WPAPSK, WPA2PSK
2) Encryption Type : WEP, TKIP, AES
SI vous utilisez d’autres paramètres, le routeur ne fonctionnera pas avec le téléviseur.
N
N
N
N
N
N
N
N
N
N
N
N
N
N
N
Panneau arrière du téléviseur
Câble LAN
1
Connecteur LAN
mural
Panneau arrière du téléviseur
Câble LAN
Routeur IP
Câble LAN
Connecteur LAN
mural
Vous pouvez connecter le réseau via un routeur.
Panneau latéral du téléviseur
Adaptateur "Samsung
Wireless LAN Adapter for
InfoLive"
Câble LAN
Routeur IP sans l
Connecteur LAN
mural
BN68-01757A-Fre.indb 28 2008-9-24 15:04:48

Français - 29
Configuration du réseau
Sélection du réseau
Sélectionnez Cable ou Wireless, selon la méthode utiliser pour la connexion au
réseau.
Le menu n’est disponible que si ‘Samsung Wireless LAN Adapter for
InfoLive’ est connecté.
Câble
: Connexion au réseau par câble.
Sans fil
: Connexion sans l.
Conguration internet
Conf. Prot. Internet → Config. auto. / Config. Manuel
Test réseau
: Permet de tester ou vérier la connexion réseau après la conguration du réseau.
En cas d’impossibilité de se connecter à un réseau câblé
Si votre fournisseur d’accès a enregistré l’adresse MAC du périphérique utilisé pour se connecter la première fois à
Internet et qu’il authentie cette adresse MAC chaque fois que vous vous connectez à Internet, votre téléviseur ne
pourra pas se connecter à Internet car l’adresse MAC différera de celle du périphérique (votre PC) utilisé pour se
connecter la première fois. Dans ce cas, demandez à votre fournisseur d’accès la procédure à suivre pour connecter des
périphériques autres que votre PC (p. ex. votre téléviseur) à Internet. Si votre fournisseur d’accès exige un identiant ou
un mot de passe pour la connexion à Internet (réseau), votre téléviseur ne pourra pas se connecter à Internet. Dans ce
cas, vous devez entrer l’identiant ou le mot de passe lors de la connexion à Internet à l’aide d’un routeur.
La connexion à Internet peut échouer à cause d’un problème de pare-feu (rewall). Dans ce cas, contactez votre
fournisseur d’accès. Si vous ne pouvez pas vous connecter à Internet même en suivant les procédures communiquées
par votre fournisseur d’accès, consultez un Centre de services Samsung Electronics.
Conguration du réseau sans l
Conf. Prot. Internet → Config. auto. / Config. Manuel
Test réseau
: Permet de tester ou vérifier la connexion réseau après la configuration du réseau.
En cas d’impossibilité de se connecter à un réseau sans l
Il se peut que votre téléviseur ne parvienne pas à localiser un point d’accès conguré comme SSID privé. Dans ce cas,
modiez les paramètres de point d’accès et réessayez. Si votre fournisseur d’accès a enregistré l’adresse MAC du
périphérique utilisé pour se connecter la première fois à Internet et qu’il authentie cette adresse MAC chaque fois que
vous vous connectez à Internet, votre téléviseur ne pourra pas se connecter à Internet car l’adresse MAC différera de
celle du périphérique (votre PC) utilisé pour se connecter la première fois. Dans ce cas, demandez à votre fournisseur
d’accès la procédure à suivre pour connecter des périphériques autres que votre PC (p. ex. votre téléviseur) à Internet.
Si vous ne pouvez pas vous connecter à Internet même en suivant les procédures communiquées par votre fournisseur
d’accès, consultez un Centre de services Samsung Electronics.
Sélec. Point accés:
Vous pouvez sélectionner le routeur à utiliser pour la connexion au réseau sans l.
Si la liste de points d’accès ne comporte pas de point d’accès sans l, appuyez sur le bouton Rouge.
Une fois la connexion effectuée, l’écran initial réapparaît.
Si vous avez sélectionné un point d’accès qui exige une authentication, entrez la clé de sécurité.
Si vous avez sélectionné un point d’accès exigeant une authentication :
L’écran de saisie de la clé de sécurité apparaît.
Entrez la clé de sécurité et appuyez sur le bouton ENTERE.
Utilisez les touches de la télécommande dans l’écran de saisie de la clé de sécurité.
L'écran de conguration peut varier en fonction des types de sécurité.
Bouton Description
▲/▼/◄/►
(Molette)
Déplace la sélection vers le haut/le bas/la gauche/la droite.
(ENTER)
Entre le caractère sélectionné.
Bouton rouge
Permet de basculer entre majuscules et minuscules.
Bouton vert
Permet d'effacer un caractère déjà introduit.
Bouton bleu
Permet de mettre n à la saisie de la clé de sécurité.
❑
N
❑
N
❑
N
N
N
N
N
-
-
-
N
conguration
Langue : Français
Horloge
Sélection du réseau : Câble ►
Configuration du réseau sans fil
Configuration internet
Verrouillage Canal : Marche
Modifier PIN
Verrouillage parental
Sous-titres
Langue du télétexte : - - - -
BN68-01757A-Fre.indb 29 2008-9-24 15:04:50

Français - 30
Conguration internet - Cong. auto.
Si vous connectez un câble réseau et que le réseau prend en charge DHCP, les paramètres IP (Internet Protocol) sont congurés
automatiquement. Vériez si le câble LAN est correctement branché. (Voir page 27)
1. Réglez Sélection du réseau sur Câble.
2. Sélectionnez Conguration internet.
3. Réglez Cong. prot. Internett sur Cong. auto..
4. Sélectionnez Test réseau pour vérier la connexion au réseau.
Conguration internet - Cong. man.
Pour connecter le téléviseur au réseau en utilisant une adresse IP statique, vous devez congurer les paramètres IP (Internet
Protocol). Vériez si le câble LAN est correctement branché. (Voir page 27)
1. Réglez Sélection du réseau sur Câble.
2. Sélectionnez Conguration internet.
3. Réglez Cong. prot. Internet sur Cong. man..
4. Congurez les paramètres Adresse IP, Masque de sous-réseau, Passerelle et Serveur DNS.
Appuyez sur les boutons numériques de la télécommande lorsque vous paramétrez le réseau manuellement.
5. Sélectionnez Test réseau pour vérier la connexion au réseau.
Conguration du réseau sans l - Cong. auto.
Le menu n’est disponible que si ‘Samsung Wireless LAN Adapter for InfoLive’ est connecté. (Voir page 28)
Si vous connectez un câble réseau et que le réseau prend en charge DHCP, les paramètres IP (Internet Protocol) sont congurés
automatiquement. Le routeur sans l à connecter à ce produit doit prendre en charge DHCP.
1. Réglez Sélection du réseau sur Sans l.
2. Sélectionnez Conguration du réseau sans l.
3. Réglez Cong. prot. Internet sur Cong. auto..
4. Sélectionnez un point d’accès via Sélec. Point accés.
5. Sélectionnez Test réseau pour vérier la connexion au réseau.
Conguration du réseau sans l - Cong. man.
Le menu n’est disponible que si ‘Samsung Wireless LAN Adapter for InfoLive’ est connecté. (Voir page 28)
1. Réglez Sélection du réseau sur Sans l.
2. Sélectionnez Conguration du réseau sans l.
3. Réglez Cong. prot. Internett sur Cong. man..
4. Sélectionnez un point d’accès via Sélec. Point accés.
5. Sélectionnez Test réseau pour vérier la connexion au réseau.
N
BN68-01757A-Fre.indb 30 2008-9-24 15:04:50
Français - 31
Liste Source / Modif. Nom
Liste Source
Permet de sélectionner le téléviseur ou d’autres sources d’entrée externes
comme les lecteurs DVD ou les décodeurs câble/récepteurs satellite (boîtiers
décodeurs) connectés au téléviseur. Permet de sélectionner la source d’entrée
de votre choix.
TV, Ext.1, Ext.2, AV, S-Video, Component, PC, HDMI1, HDMI2 / DVI, HDMI3,
HDMI4, USB, DLNA.
Vous ne pouvez sélectionner que les appareils externes connectés au
téléviseur. Dans Liste Source, les entrées connectées sont mises en
surbrillance et afchés en début de liste. Les entrées non connectées
apparaissent dans le bas de la liste.
Utilisation des boutons de couleur de la télécommande dans la liste
des sources
Rouge (Refresh): Actualise la liste des unités externes se connectant.
TOOLS (Option): Afche les menus Modif. Nom et Information.
Appuyez sur le bouton SOURCE de la télécommande pour afcher une
source de signal externe. Le Mode TV peut être sélectionné en appuyant
sur le bouton TV, les boutons numériques (0-9) et le bouton P < / > de la
télécommande.
Modif. Nom
Magnétoscope / DVD / Décodeur Câble / Décodeur satellite / Décodeur PVR / Récepteur AV / Jeu / Caméscope / PC /
TV / IPTV / Blu-Ray / HD DVD / DMA
Nommez le périphérique connecté aux prises d’entrée pour rendre la sélection des sources d’entrée plus facile.
Lorsqu’un PC d’une résolution de 1 920 x 1 080 à 60 Hz est branché sur le port HDMI IN2, vous devez régler le mode
HDMI2/DVI sur PC dans Modif. Nom du mode Entrée.
❑
N
N
-
-
O
❑
N
Liste Source
Modif. Nom
Entrée
Guide Produit
Le Guide de produit vous donne des informations sur les fonctions les plus
importantes de ce téléviseur.
1. Appuyez sur le bouton MENU pour afcher le menu. Appuyez sur le bouton ▲ ou
▼ pour sélectionner Application, puis appuyez sur le bouton ENTER
E
.
2. Appuyez sur le bouton ▲ ou ▼ pour sélectionner Guide Produit, puis appuyez
sur le bouton ENTER
E
.
3. Appuyez sur le bouton ◄ ou ► pour sélectionner un Guide (Picture Quality,
Entertainment ou Connectivity) et appuyez ensuite sur le bouton ENTER
E
.
4. Vous pouvez parcourir l’écran r Guide Produit à l’aide des boutons ◄ et ►.
Picture Quality Full HD 1080p
Ultra FilterBright
Real 100Hz(50") / 100Hz Dual Scan(63")
Entertainment Entertainment Mode (Mode Divertissement)
Content Library
Entertainment Mode
Connectivity WISELINK Pro
DLNA
4HDMI
Anynet+
5. Appuyez sur le bouton EXIT pour quitter le menu.
Application
Content Library
InfoLive
Guide Produit ►
BN68-01757A-Fre.indb 31 2008-9-24 15:04:51

Français - 32
Utilisation de la télécommande dans le menu Guide Produit
Bouton Description
Bouton jaune Afche le contenu du menu Guide Produit dans l’ordre. (Exécution automatique)
▲/▼/◄/►
(Molette) Déplace le curseur et sélectionne un élément.
ENTER
E
Valide l’élément actuellement sélectionné.
RETURN Revient au menu précédent.
EXIT Arrête la fonction en cours et revient au menu principal Guide Produit.
P , PRE-CH Arrête le mode Product Guide et revient au mode TV.
WISELINK Pro
Connexion d’un périphérique USB
1. Appuyez sur le bouton POWER pour allumer le téléviseur.
2. Connectez un périphérique USB contenant des chiers photo, musicaux et/ou
lm à la prise WISELINK Pro (prise USB) située sur le côté du téléviseur.
Si vous entrez dans le mode WISELINK Pro alors qu’aucun périphérique
USB n’est connecté, le message “Auc. app. branché. Vérier branchement.”
s’afche. Dans ce cas, insérez le périphérique USB, quittez l’écran en appuyant
sur le bouton W.LINK de la télécommande et entrez de nouveau dans l’écran
WISELINK Pro.
Le protocole MTP (Media Transfer Protocol) n’est pas pris en charge.
Le système de chiers ne prend en charge que le format FAT16/32 (le système de chiers NTFS n’est pas pris en charge).
Il est possible que certains types d’appareils photo numériques et de périphériques audio USB ne soient pas compatibles
avec ce téléviseur.
WISELINK Pro ne prend en charge que les périphériques de stockage de masse USB de la classe MSC. La classe de
stockage de masse MSC est dédiée aux périphériques de transport de masse uniquement. Il s’agit notamment des clés USB
et des lecteurs de cartes Flash (les concentrateurs et les disques durs USB ne sont pas pris en charge).
Connectez-vous directement au port USB de votre téléviseur. Si vous utilisez une connexion par câble séparée, un problème
de compatibilité USB risque de se poser.
Avant de connecter l’appareil au téléviseur, sauvegardez vos chiers an d’éviter qu’ils ne soient endommagés ou que des
données ne soient perdues. SAMSUNG ne saurait, en aucun cas, être tenu responsable de la perte de données ou de
l’endommagement d’un chier de données.
Ne déconnectez pas le périphérique USB en cours de chargement.
MSC prend en charge les chiers MP3 et JPEG, alors qu’un périphérique PTP prend uniquement en charge les chiers JPEG.
Le format JPEG séquentiel est pris en charge.
Plus la résolution de l’image est élevée, plus le temps d’afchage à l’écran sera long.
La résolution JPEG maximale prise en charge est 15 360 x 8 640 pixels.
Pour les chiers non pris en charge ou endommagés, le message Format chier non compatible s’afche.
Si le nombre de chiers photo est supérieur à 4 000 (ou à 3 000 dans le cas des chiers musicaux), il se peut que les chiers
situés au-delà de cette limite ne soient pas afchés dans la Liste des photos (ou dans la Liste musicale).
Les chiers MP3 avec gestion des droits numériques (DRM) téléchargés à partir d’un site payant ne peuvent pas être lus.
La technologie DRM (Gestion des droits numériques) prend en charge la création de contenu, la distribution et la gestion
intégrales du contenu (par exemple, la protection des droits et des intérêts des fournisseurs de contenu, la prévention de la
copie illégale du contenu), ainsi que la gestion de la facturation et des règlements.
Si vous passez à une photo, son chargement peut prendre quelques secondes. A ce stade, l’icône de chargement apparaît.
N
N
N
N
N
N
N
N
N
N
N
N
N
N
N
N
4
Panneau latéral du
téléviseur
Lecteur USB
BN68-01757A-Fre.indb 32 2008-9-24 15:04:52

Français - 33
Utilisation de la fonction WISELINK Pro
Cette fonction vous permet de lire des photos, de la musique et/ou des lms enregistrés sur un périphérique de stockage de
masse USB (MSC).
Accès au menu WISELINK Pro
1. Appuyez sur le bouton MENU. Appuyez sur le bouton ▲ ou ▼ pour
sélectionner Application, puis appuyez sur le bouton ENTER
E
.
2. Appuyez sur le bouton ▲ ou ▼ pour sélectionner WISELINK Pro, puis
appuyez sur le bouton ENTER
E
.
Le menu WISELINK Pro s’afche.
Appuyez sur le bouton W.LINK de la télécommande pour afcher le menu
WISELINK Pro.
Appuyez plusieurs fois sur le bouton SOURCE de la télécommande pour
sélectionner USB ou DLNA, puis appuyez sur le bouton ENTER E.
3. Appuyez sur le bouton rouge, puis sur le bouton ▲ ou ▼ pour sélectionner
l’unité de stockage USB correspondante (si elle est connectée par le biais d’un
concentrateur). Appuyez sur le bouton ENTER
E
.
Cette fonction diffère selon l’unité de stockage USB connectée au
téléviseur.
Le nom du périphérique USB sélectionné s’afche dans le coin inférieur
gauche de l’écran.
4. Appuyez sur le bouton ◄ ou ► pour sélectionner une icône (Photo, Music,
Movie, Setup), puis appuyez sur le bouton ENTER
E
. Pour quitter le mode
WISELINK Pro, appuyez sur le bouton W.LINK de la télécommande.
Les jeux vidéo sont pris en charge (pas de programmes de jeu).
Retrait d’une unité de stockage USB en toute sécurité
Vous pouvez retirer le périphérique du téléviseur en toute sécurité.
1. Appuyez sur le bouton TOOLS dans l'écran de la liste des chiers WISELINK
Pro ou pendant la lecture d'un chier musical ou d'un diaporama.
2. Appuyez sur le bouton ▲ ou ▼ pour sélectionner Retrait sécurisé, puis
appuyez sur le bouton ENTER
E
.
3. Retirez le périphérique USB du téléviseur.
N
O
O
N
N
N
WISELINK Pro
Photo
SUM
Périph.
Retour
Music Setup
PHOTO
SUM
851.98MB/995.00MB Free
Movie
Photo
SUM
Périph.l
Favoris
Sélection
Passer
Option
image_1.jpg
Mois Jan
Date : Jan.01.2008
Couleur : Gris
Compo. :
Dossier : P-other
Favori : ★ ★ ★
Préférence
Mois
Date
Jan Nov
▲
▲
Lire gp act.
Supprimer
Information
Retrait sécurisé
BN68-01757A-Fre.indb 33 2008-9-24 15:04:54

Français - 34
Afchage
1. Fichier sélectionné: le chier actuellement sélectionné est mis en surbrillance. Les chiers photo et lm sont afchés sous la
forme de miniatures.
2. Fenêtre d’informations: afche des informations sur le chier actuellement sélectionné. Il existe une fenêtre d’informations
distincte destinée uniquement aux chiers photo et lm. Dans le cas des chiers musicaux, les informations apparaissent
également à l’endroit où sont afchés les chiers.
3. Ordre de tri actuel: ce champ afche l’ordre de tri actuel des chiers. Appuyez sur le bouton ▲ ou ▼ pour modier l’ordre de
tri des chiers.
4. Groupes: afche les groupes de tri. Le groupe de tri contenant la photo actuellement sélectionnée est mis en surbrillance.
5. Périphérique actuel: indique le nom du périphérique actuellement sélectionné. Appuyez sur le bouton rouge pour sélectionner
un périphérique.
6. Informations de sélection: indique le nombre de photos sélectionnées en appuyant sur le bouton Jaune.
7. Options d’aide
Bouton Rouge (Périph.): sélectionne un appareil connecté.
Bouton Vert (Favoris): modie le réglage des favoris pour le chier sélectionné. Appuyez plusieurs fois sur ce bouton
jusqu’à ce que la valeur voulue apparaisse.
Bouton Jaune (Sélection): sélectionne le chier dans la liste. Les chiers musicaux sélectionnés sont marqués du
symbole c. Appuyez une nouvelle fois sur le bouton jaune pour annuler la sélection d’un chier.
Bouton πµ (Passer): passe au groupe de tri précédent / suivant.
Bouton TOOLS (Option): afche les menus d’options. (Le menu varie en fonction de l’état actuel.)
•
•
•
•
•
Utilisation de la télécommande dans le menu WISELINK Pro
Bouton Description
▲/▼/◄/►
(Wheel) Déplace le curseur et sélectionne un élément.
ENTER
E
Valide l’élément actuellement sélectionné.
Lors de lecture d’un diaporama, d’un chier musical ou d’un lm :
- Appuyer sur le bouton ENTER
E
pendant la lecture suspend celle-ci.
- Appuyer sur le bouton ENTER
E
en mode Pause relance la lecture.
Lance la lecture d'un diaporama ou d'un chier musical, ou le met en pause.
RETURN Revient au menu précédent.
TOOLS Exécute diverses fonctions dans les menus Photo, Musique et Film.
Arrête la lecture du diaporama, du chier musical ou du lm.
Passe au groupe précédent / suivant.
INFO Afche des informations sur le chier.
W.LINK Quitte le mode WISELINK Pro.
EXIT Arrête la fonction en cours et revient au menu principal WISELINK Pro.
Photo
SUM
Périph.
Favoris
Sélection
Passer
Option
image_1.jpg
Mois : Jan
Date : Jan.01.2008
Couleur : Gris
Compo. :
Dossier : P-other
Favori :
★ ★ ★
Préférence
Mois
Date
Jan Nov
▲
1Fich. sél.
2 6
1
3 4
5 7
BN68-01757A-Fre.indb 34 2008-9-24 15:04:55
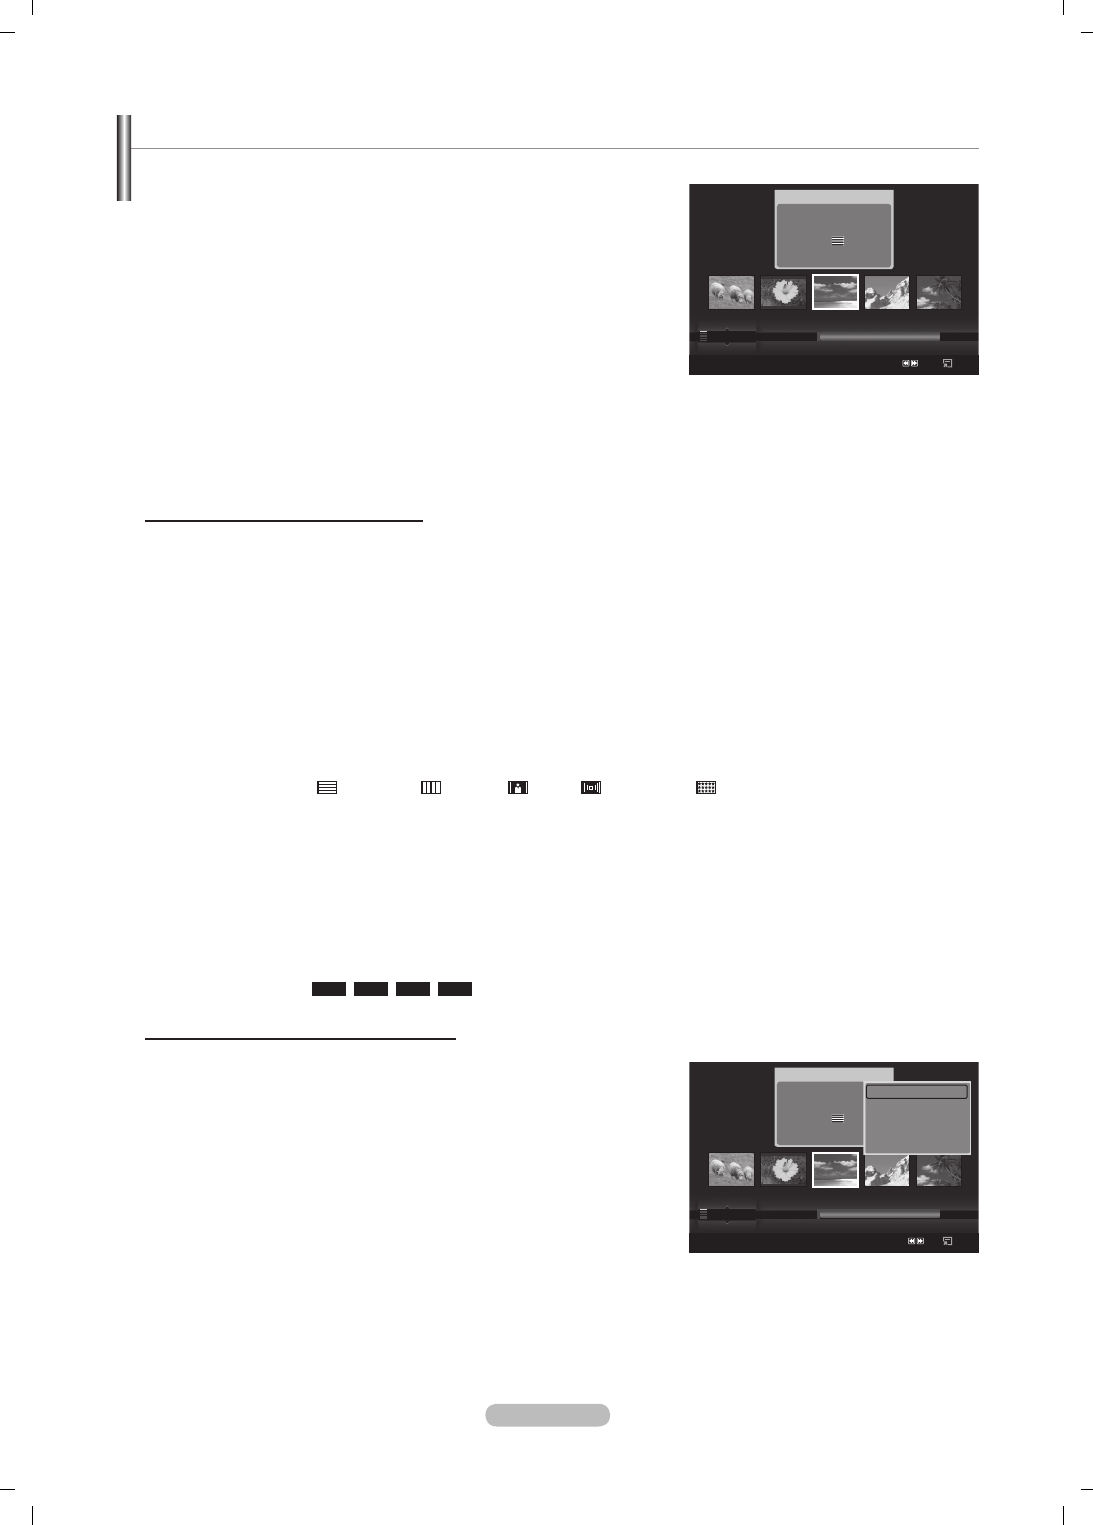
Français - 35
Utilisation et tri de la liste des photos
Vous pouvez trier les photos dans la Liste des photos selon un ordre particulier.
1. Appuyez sur le bouton ▲ ou ▼ pour sélectionner un ordre de tri dans la
Liste des photos.
Les photos sont triées selon le nouvel ordre de tri sélectionné.
Pour passer au groupe précédent/suivant, appuyez sur le bouton
π
(Retour arrière) ou
µ
(Avance rapide).
2. Appuyez sur le bouton
∂
(Lecture)/ENTER
E
pour lancer le diaporama
dans l’ordre sélectionné par l’utilisateur.
Les informations d’un chier photo sont dénies automatiquement.
Les informations Couleur et Compo. extraites d’un chier photo
peuvent être différentes de ce à quoi s’attend l’utilisateur.
Les informations sur la photo sont dénies automatiquement. Vous
pouvez modier les paramètres Couleur, Compo. et Favori.
Les photos pour lesquelles aucune information ne peut être afchée
sont dénies comme Non classé.
PTP ne prend pas en charge le tri des dossiers.
Ordre de tri de la Liste des photos
Mois
Trie et afche les photos par mois. Le tri se fait uniquement sur la base du mois (de janvier à décembre), quelle que soit
l’année.
Date
Trie et afche les photos par date. Le tri s’effectue par année et par mois, en commençant par la photo la plus ancienne.
Couleur
Trie les photos par couleur. Vous pouvez modier les informations de couleur de la photo.
Options Couleur: Rouge, Jaune, Vert, Bleu, Magenta, Noir, Gris, Non classés.
Compo.
Trie les photos par composition. Vous pouvez modier les informations de composition des photos.
Options Compo.: (horizontal), (vertical), (objet), (perspective), (motif), Non classés.
Do
ssie
r
Trie les photos par dossier. Si le périphérique USB contient de nombreux dossiers, les chiers photo sont afchés dans l’ordre
dans chaque dossier. Le chier photo dans le dossier racine est afché en premier, suivi des autres par ordre alphabétique.
Préférence
Trie les photos par préférence (Favori). Vous pouvez modier les préférences des photos.
Modication du réglage favori
Sélectionnez la photo de votre choix dans la Liste des photos, puis appuyez plusieurs fois sur le bouton vert jusqu’à ce
que le réglage voulu apparaisse.
Options Favori:
★ ★ ★
,
★ ★ ★
,
★ ★ ★
,
★ ★ ★
Menu d’options de la Liste des photos
Diaporama
Ce menu vous permet de lire un diaporama à l’aide des chiers photo situés
sur l’unité de stockage USB.
Lire gp act.
Ce menu vous permet de lire un diaporama portant uniquement sur les
chiers photo du groupe de tri sélectionné.
Supprimer
Ce menu vous permet de supprimer les chiers photo sélectionnés.
Changer gp
Vous pouvez modier les informations Couleur et
Compo.
des chiers photo.
Les informations de groupe du chier actuel sont mises à jour et le chier est déplacé vers le nouveau groupe.
Pour modier les informations de plusieurs chiers, sélectionnez ceux de votre choix en appuyant sur le bouton jaune.
N
N
N
N
N
N
N
N
N
N
N
N
N
Photo
SUM
Périph.
Favoris
Sélection
Passer
Option
image_1.jpg
Mois : Jan
Date : Jan.01.2008
Couleur : Gris
Compo. :
Dossier : P-other
Favori : ★ ★ ★
Préférence
Mois
Date
Jan Nov
▲
Photo
SUM
Périph.l
Favoris
Sélection
Saut
Option
image_1.jpg
Mois : Jan
Date : Jan.01.2008
Couleur :Gris
Compo. :
Dossier : P-other
Favori : ★ ★ ★
Préférence
Mois
Date
Jan Nov
▲
Diaporama
Lire gp act.
Supprimer
Information
▼
BN68-01757A-Fre.indb 35 2008-9-24 15:04:57
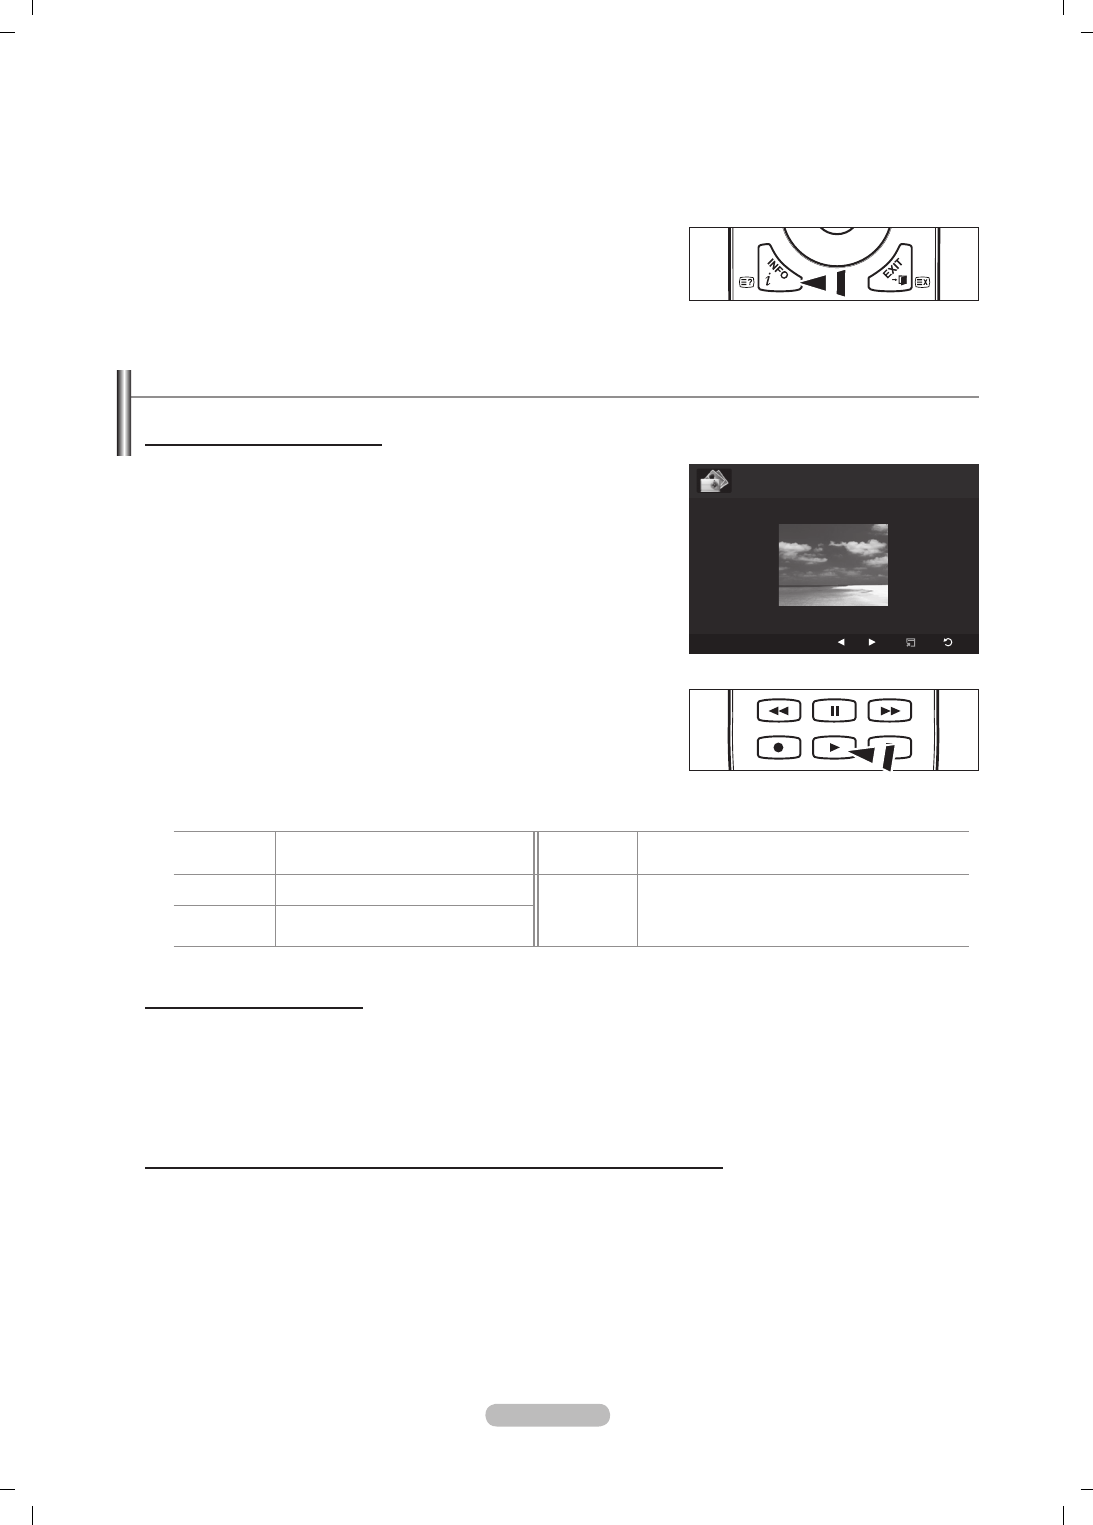
Français - 36
Information
Afche des informations sur les chiers photo, dont l’ordre du chier dans le répertoire actuel, le nom, la taille, la résolution, la
date de modication et le chemin d’accès.
Vous pouvez appliquer les mêmes procédures pour afcher les informations des chiers photo pendant un diaporama.
Une autre solution consiste à sélectionner une photo dans la liste et à appuyer ensuite sur le bouton INFO pour visualiser
les informations.
Retrait sécurisé
Vous pouvez retirer le périphérique du téléviseur en toute sécurité.
N
O
Visualisation d’une photo ou d’un diaporama
Visualisation d’un diaporama
1. Appuyez sur le bouton ◄ ou ► pour sélectionner la photo voulue dans la
Liste des photos.
2. Appuyez sur le bouton TOOLS.
3. Appuyez sur le bouton ▲ ou ▼ pour sélectionner Diaporama, puis appuyez
sur le bouton ENTER
E
.
Tous les chiers contenus dans la liste des photos seront utilisés pour
le diaporama.
Durant le diaporama, les chiers s’afchent dans l’ordre à partir du chier à
l’écran.
Le diaporama progresse dans l’ordre de tri choisi dans la Liste des photos.
Des chiers musicaux peuvent être lus automatiquement pendant le
diaporama, si l’option Fond musical est dénie sur Marche. (Voir page 37.)
Lorsqu’une liste de photos est afchée, appuyez sur le bouton
∂
(Lecture)/ENTER
E
de la télécommande pour lancer le diaporama.
Boutons de commande du diaporama
ENTER
E
Lance/Interrompt la lecture du
diaporama.
∫
Permet de quitter le mode diaporama et de
revenir à la liste des photos.
∂
Lance la lecture du diaporama. TOOLS
π
/
µ
Exécute diverses fonctions dans les menus
Photo.
Modie la vitesse de lecture du diaporama.
∑
Interrompt la lecture du diaporama.
Lecture du groupe courant
1. Appuyez sur le bouton ▲ ou ▼ pour sélectionner un ordre de tri. (Mois, Date, Couleur, Compo., Dossier, Préférence)
2. Appuyez sur le bouton
π
(Retour arrière) ou
µ
(Avance rapide) pour sélectionner le groupe de votre choix.
3. Appuyez sur le bouton TOOLS.
4. Appuyez sur le bouton ▲ ou ▼ pour sélectionner Lire gp act., puis appuyez sur le bouton ENTER
E
.
Seules les photos du groupe contenant les chiers sélectionnés seront utilisées pour le diaporama.
Pour exécuter un diaporama avec uniquement les chiers sélectionnés
1. Appuyez sur le bouton ◄ ou ► pour sélectionner la photo voulue dans la Liste des photos.
2. Appuyez sur le bouton jaune. Répétez l’opération ci-dessus pour sélectionner plusieurs photos.
La marque
c
s’afche à gauche de la photo sélectionnée.
Si vous sélectionnez un seul chier, le diaporama ne s’exécute pas.
Pour désélectionner tous les chiers, appuyez sur le bouton TOOLS et sélectionnez Désélect. tout.
3. Appuyez sur le bouton
∂
(Lecture)/ENTER
E
.
Les chiers sélectionnés seront utilisés pour le diaporama.
N
N
N
N
O
N
N
N
N
N
O
SUM
E
Pause
Préc.
Suivant
Option
Retour
►
Normal
20/22 image_1.jpg 440x440 2.0KB 2008/1/1
BN68-01757A-Fre.indb 36 2008-9-24 15:04:58

Français - 37
Menu d’options du diaporama
Arrêter le diaporama/Lancer le diaporama
Vous pouvez lancer ou arrêter un diaporama.
Rotat.
Vous pouvez faire pivoter les photos enregistrées sur une unité de stockage
USB.
Chaque fois que vous appuyez sur le bouton ◄, la photo pivote
successivement à 270˚, 180˚, 90˚ et 0˚.
Chaque fois que vous appuyez sur le bouton ►, la photo pivote
successivement à 90˚, 180˚, 270˚ et 0˚.
Zoom
Vous pouvez faire agrandir les photos enregistrées sur une unité de
stockage USB. (x1 → x2 → x4)
Pour déplacer l’image agrandie, appuyez sur le bouton ENTER
E
, puis sur ▲/▼/◄/►. Notez que lorsque la taille de
l’image agrandie est inférieure à celle de l’écran, la fonction de déplacement est inopérante.
Le chier agrandi n’est pas enregistré.
Si vous avez sélectionné Rotat., l'option Zoom est désactivée.
Vit. diaporama
Sélectionnez cette option pour modier la vitesse de délement du diaporama.
Vous ne pouvez sélectionner la vitesse du diaporama que pendant sa diffusion.
Vous pouvez également modier la vitesse du diaporama en appuyant sur la touche
π
(Retour arrière) ou
µ
(Avance
rapide) pendant la lecture.
Fond musical → Marche / Arrêt
Si vous dénissez Fond musical sur Marche, la musique de fond sera lue lors de l’afchage de photos individuelles ou sous
la forme d’un diaporama.
Si vous dénissez Fond musical sur Marche, un écran s’afche pour vous permettre de dénir le fond musical.
Pour utiliser cette fonction, de la musique et des photos doivent être stockées sur l’unité USB.
Paramètres de musique de fond
Vous pouvez sélectionner la musique de fond d’un diaporama.
Si vous désactivez la fonction Fond musical, aucune musique ne sera diffusée, même si les réglages Paramètres de
musique de fond ont été effectués.
Le changement du Mode mus. de fond exige le chargement de chiers musicaux. Lisez des chiers musicaux dans la
catégorie voulue.
Mode musicale → Humeur/Fichier sélectionné/Aléatoire
Fond musical → Energique/Rhytmique/Triste/Enivrante/Calme
Si vous dénissez Fond musical sur Humeur, vous pouvez sélectionner une ambiance.
Vous ne pouvez pas sélectionner une ambiance qui ne fait pas partie des chiers musicaux stockés sur l’unité USB.
Sél. ch. music.
Si vous dénissez Fond musical sur Fichier sélectionné, vous pouvez choisir un chier musical.
Réglage de l’image/Text du son
Reportez-vous à la page 43.
Information
Les informations relatives au chier photo sont afchées.
Retrait sécurisé
Vous pouvez retirer le périphérique du téléviseur en toute sécurité.
N
N
N
N
N
N
N
N
N
•
•
N
N
•
N
Outils
Arrêter le diaporama
Rotat.
Zoom
Vit. diaporama : Normal
Fond musicall : Arrêt
Paramètres de musique de fond
Réglage de l’image
Text du son
Information
U
Déplacer
E
Entrer
e
Quitter
BN68-01757A-Fre.indb 37 2008-9-24 15:04:58
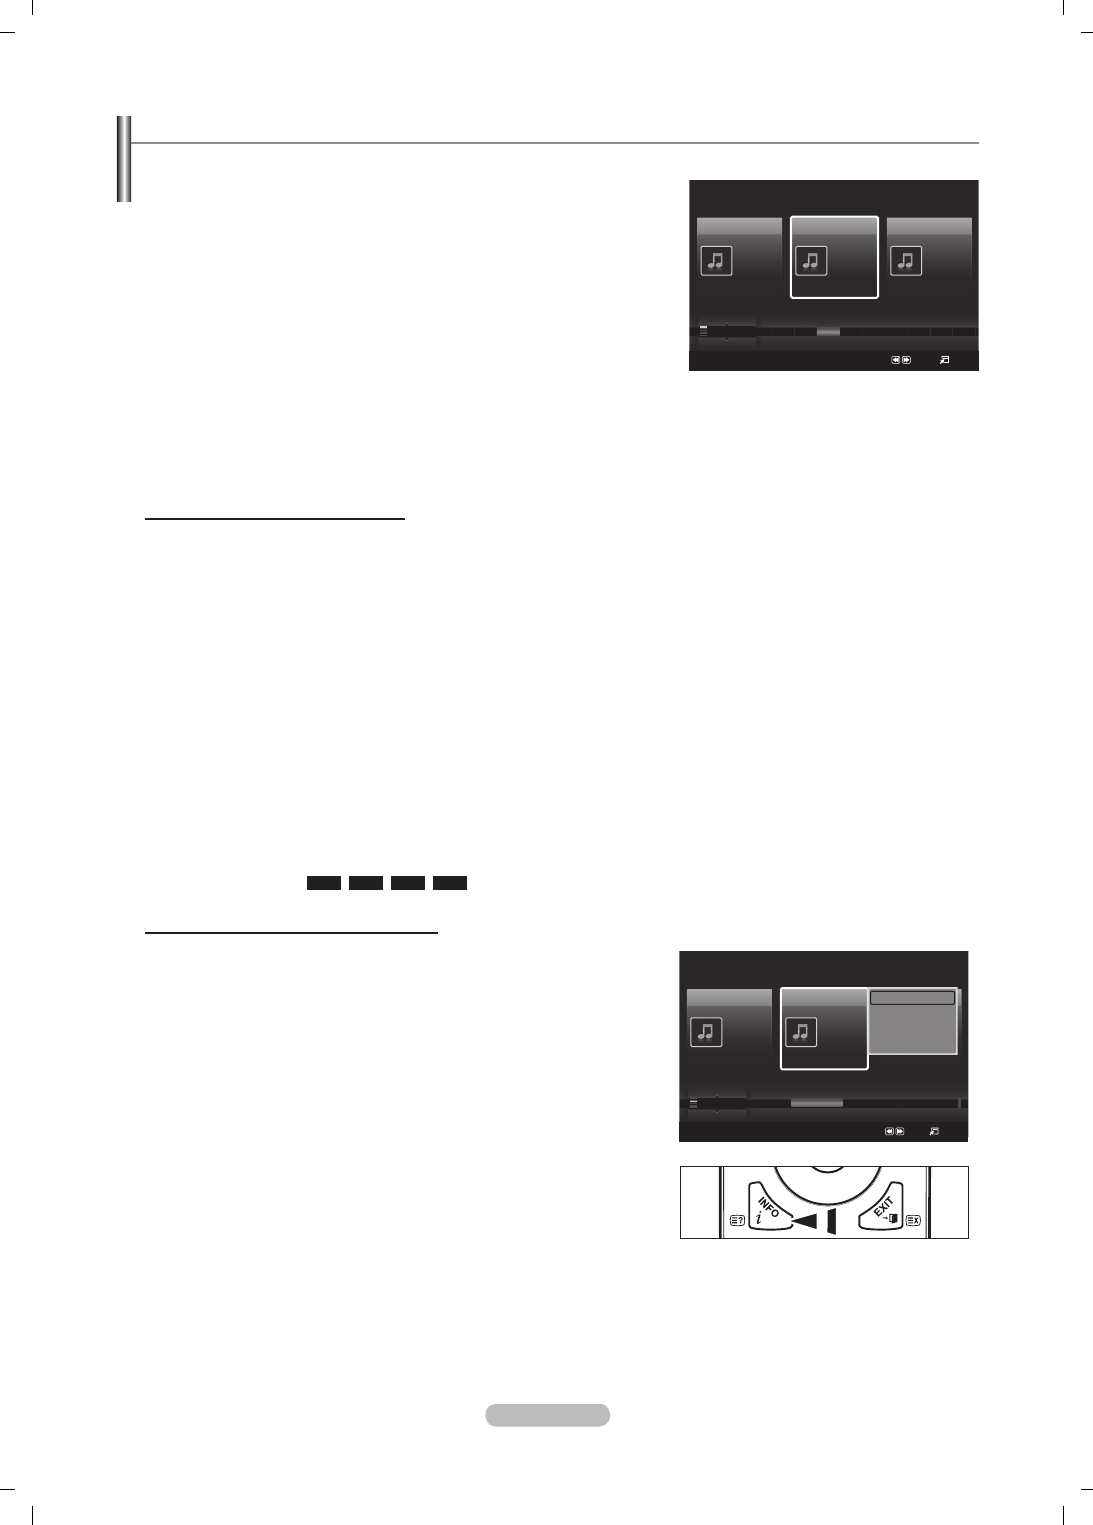
Français - 38
Utilisation et tri de la Liste musicale
Vous pouvez trier les chiers musicaux de la Liste musicale dans un ordre particulier.
1. Appuyez sur le bouton ▲ ou ▼ pour sélectionner un ordre de tri dans la
Liste musicale.
Les chiers musicaux sont triés selon le nouvel ordre de tri sélectionné.
Pour passer au groupe précédent/suivant, appuyez sur le bouton
π
(Retour arrière) ou
µ
(Avance rapide).
2. Appuyez sur le bouton ENTER
E
pour commencer la lecture des chiers
musicaux dans l’ordre sélectionné par l’utilisateur.
Les informations des chiers musicaux sont dénies automatiquement.
Les informations Humeur extraites d’un chier musical peuvent être
différentes de ce à quoi s’attend l’utilisateur
Les informations musicales sont dénies automatiquement. Vous
pouvez modier les réglages Humeur et Favori.
Les chiers musicaux pour lesquels aucune information ne peut être afchée sont dénis comme Non classé.
Si aucun titre n’est déni pour un chier musical, le nom du chier s’afche.
Si aucune information n’est disponible pour les réglages Genre, Artiste, Album ou Année, ceux-ci sont vides à l’écran.
Ordre de tri de la Liste musicale
Titre
: Les musiques sont triées en fonction de l'ordre alphabétique du titre.
Artiste
: Les fichiers musicaux sont triés en fonction de l'ordre alphabétique de l'artiste.
Humeur
: trie les fichiers musicaux par ambiance. Vous pouvez modifier les informations d’ambiance de la musique.
Options Humeur: Energique, Rhytmique, Triste, Enivrante, Calme, Non classé
Genre
: trie les fichiers musicaux par genre.
Dossie
r: trie les fichiers musicaux par dossier. Si le périphérique USB contient de nombreux dossiers, les fichiers sont
affichés dans l’ordre dans chaque dossier. Le fichier musical situé dans le dossier racine est affiché en premier, suivi
des autres par ordre alphabétique.
Préférence
: trie les fichiers musicaux par préférence (Favori). Vous pouvez modifier les préférences des fichiers
musicaux.
Modication du paramètre Favori
Sélectionnez le chier musical de votre choix dans la Liste musicale, puis appuyez plusieurs fois sur le bouton vert
jusqu’à ce que le réglage voulu apparaisse.
Pour modier les informations de plusieurs chiers, sélectionnez ceux de votre choix en appuyant sur le bouton jaune.
Options Favori:
★ ★ ★
,
★ ★ ★
,
★ ★ ★
,
★ ★ ★
Menu d’options de la Liste musicale
Lire gp act.: ce menu vous permet de lire uniquement les fichiers
musicaux du groupe de tri sélectionné.
Supprimer
: ce menu vous permet de supprimer les fichiers musicaux
sélectionnés.
Changer gp
: vous pouvez modifier les informations d’ambiance des
fichiers musicaux. Les informations de groupe du fichier actuel sont
mises à jour et le fichier est déplacé vers le nouveau groupe.
Pour modier les informations de plusieurs chiers, sélectionnez ceux
de votre choix en appuyant sur le bouton jaune.
Information
: affiche des informations sur les fichiers musicaux, dont
l’ordre du fichier dans le répertoire actuel, le nom, la taille, la date de
modification et le chemin d’accès.
Vous pouvez appliquer les mêmes procédures pour afcher les
informations des chiers musicaux pendant un diaporama.
Une autre solution consiste à sélectionner un chier musical dans la liste et à appuyer ensuite sur le bouton INFO pour
visualiser les informations.
Retrait sécurisé
: vous pouvez retirer le périphérique du téléviseur en toute sécurité.
N
N
N
N
N
N
N
N
N
N
N
N
N
N
O
Music
SUM
Périph.
Favoris
Sélection
Passer
Option
Préférence
Titre
Artiste
Energetic ★ ★ ★
Jee
Album 1
2005
Pop
Thanks
Sad ★ ★ ★
Darby
Album 2
2005
Pop
I Love You
Calm ★ ★ ★
Catherine
Album 3
2005
Pop
Better than yesterday
F G H I J L P S T V
▲
Music
SUM
Périph.
Favoris
Sélection
Passer
Option
Artist
Humeur
Genre
Triste ★ ★ ★
Jee
Album 1
2005
Pop
Thanks
Triste ★ ★ ★
Darby
Album 2
2005
Pop
I Love You
Stimulant ★ ★ ★
Catherine
Album 3
2005
Pop
Better than yesterday
Rhytmique Triste Enivrante Calme ...
▲
Lire gp act.
Supprimer
Changer gp
Information
▼
BN68-01757A-Fre.indb 38 2008-9-24 15:04:59

Français - 39
Lecture de musique
Lecture d’un chier musical
1. Appuyez sur le bouton ◄ ou ► pour sélectionner un chier musical à lire.
2. Appuyez sur le bouton
∂
(Lecture)/ENTER
E
.
Ce menu afche uniquement les chiers portant l’extension MP3. Les
chiers portant d’autres extensions ne s’afchent pas, même s’ils sont
enregistrés sur le même périphérique USB.
Les boutons
π
(Retour arrière) et
µ
(Avance rapide) ne
fonctionnent pas durant la lecture.
Le chier sélectionné s’afche en haut de l’écran, avec la durée de
lecture.
Pour régler le volume sonore, appuyez sur le bouton de volume de la
télécommande. Pour couper le son, appuyez sur le bouton MUTE de la
télécommande.
La durée de lecture d’un chier musical peut s’afcher sous la forme “00:00:00” si les informations relatives au temps de
lecture ne gurent pas au début du chier.
Boutons de commande de lecture
ENTER
E
Lance/Interrompt la lecture du chier
musical.
∫
Quitte le mode de lecture et revient à la Liste
musicale.
∂
Lance la lecture du chier musical. TOOLS Exécute diverses fonctions dans les menus
Musique.
∑
Interrompt la lecture du chier musical.
Icône d’informations sur la fonction Musique
Tous les chiers musicaux du dossier (ou le chier sélectionné) sont répétés. Mode Répétition est déni sur
Marche.
Tous les chiers musicaux du dossier (ou le chier sélectionné) sont lus une seule fois. Mode Répétition est déni
sur Arrêt.
Lecture du groupe de musiques
1. Appuyez sur le bouton ▲ ou ▼ pour sélectionner un ordre de tri.
(Titre, Artiste, Humeur, Genre, Dossier, Préférence)
2. Appuyez sur le bouton
π
(Retour arrière) ou
µ
(Avance rapide) pour sélectionner le groupe de votre choix.
3. Appuyez sur le bouton TOOLS.
4. Appuyez sur le bouton ▲ ou ▼ pour sélectionner Lire gp act., puis appuyez sur le bouton ENTER
E
.
Tous les chiers musicaux du groupe de tri, y compris le chier sélectionné, sont lus.
Lecture des chiers musicaux sélectionnés
1. Appuyez sur le bouton ◄ ou ► pour sélectionner le chier musical de votre choix dans la Liste musicale.
2. Appuyez sur le bouton jaune. Répétez l’opération ci-dessus pour sélectionner plusieurs chiers musicaux.
La marque
c
s’afche à gauche du chier musical sélectionné.
3. Appuyez sur le bouton
∂
(Lecture)/ENTER
E
.
Seul le chier sélectionné est lu.
Menu d’options de lecture de musique
Mode Répétition → Marche / Arrêt
Vous pouvez lire des chiers musicaux en boucle.
Réglage de l’image/Test du son
Reportez-vous à la page 43.
Information
Les informations relatives au chier musical sont afchées.
Retrait sécurisé
Vous pouvez retirer le périphérique du téléviseur en toute sécurité.
N
N
N
N
N
N
N
N
N
N
SUM
Pause
Précédent
Suivant
Option
Retour
7/14 00:01:15 00:05:41
I Love You
Outils
Mode Répétition
◄ Marche ►
Réglage de l’image
Test du son
Information
Retrait sécurisé
U
Déplacer
L
Régler
e
Quitter
BN68-01757A-Fre.indb 39 2008-9-24 15:05:00
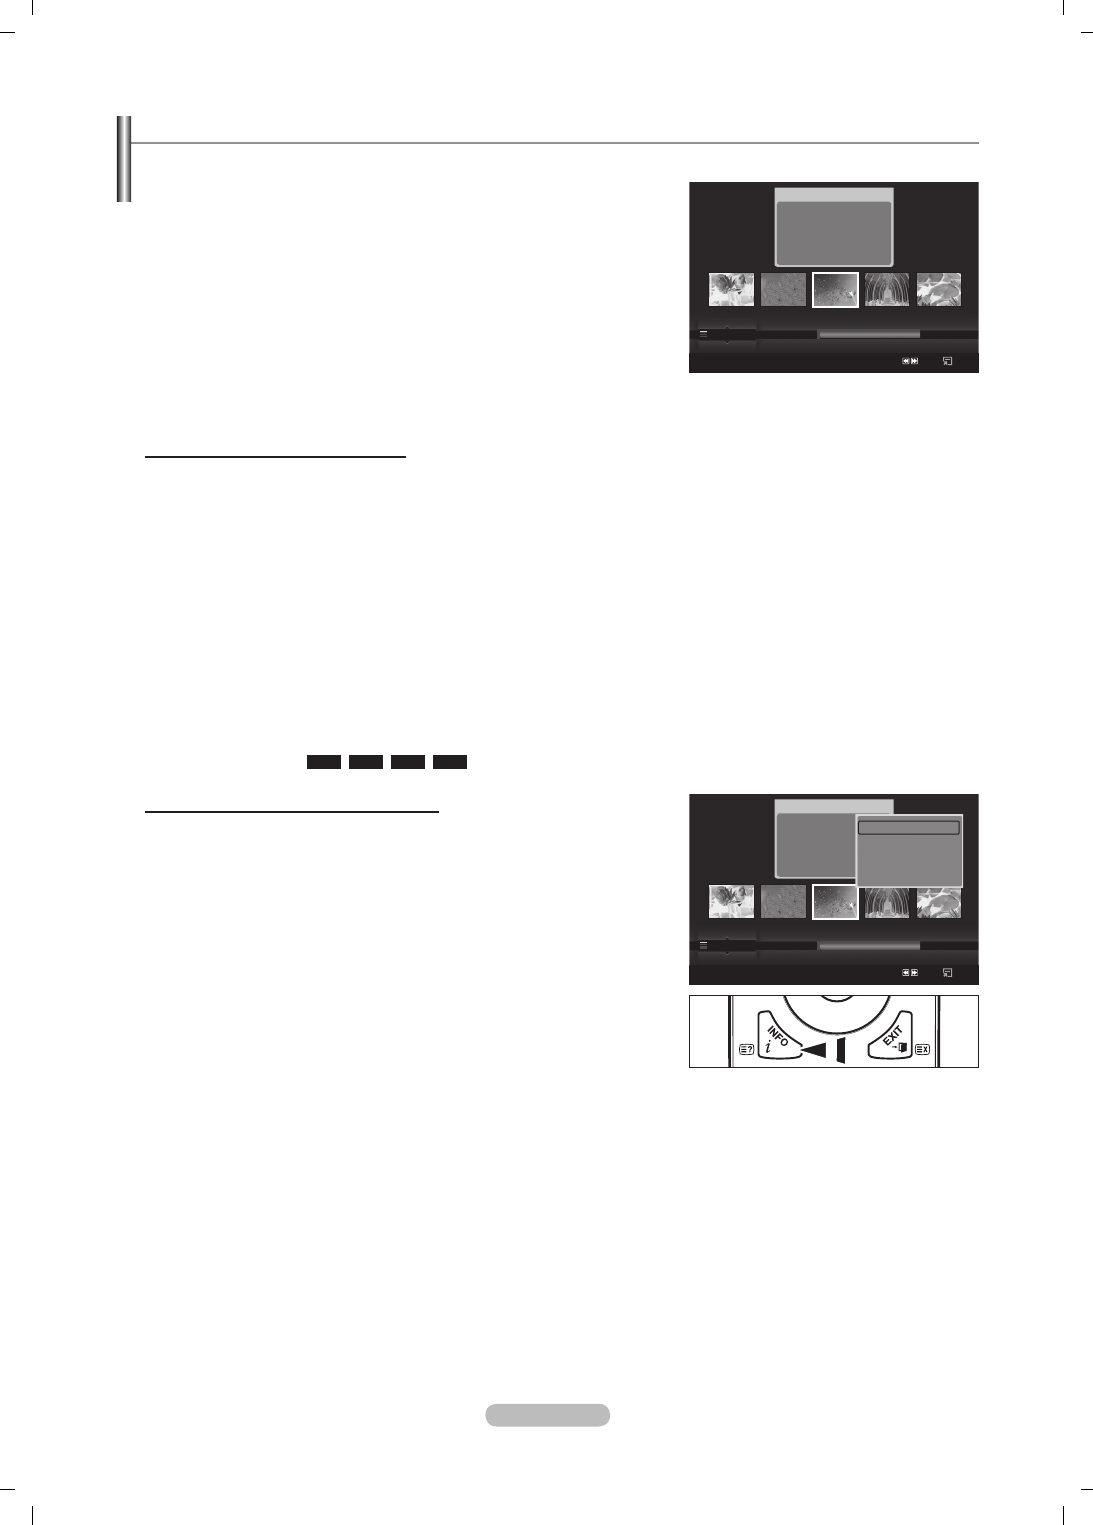
Français - 40
Utilisation et tri de la Liste des lms
Vous pouvez trier les lms de la Liste des lms selon un ordre particulier.
1. Appuyez sur le bouton ▲ ou ▼ pour sélectionner un ordre de tri dans la
Liste des lms.
Les lms sont triés selon le nouvel ordre de tri sélectionné.
Pour passer au groupe précédent/suivant, appuyez sur le bouton
π
(Retour arrière) ou
µ
(Avance rapide).
La fonction vidéo ne prend pas en charge les sous-titres.(par ex., les
chiers .smi, .srt, .sub, etc. ni les sous-titres intégrés aux chiers vidéo).
2. Appuyez sur le bouton
∂
(Lecture)/ENTER
E
pour lire le lm dans
l’ordre sélectionné par l’utilisateur.
Les lms sont triés selon le nouvel ordre de tri sélectionné.
Les informations sur le lm sont dénies automatiquement. Vous
pouvez modier le réglage Favori.
Ordre de tri de la Liste des lms
Titre
Trie et afche les titres de lm par ordre alphabétique.
Date
Trie et afche les lms par date. Le tri s’effectue par année et par mois, en commençant par le lm le plus ancien.
Dossier
Si le périphérique USB contient de nombreux dossiers, les chiers lm sont afchés dans l’ordre dans chaque dossier. Le
chier lm situé dans le dossier racine est afché en premier, suivi des autres par ordre alphabétique.
Préférence
Trie les lms par préférence. (Favori) Vous pouvez modier les préférences de lm.
Modication du réglage favori
Sélectionnez le chier lm de votre choix dans la Liste des lms, puis appuyez plusieurs fois sur le bouton vert jusqu’à ce
que le réglage voulu apparaisse.
Options Favori:
★ ★ ★
,
★ ★ ★
,
★ ★ ★
,
★ ★ ★
.
Menu d’options de la Liste des lms
Lire gp act.
Ce menu vous permet de lire uniquement les chiers lm du groupe de tri
sélectionné.
Supprimer
Ce menu vous permet de supprimer les chiers lm sélectionnés.
Information
Afche des informations sur les chiers lm, dont l'ordre du chier dans le
répertoire actuel, le nom, la taille, la date de modication et le chemin d'accès.
Une autre solution consiste à sélectionner un chier lm dans la Liste
des lms et à appuyer ensuite sur le bouton INFO pour visualiser les
informations.
Retrait sécurisé
Vous pouvez retirer le périphérique du téléviseur en toute sécurité.
N
N
N
N
N
N
N
N
Photo
SUM
Périph.
Favoris
Sélection
Passer
Option
movie_1.jpg
Date : Jan.01.2008
Dossier : movie-folder
Favori : ★ ★ ★
Préférence
Titre
Date
A M
Symbole
▲
□
ENG
Photo
SUM
Périph.
Favoris
Sélection
Passer
Option
movie_1.jpg
Date : Jan.01.2008
Dossier : movie-folder
Favori : ★ ★ ★
Préférence
Titre
Date
A M
Symbole
▲
□
ENG
Lire gp act.
Supprimer
Information
Retrait sécurisé
BN68-01757A-Fre.indb 40 2008-9-24 15:05:01
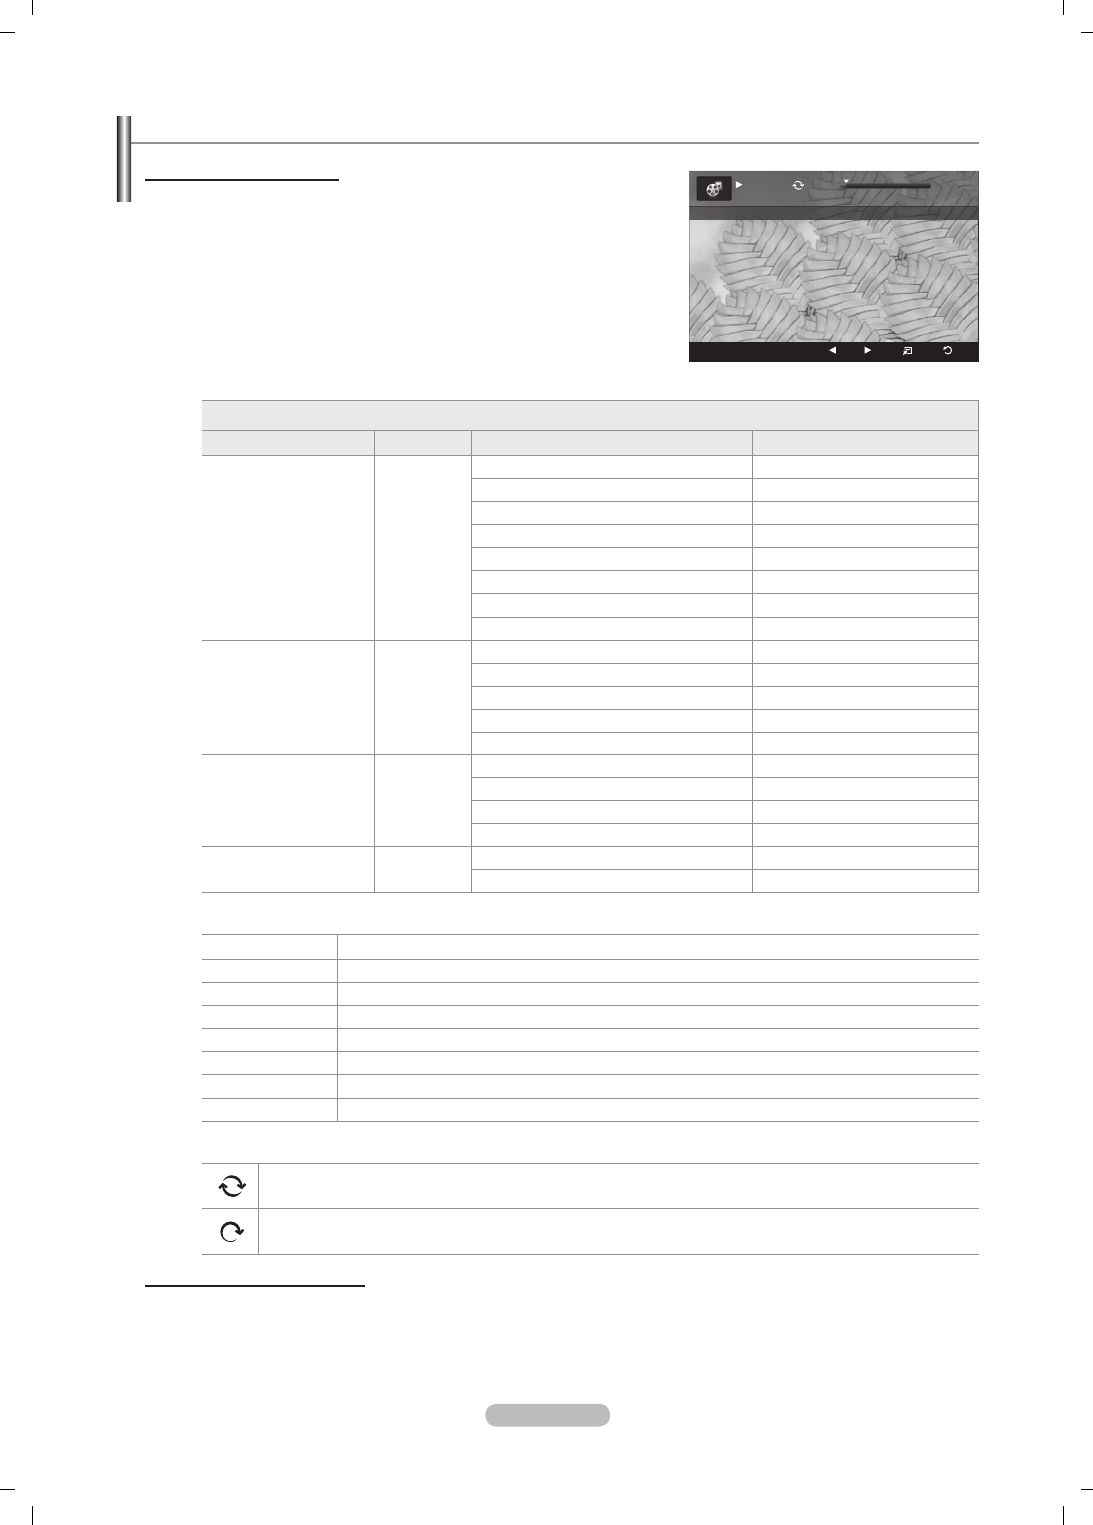
Français - 41
Lecture d’un chier lm
Lecture d’un chier lm
1. Appuyez sur le bouton ◄ ou ► pour sélectionner un lm à lire.
2. Appuyez sur le bouton
∂
(Lecture)/ENTER
E
.
La lecture du chier sélectionné commence.
Le chier sélectionné s’af che en haut de l’écran, avec la durée de
lecture.
La durée de lecture d’un chier lm peut s’af cher sous la forme
“00:00:00” si les informations relatives au temps de lecture ne gurent
pas au début du chier.
Formats vidéo pris en charge
Codec vidéo
L’extension du chier conteneur Décodeur vidéo Max Resolution Sti
*.avi AVI
XviD 720x576
MPEG1 720x576
MPEG2 720x576
H.264 BP 1920x1088
H.264 BP 1920x1088
H.264 HP 1920x1088
MPEG-4 SP 720x576
MPEG-4 ASP 720x576
*.mp4 MP4
H.264 BP 1920x1088
H.264 MP 1920x1088
H.264 HP 1920x1088
MPEG-4 SP 720x576
MPEG-4 ASP 720x576
*.mpg
PS
MPEG1 (Program Stream) 1920x1088
*.mpeg MPEG2 (Program Stream) 1920x1088
*.vro MPEG2 VOB 1920x1088
*.vob MPEG2 VRO 1920x1088
others
(ts) TS MPEG2 (Transport Stream) 1920x1088
H.264 (Transport Stream) 1920x1088
Boutons de commande de lecture vidéo
ENTER
E
Lance/Interrompt la lecture du diaporama.
∂
Lit le chier lm.
∑
Interrompt la lecture du chier lm.
∫
Quitte le mode de lecture et revient à la Liste des lms.
TOOLS Exécute diverses fonctions dans les menus Film.
◄/► Avance ou recule de 20 secondes dans le lm en cours de lecture.
µ
Modi e la vitesse de lecture.
▲/▼ Af che la première ou dernière vue du chier actuel.
Icône d’informations sur la fonction Film
Tous les chiers lm du dossier (ou le chier sélectionné) sont répétés.
Mode Répétition est dé ni sur Marche.
Tous les chiers lm du dossier (ou le chier sélectionné) sont lus une seule fois.
Mode Répétition est dé ni sur Arrêt.
Lecture du groupe de lms
1. Appuyez sur le bouton ▲ ou ▼ pour sélectionner un ordre de tri. (Titre, Date, Dossier, Préférence)
2. Appuyez sur le bouton π (Retour arrière) ou µ (Avance rapide) pour sélectionner le groupe de votre choix.
3. Appuyez sur le bouton TOOLS.
4. Appuyez sur le bouton ▲ ou ▼ pour sélectionner Lire gp act., puis appuyez sur le bouton ENTER
E
.
N
N
N
N
N
N
SUM
E
Pause
-20sec
+20sec
Option
Retour
1/5 00:00:48 00:23:05
ABC.avi
BN68-01757A-Fre.indb 41 2008-9-24 15:05:02
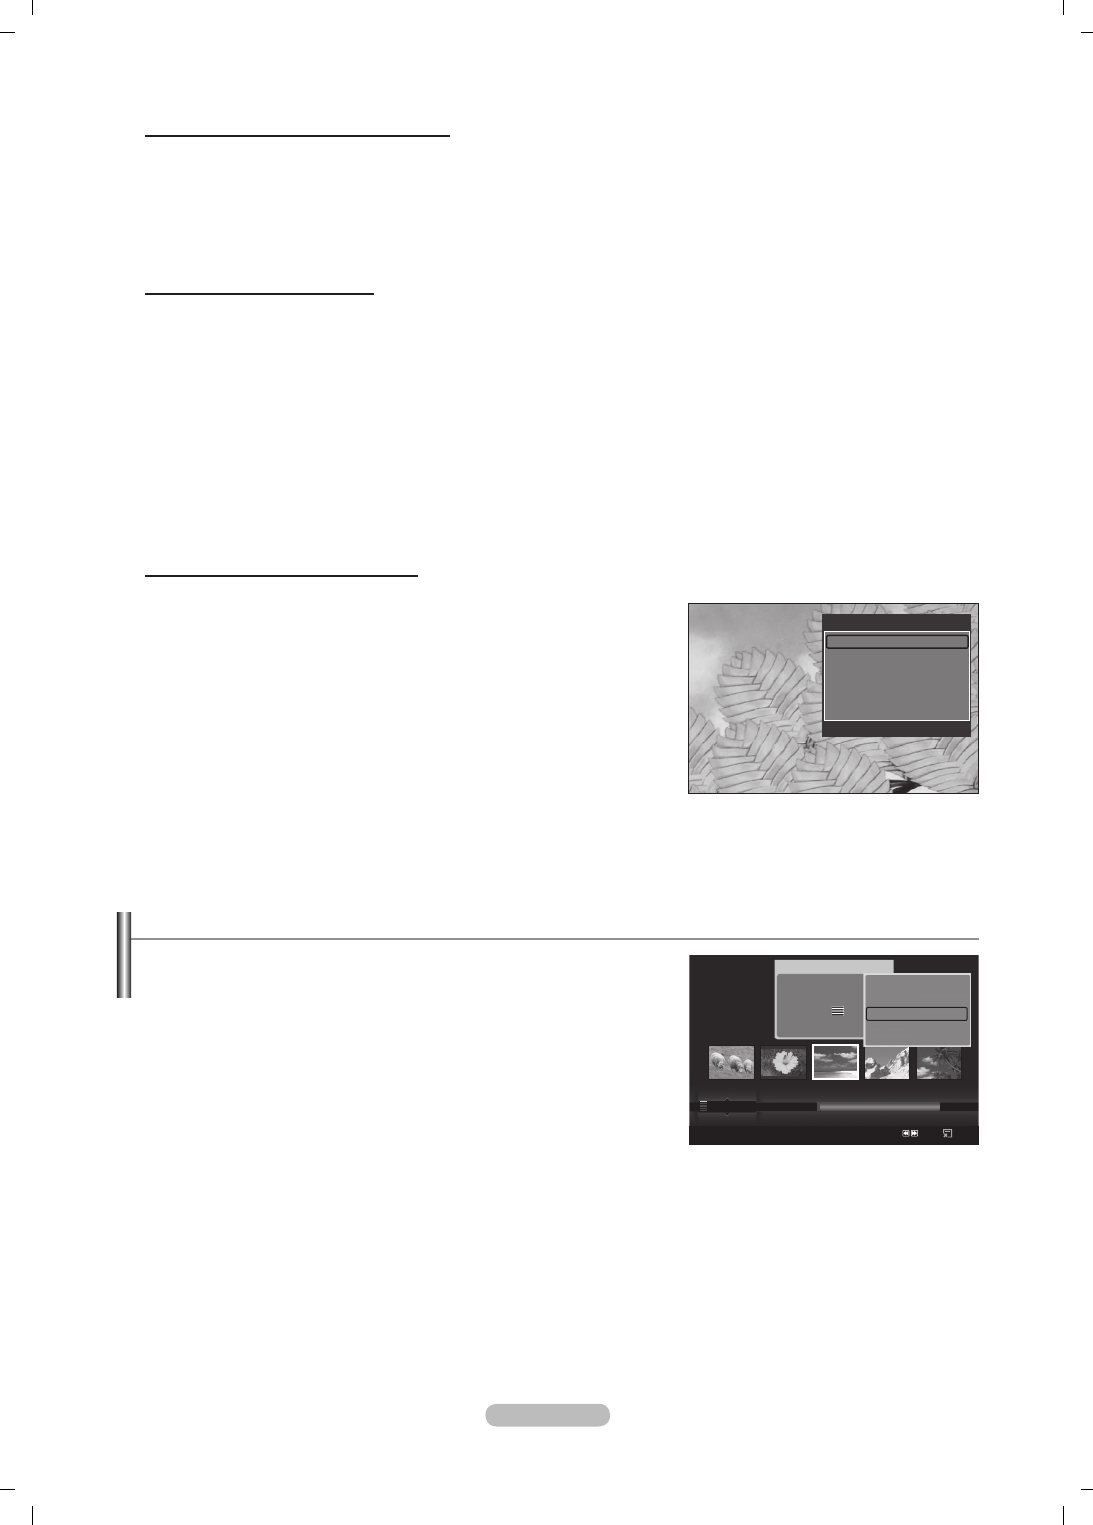
Français - 42
Lecture des chiers lm sélectionnés
1. Appuyez sur le bouton ◄ ou ► pour sélectionner le chier lm de votre choix dans la Liste des lms.
2. Appuyez sur le bouton jaune. Répétez l’opération ci-dessus pour sélectionner plusieurs chiers lm.
La marque c s’afche à gauche du chier lm sélectionné.
3. Appuyez sur le bouton ∂ (Lecture)/ENTER
E
.
Seul le chier sélectionné est lu.
Lecture d’un lm en continu
Si vous arrêtez la lecture d’un lm, vous avez la possibilité de reprendre la lecture à l’endroit où vous l’aviez abandonnée.
Pour ce faire, utilisez la fonction Lecture continue. Cela vous évitera de devoir recommencer la lecture depuis le début ou de
rechercher votre position dans le lm.
1.
Sélectionnez le chier lm que vous souhaitez lire en continu (fonction Lecture continue) en appuyant sur le bouton ◄ ou ►
dans la Liste des lms.
2. Appuyez sur le bouton ∂ (Lecture)/ENTER
E
.
3. Pour sélectionner la lecture continue, appuyez sur le bouton bleu.
Le lm reprend à l’endroit précis où vous aviez arrêté la lecture.
Si la fonction Aide lecture continue a été dénie sur Marche, un message s’afche lors de la lecture d’un chier lm que
vous souhaitez lire en continu avec la fonction Lecture continue. (voir page 43)
4.
Pour quitter le mode WISELINK Pro, appuyez sur le bouton W.LINK de la télécommande.
Menu d’options de lecture du lm
Mode rep.
Vous pouvez lire le lm en boucle.
Réglage de l’image/Test du son
Reportez-vous à la page 43.
Format de l’image
Ajustement: adapte la vidéo à la taille d’écran du téléviseur.
Original: lit la vidéo à sa taille initiale.
Information
Les informations relatives au chier lm sont afchées.
Retrait sécurisé
Vous pouvez retirer le périphérique du téléviseur en toute sécurité.
N
N
N
N
•
•
Suppression d’un chier photo/musical/lm
1. Appuyez sur le bouton ◄ ou ► pour sélectionner le chier de votre choix
dans la liste des photos, des musiques ou des lms.
Pour supprimer plusieurs chiers, sélectionnez ceux de votre choix en
appuyant sur le bouton jaune.
2. Appuyez sur le bouton TOOLS.
3. Appuyez sur le bouton ▲ ou ▼ pour sélectionner Supprimer (ou Suppr.
chier sélec.), puis appuyez sur le bouton ENTER
E
.
4. Appuyez sur le bouton ◄ ou ► pour sélectionner OK, puis appuyez sur le
bouton ENTER
E
.
Le chier est supprimé.
Lorsqu’un chier en lecture seule est supprimé, le message Fichier en lect. seule. Suppr. ? s’afche.
Les chiers en lecture seule ne peuvent pas être supprimés dans le cadre d’une sélection multiple
Si vous sélectionnez Annuler, la suppression est annulée.
Ne retirez pas l’unité de stockage USB pendant la suppression de chiers.
Vous ne pouvez pas supprimer les chiers d’image d’appareil photo numérique connectés à PTP.
Une fois supprimés, les chiers lm ne peuvent plus être récupérés.
N
N
N
N
N
N
N
N
Outils
Mode rep. ◄ Marche ►
Réglage de l’image
Test du son
Format de l’image : Ajustement
Information
Retrait sécurisé
U
Déplacer
L
Régler
e
Quitter
Photo
SUM
Périph.
Favoris
Sélection
Passer
Option
image_1.jpg
Mois :Jan
Date :Jan.01.2008
Couleur : Gris
Compo. :
Dossier : P-other
Favori : ★ ★ ★
Préférence
Mois
Date
Janv. Nov
▲
Diaporama
Lire gp act.
Supprimer
Information
▼
BN68-01757A-Fre.indb 42 2008-9-24 15:05:04
Français - 43
Réglage des paramètres d’image/audio à l’aide de WISELINK Pro
Lorsque vous visionnez un diaporama ou écoutez de la musique à l'aide de WISELINK Pro, vous pouvez régler l'image et le son.
Réglage d’image
1. Appuyez sur le bouton TOOLS pendant la lecture d'un diaporama ou d'un
chier musical.
2. Appuyez sur le bouton ▲ ou ▼ pour sélectionner Réglage de l’image.
3. Appuyez sur le bouton ◄ ou ► pour sélectionner le mode d’image Mode
Image (Dynamique, Standard ou Cinéma).
4. Appuyez sur le bouton ▲ ou ▼ pour accéder à un élément. (Contraste,
Luminosité, Couleur, Contraste Dynam., Réglage des noirs ou Réinit.)
Sélectionnez Réinit. pour réinitialiser les paramètres d’image.
5. Appuyez sur le bouton ◄ ou ► pour régler les paramètres.
Pour plus d’informations sur les paramètres d’image, reportez-vous aux
pages 15 à 18.
Test du son
1. Appuyez sur le bouton TOOLS pendant la lecture d'un diaporama ou d'un
chier musical.
2. Appuyez sur le bouton ▲ ou ▼ pour sélectionner Test du son.
3. Appuyez sur le bouton ◄ ou ► pour sélectionner le Mode Son.
(Standard, Musique, Cinéma, Parole ou Personnel)
4. Appuyez sur le bouton ▲ ou ▼ pour accéder à un élément.
Sélectionnez Réinit. pour réinitialiser les réglages audio.
5. Appuyez sur le bouton ◄ ou ► pour régler les paramètres.
Pour plus d’informations sur les réglages audio, reportez-vous à la
page 21~22.
Utilisation du menu Conguration
Le menu Conguration afche les paramètres utilisateur du menu WISELINK
Pro.
1. Appuyez sur le bouton W.LINK de la télécommande pour afcher le menu
WISELINK Pro.
2. Appuyez sur le bouton ◄ ou ► pour sélectionner SETUP, puis appuyez sur
le bouton ENTER
E
.
3. Appuyez sur le bouton ▲ ou ▼ pour sélectionner l’option de votre choix.
4. Appuyez sur le bouton ◄ ou ► pour sélectionner l’option voulue, puis
appuyez sur le bouton ENTER
E
.
Pour quitter le mode WISELINK Pro, appuyez sur le bouton W.LINK de la
télécommande.
Vitesse du diaporama → Rapide/Lent/Normal
Sélectionnez cette option pour modier la vitesse de délement du
diaporama.
Musique Mode Répétition → Marche/Arrêt
Permet de répéter la lecture de chiers musicaux.
Film Mode Répétition
Permet de répéter la lecture de chiers lm.
Aide lecture continue
Sélectionnez cette option pour afcher le message d’aide relatif à la lecture
continue des lms.
Délai éco. écran → 1 min/3 min/5 min
Sélectionnez cette option pour dénir le délai avant l’activation de l’écran de veille.
Information
Afche les informations de l’appareil connecté.
Retrait sécurisé
Vous pouvez retirer le périphérique du téléviseur en toute sécurité.
N
N
N
N
N
SETUP
SUM
Périph.
Déplacer Régler
Retour
Vitesse du diaporama ◄ Normal ►
Musique Mode Répétition : Marche
Film Mode Répétition : Marche
Aide lecture continue : Marche
Délai éco. écran : 3 min
Information
Retrait sécurisé
WISELINK Pro
Photo
SUM
Périph.
e
Quitter
Music Setup
SETUP
SUM
851.98MB/995.00MB Free
Movie
Réglage de l’image
Mode Image ◄ Standard ►
Contraste : 90
Luminosité : 45
Couleur : 50
Contraste Dynam. : Arrêt
Réglage des noirs : Arrêt
Réinit.
U
Déplacer
L
Régler
E
Entrer
R
Retour
Test du son
Mode Image ◄ Personnel ►
Balance : L50 R50
100Hz : 0
300Hz : 0
1KHz : 0
3KHz : 0
10KHz : 0
Réinit.
U
Déplacer
L
Régler
E
Entrer
R
Retour
BN68-01757A-Fre.indb 43 2008-9-24 15:05:04

Français - 44
WISELINK Pro-DLNA
Dénition du réseau DLNA
DLNA vous permet de visionner, sur votre téléviseur, des vidéos et des images enregistrées sur votre ordinateur via une connexion
réseau en mode Wiselink Pro. Cela vous évite de devoir les copier sur une unité de stockage USB, puis de connecter cette unité
au téléviseur. Pour utiliser DLNA, le téléviseur doit être connecté au réseau et l’application DLNA doit être installée sur votre
ordinateur.
Schéma des connexions réseau
1. Connectez le port [LAN] situé sur le panneau arrière du téléviseur au modem externe à l’aide d’un câble réseau.
2. Connectez l’ordinateur sur lequel le programme “DLNA PC Share Manager” sera installé au modem externe à l’aide d’un
câble réseau.
3. Connectez le port LAN situé sur la prise murale au modem externe à l’aide d’un câble modem.
Connexion au réseau
1. Une fois la connexion au réseau effectuée, congurez le réseau sur le téléviseur.
DLNA n’est pas compatible avec une connexion Internet sans l.
Les trois premiers chiffres (adresse de sous-réseau) des adresses IP du téléviseur et de l'ordinateur doivent être
identiques (par exemple, Adresse IP : 123.456.789.XX )
2. Exécutez un Test du réseau pour vérier les paramètres réseau.
Installation de l’application DLNA
Pour lire sur votre téléviseur du contenu stocké sur l’ordinateur, vous devez, dans un premier temps, installer l’application.
Configuration requise
1. Introduisez le CD du programme fourni avec le téléviseur dans le lecteur approprié de votre ordinateur.
2. L’installation du programme nécessite 20 Mo d’espace libre sur le disque dur.
Si vous partagez des chiers, jusqu’à 20 Mo d’espace disque est nécessaire par lot de 100 chiers.
Si vous annulez le partage de chiers, l’espace disque utilisé pour les informations sur les miniatures est également
libéré.
Formats pris en charge
1. Image : JPEG (jpg, jpeg)
2. Audio : MP3 (mp3)
3. Vidéo : MPEG1(mpg, mpeg), MPEG2 PS/TS(mpg, mpeg, trp, ts, tp), divx(mpg, mpeg, avi), MPEG4/H.264 (mpg, mpeg)
N
N
N
N
Téléviseur
Modem externe
(ADSL/VDSL/Télédistribution)
LAN
Ordinateur
LAN
1
2
3
BN68-01757A-Fre.indb 44 2008-9-24 15:05:05
Français - 45
Installation de l’application
1. Exécutez le chier Setup.exe situé sur le CD du programme fourni avec le téléviseur.
Vous pouvez également télécharger ce chier sur le site Web de Samsung à l’adresse www.samsung.com.
2. Installez l’application SAMSUNG PC Share Manager, comme illustré ci-dessous.
► ►
► ►
►
3. Une fois l’installation terminée, l’icône PC Share Manager apparaît sur votre Bureau.
Double-cliquez sur cette icône pour exécuter le programme.
N
N
BN68-01757A-Fre.indb 45 2008-9-24 15:05:07
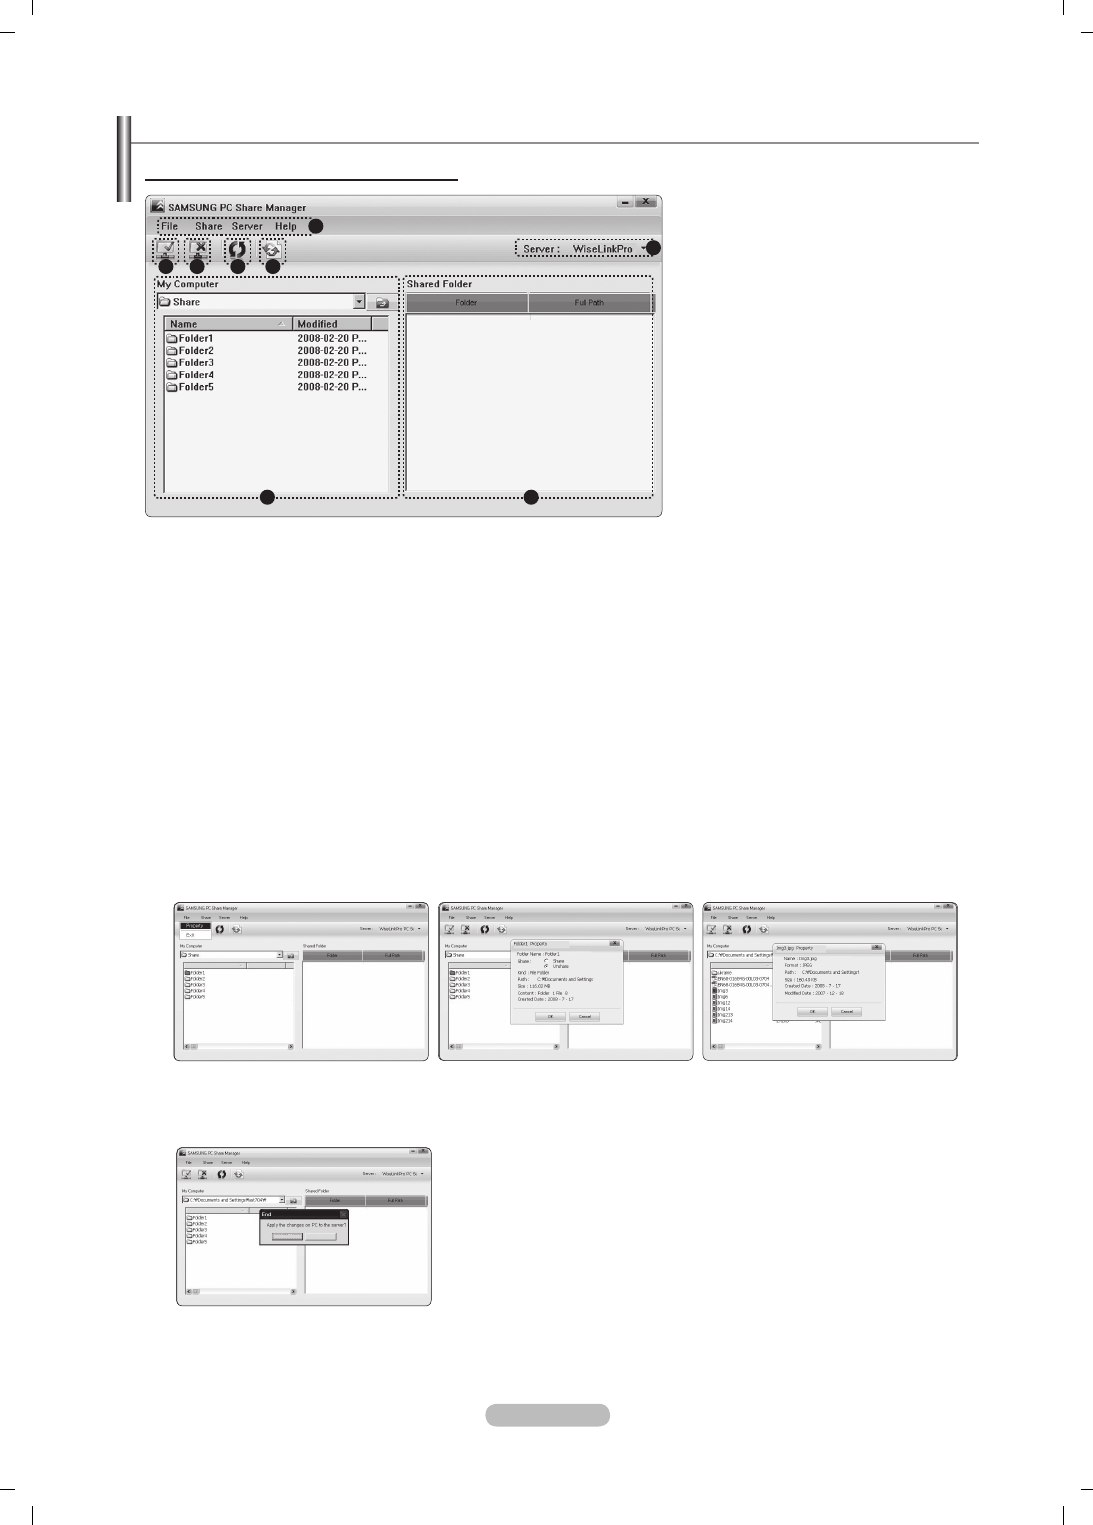
Français - 46
Utilisation de l’application DLNA
Présentation de l’écran du programme
1. Menus : l’application s’accompagne des menus suivants : Fichier, Partager, Serveur et Aide.
2. Cliquez sur ce bouton pour partager le dossier serveur sélectionné.
3. Cliquez sur ce bouton pour annuler le partage.
4. Cliquez sur ce bouton pour actualiser la liste des chiers et dossiers de l’ordinateur.
5. Cliquez sur ce bouton pour synchroniser l’état de partage.
6. Les dossiers et chiers à partager stockés sur l’ordinateur sont répertoriés.
7. Les dossiers partagés par l’utilisateur sont répertoriés.
8. Nom du serveur PC dans la liste d'appareils de WISELINK Pro : Cliquez pour modier le nom.
Fichier
Propriété: affiche des informations sur le fichier ou dossier sélectionné.
Méthode 1: sélectionnez un chier ou dossier, cliquez sur le menu Fichier, puis sélectionnez le sous-menu Propriété.
Méthode 2: sélectionnez un chier ou dossier, cliquez sur l’élément sélectionné avec le bouton droit de la souris, puis
cliquez sur Propriété dans le menu contextuel.
<Méthode 1> <Méthode 2>
Name ModiedName Name
Name
Yes No
Name ModiedName Name
Name
Yes No
Name ModiedName Name
Name
Yes No
Quitter: ferme l’application DLNA.
Si vous sélectionnez Exit sans appliquer les modications après avoir changé l’état de partage, un message vous invite à
enregistrer les paramètres modiés sur l’ordinateur. Sélectionnez Oui pour appliquer les modications et fermer l’application.
❑
-
-
Name ModiedName Name
Name
Yes No
1
2 3 4 5
6 7
8
BN68-01757A-Fre.indb 46 2008-9-24 15:05:08
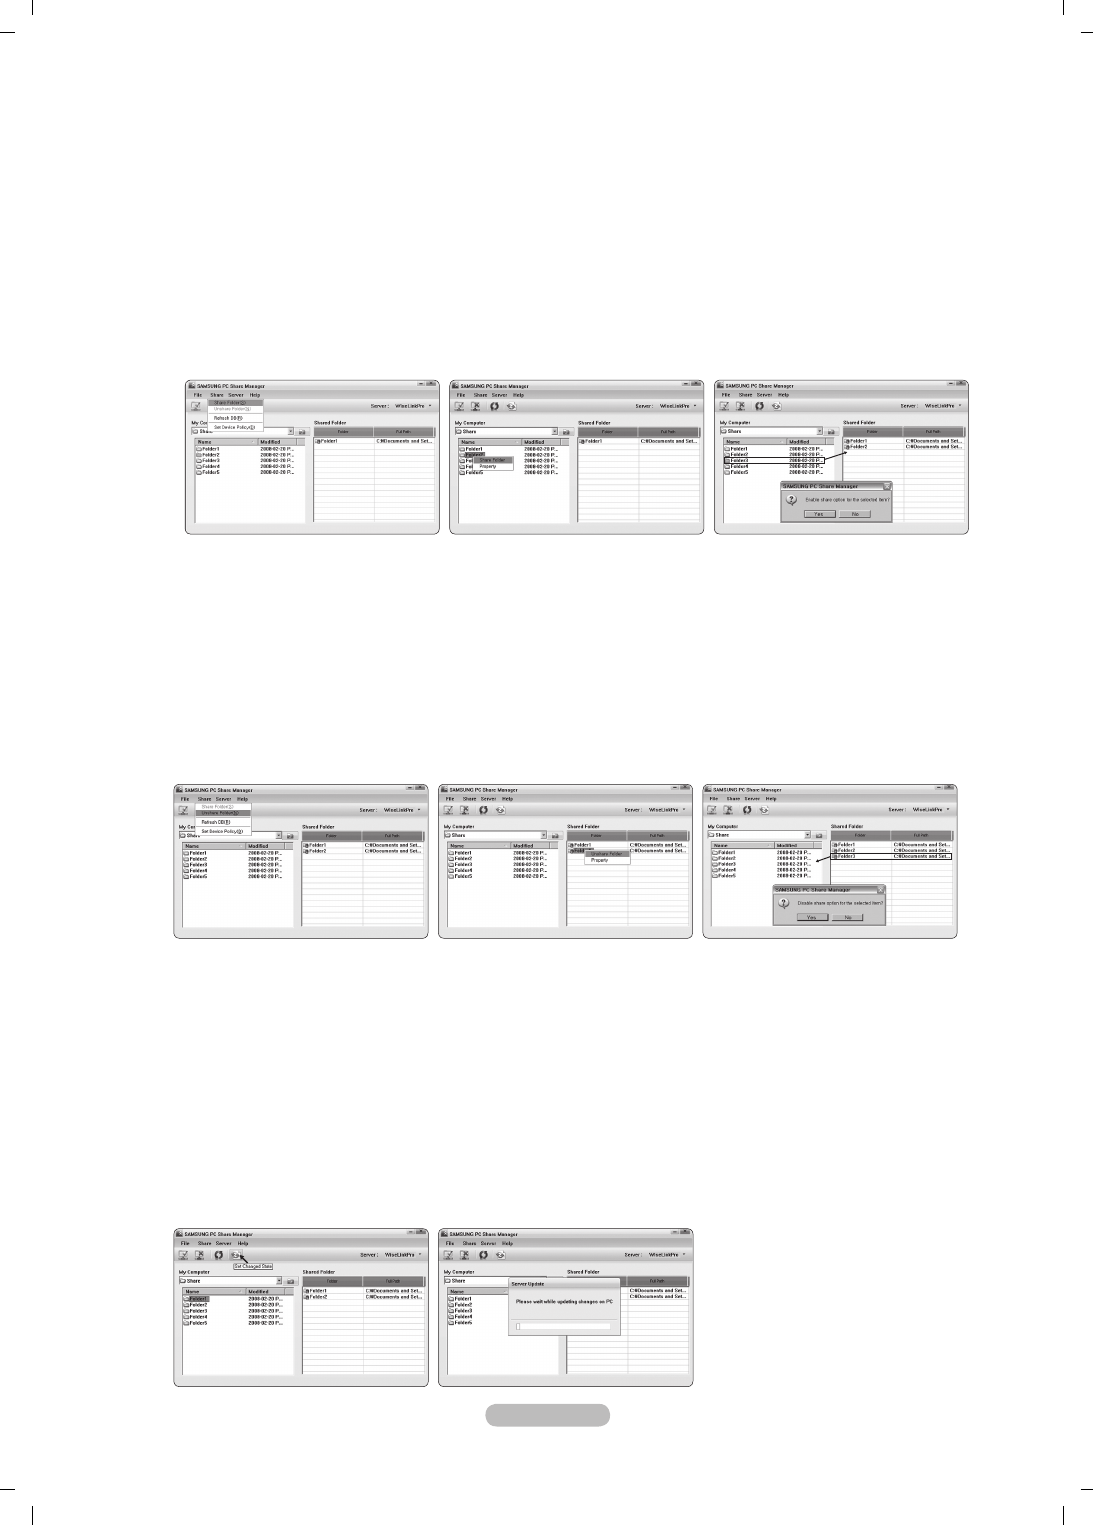
Français - 47
Partager
Partage d’un dossier
Vous pouvez partager un dossier de votre ordinateur sur le téléviseur. Vous pouvez partager, au maximum, 32 dossiers.
Votre ordinateur fera alors ofce de serveur pour le téléviseur.
Méthode 1: Sélectionnez un dossier dans Mon ordinateur, cliquez sur le menu Partager, puis sélectionnez le sous-menu
Partager le dossier.
Méthode 2: Sélectionnez un dossier dans Mon ordinateur, cliquez sur le dossier sélectionné à l’aide du bouton droit de la
souris, puis sélectionnez Partager le dossier dans le menu contextuel.
Méthode 3: placez le pointeur de la souris sur un dossier répertorié dans le volet Mon ordinateur et faites-le glisser dans le
volet Shared Folder (Dossiers partagé). Si un message vous invite à conrmer le dossier partagé, sélectionnez Oui.
<Méthode 1> <Méthode 2> <Méthode 3>
Annulation d’un dossier partagé
Vous pouvez annuler un dossier partagé sur votre ordinateur. Sélectionnez un dossier dans le volet Dossier partagé, puis
cliquez sur Annuler le partage.
Méthode 1: sélectionnez un dossier dans le volet Dossier partagé, cliquez sur le menu Partager, puis sélectionnez
Annuler le partage.
Méthode 2: sélectionnez un dossier dans le volet Dossier partagé, cliquez sur le dossier sélectionné à l’aide du bouton
droit de la souris, puis sélectionnez Annuler le partage dans le menu contextuel.
Méthode 3: placez le pointeur de la souris sur un dossier répertorié dans le volet Dossier partagé et faites-le glisser dans
le volet Mon ordinateur. Si un message vous invite à conrmer l’annulation, sélectionnez Oui.
<Méthode 1> <Méthode 2> <Méthode 3>
Application des réglages actuels
Effectuez cette opération lorsqu’une synchronisation s’avère nécessaire à la suite du partage d’un nouveau dossier ou de
l’annulation d’un partage. Le menu Dénir l’état modié applique les modications apportées aux dossiers partagés aux
données enregistrées avec le programme de partage installé sur l’ordinateur.
L’application des modications aux données internes est une procédure relativement longue. Aussi, cette fonction permet-elle
aux utilisateurs de n’appliquer les modications que lorsque cela s’avère nécessaire.
Tant que vous ne sélectionnez pas le menu Dénir l’état modié, l’état modié du dossier partagé n’est pas appliqué au
serveur.
Les modications apportées aux dossiers partagés ne sont pas appliquées à l’ordinateur tant que vous n’avez pas sélectionné
le menu Dénir l’état modié.
Méthode 1: sélectionnez le menu Partager, puis cliquez sur le sous-menu Actualiser BD.
Méthode 2: cliquez sur l’icône Dénir l’état modié.
❑
N
-
-
-
-
-
-
-
-
<Méthode 1> <Méthode 2>
BN68-01757A-Fre.indb 47 2008-9-24 15:05:09
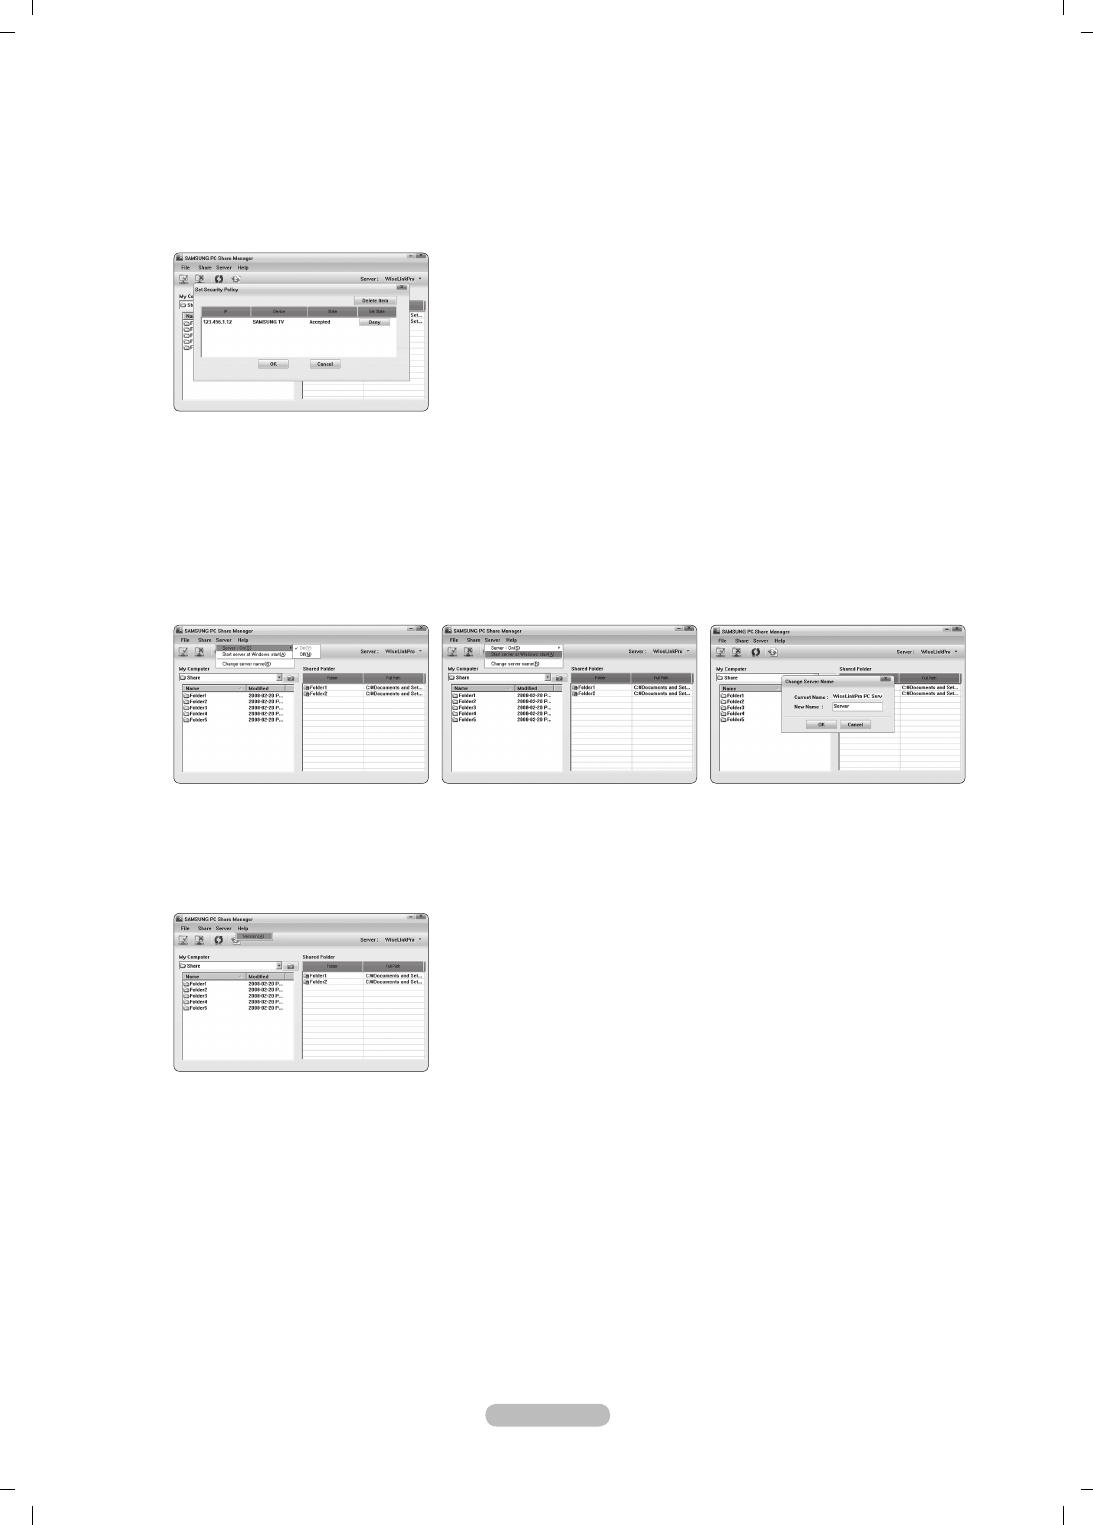
Français - 48
Définition des permissions d’accès
Pour permettre au téléviseur de détecter votre ordinateur, le téléviseur doit être déni sur Dénir la politique du
périphérique dans la fenêtre Paramètres de permission d’accès. De plus, le serveur et le téléviseur doivent se trouver sur
le même sous-réseau.
Procédure: sélectionnez le menu Partager, puis cliquez sur Dénir la politique du périphérique. Les éléments rejetés
apparaissent en gris. Vous pouvez modier les permissions d’accès en utilisant le bouton Allow Autoriser Accepter /
Refuser. Pour supprimer un élément, sélectionnez-le, puis cliquez sur Supprimer l’élément.
Serveur
Serveur
Vous pouvez utiliser votre ordinateur en tant que serveur ou annuler cette affectation.
Démarrer le serveur au démarrage de Windows
Vous pouvez indiquer si le serveur doit démarrer automatiquement au démarrage de Windows.
Modifier le nom du serveur
Vous pouvez renommer le serveur. Entrez un nouveau nom et cliquez sur OK. Le nouveau nom apparaît dans le coin
supérieur droit de la fenêtre, ainsi que sur le téléviseur.
Aide
Version
Une boîte de dialogue s’ouvre avec des informations sur la version du programme.
-
❑
❑
BN68-01757A-Fre.indb 48 2008-9-24 15:05:09

Français - 49
Utilisation de la fonction DLNA
Utilisation du menu DLNA
DLNA (Digital Living Network Alliance) permet de lire du contenu enregistré sur
un serveur DLNA (généralement votre ordinateur) connecté à votre téléviseur ou
sur un réseau.
Wiselink Pro permet de lire du contenu enregistré sur une unité de stockage
USB connectée au téléviseur, tandis que DLNA permet de lire du contenu
enregistré sur un serveur DLNA (votre ordinateur) connecté à votre téléviseur ou
sur le réseau. Les procédures d’utilisation du contenu sont identiques à celles en
usage pour WISELINK Pro.
Si vous installez, sur votre ordinateur, le programme PC Share Manager fourni
avec le téléviseur, vous pouvez faire en sorte que l’ordinateur joue le rôle de
serveur DLNA sur le réseau.
1. Appuyez sur le bouton W.LINK de la télécommande pour afcher le menu DLNA.
2. Appuyez sur le bouton ◄ ou ► pour sélectionner une icône (Photo, Musique, Film, Conguration), puis appuyez sur le bouton
ENTER
E
.
Pour quitter le mode DLNA, appuyez sur le bouton W.LINK de la télécommande.
Photo
Menu d’options de la Liste des photos
Sorting Photo List/Viewing the Information/Rotating the Photo le/Viewing a Slide Show (Tri de la Liste des photos/Afchage
des informations/Rotation du chier photo/Afchage d’un diaporama)
Menu d’options disponible pendant un diaporama
Lecture et Pause/Vitesse du diaporama/Zoom/Rotation
Music
Menu d’options de la Liste musicale
Sorting Music List/Viewing the Information/Playing a music le (Tri de la Liste musicale/Afchage des informations/Lecture
d’un chier musical)
Menu d’options de lecture de musique
Lecture et Pause/Mode de répétition
Movie
Menu d’options de la Liste de films
Tri de la Liste des lms/Afchage des informations/Lecture d’un chier lm
Menu d’options de lecture du film
Lecture et Pause/Mode de répétition
Setup
Vitesse du diaporama/Mode de répétition Musique/Mode de répétition Film veille/Information
DLNA ne prend pas en charge les fonctions suivantes.
Musique de fond et Sélection musique de fond.
Tri des chiers par préférence dans les dossiers Photo, Musique et Film.
Mod. info groupe.
Supprimer.
Supp. sécurité.
Le bouton π (Retour arrière)/µ (Avance rapide) fonctionne pendant la lecture d’un lm.
Il se peut que la fonction Ignorer (bouton ◄/►) ou Pause ne soit pas opérationnelle pendant la lecture d’un lm pour le
DLNA d’autres fabricants. Cela dépend, en fait, des informations de contenu.
Il se peut que la durée de lecture ne soit pas afchée lors de la lecture d’un lm.
N
❑
❑
❑
❑
N
-
-
-
-
-
-
N
N
WISELINK Pro
Photo
SUM
Device
e
Quitter
Music Setup
PHOTO
DLNA : Server
Movie
BN68-01757A-Fre.indb 49 2008-9-24 15:05:10

Français - 50
Activation de la Content Library
La Bibliothèque de contenu vous permet de visionner ou de lire du contenu
intégré sur le téléviseur ou stocké sur votre unité USB. Les fonctions Supprimer,
Déplacer et Mettre à jour sont inopérantes avec le contenu intégré.
1. Appuyez sur le bouton MENU. Appuyez sur le bouton ▲ ou ▼ pour
sélectionner Application, puis appuyez sur le bouton ENTER
E
.
2. Appuyez sur le bouton ▲ ou ▼ pour sélectionner Content Library, puis
appuyez sur le bouton ENTER
E
.
Le menu principal Content Library s’afche.
Appuyez sur le bouton CONTENT de la télécommande pour afcher le
menu principal Content Library.
3. Appuyez sur le bouton ◄ ou ► pour sélectionner une icône Galerie, Cuisine,
Enfants, Fitness, puis appuyez sur le bouton ENTER
E
.
L’élément sélectionné est exécuté
Consultez la description afchée pour le bouton lorsque vous l’utilisez
pendant l’exécution de contenu.
Bouton Description
▲/▼/◄/►
(cercle) Déplace le curseur et sélectionne un élément.
ENTER
E
Valide l’élément actuellement sélectionné.
RETURN Revient au menu précédent.
EXIT Arrête la fonction en cours et revient au menu principal Bibliothèque de contenu.
(Bouton de couleur) Les boutons qui donnent accès à des fonctions sont décrits sur la page correspondante.
Vous pouvez régler le volume du contenu en cours de lecture.
CONTENT Quitte le mode Content Library (Bibliothèque de contenu).
Si vous appuyez sur le bouton Volume ou MUTE, aucun OSD n’est afché, mais la fonction est exécutée comme il se doit.
La bibliothèque de contenu contient des images, chiers multimédias et autres documents fournis à titre
purement indicatif et promotionnel. Ces données ont été modiées et sont régulièrement révisées et mises à jour.
Certaines peuvent ne pas s’appliquer à tous les utilisateurs.
Les informations contenues dans la bibliothèque sont fournies telles quelles. Bien qu’elles proviennent de
sources réputées ables, Samsung ne peut garantir leur exactitude, leur validité, leur pertinence ou leur
exhaustivité. En aucun cas, en ce compris la négligence, Samsung ne pourra être tenue responsable, d’un point
de vue civil ou pénal, des dépenses, des honoraires d’avocat ni de tous dommages directs, indirects, accidentels,
spéciaux, induits ou autres résultant de, ou en rapport avec, toute information contenue dans ou l’utilisation de la
bibliothèque de contenu, même si Samsung a été avertie de la possibilité de tels dommages.
N
N
N
N
N
N
Content Library
Application
WISELINK Pro
Anynet+ (HDMI-CEC)
Content Library ►
InfoLive
Guide Produit
Configuration
USB
Retour
Quitter
Recettes Anglais pour enfants Fitness
Galerie
Gallery
Content Library
BN68-01757A-Fre.indb 50 2008-9-24 15:05:10

Français - 51
Utilisation de la bibliothèque de contenu
Galerie
Art/Relaxation/Groupe:
cette fonction lit un diaporama avec des images haute résolution et une musique de fond. Elle
crée ainsi différentes ambiances. La fonction Galerie du téléviseur vous permet de changer votre ambiance intérieure.
Appuyez sur le bouton jaune pour lire toutes les bibliothèques d’images.
Une musique par défaut est attribuée à chacune des options Art, Relaxation et Groupe.
Appuyez sur le bouton INFO pour afcher les mentions de provenance et des informations détaillées sur la bibliothèque
d’images. Appuyez une nouvelle fois sur le bouton INFO ou sur le bouton ► pour faire disparaître les mentions de
provenance.
Les droits d’auteur relatifs au contenu de la Galerie et tous les litiges qui en découlent sont du ressort de Gallery Player,
Inc.
Pour obtenir du contenu Galerie supplémentaire, recherchez des informations par le biais du site www.samsung.com.
Pour en savoir plus sur la lecture d’une bibliothèque d’images supplémentaire, consultez la section Utilisation de
contenu supplémentaire à l’aide d’une unité de stockage USB externe.
Recettes
Entrées/Plats/Desserts:
plusieurs recettes, faciles à réaliser, vous sont proposées. Inspirez-vous de ce contenu pour
préparer de délicieux repas.
Les recettes présentées dans la catégorie Recettes du téléviseur Samsung s’inspirent de recettes publiées par Anness
Publishing.
Les droits d’auteur relatifs à la catégorie Recettes et tous les litiges qui en découlent sont du ressort de Practical
Pictures.
Anglais pour enfants
Histoire/Chanson/Jeu:
ce contenu éducatif et interactif fera le bonheur de vos enfants. Ils vivront des aventures
inoubliables avec Boowa et Kwala, deux personnages sympathiques.
Les droits d’auteur relatifs à la catégorie Anglais pour enfants et les litiges qui en découlent sont du ressort de UpToTen.
Fitness
Étirements de base/Massage:
ce contenu de gestion de la santé propose des exercices d’étirement et de massage pour
toute la famille.
Ce contenu de gestion de la santé propose des exercices d’étirement et de massage pour toute la famille. La catégorie
Étirements de base
du téléviseur Samsung s’inspire du livre “Stretching” de Suzanne Martin, aux éditions DK, tandis
que la catégorie
Massage
s’inspire d’ouvrages édités par Anness Publishing.
Les droits d’auteur relatifs à la catégorie
Étirements de base
appartiennent à DK Publishing Company. Les droits
d’auteur relatifs à la catégorie
Massage
appartiennent à Practical Pictures. Tous les litiges en relation avec les droits
d’auteur sont du ressort de leurs propriétaires respectifs.
Utilisation de la télécommande dans le menu Fitness
Bouton Description
◄/►
(cercle) Afcher l’étape précédente/suivante
ENTER
E
Lecture ou pause (en modes Basic Stretches et Advanced Stretches)
Délai éco. Écran
Sélectionnez cette option pour dénir le délai avant l’activation de l’écran de veille.
Appuyez sur le bouton jaune pour sélectionner Conguration dans le menu Content Library.
❑
N
N
N
N
N
❑
N
N
❑
N
❑
N
N
❑
BN68-01757A-Fre.indb 51 2008-9-24 15:05:11
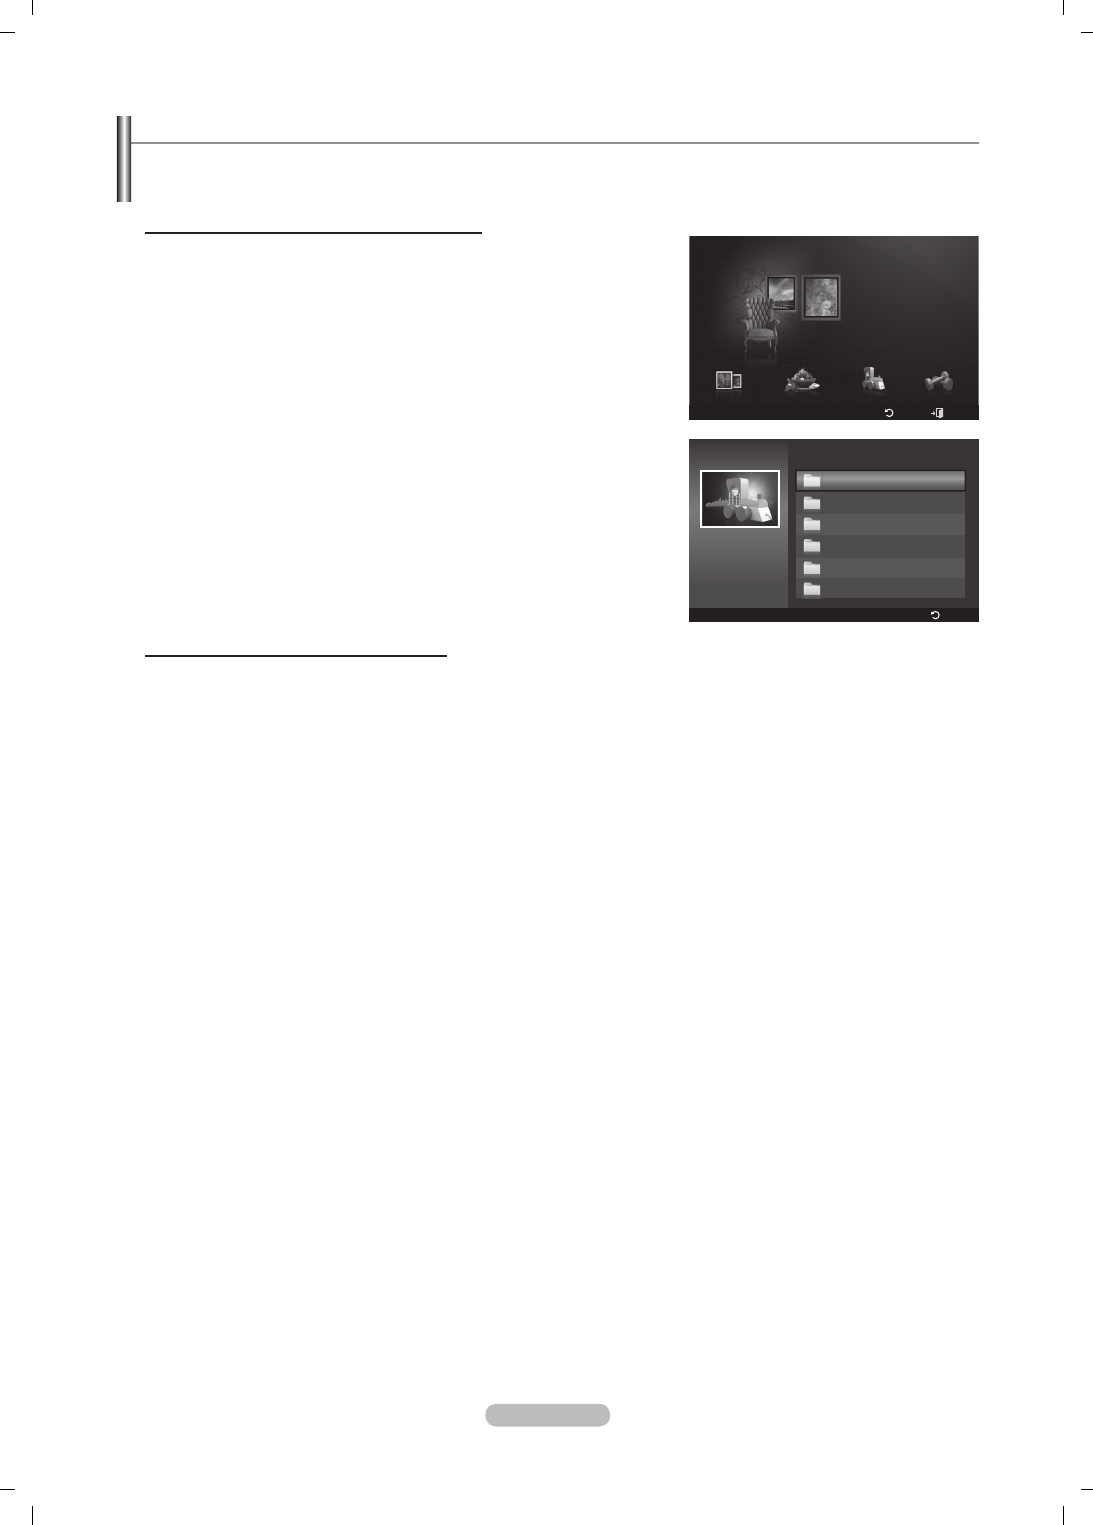
Français - 52
Utilisation de contenu supplémentaire à l’aide d’une unité de stockage USB externe
Vous pouvez télécharger du contenu sur une unité de stockage USB et le lire sur votre téléviseur. (Le contenu situé sur l’unité de
stockage USB externe est lu directement, c’est-à-dire sans être copié dans la mémoire Flash intégrée du téléviseur.)
Lecture et fermeture de nouveau contenu
1. Appuyez sur le bouton rouge pour sélectionner le menu principal Content
Library.
Le menu principal USB Browser (Navigateur USB) est af ché.
La liste des chiers enregistrés sur l’unité de stockage USB est af chée.
2. Appuyez sur le bouton ▲ ou ▼ pour accéder au chier (ou dossier) à lire.
Appuyez sur le bouton ENTER
E
.
La lecture du contenu sélectionné commence.
L’utilisation du contenu est identique à celle du contenu de la mémoire du
téléviseur.
Pour revenir à l’écran principal du navigateur USB, appuyez sur le
bouton EXIT.
Content Library ne prend en charge que les périphériques de stockage
de masse USB de la classe MSC. La classe de stockage de masse
MSC est dédiée aux périphériques de transport de masse uniquement.
Il s’agit notamment des clés USB et des lecteurs de cartes Flash (les
concentrateurs et les disques durs USB ne sont pas pris en charge).
Téléchargement de nouveau contenu
Vous pourrez vous procurer, gratuitement ou contre paiement, du nouveau contenu par le biais du site Web www.samsung.com.
Téléchargement de contenu
1. Rendez-vous sur le site Web www.samsung.com et ouvrez la page Content Library.
2. Entrez le numéro de produit (UDN, Unique Device Number) lorsque vous y êtes invité.
3. Sélectionnez un élément de contenu sur la page “Contents Download” (Téléchargement de contenu).
4. Téléchargez le contenu sur l’unité de stockage USB.
Content Library ne prend en charge que les périphériques de stockage de masse USB de la classe MSC. La classe
de stockage de masse MSC est dédiée aux périphériques de transport de masse uniquement. Il s’agit notamment des
clés USB et des lecteurs de cartes Flash (les concentrateurs et les disques durs USB ne sont pas pris en charge).
5. Accédez au menu principal Content Library en appuyant sur le bouton Contenu ou en sélectionnant Content Library
(Menu → Application → Bibliothèque de contenu)
6. Introduisez l’unité USB dans le port USB situé sur le côté du téléviseur.
Localisation d’un numéro de produit (Unique Device Number, UDN)
1. Introduisez l’unité USB dans le port USB situé sur le côté du téléviseur.
2. Appuyez sur le bouton vert (Show UDN - Af cher UDN) dans l’écran principal du navigateur USB.
3. Le nombre de 18 chiffres af ché à l’écran est le code du produit.
Contenu fourni
Du contenu supplémentaire est disponible sur www.samsung.com.
N
N
N
N
N
N
N
-
configuration
USB
Retour
Quitter
Recettes Anglais pour enfants Fitness
Galerie
Galerie
Content Library
Mémoire TV
Show UDN
Retour
Content Library
USB
<<
1/1
>>
Fitness
Enfants
Cuisine
Galerie
Living
Enfants
▼ ▲
Others
Sub Item : 2
BN68-01757A-Fre.indb 52 2008-9-24 15:05:11
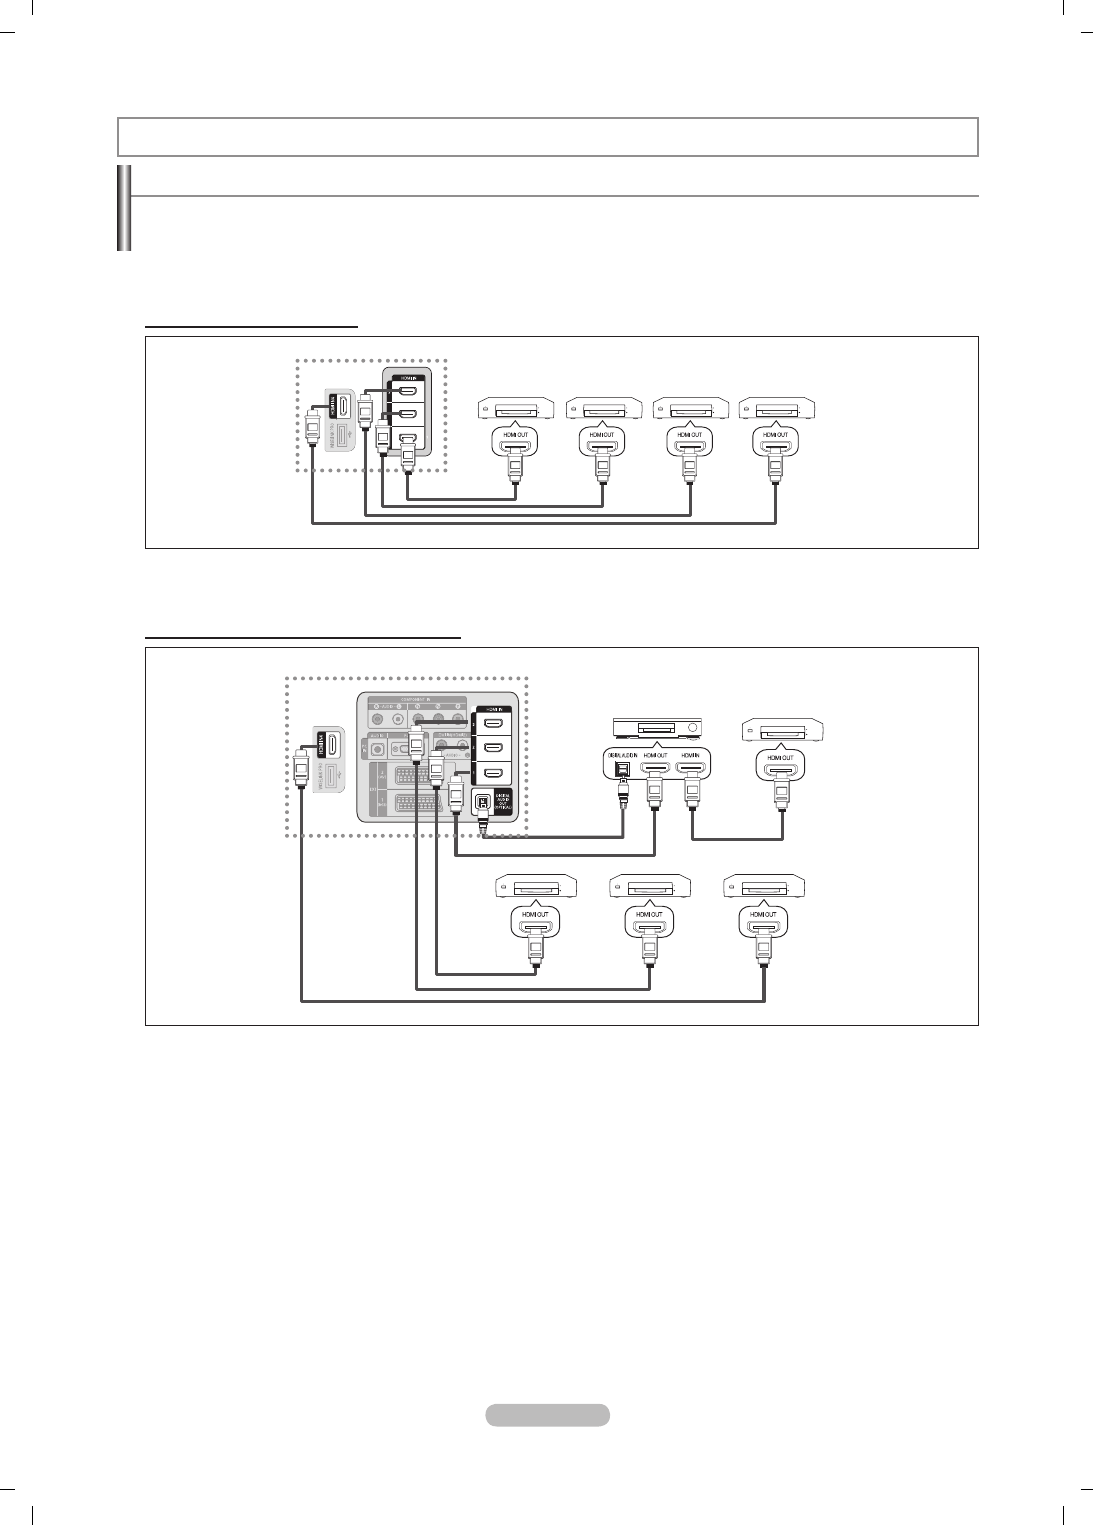
Français - 53
Connexion d’appareils Anynet+
Anynet+ est une fonction qui vous permet de contrôler tous les appareils Samsung connectés compatibles Anynet+ avec votre
télécommande Samsung.
Le système Anynet+ peut être utilisé uniquement avec les appareils Samsung disposant de la fonction Anynet+. A n de véri er
que votre appareil Samsung dispose de cette fonction, assurez-vous qu’il comporte le logo Anynet+.
Connexion à un téléviseur
1. A l’aide du câble HDMI, reliez la prise [HDMI 1], [HDMI 2], [HDMI 3] ou [HDMI 4] du téléviseur à la prise HDMI OUT de
l’appareil Anynet+ correspondant.
Connexion à un système home cinéma
1. A l’aide du câble HDMI, reliez la prise [HDMI 1], [HDMI 2], [HDMI 3] ou [HDMI 4] du téléviseur à la prise HDMI OUT de
l’appareil Anynet+ correspondant.
2. A l’aide du câble HDMI, reliez la prise HDMI IN du système home cinéma à la prise HDMI OUT de l’appareil Anynet+
correspondant.
Connectez le câble optique entre la prise Digital Audio Out (Optical) (Sortie audio numérique (Optique)) de votre téléviseur et
l’entrée Digital Audio (Audio numérique) de votre système home cinéma.
En suivant les instructions de connexion ci avant, la prise optique alimente uniquement les périphériques audio 2 canaux.
Vous entendrez du son uniquement au niveau des haut-parleurs gauche et droit avants de votre système home cinéma
et du caisson de basses. Pour écouter des chaînes audio 5.1, branchez la prise Digital Audio Out (Optical) (Sortie audio
numérique (Optique)) du lecteur DVD ou du décodeur câble/récepteur satellite (c.-à-d. appareil Anynet 1 ou 2) directement sur
l’ampli cateur ou sur un système home cinéma, et non sur le téléviseur.
Connexion uniquement à un seul système home cinéma.
Vous pouvez connecter un appareil Anynet+ à l’aide du câble HDMI 1.3. Certains câbles HDMI peuvent ne pas prendre en
charge les fonctions Anynet+.
Anynet+ fonctionne si l’appareil AV compatible est en mode Veille (Standby) ou en marche (On).
Anynet+ prend en charge jusqu’à 12 appareils AV. Vous pouvez connecter jusqu’à 3 appareils du même type.
N
N
N
N
N
N
A propos de Anynet+
TV
Appareil Anynet+ 1
Appareil Anynet+ 2 Appareil Anynet+ 3
Câble HDMI 1.3
Câble HDMI 1.3
Câble HDMI 1.3
Câble HDMI 1.3
Home Theater
Appareil Anynet+ 4
Câble HDMI 1.3
Câble optique
Appareil
Anynet+ 1
Appareil
Anynet+ 2
Appareil
Anynet+ 3
TV
Câble HDMI 1.3
Câble HDMI 1.3 Câble HDMI 1.3
Câble HDMI 1.3
Appareil
Anynet+ 4
BN68-01757A-Fre.indb 53 2008-9-24 15:05:13

Français - 54
Conguration d’Anynet+
Anynet+(HDMI-CEC)
Outils → Anynet+(HDMI-CEC) remplit la même fonction.
Configuration
Anynet+(HDMI-CEC) → Arrêt / Marche: Pour utiliser la fonction Anynet+,
l’option Anynet+ (HDMI-CEC) doit être activée Marche.
Lorsque la fonction Anynet+ (HDMI-CEC) est désactivée, toutes les
activités associées à Anynet+ sont indisponibles.
Arrêt automatique → Non / Oui: Extinction automatique d’un appareil
Anynet+ lorsque le téléviseur est mis hors tension
La source active sur la télécommande doit être dénie sur TV pour
pouvoir utiliser la fonction Anynet+.
Si vous réglez Arrêt automatique sur Oui , les appareils externes
connectés s’éteignent lorsque le téléviseur est mis hors tension.
Toutefois, si un appareil externe est en train d’enregistrer, il peut ne pas
s’éteindre.
❑
•
N
•
N
N
Recherche d’appareils Anynet+ et basculement entre des appareils
1. Appuyez sur le bouton TOOLS. Appuyez sur le bouton ENTER
E
pour
sélectionner Anynet+ (HDMI-CEC).
2. Appuyez sur le bouton ▲ ou ▼ pour sélectionner Liste d’appareils, puis
appuyez sur le bouton ENTER
E
.
La liste des appareils Anynet+ connectés au téléviseur s’afche. Si
l’appareil désiré est introuvable, appuyez sur le bouton rouge pour chercher
des appareils.
Le menu Liste d’appareils n’apparaît que si Anynet+ (HDMI-CEC) est
activée dans le menu Conguration.
3. Appuyez sur le bouton ▲ ou ▼ pour sélectionner un appareil, puis appuyez sur le bouton ENTER
E
. Vous passez ainsi à
l’appareil sélectionné.
Le basculement vers l’appareil sélectionné peut prendre 2 minutes. Il est impossible d’annuler l’opération de basculement.
Le temps nécessaire pour rechercher les appareils dépend du nombre d’appareils connectés.
Au terme de la recherche d’appareils, le nombre d’appareils trouvés n’est pas indiqué.
Bien que le téléviseur examine automatiquement la liste des périphériques lorsque le téléviseur est mis sous tension avec le
bouton marche/arrêt, les périphériques connectés au téléviseur alors que celui-ci est déjà allumé ou dans certaines autres
conditions ne sont pas automatiquement afchés dans la liste. Appuyez sur le bouton rouge pour rechercher le périphérique
connecté.
Si vous avez choisi un mode d’entrée externe en appuyant sur le bouton SOURCE, il est impossible d’utiliser la fonction
Anynet+. Veillez à basculer vers un appareil Anynet+ à l’aide de la Liste d’appareils.
N
N
N
N
N
N
N
Application
WISELINK Pro
Anynet+ (HDMI-CEC) ►
Content Library
InfoLive
Guide Produit
Liste d’appareils
Configuration
U
Déplacer
E
Entrer
R
Retour
Anynet+ (HDMI-CEC) : ON
Arrêt automatique :
U
Déplacer
E
Entrer
R
Retour
Set up
Arrêt
Marche
Voir télévision
Liste d’appareils
Enregistrement : DVDR
DVDR Operation
Récepteur : Marche
Configuration
U
Déplacer
E
Entrer
R
Retour
BN68-01757A-Fre.indb 54 2008-9-24 15:05:14
Français - 55
Menu Anynet+
Le menu Anynet+ varie selon le type et l’état des appareils Anynet+ connectés au téléviseur.
Menu Anynet+Description
Voir télévision Le mode Anynet+ change en mode de diffusion TV.
Liste d’appareils Afche la liste des appareils Anynet+.
(nom_appareil) Menu Afche les menus du périphérique connecté. Par exemple, si un enregistreur de DVD est
connecté, son menu de disques s’afche.
(nom_appareil) Fonctionnement Afche le menu de lecture de l’appareil connecté. Par exemple, si un enregistreur de DVD est
connecté, son menu de lecture s’afche.
Enregistrer: (*enregistreur) Lance immédiatement l’enregistrement avec l’enregistreur. (Cette fonction n’est disponible
que pour les périphériques prenant en charge la fonction d’enregistrement.)
(*enregistreur) Réserver
l’ enregistrement Permet de réserver un enregistrement pour l’enregistreur. (Cette fonction n’est disponible que
pour les périphériques prenant en charge la fonction de réservation.)
Arrêter Enr.: (*enregistreur) Arrête l’enregistrement.
Récepteur Le son est émis par l’intermédiaire du récepteur.
Si plusieurs enregistreurs sont connectés, il s’afchent sous la forme (*enregistreur) ; si un seul enregistreur est connecté, son
nom est afché (*nom_appareil).
Boutons de la télécommande du téléviseur disponibles en mode Anynet+
Type d’appareil Mode de fonctionnement Boutons disponibles
Appareil Anynet+
Après le basculement vers cet
appareil, lorsque son menu
s’afche à l’écran.
Touches numériques
▲/▼/◄/►/Boutons ENTER
E
Boutons de couleur / bouton EXIT
Après le basculement vers
l’appareil, pendant la lecture d’un
chier
π
(recherche vers l’arrière) /
µ
(recherche vers l’avant)
∫
(Arrêt) /
∂
(Lecture) /
∑
(Pause)
Appareil à tuner
intégré
Après le basculement vers
l’appareil, lorsque vous regardez
un programme télévisé Bouton P /
Appareil audio Lorsque le récepteur est activé Volume / Bouton
MUTE Bouton
La fonction Anynet+ est utilisable uniquement lorsque la source active sur la télécommande est dénie sur TV.
Le bouton
∏
ne fonctionne que lorsque l’appareil est dans un état où l’enregistrement est possible.
Il est impossible de commander des appareils Anynet+ à l’aide des boutons situés sur le téléviseur. Les appareils Anynet+ ne
peuvent être commandés qu’au moyen de la télécommande du téléviseur.
Il se peut que la télécommande du téléviseur ne fonctionne pas dans certaines situations. Dans ce cas, sélectionnez de
nouveau l’appareil Anynet+.
Les fonctions d’Anynet+ ne fonctionnent pas sur les produits d’autres fabricants.
Les opérations
π
,
µ
peuvent varier en fonction de l’appareil.
Enregistrement
Vous pouvez enregistrer un programme télévisé à l’aide d’un enregistreur Samsung.
1. Appuyez sur le bouton TOOLS. Appuyez sur le bouton ENTER
E
pour
sélectionner Anynet+ (HDMI-CEC).
2.
Appuyez sur le bouton ▲ or ▼ pour sélectionner Enregistrement: (nom_appareil),
puis appuyez sur le bouton ENTERE. L’enregistrement débute.
S’il y a plusieurs enregistreurs
Si plusieurs enregistreurs sont connectés, la liste de ces appareils s’afche.
Appuyez sur le bouton ▲ ou ▼ pour sélectionner un appareil, puis appuyez
sur le bouton ENTER
E
. L’enregistrement débute.
Si l’enregistreur n’est pas afché
Sélectionnez Liste d’appareils et appuyez sur le bouton rouge pour chercher des appareils.
3. Appuyez sur le bouton EXIT pour quitter le menu.
Vous pouvez effectuer un enregistrement en sélectionnant Enregistrement: (nom_appareil).
Vous enregistrez alors ce que vous regardez. Si vous regardez une vidéo provenant d’un autre appareil, cette vidéo est
enregistrée.
Avant d’enregistrer, vériez la connexion de la prise d’antenne au périphérique d’enregistrement. An de connecter
correctement une antenne à un périphérique d’enregistrement, reportez-vous à la documentation de ce dernier.
N
N
N
N
N
N
N
N
N
N
N
N
Voir télévision
Liste d’appareils
Enregistrement : DVDR
DVDR Operation
Récepteur : Marche
Configuration
U
Déplacer
E
Enter
R
Retour
BN68-01757A-Fre.indb 55 2008-9-24 15:05:14

Français - 56
Ecoute via un récepteur (home cinéma)
Le son peut être émis par l’intermédiaire d’un récepteur au lieu de l’enceinte du
téléviseur.
1. Appuyez sur le bouton TOOLS. Appuyez sur le bouton ENTER
E
pour
sélectionner Anynet+ (HDMI-CEC).
2. Appuyez sur le bouton ▲ or ▼ pour sélectionner Récepteur. Appuyez sur le
bouton ◄ ou ► pour sélectionner Marche ou Arrêt.
3. Appuyez sur le bouton EXIT pour quitter le menu.
Si votre récepteur ne prend en charge que l’audio, il peut ne pas apparaître
dans la liste des appareils.
Le récepteur fonctionnera lorsque vous aurez correctement raccordé la prise d’entrée optique du récepteur à la prise de sortie
optique du téléviseur.
Lorsque le récepteur (home cinéma) est activé, vous pouvez écouter le son sortant de la prise optique du téléviseur.
Lorsque le téléviseur afche un signal DTV(air), il envoie un son 5.1 au récepteur du home cinéma. Lorsque la source est un
composant numérique (p. ex. DVD) connecté au téléviseur TV via HDMI, seul un son 2 voies est diffusé par le récepteur du
home cinéma.
Lorsque vous utilisez la fonction WISELINK Pro, le son peut ne pas être transmis correctement par le récepteur.
Lors de l’écoute via le récepteur, des restrictions s’appliquent à l’utilisation des menus liés aux fonctions PIP et audio (MTS,
langue préférée).
Si une coupure de courant se produit alors que l’option Récepteur est dénie sur Marche (câble d’alimentation débranché ou
panne de courant), il se peut que l’option Sélection Haut-parleur soit dénie sur Haut-parleur externe lorsque vous rallumez
le téléviseur. (Voir page 22)
Dépannage d’Anynet+
Symptôme Solution
Anynet+ ne fonctionne
pas. Vériez si l’appareil est compatible Anynet+. Le système Anynet+ ne prend en charge que les
appareils compatibles Anynet+.
Connexion à un seul récepteur (home cinéma).
Vériez si le cordon d’alimentation de l’appareil Anynet+ est bien connecté.
Vériez la connexion des câbles vidéo/audio/HDMI 1.3 de l’appareil Anynet+.
Vériez qu’Anynet+ (HDMI-CEC) est déni sur Marche dans le menu de conguration Anynet+.
Vériez si la télécommande du téléviseur est en mode TV.
Vériez qu’il s’agit d’une télécommande exclusive Anynet+.
Anynet+ ne fonctionne pas dans toutes les conditions. (Recherche de chaînes, fonctionnement
de WISELINK pro, Plug & Play, etc.)
Lorsque vous branchez ou retirez le câble HDMI 1.3, veillez à relancer une recherche de
périphérique ou à éteindre et rallumer votre téléviseur.
Vériez que la fonction Anynet+ du périphérique Anynet+ est activée.
•
•
•
•
•
•
•
•
•
•
Je veux démarrer Anynet+.Assurez-vous que l’appareil Anynet+ est bien connecté au téléviseur et assurez-vous que la
fonction Anynet+ (HDMI-CEC) est réglée sur Marche dans le menu Setup d’Anynet+.
Appuyez sur le bouton TV de la télécommande pour allumer le téléviseur. Appuyez ensuite sur
le bouton TOOLS pour afcher le menu Anynet+ et sélectionnez le menu désiré.
•
•
Je veux quitter Anynet+.Choisissez View TV dans le menu Anynet+.
Appuyez sur le bouton SOURCE de la télécommande et choisissez un appareil non compatible
Anynet+.
(Remarque : le bouton de canal ne fonctionne que si aucun appareil Anynet+ à tuner incorporé
n’est connecté.)
•
•
•
Le message Connexion
à Anynet+... apparaît à
l’écran.
Il est impossible d’employer la télécommande quand vous congurez Anynet+ ou quand vous
passez à un mode de visualisation.
La télécommande n’est utilisable qu’au terme de la conguration d’Anynet+ ou du passage au
mode de visualisation.
•
•
La lecture ne démarre pas
sur l’appareil Anynet+.Vous ne pouvez pas utiliser la fonction de lecture lorsque Plug & Play est en cours.
L’appareil connecté n’est
pas afché.
Vériez si l’appareil est ou non compatible avec les fonctions d’Anynet+.
Vériez si le câble HDMI 1.3 est bien connecté.
Vériez si Anynet+ (HDMI-CEC) est déni sur Marche dans le menu de conguration Anynet+.
Lancez une nouvelle recherche d’appareils Anynet+.
Vous pouvez connecter un appareil Anynet+ à l’aide du câble HDMI 1.3 uniquement. Certains
câbles HDMI peuvent ne pas prendre en charge les fonctions Anynet+.
En cas d’arrêt anormal, tel que la déconnexion du câble HDMI ou du câble d’alimentation, ou
encore une panne de courant, effectuez une nouvelle recherche d’appareils.
•
•
•
•
•
•
Le programme TV ne
s’enregistre pas. Vériez que la prise d’antenne du périphérique d’enregistrement est correctement branchée.
Le son du téléviseur ne
sort pas par le récepteur. Connectez le câble optique entre le téléviseur et le récepteur.
N
N
N
N
N
N
Voir télévision
Liste d’appareils
Enregistrement : DVDR
DVDR Operation
DVDR Operation ◄ Marche ►
Configuration
U
Déplacer
L
Régler
R
Retour
BN68-01757A-Fre.indb 56 2008-9-24 15:05:15
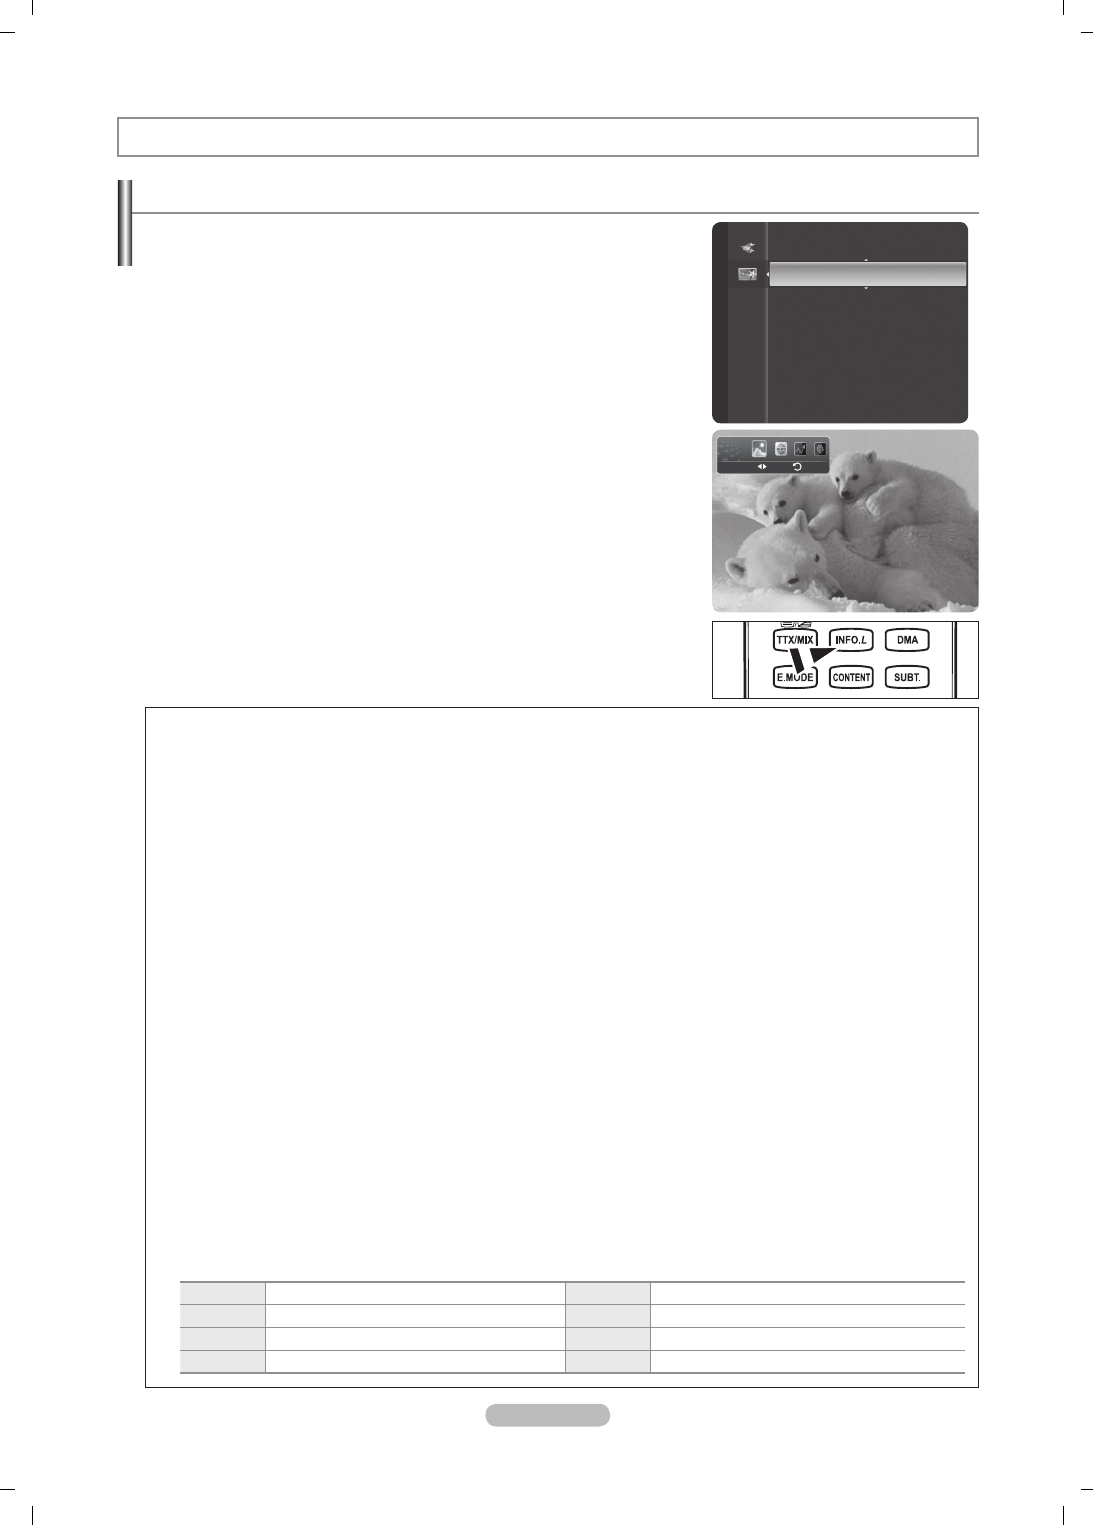
Français - 57
Utilisation d’InfoLive
Le service InfoLive de SAMSUNG vous permet de consulter l’actualité, les cours de la
bourse et la météo.
Congurez le réseau. (Reportez-vous aux pages 27 à 28)
InfoLive n’est disponible qu’au Royaume-Uni, en France, en Allemagne, en Italie,
en Espagne, en Norvège, en Suède, en Danemark, en Finlande et en Russie. Le
Pays est sélectionné en fonction du pays sélectionné dans Plug & Play.
1. Appuyez sur le bouton MENU pour afcher le menu. Appuyez sur le bouton ▲ ou
▼ pour sélectionner Application, puis appuyez sur le bouton ENTER
E
.
2. Appuyez sur le bouton ▲ ou ▼ pour sélectionner InfoLive, puis appuyez sur le
bouton ENTER
E
.
3. Appuyez sur le bouton ◄ ou ► pour sélectionner un service (Météo, Actualités,
La Bourse ou Conguration), puis appuyez sur le bouton ENTER
E
.
Vous pouvez sélectionner et afcher plusieurs services à la fois uniquement
pour les actualités non détaillées, la météo du jour et les actions préférées/
synthèse du marché.
Appuyez sur le bouton INFO.L de la télécommande pour afcher le menu
InfoLive.
N
N
N
O
InfoLive
TOUS LES MATÉRIAUX MIS À DISPOSITION VIA INFOLIVE [‘INFOLIVE CONTENT’] SONT LA PROPRIÉTÉ DES AUTEURS DU
CONTENU [“PROPRIÉTAIRE DU CONTENU”] ET/OU DE SES SOCIÉTÉS AFFILIÉES OU DONNEURS DE LICENCE ET SONT PROTÉGÉS
PAR LES LOIS SUR LE COPYRIGHT, LES MARQUES COMMERCIALES ET AUTRES LOIS SUR LA PROPRIÉTÉ INTELLECTUELLE. TOUT LE
CONTENU INFOLIVE EST FOURNI À VOTRE SEUL USAGE PERSONNEL NON COMMERCIAL. VOUS N’ÊTES PAS AUTORISÉ À UTILISER
DU CONTENU INFOLIVE D’UNE MANIÈRE QUI CONSTITUE UNE INFRACTION AUX DROITS DES PROPRIÉTAIRES DU CONTENU OU QUI
N’A PAS ÉTÉ AUTORISÉE PAR CEUX-CI. PLUS PARTICULIÈREMENT, SAUF AUTORISATION EXPRESSE DANS LA PRÉSENTE NOTICE OU
PAR LE PROPRIÉTAIRE DU CONTENU, VOUS N’ÊTES PAS AUTORISÉ À MODIFIER, COPIER, REPRODUIRE, REPUBLIER, TÉLÉCHARGER,
POSTER, TRANSMETTRE, TRADUIRE, VENDRE, CRÉER DES TRAVAUX DÉRIVÉS, EXPLOITER OU DISTRIBUER D’UNE QUELCONQUE
MANIÈRE OU SUR QUELQUE SUPPORT QUE CE SOIT (Y COMPRIS PAR E-MAIL OU AUTRE MOYEN ÉLECTRONIQUE) TOUT CONTENU
INFOLIVE OU TOUT AUTRE MATÉRIAU PROVENANT DU SERVICE INFOLIVE. LE CONTENU FOURNI PAR LES PROPRIÉTAIRES DU
CONTENU EN RELATION AVEC LE SERVICE INFOLIVE PEUT L’ÊTRE AVEC UN DÉCALAGE DANS LE TEMPS COMME SPÉCIFIÉ PAR LE
PROPRIÉTAIRE DU CONTENU ET/OU SES SOCIÉTÉS AFFILIÉES.
INFOLIVE EST FOURNI DANS LE CADRE D’UN ACCORD ENTRE SAMSUNG ET LE PROPRIÉTAIRE DU CONTENU. LE SERVICE INFOLIVE
PEUT ÊTRE DISCONTINUÉ OU INTERROMPU À TOUT MOMENT PAR SAMSUNG OU LE PROPRIÉTAIRE DU CONTENU OU SUITE À LA
RÉSILIATION DE L’ACCORD QUI LES LIE. EN AUCUN CAS, Y COMPRIS LES CAS DE NÉGLIGENCE, SAMSUNG OU LE PROPRIÉTAIRE DU
CONTENU NE POURRONT ÊTRE TENUS RESPONSABLES, SUR UNE BASE CONTRACTUELLE OU DE DOMMAGES ET INTÉRÊTS, POUR
TOUT DOMMAGE DIRECT, INDIRECT, ACCIDENTEL, PARTICULIER OU CONSÉCUTIF, FRAIS D’AVOCAT, FRAIS EXPOSÉS OU TOUT AUTRE
DOMMAGE QUELCONQUE RÉSULTANT DE OU LIÉ À UNE TELLE RÉSILIATION OU INTERRUPTION. PUISQUE LE CONTENU TRANSMIS
VIA INFOLIVE EST REÇU PAR LE BIAIS DE RÉSEAUX ET D’INSTALLATIONS DE TRANSMISSION SUR LESQUELS SAMSUNG N’A AUCUN
CONTRÔLE, SAMSUNG DÉCLINE EXPRESSÉMENT TOUTE RESPONSABILITÉ POUR TOUTE INTERRUPTION OU SUSPENSION DU
SERVICE INTERLINK OU POUR L’ABSENCE DE CONTENU EN RÉSULTANT.
LES INFORMATIONS TRANSMISES VIA INFOLIVE SONT FOURNIES “EN L’ÉTAT”, ET, PAR CONSÉQUENT, SAMSUNG NE GARANTIT PAS
LES INFORMATIONS AINSI FOURNIES, EXPLICITEMENT OU IMPLICITEMENT, À UN QUELCONQUE USAGE PARTICULIER ; ET SAMSUNG
DÉCLINE EXPRESSÉMENT TOUTE GARANTIE IMPLICITE, Y COMPRIS DE MANIÈRE NON LIMITATIVE, LES GARANTIES DE QUALITÉ
MARCHANDE OU D’ADÉQUATION À UN USAGE PARTICULIER. SAMSUNG NE GARANTIT PAS L’EXACTITUDE, LA VALIDITÉ, L’ACTUALITÉ,
LA LÉGALITÉ OU LE CARACTÈRE COMPLET DE TOUTES INFORMATIONS OU DONNÉES RENDUES DISPONIBLES VIA INFOLIVE À UN
USAGE PARTICULIER ET, EN AUCUN CAS, Y COMPRIS LA NÉGLIGENCE, SAMSUNG NE POURRA ÊTRE TENUE RESPONSABLE, QUE CE
SOIT SUR UNE BASE CONTRACTUELLE OU EN DOMMAGES ET INTÉRÊTS, POUR TOUT DOMMAGE DIRECT, INDIRECT, ACCIDENTEL,
PARTICULIER OU CONSÉCUTIF, FRAIS D’AVOCAT, FRAIS EXPOSÉS OU TOUT AUTRE DOMMAGE QUELCONQUE RÉSULTANT DE OU LIÉ
À TOUTE INFORMATION CONTENUE DANS OU RÉSULTANT DE L’UTILISATION D’INFOLIVE PAR VOUS OU TOUT TIERS, MÊME SI ELLE A
ÉTÉ AVERTIE DE LA POSSIBILITÉ DE TELS DOMMAGES.
L’ACCÈS À INFOLIVE EST SOUMIS AUX CONDITIONS DE SERVICE DE YAHOO DISPONIBLES SUR 67
LES CONDITIONS DE SERVICE DE YAHOO EN **LANGUAGE** SONT DISPONIBLES SUR LE WEB À L’ADRESSE
**ADDRESS**.
Français http://fr.docs.yahoo.com/info/utos.html Suédois http://se.docs.yahoo.com/seterms.html
Allemand http://de.docs.yahoo.com/info/utos.html Danois http://dk.docs.yahoo.com/termsofservice.html
Italien http://it.docs.yahoo.com/info/utos.html Finnois http://.docs.yahoo.com/info/terms/?fr=sfp
Espagnol http://es.docs.yahoo.com/info/utos.html
N
N
Application
Anynet+ (HDMI-CEC)
Content Library
InfoLive
Guide Produit
Météo Retour
Dépl.
BN68-01757A-Fre.indb 57 2008-9-24 15:05:16
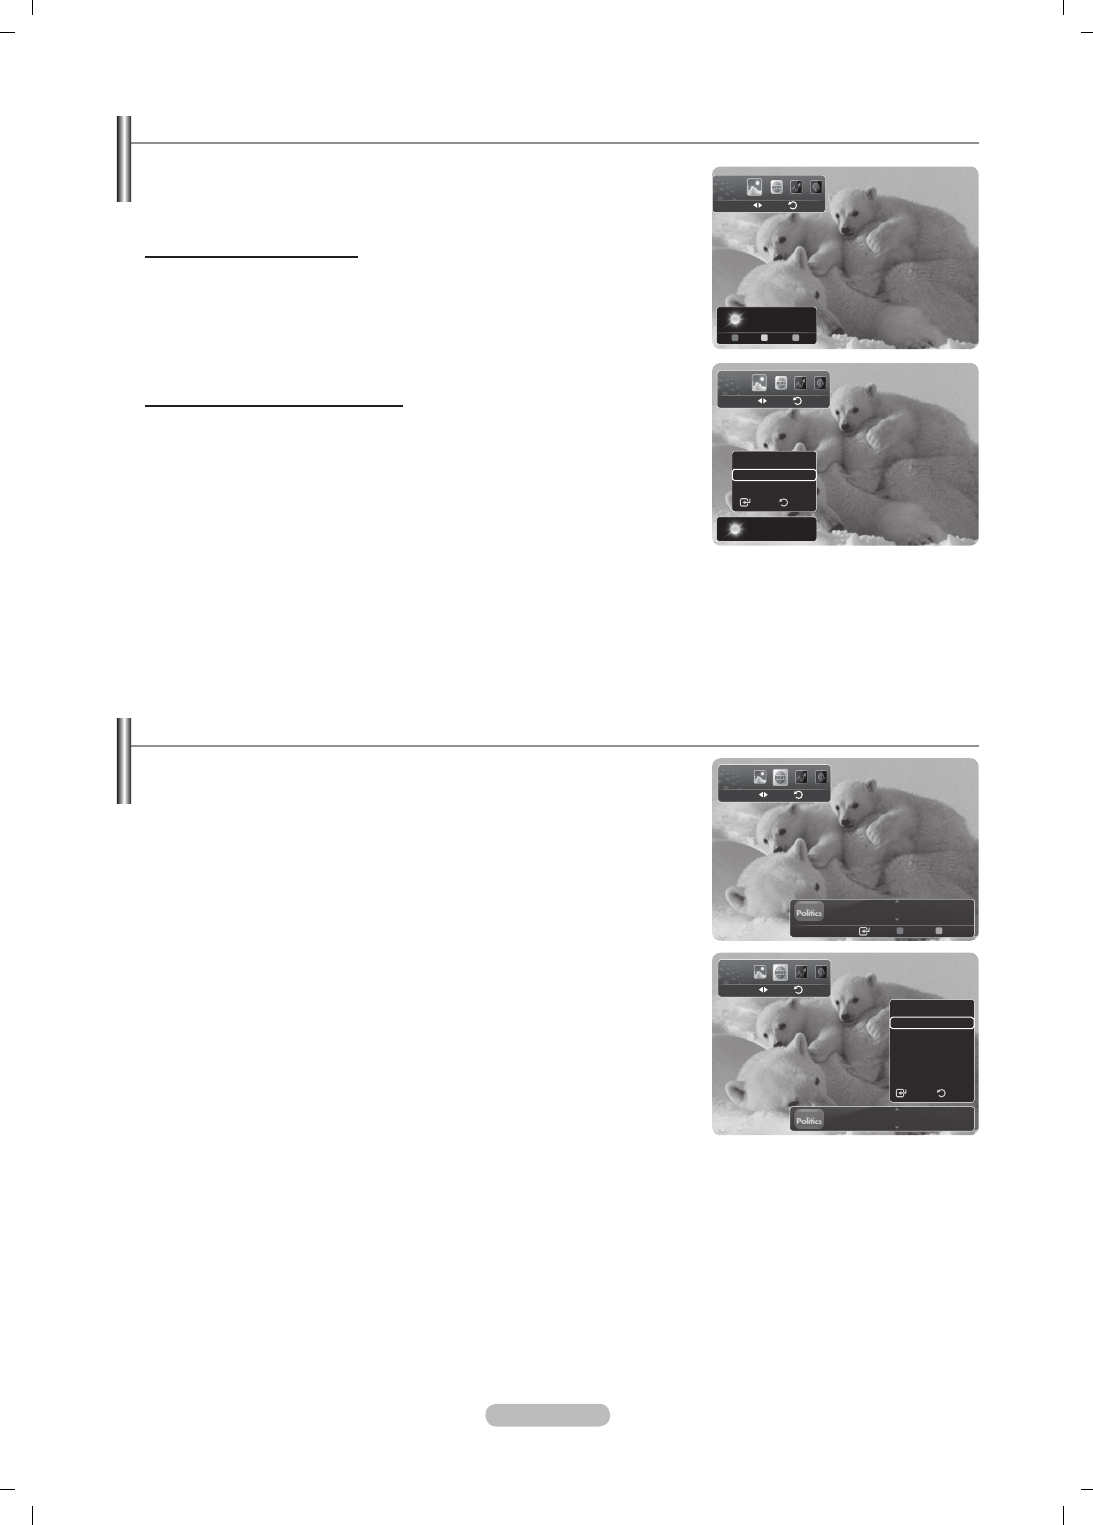
Français - 58
Utilisation du service Météo
1. Appuyez sur le bouton INFO.L de la télécommande.
2. Appuyez sur le bouton ◄ ou ► pour passer au service Météo, puis appuyez sur le
bouton ENTER
E
.
Conguration de la région
3. Appuyez sur le bouton jaune. Appuyez sur le bouton ▲ ou ▼ pour sélectionner
l’initiale (A-Z) de l’endroit voulu, puis appuyez sur le bouton ENTER
E
.
4. Appuyez sur le bouton ► pour choisir la catégorie. Appuyez sur le bouton ▲ ou ▼
pour sélectionner l’emplacement voulu, puis appuyez sur le bouton ENTER
E
.
Vous pouvez consulter le bulletin météo de la région sélectionnée.
Conguration de l’option Météo
5. Appuyez sur le bouton rouge tout en utilisant le service pour changer l’option du
service Météo.
6. Appuyez sur le bouton ▲ ou ▼ et sélectionnez Météo.
Pour quitter le service Météo, appuyez sur le bouton bleu.
Pour quitter le service InfoLive, appuyez sur le bouton EXIT.
Utilisation du service Actualités
Le fournisseur d’informations peut être modié ultérieurement.
1. Appuyez sur le bouton INFO.L de la télécommande.
2. Appuyez sur le bouton ◄ ou ► pour passer au service Actualités, puis appuyez
sur le bouton ENTER
E
.
Appuyez sur le bouton ENTER
E
pour afcher l’article détaillé.
Appuyez sur le bouton ▲ ou ▼ pour sélectionner l’article précédent ou suivant.
3. Appuyez sur le bouton rouge tout en utilisant le service pour changer l’option du
service Actualités.
4. Appuyez sur le bouton ▲ ou ▼ et sélectionnez l’option de service Actualités.
L’option de service Actualités change en fonction sur service web fourni.
Pour quitter le service Actualités, appuyez sur le bouton bleu.
Pour quitter le service InfoLive, appuyez sur le bouton EXIT.
N
N
N
N
N
N
N
N
N
Sarreguemines
-00°C
Options Location Close
Sarreguemines
-00°C
Options
La Météo quotidienne
Prév. hebdo.
Retour
Sélection
Météo Retour
Dépl.
GM turns 100 with focus on future
Entrer Options Fermer
GM turns 100 with focus on future
Optiones
Politique
Économie
Actualités
Divertissement
Sport
Sélection
Retour
Actualités Retour
Dépl.
Actualités Retour
Dépl.
Météo Retour
Dépl.
BN68-01757A-Fre.indb 58 2008-9-24 15:05:17
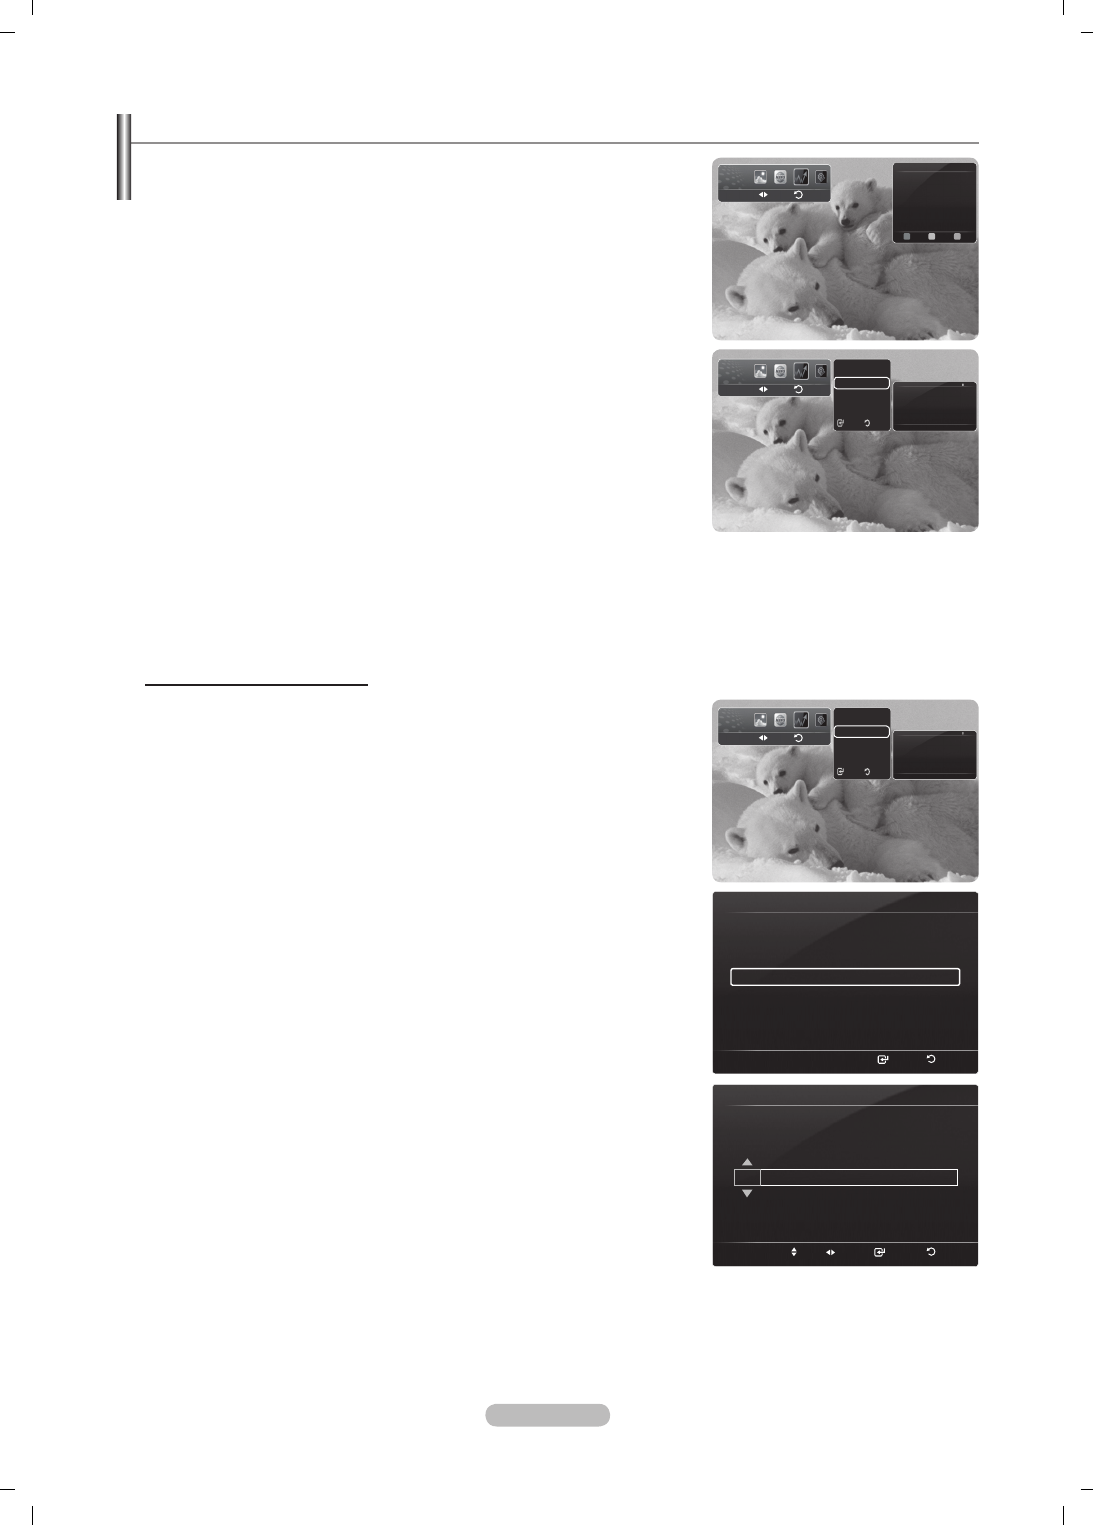
Français - 59
Utilisation du service La Bourse
1. Appuyez sur le bouton INFO.L de la télécommande.
2. Appuyez sur le bouton ◄ ou ► pour passer au service La Bourse, puis appuyez
sur le bouton ENTER
E
.
3. Appuyez sur le bouton rouge tout en utilisant le service pour changer l’option du
service La Bourse.
4. Appuyez sur le bouton ▲ ou ▼ pour sélectionner La Bourse, puis appuyez sur le
bouton ENTER
E
.
Les cours boursiers sont afchés avec un décalage de maximum 20 minutes. Le
décalage peut varier en fonction du pays.
Pour quitter le service La Bourse, appuyez sur le bouton bleu.
Pour quitter le service InfoLive, appuyez sur le bouton EXIT.
Bourse favorites: vos informations boursières préférées sont affichées. Vous
pouvez définir cette option en appuyant sur le bouton jaune.
Récap. marchés: les indices principaux, l'index complet, les valeurs croissantes et
décroissantes et les pourcentages sont affichés.
Bourse et actualités: vos informations boursières préférées, indices principaux et
actualités financières sont affichés.
Sélection des cours favoris
1. Appuyez sur le bouton jaune lorsque l’option Bourse favorites ou Bourse et
actualités est sélectionnée.
2. Appuyez sur le bouton ▲ ou ▼ pour sélectionner le marché des changes requis,
puis appuyez sur le bouton ENTER
E
.
L’écran de sélection Bourse favorites s’afche.
3. Appuyez sur le bouton ◄, ►, ▲ ou ▼ pour saisir un symbole boursier. Appuyez
ensuite sur le bouton ENTER
E
.
Le résultat s'afche.
Vous pouvez vérier les symboles boursiers via le journal ou Internet.
4. Appuyez sur le bouton ENTER
E
pour dénir un cours favori.
Le cours sélectionné est déni comme cours favori.
Pour supprimer vos cours favoris
Appuyez sur le bouton vers lorsque l’option Bourse favorites ou Bourse et
actualités est sélectionnée. Appuyez sur le bouton ▲ ou ▼ pour sélectionner
un cours, puis appuyez sur le bouton ENTER
E
. La marque c disparaît à
gauche du nom du cours sélectionné. Appuyez sur le bouton RETURN.
N
N
N
N
N
N
N
N
No Favorite Stocks
Quotes delayed at least 20 minutes.
Data provided by interastive Data.
Options Favorite Close
Options
Bourse favorites
Récap. marchés
Bourse et actualités
Retour
Sélection
Options
Bourse favorites
Récap. marchés
Bourse et actualités
Retour
Sélection
Définir bourse favorite
Sélection
Retour
Sélectionnez le marché des changes.
O London Stock Exchange
Définir bourse favorite
Régler
Déplacer Sélection
Retour
Entrer le symbole de l’action.
La Bourse Retour
Dépl.
La Bourse Retour
Dépl.
La Bourse Retour
Dépl.
Quotes delayed at least 20 minutes.
Brought to you by Yahoo! Finance
12/24 Mon 15:00 Updated 1/2
AAAAAA $0.000,000 ▲ $000,000 +00,00%
BBBBBB $0.000,000 ▲ $000,000 +00,00%
CCCCCC $0.000,000 ▲ $000,000 +00,00%
DDDDDD $0.000,000 $000,000 +00,00%
EEEEEE $0.000,000 ▼ $000,000 -00,00%
– – – – – – help area – – – – – –
Quotes delayed at least 15 minutes.
Brought to you by Yahoo! Finance
12/24 Mon 15:00 Updated 1/2
AAAAAA $0.000,000 ▲ $000,000 +00,00%
BBBBBB $0.000,000 ▲ $000,000 +00,00%
CCCCCC $0.000,000 ▲ $000,000 +00,00%
DDDDDD $0.000,000 $000,000 +00,00%
EEEEEE $0.000,000 ▼ $000,000 -00,00%
– – – – – – help area – – – – – –
BN68-01757A-Fre.indb 59 2008-9-24 15:05:19
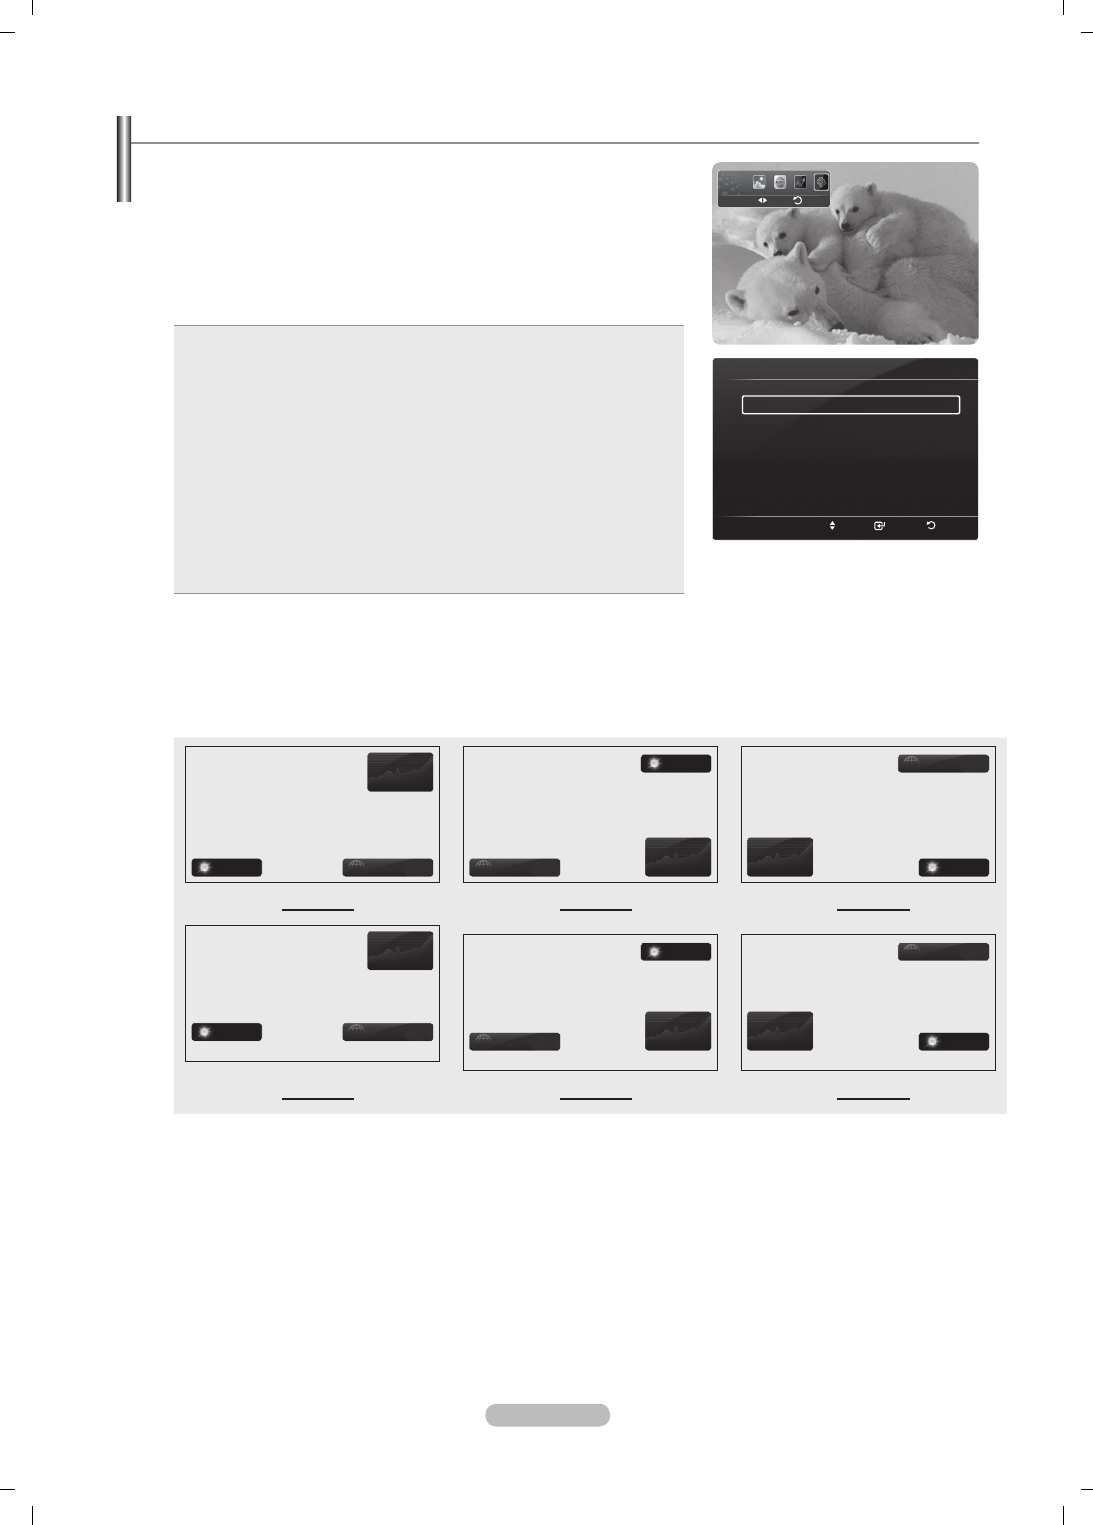
Français - 60
Conguration d’InfoLive
1. Appuyez sur le bouton INFO.L de la télécommande.
2. Appuyez sur le bouton ◄ ou ► pour sélectionner Conguration, puis appuyez sur
le bouton ENTER
E
.
3. Appuyez sur le bouton ▲ ou ▼ pour sélectionner l’option de votre choix.
(Lancement auto., Heure d’afchage, Taille de police,Couleur d’arrièreplan,
Position d’InfoLive)
4. Appuyez sur le bouton ▲ ou ▼ pour sélectionner une option, puis appuyez sur le
bouton ENTER
E
.
Lancement auto.: Détermine si InfoLive doit être lancé automatiquement
lorsque le téléviseur est mis sous tension. Vous avez le choix entre Arrêt et
Marche.
Heure d’afchage: Détermine à quelle heure afcher le service d’actualités
sur l’écran du téléviseur. Vous avez le choix entre 10 minutes, 20
minutes, 1 heure ou Toujours.
Taille de police: Vous pouvez choisir la taille Standard ou Large pour tout
le service InfoLive.
Couleur d’arrière-plan:Vous pouvez sélectionner les couleurs d'arrière-
plan (noir, bleu, rouge, vert, gris) du service InfoLive. La couleur s'applique
à tous les services, options et fenêtres de conguration.
Position d’InfoLive: Vous pouvez dénir la position de chaque service
InfoLive sur l’écran. Vous avez le choix entre six positions InfoLive
prédénies (Position 1 à Position 6).
•
•
•
•
•
Pour quitter le service Conguration, appuyez sur le bouton RETURN.
Pour quitter le service InfoLive, appuyez sur le bouton EXIT.
Position d’InfoLive:
La Bourse
Météo Actualités
Météo
Actualités La Bourse
Actualités
La Bourse Météo
Position 1 Position 2 Position 3
La Bourse
Météo Actualités
Météo
Actualités La Bourse
Actualités
La Bourse Météo
Position 4 Position 5 Position 6
N
N
Configuration d’InfoLive InfoLive’s
Déplacer Sélection
Retour
Lancement auto. : Arrêt
Heure d’affichage : 10 minutes
Taille de police : Standard
Couleur d’arrière-plan : Black
Position d’InfoLive
configuration
Retour
Dépl.
BN68-01757A-Fre.indb 60 2008-9-24 15:05:20
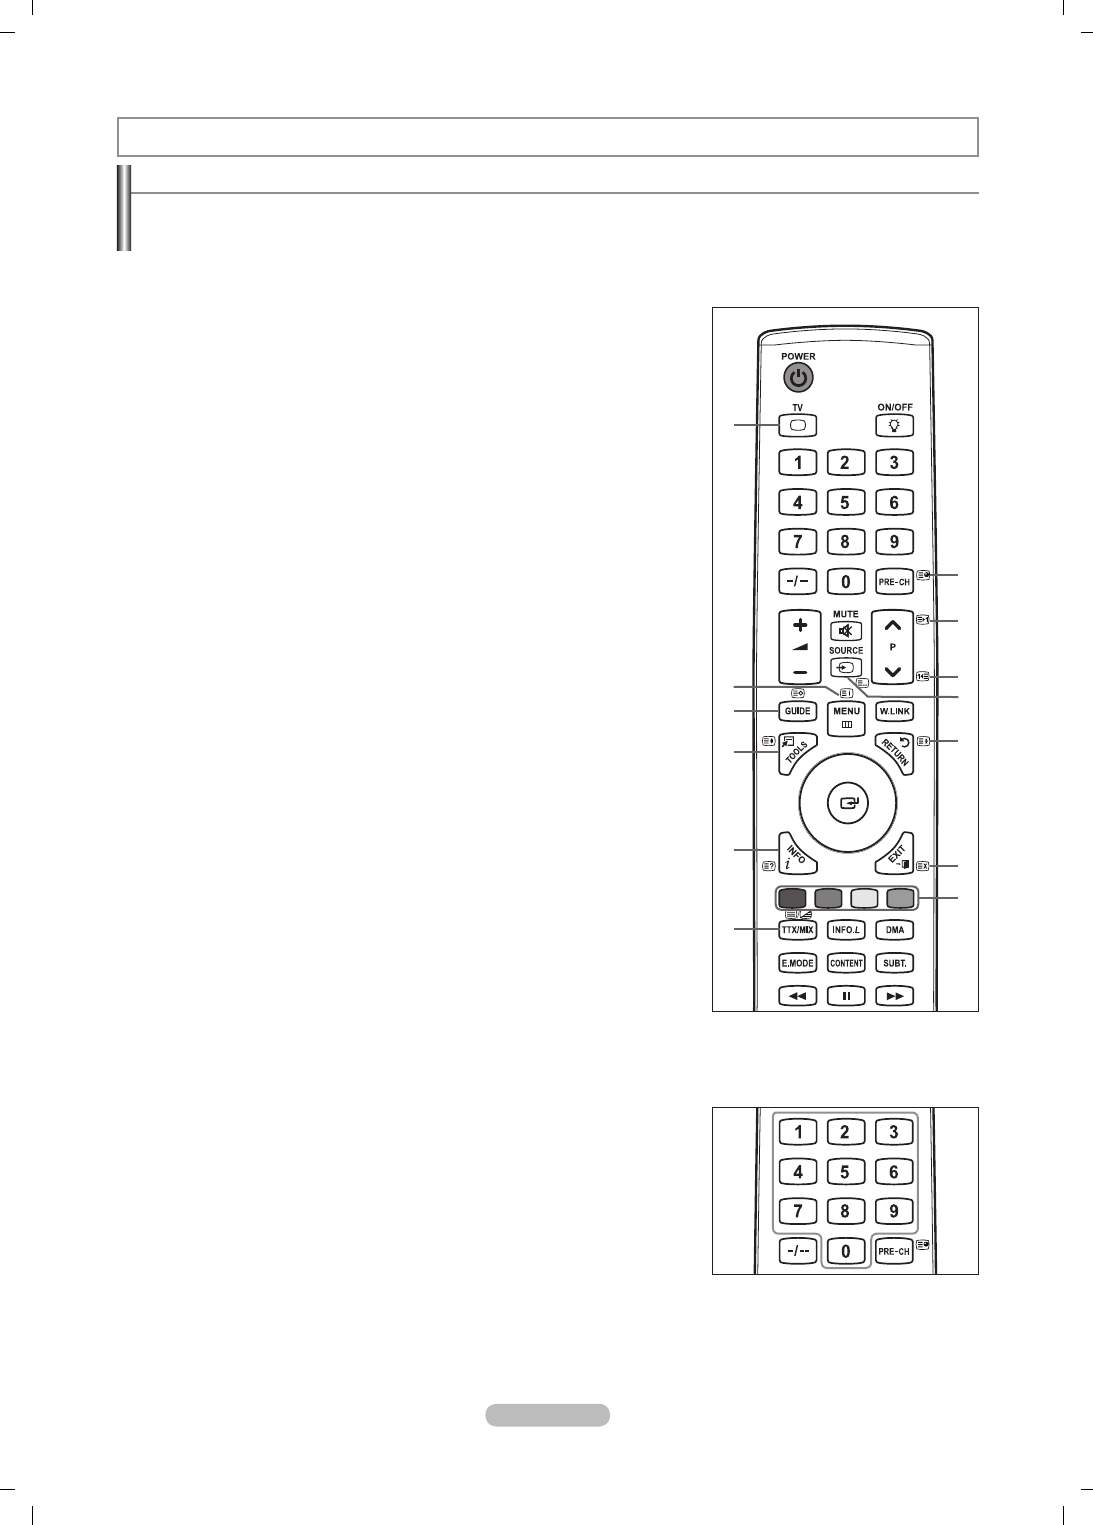
Français - 61
Conseils d’utilisation
Fonction Télétexte
La plupart des chaînes de télévision proposent des services d’informations via le télétexte. La page d’index du télétexte contient
des instructions sur l’utilisation de ce service. Vous pouvez, en outre, sélectionner différentes options à l’aide des touches de la
télécommande.
Pour que l’afchage des informations de télétexte soit correct, la réception des chaînes doit être stable. Dans le cas contraire,
des informations pourraient manquer ou certaines pages pourraient ne pas s’afcher.
1
: (quitter)
Quitte l’afchage télétexte.
2
6 (index)
Permet d’afcher la page d’index du télétexte (sommaire).
3
8 (mémoriser)
Permet de mémoriser les pages de télétexte.
4
4 (taille)
Permet d’afcher la moitié supérieure de l’écran en caractères deux fois plus
grands. Appuyez à nouveau sur cette touche pour afcher la moitié inférieure de
l’écran. Appuyez à nouveau pour rétablir le mode d’afchage normal.
5
5 (afficher)
Permet d’afcher le texte masqué (les réponses à un questionnaire, par exemple).
Appuyez à nouveau sur cette touche pour rétablir le mode d’afchage normal.
6
/ (télétexte actif/mixte)
Permet d’activer le mode Télétexte après avoir choisi la chaîne diffusant le
service télétexte. Appuyez deux fois sur ce bouton pour superposer le télétexte à
l’émission diffusée.
7
1 (page secondaire)
Permet d’afcher une page secondaire.
8
2 (page suivante)
Permet d’afcher la page télétexte suivante.
9
3 (page précédente)
Permet d’afcher la page télétexte précédente.
0
0 (mode)
Permet de sélectionner le mode Télétexte (LIST/FLOF). Si vous appuyez sur cette
touche en mode LISTE, vous accédez au mode d’enregistrement de liste. Dans
ce mode, vous pouvez enregistrer une page télétexte dans une liste à l’aide du
bouton 8 (mémoriser).
!
9 (maintenir)
Permet de bloquer l’afchage sur une page précise, si celle-ci est reliée à
plusieurs pages secondaires qui s’afchent automatiquement les unes après les
autres. Pour reprendre l’afchage des autres pages, appuyez à nouveau sur cette
touche.
@
7 (annuler)
Permet d’afcher le programme lors de la recherche d’une page.
#
Boutons de couleur (rouge/vert/jaune/bleu)
Si la société émettrice utilise le système FASTEXT, les différents sujets traités
dans la page télétexte disposent d’un code couleur et peuvent être sélectionnés
à l’aide des touches de couleur de la télécommande. Appuyez sur la touche
correspondant à la fonctionnalité requise. La page s’afche, ainsi que d’autres
informations en couleur pouvant être sélectionnées de la même manière. Pour
afcher la page précédente ou la page suivante, appuyez sur la touche de couleur
correspondante.
Vous pouvez changer de page de télétexte en appuyant sur les boutons numériques de la télécommande.
N
N
1
3
4
5
6
2
7
8
9
0
!
@
#
BN68-01757A-Fre.indb 61 2008-9-24 15:05:20
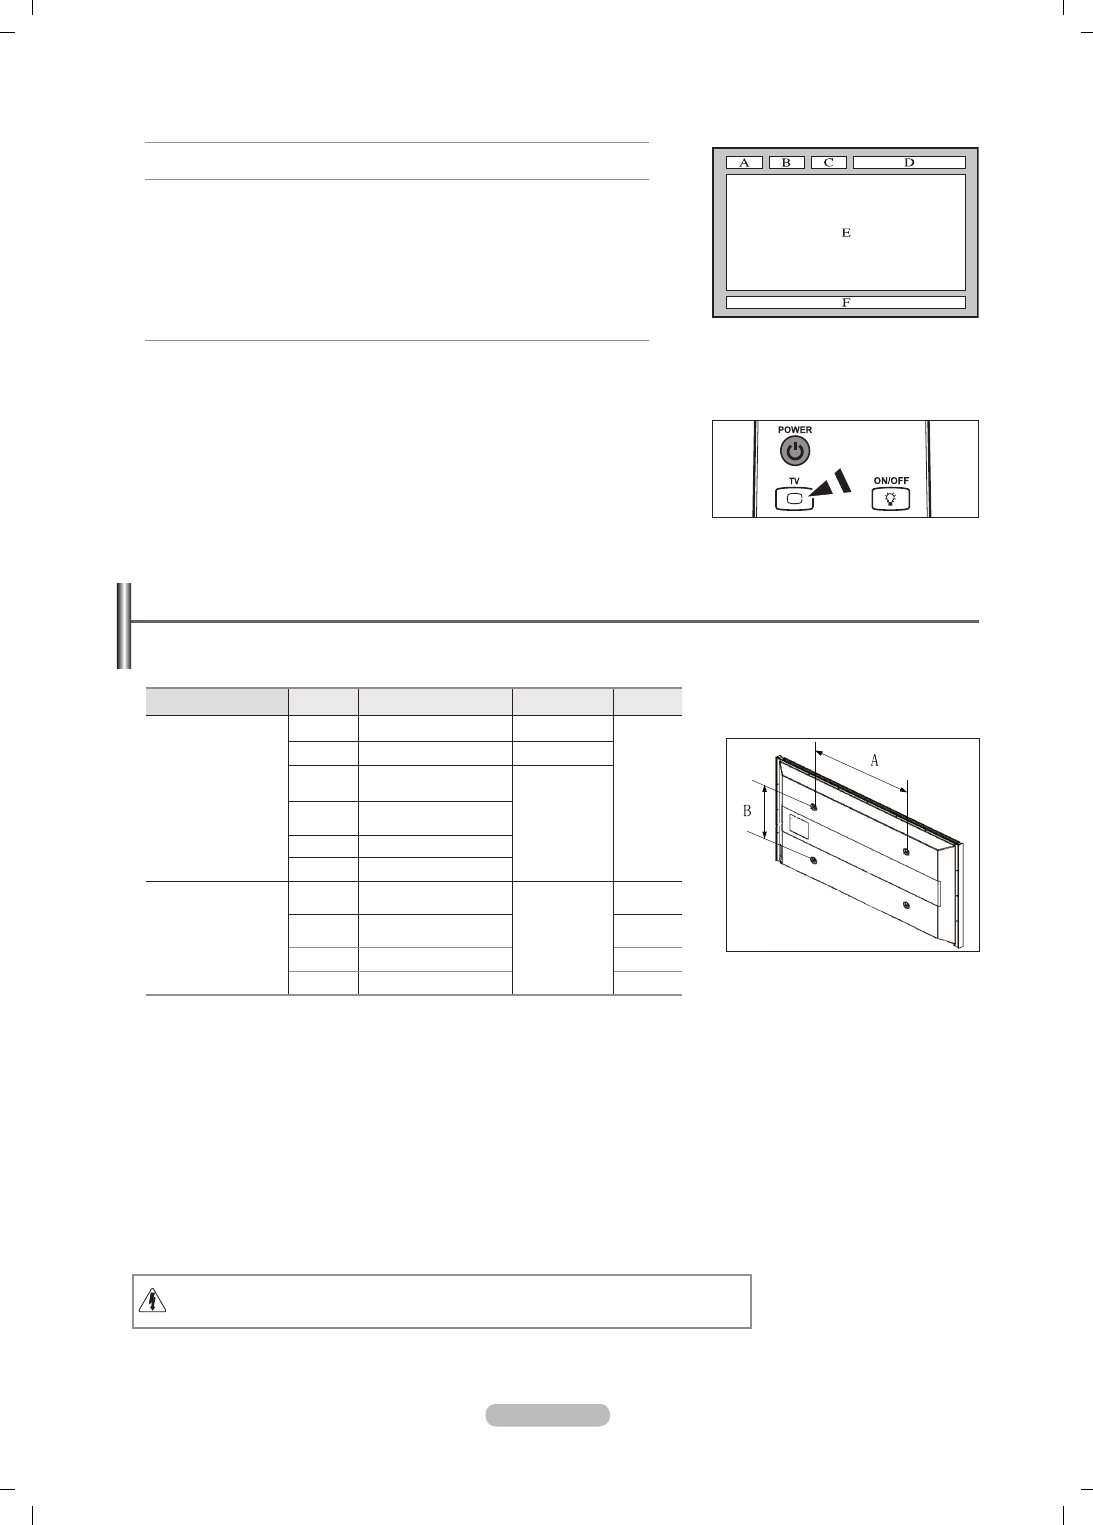
Français - 62
Les pages télétexte sont organisées en six catégories :
Catégorie Sommaire
A Numéro de la page sélectionnée
B Identité du canal émetteur
C Numéro de la page actuelle ou indications de recherche
D Date et heure
E Texte
F Informations sur l’état
Informations FASTEXT
Les informations du télétexte sont souvent réparties sur plusieurs pages qui
s’afchent l’une après l’autre. Ces pages sont accessibles en :
entrant le numéro de page ;
sélectionnant un titre dans une liste ;
sélectionnant un en-tête de couleur (système FASTEXT).
Appuyez sur le bouton TV pour quitter l’afchage télétexte.
N
-
-
-
O
Caractéristiques du kit de fixation murale (VESA)
Installez votre fixation murale sur un mur solide perpendiculaire au sol.
Si vous souhaitez la fixer sur d’autres matériaux de construction, veuillez prendre contact avec votre revendeur le plus proche. Si
vous l’installez au plafond ou sur un mur non droit, elle peut tomber et provoquer des blessures corporelles graves.
Famille de produit pouce Caract. VESA (A * B) Vis standard Quantité
TELEVISEUR
LCD
23 ~ 26 200 * 100 M4
4
32 ~ 40 200 * 200 M6
46 ~ 52 400 * 400
600 * 400
M8
57 700 * 400
(Pas VESA)
57 ~ 70 800 * 400
80 ~ 1400 * 800
TELEVISEUR
ECRAN A PLASMA
42 ~ 58 400 * 400
600 * 400
M8
4
63 676 * 407
(Pas VESA) 6
63 ~ 70 800 * 400 4
80 ~ 1400 * 800 4
Nous avons fourni les dimensions standard pour tous les kits de xation murale, comme indiqué dans le tableau ci-dessus.
Un manuel d’installation détaillé et toutes les pièces nécessaires au montage sont fournis avec le kit de xation mural.
N’utilisez pas de vis plus longues que la dimension standard car elles pourraient endommager l’intérieur du téléviseur.
Pour les xations murales non conformes aux caractéristiques des vis VESA standard, la longueur des vis peut varier, selon
leurs caractéristiques.
N’utilisez pas de vis non conformes aux caractéristiques des vis VESA standard. Ne serrez pas trop les vis : cela pourrait
endommager le produit ou provoquer sa chute, entraînant des blessures corporelles. Samsung ne peut être tenue
responsable de ce type d’accident.
Samsung ne peut être tenue responsable de tout dommage au produit ou toute blessure corporelle dans le cas de l’utilisation
d’une xation murale non-VESA ou non spécié, ni si l’utilisateur ne suit pas les instructions d’installation du produit.
Nos modèles 57” et 63” ne sont pas conformes aux caractéristiques VESA. Vous devez par conséquent utiliser notre kit de
xation mural approprié pour ce modèle.
Lors du montage, l’inclinaison du téléviseur ne doit pas dépasser 15 degrés.
N
N
N
N
N
N
N
N
N’installez pas votre kit de montage mural lorsque votre téléviseur est en fonctionnement.
Une blessure par choc électrique pourrait en résulter.
BN68-01757A-Fre.indb 62 2008-9-24 15:05:21
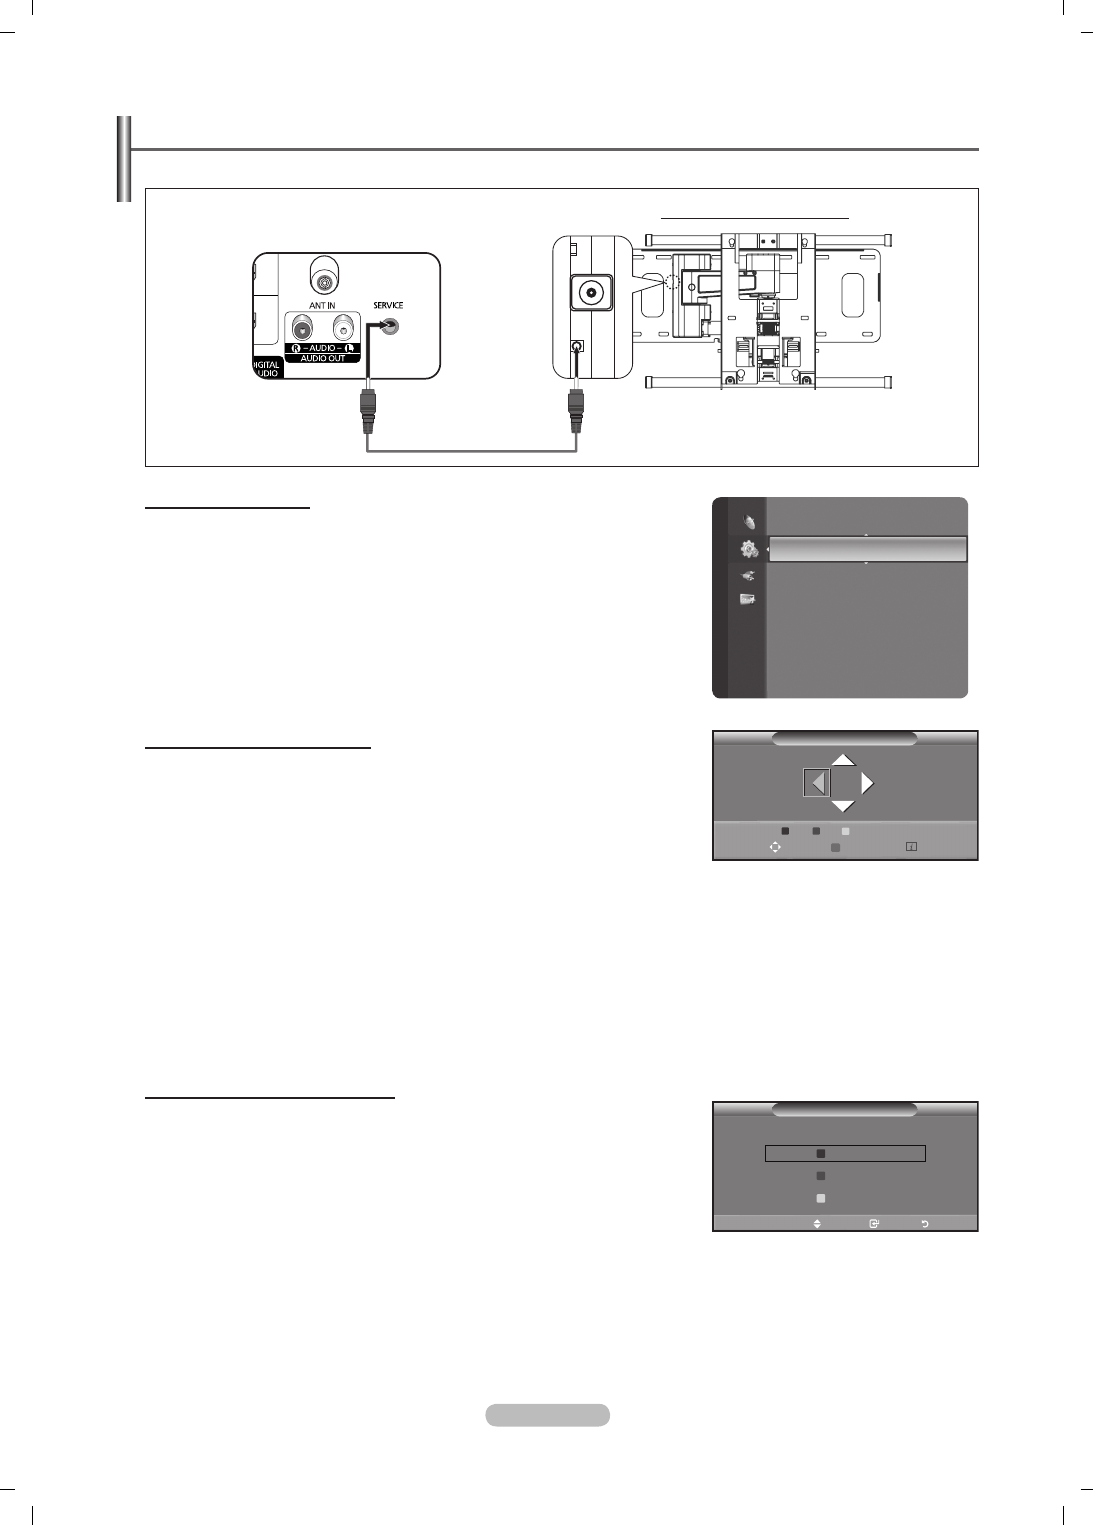
Français - 63
Réglage de la fixation murale automatique (vendue séparément)
Grâce à l’installation d’un support mural automatique, vous pouvez régler facilement la position de votre téléviseur.
Entrer dans le menu
1. Appuyez sur le bouton ▲, ▼, ◄ ou ► de votre télécommande.
L’écran Wall-Mount Adjustment s’afche.
Si l’écran Auto Wall-Mount ne s’afche pas lorsque vous cliquez sur un
bouton de direction en regardant la télévision, utilisez le menu pour l’
afcher.
Appuyez sur le bouton MENU pour afcher le menu. Appuyez sur le
bouton ▲ ou ▼ pour sélectionner Conguration, puis appuyez sur le
bouton ENTER
E
.
Appuyez sur le bouton ▲ ou ▼ pour sélectionner Ajust. xation mur.,
puis appuyez sur le bouton ENTER
E
.
Mémorisation de la position
2. Réglez la position souhaitée à l’aide des boutons ▲, ▼, ◄, ►.
Si vous appuyez sur une touche échée alors qu’aucun menu OSD n’est
afché sur l’écran du téléviseur, l’écran de réglage s’afche.
Appuyez sur le bouton INFO pour effectuer une réinitialisation. Appuyez
sur le bouton ◄ ou ► pour sélectionner Oui, puis appuyez sur le bouton
ENTER
E
. La position est initialisée sur le réglage par défaut.
3. Appuyez sur le bouton bleu. Appuyez sur les boutons ▲ et ▼ pour sélectionner
un mode d’enregistrement parmi Position 1, Position 2 ou Position 3 an
d’enregistrer la position actuelle.
Si vous ne souhaitez pas enregistrer la position actuelle, appuyez sur le bouton RETURN.
Lorsque vous sélectionnez un mode d’enregistrement, vous ne pouvez pas utiliser les boutons de couleur.
4. Appuyez sur le bouton ENTER
E
pour enregistrer.
Si Position1 est sélectionné, le message Position actuelle enregistrée sous Position1 est afché.
5. Appuyez sur le bouton ENTER
E
.
La position enregistrée apparaît sur le côté gauche de l’OSD.
Accès à la position mémorisée
1. Exécutez l’étape 1 de la procédure Entrer dans le menu.
2. Appuyez sur un bouton de couleur (rouge, vert ou jaune) pour déplacer le
support mural vers la position enregistrée.
Vous pouvez déplacer le support mural sur l’une des trois positions
prédénies en appuyant sur le bouton Rouge (Position 1), Vert (Position 2)
ou Jaune (Position 3).
Si vous réglez la position après avoir accédé à une position prédénie,
l’écran de position disparaît.
Pour l’installation, consultez le manuel d’installation fourni avec le support mural.
Pour l’installation du produit ainsi que l’installation et le déplacement de la xation murale, adressez-vous à une société
d’installation spécialisée.
Utilisez ce manuel d’installation si vous souhaitez xer le support sur un mur. Si vous souhaitez le xer sur d’autres matériaux
de construction, veuillez prendre contact avec votre revendeur le plus proche.
Le support mural automatique ne fonctionne pas lorsque la fonction Anynet+ ou WISELINK Pro est activée.
N
N
-
-
N
N
N
O
N
N
N
N
N
N
N
N
Câble SERVICE (non fourni)
Support mural automatique
Setup
Texte numérique : Enable
Effet lumineux : Watching TV
Ajust. fixation mur. ►
Mélodie : Arrêt
Divertissement : Arrêt
Mode éco. : Arrêt
PIP
Mise à niveau du logiciel
Interface commune
Ajust. fixation mur.
Position 1 2 3
Régler Sauvegarder Centre
Sauvegarder
Sélectionner un moyen de sauvegarde
Déplacer Entrer Retour
Position1
Position2
Position3
BN68-01757A-Fre.indb 63 2008-9-24 15:05:22
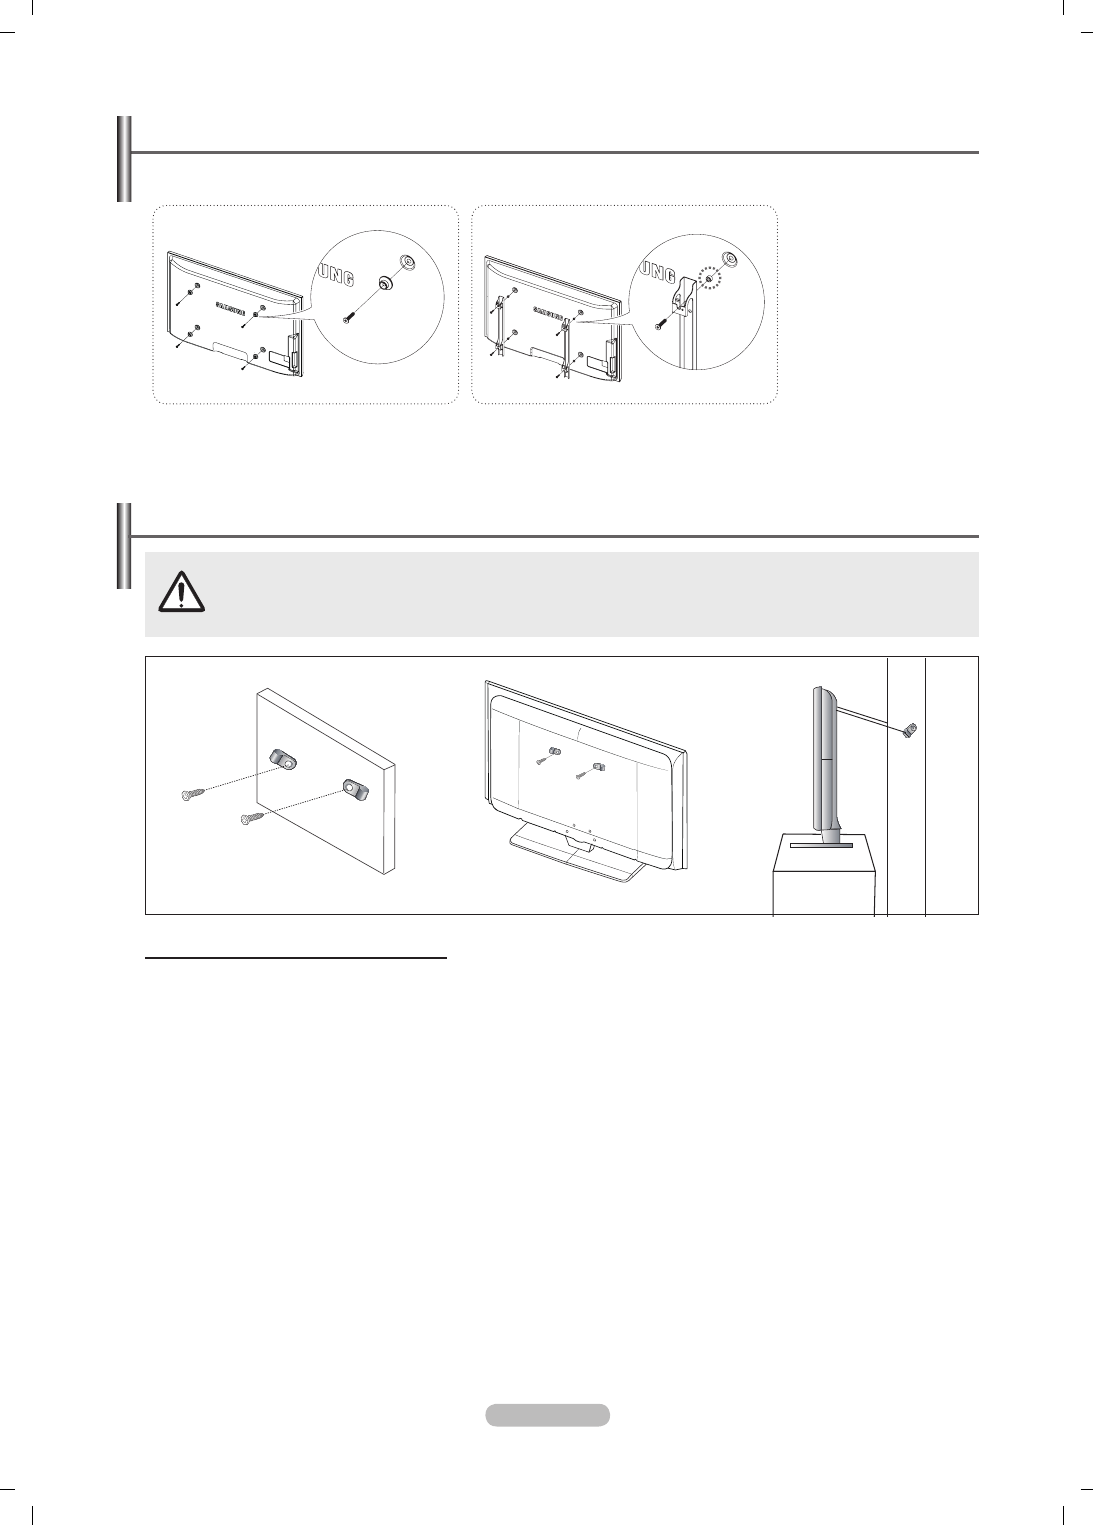
Français - 64
Préparation avant l’installation d’un dispositif de fixation murale
1. Installez le dispositif de fixation murale avec un couple de serrage de 15 kg/cm ou moins. Certaines pièces peuvent être
endommagées si le couple est supérieur.
2.
Le kit d’accessoires contient un Support – un Anneau [①] en vue d’installer un dispositif d’une marque autre que Samsung TV. (Cas B)
Cas A. Installation d’un dispositif de fixation
murale SAMSUNG
Cas B. Installation d’un dispositif de fixation
murale d’un autre fabricant
Mur
Mur
Montage mural du téléviseur
Si vous tirez, poussez ou grimpez sur le téléviseur, celui-ci peut tomber. Veillez, en particulier, à ce que vos enfants
ne se pendent pas, ni ne déséquilibre le téléviseur. Ils pourraient le faire basculer et entraîner des blessures graves,
voire la mort. Respectez toutes les précautions de sécurité indiquées dans la brochure relative à la sécurité. Pour une
stabilité accrue, installez le dispositif anti-chute comme indiqué.
Pour éviter toute chute du téléviseur:
1. Placez les vis dans les colliers et xez-les fermement au mur. Assurez-vous que les vis ont été fermement xées au mur.
En fonction du type de mur, il est possible que vous ayez besoin de matériel supplémentaire, tel que des chevilles.
Les colliers, vis et chaînettes n’étant pas fournis, veuillez les acheter séparément.
2. Retirez les vis situées sur la partie centrale arrière du téléviseur, placez les vis dans les bagues, puis xez-les à nouveau sur
le téléviseur.
Il se peut que les vis ne soient pas fournies avec le produit. Dans ce cas, elles sont vendues séparément.
3. Reliez les bagues xées au téléviseur et celles xées sur le mur à l’aide de chaînettes, puis attachez-les fermement.
Installez le téléviseur à proximité du mur an qu’il ne bascule pas vers l’arrière.
Il est préférable de relier la chaînette an que les bagues xées au mur soient placées à même hauteur ou plus bas que
celles xées au téléviseur.
Détachez la chaînette avant de déplacer le téléviseur.
4. Vériez que toutes les connexions sont xées correctement. Vériez régulièrement que les connexions ne présentent aucun
signe d’usure. Si vous avez un doute quand à la sécurité de vos connexions, contactez un installateur professionnel.
N
N
N
N
N
N
경고 주의
경고 주의
BN68-01757A-Fre.indb 64 2008-9-24 15:05:24
Français - 65
Dépannage
Si vous ne pouvez pas résoudre le problème en suivant les instructions ci-dessous, notez le modèle et le numéro de série de votre
téléviseur et contactez votre revendeur local.
Aucune image ou aucun son Vériez que le cordon d’alimentation est branché à une prise secteur.
Vériez que vous avez appuyé sur le bouton de votre téléviseur.
Vériez les paramètres de contraste et de luminosité.
Vériez le volume.
Vériez que Sélection Haut-parleur est réglé sur Haut-parleur externe
•
•
•
•
•
Image normale, mais aucun son Vériez le volume.
Vériez si le bouton MUTEMde la télécommande a été actionné.
•
•
Aucune image ou image en noir
et blanc
Réglez les paramètres de couleur.
Vériez que le système d’émission sélectionné est correct.
•
•
Interférence du son et de l’image Essayez d’identier l’appareil électrique qui perturbe le téléviseur et éloignez-le.
Branchez le téléviseur sur une autre prise secteur.
•
•
Image neigeuse ou oue, son
altéré
Vériez l’orientation, l’emplacement et les branchements de votre antenne.
Cette interférence est souvent due à l'utilisation d'une antenne intérieure.
•
•
Dysfonctionnements de la
télécommande
Remplacez les piles de la télécommande.
Nettoyez la partie supérieure de la télécommande (fenêtre de transmission).
Vériez que les pôles + et - des piles sont orientés correctement.
Vériez si les piles ne sont pas déchargées.
•
•
•
•
L’écran est noir et le témoin
d’alimentation clignote à
intervalles réguliers.
Sur votre ordinateur, allez sur : Alimentation, Câble de signal.
Déplacez la souris de l'ordinateur ou appuyez sur une touche du clavier.
Sur votre appareil, allez sur (STB, DVD, etc.): Alimentation, Câble de signal.
Le mode de gestion d'alimentation est activé.
Appuyez sur le bouton Source du panneau ou de la télécommande.
Allumez et éteignez le téléviseur.
•
•
•
•
•
•
L’image endommagée apparaît
dans le coin de l’écran.
Si l’option Scan uniquement est sélectionnée dans certains périphériques externes,
l’image endommagée peut apparaitre dans le coin de l’écran. Ce problème est provoqué
par les périphériques externes et non par le téléviseur.
•
Le message “Resets all settings
to the default values” s’afche.
Il s’afche lorsque vous appuyez longuement sur le bouton EXIT. Les paramètres du
produit sont rétablis sur leur valeur par défaut.
•
BN68-01757A-Fre.indb 65 2008-9-24 15:05:24

Français - 66
Caractéristiques
Les descriptions et caractéristiques fournies dans ce manuel sont données à titre indicatif seulement et sont susceptibles d'être
modifiées sans préavis.
Nom du modèle PS50A756 PS63A756
Taille de l’écran
(diagonale) 50 inches 63 inches
Résolution PC 1920 x 1080 @ 60 Hz 1920 x 1080 @ 60 Hz
Son (Sortie) 10 W x 2 15 W x 2
Dimensions (WxHxD)
Corps
Avec pied
1240 x 766 x 96 mm
1240 x 830 x 315 mm 1531 x 932 x 99 mm
1531 x 1005 x 418 mm
Poids
Corps
Avec pied
39 kg
44 kg 67 kg
84 kg
Considérations environnementales
Température de fonctionnement
Humidité au cours du fonctionnement
Température de stockage
Humidité sur le lieu de stockage
50 °F to 104 °F (10 °C to 40 °C)
10% to 80%, non-condensing
-4 °F to 113 °F (-20 °C to 45 °C)
5% to 95%, non-condensing
La conception et les spécications sont susceptibles de changer sans préavis.
Ce périphérique est un appareil numérique de classe B.
Pour les caractéristiques d’alimentation et de consommation électrique, voir l’étiquette xée au produit.
N
N
N
BN68-01757A-Fre.indb 66 2008-9-24 15:05:24

Comment éliminer ce produit
(Déchets D’équipements Électriques et Électroniques)
(Applicable dans les pays de l’Union Européen et aux autres pays
européens disposant de systémes de collecte sélective)
Ce symbole sur le produit ou sa documentation indique qu’il ne doit
pas être éliminé en fin de vie avec les autres déchets ménagers.
L’élimination incontrôlée des déchets pouvant porter préjudice à
l’environnement ou à la santé humaine, veuillez le séparer des autres
types de déchets et le recycler de façon responsable. Vous favoriserez
ainsi la réutilisation durable des ressources matérielles.
Les particuliers sont invités à contacter le distributeur leur ayant vendu
le produit ou à se renseigner auprès de leur mairie pour savoir où et
comment ils peuvent se débarrasser de ce produit afin qu’il soit recyclé
en respectant l’environnement.
Les entreprises sont invitées à contacter leurs fournisseurs et à
consulter les conditions de leur contrat de vente. Ce produit ne doit pas
être éliminé avec les autres déchets commerciaux.
BN68-01757A-Fre.indb 67 2008-9-24 15:05:24
© 2008 Samsung Electronics Co., Ltd. All rights reserved.
Benutzerhinweise
Einbrennen von Standbildern
Zeigen Sie Standbilder (z. B. bei einem Videospiel oder bei Anschluss eines PC an diesen Plasmamonitor) niemals länger als 2
Stunden auf dem Plasmabildschirm an, da das Bild auf diese Weise einbrennen kann. Das Einbrennen von Standbildern wird auch als „
Bildkonservierung“ bezeichnet. Sie können das Einbrennen vermeiden, indem Sie die Helligkeit und den Kontrast des Monitors beim
Anzeigen von Standbildern verringern.
Höhe
Um normalen Betrieb zu gewährleisten, muss der Plasmabildschirm in einer Höhe unter 2000 m aufgestellt werden. Der Betrieb des
Monitors wird möglicherweise gestört, wenn er in mehr als 2000 m Höhe betrieben wird. Sie dürfen den Plasmabildschirm deshalb nicht in
einer Höhe von über 2000 m aufstellen und betreiben.
Wärmeentwicklung auf der Oberseite des Plasmabildschirms
Die Oberseite des Produkts kann nach längerem Betrieb warm werden, da die Wärme aus dem Monitor über die Entlüftungsöffnung im
oberen Teil des Geräts abgeführt wird. Dies ist normal und weist nicht auf einen Defekt oder eine Fehlfunktion des Geräts hin. Allerdings
sollten Kinder von dem oberen Teil des Geräts ferngehalten werden.
Das Gerät verursacht ein „knackendes“ Geräusch.
Ein „knackendes“ Geräusch entsteht, wenn das Gerätematerial sich aufgrund einer Änderung der Umgebung, wie z. B.
Temperaturschwankungen oder Änderung der Luftfeuchtigkeit, zusammenzieht oder ausdehnt. Das ist normal und stellt keinen Defekt des
Geräts dar.
Pixelfehler
Der Plasmabildschirm besitzt eine Bildfläche mit 1.230.000 (bei SD-Auflösung) bis 3.150.000 (bei HD-Auflösung) Pixeln, für dessen
Herstellung hoch entwickelte Technologie eingesetzt wird. Allerdings können ein paar zu helle oder zu dunkle Pixel auf der Bildfläche zu
sehen sein. Diese Pixelfehler haben keinen Einfluss auf die Geräteleistung.
Vermeiden Sie den Betrieb des Plasmabildschirms bei Temperaturen unter 5°C.
Ein Standbild, dass zu lange angezeigt wird, kann zu einer bleibenden Beschädigung des Plasmabildschirms führen
Der Betrieb des Plasmafernsehers im Format 4:3 über einen längeren Zeitraum kann links, rechts und in der Mitte
des Monitors Spuren der Bildränder hinterlassen, die durch die unterschiedliche Lichtemission auf dem Bildschirm
verursacht werden. Das Wiedergeben einer DVD oder der Betrieb einer Spielkonsole kann auf dem Bildschirm zu
ähnlichen Effekten führen. Schäden, die durch die o. g. Effekte verursacht wurden, unterliegen nicht der Garantie.
Nachbilder auf dem Monitor
Das Anzeigen von Standbildern von Videospielen und PC-Anwendungen über einen bestimmten Zeitraum kann zu partiellen Nachbildern
führen. Um diesen Effekt zu verhindern, verringern Sie Helligkeit und Kontrast, wenn Sie Standbilder anzeigen möchten.
Garantie
– Durch diese Garantie nicht abgedeckt sind Schäden, die durch Einbrennen von Bildern entstehen.
– Das Einbrennen von Bildern wird von der Garantie nicht abgedeckt.
Installieren
Wenden Sie sich an den autorisierten Kundendienst, wenn das Gerät an einem Ort mit hoher Konzentration an Staubpartikeln,
außergewöhnlich hoher oder geringer Raumtemperatur, extrem hoher Luftfeuchtigkeit, in unmittelbarer Nähe zu chemischen Lösungsmitteln
oder für den Dauerbetrieb, z.B. auf Bahn- oder Flughäfen, aufgestellt werden soll. Eine nicht fachgerechte Aufstellung kann zu schweren
Schäden am Gerät führen.
Deutsch - 2
Hinweis zu Digitalfernsehgeräten (DVB-T)
1. FUNKTIONEN FÜR DIGITALFERNSEHEN (DVB) SIND NUR IN LÄNDERN UND REGIONEN VERFÜGBAR, IN
DENEN DIGITALE DVB-T-SIGNALE (MPEG2 UND MPEG4 AVC) TERRESTRISCH GESENDET WERDEN. DVB-T
ist der Standard des Europäischen Konsortiums für terrestrisches Digitalfernsehen. Fragen Sie Ihren örtlichen Händler,
wenn Sie Informationen über die Verfügbarkeit von DVB-T in Ihrer Gegend benötigen.
2. Zwar hält dieses Fernsehgerät die Vorgaben der DVB-T-Spezikation [August 2008] ein, aber es kann nicht garantiert
werden, dass die Kompatibilität mit zukünftigen digitalen terrestrischen DVB-T-Signalen gewahrt bleibt.
3. Manche Funktionen des Digitalfernsehens stehen möglicherweise nicht zur Verfügung oder arbeiten in bestimmten
Ländern und Regionen möglicherweise nicht korrekt.
4. Für weitere Informationen setzen Sie sich bitte mit dem SAMSUNG-Kundendienstzentrum in Verbindung.
Kontakt zu Samsung
Falls Sie Fragen oder Anregungen zu Samsung-Produkten haben, wenden Sie sich bitte an den Samsung-Kundendienst. (Weitere
Informationen auf der Rückseite)
BN68-01757A-Ger.indb 2 2008-9-24 15:36:30
Deutsch
N O T
Symbol Drücken Hinweis Zielwahltaste TOOL-Taste
Deutsch - 3
Anschließen und Vorbereiten des Fernsehgeräts
Lieferumfang .......................................................................4
Verwenden des Standfußes ................................................4
Montieren des Standfußes (modellabhängig) .....................4
Bedienfeld ...........................................................................5
Anschlussfeld ......................................................................6
Fernbedienung ....................................................................8
Batterien in die Fernbedienung einsetzen ...........................9
Ein- und Ausschalten ...........................................................9
Fernsehgerät in den Standby-Modus schalten ....................9
Menüs anzeigen ................................................................10
Verwenden der Taste TOOLS ............................................10
Verwenden des Steuerungsrads .......................................10
Plug & Play-Funktion .........................................................11
Kanalsteuerung
Speichern von Kanälen und Kanal ...................................11
Verwalten von Kanälen ......................................................14
Bildeinstellungen
Ändern und Zurücksetzen der Bildeinstellungen ...............15
Verwenden der Bild-in-Bild-Funktion (PIP) ........................19
Fernsehgerät mithilfe des PCs einstellen ..........................19
PC-Anzeige .......................................................................20
Toneinstellungen
Tonstandard wählen ..........................................................21
Tonmodus wählen .............................................................22
Funktionsbeschreibung
Kongurieren der Menüeinstellungen ................................23
Einstellen der Uhrzeit ........................................................26
Netzwerkverbindung ..........................................................27
Netzwerk einrichten ...........................................................29
Quellen / Name bearb. ......................................................31
Gerätehandbuch ................................................................31
WISELINK Pro
Anschließen eines USB-Geräts .........................................32
Verwenden der WISELINK Pro-Funktion ..........................33
Verwenden und Sortieren der Fotoliste .............................35
Anzeigen eines Fotos oder einer Diashow ........................36
Verwenden und Sortieren der Musikliste ...........................38
Wiedergeben von Musik ....................................................39
Verwenden und Sortieren der Filmliste .............................40
Wiedergeben von Filmdateien ...........................................41
Löschen von Foto-/Musik-/Filmdateien .............................42
Bild-/Musikeinstellungen mit WISELINK Pro .....................43
Verwenden des Menüs Einstellungen ...............................43
■
■
■
■
■
■
■
■
■
■
■
■
■
■
■
■
■
■
■
■
■
■
■
■
■
■
■
■
■
■
■
■
■
■
■
■
■
■
WISELINK Pro-DLNA
Einrichten des DLNA-Netzwerks .......................................44
Installieren der DLNA-Anwendung ....................................44
Verwenden der DLNA-Anwendung ...................................46
Verwenden der DLNA-Funktion .........................................49
Bibliothek der Inhalte
Aktivieren der Bibliothek der Inhalte ..................................50
Verwenden der Bibliothek der Inhalte ................................51
Verwenden weiterer Inhalte mithilfe eines externen
USB-Speichers ..................................................................52
Informationen zu Anynet+
Anschließen von Anynet+-Geräten....................................53
Einrichten von Anynet+......................................................54
Suchen von Anynet+-Geräten und Umschalten
zwischen diesen Geräten ..................................................54
Aufnahme ..........................................................................55
Abspielen über einen Receiver (Heimkinosystem) ............56
Fehlerbehebung für Anynet+ ............................................56
InfoLive
Verwenden von InfoLive ....................................................57
Verwenden des Wetterberichts..........................................58
Verwenden des Dienstes für Nachrichten .........................58
Verwenden des Aktiendienstes .........................................59
InfoLive-Einstellungen .......................................................60
Empfehlungen für den Betrieb
Videotextfunktion ...............................................................61
Spezikation (VESA) der Wandhalterung ..........................62
Justieren der automatischen Wandhalterung
(Gesondert lieferbar) ........................................................63
Vorbereitung für die Befestigung der
Wandhalterung an der Wand .............................................64
Befestigen des Fernsehgeräts an der Wand .....................64
Fehlerbehebung ................................................................65
Technische Daten ..............................................................66
■
■
■
■
■
■
■
■
■
■
■
■
■
■
■
■
■
■
■
■
■
■
■
■
■
Inhalt
BN68-01757A-Ger.indb 1 2008-9-24 15:36:30
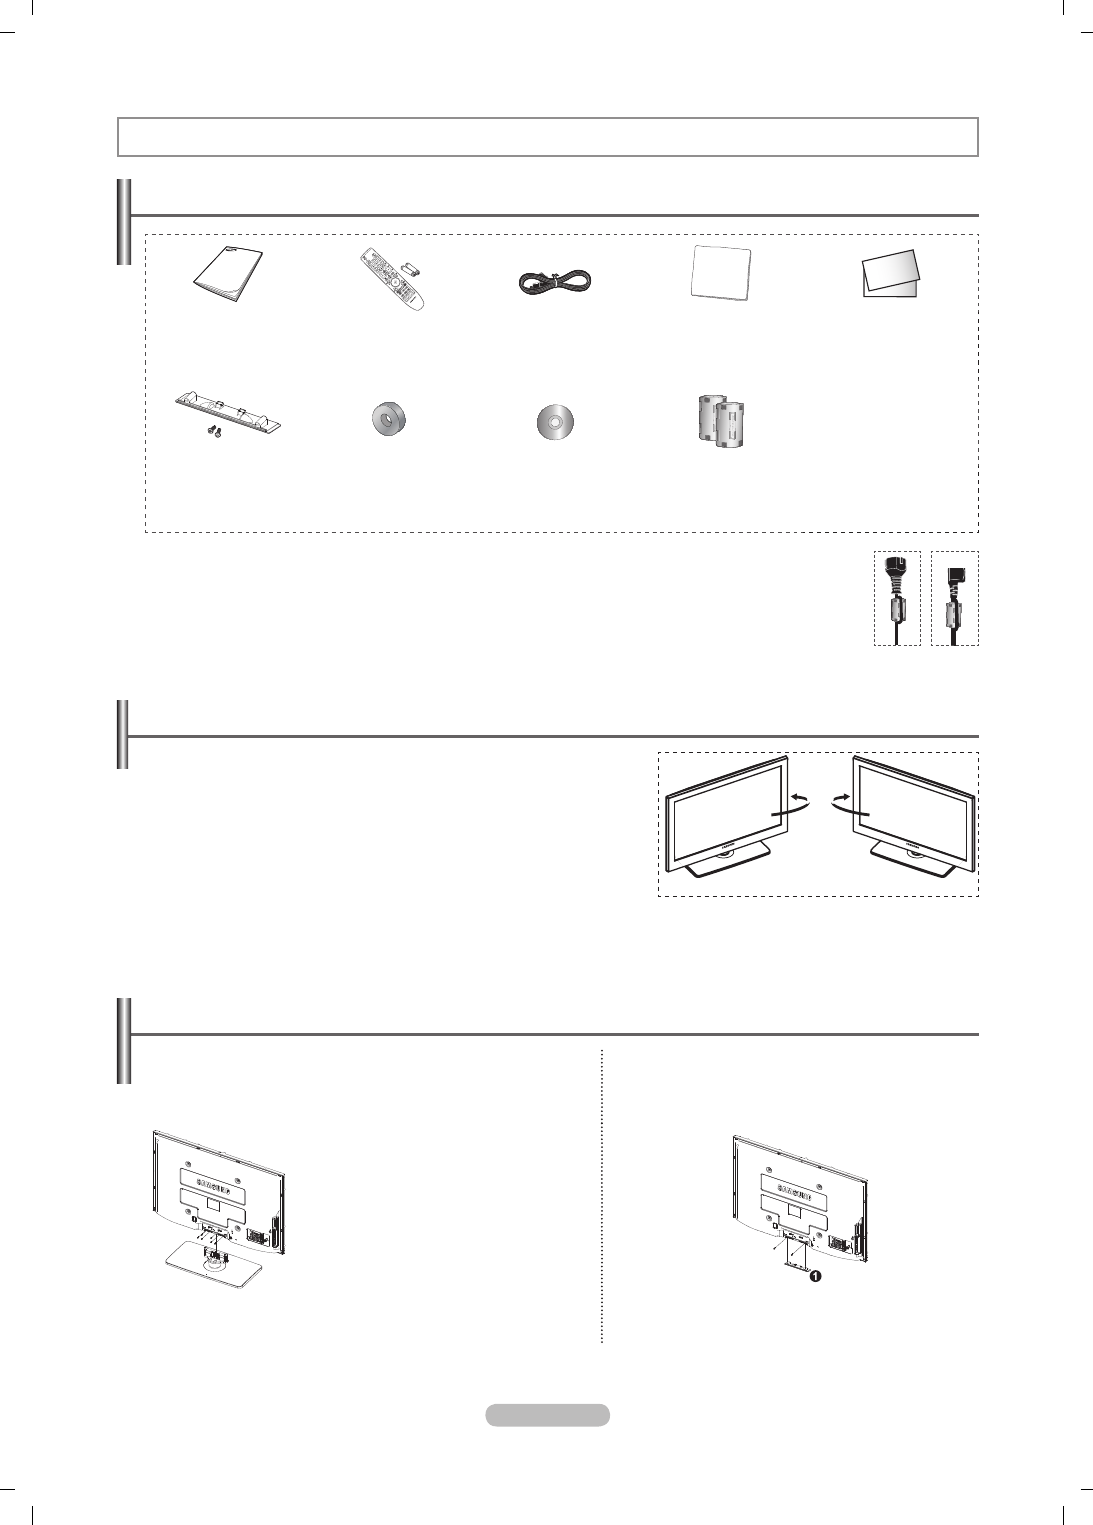
Deutsch - 4
Lieferumfang
Bedienungsanleitung Fernbedienung/
AAA-Batterien
(2 Stück)
Netzkabel Reinigungstuch Garantiekarte/
Sicherheitshinweise
(Nicht überall verfügbar)
Untere Abdeckung / Schrauben
(2 Stück) (PS50A756)
Haltering (4 Stück)
(Informationen hierzu
finden Sie auf Seite 64).
Software-CD Ferritkern für Netzkabel
(2 Stück)
Verwenden des Standfußes
Der Plasmafernseher sollte von mindestens zwei Personen
getragen werden. Um Beschädigungen zu vermeiden, legen Sie den
Plasmafernseher nie auf den Fußboden. Der Plasmabildschirm muss sich
immer in aufrechter Position befinden.
Der Plasmabildschirm kann um 20 Grad nach recht und links gedreht
werden.
N
N
Montieren des Standfußes (modellabhängig)
Verwenden Sie die 6 mitgelieferten Schrauben, um den TV fest mit
der Bodenplatte zu verschrauben.
(Das Gehäuse Ihres Fernsehers entspricht möglicherweise nicht
genau der Abbildung.)
Bei Wandinstallation Ihres Fernsehgeräts Schließen Sie
den Deckel (1) am Verbindungsteil des Standfußes
mithilfe der zwei Verblendschrauben.
Achtung
Befestigen Sie den Standfuß sicher am
Fernsehgerät, ehe Sie ihn bewegen,
da der Standfuß umfallen und schwere
Verletzungen verursachen kann.
Der PDP-Fernseher sollte von
mindestens zwei Personen getragen
werden. Um Beschädigungen zu
vermeiden, legen Sie den Fernseher nie
auf den Fußboden.
Bewahren Sie ihn stets aufrecht stehend
auf.
N
Ferritkern
Ferritkerne werden zum Abschirmen von Kabeln gegen Störungen verwendet.
Öffnen Sie beim Anschließen eines Kabels den Ferritkern, und befestigen Sie ihn in der Nähe des Steckers
am Kabel.
N
Anschließen und Vorbereiten des Fernsehgeräts
-20° ~ 20°
BN68-01757A-Ger.indb 4 2008-9-24 15:36:34
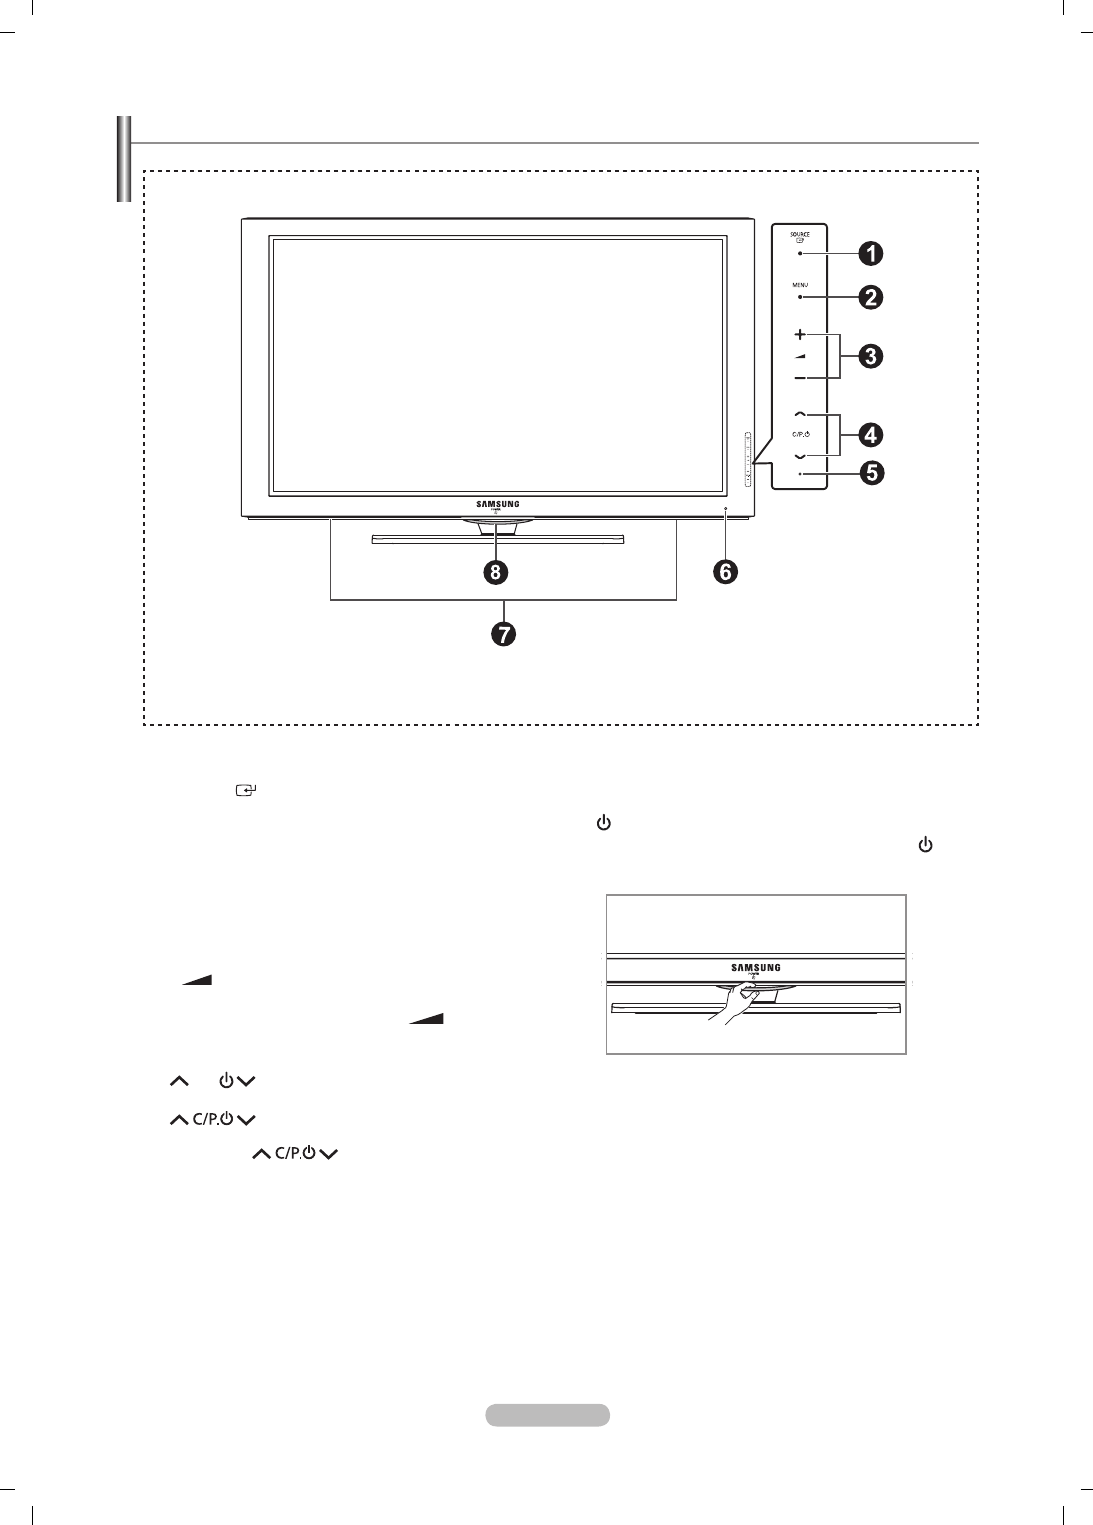
Deutsch - 5
Bedienfeld
1
SOURCE
Schaltet zwischen den verfügbaren Signalquellen um. (TV,
Ext.1, Ext.2, AV, S-Video, Komp., PC, HDMI1, HDMI2 /
DVI, HDMI3, HDMI4, USB, DLNA).
Im Bildschirmmenü können Sie diese Taste wie die
ENTER auf der Fernbedienung verwenden.
2
MENU
Drücken Sie diese Taste, um die Funktionen des
Fernsehgeräts in einem Bildschirmmenü anzuzeigen.
3
– +
Drücken, um die Lautstärke zu erhöhen oder zu verringern.
Wählen Sie im Bildschirmmenü die − + Schaltflächen,
so wie Sie die ◄ und ► Tasten auf der Fernbedienung
verwenden.
4
C/P.
Kanal wechseln. Wählen Sie im Bildschirmmenü die
Schaltflächen, so wie Sie die ▲ und ▼
Tasten auf der Fernbedienung verwenden. Verwenden
Sie die Taste , um das Fernsehgerät ohne
Fernbedienung anzuschalten.
5
STROMVERSORGUNGSANZEIGE
Beim Einschalten des Fernsehgeräts blinkt die
Betriebsanzeige kurz und erlischt anschließend. Im
Standbymodus leuchtet die Anzeige permanent.
6
FERNBEDIENUNGSSENSOR
Richten Sie die Fernbedienung auf diesen Sensor am
Fernsehgerät.
N
7
LAUTSPRECHER
8 (
POWER)
Berühren Sie den silbernen Sensor unterhalb der ( ) -
Markierung, um das Fernsehgerät an- bzw. auszuschalten.
Silberner Sensor
Tasten auf der Vorderseite
Berühren Sie die verschiedenen
Tasten, um die gewünschten
Funktionen zu nutzen.
Die Produktfarbe und -form können sich je nach Modell unterscheiden.
N
BN68-01757A-Ger.indb 5 2008-9-24 15:36:35
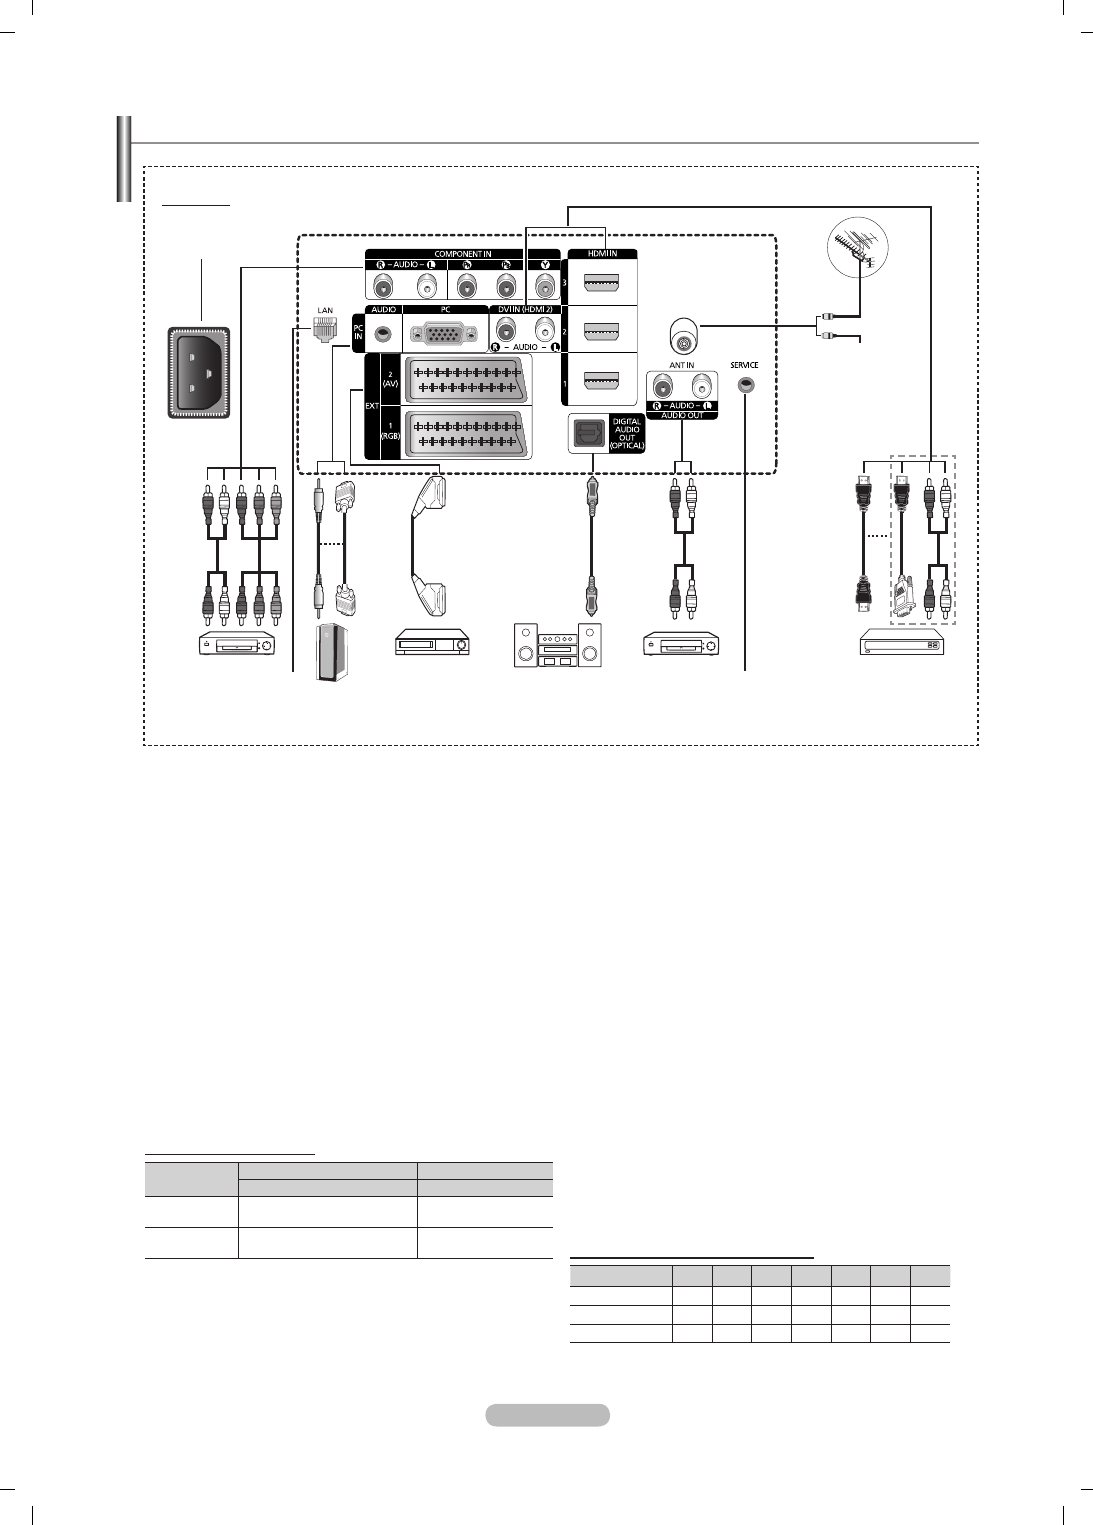
Deutsch - 6
Anschlussfeld
Rückseite
Kabelfernsehen
Netzwerk
oder
oder
oder
1
5 7 96
0
83 4
Die Produktfarbe und -form können sich je nach Modell unterscheiden.
N
2
1
Netzanschluss
Zum Anschließen des mitgelieferten Netzkabels.
2
COMPONENT IN
Audio (AUDIO L/R) und Videoeingänge (Y/PB/PR) für
Komponentenanschluss.
3
LAN
Schließen Sie ein Netzwerkkabel zur Verbindung mit dem
Server an diesen Anschluss an
4
PC IN(PC) / AUDIO
Zum Anschließen an den Video- und Audioausgang eines
Computers.
5
EXT 1, EXT 2
Ein- und Ausgänge für externe Geräte wie z. B.
Videorecorder, DVD-Player, Spielekonsolen oder Video-
Disc-Player.
Anschlussmöglichkeiten
Anschluss Eingang Ausgang
Video Audio(L/R) RGB Video + Audio(L/R)
EXT 1 ✔ ✔ ✔Nur TV- oder DTV-
Ausgang verfügbar.
EXT 2 ✔ ✔Ausgang frei wählbar.
6
DIGITAL AUDIO OUT (OPTICAL)
Ausgang an ein digitales Audiogerät anschließen.
7
AUDIO OUT(AUDIO R/L)
Schließen Sie die Cinch-Audiosignale des Fernsehgeräts
an eine externe Quelle an, z. B. an ein Audiogerät.
8
SERVICE
− Anschluss für Servicezwecke.
9
HDMI IN 1, 2, 3
– Beim Anschluss von Geräten über eine HDMI-Schnittstelle
ist keine zusätzliche Audioverbindung erforderlich.
− Eine Verbindung über HDMI/DVI-Kabel kann nur über HDMI
IN 2 erfolgen.
What is HDMI?
− HDMI, die hochauflösende Multimediaschnittstelle,
ermöglicht die Übertragung von hochauflösenden
digitalen Videodaten und mehreren Kanälen mit
Digitalaudio.
− Mit dem entsprechenden Kabel ermöglicht der
HDMI/DVI-Anschluss DVI-Verbindungen zu einem
erweiterten Gerät (nicht mitgeliefert). Der Unterschied
zwischen HDMI und DVI besteht darin, dass ein
Gerät mit HDMI kleiner ist, mit dem Kopierschutz
HDCP (Hoch Bandwidth Digital Copy Protection/
digitaler Kopierschutz) ausgestattet ist und digitalen
Mehrkanalton unterstützt.
DVI IN(HDMI2) AUDIO L/R
DVI-Audioausgänge für externe Geräte.
0
Antenneneingang
75 Ω-Koaxialanschluss für Antenne/Kabelanschluss.
Unterstützte Modi für HDMI/DVI und
480i 480p 576i 576p 720p 1080i 1080p
HDMI/DVI 50Hz X X X O O O O
HDMI/DVI 60Hz X O X X O O O
Komp O O O O O O O
N
Stellen Sie sicher, dass der Fernseher und alle angeschlossenen Geräte ausgeschaltet sind, ehe Sie weitere Geräte
anschließen.
Achten Sie beim Anschließen eines externen Geräts auf die Farbcodierung: Stecker und Buchse müssen die gleiche Farbe
aufweisen.
N
N
BN68-01757A-Ger.indb 6 2008-9-24 15:36:38

Deutsch - 7
1
Steckplatz für gemeinsame Schnittstelle
IAnschließen einer CI-Karte (Gemeinsame Schnittstelle)
(Informationen hierzu finden Sie auf Seite 25.)
− Ohne eingelegte CI-Karte zeigt das Fernsehgerät auf
einigen Kanälen ein gestörtes Signal an.
− Die Verbindungsinformationen mit Telefonnummer,
Kennung der CI-Karte, Hostkennung und anderen Angaben
wird nach ungefähr 2 bis 3 Minuten angezeigt. Wenn eine
Fehlermeldung angezeigt wird, wenden Sie sich bitte an
Ihren Dienstanbieter.
− Wenn die Kanalinformationskonfiguration abgeschlossen
ist, wird die Meldung Aktualisierung abgeschlossen
angezeigt. Dies bedeutet, dass die Kanalliste jetzt
aktualisiert ist.
Die Richtung, in der Sie die Karte einlegen müssen, ist
darauf mit einem Pfeil markiert.
2
HDMI IN 4
Zum Anschließen an die HDMI-Buchse von Geräten mit
HDMI-Ausgang.
3
WISELINK PRO
Schließen Sie einen USB-Massenspeicher an, um
Fotodateien (JPEG), Audiodateien (MP3) und Filmdateien
anzuzeigen bzw. abzuspielen.
Sie können eine drahtlose Verbindung zum SAMSUNG-
Netzwerk herstellen.
4
S-VIDEO or VIDEO / AUDIO L/R
S-Video-, Video- und Audioeingänge für externe Geräte wie
z. B. Camcorder oder Videorecorder.
N
5
KOPFHÖRERBUCHSE
Wenn Sie beim Fernsehen andere Personen im Zimmer
nicht stören möchten, können Sie Kopfhörer an das
Fernsehgerät anschließen.
Das Verwenden von Kopfhörern bei hoher
Lautstärke über einen längeren Zeitraum kann zu
Hörschäden führen.
N
Die Produktfarbe und -form können sich je nach Modell unterscheiden.
N
Seitenverkleidung
oder
4
5
3
2
1
4
BN68-01757A-Ger.indb 7 2008-9-24 15:36:41
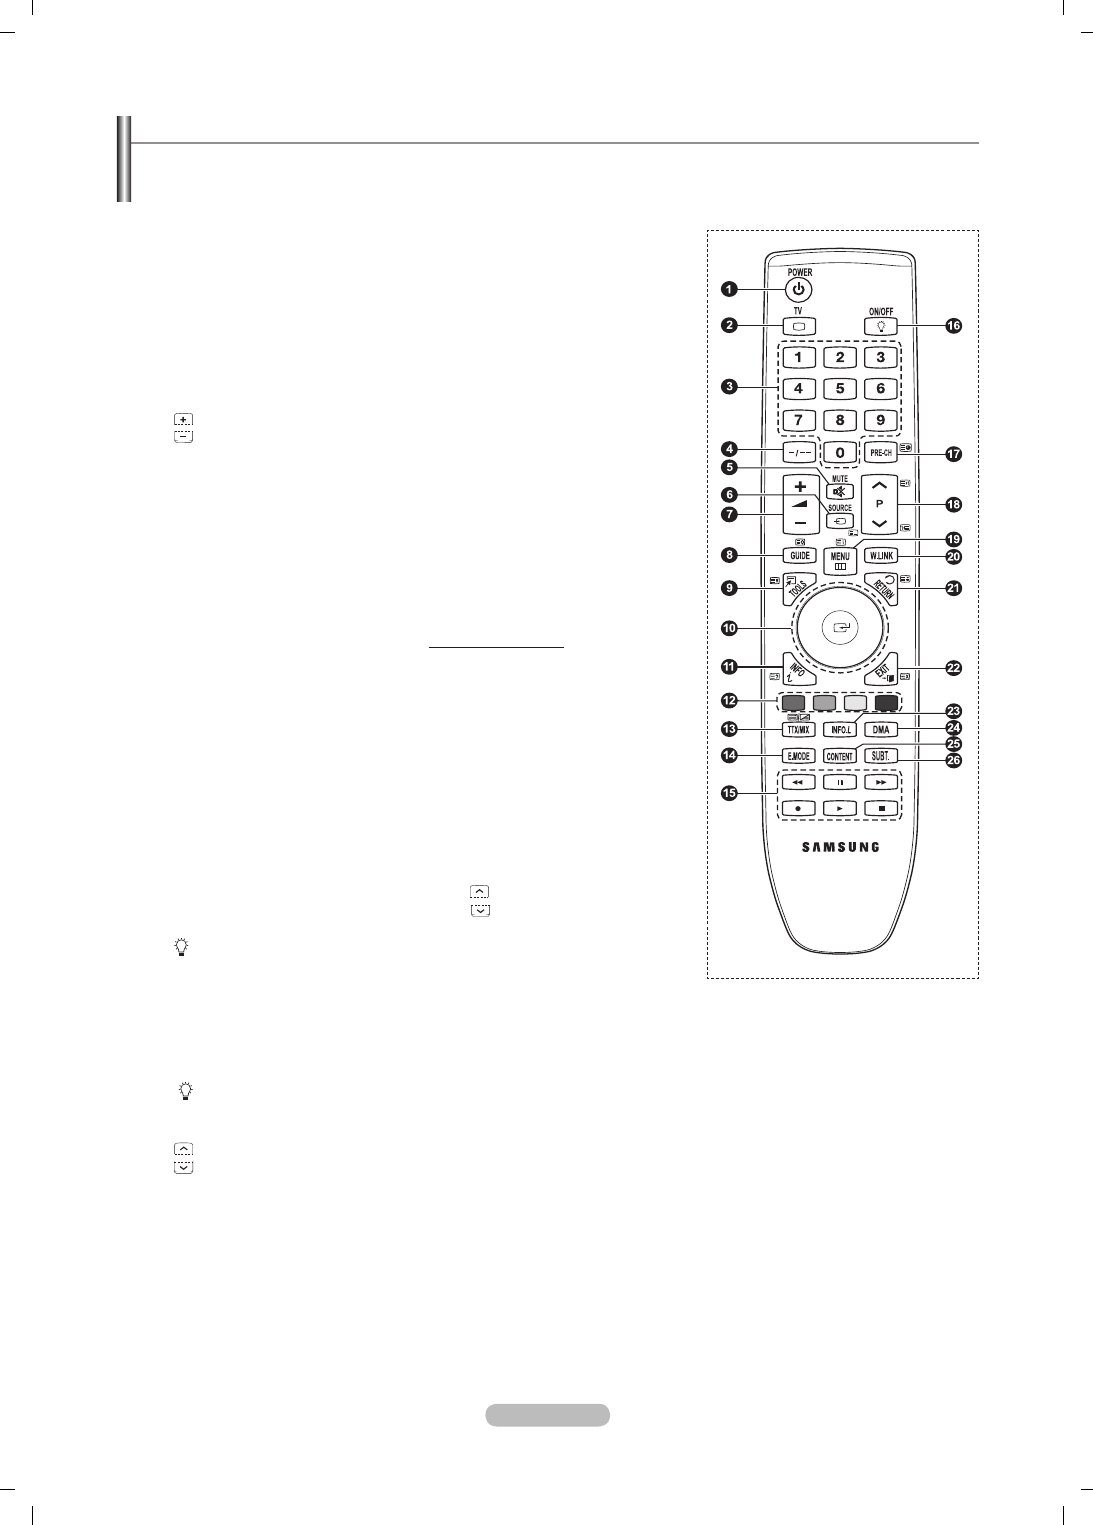
Deutsch - 8
Fernbedienung
Die Reichweite der Fernbedienung beträgt ca. 7 m.
Die Leistungsfähigkeit der Fernbedienung kann durch starke Lichteinstrahlung beeinträchtigt werden.
N
1
Netztaste (Zum An- und
Ausschalten des Fernsehgeräts)
2
TV-Modus direkt aufrufen
3
Zifferntasten für direkte
Programmplatzeingabe
4
Taste zum Auswählen von ein-/
mehrstelligen Programmplätzen
5
Ton vorübergehend ausschalten
6
Verfügbare Signalquelle auswählen
7
Lauter
Lautstärke verringern
8
EPG-Anzeige (Elektronischer
Programmführer)
9
Hiermit können Sie häufig
verwendete Funktionen mithilfe von
Symbolen schnell ausführen.
0
Drücken Sie die Bereiche Auf / Ab /
Links / Rechts des Steuerungsrads
und anschließend die Eingabetaste,
um Optionen im Bildschirmmenü zu
wählen und die Menüwerte zu ändern.
Durch Drehen des Steuerungsrades
können Sie im Menü navigieren,
Kanäle wechseln und die Lautstärke
einstellen.
!
Anzeigen von Informationen zur
aktuellen Sendung
@
Verwenden Sie diese Tasten bei der Arbeit
mit der Kanalliste und in WISELINK
Pro
usw.
$
Drücken Sie diese Taste, um den
optionalen Anzeige- und Audiomodus
für Sport, Kinofilme und Spiele
auszuwählen.
%
Verwenden Sie diese Tasten bei der
Arbeit mit der Kanalliste, WISELINK
Pro und Anynet+.
^
ON/OFF
Drücken Sie diese Taste, um die
Tastenbeleuchtung der Fernbedienung
zu aktivieren. Diese Funktion ist in
der Nacht oder in einem dunklen
Zimmer hilfreich. (Wenn Sie die
Fernbedienung mit angeschalteter
Hintergrundbeleuchtung ON/OFF
( ) verwenden, verkürzt dies die
Lebensdauer der Batterie.)
&
Vorheriger Kanal
*
Nächster Kanal
Vorheriger Kanal
(
Bildschirm-Hauptmenü anzeigen
)
Mit dieser Funktion können Sie Foto-
(JPEG), Audiodateien (MP3) und
Filmdateien von einem externen
Gerät anzeigen bzw. wiedergeben.
a
Zurück zum vorherigen Menü
b
OSD-Menü ausblenden
c
Drücken Sie diese Taste, um die
Informationsdienste für Nachrichten,
Aktienkurse und Wettervorhersagen
zu nutzen, die Ihnen über das
Netzwerk zur Verfügung stehen.
d
Verwenden Sie dies, wenn Sie ein
DMA-Gerät von Samsung über eine
HDMISchnittstelle anschließen und in
den DMA-Modus wechseln. Weitere
Informationen zu den Betriebsabläufen
finden Sie im Benutzerhandbuch des
DMA-Geräts.
Diese Schaltfläche ist verfügbar, Diese
Schaltfläche ist verfügbar, wenn Anynet+
(HDMI-CEC) auf An geschaltet ist.
(siehe Seite 54)
e
Diese Funktion ermöglicht die
Anzeige der Content Library.
f
Digitale Untertitel anzeigen
Teletext-Funktionen
2
Videotextanzeige beenden
(modellabhängig)
6
Videotext-Modus auswählen (LIST/
FLOF)
8
Videotextseite speichern
9
Videotextgrösse
!
Verborgenen Inhalt einblenden
@
Fastext-Thema auswählen
#
Videotext anzeigen/Videotext und
Fernsehsendung zugleich anzeigen
&
Untergeordnete Videotextseite
*
P : Nächste Videotextseite
P :Vorige Videoteite
(
Videotext-Index
a
Seite weiter anzeigen (nicht
umblättern)
b
Videotext abbrechen
BN68-01757A-Ger.indb 8 2008-9-24 15:36:41

Deutsch - 9
Batterien in die Fernbedienung einsetzen
1. Heben Sie die Abdeckung auf der Rückseite der Fernbedienung an, wie in der
Abbildung dargestellt.
2. Legen Sie zwei AAA-Batterien ein.
Achten Sie darauf, dass die Pole der Batterien (+ und –) wie im
Batteriefach angezeigt ausgerichtet sind.
3. Schließen Sie den Deckel.
Wenn die Fernbedienung für einen längeren Zeitraum nicht verwendet
wird, nehmen Sie die Batterien heraus, und lagern Sie sie an einem kühlen,
trockenen Ort.
Wenn Sie die Fernbedienung mit angeschalteter Hintergrundbeleuchtung
ON/OFF (@) verwenden, verkürzt dies die Lebensdauer der Batterie.
Wenn die Fernbedienung nicht funktioniert: Überprüfen Sie Folgendes:
1. Ist das Fernsehgerät eingeschaltet?
2. Wurden Plus- und Minuspol der Batterien vertauscht?
3. Sind die Batterien leer?
4. Gibt es einen Stromausfall oder ist das Netzkabel nicht angeschlossen?
5. Befindet sich eine Leuchtstoffröhre oder ein Neonschild in der Nähe?
N
Batterien und Akkus gehören nicht in den Hausmüll.
Als Verbraucher sind Sie verpichtet, alte Batterien und Akkus zur umweltschonenden Entsorgung zurückzugeben.
Sie können alte Batterien und Akkus bei den öffentlichen Sammelstellen in Ihrer Gemeinde oder überall dort abgeben, wo
Batterien und Akkus der betreffenden Art verkauft werden.
Ein- und Ausschalten
Das Netzkabel wird auf der Rückseite des Fernsehgeräts angeschlossen.
1. Schließen Sie das Netzkabel an eine geeignete Netzsteckdose an.
Am Gerät leuchtet die Standby-Anzeige auf.
2. Drücken Sie am Gerät die Taste POWER
P
.
Zum Einschalten des Fernsehgeräts können Sie auch die Taste POWER
P
oder die Taste TV auf der Fernbedienung
drücken.
Der Sender, den Sie zuletzt gesehen haben, wird automatisch wieder aufgerufen.
3. Drücken Sie auf der Fernbedienung die Zifferntasten (0-9) bzw. eine der Programmwahltasten (< / >), oder drücken Sie die
Taste >C/P.
P
< am Gerät.
Wenn Sie das Gerät zum ersten Mal einschalten, können Sie die Sprache auswählen, in der die Menüs angezeigt
werden.
4. Zum Ausschalten des Fernsehgeräts drücken Sie erneut die Taste POWER
P
.
Fernsehgerät in den Standby-Modus schalten
Um den Stromverbrauchs zu senken, kann das Gerät in den Standby-Modus geschaltet werden. Der Standby-Modus ist nützlich,
wenn Sie das Gerät vorübergehend ausschalten möchten (z. B. während einer Mahlzeit).
1. Drücken Sie die Taste POWER
P
auf der Fernbedienung.
Der Bildschirm wird ausgeschaltet, und auf der Vorderseite des Fernsehgeräts leuchtet die rote Standby-Anzeige auf.
2. Drücken Sie einfach erneut die Taste POWER
P
, eine Zifferntaste (0-9) bzw. die Taste TV oder die Programmwahltaste
(< / >), um das Gerät wieder einzuschalten.
Der Standby-Modus ist nicht für längere Phasen der Abwesenheit gedacht (z. B. wenn Sie verreist sind). Ziehen Sie dann
sicherheitshalber den Netzstecker und das Antennenkabel.
N
N
N
N
N
N
N
N
N
BN68-01757A-Ger.indb 9 2008-9-24 15:36:42
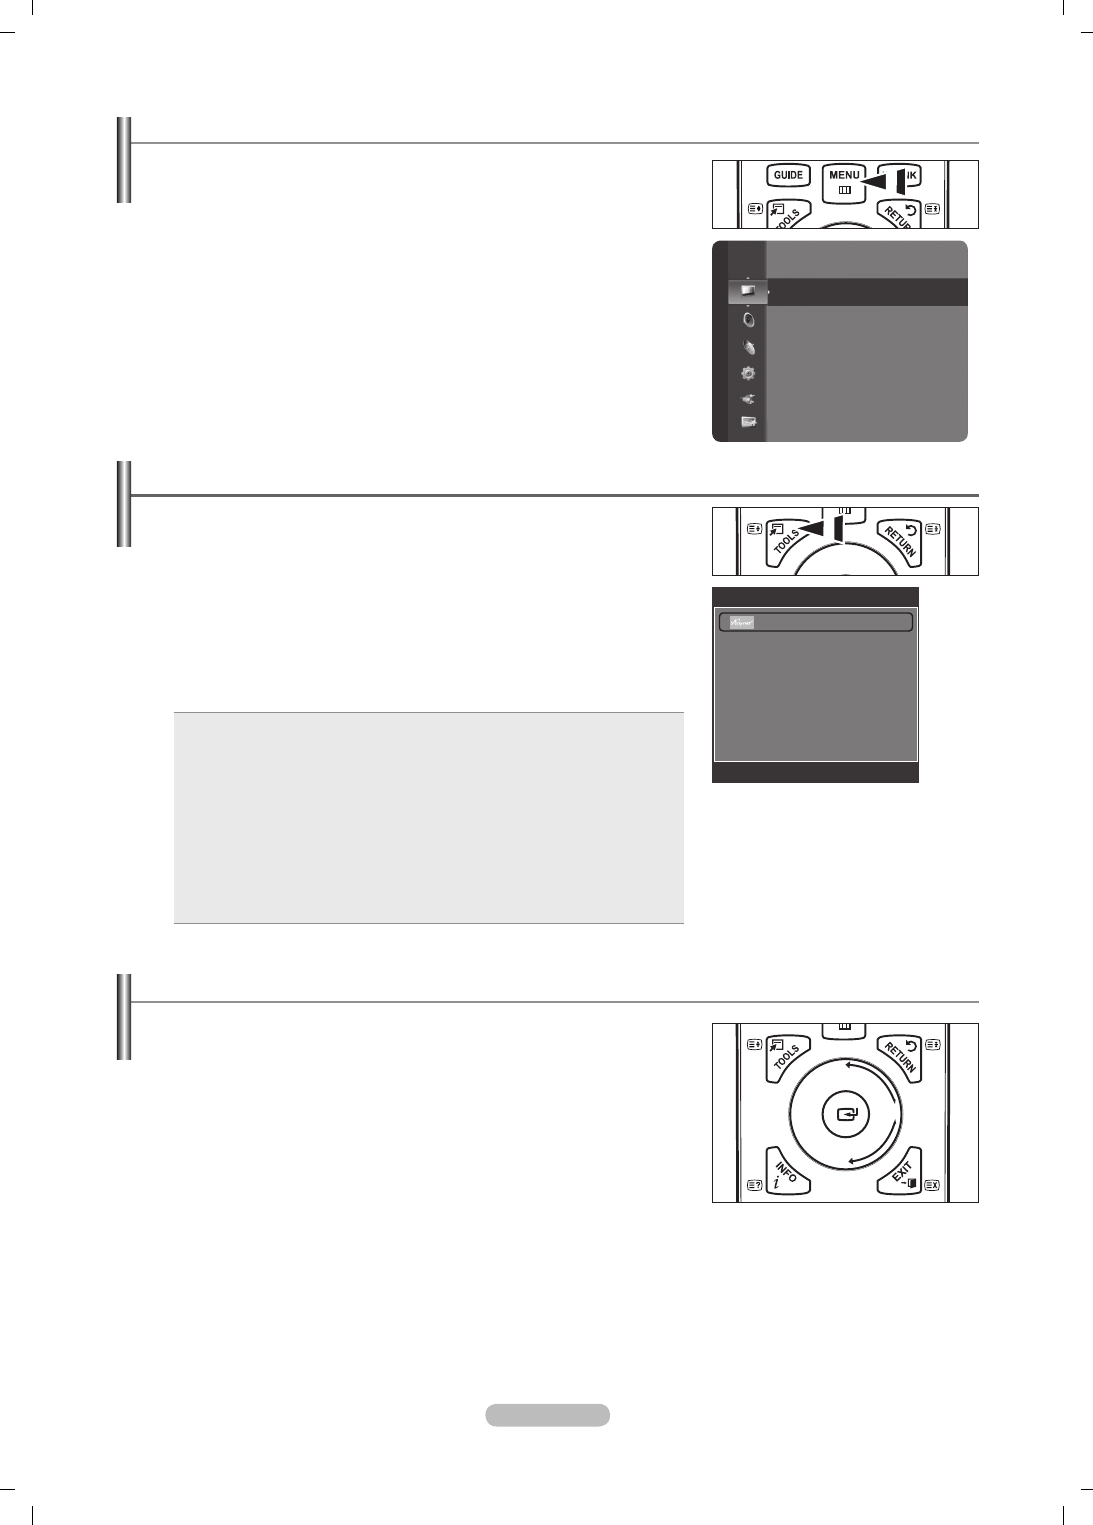
Deutsch - 10
Menüs anzeigen
1. Drücken Sie die Taste MENU bei angeschaltetem Gerät. Das Hauptmenü wird
auf dem Bildschirm angezeigt. Links im Menü sind Symbole zu sehen: Bild, Ton,
Kanal, Einstellungen, Eingang, Anwendung.
2. Wählen Sie mit den Tasten ▲ und ▼ eines der Symbole aus. Drücken Sie dann
die Taste ENTER
E
, um in das Untermenü des Symbols zu wechseln.
3. Zum Beenden drücken Sie die Taste EXIT.
Das Bildschirmmenü wird nach etwa einer Minute vom Bildschirm gelöscht.
Verwenden der Taste TOOLS (Extras)
Sie können die Taste TOOLS verwenden, um häufig verwendete Funktionen schnell
und einfach auszuwählen. Der Inhalt des Menüs Extras hängt davon ab, welche
externe Signalquelle Sie für die Anzeige verwenden.
1 Drücken Sie die Taste TOOLS (Extras).
Das Menü Extras wird geöffnet.
2 Wählen Sie durch Drücken der Tasten ▲ oder ▼ eine Menüoption, und drücken
Sie dann die Taste ENTER (Eingabe).
3 Drücken Sie die Tasten ▲/▼/◄/►/ENTER (Eingabe), um die markierten
Elemente anzuzeigen, zu ändern oder zu verwenden.
Ausführliche Beschreibungen der einzelnen Funktionen finden Sie auf der
jeweiligen Seite.
Anynet+ (HDMI-CEC): siehe Seite 53
Bildformat: siehe Seite 17
Bildmodus: siehe Seite 15
Tonmodus: siehe Seite 21
Sleep-Timer: siehe Seite 26
SRS TS XT: siehe Seite 21
Energiesparmodus: siehe Seite 25
Dual l ll: siehe Seite 22
PIP: siehe Seite 19
Autom. Einstellung: siehe Seite 19
•
•
•
•
•
•
•
•
•
•
Verwenden des Steuerungsrads
Sie erhöhen die Kanalnummer, indem Sie das Rad bei angezeigtem
Kanalfenster im Uhrzeigersinn drehen. Um die Kanalnummer zu senken,
drehen Sie das Rad gegen den Uhrzeigersinn.
Sie erhöhen die Lautstärke, indem Sie das Rad bei angezeigtem
Lautstärkefenster im Uhrzeigersinn drehen. Um die Lautstärke zu senken,
drehen Sie das Rad gegen den Uhrzeigersinn.
Sie wechseln in ein Untermenü, indem Sie das Rad bei angezeigtem Menü
im Uhrzeigersinn drehen. Um in ein höheres Menü zu wechseln, drehen Sie
das Rad gegen den Uhrzeigersinn.
N
Modus
:
Standard
Zellhelligkeit : 7
Kontrast : 95
Helligkeit : 45
Schärfe : 50
Farbe : 50
Farbton (G / R) : G50 / R50
Detaileinstellungen
Bild
Extras
Anynet+ (HDMI-CEC)
Bildformat : Autom. Breit
Bildmodus : Standard
Tonmodus : Benutzerd.
Sleep-Timer : Aus
SRS TS XT : Aus
Energiesparmod. : Aus
Dual l ll : Mono
U
Navig.
E
Eingabe
e
Beenden
BN68-01757A-Ger.indb 10 2008-9-24 15:36:42
Deutsch - 11
Plug & Play-Funktion
Wenn das Fernsehgerät zum ersten Mal eingeschaltet wird, werden automatisch die Grundeinstellungen vorgenommen.
1. Drücken Sie die Taste POWER auf der Fernbedienung. Die Meldung The Menu
Sprache, Shop-Demo, Channels, and Time will be set. wird angezeigt.
2. Wenn Sie auf ENTER
E
drücken, wird das Menü Select the OSD Language.
angezeigt. Drücken Sie die Taste ENTER
E
.
3. Wählen Sie die gewünschte Sprache mit den Tasten ▲ oder ▼ aus. Drücken
Sie die Taste ENTER
E
, um Ihre Auswahl zu bestätigen.
4. Wählen Sie durch Drücken der Tasten ◄ oder ► die Option Shop-Demo oder
Privatgebrauch, und drücken Sie dann auf ENTER
E
.
Wir empfehlen Ihnen, das Fernsehgerät im Modus Privatgebrauch zu verwenden, um das optimale Bild für den
Privatgebrauch zu erzielen.
Der Modus Shop-Demo ist nur geeignet, wenn das Gerät in einem Verkaufsbereich verwendet wird.
Wenn das Gerät versehentlich auf den Modus Shop-Demo eingestellt ist, und Sie möchten wieder zurück zu
Privatgebrauch (Standard) wechseln, gehen Sie so vor: Drücken Sie die Lautstärketaste am Fernsehgerät. Wenn das
Menü Volume angezeigt wird, halten Sie die Taste MENU am Fernsehgerät 5 Sekunden lang gedrückt.
Der Bildschirmschoner wird aktiviert, wenn im Plug&Play-Betrieb länger als 1 Minute keine Eingabe mit der Fernbedienung erfolgt.
Der Bildschirmschoner wird aktiviert, wenn länger als 15 Minuten kein Betriebssignal anliegt.
5. Drücken Sie die Taste ENTER
E
. Wählen Sie das gewünschte Land mit der Taste ▲ oder ▼ aus. Drücken Sie die Taste
ENTER
E
, um Ihre Auswahl zu bestätigen.
6. Wählen Sie durch Drücken der Tasten ▲ oder ▼ die Signalquelle aus, die gespeichert werden soll. Drücken Sie die Taste
ENTER
E
, um Start auszuwählen.
Digital und Analog: Digitale und analoge Kanäle.
Digital: Digitale Kanäle.
Analog: Analoge Kanäle.
Die Kanalsuche wird automatisch gestartet und beendet.
Zum Unterbrechen des Speichervorgangs zu einem beliebigen Zeitpunkt drücken Sie die Taste ENTER
E
.
Wenn Sie alle verfügbaren Kanäle gespeichert haben, wird die Meldung Uhrmodus einstellen. angezeigt.
7. Drücken Sie die Taste ENTER
E
. Wählen Sie durch Drücken der Tasten ▲ oder ▼ die Option Auto, und drücken Sie dann
die Taste ENTER
E
.
Wenn Sie Manuell wählen, wird Hiermit stellen Sie das Datum und die Uhrzeit ein.
angezeigt. (Siehe Seite 26)
Wenn Sie ein digitales Signal empfangen, wird die Zeit automatisch eingestellt. Anderenfalls siehe Seite 26, wenn Sie
Informationen zum Stellen der Uhr wünschen.
8. Die Meldung Wir wünschen gute Unterhaltung! wird angezeigt. Drücken Sie abschließend die Taste ENTER
E
.
So setzen Sie diese Funktion zurück:
1. Drücken Sie die Taste MENU, um das Menü anzuzeigen. Wählen Sie durch
Drücken der Tasten ▲ oder ▼ die Option Einstellungen, und drücken Sie
dann die Taste ENTER
E
.
2. Drücken Sie die Taste ENTER
E
erneut, um Plug & Play auszuwählen.
3. Geben Sie nun Ihre vierstellige PIN ein. Der Standard-PIN-Code eines neuen
Fernsehgeräts lautet 0000.
Informationen zum Ändern der PIN erhalten Sie auf Seite 23.
Die Plug & Play-Funktion gibt es nur im TV-Modus
N
N
N
N
N
N
N
N
N
N
N
N
N
N
Kanalsteuerung
Speichern von Kanälen und Kanal
Land
Analog Sender: Sie können das Land für Analogkanäle ändern.
Digitaler Sender: Sie können das Land für Digitalkanäle ändern.
Der Eingabebildschirm für die PIN wird geöffnet. Geben Sie nun Ihre vierstellige
PIN ein.
❑
N
Einstellungen
Plug & Play ►
Sprache : Deutsch
Zeit
Auswahl des Netzwerks : Kabel
Drahtlos-Netzwerk einrichten
Kabelnetzwerk einrichten
Kindersicherung : Ein
PIN ändern
Kanal
Land
►
Autom. speichern
Manuell speichem
Ausführlich
Übersicht
Standard : Übersicht
Senderliste
Kanalmodus : Hinzugef. Sender
Plug & Play
The Menu Language, Shop-Demo, Channels and Time
will be set.
OK
E
Eingabe
BN68-01757A-Ger.indb 11 2008-9-24 15:36:43

Deutsch - 12
Autom. speichern
Sie können den verfügbaren Frequenzbereich nach Sendern durchsuchen (verfügbare Sender und Frequenzbereiche sind
vom jeweiligen Land abhängig). Die automatisch zugewiesenen Programmplätze entsprechen unter Umständen nicht den
gewünschten Programmplätzen.
Digital und Analog: Digitale und analoge Kanäle.
Digital: Digitale Kanäle.
Analog: Analoge Kanäle.
Das Fernsehgerät durchsucht automatisch alle Kanäle mit aktiven Sendern und speichert sie im Speicher des Fernsehgeräts.
Wenn Sie Auto Store anhalten möchten, drücken Sie auf ENTER
E
.
Die Meldung Automatische Senderspeicherung beenden? wird angezeigt.
Drücken Sie die Taste ◄ oder ►, um Yes auszuwählen, und drücken Sie dann die Taste ENTER
E
.
Wenn ein Kanal mit der Funktion Kindersicherung gesperrt wurde, wird das Eingabefenster für die PIN geöffnet.
Manuell speichem
Hiermit wird manuell ein Kanal gesucht und dieser im Fernsehspeicher abgelegt.
Wenn ein Kanal mit der Funktion Kindersicherung gesperrt wurde, wird das Eingabefenster für die PIN geöffnet.
Digitaler Sender
Manuelles Speichern von digitalen Kanälen.
Kanal: Stellen Sie die Kanalnummer mit den Tasten ▲, ▼ oder einer Zifferntaste (0 – 9) ein.
Frequenz: Einstellen der Frequenz mithilfe der Zifferntasten.
Bandbreite: Einstellen der Bandbreite mit den Tasten ▲, ▼ oder einer Zifferntaste (0 – 9).
Nach Abschluss des Suchlaufs werden die Kanäle in der Kanalliste aktualisiert.
Analog Sender
Manuelles Speichern von analogen Kanälen.
Programm (der Programmplatz, der dem Kanal zugewiesen werden soll): Stellen Sie den Programmplatz mit den Tasten
▲, ▼ oder einer Zifferntaste (0 – 9) ein.
Fernsehnorm →Auto/PAL/SECAM/NTSC4.43: Einstellen der Fernsehnorm mithilfe der Taste ▲ oder ▼.
Tonsystem → BG / DK / I / L: Einstellen des Tonsystems mithilfe der Taste ▲ oder ▼.
Kanal (Wenn Ihnen die Nummer des zu speichernden Senders bekannt ist) Wählen Sie durch Drücken der Tasten
▲ oder ▼ die Option C (terrestrischer Kanal) oder S (Kabelkanal). Drücken Sie die Taste ►, und drücken Sie dann die
Tasten ▲, ▼ oder eine Zifferntaste (0 - 9) , um die gewünschte Nummer auszuwählen.
Die Kanalnummer können Sie auch direkt durch Drücken der Zifferntasten (0 - 9) auswählen.
Falls kein oder nur schlechter Ton zu hören sein sollte, wählen Sie einen anderen Audiostandard aus.
Suchlauf (Wenn Ihnen die Kanalnummern nicht bekannt sind): Drücken Sie zum Starten des Suchlaufs die Taste
▲ oder ▼. Der Tuner durchsucht den Frequenzbereich, bis der erste Sender bzw. der ausgewählte Sender empfangen wird.
Speichern (zum Speichern des Kanals und des zugehörigen Programmplatzes) Drücken Sie die Taste ENTER
E
, um OK zu
wählen.
Kanalmodus
P (Programm-Modus): Nach Abschluss der Einstellungen sind den Sendern Ihrer Region Plätze mit den Nummern
von P00 bis P99 zugewiesen worden. In diesem Modus können Sie Sender durch Eingabe des Programmplatzes
auswählen.
C (Antennenempfangsmodus): In diesem Modus können Sie Kanäle durch Eingabe der Nummer anwählen, die
jedem Antennensender zugeordnet ist.
S (Kabelkanalmodus): In diesem Modus können Sie Sender durch Eingabe der Nummer anwählen, die jedem
Kabelsender zugeordnet ist.
Ausführlich / Übersicht
Die Informationen des elektronischen Programmführers werden von den Sendern zur Verfügung gestellt. Es kann sein,
dass Programmeinträge leer oder veraltet sind. Dies ist auf die für einen bestimmten Kanal übertragenen Informationen
zurückzuführen. Die Anzeige wird dynamisch aktualisiert, sobald neue Informationen verfügbar sind.
Detaillierte Verfahrensbeschreibungen zur Verwendung von Ausführlich
und Übersicht entnehmen Sie den Hinweisen auf Seite 13.
Sie können das Programmführermenü auch durch Drücken der Taste
GUIDE aufrufen. (Weitere Informationen zum Kongurieren des Standard
nden Sie bei den entsprechenden Beschreibungen.)
Ausführlich : Hier werden die Programminformationen in einem Zeitplan mit einer Unterteilung von jeweils 1 Stunde
angezeigt. Es wird ein Zeitfenster von 2 Stunden mit Programminformationen angezeigt. Dieses Fenster kann jedoch
in der Zeit nach vorne oder nach hinten verschoben werden.
Übersicht: Die Informationen für die einzelnen Programme werden im Fenster für den Mini-Programmführer in
chronologischer Reihenfolge des Programmstarts zeilenweise ab dem aktuell laufenden Programm angezeigt.
❑
•
•
•
N
N
N
N
N
❑
N
N
•
•
•
N
•
•
•
•
N
N
•
•
N
-
-
-
❑
N
O
BN68-01757A-Ger.indb 12 2008-9-24 15:36:43
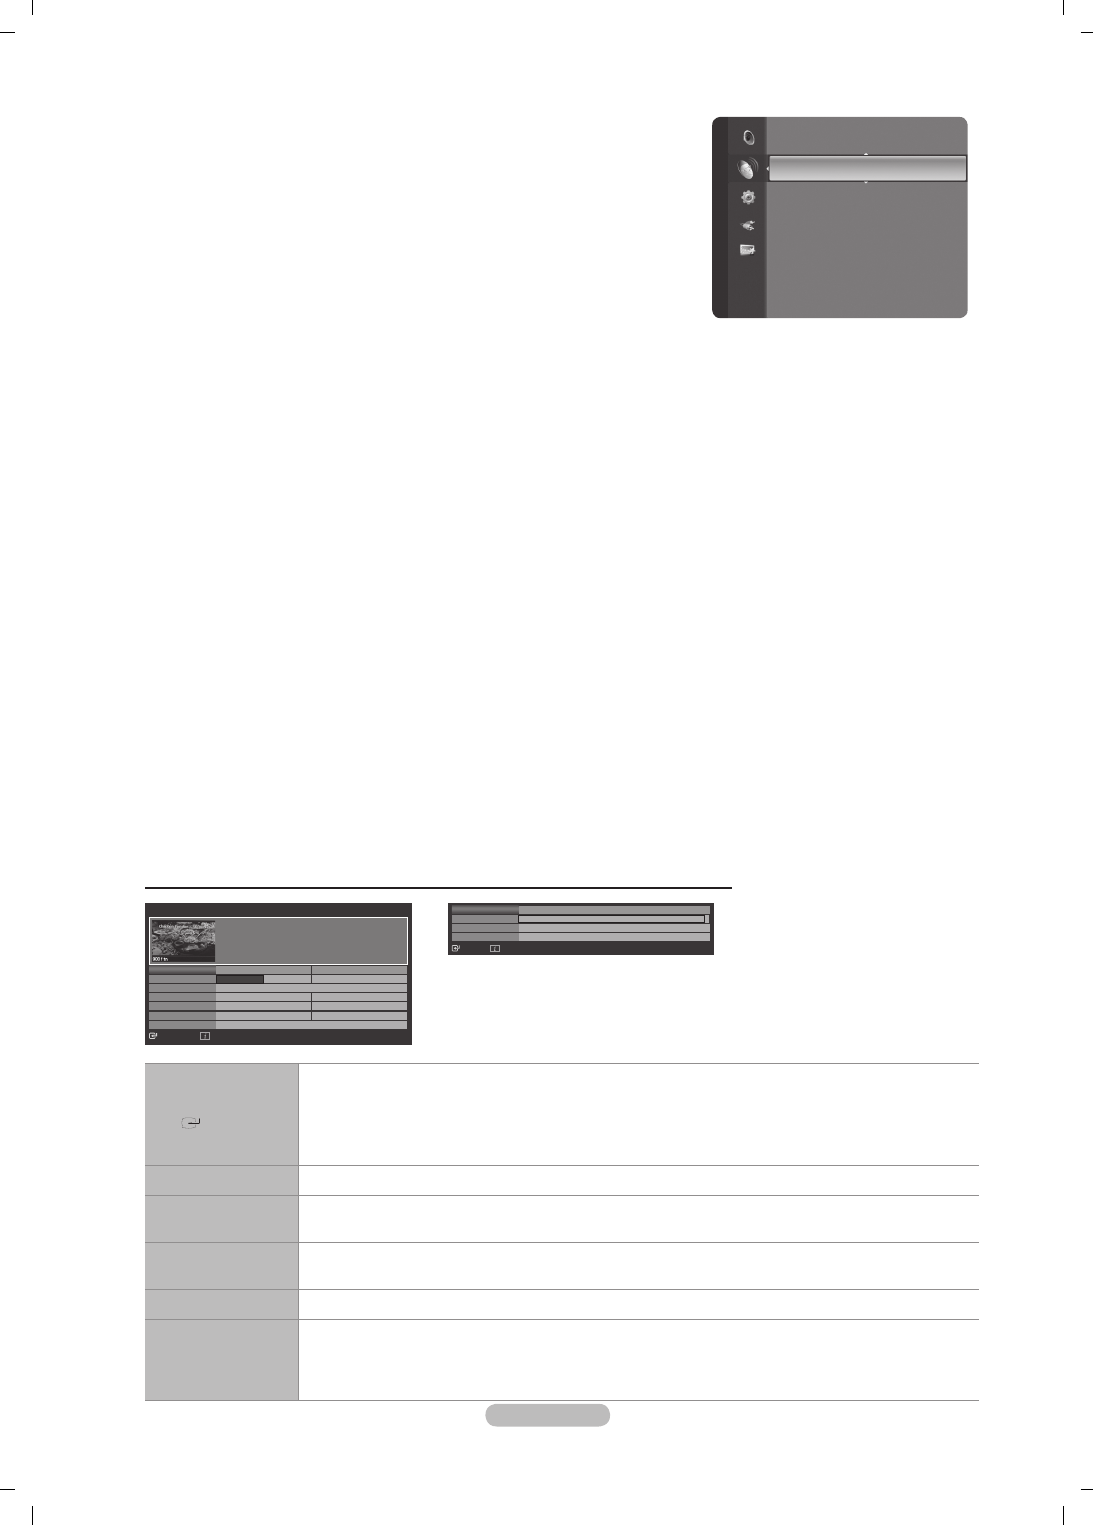
Deutsch - 13
Standard
Übersicht / Ausführlich : Mit der Taste GUIDE auf der Fernbedienung
können Sie einstellen, ob der Übersicht oder der Ausführlich angezeigt
werden soll.
Kanalliste
Detaillierte Verfahrensbeschreibungen zur Verwendung der Senderliste
entnehmen Sie den Beschreibungen auf Seite 14–15.
Kanalmodus
Durch Drücken der Tasten P >/< wechseln Sie innerhalb der gewählten Kanalliste zwischen den Kanälen.
Hinzugef: Es wird nur zwischen Kanälen der gespeicherten Kanalliste gewechselt.
Favoriten: Es wird nur zwischen Kanälen der Favoritenliste gewechselt.
Feinabstimmung
Bei klarem Empfang ist keine Feinabstimmung nötig, da diese automatisch während der Sendersuche erfolgt. Falls das Signal
jedoch schwach oder das Bild verzerrt ist, müssen Sie unter Umständen eine manuelle Feinabstimmung durchführen.
Gespeicherte feinabgestimmte Kanäle werden mit einem Sternchen „*“ auf der rechten Seite der Kanalnummer im Kanal-
Banner markiert.
Wählen Sie zum Zurücksetzen der Feinabstimmung die Option Reset aus, indem Sie die Taste ▲ oder ▼ drücken und
dann die Taste ENTER
E
drücken.
Eine Feinabstimmung ist nur für Analogfernsehgeräte möglich.
Signalinformation
Sie können Informationen über den Signalstatus erhalten.
Bei schwachem Signal wird die Meldung Kein Signal oder schlechtes Signal angezeigt.
Während Sie ein digitales Programm anschauen, können Sie diese Funktion auswählen.
Die technischen Informationen für den Signalstatus werden angezeigt.
- Frequenz / Senderkennung / Multiplex / Netzwerk / Bitfehlerebene / Signalstärke
LNA→Aus/Ein
Mit Hilfe der LNA-Funktion (rauscharmer Verstärker) kann der Empfang in Gebieten mit schwachem Empfang verbessert
werden (ein rauscharmer Vorverstärker verstärkt das Eingangssignal).
Während Sie ein analoges Programm anschauen, können Sie diese Funktion auswählen.
Verwenden des vollständigen Programmführers / Mini-Programmführers
▲/▼/◄/►,
(ENTER)
Wählen Sie mit den Tasten ▲/ ▼/ ◄/ ► das Programm aus.
Sobald Sie ein Programm gewählt haben, wird es zusammen mit einem Uhr-Symbol angezeigt. Wenn
Sie erneut ENTER gedrückt haben, drücken Sie auf ▲/▼/◄/►, um die Option Programmierung
abbrechen zu wählen. Danach wird die Programmwahl aufgehoben und das Uhr-Symbol wird entfernt.
Weitere Informationen über das Vormerken von Programmen finden Sie im Abschnitt.
ROT Schalten Sie zwischen der Übersicht und dem Ausführlichen Programmführer um.
GRÜN Ausführlich: Schnell zurückblättern (24 Stunden).
Übersicht: Nächste Seite schnell anzeigen.
GELB Ausführlich: Schnell weiterblättern (24 Stunden).
Übersicht: Vorherige Seite schnell anzeigen.
BLAU Programmführer beenden
INFO
INFO-Taste, um detailliertere Informationen zu erhalten. Zu diesen Informationen gehören:
Kanalnummer, Programmdauer, Statusleiste, Kindersicherungsstufe, Bildqualität (HD/SD), Tonmodus,
Untertitel oder Teletext, Sprache für Untertitel oder Teletext sowie Kurzzusammenfassung des
markierten Programms. Wenn die Zusammenfassung zu lang ist, wird ... angezeigt.
❑
❑
❑
❑
N
N
N
❑
N
N
N
❑
N
Kanal
Feinabstimmung
Signalinformation
LNA : Aus
►
Ausführlich
DTV Kabel 900 f tn 2:10 Tue 1 Jun
Keine Information
2:00 - 2:30
Keine detaillierten Inf ormation.
Heute 2:00 - 3:00 3:00 - 4:00
Mint Extra
Loaded
Fresh 40 with Dynamite MC
The Distillery
Smash Hits! Sonntag
900 f tn
901 ITV Play
902 Kerrang!
903 Kiss
903 oneword
903 Smash Hits!
▼
Street Hypn..
Kisstory
Keine Information
Keine Information
Keine Information
Freshmen O..
Ansehen
Information
Übersicht
+24 Std.
Beenden
Übersicht DTV Kabel 900 f tn
Street Hypnosis
Booze Britain
2:00
2:30
5:00
▼
Keine Information
Ansehen
Information
Ausführlich
Nächste Seite
beenden
BN68-01757A-Ger.indb 13 2008-9-24 15:36:44

Deutsch - 14
Verwalten von Kanälen
Mit diesem Menü können Sie Favoriten hinzufügen, löschen oder einstellen und
den digitalen Programmführer für Digitalsendungen verwenden.
Wählen Sie im Fenster Alle Sender, Hinzugefügte Sender, Favorit oder
Programmiert einen Kanal. Drücken Sie hierzu die Tasten ▲ / ▼ und die Taste
ENTER
E.
Alle Sender: Hiermit zeigen Sie alle verfügbaren Kanäle an.
Hinzugefügte Sender: Hiermit zeigen Sie alle hinzugefügten Kanäle an.
Favorit
: Hiermit zeigen Sie alle Favoritenkanäle an.
Programmiert
: Hiermit zeigen Sie alle vorgemerkten Programme an.
Verwenden der Farbtasten in Verbindung mit der Kanalliste.
Rot (Kanaltyp): Schalten Sie zwischen TV, Radio,Daten/And. und Alle um.
Grün (Zoom): Hiermit vergrößern oder verkleinern Sie die Kanalnummer.
Gelb (Select): Hiermit wählen Sie mehrere Kanallisten aus.
TOOLS (Option): Hiermit zeigen Sie die Menüs Löschen (oder Hinzufügen),
Zu Favoriten hinzufügen (oder Aus Favoriten löschen), Sperren (oder
Freigabe), Timer-Wiedergabe, Sendernamen bearbeiten, Sortieren,
Programmplatz bearbeiten, Alle wählen, Alle abwählen oder Autom.
speichern an. (Der Inhalt des Menüs Optionen hängt von der jeweiligen
Situation ab.)
Symbole zur Anzeige des Kanalstatus
AEin analoger Kanal. cEin Kanal, der durch Drücken der gelben Taste gewählt wurde.
♥
Ein Kanal, der als Favorit eingestellt ist. (Ein Programm, das gerade gesendet wird.
\Ein gesperrter Kanal. )Ein vorgemerktes Programm
Optionsmenü für Kanallisten (in Alle Sender / Hinzugefügte Sender / Favourites)
Drücken Sie die Taste TOOLS, um das Optionsmenü zu öffnen.
Der Inhalt des Optionsmenüs hängt vom jeweiligen Kanalstatus ab.
Hinzufügen/Löschen
Sie können Kanäle löschen oder hinzufügen, damit nur die gewünschten
Kanäle angezeigt werden.
Alle gelöschten Kanäle werden im Menü Alle Sender angezeigt.
Wenn der Kanal in grauer Farbe dargestellt wird, wurde er gelöscht.
Das Menü Hinzufügen wird nur für gelöschte Kanäle angezeigt.
Sie können einen Kanal aus dem Menü Hinzugefügte Sender oder
Favourite in gleicher Weise löschen.
Zu Favoriten hinzufügen / Aus Favoriten löschen
Sie können Kanäle, die Sie häug sehen, als Favorit festlegen.
Das Symbol “♥” wird angezeigt, und der Kanal wird als Favorit festgelegt.
Alle Favoritenkanäle werden im Menü Favourite angezeigt.
Sperren / Freigabe
Sie können einen Kanal sperren, sodass er nicht ausgewählt und angezeigt werden kann. Diese Funktion ist nur verfügbar,
wenn die Kindersicherung aktiviert ist Ein. (siehe Seite 23)
Der Eingabebildschirm für die PIN wird geöffnet. Geben Sie nun Ihre vierstellige PIN ein.
Der Standard-PIN-Code eines neuen Fernsehgeräts lautet 0000. Sie können die PIN ändern, indem Sie im Menü den
Befehl PIN ändern wählen.
Das Symbol “\” wird angezeigt, und der Kanal wird gesperrt.
Timerwiedergabe
Wenn Sie ein Programm zum Anschauen vorgemerkt haben, wechselt das Fernsehgerät automatisch zum vorgemerkten
Kanal in der Kanalliste, auch wenn Sie gerade einen anderen Kanal anschauen. Um ein Programm vorzumerken, müssen Sie
zuerst die Uhrzeit einstellen. (Siehe Seite 26.)
Sie können nur gespeicherte Kanäle vormerken.
Sie können Kanal, Monat, Tag, Jahr, Stunde oder Minute auch direkt über die Zifferntasten auf der Fernbedienung einstellen.
Das Vormerken eines Programms wird im Menü Programme med angezeigt.
Digitaler Programmführer und Vormerken von Sendungen
Wenn Sie einen digitalen Kanal gewählt haben und die Taste ► drücken, wird der Programmführer für diesen Kanal
angezeigt. Gehen Sie in der oben beschriebenen Weise vor, wenn Sie ein Programm vormerken möchten.
N
N
-
-
-
-
N
N
N
N
N
N
N
N
N
N
N
N
N
N
N
N
Kanal
Übersicht
Standard : Übersicht
Kanalliste
Kanalmodus : Hinzugef. Sender
Feinabstimmung
Signalinformation
LNA : Aus
824 UKTV Gold
825 UKTV style
A
1 C --
A
2 C
--
A
3
♥
C
--
A
4 C
--
A
5 C
--
A
6 C
--
A
7 C
--
A
8 C
--
Hinzugefügte Sender
Alle
Kanaltyp
Zoom
Wählen
Option
824 UKTV Gold
825 UKTV style
A
1 C --
A
2 C
--
A
3
C
--
A
4 C
--
A
5 C
--
A
6 C
--
A
7 C
--
A
8 C
--
Alle Sender
Alle
Kanaltyp
Zoom
Wählen
Option
Löschen
Zu Favoriten hinzufügen
Sperren
Timer-Wiedergabe
Sendernamen bearbeiten
Sortieren
▼
BN68-01757A-Ger.indb 14 2008-9-24 15:36:45
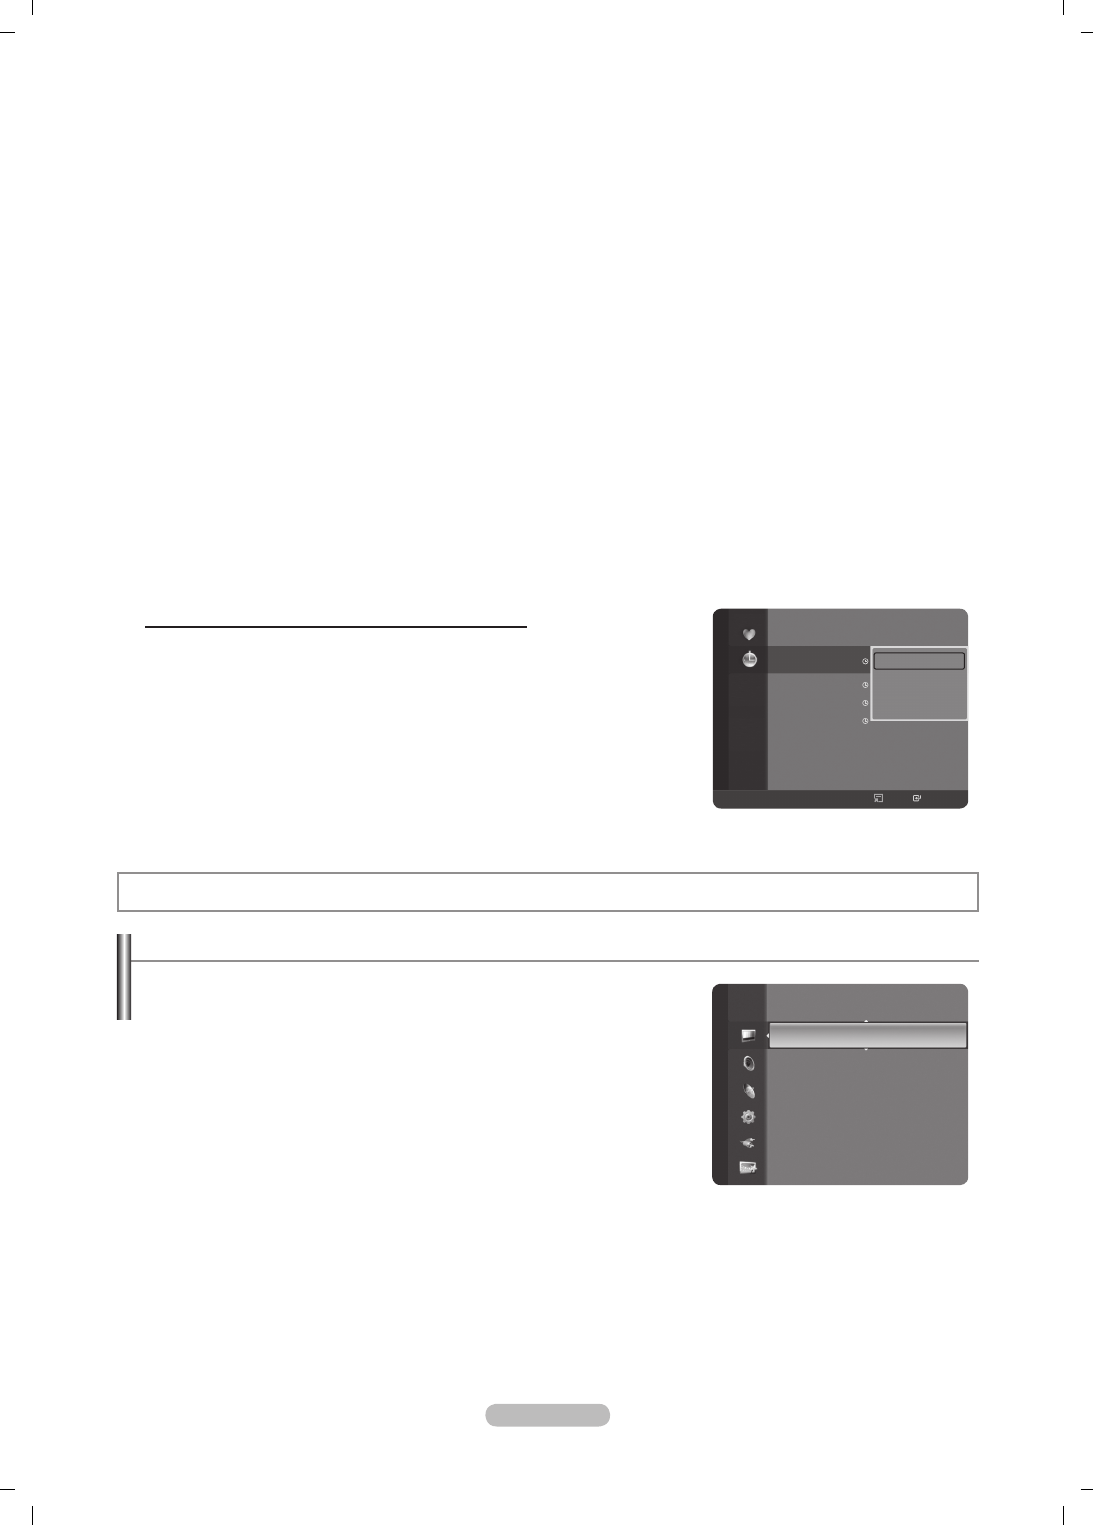
Deutsch - 15
Sendernamen bearbeiten (nur Analogkanal)
Sie können Kanäle mit Beschriftungen versehen, sodass die ersten Buchstaben des Namens immer dann angezeigt werden,
wenn Sie den Kanal wählen.
Die Namen der digitalen Sender werden automatisch zugewiesen und können nicht geändert werden.
Programmplatz bearbeiten (nur Digitalkanal)
Sie können die Kanalnummer auch mit den Zifferntasten der Fernbedienung einstellen.
Sortieren.
Mit diesem Vorgang können Sie die Programmnummern gespeicherter Sender ändern. Das ist möglicherweise nach dem
automatischen Speichern von Sendern erforderlich.
Diese Funktion gibt es nur im Analogmodus.
Alle wählen / Alle abwählen
Alle wählen: Sie können alle Kanäle in der Kanalliste auswählen.
Alle abwählen: Sie können die Auswahl aller Kanäle in der Kanalliste aufheben.
Sie können die Funktionen zum Hinzufügen / Löschen, Zu Favoriten hinzufügen / Aus Favoriten löschen oder
Sperren / Freigeben gleichzeitig verwenden. Markieren Sie die gewünschten Kanäle und drücken Sie die gelbe Taste,
um alle markierten Kanäle zugleich einzustellen.
Links neben dem Namen des gewählten Kanals wird das Symbol c angezeigt.
Alle abwählen können Sie nur wählen, wenn mindestens ein Kanal gewählt ist.
Autom. speichern
Weitere Informationen zum Einstellen der Optionen nden Sie auf Seite 11.
Wenn ein Kanal mit der Funktion Kindersicherung gesperrt wurde, wird das Eingabefenster für die PIN geöffnet.
Optionsmenü für Kanallisten (in Programmiert)
Mit dieser Menüoption können Sie eine Vormerkung anzeigen, ändern oder löschen.
Drücken Sie die Taste TOOLS, um das Optionsmenü zu öffnen.
Info ändern: Wählen Sie diese Option, um eine Vormerkung zu ändern.
Programmierung abbrechen: Wählen Sie diese Option, um eine
Vormerkung zu stornieren.
Information: Wählen Sie diese Option, um eine Vormerkung anzuzeigen.
(Sie können auch die Vormerkinformationen auswählen).
Alle wählen: Wählen Sie alle vorgemerkten Programme.
N
N
•
•
N
N
N
N
N
N
Bildeinstellungen
Ändern und Zurücksetzen der Bildeinstellungen
Modus
Sie können den Bildstandard auswählen, der für Ihre Sehgewohnheiten am
besten geeignet ist.
Dynamisch: Wählen Sie diese Option für die Anzeige von
hochauflösenden Fernsehbildern bei starker Umgebungsbeleuchtung aus.
Standard: Wählen Sie diese Option für die optimale Anzeige von
Fernsehbildern bei normaler Umgebungsbeleuchtung aus.
Film: Wählen Sie diese Option für die optimale Anzeige von Filmen in
einem abgedunkelten Zimmer.
Drücken Sie die Taste TOOLS, um das Menü Extras anzuzeigen.
Sie können den Bildmodus durch Auswahl von Extras→Bildmodus
einstellen.
Zellhelligkeit / Kontrast / Helligkeit / Schärfe / Farbe / Farbton(G/R)
Das Gerät verfügt über mehrere Einstellmöglichkeiten für die Bildqualität:
Zellhelligkeit: Zum Anpassen der Pixelhelligkeit. 10 ist die hellste Einstellung.
Kontrast : Hiermit stellen Sie den Kontrast für das Bild ein.
Helligkeit : Hiermit stellen Sie die Helligkeit für das Bild ein.
Schärfe: Hiermit stellen Sie die Kantenauflösung für das Bild ein.
Farbe: Dient zum Anpassen der Farbsättigung des Bilds.
❑
T
❑
Programmiert
1 / 1 / 2008
13:59 5 TV1 Quincy, M.E
18:59 2 TV3 The Equalizer
20:59 2 TV3 McMillan & Wife
21:59 2 TV3 M.Spillane’s mike Hammer
Info ändern
Programmierung abbrechen
Information
Alle wählen
Alle
Kanaltyp
Zoom
Wählen
Option
Information
Modus : Standard
►
Zellhelligkeit : 7
Kontrast : 95
Helligkeit : 45
Schärfe : 50
Farbe : 50
Farbton(G/R) : G50 / R50
Detaileinstellungen
Bild
BN68-01757A-Ger.indb 15 2008-9-24 15:36:46

Deutsch - 16
Farbton(G/R): Hiermit stellen Sie die Farbtemperatur ein.
Wählen Sie zuerst einen Bildmodus zum Anpassen. Die eingestellten Werte werden auf jeden Bildmodus angewendet.
Wenn Sie Änderungen an Zellhelligkeit, Kontrast, Helligkeit, Schärfe, Farbe oder Farbton(G/R) vornehmen, wird das
Bildschirmmenü entsprechend eingestellt.
Sie können die Funktion Farbton im Analog-TV-, Ext.-, AV- oder S-Video-Modus des PAL-Systems nicht verwenden.
Im PC-Modus können Sie nur Zellhelligkeit, Kontrast und Helligkeit einstellen.
Sie können die Einstellungen für jedes externe Gerät festlegen und speichern, das Sie an einen Eingang des Fernsehgeräts
angeschlossen haben.
Die im Betrieb verbrauchte Energiemenge geht deutlich zurück, wenn Sie die Helligkeit des Bildes reduzieren. Damit senken
Sie die Betriebskosten.
Detaileinstellungen
Bei den neuen Fernsehgeräten von Samsung können Sie die Bildeinstellungen
noch genauer anpassen als mit den früheren Modellen. Informationen
Bildeinstellungen im Einzelnen nden Sie nachfolgend.
Detaileinstellungen stehen in den Modi Standard oder Film zur Verfügung.
Im PC-Modus können von den Detaileinstellungen nur Optimalkontrast,
Gamma und Weißabgleich eingestellt werden.
Schwarzabgleich→Aus/Gering/Mittel/Hoch
Sie können den Schwarzwert direkt auf dem Bildschirm auswählen, um die
Bildschirmtiefe anzupassen.
Optimalkontrast→Aus/Gering/Mittel/Hoch
Sie können den Bildschirmkontrast so anpassen, dass ein optimaler Kontrast gewährleistet ist.
Gamma
Sie können die Intensität der Primärfarbe (Rot, Grün und Blau) einstellen.
Farbraum
Der Farbraum ist eine Farbmatrix bestehend aus den Farben Rot, Grün und Blau. Wählen Sie Ihren bevorzugten Farbraum,
um die Welt in den natürlichsten Farben zu erfahren.
Auto: Mit dem Farbraum Auto wird, je nach Programmquelle, der natürlichste Farbton eingestellt.
Nativ: Der native Farbraum ermöglicht tiefe und lebhafte Farbtöne.
Benutzerd: Hiermit stellen Sie den Farbbereich wunschgemäß ein.
Anpassen des Farbraums
Farbe → Rot / Grün / Blau / Gelb / Zyan/Magenta
Hiermit stellen Sie den Farbbereich wunschgemäß ein. Die Option Colour ist verfügbar, wenn der Farbraum auf
Benutzerd. eingestellt ist.
Rot / Grün / Blau: Im Modus Farbe können Sie die RGB-Werte der jeweils ausgewählten Farbe einstellen.
Zurücksetzen: Setzt den Farbbereich auf die Standardwerte zurück.
Weißabgleich
Um natürlichere Bildfarben zu erhalten, können Sie die Farbtemperatur anpassen.
R-Offset/G-Offset/B-Offset/R-Gain/G-Gain/B-Gain: Wenn Sie den Anpassungswert ändern, wird der angepasste
Bildschirm aktualisiert.
Zurücksetzen: Der zuvor angepasste Weißabgleich wird auf die Werkseinstellungen zurückgesetzt.
Hautton
Sie können im Bild den Farbton Rosa (Fleischfarbe) betonen.
Wenn Sie den Anpassungswert ändern, wird der angepasste Bildschirm aktualisiert.
Kantenglättung→Aus/Ein
Sie können die Objektbegrenzungen im Bild betonen.
xvYCC→Aus/Ein
Durch Aktivieren des xvYCC-Modus vergrößern Sie die Detailtreue und den
Farbraum beim Abspielen von Filmen auf einem externen Gerät (d.h. DVD-
Player).
xvYCC ist verfügbar, wenn der Bildmodus auf Film und der externe Eingang
auf HDMI oder Komp. eingestellt ist.
Wenn die xvYCC-Funktion aktiv ist, kann PIP nicht verwendet werden.
Bildoptionen
Im PC-Modus können von den Bildoptionen nur Farbtemp., Format und
Bildschirm-Einbrennschutz eingestellt werden.
N
N
N
N
N
N
❑
N
N
•
•
•
N
-
-
-
-
•
•
N
N
N
❑
N
Farbe : 50
Farbton (G / R) : G50 / R50
Detaileinstellungen ►
Bildoptionen
Zurücksetzen
Bild
Farbton (G / R) : G50 / R50
Detaileinstellungen
Bildoptionen ►
Zurücksetzen
Bild
BN68-01757A-Ger.indb 16 2008-9-24 15:36:46

Deutsch - 17
Farbtemp.→Kalt2/Kalt1/Normal/Warm1/Warm2
Sie können den für Ihre Augen angenehmsten Farbton auswählen.
Die eingestellten Werte werden entsprechend dem jeweils ausgewählten Bild-Modus gespeichert.
Warm1 oder Warm2 werden nur aktiviert, wenn der Bildmodus auf Film eingestellt ist.
Format
Sie können ein Bildformat auswählen, das Ihren Sehgewohnheiten am besten entspricht.
Drücken Sie die Taste TOOLS, um das Menü Extras anzuzeigen. Sie können die Größe durch Auswahl von Extras→
Bildformat einstellen.
Autom. Breite: Mit dieser Option stellen Sie das Bildformat automatisch auf das Seitenverhältnis 16:9 ein.
16:9: Wählen Sie diese Option, um als Bildformat das Seitenverhältnis 16:9 einzustellen (zum Anzeigen von DVDs und
Fernsehsendungen im Breitbildformat).
Breitenzoom: Diese Option vergrößert das Bild auf mehr als 4:3.
Zoom: Wählen Sie diese Option aus, um das 16:9-Breitbild auf die volle Bildschirmbreite zu vergrößern.
4:3: Dies ist die Standardeinstellung zum Anzeigen von Videos und herkömmlichen Fernsehsendungen.
Nur Scan: Mit dieser Funktion wird das ganze Bild auch bei Versorgung mit HDMI- (720p/1080i/1080p) oder
Komponentensignalen (1080i/1080p) vollständig und ohne Beschneidung angezeigt.
Je nach Signalquelle können die Bildgrößenoptionen variieren.
Die verfügbaren Elemente können in Abhängigkeit vom ausgewählten Modus variieren.
Im PC-Modus können nur die Modi 16:9 und 4:3 eingestellt werden.
Sie können die Einstellungen für jedes externe Gerät festlegen und speichern, das Sie an einen Eingang des
Fernsehgeräts angeschlossen haben.
Es kann zu vorübergehender Bildkonservierung kommen, wenn Sie auf dem Gerät mehr als zwei Stunden lang ein
unbewegten Bild angezeigt haben.
Breitenzoom: Wählen Sie durch Drücken der Taste ► die Option Position, und drücken Sie dann die Taste ENTER
E
.
Mit der Taste ▲ oder ▼ können Sie das Bild nach oben oder nach unten verschieben. Drücken Sie dann die Taste ENTER
E
.
Zoom: Wählen Sie durch Drücken der Taste ► die Option Position, und drücken Sie dann die Taste ENTER
E
.
Mit der Taste ▲ oder ▼ können Sie das Bild nach oben oder nach unten verschieben. Drücken Sie dann die Taste
ENTER
E
. Press the ► button to Select Format, then press the ENTER
E
button. Drücken Sie die Tasten ▲ oder
▼, um das Bild in vertikaler Richtung zu vergrößern oder zu verkleinern. Drücken Sie dann die Taste ENTER
E
.
Nach Auswahl von Nur Scan im HDMI (1080i/1080p) oder Komponentenmodus (1080i/1080p): Wählen Sie durch
Drücken der Tasten ◄ oder ► die Option Position. Mit den Tasten ▲, ▼, ◄ oder ► können Sie das Bild verschieben.
Zurücksetzen: Wählen Sie durch Drücken der Tasten ◄ oder ► die Option Zurücksetzen, und drücken Sie dann die
Taste ENTER
E
. Sie können die Einstellung initialisieren.
Wenn Sie die Funktion Nur Scan zusammen mit einem HDMI 720p-Signal verwenden, wird eine Zeile wie bei
Overscan oben, unten, links und rechts abgeschnitten.
Wenn der Modus Double ( , ) im PIP-Modus eingestellt wurde, können Sie die Bildgröße nicht einstellen.
Bildschirmmodus→16:9/Breitenzoom/Zoom/4:3
Wenn Sie die Bildgröße bei einem Fernsehgerät im 16:9-Format auf Autom. Breit einstellen, können Sie bestimmen, dass
das Bild als 4:3 WSS (Breitbilddienst) oder gar nicht angezeigt werden soll. Da jedes europäische Land eine andere Bildgröße
verwendet, können die Benutzer sie damit einstellen.
16:9: Stellt das Bildformat auf den Breitbildmodus 16:9 ein.
Breitenzoom: Diese Option vergrößert das Bild auf mehr als 4:3.
Zoom: Vergrößert das Bild vertikal.
4:3: Stellt das Bildformat auf den Normalmodus 4:3 ein.
Diese Funktion ist im Modus Autom. Breit verfügbar.
Diese Funktion ist im Modus PC, Komp. oder HDMI nicht verfügbar.
DigitaleRM→Aus/Gering/Mittel/Hoch/Auto
Wenn das vom Fernsehgerät empfangene Sendesignal schwach ist, können Sie die digitale Rauschunterdrückung aktivieren,
um ggf. statische Bilder oder Doppelbilder auf dem Bildschirm zu verringern.
Bei schwachem Signal wählen Sie diejenige der anderen Optionen, bei der das beste Bild angezeigt wird.
DNIe→Aus/Demo/Ein
Dieses Fernsehgerät weist die DNIe-Funktion auf und bietet daher hohe Bildqualität. Wenn DNIe eingestellt wird, ist
auf dem Bildschirm die DNIe-Funktion aktiviert. Wenn Sie DNIe auf Demo festlegen, können Sie auf dem Bildschirm zu
Demonstrationszwecken die aktivierte DNIe und ein normales Bild anzeigen. Mit dieser Funktion können Sie den Unterschied
in der Bildqualität sehen.
DNIe™ (Digital Natural Image engine) DNIe™
Mit dieser Funktion erhalten Sie durch 3D-Rauschunterdrückung, Detailverbesserung, Kontrastverstärkung und
verbesserte Weißdarstellung ein schärferes Bild. Der neue Bildausgleichsalgorithmus sorgt für ein helleres, klareres und
viel detailreicheres Bild. Durch die DNIe™-Technologie wird jede Art von Signal an Ihre Sehgewohnheiten angepasst.
Diese Funktion ist im Modus Film und Standard nicht verfügbar.
N
N
T
•
•
•
•
•
•
N
N
N
N
N
N
N
N
N
N
N
•
•
•
•
N
N
N
N
N
BN68-01757A-Ger.indb 17 2008-9-24 15:36:46
Deutsch - 18
HDMI-Schwarzwert→Normal/Gering
Sie können direkt auf dem Bildschirm den Schwarzwert auswählen, um die Bildschirmtiefe anzupassen.
Diese Funktion ist nur bei einer Verbindung des externen Eingangs mit HDMI (RGB-Signal) aktiv.
Real100Hz-Demo→Aus/Ein
Sie erkennen deutlich den Unterschied zwischen Real 100 Hz und 50 Hz, insbesondere bei Sendungen mit schnellen
Bewegungen. Deshalb können Sie, wenn Sie ein Bild mit langsamen Bewegungen betrachten, nicht zwischen Real 100 Hz
und 50 Hz unterscheiden. Demo 100 Hz funktioniert nur zusammen mit einem 50 Hz-Signal. Real 100 Hz wird zusammen mit
speziellen Bildern für Geschäftsdemos verwendet.
MoviePlus→Aus/Gering/Mittel/Hoch/Demo
Selbst in schnellen Szenen werden die Haut natürlicher und der Text klarer angezeigt.
Verwenden Sie bei Spiellmen diese Funktion.
Diese Funktion ist im Modus Breitenzoom und Zoom nicht verfügbar.
Diese Funktion ist nicht verfügbar, wenn PIP aktiviert Ein ist.
Wird im HDMI-Modus mit 1080p/24Hz, 25Hz und 30Hz nicht unterstützt.
Blaumodus→Aus/Ein
Diese Funktion ist für Experten zum Ausmessen von AV-Geräten bestimmt. Mit dieser Funktion werden das rote und das
grüne Signal aus dem Videosignal entfernt, sodass nur das blaue Signal angezeigt wird. Damit wird ein Blaulter erzeugt,
mithilfe dessen die Farbe und der Farbton von Videogeräten wie DVD-Playern, Heimkinosystemen usw. eingestellt
werden können. Mit dieser Funktion können Sie die Farbe und den Farbton auf Werte einstellen, die dem Signalpegel der
verschiedenen Videogeräte angemessen sind. Verwenden Sie hierzu die Streifenmuster für die Farben Rot/Grün/Blau/Zyan/
Magenta/Gelb, ohne zusätzlich den Blaulter zu verwenden.
Der Blaumodus ist verfügbar, wenn der Bildmodus auf Film oder Standard eingestellt ist.
Einbrennschutz
Dieses Gerät ist mit Einbrennschutz-Technologie ausgestattet, um die Möglichkeit des Einbrennens des Monitorbildes zu verringern. Diese
Technologie ermöglicht das Einstellen von vertikalen (Pixel vertikal) und horizontalen (Pixel horizontal) Bildbewegungen. Die Zeiteinstellung
ermöglicht das Programmieren der Dauer zwischen Bildbewegungen in Minuten.
Pixel-Shift: Diese Funktion verschiebt Pixel auf dem Plasmabildschirm horizontal oder vertikal, um die Möglichkeit des
Einbrennens des Bildes zu minimieren.
Schalten Sie über die Tasten ▲ oder ▼ die Pixel-Shift-Funktion Ein, und drücken Sie dann die Taste ENTER.
Wählen Sie mit den Tasten ▲ oder ▼ die gewünschte Option aus, und drücken Sie dann die Taste ENTER.
Verfügbare Optionen: Pixel horizontal, Pixel vertikal, Zeit
Optimale Einstellung für Pixel Shift:
PC TV/Ext/AV/Komp./
HDMI/DTV
Pixel horizontal 4 4
Pixel vertikal 4 4
Zeit (Minuten) 4 2 min
Der Pixel Shift-Wert kann in Abhängigkeit von der Monitorgröße (Zoll) und dem ausgewählten Modus variieren.
Diese Funktion ist im Modus Nur Scan nicht verfügbar.
Vollweiß: Diese Funktion dient zum Entfernen von Nachbildern auf dem Bildschirm, indem sie die Farbe aller Pixel in
Weiß ändert. Verwenden Sie diese Funktion, wenn Nachbilder oder -symbole auf dem Bildschirm angezeigt werden. Diese
können insbesondere dann auftreten, wenn auf dem Bildschirm über längere Zeit ein Standbild angezeigt wurde.
Blättern: Diese Funktion dient zum Entfernen von Nachbildern auf dem Bildschirm, indem alle Pixel des Plasmabildschirms
nach einem bestimmten Muster verschoben werden. Verwenden Sie diese Funktion, wenn Nachbilder oder -symbole auf
dem Bildschirm angezeigt werden. Diese können insbesondere dann auftreten, wenn auf dem Bildschirm über längere Zeit
ein Standbild angezeigt wurde.
Seitenbalken: Sie verhindern bei Anzeige im Format 4:3 Beschädigungen des Bildschirms, indem Sie einen Weißabgleich
an den beiden linken Bildschirmrändern vornehmen.
Dunkel: Bei Anzeige im Format 4:3 werden die beiden seitlichen Bildschirmränder abgedunkelt.
Hell: Bei Anzeige im Format 4:3 werden die beiden seitlichen Bildschirmränder aufgehellt.
Zurücksetzen→ResetBildmodus/Abbrechen
Setzt alle Bildeinstellungen auf die Standardwerte zurück.
Wählen Sie zuerst einen Bildmodus zum Zurücksetzen. Die Reset-Funktion wird für jeden Bildmodus durchgeführt.
N
N
N
N
N
N
•
N
N
N
N
N
N
•
•
•
-
-
❑
N
BN68-01757A-Ger.indb 18 2008-9-24 15:36:46
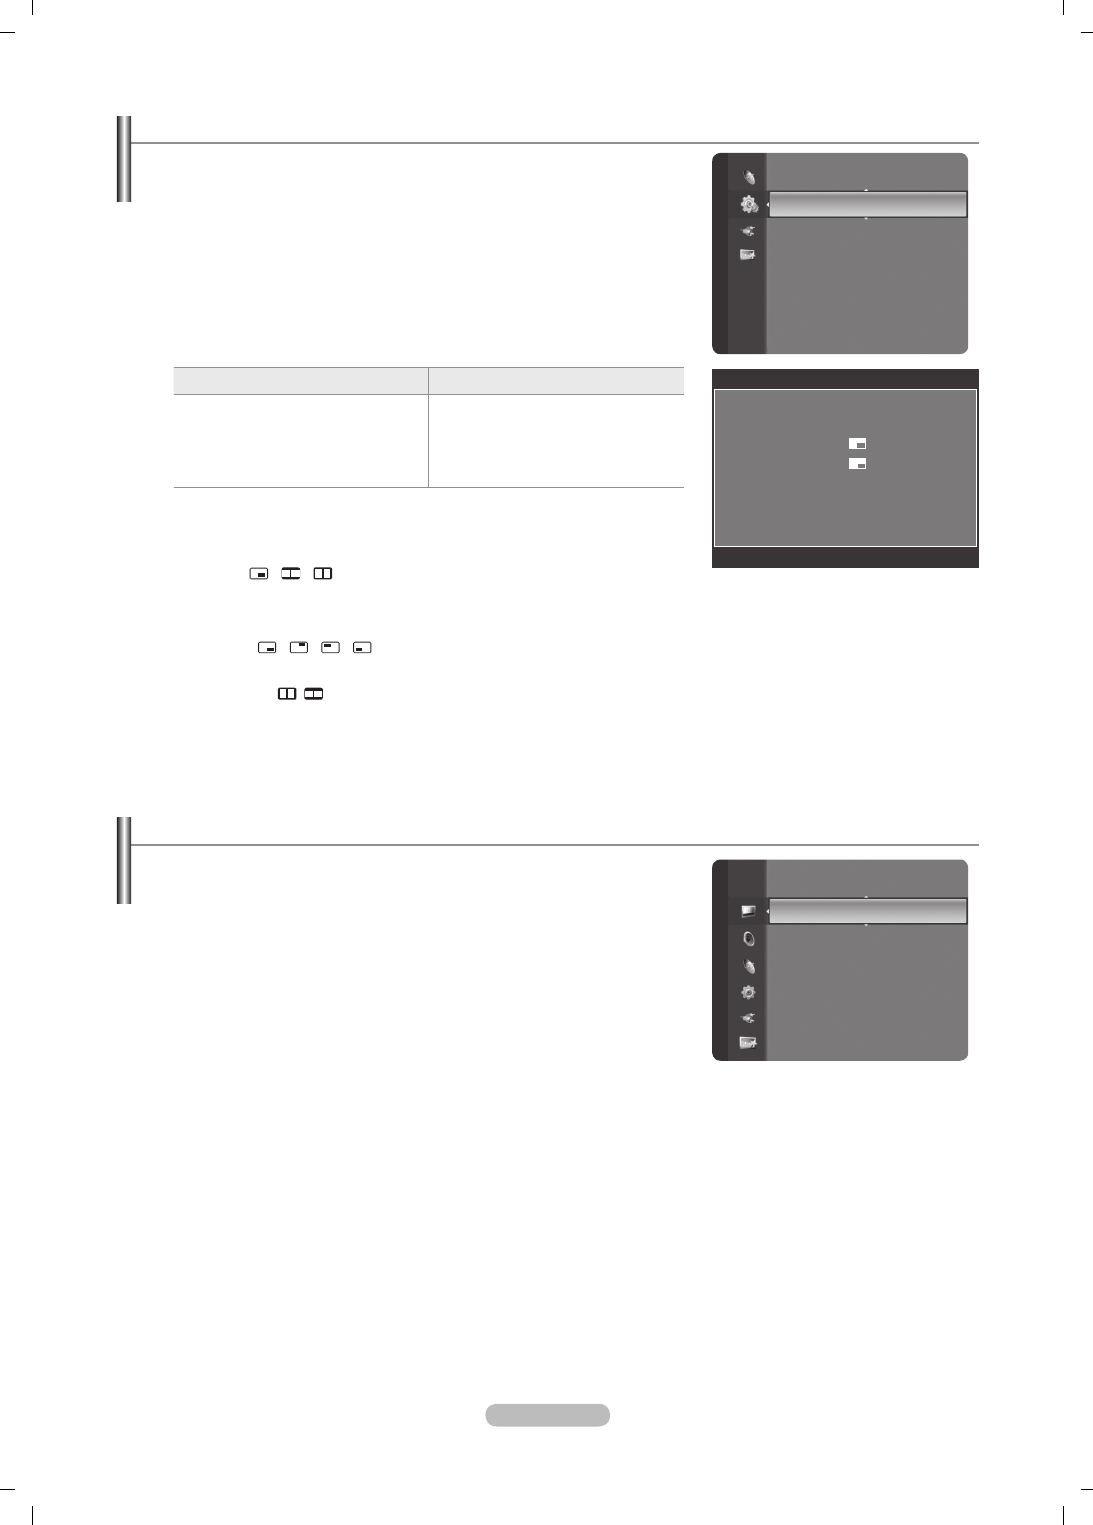
Deutsch - 19
Verwenden der Bild-in-Bild-Funktion (PIP)
Sie können innerhalb des Hauptbildes (Fernsehsendung oder Video) ein PIP-Bild
einblenden. Dadurch können Sie gleichzeitig eine Fernsehsendung oder ein Video
von einem angeschlossenen Gerät im Auge behalten.
Möglicherweise wirkt das Bild im PIP-Fenster leicht unnatürlich, wenn Sie den
Hauptbildschirm zum Anzeigen von Spielen oder für Karaoke verwenden.
Drücken Sie die Taste TOOLS, um das Menü Extras anzuzeigen. Sie können
die PIP-Einstellungen durch Auswahl von Extras→PIP anpassen.
PIP→Aus/Ein
Sie können die PIP-Funktion aktivieren oder deaktivieren.
Hauptbild Nebenbild
Komp.
HDMI 1, HDMI / DVI 2, HDMI 3,
HDMI 4
PC
TV, Ext.1, Ext.2, AV
Quelle
Wählen Sie eine Signalquelle für das PIP-Bild.
Format→ / /
Sie können die Größe für das PIP-Bild auswählen.
Wenn sich das Hauptbild im HDMI-Modus bendet, steht die Funktion Format zur Verfügung.
Position→ / / /
Sie können die Position für das PIP-Bild auswählen.
Im Modus ( , ) Double kann Position nicht gewählt werden.
Sender
Sie können nur dann einen Kanal für das PIP-Bild auswählen, wenn Quelle auf TV eingestellt ist.
Drücken Sie die Taste TOOLS, um das Menü Extras anzuzeigen.
Sie können den Bildmodus durch Auswahl von Extras→PIPeinstellen.
N
T
❑
N
N
T
Einstellungen
Entertainment : Aus
Energiesparmod. : Aus
PIP ►
Software Upgrade
Common Interface
PIP
PIP : Ein
Quelle : TV
Format :
Position :
Kanal : ATV 11
L
Navig.
E
Eingabe
R
Zurück
Fernsehgerät mithilfe des PCs einstellen
Voreinstellung: Drücken Sie die Taste Quelle, um den Modus „PC“ einzustellen.
Auto Einstellung
Die automatische Einstellung ermöglicht eine automatische Anpassung des
PC-Monitors an das eingehende PC-Videosignal. Die Werte für Fein, Grob und
position werden automatisch eingestellt.
Diese Funktion ist im DVI-HDMI-Modus nicht verfügbar.
Drücken Sie die Taste TOOLS, um das Menü Extras anzuzeigen. Sie
können die automatische Einstellung durch Auswahl von Extras→Autom.
Einstellung durchführen.
Fenster
Grob / Fein: Durch das Einstellen der Bildqualität können Bildstörungen und Rauschen beseitigt oder verringert
werden. Falls sich Bildrauschen durch die Feinabstimmung allein nicht beheben lässt, stellen Sie zunächst die
Frequenz möglichst genau ein (Grob). Führen Sie dann erneut eine Feinabstimmung durch. Nachdem Sie das
Bildrauschen durch die Grob- und Feinabstimmung des Bildes verringert haben, stellen Sie die Position des Bildes so
ein, dass es auf dem Bildschirm zentriert ist.
PC-Position: Passen Sie die Position des PC-Bilds an, wenn es nicht auf das Fernsehbild passt. Stellen Sie mit den
Tasten ▲ oder ▼ die vertikale Position ein. Stellen Sie mit den Tasten ▲ oder ▼ die horizontale Position ein.
Bild zurücksetzen: Sie können alle Bildeinstellungen auf die werkseitig eingestellten Ausgangswerte zurücksetzen.
N
❑
N
T
❑
Helligkeit : 45
Schärfe : 50
Autom. Einstellung
►
Fenster
Detaileinstellungen
Bildoptionen
Zurücksetzen
Bild
BN68-01757A-Ger.indb 19 2008-9-24 15:36:47
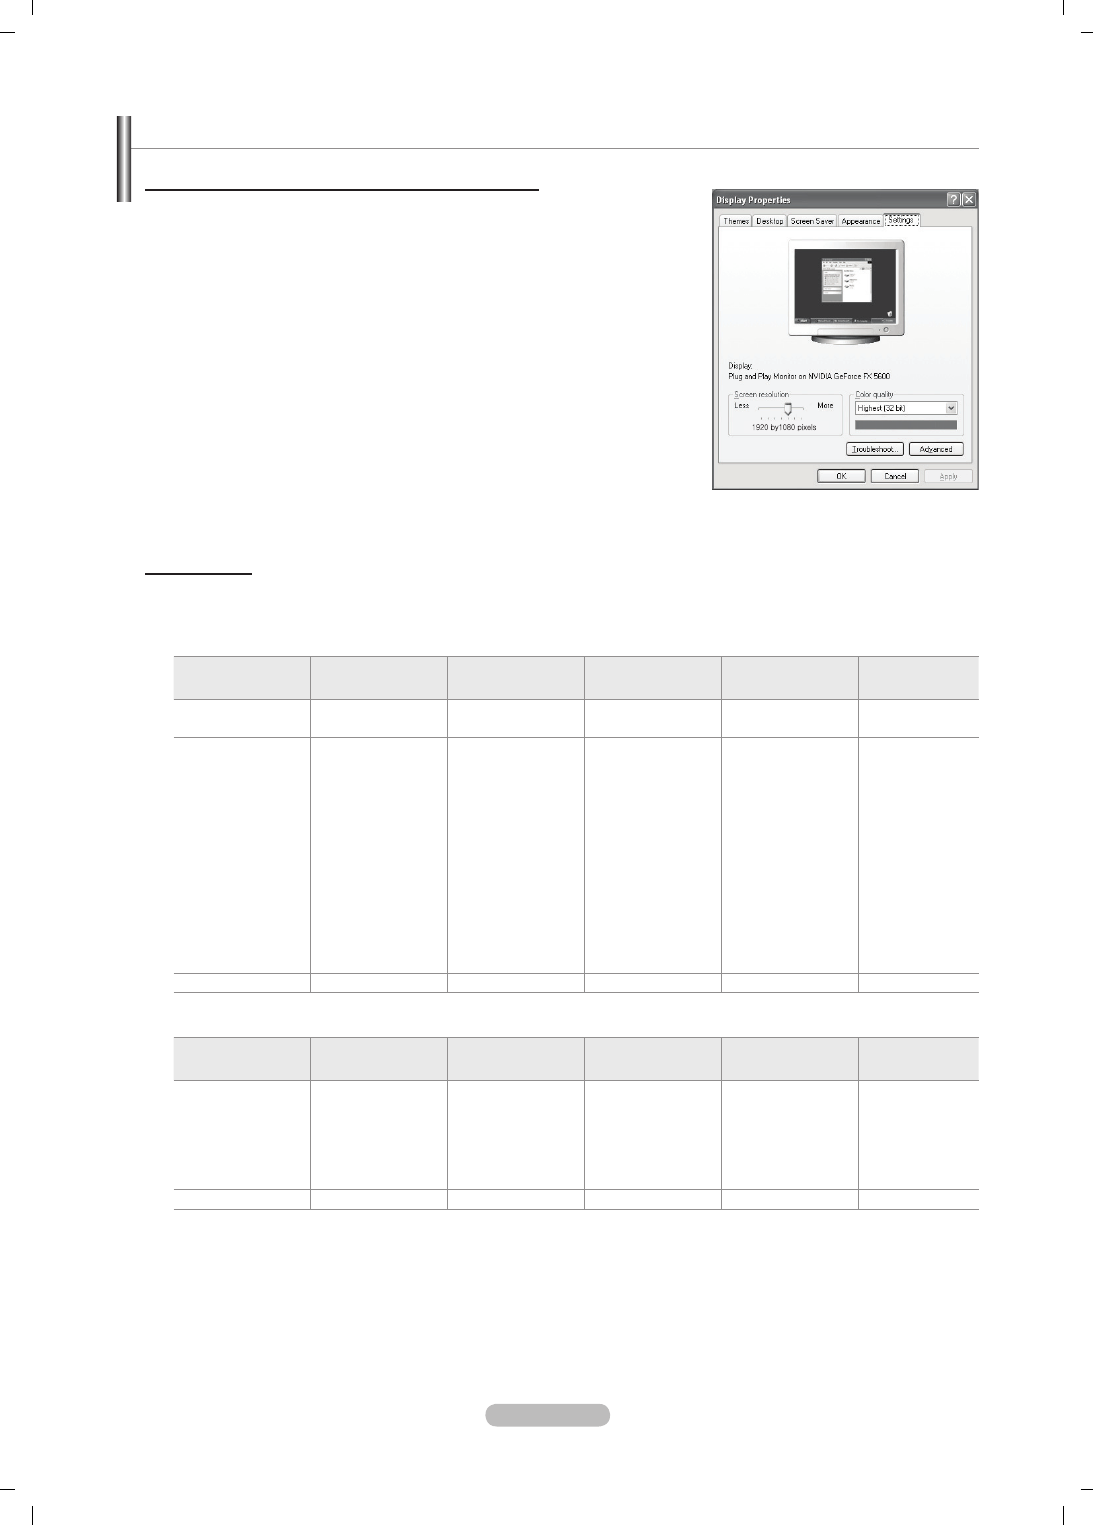
Deutsch - 20
PC-Anzeige
Installieren der PC-Software (unter Windows XP)
Im Folgenden sind die Windows-Anzeigeeinstellungen für die meisten Computer
aufgeführt. Die Bildschirmseiten, die von Ihrem PC angezeigt werden, entsprechen
je nach installierter Windows-Version und verwendeter Grakkarte möglicherweise
nicht genau der Abbildung. Trotzdem sind die hier beschriebenen Informationen zur
Einrichtung für fast alle Betriebssysteme anwendbar. (Wenden Sie sich andernfalls
an den Computerhersteller oder Samsung-Händler.)
1. Klicken Sie im Startmenü von Windows auf „Systemsteuerung“.
2. Wenn das Fenster „Systemsteuerung“ angezeigt wird, klicken Sie auf
„Darstellung und Designs“. Ein Dialogfeld wird geöffnet.
3. Wenn das Fenster der Systemsteuerung angezeigt wird, klicken Sie auf
„Anzeige“. Anschließend wird ein Dialogfeld angezeigt.
4. Klicken Sie nun im Dialogfeld Anzeige auf die Registerkarte „Einstellungen.“
Die korrekten Einstellungen für die Bildschirmauösung:
Optimal: 1920 x 1080 Pixel
Wenn das Dialogfeld eine Option für die Bildschirmfrequenz enthält, muss als
Einstellung 60 oder 60 Hz ausgewählt werden. Andernfalls klicken Sie einfach auf OK, um das Dialogfeld zu schließen.
Anzeigemodi
Bildschirmposition und -größe hängen vom Typ des PC-Monitors und seiner Auösung ab.
Bei den in der Tabelle angegebenen Auösungen handelt es sich um die empfohlenen Auösungen.
D-Sub-Eingang
Modus Auösung Horizontalfrequenz
(kHz)
Vertikalfrequenz
(Hz) Pixeltakt (MHz) Synchronisation
spolarität (H/V)
IBM 640 x 350
720 x 400
31.469
31.469
70.086
70.087
25.175
28.322
+ / -
- / +
VESA
640 x 480
640 x 480
640 x 480
800 x 600
800 x 600
800 x 600
1024 x 768
1024 x 768
1024 x 768
1280 x 1024
1280 x 1024
1360 x 768
1600 x 1200
31.469
37.861
37.500
37.879
48.077
46.875
48.363
56.476
60.023
63.981
79.976
47.712
75.000
59.940
72.809
75.000
60.317
72.188
75.000
60.004
70.069
75.029
60.020
75.025
60.015
60.000
25.175
31.500
31.500
40.000
50.000
49.500
65.000
75.000
78.750
108.000
135.000
85.500
162.000
- / -
- / -
- / -
+ / +
+ / +
+ / +
- / -
- / -
+ / +
+ / +
+ / +
+ / +
+ / +
CVT 1920 x 1080RB 66.587 59.934 138.500 + / -
HDMI/DVI-Eingang
Modus Auösung Horizontalfrequenz
(kHz)
Vertikalfrequenz
(Hz) Pixeltakt (MHz) Synchronisation
spolarität (H/V)
VESA
640 x 480
800 x 600
1024 x 768
1280 x 1024
1360 x 768
1600 x 1200
31.469
37.879
48.363
63.981
47.712
75.000
59.940
60.317
60.004
60.020
60.015
60.000
25.175
40.000
65.000
108.000
85.500
162.000
- / -
+ / +
- / -
+ / +
+ / +
+ / +
CEA 1920 x 1080p 67.500 60.000 148.500 + / +
Eine Verbindung über HDMI/DVI-Kabel kann nur über HDMI IN 2 erfolgen.
Das Zeilensprungverfahren wird nicht unterstützt.
Das Fernsehgerät funktioniert möglicherweise nicht ordnungsgemäß, wenn kein Standardmodus ausgewählt wird.
Separate- und Composite-Modus werden unterstützt. SOG wird nicht unterstützt.
Ein zu langes oder qualitativ geringwertiges VGA-Kabel kann in hochauösenden Modi (1920 x 1080) zu Bildrauschen
führen.
N
N
N
N
N
BN68-01757A-Ger.indb 20 2008-9-24 15:36:47
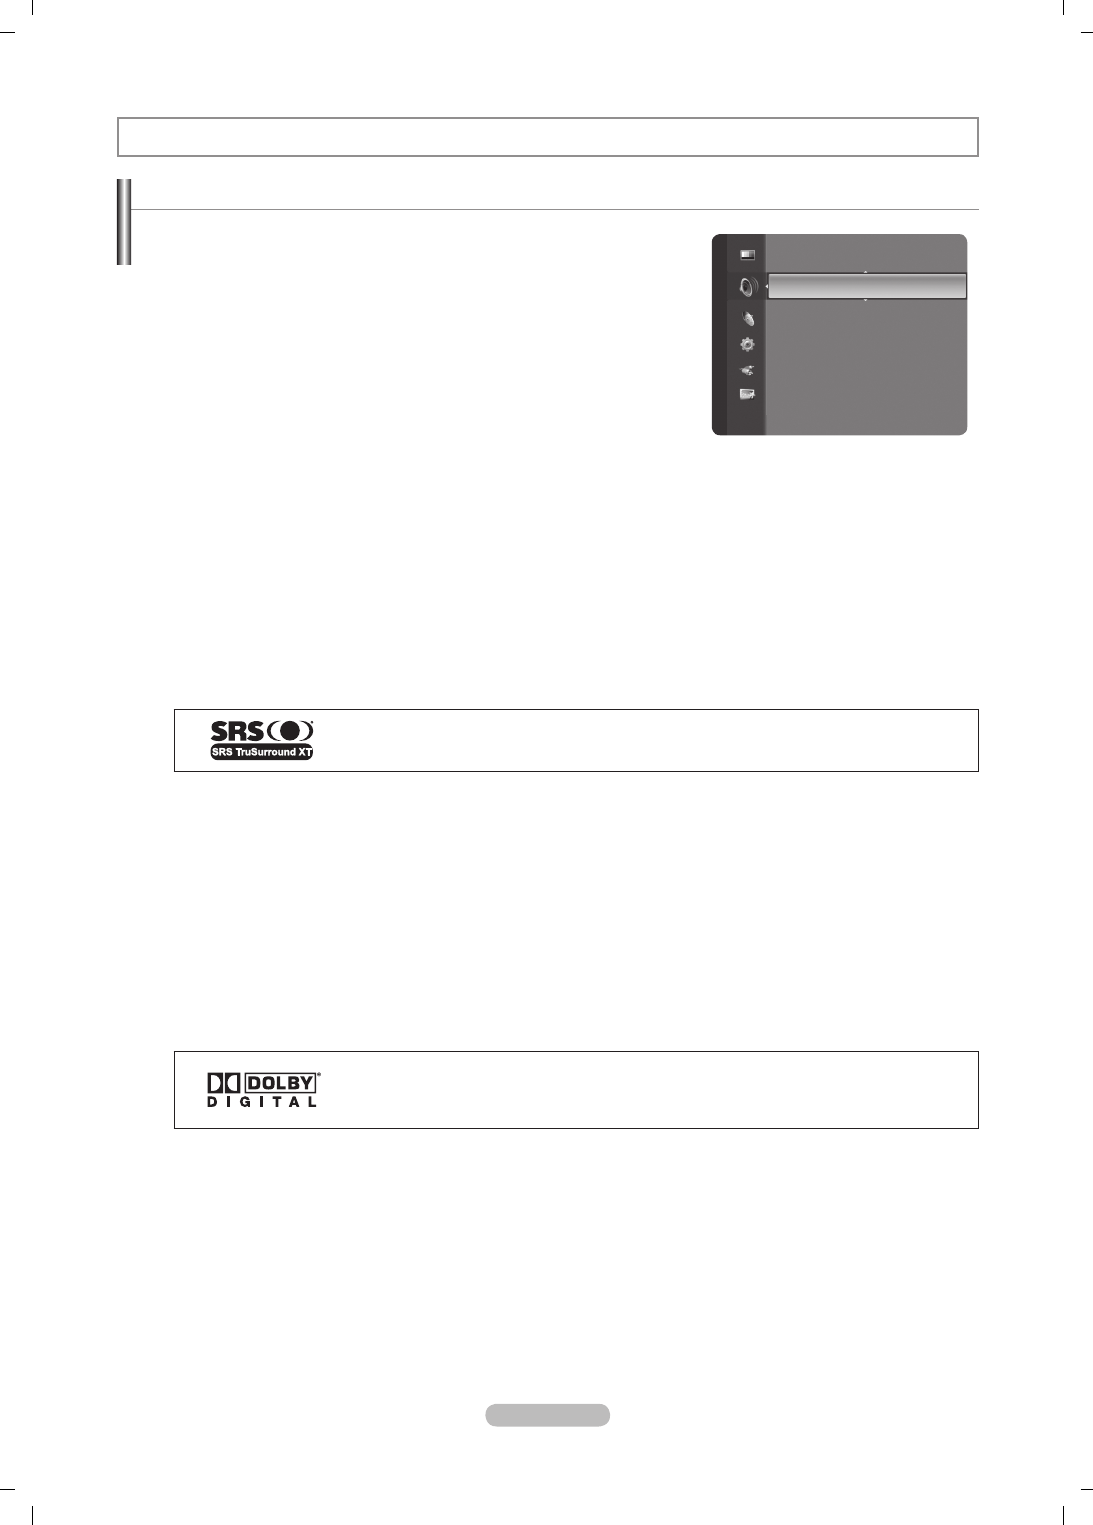
Deutsch - 21
Toneinstellungen
Tonstandard wählen
Modus→Standard/Musik/Film/Sprache/Benutzerd.
Stellen Sie den Audiomodus ein, der am besten zur jeweiligen Sendung passt.
Drücken Sie die Taste TOOLS, um das Menü Extras anzuzeigen.
Sie können den Tonmodus durch Auswahl von Extras→Tonmodus
kongurieren.
Equalizer
Sie können den Ton Ihrem persönlichen Geschmack anpassen.
Modus: Sie können einen Audiomodus gemäß Ihrem persönlichen
Geschmack einstellen.
Balance: Steuert die Balance zwischen dem linken und dem rechten Lautsprecher.
100Hz / 300Hz / 1kHz / 3kHz / 10kHz (Einstellen der Bandbreite): Zum Einstellen der unterschiedlichen
Bandbreitenfrequenzen.
Zurücksetzen: Setzt die Equalizereinstellungen auf die Standardwerte zurück.
SRSTruSurroundXT→Ein/Aus
TruSurround XT ist eine patentierte SRS-Technologie, die das Problem des Abspielens von 5.1-Mehrkanalinhalten über
zwei Lautsprecher löst. Mit TruSurround kommen Sie mit jedem Stereo-System mit zwei Lautsprechern, auch den internen
Gerätelautsprechern, in den Genuss überzeugender Virtual Surround-Effekte. Es ist vollständig kompatibel mit allen
Mehrkanalformaten.
Drücken Sie die Taste TOOLS, um das Menü Extras anzuzeigen.
Sie können außerdem durch Auswahl von Extras→SRSTSXT SRS TruSurround XT anpassen.
TruSurround XT, SRS und das Symbol sind Marken von SRS Labs, Inc. Das TruSurround
XT-Verfahren wird in Lizenz von SRS Labs, Inc. verwendet.
Audiosprache
Sie können die Standardsprache für Audio ändern. Zeigt die Sprachinformationen für den eingehenden Audiostream an.
Während Sie ein digitales Programm anschauen, können Sie diese Funktion auswählen.
Sie können nur Sprachen auswählen, die auch tatsächlich übertragen werden.
AudiofürSehgeschädigte→MPEG/DolbyDigital
Wenn Sie für die Tonausgabe sowohl den Hauptlautsprecher als auch den Audioreceiver verwenden, kann es aufgrund der
Geschwindigkeitsunterschiede beim Dekodieren durch die beiden Systeme zu einem Echoeffekt kommen. Verwenden Sie in
diesen Fall die TV-Lautsprecher.
Während Sie ein digitales Programm anschauen, können Sie diese Funktion auswählen.
Sie können nur Sprachen auswählen, die auch tatsächlich übertragen werden.
Hergestellt unter Lizenz von Dolby Laboratories. Dolby sowie das Doppel-D-Symbol sind
Warenzeichen der Dolby® Laboratories.
Audio-Beschreibung
Dies ist eine zusätzliche Audiofunktion, mit der für sehbehinderte Personen eine zusätzliche Tonspur wiedergegeben wird.
Diese Funktion verarbeitet den Audiostream für die AB (Audio-Beschreibung), sofern diese vom Sender zusammen mit dem
Vordergrundton übertragen wird. Der Benutzer kann die Audio-Beschreibung aktivieren oder deaktivieren und die Lautstärke
einstellen.
AudiofürSehgeschädigte→Aus/Ein: Hiermit schalten Sie die Funktion für Audiobeschreibungen ein und aus.
Lautstärke: Hiermit stellen Sie die Lautstärke der Audiobeschreibungen ein.
Lautstärke ist aktiv, wenn Audio für Sehgeschädigte aktiviert Ein ist.
Während Sie ein digitales Programm anschauen, können Sie diese Funktion auswählen.
❑
T
❑
❑
T
❑
N
N
❑
N
N
❑
N
N
Modus : Benutzerd.
►
Equalizer
SRS TruSurround XT : Aus
Audioformat : ----
Audio für Sehgeschädigte
: ----
Audio für Sehgeschädigte
Auto. Lautst. : Aus
Lautsprecher auswählen : TV-Lautsprecher
Sound
BN68-01757A-Ger.indb 21 2008-9-24 15:36:48

Deutsch - 22
Auto.Lautst.→Aus/Ein
Aufgrund unterschiedlicher Signalbedingungen unterscheiden sich
Fernsehsender in der Lautstärke, so dass es erforderlich sein kann, die
Lautstärke beim Umschalten zwischen Sendern jedes Mal nachzuregeln.
Mit der Funktion für automatische Lautstärkeeinstellung wird die Lautstärke
automatisch bei starkem Modulationssignal verringert und bei schwachem
Modulationssignal erhöht.
Lautsprecherauswählen→Ext.Lautsprecher/TV-
Lautsprecher
Wenn Sie den Ton über separate Lautsprecher hören möchten, deaktivieren Sie den internen Verstärker.
Die Tasten – +, MUTE funktionieren nicht, wenn der TV-Lautsprecher des Geräts ausgeschaltet Aus ist.
Wenn Sie im Menü Lautsprecher auswählen die Option Ext. Lautsprecher wählen, werden die Audioeinstellungen
eingeschränkt.
Eingebauter Lautsprecher des Fernsehgeräts Audioausgang (Optisch, L/R-Out) zum Soundsystem
TV / Ext. / AV / S-Video / Komp. / PC / HDMI TV / Ext. / AV / S-Video / Komp. / PC / HDMI
TV-Lautsprecher Lautsprecherausgang Audioausgang
Ext. Lautsprecher Mute Audioausgang
Kein Videosignal Mute Mute
Ton Wählen
Wenn die PIP-Funktion aktiviert ist, können Sie den Ton des PIP-Bildes wiedergeben.
Hauptsender: Verwenden Sie diese Option, um den zum Hauptbild gehörenden Ton wiederzugeben.
PIP-sender: Verwenden Sie diese Option, um den zum PIP-Bild gehörenden Ton wiederzugeben.
Drücken Sie die Taste TOOLS, um das Menü Extras anzuzeigen.
Sie können den Ton des PIP-Bilds durch Auswahl von Extras→PIP→Tonwählen einstellen.
Ton zurücksetzen
Alle zurücksetzen / Reset Tonmodus / Abbrechen: Sie können alle Audioeinstellungen wieder auf die
Werkseinstellungen zurücksetzen.
❑
❑
N
N
❑
T
❑
Tonmodus wählen
Sie können den Tonwiedergabemodus im Menü Extras wählen. Wenn Sie Dual l ll
einstellen, wird der aktuelle Tonwiedergabemodus auf dem Bildschirm abgebildet.
Art der Sendung Bildschirmanzeige
NICAM
Stereo
Standardsendung
(Standardtonwiedergabe) Mono (normale Verwendung)
Standard und NICAM-
Mono NICAM Mono
(Normal)
NICAM-Stereo NICAM
Stereo Mono
(Normal)
NICAM Dual-I/II NICAM
Dual-1
NICAM
Dual-2
Mono
(Normal)
A2
Stereo
Standardsendung
(Standardtonwiedergabe) Mono (normale Verwendung)
Zweisprachig oder Dual-I/
II Dual I Dual II
Stereo Stereo
Mono
(Mono
erzwungen)
Falls das Stereosignal schwach ist und automatisch umgeschaltet wird, sollten Sie zu mono wechseln.
Diese Funktion ist nur bei einem Stereosignal aktiviert. Bei Monosignalen ist es deaktiviert.
Diese Funktion ist nur im TV-Modus verfügbar.
N
N
N
Extras
Anynet+ (HDMI-CEC)
Bildformat : Autom. Breit
Bildmodus : Standard
Tonmodus : Benutzerd.
Sleep-Timer : Aus
SRS TS XT : Aus
Energiesparmod. : Aus
Dual l ll ◄ Mono ►
U
Navig.
L
Einstellen
e
Beenden
Lautsprecher auswählen : TV-Lautsprecher
Ton wählen : Hauptsender
Tonzurücksetzen ►
Sound
BN68-01757A-Ger.indb 22 2008-9-24 15:36:48

Deutsch - 23
KongurierenderMenüeinstellungen
Sprache
Sie können die Menüsprache festlegen.
Kindersicherung→Aus/Ein
Mit dieser Funktion können Sie nicht autorisierte Benutzer, z. B. Kinder, daran
hindern ungeeignete Programme anzuschauen, indem das Bild blockiert und
der Ton stummgeschaltet wird.
Ehe das Einstellungsfenster angezeigt wird, wird das Fenster zur Eingabe
der PIN geöffnet. Geben Sie nun Ihre vierstellige PIN ein.
Der Standard-PIN-Code eines neuen Fernsehgeräts lautet 0000. Sie
können die PIN ändern, indem Sie im Menü den Befehl PIN ändern
wählen.
Sie können einige der Kanäle in der Kanalliste sperren. (Informationen hierzu nden Sie auf Seite 14)
Kindersicherung: Diese Funktion ist nur im PC-Modus verfügbar.
PIN ändern
Sie können Ihre zum Einrichten des Fernsehgeräts benötigte persönliche Kennnummer ändern.
Ehe das Einstellungsfenster angezeigt wird, wird das Fenster zur Eingabe der PIN geöffnet. Geben Sie nun Ihre
vierstellige PIN ein.
Der Standard-PIN-Code eines neuen Fernsehgeräts lautet 0000.
Wenn Sie den PIN-Code vergessen haben, drücken Sie die Fernbedienungstasten in der angegebenen Reihenfolge, um
die PIN auf 0-0-0-0 zurückzusetzen: POWER (Aus), MUTE, 8, 2, 4, POWER (Ein).
Sicherungsstufe→Altersbeschränkung
Mit dieser Funktion können Sie nicht autorisierte Benutzer, z. B. Kinder, daran hindern, ungeeignete Programme
anzuschauen. Hierzu verwenden Sie eine benutzerdenierte vierstellige PIN.
Kongurieren Sie im Fenster Altersbeschränkung die Altersbeschränkungen.
Ehe das Einstellungsfenster angezeigt wird, wird das Fenster zur Eingabe der PIN geöffnet. Geben Sie nun Ihre
vierstellige PIN ein.
Der Standard-PIN-Code eines neuen Fernsehgeräts lautet 0000. Sie können die PIN ändern, indem Sie im Menü den
Befehl PIN ändern wählen.
Nachdem die Altersbeschränkungen eingestellt sind, wird das Symbol “
\
” angezeigt.
Alle zul.: Drücken Sie diese Taste, um alle Altersbeschränkungen aufzuheben.
Keine zul.: Drücken Sie diese Taste, um alle Altersbeschränkungen zu aktivieren.
Untertitel
Sie können Untertitel aktivieren und deaktivieren. Mit diesem Menü legen Sie den Untertitelmodus fest. Die Menüoption
Normal ist die Basisoption für Untertitel, und die Option Schwerhörig ist für hörgeschädigte Personen bestimmt.
Untertitel→Ein/Aus: Untertitel aktivieren oder deaktivieren.
Modus→Nor
mal / Schwerhörig: Festlegen des Untertitelmodus
Untertitel Sprache: Festlegen der Untertitelsprache
Wenn das Programm, das Sie gerade sehen, die Funktion Schwerhörig nicht unterstützt, wird selbst bei ausgewählter
Funktion Schwerhörig automatisch die Funktion Normal aktiviert.
Englisch ist der Standardwert in Fällen, wo die ausgewählte Sprache für die Sendung nicht verfügbar ist.
Sie können diese Optionen auswählen, indem Sie einfach die Taste SUBT. auf der Fernbedienung drücken.
Teletext-Sprache
Sie können die Videotextsprache durch Auswählen des Sprachtyps einstellen.
Englisch ist der Standardwert in Fällen, wo die ausgewählte Sprache für die
Sendung nicht verfügbar ist.
❑
❑
N
N
N
N
❑
N
N
N
❑
-
N
N
N
N
❑
N
N
N
❑
N
Funktionsbeschreibung
Einstellungen
Plug & Play
Sprache :Deutsch ►
Zeit
Auswahl des netzwerks : Kabel
Drahtlos-Netzwerk einriohten
Kabelnetzwerk einrichten
Kindersicherung : Ein
PIN ändern
Sicherungsstufe
BN68-01757A-Ger.indb 23 2008-9-24 15:36:48

Deutsch - 24
Voreinstellung
Primäre Audiosprache / Sekundäre Audiosprache / Primäre Untertitelsprache / Sekundäre Untertitelsprache /
Primäre Videotextsprache / Sekundäre Videotextsprache
Mit dieser Funktion können Sie eine der verfügbaren Sprachen wählen. Die hier gewählte Sprache ist die Standardsprache,
wenn der Benutzer einen Kanal auswählt.
Wenn Sie die Spracheinstellung ändern, werden die Untertitelsprache, die Audiosprache und die Videotextsprache im Menü
Sprache automatisch in die gewünschte Sprache geändert.
Mit den Untermenüs für die Untertitelsprache, Audiosprache und Videotextsprache im Menü Sprache zeigen Sie eine
Liste der vom aktuellen Kanal unterstützten Sprachen an, und die aktuelle Auswahl wird hervorgehoben. Wenn Sie die
Spracheinstellung ändern, gilt die neue Auswahl nur für den aktuellen Kanal. Die geänderte Einstellung hat keinen Einuss auf
die Einstellung der Untertitelsprache, Audiosprache und Teletext-Sprache im Menü Voreinstellung.
Digitaltext→Deaktivieren/Aktivieren
Wenn das Programm mit Digitaltext gesendet wird, ist diese Funktion aktiviert.
MHEG (Multimedia and Hypermedia Information Coding Experts
Group)
Ein internationaler Standard für Datenkompressionssysteme für MulZeitdia-
und Hypermedia-Anwendungen. Dies ist ein höheres Niveau als das
MPEG-System, das solche datenverknüpfenden Hypertextmedien
wie Standbilder, Zeichendienst, Animations-, Grak- und Videodateien
sowie Multimediadateien umfasst. MHEG ist eine Technologie für
Laufzeitinteraktion mit dem Benutzer, und sie wird auf verschiedenen
Gebieten verwendet, z. B. VOD (Video-On-Demand), ITV (Interactive TV),
EC (Electronic Commerce), Teleweiterbildung, Telekonferenzen, digitale
Bibliotheken und Netzwerkspiele.
Lichteffekt→Aus/Standby/TVModusAn/Ein
Sie können die blaue LED an der Vorderseite des Fernsehgeräts je nach Wunsch an- bzw. abschalten. Schalten Sie sie ab,
wenn Sie Energie sparen möchten oder die LED Ihre Augen stört.
Aus: Die blaue LED ist immer aus.
Standby: Die blaue LED leuchtet im Standby-Modus und wird beim Anschalten des Fernsehgeräts ausgeschaltet.
TV Modus An: Die blaue LED leuchtet bei angeschaltetem Fernsehgerät und wird beim Ausschalten abgeschaltet.
Ein: Die blaue LED leuchtet immer.
Stellen Sie diesen Lichteffekt aus, um den Stromverbrauch zu reduzieren.
Melodie
Aus/Gering/Mittel/Hoch
Sie können die Melodie auswählen, die beim Ein- und Ausschalten des Fernsehers abgespielt wird.
Die Melodie wird nicht abgespielt.
Das Fernsehgerät gibt keinen Ton aus, weil die MUTE-Taste gedrückt wurde.
Das Fernsehgerät gibt keinen Ton aus, weil die Taste – (Lautstärke) gedrückt wurde.
Das Fernsehgerät wurde mit dem Seep-Timer ausgeschaltet.
Entertainment
Im Modus Entertainment können Sie die optimale Anzeige und den optimalen Ton für Sport, Kinolme und Spiele auswählen.
Aus: Deaktivieren der Funktion Entertainment.
Sport: Hiermit erzielen Sie optimale Bild- und Tonqualität für Sport.
Kino: Hiermit erzielen Sie optimale Bild- und Tonqualität für Kinolme. Farbe und Ton sind detailreicher und ansprechender.
Spiel: Hiermit erzielen Sie optimale Bild- und Tonqualität für Spiele. In diesem Modus können Sie die Spielgeschwindigkeit
erhöhen, wenn Sie eine externe Spielkonsole an Ihr Fernsehgerät anschließen.
Wenn Sie einen der drei Modi von Entertainment aktivieren, werden die Einstellungen gesperrt und können nicht verändert
werden. Außerdem sind Bild- und Toneinstellungen nicht zulässig. Wenn Sie Änderungen am Bild- und Tonmodus vornehmen
möchten, müssen Sie den Modus Entertainment deaktivieren.
Die Einstellungen für Entertainment werden für jede Signalquelle gespeichert.
Der Entertainment-Modus ist im PC-Modus nicht aktiviert..
Sie können auch mehrmals die Taste E.MODE auf der Fernbedienung drücken,
um eine der Einstellungen für Entertainment zu ändern.
❑
❑
N
❑
N
❑
N
-
-
-
❑
N
N
N
N
Einstellungen
Videotext-Sprache : ----
Voreinstellung
Digitaltext :Aktivieren ►
Lichteffekt : TV Modus An
Wall-Mount Adjustment
Melodie : Aus
Entertainment : Aus
Energiesparmod. : Aus
PIP
Software Upgrade
BN68-01757A-Ger.indb 24 2008-9-24 15:36:49

Deutsch - 25
Energiesparmodus
Mit dieser Funktion stellen Sie die Helligkeit des Fernsehgeräts ein, um den Stromverbrauch zu senken. Wenn Sie nachts
fernsehen, stellen Sie Energiesparmod. auf Hoch ein, um sowohl die Augenermüdung als auch den Stromverbrauch zu
senken.
Aus: Deaktiviert die Energiesparfunktion.
Gering: Hiermit stellen Sie die Energiesparfunktion auf Niedrig.
Mittel: Hiermit stellen Sie die Energiesparfunktion auf Mitte.
Hoch: Hiermit stellen Sie die Energiesparfunktion auf Hoch.
Drücken Sie die Taste TOOLS, um das Menü Extras anzuzeigen. Sie können zudem die Energiesparoption durch Auswahl
von Extras → Energiesparmod. anpassen.
Software-Update
Damit Ihr Produkt stets mit den neuesten Funktionen des Digitalfernsehens
ausgerüstet ist, werden zusammen mit dem normalen TV-Signal regelmäßig
Softwareaktualisierungen übertragen. Das Gerät erkennt diese Signale
automatisch und zeigt einen Hinweis auf die Softwareaktualisierung an. Sie
haben die Wahl, ob die Aktualisierung installiert werden soll.
PER USB
Legen Sie ein USB-Laufwerk mit dem gespeicherten Firmwareupgrade in
das Fernsehgerät ein. Achten Sie beim Einspielen des Upgrades darauf,
die Stromversorgung nicht zu unterbrechen und das USB-Laufwerk nicht zu
entfernen. Das Fernsehgerät wird automatisch ab- und wieder angeschaltet, sobald das Firmwareupgrade abgeschlossen
ist. Kontrollieren Sie die Firmwareversion, wenn das Upgrade abgeschlossen ist. Nachdem die Software aktualisiert wurde,
sind die Video- und Audioeinstellungen wieder auf die werkseitigen Standardwerte zurückgesetzt. Wir empfehlen, diese Werte
aufzuschreiben, damit Sie sie nach dem Upgrade einfach wieder einstellen können.
Per Channel
Aktualisierung der Software über das Sendesignal.
Update im Standby-Modu
Um die Softwareaktualisierung mit eingeschaltetem Hauptnetz fortzusetzen, wählen Sie mit den Tasten ▲ oder ▼ „Ein“
aus. 45 Minuten nach Beginn des Standbymodus wird die manuelle Aktualisierung automatisch ausgeführt. Da intern die
Stromversorgung für das Gerät eingeschaltet ist, kann der Bildschirm leicht beleuchtet sein. Dieser Zustand kann etwas mehr
als eine Stunde andauern, bis die Softwareaktualisierung abgeschlossen ist.
Andere Software
So zeigen Sie die Informationen zur Softwareversion an.
Common Interface
Installieren der CI-Karte
a. Sie können das CI-CAM-Modul bei Ihrem nächsten Händler oder durch
telefonische Bestellung erwerben.
b. Schieben Sie die CI-Karte in Richtung des Pfeils in das CAM-Modul hinein, bis
sie fest sitzt.
c. Schieben Sie das CAM-Modul mit installierter CI-Karte in den Schlitz für die
gemeinsame Schnittstelle hinein.
Schieben Sie das CAM-Modul in Pfeilrichtung bis zum Anschlag, sodass es
parallel mit dem Schlitz ist.
d. Kontrollieren Sie, ob Sie ein Bild sehen oder ein gestörtes Signal.
CI-Menü
Hiermit kann der Benutzer seine Auswahl in dem vom CAM-Modul bereitgestellten
Menü treffen.
Wählen Sie das CI-Menü ausgehend vom Menü PC Card.
Anwendungsinformationen
.
Die folgenden Erklärungen gelten für den Fall, dass ein CAM-Modul in den CI-Schlitz gesteckt ist und angezeigt wird.
In den Anwendungsinformationen wird die CI-Karte beschrieben. Sie können das CAM-Modul unabhängig davon anschließen,
ob das Fernsehgerät angeschaltet ist oder nicht.
1. Sie können das CI-CAM-Modul bei Ihrem nächsten Händler oder durch telefonische Bestellung erwerben.
2. Schieben Sie die CI-Karte in Richtung des Pfeils in das CAM-Modul ein, bis sie fest sitzt.
3. Schieben Sie das CAM-Modul mit installierter CI-Karte in den Schlitz für die gemeinsame Schnittstelle hinein. (Schieben
Sie das CAM-Modul in Pfeilrichtung bis zum Anschlag, sodass es parallel mit dem Schlitz ist.)
4. Kontrollieren Sie, ob Sie ein Bild sehen oder ein gestörtes Signal.
❑
T
❑
❑
N
4
Seitenverkleidung des
Fernsehgeräts
USB-Laufwerk
BN68-01757A-Ger.indb 25 2008-9-24 15:36:49

Deutsch - 26
Einstellen der Uhrzeit
Uhr
Die Uhr muss eingestellt werden, damit Sie die verschiedenen Timerfunktionen
des Fernsehgeräts verwenden können.
Jedes Mal, wenn Sie die Taste INFO drücken, wird die aktuelle Zeit
angezeigt.
Wenn Sie das Netzkabel ziehen, müssen Sie die Uhr erneut einstellen.
Uhr-Modus
Sie können die aktuelle Zeit manuell oder automatisch einstellen.
Auto: Hiermit stellen Sie die Uhrzeit automatisch anhand der Zeit aus den
digitalen Übertragungen ein.
Manuell: Hiermit stellen Sie die aktuelle Zeit auf einen manuell eingestellten
Wert ein.
Zeit einstellen
Sie können die aktuelle Zeit manuell einstellen.
Kongurieren Sie diese Option, nachdem Sie Uhr-Modus auf Manuell
eingestellt haben.
Sie können Monat, Tag, Jahr, Stunde oder Minute auch direkt über die
Zifferntasten auf der Fernbedienung einstellen.
Sleep-Timer→30Min./60Min./90Min./120Min./150Min./
180Min.
Der Sleep-Timer schaltet das Fernsehgerät automatisch nach einer eingestellten Zeit (30, 60, 90, 120, 150, 180 Minuten) aus.
“Wenn die eingestellte Zeit abgelaufen ist, schaltet das Fernsehgerät automatisch in den Standby-Modus.”
Um die Sleep-Timer-Funktion abzubrechen, wählen Sie Aus.
Drücken Sie die Taste TOOLS, um das Menü Extras anzuzeigen. Sie können den Sleep-Timer durch Auswahl von Extras
→ Sleep-Timer einstellen.
Timer 1 / Timer 2 / Timer 3
Sie können drei verschiedene Einstellungen für den Ein-/Ausschalttimer vornehmen.
Anschaltzeit: Stellen Sie Stunde, Minute und aktiviert/deaktiviert ein.
(Zum Aktivieren des Timers, wenn Sie mit den Einstellungen fertig sind, wählen Sie Aktivieren.)
Ausschaltzeit: Stellen Sie Stunde, Minute und aktiviert/deaktiviert ein.
(Zum Aktivieren des Timers, wenn Sie mit den Einstellungen fertig sind, wählen Sie Aktivieren.)
Lautstärke: Stellen Sie die gewünschte Lautstärke ein.
I
nhalt: Wenn der On Timer aktiviert ist, können Sie einen bestimmten Kanal aktivieren oder Inhalte wie beispielsweise Foto-
oder Audiodateien anzeigen/wiedergeben.
TV / USB: Wählen Sie TV oder USB. (Stellen Sie sicher, dass ein USB-Gerät an das Fernsehgerät angeschlossen ist.)
TV-Empfang: Wählen Sie ATV oder DTV.
Kanal: Wählen Sie den gewünschten Kanal.
Musik: Wählen Sie im USB-Gerät den Ordner mit den MP3-Dateien.
Foto: Wählen Sie im USB-Gerät den Ordner mit den JPEG-Dateien.
Wiederholen: Wählen Sie Einmal, Everyday, Mo - Fr, Mo - Sa, Sa - So oder Manuell.
Wenn Manuell gewählt ist, drücken Sie die Taste ►, um den gewünschten Wochentag einzustellen. Drücken Sie die
ENTER
E
-Taste, während der gewünschte Tage markiert ist, und das Symbol c wird angezeigt.
Voraussetzung dafür ist, dass Sie die Uhr gestellt haben.
Sie können die Stunden, Minuten und den Kanal auch über die Zifferntasten auf der Fernbedienung einstellen.
Automatisch Ausschalten
Wenn Sie den Timer aktivieren, schaltet sich das Fernsehgerät drei Stunden nach dem Einschalten durch den Timer ab,
wenn in dieser Zeit keine Funktionen verwendet wurden Diese Funktion ist nur verfügbar, wenn der Timer aktiviert ist, und sie
verhindert Schäden durch Überhitzung, wenn das Fernsehgerät zu lange eingeschaltet ist.
❑
N
N
•
•
N
N
❑
N
N
T
❑
•
•
•
•
•
N
N
N
N
Einstellungen
Plug & Play
Sprache : Deutsch
Zeit ►
Auswahl des netzwerks : Kabel
Drahtlos-Netzwerk einriohten
Kabelnetzwerk einrichten
Kindersicherung : Ein
PIN ändern
Sicherungsstufe
Untertitel
Zeit
Uhr : -- : -- ►
Sleep-Timer : Aus
Timer 1 : Deaktiviert
Timer 2 : Deaktiviert
Timer 3 : Deaktiviert
U
Navig.
E
Eingabe
R
Zurück
BN68-01757A-Ger.indb 26 2008-9-24 15:36:50
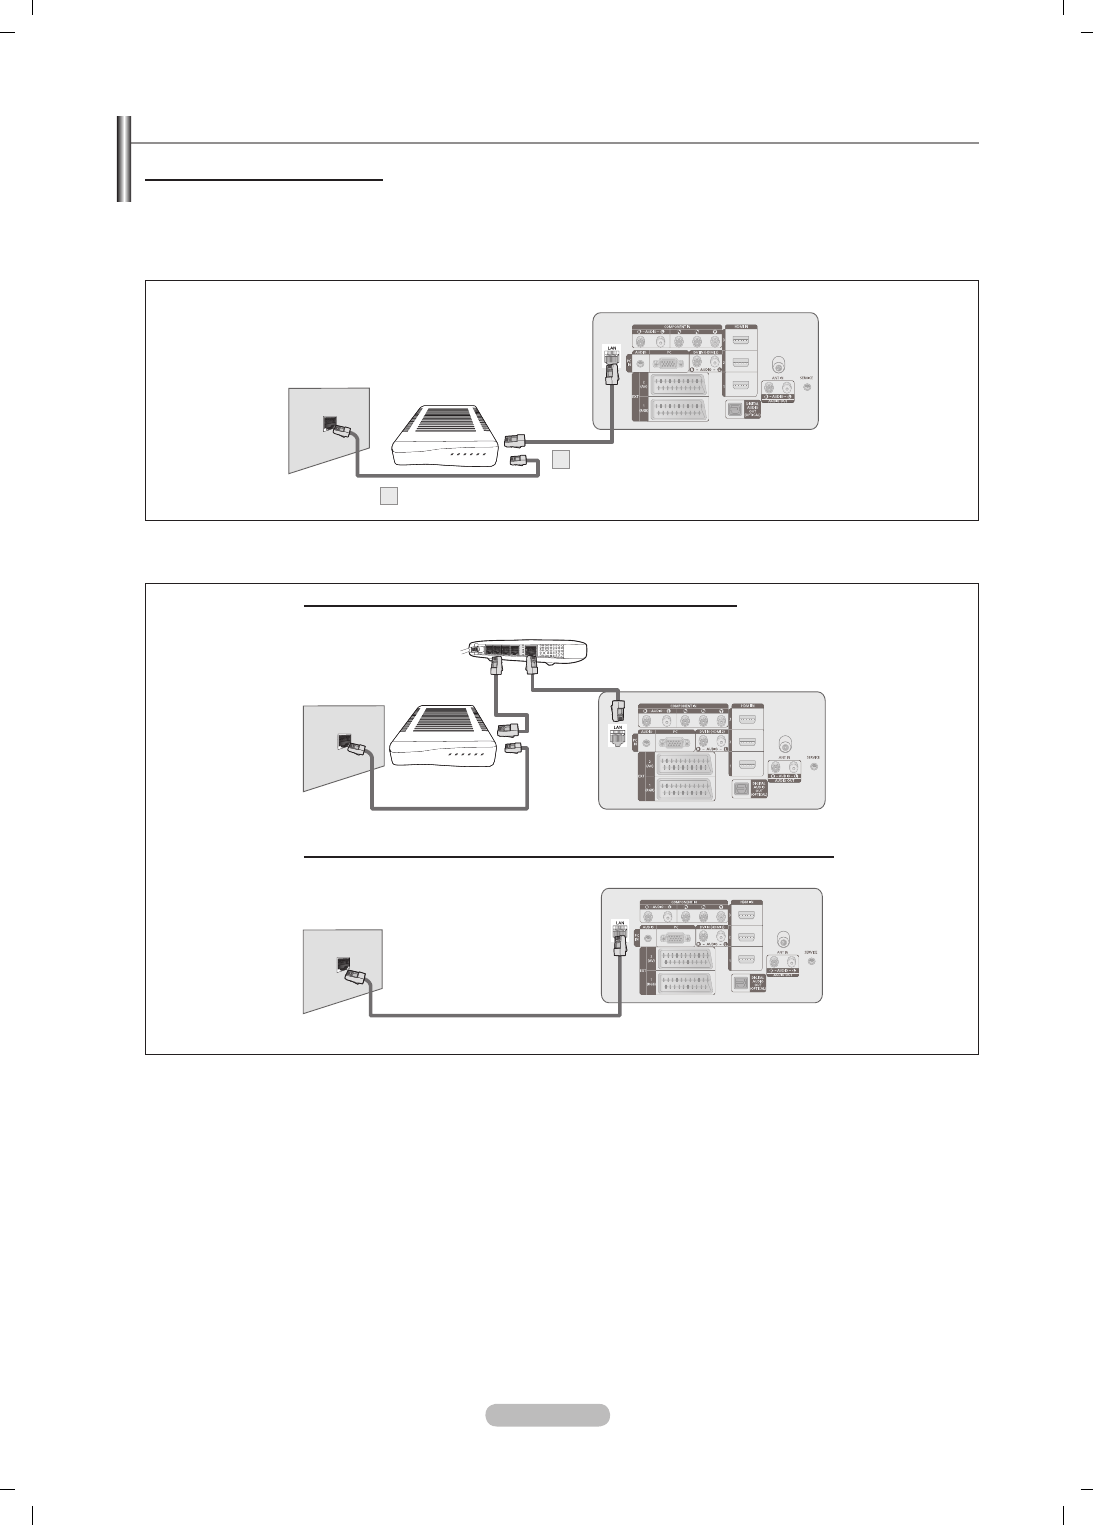
Deutsch - 27
Netzwerkverbindung
Netzwerkverbindung – Kabel
Kabelverbindung für eine DHCP-Umgebung
Die Verfahren zum Einrichten des Netzwerks mithilfe von DHCP (Dynamic Host Conguration Protocol) werden nachfolgend
beschrieben. Da eine IP-Adresse sowie Teilnetzmaske, Gateway und DNS automatisch zugeordnet werden, wenn Sie DHCP
wählen, müssen Sie diese Parameter nicht von Hand eingeben.
1. Verbinden Sie den [LAN]-Anschluss auf der Rückseite des Fernsehgeräts über ein LAN-Kabel mit dem externen Modem.
2. Verbinden Sie den [LAN]-Anschluss an der Wand über ein Modemkabel mit dem externen Modem.
Die Anschlüsse (also Position und Art des Anschlusses) des externen Geräts können sich je nach Hersteller unterscheiden.
Wenn die Zuordnung der IP-Adresse durch den DHCP-Server fehlschlägt, müssen Sie das externe Modem aus und nach
frühestens 10 Sekunden wieder anschalten. Wiederholen Sie den Versuch danach.
Informationen zu den Verbindungen zwischen dem externen Modem und dem Sharer (Router) nden Sie im
Benutzerhandbuch des entsprechenden Geräts.
Sie können das Fernsehgerät direkt an das LAN anschließen, ohne vorher einen Sharer (Router) dazwischen zu schalten.
Sie können kein ADSL-Modem für manuelle Verbindungen verwenden, da dieses DHCP nicht unterstützt. Sie müssen ein
ADSL-Modem für automatische Verbindungen verwenden.
N
N
N
N
N
Rückseite des Fernsehgeräts
Modemanschluss
an der Wand
Modem-Kabel
2
Externes Modem
(ADSL/VDSL/Kabelfernsehen)
LAN-Kabel
1
Sie können den LAN-Anschluss und das Fernsehgerät je nach Netzwerkstatus direkt anschließen.
Rückseite des Fernsehgeräts
LAN-Kabel
LAN-Anschluss an
der Wand
Sie können die Netzwerkverbindung auch über einen Sharer (Router) herstellen.
Rückseite des Fernsehgeräts
Modemanschluss
an der Wand
Externes Modem
(ADSL/VDSL/
Kabelfernsehen)
IP-Sharer
LAN-Kabel
Modem-Kabel
LAN-Kabel
BN68-01757A-Ger.indb 27 2008-9-24 15:36:54
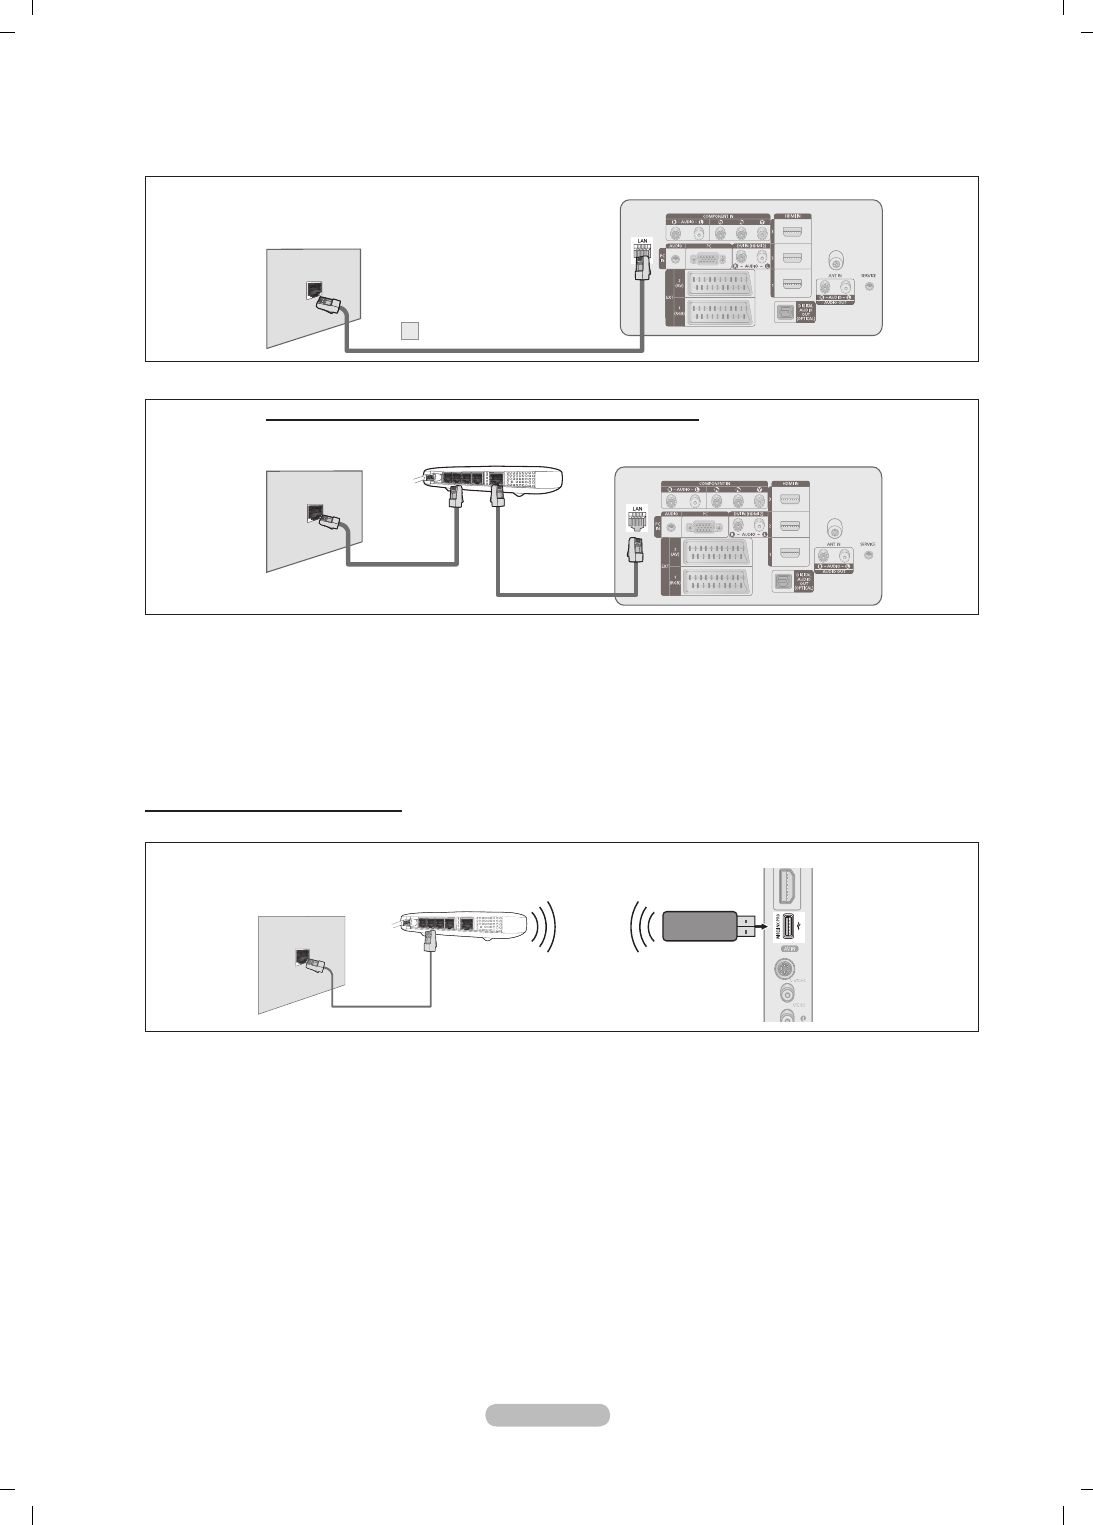
Deutsch - 28
L
AN-Verbindung für eine
Umgebung mit statischen IP-Adressen
Die Verfahren zum Einrichten des Netzwerks mithilfe einer statischen IP-Adresse werden nachfolgend beschrieben. Sie
müssen die Ihnen von Ihrem Internet-Provider genannte IP-Adresse, Teilnetzmaske, Gateway und DNS manuell eingeben.
1. Verbinden Sie den [LAN]-Anschluss auf der Rückseite des Fernsehgeräts über ein LAN-Kabel mit dem LAn-Anschluss in der Wand.
Die Anschlüsse (also Position und Art des Anschlusses) des externen Geräts können sich je nach Hersteller unterscheiden.
Wenn Sie eine statische IP-Adresse verwenden, teilt Ihr Internet-Provider Ihnen die IP-Adresse, Teilnetzmaske, Gateway und
DNS mit. Sie müssen diese Werte eingeben, um die Netzwerkeinstellungen abzuschließen. Falls Sie die Werte nicht kennen,
fragen Sie Ihren Netzwerkadministrator.
Informationen zum Kongurieren und Verbinden mit Sharer (Router) nden Sie im Benutzerhandbuch des entsprechenden Geräts.
Sie können das Fernsehgerät direkt an das LAN anschließen, ohne vorher einen Sharer (Router) dazwischen zu schalten.
Wenn Sie einen IP-Sharer (IP-Router) verwenden, der DHCP unterstützt, können Sie das Gerät für DHCP oder statische IP einrichten.
Informationen über die Verfahren zum Einrichten mit einer statischen IP-Adresse erfragen Sie bei Ihrem Internet Service Provider.
Netzwerkverbindung – Drahtlos
Sie können die Verbindung zum drahtlosen Netzwerk auch über einen drahtlosen IP-Sharer herstellen.
1. Schließen Sie den Samsung Drahtlos LAN Adapter for InfoLive an den Wiselink-Anschluss des Fernsehgeräts an.
Sie müssen den “Samsung Drahtlos LAN Adapter for InfoLive’(WIS-08BG)” verwenden, wenn Sie mit einem Drahtlosnetzwerk
arbeiten möchten.
Der “Samsung Drahtlos LAN Adapter for InfoLive” ist gesondert erhältlich. Setzen Sie sich mit einem Vertreter oder
Kundendienstzentrum von Samsung Electronics in Verbindung, wenn Sie ihn erwerben möchten.
Wenn Sie mit einem Drahtlosnetzwerk arbeiten möchten, müssen Sie Ihr Fernsehgerät an einen drahtlosen IP-Sharer anschließen.
Wenn der drahtlose IP-Sharer DHCP unterstützt, kann Ihr Fernsehgerät über DHCP oder über eine statische IP-Adresse mit
dem Drahtlosnetzwerk verbunden werden.
Sie müssen einen drahtlosen IP-Sharer verwenden, der IEEE 802.11 B oder IEEE 802.11G unterstützt.
Wenn Ihr IP-Sharer eine deaktivierbare Funktion anbietet, um einen Verbindungstest mittels Ping durchzuführen, so aktivieren
Sie diese Funktion.
Schalten Sie den drahtlosen IP-Sharer auf Infrastrukturmodus. Ad-hoc-Modus wird nicht unterstützt.
Wählen Sie einen zurzeit unbenutzten Kanal für den drahtlosen IP-Sharer. Wenn der für den drahtlosen IP-Sharer eingestellte
Kanal von einem anderen Gerät in der Nähe belegt ist, führt dies zu Störungen und die Datenübertragung scheitert.
Es werden nur folgende Sicherheitsschlüssel für den Zugangspunkt (drahtloser IP-Sharer) unterstützt.
1) Authentizierungsmodus : WEP, WPAPSK, WPA2PSK
2) Verschlüsselungsmethode : WEP, TKIP, AES
Wenn Sie ein anderes Sicherheitssystem als die oben angeführten verwenden, so kann dies zusammen mit dem
Fernsehgerät nicht eingesetzt werden.
N
N
N
N
N
N
N
N
N
N
N
N
N
N
N
Rückseite des Fernsehgeräts
LAN-Kabel
1
LAN-Anschluss an
der Wand
Rückseite des Fernsehgeräts
LAN-Kabel
IP-Sharer
LAN-Kabel
LAN-Anschluss an
der Wand
Sie können die Netzwerkverbindung auch über einen Sharer (Router) herstellen.
Seitenverkleidung des Fernsehgeräts
Samsung Drahtlos LAN
Adapter for InfoLive
LAN-Kabel
Drahtloser IP-Sharer
LAN-Anschluss
an der Wand
BN68-01757A-Ger.indb 28 2008-9-24 15:36:58
Deutsch - 29
Netzwerk einrichten
Netzwerk-Auswahl
Wählen Sie den Kabelzugang oder den Funkzugang als Methode für die
Netzwerkverbindung.
Dieses Menü wird nur aktiviert, wenn der Samsung Drahtlos LAN Adapter
for InfoLive angeschlossen ist.
Kabel: Anschließen mit einem Kabel.
Drahtlos: Drahtlose Verbindung.
Kabelnetzwerk einrichten
IP-Konguration→Auto-Setup/Manuellkong
Netzwerktest: Sie können den Netzwerkverbindungsstatus nach dem Einrichten des Netzwerks testen bzw. bestätigen.
Keine Verbindung zum drahtgebundenen Netzwerk möglich
Wenn Ihr Internet-Provider die MAC-Adresse des Geräts registriert hat, mit dem die erste Internetverbindung hergestellt
wurde und diese MAC-Adresse bei jeder Verbindung zum überprüft, besteht die Möglichkeit, dass Ihr Fernsehgerät
keine Internetverbindung herstellen kann, da dessen MAC-Adresse von der des Geräts abweicht, mit dem die erste
Internetverbindung hergestellt wurde. Fragen Sie in diesem Fall Ihren Internetprovider, auf welche Weise die Verbindung
durch andere Geräte als Ihren PC (z. B. Ihr Fernsehgerät) hergestellt werden kann. Wenn Ihr Internet-Provider eine
Kennung oder ein Kennwort erfordert, um die Verbindung zum Internet (Netzwerk) herzustellen, kann Ihr Fernsehgerät
möglicherweise keine Internetverbindung aufbauen. In diesem Fall müssen Sie Ihre Kennung oder Ihr Kennwort
eingeben, wenn die Verbindung mit dem Internet über den Internet-Sharer (Router) hergestellt wird.
Die Internetverbindung kann auch aufgrund von Problemen mit der Firewall fehlschlagen. Setzen Sie sich in diesem Fall
mit Ihrem Internetprovider in Verbindung. Wenn Sie selbst noch dann keine Internetverbindung aufbauen können, wenn
Sie die Anweisungen Ihres Internet-Providers eingehalten haben, setzen Sie sich mit dem Kundendienstzentrum von
Samsung Electronics in Verbindung.
Drahtlos-Netzwerk einriohten
IP-Konfiguration→Auto-Setup/Manuellkonfig.
Netzwerktest: Sie können den Netzwerkverbindungsstatus nach dem Einrichten des Netzwerks testen bzw. bestätigen.
Keine Verbindung zum Drahtlosnetzwerk möglich
Möglicherweise kann Ihr Fernsehgerät keinen Zugangspunkt nden, der mit privater SSID konguriert ist. Ändern Sie in
diesem Fall die Einstellungen für den Zugangspunkt, und versuchen Sie es erneut. Wenn Ihr Internet-Provider die MAC-
Adresse des Geräts registriert hat, mit dem die erste Internetverbindung hergestellt wurde und diese MAC-Adresse bei
jeder Verbindung zum überprüft, besteht die Möglichkeit, dass Ihr Fernsehgerät keine Internetverbindung herstellen kann,
da dessen MAC-Adresse von der des Geräts abweicht, mit dem die erste Internetverbindung hergestellt wurde. Fragen
Sie in diesem Fall Ihren Internetprovider, auf welche Weise die Verbindung durch andere Geräte als Ihren PC (z. B. Ihr
Fernsehgerät) hergestellt werden kann. Wenn Sie selbst noch dann keine Internetverbindung aufbauen können, wenn
Sie die Anweisungen Ihres Internet-Providers eingehalten haben, setzen Sie sich mit dem Kundendienstzentrum von
Samsung Electronics in Verbindung.
ZP auswählen: Sie können wählen, welcher IP-Sharer verwendet werden soll, wenn Sie ein Drahtlosnetzwerk nutzen.
Wenn in der Liste der Zugangspunkte kein drahtloser Zugangspunkt enthalten ist, drücken Sie die rote Taste.
Sobald die Verbindung aufgebaut ist, wird automatisch wieder das Fenster angezeigt.
Wenn Sie einen Zugangspunkt gewählt haben, der mit Authentizierung arbeitet, geben Sie den entsprechenden
Sicherheitsschlüssel ein.
Sie haben einen Zugangspunkt mit Authentizierung gewählt:
Der Eingabebildschirm für den Sicherheitsschlüssel wird geöffnet.
Geben Sie den Sicherheitsschlüssel ein, und drücken Sie die Taste ENTERE.
Verwenden der Fernbedienungstasten im Fenster zur Eingabe des Sicherheitsschlüssels.
Der Inhalt des Sicherheitsfensters richtet sich nach den Sicherheitstypen.
Taste Vorgang
▲/▼/◄/►, (Wheel)
Verschiebt die Markierung nach Oben / Unten / Links / Rechts
(ENTER)
Eingabe des gewählten Zeichens.
Rote Taste
Wechseln zwischen Groß- und Kleinschreibung
Grüne Taste
Löschen des gerade eingegebenen Zeichens.
Blaue Taste
Drücken Sie diese Taste, um die Eingabe des Sicherheitsschlüssels zu beenden.
❑
N
❑
N
❑
N
N
N
N
N
-
-
-
N
Einstellungen
Sprache : Deutsch
Zeit
Auswahl des netzwerks
:Kabel ►
Drahtlos-Netzwerk einriohten
Kabelnetzwerk einrichten
Kindersicherung : Ein
PIN ändern
Sicherungsstufe
Untertitel
Videotext-Sprache : - - - -
BN68-01757A-Ger.indb 29 2008-9-24 15:36:59

Deutsch - 30
Einrichten des Kabelnetzwerks – Automatisches Setup
Wenn Sie das Netzwerkkabel anschließen und DHCP wird unterstützt, werden die Einstellungen für das Internetprotokoll (IP)
automatisch konguriert. Überprüfen Sie, ob das Netzwerkkabel angeschlossen ist. (Siehe Seite 27)
1. Stellen Sie Auswahl des netzwerks auf Kabel.
2. Wählen Sie Kabelnetzwerk einrichten.
3. Stellen Sie IP-Kongurationauf auf Auto-Setup.
4. Wählen Sie Netzwerktest, um die Netzwerkverbindung zu überprüfen.
Einrichten des Kabelnetzwerks – Manuelles Setup
Wenn Sie das Fernsehgerät mittels einer statischen IP-Adresse mit dem LAN verbinden möchten, müssen Sie das
Internetprotokoll (IP) kongurieren. Überprüfen Sie, ob das Netzwerkkabel angeschlossen ist. (Siehe Seite 27)
1. Stellen Sie Auswahl des netzwerks auf Kabel.
2. Wählen Sie Kabelnetzwerk einrichten.
3. Stellen Sie IP-Konguration auf Manuellkong ein.
4. Geben Sie die Parameter für IP-Adresse,Teilnetzmaske,Gateway und DNS Server ein.
Drücken Sie die Zifferntasten auf der Fernbedienung, wenn Sie das Netzwerk manuell einstellen.
5. Wählen Sie Netzwerktest, um die Netzwerkverbindung zu überprüfen.
Einrichten des Drahtlosnetzwerks – Automatisches Setup
Dieses Menü wird nur aktiviert, wenn der Samsung Drahtlos LAN Adapter for InfoLive angeschlossen ist. (Siehe Seite 28)
Wenn Sie das Netzwerkkabel anschließen und DHCP wird unterstützt, werden die Einstellungen für das Internetprotokoll (IP)
automatisch konguriert. Der drahtlose IP-Sharer, den Sie an dieses Gerät anschließen, muss DHCP unterstützen.
1. Stellen Sie Auswahl des Netzwerks auf Drahtlos.
2. Wählen Sie Drahtlos-Netzwerk einriohten.
3. Stellen Sie IP-Konguration auf Auto-Setup.
4. Wählen Sie über ZP auswählen einen Zugangspunkt.
5. Wählen Sie Netzwerktest, um die Netzwerkverbindung zu überprüfen.
Einrichten des Drahtlosnetzwerks – Manuelles Setup
Dieses Menü wird nur aktiviert, wenn der Samsung Drahtlos LAN Adapter for InfoLive angeschlossen ist. (Siehe Seite 28)
1. Stellen Sie Auswahl des netzwerks auf Drahtlos.
2. Wählen Sie Drahtlos-Netzwerk einriohten.
3. Stellen Sie IP-Konguration auf Manuellkong ein.
4. Wählen Sie über ZP auswählen einen Zugangspunkt.
5. Wählen Sie Netzwerktest, um die Netzwerkverbindung zu überprüfen.
N
BN68-01757A-Ger.indb 30 2008-9-24 15:36:59
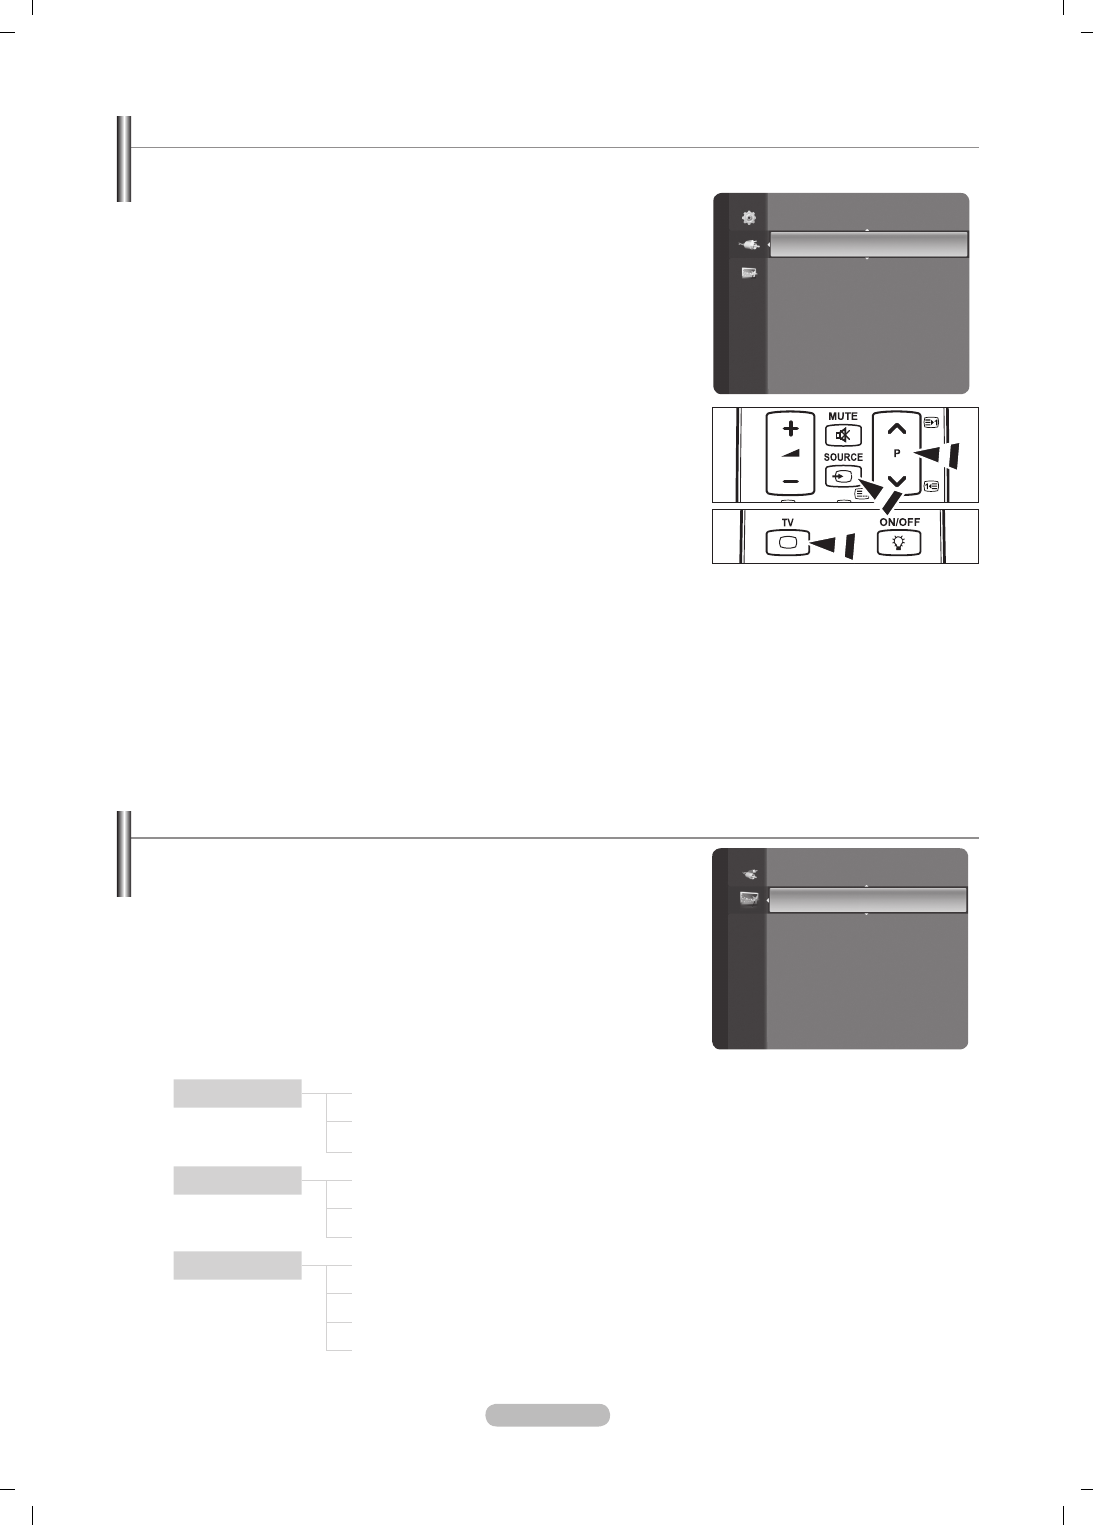
Deutsch - 31
Quellen / Name bearb.
Quellen
Hiermit wählen Sie das Fernsehgerät oder andere externe Signaleingänge wie
z. B. DVD-Player oder Kabelbox/Satellitenreceiver (Set-Top-Box), die mit dem
Fernsehgerät verbunden sind. Stellen Sie die gewünschte Signalquelle ein.
TV, Ext.1, Ext.2, AV, S-Video, Component, PC, HDMI1, HDMI2 / DVI,
HDMI3, HDMI4, USB, DLNA.
Sie können nur solche externen Geräte wählen, die an das Fernsehgerät
angeschlossen sind. Bei Quellen werden die angeschlossenen
Signalquellen hervorgehoben und am Anfang dargestellt. Nicht
angeschlossene Signalquellen werden am Ende der Liste dargestellt.
Verwenden der Farbtasten auf der Fernbedienung in Verbindung mit
der Kanalliste.
Rot (Refresh): Aktualisieren der angeschlossenen externen Geräte.
TOOLS (Option): Anzeigen der Menüs Name bearb. und Information.
Drücken Sie die Taste SOURCE auf der Fernbedienung, um eine externe
Signalquelle anzuzeigen. Der TV-Modus kann durch Drücken der Taste TV,
der Zifferntasten (0~9) und der Taste P < / > auf der Fernbedienung
ausgewählt werden.
Name bearb. (Name bearbeiten)
VCR / DVD / VCR / DVD / Cable STB / Satellite STB / PVR STB / AV Receiver / Game / Camcorder / PC / TV / IPTV /
Blu-ray / HD DVD / DMA
Vergeben Sie Namen für die an die Eingangsbuchsen angeschlossenen Geräte, um die Auswahl der Signalquelle zu
vereinfachen.
Wenn ein PC mit einer Auösung von 1920 x 1080 bei 60 Hz an den Anschluss HDMI IN 2 angeschlossen wird, stellen
Sie unter Name bearb. im Modus Eingang den HDMI2 / DVI-Modus auf PC ein.
❑
N
N
-
-
O
❑
N
Produktdemo
Mit diesem Produktdemo erhalten Sie Informationen zu den wichtigsten Funktionen
dieses Fernsehgeräts.
1. Drücken Sie die Taste MENU, um das Menü anzuzeigen. Wählen Sie durch
Drücken der Tasten ▲ oder ▼ die Option Anwendung, und drücken Sie dann
die Taste ENTER
E
.
2. Wählen Sie durch Drücken der Tasten ▲ oder ▼ die Option Produktdemo, und
drücken Sie dann die Taste ENTER
E
.
3. Wählen Sie durch Drücken der Tasten ◄ oder ► ein Handbuch (Picture
Quality, Entertainment oder Connectivity), und drücken Sie dann die Taste
ENTER
E
.
4. Sie können mit den Tasten ◄ oder ► im Fenster für das Produktdemo navigieren.
Picture Quality Full HD-Auösung (1080p)
Ultra FilterBright
Real 100Hz(50") / 100Hz Dual Scan(63")
Entertainment InfoLive
Content Library
Unterhaltungsmodus
Connectivity WISELINK Pro
DLNA
4 HDMI
Anynet+
5. Zum Beenden drücken Sie die Taste EXIT.
Anwendung
Content Library
InfoLive
Produktdemo ►
Quellen
Name bearb.
Eingang
BN68-01757A-Ger.indb 31 2008-9-24 15:37:00

Deutsch - 32
Anschließen eines USB-Geräts
1. Drücken Sie zum Einschalten des Computers die POWER-Taste.
2. Schließen Sie ein USB-Gerät mit Foto-, Music und/oder Filmdateien an die
WISELINK-Buchse (USB-Buchse) seitlich am Fernsehgerät an.
Wenn Sie den WISELINK Pro-Modus starten, obwohl kein USB-Gerät
angeschlossen ist, wird die Meldung ‘Kein externes Speichergerät gefunden.
Überprüfen Sie den Verbindungsstatus’ angezeigt. Legen Sie in diesem
Fall das USB-Gerät ein, und schließen Sie das Fenster, indem Sie auf
der Fernbedienung auf die Taste W.LINK drücken. Öffnen Sie WISELINK
anschließend wieder.
MTP (Media Transfer Protocol) wird nicht unterstützt.
Als Dateisystem wird ausschließlich FAT16/32 unterstützt. NTFS-Dateisysteme werden nicht unterstützt
Einige Typen von USB-Digitalkameras und -Audiogeräten sind eventuell nicht mit diesem Fernseher kompatibel.
WISELINK Pro unterstützt ausschließlich USB-Massenspeichergeräte vom Typ MSC (Mass Storage Class). MSC-Geräte sind
Massenspeicher zur Übertragung von Daten. Beispiele für MSC sind Thumb-Laufwerke und Flash Card-Lesegeräte. USB
HDD und HUB werden nicht unterstützt.
Schließen Sie diese direkt an den USB-Anschluss Ihres Fernsehgeräts an. Wenn Sie eine gesonderte Kabelverbindung
verwenden, können USB-Kompatibilitätsprobleme auftreten.
Ehe Sie Ihr Gerät an das Fernsehgerät anschließen, sichern Sie Ihre Dateien, um eventuellem Datenverlust vorzubeugen.
SAMSUNG haftet nicht für Verlust und Beschädigung von Daten.
Trennen Sie das USB-Gerät nicht, solange Daten geladen werden.
MSC unterstützt MP3- und JPEG-Dateien, wogegen PTP-Geräte nur JPEG-Dateien unterstützen.
Das sequentielle JPEG-Format wird unterstützt.
Je höher die Auösung des Bilds, desto länger dauert es, um es auf dem Bildschirm anzuzeigen.
Die maximal unterstützte JPEG-Auösung beträgt 15.360 x 8.640 Pixel.
Bei nicht unterstützten oder beschädigten Dateien wird die Meldung “Dateiformat wird nicht unterstützt” angezeigt.
Wenn mehr als 4000 Fotodateien (oder mehr als 3000 Musikdateien), vorhanden sind, werden die Dateien ab 4.000 (3.000)
möglicherweise nicht in der Fotoliste (oder Musicliste) angezeigt.
MP3-Dateien mit DRM, die von einer nicht-lizenzfreien Site heruntergeladen worden sind, können nicht abgespielt werden.
Digital Rights Management (DRM) ist eine Technologie, die das Erstellen von Inhalten und die Distribution und das
Management der Inhalte integriert und umfassend unterstützt. Dies beinhaltet den Schutz der Rechte und der Interessen
der Content-Provider, die Verhütung von unerlaubtem Kopieren der Inhalte sowie das Management von Abrechnung und
Bezahlung.
Wenn Sie zu einem anderen Foto wechseln, kann das Laden einige Sekunden dauern. In diesem Fall wird das Ladesymbol
angezeigt.
N
N
N
N
N
N
N
N
N
N
N
N
N
N
N
N
WISELINK Pro
Verwenden der Fernbedienungstasten im Menü für das Produktdemo
Taste Vorgang
Gelbe Taste Zeigt den nacheinander den Inhalt des Produktdemos an. (AutoPlay)
Rot (◄/►) Cursor bewegen und Elemente auswählen.
ENTER
E
Markiertes Element auswählen.
Zurück Zurück zum vorherigen Menü.
EXIT Beenden der aktuellen Funktion und Rückkehr zum Hauptmenü des Produktdemo.
P , PRE-CH Schließen des Produktdemos und Rückkehr zum Fernsehmodus
4
Seitenverkleidung des
Fernsehgeräts
USB-Laufwerk
BN68-01757A-Ger.indb 32 2008-9-24 15:37:01
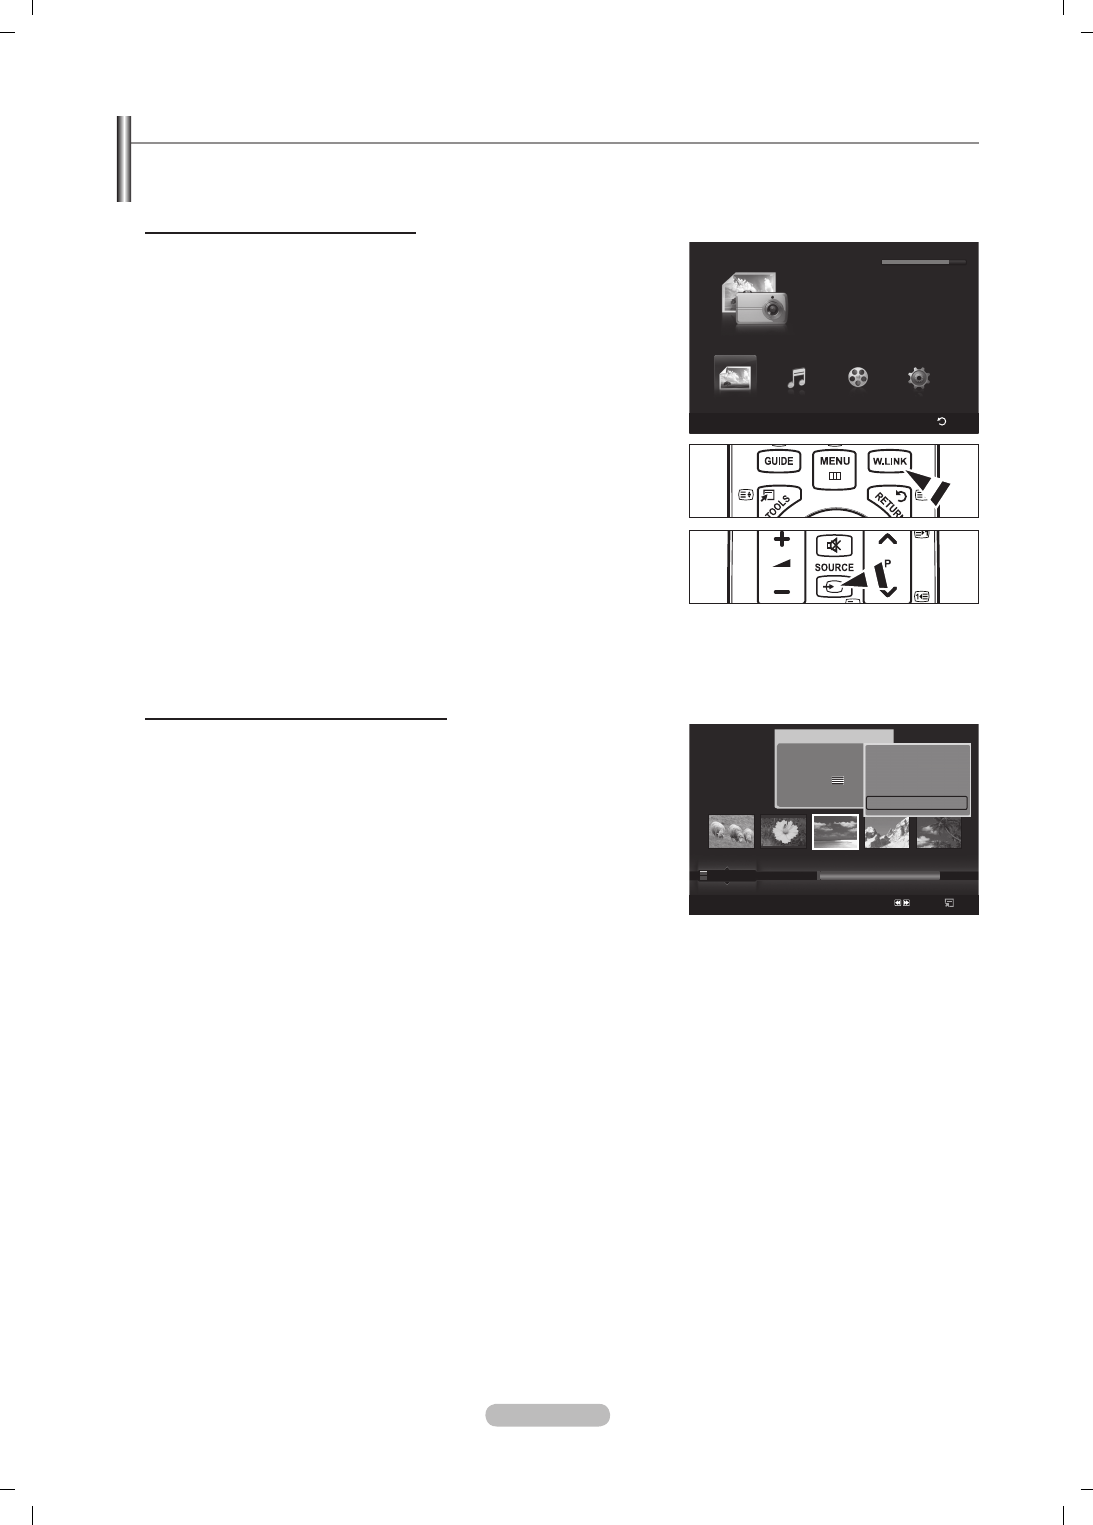
Deutsch - 33
Verwenden der WISELINK Pro-Funktion
Mit dieser Funktion können Sie auf einem USB-Speichermedium (MSC) gespeicherte Foto-, Music und/oder Filmdateien anzeigen
bzw. wiedergeben.
Öffnen des WISELINK Pro-Menüs
1. Drücken Sie die Taste MENU. Wählen Sie durch Drücken der Tasten ▲ oder
▼ die Option Anwendung, und drücken Sie dann die Taste ENTER
E
.
2. Wählen Sie durch Drücken der Tasten ▲ oder ▼ die Option WISELINK Pro,
und drücken Sie dann die Taste ENTER
E
.
Das WISELINK Pro-Menü wird angezeigt.
Drücken Sie die W.LINK-Taste auf der Fernbedienung, um das WISELINK
Pro-Menü anzuzeigen.
Drücken Sie so oft die SOURCE-Taste auf der Fernbedienung, bis USB
oder DLNA ausgewählt ist, und drücken Sie dann die ENTER-Taste
E
.
3. Drücken Sie zuerst die rote Taste und dann ▲ oder ▼, um das entsprechende
USB-Speichergerät auszuwählen (sofern es über einen Hub angeschlossen
ist). Drücken Sie die Taste ENTER
E
.
Diese Funktion hängt vom Typ des an das Fernsehgerät angeschlossenen
USB-Speichers ab.
Der Name des USB-Geräts wird links unten auf dem Bildschirm angezeigt.
4. Drücken Sie die Tasten ◄ oder ►, um ein Symbol (Foto, Music, Movie,
Setup) auszuwählen, und drücken Sie dann die Taste ENTER
E
. Um den
WISELINK Pro-Modus zu verlassen, drücken Sie auf der Fernbedienung die
Taste W.LINK.
Sie können Spiele wie einen Film ablaufen lassen. (Das Spiel selbst
können Sie aber nicht spielen)
Sicheres Entfernen von USB-Geräten
Sie können das Gerät sicher vom Fernsehgerät entfernen.
1. Drücken Sie die Taste TOOLS im Dateilistenfenster von WISELINK Pro oder
während eine Diashow bzw. Musikdatei wiedergegeben wird.
2. Wählen Sie durch Drücken der Tasten ▲ oder ▼ die Option Sicher entfernen,
und drücken Sie dann die Taste ENTER
E
.
3. Entfernen Sie das USB-Gerät sicher vom Fernsehgerät.
N
O
O
N
N
N
Photo
SUM
Gerät
Favoriten-Einst
Wählen
Wechseln
Option
image_1.jpg
Monat : Jan
Datum : Jan.01.2008
Farbe : Grau
Komposition :
Ordner : P-other
Favorit : ★ ★ ★
Benutzerd.
Monatlich
Erstellung
Jan Nov
▲
▲
Gruppe abspielen
Löschen
Information
Sicher entfernen
WISELINK Pro
Photo
SUM
Gerät
Zurück
Music Setup
PHOTO
SUM
851.98MB/995.00MB Free
Film
BN68-01757A-Ger.indb 33 2008-9-24 15:37:03

Deutsch - 34
Bildschirmanzeige
1. Ausgewählte Datei: Die ausgewählte Datei ist hervorgehoben. Foto- und Filmdateien werden als Miniaturbilder angezeigt.
2. Informationsfernster: Enthält Informationen über die ausgewählte Datei. Dies ist ein gesondertes Informationsfenster nur für Foto-
und Filmdateien. Bei Musikdateien werden die Dateiinformationen auch an der Stelle angezeigt, wo die Datei angezeigt wird.
3. Aktuelle Sortierreihenfolge: Dieses Feld zeigt die aktuell eingestellte Sortierreihenfolge. Drücken Sie zum Ändern der
Einstellung die Taste ▲ oder ▼.
4. Anzeigegruppen: Zeigt die Sortiergruppen an. Die Sortiergruppe mit dem ausgewählten Foto wird hervorgehoben.
5. Aktuelles Gerät: Zeigt den Namen des aktuell ausgewählten Geräts an. Wählen Sie mit der roten Taste ein Gerät.
6. Informationen zur Auswahl von Elementen: Zeigt die Anzahl der Fotos an, die durch Drücken der gelben Taste ausgewählt
wurden.
7. Hilfe
Rote Taste (Gerät): Dient zur Auswahl eines angeschlossenen Geräts.
Grüne Taste (Favoriten-Einst): Ändert den Favoritenstatus der ausgewählten Datei. Drücken Sie diese Taste so oft, bis
der gewünschte Wert angezeigt wird.
Gelbe Taste (Wählen): Hiermit wählen Sie eine Datei aus der Dateiliste aus. Die ausgewählten Dateien werden mit dem
Symbol c gekennzeichnet c. Drücken Sie die gelbe Taste noch einmal, um die Auswahl einer Datei zu stornieren.
πµ Taste (Wechseln): Wechselt zur vorherigen oder zur nächsten Sortiergruppe.
TOOLS-Taste (Option): Hiermit zeigen Sie die Optionsmenüs an. (Der Inhalt des Optionsmenüs richtet sich nach dem
jeweiligen Status.)
•
•
•
•
•
Verwenden der Fernbedienungstasten im Menü WISELINK Pro
Taste Vorgang
▲/▼/◄/►
(Wheel) Cursor bewegen und Elemente auswählen.
ENTER
E
Markiertes Element auswählen.
Bei der Wiedergabe einer Diashow, eines Films oder eine Musikdatei:
- Durch Drücken der Taste ENTER
E
während der Wiedergabe wird die Wiedergabe unterbrochen.
- Durch erneutes Drücken der Taste ENTER
E
während der Wiedergabe wird die Wiedergabe
fortgesetzt.
Abspielen oder Anhalten der Diashow oder MP3-Datei.
Zurück Zurück zum vorherigen Menü.
TOOLS Ausführen verschiedener Funktionen aus dem Foto-, Music- und Filmmenü.
Anhalten der aktuellen Diashow und Music- oder MP3-Datei.
Wechsel zur vorherigen Gruppe/nächsten Gruppe.
INFO Anzeigen von Dateiinformationen.
W.LINK Beenden des WISELINK Pro-Modus.
EXIT Beenden der aktuellen Funktion und Rückkehr zum Hauptmenü WISELINK Pro.
Photo
SUM
Gerät
Favoriten-Einst
Wählen
Wechseln
Option
image_1.jpg
Monat : Jan
Datum : Jan.01.2008
Farbe : Grau
Komposition :
Ordner : P-other
Favorit :
★ ★ ★
Benutzerd.
Monatlich
Erstellung
Jan Nov
▲
1File(s) Selected
2 6
1
3 4
5 7
BN68-01757A-Ger.indb 34 2008-9-24 15:37:04
Deutsch - 35
Verwenden und Sortieren der Fotoliste
Sie können die Fotos in der Fotoliste nach einem bestimmten System sortieren.
1. Wählen Sie mit den Tasten ▲ oder ▼ ein Sortierverfahren für die Fotoliste.
Die Fotos werden nun nach dem neu ausgewählten Verfahren sortiert.
Um zur vorherigen/nächsten Gruppe zu wechseln, drücken Sie die
Taste
π
(REW) oder
µ
(FF).
2. Drücken Sie die Taste
∂
(Play)/ENTER
E
, um die Diashow in der vom
Benutzer ausgewählten Sortierung zu starten.
Die Informationen einer Fotodatei werden automatisch eingestellt.
Die aus der Fotodatei entnommenen Informationen zu Farbe und
Komposition müssen nicht unbedingt den Erwartungen des Benutzers
entsprechen.
Die Fotoinformationen werden automatisch eingestellt. Sie können
Farbe, Komposition und Favorit ändern.
Fotos, für die keine Informationen angezeigt werden können, werden
als Jedes Alter eingestuft.
PTP ermöglicht keine Ordnersortierung.
Sortierverfahren für die Fotoliste
Monatlich
Hiermit werden die Fotos in der Datei nach Monaten sortiert und angezeigt. Die Sortierung erfolgt nach Monaten (Januar bis
Dezember) und ohne Beachtung des Jahres.
Erstellungsdatum
Hiermit werden die Fotos nach dem Datum sortiert und angezeigt. Die Sortierung berücksichtigt Monat und Jahr und beginnt
beim ältesten Foto.
Farbe
Hiermit werden die Fotos nach der Farbe sortiert. Sie können die Farbinformation des Fotos ändern.
Mögliche Werte für Farbe: Rot, Gelb, Grün, Blau, Magenta, Schwarz, Grau und Jedes Alter.
Komposition
Hiermit werden die Fotos nach dem Aufbau sortiert. Sie können die Informationen zum Aufbau der Fotos ändern.
Mögliche Werte für Komposition: (horizontal), (vertikal), (Objekt), (Perspektive), (Muster), Jedes Alter.
Ordner
Hiermit werden die Fotos nach dem Ordner sortiert. Wenn es auf dem USB-Speicher viele Ordner gibt, werden die
Fotodateien nach Ordnern sortiert. Die Fotodatei im Stammordner erscheint als erste und die anderen werden nach Namen
sortiert angezeigt.
Benutzerdefiniert
Hiermit werden die Fotos benutzerdeniert (Favorit) sortiert. Sie können die benutzerdenierten Informationen zum Foto ändern.
Ändern der Favoriteneinstellung
Markieren Sie das gewünschte Foto in der Fotoliste und drücken Sie dann so oft die grüne Taste, bis die gewünschte
Einstellung angezeigt wird.
Mögliche Werte für Favorite:
★ ★ ★
,
★ ★ ★
,
★ ★ ★
,
★ ★ ★
Menü der Optionen für Fotolisten
Diashow
Mit diesem Menübefehl können Sie eine Diashow mit den Fotodateien auf
dem USB-Speicher ablaufen lassen.
Gruppe abspielen
Mit diesem Menübefehl können Sie eine Diashow nur mit den Fotodateien
aus der aktuell ausgewählten Sortiergruppe ablaufen lassen.
Löschen
Mit diesem Menübefehl können Sie die ausgewählten Fotodateien löschen.
Grp. ändern
Sie können die Informationen zu Farbe und Komposition des Fotos ändern.
Die Gruppeninformationen der aktuellen Datei werden aktualisiert und die Datei wird in die neue Gruppe verschoben.
Wenn Sie die Informationen für mehrere Dateien ändern möchten, wählen Sie die gewünschten Dateien und drücken Sie
die gelbe Taste.
N
N
N
N
N
N
N
N
N
N
N
N
N
Photo
SUM
Gerät
Favoriten-Einst
Wählen
Wechseln
Option
image_1.jpg
Monat : Jan
Datum : Jan.01.2008
Farbe : Grau
Komposition :
Ordner : P-other
Favorit : ★ ★ ★
Benutzerd.
Monatlich
Erstellung
Jan Nov
▲
Photo
SUM
Gerät
Favoriten-Einst
Wählen
Wechseln
Option
image_1.jpg
Monat : Jan
Datum : Jan.01.2008
Farbe : Grau
Komposition :
Ordner : P-other
Favorit : ★ ★ ★
Benutzerd.
Monatlich
Erstellung
Jan Nov
▲
Diashow
Gruppe abspielen
Löschen
Information
▼
BN68-01757A-Ger.indb 35 2008-9-24 15:37:06

Deutsch - 36
Information
Die Fotoinformationen einschließlich der Ordnung der Datei im aktuellen Verzeichnis, der Name, die Größe, die Auösung,
das Datum der letzten Änderung und der Pfad werden angezeigt.
Sie können die Informationen von Fotodateien mit den gleichen Verfahren
auch während einer Diashow anzeigen.
Alternativ wählen Sie ein Foto aus der Fotoliste und drücken die Taste
INFO, um die Informationen anzuzeigen.
Sicher entfernen
Sie können das USB-Gerät sicher vom Fernsehgerät entfernen.
N
O
Anzeigen eines Fotos oder einer Diashow
Anzeigen von Diashows
1. Wählen Sie das gewünschte Foto mit den Tasten ◄ oder ► aus der
Fotoliste aus.
2. Drücken Sie die Taste TOOLS.
3. Wählen Sie durch Drücken der Tasten ▲ oder ▼ die Option Diashow, und
drücken Sie dann die Taste ENTER
E
.
Alle Dateien in der Fotoliste werden für die Diashow verwendet.
Die Bilder werden nacheinander, beginnend mit der aktuell angezeigten
Datei angezeigt.
Die Diashow wird entsprechend der Sortierreihenfolge in der Fotoliste
ausgeführt.
Musikdateien können während der Diashow automatisch abgespielt werden,
wenn Hintergrundmusik auf Ein festgelegt ist. (Informationen hierzu nden
Sie auf Seite 37).
Drücken Sie die Fernbedienungstaste
∂
(Play)/ENTER
E
, während die Fotoliste angezeigt wird, um die Diashow zu
starten.
Diashow-Steuertasten
ENTER
E
Abspielen/Anhalten der Diashow.
∫
Beenden Sie die Diashow und wechseln Sie
wieder zur Fotoliste.
∂
Abspielen der Diashow. TOOLS
π
/
µ
Hiermit führen Sie verschiedene Funktionen aus
den Fotomenüs aus.
Ändern der Abspielgeschwindigkeit der Diashow.
∑
Diashow anhalten
Abspielen der aktuellen Gruppe
1. Wählen Sie mit den Tasten ▲ oder ▼ das Sortierverfahren aus. (Monatlich, Erstellung, Farbe, Komposition, Ordner,
Benutzerd.)
2. Drücken Sie die Tasten
π
(REW) oder
µ
(FF), um die gewünschte Gruppe auszuwählen.
3. Drücken Sie die Taste TOOLS.
4. Wählen Sie durch Drücken der Tasten ▲ oder ▼ die Gruppe abspielen, und drücken Sie dann die Taste ENTER
E
.
Nur die Fotos aus der Sortiergruppe mit den ausgewählten Dateien werden für die Diashow verwendet.
So starten Sie eine Diashow nur mit den ausgewählten Dateien
1. Wählen Sie das gewünschte Foto mit den Tasten ◄ oder ► aus der Fotoliste aus.
2. Drücken Sie die gelbe Taste. Wiederholen Sie den obigen Vorgang, um mehrere Fotodateien auszuwählen.
Links neben dem Namen der Fotodatei wird das Symbol
c
angezeigt.
Wenn Sie nur eine Datei wählen, wird keine Diashow gestartet.
Um die Auswahl sämtlicher Dateien aufzuheben, drücken Sie die Taste TOOLS und wählen Sie dann Alle abwählen.
3. Drücken Sie die Taste
∂
(Play)/ENTER
E
.
Die ausgewählten Dateien werden für die Diashow verwendet.
N
N
N
N
O
N
N
N
N
N
O
SUM
E
Pause
Vorherige
Nächste
Option
Zurück
►
Normal
20/22 image_1.jpg 440x440 2.0KB 2008/1/1
BN68-01757A-Ger.indb 36 2008-9-24 15:37:07

Deutsch - 37
Menü der Optionen für Diashows
Diashow anhalten/Diashow starten
Hiermit können Sie eine Diashow starten oder anhalten.
Drehen
Sie können alle auf einem USB-Speichergerät gespeicherten Dateien drehen.
Wenn Sie die Taste ◄ drücken, wird das Foto nacheinander um 270˚,
180˚, 90˚ und 0˚ gedreht.
Wenn Sie die Taste ► drücken, wird das Foto nacheinander um 90˚,
180˚, 270˚ und 0˚ gedreht.
Zoom
Sie können alle auf einem USB-Speichergerät gespeicherten Fotos
vergrößern. (x1 → x2 → x4)
Um das vergrößerte Foto zu verschieben, drücken sie die Taste
ENTER
E
und anschließend ▲/▼/◄/►. Beachten Sie, dass die Funktion zum Verschieben deaktiviert ist, wenn das
vergrößerte Bild kleiner als das ursprüngliche Fenster ist.
Die vergrößerte Datei wird nicht gespeichert.
Wenn Sie Drehen gewählt haben, ist Zoom deaktiviert.
Diashow-Geschwindigkeit
Sie können die Geschwindigkeit der Diashow festlegen.
Sie können die Geschwindigkeit der Diashow nur während einer Diashow auswählen.
Wenn Sie die Tasten
π
(REW) oder
µ
(FF) während einer Diashow drücken, können Sie auch deren
Abspielgeschwindigkeit ändern.
Hintergrundmusik→Ein/Aus
Wenn Sie Hintergrundmusik aktivieren, wird die Hintergrundmusik abgespielt, während Sie einzelne Fotos anzeigen oder
eine Diashow abspielen.
Wenn Sie Hintergrundmusik aktivieren, wird sofort das Fenster angezeigt, in dem Sie die Hintergrundmusik Einst. können.
Um diese Funktion zu verwenden, müssen auf dem UB-Speicher Music- und Fotodateien gespeichert sein.
Hintergrundmusik-Einstellungen
Sie können die Hintergrundmusik auswählen, während Sie eine Diashow anzeigen.
Wenn Sie die Hintergrundmusik ausschalten, wird keine Hintergrundmusik abgespielt, auch wenn Sie die
Hintergrundmusik-Einstellungen vorgenommen haben.
Laden der Musikdateien erforderlich, um in den Hintergrundmusikmodus zu wechseln. Musikdateien aus der Kategorie
abspielen, die geladen werden soll.
BGM-Modus → Stimmung/Markierte Dateien/Zufallswiedergabe
BGM-Stimmung → Dynamisch/Rhythmisch/Traurig/Aufregend/Ruhig
Wenn Sie BGM-Modus auf Stimmung Einst., können Sie eine Stimmung auswählen.
Sie können keine Stimmung wählen, die keiner der Musikdateien auf dem USB-Speicher zugeordnet ist.
Musikdatei wählen
Wenn Sie BGM-Modus auf Gewählte Datei Einst., können Sie eine Musikdatei wählen.
Bildeinstellungen/Toneinstellungen
Informationen hierzu nden Sie auf Seite 43.
Information
Die Informationen zur Fotodatei werden angezeigt.
Sicher entfernen
Sie können das USB-Gerät sicher vom Fernsehgerät entfernen.
N
N
N
N
N
N
N
N
N
•
•
N
N
•
N
Extras
Diashow Anhalten
Drehen
Zoom
Diashow-Geschw. : Normal
Hintergrundmusik : Aus
Einstellung der Hintergrundmusik
Bildeinstellungen
Toneinstellungen
Information
U
Navig.
E
Eingabe
e
Beenden
BN68-01757A-Ger.indb 37 2008-9-24 15:37:07
Deutsch - 38
Verwenden und Sortieren der Musikliste
Sie können die Musikdateien in der Musikliste nach einem bestimmten System sortieren.
1. Wählen Sie mit den Tasten ▲ oder ▼ ein Sortierverfahren für die Musikliste.
Die Musikdateien werden nun nach dem neu ausgewählten Verfahren
sortiert.
Um zur vorherigen/nächsten Gruppe zu wechseln, drücken Sie die
Taste
π
(REW) oder
µ
(FF).
2. Drücken Sie die Taste ENTER
E
, um die Musik in der vom Benutzer
gewählten Reihenfolge zu starten.
Die Informationen der Musikdateien werden automatisch eingestellt.
Die aus der Musikdatei entnommenen Informationen zur Stimmung
müssen nicht unbedingt den Erwartungen des Benutzers entsprechen.
Die Musikinformationen werden automatisch eingestellt. Sie können
Stimmung und Favorit ändern.
Musikdateien, für die keine Informationen angezeigt werden können, werden als Jedes Alter eingestuft.
Wenn es für eine Musikdatei keine Titelinformationen gibt, wird der Dateiname angezeigt.
Wenn zu Genre, Künstler, Album oder Jahr keine Informationen vorliegen, wird das entsprechende Feld leer gelassen.
Sortierverfahren für die Musikliste
Titel: Sortierung der Musiktitel in alphabetischer Reihenfolge und Anzeige der Musikdatei.
Interpret: Die Musikdateien werden in alphabetischer Reihenfolge nach dem Namen des Interpreten sortiert.
Stimmung: Sortieru
ng der Musikdateien nach der Stimmung. Sie können die Informationen zur Stimmung der Musik ändern.
Optionen für die Stimmung: Dynamisch, Rhythmisch, Traurig, Aufregend, Ruhig, Jedes Alter.
G
enre: Sortierung der Musikdateien nach dem Genre.
Ord
ner: Sortierung der Musikdateien nach dem Ordner. Wenn es auf dem USB-Speicher viele Ordner gibt, werden
die Musikdateien nach Ordnern sortiert. Die Musikdatei im Stammordner erscheint als erste und die anderen werden
ordnerweise nach Namen sortiert angezeigt.
Benutzerd.: Sortierung der Musikdateien nach der Benutzerdefinition (Favorit). Sie können die Präferenzinformationen der
Musikdatei ändern.
Ändern der Favoriteneinstellung
Markieren Sie die gewünschte Musikdatei in der Musikliste und drücken Sie dann so oft die grüne Taste, bis die
gewünschte Einstellung angezeigt wird.
Wenn Sie die Informationen für mehrere Dateien ändern möchten, wählen Sie die entsprechenden Dateien, und drücken
Sie die gelbe Taste.
Optionen für Favoriten:
★ ★ ★
,
★ ★ ★
,
★ ★ ★
,
★ ★ ★
Menü der Optionen für Fotolisten
Gruppe abspielen: Mit diesem Menübefehl können Sie nur die
Musikdateien aus der aktuell ausgewählten Sortiergruppe abspielen.
Löschen: Mit diesem Menübefehl können Sie die ausgewählten
Musikdateien löschen.
Grp. ändern: Sie können die Informationen zur Stimmung der
Musikdateien ändern. Die Gruppeninformationen der aktuellen Datei
werden aktualisiert und die Datei wird in die neue Gruppe verschoben.
Wenn Sie die Informationen für mehrere Dateien ändern möchten,
wählen Sie die entsprechenden Dateien, und drücken Sie die gelbe
Taste.
Information: Die Musikdateiinformationen einschließlich der Ordnung
der Datei im aktuellen Verzeichnis, der Name, die Größe, das Datum
der letzten Änderung und der Pfad werden angezeigt.
Sie können die Informationen von Musikdateien mit den gleichen
Verfahren auch während einer Diashow anzeigen.
Alternativ wählen Sie eine Musikdatei aus der Musikliste und drücken die
Taste INFO, um die Informationen anzuzeigen.
Sicher
entfern
en: Sie können das USB-Gerät sicher vom Fernsehgerät entfernen.
N
N
N
N
N
N
N
N
N
N
N
N
N
N
O
Music
SUM
Gerät
Favoriten-Einst
Wählen
Wechseln
Option
Benutzerd.
Titel
Interpret
Dynamisch ★ ★ ★
Jee
Album 1
2005
Pop
Thanks
Traurig ★ ★ ★
Darby
Album 2
2005
Pop
I Love You
Ruhig ★ ★ ★
Catherine
Album 3
2005
Pop
Better than yesterday
F G H I J L P S T V
▲
Music
SUM
Gerät
Favoriten-Einst
Wählen
Wechseln
Option
Interpret
Stimmung
Genre
Traurig ★ ★ ★
Jee
Album 1
2005
Pop
Thanks
Traurig ★ ★ ★
Darby
Album 2
2005
Pop
I Love You
Aufregend ★ ★ ★
Catherine
Album 3
2005
Pop
Better than yesterday
Rhythmisch Traurig Aufregend Ruhig ...
▲
Gruppe abspielen
Löschen
Grp. ändern
Information
▼
BN68-01757A-Ger.indb 38 2008-9-24 15:37:08
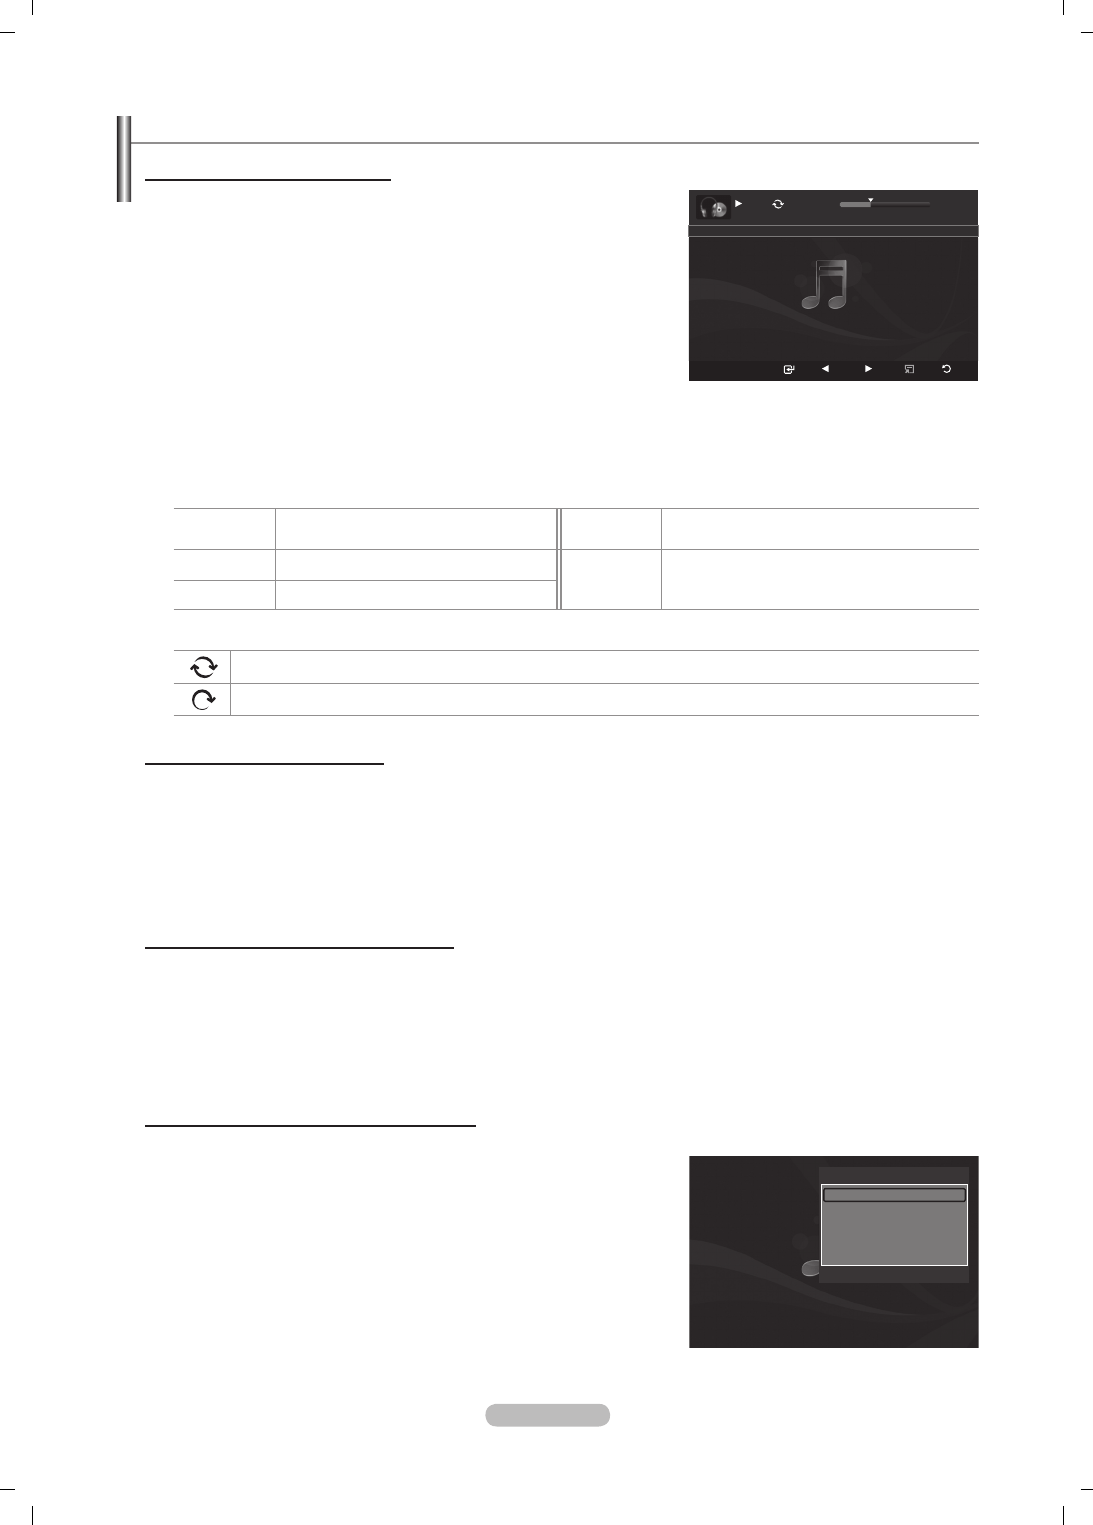
Deutsch - 39
Wiedergeben von Musik
Wiedergeben einer Musikdatei
1. Wählen Sie mit den Tasten ◄ oder ► eine Musikdatei, die abgespielt
werden soll.
2. Drücken Sie die Taste
∂
(Play)/ENTER
E
.
Dieses Menü zeigt nur Dateien mit der Dateinamenserweiterung MP3.
Dateien mit anderer Dateinamenserweiterung werden nicht angezeigt,
auch wenn sie auf dem gleichen USB-Gerät gespeichert wurden.
Die Tasten
π
(REW) oder
µ
(FF) sind bei der Wiedergabe
funktionslos.
Die ausgewählte Datei wird zusammen mit der Abspieldauer oben
angezeigt.
Um die Musiklautstärke anzupassen, drücken Sie auf der Fernbedienung die Taste Lautstärke . Wenn Sie den Ton
ausschalten möchten, drücken Sie die MUTE-Taste auf der Fernbedienung.
Die Abspieldauer einer Musikdatei wird möglicherweise als 00:00:00 angezeigt, wenn am Anfang der Datei keine
Informationen über die Abspieldauer gefunden werden.
Regler für Musikwiedergabe
ENTER
E
Wiedergabe/Pause einer Musikdatei.
∫
Beenden des Wiedergabemodus und
Rückkehr zur Musikliste.
∂
Spielen Sie die Musikdatei ab. TOOLS Hiermit führen Sie verschiedene Funktionen
aus den Musikmenüs aus.
∑
Hiermit wird die Musikdatei angehalten.
Symbol für Informationen zur Musik-Funktion
Hiermit werden alle Musikdateien im Ordner (oder die markierte Datei) wiederholt abgespielt. Wiederhol-M. ist Ein.
Hiermit werden alle Musikdateien im Ordner (oder die markierte Datei) einmal abgespielt. Wiederhol-M. ist Ein.
Abspielen einer Musikgruppe
1. Wählen Sie mit den Tasten ▲ oder ▼ das Sortierverfahren aus.
(Titel, Interpret, Stimmung, Genre, Ordner, Benutzerd.)
2. Drücken Sie die Tasten
π
(REW) oder
µ
(FF), um die gewünschte Gruppe auszuwählen.
3. Drücken Sie die Taste TOOLS.
4. Wählen Sie durch Drücken der Tasten ▲ oder ▼ die Option Gruppe abspielen, und drücken Sie dann die Taste ENTER
E
.
Hiermit werden alle Musikdateien im Ordner (oder die markierte Datei) einmal abgespielt.
Abspielen ausgewählter Musikdateien
1. Wählen Sie die gewünschte Musikdatei mit den Tasten ◄ oder ► aus der Musikliste aus.
2. Drücken Sie die gelbe Taste. Wiederholen Sie den obigen Vorgang, um mehrere Filmdateien auszuwählen.
Links neben dem Namen der Musikdatei wird das Symbol
c
angezeigt.
3. Drücken Sie die Taste
∂
(Play)/ENTER
E
.
Nur die gewählte Datei wird wiedergegeben.
Menü der Optionen für Musikwiedergabe
Wiederhol-M.→Ein/Aus
Sie können Musikdateien wiederholt abspielen.
Bildeinstellungen/Toneinstellungen
Informationen hierzu nden Sie auf Seite 43.
Information
Die Informationen zur Musikdatei werden angezeigt.
Sicher entfernen
Sie können das USB-Gerät sicher vom Fernsehgerät entfernen.
N
N
N
N
N
N
N
N
N
N
SUM
Pause
Vorherige
Nächste
Option
Zurück
7/14 00:01:15 00:05:41
I Love You
Extras
Wiederhol-Modus
◄ Ein ►
Bildeinstellungen
Toneinstellungen
Information
Sicher entfernen
U
Navig.
L
Einst.
e
Beenden
BN68-01757A-Ger.indb 39 2008-9-24 15:37:09

Deutsch - 40
Verwenden und Sortieren der Filmliste
Sie können die Filme in der Filmliste nach einem bestimmten System sortieren.
1. Wählen Sie mit den Tasten ▲ oder ▼ ein Sortierverfahren für die Filmliste.
Die Filmdateien werden nun nach dem neu ausgewählten Verfahren
sortiert.
Um zur vorherigen/nächsten Gruppe zu wechseln, drücken Sie die
Taste
π
(REW) oder
µ
(FF).
Der Film unterstützt keine Untertitel.
(z. B. Unterstützung weder für SMI-, SRT- und SUB-Dateien (usw.)
noch für Unteertitel, die in den Filmdateien gespeichert sind)
2. Drücken Sie die Taste
∂
(Play)/ ENTER
E
, um die Filme in der vom
Benutzer ausgewählten Sortierung zu starten.
Die Filme werden nun nach dem neu ausgewählten Verfahren sortiert.
Die Filminformationen werden automatisch eingestellt. Sie können die
Einstellungen zum Favorit ändern.
Sortierverfahren für die Filmliste
Titel
Die Filmtitel werden in alphabetischer Reihenfolge sortiert angezeigt.
Erstellungsdatum
Hiermit werden die Filme nach dem Datum sortiert und angezeigt. Die Sortierung berücksichtigt Monat und Jahr und beginnt
beim ältesten Film.
Ordner
Wenn es auf dem USB-Speicher viele Ordner gibt, werden die Filmdateien nach Ordnern sortiert. Die Filmdatei im
Stammordner erscheint als erste und die anderen Dateien werden ordnerweise nach Namen sortiert angezeigt.
Benutzerdefiniert
Hiermit werden die Filme benutzerdeniert sortiert (Favorit). Sie können die benutzerdenierten Informationen zum Film
ändern.
Ändern der Favoriteneinstellung
Markieren Sie die gewünschte Filmdatei in der Filmliste und drücken Sie dann so oft die grüne Taste, bis die gewünschte
Einstellung angezeigt wird.
Optionen für Favoriten:
★ ★ ★
,
★ ★ ★
,
★ ★ ★
,
★ ★ ★
Menü der Optionen für Filmlisten
Gruppe abspielen
Mit diesem Menübefehl können Sie nur die Filmdateien aus der aktuell
ausgewählten Sortiergruppe abspielen.
Löschen
Mit diesem Menübefehl können Sie die ausgewählten Filmdateien löschen.
Informationen
Die Filmdateiinformationen einschließlich der Ordnung der Datei im
aktuellen Verzeichnis, der Name, die Größe, das Datum der letzten Änderung
und der Pfad werden angezeigt.
Alternativ wählen Sie einen Film aus der Filmliste, und drücken Sie die
Taste INFO, um die Informationen anzuzeigen.
Sicher entfernen
Sie können das USB-Gerät sicher vom Fernsehgerät entfernen.
N
N
N
N
N
N
N
O
Movie
SUM
Gerät
Favoriten-Einst
Wählen
Wechseln
Option
movie_1.jpg
Datum : Jan.01.2008
Ordner : movie-folder
Favorit : ★ ★ ★
Benutzerd.
Titel
Erstellung
A M
SYMBOL
▲
□
ENG
Movie
SUM
Gerät
Favoriten-Einst
Wählen
Wechseln
Option
movie_1.jpg
Datum : Jan.01.2008
Ordner : movie-folder
Favorit : ★ ★ ★
Benutzerd.
Titel
Erstellung
A M
SYMBOL
▲
□
ENG
Gruppe abspielen
Löschen
Information
Sicher entfernen
BN68-01757A-Ger.indb 40 2008-9-24 15:37:10
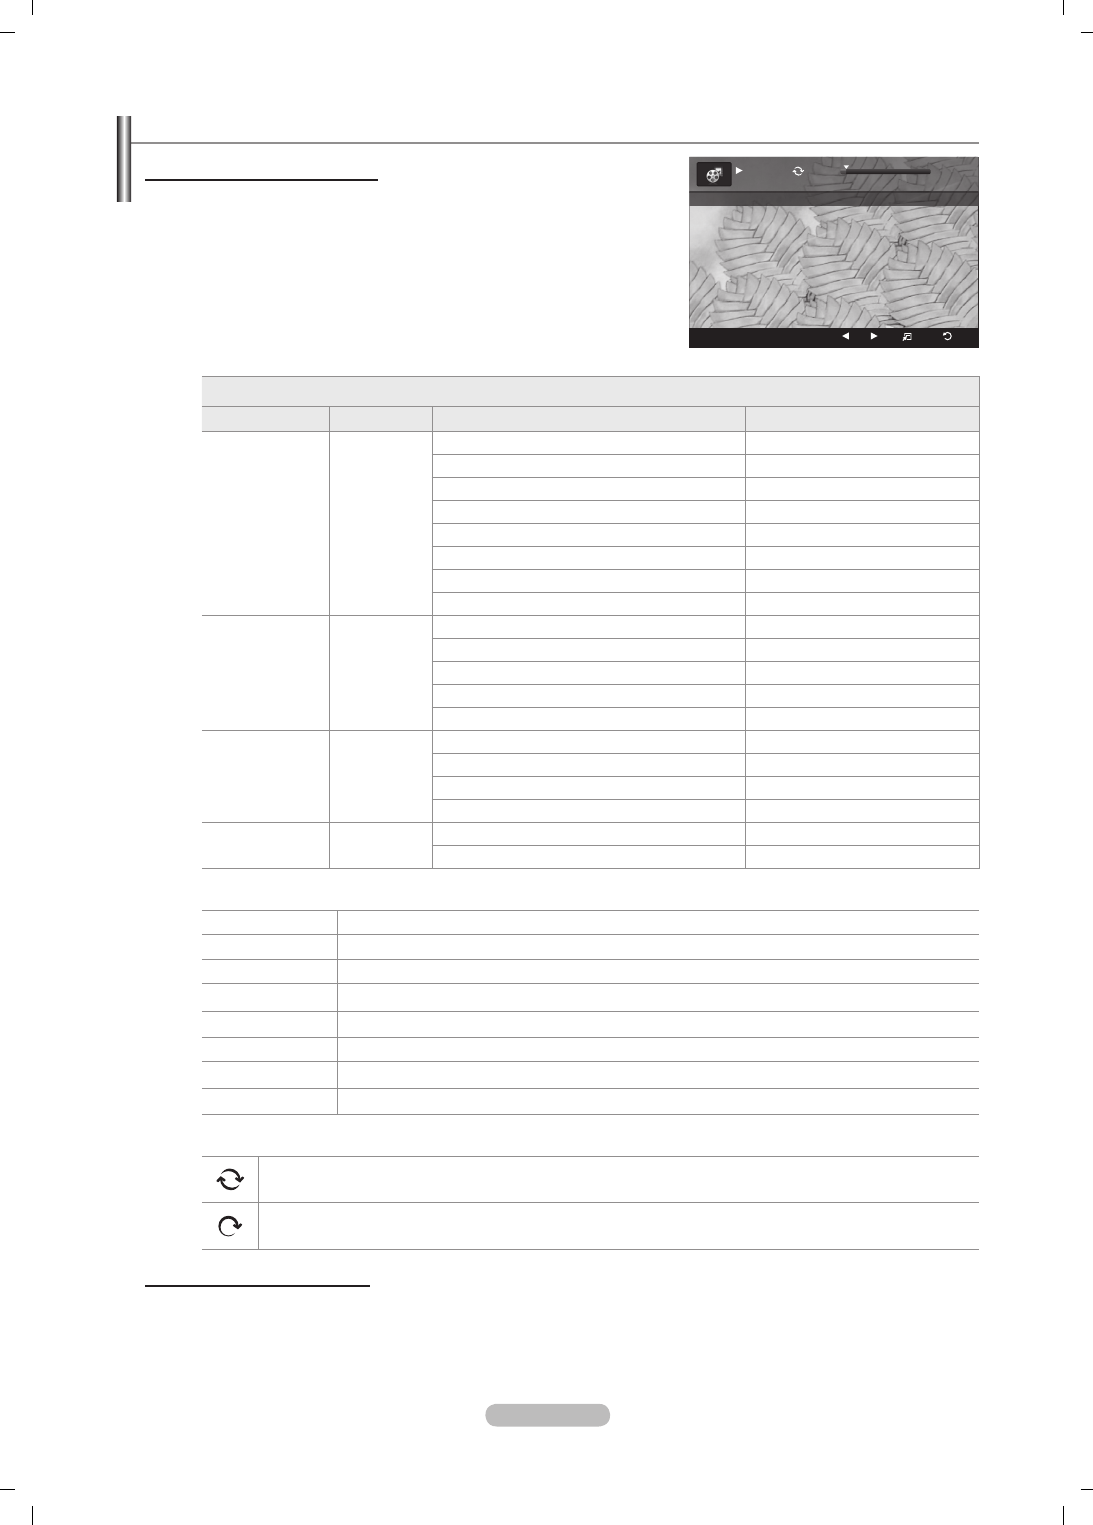
Deutsch - 41
Wiedergeben von Filmdateien
Wiedergeben einer Filmdatei
1. Wählen Sie mit den Tasten ◄ oder ► eine Filmdatei, die abgespielt werden soll.
2. Drücken Sie die Taste
∂
(Play)/ENTER
E
.
Die gewählte Datei wird wiedergegeben.
Die ausgewählte Datei wird zusammen mit der Abspieldauer oben
angezeigt.
Die Abspieldauer einer Filmdatei wird möglicherweise als 00:00:00
angezeigt, wenn am Anfang der Datei keine Informationen über die
Abspieldauer gefunden werden.
Unterstützte Videoformate
Video Codec
Dateierweiterung Container Video Decoder Max Resolution Sti
*.avi AVI
XviD 720x576
MPEG1 720x576
MPEG2 720x576
H.264 BP 1920x1088
H.264 BP 1920x1088
H.264 HP 1920x1088
MPEG-4 SP 720x576
MPEG-4 ASP 720x576
*.mp4 MP4
H.264 BP 1920x1088
H.264 MP 1920x1088
H.264 HP 1920x1088
MPEG-4 SP 720x576
MPEG-4 ASP 720x576
*.mpg
PS
MPEG1 (Programmstream) 1920x1088
*.mpeg MPEG2 (Programmstream) 1920x1088
*.vro MPEG2 VOB 1920x1088
*.vob MPEG2 VRO 1920x1088
andere
(ts) TS MPEG2 (Programmstream) 1920x1088
H.264 (Programmstream) 1920x1088
Regler für Videowiedergabe
ENTER
E
Abspielen/Anhalten der Diashow.
∂
Wiedergeben der Filmdatei
∑
Anhalten der Filmwiedergabe
∫
Beenden des Wiedergabemodus und Rückkehr zur Filmliste.
TOOLS Hiermit führen Sie verschiedene Funktionen aus den Filmmenüs aus.
◄/► Schneller Vor- oder Rücklauf durch den Film in Schritten von 20 Sekunden.
µ
Ändern der Abspielgeschwindigkeit.
▲/▼ Wechseln Sie zur ersten oder letzten Ansicht der aktuellen Datei.
Symbol für Informationen zur Film-Funktion
Hiermit werden alle Filmdateien im Ordner (oder die markierte Datei) wiederholt abgespielt.
Wiederhol-M. ist Ein.
Hiermit werden alle Filmdateien im Ordner (oder die markierte Datei) einmal abgespielt.
Wiederhol-M. ist Aus.
Abspielen einer Filmgruppe
1. Wählen Sie mit den Tasten ▲ oder ▼ das Sortierverfahren aus. (Titel, Erstellung, Ordne, Benutzerd.)
2. Drücken Sie die Tasten π (REW) oder µ (FF), um die gewünschte Gruppe auszuwählen.
3. Drücken Sie die Taste TOOLS.
4. Wählen Sie durch Drücken der Tasten ▲ oder ▼ die Option Gruppe abspielen, und drücken Sie dann die Taste ENTER
E
.
N
N
N
N
N
N
SUM
E
Pause
-20s
+20s
Option
Zurück
1/5 00:00:48 00:23:05
ABC.avi
BN68-01757A-Ger.indb 41 2008-9-24 15:37:11

Deutsch - 42
Abspielen der ausgewählten Filmdateien
1. Wählen Sie die gewünschte Filmdatei mit den Tasten ◄ oder ► aus der Filmliste aus.
2. Drücken Sie die gelbe Taste. Wiederholen Sie den obigen Vorgang, um mehrere Musikdateien auszuwählen.
Links neben dem Namen der Musikdatei wird das Symbol c angezeigt.
3. Drücken Sie die Taste ∂ (Play)/ENTER
E
.
Nur die gewählte Datei wird wiedergegeben.
Schleifenwiedergabe eines Filmes
Wenn Sie die Wiedergabe eines Films beenden, können Sie ihn später trotzdem in einer Schleife wiedergeben.
Mit der Funktion Ununterbrochen abspielen können Sie die Filmwiedergabe an der Stelle wieder fortsetzen, wo Sie zuletzt
aufgehört haben. Sie müssen also nicht den ganzen Film von Anfang an anschauen oder diese Stelle suchen.
1.
Wählen Sie den Film, den Sie Ununterbrochen abspielen möchten. Drücken Sie dazu in der Filmliste auf ◄ oder ►.
2. Drücken Sie die Taste ∂ (Play)/ENTER
E
.
3. Wählen Sie mit der blauen Taste die Funktion für ununterbrochene Wiedergabe.
Die Filmwiedergabe wird dort fortgesetzt, wo Sie sie beendet hatten.
Wenn Hilfe zu Schleifenbetrieb aktiviert wurde Ein, wird eine Meldung angezeigt, wenn Sie die gewünschte Filmdatei
Ununterbrochen abspielen möchten. (Informationen hierzu nden Sie auf Seite 43.)
4.
Um den WISELINK Pro-Modus zu verlassen, drücken Sie auf der Fernbedienung die Taste W.LINK.
Menü der Optionen für Filmwiedergabe
Wiederholungsmodus
Sie können den Film wiederholt abspielen.
Bildeinstellungen/Toneinstellungen
Informationen hierzu nden Sie auf Seite 43.
Bildformat
Anpassung: Abspielen des Videos im Format des Fernsehbildschirms.
Original: Abspielen des Videos im Originalformat.
Information
Die Informationen zur Filmdatei werden angezeigt.
Sicher entfernen
Sie können das USB-Gerät sicher vom Fernsehgerät entfernen.
N
N
N
N
•
•
Löschen von Foto-/Musik-/Filmdateien
1. Wählen Sie die gewünschte Datei mit den Tasten ◄ oder ► aus der Foto-/
Musik-/Filmliste aus.
Wenn Sie mehrere Dateien löschen möchten, wählen Sie die
entsprechenden Dateien, und drücken Sie die gelbe Taste.
2. Drücken Sie die Taste TOOLS.
3. Wählen Sie durch Drücken der Tasten ▲ oder ▼ die Option Löschen (oder
Gew. Datei löschen), und drücken Sie dann die Taste ENTER
E
.
4. Wählen Sie durch Drücken der Tasten ◄ oder ► die Option OK, und
drücken Sie dann die Taste ENTER
E
.
Die Datei wird gelöscht.
Bei schreibgeschützten Dateien wird die Meldung Die Datei ist schreibgeschützt. Löschen? angezeigt.
Schreibgeschützte Dateien in einer Dateiliste können nicht gelöscht werden.
Wenn Sie auf Abbrechen klicken, wird das Löschen abgebrochen.
Sie dürfen den USB-Speicher während des Löschvorgangs nicht entfernen.
Sie können Bilddateien einer Digitalkamera, die über PTP angeschlossen ist, nicht entfernen.
Die gelöschten Filmdateien können nicht wiederhergestellt werden.
N
N
N
N
N
N
N
N
Extras
Wiederhol-Modus ◄ Ein ►
Bildeinstellungen
Toneinstellungen
Bildformat : Anpassung
Information
Sicher entfernen
U
Navig.
L
Einst.
e
Beenden
Photo
SUM
Gerät
Favoriten-Einst
Wählen
Wechseln
Option
image_1.jpg
Monat : Jan
Datum : Jan.01.2008
Farbe : Grau
Komposition :
Ordner : P-other
Favorit : ★ ★ ★
Benutzerd.
Monatlich
Erstellung
Jan Nov
▲
Diashow
Gruppe abspielen
Löschen
Information
▼
BN68-01757A-Ger.indb 42 2008-9-24 15:37:12
Deutsch - 43
Bild-/Musikeinstellungen mit WISELINK Pro
Während Sie mit WISELINK Pro eine Diashow abspielen oder Musik hören, können Sie das Bild und den Ton Einst..
Bildeinstellungen
1. Drücken Sie während einer Diashow oder beim Abspielen von Musik die
Taste TOOLS.
2. Wählen Sie mit den Tasten ▲ oder ▼ die Option Bildeinstellungen aus.
3. Wählen Sie mit ◄ oder ► den Bild – Modus (Dynamisch, Standard oder
Film)
4. Navigieren Sie mit der Taste ▲ oder ▼ zum gewünschten Menüpunkt
(Kontrast, Helligkeit, Farbe, Optimalkontrast, Schwarzabgleich oder
Reset).
Wählen Sie Reset, um die Bildeinstellungen zurückzusetzen.
5. Drücken Sie zum Ändern der Einstellung die Taste ◄ oder ►.
Weitere Informationen zu den Bildeinstellungen nden Sie auf den Seiten 15~18.
Toneinstellungen
1. Drücken Sie die TOOLS-Taste während eine Diashow, Musik oder ein Film
wiedergegeben wird.
2. Wählen Sie mit den Tasten ▲ oder ▼ die Option Toneinstellungen aus.
3. Wählen Sie mit den Tasten ▲ oder ▼ die Option Tonmodus aus.
(Standard, Musik, Film, Sprache, Benutzerd.)
4. Navigieren Sie mit der Taste ▲ oder ▼ zum gewünschten Menüpunkt
Wählen Sie Reset, um die Toneinstellungen zurückzusetzen.
5. Drücken Sie zum Ändern der Einstellung die Taste ◄ oder ►.
(Weitere Informationen über die Toneinstellungen nden Sie auf Seite
21~22.)
Verwenden des Menüs Einstellungen
Mit dem Setup zeigen Sie die im WISELINK Pro-Menü vorgenommenen
Benutzereinstellungen an.
1. Drücken Sie die W.LINK-Taste auf der Fernbedienung, um das WISELINK
Pro-Menü anzuzeigen.
2. Wählen Sie durch Drücken der Tasten ◄ oder ► die Option Einstellungen,
und drücken Sie dann die Taste ENTER
E
.
3. Wählen Sie mit den Tasten ▲ oder ▼ die gewünschte Option aus.
4. Wählen Sie die Option durch Drücken der Tasten ◄ oder ►, und drücken
Sie dann die Taste ENTER
E
.
Um den WISELINK Pro-Modus zu verlassen, drücken Sie auf der
Fernbedienung die Taste W.LINK.
Diashow-Geschwindigkeit→Schnell/Langsam/Normal
Wählen Sie diese Option aus, um die Geschwindigkeit der Diashow
festzulegen.
Wiederhol-Modus→Ein/Aus
Hiermit können Sie Musikdateien wiederholt abspielen.
Filmwiederholung→Ein/Aus
Hiermit können Sie Filmdateien wiederholt abspielen.
HilfezuSchleifenbetrieb→Ein/Aus
Hiermit öffnen Sie das Popupfenster mit Informationen zum Schleifenbetrieb.
LaufzeitfürBildschirmschoner→1Min/3Min/5Min
Wählen Sie die Wartezeit bis zum Aktivieren des Bildschirmschoners.
Informationen
Hiermit zeigen Sie die Informationen zum angeschlossenen Gerät an.
Sicher entfernen
Sie können das USB-Gerät sicher vom Fernsehgerät entfernen.
N
N
N
N
N
SETUP
SUM
Gerät
Navig. Einst.
Zurück
Diashow-Geschwindigkeit ◄ Normal ►
Wiederhol-Modus : Ein
Filmwiederholung : Ein
Hilfe zu Schleifenbetrieb : Ein
Laufzeit für Bildschirmschoner
: 3Min
Information
Sicher entfernen
WISELINK Pro
Photo
SUM
Gerät
e
Beenden
Music SETUP
SETUP
SUM
851.98MB/995.00MB Free
Movie
Bildeinstellungen
Bildmodus ◄ Standard ►
Kontrast : 90
Helligkeit : 45
Farbe : 50
Optimalkontrast : Aus
Schwarzabgleich : Aus
Reset
U
Navig.
L
Einst.
E
Eingabe
R
Zurück
Toneinstellungen
Tonmodus ◄ Benutzerd. ►
Balance : L50 R50
100Hz : 0
300Hz : 0
1KHz : 0
3KHz : 0
10KHz : 0
Reset
U
Navig.
L
Einst.
E
Eingabe
R
Zurück
BN68-01757A-Ger.indb 43 2008-9-24 15:37:13
Deutsch - 44
WISELINK Pro-DLNA
Einrichten des DLNA-Netzwerks
Mit DLNA können Sie Videos und Bilder, die auf Ihrem PC gespeichert sind, über eine Netzwerkverbindung im Wiselink Pro-Modus
anzeigen. Damit brauchen Sie die Dateien nicht mehr auf einen USB-Speicher zu kopieren, den Sie dann an Ihren Fernseher
anschließen. Damit Sie DLNA verwenden können, muss der Fernseher mit dem Netzwerk verbunden und die DLNA-Anwendung
muss auf Ihrem PC installiert sein.
Diagramm der Netzwerkverbindungen
1. Verbinden Sie den [LAN]-Anschluss auf der Rückseite des Fernsehgeräts über ein LAN-Kabel mit dem externen Modem.
2. Schließen Sie den PC, auf dem das Programm “DLNA PC Share Manager” installiert wird, über ein Netzwerkkabel an das
externe Modem an.
3. Verbinden Sie den [LAN]-Anschluss an der Wand über ein Modemkabel mit dem externen Modem.
Verbinden mit dem Internet
1. Nachdem Sie die Anschlüsse hergestellt haben, müssen Sie im Fernsehgerät das Netzwerk einrichten.
Drahtlosnetzwerke sind für DLNA nicht geeignet.
Die ersten 3 Ziffern (Teilnetzadresse) der IP-Adressen des Fernsehgeräts und des PCs müssen übereinstimmen (z. B.:
IP-Adresse: 123.456.789.XX )
2. Führen Sie einen “Netzwerktest” durch, um die Einstellungen für das Netzwerk zu überprüfen.
Installieren der DLNA-Anwendung
Damit die Inhalte vom PC auf dem Fernsehgerät abgespielt werden können, müssen Sie die Anwendung installieren.
Systemanforderungen
1. Legen Sie die mit diesem Fernsehgerät gelieferte Programm-CD in den PC ein.
2. Zur Installation des Programms benötigen Sie 20 MB freien Platz auf der Festplatte.
Bei Freigabe der Dateien reichen 20 MB Festplattenspeicher für jeweils etwa 100 Dateien.
Wenn Sie die Dateifreigabe beenden, wird auch der Festplattenspeicher freigegeben, der ansonsten für die
Miniaturbildinformationen verwendet wird.
Unterstützte Formate
1. Bild: JPEG-Bild (*.jpg, *.jpeg)
2. Audio: MP3 (mp3)
3. Video: MPEG1 (mpg, mpeg), MPEG2 PS/TS (mpg, mpeg, trp, ts, tp), divx(mpg, mpeg, avi), MPEG4/H.264 (mpg, mpeg)
N
N
N
N
TV
Externes Modem
(ADSL/VDSL/Kabelfernsehen)
LAN
PC
LAN
1
2
3
BN68-01757A-Ger.indb 44 2008-9-24 15:37:13

Deutsch - 45
Installieren Sie die Anwendung
1. Starten Sie die Datei SETUP.EXE, die auf der zusammen mit dem Gerät gelieferten Programm-CD gespeichert ist.
Sie können die Datei allerdings auch von www.samsung.com herunterladen.
2. Installieren Sie den SAMSUNG PC Share Manager (siehe nachfolgende Abbildungen).
► ►
► ►
►
3. Nach Abschluss der Installation wird auf dem Desktop das Symbol für den PC Share Manager angezeigt.
Doppelklicken Sie auf das Symbol, um das Programm zu starten.
N
N
BN68-01757A-Ger.indb 45 2008-9-24 15:37:15

Deutsch - 46
Verwenden der DLNA-Anwendung
Layout des Programmfenster
1. Menüs: Folgende Anwendungsmenüs sind verfügbar: Datei, Freigeben, Server und Hilfe.
2. Klicken Sie, um den markierten Ordner auf dem PC-Server freizugeben.
3. Klicken Sie erneut, um die Freigabe zu beenden.
4. Klicken Sie, um die Ordner und Dateien auf dem PC zu aktualisieren.
5. Klicken Sie, um den Freigabestatus zu synchronisieren.
6. Auf dem PC werden die Ordner und Dateien aufgeführt, die freigegeben werden sollen.
7. Es werden Ordner aufgelistet, die vom Benutzer freigegeben wurden.
8. Name des PC-Servers aus der Geräteliste von WISELINK Pro: Klicken Sie hier, um den Namen zu ändern.
Datei
Eigenschaften: Hiermit zeigen Sie Informationen zu der ausgewählten Datei oder dem ausgewählten Ordner an.
Vorgehensweise 1: Markieren Sie eine Datei oder einen Ordner und klicken Sie auf Datei. Klicken Sie anschließend auf
das Untermenü Property.
Vorgehensweise 2: Markieren Sie eine Datei oder einen Ordner und klicken Sie mit der rechten Maustaste darauf. Wählen
Sie dann im Kontextmenü den Befehl Property.
<Vorgehensweise 1> <Vorgehensweise 2>
Name ModiedName Name
Name
Yes No
Name ModiedName Name
Name
Yes No
Name ModiedName Name
Name
Yes No
Beenden: Beenden der DLNA-Anwendung
Wenn Sie Beenden wählen, ohne die Änderungen nach Veränderung des Freigabestatus zu übernehmen, wird in einer
Meldung abgefragt, ob Sie die geänderten Einstellungen für den PC übernehmen möchten. Wählen Sie Ja, um die
Änderungen zu speichern und die Anwendung zu beenden.
Name ModiedName Name
Name
Yes No
❑
-
-
1
2 3 4 5
6 7
8
BN68-01757A-Ger.indb 46 2008-9-24 15:37:18

Deutsch - 47
Freigeben
Freigeben eines Ordners
Sie können einen Ordner auf dem PC für das Fernsehgerät freigeben. Maximal möglich sind 32 Ordner.
Ihr PC arbeitet dann als Server für das Fernsehgerät.
Vorgehensweise 1: Markieren Sie in Arbeitsplatz einen Ordner, wählen Sie Freigeben und klicken Sie anschließend auf
den Befehl Ordner freigeben.
Vorgehensweise 2: Markieren Sie in Arbeitsplatz einen Ordner, klicken Sie mit der rechten Maustaste auf den markierten
Ordner, und wählen Sie dann im Kontextmenü den Befehl Ordner freigeben.
Vorgehensweise 3: Zeigen Sie im linken Fensterbereich mit der Maus auf einen Ordner der Ordnerliste Arbeitsplatz
und ziehen Sie den Ordner dann in den Bereich mit den freigegebenen Ordnern. Wenn Sie in einer Meldung aufgefordert
werden, die Ordnerfreigabe zu bestätigen, wählen Sie Ja.
<Vorgehensweise 1> <Vorgehensweise 2> <Vorgehensweise 3>
Aufheben der Freigabe eines Ordners
Sie können die Freigabe eines Ordners auf Ihrem PC aufheben. Markieren Sie einen Ordner im Bereich Freigegebener
Ordner und klicken Sie dann auf Unshare Folder.
Vorgehensweise 1: Markieren Sie einen Ordner im Bereich Freigegebener Ordner, wählen Sie dann das Menü Freigeben
und klicken Sie anschließend auf Unshare Folder.
Vorgehensweise 2: Markieren Sie im Bereich Freigegebener Ordner einen Ordner, klicken Sie mit der rechten Maustaste
auf den markierten Ordner, und wählen Sie dann im Kontextmenü den Befehl Unshare Folder.
Vorgehensweise 3: Zeigen Sie mit der Maus im Bereich Freigegebener Ordner auf einen Ordner und ziehen Sie den
Ordner dann in den Bereich Arbeitsplatz. Wenn Sie in einer Meldung aufgefordert werden, das Aufheben der Freigabe zu
bestätigen, wählen Sie Ja.
<Vorgehensweise 1> <Vorgehensweise 2> <Vorgehensweise 3>
Übernehmen der aktuellen Einstellungen
Führen Sie diesen Vorgang aus, wenn aufgrund einer neuen Ordnerfreigabe oder der Aufhebung einer Ordnerfreigabe eine
Synchronisierung erforderlich ist. Mit dem Menü Neuen Status Einst. übernehmen Sie die Änderungen in den freigegebenen
Ordnern auf die Daten, die mit dem PC-Freigabeprogramm gespeichert wurden.
Da das Übernehmen der Änderungen an den internen Daten ein zeitraubender Vorgang ist, wird dem Benutzer mit dieser
Funktion die Möglichkeit geboten, die Änderungen an den Daten nur bei Bedarf zu übernehmen.
Erst wenn der Befehl Neuen Status Einst. gewählt wird, wird der geänderte Status des freigegebenen Ordners auf den
Server übernommen.
Änderungen an den freigegebenen Ordnern werden erst auf Ihren PC übernommen, wenn Sie den Befehl Neuen Status
Einst. wählen.
Vorgehensweise 1: Klicken Sie auf Freigeben und wählen Sie den Befehl DB aktualisieren.
Vorgehensweise 2: Klicken Sie auf das Symbol Neuen Status Einst..
❑
N
-
-
-
-
-
-
-
-
BN68-01757A-Ger.indb 47 2008-9-24 15:37:19

Deutsch - 48
Festlegen der Zugangsberechtigung
Damit Ihr Fernsehgerät den PC nden kann, muss das Fernsehgerät im Fenster mit den Einstellungen für die
Zugangsberechtigungen auf Geräterichtlinie einst. eingestellt werden. Zusätzlich müssen sich der PC-Server und das
Fernsehgerät im gleichen Teilnetz benden.
Vorgehensweise: Klicken Sie auf Freigeben und wählen Sie den Befehl Geräterichtlinie einst.. Nicht verfügbare Elemente
werden in Grau dargestellt. Sie können die Zugangsberechtigungen mit den Schaltächen Akzeptiern / Ablehnen Einst..
Um ein Element zu löschen, wählen Sie Delete Item.
Server
Server
Sie können Ihren PC als Server verwenden und den Serverstatus später wieder aufheben.
Server zusammen mit Windows starten
Sie können bestimmen, ob der PC-Server automatisch zusammen mit Windows gestartet werden soll.
Servernamen ändern
Sie können den PC-Server umbenennen. Geben Sie einen neuen Namen ein, und klicken Sie auf OK. Der neue Name wird
oben rechts im Fenster und auf dem Fernsehbildschirm angezeigt.
Hilfe
Version
Informationen zur Programmversion werden angezeigt.
-
❑
❑
BN68-01757A-Ger.indb 48 2008-9-24 15:37:19

Deutsch - 49
Verwenden der DLNA-Funktion
Verwenden des DLNA-Menüs
Durch DLNA (Digital Living Network Alliance) wird es möglich, Inhalte
wiederzugeben, die auf einem direkt oder über das Netzwerk an Ihr
Fernsehgerät angeschlossenen DLNA-Server (gewöhnlich Ihrem PC)
gespeichert sind.
Mithilfe von Wiselink Pro können Sie Inhalte von einem an das Fernsehgerät
angeschlossenen USB-Speicher wiedergeben, wogegen Sie mit DLNA Inhalte
von einem DLNA-Server (Ihrem PC) wiedergeben können, der direkt oder über
das Netzwerk an Ihr Fernsehgerät angeschlossen ist. Die Vorgehensweisen zum
Verwenden der Inhalte stimmen mit denen bei WISELINK Pro überein.
Wenn Sie den zusammen mit dem Fernsehgerät gelieferten PC-Freigabe-
Manager auf einem PC installieren, können Sie den PC über das Netzwerk als
DLNA-Server verwenden.
1. Drücken Sie die W.LINK-Taste auf der Fernbedienung, um das DLNA-Menü anzuzeigen.
2. Drücken Sie die Tasten ◄ oder ►, um ein Symbol (Foto, Musik, Film, Setup) auszuwählen, und drücken Sie dann die Taste
ENTER
E
.
Um den “DLNA”-Modus zu verlassen, drücken Sie auf der Fernbedienung die Taste W.LINK.
Foto
Menü der Optionen für Fotolisten
Sortieren der Fotoliste/Anzeigen der Informationen/Drehen der Fotodatei/Anzeigen einer Diashow
Menü der Optionen während einer Diashow
Wiedergabe & Pause/Diashow-Geschwindigkeit/Zoom/Drehen
Musik
Menü der Optionen für Musiklisten
Musikliste sortieren/Anzeigen der Informationen/Abspielen einer Musikdatei
Menü der Optionen für Musikwiedergabe
Wiedergabe & Pause/Wiederholmodus
Filme
Menü der Optionen für Filmlisten
Filmliste sortieren/Anzeigen der Informationen/Wiedergeben einer Filmdatei
Menü der Optionen für Filmwiedergabe
Wiedergabe & Pause/Wiederholmodus
Einrichtung
Diashow-Geschwindigkeit/Wiederhol-Modus/Filmwiederholung/Laufzeit für Bildschirmschoner/Informationen
DLNA unterstützt die folgenden Funktionen nicht.
Hintergrundmusik und Einstellungen für Hintergrundmusik.
Benutzerdenierte Sortierung von Dateien im Foto-, Musik- und Filmordner.
Die Funktion zum Ändern der Gruppe.
Die Löschfunktion.
Die Funktion zum sicheren Entfernen.
Die Tasten π (REW)/µ (FF) können Sie verwenden, wenn ein Film abgespielt wird.
Die Funktionen zum Überspringen (Taste ◄/►) oder die Pause-Funktion sind möglicherweise bei Verwendung der DLNA-
Software anderer Hersteller nicht verfügbar. Dies hängt vom jeweiligen Inhalt ab.
Die Wiedergabedauer wird beim Abspielen von Filmen möglicherweise nicht angezeigt.
N
❑
❑
❑
❑
N
-
-
-
-
-
-
N
N
WISELINK Pro
Photo
SUM
Gerät
e
Beenden
Music SETUP
PHOTO
DLNA : Server
Movie
BN68-01757A-Ger.indb 49 2008-9-24 15:37:19
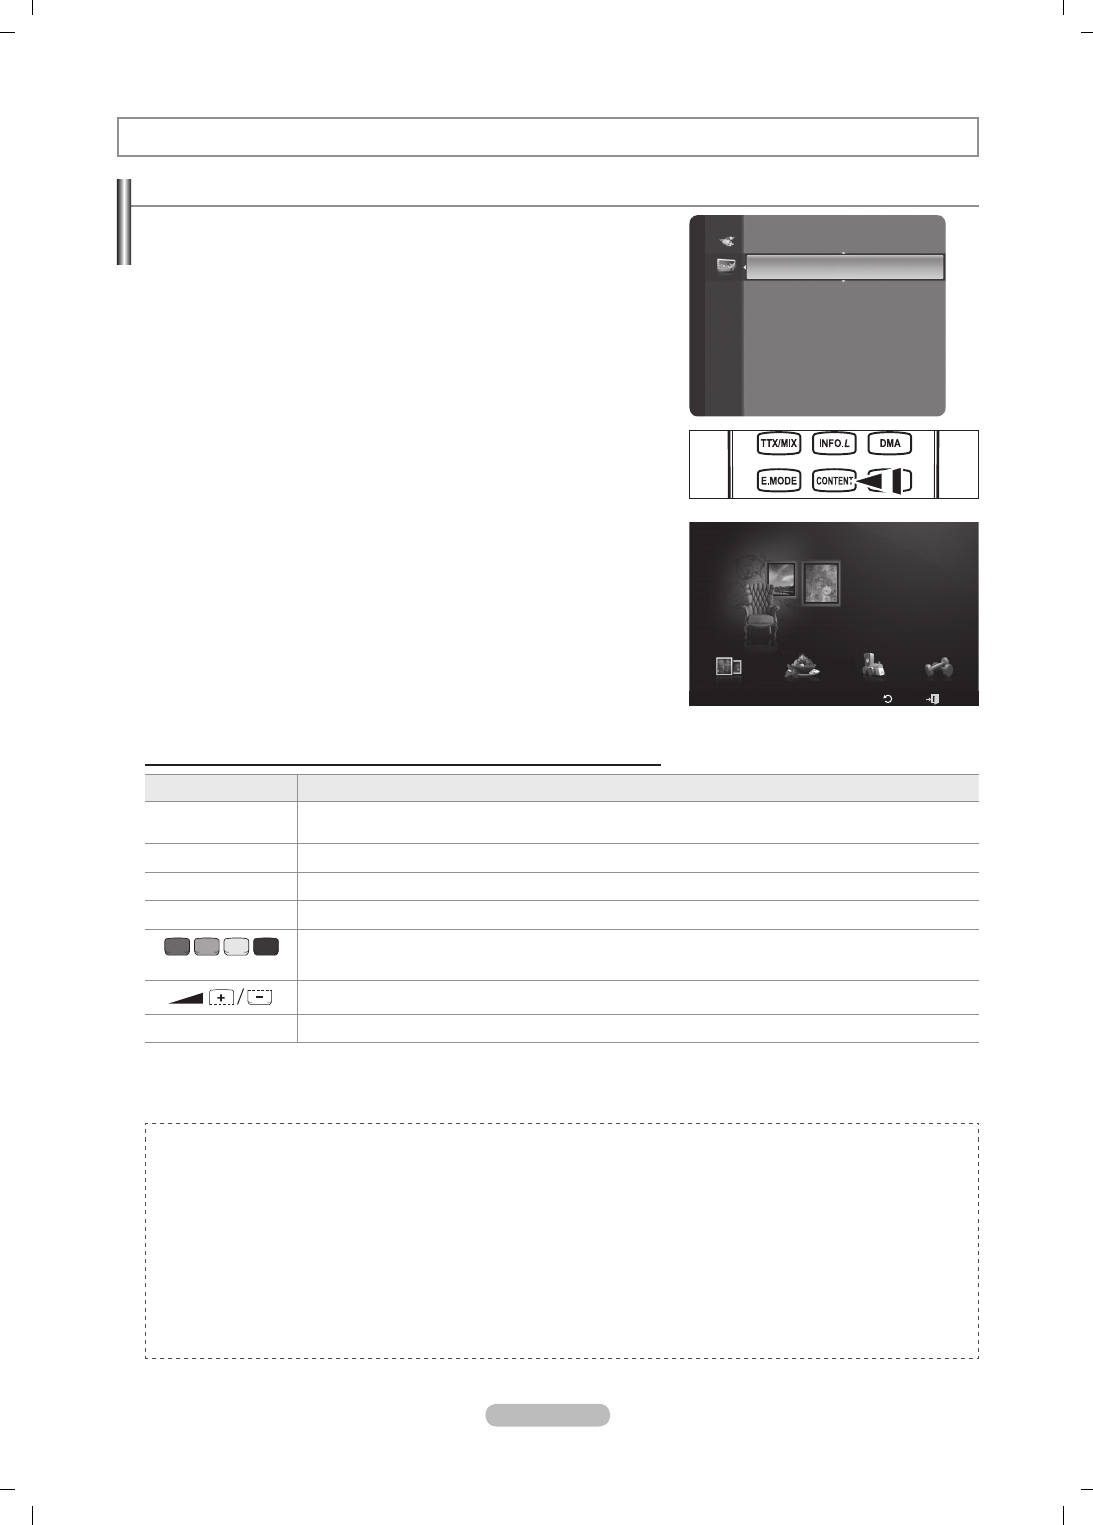
Deutsch - 50
Aktivieren der Bibliothek der Inhalte
Mit dem Befehl “Content Library” können Sie die Inhalte im Fernsehgerät oder
auf dem USB-Speicher anzeigen und abspielen. Die Funktionen zum Löschen,
Verschieben und Aktualisieren funktionieren nicht in Verbindung mit den auf dem
Fernsehgerät abgelegten Inhalten.
1. Drücken Sie die Taste MENU. Wählen Sie durch Drücken der Tasten ▲ oder
▼ die Option Anwendung, und drücken Sie dann die Taste ENTER
E
.
2. Wählen Sie durch Drücken der Tasten ▲ oder ▼ die Option Content
Library, und drücken Sie dann die Taste ENTER
E
.
Das Hauptmenü der Content Library wird angezeigt.
Drücken Sie die CONTENT-Taste auf der Fernbedienung, um das Hauptmenü
der Content Library anzuzeigen.
3. Drücken Sie die Tasten ◄ oder ►, um ein Symbol (Galerie, Kochen, Kinder,
Fitness) auszuwählen, und drücken Sie dann die Taste ENTER
E
.
Das ausgewählte Element wird wiedergegeben.
Weitere Informationen werden angezeigt, wenn der Benutzer diese
Schaltäche verwendet, während die Inhalte wiedergegeben werden.
Verwenden der Fernbedienungstasten im Menü Content Library
Taste Vorgang
▲/▼/◄/►
(Rad) Cursor bewegen und Elemente auswählen.
ENTER
E
Markiertes Element auswählen.
Zurück Zurück zum vorherigen Menü.
EXIT Beenden der aktuellen Funktion und Rückkehr zum Hauptmenü der Content Library.
(colour button) Die Schaltächen für Funktionen werden auf den entsprechenden Seiten beschrieben.
Sie können die Lautstärke der wiedergegebenen Inhalte Einst..
CONTENT Beenden der Bibliothek der Inhalte
Wenn Sie die Lautstärketaste oder MUTE drücken, wird kein Bildschirmmenü angezeigt, aber die Funktion wird entsprechend
ausgeführt.
DieBibliothekderInhalteenthältnurTexte,Graken,Bilder,MultimediaundweitereMaterialienfürInformations-
und sonstige Zwecke. Das Material in der Bibliothek der Inhalte wurde geändert und wird ständig überarbeitet und
aktualisiert. Das Material in der Bibliothek der Inhalte ist nicht unbedingt für jedes Publikum geeignet.
Die Informationen in der Bibliothek der Inhalte werden ohne Mängelgewähr zur Verfügung gestellt. Zwar werden
die Informationen, die wir Ihnen mit der Bibliothek der Inhalte zur Verfügung stellen, unserer Ansicht nach aus
zuverlässigen Quellen gewonnen, Samsung kann und wird nicht für die Richtigkeit, Gültigkeit, Pünktlichkeit
und Vollständigkeit der Informationen oder Daten garantieren, die Ihnen für einen bestimmten Zweck zur
Verfügung gestellt werden. Unter keinen Umständen (auch nicht bei Fahrlässigkeit) haften SAMSUNG oder
der Rechteinhaber vertraglich oder gesetzlich für direkte oder indirekte Schäden, für Nebenschäden und
Folgeschäden, Anwaltsgebühren, Auslagen und sonstige Schäden, die als Folge von oder im Zusammenhang mit
solchen Informationen aus der Bibliothek der Inhalte oder deren Verwendung auftreten. Dies ist auch dann der
Fall, wenn SAMSUNG auf die Möglichkeit solcher Schäden hingewiesen wurde.
N
N
➣
N
N
N
Bibliothek der Inhalte
Anwendung
WISELINK Pro
Anynet+ (HDMI-CEC)
ContentLibrary ►
InfoLive
Produktdemo
Einstellungen
USB
Zurück
Beenden
Kochen KindeEnglisch für Kinderr Fitness
Galerie
Galerie
Content Library
BN68-01757A-Ger.indb 50 2008-9-24 15:37:20

Deutsch - 51
Verwenden der Bibliothek der Inhalte
Galerie
Kunst/Entspannung/Party: Mit dieser Funktion starten Sie eine Diashow mit hochauflösenden Bildern und
Hintergrundmusik, um eine bestimmte Atmosphäre zu schaffen. Mithilfe der Galeriefunktion Ihres Fernsehgeräts können Sie
die Atmosphäre Ihres Heims ändern.
Drücken Sie die gelbe Taste, um alle Bilder anzuzeigen.
Für jede der Optionen Art, Relax und Party gibt es eine Standardmusik.
Drücken Sie die INFO-Taste, um die Autoreninformationen und weitere Details für die Bilder anzuzeigen. Drücken Sie
die INFO-Taste noch einmal oder drücken Sie auf ►, um die Autoreninformationen zu entfernen. (Autoreninformationen
derzeit nur in Englisch).
Das Urheberrecht für die Inhalte unter Galerie sowie die weiteren entsprechenden Rechte sind Gallery Player, Inc.
vorbehalten.
Weitere Inhalte für Galerie nden Sie unter www.samsung.com.
Kochen
Vorspeisen/Hauptgerichte/Nachspeisen: Hiermit öffnen Sie verschiedene Rezepte, die Sie dann schrittweise befolgen
können. Freuen Sie sich auf diese Inhalte, denn so erhalten Sie zahlreiche Anregungen für gutes Essen.
Die Rezepte aus dem Abschnitt Kochen auf dem Samsung-Fernseher basieren auf den von Anness Publishing
veröffentlichten Rezepten.
Das Urheberrecht für die Inhalte unter Kochen sowie die weiteren entsprechenden Rechte sind Practical Pictures
vorbehalten.
Kinder
Stories/Songs/Spiele: Hierbei handelt sich um Lerninhalte und interaktive Inhalte, die Kinder regelmäßig schauen dürfen.
Freuen Sie sich auf die Geschichten, Songs und Spiele mit Boowa und Kwala.
Das Urheberrecht für die Inhalte unter Kinder sowie die weiteren entsprechenden Rechte sind UpToTen vorbehalten.
Fitness
Einfache Dehnübungen/Massage: Diese nützlichen Inhalte für die Gesundheitspflege umfassen Dehnübungen und
Massagen, die Ihrer ganzen Familie gut tun.
Diese nützlichen Inhalte für die Gesundheitspege umfassen Dehnübungen und Massagen, die Ihrer ganzen Familie gut
tun. Die Inhalte in Einfache Dehnübungen für das Samsung-Fernsehgerät basieren auf dem von DK herausgegebenen
Buch Stretching von Suzanne Martin und die Inhalte unter Massage auf verschiedenen Büchern von Anness Publishing.
Das Urheberrecht an Einfache Dehnübungen liegt bei DK Publishing Company. Das Urheberrecht an “Massage” liegt
bei Practical Pictures. Alle weiteren Rechte im Zusammenhang mit dem geistigen Eigentum sind den entsprechenden
Unternehmen vorbehalten.
Verwenden der Fernbedienungstasten im Fitness-Menü
Taste Vorgang
◄/►
(Wheel) Letzten Schritt anzeigen/Nächsten Schritt anzeigen
ENTER
E
Wiedergabe oder Pause (bei einfachen Dehnübungen und Dehnübungen für Fortgeschrittene)
Laufzeit für Bildschirmschoner
Wählen Sie die Wartezeit bis zum Aktivieren des Bildschirmschoners.
Drücken Sie die gelbe Taste, um im Hauptmenü der Content Library den Befehl Einstellungen zu wählen.
❑
N
N
N
N
N
❑
N
N
❑
N
❑
N
N
❑
BN68-01757A-Ger.indb 51 2008-9-24 15:37:20

Deutsch - 52
Verwenden weiterer Inhalte mithilfe eines externen USB-Speichers
Sie können Inhalte auf einen USB-Speicher herunterladen und diese auf Ihrem Fernsehgerät abspielen. (Die Inhalte auf dem
externen USB-Gerät werden direkt abgespielt und nicht zuerst auf den eingebauten Flash-Speicher des Fernsehers kopiert.)
Abspielen und Beenden von neuen Inhalten
1. Drücken Sie im Hauptmenü der Content Library die rote Taste.
Das Hauptfenster des USB-Browsers wird geöffnet.
Eine Liste der Dateien auf dem USB-Speicher wird angezeigt.
2. Drücken Sie so oft die Tasten ▲ oder ▼, bis die Datei (oder der Ordner)
markiert ist, die Sie abspielen möchten. Drücken Sie die Taste ENTER
E
.
Die gewählten Inhalte werden abgespielt.
Die Verwendung der Inhalte erfolgt in gleicher Weise wie die der Inhalte im
Fernsehgerät.
Um zum Hauptfenster des USB-Browsers zurückzukehren, drücken Sie
die Taste EXIT.
Die Content Library unterstützt ausschließlich USB-
Massenspeichergeräte vom Typ MSC (Mass Storage Class). MSC-
Geräte sind Massenspeicher zur Übertragung von Daten. Beispiele für
MSC sind Thumb-Laufwerke und Flash Card-Lesegeräte. USB HDD
und HUB werden nicht unterstützt.
Herunterladen neuer Inhalte
Neue bzw. andere als die eingebauten Inhalte können Sie kostenlos oder gegen
Bezahlung über die Website Samsung.com beziehen.
Herunterladen von Inhalten
1. Wechseln Sie zur Website www.samsung.com und öffnen Sie die Seite mit der Bibliothek der Inhalte
2. Geben Sie die Gerätenummer ein (UDN, Eindeutige Gerätenummer) ein, wenn sie abgefragt wird.
3. Wählen Sie auf der Seite zum Herunterladen von Inhalten einen Inhaltsbereich aus.
4. Laden Sie den Inhalt auf den USB-Speicher.
Die Content Library unterstützt ausschließlich USB-Massenspeichergeräte vom Typ MSC (Mass Storage Class).
MSC-Geräte sind Massenspeicher zur Übertragung von Daten. Beispiele für MSC sind Thumb-Laufwerke und Flash
Card-Lesegeräte. USB HDD und HUB werden nicht unterstützt.
5. Wechseln Sie zum Hauptmenü der Content Library. Drücken Sie dazu auf Inhalt oder wählen Sie Content Library
(Menü → Anwendung → Content Library)
6. Stecken Sie den USB-Speicher in den USB-Anschluss seitlich am Fernsehgerät.
Suchen der Gerätenummer (UDN, Eindeutige Gerätenummer).
1. Stecken Sie den USB-Speicher in den USB-Anschluss seitlich am Fernsehgerät.
2. Drücken Sie im Hauptfenster des USB-Browsers auf die grüne Taste (UDN anzeigen).
3. Bei der angezeigten 18-stelligen Zahl handelt es sich um die Gerätenummer.
Bereitgestellte Inhalte
Zusätzliche Inhalte erhältlich über www.samsung.com.
N
N
N
N
N
N
N
Einstellungen
USB
Zurück
Beenden
Kochen Kinder Fitness
Galerie
Galerie
Content Library
TV Memory
Show UDN
Zurück
Content Library
USB
<<
1/1
>>
Fitness
Kinder
Kochen
Galerie
Living
Kinder
▼ ▲
Others
Sub Item : 2
BN68-01757A-Ger.indb 52 2008-9-24 15:37:21
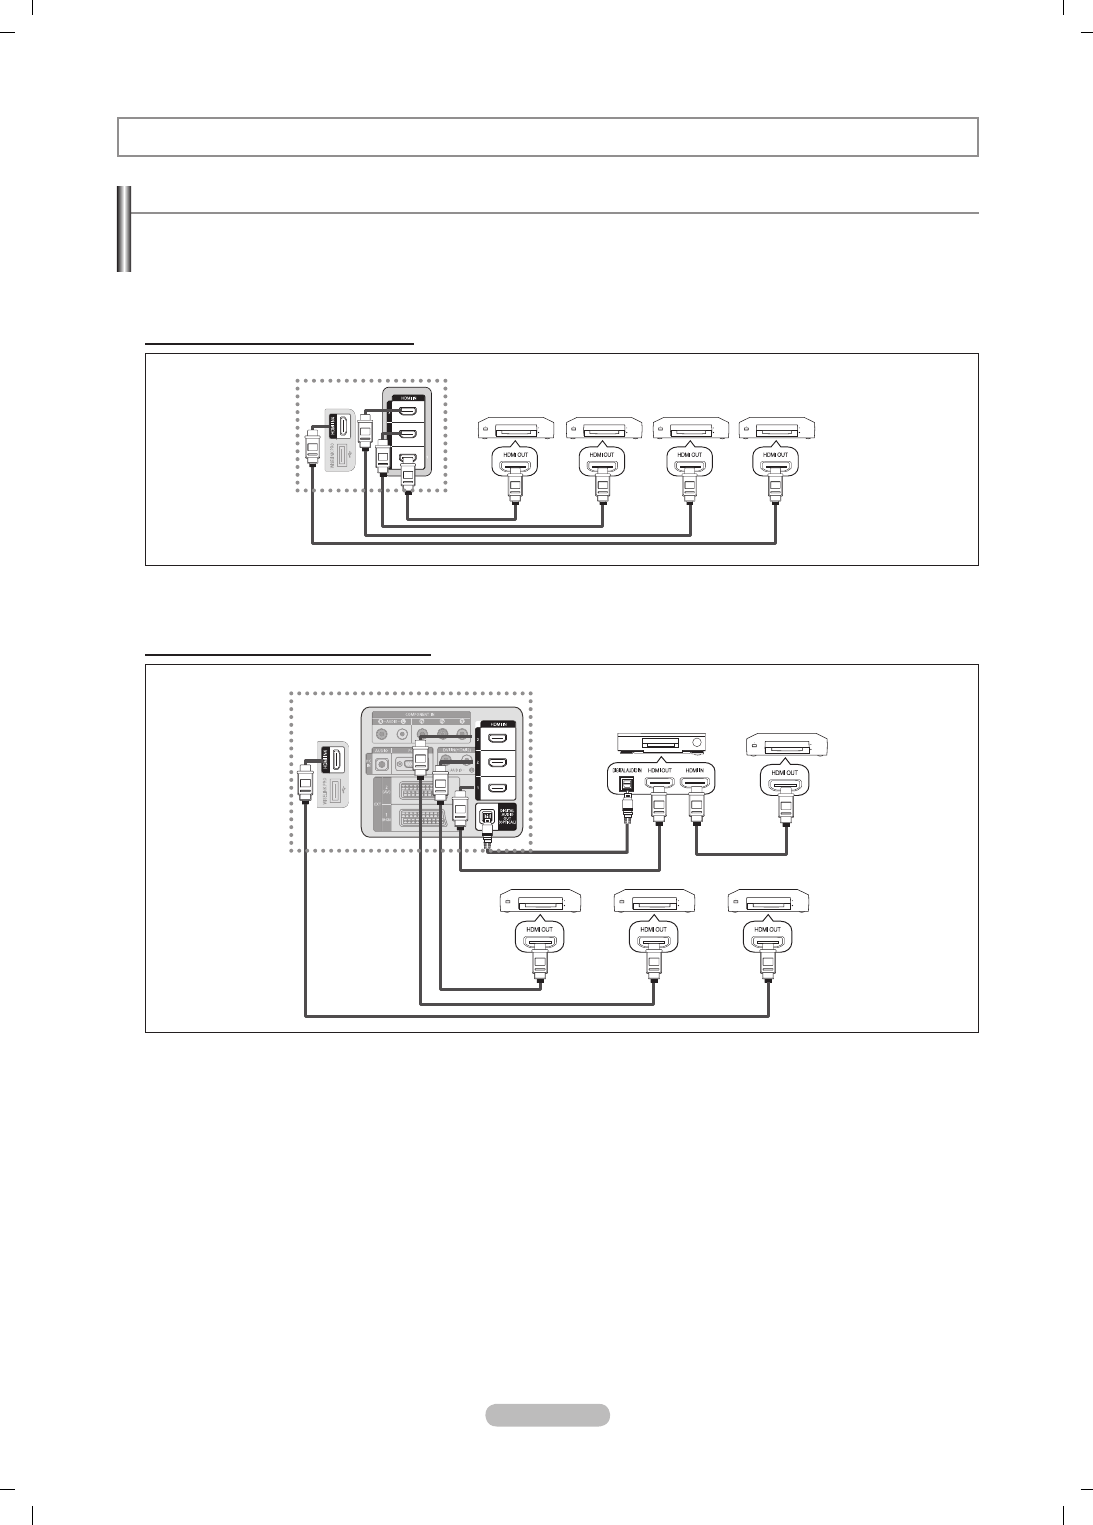
Deutsch - 53
Anschließen von Anynet+-Geräten
Bei Anynet+ handelt es sich um eine Funktion, mit der Sie alle angeschlossenen Samsung-Geräte, die Anynet+ unterstützen, mit
der Fernbedienung für Ihr Samsung-Fernsehgerät steuern können.
Das Anynet+-System unterstützt nur Anynet+-fähige Samsung-Geräte. Wenn Sie wissen möchten, ob Ihr Samsung-Gerät diese
Funktion unterstützt, suchen Sie das Anynet+ auf Ihrem Gerät.
Anschließen an ein Fernsehgerät
1. Verbinden Sie einen der Anschlüsse [HDMI 1], [HDMI 2], [HDMI 3] oder [HDMI 4] am Fernsehgerät mit dem HDMI OUT-
Anschluss am entsprechenden Anynet+-Gerät. Verwenden Sie hierfür ein HDMI-Kabel.
Anschluss an das Heimkinosystem
1. Verbinden Sie einen der Anschlüsse [HDMI 1], [HDMI 2], [HDMI 3] oder [HDMI 4] am Fernsehgerät mit dem HDMI OUT-
Anschluss am entsprechenden Anynet+-Gerät. Verwenden Sie hierfür ein HDMI-Kabel.
2 Verbinden Sie den HDMI IN-Anschluss des Heimkinosystems mit dem HDMI OUT-Anschluss des entsprechenden Anynet+-
Geräts. Verwenden Sie hierfür ein HDMI-Kabel.
Verbinden Sie den (optischen) digitalen Audioausgang am Fernsehgerät und den digitalen Audioeingang des
Heimkinoszstems ausschließlich mit Hilfe des Glasfaserkabels.
Bei obiger Vorgehensweise überträgt der optische Anschluss nur 2-Kanalaudio. Die Tonausgabe erfolgt also nur über den
linken und rechten Frontlautsprecher sowie den Subwoofer des Heimkinosystems. Wenn Sie 5.1-Kanalton wünschen, müssen
Sie den digitalen (optischen) Audioausgang des DVD-Players oder der Kabel-/Sat-Box (also Anynet-Gerät 1 oder 2) direkt an
einen Verstärker oder ein Heimkinosystem und nicht an das Fernsehgerät anschließen.
Schließen Sie nur ein Heimkinosystem an.
Sie können Anynet+-Geräte mithilfe eines HDMI 1.3-Kabels verbinden. Einige HDMI-Kabel unterstützen möglicherweise keine
Anynet+-Funktionen.
Anynet+ arbeitet, wenn das AV-Gerät, das Anynet+ unterstützt, im Standby-Modus oder angeschaltet ist.
Anynet+ unterstützt maximal 12 AV-Geräte. Beachten Sie, dass Sie maximal 3 Geräte des gleichen Typs anschließen können.
N
N
N
N
N
N
Informationen zu Anynet+
Anynet+-
Gerät 1
Anynet+-
Gerät 2
Anynet+-
Gerät 3
TV
HDMI-1.3-Kabel HDMI-1.3-Kabel
HDMI-1.3-Kabel HDMI-1.3-Kabel
Anynet+-
Gerät 4
TV
Anynet+-Gerät 1
Anynet+-Gerät 2 Anynet+-Gerät 3
HDMI-1.3-Kabel
HDMI-1.3-Kabel
HDMI-1.3-Kabel
HDMI-1.3-Kabel
Heimkinosystem
Anynet+-Gerät 4
HDMI-1.3-Kabel
Optisches Kabel
BN68-01757A-Ger.indb 53 2008-9-24 15:37:23

Deutsch - 54
Suchen von Anynet+-Geräten und Umschalten zwischen diesen Geräten
1 Drücken Sie die Taste TOOLS. Drücken Sie die Taste ENTER
E
, um Anynet+
(HDMI-CEC) auszuwählen.
2. Wählen Sie durch Drücken der Tasten ▲ oder ▼ die Option Geräteliste, und
drücken Sie dann die Taste ENTER
E
.
Nun werden die an das Fernsehgerät angeschlossenen Anynet+-Geräte
aufgelistet. Wenn Sie das gewünschte Gerät nicht nden, drücken Sie die
rote Taste, um nach Geräten zu suchen.
Nur wenn Sie Anynet+ (HDMI-CEC) im Menü Einstellungen aktivieren,
wird das Menü Geräteliste angezeigt.
3. Wählen Sie ein bestimmtes Gerät durch Drücken der Tasten ▲ oder ▼, und drücken Sie dann die Taste ENTER
E
. Das
System wechselt zum ausgewählten Gerät.
Das Umschalten zu den ausgewählten Geräten kann bis zu 2 Minuten dauern. Sie können diesen Vorgang während des
Umschaltens nicht abbrechen.
Die zum Suchen nach Geräten erforderliche Zeit hängt von der Anzahl der angeschlossenen Geräte ab.
Wenn die Gerätesuche abgeschlossen ist, wird die Anzahl der gefundenen Geräte nicht angezeigt.
Zwar sucht das Fernsehgerät beim Anschalten mit der Netztaste automatisch die Geräteliste, aber Geräte, die bei
angeschaltetem Fernsehgerät oder unter bestimmten Umständen angeschlossen werden, erscheinen in der Geräteliste nicht.
Drücken Sie die rote Taste, um die angeschlossenen Geräte zu suchen.
Wenn Sie mit der Taste SOURCE eine externe Signalquelle eingestellt haben, können Sie die Anynet+-Funktion nicht
verwenden. Achten Sie darauf, immer nur mit der Geräteliste zu einem Anynet+-Gerät zu wechseln.
N
N
N
N
N
N
N
Einrichten von Anynet+
Anynet+(HDMI-CEC)
Extras→Anynet+(HDMI-CEC)führt die gleiche Funktion aus.
Einrichtung
Anynet+(HDMI-CEC)→Aus/Ein: Damit Sie die Funktionen von Anynet+
nutzen können, muss Anynet+ (HDMI-CEC) aktiviert (Ein) sein.
Wenn die Funktion Anynet+ (HDMI-CEC) deaktiviert wird, sind auch alle
Vorgänge in Verbindung mit Anynet+ deaktiviert.
Autom.Ausschalten→Nein/Ja: Automatisches Abschalten von Anynet+-
Geräten durch Abschalten des Fernsehgeräts
Damit Sie Anynet+ verwenden können, muss die Geräteauswahl der
Fernbedienung auf TV eingestellt sein.
Wenn Sie Autom.Ausschalten auf Ja setzen, werden auch die
angeschlossenen externen Geräte ausgeschaltet, wenn Sie das
Fernsehgerät ausschalten. Wenn das externe Gerät jedoch gerade
aufnimmt, wird es möglicherweise abgeschaltet oder auch nicht.
❑
•
N
•
N
N
Anwendung
WISELINK Pro
Anynet+(HDMI-CEC) ►
Content Library
InfoLive
Produktdemo
Geräteliste
Einstellungen
U
Navig.
E
Eingabe
R
Zurück
Fernsehen
Geräteliste
Aufnehmen : DVDR
DVDR Operation
Empfänger : Ein
Einstellungen
U
Navig.
E
Eingabe
R
Zurück
Anynet+ (HDMI-CEC) : ON
Autom.Ausschalten : Ja
U
Navig.
E
Eingabe
R
Zurück
Einstellungen
Aus
Ein
BN68-01757A-Ger.indb 54 2008-9-24 15:37:23
Deutsch - 55
Anynet+-Menü
Der Inhalt des Anynet+-Menüs hängt vom Typ und Status der an das Fernsehgerät angeschlossenen Anynet+-Geräte ab.
Anynet+-Menü Beschreibung
Fernsehen Wechsel vom Anynet+-Modus zum Fernsehmodus.
Geräteliste Anzeige der Anynet+-Geräteliste.
(Geräte_Name)-Menü Hiermit öffnen Sie die Menüs der angeschlossenen Geräte. Wenn z. B. ein DVD-Recorder
angeschlossen ist, wird das DVD-Menü des DVD-Recorders angezeigt.
(Geräte_Name)-Funktion Zeigt das Wiedergabemenü des angeschlossenen Geräts an. Wenn z. B. ein DVD-Recorder
angeschlossen ist, wird das Wiedergabemenü des DVD-Recorders angezeigt.
Aufnehmen: (*recorder) Sofortoges Starten einer Aufnahme mit dem Rekorder (Diese Funktion ist nur für Geräte mit
Aufnahmefunktion verfügbar.)
(*Rekorder) Aufnahme vormerken Hiermit können Sie eine Aufnahme mit dem Rekorder vormerken. (Diese Funktion ist nur für
Geräte mit Vormerkfunktion für Aufnahmen verfügbar.)
Aufnahme anhalten: (*recorder) Beenden der Aufnahme.
Empfänger Sound is played through the Empfänger.
Bei Anschluss von mehr als einem Aufnahmegerät werden sie als (*Rekorder) angezeigt, bei Anschluss eines einzigen
Aufnahmegeräts erfolgt die Anzeige als (*Geräte_Name).
Im Anynet+-Modus verfügbare Tasten der TV-Fernbedienung
Gerätetyp Betriebsstatus Verfügbare Tasten
Anynet+-Gerät
Wenn nach dem Wechseln
zum Gerät das Menü des
entsprechenden Geräts auf dem
Bildschirm angezeigt wird.
Zifferntasten
▲/▼/◄/►/Taste ENTER
E
Farbtasten / EXIT-Taste
Nach dem Wechseln zum Gerät
beim Abspielen einer Datei
π
(Suche rückwärts) /
µ
(Suche vorwärts)
∫
(Stopp) /
∂
(Wiedergabe) /
∑
(Pause)
Gerät mit
eingebautem
Tuner
Nach dem Wechseln zum Gerät
beim Fernsehen P / -Taste
Audiogerät Beim Aktivieren des Receivers TVOL / -Taste
MUTE -Taste
Die Anynet+-Funktion ist nur nutzbar, wenn auf der Fernbedienung das Fernsehgerät als Empfänger eingestellt ist.
Die
∏
-Taste ist nur im Aufnahmestatus belegt.
Sie können Anynet+-Geräte nicht mit den Tasten an Ihrem Fernsehgerät bedienen. Sie können Anynet+-Geräte nur mit der
TV-Fernbedienung steuern.
Die TV-Fernbedienung funktioniert unter bestimmten Umständen nicht. Wählen Sie in diesem Fall erneut das Anynet+-Gerät.
Die Anynet+-Funktionen sind für Geräte anderer Hersteller nicht verfügbar.
Die Funktionen der Tasten
π
,
µ
können je nach Gerät unterschiedlich sein.
Aufnahme
Sie können Fernsehprogramme mit einem Samsung-Recorder aufnehmen.
1 Drücken Sie die Taste TOOLS. Drücken Sie die Taste ENTER
E
, um Anynet+
(HDMI-CEC) auszuwählen.
2. Wählen Sie durch Drücken der Tasten ▲ oder ▼ die Option Aufnehmen:
(device_name), und drücken Sie dann die Taste ENTER
E
. Die Aufnahme
beginnt.
Bei mehr als einem Aufnahmegerät
Wenn mehrere Aufnahmegeräte angeschlossen sind, werden diese in
einer Liste angezeigt. Wählen Sie durch Drücken der Tasten ▲ oder ▼ ein
Gerät, und drücken Sie dann die Taste ENTER
E
. Die Aufnahme beginnt.
Das Aufnahmegerät wird nicht angezeigt.
Wählen Sie Geräteliste und drücken Sie die rote Taste, um nach Geräten zu suchen.
3. Drücken Sie zum Beenden die Taste EXIT.
Sie können das Signal der jeweiligen Quelle aufnehmen. Wählen Sie hierzu Aufnehmen: (device_name).
Durch Drücken von
∏
wird die laufende Sendung aufgenommen. Wenn Sie Bilder aus einer anderen Signalquelle anzeigen,
wird das Videosignal aus dieser Quelle aufgenommen.
Überprüfen Sie vor der Aufnahme, ob der Antennenstecker ordnungsgemäß am Aufnahmegerät angeschlossen
ist. Informationen zur richtigen Antennenverbindung mit dem Aufnahmegerät nden Sie im Benutzerhandbuch des
Aufnahmegeräts.
N
N
N
N
N
N
N
N
N
N
N
N
Fernsehen
Geräteliste
Aufnehmen : DVDR
DVDR Operation
Empfänger : Ein
Einstellungen
U
Navig.
E
Eingabe
R
Zurück
BN68-01757A-Ger.indb 55 2008-9-24 15:37:24
Deutsch - 56
Abspielen über einen Empfänger (Heimkinosystem)
Sie können die Tonwiedergabe über einen Empfänger anstelle des TV-
Lautsprechers laufen lassen.
1. Drücken Sie die Taste TOOLS. Drücken Sie die Taste ENTER
E
, um Anynet+
(HDMI-CEC) auszuwählen.
2. Wählen Sie mit den Tasten ▲ oder ▼ die Option Empfänger. Drücken Sie die
Taste ◄ oder ►, um Ein oder Aus auszuwählen.
3. Drücken Sie zum Beenden die Taste EXIT.
Wenn Ihr Empfänger nur Audiosignale unterstützt, wird er in der Geräteliste
möglicherweise nicht angezeigt.
Der Empfänger kann eingesetzt werden, wenn Sie den optischen Eingang des Receivers mit dem optischen Ausgang des
Fernsehgeräts verbunden haben.
Wenn der Empfänger (Heimkinosystem) angeschaltet ist, können Sie den Ton so hören, wie er vom optischen Ausgang der
Fernsehgeräts zur Verfügung gestellt wird. Wenn das Fernsehgerät ein (terrestrisches) DTV-Signal anzeigt, überträgt das
Fernsehgerät 5.1-Kanalton an den Empfänger des Heimkinosystems. Wenn es sich bei der Signalquelle um eine digitale
Komponente wie beispielsweise einen DVD-Player handelt, der über HDMI an das Fernsehgerät angeschlossen ist, kann der
Empfänger des Heimkinosystems nur 2-Kanalton wiedergeben.
Bei Verwendung von WISELINK Pro wird der Ton über den Empfänger möglicherweise nicht korrekt ausgegeben.
Bei Betrieb über den Empfänger bestehen Einschränkungen hinsichtlich der PIP-Funktion und der Menüs für die
Audofunktionen (MTS, bevorzugte Sprache).
Wenn es zu einer Unterbrechnung der Stromversorgung des Fernsehgeräts kommt, wenn der Empfänger angeschaltet (Ein)
ist (z. B. durch Herausziehen des Netzkabels oder einen Stromausfall), ist möglicherweise Lautsprecher auswählen auf Ext.
Lautsprecher gesetzt, wenn Sie das Fernsehgerät wieder anschalten. (siehe Seite 22)
Fehlerbehebung für Anynet+
Symptom Lösung
Anynet+ funktioniert nicht. Überprüfen Sie, ob das Signalkabel fest angeschlossen ist. Das Anynet+-System unterstützt nur Anynet+-
fähige Geräte.
Schließen Sie nur einen Empfänger (Heimkinosystem) an.
Prüfen Sie, ob das Netzkabel des Anynet+-Geräts richtig angeschlossen ist.
Prüfen Sie die Video/Audio/HDMI 1.3-Kabelverbindungen des Anynet+-Geräts.
Prüfen Sie, ob Anynet+ (HDMI-CEC) im Setupmenü von Anynet+ aktiviert ist.
Prüfen Sie, ob die Fernbedienung im TV-Modus arbeitet.
Prüfen Sie, ob es sich um eine ausschließlich für Anynet+ geeignete Fernbedienung handelt.
Anynet+ funktioniert unter bestimmten Umständen nicht. (Kanalsuche, Bedienung von WISELINK, Plug&Play usw.)
Stellen Sie nach dem Anschließen oder Entfernen des HDMI 1.3-Kabels sicher, dass die Geräte wieder
gesucht werden, oder schalten Sie das TV-Gerät aus und wieder ein.
Überprüfen Sie, ob die Anynet+Funktion des Anynet+-Geräts eingeschaltet ist.
•
•
•
•
•
•
•
•
•
•
Ich möchte Anynet+ starten. Prüfen Sie, ob das Anynet+-Gerät ordnungsgemäß an das Fernsehgerät angeschlossen ist, und kontrollieren
Sie zudem, ob Anynet+ im Menü “Einstellungen” von Anynet+ aktiviert ist.
Drücken Sie die Taste TV auf der Fernbedienung, um zum Fernsehgerät zu wechseln. Drücken Sie dann die
TOOLS-Taste, um das Anynet+-Menü anzuzeigen und die gewünschte Menüoption auszuwählen.
•
•
Ich möchte Anynet+ beenden. Wählen Sie im Anynet+-Menü die Option Fernsehen.
Drücken Sie die Taste SOURCE auf der TV-Fernbedienung, und wählen Sie ein Gerät, bei dem es sich nicht
um ein Anynet+-Gerät handelt.
(Beachten Sie, dass die Kanaltaste nur funktioniert, wenn kein Anynet+-Gerät mit integriertem Tuner
angeschlossen ist.)
•
•
•
Die Meldung ”Connecting to
Anynet+ device (Verbinden
mit Anynet+-Gerät)” wird
angezeigt.
Sie können die Fernbedienung nicht verwenden, während Sie Anynet+ kongurieren oder in einen anderen
Anzeigemodus wechseln.
Verwenden Sie die Fernbedienung, wenn das Kongurieren von Anynet+ oder das Ändern des Anzeigemodus
abgeschlossen ist.
•
•
Keine Wiedergabe mit dem
Anynet+-Gerät.
Die Wiedergabefunktion kann nicht verwendet werden, wenn der Plug & Play-Vorgang läuft.
Das angeschlossene Gerät
wird nicht angezeigt.
Prüfen Sie, ob das Gerät die Anynet+-Funktionen unterstützt.
Prüfen Sie, ob das HDMI 1.3-Kabel ordungsgemäß angeschlossen wurde.
Prüfen Sie, ob Anynet+ (HDMI-CEC) im Setupmenü von Anynet+ aktiviert ist.
Suchen Sie noch einmal nach Anynet+-Geräten
Sie können Anynet+-Geräte nur mithilfe eines HDMI 1.3-Kabels verbinden. Einige HDMI-Kabel unterstützen
möglicherweise keine Anynet+-Funktionen.
Wenn es durch eine Störung (z. B. Trennen des HDMI-Kabels, des Netzkabels oder Stromausfall) zu einer
Beendigung kommt, wiederholen Sie die Gerätesuche.
•
•
•
•
•
•
Das Fernsehprogramm kann
nicht aufgezeichnet werden.
Prüfen Sie, ob der Antennenstecker des Aufnahmegeräts ordnungsgemäß angeschlossen ist.
Die Ausgabe des Fernsehtons
erfolgt über den Empfänger.
Schließen Sie das Glasfaserkabel an das Fernsehgerät und den Empfänger an.
N
N
N
N
N
N
Fernsehen
Geräteliste
Aufnehmen : DVDR
DVDR Operation
Empfänger ◄ Ein ►
Einstellungen
U
Navig.
L
Einstellen
R
Zurück
BN68-01757A-Ger.indb 56 2008-9-24 15:37:24
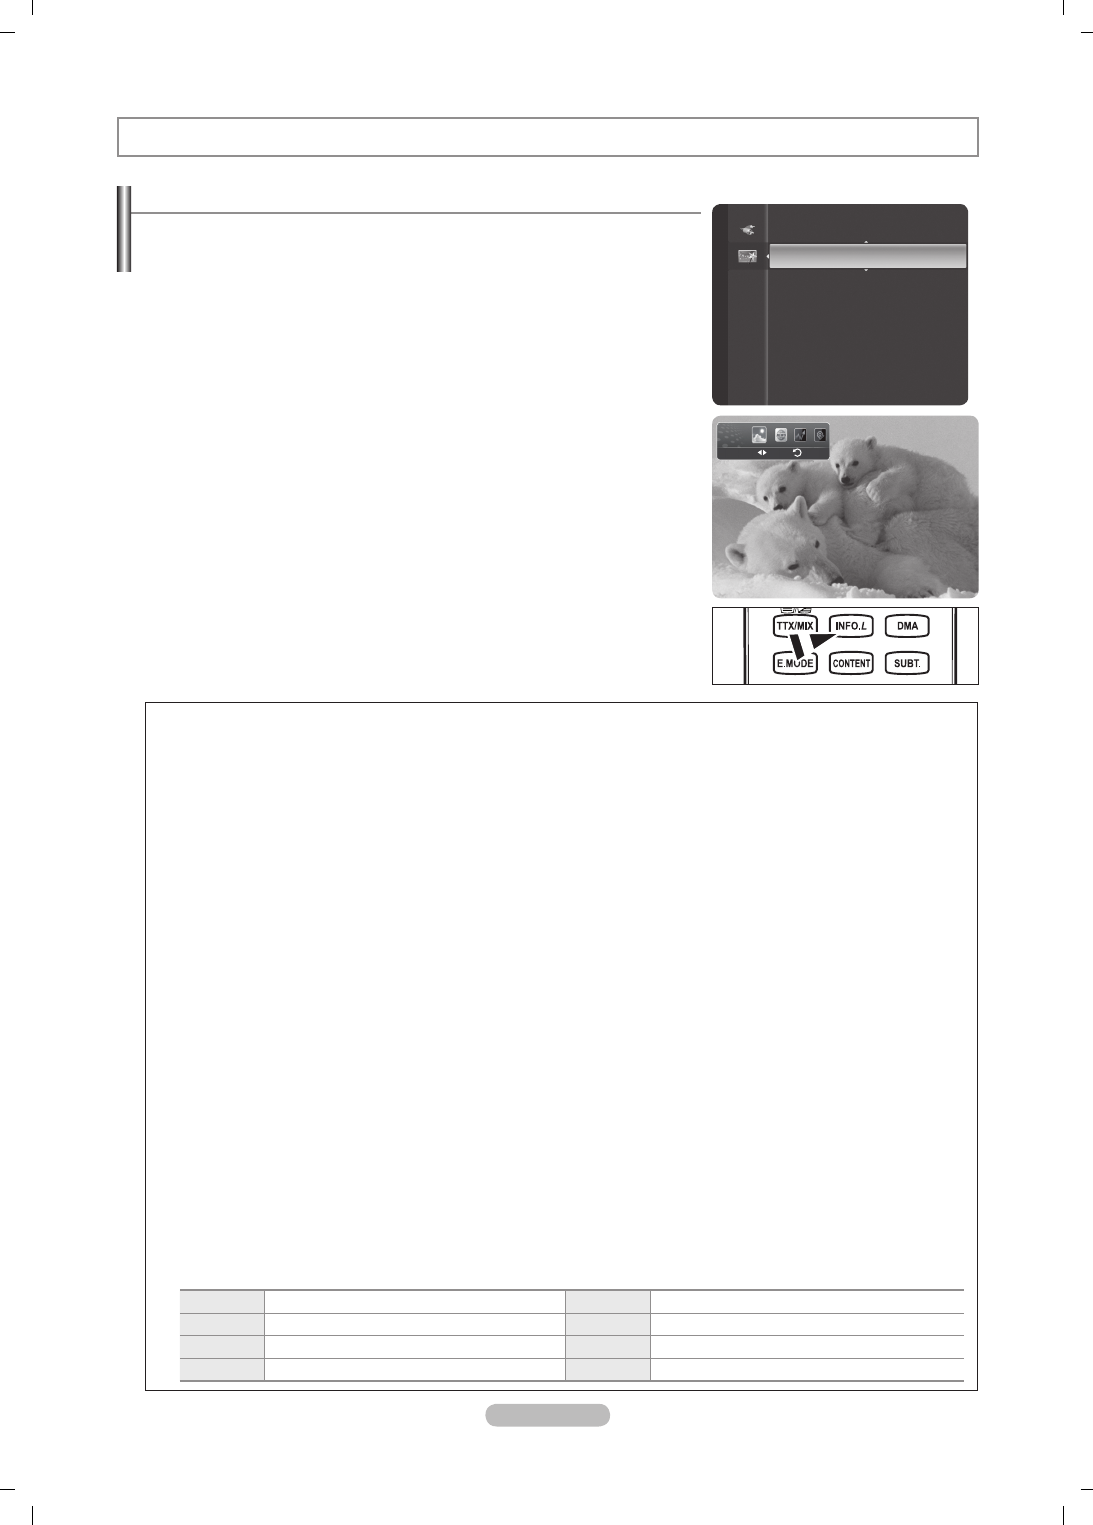
Deutsch - 57
Verwenden von InfoLive
Sie können mit dem InfoLive-Dienst von Samsung Nachrichten, Aktienkurse und
Wetterberichte anzeigen.
Stellen Sie das Netzwerk ein. (Informationen hierzu nden Sie auf den Seiten
27–28.)
InfoLive wird nur in Großbritannien, Frankreich, Deutschland, Italien, Spanien,
Norwegen, Schweden, Dänemark, Finnland und Russland angeboten. Das
eingestellte Land richtet sich danach, welches bei Plug & Play eingestellt ist.
1. Drücken Sie die Taste MENU, um das Menü anzuzeigen. Wählen Sie durch
Drücken der Tasten ▲ oder ▼ die Option Anwendung, und drücken Sie dann die
Taste ENTER
E
.
2. Wählen Sie durch Drücken der Tasten ▲ oder ▼ die Option InfoLive, und drücken
Sie dann die Taste ENTER
E
.
3. Drücken Sie die Tasten ◄ oder ►, um einen Dienst (Wetter, Nachrichten, Aktien
oder Einstellungen) auszuwählen, und drücken Sie dann die Taste ENTER
E
.
Nur bei den Nachrichten (ohne Detailinformationen), beim aktuellen Wetter
und bei den bevorzugten Aktien können Sie mehrere Dienste gleichzeitig
auswählen und anzeigen.
Drücken Sie die INFO.L-Taste auf der Fernbedienung, um das InfoLive-Menü
anzuzeigen.
N
N
N
N
InfoLive
SÄMTLICHE ÜBER INFOLIVE [‘INFOLIVE CONTENT’] ZUR VERFÜGUNG GESTELLTEN INHALTE SIND EIGENTUM DES URHEBERS DER
INHALTE [RECHTEINHABER] UND/ODER VON DESSEN NIEDERLASSUNGEN UND LIZENZGEBERN, UND SIE UNTERLIEGEN DEM
SCHUTZ DURCH DAS URHEBERRECHT, MARKEN UND ANDERE RECHTE ZUM SCHUTZ DES GEISTIGEN EIGENTUMS. SÄMTLICHE
INFOLIVE-INHALTE WERDEN IHNEN AUSCHLIESSLICH ZUR PERSÖNLICHEN UND NICHT-GEWERBLICHEN NUTZUNG ZUR VERFÜGUNG
GESTELLT.. SIE DÜRFEN DIE INFOLIVE-INHALTE IN KEINER WEISE VERWENDEN, DIE EINEN VERSTOSS GEGEN DIE RECHTE DES
EIGENTÜMERS DER INHALTE DARSTELLEN WÜRDE, ODER DIE VOM RECHTEINHABER NICHT GENEHMIGT WURDE. SOFERN NICHT
IN DIESEM HAFTUNGSAUSSCHLUSS ODER DURCH DEN RECHTEINHABER GENEHMIGT, IST ES INSBESONDERE UNTERSAGT, DIE
INFOLIVE-INHALTE ODER SONSTIGE MATERIALIEN AUS DEM INFOLIVE-DIENST ZU VERÄNDERN, ZU KOPIEREN, ZU REPRODUZIEREN,
ANDERWEITIG ZU VERÖFFENTLICHEN, HOCHZULADEN, ZU PUBLIZIEREN, ZU ÜBERTRAGEN, ZU ÜBERSETZEN, ZU VERKAUFEN,
BEARBEITUNGEN ZU ERSTELLEN, SIE ZU NUTZEN ODER ZU VERTREIBEN, EGAL AUF WELCHE WEISE UND ÜBER WELCHES
MEDIUM (EINSCHLIESSLICH E-MAIL ODER ANDERE ELEKTRONISCHE MITTEL) DIES GESCHIEHT. DIE VON DEN RECHTEINHABERN IM
ZUSAMMENHANG MIT DEM INFOLIVE-DIENST ZUR VERFÜGUNG GESTELLTEN INHALTE KÖNNEN BEI ENTSPRECHENDER ANGABE
DURCH DEN RECHTEINHABER UND DESSEN NIEDERLASSUNGEN MIT EINER ZEITLICHEN VERZÖGERUNG BEHAFTET SEIN.
INFOLIVE WIRD IM RAHMEN EINES VERTRAGES ZWISCHEN SAMSUNG UND DEN RECHTEINHABERN ZUR VERFÜGUNG GESTELLT.
DER INFOLIVE-DIENST KANN VON SAMSUNG ODER DEM RECHTEINHABER ODER AUFGRUND EINER KÜNDIGUNG DES VERTRAGES
ZWISCHEN DIESEN PARTEIEN JEDERZEIT BEENDET ODER UNTERBROCHEN WERDEN. UNTER KEINEN UMSTÄNDEN (AUCH NICHT
BEI FAHRLÄSSIGKEIT) HAFTEN SAMSUNG ODER DER RECHTEINHABER VERTRAGLICH ODER GESETZLICH FÜR DIREKTE ODER
INDIREKTE SCHÄDEN, FÜR NEBENSCHÄDEN UND FOLGESCHÄDEN, ANWALTSGEBÜHREN, AUSLAGEN UND SONSTIGE SCHÄDEN,
DIE ALS FOLGE VON ODER IM ZUSAMMENHANG MIT SOLCH EINER KÜNDIGUNG ODER UNTERBRECHUNG DES DIENSTES
ENTSTEHEN. DA DIE ÜBER INFOLIVE ÜBERTRAGENEN INHALTE MITHILFE VON NETZWERKEN UND ÜBERTRAGUNGSEINRICHTUNGEN
EMPFANGEN WERDEN, ÜBER DIE SAMSUNG KEINE KONTROLLE HAT, SCHLIESST SAMSUNG AUSDRÜCKLICH JEGLICHE HAFTUNG
FÜR UNTERBRECHUNGEN ODER EIN AUSSETZEN DES INTERLINK-DIENSTES ODER FÜR DAS DARAUS RESULTIERENDE FEHLEN VON
INHALTEN AUS.
DIE INFORMATIONEN IN INFOLIVE WERDEN OHNE MÄNGELGEWÄHR ZUR VERFÜGUNG GESTELLT UND DAHER ÜBERNIMMT
SAMSUNG KEINE GARANTIE FÜR DIE BEREIT GESTELLTEN INFORMATIONEN, WEDER VERTRAGLICH NOCH GESETZLICH UND
EGAL ZU WELCHEM ZWECK; SAMSUNG SCHLIESST VERTRAGLICH ALLE GESETZLICHEN GEWÄHRLEISTUNGEN AUS, AUCH DIE
GEWÄHRLEISTUNG FÜR HANDELSGÄNGIGKEIT ODER DIE EIGNUNG FÜR EINEN BESTIMMTEN ZWECK. SAMSUNG GARANTIERT
NICHT FÜR DIE RICHTIGKEIT, GÜLTIGKEIT, PÜNKTLICHKEIT, LEGALITÄT ODER VOLLSTÄNDIGKEIT DER INFORMATIONEN ODER DATEN,
DIE FÜR EINEN BESTIMMTEN ZWECK ÜBER INFOLIVE ZUR VERFÜGUNG GESTELLT WERDEN; UND UNTER KEINEN UMSTÄNDEN
(AUCH FAHRLÄSSIGKEIT) HAFTET SAMSUNG VERTRAGLICH ODER GESETZLICH FÜR DIREKTE ODER INDIREKTE SCHÄDEN, FÜR
NEBENSCHÄDEN UND FOLGESCHÄDEN, ANWALTSGEBÜHREN, AUSLAGEN UND SONSTIGE SCHÄDEN, DIE ALS FOLGE VON ODER IM
ZUSAMMENHANG MIT INFORMATIONEN AUS INFOLIVE ODER INFOLGE DER VERWENDUNG VON INFOLIVE DURCH SIE ODER DRITTE
ENTSTEHEN, SELBST WENN DIE MÖGLICHKEIT SOLCHER SCHÄDEN ANGEKÜNDIGT WURDE.
DER ZUGRIFF AUF INFOLIVE UNTERLIEGT DEN NUTZUNGSBEDINGUNGEN VON YAHOO SIEHE SEITE 67.
DIE NUTZUNGSBEDINGUNGEN VON YAHOO IN **LANGUAGE** STEHEN IM INTERNET UNTER **ADDRESS** ZUR
VERFÜGUNG.
Französisch http://fr.docs.yahoo.com/info/utos.html Schwedisch http://se.docs.yahoo.com/seterms.html
Deutsch http://de.docs.yahoo.com/info/utos.html Dänisch http://dk.docs.yahoo.com/termsofservice.html
Italienisch http://fr.docs.yahoo.com/info/utos.html Finnisch http://.docs.yahoo.com/info/terms/?fr=sfp
Spanisch http://es.docs.yahoo.com/info/utos.html
N
N
Anwendung
Anynet+ (HDMI-CEC)
Content Library
InfoLive
Produktdemo
Weather Zurück
Navig.
BN68-01757A-Ger.indb 57 2008-9-24 15:37:25

Deutsch - 58
Verwenden des Wetterberichts
1. Drücken Sie die Taste INFO.L auf der Fernbedienung.
2. Wählen Sie durch Drücken der Tasten ◄ oder ► den Dienst Wetter, und drücken
Sie dann die Taste ENTERE
.
Stellen Sie die Region ein.
3. Drücken Sie die gelbe Taste. Wählen Sie den Anfangsbuchstaben (A-Z) des
gewünschten Orts durch Drücken der Tasten ◄ oder ►, und drücken Sie dann die
Taste ENTER
E
.
4. Drücken Sie die Taste ►, um zu dieser Kategorie zu gelangen. Wählen Sie den
gewünschten Ort durch Drücken der Tasten ▲ oder ▼, und drücken Sie dann die
Taste ENTER
E
.
Nun wird das Wetter in der gewählten Region angezeigt.
Einrichten des Wetterdienstes
5. Drücken Sie bei Verwendung des Dienstes die rote Taste, um die Option des
Dienstes Wetter zu wechseln.
6. Drücken Sie die Taste ▲ oder ▼ und wählen Sie die Option Wetter.
Zum Beenden des Dienstes Wetter drücken Sie die blaue Taste.
Zum Beenden des Dienstes InfoLive drücken Sie die Taste EXIT.
Verwenden des Dienstes für Nachrichten
Der Nachrichtenanbieter wird zukünftig möglicherweise gewechselt.
1. Drücken Sie die Taste INFO.L auf der Fernbedienung.
2. Wählen Sie durch Drücken der Tasten ◄ oder ► den Dienst Nachrichten, und
drücken Sie dann die Taste ENTERE
E.
Drücken Sie die Taste ENTER
E
, um den vollständigen Artikel anzuzeigen.
Drücken Sie die Tasten ▲ oder ▼, um den vorherigen oder den nächsten
Artikel anzuzeigen.
3. Drücken Sie bei Verwendung des Dienstes die rote Taste, um die Option des
Dienstes Nachrichten zu wechseln.
4. Drücken Sie die Taste ▲ oder ▼ und wählen Sie die Option Nachrichten.
Die Optionen des Dienstes für Nachrichten hängen vom jeweiligen Internetdienst ab.
Zum Beenden des Dienstes Nachrichten drücken Sie die blaue Taste.
Zum Beenden des Dienstes InfoLive drücken Sie die Taste EXIT.
N
N
N
N
N
N
N
N
Sarreguemines
-00°C
Optionen Ort Schließen
Weather Zurück
Navig.
Sarreguemines
-00°C
Optionen
Heutiges Wetter
Wochenvorhersage
ZurückWählen
Weather Zurück
Navig.
GM turns 100 with focus on future
Eingabe Optionen Schließen
Nachrichten Zurück
Navig.
GM turns 100 with focus on future
Optionen
Politik
Wirtschaft
Nachrichten
Unterhaltung
Sport
Wählen Zurück
Nachrichten Zurück
Navig.
BN68-01757A-Ger.indb 58 2008-9-24 15:37:27
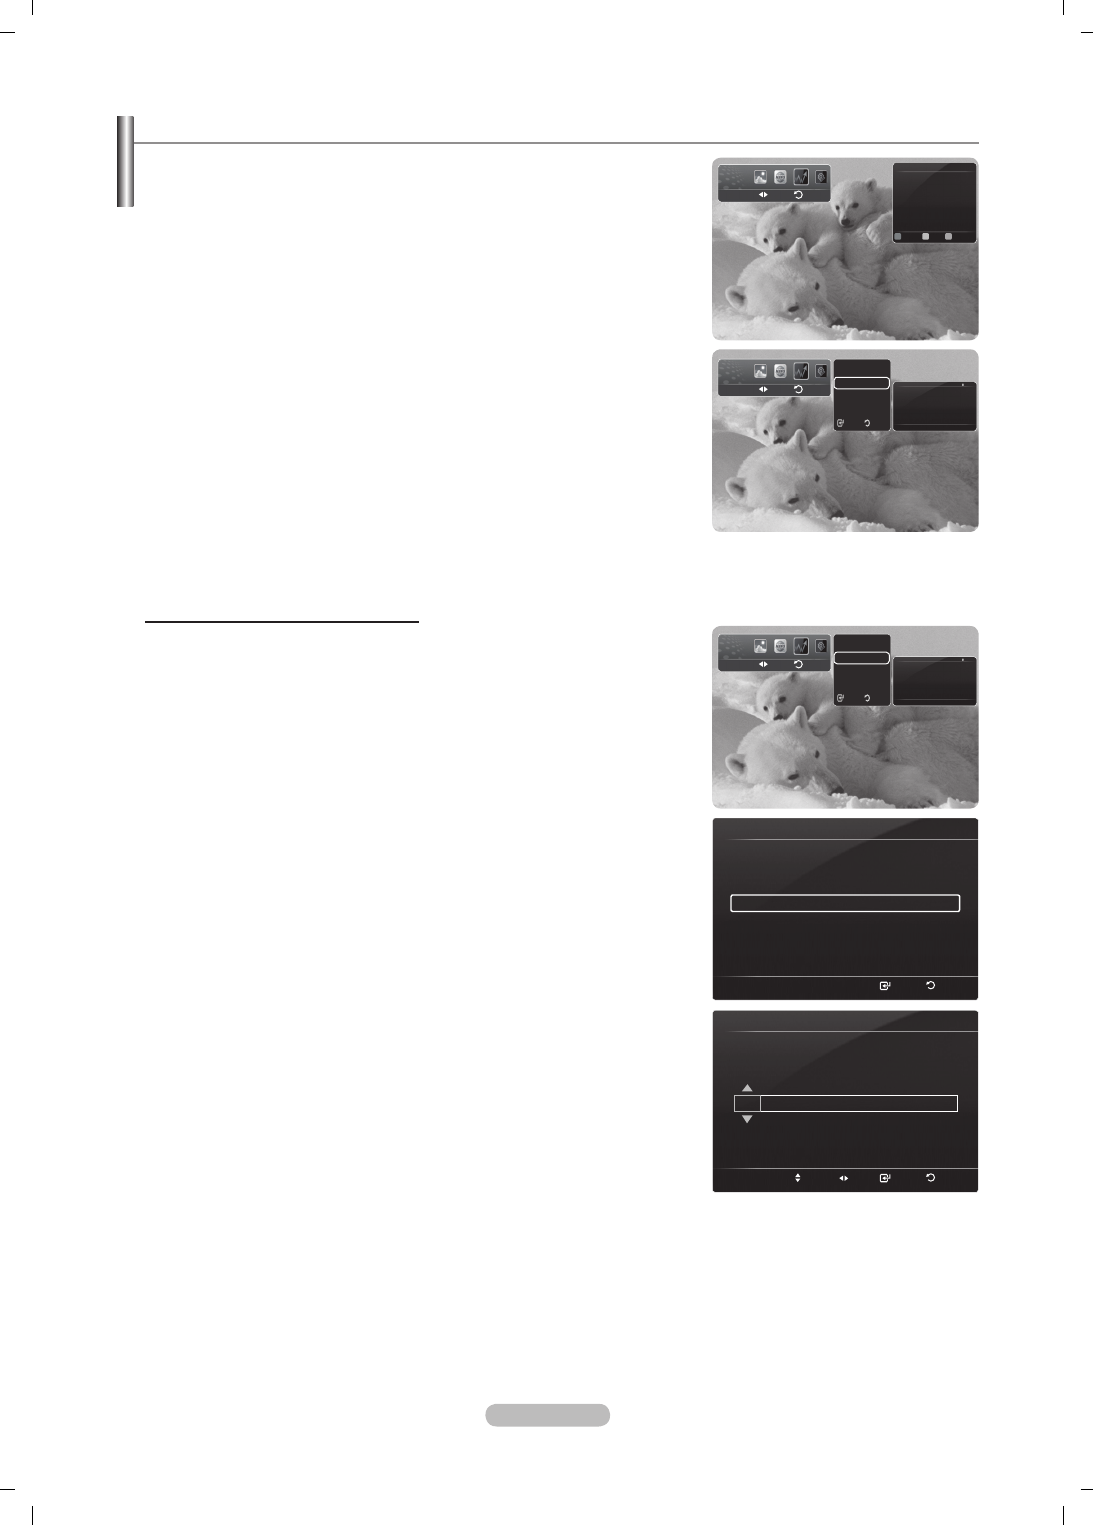
Deutsch - 59
Verwenden des Aktiendienstes
1. Drücken Sie die Taste INFO.L auf der Fernbedienung.
2. Wählen Sie durch Drücken der Tasten ◄ oder ► den Dienst Aktien, und drücken
Sie dann die Taste ENTERE
E.
3. Drücken Sie bei Verwendung des Dienstes die rote Taste, um die Option des
Dienstes Aktien zu wechseln.
4. Wählen Sie durch Drücken der Tasten ▲ oder ▼ die Option Aktien, und drücken
Sie dann die Taste ENTER
E
.
Aktienkurse sind um bis zu 20 Minuten verzögert. Die Verzögerungszeit kann sich
je nach Land unterscheiden.
Zum Beenden des Dienstes Aktien drücken Sie die blaue Taste.
Zum Beenden des Dienstes InfoLive drücken Sie die Taste EXIT.
Bevorzugte Aktien: Die Informationen über die bevorzugten Aktien werden
angezeigt. Drücken Sie die gelbe Taste, um die bevorzugten Aktien einzurichten.
Marktübersicht: Sie können zwischen den wichtigen Aktienindices umschalten
und den gesamten Index und dessen absolute oder prozentuale Veränderung
anzeigen.
Aktien und Nachrichten: Die Informationen über die bevorzugten Aktien sowie
die wichtigen Indices und Finanznachrichten werden angezeigt.
Festlegen der bevorzugten Aktien
1. Drücken Sie die gelbe Taste, während Favorite Stocks oder Aktien &
Nachrichten gewählt ist.
2. Drücken Sie die Taste ENTER
E
, um den gewünschten Börsenplatz
auszuwählen.
Das Fenster Bevorzugte Aktien festlegen wird geöffnet.
3. Drücken Sie die Taste ◄, ►, ▲ oder ▼, um ein Aktiensymbol einzugeben.
Drücken Sie dann die Taste ENTER
E
.
Das Ergebnis wird angezeigt.
Sie können die Aktiensymbole in der Zeitung oder im Internet kontrollieren.
4. Drücken Sie die Taste ENTER
E
, um eine bevorzugte Aktie festzulegen.
Der gewählte Titel wird als bevorzugte Aktie eingestellt.
So löschen Sie Ihre bevorzugten Aktien
Drücken Sie die grüne Taste, während Bevorzugte Aktien oder Aktien &
Nachrichten gewählt ist. Wählen Sie die Option durch Drücken der Tasten
▲ oder ▼, und drücken Sie dann die Taste ENTER
E
. Das Symbol c links
neben der Aktienbezeichnung wird gelöscht. Drücken Sie die Taste RETURN.
N
N
N
N
N
N
N
N
Bevorzugte Aktien festlegen
Wählen
Zurück
Wählen Sie eine Börse.
O London Stock Exchange
Bevorzugte Aktien festlegen
Einstellen
Navig. Wählen
Zurück
Wertpapiersymbol eingeben.
Keine bevorzugten Aktien
Kurse um max. 15 Minuten verzögert.
Von Yahoo! Finanzen
Optionen Favorit Schließen
Aktien Zurück
Navig.
Optionen
Bevorzugte Aktien
Marktübersicht
Aktien und Nachrichten
ZurückWählen
Aktien Zurück
Navig.
Kurse um max. 15 Minuten verzögert.
Brought to you by Yahoo! Finance
12/24 Mon 15:00 Updated 1/2
AAAAAA $0.000,000 ▲ $000,000 +00,00%
BBBBBB $0.000,000 ▲ $000,000 +00,00%
CCCCCC $0.000,000 ▲ $000,000 +00,00%
DDDDDD $0.000,000 $000,000 +00,00%
EEEEEE $0.000,000 ▼ $000,000 -00,00%
– – – – – – help area – – – – – –
Optionen
Bevorzugte Aktien
Marktübersicht
Aktien und Nachrichten
ZurückWählen
Aktien Zurück
Navig.
Quotes delayed at least 15 minutes.
Brought to you by Yahoo! Finance
12/24 Mon 15:00 Updated 1/2
AAAAAA $0.000,000 ▲ $000,000 +00,00%
BBBBBB $0.000,000 ▲ $000,000 +00,00%
CCCCCC $0.000,000 ▲ $000,000 +00,00%
DDDDDD $0.000,000 $000,000 +00,00%
EEEEEE $0.000,000 ▼ $000,000 -00,00%
– – – – – – help area – – – – – –
BN68-01757A-Ger.indb 59 2008-9-24 15:37:28
Deutsch - 60
InfoLive-Setup
1. Drücken Sie die Taste INFO.L auf der Fernbedienung.
2. Wählen Sie durch Drücken der Tasten ◄ oder ► die Option Einstellungen, und
drücken Sie dann die Taste ENTER
E
.
3. Wählen Sie mit den Tasten ▲ oder ▼ die gewünschte Option aus.
(Automatisches Starten, Anzeigedauer, Schriftgrad, Farbe hinten, Position
von InfoLive)
4. Wählen Sie die Option durch Drücken der Tasten ▲ oder ▼, und drücken Sie
dann die Taste ENTER
E
.
Automatisches Starten: Hiermit bestimmen Sie, dass InfoLink automatisch
gestartet werden soll, wenn das Fernsehgerät angeschaltet wird. Sie
können Aus oder Ein wählen.
Anzeigedauer: Hiermit bestimmen Sie, wie lange die Nachrichten auf dem
Fernsehbildschirm angezeigt werden. Sie haben die Wahl zwischen 10
Minuten, 20 Minuten, 1 Stunde oder Immer.
Schriftgrad: Sie können die Schriftgröße Standard oder Groß für den
InfoLive-Dienst auswählen.
Farbe hinten: Sie können die Hintergrundfarben (Farbe hinten: Schwarz,
Blau, Rot, Grün, Gray) für den InfoLink-Dienst einstellen. Die Farbe wird für
jeden Dienst, jede Option und jedes Setupfenster verwendet.
Position von InfoLive: Sie können die Position der verschiedenen
Dienste auf dem Bildschirm einstellen. Sie haben die Wahl zwischen sechs
voreingestellten InfoLive-Positionen (Position 1 – Position 6).
•
•
•
•
•
Zum Beenden des Dienstes Einrichten drücken Sie die Taste RETURN.
Zum Beenden des Dienstes InfoLive drücken Sie die Taste EXIT.
Position von InfoLink
Aktien
Weather Nachrichten
Weather
Nachrichten Aktien
Nachrichten
Aktien Weather
Position 1 Position 2 Position 3
Aktien
Weather Nachrichten
Weather
Nachrichten Aktien
Nachrichten
Aktien Weather
Position 4 Position 5 Position 6
N
N
Einrichten von InfoLive
Navig. Wählen
Zurück
Automatisches Starten : Aus
Anzeigedauer : 10 minutes
Schriftgrad : Standard
Farbe hinten : Schwarz
Position von InfoLive
Einstellungen Zurück
Navig.
BN68-01757A-Ger.indb 60 2008-9-24 15:37:29
Deutsch - 61
Empfehlungen für den Betrieb
Videotextfunktion
Die meisten Fernsehsender bieten über Videotext Informationen an. Auf der Videotext-Indexseite nden Sie Verwendungshinweise
zum Videotext. Darüber hinaus können Sie über die Tasten der Fernbedienung nach Bedarf verschiedene Optionen einstellen.
Für die korrekte Anzeige von Videotextinformationen muss der Senderempfang einwandfrei sein. Andernfalls können
Informationen unvollständig sein oder einige Seiten nicht angezeigt werden.
1
: (exit)
Videotextanzeige beenden.
2
6 (index)
Drücken Sie diese Taste, um die Videotext-Indexseite (Inhaltsverzeichnis)
anzuzeigen.
3
8 (store)
Drücken Sie diese Taste, um Videotextseiten zu speichern.
4
4 (size)
Drücken Sie diese Taste, um Videotext in doppelt so großen Buchstaben in der
oberen Hälfte des Bildschirms anzuzeigen. Drücken Sie die Taste erneut, um
den Text in der unteren Hälfte des Bildschirms anzuzeigen. Zum Ausblenden des
Videotextes drücken Sie die Taste erneut.
5
5 (reveal)
Drücken Sie diese Taste, um verborgenen Text anzuzeigen (z. B. Antworten bei
Quizsendungen). Drücken Sie die Taste erneut, um den Videotext auszublenden.
6
/ (teletext on/mix)
Drücken Sie diese Taste, um den Videotextmodus zu aktivieren, nachdem Sie
einen Sender ausgewählt haben, der Videotext anbietet. Drücken Sie die Taste
zweimal, um die Videotextinformationen gleichzeitig mit der aktuellen Sendung auf
dem Bildschirm einzublenden.
7
1 (sub-page)
Drücken Sie diese Taste, um eine verfügbare untergeordnete Seite anzuzeigen.
8
2 (page up)
Drücken Sie diese Taste, um die nächste Videotextseite anzuzeigen.
9
3 (page down)
Drücken Sie diese Taste, um die vorherige Videotextseite anzuzeigen.
0
0 (mode)
Drücken Sie diese Taste, um den Videotextmodus auszuwählen (LISTE/
FLOF) Wenn Sie diese Taste im Modus LIST (Liste) drücken, wird in den
Listenspeichermodus umgeschaltet. Im Listenspeichermodus können Sie mit der
Taste 8(store) Videotextseiten in einer Liste speichern.
!
9 (hold)
Drücken Sie diese Taste, um bei einer angezeigten Seite, die mit weiteren,
untergeordnete Seiten verknüpft ist, das automatische Umblättern zu verhindern.
Drücken Sie zum Fortfahren die Taste erneut.
@
7 (cancel)
Drücken Sie diese Taste, um beim Suchen nach einer Seite die Sendung
anzuzeigen.
#
Farbtasten (rot/grün/gelb/blau)
Wenn der Sender das FASTEXT-System verwendet, sind die verschiedenen
Themen auf den Videotextseiten farbig gekennzeichnet und können mit den Farbtasten auf der Fernbedienung angewählt
werden. Drücken Sie die Farbtaste, die dem Thema entspricht, das Sie anzeigen möchten. Die Seite wird mit anderen
farbig markierten Informationen angezeigt, die auf dieselbe Art ausgewählt werden können. Drücken Sie die entsprechende
Farbtaste, um die vorherige oder nächste Seite anzuzeigen.
Sie können die Videotextseiten durch Drücken der Zifferntasten auf der Fernbedienung wechseln.
N
N
1
3
4
5
6
2
7
8
9
0
!
@
#
BN68-01757A-Ger.indb 61 2008-9-24 15:37:30
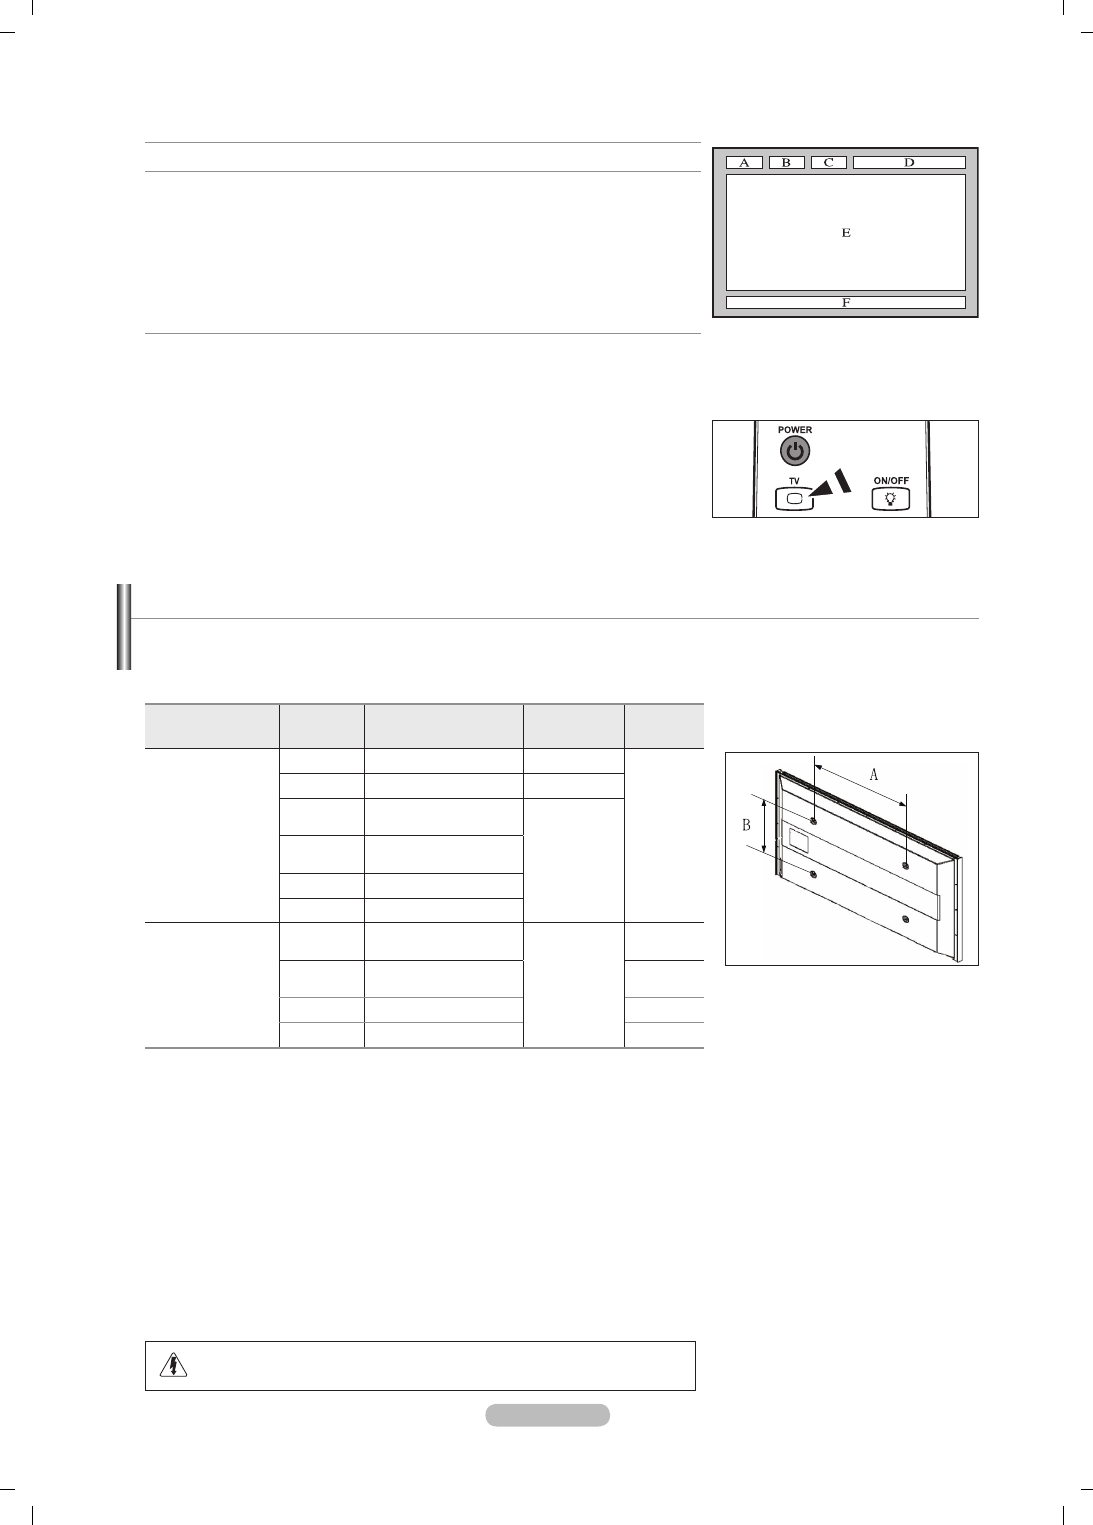
Deutsch - 62
Die Videotextseiten sind in sechs Kategorien unterteilt:
Sportergebnisse Inhalt
A Gewählte Seitennummer
B Senderkennung
C Aktuelle Seitenzahl oder Suchhinweise
D Datum und Uhrzeit
E Text
F Statusinformation
FASTEXT-Informationen
Videotextinformationen sind oft auf mehrere, aufeinander folgende Seiten verteilt,
die wie folgt aufgerufen werden können:
Eingabe der Seitennummer
Auswahl eines Titels in einer Liste
Auswahl einer farbigen Überschrift (FASTEXT-System)
Drücken Sie die Taste TV, um Videotext zu beenden.
N
-
-
-
O
Spezikation(VESA)derWandhalterung
Montieren Sie die Wandhalterung an einer soliden Wand, die senkrecht zum Boden steht.
Bei Installation auf anderen Trägermaterialien wenden Sie sich bitte an Ihren Fachhändler.
Bei Montage an einer Decke oder schrägen Wand kann es herunterfallen und zu Verletzungen kommen.
Produktfamilie Zoll
VESA-Spezifikation (A * B)
Standard-
schraube Menge
LCD-TV
23 ~ 26 200 * 100 M4
4
32 ~ 40 200 * 200 M6
46 ~ 52 400 * 400
600 * 400
M8
57 700 * 400
(No VESA)
57 ~ 70 800 * 400
80 ~ 1400 * 800
PDP-TV
42 ~ 58 400 * 400
600 * 400
M8
4
63 676 * 407
(No VESA) 6
63 ~ 70 800 * 400 4
80 ~ 1400 * 800 4
Di
e von uns empfohlenen Sta
ndardabmessungen der Wandhalterung finden Sie in der obigen Tabelle.
Beim Kauf unserer Wandhalterung erhalten Sie ein detailliertes Installationshandbuch sowie alle für die Montage
erforderlichen Teile.
Verwenden Sie keine Schrauben, die länger sind als hier angegeben, da damit innen liegende Bauteile des Fernsehers
beschädigt werden können.
Bei Wandhalterungen, die nicht der VESA-Standardspezifikation für Schrauben entsprechen, kann die Länge der Schrauben
je nach Spezifikation unterschiedlich sein.
Verwenden Sie keine Schrauben, die nicht der VESA-Standardspezifikation für Schrauben entsprechen. Ziehen Sie die
Schrauben nicht zu fest an, weil Sie so das Produkt beschädigen könnten oder das Produkt dadurch herunterfallen könnte,
was zu Verletzungen führen kann. Samsung haftet nicht bei derartigen Unfällen.
Samsung haftet nicht für Geräteschäden oder Verletzungen, wenn eine Wandhalterung verwendet wird, die nicht dem VESA-
Standard entspricht oder nicht spezifiziert ist, oder wenn der Verbraucher die Installationsanleitung für das Produkt nicht
befolgt.
Unsere 57- und 63-Zoll-Modelle entsprechen nicht der VESA-Spezifikation. Verwenden Sie für dieses Modell deshalb unseren
speziellen Wandmontagesatz.
Bei der Montage dieses Fernsehgeräts dürfen Sie eine Neigung von 15 Grad nicht überschreiten.
N
N
N
N
N
N
N
N
Installieren Sie die Wandhalterung nicht bei angeschaltetem Fernsehgerät.
Sie könnten dabei einen Stromschlag erhalten und sich verletzen.
BN68-01757A-Ger.indb 62 2008-9-24 15:37:30

Deutsch - 63
Justieren der automatischen Wandhalterung (Gesondert lieferbar)
Nachdem Sie die Wandhalterung montiert haben, können Sie die Position Ihres Fernsehgeräts einfach justieren.
Öffnen des Menüs
1. Drücken Sie auf der Fernbedienung die Taste ▲, ▼, ◄ oder ►.
Das Fenster zum Justieren der Wandhalterung wird angezeigt.
Wenn das Fenster zum Justieren der automatischen Wandhalterung nicht
angezeigt wird, nachdem Sie beim Fernsehen auf eine der Richtungstasten
gedrückt haben, öffnen Sie dieses Fenster mithilfe des Menüs.
Drücken Sie die Taste MENU, um das Menü anzuzeigen. Wählen Sie
durch Drücken der Tasten ▲ oder ▼ die Option Einrichten, und drücken
Sie dann die Taste ENTER
E
.
Wählen Sie durch Drücken der Tasten ▲ oder ▼ die Option Einstellung
für Wandmontage, und drücken Sie dann die Taste ENTER
E
button..
Abspeichern der Position
2. Stellen Sie mit den Tasten ▲,▼,◄,► die gewünschte Position ein.
Wenn Sie eine Pfeiltaste drücken, wenn das Bildschirmmenü nicht auf dem
Bildschirm angezeigt wird, wird das Fenster zum Einstellen angezeigt.
Drücken Sie zum Zurücksetzen die Taste INFO. Wählen Sie mit der Taste
◄ oder ► Ja, und drücken Sie dann auf ENTER
E
. Diese Position wird
als Standardwert gespeichert.
3. Drücken Sie die blaue Taste. Drücken Sie auf die Tasten ▲ und ▼, um eine
der gespeicherten Positionen (Position1, Position2, Position3) mit der aktuellen
Position zu belegen.
Wenn Sie die aktuelle Position nicht speichern möchten, drücken Sie auf
die Taste RETURN.
Wenn Sie einen Speicherplatz auswählen möchten, können Sie die Farbtasten nicht verwenden.
4. Drücken Sie zum Speichern auf die Taste ENTER
E
.
Wenn Sie Position 1 wählen, wird die Meldung Aktuelle Position wird als Position1 gespeichert angezeigt.
5. Drücken Sie die Taste ENTER
E
.
Die gespeicherte Position wird links im Bildschirmmenü angezeigt.
Einstellen einer gespeicherten Position
1. Führen Sie den 1. Schritt von Öffnen des Menüs aus.
2. Durch Drücken einer Farbtaste (Rot, Grün, Gelb) wird die automatische
Wandhalterung in die gespeicherte Position gebracht.
Sie können die Wandhalterung in eine der 3 voreingestellten Positionen
bringen. Drücken Sie hierzu auf die rote (Position 1), grüne (Position 2)
oder gelbe (Position 3) Taste.
Wenn Sie die Position verändern, nachdem Sie eine gespeicherte Position
eingestellt haben, wird die Anzeige der Position geschlossen.
Einzelheiten zur Installation entnehmen Sie bitte dem zusammen mit der Wandhalterung gelieferten Installationshandbuch.
Setzen Sie sich für die Installation des Geräts und zum Einbauen und Positionieren der Wandhalterung mit einem Fachbetrieb
in Verbindung.
Verwenden Sie dieses Installationshandbuch, wenn Sie die Wandhalterung an einer Wand befestigen. Bei Installation auf
anderen Trägermaterialien wenden Sie sich bitte an Ihren Fachhändler.
Die automatische Wandhalterung funktioniert nicht, wenn Anynet+ oder WISELINK Pro aktiv sind.
N
N
-
-
N
N
N
N
N
N
N
N
N
N
N
N
SERVICE-Kabel (nicht im Lieferumfang)
Rückseite des Fernsehgeräts Automatische Wandhalterung
Einstellungen
Digitaltext : Deaktivieren
Lichteffekt : TV Modus An
Einstellung für Wandmontage ►
Melodie : Aus
Entertainment : Aus
Energiesparmod. : Aus
PIP
Software-Update
Common interface
Einstellung für Wandmontage
Position 1 2 3
Einstellen Adjust Center
Speichern
Speichern Sie die Position.
Navig. Eingabe Zurück
Position1
Position2
Position3
BN68-01757A-Ger.indb 63 2008-9-24 15:37:32
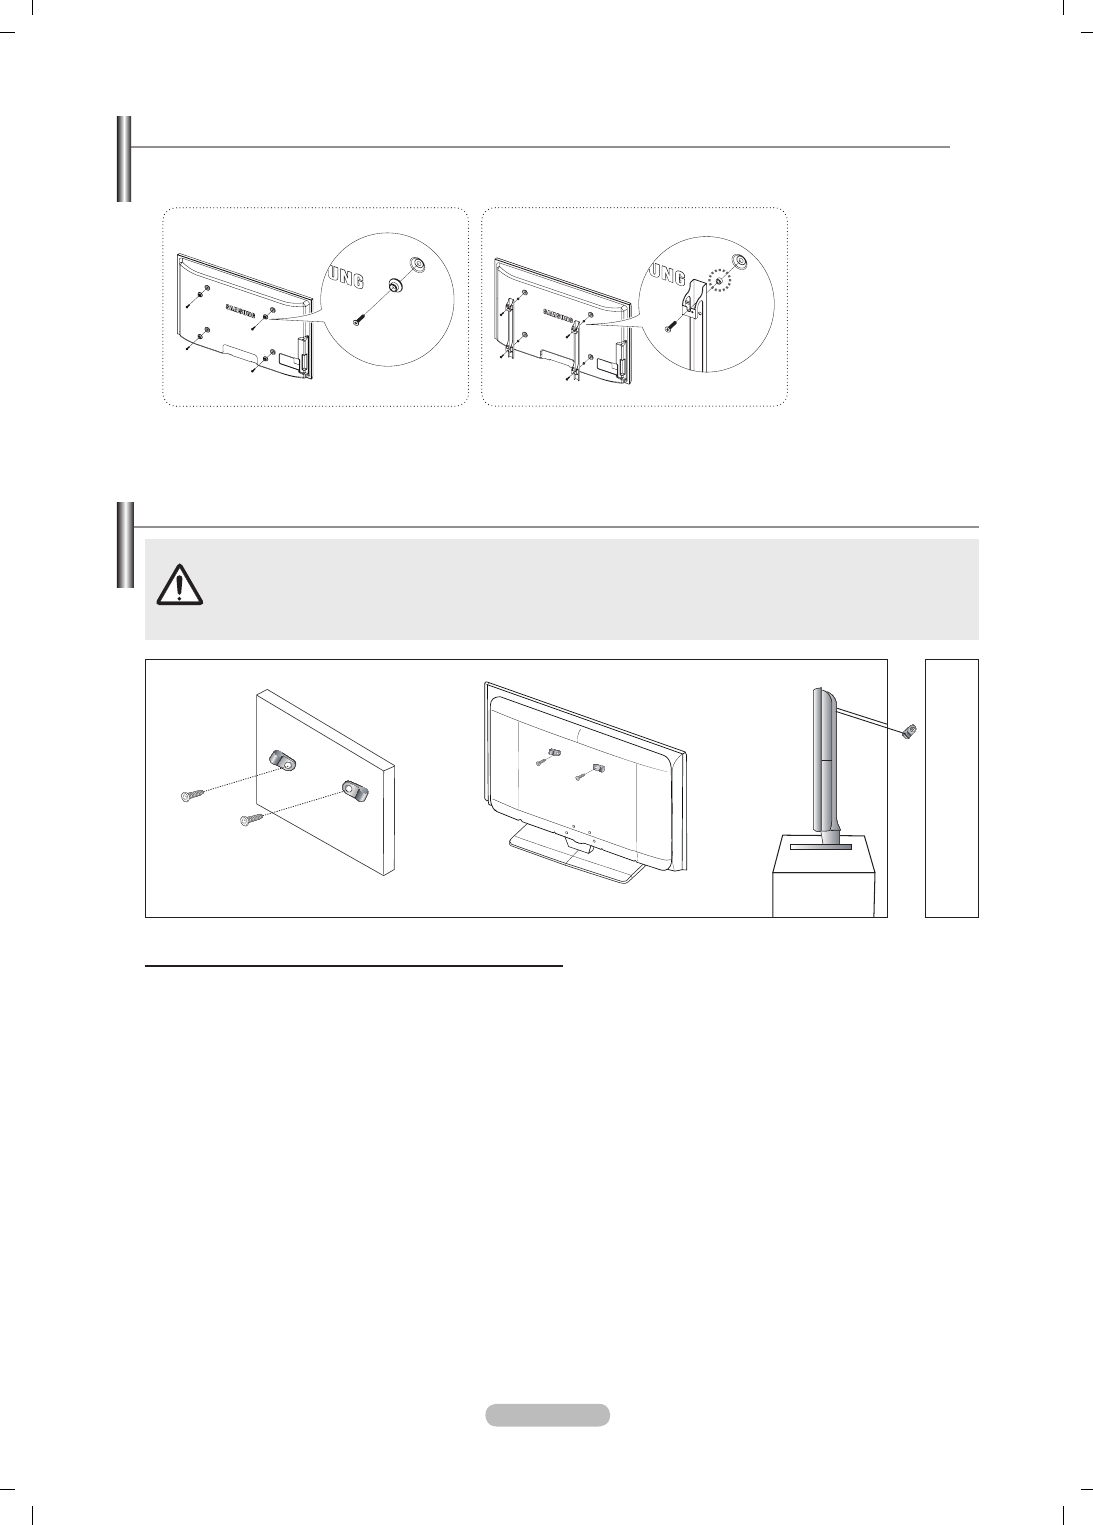
Deutsch - 64
Befestigen des Fernsehgeräts an der Wand
Das Fernsehgerät kann hinfallen, wenn Sie daran ziehen, es schieben oder darauf klettern. Stellen Sie insbesondere
sicher, dass sich keine Kinder an das Gerät hängen oder es aus dem Gleichgewicht bringen. Anderenfalls könnte
das Gerät umkippen und schwere Verletzungen oder den Tod verursachen. Beachten Sie alle Anweisungen der
beigefügten Sicherheitshinweise. Noch mehr Stabilität erreichen Sie, wenn Sie den Kippschutz installieren. Gehen Sie
hierzu folgendermaßen vor.
So verhindern Sie, dass das Fernsehgerät umkippt:
1. Stecken Sie die Schrauben durch die Halterungen und befestigen Sie sie fest an der Wand. Vergewissern Sie sich, dass die
Schrauben gut halten.
Je nach Ausführung der Wand benötigen Sie zum Befestigen weiteres Material, wie z. B. einen Dübel.
Da die benötigten Halterungen, Schrauben und das Band nicht zum Lieferumfang gehören, müssen Sie diese Teile
gesondert erwerben.
2. Entfernen Sie die Schrauben in der Mitte auf der Rückseite des Fernsehgeräts. Setzen Sie diese Schrauben in die
Halterungen ein und befestigen Sie die Schrauben dann wieder am Fernsehgerät.
Die Schrauben werden möglicherweise nicht zusammen mit dem Gerät geliefert. In diesem Fall werden sie gesondert
verkauft.
3. Verbinden Sie die Halterungen an der Wand und die Halterung am Fernsehgerät mit einem festen Band miteinander und
ziehen Sie das Band dann fest.
Stellen Sie das Fernsehgerät in der Nähe der Wand auf, damit es nicht nach hinten kippen kann.
Es ist noch sicherer, wenn die Halterungen an der Wand niedriger als die Halterungen am Fernsehgerät sind.
Lösen Sie das Band, ehe Sie den Fernsehapparat bewegen.
4. Kontrollieren Sie, ob alle Anschlüsse weiterhin fest verbunden sind. Prüfen Sie regelmäßig die Verbindungen auf Zeichen von
Ermüdung oder Versagen. Bei Zweifeln hinsichtlich der Sicherheit Ihrer Halterung wenden Sie sich an einen professionellen
Installationsbetrieb.
N
N
N
N
N
N
Vorbereitung für die Befestigung der Wandhalterung an der Wand
1 Befestigen Sie die Wandhalterung mit einem Anzugsmoment von maximal 15kgf•cm. Denken Sie daran, dass Bauteile bei
einem höheren Anzugsmoment beschädigt werden können.
2 Zum Zubehörsatz gehört ein Haltering [①] zum Befestigen der Wandhalterungen von Drittanbietern am Samsung-
Fernseher. (Fall B)
Fall A. Installieren der SAMSUNG-
Wandhalterung
Fall B. Installieren der Wandhalterung
eines anderen Anbieters
Wand Wand
경고 주의
경고 주의
BN68-01757A-Ger.indb 64 2008-9-24 15:37:33
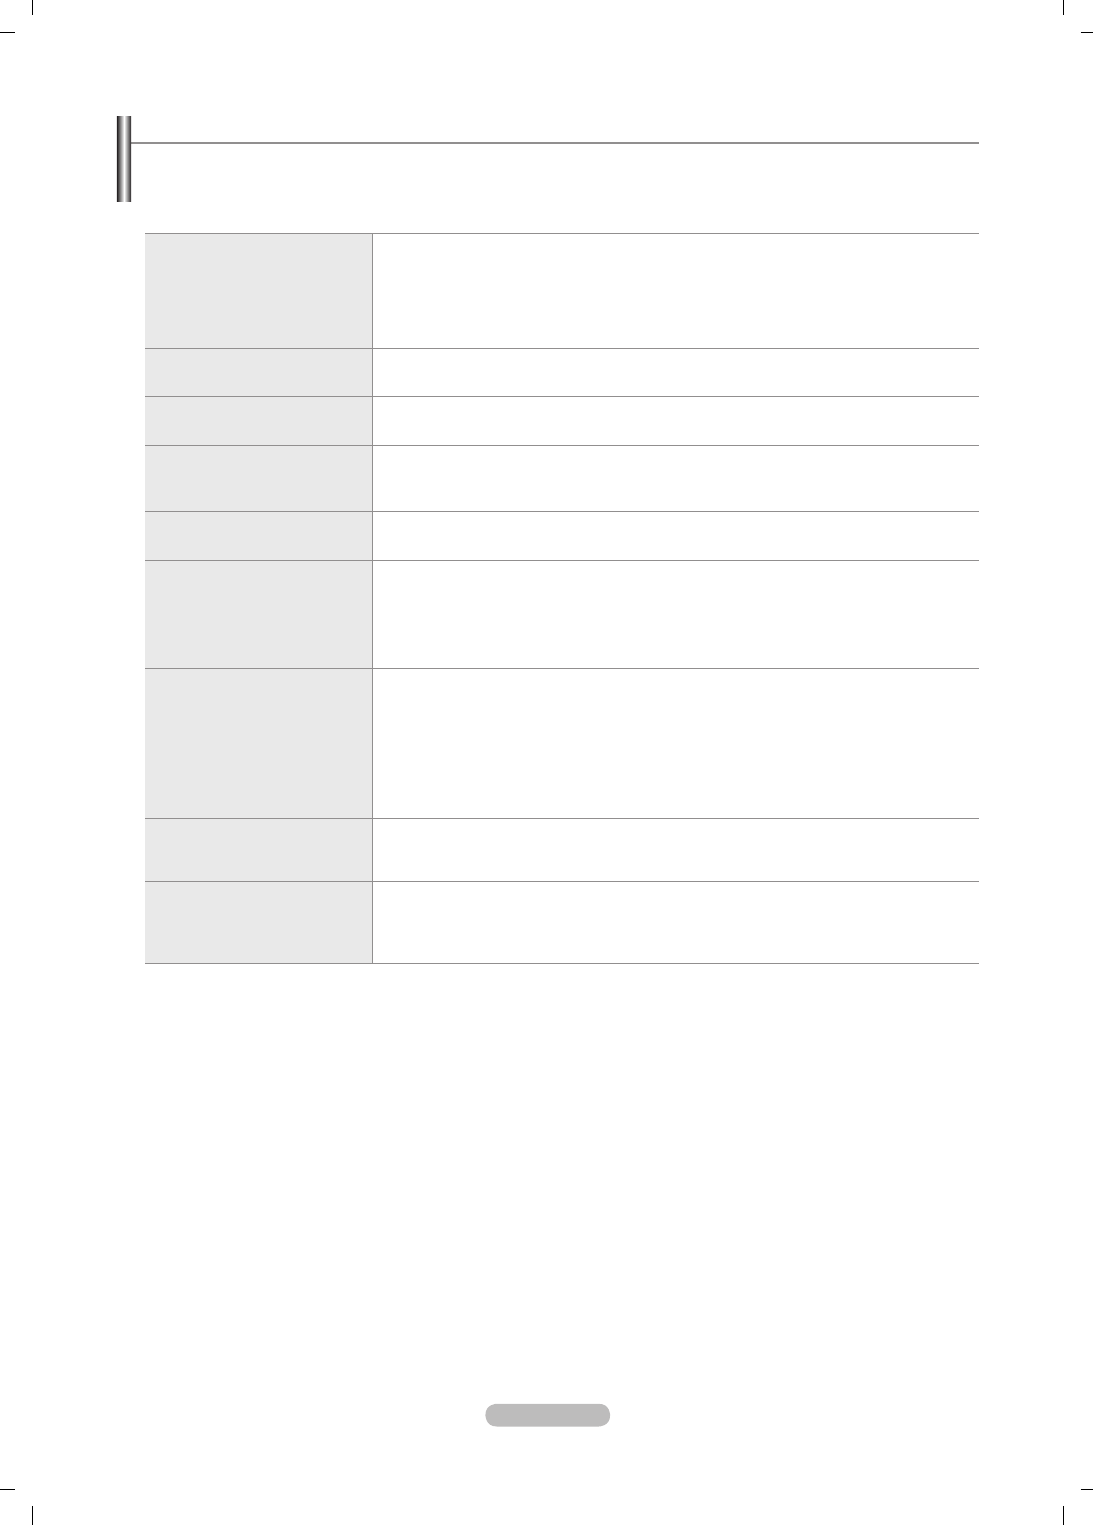
Deutsch - 65
Fehlerbehebung
Bevor Sie sich über Ihren Fachhändler an den Kundendienst von Samsung wenden, führen Sie bitte die nachstehend
beschriebenen einfachen Maßnahmen durch.
Wenn Sie das Problem nicht anhand der angegebenen Hinweise lösen können, notieren Sie Modell- und Seriennummer des
Fernsehgeräts, und wenden Sie sich an Ihren Fachhändler.
Kein Ton oder Bild Stellen Sie sicher, dass das Netzkabel an eine Steckdose angeschlossen ist.
Stellen Sie sicher, dass Sie auf der Fernbedienung die Taste gedrückt haben.
Überprüfen Sie die Einstellungen für Kontrast und Helligkeit.
Überprüfen Sie die Lautstärke.
Prüfen Sie, ob Lautsprecher auswählen Ext. Lautsprecher ist.
•
•
•
•
•
Normales Bild, aber kein Ton Überprüfen Sie die Lautstärke.
Überprüfen Sie, ob die Taste MUTEM auf der Fernbedienung gedrückt wurde.
•
•
Kein Bild oder nur
schwarzweißes Bild
Ändern Sie die Farbeinstellungen.
Stellen Sie sicher, dass die korrekte Fernsehnorm ausgewählt ist.
•
•
Ton- und Bildstörungen “Suchen Sie das elektrische Gerät, das die Störungen am Fernsehgerät verursacht, und
stellen Sie es in einem größeren Abstand auf.”
Schließen Sie das Fernsehgerät an eine andere Steckdose an.
•
•
Verzerrtes oder verschneites
Bild, verzerrter Ton
Überprüfen Sie Ausrichtung, Standort und Anschlüsse der Antenne.
Störungen werden oft durch Zimmerantennen verursacht.
•
•
Fernbedienung funktioniert nicht
richtig
Tauschen Sie die Batterien der Fernbedienung aus.
Reinigen Sie die Vorderseite der Fernbedienung (dort bendet sich der Infrarotsender).
Überprüfen Sie, ob die Pole (+ und –) der Batterien wie im Batteriefach angezeigt
ausgerichtet sind.
Überprüfen Sie, ob die Batterien möglicherweise leer sind.
•
•
•
•
Der Bildschirm ist schwarz
und die Betriebsanzeige blinkt
kontinuierlich.
Überprüfen Sie Stromversorgung und Signalkabel Ihres Computers.
Bewegen Sie die Maus des Computers, oder drücken Sie eine Taste auf der Tastatur.
Überprüfen Sie bei den Geräten (Set-Top-Box, DVD usw.) Stromversorgung und
Signalkabel.
Das Fernsehgerät bendet sich im Energiesparmodus.
Drücken Sie auf der Fernbedienung die Taste Source (Quelle).
Schaltet das Fernsehgerät ein oder aus.
•
•
•
•
•
•
Das beschädigte Bild wird in der
Ecke des Bildschirms angezeigt.
Wenn bei manchen externen Geräten Nur Scan gewählt ist, erscheint das beschädigte Bild
in der Ecke des Bildschirms. Dieses Symptom ist auf das externe Gerät und nicht auf das
Fernsehgerät zurückzuführen.
•
Es wird eine Meldung angezeigt,
dass alle Einstellungen auf die
Standardwerte zurückgesetzt
werden.
Diese erscheint, wenn Sie die EXIT-Taste gedrückt halten. Die Geräteeinstellungen
werden auf die Werkseinstellungen zurückgesetzt.
•
BN68-01757A-Ger.indb 65 2008-9-24 15:37:33

Deutsch - 66
Technische Daten
Die Beschreibungen und Eigenschaften in diesem Handbuch werden nur zu Informationszwecken herausgegeben und können
ohne vorherige Ankündigung geändert werden.
Modell PS50A756 PS63A756
Bildgröße (Diagonal) 50 inch 63 inch
VertikalPC-Auösung 1920 x 1080 @ 60 Hz 1920 x 1080 @ 60 Hz
Audio (Ausgang) 10 W x 2 15 W x 2
Abmessungen (BxHxT)
Gehäuse
Mit Fuß
1240 x 766 x 96 mm
1240 x 830 x 315 mm 1531 x 932 x 99 mm
1531 x 1005 x 418 mm
Gewicht
Gehäuse
Mit Fuß 39 kg
44 kg 67 kg
84 kg
Umgebungsbedingungen
Betriebstemperatur
Luftfeuchtigkeit (bei Betrieb)
Lagerungstemperatur
Luftfeuchtigkeit (Lagerung)
50 °F to 104 °F (10 °C to 40 °C)
10% to 80%, non-condensing
-4 °F to 113 °F (-20 °C to 45 °C)
5% to 95%, non-condensing
Änderungen der technischen Daten und des Geräte-Designs vorbehalten.
Dies ist ein digitales Gerät der Klasse B.
Die technischen Daten zur benötigten Netzspannung nden Sie auf dem Etikett am Produkt.
N
N
N
BN68-01757A-Ger.indb 66 2008-9-24 15:37:34

Korrekte Entsorgung von Altgeräten
(Elektroschrott)
(In den Ländern der Europäischen Union und anderen
europäischen Ländern mit einem separaten Sammelsystem)
Die Kennzeichnung auf dem Produkt bzw. auf der
dazugehörigen Dokumentation gibt an, dass es nach seiner
Lebensdauer nicht zusammen mit dem normalen Haushaltsmüll
entsorgt werden darf. Entsorgen Sie dieses Gerät bitte getrennt
von anderen Abfällen, um der Umwelt bzw. der menschlichen
Gesundheit nicht durch unkontrollierte Müllbeseitigung
zu schaden. Helfen Sie mit, das Altgerät fachgerecht zu
entsorgen, um die nachhaltige Wiederverwertung von stofflichen
Ressourcen zu fördern.
Private Nutzer wenden sich an den Händler, bei dem das
Produkt gekauft wurde, oder kontaktieren die zuständigen
Behörden, um in Erfahrung zu bringen, wo Sie das Altgerät für
eine umweltfreundliche Entsorgung abgeben können.
Gewerbliche Nutzer wenden sich an ihren Lieferanten und
gehen nach den Bedingungen des Verkaufsvertrags vor. Dieses
Produkt darf nicht zusammen mit anderem Gewerbemüll
entsorgt werden.
BN68-01757A-Ger.indb 67 2008-9-24 15:37:34
Italiano - 2
© 2008 Samsung Electronics Co., Ltd. All rights reserved.
Istruzioni per l’uso
Ritenzione dell’immagine a video
Non visualizzare un’immagine fissa (come ad esempio su un videogioco o collegando un PC a questo PDP) per più di due
ore poiché ciò può causare una ritenzione dell’immagine a video. Il fenomeno di ritenzione dell’immagine è anche noto come
“bruciatura dello schermo”. Per evitare il fenomeno di ritenzione dell’immagine, ridurre il grado di luminosità e di contrasto
dello schermo quando si visualizza un’immagine fissa.
Altitudine
Generalmente, lo schermo PDP può operare solo a un’altitudine inferiore a 2000 m. Ad altitudini superiori il display potrebbe
non funzionare correttamente.
Riscaldamento del pannello superiore del televisore PDP
Dopo lunghi periodi di utilizzo, la parte superiore del prodotto potrebbe risultare calda, dato che il calore si disperde attraverso
il foro di ventilazione sul pannello superiore dello schermo. Questo fenomeno è del tutto normale e non indica un difetto o un
guasto. Tuttavia, è bene impedire ai bambini di toccare la parte superiore del prodotto.
Il prodotto emette un suono improvviso e secco.
Questo fenomeno può verificarsi quando il prodotto si contrae o si espande a causa di una variazione di temperatura o
umidità ambiente. È una reazione normale e non indica un difetto dell’unità .
Difetti dei pixel
Il televisore PDP utilizza un pannello composto da 1.230.000 (livello SD) a 3.150.000 (livello HD) pixel, la cui produzione
richiede una tecnologia estremamente sofisticata. Tuttavia, alcuni pixel potrebbero risultare più luminosi o più scuri. Questo
fenomeno non ha alcun impatto sulle prestazioni del prodotto.
Evitare di utilizzare il prodotto a una temperatura inferiore a 5°C(41°F).
La visualizzazione prolungata di un’immagine fissa potrebbe causare un danno permanente al pannello PDP.
L’uso per un periodo prolungato del formato 4:3 può causare la visualizzazione di tracce di bordi sulla
parte sinistra, destra e centrale dello schermo a causa delle differenti emissioni luminose dello schermo.
La riproduzione di un DVD o l’uso di una console per videogiochi può causare effetti analoghi. Questo
tipo di danni non è coperto dalla garanzia.
Immagine residua.
La visualizzazione prolungata di immagini fisse da videogiochi o PC può causare la visualizzazione di immagini residue
parziali. Per evitare questo problema, ridurre la luminosità e il contrasto mentre si visualizzano le immagini fisse.
Garanzia
- La garanzia non copre eventuali danni causati dalla ritenzione dell’immagine.
- La bruciatura dello schermo non è coperta dalla garanzia.
Installazione
Se si installa il prodotto in un ambiente con molta polvere, temperature alte o basse, elevata umidità, sostanze chimiche
oppure se si prevede di utilizzare il prodotto 24 ore al giorno, come ad esempio negli aeroporti, nelle stazioni ferroviarie, ecc.,
si raccomanda di contattare un centro di assistenza autorizzato. La mancata osservanza di questa precauzione può causare
gravi danni al prodotto.
Avvertenza TV Digitale (DVB-T)
1. LE FUNZIONI RELATIVE AL TV DIGITALE (DVB) SONO DISPONIBILI SOLO NEI PAESI O NELLE AREE DOVE
VENGONO TRASMESSI I SEGNALI DEL DIGITALE TERRESTRE DVB-T (MPEG2 E MPEG4 AVC). DVB-T è il
consorzio Europeo per lo standard di trasmissione della televisione digitale terrestre. Vericare con il rivenditore locale la
disponibilità del servizio DVB-T nella propria zona.
2. Sebbene questo TV rispetti gli attuali standard DVB-T alla data di [Agosto, 2008], la compatibilità con future trasmissioni
digitali terrestri non può essere garantita.
3. Alcune funzioni digitali del TV possono non essere disponibili o operare correttamente in alcuni paesi o regioni.
4. Per maggiori informazioni contattare il locale centro assistenza clienti SAMSUNG.
Contatta SAMSUNG WORLDWIDE
Se avete commenti o domande sui prodotti Samsung, contattate il Servizio Clienti Samsung.
(Vedere retro di copertina per maggiori informazioni.)
BN68-01757A-Ita.indb 2 2008-9-24 15:01:30
N O T
Simbolo Premere Nota Tasto One-Touch Tasto TOOL
Italiano - 3
Italiano
Collegamento e congurazione del televisore
Istruzioni per l’uso ...............................................................2
Controllo dei componenti .....................................................4
Uso del piedistallo ...............................................................4
Assemblaggio del piedistallo (a seconda del modello) ........4
Pannello di controllo ............................................................5
Pannello dei collegamenti ...................................................6
Telecomando .......................................................................8
Installazione delle batterie nel telecomando .......................9
Accensione e spegnimento .................................................9
Attivazione della modalità Standby del televisore ...............9
Visualizzazione dei menu ..................................................10
Uso del tasto TOOLS ........................................................10
Utilizzo della rotella ...........................................................10
Funzioni Plug & Play .........................................................11
Controllo dei canali
Memorizzazione dei canali ................................................11
Gestione dei canali ............................................................14
Controllo dell’immagine
Modica e reimpostazione delle impostazioni
dell’immagine ....................................................................15
Visione di Picture-in-Picture ..............................................19
Congurazione del televisore con il PC .............................19
Schermo del PC ................................................................20
Controllo dell’audio
Modica dello standard audio ............................................21
Selezione della modalità audio ..........................................22
Descrizione delle funzioni
Congurazione del menu Setup ........................................23
Impostazione dell’orologio .................................................26
Connessione di rete ..........................................................27
Impostazione della rete .....................................................29
Elenco sorgenti / Modica Nome .......................................31
Guida Prodotto ..................................................................31
WISELINK Pro
Collegamento di un dispositivo USB .................................32
Uso della funzione WISELINK Pro ..................................33
Uso e ordinamento dell’Elenco foto ...................................35
Visualizzazione di una foto o di una proiezione
di diapositive .....................................................................36
Usare e ordinare l’Elenco musica ......................................38
Riproduzione di un le musicale .......................................39
Usare e ordinare l’Elenco lmati ........................................40
Riproduzione di un lmato ...............................................41
Cancellazione di Foto/Musica/Filmati ................................42
Impostazione di immagini/musica mediante
WISELINK Pro ...................................................................43
Uso del menu Impostazione ..............................................43
■
■
■
■
■
■
■
■
■
■
■
■
■
■
■
■
■
■
■
■
■
■
■
■
■
■
■
■
■
■
■
■
■
■
■
■
■
■
■
WISELINK Pro-DLNA
Impostazione della rete DLNA ...........................................44
Installazione dell’applicazione DLNA .................................44
Uso dell’applicazione DLNA ..............................................46
Uso della funzione DLNA ..................................................49
Content Library
Attivazione della Content Library .......................................50
Uso della Content Library ..................................................51
Uso di contenuti aggiuntivi usando un dispositivo di
memorizzazione USB esterno ...........................................52
Informazioni su Anynet+
Collegamento dei dispositivi Anynet+ ................................53
Congurazione di Anynet+ ................................................54
Scansione e passaggio da un dispositivo
Anynet+ all’altro .................................................................54
Registrazione ....................................................................55
Ascolto tramite il Ricevitore (Home theater) ......................56
Risoluzione dei problemi con Anynet+ ............................56
InfoLive
Usare InfoLive ...................................................................57
Uso del Servizio Meteo .....................................................58
Uso del Servizio Notiziari ..................................................58
Uso del Servizio Azioni ......................................................59
Impostazione di InfoLive ....................................................60
Consigli per l’uso
Funzione Teletext ..............................................................61
Speciche del kit di supporto a parete (VESA) .................62
Regolazione supporto a parete
(Kit venduto separatamente) ...........................................63
Preparazione prima dell’installazione del
supporto a parete ..............................................................64
Fissaggio del televisore alla parete ...................................64
Risoluzione dei problemi ...................................................65
Speciche ..........................................................................66
Schema blocco ..................................................................67
■
■
■
■
■
■
■
■
■
■
■
■
■
■
■
■
■
■
■
■
■
■
■
■
■
■
Sommario
Questo apparecchio è fabbricato in conformità al D.M.28.08.95 n.548
ed in particolare a quanto specicato nell Art.2, comma 1. Questo
apparecchio è fabbricato nella U.E. in conformità al D.M.28.08.95 n.548
Art.2, comma 1 ed al D.M.26.03.92 Art.1
BN68-01757A-Ita.indb 3 2008-9-24 15:01:30

Italiano - 4
Collegamento e congurazione del televisore
Controllo dei componenti
Manuale dell'utente Telecomando /
Batterie AAA (2ea)
Cavo di alimentazione Panno di pulizia
Scheda di garanzia/ Manuale
Guida alla sicurezza (Non
disponibile in tutte le località)
Coperchio-Pannello inferiore /
Viti (2ea) (PS50A756)
Anello di sostegno (4ea)
(vedere a pag. 64)
CD del programma
Nucleo in ferrite per cavo
di alimentazione (2ea)
Nucleo in ferrite
I nuclei in ferrite sono utilizzati per schermare i cavi dalle interferenze. Quando si collega un cavo, aprire il
nucleo in ferrite e avvolgerlo intorno al cavo vicino alla spina.
N
Uso del piedistallo
Il PDP deve essere trasportato da due o più persone. Non appoggiare mai
il PDP sul pavimento perché potrebbe danneggiarsi. Mantenere sempre il
PDP in posizione diritta.
Il PDP può ruotare di 20 gradi a sinistra e a destra.
N
N
Assemblaggio del piedistallo (a seconda del modello)
Utilizzare le 6 viti fornite in dotazione per fissare saldamente la TV del
piedistallo al TV.
L’aspetto dell’unità può variare rispetto all’immagine.
In caso di installazione a parete del televisore, Chiudere il
coperchio
(1)
sul raccordo del piedistallo utilizzando due
viti.
Avvertenza
Fissare saldamente il televisore al piedistallo
prima di muoverlo.
In caso contrario, potrebbe cadere causando
gravi lesioni.
Il televisore deve essere trasportato da
due o più persone. Non appoggiare mai
il televisore sul pavimento perché lo
schermo potrebbe subire danni.
Appoggiare sempre il televisore il
posizione diritta.
N
-20° ~ 20°
BN68-01757A-Ita.indb 4 2008-9-24 15:01:33

Italiano - 5
Italiano - 5
Pannello di controllo
La forma e il colore del prodotto possono variare in base al modello.
N
Tasti del pannello frontale
Premere ogni tastoper attivare la
funzione correlata.
1
SOURCE
Passa tra tutte le sorgenti di ingresso disponibili
(TV, Est.1, Est.2, AV, S-Video, Comp., PC, HDMI1,
HDMI2/DVI, HDMI3, HDMI4, USB, DLNA).
Nel menu a video, utilizzare questo tasto così come si
usa il tasto ENTER del telecomando.
2
MENU
Premere per visualizzare il menu a video con le funzioni del
televisore.
3
– +
Premere peraumentare odiminuire il volume.
Nel menu a video, utilizzare i pulsanti – + così come
si utilizzano i tasti ◄ e ► del telecomando.
4
C/P.
Premere per cambiare canale. Nel menu a video, utilizzare
i pulsanti così come si utilizzano i tasti ▲ e
▼ del telecomando. E’ possibile utilizzare il tasto
per accendere il televisore senza il telecomando.
5
INDICATORE DI ALIMENTAZIONE
Lampeggia e si spegne quando l’alimentazione è attivata, e
si accende in modalità standby.
6
SENSORE DEL TELECOMANDO
Puntare il telecomando in direzione di questo punto sul
televisore.
N
7
ALTOPARLANTE
8
TASTO DI ACCENSIONE
Premere il sensore argento sotto il simbolo ( ) per
accendere e spegnere il televisore.
Sensore argento
BN68-01757A-Ita.indb 5 2008-9-24 15:01:34
Italiano - 6
Pannello dei collegamenti
Quando si collega un sistema audio o video al televisore, assicurarsi che tutti gli elementi siano spenti.
Quando si collega un dispositivo esterno, fare corrispondere il colore del terminale di collegamento a quello del cavo.
N
N
1
POWER IN
Collegare il cavo di alimentazione fornito in dotazione.
2
COMPONENT IN
Ingressi (AUDIO L/R) e video (Y/PB/PR) per Component.
3
LAN
Inserire un cavo LAN in questa porta per effettuare il
collegamento in rete.
4
PC IN(PC) / AUDIO
Collegare ai jack video e audio del PC.
5
EXT 1, EXT 2
Ingressi e uscite di dispositivi esterni quali videoregistratori,
DVD, periferiche di gioco o lettori di dischi video.
Specifiche di I/O
Connettore Ingresso Uscita
Video Audio (L/R) RGB Video + Audio (L/R)
EXT 1 ✔ ✔ ✔ Solo l’uscita TV o DTV è
disponibile.
EXT 2 ✔ ✔ Uscita da scegliere.
6
DIGITAL AUDIO OUT (OPTICAL)
Collegare a un componente audio digitale.
7
AUDIO OUT(AUDIO R/L)
Collegare i segnali audio RCA provenienti dal televisore
a una sorgente esterna, come per esempio un dispositivo
audio.
8
SERVICE
−Connettore riservato all’assistenza.
9
HDMI IN 1,2,3
− Non è necessario un ulteriore collegamento Audio per la
connessione HDMI-HDMI.
− Quando si effettua una connessione mediante cavo
HDMI/DVI, è necessario utilizzare il jack HDMI IN2.
Che cosa significa HDMI?
-
Alto Definition Multimedia interface permette la
trasmissione di dati video digitali ad alta definizione e
audio digitale a canali multipli.
- l terminale HDMI/DVI supporta il collegamento DVI
a una periferica estesa con un cavo appropriato
(non fornito). La differenza tra HDMI e DVI è che il
dispositivo HDMI è di dimensioni più piccole, dispone
della funzione di codifica HDCP (High Bandwidth Digital
Copy Protection) installata, e supporta audio digitale
multicanale.
DVI IN (HDMI 2) AUDIO L/R
Uscite audio DVI per dispositivi esterni.
0
ANT IN
Connettore coassiale 75Ω per reti aeree/cavo.
Supported modes for HDMI/DVI and Component
480i 480p 576i 576p 720p 1080i 1080p
HDMI/DVI 50Hz
X X X O O O O
HDMI/DVI 60Hz
X O X X O O O
Component
O O O O O O O
N
La forma e il colore del prodotto possono variare in base al modello.
N
Pannello posteriore
Televisione via
cavo Rete
oppure
oppure
oppure
1
5 7 96
0
83 4
2
BN68-01757A-Ita.indb 6 2008-9-24 15:01:38

Italiano - 7
1
Slot COMMON INTERFACE
Inserire la scheda CI (Common Interface, interfaccia comune)
nello slot. (vedere pagina 25)
− Con alcuni canali, se non si inserisce la Scheda IC appare
il messaggio Segnale criptato.
−Le informazioni di pairing che contengono un numero
telefonico, l’ID della scheda IC, l’ID host e altri dati
verranno visualizzate entro 2~3 minuti. Se viene
visualizzato un messaggio di errore, contattare il service
provider.
−Quando la configurazione delleinformazioni relative al
canale è stata completata, viene visualizzato il messaggio
Aggiornamento completato, a indicare che l’elenco dei
canali è stato aggiornato.
Inserire la scheda IC nella direzione indicata sulla scheda
stessa.
2
HDMI IN 4
Collegare al jack HDMI di un dispositivo predisposto per tale
uscita.
3
WISELINK PRO
Collegare un dispositivo di memorizzazione di massa USB
per visualizzare file di fotografie (JPEG) e riprodurre file audio
(MP3) e filmati.
E’ possibile collegarsi alla rete SAMSUNG via wireless.
4
S-VIDEO o VIDEO / AUDIO L/R
Ingressi video (S–Video o Video) e audio per dispositivi
esterni, come ad esempio una videocamera o un
videoregistratore.
N
5
JACK DELLA CUFFIA
È possibile collegare le cuffie se si desidera guardare un
programma televisivo senza disturbare le altre persone
presenti nella stanza.
uso prolungato delle cuffie ad alto volume può
provocare danni all’udito.
N
La forma e il colore del prodotto possono variare in base al modello.N
Pannello laterale
oppure
4
5
3
2
1
4
BN68-01757A-Ita.indb 7 2008-9-24 15:01:40
Italiano - 8
Telecomando
Il telecomando è utilizzabile no a una distanza di 7 metri dal televisore.
Una illuminazione troppo intensa può avere conseguenze sulle prestazioni del telecomando.N
1
Tasto POWER
(accende e spegne il televisore)
2
Seleziona direttamente il televisore
3
Tasti numerici per selezionare
direttamente i canali
4
Selezione dei canali a una/due cifre
5
Disattivazione temporanea
dell'audio
6
Selezione della sorgente disponibile
7
Aumento del volume
Diminuzione del volume
8
Visualizzazione della Guida
elettronica ai programmi (EPG)
9
Utile per selezionare rapidamente
le funzioni più frequentemente
utilizzate.
0
Premere la sezione Su / Giù /
Sinistra / Destra della rotella e
Enter per selezionare le voci del
menu a video e cambiarne i valori.
E' possibile navigare in alto e in
basso nel menu, cambiare i canali
e regolare il volume ruotando la
rotella.
!
Consente di vedere le informazioni
sull'emittente corrente
@
Utilizzare questi tasti nell’elenco
Canali, WISELINK Pro, ecc.
$
Premere per selezionare le opzioni
Schermo e Suono per le modalità
Sport, Cinema e Giochi.
%
Premere questo tasto in Channel
list, WISELINK Pro e Anynet+.
^
ON/OFF
Premere per attivare la
retroilluminazione dei tasti sul
telecomando. Questa funzione
risulta comoda durante la visione
notturna dei programmi o quando
la stanza in cui si sta guardando il
televisore non è illuminata.(L’uso del
telecomando con il tasto ON/OFF
( ) impostato su acceso riduce l’
uso della batteria.)
&
Canale precedente
*
Canale successivo
Canale precedente
(
Visualizza il menu a video principale
)
Questa funzione consente di
visualizzare i file di fotografie
(JPEG) e riprodurre i file audio
(MP3) e i filmati da un dispositivo
esterno.
a
Ritorna al menu precedente
b
Esce dal menu a video
c
Premere per usare i servizi
informativi quali News, Stock Market
e Weather Forecast disponibili sulla
rete.
d
Utilizzarlo quando si connette un
dispositivo Samsung DMA (Digital
Media Adapter) mediante un’
interfaccia HDMI e passando alla
modalità DMA.
(Il tasto DMA è opzionale.)Per
ulteriori informazioni sulle procedure
operative, consultare il Manuale dell
’utente del dispositivo DMA. Questo
tasto è disponibile quando Anynet+
(HDMI-CEC) è Acceso (vedere a
pag. 54).
e
Questa funzione permette la visione
di Content Library.
f
Visualizzazione dei sottotitoli digitali
Funzioni Teletext
2
Uscita da Teletext (in base al
modello)
6
Selezione della modalità Teletext
(LIST/FLOF)
8
Memorizzazione Teletext
9
Formato Teletext
!
Visualizzazione Teletext
@
Selezione argomento Fastext
#
Schermo Teletext/visualizzazione
contemporanea delle informazioni
Teletext e della trasmissione
normale
&
Pagina secondaria Teletext
*
P : Pagina Teletext successiva
P : Pagina Teletext precedente
(
Indice del Teletext
a
Mantenimento Teletext
b
Annullamento Teletext
BN68-01757A-Ita.indb 8 2008-9-24 15:01:41
Italiano - 9
Installazione delle batterie nel telecomando
1.
Sollevare il coperchio sul retro del telecomando come mostra la gura.
2. Installare le due batterie AAA.
Assicurarsi che le indicazioni “+” e “–” sulle batterie corrispondano allo
scherma all’interno del vano.
3. Chiudere il coperchio come mostra la gura.
Se si prevede di non utilizzare il telecomando per un periodo di tempo
prolungato, rimuovere le batterie e riporle in un luogo asciutto e fresco.
L’uso del telecomando con il tasto ON / OFF ( ) impostato su ON riduce
l’uso della batteria.
Se il telecomando non funziona! Verificare i seguenti punti:
1. Il televisore è acceso?
2. I poli - e + delle batterie sono invertiti?
3. Le batterie sono esaurite?
4. Si è verificata una interruzione di corrente, o il cavo di alimentazione è
scollegato?
5. È presente una luce a fluorescenza speciale o un neon nelle vicinanze?
N
Accensione e spegnimento
La spina di alimentazione è collegata al pannello posteriore del televisore.
Inserire la spina in una presa appropriata.
1. Inserire la spina in una presa appropriata.
L’indicatore di standby si accende.
2. Premere il pulsante POWERP sull’apparecchio.
E’ possibile accendere il televisore anche premendo il tasto POWERP o il tasto TV sul telecomando.
All'accensione, l'ultimo canale che si stava guardando prima di spegnere il televisore verrà riselezionato
automaticamente.
3. Premere i tasti numerici (0~9), il tasto canale successivo/precedente (< / >) sul telecomando o il tasto >C/P.
P
<
sull’apparecchio.
Quando si accende l’apparecchio per la prima volta, verrà visualizzato un messaggio per la selezione della lingua dei
menu.
4. Per spegnere l’apparecchio, premere nuovamente il tasto POWER
P
.
Attivazione della modalità Standby del televisore
La modalità Standby del televisore consente di ridurre il consumo di corrente. La modalità Standby è particolarmente utile quando
si desidera disattivare temporaneamente il televisore, ad esempio durante i pasti.
1. Premere il tasto POWER
P
del telecomando.
Lo schermo si spegne e l'indicatore rosso di standby sull’apparecchio si accende.
2. Per riaccendere il televisore, basta premere nuovamente POWER
P
, i tasti numerici (0~9), il tasto TV o il tasto canale
precedente/successivo (< / >).
Non lasciare il televisore in modalità standby per un periodo di tempo prolungato, ad esempio quando si è in vacanza. Si
consiglia di scollegare l’apparecchio dal cavo di alimentazione e dall’antenna.
N
N
N
N
N
N
N
N
N
BN68-01757A-Ita.indb 9 2008-9-24 15:01:41
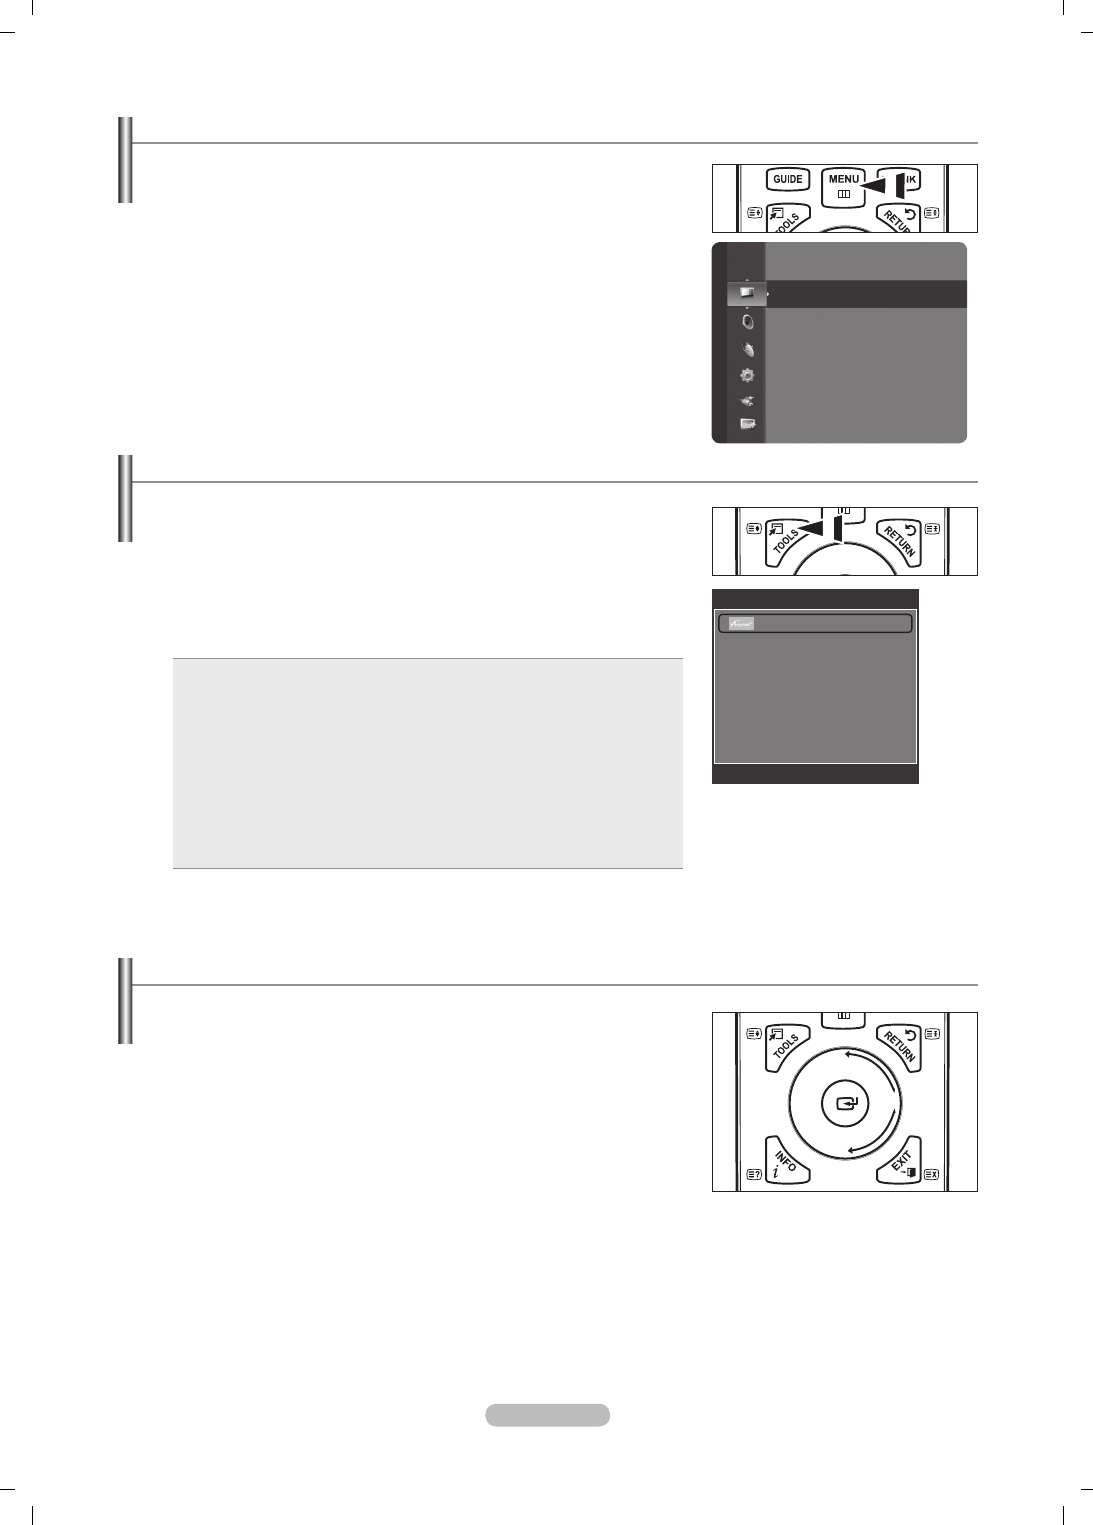
Italiano - 10
Visualizzazione dei menu
1. A dispositivo acceso, premere il tasto MENU. Viene visualizzato il menu
principale. Sul lato sinistro del menu compaiono delle icone: Immagine, Suono,
Canale, Impostazione, Ingressi e Application (Applicazione).
2. Per selezionare un’icona, premere il tasto ▲ o ▼. Per accedere al sottomenu
dell’icona, premere il tasto ENTER
E
3. Premere il tasto EXIT per uscire.
La visualizzazione del menu a schermo viene disattivata dopo circa un minuto.
Uso del tasto TOOLS
You can use the TOOLS button to select your frequently used functions quickly and
easily. The Strumenti menu changes depending on which external input mode you are
viewing.
1.Premere il tasto TOOLS. Verrà visualizzato il menu Strumenti.
2.Premere il tasto ▲ o ▼ per selezionare un menu, quindi premere ENTER.
3.Premere i tasti ▲/▼/◄/►/ENTER
E
per visualizzare, modificare o utilizzare le
voci selezionate.Per una descrizione più dettagliata di ogni funzione, consultare la
pagina corrispondente.
Anynet+(HDMI-CEC), vedere pag. 53
Formato immagine, vedere pag. 17
Modalità immagine , vedere pag. 15
Modalità audio, vedere pag. 21
Timer stand-by, vedere pag. 26
SRS TS XT, vedere pag. 21
Risp. energia, vedere pag. 25
Dual I II, vedere pag. 22
PIP, vedere pag. 19
Regolazione auto, vedere pag. 19
•
•
•
•
•
•
•
•
•
•
Utilizzo della rotella
Per scorrere i canali verso numeri alti, ruotare in senso orario quando è
visualizzata la schermata Channel Display. Per scorrere i canali verso numeri
bassi, ruotare in senso antiorario.
Per aumentare il volume, ruotare in senso orario quando è visualizzata la
schermata Volume Control. Per diminuire il volume, ruotare in senso antiorario.
Per raggiungere un menu inferiore, ruotare in senso orario quando è
visualizzata la schermata Menu Display. Per raggiungere un menu superiore,
ruotare in senso antiorario.
N
Modalità
:
Standard
Luce cella : 7
Contrasto : 95
Luminosità : 45
Nitidezza : 50
Colore : 50
Tinta (V / R) : V50 / R50
Impostazioni dettaglio
Immagine
Strumenti
Anynet+ (HDMI-CEC)
Formato immagine : Automatico
Modalità immagine : Standard
Modalità audio : Personaliz
Timer stand-by : Spento
SRS TS XT : Spento
Risp. energia : Spento
Dual I II : Mono
U
Sposta
E
Conferma
e
Esci
BN68-01757A-Ita.indb 10 2008-9-24 15:01:42
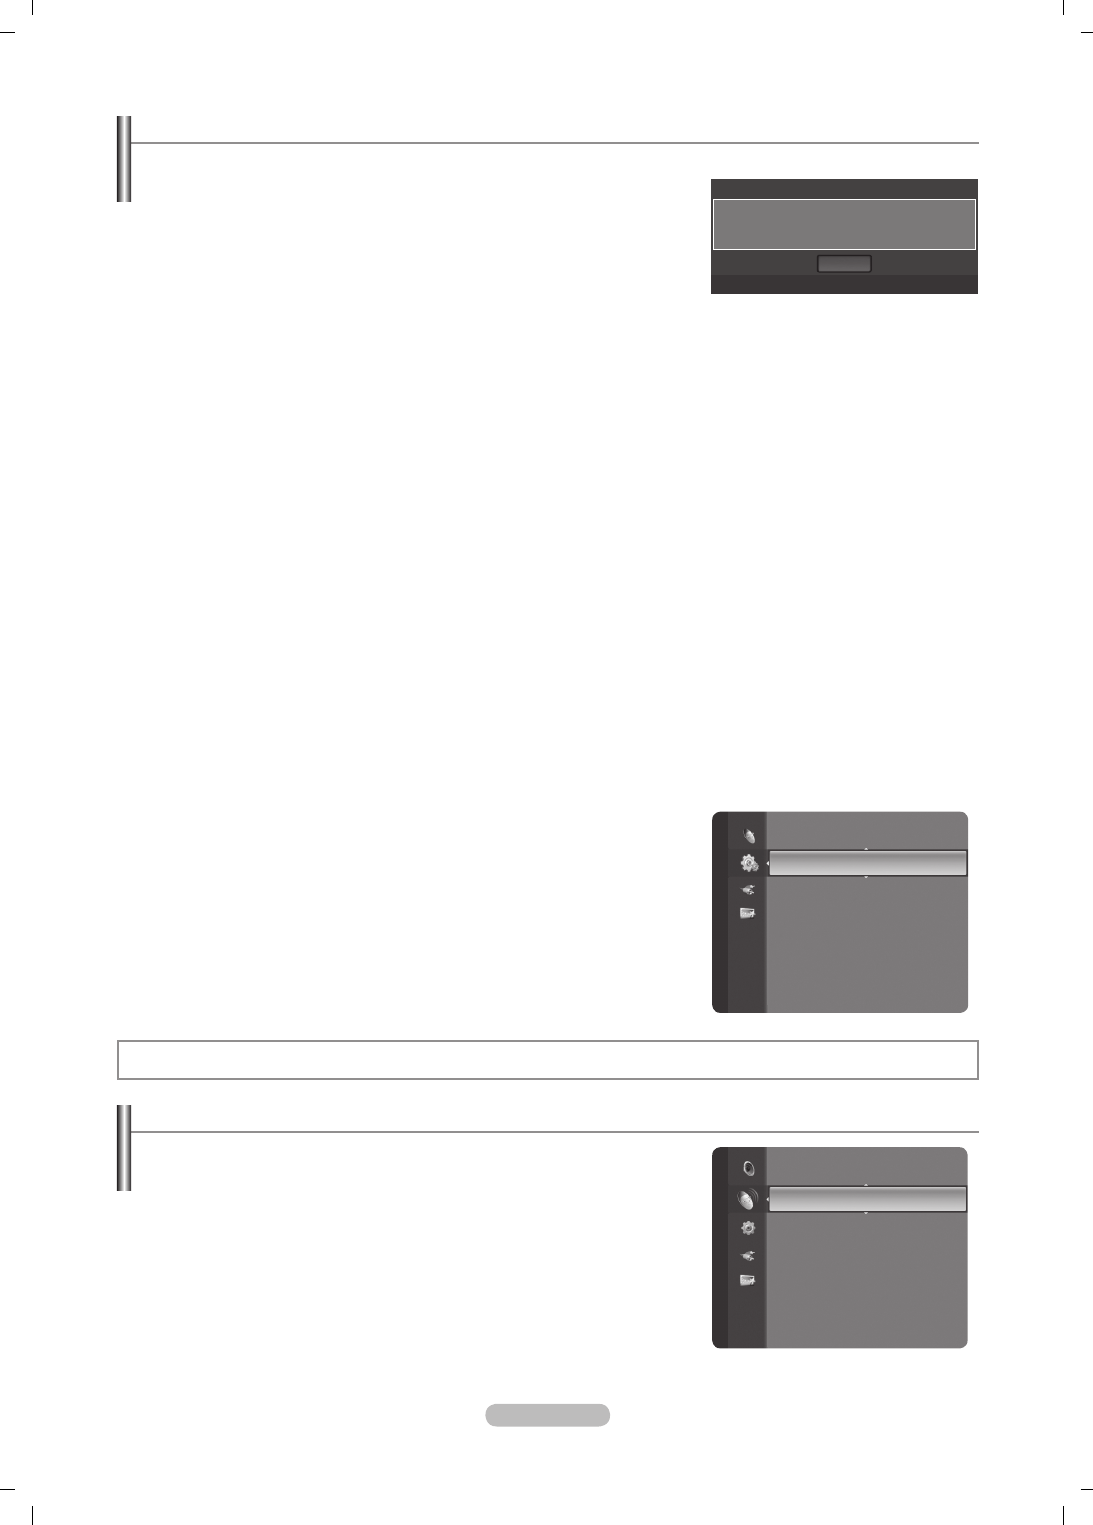
Italiano - 11
Funzioni Plug & Play
Se il televisore viene acceso per la prima volta, alcune impostazioni di base vengono visualizzate automaticamente e in sequenza.
1. Premere il tasto POWER del telecomando. Viene visualizzato il messaggio The
Menu Language, Store Demo, Channels and Time will be set.
2. Premere il tasto ENTER
E
, quindi viene automaticamente selezionato il menu
Select the OSD Language. Premere il tasto ENTER
E
.
3. Selezionare la lingua desiderata premendo il pulsante ▲ o ▼. Premere il tasto
ENTER
E
per confermare la scelta.
4. Premere il tasto ◄ o ►per selezionare Demo Negozio o Uso dom., quindi premere il tasto ENTER
E
.
Si consiglia di impostare la modalità TV su Uso domestico per ottenere la migliore qualità dell’immagine in un ambiente
domestico.
Demo Negozio è intesa solo per un uso commerciale del prodotto.
Se l’unità è stata accidentalmente impostata sulla modalità Demo Negozio e si desidera tornare alla modalità Uso dom.
(Standard): Premere il tasto Volume del televisore. Quando il menu OSD Volume viene visualizzato, tenere premuto il
tasto MENU del televisore per 5 secondi.
In modalità Plug & Play, lo Screen Saver si attiva quando non viene premuto alcun tasto del telecomando per almeno 1
minuto.
Lo Screen Saver si attiva in caso di inattività del sistema per almeno 15 minuti.
5. Premere il tasto ENTER
E
. Selezionare la lingua desiderata premendo il pulsante ▲ o ▼. Premere il tasto ENTER
E
per
confermare la scelta.
6. Premere il pulsante ▲ o ▼ per selezionare i canali da memorizzare. Premere il tasto ENTER
E
per selezionare Avvio
Digitale e Analogico: Canali digitali e analogici.
Digitale: Canali digitali
Analogico: Canali analogici.
La ricerca dei canali inizia e termina in modo automatico.
Premere il tasto ENTER
E
in qualsiasi momento per interrompere il processo di memorizzazione.
Una volta memorizzati tutti i canali disponibili, viene visualizzato il messaggio Imposta la modalità Orologio.
7. Premere il tasto ENTER
E
. Premere il tasto ▲ o ▼ per selezionare Auto, quindi premere il tasto ENTER
E
.
Selezionando Manuale, comparirà Imposta la data e I'ora correnti. (vedere pagina 26)
Ricevendo un segale digitale, l’orario verrà impostato automaticamente. In caso contrario, vedere pagina 26 per
impostare l’orologio.
8. Viene visualizzato il messaggio Buona visione. Al termine, premere il tasto ENTER
E
.
Per reimpostare questa funzione...
1. Premere il tasto MENU per visualizzare il menu. Premere il tasto ▲ o ▼ per
selezionare Impostazione, quindi premere il tasto ENTER
E
.
2. Premere nuovamente il tasto ENTER
E
per selezionare Plug & Play.
3. Digitare il PIN a quattro cifre. Il PIN predenito di un nuovo apparecchio TV è ‘0-0-
0-0’.
Per cambiare il PIN, vedere pagina 23.
La funzione Plug & Play è disponibile solo in modalità TV.
N
N
N
N
N
N
N
N
N
N
N
N
N
Controllo dei canali
Memorizzazione dei canali
Nazione
Canale analogico: Funzione per la modifica del paese per i canali analogici.
Canale digitale: Funzione per la modifica del paese per i canali digitali.
Comparirà la richiesta del PIN. Digitare il PIN a quattro cifre.
❑
N
Impostazione
Plug & Play ►
Lingua : Italiano
Ora
Selezione rete : Cavo
Imp rete wireless
Impostazione rete via cavo
Blocco canali : Acceso
Cambia PIN
Canale
Nazione
►
Memorizzazione auto
Memorizzazione manuale
Guida Completa
Mini Guida
Predefinita : Mini Guida
Elenco canali
Mod. Canale : Canali aggiunti
Plug & Play
The Menu Language, Store Demo, Channels and Time
will be set.
OK
E
Conferma
BN68-01757A-Ita.indb 11 2008-9-24 15:01:43

Italiano - 12
Memorizzazione auto
È possibile effettuare la scansione delle gamme di frequenza disponibili (in base alla nazione). I numeri di programma
assegnati automaticamente potrebbero non corrispondere ai numeri di programma effettivi o desiderati.
Digitale e Analogico: Canali digitali e analogici.
Digitale: Canali digitali
Analogico: Canali analogici.
Scorrere tutti i canali per le stazioni trasmittenti attive e memorizzarle nella memoria del televisore.
Per interrompere la funzione Auto Store, premere il pulsante ENTER
E
.
Verrà visualizzato il messaggio Interrompere la programmazione automatica?.
Premere il tasto ◄ o ► per selezionare Sì, quindi premere il tasto ENTER
E
.
Se un canale è stato bloccato mediante le funzione Blocco canali, comparirà la schermata di inserimento del PIN.
Memorizzazione manuale
Ricerca un canale manualmente e lo memorizza nella memoria TV.
Se un canale è stato bloccato mediante le funzione Blocco canali, comparirà la schermata di inserimento del PIN.
Canale analogico
Memorizzazione manuale dei canali digitali.
Canale: Impostare il numero del canale mediante i tasti ▲, ▼ o i tasti numerici (0~9).
Frequenza: Impostare la frequenza utilizzando i tasti numerici.
Larg. di banda: Impostare il numero del canale mediante i tasti ▲, ▼ o i tasti numerici (0~9).
Al termine, i canali vengono aggiornati nell’elenco dei canali.
Canali analogici
Memorizzazione manuale dei canali analogici.
Programmato (Numero di programma da assegnare a un canale): Impostare il numero del canale mediante i tasti ▲, ▼ o
i tasti numerici (0~9).
Sistema colore → Automatico / PAL / SECAM / NTSC4.43: Impostare il colore utilizzando i tasti ▲ o ▼.
Sistema audio → BG / DK / I / L: Impostare il sistema audio utilizzando i tasti ▲ o ▼.
Canale (Quando si conosce il numero del canale da memorizzare): Premere il tasto ▲ o ▼ per selezionare C (antenna) o
S (cavo). Premere il tasto ►, quindi premere il tasto ▲, ▼ o un numero (0~9) per selezionare il numero desiderato.
E’ anche possibile selezionare direttamente il numero del canale premendo i tasti numerici (0~9).
Se l’audio è anomalo o assente, riselezionare lo standard audio richiesto.
Ricerca (Quando non si conosce il numero del canale) Premere il tasto ▲ o ▼ per avviare la ricerca. Il sintonizzatore
effettua la scansione della gamma di frequenza no a quando appare il primo canale o il canale selezionato.
Memorizza (Quando si memorizza il canale e il numero di programma corrispondente): Impostare a OK premendo il tasto
ENTER
E
.
Modalità Canale
P (Programma): Una volta completata la sintonizzazione, alle emittenti della propria area viene assegnato un numero
da P00 a P99. In questa modalità, è possibile selezionare un canale digitando il numero corrispondente.
C (Antenna): È possibile selezionare un canale immettendo in questa modalità il numero assegnato a ciascuna
emittente.
S (Cavo): E’ possibile selezionare un canale immettendo in questa modalità il numero assegnato a ciascun canale via
cavo.
Guida Completa / Mini Guida
Le informazioni EPG (Electronic Programme Guide) sono fornite dall’emittente. Le voci relative ai programmi potrebbero
risultare vuote o non aggiornate, a seconda delle informazioni trasmesse dall’emittente su un determinato canale. La
schermata viene aggiornata automaticamente non appena sono disponibili le nuove informazioni.
Per le procedure dettagliate sull’uso di Guida Completa e Mini Guida,
vedere le descrizioni a pagina 13.
È anche possibile visualizzare il menu della guida semplicemente
premendo il tasto GUIDE. (per congurare la Predenita, vedere le relative
descrizioni).
Guida Completa : Visualizza la informazioni sui programmi ordinate in segmenti di un’ora. Sono comprese due ore di
programmi che è possibile scorrere in avanti o indietro.
Mini Guida: Su ogni riga della Mini Guide del canale corrente sono riportate le informazioni relative a ogni programma
partendo dal programma corrente in avanti in ordine di orario.
❑
•
•
•
N
N
N
N
N
❑
N
N
•
•
•
N
•
•
•
•
N
N
•
•
N
-
-
-
❑
N
O
BN68-01757A-Ita.indb 12 2008-9-24 15:01:43
Italiano - 13
Predenita
Mini Guida / Guida Completa: E’ possibile scegliere se visualizzare
la Mini Guida o la Guida Completa premendo il tasto GUIDE del
telecomando.
Elenco canali
Per le istruzioni dettagliate sull’uso di Elenco canali, vedere le descrizioni a
pagina 14~15.
Mod. Canale
Premendo il tasto P >/<, si passerà da un canale all’altro dell’elenco dei canali.
Canali aggiunti: I canali verranno attivati secondo l’elenco canali memorizzato.
Preferiti: I canali verranno attivati secondo l’elenco canali preferiti.
Sintonia ne
Se la ricezione è chiara, non è necessario sintonizzare il canale poiché questa operazione viene effettuata automaticamente
durante le operazioni di ricerca e memorizzazione. Se tuttavia il segnale risulta debole o distorto, può essere necessario
sintonizzare il canale manualmente.
I canali sintonizzati manualmente e memorizzati sono evidenziati da un asterisco* alla destra del numero del canale nel
relativo riquadro.
Per reimpostare la sintonia, selezionare Reset premendo il pulsante ▲ o ▼ , quindi premere il tasto ENTER
E
.
E’ possibile sintonizzare manualmente solo i canali analogici del televisore.
Informazioni sul segnale
È possibile visualizzare le informazioni sullo stato del segnale.
Se il segnale è debole, viene visualizzato il messaggio segnale debole o assente.
Durate la visione di un canale digitale, è possibile selezionare questa funzione.
Vengono visualizzate informazioni tecniche sullo stato del segnale.
- Frequenza / ID servizio / Multiplex / Rete / Livello errore bit / Potenza segnale
LNA → Spento / Acceso
Se il televisore si trova in un’area caratterizzata da un segnale debole, la funzione LNA (Low Noise Amplier) è in grado di
migliorare la ricezione (grazie a un preamplicatore low-noise che potenzia il segnale in ingresso).
Durate la visione di un canale analogico, è possibile selezionare questa funzione.
Uso di Guida Completa / Mini Guida
▲/▼/◄/►,
(ENTER)
Selezionare il programma premendo il tasto (▲/▼/◄/►).
Se si seleziona il programma successivo, appare l’icona dell’orologio che indica la visione
programmata. Premendo nuovamente il tasto ENTER, premere il tasto (▲/▼/◄/►) per selezionare
Annulla Programmazioni; la programmazione verrà annullata e l’icona dell’orologio scompare.
Per informazioni dettagliate sulla programmazione, consultare la pagina successiva.
ROSSO Alterna la Mini Guida e la Guida Completa.
VERDE Guida Completa: Per scorrere velocemente indietro (24 ore).
Mini Guida: Per visualizzare rapidamente la pagina successiva.
GIALLO Guida Completa: Per scorrere velocemente in avanti (24 ore).
Mini Guida: Per visualizzare rapidamente la pagina precedente.
BLU Per uscire dalla guida.
INFO
Per ottenere maggiori informazioni. Nelle informazioni dettagliate sono compresi Channel Number,
Running Time, Status Bar, Parental Level, Video Quality Information (HD / SD), Sound Modes, Subtitle
o Teletext, le lingue dei sottotitoli o del Teletext e una breve descrizione del programma evidenziato. “…”
appare quando la descrizione è molto lunga.
❑
❑
❑
❑
N
N
N
❑
N
N
N
❑
N
Canale
Sintonia fine
Informazioni sul segnale
LNA : Spento
►
Guida Compl
DTV Cable 900 f tn 2:10 Mar 1 Giu
Freshmen On Campus
2:00 - 2:30
No Detailed Information
Oggi 2:00 - 3:00 3:00 - 4:00
Mint Extra
Loaded
Fresh 40 with Dynamite MC
The Distillery
Smash Hits! Sunday
900 f tn
901 ITV Play
902 Kerrang!
903 Kiss
903 oneword
903 Smash Hits!
▼
Street Hypn..
Kisstory
Nessuna informazione.
Nessuna informazione.
Nessuna informazione.
Freshmen O..
Guarda
Informazioni
Mini Guida
+24 Ore
Esci
Mini Guida DTV Cable 900 f tn
Street Hypnosis
Booze Britain
2:00
2:30
5:00
▼
Freshmen On Campus
Guarda
Informazioni
Guida Compl
Pagina succ.
Esci
BN68-01757A-Ita.indb 13 2008-9-24 15:01:44

Italiano - 14
Gestione dei canali
Usando questo menu è possibile aggiungere, cancellare o impostare i canali preferiti e
utilizzare la guida dei programmi per le trasmissioni digitali.
Selezionare un canale in Tutti i Canali, Canali aggiunti, Preferiti o Programmato
premendo i tasti ▲ / ▼, quindi il tasto ENTER
E
.
Tutti i Canali
: Mostra tutti i canali attualmente disponibili.
Canali aggiunti
: Mostra tutti i canali aggiunti.
Preferiti
: Mostra tutti i canali preferiti.
Programmato
: Mostra tutti i ca
nali prenotati.
Uso dei tasti colorati nell’elenco dei canali
Rosso (Channel Type): Scorre tra TV, Radio, Dati / Altro e Tutti.
Verde (Zoom): Ingrandisce o riduce il numero di un canale.
Giallo (Select): Seleziona più elenchi di canali.
TOOLS (Option): Visualizza il menu Cancella (o Aggiungi), Aggiungi a
Preferiti (o Elimina da Preferiti), Blocco (o Sblocco), Visione timer, Modica
nome canale, Ordina, Modica numero canale, Seleziona tutti, Deseleziona
tutti o Memorizzazione auto (Il menu Options può essere diverso in base alla
situazione).
Icone sullo stato del canale
ACanale analogico. cCanale selezionato mediante il tasto giallo.
♥
Canale impostato come preferito. (Programma attualmente trasmesso.
\Canale bloccato. )Programma prenotato
Menu Channel List Option (in All Channels / Added Channels / Favourites)
Premere il tasto TOOLS per usare il menu Option.
Gli elementi del menu Option possono differire in base allo stato del canale.
Aggiungi /
Cancella
E’ possibile eliminare o aggiungere un canale per memorizzare i canali desiderati.
Tutti i canali eliminati saranno visibili nel menu Tutti i Canali.
Se il canale in elenco è evidenziato in grigio, signica che il canale è stato
eliminato.
Il menu
Aggiungi
viene visualizzato solo per i canali eliminati.
E’ anche possibile eliminare un canale nel menu Canali aggiunti o Preferiti
allo stesso modo.
Aggiungi a Preferiti
/
Elimina da Preferiti
I canali che si guardano più di frequente possono essere impostati come preferiti.
Il simbolo ♥ verrà evidenziato e il canale verrà impostato come Favourite.
Tutti i canali preferiti saranno visibili nel menu Preferiti.
Blocco / Sblocco
E’ possibile bloccare un canale in modo che non possa essere selezionato e visualizzato. Questa funzione è disponibile solo
quando la funzione Blocco canali è impostata su Acceso. (vedere pag. 23)
Comparirà la richiesta del PIN. Digitare il PIN a quattro cifre.
Il PIN predenito di un nuovo apparecchio TV è 0-0-0-0. E’ possibile modicare il PIN selezionando Change PIN nel
menu.
Verrà visualizzato il simbolo \ e il canale verrà bloccato.
Visione timer
Se si è effettuata la prenotazione di un canale, all’ora stabilita verrà visualizzato il canale prenotato anche durante la visione di
un altro canale contenuto nella Channel List. Per prenotare un programma, impostare prima l’orario corrente.
(vedere pagina 26)
E’ possibile prenotare solo i canali memorizzati.
È possibile impostare il canale, il mese, il giorno, l’anno l’ora e i minuti premendo direttamente i tasti numerici del
telecomando.
Durante le prenotazione di un programma comparirà il menu Programmato.
Digital Programme Guide e Viewing Reservation
Selezionando un canale digitale, e premendo il tasto ►, comparirà la Guida ai programmi. Per prenotare un programma
seguire le procedure descritte sopra.
N
N
-
-
-
-
N
N
N
N
N
N
N
N
N
N
N
N
N
N
N
N
Canale
Mini Guida
Predefinita : Mini Guida
Elenco canali
Mod. Canale : Canali aggiunti
Sintonia fine
Informazioni sul segnale
LNA : Spento
824 UKTV Gold
825 UKTV style
A
1 C --
A
2 C
--
A
3
♥
C
--
A
4 C
--
A
5 C
--
A
6 C
--
A
7 C
--
A
8 C
--
Canali aggiunti
Tutto
Tipo canale
Zoom
Selezione
Opzione
824 UKTV Gold
825 UKTV style
A
1 C --
A
2 C
--
A
3
C
--
A
4 C
--
A
5 C
--
A
6 C
--
A
7 C
--
A
8 C
--
Tutti i Canali
Tutto
Tipo canale
Zoom
Selezione
Opzione
Cancella
Aggiungi a Preferiti
Blocco
Visione timer
Modifica nome canale
Ordina
▼
BN68-01757A-Ita.indb 14 2008-9-24 15:01:45
Italiano - 15
Modifica nome canale (solo canali analogici)
Ai canali è possibile attribuire un nome in modo da visualizzarlo durante la visione.
I nomi dei canali digitali trasmessi vengono automaticamente assegnati e non possono essere modicati.
Modifica nome canale (solo canali digitali)
È anche possibile impostare il numero di canale premendo i tasti numerici sul telecomando.
Ordina
Questa operazione consente di modicare i numeri di programma dei canali memorizzati. Questa operazione è spesso
necessaria dopo la memorizzazione automatica dei canali.
Questa funzione è disponibile sono in modalità analogica.
Seleziona tutti / Deseleziona tutti
Seleziona tutti: Seleziona tutti i canali presenti nell’elenco dei canali.
Deseleziona tutti: E’ possibile deselezionare tutti i canali selezionati nell'elenco canali.
E’ possibile utilizzare contemporaneamente le funzioni Aggiungi / Cancella, Aggiungi a Preferiti / Elimina da Preferiti,
o Blocco / Sblocco per più canali. Selezionare i canali desiderati e premere il tasto giallo per impostare tutti i canali
selezionati contemporaneamente.
Il simbolo c compare a sinistra dei canali selezionati.
E’ possibile selezionare Deseleziona tutti solo quando è stato selezionato almeno un canale.
Memorizzazione auto
Per ulteriori informazioni sull’impostazione delle opzioni, vedere pag. 11.
Se un canale è stato bloccato mediante le funzione Blocco canali, comparirà la schermata di inserimento del PIN.
Channel List Option Menu (in Programme med )
E’ possibile visualizzare, modicare o annullare una prenotazione.
Premere il tasto TOOLS per usare il menu Option.
Modifica info: Selezionare questa funzione per modificare una prenotazione.
Annulla Programmazioni: Selezionare questa funzione per annullare una
prenotazione.
Informazioni: Selezionare questa funzione per visualizzare una prenotazione.
(è anche possibile modificare le informazioni relative alla prenotazione).
Seleziona tutti:
Selezionare tutti i programmi prenotati.
N
N
•
•
N
N
N
N
N
N
Controllo dell’immagine
Modifica e reimpostazione delle impostazioni dell’immagine
Modalità
È possibile selezionare il tipo di immagine che più corrisponde alle proprie esigenze.
Dinamica: Imposta l’immagine da visualizzare in alta definizione in un ambiente
luminoso.
Standard: Imposta l’immagine per una visualizzazione ottimale in condizioni di
luce normali.
Film: Imposta l’immagine per una visualizzazione confortevole in un ambiente
buio.
Premere il tasto TOOLS per visualizzare il menu Strumenti. E’ possibile anche
impostare la modalità dell’immagine selezionando Strumenti → Modalità
immagine.
Luce cella / Contrasto / Luminosità / Nitidezza / Colore / Tinta(V/R)
Il televisore ha diverse opzioni che consentono di controllare la qualità dell’immagine.
Luce cella: Regola la luminosità dei pixel. 10 indica la massima luminosità.
Contrasto: Regola il livello di contrasto dell’immagine.
Luminosità: Regola il livello di luminosità dell’immagine.
Nitidezza: Regola la definizione dei bordi dell’immagine.
Colore: Regola la
saturazione dei colori dell’immagine.
❑
T
❑
Programmato
1 / 1 / 2008
13:59 5 TV1 Quincy, M.E
18:59 2 TV3 The Equalizzatore
20:59 2 TV3 McMillan & Wife
21:59 2 TV3 M.Spillane’s mike Hammer
Modifica info
Annulla Programmazioni
Informazioni
Seleziona tutti
Tutto
Tipo canale
Zoom
Selezione
Opzione
Informazioni
Modalità : Standard
►
Luce cella : 7
Contrasto : 95
Luminosità : 45
Nitidezza : 50
Colore : 50
Tinta(V/R) : V50 / R50
Impostazioni dettaglio
Immagine
BN68-01757A-Ita.indb 15 2008-9-24 15:01:45

Italiano - 16
Tinta(V/R
): Regola la tonalità delle tinte dell’immagine.
Seleziona per prima una modalità dell’immagine da regolare. Per ogni modalità dell’immagine vengono memorizzati i
valori modicati.
Apportando le modiche a Luce cella, Contrasto, Luminosità, Nitidezza, Colore o Tinta(V/R), il OSD verrà regolato di
conseguenza.
In modalità Analog TV, Ext., AV, S-Video del sistema PAL, non è possibile utilizzare la funzione Tinta.
In modalità PC, è possibile modicare solo i parametri Luce cella, Contrasto e Luminosità.
Le impostazioni possono essere regolate e memorizzate per ogni dispositivo esterno connesso a un ingresso TV.
E’ possibile ridurre signicativamente il consumo di energia, e i costi ad esso associati, diminuendo la luminosità dello
schermo.
Impostazioni dettaglio
I nuovi TV Samsung permettono di impostare ancora più precisamente la
visualizzazione delle immagini rispetto ai modelli precedenti. Per eseguire le
impostazioni particolareggiate vedere più avanti.
La modalità Impostazioni dettaglio è disponibile in modalità Standard o Film.
In modalità PC, è possibile modicare solo i parametri Contrasto
Dinamico, Gamma e Bilan bianco tra le opzioni della voce Impostazioni
dettaglio.
Regolazione del nero→ Spento / Bassa / Media / Alto
Consente di selezionare il livello di nero dello schermo per regolare la
profondità dell’immagine.
Contrasto Dinamico → Spento / Bassa / Media / Alto
Consente di regolare in modo ottimale il livello di contrasto dello schermo.
Gamma
Consente di regolare l’intensità dei colori primari (rosso, verde, blu).
Spazio colore
Spazio colore è la matrice di colori composta dai colori rosso, verde e blu. Per scoprire lo straordinario mondo dei colori
naturali basta selezionare lo spazio colore preferito.
Auto: Auto Spazio colore regola automaticamente la tonalità più naturale dei colori basata sulle sorgenti del programma.
Nativa: Native Spazio colore offre tonalità di colore ricche e profonde.
Personaliz: Regola la gamma colore per adattarla alle proprie preferenze.
Personalizzazione di Spazio colore
Colore → Rosso / Verde / Blu / Giallo / Ciano / Magenta
Regola la gamma colore per adattarla alle proprie preferenze. La funzione Colore è disponibile quando l’opzione
Spazio colore è impostata su Personaliz.
Rosso / Verde / Blu: Nella funzione Colore, è possibile regolare i valori RGB per i colori selezionati.
Reset: Ripristina le impostazioni dello spazio colore ai valori predeniti.
Bilan bianco
Consente di regolare la temperatura del colore per ottenere immagini più naturali.
R-Offset / G-Offset / B-Offset/ R-Gain / G-Gain / B-Gain: Una volta modicato il valore, lo schermo viene automaticamente
aggiornato.
Reset: Consente di ripristinare i valori predeniti di bilanciamento del bianco.
Incarnato
E’ possibile enfatizzare il tono ‘incarnato’ dell’immagine.
Una volta modicato il valore, lo schermo viene automaticamente aggiornato.
Migliora imm bordi → Spento / Acceso
E’ possibile enfatizzare i contorni degli oggetti dell’immagine.
xvYCC → Spento / Acceso
Impostando la modalità xvYCC su on, si noterà un miglioramento nei dettagli e nel colore durante la visione di un lm da un
dispositivo esterno (per es. lettore DVD).
xvYCC è disponibile quando la modalità dell’immagine è impostata a Film, e l’ingresso esterno è impostato a HDMI o
Comp.
Se la funzione xvYCC è attiva, la funzione PIP non può essere selezionata.
Opzioni immagine
In modalità PC, è possibile modicare solo i parametri Toni colore,
Dimensione e Sistema prot plasmi tra le opzioni della voce Opzioni
immagine.
Toni colore→ Freddo2 / Freddo1 / Normale / Caldo1 / Caldo2
È possibile selezionare il tono del colore ottimale per la propria vista.
Le regolazioni vengono memorizzate in base alla modalità Immagine
selezionata.
Caldo1 o Caldo2 vengono attivate solo quando la modalità dell’immagine
è Film.
N
N
N
N
N
N
❑
N
N
•
•
•
N
-
-
-
-
•
•
N
N
N
❑
N
N
N
Colore : 50
Tinta (V / R) : V50 / R50
Impostazioni dettaglio ►
Opzioni immagine
Reset immagine
Immagine
Tinta (V / R) : V50 / R50
Impostazioni dettaglio
Opzioni immagine ►
Reset immagine
Immagine
BN68-01757A-Ita.indb 16 2008-9-24 15:01:45

Italiano - 17
Dimensione
È possibile impostare il formato dell’immagine che più si adatta alle proprie esigenze.
Premere il tasto TOOLS per visualizzare il menu Strumenti.
E’ possibile anche impostare la modalità dell’immagine selezionando Strumenti → Modalità immagine.
Automatico: Regola automaticamente la dimensione dell’immagine su un formato 16:9.
16:9: Regola la dimensione dell’immagine a 16:9, un valore appropriato per visualizzare DVD o trasmissioni panoramiche.
Wide Zoom: Aumenta le dimensioni dell’immagine a più di 4:3.
Zoom: Ingrandisce il formato 16:9 (in senso verticale) per adattarlo alle dimensioni dello schermo.
4:3: Questa è l’impostazione predenita per un lmato video o una trasmissione normale.
Solo scansione: Utilizzare questa funzione per visualizzare l’immagine completa con segnali HDMI (720p/1080i/1080p) o
Comp. (720p/1080i/1080p).
A seconda del tipo di sorgente di ingresso, le opzioni relative al formato dell’immagine possono variare.
Le voci disponibili variano in base alla modalità selezionata.
In modalità PC, è possibile regolare solo i formati 16:9 e 4:3.
Le impostazioni possono essere regolate e memorizzate per ogni dispositivo esterno connesso a un ingresso TV.
Se si visualizza una immagine ssa per oltre due ore, sullo schermo potrebbe apparire una immagine residua
temporanea.
Wide Zoom: Premere il tasto ► per selezionare Posizione, quindi premere il tasto ENTER
E
. Per spostare
l’immagine in alto o in basso, utilizzare il tasto ▲ o ▼. Quindi premere il tasto ENTER
E
.
Zoom: Premere il tasto ▲ o ▼ per selezionare Posizione, quindi premere il tasto ENTER
E
. Premere il pulsante
▲ o ▼ per spostare l’immagine verso l’alto o il basso. Quindi premere il tasto ENTER
E
. Premere il tasto ► per
selezionare Formato, quindi premere il tasto ENTER
E
. Premere il tasto ▲ o ▼ per aumentare o ridurre il formato
dell’immagine in direzione verticale. Quindi premere il tasto ENTER
E
.
Dopo aver selezionata l’opzione Solo scansione in modalità HDMI (1080i/1080p) o Component (1080i/1080p):
Selezionare Posizione premendo il pulsante ◄ o ►. Utilizzare il tasto ▲, ▼, ◄ o ► per spostare l’immagine.
Reset: Premere il tasto ◄ o ► per selezionare Reset, quindi premere il tasto ENTER
E
. E’ possibile azzerare
l’impostazione.
Usando la funzione Solo scansione con un ingresso HDMI 720p, 1 riga verrà tagliata all’inizio, alla ne, a sinistra e a
destra come nella funzione di overscan.
Se la modalità PIP è stata impostata a Double ( , ) la dimensione dell’immagine non potrà essere impostata.
Mod schermo → 16:9 / Wide Zoom / Zoom / 4:3
Quando si imposta la dimensione dell’immagine a Automatico su un televisore con formato 16:9, è possibile determinare o
meno le dimensioni dell’immagine da visualizzare nel formato 4:3 WSS (Wide Screen Service). Ogni nazione europea richiede
un formato dell’immagine diverso e questa funzione deve essere quindi selezionata dall’utente.
16:9: Imposta l’immagine sul formato 16:9.
Wide Zoom: Aumenta le dimensioni dell’immagine a più di 4:3.
Zoom: Ingrandisce verticalmente la dimensione dell’immagine sullo schermo.
4:3: Imposta il formato normale 4:3.
Questa funzione è disponibile in modalità Automatico.
Questa funzione non è disponibile in modalità PC, Comp. o HDMI.
Digital NR → Spento / Bassa / Media / Alto / Automatico
Se il segnale ricevuto dal televisore è debole, è possibile attivare la funzione Digital Noise Reduction per ridurre i disturbi
statici e l’effetto ghosting sullo schermo.
Se il segnale è debole, selezionare una delle altre opzioni disponibili no a ottenere la migliore qualità visiva.
DNIe → Spento / Demo / Acceso
Questo apparecchio televisivo include la funzione DNIe per offrire un’alta qualità visiva. Attivando questa opzione, è possibile
visualizzare l’immagine con la funzione DNIe attivata. Se si imposta la funzione DNIe su Demo, è possibile visualizzare
a scopo dimostrativo una immagine normale e una immagine migliorata attraverso la funzione DNIe. Utilizzando questa
funzione, è possibile rendersi conto della differenza di qualità visiva.
DNIe™ (Digital Natural Image engine) DNIe™
Questa funzione consente di visualizzare immagini più dettagliate con riduzione dei disturbi 3D, miglioramento dei dettagli, del
contrasto e del bianco. Il nuovo algoritmo di compensazione dell’immagine permette di ottenere immagini più brillanti, chiare e
dettagliate. La tecnologia DNIe™ si adatta a ogni tipo di segnale.
Questa funzione non è disponibile in modalità Film e Standard.
Livello di nero HDMI → Normale / Bassa
Consente di selezionare direttamente il livello di nero sullo schermo per regolarne la profondità.
Questa funzione si attiva solo quando l’ingresso esterno è collegato a HDMI (segnali RGB).
T
•
•
•
•
•
•
N
N
N
N
N
N
N
N
N
N
N
•
•
•
•
N
N
N
N
N
N
BN68-01757A-Ita.indb 17 2008-9-24 15:01:46
Italiano - 18
Demo a 100Hz reali → Spento/Acceso
E’ possibile ottenere una chiara distinzione tra
reali
100Hz e 50Hz, specialmente quando si guardano scene in movimento.
Perciò, quando si visualizzano scene caratterizzate da movimenti lenti, non è possibile distinguere tra
reali
100Hz e 50Hz.
Demo 100Hz funziona solo con segnale a 50Hz. Real 100Hz demo è disponibile per dimostrazioni presso il punto vendita con
immagini speciali.
Movie Plus → Spento/Bassa/Media/Alto/Demo
Questa funzione consente di visualizzare più chiaramente il testo e ottenere un incarnato più naturale nelle scene in rapido
movimento.
Utilizzare questa funzione quando si guardano lm.
Questa funzione non è disponibile in modalità Wide Zoom e Zoom.
Questa funzione non è disponibile quando la modalità PIP è impostata su Acceso.
Non supportato in modalità HDMI 1080p/24Hz, 25Hz, 30Hz.
Solo blu → Spento/Acceso
Questa funzione è solo per gli utenti esperti in grado di regolare le misurazioni del dispositivo AV. Questa funzione visualizza
solo il segnale blu rimuovendo i segnali rosso e verde dal video, in modo da offrire un effetto Blue Filter utile per regolare le
opzioni Colour e Tinta delle apparecchiature video quali lettori DVD, impianti Home Theater, ecc. Questa funzione consente di
regolare a livello di segnale le opzioni Colour e Tinta di qualsiasi dispositivo video che utilizzi modelli di tipo Color Bar Pattern
per i colori Rosso/Verde/Blu/Ciano/Magenta/Giallo, senza l'uso di un ulteriore Blue Filter.
Solo blu è disponibile quando la modalità Immagine è impostata su Film o Standard.
Sistema port plasmi
Per ridurre il rischio di incorrere nella bruciatura dello schermo, questa unità è equipaggiata con una tecnologia che previene
questo fenomeno. Questa tecnologia permette di programmare lo spostamento delle immagini su e giù (linee verticali) e
lateralmente (punti orizzontali). L'impostazione dell'Ora consente di programmare i minuti di intervallo tra uno spostamento e
l'altro delle immagini.
Spostam pixel: Utilizzando questa funzione, è possibile ridurre al minimo la formazione di immagini residue sullo schermo
spostando i pixel sul PDP ogni minuto in direzione orizzontale o verticale.
Impostare Spostam pixel su On premendo il tasto ▲ o ▼, quindi premere il tasto ENTER.
Selezionare l’opzione desiderata premendo il tasto ▲ o ▼, quindi premere il tasto ENTER.
Le opzioni disponibili sono: Punti Orizzontali, Linee Verticali, Ora.
Condizione ottimale per uno spostamento dei pixel;
PC TV/Est/AV/Comp./HDMI
Punti Orizzontali 4 4
Linee Verticali 4 4
Ora (Minuto) 4 2 min
Il valore Pixel Shift può differire in base alla dimensione del monitor (pollici) e alla modalità.
Questa funzione non è disponibile in modalità Solo scansione.
Schermo Bianco: Questa funzione consente di rimuovere le immagini persistenti sullo schermo cambiando il colore dei
pixel in bianco. Usare questa funzione in presenza di immagini o simboli residui sullo schermo, specialmente quando è
stata visualizzata per lungo tempo una immagine fissa.
Scorrimento: Questa funzione consente di rimuovere le immagini residue sullo schermo spostando tutti i pixel sul PDP
in base a una sequenza Usare questa funzione in presenza di immagini o simboli persistenti sullo schermo, specialmente
quando è stata visualizzata per lungo tempo una immagine fissa.
Grigio laterale: Quando si utilizza il formato 4:3, è possibile evitare il rischio di danni allo schermo regolando il
bilanciamento del bianco sull'estremità destra e sinistra.
− Scuro: Con il formato 4:3, oscura i lati destro e sinistro.
− Chiaro: Con il formato 4:3, schiarisce i lati destro e sinistro.
Reset immagine → Azzera modalità immagine / Cancella
Ripristina tutte le impostazione delle immagini ai valori predeniti.
Seleziona una modalità dell’immagine da regolare. Viene eseguita la funzione Reset per ogni modalità dell’immagine.
N
N
N
N
N
•
N
N
N
N
N
N
•
•
•
❑
N
BN68-01757A-Ita.indb 18 2008-9-24 15:01:46

Italiano - 19
Configurazione del televisore con il PC
Preimpostazione: Premere il tasto SOURCE per selezionare la modalità PC.
Regolazione auto
La regolazione automatica consente allo schermo del PC di adattarsi
automaticamente al segnale video PC in ingresso. I valori delle opzioni Fine,
Coarse e Position vengono regolati automaticamente.
Questa funzione non è disponibile in modalità DVI-HDMI.
Premere il tasto TOOLS per visualizzare il menu Strumenti. E’ possibile
anche impostare la funzione Auto Adjustments selezionando Strumenti →
Regolazione auto.
Schermo
G
rossa / Fine: Lo scopo della regolazione della qualità dell’immagine è quello di eliminare o ridurre eventuali disturbi
di visualizzazione. Se non si riesce a eliminare il disturbo cambiando sintonizzazione, regolare la frequenza nel modo
migliore possibile (Grossa) e eseguire nuovamente la sintonizzazione fine. Una volta ridotto il disturbo, regolare
l’immagine in modo che sia perfettamente centrata sullo schermo.
PC Posizione: Regolare la posizione dello schermo del PC se non si adatta allo schermo del televisore. Premere il
tasto ▲ o ▼ per regolare la posizione verticale. Premere il tasto ◄ o ► per regolare la posizione orizzontale.
Rese
t immagine: È possibile sostituire tutte le impostazioni dell’immagine ripristinando i valori di fabbrica.
N
❑
N
T
❑
Visione di Picture-in-Picture
Questa funzione consente di visualizzare un’immagine secondaria all’interno
dell’immagine principale del programma o della sorgente video impostata. In questo
modo, è possibile visualizzare l’immagine di un programma o di una sorgente video
esterna mentre si guarda l’immagine principale.
L’immagine nella nestra PIP potrebbe apparire leggermente innaturale quando
si usa la schermata principale per visualizzare un videogame o il karaoke.
Premere il tasto TOOLS per visualizzare il menu Strumenti. Selezionando
Strumenti → PIP è possibile anche regolare le impostazioni relative alla
funzione PIP.
PIP → Spento / Acceso
La funzione PIP può essere attivata e disattivata.
Immagine principale Immagine secondaria
Comp.
HDMI 1, HDMI / DVI 2, HDMI 3,
HDMI 4
PC
TV, Est.1, Est.2, AV
Sorgente
È possibile selezionare la sorgente dell’immagine secondaria.
Formato → / /
Consente di selezionare il formato dell’immagine secondaria.
Se l’immagine principale è in modalità HDMI, l’opzione Formato non è disponibile.
Posizione → / / /
Utilizzata per selezionare la posizione dell’immagine secondaria.
In modalità Double ( , ), la voce Posizione non può essere selezionata.
Canale
È possibile selezionare un canale per l’immagine secondaria solo quando l’opzione Sorgente è impostata su TV.
Premere il tasto TOOLS per visualizzare il menu Strumenti.
E' possibile anche impostare la modalità dell'immagine selezionando Strumenti → PIP
N
T
❑
N
N
T
Luminosità : 45
Nitidezza : 50
Regolazione auto
►
Schermo
Impostazioni dettaglio
Opzioni immagine
Resetimmagine
ImmagineImpostazione
Entertainment : Spento
Risp. energia : Spento
PIP ►
Aggiornamento software
Interfaccia comune
PIP
PIP : Acceso
Sorgente : TV
Formato :
Posizione :
Canale : ATV 11
L
Sposta
E
Conferma
R
Ritorno
BN68-01757A-Ita.indb 19 2008-9-24 15:01:46

Italiano - 20
Schermo del PC
Impostazione del software del PC (basato su Windows XP)
Di seguito vengono illustrate le impostazioni di visualizzazione di Windows per un
PC tipico. Le schermate visualizzate sul PC possono differire in base alla versione di
Windows e alla scheda video installate. Nel caso le schermate risultassero differenti,
le stesse informazioni di base per la congurazione sono applicabili in quasi tutti
i casi (in caso contrario, contattare la casa costruttrice del computer oppure un
rivenditore Samsung).
1. Fare clic sul ‘Control Panel’ nel menu Start di Windows.
2. Quando appare la nestra del pannello di controllo, fare clic su ‘Appearance e
Themes’, Verrà visualizzata una nestra di dialogo.
3. Quando appare la nestra del pannello di controllo, fare clic su ‘Display’, Verrà
visualizzata una nestra di dialogo.
4. Fare clic sulla scheda ‘Settings’, nella nestra di dialogo.
Impostazione della corretta dimensione (risoluzione)
Ottimale: 1920 x 1080 pixel
Se la nestra di dialogo delle impostazioni contiene un’opzione relativa alla
frequenza verticale, il valore corretto è ‘60’ o ‘60 Hz’. In caso contrario, fare clic
su ‘OK’ e uscire dalla nestra di dialogo.
Modalità di visualizzazione
La posizione e la dimensione dello schermo variano in base al tipo di schermo del PC e alla relativa risoluzione.
Le risoluzioni incluse nella tabella sono consigliate.
Ingresso D-Sub
Modalità Risoluzione Frequenza
orizzontale (kHz)
Frequenza
verticale (Hz)
Frequenza di clock
dei pixel (MHz)
Polarità sync
(O/V)
IBM 640 x 350
720 x 400
31.469
31.469
70.086
70.087
25.175
28.322
+ / -
- / +
VESA
640 x 480
640 x 480
640 x 480
800 x 600
800 x 600
800 x 600
1024 x 768
1024 x 768
1024 x 768
1280 x 1024
1280 x 1024
1360 x 768
1600 x 1200
31.469
37.861
37.500
37.879
48.077
46.875
48.363
56.476
60.023
63.981
79.976
47.712
75.000
59.940
72.809
75.000
60.317
72.188
75.000
60.004
70.069
75.029
60.020
75.025
60.015
60.000
25.175
31.500
31.500
40.000
50.000
49.500
65.000
75.000
78.750
108.000
135.000
85.500
162.000
- / -
- / -
- / -
+ / +
+ / +
+ / +
- / -
- / -
+ / +
+ / +
+ / +
+ / +
+ / +
CVT 1920 x 1080RB 66.587 59.934 138.500 + / -
Ingresso HDMI/DVI
Modalità Risoluzione Frequenza
orizzontale (kHz)
Frequenza
verticale (Hz)
Frequenza di clock
dei pixel (MHz)
Polarità sync
(O/V)
VESA
640 x 480
800 x 600
1024 x 768
1280 x 1024
1360 x 768
1600 x 1200
31.469
37.879
48.363
63.981
47.712
75.000
59.940
60.317
60.004
60.020
60.015
60.000
25.175
40.000
65.000
108.000
85.500
162.000
- / -
+ / +
- / -
+ / +
+ / +
+ / +
CEA 1920 x 1080RB 67.500 60.000 148.500 + / +
In caso di uso di u cavo di connessione HDMI / DVI è necessario usare la presa HDMI IN 2.
La modalità interlacciata non è supportata.
Questo dispositivo potrebbe non funzionare correttamente se si seleziona un formato video non standard.
Le modalità Separate e Composite sono supportate. Il formato SOG non è supportato.
Se il cavo VGA è di scarsa qualità o è troppo lungo, in alta risoluzione (1920x1080) le immagini possono risultare
disturbate.
N
N
N
N
N
BN68-01757A-Ita.indb 20 2008-9-24 15:01:47
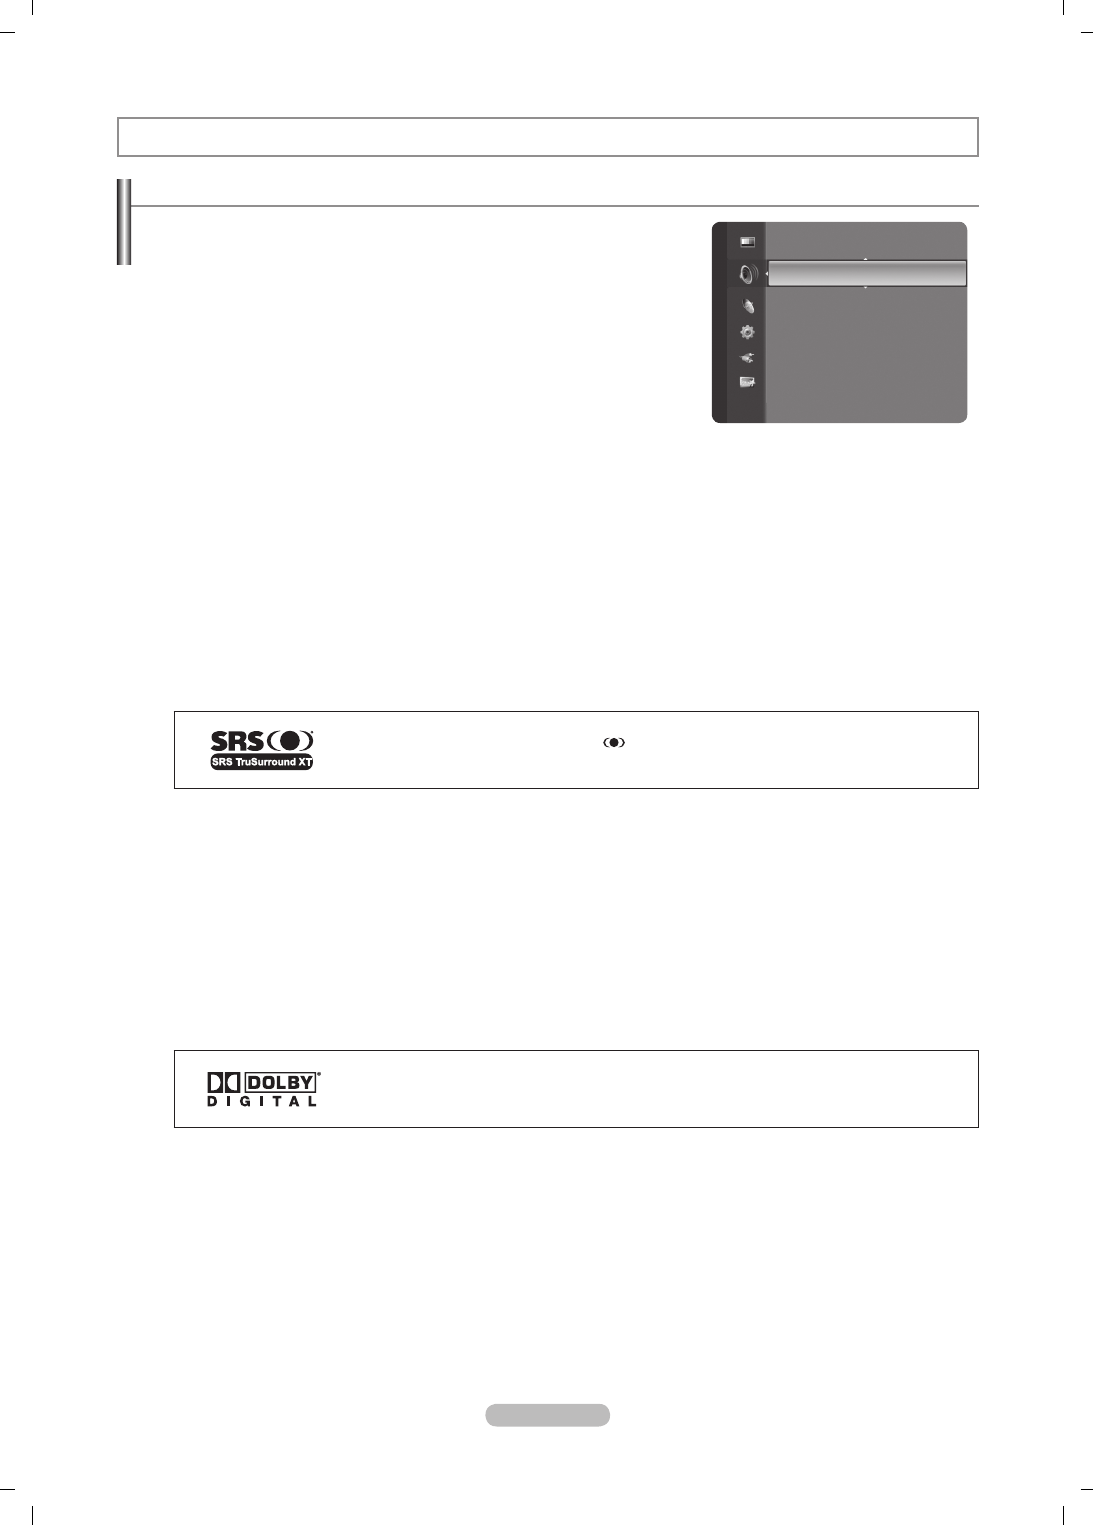
Italiano - 21
Controllo dell’audio
Modifica dello standard audio
Modalità → Standard / Musica / Film / Dialoghi / Personaliz
È possibile selezionare il tipo di effetto audio da utilizzare durante la visione di
una trasmissione.
Premere il tasto TOOLS per visualizzare il menu Strumenti.
E’ possibile anche impostare la modalità dell’immagine selezionando
Strumenti → Modalità audio.
Equalizzatore
Le impostazioni audio possono essere regolate in base alle proprie preferenze
personali.
Modalità: E’ possibile selezionare una modalità audio per soddisfare le proprie preferenze.
Bilanciamento: Controlla il bilanciamento degli altoparlanti sinistro e destro.
100Hz / 300Hz / 1kHz / 3kHz / 10kHz (Bandwidth Adjustment): Per regolare il livello delle diverse frequenze di
larghezza di banda.
Reset: Ripristina le i
mpostazione predefinite dell’equalizzatore.
TruSurround XT SRS → Spento / Acceso
TruSurround XT è una tecnologia SRS brevettata che risolve il problema della riproduzione di contenuti multicanale 5.1 su due
altoparlanti. TruSurround offre una straordinaria esperienza Surround Sound virtuale attraverso un sistema di riproduzione a
due altoparlanti, inclusi gli altoparlanti interni del televisore. È pienamente compatibile con tutti i formati multicanale.
Premere il tasto TOOLS per visualizzare il menu Strumenti.
E’ possibile impostare la funzione TruSurround XT SRS selezionando Strumenti → SRS TS XT.
TruSurround XT, SRS e il simbolo sono marchi di SRS Labs, Inc. La tecnologia
TruSurround XT è utilizzata su licenza di SRS Labs, Inc.
Lingua dell'audio
È possibile modicare la lingua predenita. Visualizza le informazioni sulla lingua relative alla trasmissione in corso.
Durante la visione di un canale digitale, è possibile selezionare questa funzione.
E’ possibile selezionare solo una delle lingue trasmesse.
Formato audio → MPEG / Dolby Digital
Quando l’audio è generato sia dall’altoparlante principale sia dal ricevitore audio, potrebbe prodursi un effetto di eco a causa
della diversa velocità di decodica dei due dispositivi. In questo caso, attivare la funzione TV Speaker.
Durante la visione di un canale digitale, è possibile selezionare questa funzione.
E’ possibile selezionare solo una delle lingue trasmesse.
Prodotto su licenza di Dolby Laboratories. Dolby e il simbolo della doppia D sono marchi di
Dolby Laboratories.
Descrozione audion
Questa funzione audio ausiliaria fornisce una traccia audio aggiuntiva per aiutare le persone con problemi visivi. Questa
funzione gestisce il usso audio per l’opzione AD (Audio Description), quando è trasmesso insieme all’Audio principale
dall’emittente. Gli utenti possono attivare o disattivare la funzione Audio Description selezionando On o Off e regolarne il
volume.
Descrozione audion → Spento / Acceso: Attiva e disattiva la funzione Audio Description.
Volume
: E’ possibile regolare il volume della funzione Audio Description.
Volume è attivo quando la funzione Descrozione audion è impostata su Acceso.
Durante la visione di un canale digitale, è possibile selezionare questa funzione.
❑
T
❑
❑
T
❑
N
N
❑
N
N
❑
N
N
Modalità : Personalizzata
►
Equalizzatore
TruSurround XT SRS : Spento
Lingua dell'audio : ----
Formato audio : ----
Descrozione audion
Volume auto : Spento
Seleziona altoparlante
: Altoparlante TV
Suono
BN68-01757A-Ita.indb 21 2008-9-24 15:01:47
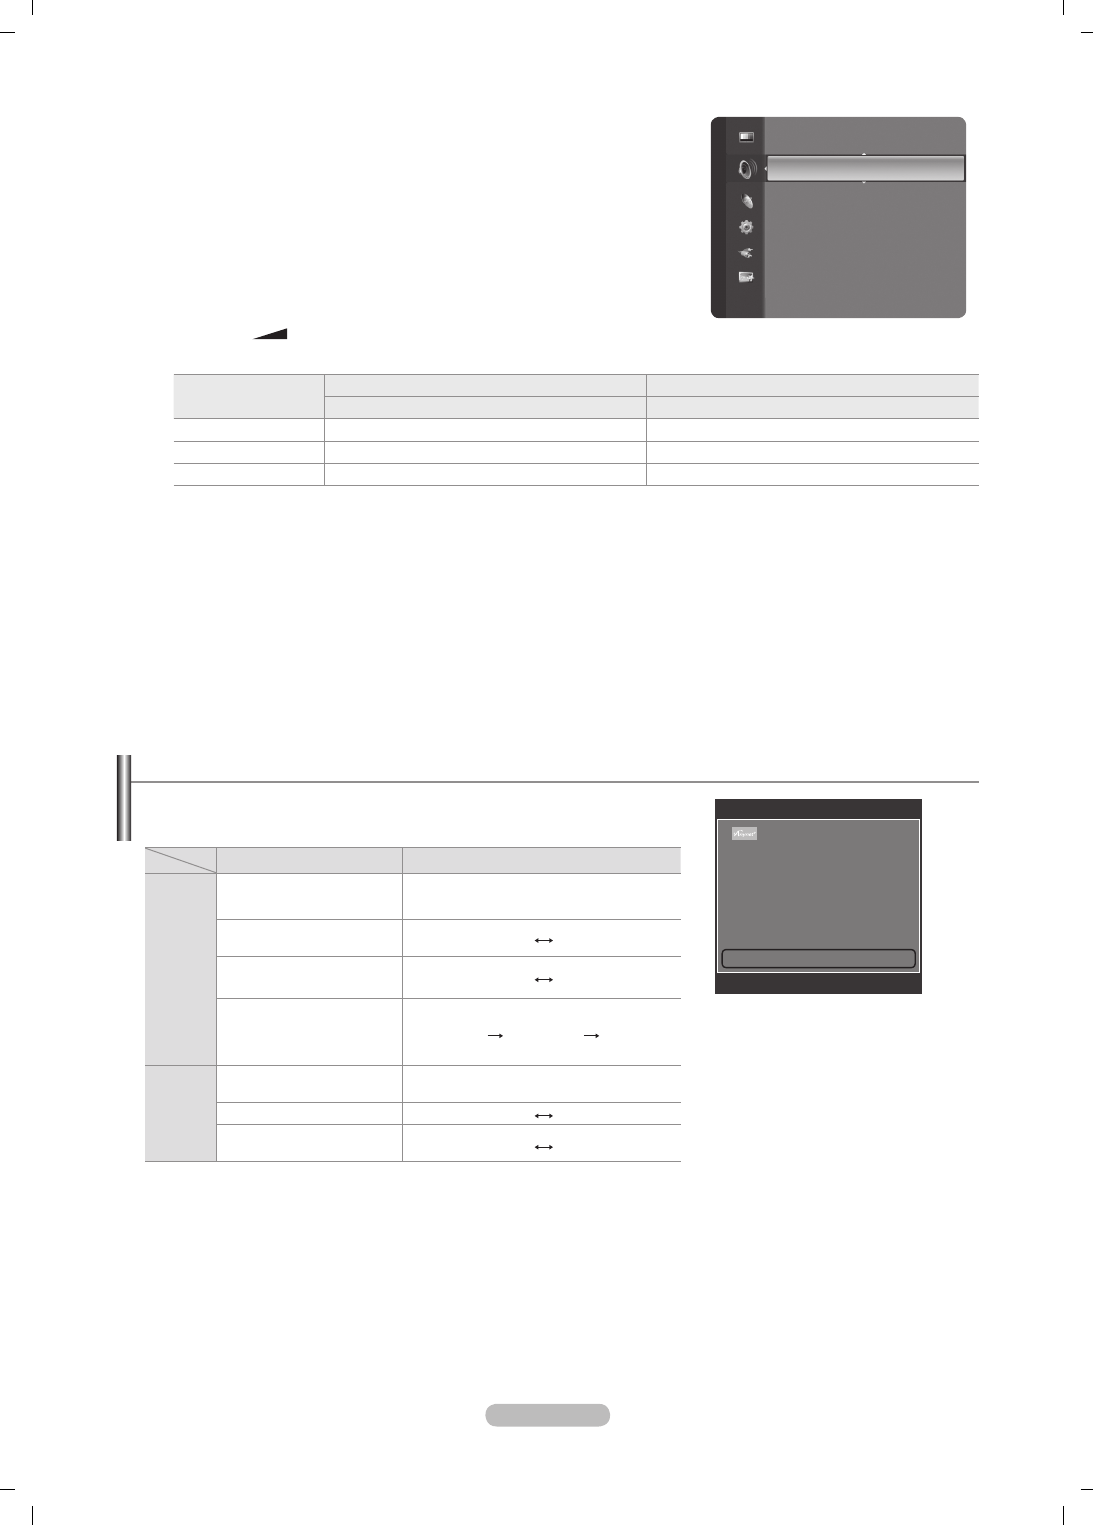
Italiano - 22
Volume auto → Spento / Acceso
Le condizioni del segnale variano a seconda dell’emittente, ma non è pratico
regolare il volume ogni volta che si cambia canale. Questa funzione consente di
regolare automaticamente il volume del canale desiderato diminuendo il livello
dell’uscita audio quando il segnale di modulazione è alto, oppure aumentando il
livello dell’uscita audio quando il segnale di modulazione è basso.
Seleziona altoparlante → Altoparlante ester / Altoparlante TV
Se si desidera ascoltare l’audio da altoparlanti separati, annullare l’amplicatore
interno.
I tasti – +, MUTE non sono disponibili quando TV Speaker è impostato su Spento.
Selezionando External Speaker nel menu Select Speaker, le impostazioni dell’audio saranno limitate.
Altoparlanti interni del TV Audio Out (Optical, L / R Out) a sistema audio
TV / Est. / AV / S-Video / Comp. / PC / HDMI TV / Est. / AV / S-Video / Comp. / PC / HDMI
Altoparlante TV Uscita altoparlanti Uscita audio
Altoparlante ester Mute Uscita audio
Nessun segnale video Mute Mute
Selezione audio
Durante l’uso della funzione PIP, è possibile ascoltare l’audio dell’immagine secondaria (PIP).
Principale: Consente di ascoltare l’audio dell’immagine principale.
Secondario:
Consente di ascoltare l’audio dell’immagine secondaria.
Premere il tasto TOOLS per visualizzare il menu Strumenti. E’ inoltre possibile impostare l’audio della immagine
secondaria selezionando Strumenti → PIP → Selezione audio.
Reset impostazioni audio
Azzera tutto /
Azz mod audio/ Cancella: E’ possibile ripristinare le impostazioni audio ai valori di fabbrica.
Selezione della modalità audio
E’ possibile impostare la modalità audio nel menu Strumenti. Quando si imposta la
modalità Dual I II, la modalità audio corrente viene visualizzata sullo schermo.
Tipo di trasmissione Indicazioni a video
NICAM
Stereo
Trasmissione normale
(Standard audio) Mono (Uso normale)
Normale + NICAM Mono
NICAM
Mono
(Normale)
NICAM-Stereo
NICAM
Stereo
Mono
(Normale)
NICAM Dual-I/II NICAM
Dual-1
NICAM
Dual-2
Mono
(Normale)
A2
Stereo
Trasmissione normale
(Standard audio) Mono (Uso normale)
Bilingue o DUAL-I/II
Dual I Dual II
Stereo Stereo Mono
(Mono forzato)
Se il segnale stereo è debole e si verica un cambio automatico, passare alla modalità Mono.
Questa funzione è attiva solo con segnale audio stereo. Al contrario, non è attiva con segnale audio mono.
Questa funzione è disponibile solo in modalità TV.
❑
❑
N
N
❑
T
❑
N
N
N
Strumenti
Anynet+ (HDMI-CEC)
Formato immagine : Automatico
Modalità immagine : Standard
Modalità audio : Personaliz
Timer stand-by : Spento
SRS TS XT : Spento
Risp. energia : Spento
Dual I II ◄ Mono ►
U
Sposta
L
Regola
e
Esci
Seleziona altoparlante : Altoparlante TV
Selezione audio : Principale
Reset impostazioni audio
►
Suono
BN68-01757A-Ita.indb 22 2008-9-24 15:01:48
Italiano - 23
Configurazione del menu Setup
Lingua
E’ possibile impostare la lingua dei menu.
Blocco canali → Spento / Acceso
Tramite questa funzione è possibile impedire agli utenti non autorizzati, ad
esempio i bambini, di guardare programmi non adatti a loro, annullando il video
e azzerando l’audio.
Prima della comparsa dell’immagine, compare la richiesta del PIN. Digitare
il PIN a quattro cifre.
Il PIN predenito di un nuovo apparecchio TV è 0-0-0-0. E’ possibile
modicare il PIN selezionando Cambia PIN nel menu.
E’ possibile bloccare alcuni canali nell’elenco dei canali. (vedere pagina 14).
Blocco canali è disponibile solo in modalità TV.
Cambia PIN
E’ possibile modicare il numero di ID necessario per impostare il TV.
Prima della comparsa dell’immagine, compare la richiesta del PIN. Digitare il PIN a quattro cifre.
Il PIN predenito di un nuovo apparecchio TV è 0-0-0-0.
Qualora si sia dimenticato il codice PIN, premere i tasti del telecomando nella sequenza seguente per ripristinare il codice
PIN predenito 0-0-0-0 : POWER (Spento), MUTE, 8, 2, 4, POWER (Acceso).
Blocco Canale→ Grado Blocco Canale
Questa funzione consente di immettere un codice PIN di identicazione personale a 4 cifre denito dall’utente per impedire
agli utenti non autorizzati, come ad esempio i bambini, di vedere programmi inadatti a loro.
Nella schermata Grado Blocco Canale, congurare la classicazione dei programmi.
Prima della comparsa dell’immagine, compare la richiesta del PIN. Digitare il PIN a quattro cifre.
Il PIN predenito di un nuovo apparecchio TV è 0-0-0-0. E’ possibile modicare il PIN selezionando Immetti PIN nel
menu.
Una volta impostata la classicazione dei programmi, verrà visualizzato il simbolo
\
.
Cons tutto: Premere per sbloccare tutte le classicazioni dei canali TV.
Bloc tutto: Premere per bloccare tutte le classicazioni dei canali TV.
Sottotitolo
È possibile attivare e disattivare i sottotitoli. Utilizzare questo menu per impostare la modalità Subtitle. L’opzione di menu
Normale rappresenta il sottotitolo di base mentre Non udenti è il sottotitolo per le persone con problemi uditivi.
Sottotitolo → Acceso / Spento: Attiva e disattiva i sottotitoli.
Modalità → Normale / Non udenti: Imposta la modalità dei sottotitoli.
Lingua del Sottotitolo
: Imposta la lingua dei sottotitoli.
Se il programma che si sta guardando non supporta la funzione Non udenti, si attiva automaticamente l’opzione Normale,
anche se è selezionata la modalità Non udenti.
L’inglese è la lingua predenita nel caso in cui la trasmissione non supporti la lingua selezionata.
È possibile selezionare queste opzioni semplicemente premendo il tasto SUBT. sul telecomando.
Lingua Teletext
E’ possibile impostare la lingua del Teletext.
L’inglese è la lingua predenita nel caso in cui la trasmissione non supporti
la lingua selezionata.
❑
❑
N
N
N
N
❑
N
N
N
❑
-
N
N
N
N
❑
N
N
N
❑
N
Descrizione delle funzioni
Impostazione
Plug & Play
Lingua : Italiano ►
Ora
Selezione rete : Cavo
Imp rete wireless
Impostazione rete via cavo
Blocco canali : Acceso
Cambia PIN
Blocco Canale
BN68-01757A-Ita.indb 23 2008-9-24 15:01:48

Italiano - 24
Preferenza
Lingua principale audio / Lingua secondaria audio / Lingua princip sottotitoli / Lingua second sottotitoli / Lingua
principale Teletext / Lingua secondaria Teletext
Mediante questa funzione, gli utenti sono in grado di selezionare una delle lingue disponibili. La lingua selezionata viene
impostata automaticamente durante la selezione di un canale.
Modicando l’impostazione della lingua, le opzioni Subtitle Language, Audio Language, Teletext Language del menu
Language vengono automaticamente impostate sulla lingua selezionata.
Le opzioni Subtitle Language, Audio Language, e Teletext Language del menu Language mostrano l’elenco delle lingue
supportate dal canale corrente, dove l’opzione corrente appare evidenziata. Se si modica una di queste opzioni, la nuova
lingua viene applicata solo al canale corrente. La nuova impostazione non viene invece applicata alle opzioni Primary Subtitle
Language, Primary Audio Language o Primary Teletext Language del menu Preference.
Testo digitale → Attiva / Disattiva
Se il programma è trasmesso con testo digitale, questa funzione è attivata.
MHEG (Multimedia and Hypermedia Information Coding Experts
Group)
Uno standard internazionale per i sistemi di codica dei dati multimediali
e ipermediali. È un sistema più complesso rispetto al formato MPEG in
quanto include collegamenti a dati ipermediali come immagini sse, servizi di
caratteri, animazioni, graca e le video, oltre ai dati multimediali. MHEG è una
tecnologia interattiva con vari campi di applicazione, come sistemi VOD (Video-
On-Demand), ITV (Interactive TV), EC (Electronic Commerce), teleformazione,
teleconferenze, librerie digitali e videogiochi di rete.
Effetto luce → Spento / Mod StdBy ON / Mod vis ON/ Sempre
Consente di attivare/disattivare il LED blu sul pannello frontale del televisore. Utilizzare questa opzione per risparmiare
energia oppure se il LED infastidisce gli occhi.
Spento: Il LED blu è sempre spento.
Mod StdBy ON: Il LED blu si illumina in modalità Standby e si spegne quando il televisore è acceso.
Mod vis ON: Il LED blu si attiva durante la visione di un programma e si spegne quando il televisore è spento.
Sempre: Il LED blu è sempre acceso.
Impostare Light Effect su Off per ridurre il consumo di energia.
Melodia
Spento / Bassa / Media / Alto
Consente di regolare l’effetto audio associato all’accensione/spegnimento del televisore.
La modalità Melody non funziona
Se il televisore non emette alcun suono signica che è stato premuto il tasto MUTE.
Se il televisore non emette alcun suono signica che è stato premuto il tasto – (Volume).
Se il televisore è stato spento mediante la funzione Timer stand-by.
Entertainment
La modalità Entertainment consente di selezionare la qualità video e audio ottimale per la visualizzazione di eventi sportivi,
lm e giochi.
Spento: Disattiva la funzione Entertainment.
Sport: Offre la qualità video e audio ottimale per la visualizzazione di eventi sportivi.
Cinema: Offre la qualità video e audio ottimale per la visualizzazione di film. Le immagini sono più dettagliate e l’audio
è ancora più potente.
Giochi: Offre la qualità video e audio ottimale per i videogiochi. Questa modalità accelera la velocità di gioco durante
l’uso
di una console esterna collegata al televisore.
Impostando una qualsiasi delle tre modalità Entertainment su On, le impostazioni verranno bloccate e non sarà possibile
modicarle. Inoltre le modalità di impostazione Picture e Sound non saranno disponibili. Per regolare le modalità Picture e
Sound, la modalità Entertainment deve essere impostata su off.
Premere ripetutamente il tasto E.MODE sul telecomando per modicare le impostazioni della modalità Entertainment.
La modalità Entertainment non è attiva in modalità PC.
Premere ripetutamente il tasto E.MODE sul telecomando per modicare le
impostazioni della modalità Entertainment.
❑
❑
N
❑
N
❑
N
-
-
-
❑
N
N
N
O
Impostazione
Lingua Teletext : ----
Preferenza
Testo digitale : Disattiva ►
Effetto luce : Mod visione ON
Regolazione montaggio a parete
Melodia : Spento
Entertainment : Spento
Risp. energia : Spento
PIP
Software Upgrade
BN68-01757A-Ita.indb 24 2008-9-24 15:01:48
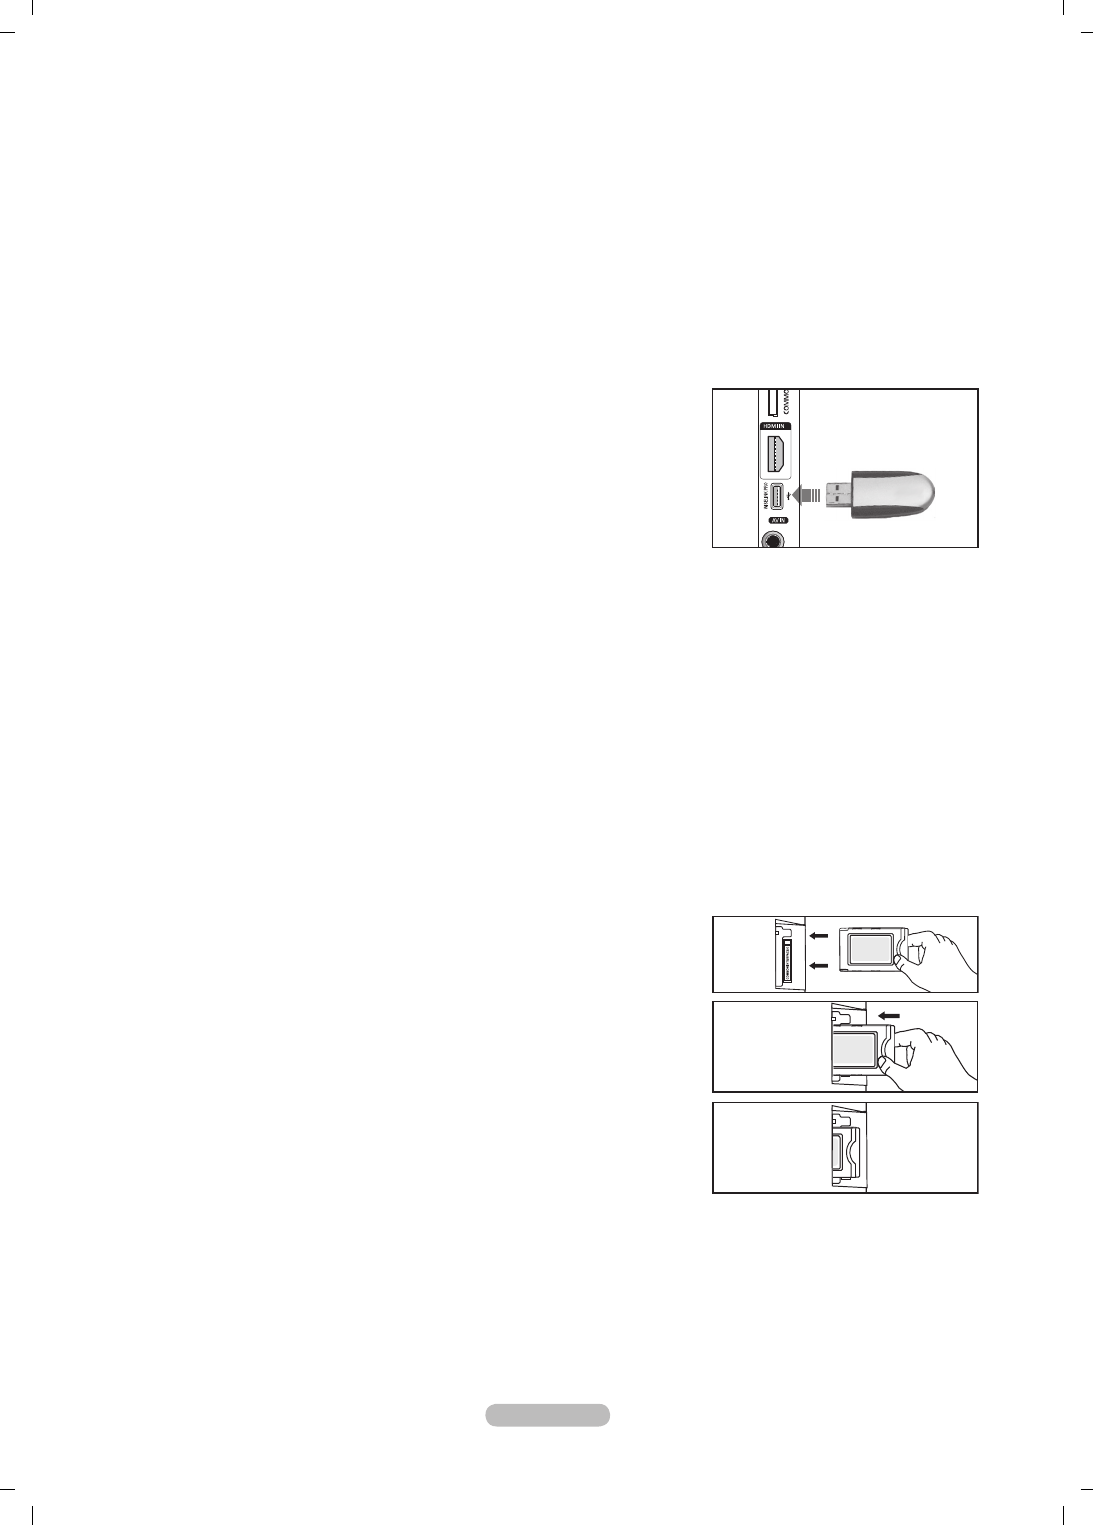
Italiano - 25
Risp. energia
Questa funzione regola la luminosità del televisore in modo da ridurre il consumo di energia. Durante la visione notturna del
televisore, impostare l’opzione della modalità Risp. energia su Alto in modo da ridurre l’affaticamento degli occhi oltre al
consumo energetico.
Spento: Disattiva la funzione di risparmio energetico.
Bassa: Imposta il televisore nella modalità a basso risparmio energetico.
Media: Imposta il televisore nella modalità a medio risparmio energetico.
Alto: Imposta il televisore nella modalità ad alto risparmio energetico.
Premere il tasto TOOLS per visualizzare il menu Strumenti.
E’ anche possibile impostare l’opzione Energy Saving selezionando Strumenti → Risp. energia.
Aggiornamento software
Gli aggiornamenti del prodotto, contenenti le nuove funzionalità di TV digitale,
vengono trasmessi periodicamente tramite il normale segnale televisivo.
Il prodotto rileva automaticamente questi segnali e visualizza la nestra di
aggiornamento del software. Se desiderato, è possibile avviare da questa
nestra l’installazione degli aggiornamenti.
Tramite USB
Inserire un’unità USB contenente l’aggiornamento del rmware nel TV. Fare
attenzione a non disattivare l’alimentazione o rimuovere l’unità USB mentre
l’aggiornamento è in corso. Al termine dell’aggiornamento del software, il
televisore si spegnerà e riaccenderà automaticamente. Vericare la versione del rmware al termine dell’aggiornamento. Al
termine dell’aggiornamento del software, le impostazioni video e audio modicate torneranno alle impostazioni predenite di
fabbrica. Si consiglia di scrivere le impostazioni in modo da poterle facilmente ripristinare dopo l’aggiornamento.
Tramite canale
Aggiorna il software mediante il segnale trasmesso.
Aggiornamento mod Standby
Per continuare l’aggiornamento software anche quando l’alimentazione principale è attiva, selezionare On premendo il tasto
▲ o ▼ . 45 minuti dopo l’ingresso in modalità Standby, viene effettuato un aggiornamento manuale. Poiché l'alimentazione
dell'unità si attiva internamente, lo schermo potrà attivarsi per breve tempo. Questo fenomeno può continuare per più di
un’ora, no al termine dell’aggiornamento software.
Software alternativo
Per visualizzare le informazioni relative alla versione del software.
Interfaccia comune
Installazione della scheda CI
a. Acquistare il modulo CI CAM presso il rivenditore locale più vicino o via telefono.
b. Inserire la scheda CI nel CAM nella direzione indicata dalla freccia.
c. Inserire il CAM con la scheda CI installata nello slot common interface.
Inserire completamente il CAM nella direzione indicata dalla freccia in modo
che risulti parallelo allo slot.
d. Vericare la visione dell’immagine su un canale a segnale criptato.
CI Menu
Ciò permette all’utente di accedere al menu del CAM.
Selezionare il CI Menu in base alla scheda PC.
Informazioni sull’applicazione
Contiene informazioni sul CAM inserita nello slot CI e le visualizza.
Le informazioni sull’applicazione sono relative alla scheda CI. È possibile installare
la CAM in qualsiasi momento sia mentre il televisore è acceso sia mentre è
spento.
1. Acquistare il modulo CI CAM presso il rivenditore locale più vicino o via telefono.
2. Inserire la scheda CI nel CAM nella direzione indicata dalla freccia.
3. Inserire il CAM con la scheda CI installata nello slot common interface. (Inserire completamente il CAM nella direzione
indicata dalla freccia in modo che risulti parallelo allo slot).
4. Vericare la visione dell’immagine su un canale a segnale criptato.
❑
T
❑
❑
N
4
Pannello laterale del
televisore
Unità USB
BN68-01757A-Ita.indb 25 2008-9-24 15:01:49
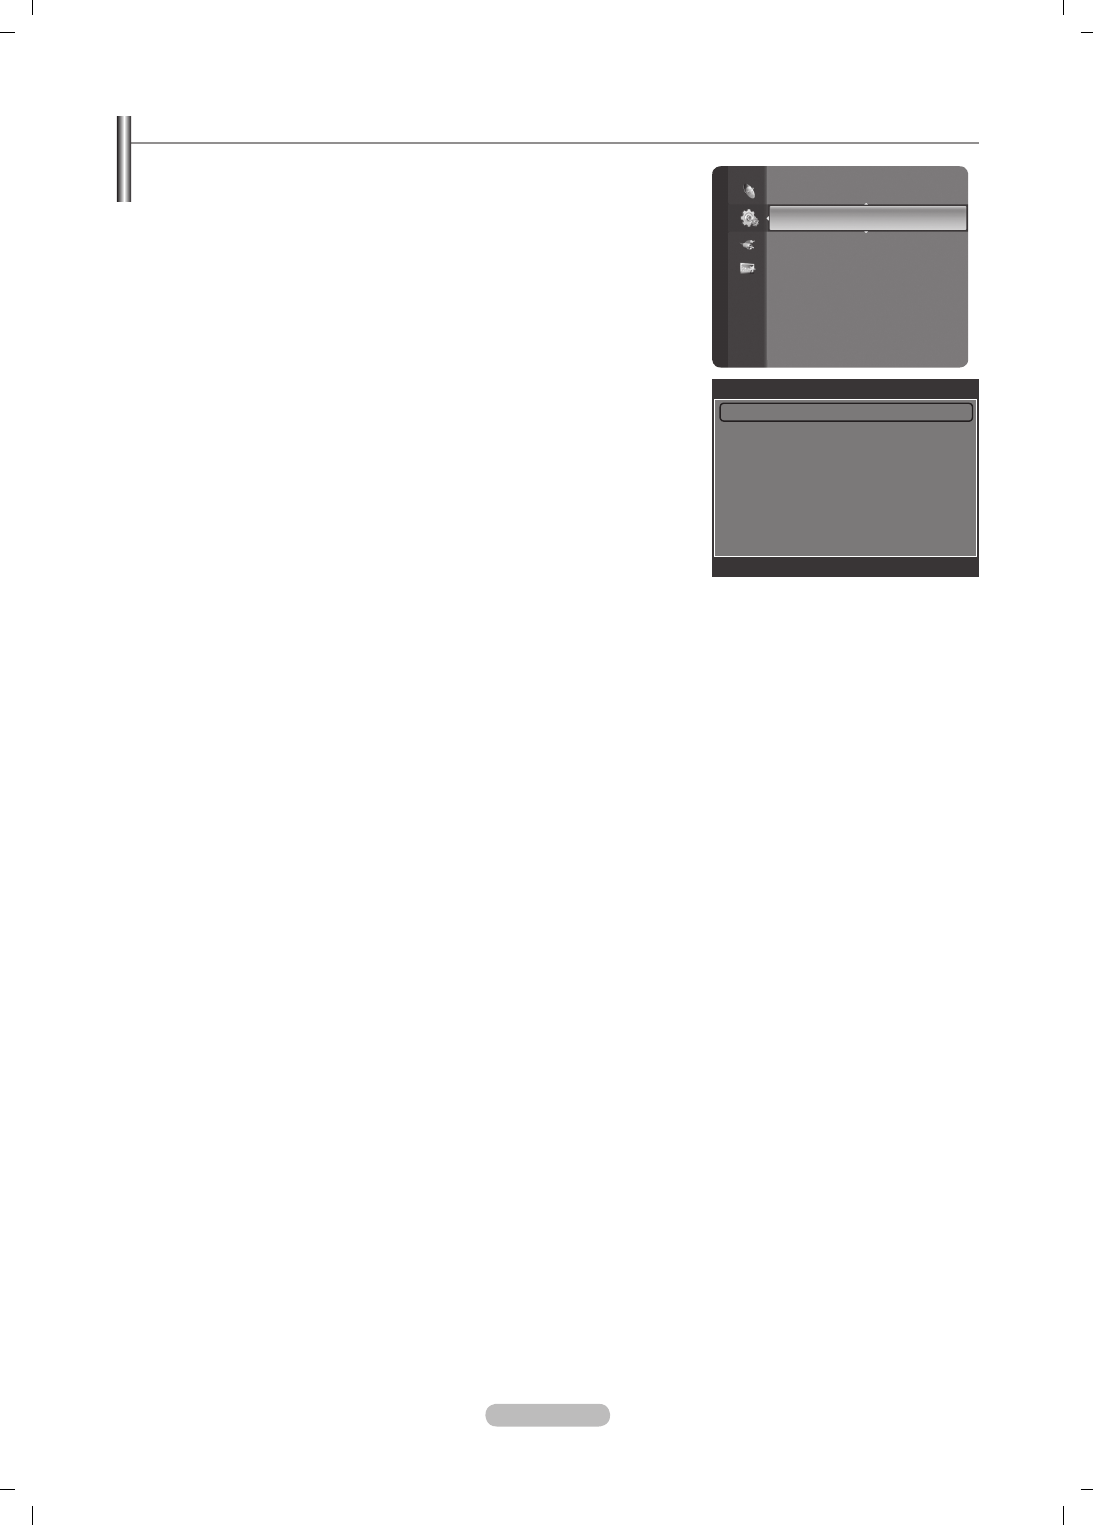
Italiano - 26
Impostazione dell’orologio
Orologio
L’impostazione dell’orologio è necessaria per utilizzare le varie funzioni di timer
del TV.
L’ora corrente appare ogni qualvolta si preme il tasto INFO.
Se il cavo di alimentazione viene scollegato, è necessario impostare
nuovamente l’orologio.
Modalità orologio
E’ possibile impostare manualmente o automaticamente l’orario corrente.
Auto: Imposta automaticamente l’orario corrente utilizzando l’orario inviato
dalla trasmissione digitale.
Manuale: Imposta manualmente l’ora corrente.
Imposta Ora
È possibile impostare manualmente l’ora corrente.
Impostare questa voce una volta impostato Modalità orologio a Manuale.
È possibile impostare il mese, il giorno, l’anno, l’ora e i minuti premendo
direttamente i tasti numerici del telecomando.
Timer stand-by → Spento / 30 min / 60 min / 90 min / 120 min /
150 min / 180 min
Il timer di spegnimento disattiva automaticamente il TV dopo il tempo impostato
(30, 60, 90, 120, 150 e 180 minuti).
Quando il timer raggiunge lo 0 il televisore passa automaticamente in modalità Standby.
Per annullare la funzione Timer stand-by, selezionare Spento.
Premere il tasto TOOLS per visualizzare il menu Strumenti. E’ anche possibile impostare il timer di spegnimento
selezionando Strumenti → Timer stand-by.
Timer 1 / Timer 2 / Timer 3
Possono essere impostate tre diverse opzioni del Timer.
Orario TV on:
Impostare l’ora e i minuti e premere Activate / Inactivate.
(per attivare il timer, scegliere Attiva)
Orario TV off:
Impostare l’ora e i minuti e premere Activate / Inactivate.
(per attivare il timer, scegliere Attiva)
Volume:
Selezionare il livello desiderato del volume.
Contenuti:
Quando Orario TV on è attivato, è possibile attivare uno specico canale o riprodurre dei contenuti quali
fotograe o brani musicali.
TV / USB: Selezionare TV o USB. (assicurarsi che al TV sia collegato un dispositivo USB)
Antenna: Selezionare ATV o DTV.
Canale: Selezionare il canale desiderato.
Musica: Selezionare la cartella del dispositivo USB contenente i le MP3.
Foto: Selezionare la cartella del dispositivo USB contenente i le JPEG.
Ripetizione:
Selezionare Una volta, Ogni gg, Lun ~ Ven, Lun ~ Sab, Sab ~ Dom, o Manuale.
Quando viene selezionato Manuale, premere il tasto ► per impostare il giorno della settimana. Premere il tasto
ENTER
E
sul giorno desiderato per visualizzare un simbolo c.
E’ prima necessario impostare l’orologio.
È possibile impostare l’ora, i minuti e il canale anche premendo i tasti numerici del telecomando.
Spegnimento in assenza di operazioni
Quando il televisore si accende attraverso il timer impostato su On, si spegne automaticamente se per tre ore non viene
premuto alcun tasto di controllo. Questa funzione è disponibile solo se il timer è impostato a On e impedisce l’eventuale
surriscaldamento del televisore dovuto a un periodo di accensione troppo lungo.
❑
N
N
•
•
N
N
❑
N
N
T
❑
•
•
•
•
•
N
N
N
N
Impostazione
Plug & Play
Lingua : Italiano
Ora ►
Selezione rete : Cavo
Imp rete wireless
Impostazione rete via cavo
Blocco canali : Acceso
Cambia PIN
Blocco Canale
Sottotitoli
Ora
Orologio : -- : -- ►
Timer stand-by : Spento
Timer 1 : Disattivato
Timer 2 : Disattivato
Timer 3 : Disattivato
U
Sposta
E
Conferma
R
Ritorno
BN68-01757A-Ita.indb 26 2008-9-24 15:01:49
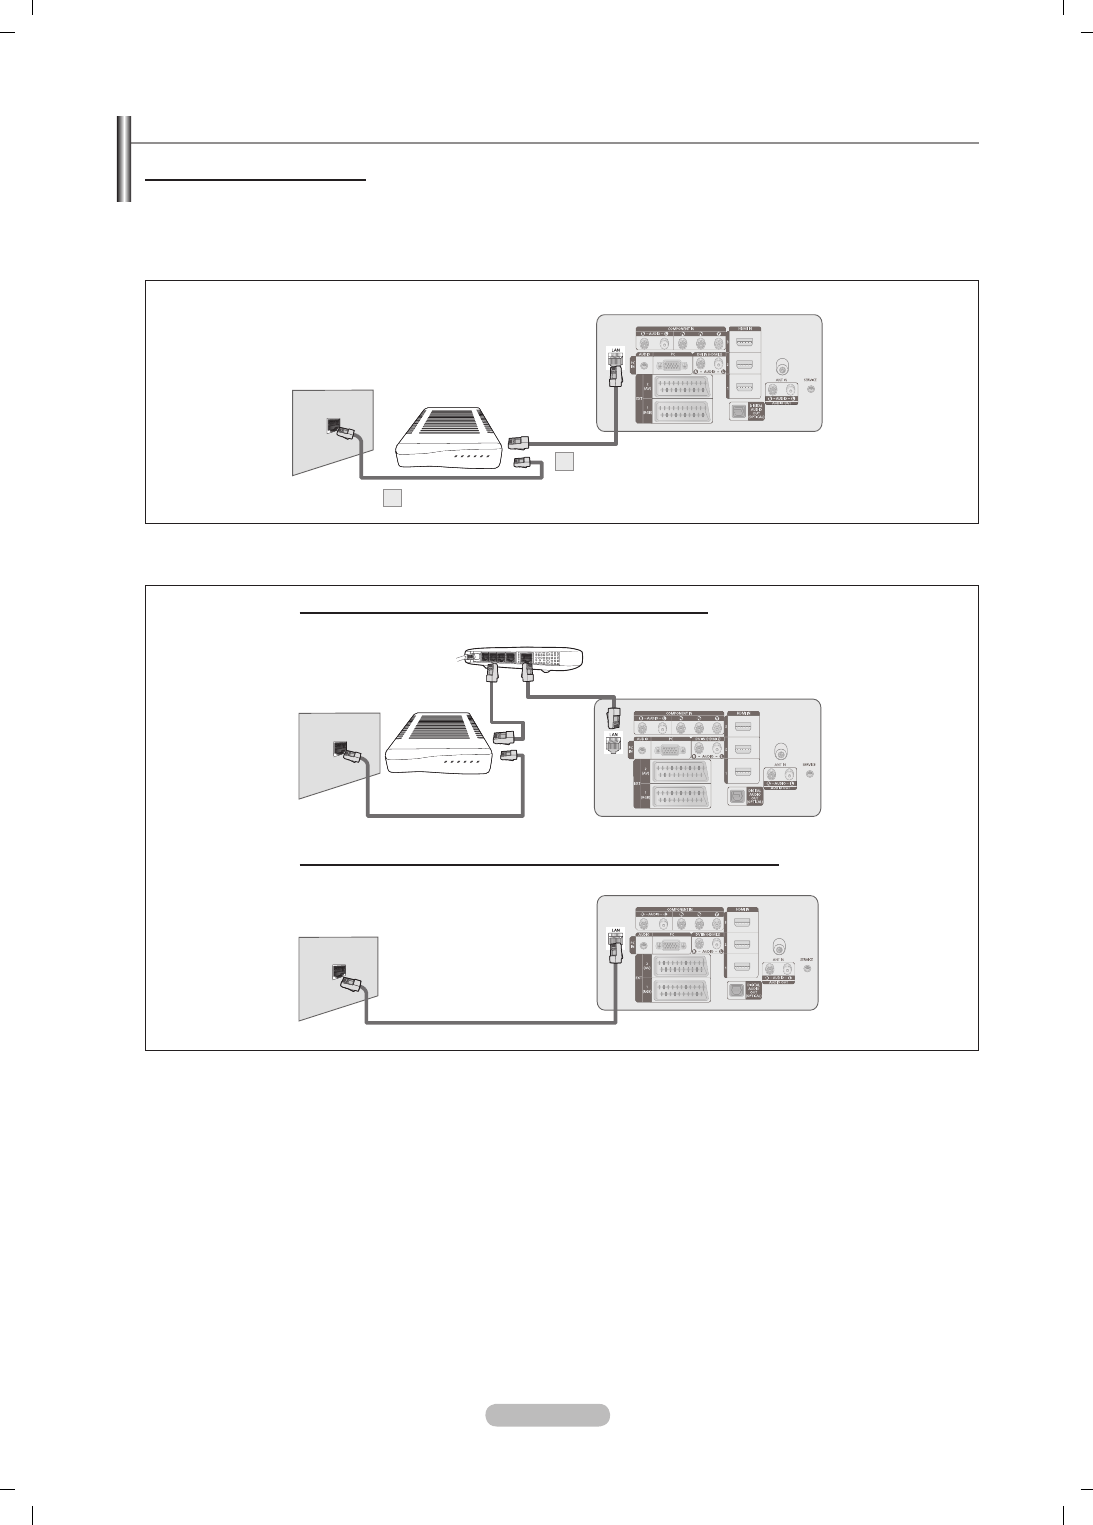
Italiano - 27
Connessione di rete
Connessione di rete - Cavo
Connessione via cavo per un ambiente DHCP
Di seguito è riportata la procedura per impostare una connessione di rete usando il protocollo DHCP (Dynamic Host
Conguration Protocol). Poiché alla selezione di DHCP vengono automaticamente impostati un indirizzo IP, una maschera di
sottorete, un gateway e un DNS, non è necessario inserirli manualmente.
1. Collegare la porta [LAN] sul retro del televisore al modem esterno mediante un cavo LAN.
2. Collegare la porta LAN a muro e il modem esterno mediante un cavo Modem.
I terminali (la posizione della porta e il tipo) del dispositivo esterno variano in base alla marca del dispositivo.
Se si è vericato un errore nell’allocazione dell’indirizzo IP da parte del server DHCP, spegnere il modem e riaccenderlo dopo
circa 10 secondi.
Per i collegamenti tra il modem esterno e il Router, vedere il manuale di riferimento del prodotto utilizzato.
E’ possibile collegare direttamente il TV alla LAN senza collegarlo tramite un Router.
Non è possibile usare un modem ADSL con connessione manuale poiché non supporta il protocollo DHCP. E’ necessario
pertanto utilizzare un modem ADSL con connessione automatica.
N
N
N
N
N
Pannello posteriore TV
Presa Modem a
parete
Cavo Modem
2
Modem esterno
(ADSL/VDSL/Cable TV)
Cavo LAN
1
E' possibile collegare la porta LAN al televisore direttamente in base allo stato della rete.
Pannello posteriore TV
Cavo LAN
Presa LAN a
parete
E' possibile collegare il televisore a una LAN mediante uno Sharer (Router).
Pannello posteriore TV
Presa Modem a
parete
Modem esterno (ADSL/
VDSL/Cable TV)
IP Sharer (Router)
Cavo LAN
Cavo Modem
Cavo LAN
BN68-01757A-Ita.indb 27 2008-9-24 15:01:54
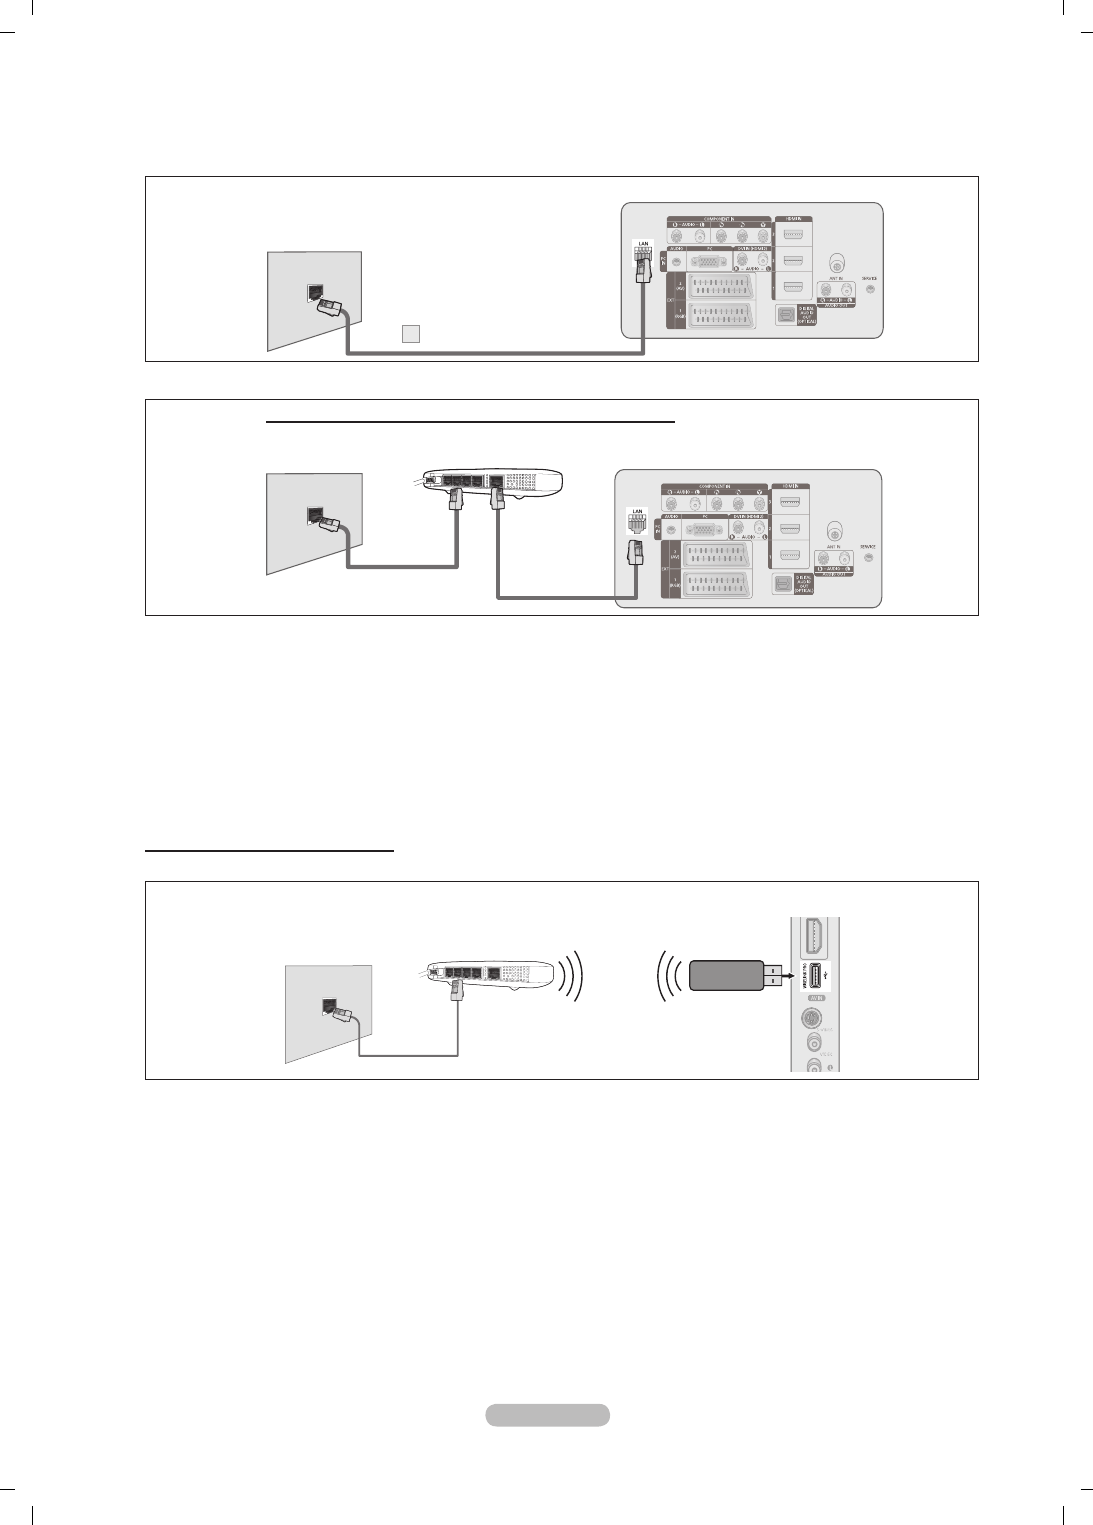
Italiano - 28
Connessioni alla LAN per ambienti con IP statico
Di seguito viene descritta la procedura per impostare la rete per l’uso di un indirizzo IP statico. L’indirizzo IP, la maschera di
sottorete, il gateway e il DNS devono essere inseriti manualmente così come forniti dall’ISP (Internet Service Provider).
1. Collegare la porta [LAN] sul retro del televisore alla porta LAN a parete mediante un cavo LAN.
I terminali (la posizione della porta e il tipo) del dispositivo esterno variano in base alla marca del dispositivo.
In caso di utilizzo di un indirizzo IP statico, l’ISP potrà fornire l’indirizzo IP, la maschera di sottorete, il gateway e il DNS. E’
necessario inserire questi valori per completare le impostazioni della rete. Qualora non si conoscano tali valori, richiederli
all’amministratore di rete.
Per maggiori informazioni sulla congurazione e sulla connessione a un router, vedere il manuale di riferimento del prodotto
corrispondente.
E’ possibile collegare direttamente il TV alla LAN senza collegarlo tramite un Router.
Qualora si utilizzi un IP Sharer (Router IP) che supporta il protocollo DHCP, è possibile impostare il dispositivo sia come
DHCP sia come IP statico.
Per conoscere le procedure necessarie per impostare un indirizzo di IP statico, rivolgersi al proprio Internet Service Provider.
Connessione di rete - Wireless
E’ possibile collegarsi alla rete in modalità senza li utilizzando un IP sharer wireless.
1. Collegare il ‘Samsung Wireless LAN Adapter for InfoLive’ al terminale Wiselink del TV.
Per utilizzare una rete wireless è necessario utilizzare il ‘Samsung Wireless LAN Adapter for InfoLive’(WIS-08BG).
‘Samsung Wireless LAN Adapter for InfoLive’ è venduto separatamente. Per effettuare l’acquisto contattare un rappresentante
o rivenditore autorizzato Samsung.
Per utilizzare una rete wireless, il televisore deve essere collegato a un IP sharer wireless.
Se il IP sharer wireless supporta il protocollo DHCP, il televisore può utilizzare sia un indirizzo DHCP sia un indirizzo IP statico
per collegarsi alla rete in modalità wireless.
E’ necessario utilizzare un IP sharer wireless in grado di supportare IEEE 802.11 B o IEEE 802.11G.
Se il IP sharer wireless permette di attivare/disattivare la funzione di connessione Ping, attivarla.
Impostare il IP sharer wireless in modalità Infrastructure. La modalità Ad-hoc non è supportata.
Selezionare un canale per il IP sharer wireless che non sia attualmente utilizzato. Se il canale impostato per il IP sharer wireless
è attualmente utilizzato da un altro dispositivo vicino, ciò comporterà delle interferenze e le comunicazioni potrebbero cadere.
Durante l’applicazione della chiave di sicurezza per il AP (IP sharer wireless), sono supportate solo le seguenti.
1) Authentication Mode : WEP, WPAPSK, WPA2PSK
2) Encryption Type : WEP, TKIP, AES
Sistema di sicurezza diversi da quelli elencati sopra, non sono compatibili con il televisore.
N
N
N
N
N
N
N
N
N
N
N
N
N
N
N
Pannello posteriore TV
Cavo LAN
IP Sharer (Router)
Cavo LAN
Presa LAN a parete
E' possibile collegare il televisore a una LAN mediante uno Sharer (Router).
Pannello laterale del
televisore
Samsung Wireless LAN
Adapter for InfoLive
Cavo LAN
IP sharer wireless
Presa LAN a
parete
Pannello posteriore TV
Cavo LAN
1
Presa LAN a parete
BN68-01757A-Ita.indb 28 2008-9-24 15:01:58
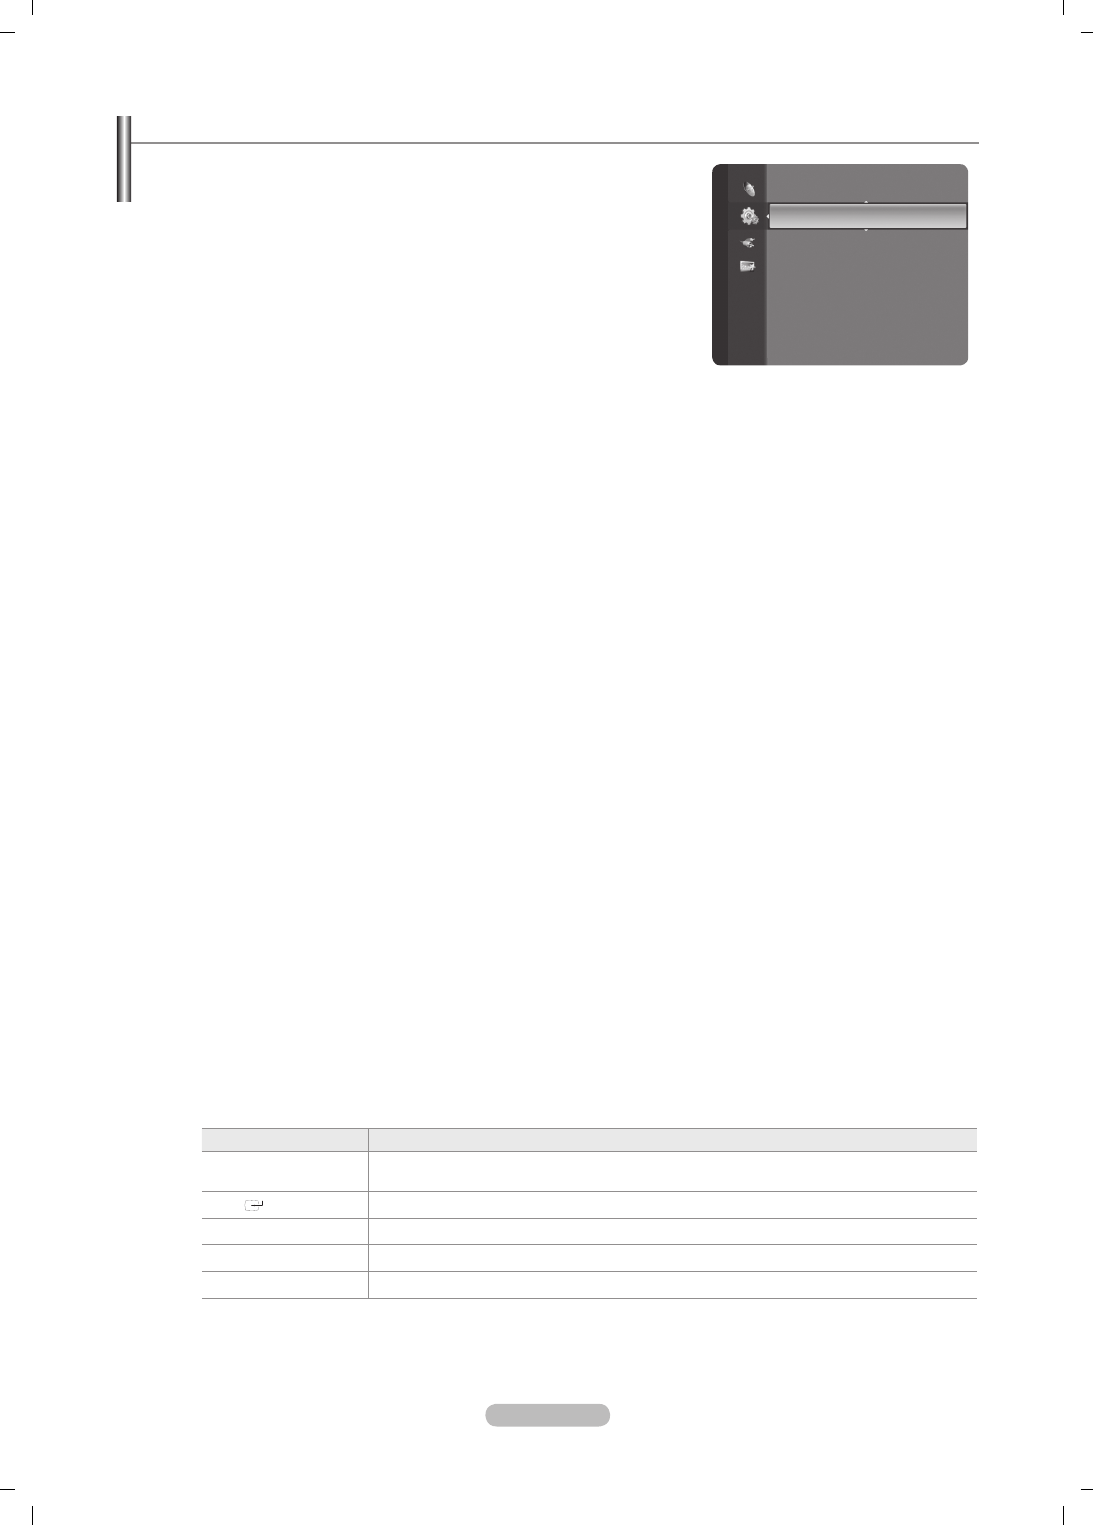
Italiano - 29
Impostazione della rete
Selezione rete
Selezionare Cable o Wireless come metodo di collegamento alla rete.
Il menu viene attivato solo se ‘Samsung Wireless LAN Adapter for InfoLive’
è collegata.
Cavo: Collegamento alla rete mediante un cavo.
Wireless
: Collegamento alla rete in modalità wireless.
Impostazione rete via cavo
Impostazione IP → Impostaz automatica / Imp manuale
Test di rete:
Mediante questa funzione è possibile testare o confermare lo stato del collegamento di rete dopo la sua
impostazione.
Cosa fare se non si è in grado di collegarsi alla rete in modalità cablata
Se l’Internet Service Provider ha registrato il MAC address del dispositivo utilizzato per il collegamento a Internet la prima
volta e esegue l’autenticazione a ogni accesso a Internet, il TV potrebbe non essere in grado collegarsi a Internet poiché
il MAC address è diverso da quello utilizzato dal dispositivo (PC) per collegarsi la prima volta a Internet. In questo caso,
chiedere al proprio Internet Service Provider le procedure per collegare dispositivi diversi al PC (ad esempio il televisore)
a Internet. Se l’Internet Service Provider richiede un ID o una password per il collegamento a Internet, il televisore
potrebbe non essere in grado di collegarsi a Internet. In questo caso, digitare la propria ID o password al collegamento a
Internet usando un Internet Sharer (Router).
La connessione internet potrebbe cadere a causa di un problema di rewall. In questo caso, contattare il proprio Internet
Service Provider. Se ancora non è possibile collegarsi a Internet anche dopo aver seguito le procedure descritte dal
proprio Internet Service Provider, contattare un centro di Assistenza autorizzato Samsung Electronics.
Imp rete wireless
Impostazione IP → Impostaz automatica / Imp manuale
Network Test: Mediante questa funzione è possibile testare o confermare lo stato del collegamento di rete dopo la
sua impostazione.
Cosa fare se non si è in grado di collegarsi alla rete in modalità wireless
Il TV non riesce a individuare un AP congurato come SSID privato. In questo caso, cambiare le impostazioni dell’AP e
riprovare. Se il proprio Internet Service Provider ha registrato il MAC address del dispositivo utilizzato per il collegamento
a Internet la prima volta ed esegue l’autenticazione a ogni accesso a Internet, il TV potrebbe non essere in grado
collegarsi a Internet poiché il MAC address è diverso da quello utilizzato dal dispositivo (PC) per collegarsi la prima volta
a Internet. In questo caso, chiedere all’Internet Service Provider le procedure per collegare dispositivi diversi al PC (ad
esempio il televisore) a Internet. Se ancora non è possibile collegarsi a Internet anche dopo aver seguito le procedure
descritte dall’Internet Service Provider, contattare un centro di Assistenza autorizzato Samsung Electronics.
Sel punto d’accesso:
Con questa funzione è possibile selezionare il IP sharer da utilizzare in caso di uso di una rete
wireless.
Se l’Access Point wireless non è riportato nell’elenco dei dispositivi disponibili, premere il tasto Rosso.
Una volta stabilita la connessione, il sistema tornerà automaticamente alla schermata.
Selezionando un Access Point che necessita di una autenticazione di sicurezza, digitare la chiave.
Una volta avuto accesso a un Access Point mediante una autenticazione di sicurezza:
Comparirà la richiesta della Chiave di sicurezza.
Digitare la chiave e premere il tasto ENTERE.
Uso dei tasti del telecomando nella nestra di inserimento della chiave di sicurezza.
Setup Screen can be different depending on the security types.
Tasto Operazioni
▲/▼/◄/►
(Rotella)
Sposta la selezione su/giù/a sinistra/a destra.
(ENTER)
Immette il carattere selezionato.
Tasto rosso
Passa dai caratteri maiuscoli a quelli minuscoli e vice versa
Tasto verde
Per cancellare un carattere immesso.
Tasto blu
Per terminare l’immissione della chiave di sicurezza.
❑
N
❑
N
❑
N
N
N
N
N
-
-
-
N
Impostazione
Lingua : English
Ora
Selezione rete : Cavo ►
Imp rete wireless
Impostazione rete via cavo
Blocco canali : Acceso
Cambia PIN
Blocco Canale
Sottotitoli
Lingua teletext : - - - -
BN68-01757A-Ita.indb 29 2008-9-24 15:02:00

Italiano - 30
Impostazione rete via cavo - Impostaz automatica
Collegando un cavo LAN a una rete che supporta il protocollo DHCP, le impostazioni di IP (Internet Protocol) vengono
automaticamente congurate. Vericare che il cavo LAN sia collegato. (vedere pagina 27)
1. Impostare Selezione rete a Cavo.
2. Selezionare Impostazione rete via cavo.
3. Impostare Impostazione IP a Impostaz automatica .
4. Selezionare Test di rete per vericare la connettività della rete.
Impostazione rete via cavo - Imp manuale
Per collegare il TV alla LAN mediante un indirizzo IP statico, è necessario impostare l’indirizzo IP. Vericare che il cavo LAN sia
collegato. (vedere pagina 27)
1. Impostare Selezione rete.
2. Selezionare Impostazione rete via cavo.
3. Impostare Impostazione IP a Imp manuale.
4. Impostare Indirizzo IP, Maschera sottorete, Gateway e Server DNS.
Premere i tasti numerici sul telecomando quando si desidera impostare manualmente la rete.
5. Selezionare Test di rete per vericare la connettività della rete.
Wireless Network Setup-Auto Setup
Il menu viene attivato solo se ‘Samsung Wireless LAN Adapter for InfoLive’ è collegata (vedere pagina 28).
Collegando un cavo LAN a una rete che supporta il protocollo DHCP, le impostazioni di IP (Internet Protocol) vengono
automaticamente congurate. Il IP sharer wireless da collegare a questo prodotto deve supportare il protocollo DHCP.
1. Impostare Selezione retea Wireless.
2. Selezionare Imp rete wireless.
3. Impostare ImpostazioneIP a Impostazione automatica.
4. Selezionare un AP mediante Sel punto d’accesso.
5. Selezionare Testdirete per vericare la connettività della rete.
Wireless Network Setup-Manual Setup
Il menu viene attivato solo se ‘Samsung Wireless LAN Adapter for InfoLive’ è collegata (vedere pagina 28).
1. Impostare Selezione rete a Wireless.
2. Selezionare Imp rete wireless.
3. Impostare ImpostazioneIP a Imp manuale.
4. Selezionare un AP mediante Sel punto d’accesso.
5. Selezionare Testdirete per vericare la connettività della rete.
N
BN68-01757A-Ita.indb 30 2008-9-24 15:02:00
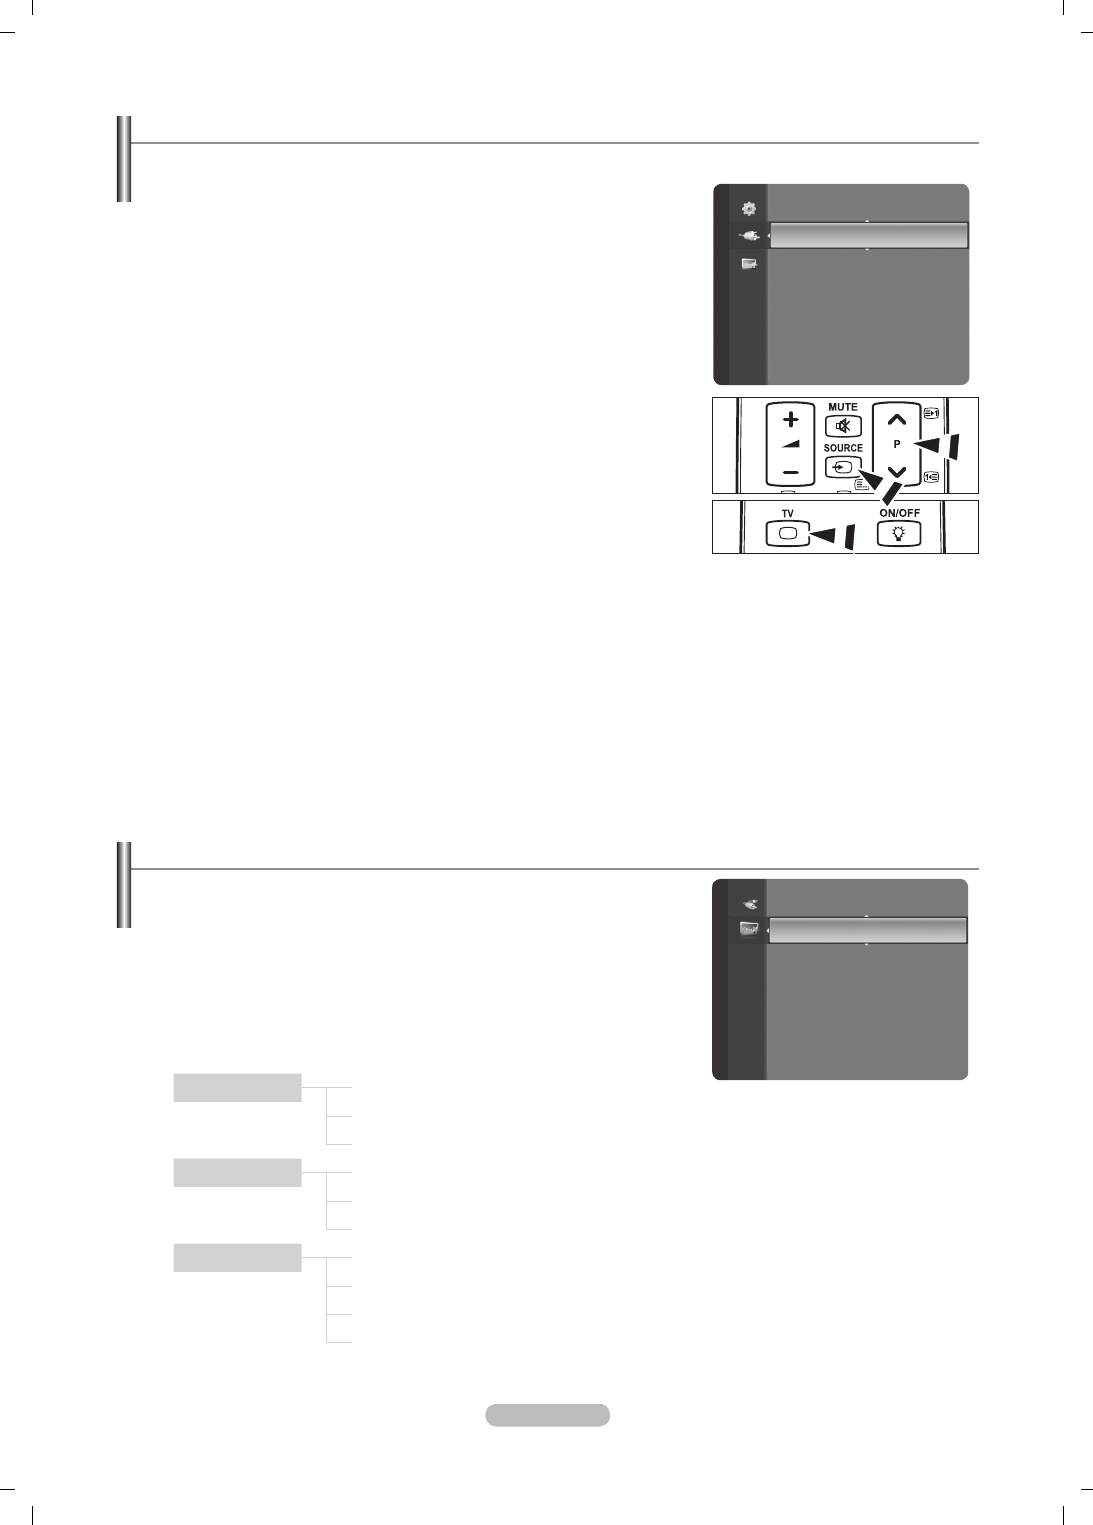
Italiano - 31
Elenco sorgenti / Modica Nome
Elenco sorgenti
Questa funzione viene usata per selezionare il TV o un altra sorgente di
ingresso come un lettore DVD o un decoder digitale / ricevitore satellitare
(Set-Top Box) collegato al televisore. Utilizzare la funzione per selezionare la
sorgente di ingresso desiderata.
TV, Est.1, Est.2, AV, S-Video, Com., PC, HDMI1, HDMI2 / DVI, HDMI3,
HDMI4, USB, DLNA.
E’ possibile scegliere solo i dispositivi esterni collegati al televisore. In
Elenco sorgenti, gli ingressi collegati verranno evidenziati e ordinati
in cima all’elenco. Gli ingressi non collegati verranno ordinati in fondo
all’elenco.
Uso dei tasti colorati del telecomando nell’elenco delle sorgenti
Rosso (Refresh): Aggiorna il collegamento ai dispositivi esterni.
TOOLS (Opzione): Visualizza i menu Modica Nome e Informazioni.
Premere il tasto SOURCE sul telecomando per visualizzare una sorgente
del segnale esterna. La modalità TV può essere selezionata premendo il
tasto TV, i tasti numerici (0~9), e il tasto P< / > sul telecomando.
Modica Nome
VCR / DVD / VCR / DVD / Cable STB / Satellite STB / PVR STB / AV Receiver / Game / Camcorder / PC / TV / IPTV /
Blu-ray / HD DVD / DMA
Assegnare un nome al dispositivo collegato ai jack di ingresso per semplicare la selezione della sorgente di ingresso.
Quando un PC con una risoluzione di 1920 x 1080 a 60Hz è collegato alla porta HDMI IN 2, è necessario impostare la
modalità HDMI2 / DVI a PC in Modica Nome della modalità Ingressi.
❑
N
N
-
-
O
❑
N
Guida Prodotto
La Guida al prodotto vi fornisce informazioni sulle più importanti funzioni di questo
televisore.
1. Premere il tasto MENU per visualizzare il menu. Premere il tasto ▲ o ▼ per
selezionare Applicazione, quindi premere il tasto ENTER
E
.
2. Premere il tasto ▲ o ▼ per selezionare Guida Prodotto, quindi premere il tasto
ENTER
E
.
3. Premere il tasto ◄ o ► per selezionare una Guida (Picture Quality,
Entertainment o Connectivity) e premere il tasto ENTER
E
.
4. Per navigare nella schermata Product Guide usare i tasti ◄ e ►.
Picture Quality Full HD 1080p
Ultra FilterBright™
Real 100Hz(50") / 100Hz Dual Scan(63")
Entertainment InfoLive
Content Library
Entertainment Mode
Connectivity WISELINK Pro
DLNA
4HDMI
Anynet+
5. Al termine, premere il tasto EXIT.
Elenco sorgenti
Modifica Nome
Ingressi Applica zione
Content Library
InfoLive
Guida Prodotto ►
BN68-01757A-Ita.indb 31 2008-9-24 15:02:01
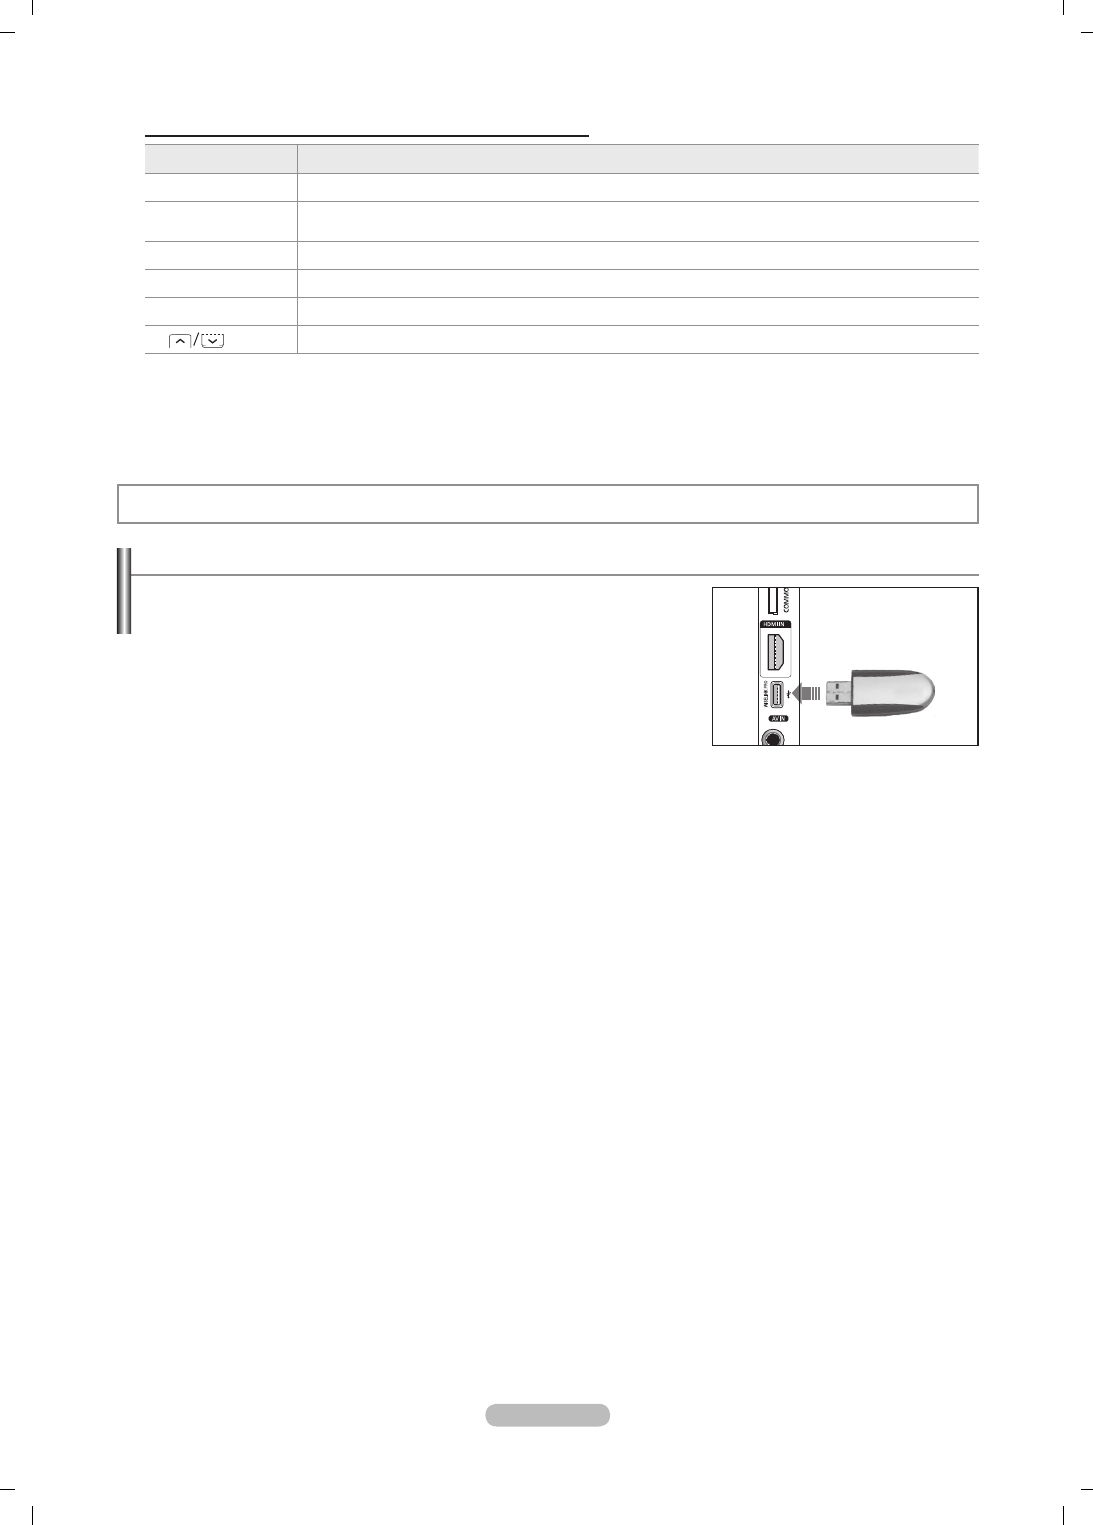
Italiano - 32
Uso dei tasti del telecomando nel menu Product Guide
Tasto Operazioni
Tasto giallo Mostra in sequenza il contenuto della Guida Prodotto (AutoPlay).
▲/▼/◄/►
(Rotella) Sposta il cursore e seleziona una voce.
ENTER
E
Attiva la voce attualmente selezionata.
RETURN Ritorna al menu precedente.
EXIT Arresta la funzione corrente e ritorna al menu Guida Prodotto principale.
P , PRE-CH Interrompe la modalità Product Guide e torna alla modalità TV
WISELINK Pro
Collegamento di un dispositivo USB
1. Per accendere il televisore premere il tasto POWER.
2. Collegare un dispositivo USB contenente foto, musica e/o lmati al jack
WISELINK (jack USB) sul pannello laterale del televisore.
Accedendo alla modalità WISELINK Pro senza alcun dispositivo USB collegato,
il sistema visualizzerà il messaggio ‘No external storage device found. Check
the connection status.’ In questo caso, collegare il dispositivo USB, uscire dalla
schermata premendo il tasto W. LINK sul telecomando e accedere nuovamente
alla schermata WISELINK Pro.
MTP (Media Transfer Protocol) non è supportato.
Il le system supporta solo FAT16/32 (il le system NTFS non è supportato).
Alcuni dispositivi audio e videocamere digitali USB possono non essere compatibili con questo televisore.
WISELINK Pro supporta solo il dispositivo USB MSC (Mass Storage Class). MSC è un dispositivo di memorizzazione di
massa Bulk-Only Transport. Esempi di MSC sono le unità Thumb e i Flash Card Reader (entrambe le unità HDD e HUB USB
non sono supportate).
Collegare direttamente alla porta USB del TV. Se si utilizza un cavo separato, possono vericarsi problemi di compatibilità
USB.
Prima di collegare il dispositivo al televisore, eseguire il backup dei le per prevenire una perdita accidentale o eventuali
danni. SAMSUNG non è responsabile di eventuali danni ai le dati o perdite di dati.
Non scollegare il dispositivo USB durante il caricamento.
MSC supporta le MP3 e JPEG, mentre un dispositivo PTP supporta solo le JPEG.
Il formato JPEG sequenziale è supportato.
Maggiore è la risoluzione dell’immagine, più lungo è il tempo necessario per visualizzarla sulo schermo.
La risoluzione massima supportata in JPEG è di 15360X8640 pixel.
In caso di le non supportati o danneggiati, comparirà il messaggio Not Supported File Format.
Se il numero di le eccede i 4000 (o il numero di le musicali eccede i 3000), tutti i le eccedenti tale limite non verranno
visualizzati nell’Elenco foto (o nell’Elenco musica).
I le MP3 con DRM precedentemente scaricati da un sito a pagamento non potranno essere riprodotti. Digital Rights
Management (DRM) è una tecnologia che supporta la creazione di contenuti, la distribuzione e la gestione di contenuti in
modo completo e integrato, compresa la protezione dei diritti e degli interessi dei fornitori dei contenuti, la prevenzione dalla
copia illegale dei contenuti, così come la gestione degli addebiti e dei pagamenti.
Passare da una foto all’altra potrebbe richiedere alcuni secondi. Ora, sullo schermo comparirà l’icona che indica il caricamento
in corso.
N
N
N
N
N
N
N
N
N
N
N
N
N
N
N
N
4
Pannello laterale del
televisore
Unità USB
BN68-01757A-Ita.indb 32 2008-9-24 15:02:01
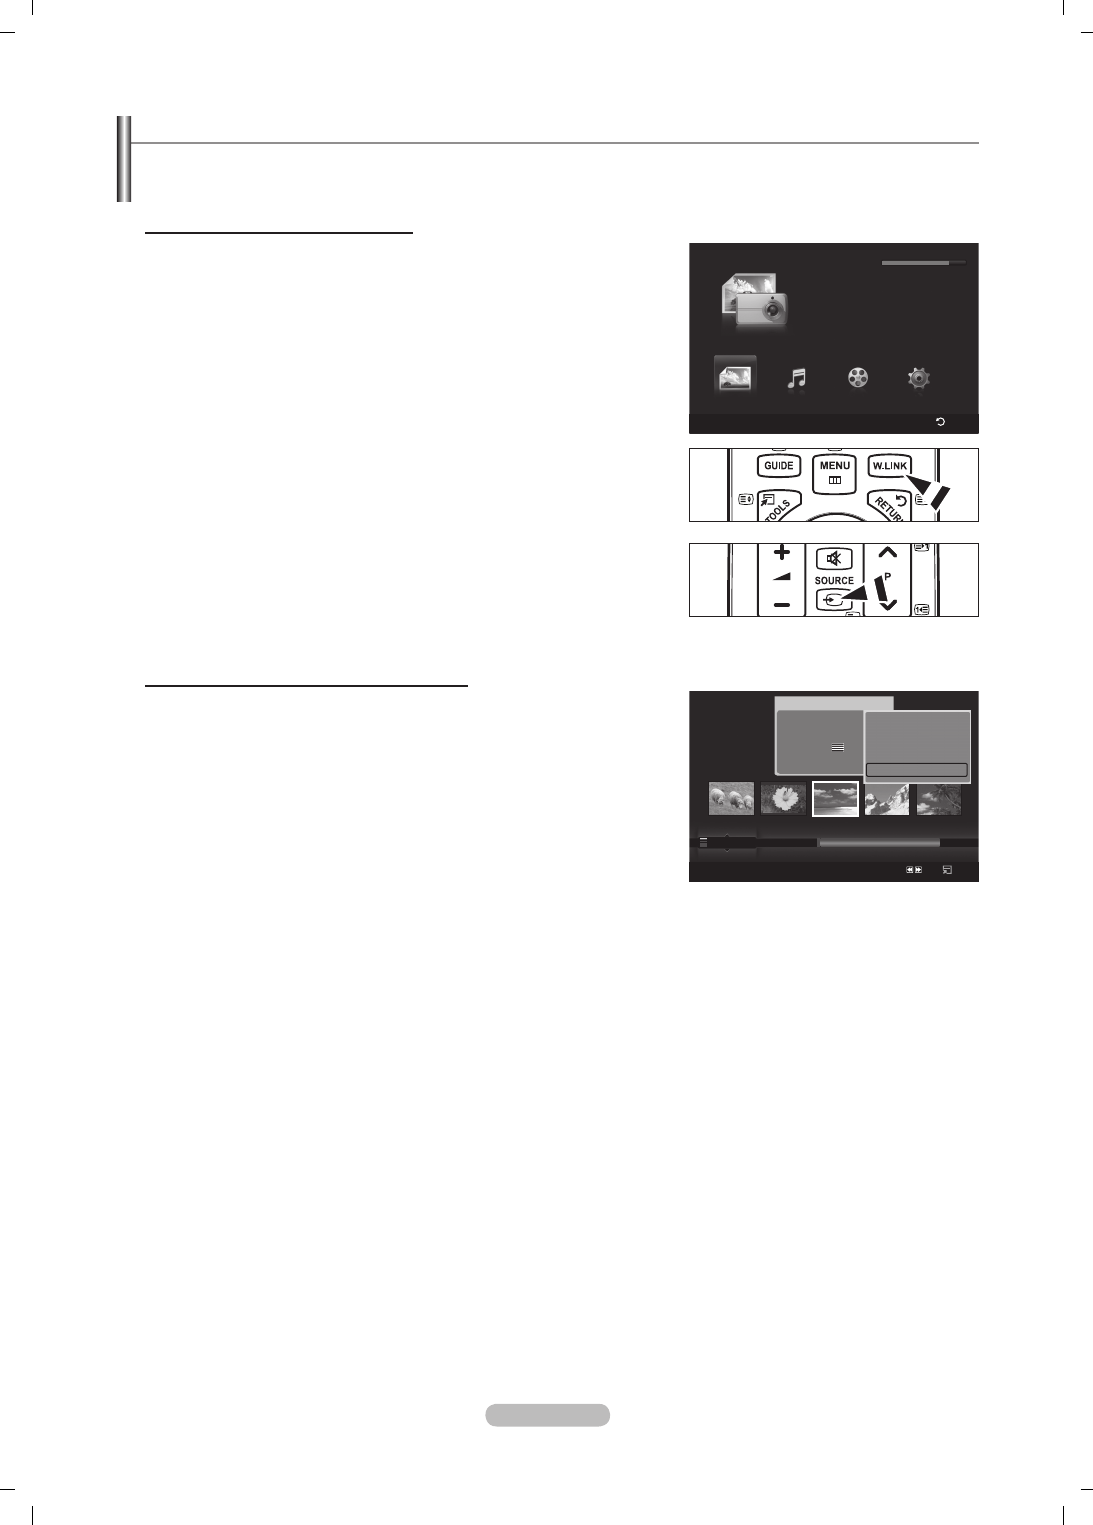
Italiano - 33
Uso della funzione WISELINK Pro
Questa funzione consente di visualizzare e riprodurre le fotograci e audio memorizzati su un dispositivo di memorizzazione di
massa USB.
Accedere al menu WISELINK Pro
1. Premere il tasto MENU. Premere il tasto ▲ o ▼ per selezionare Applica
zione, quindi premere il tasto ENTER
E
.
2. Premere il tasto ▲ o ▼ per selezionare WISELINK Pro, quindi premere il tasto
ENTER
E
.
Sullo schermo viene visualizzato il menu WISELINK Pro.
Premere il tasto W.LINK sul telecomando per visualizzare il menu
WISELINK Pro.
Premere SOURCE ripetutamente sul telecomando per selezionare USB o
DLNA, quindi premere ENTER
E
.
3. Premere il tasto rosso, quindi il tasto ▲ o ▼ per selezionare il dispositivo
USB corrispondente (per es. se collegato mediante un hub). Premere il tasto
ENTER
E
.
Questa funzione può risultare diversa in base al dispositivo di memoria
USB collegato al televisore.
Nella parte inferiore sinistra dello schermo comparirà il nome del
dispositivo USB selezionato.
4. Premere il tasto ◄ o ► per selezionare una icona (Photo, Music, Movie,
Setup), quindi premere il tasto ENTER
E
. Per uscire dalla modalità
WISELINK Pro premere il tasto W.LINK sul telecomando.
Per giocare. (Programma di gioco non supportato)
Rimozione sicura di un dispositivo USB
Il dispositivo può essere rimosso dal televisore in modo sicuro.
1. Premere il tasto TOOLS nella scherma di elenco dei le WISELINK Pro, o
durante la proiezione di diapositive o la riproduzione di un brano musicale.
2. Premere il tasto ▲ o ▼ per selezionare Rimozione sicura, quindi premere il
tasto ENTER
E
.
3. Rimuovere il dispositivo USB dal televisore.
N
O
O
N
N
N
Photo
SUM
Dispositivo
Impostazioni pref
Selezione
Salta
Opzione
image_1.jpg
Mese : Gen
Data : Gen.01.2008
Colore : Grigio
Compos :
Cartella : P-other
Preferiti : ★★★
Preferenza
Mensile
Orario
Gen Nov
▲
▲
Rip grup cor
Cancella
Informazioni
Rimozione sicura
WISELINK Pro
Photo
SUM
Disposit
Ritorno
Music Setup
PHOTO
SUM
851.98MB/995.00MB Libero
Movie
BN68-01757A-Ita.indb 33 2008-9-24 15:02:03
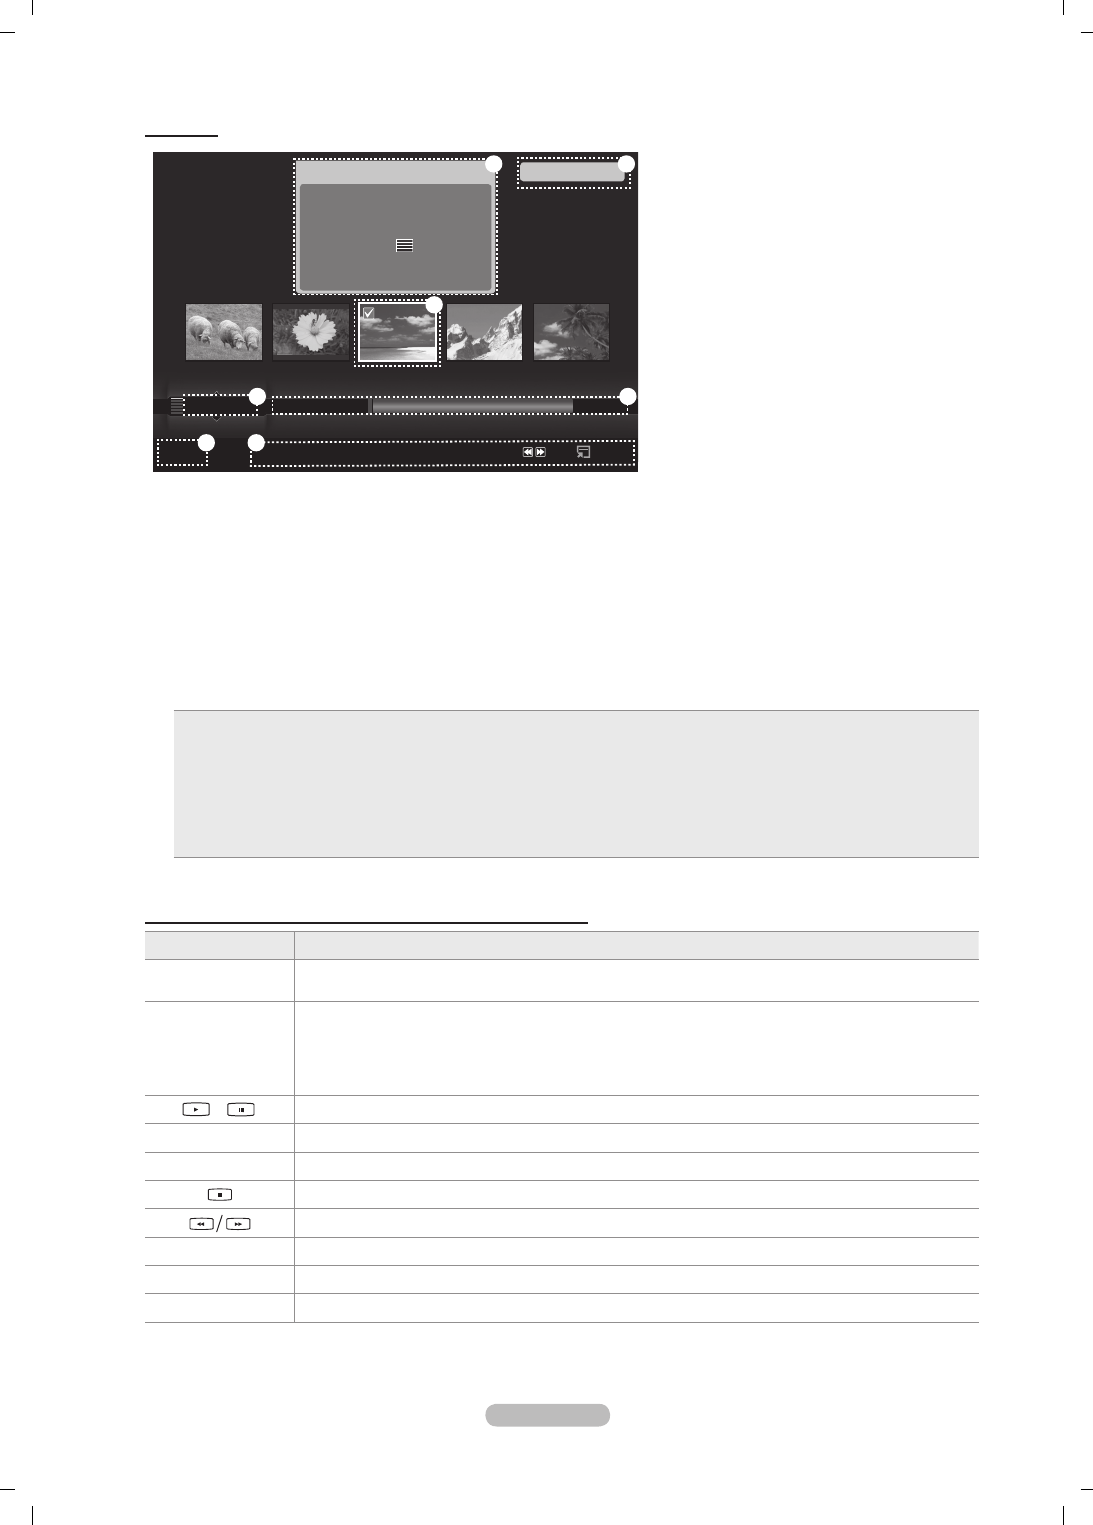
Italiano - 34
Schermo
Photo
SUM
Dispositivo
Impostazioni pref
Selezione
Salta
Opzi
one
image_1.jpg
Mese : Gen
Date : Gen.01.2008
Colore : Grigio
Compos :
Cartella : P-other
Preferiti :
★★★
Preferenza
Mensile
Orario
Gen Nov
▲
1File selez
2 6
1
3 4
5 7
1. File attualmente selezionato: Il le attualmente selezionato viene evidenziato. I le fotograci e i lmati vengono visualizzati
come miniature.
2. Schermata informativa: Mostra le informazioni sul le attualmente selezionato. Per le foto e i lmati esiste un nestra separata.
Per i brani musicali, le informazioni sul le vengono visualizzate anche nel posto nel quale vengono visualizzati i le.
3. Current Sort Standard: Questo campo mostra lo standard attuale per l’ordinamento dei le. Premere ▲ o ▼ per cambiare lo
standard di ordinamento dei le.
4. View Groups: Mostra i gruppi di ordinamento. Il gruppo di ordinamento che comprende le foto selezionate viene evidenziato.
5. Current Device: Mostra il nome del dispositivo attualmente selezionato. Premere il tasto Rosso per selezionare un dispositivo.
6. Item Selection Information: Mostra il numero di foto selezionate premendo il tasto Giallo.
7. Voci della guida
Tasto Rosso (Dispositivo): Seleziona un dispositivo connesso.
Tasto Verde (Impostazioni pref): Modica le impostazioni preferite per il le selezionato. Premere ripetutamente questo
tasto no a visualizzare il valore desiderato.
Tasto Giallo (Selezione): Seleziona il le dall’elenco. I le selezionati vengono evidenziati con un simbolo c. Premere
nuovamente il tasto giallo per deselezionare il le.
Tasto πµ (Salta): Passa al gruppo di ordinamento precedente/successivo .
Tasto TOOLS (Opzione): Visualizza i menu delle opzioni. (Il menu delle opzioni varia in base allo stato corrente).
•
•
•
•
•
Uso dei tasti del telecomando nel menu WISELINK Pro
Tasto Operazioni
▲/▼/◄/►
(Rotella) Sposta il cursore e seleziona una voce.
ENTER
E
Attiva la voce attualmente selezionata.
Durante la riproduzione di una presentazione, un lmato o un brano musicale:
- Premendo il tasto ENTER
E
durante una riproduzione, l’esecuzione si arresta in pausa.
- Premendo il tasto ENTER
E
durante una pausa, l’esecuzione riprende.
Riproduce o interrompe la proiezione di diapositive o la riproduzione di un brano musicale.
RETURN Ritorna al menu precedente.
TOOLS Esegue varie funzioni nei menu Foto, Musica e Film.
Arresta la proiezione di diapositive, la riproduzione di un brano musicale o di un lmato.
Passa al gruppo precedente/successivo.
INFO Mostra le informazioni relative al le.
W.LINK Termina la modalità WISELINK Pro.
EXIT Arresta la funzione corrente e ritorna al menu principale di WISELINK Pro.
BN68-01757A-Ita.indb 34 2008-9-24 15:02:05
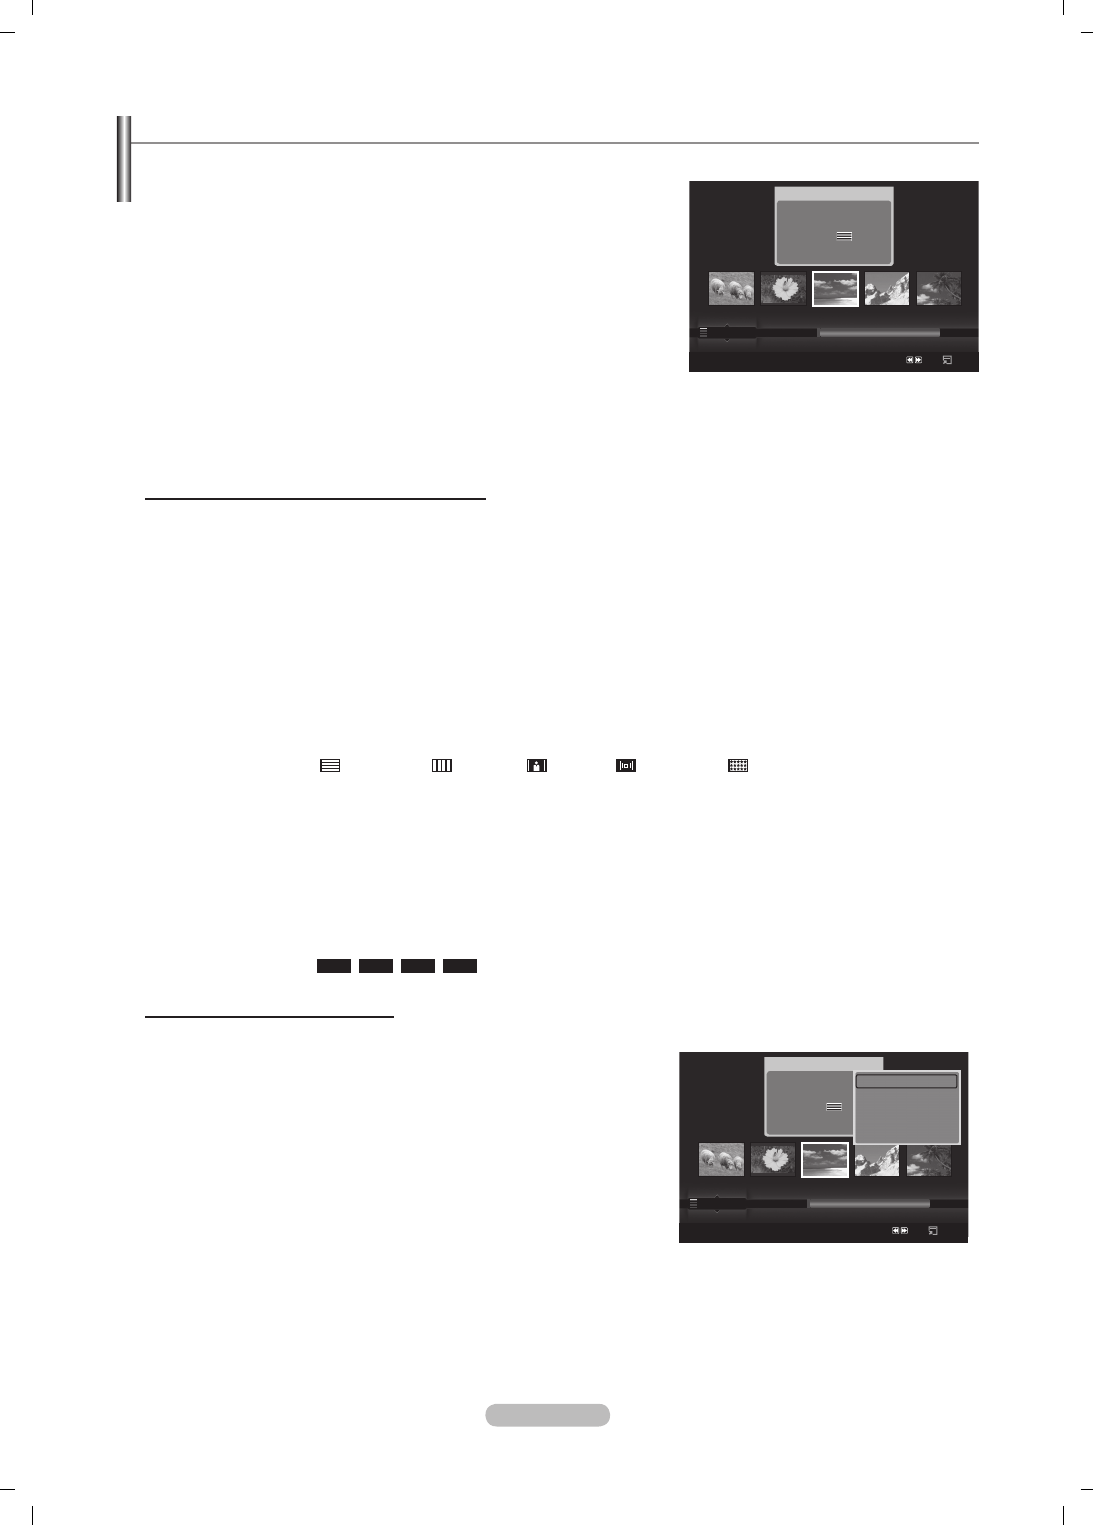
Italiano - 35
Uso e ordinamento dell’Elenco foto
L’Elenco foto può essere ordinato in diversi modi.
1. Premere il tasto ▲ o ▼ per selezionare il tipo di ordinamento che si desidera
applicare all’Elenco foto.
Le foto vengono ordinate in base all’ordinamento selezionato.
Per passare al gruppo successivo/precedente, premere il tasto
π
(REW)
o
µ
(FF).
2. Per iniziare la proiezione di diapositive secondo l’ordine selezionato dall’utente
premere il tasto
∂
(Play)/ENTER
E
.
Le informazioni di un le fotograco vengono impostate automaticamente.
Le informazioni relative a Colore e
Compos
estratte da un le fotograco
possono essere diverse dalle aspettative dall’utente.
Le informazioni relative alle foto vengono impostate automaticamente. E’ possibile modicare le informazioni relative a
Colore,
Compos
, e Preferiti.
Le foto per le quali non possono essere visualizzate le informazioni sono impostate come Non classif.
PTP non supporta la modalità di ordinamento a cartella.
Standard di ordinamento per l’Elenco foto
Mensile
Ordina e mostra le foto contenute nel le in base al mese. Ordina solo in base al mese (da gennaio a dicembre)
indipendentemente dall’anno.
Orario
Ordina e visualizza le foto in base alla data. Ordina in base all’anno e mese partendo dalla foto con data più vecchia.
Colore
Ordina le foto in base al colore. E’ possibile cambiare le informazioni relative al colore della foto.
Opzioni Colore: Rosso, Giallo, Verde, Blu, Magenta, Nero, Grigio, Non classif.
Compos
Ordina le foto in base alla composizione. E’ possibile cambiare le informazioni relative alla composizione delle foto.
Opzioni Compos: (orizzontale), (verticale), (oggetto), (prospettiva), (modello), Non classicato.
Cartella
Ordina le foto in base alla cartella. Se nel dispositivo USB sono presenti più cartelle, i le fotograci vengono visualizzati in
ordine in ogni cartella. I le fotograci nella cartella Root vengono mostrati per primi mentre gli altri vengono ordinati per nome.
Preferenza
Ordina le foto in base alla preferenza (Preferiti). E’ possibile cambiare le informazioni relative alle preferenze della foto.
Cambiare le Impostazioni preferite
Selezionare la foto desiderata nell’Elenco foto e premere il tasto Verde ripetutamente no alla comparsa dell’impostazione
desiderata.
Opzioni Preferiti:
★★★
,
★★★
,
★★★
,
★★★
Menu Opzione dell’Elenco foto
Slide Show
Questo menu consente di avviare una proiezione di diapositive delle foto
contenute nel dispositivo USB.
Rip grup cor
Questo menu consente di avviare una proiezione di diapositive solo delle
foto contenute nel gruppo di ordinamento selezionato.
Cancella
Con questo menu è possibile cancellare i le fotograci selezionati.
Mod. gruppo
E’ possibile cambiare le informazioni dei le fotograci relative Colore e Compos.
Le informazioni del gruppo del le corrente vengono aggiornate e il le viene spostato nel nuovo gruppo.
Per cambiare le informazioni di più le, selezionare i le desiderati premendo il tasto giallo.
N
N
N
N
N
N
N
N
N
N
N
N
N
Photo
SUM
Dispositivo
Impostazioni pref
Selezione
Salta
Opzione
image_1.jpg
Mese : Gen
Date : Gen.01.2008
Colore : Grigio
Compos :
Cartella : P-other
Preferiti : ★★★
Preferenza
Monthly
Orario
Gen Nov
▲
Photo
SUM
Dispositivo
Impostazioni pref
Selezione
Salta
Opzione
image_1.jpg
Mese : Gen
Date : Gen.01.2008
Colore : Grigio
Compos :
Cartella : P-other
Preferiti : ★★★
Preferenza
Monthly
Orario
Gen Nov
▲
Slide Show
Rip grup cor
Cancella
Informazioni
▼
BN68-01757A-Ita.indb 35 2008-9-24 15:02:07

Italiano - 36
Informazioni
Vengono visualizzate le informazioni relative ai le fotograci nell’ordine impostato nella cartella corrente, comprendenti il
nome, la dimensione, la risoluzione, la data di modica e il percorso.
Usando le stesse procedure durante una proiezione di diapositive, è possibile vedere le informazioni relative ai le
fotograci.
In alternativa, selezionare una immagine dall’Elenco foto e premere il tasto
INFO per vedere le informazioni relative.
Rimozione sicura
Il dispositivo può essere rimosso dal televisore in modo sicuro.
N
O
Visualizzazione di una foto o di una proiezione di diapositive
Proiezione di diapositive
1. Premere il tasto ▲ o ▼ per selezionare l’immagine desiderata nell’Elenco foto.
2. Premere il tasto TOOLS.
3. Premere il tasto ▲ o ▼ per selezionare Slide Show, quindi premere il tasto
ENTER
E
.
Nella proiezione verranno utilizzate tutte le foto contenute in elenco.
Durante la proiezione di diapositive, i le appaiono in sequenza a partire da
quello correntemente visualizzato.
La proiezione prosegue in base all’ordine specicato in elenco.
Impostando l’opzione Musica di sottof su Acceso, durante la proiezione delle
diapositive i brani musicali vengono riprodotti automaticamente (vedere pag.
37).
Quando si visualizza un Elenco foto, per iniziare la proiezione di
diapositive premere il tasto
∂
(Play)/ENTER
E
.
Tasti di controllo per la proiezione di diapositive
ENTER
E
Inizia/Arresta la proiezione.
∫
Esci dalla proiezione diapositive e torna
all’elenco delle foto
∂
Inizia la proiezione di diapositive. TOOLS
π
/
µ
Esegue varie funzioni nei menu Foto.
Varia la velocità di riproduzione della proiezione.
∑
Arresta la proiezione di diapositive.
Riproduce il gruppo corrente
1. Premere il tasto ▲ o ▼ per selezionare l’ordinamento. (Mensile, Orario, Colore, Compos, Cartella, Preferenza)
2. Per selezionare il gruppo desiderato, premere il tasto
π
(REW) o
µ
(FF).
3. Premere il tasto TOOLS.
4. Premere il tasto ▲ o ▼ per selezionare Rip grup cor, quindi premere il tasto ENTER
E
.
Per la proiezione verranno utilizzati solo i le contenuti nel gruppo di ordinamento.
Per riprodurre una proiezione dei soli le selezionati
1. Premere il tasto ▲ o ▼ per selezionare l’immagine desiderata nell’Elenco foto.
2. Premere il tasto giallo. Ripetere l’operazione per selezionare più le fotograci.
Il contrassegno
c
compare a sinistra della foto selezionata.
Selezionando un solo le, la proiezione di diapositive non avrà inizio.
Per deselezionare tutti i le, premere il tasto TOOLS, quindi selezionare Deselez tutto.
3. Premere il tasto
∂
(Play)/ENTER
E
.
I le selezionati verranno utilizzati per la proiezione di diapositive.
N
N
N
N
O
N
N
N
N
N
O
SUM
E
Pause
Previous
Successivo
Opzione
Ritorno
►
Normale
20/22 image_1.jpg 440x440 2.0KB 2008/1/1
BN68-01757A-Ita.indb 36 2008-9-24 15:02:08

Italiano - 37
Menu Opzione di Slide Show
Arresta proiezione diapositive/Avvia proiezione diapositive
E’ possibile iniziare o interrompere la proiezione di diapositive.
Ruota
E’ possibile ruotare le foto memorizzate su un dispositivo USB.
Premendo il tasto ◄, la foto verrà ruotata di 270˚, 180˚, 90˚ e 0˚.
Premendo il tasto ►, la foto verrà ruotata di 90˚, 180˚, 270˚ e 0˚.
Zoom
E’ possibile ingrandire le foto memorizzate su un dispositivo USB. (x1 → x2
→ x4)
Per spostare l’immagine, premere il tasto ENTER
E
, quindi i tasti ▲/▼/◄/►. Notare che se l’immagine ingrandita è più
piccola della dimensione dello schermo originale, la funzione di modica della posizione non avrà alcun effetto.
Il le ingrandito non può essere memorizzato.
Selezionando Ruota, la funzione Zoom verrà disattivata.
Velocità Slide Show
Selezionare questa opzione per determinare la velocità di proiezione delle diapositive.
La velocità di proiezione delle diapositive è selezionabile solo durante la proiezione.
La velocità di proiezione delle diapositive può essere modicata premendo il tasto
π
(REW) o
µ
(FF) durata le
proiezione.
Musica di sottof → Acceso/Spento
Impostando Musica di sottof su Acceso, la musica verrà riprodotta insieme alle immagini durante la proiezione.
Impostando Musica di sottof su Acceso, comparirà una schermata nella quale è possibile impostare la musica desiderata.
Per usare questa funzione, la musica scelta deve essere memorizzata sul dispositivo USB.
Impostazione musica di sottof
Durante una proiezione di diapositive è possibile impostare la musica di sottofondo desiderata.
Disattivando Musica di sottof la musica non verrà riprodotta nonostante sia stata impostata l’opzione
Impostazione
musica di sottof
.
Per modicare la modalità Musica di sottofondo è necessario caricare i brani musicali. Riprodurre i brani musicali nella
categoria musica per caricarli.
Modalità BGM → Atmosfera/File selezionato/Rip casual
Atmosfera BGM → Energetico/Ritmico/Triste/Eccitante/Calmo
Impostando Modalità BGM su Atmosfera, è possibile selezionare l’atmosfera desiderata.
Non è tuttavia possibile selezionare un’atmosfera che non faccia parte dei brani musicali presenti nel dispositivo USB.
Sel le musicale
Impostando Modalità BGM su File selezionato, è possibile selezionare un brano musicale.
Impostazioni immagine/Impostazioni audio
vedere pag. 43.
Informazioni
Vengono visualizzate le informazioni relative alla foto.
Rimozione sicura
Il dispositivo può essere rimosso dal televisore in modo sicuro.
N
N
N
N
N
N
N
N
N
•
•
N
N
•
N
Strumenti
Arresta proiezione diapositive
Ruota
Zoom
Velocità Slide Show : Normale
Musica di sottof : Spento
Impostazione musica di sottofondo
Impostazioni immagine
Impostazioni audio
Informazioni
U
Sposta
E
Conferma
e
Esci
BN68-01757A-Ita.indb 37 2008-9-24 15:02:08
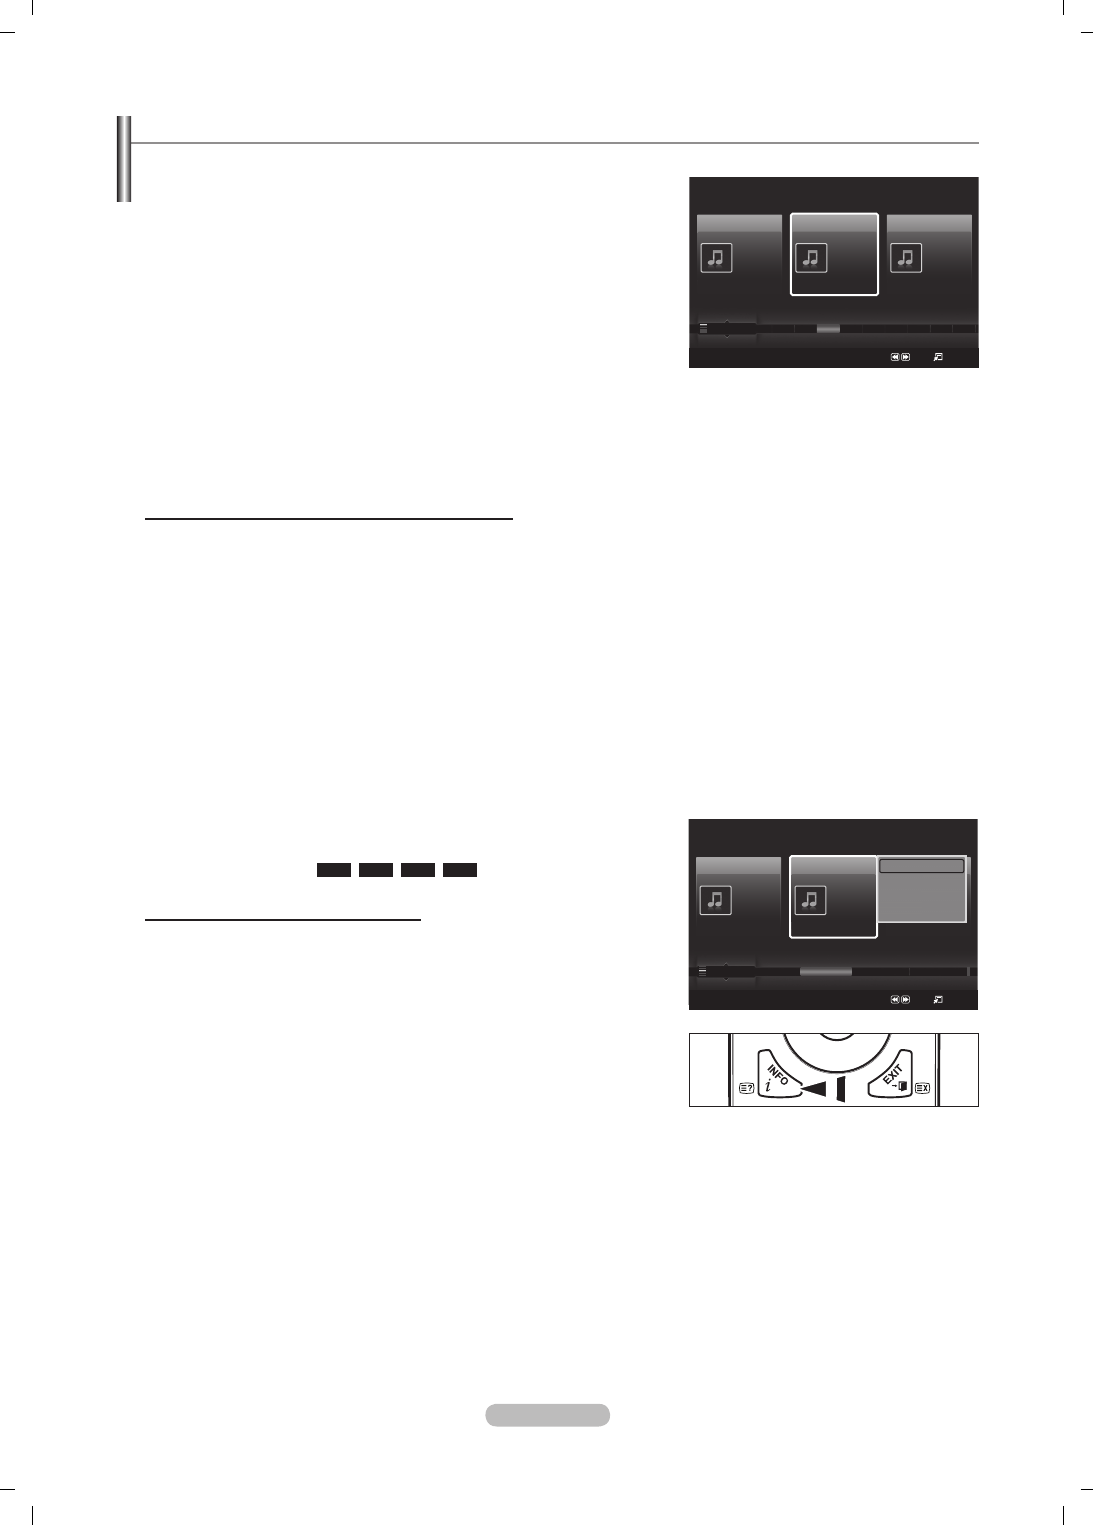
Italiano - 38
Usare e ordinare l’Elenco musica
L’Elenco musica può essere ordinato in diversi modi.
1. Premere il tasto ▲ o ▼ per selezionare un ordinamento nell’Elenco musica.
I brani musicali vengono ordinati in base all’ordinamento selezionato.
Per passare al gruppo successivo/precedente, premere il tasto
π
(REW) o
µ
(FF).
2. Per iniziare la riproduzione dei brani musicali secondo l’ordine selezionato
dall’utente premere il tasto ENTER
E
.
Le informazioni del brano musicale vengono impostate
automaticamente.
Le informazioni Atmosfera estratte da un brano musicale possono
differire dalle aspettative dell’utente.
Le informazioni relative alla musica vengono impostate
automaticamente. E’ possibile modicare le informazioni relative a Atmosfera e Preferiti.
I brani musicali per i quali non è possibile visualizzare le impostazioni vengono impostati come Non classif.
Se per un brano musicale non è disponibile alcuna informazione sul titolo, verrà visualizzato il nome del le.
Se non è disponibile alcuna informazione per Genere, Artista, Album, o Anno, la voce corrispondente rimarrà in bianco.
Standard di ordinamento per l’Elenco musica
Titolo:
Ordina e mostra alfabeticamente i titoli dei brani musicali.
Artista:
Ordina i brani musicali alfabeticamente per artista.
At
mosfera: Ordina i brani musicali per atmosfera. E’ possibile cambiare le informazioni relative all’atmosfera musicale.
Opzioni Atmosfera: Energetico, Ritmico, Triste, Eccitante, Calmo, Non classif
Genere: Ordina i brani musicali per genere musicale.
Cartella: Ordina i brani musicali per cartella. Se nel dispositivo USB sono presenti molte cartelle, i file vengono
visualizzati in ordine in ogni cartella. I brani musicali nella cartella Root vengono mostrati per primi, mentre gli altri
vengono ordinati alfabeticamente per nome.
Prefe
renza: Ordina i brani musicali per preferenza (Preferiti). E’ possibile cambiare le informazioni relative alle preferenze
dei brani musicali.
Cambiare le impostazioni di Preferiti
Selezionare il brano musicale desiderato nell’Elenco musica, quindi premere ripetutamente il tasto Verde no a ottenere
l’impostazione desiderata.
Per cambiare le informazioni di più le, selezionare i le desiderati
premendo il tasto giallo.
Opzioni Preferiti:
★★★
,
★★★
,
★★★
,
★★★
Menu Opzione dell’Elenco musica
Rip grup cor: Questo menu consente di riprodurre solo i brani musicali
nel gruppo di ordinamento selezionato.
Cancella: Questo menu consente di cancellare i brani musicali
selezionati.
Mod. gruppo: E’ possibile cambiare le informazioni relative
all’atmosfera del
file musicale. Le informazioni del gruppo del file corrente
vengono aggiornate e il file viene spostato nel nuovo gruppo.
Per cambiare le informazioni di più le, selezionare i le desiderati
premendo il tasto giallo.
Informazioni: Vengono visualizzate le informazioni relative ai brani musicali nell’ordine impostato nella cartella
corrente, comprendenti il nome, la dimensione, la data di modifica e il percorso.
Usando le stesse procedure durante una proiezione di diapositive, è possibile vedere le informazioni relative ai brani
musicali.
In alternativa, selezionare un brano dall’Elenco musica e premere il tasto INFO per vedere le informazioni relative.
Rimozione sicura:
Il dispositivo può essere rimosso dal televisore in modo sicuro.
N
N
N
N
N
N
N
N
N
N
N
N
N
N
O
Music
SUM
Disposit
Impostazioni pref
Selezione
Salta
Opzione
Preferenza
Titolo
Artista
Energetico ★★★
Jee
Album 1
2008
Pop
Thanks
Triste ★★★
Darby
Album 2
2008
Pop
I Love You
Calmo ★★★
Catherine
Album 3
2008
Pop
Better than yesterday
F G H I J L P S T V
▲
Music
SUM
Disposit
Impostazioni pref
Selezione
Salta
Opzione
Artista
Atmosfera
Genere
Triste ★★★
Jee
Album 1
2008
Pop
Thanks
Triste ★★★
Darby
Album 2
2008
Pop
I Love You
Eccitante ★★★
Catherine
Album 3
2005
Pop
Better than yesterday
Ritmico Triste Eccitante Calmo ...
▲
Rip grup cor
Cancella
Mod. gruppo
Informazioni
▼
BN68-01757A-Ita.indb 38 2008-9-24 15:02:09

Italiano - 39
Riproduzione di un le musicale
Riproduzione di un le musicale
1. Premere il tasto ◄ o ► per selezionare il brano musicale da riprodurre.
2. Premere il tasto
∂
(Play)/ENTER
E
.
Questo menu mostra solo i le con estensione MP3. I le con altre
estensioni non vengono visualizzati, nemmeno se sono stati salvati sul
medesimo dispositivo USB.
I tasti
π
(REW) o
µ
(FF) non sono attivi durante la riproduzione.
Il le selezionato appare in alto con il relativo tempo di riproduzione.
Per regolare il volume della musica, premere il tasto volume sul
telecomando. Per azzerare il volume, premere il tasto MUTE sul
telecomando.
La durata di un brano musicale può essere visualizzata come ‘00:00:00’ se all’inizio della riproduzione non vengono
reperite le informazioni relative al tempo di riproduzione.
Pulsanti di controllo della riproduzione musicale
ENTER
E
Riproduce/arresta il brano musicale.
∫
Esce dalla modalità di riproduzione e torna
all’Elenco musica.
∂
Riproduce un brano musicale TOOLS Esegue varie funzioni nei menu Musica.
∑
Interrompe il brano musicale
Icona informazioni sulla funzione Musica
Quando tutti i brani musicali presenti nella cartella (o i le selezionati) sono stati ripetuti Modalità Ripetizione è
Acceso.
Quando tutti i brani musicali presenti nella cartella (o i le selezionati) sono stati riprodotti una volta Modalità
Ripetizione è Spento.
Riproduzione di un gruppo di brani
1. Premere il tasto ▲ o ▼ per selezionare l’ordinamento.
(Titolo, Artista, Atmosfera, Genere, Cartella, Preferenza)
2. Per selezionare il gruppo desiderato premere il tasto
π
(REW) o
µ
(FF) .
3. Premere il tasto TOOLS.
4. Premere il tasto ▲ o ▼ per selezionare Rip grup cor, quindi premere il tasto ENTER
E
.
Vengono riprodotti i brani musicali inseriti nel gruppo di ordinamento, compresi i brani selezionati.
Riproduzione dei brani musicali selezionati
1. Premere il tasto ▲ o ▼ per selezionare il brano desiderato nell’Elenco musica.
2. Premere il tasto giallo. Ripetere l’operazione per selezionare più le musicali.
Il contrassegno
c
compare a sinistra del brano musicale selezionato.
3. Premere il tasto
∂
(Play)/ENTER
E
.
Verrà riprodotto solo il le selezionato.
Menu Opzione della riproduzione di le musicali
Modalità Ripetizione → Acceso/Spento
E’ possibile riprodurre ripetutamente i brani musicali.
Impostazioni immagine/Impostazioni audio
vedere pag. 43.
Informazioni
Vengono visualizzate le informazioni relative al brano musicale.
Rimozione sicura
Il dispositivo può essere rimosso dal televisore in modo sicuro.
N
N
N
N
N
N
N
N
N
N
SUM
Pausa
Previous
Successivo
Opzione
Ritorno
7/14 00:01:15 00:05:41
I Love You
Strumenti
Modalità Ripetizione
◄ Acceso ►
Impostazioni immagine
Impostazioni audio
Informazioni
Rimozione sicura
U
Sposta
L
Regola
e
Esci
BN68-01757A-Ita.indb 39 2008-9-24 15:02:09

Italiano - 40
Usare e ordinare l’Elenco lmati
L’Elenco lmati può essere ordinato in diversi modi.
1. Premere il tasto ▲ o ▼ per selezionare un ordinamento nell’Elenco lmati.
I lmati vengono ordinati in base all’ordinamento selezionato.
Per passare al gruppo successivo/precedente, premere il tasto
π
(REW) o
µ
(FF).
Il lmato non supporta sottotitoli.
(Per esempio, non sono supportati i le smi, srt, sub, ecc né i sottotitoli
inclusi nei lmati)
2. Per iniziare la riproduzione del lmato secondo l’ordine selezionato
dall’utente premere il tasto
∂
(Play)/ENTER
E
.
I lmati vengono ordinati in base all’ordinamento selezionato.
Le informazioni relative ai lmati vengono impostate automaticamente.
E’ possibile cambiare i Preferiti.
Standard di ordinamento per l’Elenco lmati
Titolo
Ordina e visualizza i titoli dei lmati in ordine alfabetico.
Orario
Ordina e visualizza i lmati in base alla data. Ordina in base all’anno e mese partendo dal lmato con data più vecchia.
Cartella
Se nel dispositivo USB sono presenti molte cartelle, i le vengono visualizzati in ordine in ogni cartella. I lmati contenuti nella
cartella Root vengono mostrati per primi, mentre gli altri vengono ordinati alfabeticamente per nome.
Preferenza
Ordina i lmati in base alle preferenze. (Preferiti) E’ possibile cambiare le preferenze dei lmati.
Cambiare le impostazioni del gruppo Preferiti
Selezionare il lmato desiderato nell’Elenco lmati, quindi premere ripetutamente il tasto verde no a ottenere
l’impostazione desiderata.
Opzioni Preferiti:
★★★
,
★★★
,
★★★
,
★★★
Menu Opzione dell’Elenco lmati
Rip grup cor
Questo menu consente di riprodurre solo i lmati contenuti nel gruppo di
ordinamento selezionato.
Cancella
Questo menu consente di cancellare i lmati selezionati.
Informazioni
Vengono visualizzate le informazioni relative ai lmati nell'ordine impostato
nella cartella corrente, comprendenti il nome, la dimensione, la data di
modica e il percorso.
In alternativa, selezionare un lmato dall’Elenco lmati e premere il
tasto INFO per vedere le informazioni relative.
Rimozione sicura
Il dispositivo può essere rimosso dal televisore in modo sicuro.
N
N
N
N
N
N
N
N
Move
SUM
Disposit
Impostazioni pref
Selezione
Salta
Opzione
Film_1.jpg
Date : Gen.01.2008
Cartella : Film-folder
Preferiti : ★★★
Preferenza
Titolo
Orario
A M
SYMBOL
▲
□
ENG
Move
SUM
Disposit
Impostazioni pref
Selezione
Salta
Opzione
Film_1.jpg
Date : Gen.01.2008
Cartella : Film-folder
Preferiti : ★★★
Preferenza
Titolo
Orario
A M
SYMBOL
▲
□
ENG
Rip grup cor
Cancella
Informazioni
Rimozione sicura
BN68-01757A-Ita.indb 40 2008-9-24 15:02:11
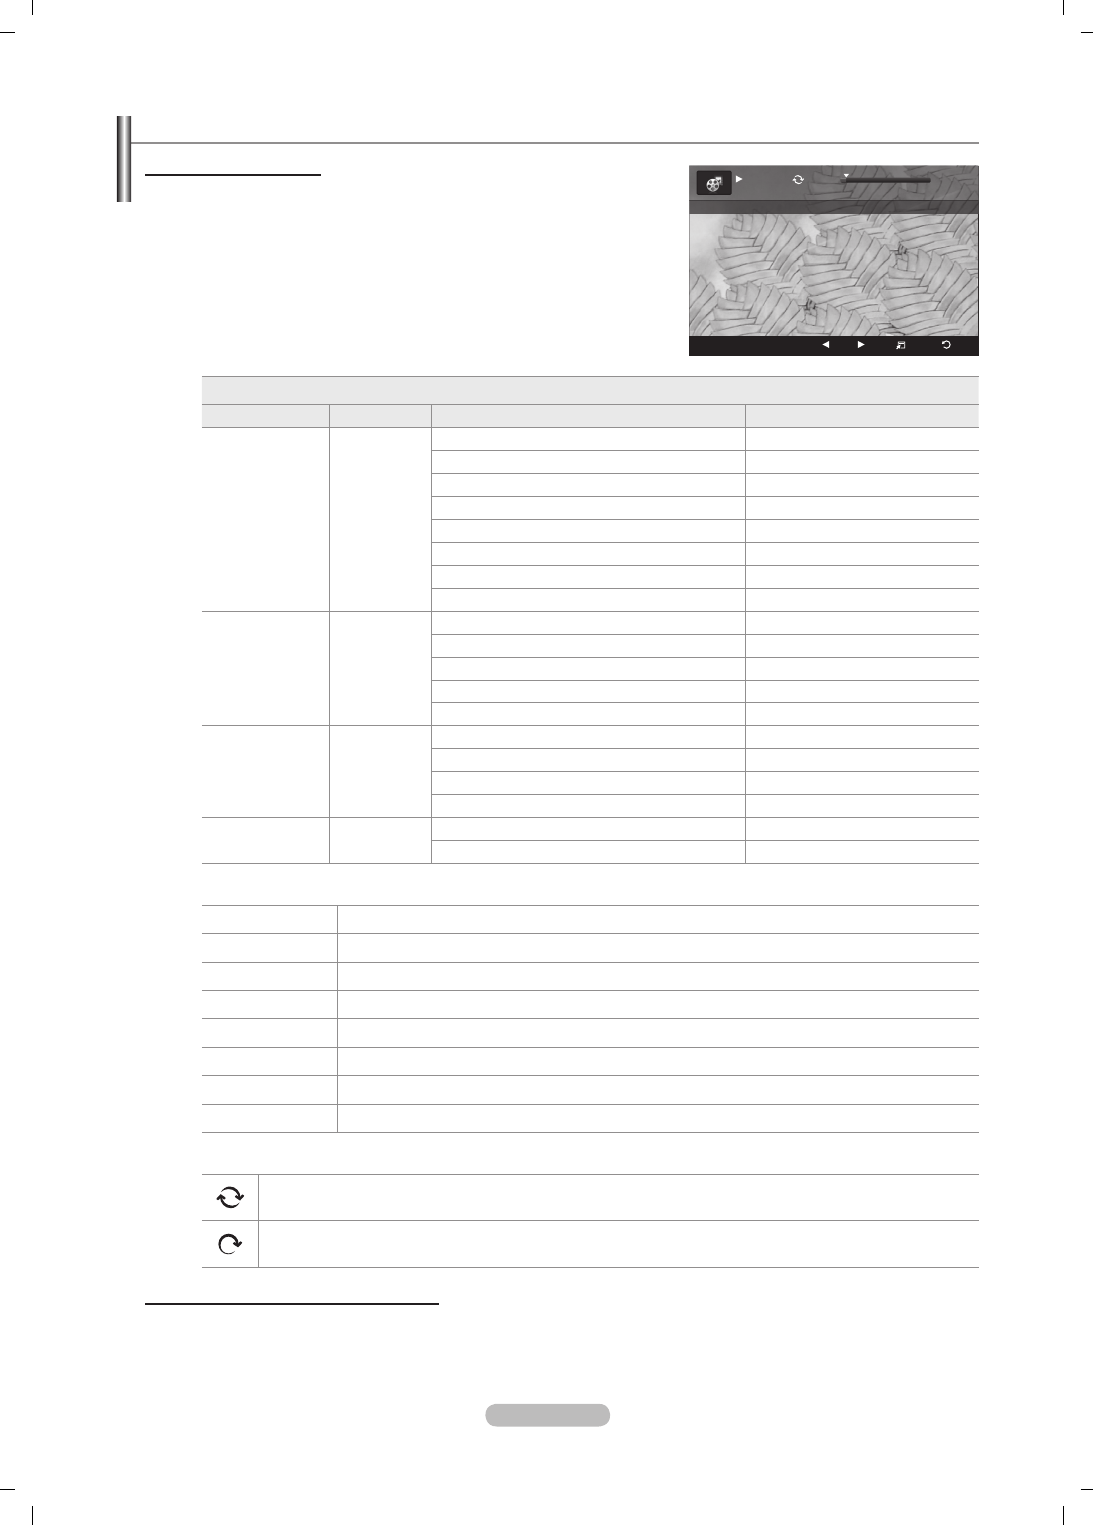
Italiano - 41
Riproduzione di un lmato
Riproduce un lmato.
1. Premere il tasto ◄ o ► per selezionare il lmato da riprodurre.
2. Premere il tasto
∂
(Play)/ENTER
E
.
Verrà visualizzato il le selezionato.
Il le selezionato appare in alto con il relativo tempo di riproduzione.
La durata di un lmato può essere visualizzata come ‘00:00:00’ se
all’inizio della riproduzione non vengono reperite le informazioni relative
al tempo di riproduzione.
Formati video supportati
Codec Video
Estensione le Contenitore Decodi catore Video Risoluzione massima Sti
*.avi AVI
XviD 720x576
MPEG1 720x576
MPEG2 720x576
H.264 BP 1920x1088
H.264 BP 1920x1088
H.264 HP 1920x1088
MPEG-4 SP 720x576
MPEG-4 ASP 720x576
*.mp4 MP4
H.264 BP 1920x1088
H.264 MP 1920x1088
H.264 HP 1920x1088
MPEG-4 SP 720x576
MPEG-4 ASP 720x576
*.mpg
PS
MPEG1 (Flusso di programma) 1920x1088
*.mpeg MPEG2 (Flusso di programma) 1920x1088
*.vro MPEG2 VOB 1920x1088
*.vob MPEG2 VRO 1920x1088
altri
(ts) TS MPEG2 (Flusso di trasporto) 1920x1088
H.264 (Flusso di trasporto) 1920x1088
Tasti di controllo della riproduzione video
ENTER
Inizia/Arresta la proiezione di diapositive.
∂
Riproduce il lmato
∑
Interrompe la riproduzione del lmato
∫
Esce dalla modalità di riproduzione e torna all’Elenco lmati.
TOOLS Esegue varie funzioni nei menu dei lmati.
◄/► Scorre in avanti e indietro i lmati con intervalli di 20 secondi.
µ
Varia la velocità di riproduzione.
▲/▼ Sposta alla prima o all’ultima vista del le corrente.
Icona informazioni sulla funzione Film
Quando tutti i lmati presenti nella cartella (o i le selezionati) sono stati ripetuti,
Modalità Ripetizione è Acceso.
Quando tutti i lmati presenti nella cartella (o i le selezionati) sono stati riprodotti una volta,
Modalità Ripetizione è Spento.
Riproduzione di un gruppo di lmati
1. Premere il tasto ▲ o ▼ per selezionare l’ordinamento. (Titolo, Orario, Cartella, Preferenza)
2. Per selezionare il gruppo desiderato premere il tasto π (REW) o µ (FF).
3. Premere il tasto TOOLS.
4. Premere il tasto ▲ o ▼ per selezionare Rip grup cor, quindi premere il tasto ENTER
E
.
N
N
N
N
N
N
SUM
E
Pausa
-20sec
+20sec
Opzione
Ritorno
1/5 00:00:48 00:23:05
ABC.avi
BN68-01757A-Ita.indb 41 2008-9-24 15:02:12

Italiano - 42
Riproduzione dei lmati selezionati
1. Premere il tasto ▲ o ▼ per selezionare il lmato desiderato nell’Elenco lmati.
2. Premere il tasto giallo. Ripetere l’operazione per selezionare più lmati.
Il simbolo c compare a sinistra del lmato selezionato.
3. Premere il tasto ∂ (Play)/ENTER
E
.
Viene riprodotto solo il le selezionato.
Riproduzione continua dei lmati
Terminando la riproduzione di un lmato, è possibile riprodurlo in seguito in modo continuo.
Mediante la funzione Ripr in continuo, è possibile vedere un lmato senza iniziare nuovamente dall’inizio o ricercare il punto nel
quale si era precedentemente arrestato.
1. Selezionare il lmato per il quale si desidera attivare la funzione Ripr in continuo premendo il tasto ◄ o ► nell’Elenco lmati.
2. Premere il tasto ∂ (Play)/ENTER
E
.
3. Selezionare la riproduzione continua premendo il tasto Blu.
Il lmati inizierà ad essere riprodotto dal punto di arresto precedente.
Se la funzione Prom ripr cont di un lm è impostata su Acceso, sullo schermo comparirà un messaggio quando si
imposta l’opzione Ripr in continuo (vedere pag. 43)
4.
Per uscire dalla modalità WISELINK Pro premere il tasto W.LINK sul telecomando.
Menu Opzione della riproduzione di lmati
Modalità Ripetizione
Riproduce continuamente il lmato.
Impostazioni immagine/Impostazioni audio
vedere pag. 43.
Formato immagine
Adatta: Riproduce i lmato con la stessa dimensione dello schermo del
televisore.
Originale: Riproduce i lmato con la dimensione originale.
Informazioni
Vengono visualizzate le informazioni relative al lmato.
Rimozione sicura
Il dispositivo può essere rimosso dal televisore in modo sicuro.
N
N
N
N
•
•
Cancellazione di Foto/Musica/Filmati
1. Premere il tasto ▲ o ▼ per selezionare il le desiderato nell’Elenco Foto/
Musica/Filmati.
Per cancellare più le, selezionarli premendo il tasto giallo.
2. Premere il tasto TOOLS.
3. Premere il tasto ▲ o ▼ per selezionare Cancella o Elim le selez) quindi
premere il tasto ENTER
E
.
4. Premere il tasto ▲ o ▼ per selezionare OK, quindi premere il tasto
ENTER
E
.
Il le viene eliminato.
Quando un le di sola lettura viene eliminato, sullo schermo compare il
messaggio File sola lett.Elim?.
Non è possibile eliminare le di sola lettura insieme ad altri le.
Selezionando Cancella, l’eliminazione verrà annullata.
Durante l’eliminazione dei le, non rimuovere il dispositivo USB.
I le delle immagini della telecamera digitale connessa via PTP non possono essere cancellati.
I lmati cancellati non possono essere ripristinati.
N
N
N
N
N
N
N
N
Strumenti
Modalità Ripetizione ◄ Acceso ►
Impostazioni immagine
Impostazioni audio
Formato immagine : Adatta
Informazioni
Rimozione sicura
U
Sposta
L
Regola
e
Esci
Photo
SUM
Dispositivo
Impostazioni pref
Selezione
Salta
Opzione
image_1.jpg
Mese : Gen
Date : Gen.01.2008
Colore : Grigio
Compos :
Cartella : P-other
Preferiti : ★★★
Preferenza
Monthly
Orario
Gen Nov
▲
Slide Show
Rip grup cor
Cancella
Informazioni
▼
BN68-01757A-Ita.indb 42 2008-9-24 15:02:13
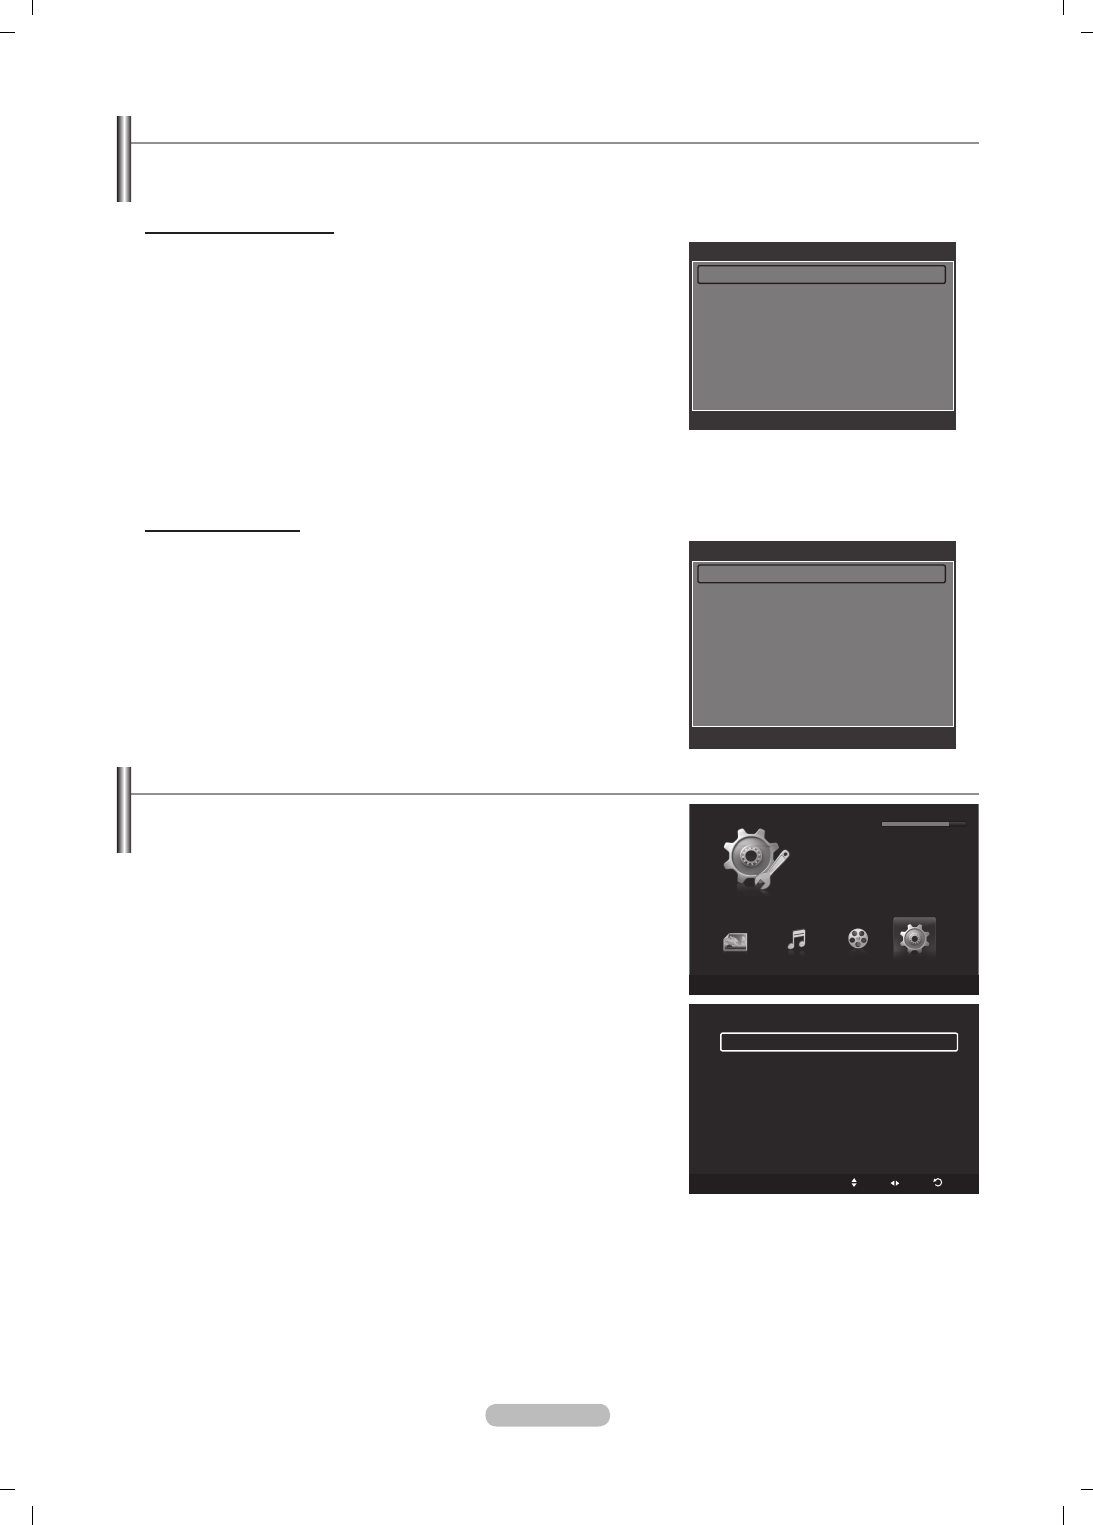
Italiano - 43
Impostazione di immagini/musica mediante WISELINK Pro
Durante la visione di una proiezione di diapositive o l'ascolto di musica con WISELINK Pro, è possibile impostare le immagini e
l'audio.
Impostazioni immagine
1. Premere il tasto TOOLS durante la proiezione di diapositive o la
riproduzione di un brano musicale.
2. Premere il tasto ▲ o ▼ per selezionare Impostazioni immagine.
3. Premere il tasto ◄ o ► per selezionare Modalità immagine (Dinamica,
Standard, o Film).
4. Premere i tasti ▲ o ▼ per spostarsi sulla voce desiderata. (Contrasto,
Luminosità, Colore, Contrasto dinamico, Regolazione del nero, o
Reset)
Per ripristinare le impostazioni delle immagini selezionare Reset.
5. Premere il tasto ◄ o ► per regolare l’impostazione.
Per maggiori informazioni sulle impostazioni delle immagini, vedere le pagine 15~18.
Impostazioni audio
1. Premere il tasto TOOLS durante una proiezione di diapositive o la
riproduzione di un brano musicale.
2. Premere il tasto ▲ o ▼ per selezionare Impostazioni audio.
3. Premere il tasto ◄ o ► per selezionare la modalità Modalità audio.
(Standard, Musica, Film, Dialoghi, o Personaliz)
4. Premere i tasti ▲ o ▼ per spostarsi sulla voce desiderata.
Per ripristinare le impostazioni delle immagini selezionare Reset.
5. Premere il tasto ◄ o ► per regolare l’impostazione.
Per maggiori informazioni sull’impostazione audio, vedere pagina 21~22.
Uso del menu Impostazione
Il menu Setup mostra le impostazioni utente del menu WISELINK Pro.
1. Premere il tasto W.LINK sul telecomando per visualizzare il menu
WISELINK Pro.
2. Premere il tasto ▲ o ▼ per selezionare Impostazione, quindi premere il
tasto ENTER
E
.
3. Per selezionare l’opzione desiderata, premere il tasto ▲ o ▼.
4. Premere il tasto ▲ o ▼ per selezionare l’opzione, quindi premere il tasto
ENTER
E
.
Per uscire dalla modalità WISELINK Pro premere il tasto W.LINK sul
telecomando.
Velocità slide show → Veloce/Lento/Normale
Selezionare questa opzione per determinare la velocità della proiezione
delle diapositive.
Musica Modalità Ripetizione → Acceso/Spento
Selezionare questa opzione per riprodurre ripetutamente i brani musicali.
Film Modalità Ripetizione
Selezionare questa opzione per riprodurre ripetutamente i lmati.
Prom ripr cont di un film
Selezionare questa opzione per visualizzare il messaggio a comparsa di aiuto per la riproduzione continua del lmato.
Durata salvasch → 1 min/3 min/5 min
Selezionare questa opzione per impostare il tempo di attesa prima che lo screen saver entri in funzione.
Informazioni
Selezionare questa opzione per visualizzare le informazioni sul dispositivo collegato.
Rimozione sicura
Il dispositivo può essere rimosso dal televisore in modo sicuro.
N
N
N
N
N
Setup
SUM
Disposit
Sposta Regola
Ritorno
Velocità slide show ◄ Normale ►
Musica Modalità Ripetizione : Acceso
Film Modalità Ripetizione : Acceso
Prom ripr cont di un film : Acceso
Durata salvasch : 3 min
Informazioni
Rimozione sicura
WISELINK Pro
Photo
SUM
Disposit
e
Esci
Music Setup
Setup
SUM
851.98MB/995.00MB Free
Movie
Impostazioni immagine
Modalità immagine ◄ Standard ►
Contrasto : 90
Luminosità : 45
Colore : 50
Contrasto dinamico : Spento
Regolazione del nero : Spento
Reset
U
Sposta
L
Regola
E
Conferma
R
Ritorno
Impostazioni audio
Modalità audio ◄ Personaliz ►
Bilanciamento : S50 D50
100Hz : 0
300Hz : 0
1KHz : 0
3KHz : 0
10KHz : 0
Reset
U
Sposta
L
Regola
E
Conferma
R
Ritorno
BN68-01757A-Ita.indb 43 2008-9-24 15:02:13

Italiano - 44
WISELINK Pro-DLNA
Impostazione della rete DLNA
DLNA permette la visione di lmati e immagini memorizzati nel PC sul televisore mediante una connessione di rete in modalità
Wiselink Pro. Ciò elimina la necessità di copiare i le su un dispositivo di memorizzazione USB per poi collegarlo al televisore. Per
utilizzare DLNA, il televisore deve essere collegato alla rete e l’applicazione DLNA deve essere installata sul PC.
Diagramma delle connessioni di rete
1. Collegare la porta [LAN] sul retro del televisore al modem esterno mediante un cavo LAN.
2. Collegare il PC sul quale è stato installato il programma “DLNA PC Share Manager” e il modem esterno mediante un cavo
LAN.
3. Collegare la porta LAN a muro e il modem esterno mediante un cavo Modem.
Collegamento alla rete
1. Una volta terminato il collegamento alla rete, impostare la rete sul televisore.
Una connessione wireless a Internet non supporta DLNA.
Le prime tre cifre (indirizzo subnet) degli indirizzi IP del televisore e del PC devono essere le stesse (es. IP Address:
123.456.789.XX )
2. Eseguire Test di rete per vericare le impostazioni di rete.
Installazione dell’applicazione DLNA
Per riprodurre il contenuto del PC sul televisore, è necessario prima installare l’applicazione.
Requisiti di sistema
1. Inserire nel PC il CD del programma fornito in dotazione con il televisore.
2. Per l’installazione del programma sono necessari 20MB di spazio libero sul disco rigido.
Se si intende condividere le, è necessario disporre di 20MB di spazio libero sul disco rigido ogni 100 le.
Annullando la condivisione dei le, lo spazio sul disco sso utilizzato per le informazioni delle miniature verrà liberato.
Formati supportati
1. Immagine: JPEG (jpg, jpeg)
2. Audio: MP3 (mp3)
3. Video: MPEG1(mpg, mpeg), MPEG2 PS/TS(mpg, mpeg, trp, ts, tp), divx(mpg, mpeg, avi), MPEG4/H.264 (mpg, mpeg)
N
N
N
N
TV
Modem esterno
(ADSL/VDSL/Cable TV)
LAN
PC
LAN
1
2
3
BN68-01757A-Ita.indb 44 2008-9-24 15:02:14

Italiano - 45
Installare l’applicazione
1. Eseguire il le Setup.exe contenuto del CD del programma fornito in dotazione con il prodotto.
In alternativa, è possibile scaricare il le dal sito web www.samsung.com.
2. Installare SAMSUNG PC Share Manager come mostrato nelle gure sottostanti.
► ►
► ►
►
3. Una volta completata l’installazione, sul desktop verrà visualizzata l’icona PC Share Manager.
Fare doppio clic sull’icona per avviare il programma.
N
N
BN68-01757A-Ita.indb 45 2008-9-24 15:02:16

Italiano - 46
Uso dell’applicazione DLNA
La schermata del programma
1. Menu: Vengono forniti i seguenti menu dell’applicazione: File, condividi, Server, e Guida.
2. Fare clic per condividere la cartella del server PC selezionata.
3. Fare clic per annullare la condivisione.
4. Fare clic per aggiornare la cartella del PC e i le.
5. Fare clic per sincronizzare lo stato della condivisione.
6. Vengono elencate le cartelle e i le del PC da condividere.
7. Vengono elencate le cartelle condivise dall’utente.
8. Nome server PC indicato nell’elenco periferiche di WISELINK Pro: Fare clic per modicare il nome.
File
Proprietà: Mostra le informazioni relative al file selezionato nel file o nella cartella selezionati.
Metodo 1: Selezionare un le o una cartella quindi selezionare il menu File e il menu secondario proprietà.
Metodo 2: Selezionare un le o una cartella, fare clic con il tasto destro del mouse sul le o sulla cartella selezionati, quindi
selezionare proprietà nel menu a comparsa.
<Metodo 1> <Metodo 2>
Name ModiedName Name
Name
Yes No
Name ModiedName Name
Name
Yes No
Name ModiedName Name
Name
Yes No
Esci: Termina l’applicazione DLNA.
Una volta modicato lo stato della condizione, selezionando Esci senza applicare le modiche, sullo schermo comparirà
un messaggio che richiederà se si desidera applicare le modiche apportate alle impostazioni del PC. Selezionare Sì per
applicare le modiche e uscire dall’applicazione.
Name ModiedName Name
Name
Yes No
❑
-
-
1
2 3 4 5
6 7
8
BN68-01757A-Ita.indb 46 2008-9-24 15:02:18
Italiano - 47
condividi
Condivisione di una cartella
E’ possibile condividere una cartella del PC sul televisore. Il numero massimo di cartelle condivisibili è 32.
Il PC fungerà da server per il televisore.
Metodo 1: Selezionare una cartella in Risorse del computer, quindi selezionare il menu condividi e quindi il menu
secondario condividi cartella.
Metodo 2: Selezionare una cartella in Risorse del computer, fare clic con il tasto destro del mouse sulla cartella
selezionata, quindi selezionare condividi cartella nel menu a comparsa.
Metodo 3: Posizionare il mouse su una cartella nell’elenco delle cartelle in Risorse del computer nel pannello di sinistra
e trascinare la cartella nel pannello Shared Folders. Alla comparsa di un messaggio di conferma della condivisione della
cartella selezionare Sì.
<Metodo 1> <Metodo 2> <Metodo 3>
Annullamento della condivisione di una cartella
E’ possibile annullare la condivisione di una cartella sul PC. Selezionare una cartella dal pannello Cartella condivisa e
selezionare non condividere cartella.
Metodo 1: Selezionare una cartella nel pannello Cartella condivisa, selezionare il menu condividi quindi selezionare non
condividere cartella.
Metodo 2: Selezionare una cartella nel pannello Cartella condivisa, fare clic con il tasto destro del mouse sulla cartella
selezionata, quindi selezionare non condividere cartella nel menu a comparsa.
Metodo 3: Posizionare il mouse su una cartella nel pannello Cartella condivisa e trascinare la cartella nel pannello Risorse
del computer. Alla comparsa di un messaggio di conferma dell’annullamento della condivisione della cartella selezionare Sì.
<Metodo 1> <Metodo 2> <Metodo 3>
Applicazione dwwelle impostazioni correnti
Eseguire questa operazione quando la sincronizzazione è necessaria a causa di una nuova cartella condivisa o
dell’annullamento di una condivisione. Il menu Imposta stato modicato applica i cambiamenti delle cartelle condivise ai dati
memorizzati con il programma di condivisione PC.
Dal momento che l’applicazione dei cambiamenti ai dati interni è un processo lungo, questa funzione permette agli utenti di
applicare le modiche ai dati solo quando è necessario.
Fino a quando il menu Imposta stato modicato non viene selezionato, le modiche alla cartella condivisa non verranno
applicate al server.
Le modiche alle cartelle condivise non vengono applicate al PC no a quando non viene selezionato il menu Imposta stato
modicato.
Metodo 1: Selezionare il menu condividi quindi il menu secondario Aggiorna DB.
Metodo 2: Fare clic sull’icona Imposta stato modicato.
❑
N
-
-
-
-
-
-
-
-
BN68-01757A-Ita.indb 47 2008-9-24 15:02:19
Italiano - 48
Impostazione dei permessi di accesso
Per abilitare il televisore a vedere il PC, il televisore deve essere impostato su Imposta politica dispositivo nella nestra
Access Permission Settings. Inoltre, il server del PC e il televisore devono appartenere alla stessa subnet.
Metodo: Selezionare il menu condividi quindi selezionare Imposta politica dispositivo. Le voci riutate vengono
rappresentate in grigio. E’ possibile cambiare i permessi di accesso usando il tasto accetta / Nega. Per eliminare una voce,
selezionarla e selezionare elimina voce selezionata.
Server
Server
E’ possibile eseguire o interrompere usando il PC come server.
Avviamento del server all’avvio di Windows
E’ possibile impostare il server del PC per essere eseguito automaticamente all’avvio di Windows.
Modifica nome server
È possibile rinominare il server del PC. Digitare un nuovo nome e fare clic su OK. Il nuovo nome comparirà nella parte
superiore destra della nestra e anche sul televisore.
Guida
Versione
Sullo schermo comparirà un riquadro informativo che riporta la versione del programma.
-
❑
❑
BN68-01757A-Ita.indb 48 2008-9-24 15:02:19

Italiano - 49
Uso della funzione DLNA
Uso del menu DLNA
DLNA (Digital Living Network Alliance) permette la riproduzione dei contenuti
memorizzati su un server DLNA (solitamente il PC) collegato al proprio televisore
tramite una rete.
Wiselink Pro permette la riproduzione di contenuti memorizzati su un dispositivo
USB collegato al televisore, mentre DLNA permette la riproduzione di contenuti
memorizzati su un server DLNA (PC) collegato al televisore tramite una rete. Le
procedure per l’uso dei contenuti sono uguali a quelle utilizzate con WISELINK
Pro.
Installando il programma PC share manager fornito insieme al televisore sul PC,
è possibile impostare il PC per assumere il ruolo di server DLNA tramite la rete.
1. Premere il tasto W.LINK sul telecomando per visualizzare il menu DLNA.
2. Premere il tasto ◄ o ► per selezionare una icona (Foto, Musica, Impostazione), quindi premere il tasto ENTER
E
.
Per uscire dalla modalità DLNA premere il tasto W.LINK sul telecomando.
Photo
Menu Opzione dell’Elenco foto
Sorting Photo List/Viewing the Information/Rotating the Photo le/Viewing a Slide Show
Menu Opzioni durante una proiezione di diapositive
Play & Pause/Velocità slide show/Zoom/Ruota
Music
Menu Opzione dell’Elenco musica
Sorting Music List/Viewing the Information/Playing a music le
Menu Opzione della riproduzione di file musicali
Modalità Play & Pause/Repeat
Movie
Menu Opzione dell’Elenco film
Sorting Movie List/Viewing the Information/Playing a Movie le
Menu Opzione della riproduzione di filmati
Modalità Play & Pause/Repeat
Setup
Velocità slide show/Music Repeat Mode/Movie Repeat Mode/Durata salvasch/Informazioni
DLNA non supporta le seguenti funzioni.
Le funzioni Musica di sottofondo e Impostazione musica di sottofondo.
Ordinamento dei le in base alle preferenze nelle cartelle Foto, Musica e Film.
La funzione Mod. gruppo
La funzione Cancella.
La funzione Rimozione sicura.
wLe funzioni dei tasti π (REW)/µ (FF) durante la riproduzione di un lmato.
La funzione Skip (tasto ◄/►) o Pause potrebbe non funzionare durante la riproduzione di un lmato per DLNA di altri
produttori, in base al contenuto delle informazioni corrispondenti.
Il tempo di riproduzione può non essere visualizzato durante la riproduzione di un lmato.
N
❑
❑
❑
❑
N
-
-
-
-
-
-
N
N
WISELINK Pro
Photo
SUM
Disposit
e
Esci
Music Setup
Photo
DLNA : Server
Movie
BN68-01757A-Ita.indb 49 2008-9-24 15:02:20

Italiano - 50
Attivazione della Content Library
Content Library permette la visione o la riproduzione dei contenuti incorporati
sul televisore o memorizzati sul dispositivo USB. Le funzioni Cancella, Sposta e
Update non saranno attive con i contenuti incorporati sul televisore.
1. Premere il tasto MENU. Premere il tasto ▲ o ▼ per selezionare Applicazione,
quindi premere il tasto ENTER
E
.
2. Premere il tasto ▲ o ▼ per selezionare Content Library quindi premere il
tasto ENTER
E
.
Sullo schermo viene visualizzato il menu principale Content Library.
Premere il tasto CONTENT sul telecomando per visualizzare il menu
principale Content Library.
3. Premere il tasto ▲ o ▼ per selezionare un’icona (Galleria, Cucina, Inglese
per bambini, Fitness), quindi premere il tasto ENTER
E
.
L’elemento selezionato verrà eseguito.
Consultare la spiegazione dei tasti che appare a schermo quando si usano
mentre il contenuto viene riprodotto.
Tasto Operazioni
▲/▼/◄/►(Rotella) Sposta il cursore e seleziona una voce.
ENTER
Attiva la voce attualmente selezionata.
RETURN Ritorna al menu precedente.
EXIT Arresta la funzione corrente e ritorna al menu principale di Content Library.
(Tasti colorati) I tasti che attivano le funzioni sono descritti nella pagina corrispondente.
Questa barra serve per regolare il volume del contenuto riprodotto.
CONTENT Uscita dalla modalità Content Library.
Premendo il tasto Volume o MUTE, non verrà visualizzato alcun OSD, ma verrà attivata la funzione corrispondente.
Contents Library contiene testo, graca, immagini, contenuti multimediali, e altri materiali unicamente per uso
informativo e promozionale. I materiali contenuti in Contents Library sono in continuo aggiornamento. I Materiali
contenuti in Contents Library potrebbero non essere idonei ad alcune fasce di pubblico.
Le informazioni contenute in Contents Library sono fornite “così come sono.” Sebbene le informazioni fornite
all’utente di Contents Library sono ottenute da, o sono conformi a, fonti ritenute afdabili, Samsung non è
in grado di garantire e non garantisce l’accuratezza, la validità, la tempestività e la completezza di qualsiasi
informazione o dati resi disponibili all’utente per alcun particolare scopo. In nessuna circostanza, inclusa
negligenza, Samsung può essere ritenuta responsabile, sia per contratto sia per illecito, di eventuali danni diretti,
incidentali, speciali o consequenziali, parcelle legali, spese, o qualsiasi altro danno di qualsiasi natura possa
derivare, o essere associato, alle informazioni contenute in, o all’uso di, Contents Library, anche se avvisati del
possibile vericarsi di tali danni.
N
N
N
N
N
N
Content Library
Applicazione
WISELINK Pro
Anynet+ (HDMI-CEC)
Content Library ►
InfoLive
Guida Prodotto
Impostazione
USB
Indietro
Esci
Cucina Inglese per bambini Fitness
Galleria
Galleria
Content Library
BN68-01757A-Ita.indb 50 2008-9-24 15:02:20

Italiano - 51
Uso della Content Library
Galleria
Art/Relax/Party: Questa funzione attiva una presentazione di diapositive con immagini ad alta risoluzione e musica di
sottofondo e produce varie atmosfere. Usando la funzione Gallery del televisore, è possibile cambiare l’atmosfera della
casa.
Per riprodurre tutte le immagini, premere il tasto giallo.
Per ogni opzione Art, Relax, e Party, esiste una musica preimpostata.
Premere il tasto INFO per vedere le informazioni dettagliate delle immagini. Premere il tasto INFO nuovamente o il tasto
► per nascondere le informazioni sui crediti.
I copyright dei contenuti di Galleria e tutte le informazioni ad essi relative sono riservati a Gallery Player, Inc.
Per ulteriori contenuti Galleria, vericare le informazioni sul sito web www.samsung.com. Per vedere come riprodurre
ulteriori immagini, fare riferimento alla sezione Using Additional Content Using External USB Memory Storage.
Cucina
Antipasti/Secondi/Desserts:
Mediante questa funzione è possibile visualizzare diverse ricette da seguire passo dopo
passo. Vi auguriamo un buon divertimento con questi contenuti che vi potranno dare delle ottime idee per le vostre cene.
Le ricette inserite nei contenuti di Cucina sul televisore Samsung si basano su ricette pubblicate da Anness Publishing.
I copyright dei contenuti di Cucina e tutte le informazioni ad essi relative sono riservati a Practical Pictures.
Inglese per bambini
Storia/Canzoni/Riproduzione: Questo è un contenuto educativo e interattivo che i bambini possono vedere più volte. Buon
divertimento con le storie, le canzoni e i giochi e i personaggi Boowa e Kwala.
I copyright dei contenuti di Inglese per bambini e tutte le implicazioni ad essi relative sono riservati a UpToTen.
Fitness
Stretching di base/Massaggio: Questo contenuto è dedicato al mantenimento della forma sica, e mostra esercizi di
massaggio e di stretching che possono essere utilizzati da tutta la famiglia.
Questo contenuto è dedicato al mantenimento della forma sica, e mostra esercizi di massaggio e di stretching che
possono essere utilizzati da tutta la famiglia. I contenuti Stretching di base per il televisore Samsung sono basati sul
libro Stretching di Suzanne Martin pubblicato da DK mentre i contenuti di Massaggio sono basati sui libri pubblicati da
Anness Publishing.
I copyright di Stretching di base sono riservati a DK Publishing Company. I copyright di Massaggio sono riservati a
Practical Pictures. Tutte le implicazioni relative ai copyright sono riservate alla società corrispondente.
Uso dei tasti del telecomando nel menu Fitness
Tasto Operazioni
◄/►(Rotella) Vedere il passo precedente/successivo
ENTER
E
Riproduzione o arresto (in Basic e Advanced Stretches)
Durata salvasch
Selezionare questa opzione per impostare il tempo di attesa prima che lo screen saver entri in funzione.
Premere il tasto giallo per selezionare Setup nel menu principale Content Library.
❑
N
N
N
N
N
❑
N
N
❑
N
❑
N
N
❑
BN68-01757A-Ita.indb 51 2008-9-24 15:02:21
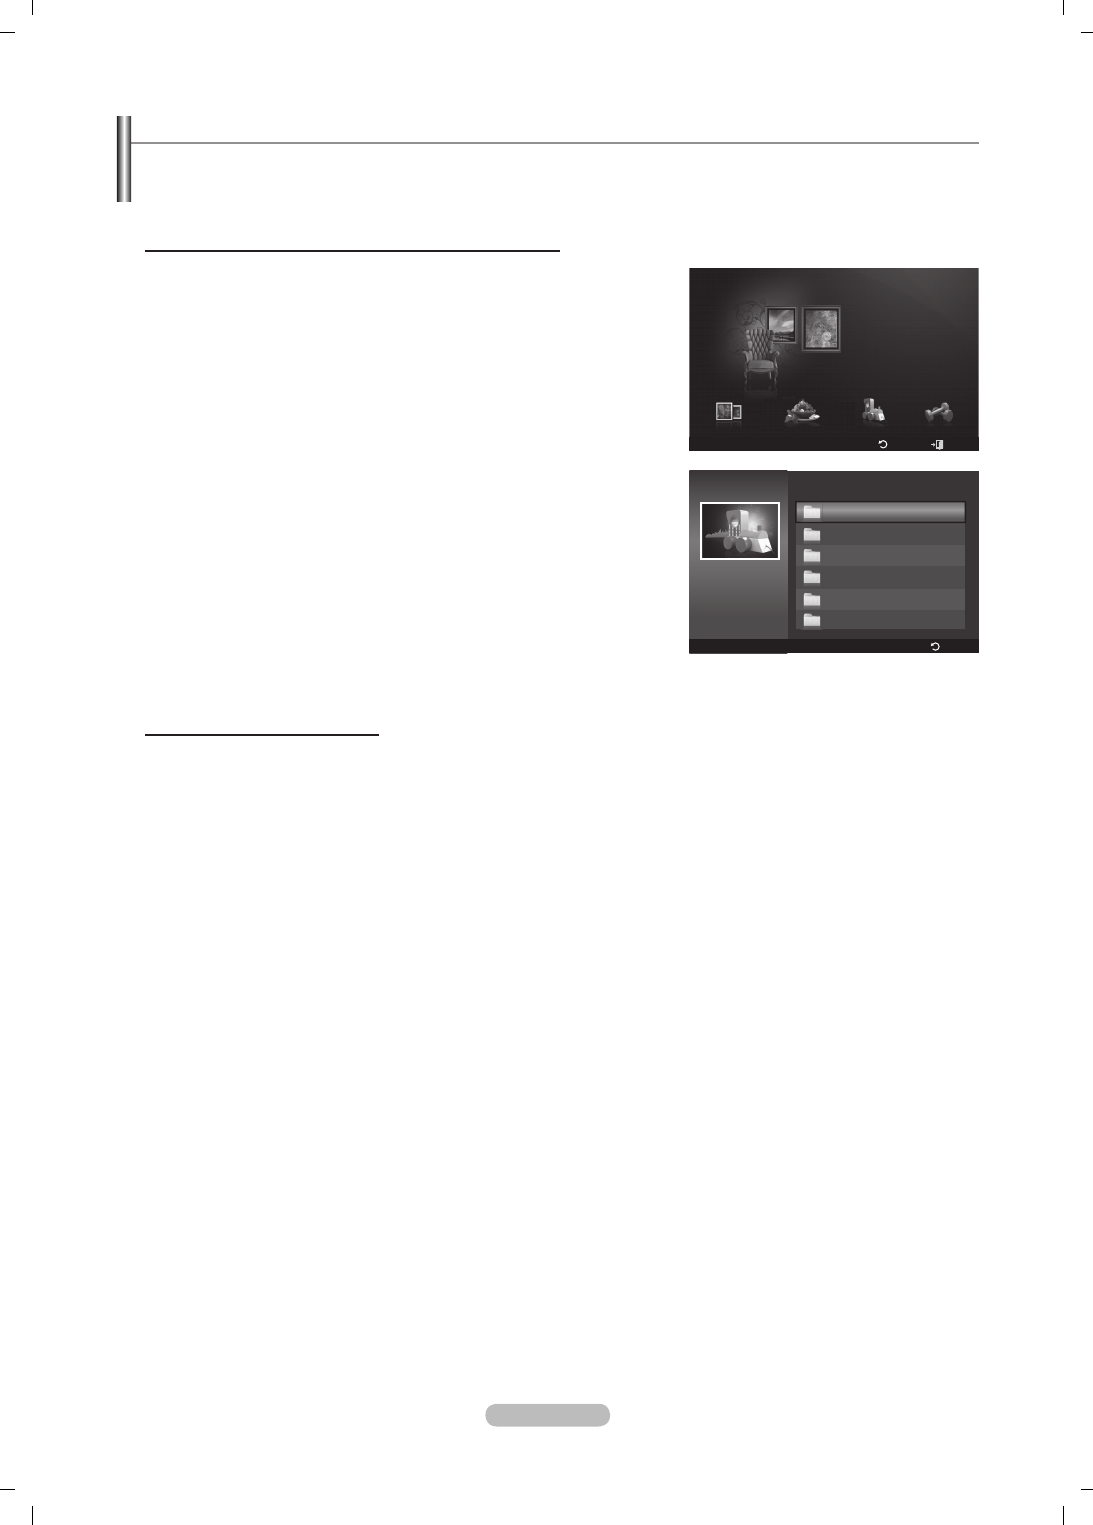
Italiano - 52
Uso di contenuti aggiuntivi usando un dispositivo di memorizzazione USB esterno
E’ possibile scaricare i contenuti su un dispositivo USB esterno per poi riprodurli sul televisore (i contenuti memorizzati su
un dispositivo USB esterno vengono riprodotti direttamente senza prima essere copiati nella memoria Flash incorporata nel
televisore).
Riproduzione e interruzione di un nuovo contenuto
1. Premere il tasto rosso nel menu principale Content Library .
Sullo schermo verrà visualizzata la schermata principale del browser USB.
Comparirà quindi un elenco di tutti i le memorizzati nel dispositivo USB.
2. Premere il tasto ▲ o ▼ per passare al le (o cartella) da riprodurre. Premere il
tasto ENTER
E
.
Verrà visualizzato il contenuto selezionato.
L’uso del contenuto è uguale all’uso dei contenuti memorizzati nella
memoria del televisore.
Per tornare alla schermata principale del browser USB, premere il tasto
EXIT.
Content Library supporta solo dispositivi USB Mass Storage Class
(MSC). MSC è un dispositivo di memorizzazione di massa Bulk-Only
Transport. Esempi di MSC sono le unità Thumb e i Flash Card Reader
(entrambe le unità HDD e HUB USB non sono supportate).
Download di nuovi contenuti
Eventuali nuovi contenuti diversi da quelli incorporati vengono forniti sul sito web Samsung.com a pagamento o a titolo gratuito.
Download di contenuti
1. Visitare il sito web www.samsung.com e accedere alla pagina Content Library.
2. Digitare il codice del prodotto (UDN, Unique Device Number).
3. Selezionare un contenuto nella pagina Contents Download.
4. Scaricare il contenuto sul dispositivo USB.
Content Library supporta solo dispositivi USB Mass Storage Class (MSC). MSC è un dispositivo di memorizzazione di
massa Bulk-Only Transport. Esempi di MSC sono le unità Thumb e i Flash Card Reader (entrambe le unità HDD e HUB
USB non sono supportate).
5. Accedere al menu principale Content Library premendo il tasto CONTENT o selezionando Content Library (Menu →
Applicazione → Content Library)
6. Collegare il dispositivo USB alla porta USB posta sul lato del televisore.
Individuare il codice del prodotto (Unique Device Number, UDN)
1. Collegare il dispositivo USB alla porta USB posta sul lato del televisore.
2. Nella schermata principale del browser USB, premere il tasto verde (Show UDN).
3. Il codice a 18 cifre visualizzato sullo schermo è il codice del prodotto.
Contenuto fornito
Sono disponibili ulteriori contenuti sul sito www.samsung.com.
N
N
N
N
N
N
N
Impostazione
USB
Indietro
Esci
Cucina Inglese per bambini Fitness
Galleria
Galleria
Content Library
Memoria TV
Show UDN
Indietro
Content Library
USB
<<
1/1
>>
Fitness
Inglese per bambini
Cucina
Galleria
Living
Inglese per bambini
▼ ▲
Others
Sub Item : 2
BN68-01757A-Ita.indb 52 2008-9-24 15:02:21

Italiano - 53
Collegamento dei dispositivi Anynet+
Anynet+ è una funzione che permette di controllare mediante il telecomando del televisore Samsung tutti i dispositivi Samsung
collegati che supportano Anynet+.
Il sistema Anynet+può essere usato solo con i dispositivi Samsung dotati della funzione Anynet+. Per controllare se il dispositivo
Samsung in uso è dotato di questa funzione, veri care la presenza del logo Anynet+.
Per collegarlo a un TV
1. Collegare il jack [HDMI 1], [HDMI 2], [HDMI 3] o [HDMI 4] del televisore al jack HDMI OUT del dispositivo Anynet+
corrispondente tramite un cavo HDMI.
Per effettuare il collegamento al sistema Home Theater
1. Collegare il jack [HDMI 1], [HDMI 2], [HDMI 3] o [HDMI 4] del televisore al jack HDMI OUT del dispositivo Anynet+
corrispondente tramite un cavo HDMI.
2. Collegare il jack HDMI IN del sistema Home Theater al jack HDMI OUT del dispositivo Anynet+ corrispondente tramite un
cavo HDMI.
Collegare il cavo ottico tra l’uscita Digital Audio Out (ottica) del televisore e l’ingresso Digital Audio dell’Home Theater.
Qualora si opti per una connessione di questo genere, la presa Optical permette l’uscita di soli 2 canali audio. In questo modo
non sarà possibile sentire l’audio dall’altoparlante frontale sinistro e destro dell’Home Theater e dal subwoofer. Per avere un
audio a 5.1 canali, collegare il jack Digital Audio Out (ottico) del lettore DVD o del decoder cavo/satellite (es. Anynet Device 1
o 2) direttamente a un ampli catore o all’Home Theater, non al televisore.
Collegare solo un Home Theater.
E’ possibile collegare un dispositivo Anynet+ tramite un cavo HDMI 1.3. Alcuni cavi HDMI potrebbero non supportare le
funzioni Anynet+.
Anynet+ si attiva solo quando il relativo dispositivo AV che supporta Anynet+ è acceso o in modalità Standby.
Anynet+ supporta no a 12 dispositivi AV. Da notare che è possibile collegare no a 3 dispositivi dello stesso tipo.
N
N
N
N
N
N
Informazioni su Anynet+
Dispositivo
Anynet+ 1
Dispositivo
Anynet+ 2
Dispositivo
Anynet+ 3
TV
Cavo HDMI 1.3 Cavo HDMI 1.3 Cavo HDMI 1.3 Cavo HDMI 1.3
Dispositivo
Anynet+ 4
TV
Dispositivo Anynet+ 1
Dispositivo Anynet+ 2 Dispositivo Anynet+ 3
Cavo HDMI 1.3
Cavo HDMI 1.3
Cavo HDMI 1.3
Cavo HDMI 1.3
Home Theater
Dispositivo Anynet+ 4
Cavo HDMI 1.3
Cavo ottico
BN68-01757A-Ita.indb 53 2008-9-24 15:02:23

Italiano - 54
Scansione e passaggio da un dispositivo Anynet+ all’altro
1. Premere il tasto TOOLS. Premere il tasto ENTER
E
per selezionare Anynet+
(HDMI-CEC).
2. Premere il tasto ▲ o ▼ per selezionare Elenco dispositivi, quindi premere il
tasto ENTER
E
.
Vengono elencati tutti i dispositivi Anynet+ collegati al televisore. Se non
si trova il dispositivo desiderato, premere il tasto rosso per eseguire la
scansione dei dispositivi.
Solo all’impostazione di Anynet+ (HDMI-CEC) su On nel menu
Impostazione comparirà il menu Elenco dispositivi
3. Premere il tasto ▲ o ▼ per selezionare un particolare dispositivo, quindi premere il tasto ENTER
E
. Il dispositivo
selezionato viene attivato.
Il passaggio al dispositivo selezionato può richiedere no a 2 minuti. Non è possibile annullare l’operazione durante il
passaggio da un dispositivo all’altro.
Il tempo richiesto per la scansione dei dispositivi dipende dal numero di dispositivi collegati al televisore.
Al termine della scansione, il numero di dispositivi trovati non appare.
Sebbene all’accensione del televisore l’apparecchio ricerchi automaticamente tutti i dispositivi collegati, questi non vengono
automaticamente visualizzati nell’elenco dei dispositivi collegati. Per ricercare il dispositivo collegato premere il tasto rosso.
Se si è selezionata una modalità di ingresso esterna tramite il tasto SOURCE, non sarà possibile utilizzare la funzione
Anynet+. Passare a un dispositivo Anynet+ utilizzando Elenco dispositivi.
N
N
N
N
N
N
N
Congurazione di Anynet+
Anynet+(HDMI-CEC)
Strumenti → Anynet+ (HDMI-CEC) esegue la stessa funzione.
Impostazione
Anynet+ (HDMI-CEC) → Spento / Acceso: Per utilizzare la funzione
Anynet+, Anynet+ (HDMI-CEC) deve essere impostato su Acceso.
Quando la funzione Anynet+ (HDMI-CEC) è disattivata, sono disattivate
anche tutte le funzioni relative a Anynet+.
Spegnimento auto→ No / Sì:Disattivazione automatica di un dispositivo
Anynet+ allo spegnimento del televisore
La sorgente attiva deve essere impostata sul telecomando in modo che il
televisore utilizzi la funzione Anynet+.
Se si imposta Spegnimento auto su Sì, i dispositivi esterni collegati
al televisore si spengono ogniqualvolta si spegne il televisore. Se un
dispositivo esterno è in fase di registrazione, potrebbe non spegnersi
automaticamente.
❑
•
N
•
N
N
Applicazione
WISELINK Pro
Anynet+ (HDMI-CEC) ►
Content Library
InfoLive
Guida Prodotto
Elenco dispositivi
mpostazione
U
Sposta
E
Conferma
R
Ritorno
Visualizza TV
Elenco dispositivi
Registrazione : DVDR
DVDR FunzionamentoRicevitore : Acceso
Impostazione
U
Sposta
E
Conferma
R
Ritorno
Anynet+ (HDMI-CEC) : Acceso
Spegnimento auto
U
Sposta
E
Conferma
R
Ritorno
Impostazione
Spento
Acceso
BN68-01757A-Ita.indb 54 2008-9-24 15:02:24
Italiano - 55
Menu Anynet+
Il menu Anynet+ può variare a seconda del tipo e dello stato del dispositivo Anynet+ collegato al televisore.
Menu Anynet+ Descrizione
Visualizza TV La modalità Anynet+ passa alla modalità di trasmissione TV.
Elenco dispositivi Visualizza l’elenco dei dispositivi Anynet+.
Menu (nome_dispositivo) Mostra i menu del dispositivo collegato. Ad esempio, se è collegato un registratore DVD, comparirà
il menu del disco del registratore DVD.
Funzionamento (nome_
dispositivo)
Mostra i menu di riproduzione del dispositivo collegato. Ad esempio, se è collegato un registratore
DVD, comparirà il menu di riproduzione del registratore DVD.
Registra: (*registratore) Avvia immediatamente la registrazione mediante il registratore. (Questa funzione è disponibile solo
per i dispositivi che supportano la funzione di registrazione.)
(*registratore) Prenota
Registrazione
Permette la programmazione della registrazione sul registratore. (Questa funzione è disponibile solo
per i dispositivi che supportano la funzione di programmazione.)
Interrompere registrazione:
(*registratore)
Interrompe la registrazione.
Ricevitore L’audio viene emesso attraverso il ricevitore.
Se al sistema è collegato più di un dispositivo di registrazione, questi vengono visualizzati come (*registratore); in caso il
dispositivo collegato sia uno solo, verrà rappresentato come (*nome_dispositivo).
Tasti del telecomando disponibili in modalità Anynet+
Tipo di dispositivo Stato operativo Tasti disponibili
Dispositivo Anynet+
Una volta attivato il dispositivo,
quando il menu del dispositivo
corrispondente appare sullo
schermo.
Tasti numerici
▲/▼/◄/►/Tasti ENTER
E
Tasti colorati / tasto EXIT
Una volta attivato il dispositivo,
quando si riproduce un le
π
(Ricerca indietro) /
µ
(Ricerca avanti)
∫
(Stop) /
∂
(Riproduci) /
∑
(Pausa)
Dispositivo con
sintonizzatore
incorporato
Una volta attivato il dispositivo,
durante la visione di un
programma televisivo Tasto P /
Dispositivo audio Una volta attivato il ricevitore Tasto VOL /
Tasto MUTE
La funzione Anynet+ è utilizzabile solo quando il telecomando è impostato su TV.
Il tasto
∏
è attivo solo in fase di registrazione.
Non è possibile gestire i dispositivi Anynet+ utilizzando i pulsanti del televisore. I dispositivi Anynet+ possono essere gestiti
solo tramite telecomando.
In determinate condizioni, il telecomando del televisore potrebbe non funzionare. In questo caso, selezionare nuovamente il
dispositivo Anynet+.
Le funzioni Anynet+ non sono attive con prodotti di altre marche.
Le operazioni
π
,
µ
possono differire a seconda del dispositivo in uso.
Registrazione
Con un videoregistratore Samsung è possibile registrare un programma televisivo.
1. Premere il tasto TOOLS. Premere il tasto ENTER
E
per selezionare Anynet+
(HDMI-CEC).
2. Premere il tasto ▲ o ▼ per selezionare Registrazione: (nome_dispositivo),
quindi premere il tasto ENTER
E
. La registrazione ha inizio.
Se sono presenti più dispositivi di registrazione
Se sono collegati più dispositivi di registrazione, questi vengono elencati.
Premere il tasto ▲ o ▼ per selezionare un particolare dispositivo, quindi
premere il tasto ENTER
E
. La registrazione ha inizio.
Se il dispositivo di registrazione non è visualizzato
Selezionare Elenco dispositivi e premere il tasto rosso per cercare i dispositivi collegati.
3. Premere il tasto EXIT per uscire.
E’ possibile registrare il segnale preveniente da una sorgente selezionando Registrazione: (nome_dispositivo).
Premendo il tasto
∏
si eseguirà la registrazione del programma attualmente visualizzato sul televisore. Se si sta guardando
l’immagine di un altro dispositivo, vengono registrate le immagini di quel dispositivo.
Prima di registrare, controllare che il jack dell’antenna sia correttamente collegato al dispositivo di registrazione. Per collegare
in modo corretto un’antenna a un dispositivo di registrazione, consultare la guida di riferimento del dispositivo di registrazione
utilizzato.
N
N
N
N
N
N
N
N
N
N
N
N
Visualizza TV
Elenco dispositivi
Registrazione : DVDR
DVDR Funzionamento
Ricevitore : Acceso
Impostazione
U
Sposta
E
Conferma
R
Ritorno
BN68-01757A-Ita.indb 55 2008-9-24 15:02:24
Italiano - 56
Ascolto tramite il Ricevitore (Home theater)
È possibile ascoltare l’audio tramite un ricevitore anzichè dagli altoparlanti del televisore.
1. Premere il tasto TOOLS. Premere il tasto ENTER
E
per selezionare Anynet+
(HDMI-CEC).
2. Premere il tasto ▲ o ▼ per selezionare Ricevitore. Premere il tasto ▲ o ▼per
selezionare Acceso o Spento.
3. Premere il tasto EXIT per uscire.
Se il ricevitore supporta solo l’audio, potrebbe non comparire nell’elenco dei
dispositivi.
Il ricevitore è operativo solo se è collegato in modo appropriato il jack Optical In
del ricevitore al jack Optical Out del televisore.
Quando il ricevitore (home theater) è impostato su On, è possibile udire l’audio proveniente dall’uscita Optical del televisore.
Quando il televisore visualizza un segnale DTV (air), invia l’audio a 5.1 canali al ricevitore Home Theater. Se la sorgente è un
componente digitale, come per es. un DVD, ed è collegata al televisore mediante HDMI, saranno udibili solo 2 canali audio dal
ricevitore Home Theater.
Utilizzando la funzione WISELINK Pro, l’audio potrebbe non essere emesso correttamente attraverso il ricevitore.
Quando si ascolta l’audio attraverso il ricevitore, vi sono limitazioni per l’uso del menu relativo all’audio e alla funzione PIP
(MTS, Preferred language).
Nel caso di una interruzione di corrente al televisore quando il menu Ricevitore è impostato su Acceso (per lo scollegamento
del cavo o un calo di potenza), la funzione Select speaker può essere impostata su Altoparlante ester alla riaccensione del
televisore (vedere pag. 22).
Risoluzione dei problemi con Anynet+
Sintomo Soluzione
Anynet+ non funziona. Controllare se si sta utilizzando un dispositivo Anynet+. Il sistema Anynet+ può essere
utilizzato solo con dispositivi AV che supportano Anynet+.
Collegare un solo ricevitore (Home Theater).
Controllare che il cavo di alimentazione di Anynet+ sia correttamente collegato.
Controllare i collegamenti dei cavi Video/Audio/HDMI 1.3 del dispositivo Anynet+.
Vericare se Anynet+ (HDMI-CEC) è impostato su On nel menu Impostazione di Anynet+.
Vericare che il telecomando del televisore sia in modalità TV.
Vericare che sia Anynet+ la modalità esclusiva del telecomando.
In particolari condizioni, Anynet+ non funziona. (Ricerca canali, funzionamento WISELINK
Pro, Plug & Play, ecc.)
Quando si collega o si rimuove il cavo HDMI 1.3, eseguire una nuova ricerca dei
dispositivi oppure spegnere e riaccendere il televisore.
Controllare che la funzione Anynet+ del dispositivo Anynet+ sia attivata.
•
•
•
•
•
•
•
•
•
•
Per avviare Anynet+.Vericare che il dispositivo Anynet+ sia collegato correttamente al televisore e che
Anynet+ (HDMI-CEC) sia impostato su On nel menu Impostazione di Anynet+.
Premere il tasto TV sul telecomando per passare al controllo del televisore. Premere il
tasto TOOLS per visualizzare il menu Anynet+ e selezionare l’opzione desiderata.
•
•
Per uscire da Anynet+.Selezionare View TV nel menu Anynet+.
Premere il tasto SOURCE sul telecomando del televisore e selezionare un dispositivo non
Anynet+.
(Notare che il tasto dei canali funziona solo se non è collegato un dispositivo Anynet+ con
sintonizzatore incorporato.)
•
•
•
Sullo schermo viene visualizzato
il messaggio Connecting to
Anynet+ device....
Non è possibile utilizzare il telecomando durante la congurazione di Anynet+ o il
passaggio a un’altra modalità di visualizzazione.
Utilizzare il telecomando solo al termine dell’impostazione di Anynet+ o del passaggio alla
nuova modalità di visualizzazione.
•
•
Impossibile avviare la riproduzione
sul dispositivo Anynet+.
Non è possibile utilizzare la funzione di riproduzione mentre è in corso la funzione Plug &
Play.
Lo schermo del dispositivo
esterno non appare. Controllare se il dispositivo supporta le funzioni Anynet+.
Vericare che il cavo HDMI 1.3 sia collegato correttamente.
Vericare che Anynet+ (HDMI-CEC) sia impostato su On nel menu Impostazione di
Anynet+.
Cercare nuovamente altri dispositivi Anynet+.
E’ possibile collegare un dispositivo Anynet+ utilizzando solo un cavo HDMI 1.3. Alcuni
cavi HDMI potrebbero non supportare le funzioni Anynet+.
In caso di chiusura anomala, a causa di uno scollegamento del cavo HDMI, del cavo di
alimentazione oppure di una interruzione di corrente, ripetere la ricerca del dispositivo.
•
•
•
•
•
•
Il programma TV non può essere
registrato. Vericare se il jack dell’antenna sul dispositivo di registrazione è correttamente collegato.
L’audio del televisore non viene
riprodotto attraverso il ricevitore. Collegare il televisore e il ricevitore mediante il cavo ottico.
N
N
N
N
N
N
Visualizza TV
Elenco dispositivi
Registrazione : DVDR
DVDR Funzionamento
Ricevitore ◄ Acceso ►
Impostazione
U
Sposta
L
Adjust
R
Ritorno
BN68-01757A-Ita.indb 56 2008-9-24 15:02:24

Italiano - 57
Usare InfoLive
Mediante il servizio InfoLive di SAMSUNG è possibile vedere notizie, avere
informazioni sul mercato borsistico e sul meteo.
Congurazione della rete (Vedere pagine 27~28)
Il servizio InfoLive è disponibile solo in Inghilterra, Francia, Germania, Italia,
Spagna, Norvegia, Svezia, Danimarca, Finlandia e Russia. La nazione è
selezionata in base a quella impostata in Plug & Play.
1. Premere il tasto MENU per visualizzare il menu. Premere il tasto ▲ o ▼ per
selezionare Applicazione, quindi premere il tasto ENTER
E
.
2. Premere il tasto ▲ o ▼ per selezionare InfoLive, quindi premere il tasto
ENTER
E
.
3. Premere il tasto ◄ o ► per selezionare un servizio (Meteo, Notiziari, Azioni o
Impostazione) e premere il tasto ENTER
E
.
E’ possibile selezionare e vedere più di un servizio per volta solo per ‘Notiziari
(senza le informazioni dettagliate)’, ‘Cond. meteo odierne’, e ‘Azioni-Azioni
preferite, Panoramica mercato’.
Premere il tasto INFO.
L
sul telecomando per visualizzare il menu InfoLive.
N
N
N
N
InfoLive
TUTTI I MATERIALI DISPONIBILI ATTRAVERSO INFOLIVE [‘INFOLIVE CONTENT’] SONO DI PROPRIETA’ DEL LICENZIATARIO DEL
CONTENUTO [‘PROPRIETARIO DEL CONTENUTO’] E/O DELLE SUE AFFILIATE O LICENZIATARI, E SONO PROTETTI DA LEGGI SUL
COPYRIGHT, MARCHI E ALTRE LEGGI RELATIVE ALLA PROPRIETA’ INTELLETTUALE. TUTTI I CONTENUTI INFOLIVE SONO FORNITI PER
UN USO PERSONALE E NON COMMERCIALE. E’ VIETATO L’USO DI QUALSIASI CONTENUTO INFOLIVE IN MODO CHE COSTITUISCA
UNA VIOLAZIONE DEI DIRITTI D’AUTORE DEL PROPRIETARIO DEL CONTENUTO O SENZA LA PREVIA AUTORIZZAZIONE SCRITTA
DEL PROPRIETARIO DEL CONTENUTO. PIU’ IN PARTICOLARE, SENZA L’ESPLICITA AUTORIZZAZIONE CONTENUTA IN QUESTA
DICHIARAZIONE DI ESCLUSIONE DI RESPONSABILITA’ O RILASCIATA DAL PROPRIETARIO DEL CONTENUTO, E’ VIETATO MODIFICARE,
COPIARE, RIPRODURRE, RIPUBBLICARE, CARICARE, INVIARE, TRASMETTERE, TRADURRE, VENDERE, CREARE OPERE DERIVANTI O
DISTRIBUIRE IN QUALSIASI FORMA O MANIERA (COMPRESO L’INVIO VIA EMAIL O ALTRI MEZZI ELETTRONICI) QUALSIASI CONTENUTO
INFOLIVE O QUALSIASI ALTRO MATERIALE DEL SERVIZIO INFOLIVE. I CONTENUTI FORNITI DAL PROPRIETARIO DEI CONTENUTI
CONGIUNTAMENTE AL SERVIZIO INFOLIVE POSSONO ESSERE INVIATI IN DIFFERITA COME SPECIFICATO DAL PROPRIETARIO DEI
CONTENUTI E/O DAI SUOI AFFILIATI.
INFOLIVE VIENE EROGATO ATTRAVERSO UN ACCORDO TRA SAMSUNG E IL PROPRIETARIO DEI CONTENUTI. IL SERVIZIO INFOLIVE
PUO’ ESSERE INTERROTTO O TERMINATO IN QUALSIASI MOMENTO DA SAMSUNG O DAL FORNITORE DEI CONTENUTI O MEDIANTE
LA CESSAZIONE DELL’ACCORDO VIGENTE TRA LE DUE PARTI. IN NESSUNA CIRCOSTANZA, INCLUSA NEGLIGENZA, SAMSUNG
O IL FORNITORE DEI CONTENUTI POSSONO ESSERE RITENUTI RESPONSABILI, SIA PER CONTRATTO SIA PER ILLECITO, DI
EVENTUALI DANNI DIRETTI, INDIRETTI, INCIDENTALI, SPECIALI O CONSEQUENZIALI, PARCELLE LEGALI, SPESE, O QUALSIASI
ALTRO DANNO DI QUALSIASI NATURA POSSA DERIVARE O ESSERE ASSOCIATO A TALE INTERRUZIONE O CESSAZIONE. POCHE’ I
CONTENUTI VENGONO TRASMESSI ATTRAVERSO IL SERVIZIO INFOLIVE E VENGONO RICEVUTI TRAMITE LE RETI E LE STAZIONI
DI TRASMISSIONE SULLE QUALI SAMSUNG NON HA ALCUN CONTROLLO, SAMSUNG NON SI ASSUME ALCUNA RESPONSABILITA’
OD OBBLIGAZIONE PER EVENTUALI INTERRUZIONI O SOSPENSIONE DEI SERVIZI DI NTERCONNESSIONE O PER L’ASSENZA DEI
CONTENUTI EVENTUALMENTE DERIVANTI DA TALI EVENTI.
LE INFORMAZIONI FORNITE DAL SERVIZIO INFOLIVE VENGONO EROGATE “COSI’ COME SONO” E PERTANTO SAMSUNG NON
GARANTISCE LA CORRETTEZZA DELLE INFORMAZIONI FORNITE, IN MODO SIA IMPLICITO SIA ESPLICITO, PER QUALSIASI SPECIFICO
UTILIZZO; SAMSUNG NON FORNISCE ESPRESSAMENTE ALCUNA GARANZIA, COMPRESA MA NON LIMITATA A, GARANZIA DI
COMMERCIABILITA’ O IDONEITA’ PER UN PARTICOLARE SCOPO. SAMSUNG NON GARANTISCE L’ACCURATEZZA, LA VALIDITA’, LA
TEMPESTIVITA’, LA LEGALITA’, O LA COMPLETEZZA DI QUALSIASI INFORMAZIONE O DATO RESO DISPONIBILE ATTRAVERSO IL
SERVIZIO INFOLIVE PER QUALSIASI SCOPO SPECIFICO E IN NESSUNA CIRCOSTANZA, INCLUSA NEGLIGENZA, SAMSUNG PUO’
ESSERE RITENUTA RESPONSABILE, SIA PER CONTRATTO SIA PER ILLECITO, PER EVENTUALI DANNI DIRETTI, INDIRETTI, INCIDENTALI
, SPECIALI O CONSEQUENZIALI, PARCELLE LEGALI, SPESE, O EVENTUALI ALTRI DANNI DERIVANTI O RELATIVI A QUALSIASI
INFORMAZIONE CONTENUTA, O COME RISULTATO DELL’USO DEL SERVIZIO INFOLIVE DA PARTE DELL’UTENTE O DI TERZI ANCHE SE
AVVISATI DELL’EVENIENZA DI TALI DANNI.
L’ACCESSO A INFOLIVE È SOGGETTO AI TERMINI DEL SERVIZIO DI YAHOO! DISPONIBILI ALLA PAGINA 67.
I TERMINI DEL SERVIZIO DI YAHOO! IN **LANGUAGE** SONO DISPONIBILI SUL SITO WEB ALLA PAGINA **ADDRESS**.
Francese http://fr.docs.yahoo.com/info/utos.html Svedese http://se.docs.yahoo.com/seterms.html
Tedesco http://de.docs.yahoo.com/info/utos.html Danese http://dk.docs.yahoo.com/termsofservice.html
Italiano http://it.docs.yahoo.com/info/utos.html Finlandese http://.docs.yahoo.com/info/terms/?fr=sfp
Spagnolo http://es.docs.yahoo.com/info/utos.html
N
N
Applicazione
Anynet+ (HDMI-CEC)
Content Library
InfoLive ►
Guida Prodotto
Meteo Ritorno
Sposta
BN68-01757A-Ita.indb 57 2008-9-24 15:02:26

Italiano - 58
Uso del Servizio Meteo
1. Premere il tasto INFO.
L
del telecomando.
2. Premere il tasto ◄ o ► per selezionare Meteo, quindi premere il tasto ENTER
E
.
Congurare la Regione
3. Premere il tasto giallo. Premere il tasto ▲ o ▼ per selezionare la lettera iniziale
(A~Z) della zona desiderata, quindi premere il tasto ENTER
E
.
4. Premere il pulsante ► per passare alla categoria. Premere il tasto ▲ o ▼ per
selezionare la zona desiderata, quindi premere il tasto ENTER
E
.
E’ possibile controllare le condizioni meteo della regione selezionata.
Impostare l’opzione Meteo
5. Premere il tasto rosso durate l’uso del servizio per cambiare l’opzione Meteo.
6. Premere il tasto ▲ o ▼ e selezionare l’opzione Meteo.
Per uscire dal servizio Meteo, premere il tasto blu.
Per uscire dal servizio InfoLive, premere il tasto EXIT.
Uso del Servizio Notiziari
L’emittente dei notiziari potrebbe essere sostituita in futuro.
1. Premere il tasto INFO.L del telecomando.
2. Premere il tasto ◄ o ► per selezionare Notiziari, quindi premere il tasto
ENTERE
E
.
Premere il tasto ENTER
E
per vedere l’articolo nei dettagli.
Premere il tasto ▲ o ▼ per vedere l’articolo precedente o successivo.
3. Premere il tasto rosso durate l’uso del servizio per cambiare l’opzione Notiziari del
servizio.
4. Premere il tasto ▲ o ▼ e selezionare l’opzione Notiziari del servizio.
L’opzione del servizio Notiziari cambia in base al servizio web fornito.
Per uscire dal servizio Notiziari, premere il tasto blu.
Per uscire dal servizio InfoLive, premere il tasto EXIT.
N
N
N
N
N
N
N
N
N
Sarreguemines
-00°C
Opzioni Luogo Chiudi
Meteo Ritorno
Sposta
Sarreguemines
-00°C
Opzioni
Cond. meteo odierner
Meteo settiman.
RitornoSelezione
Meteo Ritorno
Sposta
GM turns 100 with focus on future
Conferma Opzioni Chiudi
Notiziari Ritorno
Sposta
GM turns 100 with focus on future
Opzioni
Politica
Economia
Notizie
Divertimento
Sport
Selezione Ritorno
Notiziari Ritorno
Sposta
BN68-01757A-Ita.indb 58 2008-9-24 15:02:27

Italiano - 59
Uso del Servizio Azioni
1. Premere il tasto INFO.L del telecomando.
2. Premere il tasto ◄ o ► per selezionare Azioni, quindi premere il tasto ENTER
E
.
3. Premere il tasto rosso durante l’uso del servizio per cambiare l’opzione Azioni.
4. Premere il tasto ▲ o ▼ per selezionare Azioni, quindi premere il tasto ENTER
E
.
Le quotazioni riportate hanno un ritardo massimo di 20 minuti. Il ritardo nelle
quotazioni può variare in base al paese.
Per uscire dal servizio Azioni, premere il tasto blu.
Per uscire dal servizio InfoLive, premere il tasto EXIT.
Azioni preferite: Vengono visualizzate le informazioni relative alle azioni preferite.
E’ possibile impostare Favorite Stocks (Azioni preferite) premendo il tasto giallo.
Panoramica mercato: Riporta i principali indici e l’indice completo, le variazioni
nelle quotazioni, con l’indicazione %.
Azioni & Notizie: Vengono visualizzate le informazioni relative alle azioni preferite,
agli indici principali e alle notizie nanziarie.
Impostazione degli elementi della voce Azioni preferite
1. Premere il tasto giallo quando è selezionata l’opzione Azioni preferite o Azioni &
Notizie.
2. Premere il tasto ENTER
E
per selezionare il mercato borsistico desiderato.
Comparirà la videata di impostazione di Azioni preferite .
3. Premere il tasto ◄, ►, ▲ o ▼ per inserire il simbolo dell’azione desiderata. Quindi
premere il tasto ENTER
.
Viene visualizzato il risultato.
E’ possibile controllare i simboli azionari attraverso i quotidiani o Internet.
4. Premere il tasto ENTER
E
per impostare una azione preferita.
Il titolo selezionato viene impostato come Azione preferita.
Per cancellare le azioni preferite
Premere il tasto verde quando è selezionata l’opzione Azioni preferite o
Azioni & Notizie. Premere il tasto ▲ o ▼ per selezionare il titolo, quindi
premere il tasto ENTER
E
. Il contrassegno c comparirà alla sinistra del
nome del titolo selezionato. Premere il tasto RETURN.
N
N
N
N
N
N
N
N
No Favorite Stocks
Quotes delayed at least 20 minutes.
Data provided by interastive Data.
Opzioni Prefer Chiudi
Imposta azioni preferite
Selezione
Ritorno
Selezionare la Borsa di riferimento.
O London Stock Exchange
Azioni Ritorno
Sposta
Opzioni
Azioni preferite
Panoramica mercato
Azioni & Notizie
RitornoSelezione
Azioni Ritorno
Sposta
Quotes delayed at least 20 minutes.
Brought to you by Yahoo! Finance
12/24 Lun 15:00 Updated 1/2
AAAAAA $0.000,000 ▲ $000,000 +00,00%
BBBBBB $0.000,000 ▲ $000,000 +00,00%
CCCCCC $0.000,000 ▲ $000,000 +00,00%
DDDDDD $0.000,000 $000,000 +00,00%
EEEEEE $0.000,000 ▼ $000,000 -00,00%
– – – – – – help area – – – – – –
Opzioni
Azioni preferite
Market Summary
Azioni & Notizie
Ritorno
Selezione
Azioni Ritorno
Sposta
Quotes delayed at least 15 minutes.
Brought to you by Yahoo! Finance
12/24 Lun 15:00 Updated 1/2
AAAAAA $0.000,000 ▲ $000,000 +00,00%
BBBBBB $0.000,000 ▲ $000,000 +00,00%
CCCCCC $0.000,000 ▲ $000,000 +00,00%
DDDDDD $0.000,000 $000,000 +00,00%
EEEEEE $0.000,000 ▼ $000,000 -00,00%
– – – – – – help area – – – – – –
Imposta azioni preferite
Regola
Sposta Selezione
Ritorno
Inserisci simbolo titolo azionario.
BN68-01757A-Ita.indb 59 2008-9-24 15:02:29
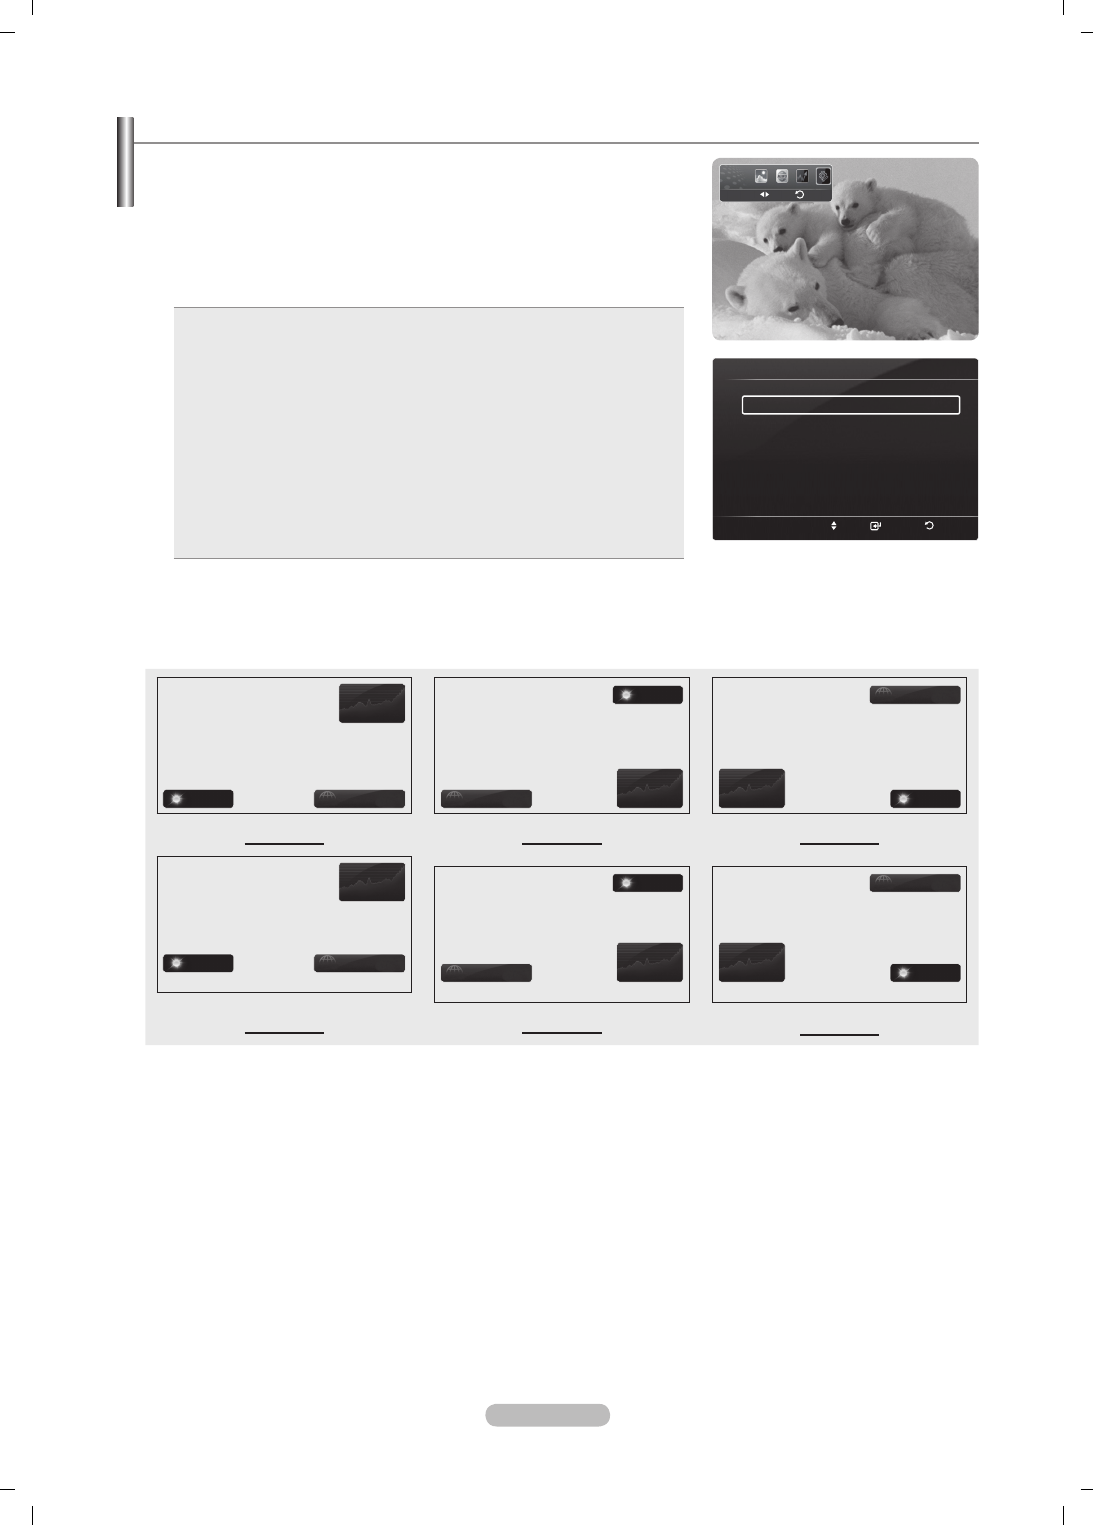
Italiano - 60
Impostazione di InfoLive
1. Premere il tasto INFO.L del telecomando.
2. Premere il tasto ▲ o ▼ per selezionare Impostazione, quindi premere il tasto
ENTER
E
.
3. Per selezionare l’opzione desiderata, premere il tasto ▲ o ▼. (Avvio automatico,
Visual ora, Dimensione carattere, Colore primo piano, InfoLive’s Position)
4. Premere il tasto ▲ o ▼ per selezionare un’opzione, quindi premere il tasto
ENTER
E
.
Avvio automatico: Determina l’avviamento automatico di InfoLive
all’all’accensione del televisore. E’ possibile selezionare Spento o Acceso.
Visual ora: Determina il tempo di visualizzazione del servizio Notiziari sullo
schermo del televisore. E’ possibile selezionare: 10 minuti, 20 minuti, 1
ora, o Sempre.
Dimensione carattere: Nel servizio InfoLive è possibile selezionare la
dimensione dei caratteri tra Standard o Large.
Colore primo piano: Per il servizio InfoLive è possibile selezionare i Colore
primo piano (nero, blu, rosso, verde, grigio). Il colore viene applicato a ogni
nestra, opzione e impostazione del servizio.
InfoLive’s Posizione: E’ possibile impostare sullo schermo la posizione
di ogni servizio InfoLive disponibile. E’ possibile selezionare una delle sei
posizioni preimpostate di InfoLive (Posizione 1~Posizione 6).
•
•
•
•
•
Per uscire dal servizio Impostazione, premere il tasto EXIT.
Per uscire dal servizio InfoLive, premere il tasto EXIT.
nfoLive’s Posizione
Azioni
Meteo Notiziari
Notiziari
Notiziari Azioni
Notiziari
Azioni Notiziari
Posizione 1 Posizione 2 Posizione 3
Azioni
Notiziari Notiziari
Notiziari
Notiziari Azioni
Notiziari
Azioni Notiziari
Posizione 4 Posizione 5 Posizione 6
N
N
Impostazione di InfoLive
Sposta Selezione
Ritorno
Avvio automatico : Spento
Visual ora : 10 Minuto
Dimensione carattere : Standard
Colore primo piano : Nero
InfoLive’s Position
Impostazione
Ritorno
Sposta
BN68-01757A-Ita.indb 60 2008-9-24 15:02:30

Italiano - 61
Consigli per l’uso
Funzione Teletext
La maggior parte delle emittenti televisive fornisce servizi informativi tramite il servizio Teletext. La pagina dell’indice del servizio
Teletext contiene informazioni sull’uso del servizio. Inoltre, è possibile selezionare varie opzioni tramite i tasti del telecomando.
Per ricevere correttamente le informazioni del servizio Teletext, è necessario che la ricezione del canale sia stabile. In caso
contrario, alcune informazioni potrebbero essere perse o alcune pagine potrebbero non essere visualizzate correttamente.
1
: (esci)
Esce dal servizio Teletext
2
6 (indice)
Premere questo tasto in qualsiasi momento per visualizzare la pagina dell’indice.
3
8 (memorizza)
Utilizzato per memorizzare le pagine del servizio Teletext.
4
4 (formato)
Premere questo tasto per raddoppiare le dimensioni dei caratteri nella
metà superiore dello schermo. Premere di nuovo il tasto per ingrandire i caratteri
nella metà inferiore dello schermo. Per tornare alla modalità di visualizzazione
normale, premere di nuovo il tasto.
5
5 (scopri)
Consente di visualizzare il testo nascosto (risposte a quiz, ad esempio). Per
tornare alla modalità di visualizzazione normale, premere di nuovo il tasto.
6
/ (teletext attivo/mix)
Premere questo tasto per attivare la modalità Teletext dopo avere selezionato
un canale che fornisce questo tipo di servizio. Premere di nuovo il tasto per
sovrapporre le informazioni del servizio Teletext alla trasmissione corrente.
7
1 (pagina secondaria)
Visualizza la pagina secondaria disponibile.
8
2 (pagina su)
Consente di visualizzare la pagina Teletext successiva.
9
3 (pagina giù)
Consente di visualizzare la pagina Teletext precedente.
0
0 (modalità)
Premere questo tasto per selezionare la modalità Teletext (LIST/FLOF). Premendo
questo tasto nella modalità LIST, si attiva la modalità di memorizzazione
dell’elenco. In questa modalità è possibile memorizzare la pagina Teletext
all’interno di un elenco utilizzando il tasto 8 (memorizza).
!
9 (mantieni)
Consente di mantenere visualizzata una pagina, se la pagina è collegata a più
pagine secondarie che scorrono automaticamente. Premerlo nuovamente per
riprendere la visualizzazione.
@
7 (annulla)
Utilizzato per visualizzare le stazioni emittenti durante la ricerca di una pagina.
#
Tasti colorati (rosso/verde/giallo/blu)
Se una emittente usa il sistema FASTEXT, i vari argomenti trattati in una pagina
Teletext vengono codicati in base ai colori e possono essere selezionati
premendo i relativi tasti colorati. Premere il tasto il cui colore corrisponde a quello
dell’argomento desiderato. La pagina viene visualizzata con altre informazioni
colorate che possono essere selezionate allo stesso modo. Per visualizzare la
pagina successiva o precedente, premere il tasto colorato corrispondente.
E’ possibile cambiare le pagine teletext premendo i tasti numerici sul telecomando.
N
N
1
3
4
5
6
2
7
8
9
0
!
@
#
BN68-01757A-Ita.indb 61 2008-9-24 15:02:30
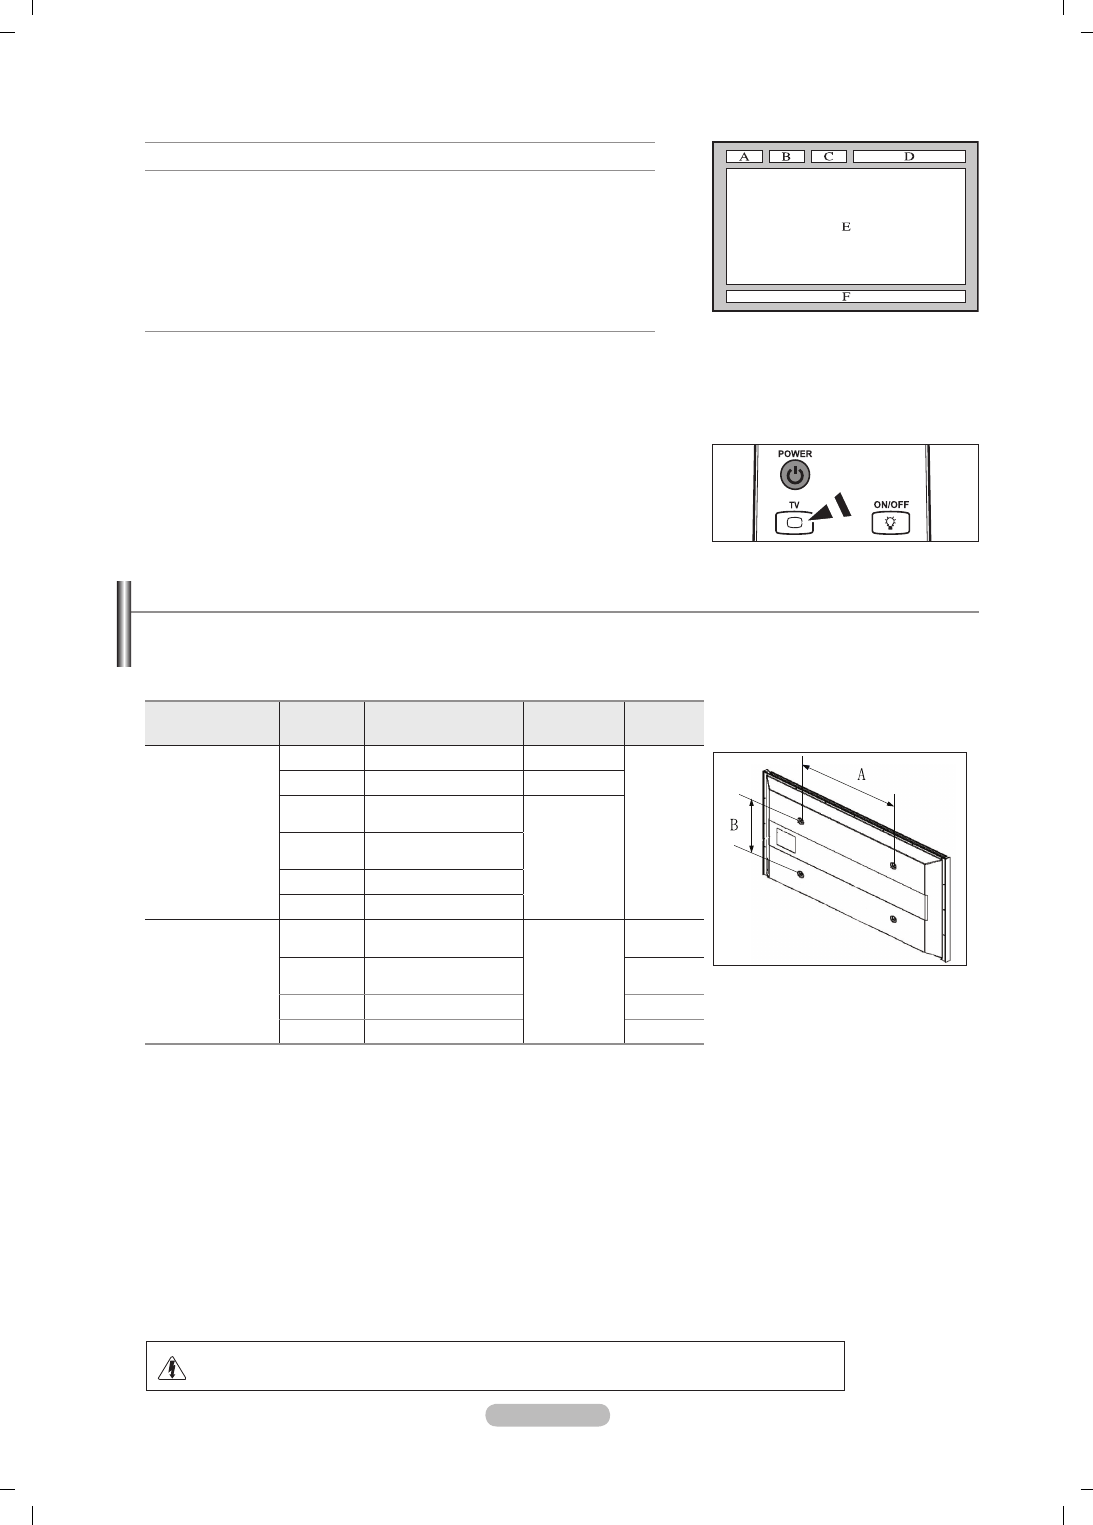
Italiano - 62
Le pagine teletext sono organizzate in base a sei categorie:
Parte Contenuti
A Numero della pagina selezionata.
B Identità della stazione emittente.
C Numero della pagina corrente o stato della ricerca.
D Data e ora
E Testo.
F Informazioni sullo stato.
Informazioni FASTEXT.
Le informazioni del servizio Teletext sono spesso suddivise su più pagine
visualizzate in sequenza alle quali è possibile accedere come segue:
Digitando il numero di pagina
Selezionando un titolo in un elenco
Selezionando un’intestazione colorata (sistema FASTEXT)
Premere il tasto TV per uscire dal servizio Teletext.
N
-
-
-
N
Speciche del kit di supporto a parete (VESA)
Installare il supporto su una parete solida perpendicolare al pavimento.
Se il supporto deve essere ssato ad altri tipi di materiale, consultare il rivenditore di zona.
Una installazione a softto o su pareti inclinate può provocare la caduta dell’unità e lesioni personali.
Famiglia di prodotti
poll. Spec. VESA (A * B) Vite standard Quantità
LCD-TV
23 ~ 26 200 * 100 M4
4
32 ~ 40 200 * 200 M6
46 ~ 52 400 * 400
600 * 400
M8
57 700 * 400
(No VESA)
57 ~ 70 800 * 400
80 ~ 1400 * 800
PDP-TV
42 ~ 58 400 * 400
600 * 400
M8
4
63 676 * 407
(No VESA) 6
63 ~ 70 800 * 400 4
80 ~ 1400 * 800 4
Sono disponibili kit di montaggio a parete per tutte le dimensioni standard, come mostra la tabella precedente.
Insieme al kit di montaggio a parete vengono forniti anche un manuale di istruzioni e tutti i componenti necessari per
l’assemblaggio.
Non utilizzare viti più lunghe rispetto alle dimensioni standard, in quanto potrebbero danneggiare l’interno del televisore.
Per installazioni a parete con viti non conformi agli standard VESA, la lunghezza delle viti può variare a seconda delle relative
specifiche.
Non utilizzare viti non conformi agli standard VESA. Non serrare eccessivamente le viti, in quanto potrebbero danneggiare
il prodotto o causarne la caduta con conseguente rischio di infortuni. Samsung declina ogni responsabilità per questo tipo di
incidenti.
Samsung declina ogni responsabilità in caso di danni al prodotto o infortuni dovuti a un’installazione non conforme agli
standard VESA o alle specifiche indicate oppure alla mancata osservanza delle istruzioni di installazione del prodotto.
I modelli a 57” e a 63” non sono conformi alle specifiche VESA. Di conseguenza, con questo modello è necessario utilizzare
un kit di montaggio a parete apposito.
Non superare i 15° di inclinazione quando si monta questo televisore.
N
N
N
N
N
N
N
N
Non installare il Supporto a parete mentre il televisore è acceso.
In caso contrario, potrebbero verificarsi incidenti con lesioni personali causate da scosse elettriche.
BN68-01757A-Ita.indb 62 2008-9-24 15:02:31
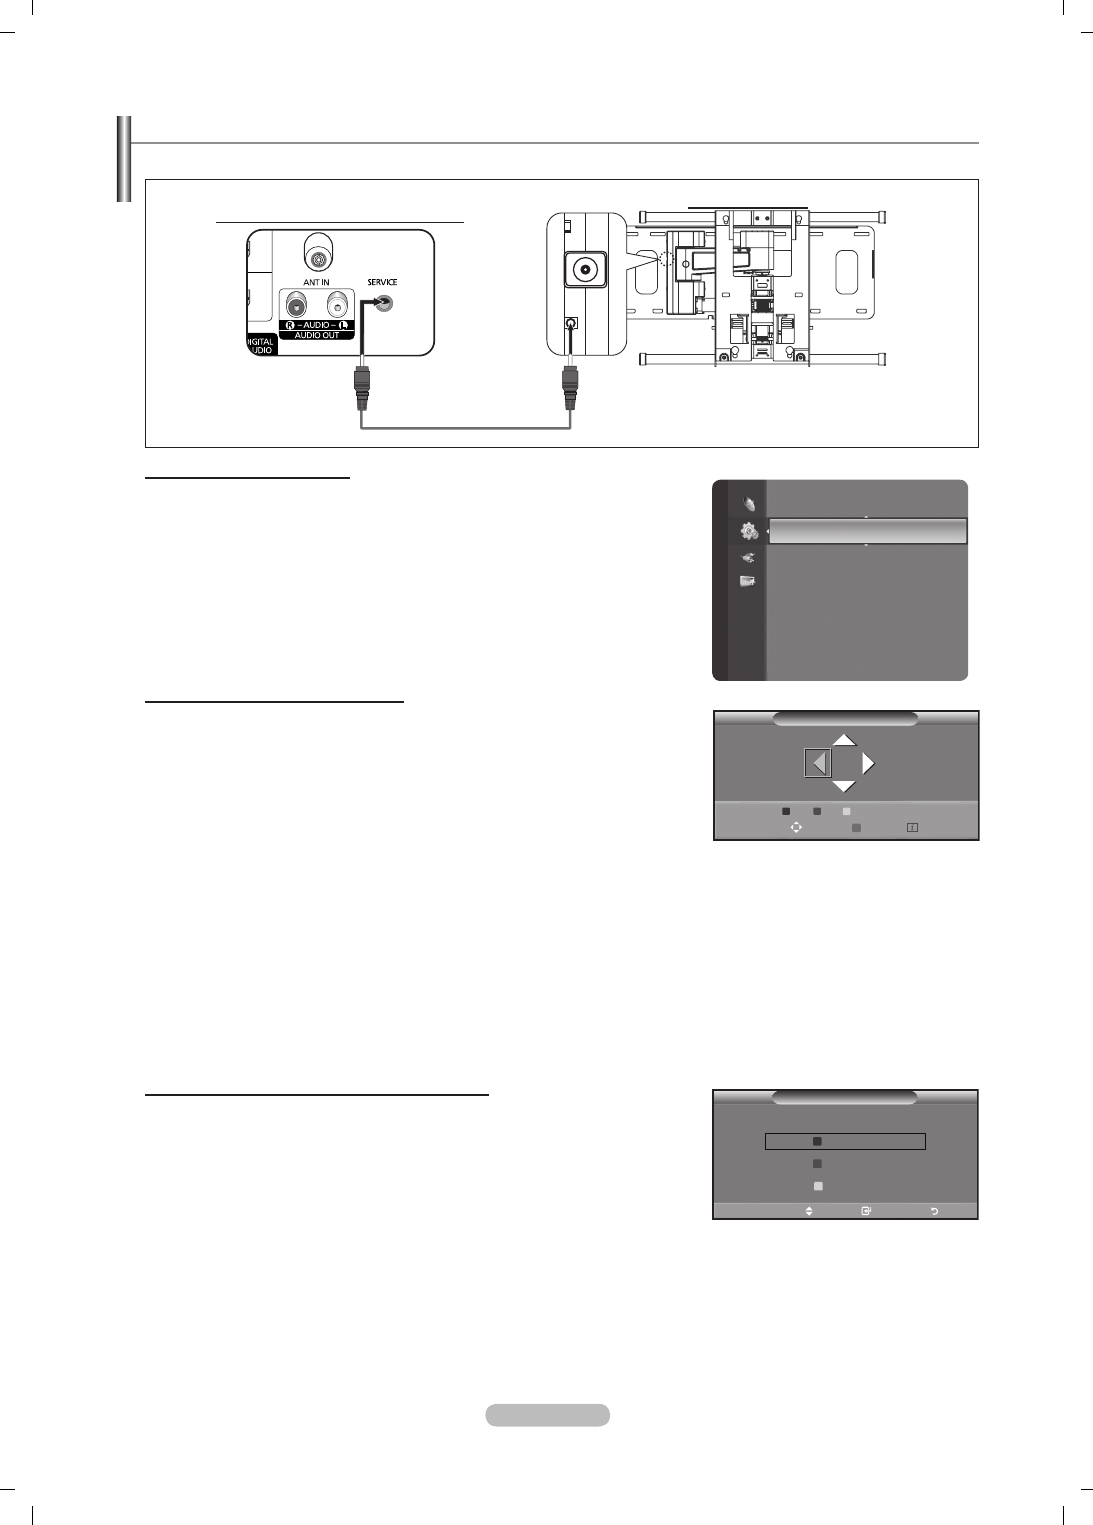
Italiano - 63
Regolazione supporto a parete (Kit venduto separatamente)
Una volta installato il supporto a parete, è possibile regolare facilmente la posizione del televisore.
Visualizzazione del menu
1. Premere il tasto ▲, ▼, ◄ o ► sul telecomando.
Viene visualizzata la schermata Wall Mount Adjustment.
Quando si guarda un programma sul televisore, se premendo un tasto di
direzione la schermata Auto Wall Mount non compare, utilizzare il menu per
visualizzarla.
Premere il tasto MENU per visualizzare il menu. Premere il tasto ▲ o ▼ per
selezionare Impostazione, quindi premere il tasto ENTER
E
.
Premere il tasto ▲ o ▼ per selezionare Reg mont a parete, quindi premere
il tasto ENTER
E
.
Memorizzazione della posizione
2. Effettuare la regolazione no a impostare la posizione desiderata utilizzando i tasti
▲,▼,◄,►.
Quando sullo schermo del televisore non sono visualizzati messaggi OSD,
premendo un tasto freccia comparirà la schermata di regolazione.
Premere INFO per reimpostare i valori. Premere il tasto ◄ o ► per selezionare
Sì, quindi premere il tasto ENTER
E
. La posizione viene inizializzata alle
impostazioni predenite.
3. Premere il tasto blu. Premere il tasto ▲ e ▼ per selezionare una modalità di
memorizzazione tra Position 1, Position 2 o Position 3 allo scopo di memorizzare la
posizione corrente.
Per non memorizzare la posizione corrente, premere il tasto RETURN.
Quando si seleziona una modalità di memorizzazione, non è possibile utilizzare i tasti colorati.
4. Premere il tasto ENTER
E
per memorizzare.
Quando è selezionata l’opzione Position1, viene visualizzato il messaggio Posizione corrente salvata come
Posizione1.
5. Premere il tasto ENTER
E
.
La posizione memorizzata viene visualizzata a sinistra del menu OSD.
Spostamento sulla posizione memorizzata
1. Completare la Fase 1 della procedura “Entering the menu”.
2 Premendo un tasto colorato (rosso, verde, giallo) è possibile spostare il supporto a
parete nella posizione memorizzata.
E’ possibile spostare il supporto a parete su una delle tre posizioni
preimpostate semplicemente premendo i tasti colorati rosso (posizione 1),
verde (posizione 2) o giallo (posizione 3).
Regolando la posizione dopo aver effettuato lo spostamento su una posizione
preimpostata, la visualizzazione della posizione scomparirà.
Per informazioni sull’installazione, consultare il Manuale di installazione fornito insieme al supporto a parete.
Per l’installazione del prodotto e l’installazione e lo spostamento del supporto a parete, consultare un installatore
specializzato.
Utilizzare questo manuale di installazione se si desidera ssare il supporto a una parete. Se il supporto deve essere ssato ad
altri tipi di materiale, consultare il rivenditore di zona.
L’opzione Auto Wall Mount non è disponibile se Anynet+ o WISELINK Pro sono in uso.
N
N
-
-
N
N
N
O
N
N
N
N
N
N
N
N
Impostazione
Testo digitale : Disattiva
Effetto luce : Mod vis ON
Reg mont a parete ►
Melodia : Spento
Entertainment : Spento
Risp. energia : Spento
PIP
Aggiornamento software
Interfaccia comune
Regolazione montaggio a parete
Posizione 1 2 3
Regola Salva Centrale
Salva
Selez modalità di salvataggio.
Sposta Conferma Ritorno
Posizione1
Posizione2
Posizione3
Cavo di SERVIZIO (Non fornito)
Pannello posteriore del televisore Auto Wall-Mount
BN68-01757A-Ita.indb 63 2008-9-24 15:02:32
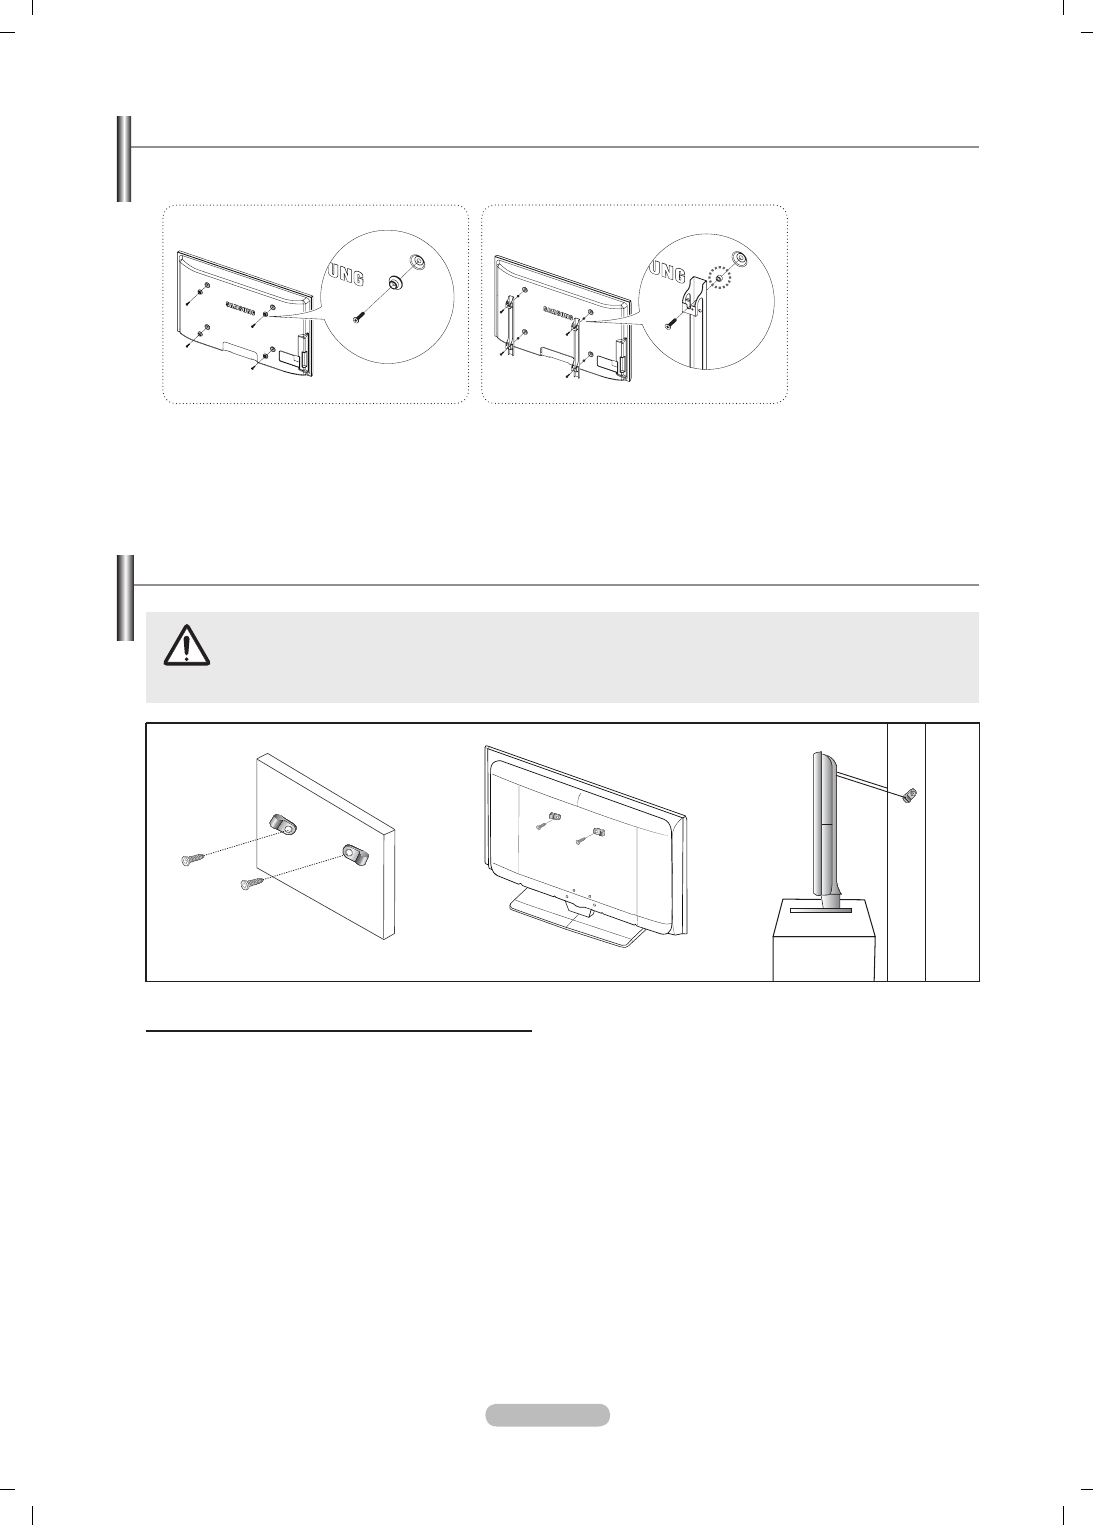
Italiano - 64
Preparazione prima dell’installazione del supporto a parete
1. Installare il supporto a parete con un valore di coppia di 15kgf·cm o inferiore. Applicando un valore di coppia diverso da quello
indicato i componenti possono subire danni.
2. Il kit degli accessori contiene un anello di sostegno [①] per l’installazione di supporti a parete di altre marche su televisori
Samsung. (Caso B)
Caso A. Installazione di un supporto a parete
SAMSUNG
Caso B. Installazione di un supporto a parete di un’altra
marca
Tirare, spingere o arrampicarsi sul televisore sono azioni che possono provocarne la caduta. Si raccomanda
di non far giocare i bambini con il televisore poiché potrebbero appendersi ad esso destabilizzandolo; se ciò
dovesse verificarsi, il televisore potrebbe cadere provocando lesioni personali gravi e perfino mortali. Seguire tutte
le precauzioni di sicurezza descritte della documentazione allegata. Per una maggiore stabilità e sicurezza del
prodotto, installare il dispositivo anticaduta come segue.
Per evitare una eventuale caduta del televisore:
1. Avvitare saldamente i ganci alla parete. Vericare che le viti di ssaggio siano ben serrate.
A seconda del tipo di parete, potrebbe essere necessario utilizzare anche un fisher.
Poiché i ganci, le viti e il cavo di sicurezza non sono forniti in dotazione, è necessario acquistare tali materiali
separatamente.
2. Rimuovere le viti dal centro del pannello posteriore del televisore, inserirle nei ganci e quindi avvitarle nuovamente al
televisore.
Le viti potrebbero non essere fornite insieme al prodotto. In questo caso, le viti sono vendute separatamente.
3. Collegare i ganci ssati al televisore a quelli ssati alla parete utilizzando un cavo resistente, quindi legarlo strettamente.
Installare il televisore il più possibile vicino alla parete in modo che non possa cadere all’indietro.
Collegare il cavo in modo che i ganci fissati alla parete si trovino allineati o leggermente più in basso di quelli fissati al
televisore.
Slegare il cavo prima di spostare il televisore.
4. Accertarsi che tutte le connessioni siano adeguatamente ssate. Controllare periodicamente le connessioni per vericarne
l’eventuale usura o rottura. Per qualsiasi dubbio relativo alla sicurezza delle connessioni effettuate, contattare un installatore
specializzato.
N
N
N
N
N
N
경고 주의
경고 주의
Fissaggio del televisore alla parete
Parete Parete
BN68-01757A-Ita.indb 64 2008-9-24 15:02:33
Italiano - 65
Risoluzione dei problemi
Prima di contattare il Servizio di assistenza Samsung, si consiglia di eseguire i seguenti semplici controlli.
Se non si riesce a risolvere il problema seguendo le istruzioni qui indicate, annotare il modello e il numero di serie del prodotto e
contattare il rivenditore.
Nessun audio o immagine Controllare che il cavo di alimentazione sia collegato alla presa di corrente.
Vericare di aver premuto il tasto sul dispositivo.
Controllare le impostazioni relative al contrasto e alla luminosità dell’immagine.
Controllare il volume.
Controllare se Seleziona altoparlante è impostato su Altoparlante ester.
•
•
•
•
•
Immagine normale ma audio
assente
Controllare il volume.
Controllare se il tasto MUTEM del telecomando è stato premuto.
•
•
Nessuna immagine oppure
immagine in bianco e nero
Regolare le impostazioni del colore.
Controllare se la selezione del sistema di trasmissione è corretta.
•
•
Interferenze di audio e immagine Provare a identicare l’apparecchiatura elettrica che causa le interferenze e spostarla più
lontano.
Collegare il televisore a un’altra presa di corrente.
•
•
Immagini offuscate o poco nitide,
audio distorto
Controllare la direzione, la posizione e i collegamenti dell’antenna.
Questo problema si verica spesso quando si utilizza un’antenna interna.
•
•
Telecomando non funzionante Sostituire le batterie del telecomando.
Pulire il bordo superiore del telecomando (nestra di trasmissione).
Controllare che i terminali + e - delle batterie siano inseriti correttamente.
Controllare che le batterie non siano scariche.
•
•
•
•
Lo schermo è nero e la spia
di alimentazione lampeggia in
modo continuo
Sul computer controllare l'alimentazione e il cavo di segnale.
Muovere il mouse o premere un tasto qualsiasi sulla tastiera del computer.
Sul dispositivo (STB, DVD, ecc.) vericare l'alimentazione e il cavo segnale.
Il televisore sta utilizzando il proprio sistema di gestione alimentazione.
Premere il tasto Source sul pannello di controllo o sul telecomando.
Spegnere e riaccendere il televisore.
•
•
•
•
•
•
L’immagine danneggiata viene
visualizzata nell’angolo dello
schermo.
Se Just Scanè selezionata, l’immagine danneggiata può essere visibile nell’angolo dello
schermo. Questa anomalia è causata dalle periferiche esterne, non dal televisore.
Viene visualizzato il messaggio
“Resets all settings to the default
values.”.
Ciò si verica quando si tiene premuto il tasto EXIT per qualche istante. Le impostazioni del
prodotto vengono reimpostate ai valori di fabbrica.
BN68-01757A-Ita.indb 65 2008-9-24 15:02:34
Italiano - 66
Speciche
Le descrizioni e le caratteristiche riportate in questo manuale sono fornite unicamente a scopo informativo e sono soggette a
modifiche senza preavviso.
Nome modello PS50A756 PS63A756
Dimensione schermo (Diagonale) 50 pollici 63 pollici
Risoluzione PC (Ottimale) 1920 x 1080 @ 60 Hz 1920 x 1080 @ 60 Hz
Uscita
Audio 10 W x 2 15 W x 2
Dimensioni (LxPxA)
Corpo
Con piedistallo
1240 x 766 x 96 mm
1240 x 830 x 315 mm 1531 x 932 x 99 mm
1531 x 1005 x 418 mm
Peso
Corpo
Con piedistallo
39 kg
44 kg 67 kg
84 kg
Caratteristiche ambientali
Temperatura di esercizio
Umidità di esercizio
Temperatura di stoccaggio
Umidità di stoccaggio
50 °F to 104 °F (10 °C to 40 °C)
10% to 80%, senza condensa
-4 °F to 113 °F (-20 °C to 45 °C)
5% to 95%, senza condensa
Questo prodotto è un’apparecchiatura digitale di Classe B.
Design e speciche sono soggetti a modiche senza preavviso.
Per l’alimentazione elettrica e il consumo di corrente, consultare l’etichetta apposta al prodotto.
N
N
N
BN68-01757A-Ita.indb 66 2008-9-24 15:02:34
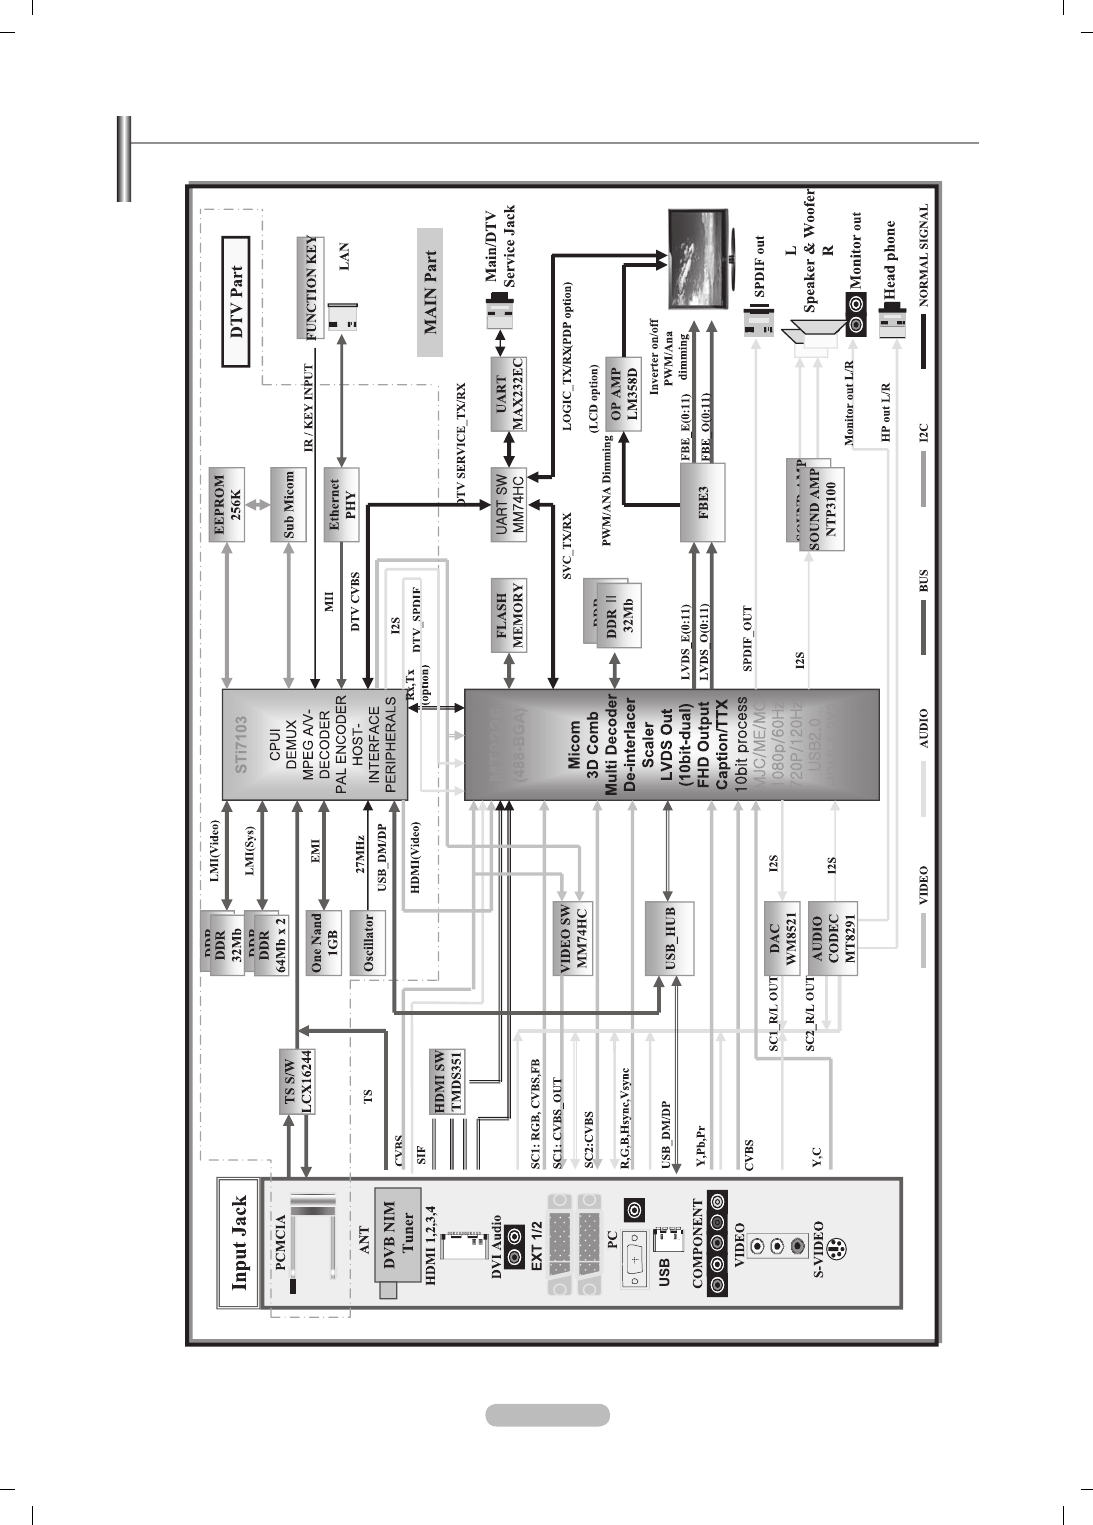
Italiano - 67
Schema blocco
BN68-01757A-Ita.indb 67 2008-9-24 15:02:35

Corretto smaltimento del prodotto
(Riuti Elettrici ed Elettronici)
(Applicabile in i paesi dell’Unione Europea e in quelli con sistema di raccolta differenziata)
Il marchio riportato sul prodotto o sulla sua documentazione indica che il prodotto non deve
essere smaltito con altri rifiuti domestici al termine del ciclo di vita. Per evitare eventuali
danni all’ambiente o alla salute causati dall’inopportuno smaltimento dei rifiuti, si invita
l’utente a separare questo prodotto da altri tipi di rifiuti e di riciclarlo in maniera responsabile
per favorire il riutilizzo sostenibile delle risorse materiali.
Gli utenti domestici sono invitati a contattare il rivenditore presso il quale è stato acquistato il
prodotto o l’ufficio locale preposto per tutte le informazioni relative alla raccolta differenziata e
al riciclaggio per questo tipo di prodotto.
Gli utenti aziendali sono invitati a contattare il proprio fornitore e verificare i termini e le
condizioni del contratto di acquisto. Questo prodotto non deve essere smaltito unitamente ad
altri rifiuti commerciali.
BN68-01757A-Ita.indb 68 2008-9-24 15:02:35

Español - 2
© 2008 Samsung Electronics Co., Ltd. All rights reserved.
Instrucciones para el usuario
Retención de imágenes en la pantalla
No visualice una imagen fija (como las de un videojuego o cuando el PDP está conectado a un PC) en el panel del monitor
de plasma durante más de 2 horas porque podría causar la retención de imagen en pantalla. Este fenómeno de retención
de imágenes también se denomina “quemadura de pantalla”. Para evitar que se produzca esa persistencia de la imagen,
reduzca el nivel de luminosidad y de contraste de la pantalla cuando muestre imágenes fijas.
Altura
La PDP puede funcionar normalmente hasta altitudes de 2.000 metros. No la instale ni utilice en lugares que se encuentren a
más de 2.000 metros de altitud porque el funcionamiento podría ser irregular.
Calor en la parte superior del TV PDP
La parte superior del aparato puede calentarse tras un uso prolongado ya que el calor se disipa desde el panel a través de los
orificios de ventilación de la parte superior del aparato. Esto es normal y no indica ningún defecto ni fallo de funcionamiento
del aparato. No obstante, debe evitarse que los niños toquen la parte superior del aparato.
El aparato emite una especie de ‘crujido’.
A ‘cracking’ noise may occur when the product contracts or expands due to a change of surrounding environment such as
temperature or humidity. This is normal and not a defect of the unit.
Defecto de celda
La PDP utiliza un panel compuesto de 1.230.000 (nivel SD) a 3.150.000 (nivel HD) píxeles que requieren una sofisticada
tecnología para su producción. No obstante, puede que existan unos cuantos píxeles brillantes u oscuros en la pantalla. Estos
píxeles no influirán en el rendimiento del aparato.
Evite que el TV funcione a temperaturas por debajo de 5°C (41°F)
La imagen fija visualizada durante demasiado tiempo puede causar daños permanentes en el panel de la PDP.
Ver el TV PDP en formato 4:3 durante un tiempo prolongado puede dejar rastros de bordes en la
izquierda, derecha o centro de la pantalla causados por la diferencia de emisión de luz en la pantalla.
Reproducir un DVD o una videoconsola puede causar un efecto similar en la pantalla. La garantía no
cubre estos daños.
Restos de imágenes en pantalla.
Ver imágenes fijas de videojuegos y PC durante más tiempo del indicado puede producir restos de imágenes parciales.
Para evitar este efecto, reduzca el ‘brillo’ y el ‘contraste’ cuando vea imágenes fijas.
Garantía
- La garantía no cubre los daños causados por la retención de imagen.
- La garantía no cubre el desgaste de la pantalla.
Instalación
Póngase en contacto con un centro de servicio técnico autorizado cuando instale el equipo en un lugar expuesto a gran
cantidad de polvo, temperaturas extremas, alto nivel de humedad y productos químicos, y en lugares donde se vaya a utilizar
continuamente, como aeropuertos, estaciones, etc.
Nota sobre la TV digital (DVB-T)
1. LAS FUNCIONES RELACIONADAS CON LA TV DIGITAL (DVB) SÓLO ESTÁN DISPONIBLES EN PAÍSES O
REGIONES DONDE SE EMITEN SEÑALES TERRESTRES DIGITALES DVB-T (MPEG2 Y MPEG4 AVC). DVB-T es
una norma del consorcio europeo para la transmisión de la televisión digital terrestre. Compruebe si su distribuidor local
dispone del servicio DVB-T en su región.
2. Este equipo de televisión cumple las actuales normas DVB-T de [agosto de 2008], pero no se garantiza la compatibilidad
con futuras emisiones de televisión digital terrestre DVB-T.
3. Algunas funciones de televisión digital no están disponibles o no funcionan correctamente en algunos países o regiones.
4. Para obtener más información, póngase en contacto con su centro de atención al cliente de SAMSUNG.
Contacte con SAMSUNG WORLDWIDE
Si tiene alguna pregunta o comentario referente a nuestros productos, por favor contacte con nuestro Servicio de Atención al
Cliente (Consulte la cubierta posterior para obtener más información.)
BN68-01757A-Spa.indb 2 2008-9-24 15:55:20
Español
N O T
Símbolo Pulse Notas Botón de una pulsación Botón TOOL
Español - 3
Contenido
Conexión y preparación del televisor
Instrucciones para el usuario ..............................................2
Comprobación de los componentes ....................................4
Uso del soporte ...................................................................4
Cómo montar la base del soporte
(según el modelo) ................................................................4
Aspecto general del panel de control ..................................5
Aspecto general del panel de conexiones ...........................6
Mando a distancia ...............................................................8
Instalación de las pilas en el mando a distancia .................9
Encendido y apagado ..........................................................9
Cómo poner el televisor en modo de espera ......................9
Visualización de los menús ...............................................10
Uso del botón TOOLS .......................................................10
Uso del botón de rueda .....................................................10
Función Plug & Play ..........................................................11
Control de los canales
Memorización de canales .................................................11
Gestión de los canales ......................................................14
Control de la imagen
Cambio y restauración de la conguración de la imagen ..15
Visualización de imagen sobre imagen .............................19
Ajuste del televisor con el ordenador ................................19
Pantalla de PC ..................................................................20
Control del sonido
Cambio del estándar de sonido .........................................21
Selección del modo de sonido ..........................................22
Descripción de las funciones
Conguración del menú de conguración .........................23
Conguración de la hora ...................................................26
Conexión con la red ..........................................................27
Conguración de red .........................................................29
Fuentes / Editar nombre ....................................................31
Guía del producto ..............................................................31
WISELINK Pro
Conexión de un dispositivo USB .......................................32
Uso de la función WISELINK Pro ......................................33
Uso y clasicación de la lista de fotos ...............................35
Visualización de una foto o una presentación ...................36
Uso y clasicación de la lista de música ...........................38
Reproducción de música ...................................................39
Uso y clasicación de la lista de películas ........................40
Reproducción de un archivo de película ...........................41
Supresión de archivos de fotos, música y películas ..........42
Conguración de imagen y música con WISELINK Pro ....43
Uso del menú de conguración .........................................43
■
■
■
■
■
■
■
■
■
■
■
■
■
■
■
■
■
■
■
■
■
■
■
■
■
■
■
■
■
■
■
■
■
■
■
■
■
■
■
WISELINK Pro-DLNA
Conguración de la red DLNA ...........................................44
Instalación de la aplicación DLNA .....................................44
Uso de la aplicación DLNA ................................................46
Uso de la función DLNA ....................................................49
Biblioteca de contenidos
Activación de la biblioteca de contenidos ..........................50
Uso de la biblioteca de contenidos ....................................51
Uso de contenidos adicionales con almacenamiento de
memoria USB externa .......................................................52
Acerca de Anynet+
Conexión de dispositivos Anynet+.....................................53
Conguración de Anynet+ .................................................54
Búsqueda y cambio de dispositivos Anynet+ ....................54
Grabación ..........................................................................55
Escucha a través de un receptor
(sistema Home Cinema) ....................................................56
Solución de problemas de Anynet+ ..................................56
InfoLive
Uso de InfoLive .................................................................57
Uso del servicio meteorológico .........................................58
Uso del servicio de noticias ...............................................58
Uso del servicio bursátil ....................................................59
Conguración de InfoLive ..................................................60
Recomendaciones de uso
Función de teletexto ..........................................................61
Ajuste de montaje mural automático
(se vende por separado) ...................................................62
Ajuste de montaje mural automático
(se vende por separado) ..................................................63
Preparación para instalar el montaje mural .......................64
Fijación del televisor a la pared .........................................64
Solución de problemas ......................................................65
Especicaciones ................................................................66
■
■
■
■
■
■
■
■
■
■
■
■
■
■
■
■
■
■
■
■
■
■
■
■
■
BN68-01757A-Spa.indb 3 2008-9-24 15:55:21
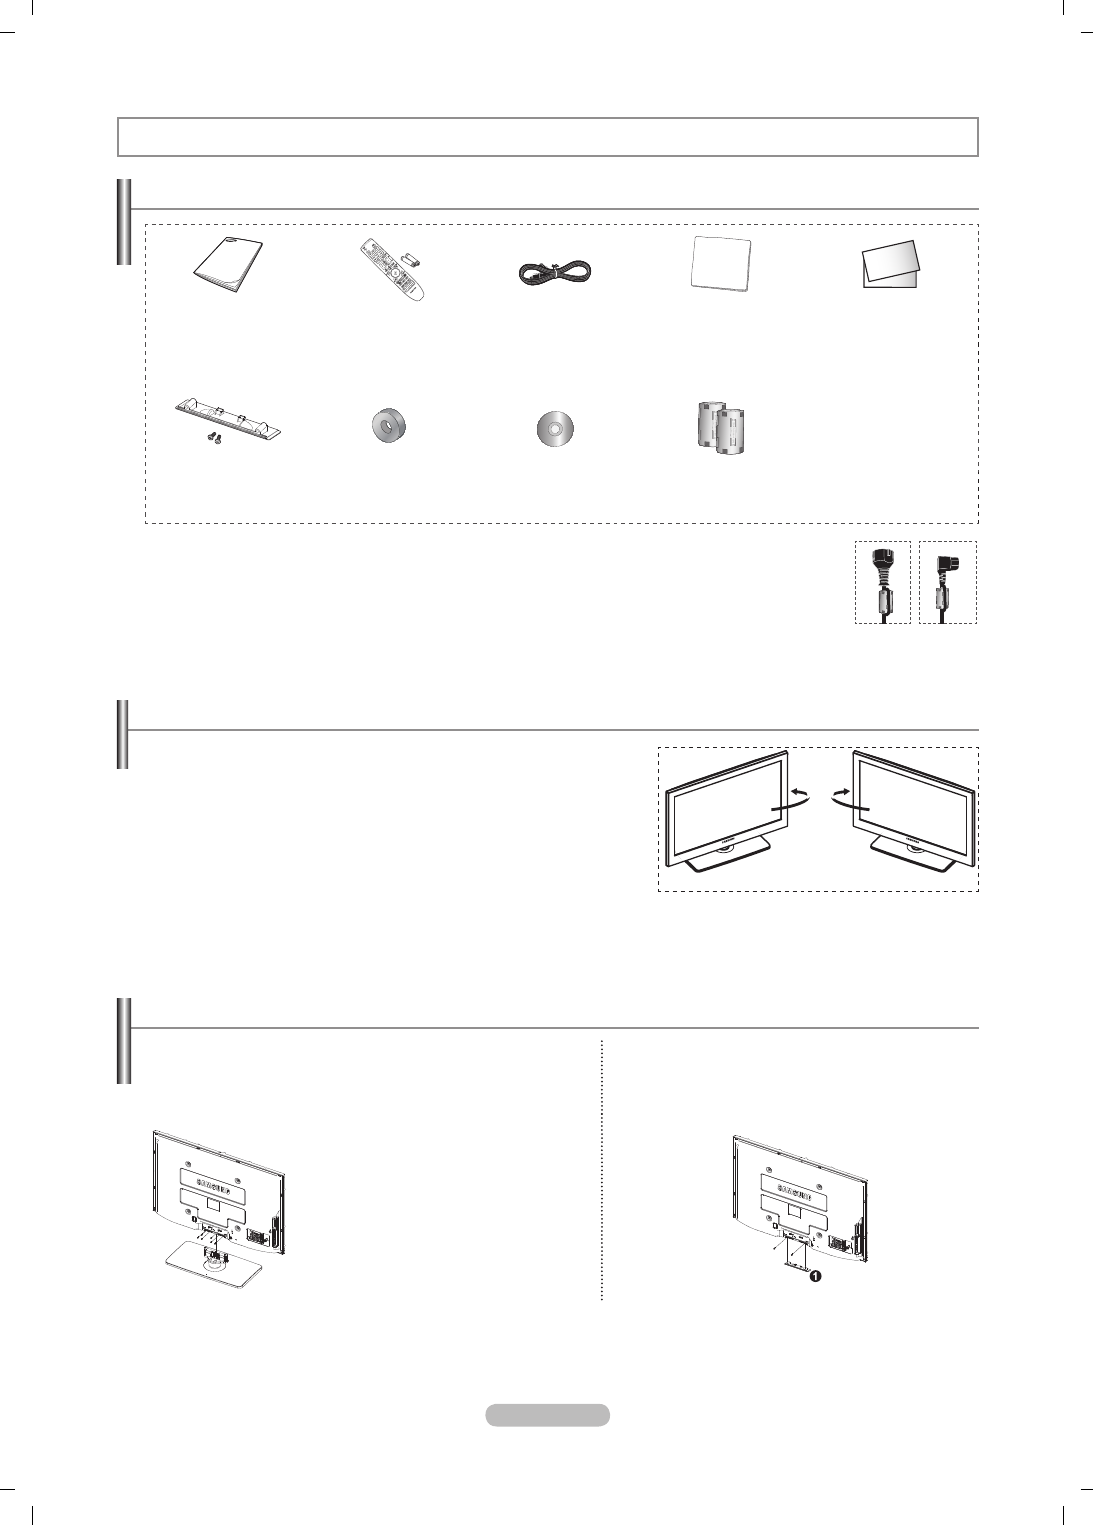
Español - 4
Conexión y preparación del televisor
Comprobación de los componentes
Manual de instrucciones Mando a distancia /
Pilas AAA
(2)
Cable de alimentación Paño de limpieza Tarjeta de garantía/
Manual de guía de
seguridad (no disponible en
todos los lugares)
Cubierta inferior/Tornillos (2)
(PS50A756)
Soportes anilla (4)
(Consulte la página 64.)
CD del programa Núcleo de ferrita para
cable de alimentación(2)
Núcleo de ferrita (Cable de alimentación)
Los núcleos de ferrita se utilizan para proteger los cables de las interferencias.
Cuando conecte un cable, abra el núcleo de ferrita y fíjelo alrededor del cable cerca del conector.
N
Uso del soporte
La PDP la deben transportar dos o más personas. Nunca deje la PDP en el
suelo ya que la pantalla puede sufrir daños. Mantenga siempre la PDP en
posición vertical.
La PDP se puede girar 20 grados a derecha e izquierda.
N
N
Cómo montar la base del soporte (según el modelo)
Con los 6 tornillos de sujeción de la base del soporte y el TV, fije
firmemente éste a la base del soporte.
(Es posible que el exterior del equipo sea diferente del que se muestra
en la imagen.)
Si va a instalar el televisor en la pared, fije la tapa (1)
en la zona de conexión de la base del soporte con los
dos tornillos para ocultar la ranura.
Advertencia
Antes de mover el televisor asegure
firmemente el soporte, para evitar que se
caiga y cause daños físicos.
El televisor lo deben transportar dos o
más personas. Nunca deje el televisor en
el suelo ya que la pantalla puede sufrir
daños.
Mantenga siempre el televisor en su
posición vertical.
N
-20° ~ 20°
BN68-01757A-Spa.indb 4 2008-9-24 15:55:24
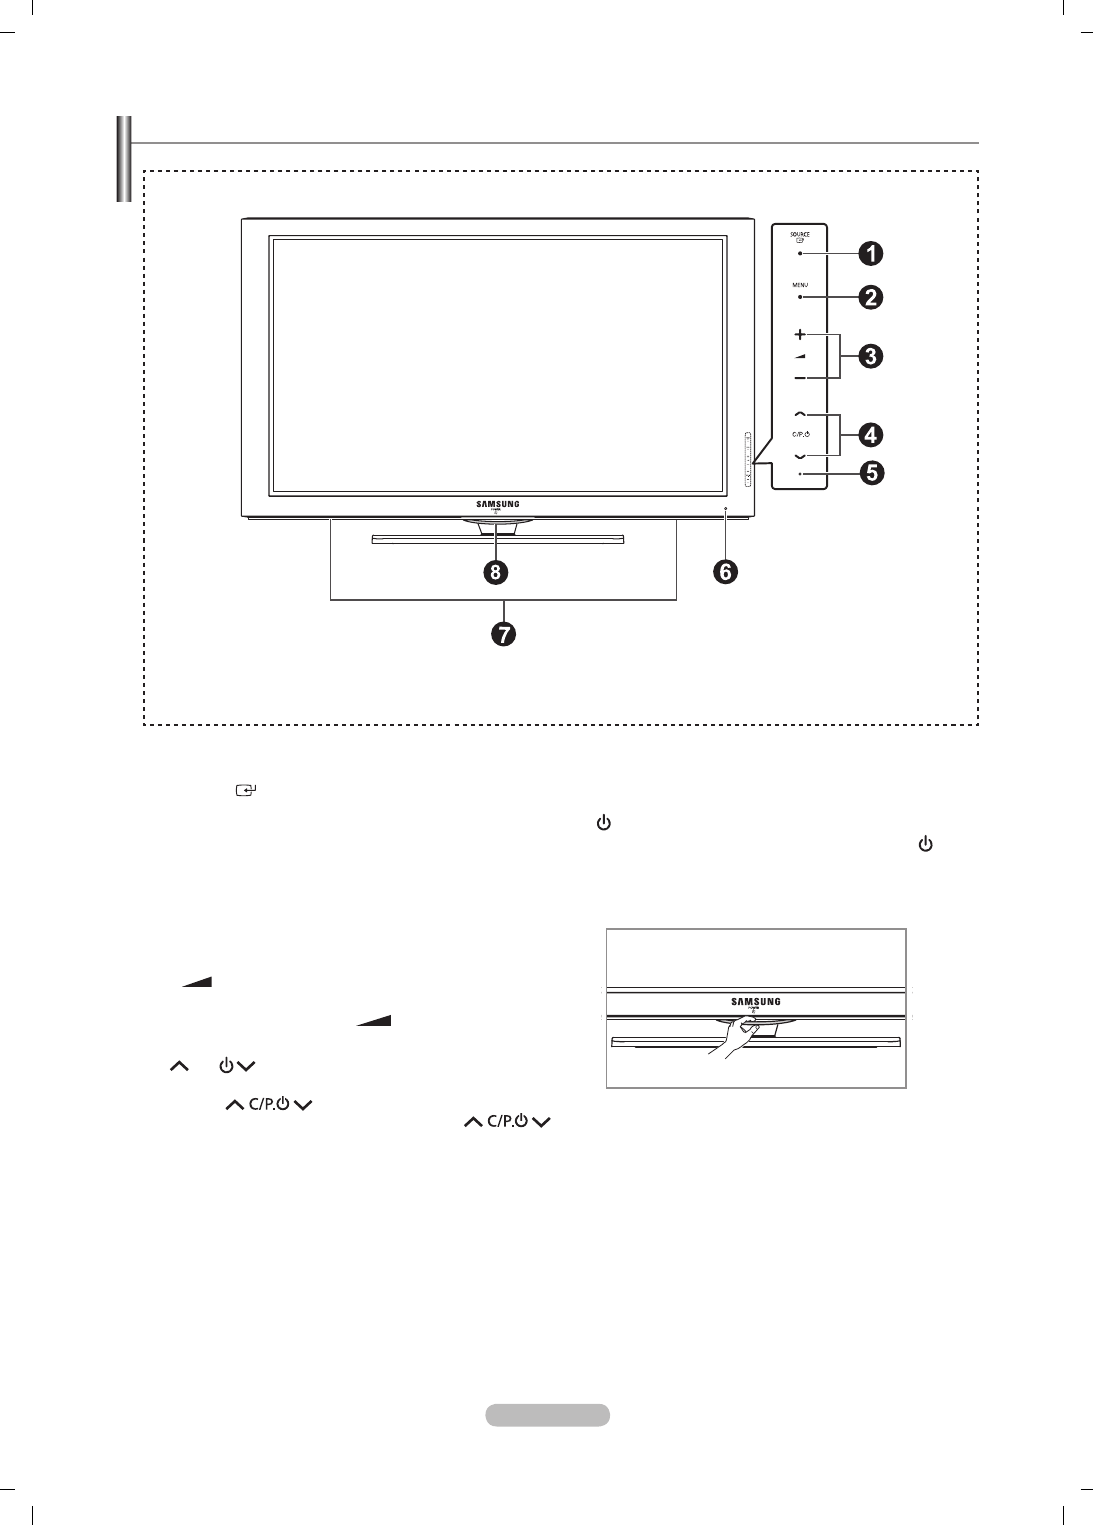
Español - 5
Aspecto general del panel de control
1
SOURCE
Cambia entre todas las fuentes de entrada disponibles
(TV, Ext.1, Ext.2, AV, S-Vídeo, Componente, PC, HDMI1,
HDMI2 / DVI, HDMI3, HDMI4, USB, DLNA).
En el menú en pantalla, utilice este botón como lo
haría con el botón ENTER del mando a distancia.
2
MENU
Púlselo para ver el menú en pantalla con las opciones del
televisor.
3
– +
Púlselos para subir o bajar el volumen. En el menú en
pantalla, use los botones – + del mismo modo que
los botones ◄ y ► del mando a distancia.
4
C/P.
Permiten cambiar de canal. En el menú en pantalla, use los
botones del mismo modo que los botones ▲ y
▼ del mando a distancia. Puede usar el botón
para encender el televisor sin el mando a distancia.
5
Indicador de encendido
Parpadean y se apagan cuando se enciende el aparato y
se ilumina en el modo en espera.
6
Sensor del mando a distancia
El mando a distancia debe dirigirse hacia este punto del
televisor.
N
7
Altavoz
8 (POWER)
Toque el sensor plateado debajo de la marca ( ) para
encender o apagar el televisor.
El color y la forma del producto pueden variar según el modelo.
N
Botones del panel frontal
Toque cada botón para
activar la función.
Sensor plateado
BN68-01757A-Spa.indb 5 2008-9-24 15:55:25

Español - 6
Aspecto general del panel de conexiones
Al conectar un sistema de audio o vídeo al aparato, asegúrese de que todos los elementos estén apagados.
Cuando conecte un dispositivo externo, debe hacer coincidir los colores del terminal de conexión y del cable.
N
N
Panel posterior
o
o
o
1
5 7 96
0
83 4
Barva in oblika izdelka sta odvisni od modela.
N
1
POWER IN
Conexión para el cable de alimentación suministrado.
2
COMPONENT IN
Entradas de audio (AUDIO L/R) y vídeo (Y/PB/PR) para
componentes.
3
LAN
Conecte un cable LAN a este puerto para conectarse a la
red.
4
PC IN(PC) / AUDIO
Se conecta a la toma de salida de audio y vídeo del PC.
5
EXT 1, EXT 2
Tomas de entrada o salida para dispositivos externos,
como aparatos de vídeo, reproductores de DVD, consolas
de videojuegos o reproductores de videodiscos.
Especificaciones de entrada/salida
Conector Entrada Salida
Vídeo Audio(L/R) RGB Video + Audio(L/R)
EXT 1 ✔ ✔ ✔Sólo está disponible la
salida de TV o DTV.
EXT 2 ✔ ✔La salida que
puede elegir..
6
DIGITAL AUDIO OUT (OPTICAL)
Conexión para un componente de audio digital.
7
AUDIO OUT(AUDIO R/L)
Puede conectar las señales de audio desde el televisor a
una fuente externa, como un equipo de audio.
8
SERVICE
− Conector para servicio.
9
HDMI IN 1,2,3
-
No se necesita conexión de audio adicional para una
conexión de HDMI a HDMI
.
- Cuando se usa una conexión de cable HDMI/DVI, se
debe conectar en el terminal HDMI IN 2.
¿Qué es HDMI?
- La interfaz multimedia de alta definición (HDMI)
permite la transmisión de los datos de vídeo digital de
alta definición y varios canales de sonido digital.
-
El terminal HDMI/DVI admite la conexión DVI con un
dispositivo ampliado mediante el cable apropiado (no
suministrado). La diferencia entre los dispositivos HDMI
y DVI es que el HDMI es más pequeño, tiene instalada la
función de codificación HDCP (protección alta de la copia
digital del ancho de banda) y es compatible con el sonido
digital de varios canales.
DVI IN(HDMI2) AUDIO L/R
Salidas de audio DVI para dispositivos externos.
0
ANT IN
Conector coaxial de 75 Ω para antena o red por cable.
Modos compatibles con HDMI y componentes
480i 480p 576i 576p 720p 1080i 1080p
HDMI/DVI 50Hz X X X O O O O
HDMI/DVI 60Hz X O X X O O O
Component O O O O O O O
N
2
Red de televisión
por cable
BN68-01757A-Spa.indb 6 2008-9-24 15:55:28
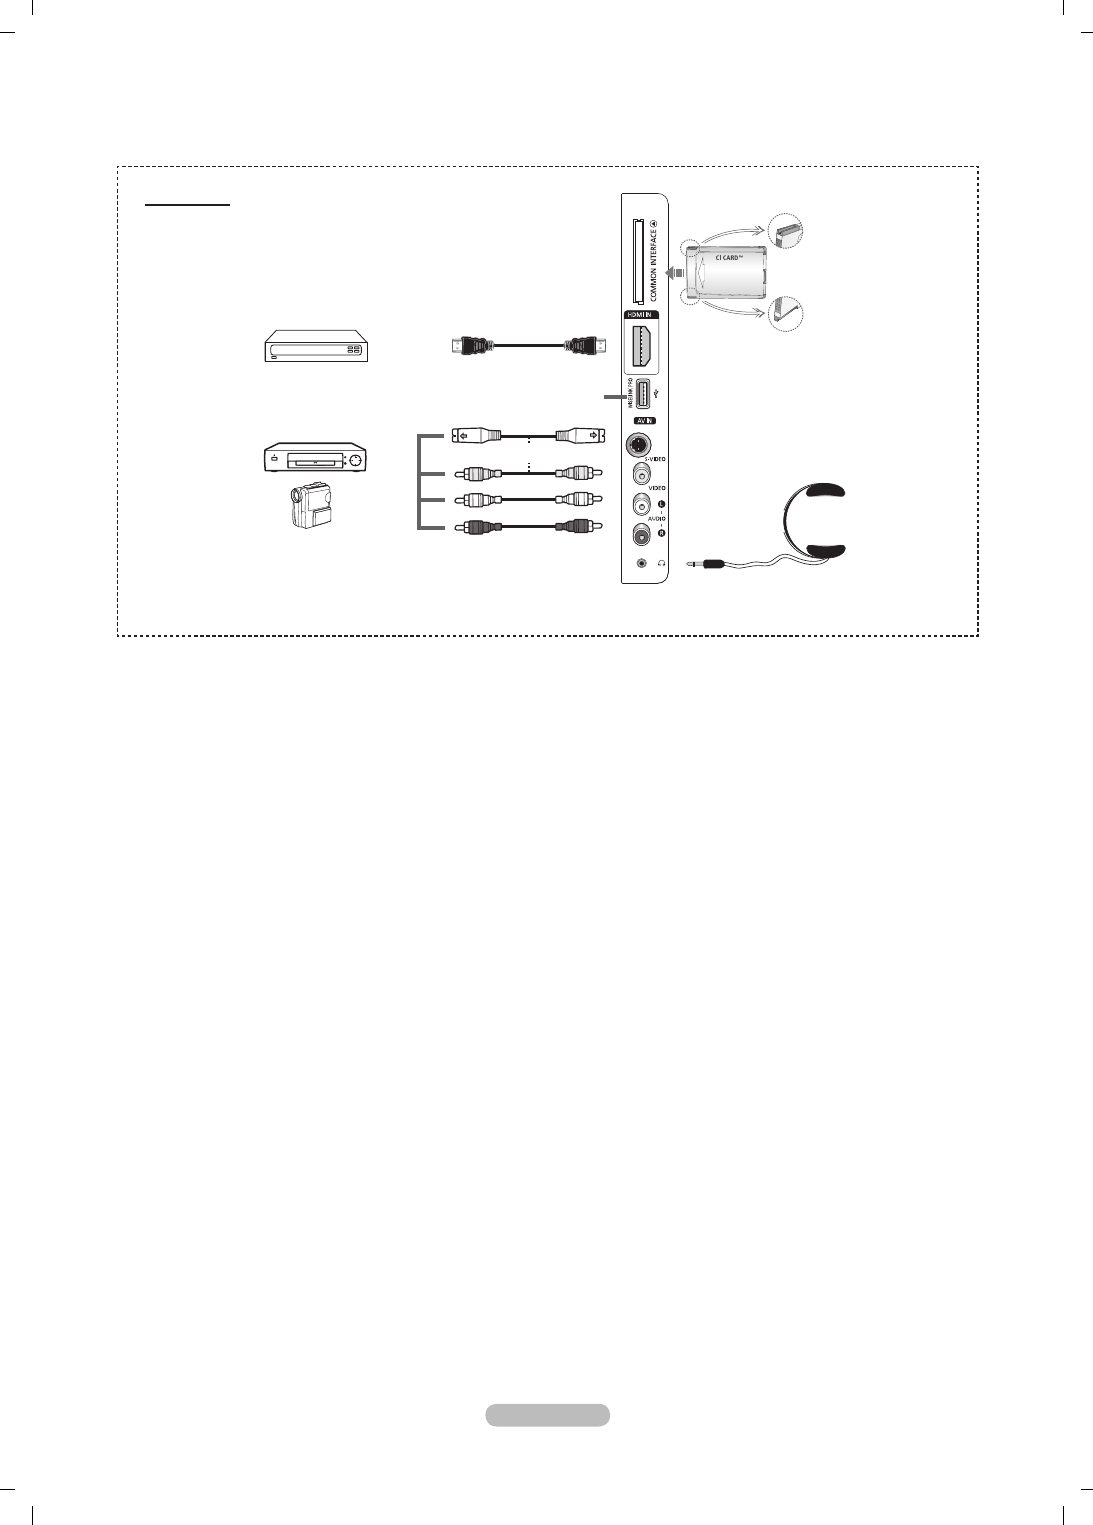
Español - 7
1
Ranura COMMON INTERFACE
Inserte la tarjeta CI (Interfaz común) en la ranura.
(consulte la página 25).
− Si no se inserta una TARJETA CI con algunos canales, en
la pantalla aparece Señal codificada.
− En 2 o 3 minutos aparecerá en la pantalla la información
del enlace que contiene un número telefónico, un
identificador de TARJETA CI, un identificador del sistema
y demás información. Si aparece un mensaje de error,
póngase en contacto con su proveedor de servicios.
− Una vez completada la configuración de la información
del canal, aparecerá el mensaje Actualiz. completa,
indicando que la lista de canales ya se ha actualizado.
Inserte la tarjeta CI en la dirección marcada sobre ella.
2
HDMI IN 4
Conexión HDMI de un dispositivo que tenga salida HDMI.
3
WISELINK PRO
Conexión para un dispositivo de almacenamiento masivo
USB para ver y reproducir archivos de fotos (JPEG), archivos
de audio (MP3) y de películas.
Puede conectarse a la red inalámbrica de SAMSUNG.
4
S-VIDEO o VIDEO/AUDIO L/R
Entradas de vídeo (S-Vídeo o Vídeo) y audio para
dispositivos externos, como una videocámara o un
reproductor de vídeo.
N
5
conector de los auriculares
Puede conectar un equipo de auriculares si desea ver
un programa de televisión sin molestar a otras personas
que se encuentren en la misma sala.
El uso continuado de auriculares a un volumen
elevado puede dañar la capacidad auditiva.
N
El color y la forma del producto pueden variar según el modelo.
N
Panel lateral
o
4
5
3
2
1
4
BN68-01757A-Spa.indb 7 2008-9-24 15:55:30
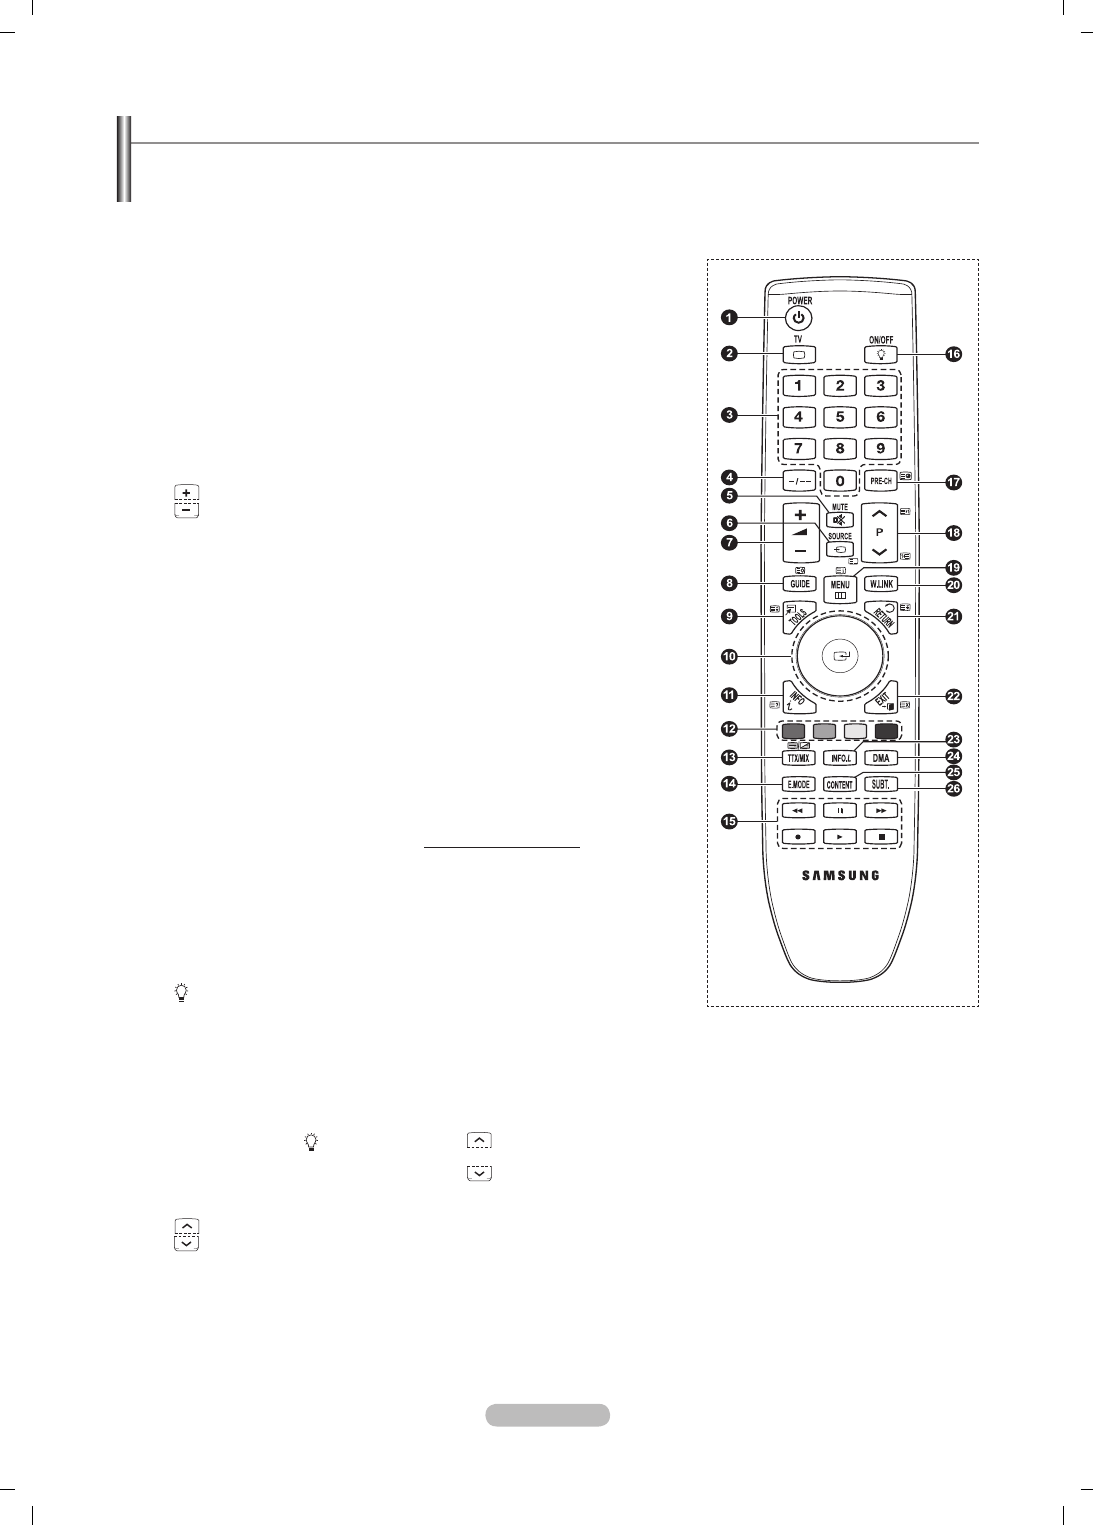
Español - 8
Mando a distancia
Puede utilizar el mando a una distancia del televisor de hasta 7 metros.
El exceso de luz puede influir en el rendimiento del mando a distancia.
N
1
Botón POWER
(enciende y apaga el televisor)
2
Selecciona directamente los modos
TV.
3
Botones numéricos para acceso
directo a los canales
4
Selección de canal de uno o más
dígitos
5
Interrupción momentánea del sonido
6
Selección de fuente disponible
7
Aumentar el volumen
Bajar el volumen
8
Visualización de la Guía electrónica
de programas (EPG).
9
Permite seleccionar rápidamente las
funciones que se usan con mayor
frecuencia.
0
Pulse las secciones arriba/abajo/
izquierda/derecha del botón de
rueda y Enter para seleccionar los
elementos del menú en pantalla
y cambiar los valores del menú.
Con el botón de rueda puede
desplazarse arriba y abajo del
menú, cambiar canales y ajustar el
volumen.
!
Se utiliza para ver información sobre
la emisión actual
@
Use estos botones en la lista de
canales y WISELINK Pro, etc.
$
Pulse este botón para seleccionar
los modos de visualización y
sonido opcionales en los deportes,
películas y juegos.
%
Use estos botones en la lista de
canales, WISELINK Pro y Anynet+.
^
ON/OFF
Pulse para activar la luz de celda de
los botones del mando a distancia.
Pulse este botón para activar la luz
de fondo de los botones del mando a
distancia. Esta función es útil cuando
se usa el mando a distancia de noche
o en una sala oscura. (El uso del
mando a distancia con los botones de
iluminación ON/OFF( ) activados
reduce el tiempo de uso de las
pilas.)
&
Canal anterior
*
Canal siguiente
Canal anterior
(
Muestra el menú principal en la
pantalla
)
Esta función permite ver y
reproducir archivos de fotos (JPEG),
de audio (MP3) y de películas desde
un dispositivo externo.
a
Vuelve al menú anterior
b
Salir del menú en pantalla
c
Pulse este botón para usar los
servicios de noticias, previsiones
meteorológicas y bursátiles
disponibles en la red.
d
Se usa cuando se conecta un
dispositivo SAMSUNG DMA
(Adaptador digital multimedia)
mediante una interfaz HDMI y
se cambia al modo DMA. (El
botón DMA es opcional.) Para
obtener más información sobre los
procedimientos de funcionamiento,
consulte el manual del usuario del
dispositivo DMA. Este botón está
disponible cuando Anynet+ (HDMI-
CEC) está configurado como Act.
(ver página 54 ).
e
Esta función permite ver la Content
Library.
f
Visualización de subtítulos digitales
Funciones de teletexto
2
Sale del teletexto (según los
modelos)
6
Selección del modo de teletexto
(LIST/FLOF)
8
Memorización de teletexto
9
Tamaño del teletexto
!
Mostrar el teletexto
@
Selección de tema de Fastext
#
Visualización de teletexto/mezclar
información de teletexto y emisión
normal
&
Página secundaria de teletexto
*
P : Página siguiente del
teletexto
P :Página anterior del teletexto
(
Índice del teletexto
a
Teletexto en espera
b
Cancelar teletexto
BN68-01757A-Spa.indb 8 2008-9-24 15:55:31

Español - 9
Instalación de las pilas en el mando a distancia
1.
Levante la tapa de la parte posterior del mando a distancia, como se muestra
en la ilustración.
2. Instale dos pilas de tamaño AAA.
Asegúrese de que los extremos “+” y “–” de las pilas concuerden con el
diagrama del interior del compartimiento.
3. Cierre la cubierta.
Si no va a utilizar el mando a distancia durante mucho tiempo, quite las
pilas y guárdelas en un lugar fresco y seco.
El uso del mando a distancia con los botones de iluminación ON/OFF @
activados reduce el tiempo de uso de las pilas.
Si el mando a distancia no funciona. Efectúe estas comprobaciones.
1. ¿Está encendido el televisor?
2. ¿Están intercambiados los polos positivos y negativos de las pilas?
3. ¿Se han agotado las pilas?
4. ¿Ha habido un corte de energía o se ha desenchufado el cable?
5. ¿Hay en las proximidades un uorescente o un neón?
N
Encendido y apagado
El cable de alimentación se conecta a la parte trasera del televisor.
1. Enchufe el cable de alimentación en una toma eléctrica adecuada.
El indicador del modo de espera se enciende en el equipo.
2. Pulse el botón POWER P del equipo.
También puede pulsar el botón POWER
P
o el botón TV del mando a distancia para encender el televisor.
El programa que estaba viendo por última vez se vuelve a seleccionar de forma automática.
3. Pulse los botones numéricos (0~9) o de canales arriba/abajo (< / >) del mando a distancia o el botón >C/P.
P
< del
equipo.
Cuando encienda el equipo por primera vez, se le pedirá que elija el idioma en el que quiere que aparezcan los menús.
4. Para apagar el televisor, vuelva a pulsar el botón POWER
P
.
Cómo poner el televisor en modo de espera
El aparato puede ponerse en modo de espera para reducir el consumo eléctrico. El modo de espera es muy útil si desea
interrumpir la visualización momentáneamente (durante la comida, por ejemplo).
1. Pulse el botón POWER
P
del mando a distancia.
La pantalla se apaga y aparece un indicador de modo de espera rojo en el equipo.
2. Para volver a encender el equipo, pulse de nuevo los botones POWER
P
, numéricos (0~9), TV o de canal arriba/abajo
(< / >).
No deje el aparato en modo de espera durante períodos largos de tiempo (cuando está de vacaciones, por ejemplo). Lo
mejor es desenchufar el aparato de la red eléctrica y de la antena.
N
N
N
N
N
N
N
N
N
BN68-01757A-Spa.indb 9 2008-9-24 15:55:32

Español - 10
Visualización de los menús
1. Con el aparato encendido, pulse el botón MENU. En la pantalla aparece el
menú principal. En el lado izquierdo del menú hay los iconos: Imagen, Sonido,
Canal, Conguración, Entrada y Aplicación .
2. Pulse los botones ▲ o ▼ para seleccionar uno de los iconos. Después pulse el
botón ENTER
E
para acceder al submenú del icono.
3. Pulse el botón EXIT para salir.
Pasado aproximadamente un minuto, los menús de la pantalla
desaparecen.
Uso del botón TOOLS
Se puede usar el botón TOOLS para seleccionar rápida y fácilmente las funciones
que se usan con más frecuencia. El menú Herramientas cambia según el modo de
entrada externo que se está viendo.
1. Pulse el botón TOOLS.Aparece el menú Herramientas.
2. Pulse los botones ▲ o ▼ para seleccionar un menú y, a continuación, pulse el
botón ENTER.
3. Pulse los botones ▲/▼/◄/►/ENTER
E
para ver, cambiar o usar las opciones
seleccionadas.Para ver una descripción más detallada de cada función,
consulte la página correspondiente.
Anynet+ (HDMI-CEC): Consulte la página 53
Tamaño de imagen: Consulte la página 17
Modo imagen: Consulte la página 15
Modo de sonido: Consulte la página 21
Temp.desc.: Consulte la página 26
SRS TS XT: Consulte la página 21
Ahorro energía: Consulte la página 25
Dual l ll: Consulte la página 22
PIP: Consulte la página 19
Ajuste automático: Consulte la página 19
•
•
•
•
•
•
•
•
•
•
Uso del botón de rueda
Para aumentar el número del canal gire la rueda hacia la derecha cuando
se vea el canal. Para disminuir el número del canal, gire la rueda hacia la
izquierda.
Para subir el volumen gire la rueda hacia la derecha cuando se muestre la
ventana de control del volumen. Para bajar el volumen gire la rueda hacia
la izquierda.
Para ir a un menú inferior, gire la rueda hacia la derecha cuando se
muestre el menú Display. Para ir a un menú superior, gire la rueda hacia
la izquierda.
N
Modo
:
Estándar
llmin.celda : 7
Contraste : 95
Brillo : 45
Nitidez : 50
Color : 50
Matiz (V/R) : V50/R50
Configuración detallada
Imagen
Herramientas
Anynet+ (HDMI-CEC)
Tamaño de imagen : Ancho automático
Modo imagen : Estándar
Modo de sonido : Personal
Temp.desc. : Desactivado
SRS TS XT : Desactivado
Ahorro energía : Desactivado
Dual l ll : Mono
U
Mover
E
Entrar
e
Salir
BN68-01757A-Spa.indb 10 2008-9-24 15:55:32

Español - 11
Función Plug & Play
Cuando el televisor se enciende por primera vez, los valores se inician correlativamente de forma automática.
1. Pulse el botón POWER en el mando a distancia. Aparece el mensaje The
Menu Language, Demo tienda, Channels, and Time will be set.
2. Pulse el botón ENTER
E
y aparecerá automáticamente el menú Select the
OSD Language. Pulse el botón ENTER
E
.
3. Seleccione el idioma correspondiente pulsando los botones ▲ o ▼. Pulse el
botón ENTER
E
para conrmar la elección.
4. Pulse los botones ◄ o ► para seleccionar Demo tienda o Uso doméstico, a continuación pulse el botón ENTER
E
.
Es recomendable congurar el televisor en el modo Uso doméstico para obtener la mejor imagen en un entorno
doméstico.
Demo tienda sólo es necesario en los entornos comerciales.
Si la unidad accidentalmente se congura en el modo Demo tienda y se desea volver a Uso doméstico (estándar):
Pulse el botón del volumen del televisor. Cuando se muestra la OSD del volumen, mantenga pulsado el botón MENU del
televisor durante 5 segundos.
El salvapantallas se activa si durante más de 1 minuto no hay ninguna entrada desde el teclado del mando a distancia
mientras Plug & Play está en ejecución.
El salvapantallas se activa si durante más de 15 minutos no se detecta ninguna señal de funcionamiento.
5. Pulse el botón ENTER
E
. Seleccione el país pulsando los botones ▲ o ▼. Pulse el botón ENTER
E
para conrmar la
elección.
6. Pulse los botones ▲ o ▼ para seleccionar la fuente de canal que desea memorizar. Pulse el botón ENTER
E
para
seleccionar Empezar.
Digital y Analógico: Canales digitales y analógicos.
Digital: Canales digitales.
Analógico: Canales analógicos.
La búsqueda de canales se iniciará y terminará automáticamente.
Pulse el botón ENTER
E
en cualquier momento para interrumpir el proceso de memorización.
Una vez memorizados todos los canales disponibles, se muestra el mensaje Congurar el modo del reloj
7. Pulse el botón ENTER
E
. Pulse los botones ▲ o ▼ para seleccionar Auto y, a continuación, pulse el botón ENTER
E
.
Si se selecciona Manual, se muestra Congura la fecha y la hora actuales. (Consulte la página 26)
Si ha recibido una señal digital, se ajustará la hora automáticamente. En caso negativo, consulte la página 26 para
ajustar el reloj.
8. Aparecerá el mensaje Disfrutar su visión. Cuando termine, pulse el botón ENTER
E
.
Si desea reiniciar esta función...
1. Pulse el botón MENU para ver el menú. Pulse los botones ▲ o ▼ para
seleccionar Conguración, a continuación, pulse el botón ENTER
E
.
2. Pulse el botón ENTER
E
de nuevo para seleccionar Plug & Play.
3. Escriba su código PIN de 4 dígitos. El código PIN predeterminado para un
televisor nuevo es ‘0-0-0-0’.
Si desea cambiar el número PIN, consulte la página 23.
La función Plug & Play está disponible sólo en el modo TV.
N
N
N
N
N
N
N
N
N
N
N
N
N
Control de los canales
Memorización de canales
País
Canal analógico: Se puede cambiar el país de los canales analógicos.
Canal digital: Se puede cambiar el país de los canales digitales.
Aparece la pantalla para la introducción del número PIN. Escriba su código PIN
de 4 dígitos.
❑
N
Conguración
Plug & Play ►
Idioma : Español
Hora
Selección de red : Cable
Config.red inalámb.
Configuraciób de red por cable
Sagoridad niños : Activado
Cambiar PIN
Canal
País
►
Guardado automático
Guardado manual
Guía completa
Miniguía
Guía predeterminada : Miniguía
Lista de canales
Modo Canal : Canales añadidos
Plug & Play
The Menu Language, Demo tienda, Channels and Time
will be set.
Aceptar
E
Entrar
BN68-01757A-Spa.indb 11 2008-9-24 15:55:33

Español - 12
Guardado automático
Puede explorar los rangos de frecuencia disponibles (la disponibilidad depende del país). Puede que los números de
programa asignados automáticamente no correspondan a los números de programa reales o deseados.
Digital y Analógico: Canales digitales y analógicos.
Digital: Canales digitales.
Analógico: Canales analógicos.
Busca todos los canales de las emisoras activas y los memoriza en el televisor.
Si desea detener Auto Store, pulse el botón ENTER
E
.
Aparece el mensaje ¿Detener guardado automático?.
Pulse los botones ◄ o ► para seleccionar “Yes” y, a continuación, pulse el botón ENTER
E
.
Si el canal está bloqueado con la función Sagoridad niños aparece la ventana para la introducción del código PIN.
Guardado manual
Busca un canal manualmente y lo memoriza en el televisor.
Si el canal está bloqueado con la función Sagoridad niños aparece la ventana para la introducción del código PIN.
Canal digital
Almacenamiento manual de canales digitales.
Canal: Establezca el número del canal con los botones ▲, ▼ o numéricos (0~9).
Frecuencia: Establezca la frecuencia con los botones numéricos.
Ancho de banda: Establezca el ancho de banda con los botones ▲, ▼ o numéricos (0~9).
Una vez nalizada, la lista de canales se actualiza automáticamente.
Canal analógico
Almacenamiento manual de canales analógicos.
Programa (número de programa que asignar a un canal): Establezca el número del programa con los botones ▲, ▼ o
numéricos (0~9).
Sistema de color → Automático / PAL / SECAM / NTSC4.43: Establezca el sistema del color con los botones ▲ o ▼.
Sistema de sonido → BG / DK / I / L: Establezca el sistema del sonido con los botones ▲ o ▼.
Canal (si conoce el número de canal que desea guardar): Pulse los botones ▲ o ▼ para seleccionar C (canal aéreo) o S
(canal por cable). Pulse el botón ► y después ▲, ▼ o numéricos (0~9) para seleccionar el número que desee.
También puede seleccionar el número de canal directamente pulsando los botones numéricos (0~9).
Si se produce un sonido anormal o no se produce sonido, vuelva a seleccionar el estándar de sonido adecuado.
Buscar (si no conoce los números de los canales): Pulse los botones ▲ o ▼ para iniciar la búsqueda. El sintonizador
explora el rango de frecuencia hasta que se recibe en la pantalla el primer canal o el canal que se ha seleccionado.
Guardar (cuando guarde el canal y el número de programa asociado): Establezca Aceptar pulsando el botón ENTER
E
.
Modo de canal
P (Modo de programa): Al nalizar la sintonización, las estaciones de emisión de su zona se habrán asignado a
los números de posición comprendidos entre P00 y P99. Puede seleccionar un canal introduciendo el número de
posición en este modo.
C (Modo de canal aéreo): Puede seleccionar un canal introduciendo el número asignado a cada emisora aérea de
este modo.
S (Modo de canal por cable): Puede seleccionar un canal introduciendo el número asignado a cada canal por cable
en este modo.
Guía completa / Miniguía
La información de la Guía electrónica de programas (EPG) la proporcionan las emisoras. Las entradas de los programas
pueden aparecer vacías u obsoletas, según la información proporcionada por un canal determinado. La pantalla se actualiza
dinámicamente tan pronto como la información está disponible.
Para obtener una descripción detallada sobre el uso de Guía completa y
Miniguía, consulte la página 13.
También puede ver el menú de la guía pulsando el botón GUIDE. (Para
congurar la Guía predeterminada, siga las instrucciones.)
Guía completa: Se muestra la información de los programas ordenados por hora en segmentos de una hora. Se muestra la
información de dos horas de programa que se puede desplazar adelante o atrás en el tiempo.
Miniguía: La información de cada programa se muestra en una línea de la pantalla Mini Guide del canal actual desde el
programa actual en adelante según el orden de la hora de inicio del programa.
❑
•
•
•
N
N
N
N
N
❑
N
N
•
•
•
N
•
•
•
•
N
N
•
•
N
-
-
-
❑
N
O
BN68-01757A-Spa.indb 12 2008-9-24 15:55:33

Español - 13
Guía predeterminada
Miniguía / Guía completa: Puede decidir que se muestre Miniguía o Guía
completa cuando se pulsa el botón GUIDE del mando a distancia.
Lista de canales
Para obtener una descripción detallada sobre el uso de Lista de canales,
consulte las páginas 14 y 15.
Modo Canal
Cuando se pulsa el botón P >/< se cambian los canales en la lista de
canales seleccionados.
Canales añadidos:
Los canales se cambian en la lista de canales memorizados.
Canales favoritos: Los canales se cambian en la lista de canales favoritos.
Sintonización na
Si la recepción es clara, no tiene que realizar la sintonización precisa del canal, ya que esta operación se hace de forma
automática durante la búsqueda y la memorización. Si la señal es débil o está distorsionada, puede que deba realizar la
sintonización precisa del canal de forma manual.
Los canales que se han ajustado con sintonización na se marcan con un asterisco “*” a la derecha del número de canal
en la banda del canal.
Para reiniciar la sintonía na, seleccione Restablecer pulsando los botones ▲ o ▼ y pulse el botón ENTER
E
.
Sólo puede ajustarse la sintonización de los canales de televisión analógicos.
Información de señal
Se puede obtener información acerca del estado de la señal.
Si el estado de la señal es deciente, se muestra el mensaje No hay señal o es débil.
Cuando se visualiza un canal digital se puede seleccionar esta opción.
Se muestra la información técnica del estado de la señal.
- Frecuencia / ID de servicio / Multiplex / Red / Nivel error de bit / Intensidad de la señal
LNA → Desactivado / Activado
Si el televisor está funcionando en una zona con señal débil, la función LNA (Amplicador de ruido bajo) puede mejorar la
recepción (un amplicador previo de bajo ruido refuerza la señal entrante).
Cuando se visualiza un canal analógico se puede seleccionar esta opción.
Uso de Guía completa / Miniguía
▲/▼/◄/►,
(ENTER)
Seleccionar un programa pulsando los botones (▲/▼/◄/►).
Si el programa siguiente está seleccionado, se concreta con un icono de reloj. Si se vuelve a pulsar
el botón ENTER, pulse los botones (▲/▼/◄/►) para seleccionar Cancelar programaciones; la
programación se cancela y el icono del reloj desaparece.
Para conocer los detalles de la programación de los programas, consulte la sección correspondiente.
RED Intercambiar entre Miniguía o Guía completa.
GREEN Guía Completa: Desplazarse rápidamente hacia atrás (24 horas).
Miniguía: Mostrar la página siguiente rápidamente.
YELLOW Guía Completa: Desplazarse rápidamente hacia adelante (24 horas).
Miniguía: Mostrar la página anterior rápidamente.
BLUE Salir de la guía.
INFO
Botón INFO para obtener información detallada. En la información detallada se incluye el número del
canal, la hora de ejecución, la barra de estado, el nivel del control paterno, la información de calidad del
vídeo (HD/SD), los modos de sonido, subtítulos o teletexto, los idiomas de los subtítulos o del teletexto
y un resumen breve del programa seleccionado. “…” se muestra si el resumen es largo.
❑
❑
❑
❑
N
N
N
❑
N
N
N
❑
N
Canal
Sintonización fina
Información de señal
LNA : Desactivado
►
Guía completa
DTV Cable 900 f tn 2:10 Mar 1 Jun
Freshmen On Campus
2:00 - 2:30
Información no detallada.
Today 2:00 - 3:00 3:00 - 4:00
Mint Extra
Loaded
Fresh 40 with Dynamite MC
The Distillery
Smash Hits! Sunday
900 f tn
901 ITV Play
902 Kerrang!
903 Kiss
903 oneword
903 Smash Hits!
▼
Street Hypn.
Kisstory
Sin información.
Sin información.
Sin información.
Freshmen O..
Ver
Información
Miniguía
+24 Hora
Salir
Miniguía DTV Cable 900 f tn
Street Hypnosis
Booze Britain
2:00
2:30
5:00
▼
Freshmen On Campus
Ver
Información
Guía completa
Pág. sig.
Salir
BN68-01757A-Spa.indb 13 2008-9-24 15:55:34
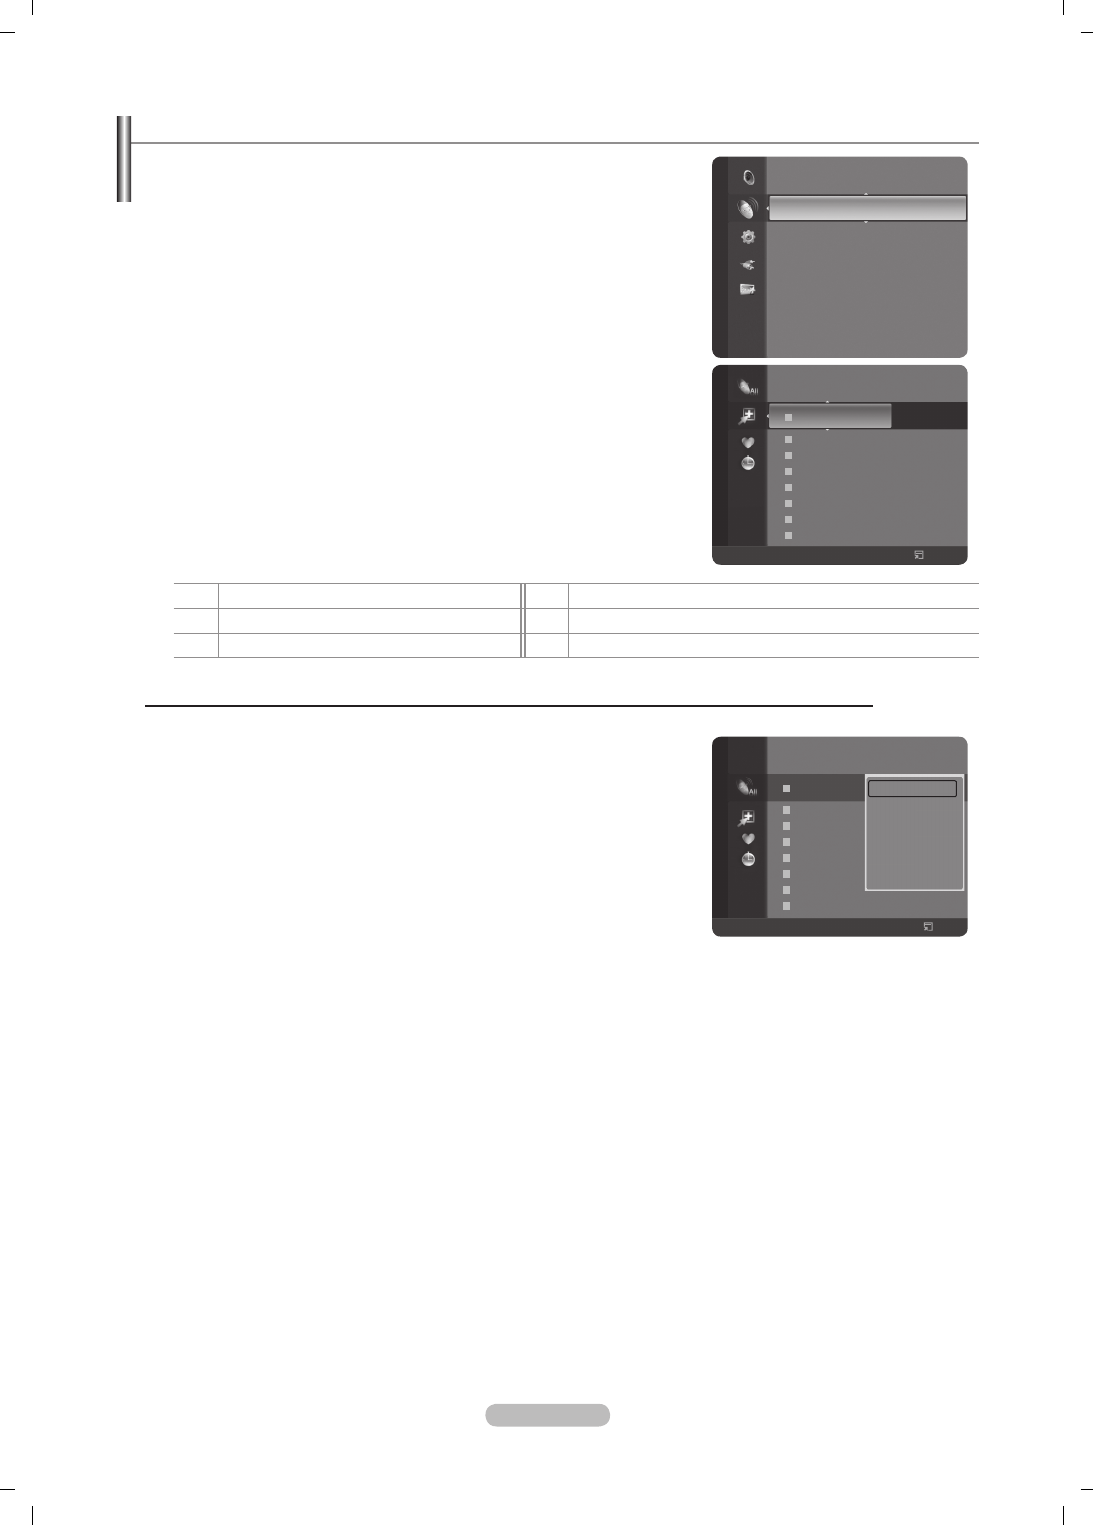
Español - 14
Gestión de los canales
Con este menú puede agregar y borrar los canales o congurarlos como favoritos y
usar la guía de programas de las emisoras digitales.
Selecciona un canal en la pantalla Todos los canales, Canales añadidos,
Favoritos o Programado pulsando los botones ▲ /▼ y el botón ENTER
E
.
Todos los canales: Muestra todos los canales disponibles actualmente.
Canales añadidos: Muestra todos los canales añadidos.
Favoritos: Muestra todos los canales favoritos.
Programado: Muestra todos los programas actualmente reservados.
Uso de los botones de colores en la lista de canales
Rojo (Channel Type): Cambiar entre TV, Radio, Datos / Otr y Todos.
Verde (Zoom): Amplía o disminuye el número del canal.
Amarillo (Select): Selecciona varias listas de canales.
TOOLS (Option): Muestra los menús Borrar (o Añadir), Añadir a Favoritos
(o Borrar de Favoritos), Bloquear (o Desbloquear), Visualiz. con
temporiz., Modicac. nombre canal, Ordenar, Modicac. número canal,
Seleccionar todos, Deseleccionar todo o Guardado automático. (Los
menús de las opciones pueden cambiar, dependiendo de la situación.)
Iconos de la pantalla de estado del canal
ACanal analógico. cCanal seleccionado al pulsar el botón amarillo.
♥
Canal congurado como favorito. (Programa que se está emitiendo.
\Canal bloqueado. )Programa reservado.
Menú de opciones de la lista de canales (en All Channels / Canales añadidos / Favourites)
Pulse el botón TOOLS para usar el menú de opciones.
Los elementos del menú de opciones pueden variar según el estado del canal.
Añadir / Borrar
Puede suprimir o añadir un canal para que se muestren los canales que desee.
Todos los canales borrados se mostrarán en el menú Todos los canales.
Un canal de color gris quiere decir que se ha suprimido.
El menú Añadir sólo aparece con los canales borrados.
También puede borrar un canal en los menús Canales añadidos o
Favoritos de la misma manera.
Añadir a Favoritos / Delete to Favourite
Puede congurar como favoritos los canales que vea con más frecuencia.
Se mostrará el símbolo “♥“ y el canal se congurará como favorito.
Todos los canales seleccionados se mostrarán en el menú Favoritos.
Bloquear / Desbloquear
Se puede bloquear un canal para que no se pueda seleccionar ni visualizar. Está función está disponible sólo cuando
Sagoridad niños está congurado como Activado. (consulte la página 23)
Aparece la pantalla para la introducción del número PIN. Escriba su código PIN de 4 dígitos.
El código PIN predeterminado para un televisor nuevo es 0-0-0-0. Se puede cambiar el PIN seleccionando Cambiar PIN
en el menú.
Se muestra el símbolo “\” y el canal queda bloqueado.
Timer Viewing
Si reserva un programa que desea ver, el canal se cambia automáticamente al canal reservado en la lista de canales aunque
esté viendo otro canal. Para reservar un canal primero debe congurar la hora actual. (Consulte la página 26.)
Sólo se pueden reservar los canales memorizados.
Puede ajustar el canal, el mes, el día, el año, la hora y el minuto directamente pulsando los botones numéricos del
mando a distancia.
La reserva de un programa se muestra en el menú Programme med.
Guía de programas digitales y reserva de visualización
Si se ha seleccionado un canal digital y se pulsa el botón ► aparece la guía de programas del canal. Se puede reservar
un programa mediante el procedimiento descrito anteriormente.
N
N
-
-
-
-
N
N
N
N
N
N
N
N
N
N
N
N
N
N
N
N
Canal
Miniguía
Guía predeterminada : Miniguía
Lista de canales
Modo Canal : Canales añadidos
Sintonización fina
Información de señal
LNA : Desactivado
824 UKTV Gold
825 UKTV style
A
1 C --
A
2 C
--
A
3
♥
C
--
A
4 C
--
A
5 C
--
A
6 C
--
A
7 C
--
A
8 C
--
Canales añadidos
Todos
Tipo de canal
Zoom
Seleccionar
Opción
824 UKTV Gold
825 UKTV style
A
1 C --
A
2 C
--
A
3
C
--
A
4 C
--
A
5 C
--
A
6 C
--
A
7 C
--
A
8 C
--
Todos los canales
Todos
Tipo de canal
Zoom
Seleccionar
Opción
Borrar
Añadir a Favoritos
Bloquear
Visualiz. con temporiz.
Modificac. nombre canal
Ordenar
▼
BN68-01757A-Spa.indb 14 2008-9-24 15:55:35
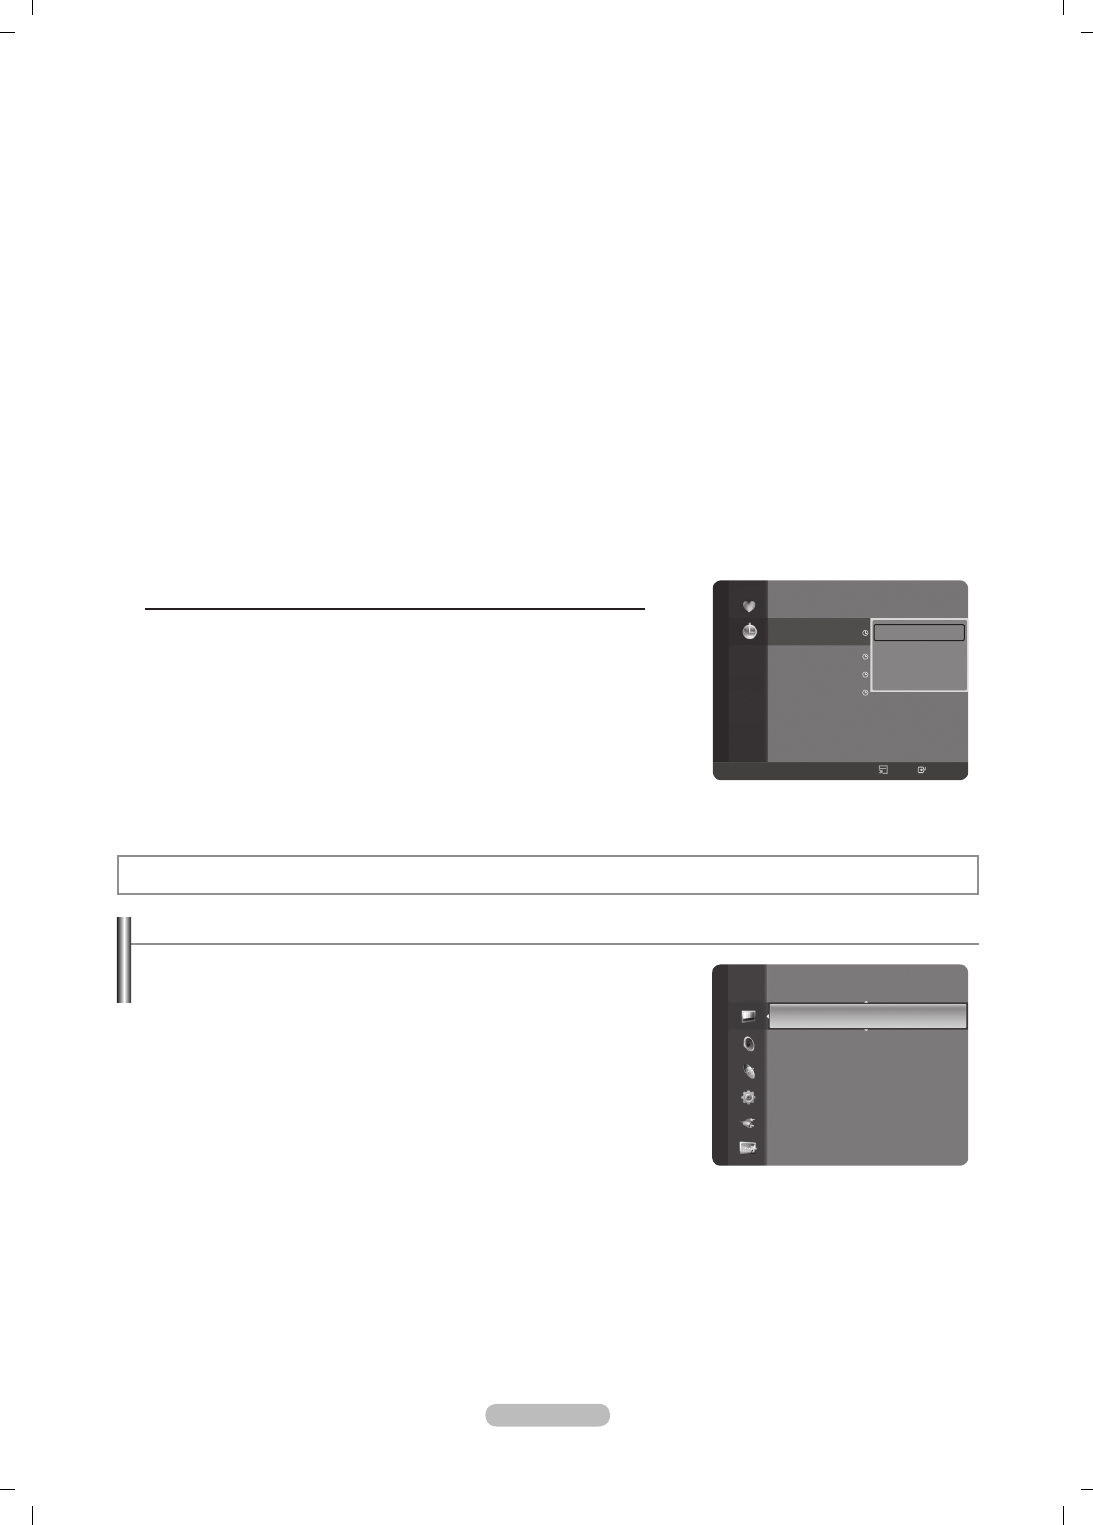
Español - 15
Modificac. nombre canal (sólo canales analógicos)
Los canales se pueden etiquetar con el propósito de que cuando éstos se seleccionan se pueda ver su nombre.
Los nombres de los canales digitales se asignan automáticamente y no se pueden etiquetar.
Modificac. número canal (sólo canales digitales)
También puede editar el número del canal pulsando los botones numéricos del mando a distancia.
Ordenar
Esta operación permite cambiar los números de programa de los canales memorizados. Puede que sea necesario realizarla
después de la memorización automática.
Esta función sólo está disponible en el modo Analógico.
Seleccionar todos / Deseleccionar todo
Seleccionar todos: Puede seleccionar todos los canales de la lista.
Deseleccionar todo: Puede desmarcar todos los canales seleccionados de la lista de canales.
Puede realizar las funciones de añadir, borrar, añadir a favoritos, borrar de favoritos, bloquear o desbloquear con varios
canales al mismo tiempo. Seleccione los canales que desee y pulse el botón amarillo para congurar los canales
seleccionados al mismo tiempo.
La marca c aparece a la izquierda de los canales seleccionados.
Sólo se puede seleccionar Deseleccionar todo si el canal está seleccionado.
Guardado automático
Si desea más detalles sobre las opciones de conguración, consulte la página 11.
Si el canal está bloqueado con la función Sagoridad niños, aparece la ventana para la introducción del código PIN.
Menú de opciones de la lista de canales (en Programme med)
Se puede ver, cambiar o borrar una reserva.
Pulse el botón TOOLS para usar el menú de opciones.
Cambiar información:
Selecciónelo para cambiar la reserva de
visualización.
Cancelar programaciones:
Selecciónelo para cancelar la reserva de
visualización.
Información:
Selecciónelo para ver una reserva de visualización. (También
se puede cambiar la información de reserva.)
Seleccionar todos:
Seleccionar todos los programas reservados.
N
N
•
•
N
N
N
N
N
N
Control de la imagen
Cambio y restauración de la conguración de la imagen
Modo
Puede seleccionar el tipo de imagen que mejor cumpla sus requisitos de
visualización.
Dinámico:
Selecciona la alta definición en la imagen, en una habitación
luminosa.
Estándar:
Selecciona la visualización óptima de la imagen, en un entorno
normal.
Película:
Selecciona la visualización para ver películas en una sala oscura.
Pulse el botón TOOLS para usar el menú Herramientas. También se
puede congurar el modo de la imagen seleccionando Herramientas →
Modo imagen.
llmin.celda / Contraste / Brillo / Nitidez / Color / Matiz(V/R)
El televisor tiene varias opciones de conguración que permiten controlar la calidad de la imagen.
llmin.celda
: Ajusta el brillo de los píxeles. 10 es el brillo máximo.
Contraste
:
Ajusta el nivel del contraste de la imagen.
Brillo
: Ajusta el nivel del brillo de la imagen.
Nitidez
: Ajusta la definición de los bordes de la imagen.
Color
: Ajusta la saturación del color de la imagen.
❑
T
❑
Programmed
1 / 1 / 2008
13:59 5 TV1 Quincy, M.E
18:59 2 TV3 The Equalizer
20:59 2 TV3 McMillan & Wife
21:59 2 TV3 M.Spillane’s mike Hammer
Cambiar información
Cancelar programaciones
Información
Seleccionar todos
Todos
Tipo de canal
Zoom
Seleccionar
Opción
Información
Modo : Estándar
►
llumin.celda : 7
Contraste : 95
Brillo : 45
Nitidez : 50
Color : 50
Matiz (V/R) : V50/R50
Configuración detallada
Imagen
BN68-01757A-Spa.indb 15 2008-9-24 15:55:35

Español - 16
Matiz (V/R):
Ajusta el matiz del color de la imagen.
Seleccione el modo de imagen que desee ajustar en primer lugar. Los valores ajustados se guardan para cada modo de imagen.
Cuando se cambian llmin.celda, Contraste, Brillo, Nitidez, Color o Matiz(V/R), la presentación en pantalla OSD se ajusta
consecuentemente.
En los modos TV, Ext., AV, S-Video del sistema PAL, no se puede usar la función Matiz.
En el modo PC, sólo se pueden realizar cambios en las opciones llmin.celda, Contraste y Brillo.
La conguración de cada dispositivo externo conectado a una entrada del televisor se puede ajustar y guardar.
La energía consumida durante el uso se puede reducir signicativamente si se disminuye el nivel del brillo de la imagen, ya
que así se reduce el costo total de funcionamiento.
Conguración detallada
Los nuevos televisores Samsung permiten una conguración más precisa de la imagen que los modelos anteriores. Consulte
más adelante cómo realizar una conguración detallada.
Conguración detallada está disponible en los modos Estándar o Película.
En el modo PC, sólo se pueden cambiar Contraste dinám., Gamma y
Balance de blanco entre los elementos de Conguración detallada.
Ajuste del negro → Desactivado / Bajo / Medio / Alto
Se puede seleccionar el nivel de negro en la pantalla para ajustar la profundidad
de ésta.
Contraste dinám. → Desactivado / Bajo / Medio / Alto
Se puede ajustar el contraste de la pantalla para conseguir un contraste óptimo.
Gamma
Se puede ajustar la intensidad de los colores primarios (rojo, verde y azul).
Gama de colores
La gama de colores es una matriz compuesta por los colores rojo, verde y azul. Seleccione su gama favorita de color y
disfrute de unos colores auténticamente naturales.
Automático: Ajusta automáticamente al tono de color más natural de acuerdo con las fuentes del programa.
Original: Proporciona tonos de color profundos y ricos.
Personal: Ajusta la gama del color según las preferencias del usuario.
Personalización de la gama de colores
Color → Rojo / Verde / Azul / Amarillo / Cián / Magenta
Ajusta la gama del color según las preferencias del usuario. Color está disponible cuando Gama de colores está
congurado como Personal.
Rojo / Verde / Azul: En Color, se pueden ajustar los valores RGB del color seleccionado.
Restablecer: Restablece la gama de colores en los valores predeterminados.
Balance de blanco
Se puede ajustar la temperatura del color para conseguir colores más naturales.
Rojo - / Verde - / Azul - / Rojo + / Verde + / Azul +: Al cambiar el valor de ajuste se actualizará la pantalla ajustada.
Restablecer: El balance de blanco anteriormente ajustado se restablecerá con los valores predenidos de fábrica.
Tono piel
Permite acentuar el tono rosado ‘piel’ de las imágenes.
Al cambiar el valor de ajuste se actualizará la pantalla ajustada.
Mejora del borde → Desactivado / Activado
Permite acentuar los bordes de los objetos en las imágenes.
xvYCC → Desactivado / Activado
Si se activa el modo xvYCC, se aumenta el detalle y la gama de colores mientras se ven películas desde un dispositivo
externo (por ejemplo, un reproductor de DVD).
xvYCC está disponible cuando el modo de imagen está congurado como Película y la entrada externa está en los
modos HDMI o Componente.
Si la función xvYCC está activa, no se puede seleccionar PIP.
Opciones de imagen
En el modo PC sólo se pueden hacer cambios en los elementos Tono de color,
Tamaño y Protección pantalla inactiva del menú Opciones de imagen.
Tono de color → Frío2 / Frío1 / Normal / Cálido1 / Cálido2
Puede seleccionar el tono de color que le resulte más cómodo para la vista.
Los parámetros ajustados se almacenan de acuerdo con el modo Imagen
seleccionado.
Cálido1 o Cálido2 sólo están disponibles cuando el modo de imagen está
congurado en Película.
N
N
N
N
N
N
❑
N
N
•
•
•
N
-
-
-
-
•
•
N
N
N
❑
N
N
N
Color : 50
Matiz (V/R) : V50/R50
Configuración detallada ►
Opciones de imagen
Reinicio de la imagen
Imagen
Matiz (V/R) : V50/R50
Configuración detallada
Opciones de imagen ►
Reinicio de la imagen
Imagen
BN68-01757A-Spa.indb 16 2008-9-24 15:55:35

Español - 17
Tamaño
Puede seleccionar el tamaño de imagen que mejor se adapte a sus requisitos de visualización.
Pulse el botón TOOLS para usar el menú Herramientas.
También se puede congurar el tamaño seleccionando Herramientas → Tamaño de imagen.
Ancho automático: Ajusta automáticamente el tamaño de la imagen a la relación de aspecto de la pantalla 16:9.
16:9: Ajusta el tamaño de la imagen a 16:9, adecuado para ver los DVD o las emisiones en formato ancho.
Zoom ancho: Aumenta el tamaño de la imagen más que 4:3.
Zoom: Amplía la imagen ancha de 16:9 (en sentido vertical) para que la imagen ocupe el tamaño de la pantalla.
4:3: Es la conguración predeterminada para una película de vídeo o una emisión normal.
Sólo exploración: Use esta función para ver la imagen completa sin cortes cuando la entrada de la señal sea HDMI
(720p/1080i/1080p) o Component (1080i/1080p).
Según la fuente de entrada, las opciones de tamaño de la imagen pueden variar.
Las opciones disponibles pueden diferir, según el modelo seleccionado.
En el modo PC, sólo se pueden ajustar los modos 16:9 y 4:3.
La conguración de cada dispositivo externo conectado a una entrada del televisor se puede ajustar y guardar.
Puede producirse una retención temporal de imagen cuando se ve una imagen estática durante más de dos horas.
Zoom ancho: Pulse el botón ► para seleccionar Posición, a continuación, pulse el botón ENTER
E
. Pulse los
botones ▲ o ▼ para desplazar la pantalla hacia arriba o hacia abajo. Pulse el botón ENTER
E
.
Zoom: Pulse el botón ► para seleccionar Posición, a continuación pulse el botón ENTER
E
. Pulse los botones ▲ o
▼ para desplazar la imagen hacia arriba o hacia abajo. Pulse el botón ENTER
E
. Pulse el botón ► para seleccionar
Tamaño, a continuación, pulse el botón ENTER
E
. Utilice los botones ▲ o ▼ para ampliar o reducir el tamaño de la
imagen en dirección vertical. Pulse el botón ENTER
E
.
Después de seleccionar Sólo exploración en los modos HDMI (1080i/1080p) o Component (1080i/1080p): Seleccione
Posición con los botones ◄ o ►. Use los botones ▲, ▼, ◄ o ► para mover la imagen.
Reset: Pulse los botones ◄ o ► para seleccionar Restablecer, a continuación pulse el botón ENTER
E
. Puede
inicializar la conguración.
Si se usa la función Sólo exploración con la entrada HDMI 720p, en los laterales superior, inferior, derecho e izquierdo
de la pantalla se cortará una línea como en la función de sobreexploración.
Si se ha seleccionado el modo doble ( ) en PIP, el tamaño de la imagen no se puede denir.
Modo Pantalla → 16:9 / Zoom ancho / Zoom / 4:3
Cuando se congura el tamaño de la imagen como Ancho automático en un televisor panorámico 16:9, se puede determinar
el tamaño de la imagen para ver una imagen en pantalla panorámica 4:3 WSS o ninguna. Cada país europeo exige un
tamaño de imagen diferente de modo que esta función está concebida con la intención de que los usuarios la seleccionen.
16:9: Ajusta la imagen al modo panorámico 16:9.
Zoom ancho: Aumenta el tamaño de la imagen más que 4:3.
Zoom: Aumenta el tamaño de la imagen verticalmente en la pantalla.
4:3: Ajusta la imagen al modo normal 4:3.
Esta función está disponible en el modo Ancho automático.
Esta función no está disponible en los modos PC, Componente o HDMI.
Digital NR → Desactivado / Bajo / Medio / Alto / Automático
Si la señal de emisión que recibe el televisor es débil, puede activarse la función Digital Noise Reduction para reducir la
estática y las imágenes superpuestas que pueden aparecer en la pantalla.
Cuando la señal sea débil, seleccione alguna de las otras opciones hasta que se vea una imagen de mejor calidad.
DNIe → Desactivado / Demo / Activado
Este televisor incluye la función DNIe con el n de conseguir una gran calidad visual. Si activa DNIe, podrá ver la pantalla con
la función DNIe activada. Si ajusta DNIe en Demo, podrá ver en la pantalla una imagen normal y con el modo DNIe aplicado
para realizar la demostración. Mediante esta función podrá ver la diferencia en la calidad visual.
DNIe™ (motor digital de imágenes naturales) DNIe™
Esta función proporciona una imagen más detallada con reducción de interferencias 3D, ampliación de los detalles, mejora
del contraste y mejora de los blancos. El nuevo algoritmo de compensación de imagen proporciona una imagen más
detallada, más clara y con más brillo. La tecnología DNIe™ adapta todas las señales al ojo humano.
Esta función no está disponible en los modos Película y Estándar.
N.neg HDMI → Normal / Bajo
Se puede seleccionar directamente el nivel de negro en la pantalla para ajustar la profundidad de ésta.
Esta función sólo está activa cuando se conecta la entrada externa a HDMI (señales RGB).
T
•
•
•
•
•
•
N
N
N
N
N
N
N
N
N
N
N
•
•
•
•
N
N
N
N
N
N
BN68-01757A-Spa.indb 17 2008-9-24 15:55:35
Español - 18
Demo de Real 100Hz? → Desactivado/Activado
Se puede ver una distinción clara entre Real 100Hz y 50 Hz, especialmente cuando se miran escenas de acción. Por ello,
cuando contemple escenas con escaso movimiento no podrá diferenciar Real 100Hz de 50 Hz. La Demo 100 Hz funciona
sólo con la señal de 50 Hz. El modo demo de Real 100Hz se proporciona para demostraciones en comercios con imágenes
especiales.
Mejor cine → Desactivado/Bajo/Medio/Alto/Demo
Podrá ver un tono de piel más natural y el texto con más claridad incluso en las escenas de acción.
Use esta función cuando vea películas.
Esta función no está disponible en los modos Zoom ancho y Zoom.
Esta función no está disponible cuando PIP está configurado en Activado.
No se admite en el modo HDMI 1080p/24Hz, 25Hz, 30Hz.
Sólo modo azul → Desactivado/Activado
Esta función es para expertos en la medición de dispositivos AV. Esta función muestra sólo la señal azul ya que se eliminan
las señales rojas y verdes de la señal de vídeo a n de proporcionar un efecto de ltro azul que se usa para ajustar el color y
el matiz de los equipos de vídeo, como reproductores DVD, sistemas Home Cinema, etc. Con esta función se puede ajustar
el color y el matiz de acuerdo con los valores preferidos adecuados al nivel de la señal de cada dispositivo de vídeo mediante
los patrones de barras de colores rojo/verde/azul/cián/magenta/amarillo, sin usar un ltro azul adicional.
La función Sólo modo azul está disponible cuando el modo de imagen está congurado como Película o Estándar.
Protección pantalla inactiva
Esta pantalla está equipada con tecnología de prevención para reducir la posibilidad de que se queme. Esta tecnología
permite denir el movimiento de la imagen arriba o abajo (línea vertical) y de lado a lado (punto horizontal). El ajuste del
tiempo permite programar intervalos temporales entre los movimientos de la imagen en minutos.
Cambio píxel: Con esta función podrá mover píxeles de forma detallada en la PDP, en sentido horizontal o vertical, para
minimizar restos de imágenes en la pantalla.
Seleccione Cambio píxel en On pulsando los botones ▲ o ▼ y ENTER.
Seleccione la opción necesaria pulsando los botones ▲ o ▼ y, a continuación, pulse el botón ENTER.
Opciones disponibles: Puntos Horiz., Lineas verticales, Hora.
Condición óptima para cambio de píxel:
PC TV/Ext/AV/Componente/HDMI
Puntos Horiz. 4 4
Lineas verticales 4 4
Hora (minutos) 4 2 min
El valor Pixel Shift puede variar según el tamaño (pulgadas) del monitor y el modo.
Esta función no está disponible en el modo Sólo explorar.
Blanco: hite: Esta función ayuda a suprimir los restos de imágenes en la pantalla cambiando el color de los píxeles
a blanco. Utilice esta función si hay restos de imágenes o símbolos en la pantalla, especialmente después de haber
mostrado una imagen ja en la pantalla durante un largo tiempo.
Desplazamiento: Esta función ayuda a suprimir los restos de imágenes en la pantalla moviendo todos los píxeles de la
PDP de acuerdo con un patrón. Utilice esta función si hay restos de imágenes o símbolos en la pantalla, especialmente
después de haber mostrado una imagen ja en la pantalla durante un largo tiempo.
Lateral gris: Cuando se ve la televisión con una relación de pantalla de 4:3, ésta se puede proteger de un posible daño si
se ajusta el balance de blanco en ambos extremos, el izquierdo y el derecho.
Oscuro: Cuando se establece una relación de pantalla de 4:3, con esta opción se oscurecen ambos extremos, el
izquierdo y el derecho.
Claro: Cuando se establece una relación de pantalla de 4:3, con esta opción se aclaran ambos extremos, el izquierdo
y el derecho.
Reinicio de la imagen → Restablecer modo imagen / Cancelar
Restablece todos los ajustes predeterminados.
Seleccione un modo de imagen que desee restaurar. La restauración se realiza en cada modo de imagen.
N
N
N
N
N
•
N
N
N
N
N
N
•
•
•
-
-
❑
N
BN68-01757A-Spa.indb 18 2008-9-24 15:55:36

Español - 19
Visualización de imagen sobre imagen
Puede mostrar una imagen secundaria dentro de la imagen principal de un
programa de TV o entrada de vídeo. De esta forma puede ver una imagen del
programa de TV o de la entrada de vídeo desde cualquier equipo conectado
mientras ve la imagen principal.
Cuando utilice la pantalla principal para ver un juego o un karaoke, podrá
advertir que la imagen en la ventana PIP es ligeramente poco natural.
Pulse el botón TOOLS para usar el menú Herramientas. También puede
ajustar valores relacionados con la conguración de PIP seleccionando
Herramientas → PIP.
PIP → Desactivado / Activado
Puede activar o desactivar la función PIP.
Imagen principal Imagen secundaria
Component
HDMI 1, HDMI / DVI 2, HDMI 3,
HDMI 4
PC
TV, Ext.1, Ext.2, AV
Fuente
Puede seleccionar un origen para una imagen secundaria.
Tamaño → / /
Puede seleccionar un tamaño para la imagen secundaria.
Si la imagen principal está en modo HDMI, la opción Tamaño está disponible.
Posición → / / /
Puede seleccionar una posición para una imagen secundaria.
En el modo doble ( , ), Posición no se puede seleccionar.
Canal
Puede seleccionar un canal de la imagen secundaria sólo cuando la opción Fuente está congurada en TV.
Pulse el botón TOOLS para usar el menú Herramientas.
También se puede congurar el modo de la imagen seleccionando Herramientas
→
PIP
N
T
❑
N
N
T
Ajuste del televisor con el ordenador
Preselección: Pulse el botón SOURCE para seleccionar el modo PC.
Ajuste automático
Esta función permite que la pantalla de PC del equipo se ajuste
automáticamente a la señal de vídeo del PC. Los valores no, grueso y
posición se ajustan automáticamente.
Esta función no se puede utilizar en modo DVI-HDMI.
Pulse el botón TOOLS para usar el menú Herramientas. También se
puede congurar esta opción seleccionando Herramientas → Ajuste
automático.
Pantalla
Grueso / Fino: El objetivo del ajuste de la calidad de imagen es eliminar o reducir las interferencias. Si el ruido no se
elimina mediante la sintonización na, ajuste la frecuencia lo mejor que pueda (gruesa) y vuelva a realizar la sintonización
na. Después de reducir el ruido, vuelva a ajustar la imagen para que quede alineada en el centro de la pantalla.
Posición de PC: Ajuste la posición de la pantalla del PC si no se acopla a la pantalla del TV. Pulse los botones ▲ o ▼ para
ajustar la posición vertical. Pulse los botones ◄ o ► para ajustar la posición horizontal.
Restablecer imagen: Puede recuperar todos los ajustes de imagen predeterminados de fábrica.
N
❑
N
T
❑
Conguración
Ocio : Desactivado
Ahorro energía : Desactivado
PIP ►
Software superior
Interfaz común
PIP
PIP : Activado
Fuente : TV
Tamaño :
Posición :
Canal : ATV 11
L
Mover
E
Entrar
R
Volver
Brillo : 45
Nitidez : 50
Ajuste automático
►
Pantalla
Configuración detallada
Opciones de imagen
Reinicio de la imagen
Imagen
BN68-01757A-Spa.indb 19 2008-9-24 15:55:36

Español - 20
Pantalla de PC
Conguración del software del PC (basado en Windows XP)
A continuación se muestra la conguración de visualización de Windows para un
ordenador típico. Probablemente la pantalla real de su PC sea distinta, según
la versión concreta de Windows y de la tarjeta de vídeo que tenga. Aunque las
pantallas reales sean diferentes, la información de configuración básica que se
aplica en casi todos los casos es la misma. (En caso contrario, póngase en contacto
con el fabricante del ordenador o con el distribuidor de Samsung.)
1. Primero, haga clic en ‘Panel de control’ en el menú Inicio de Windows.
2. Cuando aparezca la ventana del panel de control, haga clic en ‘Apariencia y
temas’ y aparecerá un cuadro de diálogo.
3. Cuando aparezca la ventana del panel de control, haga clic en ‘Pantalla’ y
aparecerá un cuadro de diálogo.
4. Seleccione la cha ‘Conguración’ en el cuadro de diálogo.
Conguración correcta del tamaño (resolución)
Óptimo: 1920 X 1080 píxeles
Si existe una opción de frecuencia vertical en el cuadro de diálogo de
configuración de la pantalla, el valor correcto es ‘60’ o ‘60 Hz’. En caso
contrario, haga clic en ‘Aceptar’ y salga del cuadro de diálogo.
Modos de visualización
Tanto la posición en la pantalla como el tamaño varían dependiendo del tipo de monitor del PC y de su resolución.
Se recomiendan las resoluciones de la tabla.
Entrada D-Sub
Modo Resolución Frecuencia
horizontal (kHz)
Frecuencia vertical
(Hz)
Frecuencia de reloj
de píxeles (MHz)
Polaridad sincr.
(H/V)
IBM 640 x 350
720 x 400
31.469
31.469
70.086
70.087
25.175
28.322
+ / -
- / +
VESA
640 x 480
640 x 480
640 x 480
800 x 600
800 x 600
800 x 600
1024 x 768
1024 x 768
1024 x 768
1280 x 1024
1280 x 1024
1360 x 768
1600 x 1200
31.469
37.861
37.500
37.879
48.077
46.875
48.363
56.476
60.023
63.981
79.976
47.712
75.000
59.940
72.809
75.000
60.317
72.188
75.000
60.004
70.069
75.029
60.020
75.025
60.015
60.000
25.175
31.500
31.500
40.000
50.000
49.500
65.000
75.000
78.750
108.000
135.000
85.500
162.000
- / -
- / -
- / -
+ / +
+ / +
+ / +
- / -
- / -
+ / +
+ / +
+ / +
+ / +
+ / +
CVT 1920 x 1080RB 66.587 59.934 138.500 + / -
Entrada HDMI/DVI
Modo Resolución Frecuencia
horizontal (kHz)
Frecuencia vertical
(Hz)
Frecuencia de reloj
de píxeles (MHz)
Polaridad sincr.
(H/V)
VESA
640 x 480
800 x 600
1024 x 768
1280 x 1024
1360 x 768
1600 x 1200
31.469
37.879
48.363
63.981
47.712
75.000
59.940
60.317
60.004
60.020
60.015
60.000
25.175
40.000
65.000
108.000
85.500
162.000
- / -
+ / +
- / -
+ / +
+ / +
+ / +
CEA 1920 x 1080p 67.500 60.000 148.500 + / +
Cuando se usa un cable de conexión HDMI/DVI, se debe utilizar el terminal HDMI IN 2.
No se admite el modo entrelazado.
El aparato puede funcionar incorrectamente si se selecciona un formato de vídeo que no sea estándar.
Los modos Independiente y Compuesto no se admiten. SOG no se admite.
Un cable VGA demasiado largo o de mala calidad puede provocar que se vea la imagen con ruido en los modos de
resolución alta (1920 x 1080).
N
N
N
N
N
BN68-01757A-Spa.indb 20 2008-9-24 15:55:36
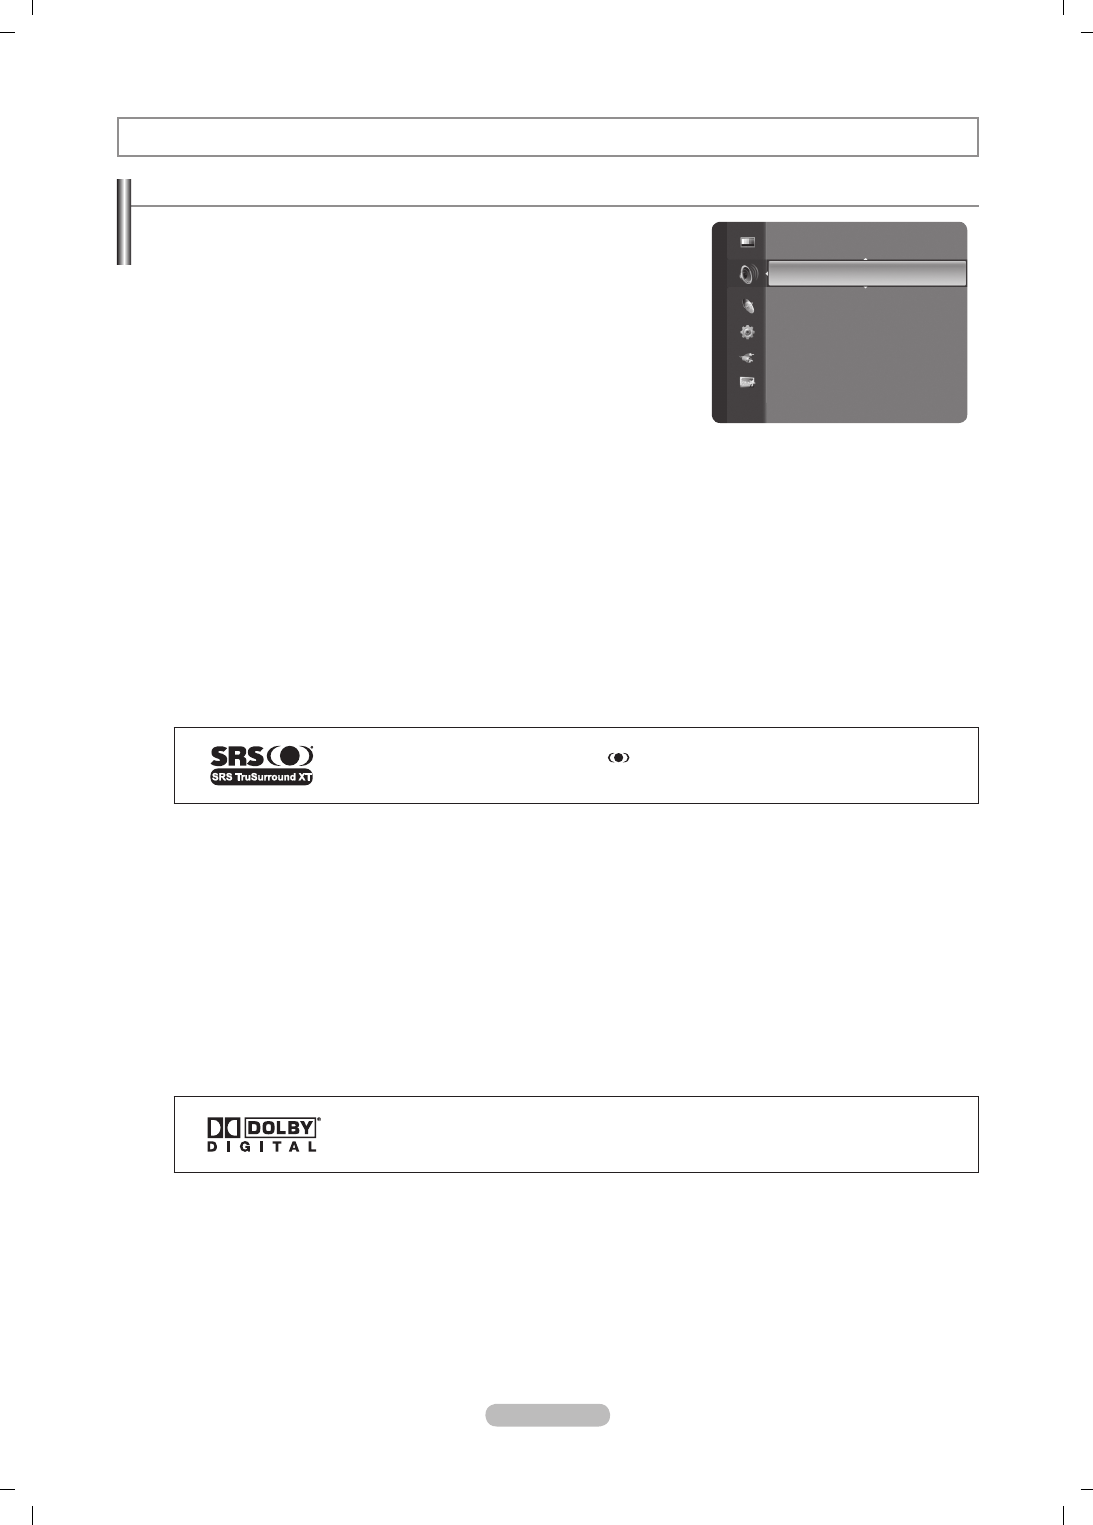
Español - 21
Control del sonido
Cambio del estándar de sonido
Modo → Estándar / Música / Película / Diálogo / Personal
Se puede seleccionar el tipo de efecto de sonido especial que se va a usar
cuando se ve un programa.
Pulse el botón TOOLS para usar el menú Herramientas. También se
puede congurar el modo de sonido seleccionando Herramientas →
Modo de sonido.
Ecualizador
Es posible ajustar los parámetros del sonido según las preferencias personales.
Modo:
Se puede seleccionar el modo de sonido que se ajuste mejor a las
preferencias personales.
Balance:
Ajusta el balance entre los altavoces izquierdo y derecho.
100Hz / 300Hz / 1kHz / 2kHz / 10kHz
(ajuste de ancho de banda): Para ajustar el nivel de las diferentes frecuencias de
ancho de banda
Restablecer:
Restablece todos los ajustes del ecualizador predeterminados.
SRS TruSurround XT → Desactivado / Activado
TruSurround XT es una tecnología SRS patentada que solventa el problema de reproducir contenido multicanal 5.1 en
dos altavoces. TruSurround proporciona una experiencia de sonido virtual convincente a través de cualquier sistema de
reproducción con dos altavoces, incluso con los altavoces internos del televisor. Es totalmente compatible con todos los
formatos multicanal.
Pulse el botón TOOLS para usar el menú Herramientas.
También se puede congurar SRS TruSurround XT seleccionando Herramientas → SRS TS XT.
TruSurround XT, SRS y el símbolo son marcas registradas de SRS Labs, Inc.
La tecnología TruSurround XT está incorporada bajo licencia de SRS Labs, Inc.
Idioma de audio
Se pueden cambiar los valores predeterminados para los idiomas del audio. Muestra la información del idioma para el ujo de
entrada.
Cuando se visualiza un canal digital se puede seleccionar esta opción.
Sólo se puede seleccionar uno de los idiomas que ofrece la emisora.
Formato audio→ MPEG / Dolby Digital
Cuando el sonido se emite desde un altavoz principal y un receptor de audio, se puede originar un sonido de eco debido a las
diferencias en la velocidad de decodicación entre el altavoz principal y un receptor de audio. En tales casos, use la función
Altavoz de TV (TV Speaker).
Cuando se visualiza un canal digital se puede seleccionar esta opción.
Sólo se puede seleccionar uno de los idiomas que ofrece la emisora.
Fabricado bajo licencia de Dolby Laboratories. Dolby y el símbolo de la doble D son marcas
comerciales de Dolby Laboratories.
Descripción de audio
Es una función auxiliar de audio que proporciona una pista de audio adicional para personas con problemas de vista. Esta
función maneja el ujo de audio de AD (Descripción de audio) cuando se envía desde el emisor con el audio principal. Los
usuarios pueden activar o desactivar la descripción de audio y controlar el volumen.
Descripción de audio → Desactivado / Activado:
Activa o desactiva la función de descripción del audio.
Volumen:
Se puede ajustar el volumen de la descripción del audio.
Volumen está activo cuando Descripción de audio se congura como Activado.
Cuando se visualiza un canal digital se puede seleccionar esta opción.
❑
T
❑
❑
T
❑
N
N
❑
N
N
❑
N
N
Modo : Personal
►
Ecualizador
SRS TruSurround XT : Desactivado
Idioma de audio : ----
Formato audio : ----
Descripción de audio
Volumen automático : Desactivado
Seleccionar altavoz : Altavoz de TV
Sonido
BN68-01757A-Spa.indb 21 2008-9-24 15:55:37
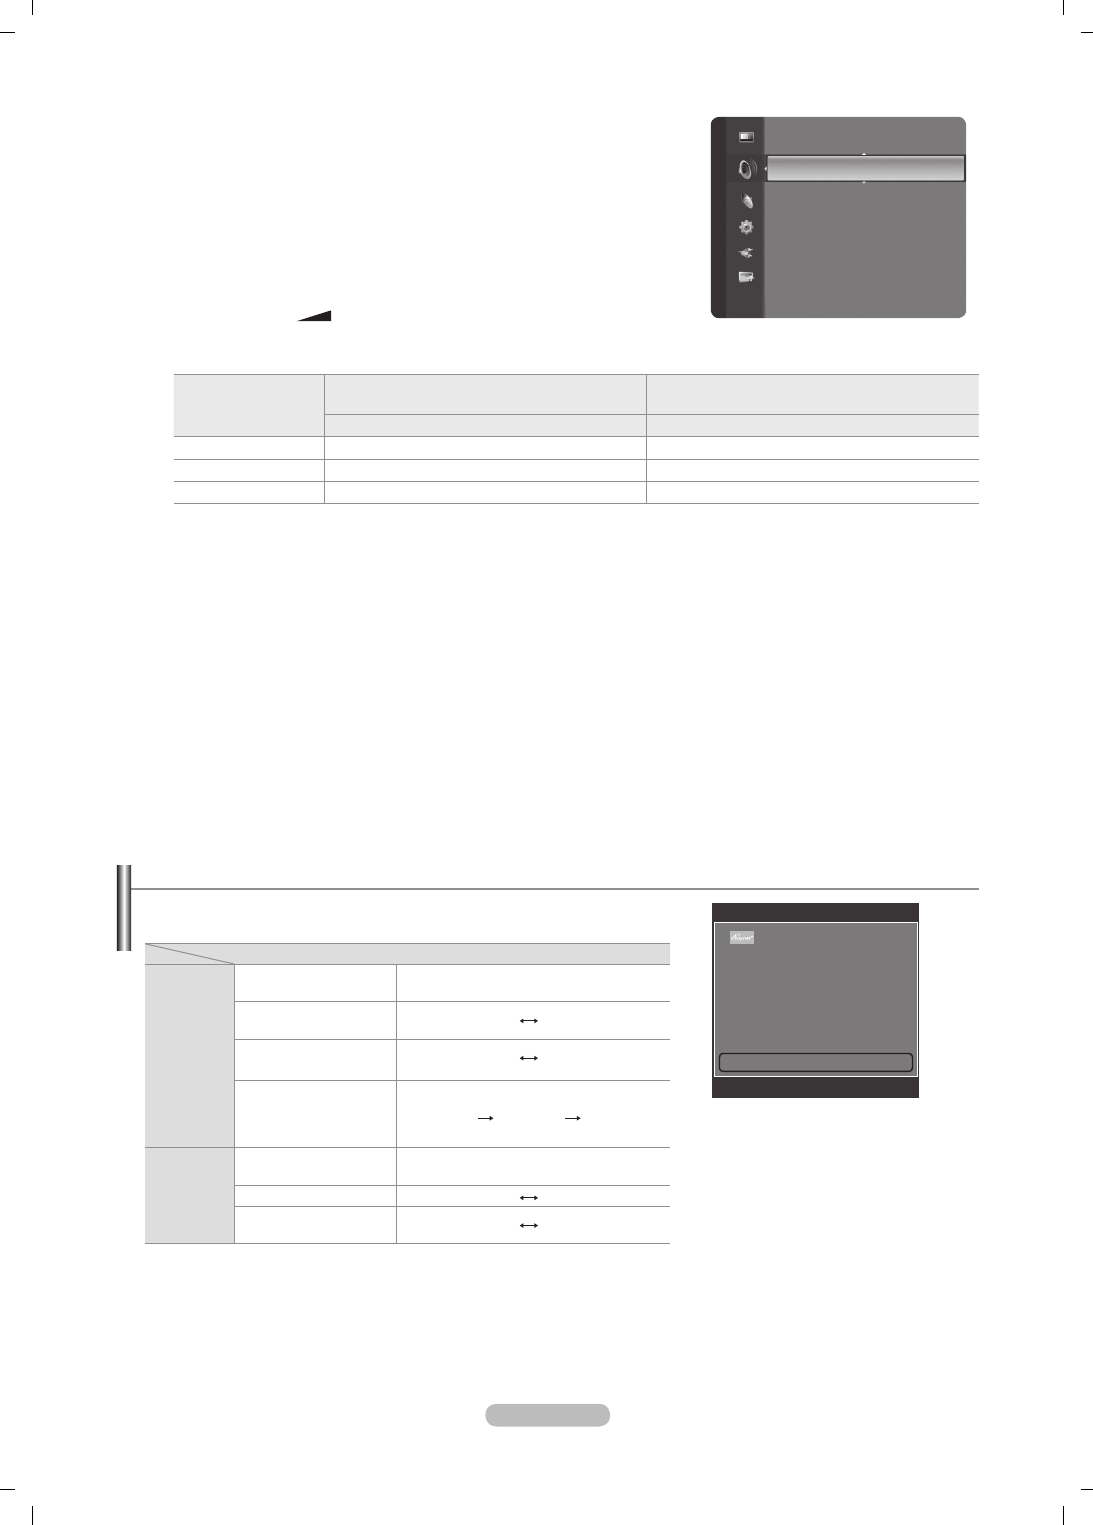
Español - 22
Selección del modo de sonido
Puede denir el modo de sonido en el menú Herramientas. Cuando se congura
Dual I-II, el modo de sonido actual se muestra en la pantalla.
Tipo de emisión Indicación en pantalla
NICAM
Estéreo
Emisión normal
(Audio estándar) Mono (Uso normal)
Normal + Mono NICAM NICAM Mono
(Normal)
NICAM estéreo NICAM
estéreo
Mono
(Normal)
NICAM DUAL-I/II NICAM
Dual-1
NICAM
Dual-2
Mono
(Normal)
A2
Estéreo
Emisión normal
(Audio estándar) Mono (Uso normal)
Bilingüe o Dual-I/II Dual-I Dual II
Estéreo Estéreo Mono
(Monoaural forzado)
Si la señal de estéreo es débil y el modo cambia de forma automática, cambie a mono.
Esta función sólo está activa en la señal de sonido estéreo. Está desactivada en el modo de señal monoaural.
Esta función sólo está disponible en el modo TV.
N
N
N
Volumen autom. → Desactivado / Activado
Cada emisora tiene sus propias condiciones de señal y resulta incómodo
ajustar el volumen cada vez que se cambia de canal. Esta función permite
ajustar automáticamente el volumen de un canal disminuyendo la salida de
sonido cuando la señal de modulación es alta o aumentando la salida de
sonido cuando la señal de modulación es baja.
Seleccionar altavoz → Altavoz externo / Altavoz de TV
Si desea usar unos altavoces independientes, cancele el amplicador interno.
Los botones – + y MUTE no funcionan si Altavoz de TV está
establecido en Des..
Si se selecciona Altavoz externo en el menú Seleccionar altavoz, se limita la conguración del sonido.
Altavoces internos del televisor Salida de audio (óptica, salida I/D) para el sistema de
sonido
TV / Ext. / AV / S-Video / Component / PC / HDMI TV / Ext. / AV / S-Video / Component / PC / HDMI
Altavoz de TV Salida de altavoces Salida de sonido
Altavoz externo Silencio Salida de sonido
Sin señal del vídeo Silencio Silencio
Selección de sonido
Cuando se activa la función PIP se puede escuchar el sonido de la imagen secundaria (PIP).
Principal:
Se usa para escuchar el sonido de la imagen principal.
Sub:
Se usa para escuchar el sonido de la imagen secundaria.
Pulse el botón TOOLS para usar el menú Herramientas. También se puede congurar el sonido de la imagen secundaria
seleccionando Herramientas → PIP → Selección de sonido.
Reinicio del sonido
Restablecer todo / Rest. m. sonido / Cancelar: Puede restaurar la conguración del sonido con los valores
predeterminados de fábrica.
❑
❑
N
N
❑
T
❑
Herramientas
Anynet+ (HDMI-CEC)
Tamaño de imagen : Ancho automático
Modo imagen : Estándar
Modo de sonido : Personal
Temp.desc. : Desactivado
SRS TS XT : Desactivado
Ahorro energía : Desactivado
Dual l ll ◄ Mono ►
U
Mover
L
Ajustar
e
Salir
Seleccionar altavoz : Altavoz de TV
Selección de sonido : Principal
Reinicio del sonido ►
Sonido
BN68-01757A-Spa.indb 22 2008-9-24 15:55:37
Español - 23
Conguración del menú de conguración
Idioma
Se puede congurar el idioma de los menús.
Seguridad niños → Desactivado / Activado
Esta función permite bloquear el vídeo y el audio para evitar que los
usuarios no autorizados (por ejemplo, los niños) puedan ver programas poco
recomendables.
Antes de que se muestre la pantalla de conguración, aparece la pantalla
para la introducción del código PIN. Escriba su código PIN de 4 dígitos.
El código PIN predeterminado para un televisor nuevo es 0-0-0-0. Se
puede cambiar el PIN seleccionando Cambiar PIN en el menú.
Se pueden bloquear algunos canales en la lista de canales. (consulte la página 14)
Seguridad para niños sólo está disponible en el modo TV.
Cambiar PIN
Se puede cambiar el número ID personal necesario para congurar el televisor.
Antes de que se muestre la pantalla de conguración, aparece la pantalla para la introducción del código PIN. Escriba su
código PIN de 4 dígitos.
El código PIN predeterminado para un televisor nuevo es 0-0-0-0.
Si ha olvidado el código PIN, pulse los botones del mando a distancia en la siguiente secuencia para reiniciar el PIN a
0-0-0-0: Botón de encendido (OFF), MUTE, 8, 2, 4, Botón de encendido (ON).
Bloqueo paterno → Clasicación paterna
Con esta función se puede impedir por medio de un código PIN (número de identicación personal) de 4 dígitos denido por
el usuario que personas no autorizadas, como los niños, vean programas inadecuados.
En la pantalla Clasicación paterna congure la clasicación parental.
Antes de que se muestre la pantalla de conguración, aparece la pantalla para la introducción del código PIN. Escriba su
código PIN de 4 dígitos.
El código PIN predeterminado para un televisor nuevo es 0-0-0-0. Se puede cambiar el PIN seleccionando Cambiar PIN
en el menú.
Una vez establecida la clasicación, se muestra el símbolo “
\
”.
Perm. todo: Se pulsa para desbloquear todos los programas de televisión.
Bloq. todo: Se pulsa para bloquear todos los programas de televisión.
Subtítulos
Se pueden activar o desactivar los subtítulos. Use este menú para congurar Modo de subtítulo. Normal es la opción básica
y Duro de oído es la opción para personas con problemas de audición.
Subtítulos → Activado / Desactivado:
Activa o desactiva los subtítulos.
Modo → Normal / Duro de oído:
Establece el modo de los subtítulos.
Idioma de los subtídtulos:
Establece el idioma de los subtítulos.
Si el programa que se está viendo no admite la opción Duro de oído, automáticamente se activa Normal aunque se
seleccione Duro de oído.
El inglés es el idioma predeterminado cuando en una emisión no está disponible la selección de idiomas.
Puede seleccionar estas opciones pulsando el botón SUBT. del mando a distancia.
Idioma del teletexto
Se puede congurar el idioma del teletexto seleccionando el tipo de idioma.
El inglés es el idioma predeterminado cuando en una emisión no está
disponible la selección de idiomas.
❑
❑
N
N
N
N
❑
N
N
N
❑
-
N
N
N
N
❑
N
N
N
❑
N
Descripción de las funciones
Conguración
Plug & Play
Idioma : Español ►
Hora
Selección de red : Cable
Config.red inalámb.
Configuración de red por cable
Seguridad niños : Activado
Cambiar PIN
Bloqueo paterno
BN68-01757A-Spa.indb 23 2008-9-24 15:55:38
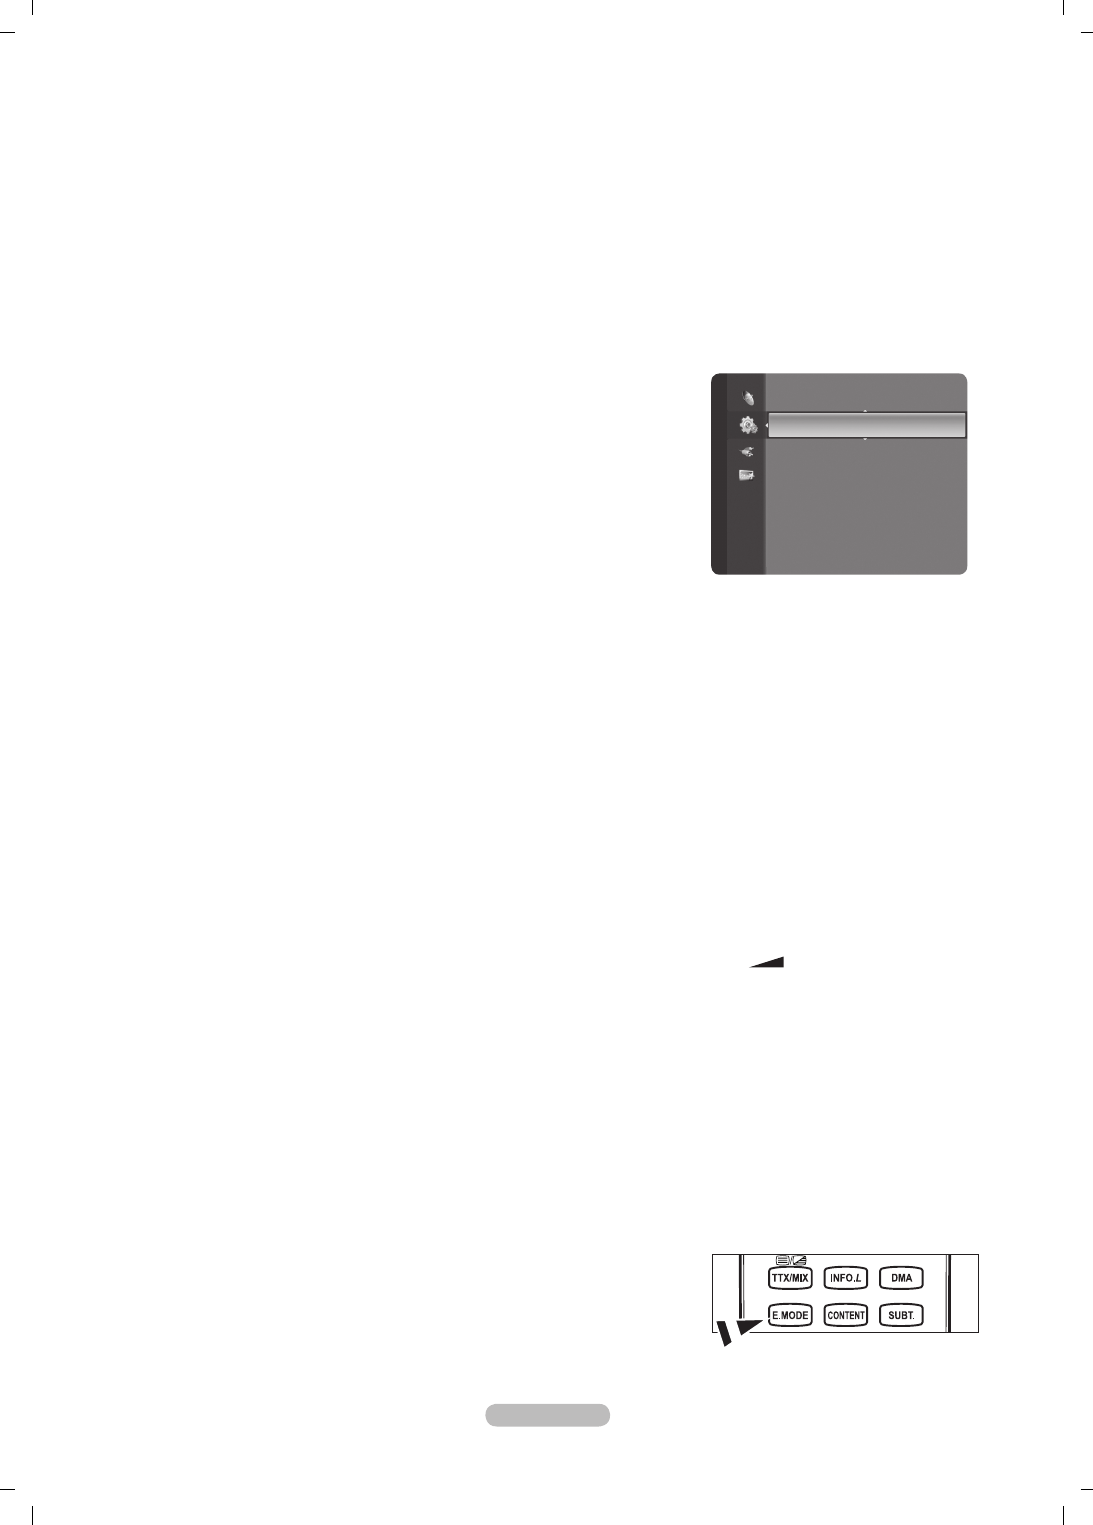
Español - 24
Preferencias
Idioma principal audio/ Idioma secundario audio/ Idioma princ. subtítulos / Idioma sec. subtítulos / Idioma principal del
teletexto / Idioma secundario del teletexto
Con esta función los usuarios pueden seleccionar uno de los idiomas. El idioma seleccionado aquí se convierte en el
predeterminado cuando se selecciona un canal.
Si se cambia la conguración del idioma, las opciones de idioma de los subtítulos, idioma de audio o idioma del teletexto del
menú de idioma se cambian automáticamente al idioma seleccionado.
Las opciones de idioma de los subtítulos, idioma de audio e idioma del teletexto, del menú de idioma, muestran una lista de
los idiomas admitidos en el canal actual y la selección se resalta. Si cambia la conguración del idioma, ésta sólo es válida en
el canal actual. Los cambios de conguración no afectan a las opciones de idioma principal de los subtítulos, idioma principal
audio o idioma principal del teletexto del menú de preferencias.
Texto digital → Disable / Enable
Si el programa se emite con texto digital, esta opción está activada.
MHEG (Multimedia and Hypermedia Information Coding Experts
Group -Grupo de expertos para la codicación de la información
hipermedia y multimedia)
Es una norma internacional para los sistemas de codicación de datos
que se utilizan en hipermedia y multimedia. Es un nivel superior al sistema
MPEG que incluye hipermedia vinculado a datos, como imágenes jas,
servicios de caracteres, animaciones, grácos y archivos de vídeo así
como datos multimedia. MHEG es una tecnología de interacción de tiempo
de ejecución del usuario que se aplica en varios campos, como VOD
(vídeo a la carta), ITV (televisión interactiva), EC (comercio electrónico),
educación a distancia, teleconferencias, bibliotecas digitales y juegos de red.
Efecto de luz → Desactivado / Modo apag. act. / Modo enc. act. / Activado
Se puede apagar o encender el LED azul del frontal del televisor según las circunstancias. Use esta función para ahorrar
energía o si el LED le molesta a la vista.
Desactivado: El LED azul siempre está apagado.
Modo apag. act.: El LED azul se enciende cuando el TV está en modo de espera y se apaga cuando se apaga el televisor.
Modo enc. act.: El LED azul se enciende cuando se ve la televisión y se apaga cuando se apaga el televisor.
Activado: El LED está siempre encendido.
Desactive la opción Light Effect para reducir el consumo de energía.
Melodía
Des. / Bajo / Medio / Alto
La melodía del encendido y del apagado del televisor se puede congurar.
La melodía no se reproduce
Cuando no hay salida de sonido desde el televisor porque se ha activado el botón MUTE.
Cuando no hay salida de sonido desde el televisor porque se ha pulsado el botón – (Volumen).
Cuando la función de temporizador ha apagado el televisor.
Ocio
El modo Ocio permite seleccionar una visualización y un sonido óptimos en los deportes, películas y juegos.
Desactivado:
Desactiva la función
Ocio.
Deportes:
Proporciona una calidad óptima de imagen para los deportes.
Cine:
Proporciona la mejor calidad de imagen y sonido para ver películas. Se obtienen mejores imágenes y se resalta
el sonido.
Juego:
Proporciona la mejor calidad de imagen y sonido para los juegos. Este modo acelera la velocidad de
reproducción de los juegos cuando se usa una consola de juegos externa conectada al televisor.
Si congura cualquiera de los tres modos de Ocio como On, la conguración se bloquea y no se puede ajustar. Además, no
se puede realizar la conguración de los modos de imagen y sonido. Si desea congurar los modos de imagen y sonido, debe
desactivar el modo Ocio.
La conguración de Ocio se guarda para cada fuente de entrada.
El modo Ocio no está activado en el modo PC.
Se puede pulsar varias veces el botón E.MODE del mando a distancia para
cambiar la conguración de Ocio.
❑
❑
N
❑
N
❑
N
-
-
-
❑
N
N
N
N
Conguración
Teletext Language : ----
Preferencias
Texto digital : Enable ►
Efecto de luz : Modo enc. act.
Ajuste del montaje mural
Melodía : Desactivado
Ocio : Desactivado
Ahorro energía : Desactivado
PIP
Software superior
BN68-01757A-Spa.indb 24 2008-9-24 15:55:38
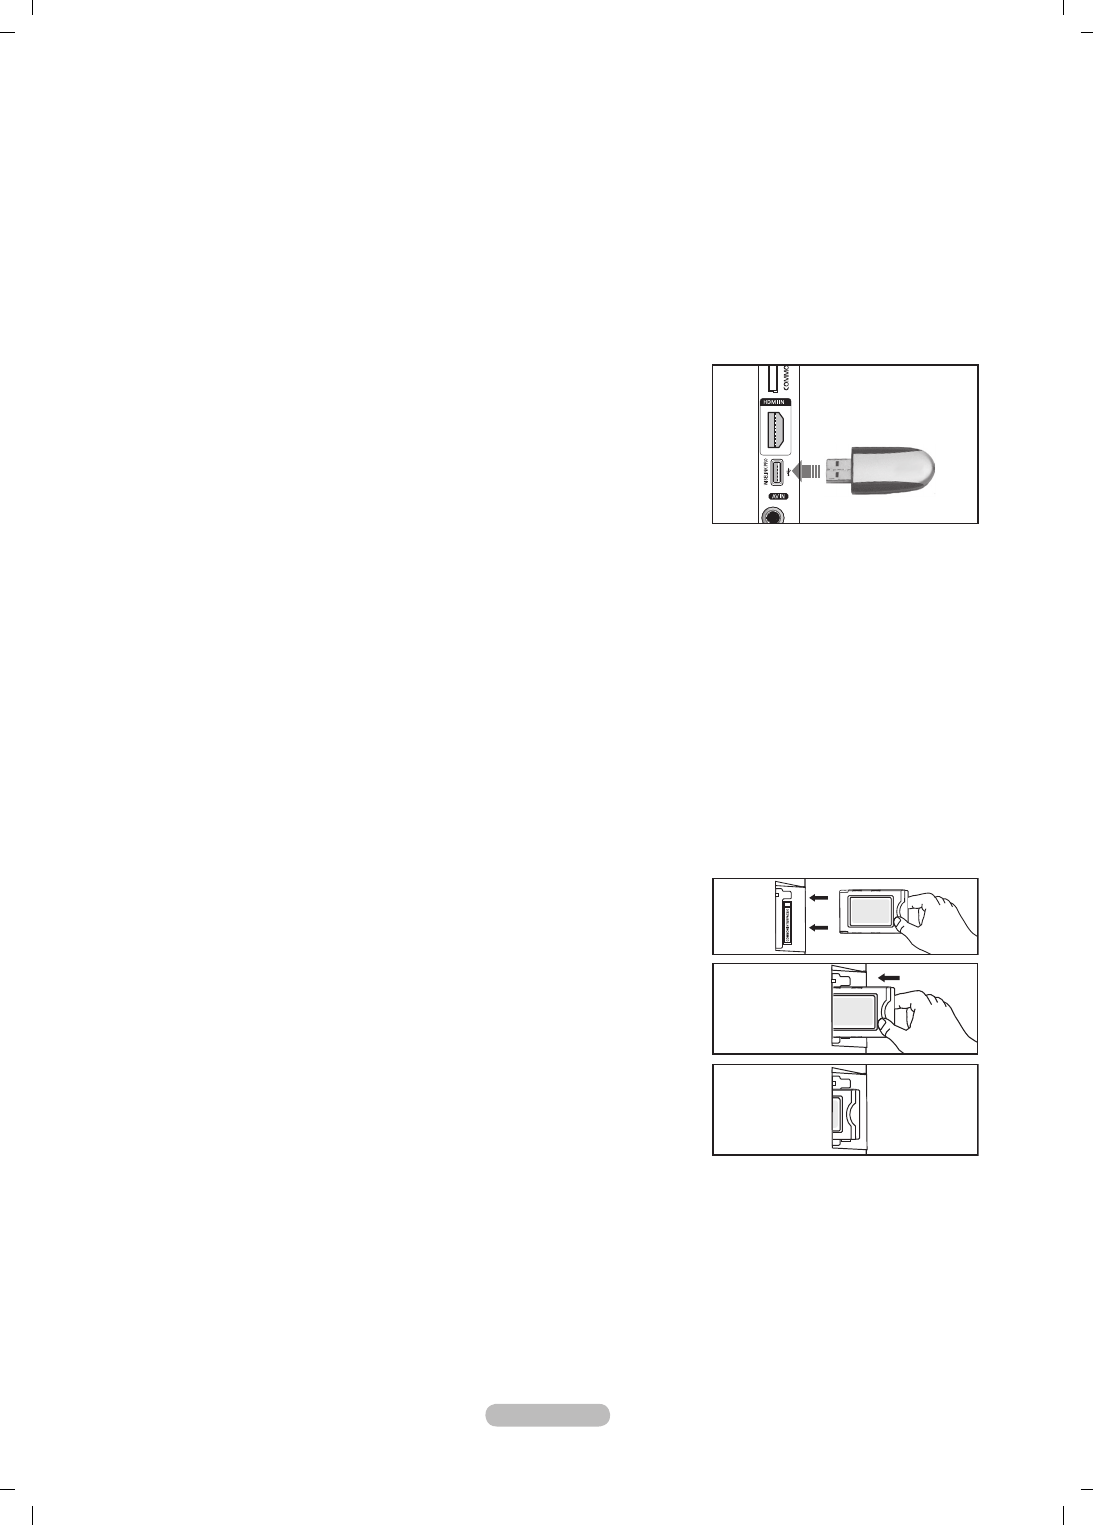
Español - 25
Ahorro energía
Esta función ajusta el brillo del televisor, lo cual reduce el consumo de energía. Si desea ver la televisión por la noche, ajuste
la opción del modo Ahorro energía en Alto; sus ojos se lo agradecerán y, además, reducirá el consumo de energía.
Desactivado:
Apaga la función de ahorro de energía.
Bajo:
Configura el televisor en el modo de ahorro de energía bajo.
Medio:
Configura el televisor en el modo de ahorro de energía medio.
Alto:
Configura el televisor en el modo de ahorro de energía alto.
Pulse el botón TOOLS para usar el menú Herramientas.
También puede congurar esta opción seleccionando Herramientas → Ahorro energía.
Software superior
Para mantener el producto actualizado con las nuevas funciones de la
televisión digital se envían periódicamente actualizaciones de software como
parte de una señal normal de televisión. Automáticamente se detectan estas
señales y se muestra una pantalla de actualización del software. Se presenta la
opción de instalar la actualización.
POR USB
Inserte una unidad USB que contenga la actualización del rmware en el
televisor. No desconecte la alimentación ni extraiga la unidad USB mientras
se aplican las actualizaciones. El televisor se apagará y se encenderá
automáticamente después de completar la actualización del rmware. Después de realizar la actualización compruebe la
versión del rmware. Cuando se actualiza el software, la conguración de vídeo y audio que se haya efectuado vuelve a la
conguración predeterminada (de fábrica). Es aconsejable anotar la conguración para recuperarla fácilmente después de la
actualización.
Por canal
Actualiza el software a través de una señal de emisión.
Actualización del modo de suspensión
Para continuar con la actualización del software con el conmutador de encendido principal activado, seleccione On pulsando
los botones ▲ o ▼. 45 minutos después de haber entrado en el modo de suspensión, se inicia automáticamente una
actualización manual. Dado que la alimentación de la unidad está activada internamente, la pantalla puede encenderse
ligeramente. Este fenómeno puede durar una hora mientras la actualización del software se completa.
Software alternativo
Para mostrar la información de la versión del software.
Interfaz común
Instalación de la tarjeta CI
a. Puede adquirir el módulo del CAM de CI por teléfono o en el distribuidor más
cercano a su domicilio.
b. Inserte la tarjeta CI en el CAM siguiendo la dirección de la echa hasta que
encaje.
c. Inserte el CAM con la tarjeta CI instalada en la ranura para interfaz común.
Inserte el CAM, siguiendo la dirección de la echa, hasta el fondo, de modo
que quede paralelo a la ranura.
d. Compruebe si se ven imágenes en un canal de señal codicada.
Menú CI
Permite al usuario realizar selecciones en el menú CAM proporcionado.
Seleccione el menú CI según el menú de la tarjeta PC.
Info. sobre la aplicación
La interfaz común contiene y muestra información acerca del CAM insertado en la ranura CI.
La información de la aplicación insertada se reere a la tarjeta CI. La instalación del CAM puede efectuarse con el televisor
encendido o apagado.
1. Puede adquirir el módulo del CAM de CI por teléfono o en el distribuidor más cercano a su domicilio.
2. Inserte la tarjeta CI en el CAM siguiendo la dirección de la echa hasta que encaje.
3. Inserte el CAM con la tarjeta CI instalada en la ranura para interfaz común. (Inserte el CAM, siguiendo la dirección de la
echa, hasta el fondo, de modo que quede paralelo a la ranura.)
4. Compruebe si se ven imágenes en un canal de señal codicada.
❑
T
❑
❑
N
4
Panel lateral del TV
Unidad USB
BN68-01757A-Spa.indb 25 2008-9-24 15:55:39
Español - 26
Conguración de la hora
Reloj
Para usar las diferentes funciones del temporizador del televisor es necesario
congurar el reloj.
La hora actual aparecerá siempre que se pulse el botón INFO.
Si desconecta el cable de alimentación, debe congurar el reloj de nuevo.
Modo de reloj
Se puede congurar la hora actual manual o automáticamente.
Automático: Congure la hora automáticamente mediante la información de
la hora de la emisión digital.
Manual: Congure la hora actual manualmente.
Ajustar hora
Puede ajustar la hora actual manualmente.
Establezca este elemento cuando congure Modo de reloj como Manual.
Puede ajustar el mes, el día, el año, la hora y el minuto directamente
pulsando los botones numéricos del mando a distancia.
Temp.desc. → Desactivado / 30 min / 60 min / 90 min / 120 min
/ 150 min / 180 min
El temporizador de desconexión apaga automáticamente el televisor después
de un período prejado (30, 60, 90, 120, 150 y 180 minutos).
Cuando el temporizador llega a 0, el televisor pasa al modo de espera de forma automática.
Para cancelar la función Temp.desc., seleccione Desactivado.
Pulse el botón TOOLS para usar el menú Herramientas.
También puede congurar el temporizador seleccionando Herramientas → Temp. de desc..
Temporizador 1 / Temporizador 2 / Temporizador 3
La activación y desactivación del temporizador se puede congurar de tres maneras.
Hora encendido:
Puede congurar la hora y los minutos y activar o desactivar el temporizador.
(Para activar el temporizador con la conguración elegida, establézcalo en Activar.)
Hora apagado:
Puede congurar la hora y los minutos y activar o desactivar el temporizador.
(Para activar el temporizador con la conguración elegida, establézcalo en Activar.)
Volumen:
Puede ajustar el nivel de volumen deseado.
Contenido:
Cuando la opción Temporizador de encendido está activa, se puede encender un canal determinado o
reproducir contenidos como archivos de fotos o de audio.
TV / USB: Permite seleccionar TV o USB. (Compruebe que haya un dispositivo USB conectado al televisor.)
Antena: Seleccione ATV o DTV.
Canal: Permite seleccionar el canal deseado.
Música: Permite seleccionar la carpeta del dispositivo USB con archivos MP3.
Foto: Permite seleccionar la carpeta del dispositivo USB con archivos JPEG.
Repetir:
Seleccione
Una vez
,
Todos los días
,
Lun~Vie
,
Lun~Sáb
,
Sáb~Dom
o
Manual
.
Con Manual seleccionado, pulse el botón ► para seleccionar el día de la semana. Pulse el botón ENTER
E
sobre el
día deseado y aparecerá la marca c.
Debe ajustar el reloj en primer lugar.
Puede ajustar la hora, los minutos y el canal pulsando los botones numéricos del mando a distancia.
Apagado automático
Si ajusta el temporizador en On, el televisor se apagará si no se pulsa ningún botón durante 3 horas, después de que
el temporizador lo haya puesto en marcha. Esta función sólo está disponible en el modo On del temporizador y evita el
recalentamiento que se puede producir si el televisor está encendido durante demasiado tiempo.
❑
N
N
•
•
N
N
❑
N
N
T
❑
•
•
•
•
•
N
N
N
N
Conguración
Plug & Play
Idioma : Español
Hora ►
Selección de red : Cable
Config.red inalámb.
Configuración de red por cable
Seguridad niños : Activado
Cambiar PIN
Bloqueo paterno
Subtítulos
Hora
Reloj : -- : -- ►
Temp.desc. : Desactivado
Temporizador 1 : Desactivado
Temporizador 2 : Desactivado
Temporizador 3 : Desactivado
U
Mover
E
Entrar
R
Volver
BN68-01757A-Spa.indb 26 2008-9-24 15:55:39
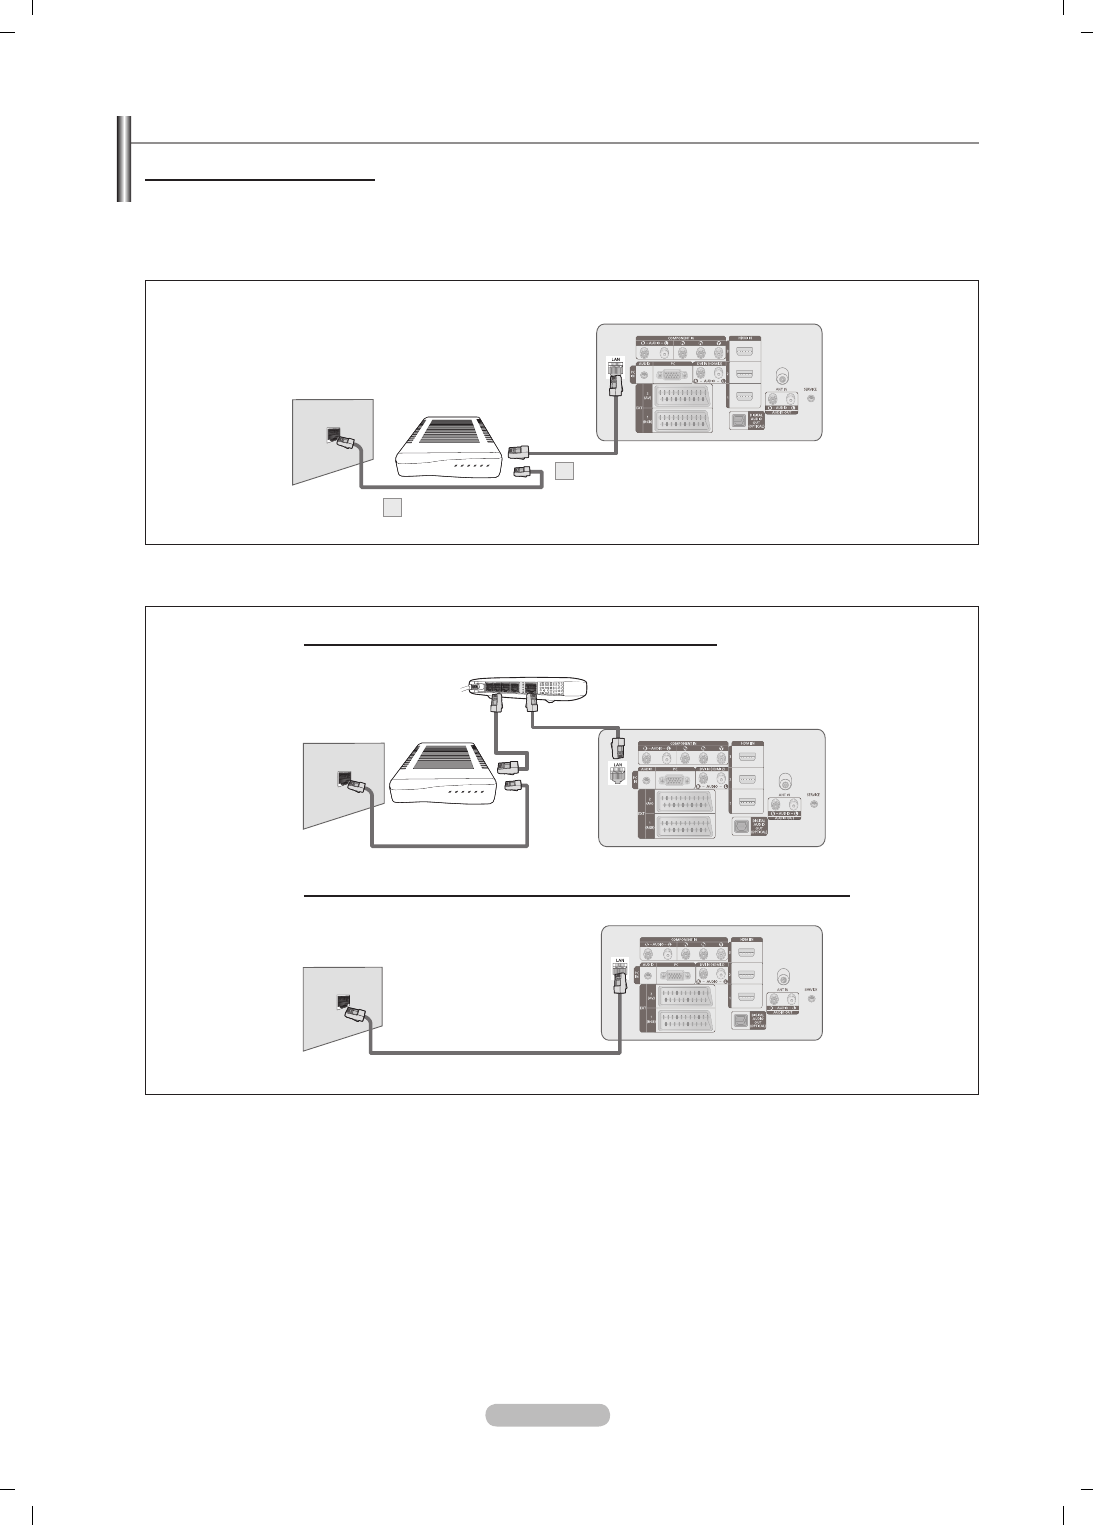
Español - 27
Conexión con la red
Conexión con la red - Cable
Cable de conexión para un entorno DHCP
A continuación se describe el procedimiento para congurar la red mediante el protocolo de conguración dinámica de host
(DHCP). Dado que la dirección IP, la máscara de subred, la puerta de enlace y el DNS se asignan automáticamente cuando
se selecciona DHCP, no es necesario introducirlos manualmente.
1. Conecte el puerto [LAN] del panel posterior del televisor y el módem externo con un cable LAN.
2. Conecte el puerto LAN de la pared y el módem externo con un cable de módem.
Los terminales (la posición del puerto y el tipo) del dispositivo externo puede variar según el fabricante.
Si falla la asignación de la dirección IP por el servidor DHCP, apague el módem externo, vuelva a encenderlo después de al
menos 10 segundos e inténtelo de nuevo.
Para las conexiones entre el módem externo y el compartidor (enrutador), consulte el manual del usuario del producto
correspondiente.
Se puede conectar el televisor a la LAN directamente sin usar compartidor (enrutador).
No se puede usar un módem ADSL de tipo de conexión manual ya que no admite DHCP. Se debe usar un módem ADSL de
tipo de conexión automática.
N
N
N
N
N
Panel posterior del TV
Puerto del módem
en la pared
Cable del módem
2
Módem externo
(ADSL/VDSL/TV por cable)
Cable LAN
1
Se puede conectar el puerto LAN y el televisor directamente según el estado de la red.
Panel posterior del TV
Cable LAN
Puerto del módem
en la pared
Se puede conectar la LAN a través de un compartidor (enrutador)
Panel posterior del TV
Puerto del módem
en la pared
Módem externo
(ADSL/VDSL/TV
por cable)
Compartidor IP
Cable LAN
Cable del módem
Cable LAN
BN68-01757A-Spa.indb 27 2008-9-24 15:55:43
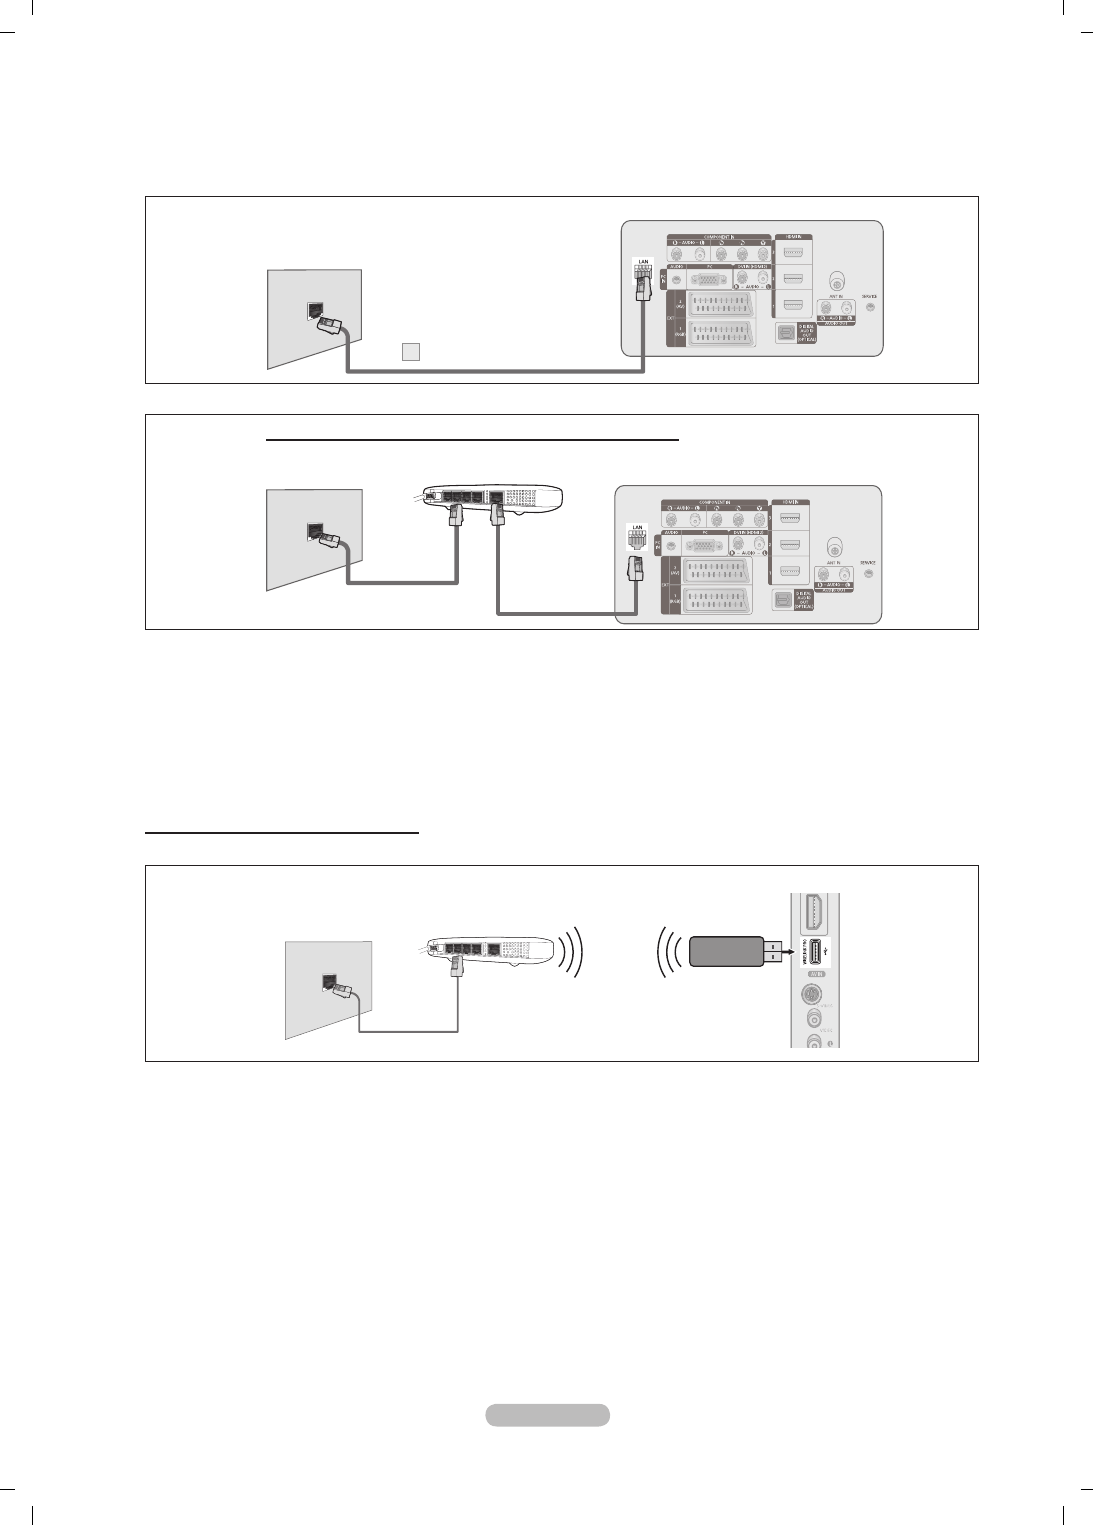
Español - 28
Conexión LAN para un entorno IP estático
A continuación se describe el procedimiento para congurar la red con una dirección IP estática. Se debe introducir
manualmente la dirección IP, la máscara de subred, la puerta de enlace y el DNS proporcionados por el proveedor de
servicios de Internet (ISP).
1. Conecte el puerto [LAN] del panel posterior del televisor y el puerto LAN de la pared con un cable LAN.
Los terminales (la posición del puerto y el tipo) del dispositivo externo puede variar según el fabricante.
Si usa una dirección IP estática, su ISP le informará de la dirección IP, la máscara de subred, la puerta de enlace y el DNS. Debe
introducir estos valores para completar la conguración de la red. Si no los conoce, consulte a su administrador de la red.
Para obtener información sobre cómo congurar y conectar un compartidor (enrutador), consulte el manual del usuario del
producto correspondiente.
Se puede conectar el televisor a la LAN directamente sin usar compartidor (enrutador).
Si usa un compartidor IP (enrutador IP) que admite DHCP, puede congurar el dispositivo como DHCP o IP estático.
Para saber cómo usar una dirección IP estática, consulte a su proveedor de servicios de Internet.
Conexión con la red - Inalámbrica
Es posible conectar a la red inalámbrica a través de un compartidor IP inalámbrico.
1. Conecte el ‘adaptador de LAN inalámbrica para InfoLive de Samsung’ en el terminal Wiselink del televisor.
Para utilizar una red inalámbrica, es necesario usar el adaptador de LAN inalámbrica para Infolive de Samsung (WIS-08BG).
El adaptador de LAN inalámbrica para InfoLive de Samsung se vende por separado. Para adquirirlo, póngase en contacto
con un agente o un centro de servicio técnico de Samsung Electronics.
Para utilizar una red inalámbrica, el televisor debe estar conectado a un compartidor IP inalámbrico.
Si el compartidor IP inalámbrico admite DHCP, el televisor puede utilizar DHCP o una dirección IP estática para conectarse a
la red inalámbrica.
Se debe usar un compartidor IP inalámbrico que admita IEEE 802.11 B o IEEE 802.11G.
Si el compartidor IP inalámbrico permite activar o desactivar la función de conexión Ping, actívela.
Ajuste el compartidor IP inalámbrico en modo Infraestructura. El modo Ad-hoc no se admite.
Seleccione un canal para el compartidor IP inalámbrico que no se esté usando en ese momento. Si el canal ajustado para el
compartidor IP inalámbrico lo está usando en ese momento otro dispositivo cercano, se producirán interferencias y es posible
que la comunicación falle.
Cuando aplique la clave de seguridad para el punto de acceso (compartidor IP inalámbrico) sólo se admiten las opciones
siguientes.
1) Modo de autenticación: WEP, WPAPSK, WPA2PSK
2) Tipo de cifrado: WEP, TKIP, AES
Si se aplica un sistema de seguridad distinto de los sistemas que se han mostrado anteriormente, no funcionará con el
televisor.
N
N
N
N
N
N
N
N
N
N
N
N
N
N
N
Panel posterior del TV
Cable LAN
1
Puerto LAN en la
pared
Panel posterior del TV
Cable LAN
Compartidor IP
Cable LAN
Puerto LAN en la
pared
Se puede conectar la LAN a través de un compartidor (enrutador)
Panel lateral del televisor
Adaptador de LAN inalámbrica
para InfoLive de Samsung
Cable LAN
Compartidor IP inalámbrico
Puerto LAN en la
pared
BN68-01757A-Spa.indb 28 2008-9-24 15:55:47

Español - 29
Conguración de red
Selección de red
Seleccione cable o inalámbrico como método para conectar con la red.
El menú sólo se activa si está conectado el ‘adaptador de LAN inalámbrica
para InfoLive de Samsung’.
Cable: Conexión a la red mediante un cable.
Inalámbr: Conexión inalámbrica a la red.
Conguraciób de red por cable
Internet Protocol Setup → Auto Setup / Manual Setup
Network Test
: Puede comprobar o conrmar el estado de conexión de la red después de congurar la red.
Cuando no pueda conectarse a una red cableada
Si su proveedor de servicios de Internet ha registrado la dirección MAC del dispositivo utilizado para conectarse a
Internet por primera vez y autentica la dirección MAC cada vez que usted se conecta a Internet, su televisor quizás
no pueda conectarse a Internet ya que la dirección MAC diere de la del dispositivo (PC) utilizado para conectarse a
Internet por primera vez. En tal caso, solicite a su proveedor de servicios de Internet que le explique el procedimiento
para conectar dispositivos que no sean un ordenador, por ejemplo su televisor, a Internet. Si su proveedor de servicios
de Internet necesita un ID o una contraseña para conectarse a Internet (red), su televisor quizás no puede conectarse
a Internet. En tal caso, debe introducir su ID o contraseña cuando se conecte a Internet mediante un compartidor de
Internet (enrutador).
La conexión de Internet puede fallar por problemas del servidor de seguridad. En este caso, póngase en contacto con
el proveedor de servicios de Internet. Si no puede conectarse a Internet aunque haya seguido el procedimiento de su
proveedor de servicios de Internet, debe ponerse en contacto con el centro de servicio técnico de Samsung Electronics.
Cong.red inalámb.
Internet Protocol Setup → Auto Setup / Manual Setup
Network Test:
Puede comprobar o confirmar el estado de conexión de la red después de configurar la red.
Cuando no pueda conectarse a una red inalámbrica
Su televisor quizás no pueda encontrar un punto de acceso (PA) que esté congurado como un tipo SSID privado. En
tal caso, cambie la conguración del PA y vuelva a intentar la operación. Si su proveedor de servicios de Internet ha
registrado la dirección MAC del dispositivo utilizado para conectarse a Internet por primera vez y autentica la dirección
MAC cada vez que usted se conecta a Internet, su televisor quizás no pueda conectarse a Internet ya que la dirección
MAC diere de la del dispositivo (PC) utilizado para conectarse a Internet por primera vez. En tal caso, solicite a su
proveedor de servicios de Internet que le explique el procedimiento para conectar dispositivos que no sean un ordenador,
por ejemplo su televisor, a Internet. Si no puede conectarse a Internet aunque haya seguido el procedimiento de su
proveedor de servicios de Internet, debe ponerse en contacto con el centro de servicio técnico de Samsung Electronics.
Selecc. Punto acceso:
Se puede seleccionar el compartidor IP que utilizar cuando se congura una red inalámbrica.
Si algún punto de acceso no aparece en la lista, pulse el botón rojo.
Cuando se establezca la conexión, volverá a la pantalla automáticamente.
Si ha seleccionado un punto de acceso que requiere autenticación de seguridad, introduzca la clave de seguridad.
Si ha seleccionado un punto de acceso con autenticación de seguridad:
Aparece la pantalla de la clave de seguridad.
Introduzca la clave de seguridad y pulse el botón ENTERE.
Utilice los botones del mando a distancia en la pantalla de introducción de la clave de seguridad.
La pantalla de conguración puede diferir según los tipos de seguridad.
Botón Función
▲/▼/◄/►,
(Rueda)
Mueve la selección arriba/abajo/izquierda/derecha.
(ENTER)
Introduce el carácter seleccionado.
Botón rojo
Cambiar entre letras en mayúsculas y en minúsculas
Botón verde
Permite borrar un carácter introducido.
Botón azul
Pulse este botón para terminar de introducir la clave de seguridad.
❑
N
❑
N
❑
N
N
N
N
N
-
-
-
N
Conguración
Idioma : Español
Hora
Selección de red : Cable ►
Config. red inalámb.
Configuración de red por cable
Seguridad niños : Activado
Cambiar PIN
Bloqueo paterno
Subtítulos
Idioma del teletexto : - - - -
BN68-01757A-Spa.indb 29 2008-9-24 15:55:49

Español - 30
Conguración automática de la red de cable
Si se conecta el cable LAN en una ubicación que admita DHCP, los ajustes del protocolo de Internet (IP) se configurarán
automáticamente. Compruebe si el cable LAN está conectado. (Consulte la página 27.)
1. Establezca Selección de red como Cable.
2. Seleccione Conguraciób de red por cable.
3. Establezca Internet Protocol Setup como Auto Setup.
4. Seleccione Network Test para comprobar la conectividad de la red.
Conguración manual de la red de cable
Para conectar el televisor a la LAN mediante una dirección IP estática, se debe congurar el protocolo de Internet (IP). Compruebe
si el cable LAN está conectado. (Consulte la página 27.)
1. Establezca Selección de red como Cable.
2. Seleccione Conguraciób de red por cable.
3. Establezca Internet Protocol Setup como Manual Setup.
4. Congure IP Address, Subnet Mask, Gateway y DNS Server.
Pulse los botones numéricos del mando a distancia cuando ajuste la red manualmente.
5. Seleccione Network Test para comprobar la conectividad de la red.
Conguración automática de la red inalámbrica
El menú sólo se activa si está conectado el ‘adaptador de LAN inalámbrica para InfoLive de Samsung’. (Consulte la página 28.)
Si se conecta el cable LAN en una ubicación que admita DHCP, los ajustes del protocolo de Internet (IP) se configurarán
automáticamente. El compartidor IP inalámbrico que se conecte a este producto debe admitir DHCP.
1. Establezca Selección de red como Inalámbr.
2. Seleccione Cong.red inalámb..
3. Establezca Internet Protocol Setup como Auto Setup.
4. Seleccione un punto de acceso (PA) mediante Selecc. Punto acceso.
5. Seleccione Network Test para comprobar la conectividad de la red.
Conguración manual de la red inalámbrica
El menú sólo se activa si está conectado el ‘adaptador de LAN inalámbrica para InfoLive de Samsung’. (Consulte la página 28.)
1. Establezca Selección de red como Inalámbr.
2. Seleccione Cong.red inalámb..
3. Establezca Internet Protocol Setup como Manual Setup.
4. Seleccione un punto de acceso (PA) mediante Selecc. Punto acceso.
5. Seleccione Network Test para comprobar la conectividad de la red.
N
BN68-01757A-Spa.indb 30 2008-9-24 15:55:49
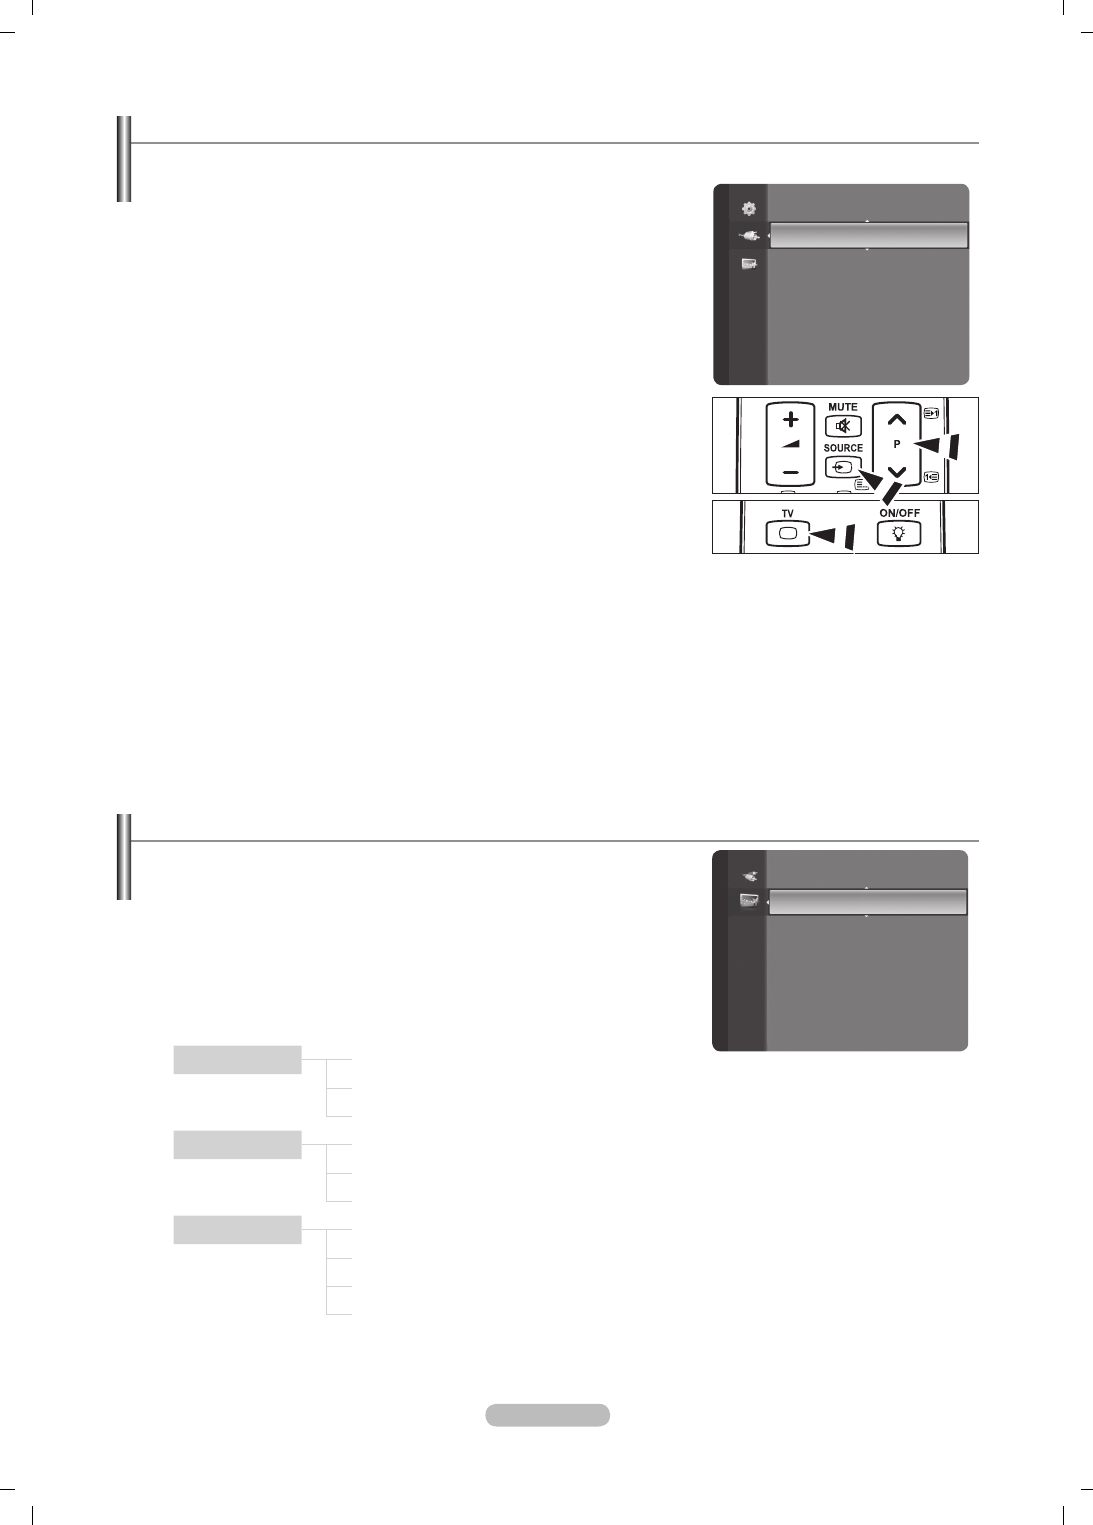
Español - 31
Guía del producto
La guía del producto proporciona información sobre las características más
importantes del televisor.
1. Pulse el botón MENU para ver el menú. Pulse los botones ▲ o ▼ para
seleccionar Aplicaciones y, a continuación, pulse el botón ENTER
E
.
2. Pulse los botones ▲ o ▼ para seleccionar Guía del producto y, a
continuación, pulse el botón ENTER
E
.
3. Pulse los botones ◄ o ► para seleccionar una guía (Picture Quality,
Entertainment or Connectivity) y pulse el botón ENTER
E
.
4. Puede navegar por la pantalla de la guía del producto con los botones ◄ y ►.
Picture Quality Full HD 1080p
Ultra FilterBright
Real 100Hz(50") / 100Hz Dual Scan(63")
Entertainment InfoLive
Content Library
Entertainment Mode
Connectivity WISELINK Pro
DLNA
4HDMI
Anynet+
5. Pulse el botón EXIT para salir.
Fuentes / Editar nombre
Fuentes
Úselo para seleccionar TV u otras fuentes de entrada externas como
reproductores de DVD o receptores de cable y satélite (decodificadores),
conectados al televisor. Permite seleccionar la fuente de entrada que se
preera.
TV, Ext.1, Ext.2, AV, S-Video, Component, PC, HDMI1, HDMI2 / DVI,
HDMI3, HDMI4, USB, DLNA.
Puede elegir solamente los dispositivos externos que estén conectados al
televisor. En Fuentes, las entradas conectadas se resaltan y se ordenan
en la parte superior. Las entradas que no están conectadas se ordenan en
la parte inferior.
Uso de los botones de colores del mando a distancia con la lista de
fuentes
Rojo (Refresh): Actualiza los dispositivos externos conectados.
TOOLS (Option): Muestra los menús Editar nombre e Información.
Pulse el botón SOURCE del mando a distancia para ver una fuente de
señal externa. El modo TV se puede seleccionar pulsando el botón TV, los
botones numéricos (0~9) y el botón P < / > del mando a distancia.
Editar nombre
VCR / DVD / VCR / DVD / Cable STB / Satellite STB / PVR STB / AV Receiver / Game / Camcorder / PC / TV / IPTV /
Blu-ray / HD DVD / DMA
Dé un nombre al dispositivo conectado en las tomas de entrada; de esta manera será más fácil seleccionar el dispositivo de
entrada.
Cuando se conecta un ordenador con una resolución de 1920 x 1080 a 60 Hz al puerto HDMI IN 2, se debe congurar el
modo HDMI2 / DVI como PC en Editar nombre del modo Entrada.
❑
N
N
-
-
O
❑
N
Fuentes
Editar nombre
Entrada Application
Content Library
InfoLive
Guía de producto ►
BN68-01757A-Spa.indb 31 2008-9-24 15:55:50
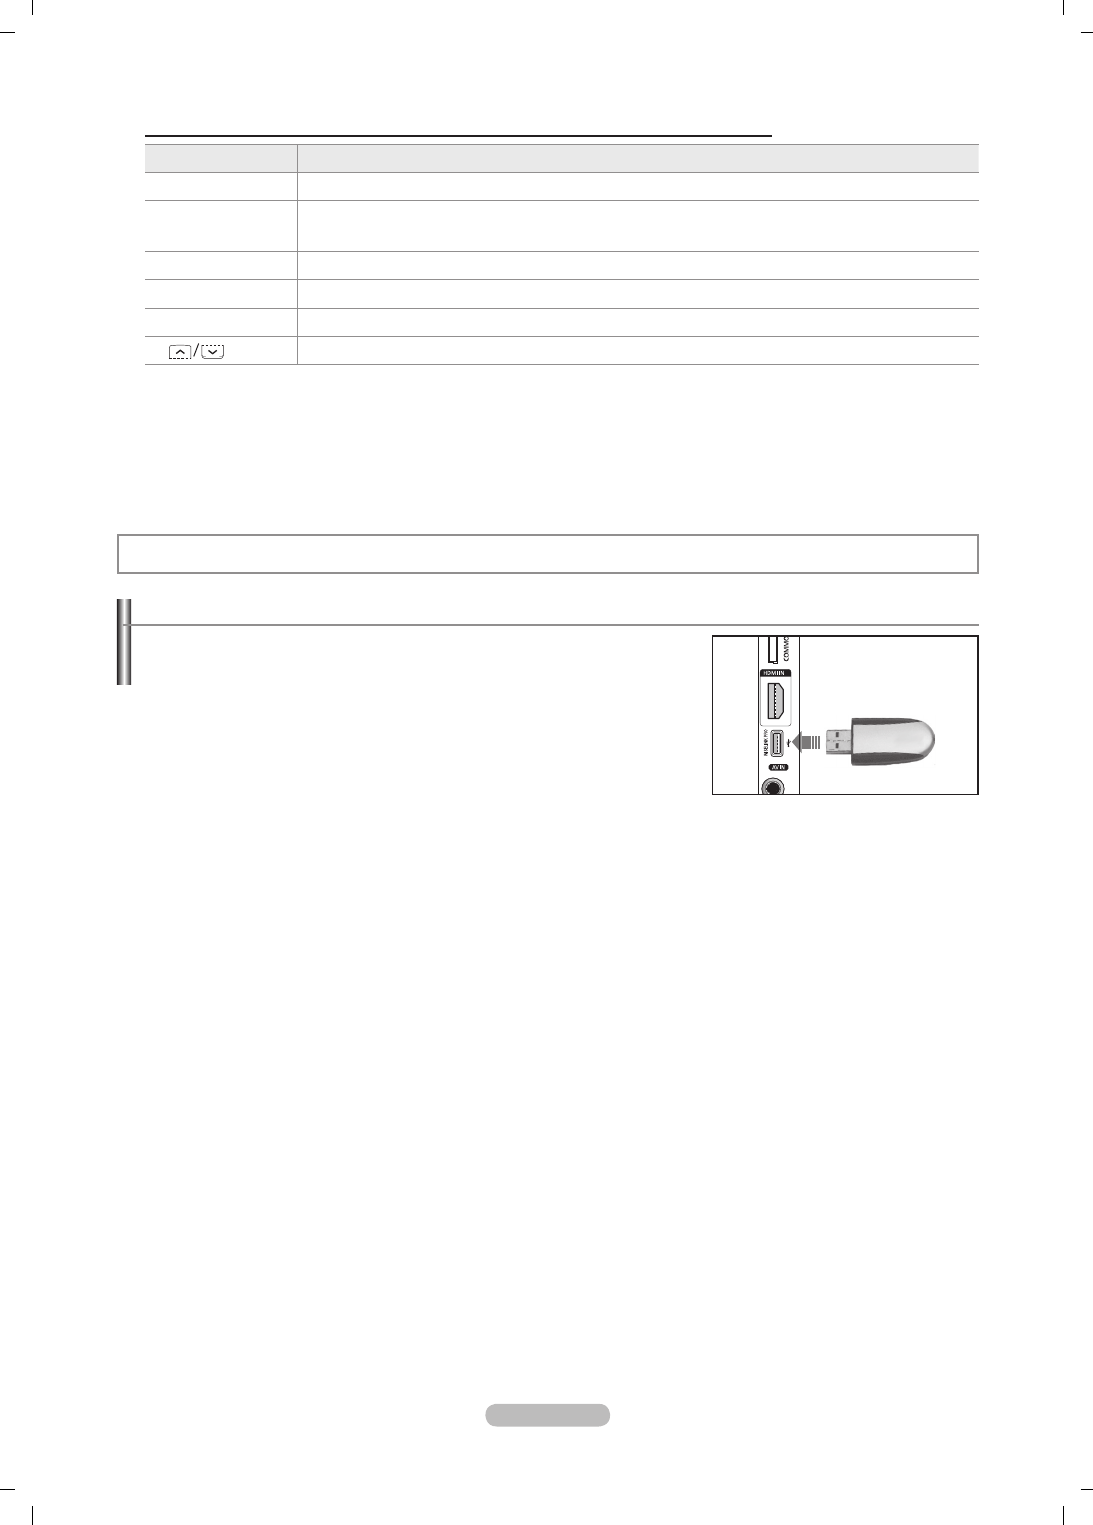
Español - 32
Uso de los botones del mando a distancia en el menú de la guía del producto
Botón Función
Botón amarillo Muestra el contenido de la guía del producto de forma secuencial. (Reproducción automática)
▲/▼/◄/►
(Rueda) Mover el cursor y seleccionar una opción.
ENTER
E
Seleccionar la opción marcada.
RETURN Volver al menú anterior.
EXIT Detener la función actual y volver al menú principal Guía del producto.
P , PRE-CH Detener el modo Guía del producto y volver al modo TV.
WISELINK Pro
Conexión de un dispositivo USB
1. Pulse el botón POWER para encender el televisor.
2. Conecte un dispositivo USB que contenga archivos de fotos, música o películas
al terminal WISELINK (terminal USB) que se encuentra en el lateral del
televisor.
Si entra en el modo WISELINK Pro y no hay ningún dispositivo USB conectado,
aparece el mensaje “No se encuentra ningún dispositivo de almacenamiento
externo. Compruebe el estado de la conexión.’. En tal caso, inserte el
dispositivo USB, salga de la pantalla pulsando el botón W.LINK del mando a
distancia y vuelva a entrar en la pantalla WISELINK Pro.
MTP (Protocolo de transferencia de recursos) no se admite.
El sistema de archivos sólo admite FAT16/32 (el sistema de archivos NTFS no se admite).
Ciertos tipos de cámara digital USB y dispositivos de audio quizás no sean compatibles con este televisor.
WISELINK Pro sólo admite dispositivos de clase de almacenamiento masivo (MSC) USB. MSC es un dispositivo de clase
de almacenamiento masivo sólo de transporte de gran capacidad. Ejemplos de MSC son unidades de almacenamiento en
miniatura y lectores de tarjetas Flash (no se admite ni disco duro de USB ni de HUB).
Conecte directamente con el puerto USB del televisor. Si utiliza una conexión con un cable independiente, puede haber
problemas de compatibilidad con el USB.
Antes de conectar el dispositivo al televisor, haga una copia de seguridad de sus archivos para evitar daños o pérdidas de
datos. SAMSUNG no se hace responsable por cualquier daño en los archivos o pérdida de datos.
No desconecte el dispositivo USB durante el proceso de carga.
MSC admite archivos MP3 y JPEG, mientras que el dispositivo PTP sólo admite archivos JPEG.
Se admite el formato JPEG secuencial.
Cuanto mayor sea la resolución de la imagen, más tiempo tardará en visualizarse en la pantalla.
La resolución JPEG máxima admitida es 15360 x 8640 píxeles.
Con archivos dañados o que no se admiten, se muestra el mensaje Formato de archivo no admitido.
Si hay más de 4000 archivos de fotografías (o el número de archivos de música supera los 3000), es posible que no se
muestre ningún archivo que supere el límite de los 4000 en la Lista de fotos (o Lista de música).
Los archivos MP3 con DRM descargados desde un sitio de pago no se pueden reproducir. La tecnología Gestión de derechos
digitales (DRM) admite la creación de contenidos, la distribución y gestión de éstos de modo integrado y general, incluida
la protección de los derechos e intereses de los proveedores de los contenidos, la prevención de copias ilegales de los
contenidos, así como la gestión de cobros y acuerdos.
Cuando se desplaza a una foto, la carga puede tardar varios segundos. En este punto, el icono de carga aparecerá en la
pantalla.
N
N
N
N
N
N
N
N
N
N
N
N
N
N
N
N
4
Panel lateral del televisor
Unidad USB
BN68-01757A-Spa.indb 32 2008-9-24 15:55:50
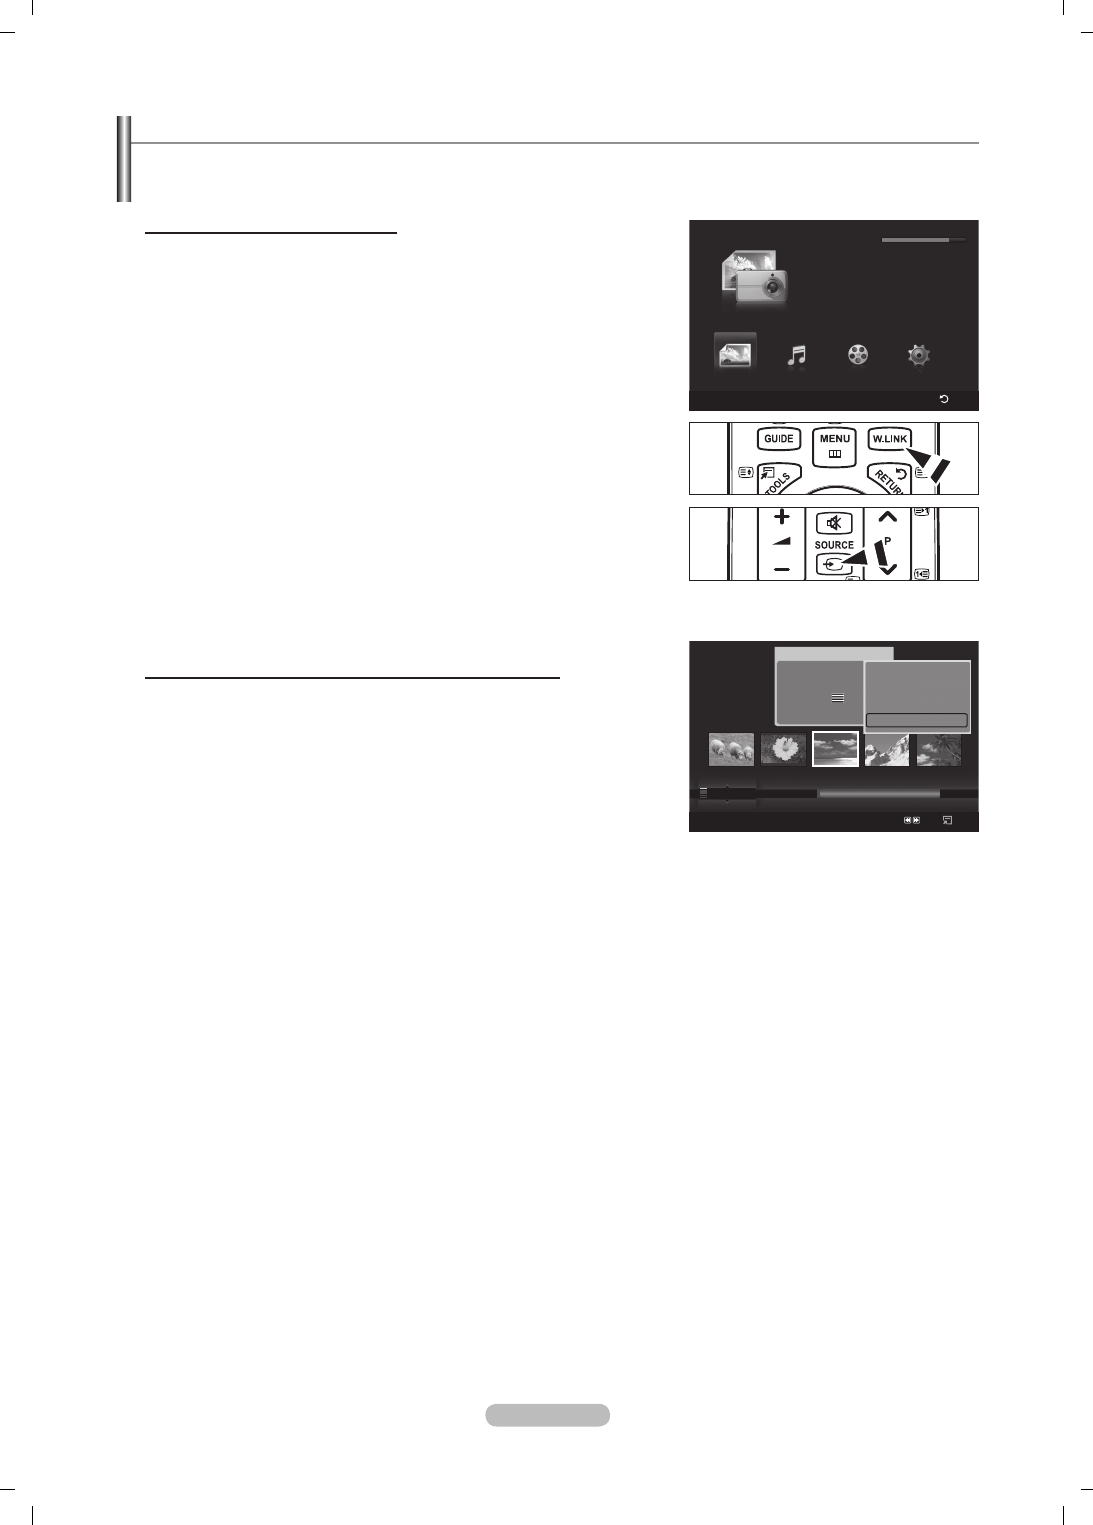
Español - 33
Uso de la función WISELINK Pro
Esta función permite reproducir archivos de fotos, de música y de películas guardados en un dispositivo de clase de
almacenamiento masivo (MSC) USB.
Acceso al menú WISELINK Pro
1. Pulse el botón MENU. Pulse los botones ▲ o ▼ para seleccionar
Aplicaciones y, a continuación, pulse el botón ENTER
E
.
2. Pulse los botones ▲ o ▼ para seleccionar WISELINK Pro y, a continuación,
pulse el botón ENTER
E
.
Se muestra el menú WISELINK Pro.
Pulse el botón W.LINK del mando a distancia para mostrar el menú
WISELINK Pro.
Pulse varias veces el botón SOURCE del mando a distancia para
seleccionar USB o DLNA y, a continuación, pulse el botón ENTER.
3. Pulse el botón rojo y, a continuación, los botones ▲ o ▼ para seleccionar
el correspondiente dispositivo de memoria USB (si está conectado a un
concentrador). Pulse el botón ENTER
E
.
Esta función puede variar según el dispositivo de memoria USB conectado
al televisor.
El nombre del dispositivo USB seleccionado aparece en la parte inferior
izquierda de la pantalla.
4. Pulse los botones ◄ o ► para seleccionar un icono (Foto, Música, Película,
Conguración) y, a continuación, pulse el botón ENTER
E
. Para salir del
modo WISELINK Pro, pulse el botón W.LINK del mando a distancia.
Se puede disfrutar de películas de juegos. (no admite programa de juegos).
Extracción segura del dispositivo de memoria USB
Se puede quitar el dispositivo del televisor con seguridad.
1. Pulse el botón TOOLS en la pantalla de la lista de archivos de WISELINK Pro
o mientras se está reproduciendo una presentación o un archivo de música.
2. Pulse los botones ▲ o ▼ para seleccionar Retirar con seguridad y, a
continuación, pulse el botón ENTER
E
.
3. Retire el dispositivo USB del televisor.
N
O
O
N
N
N
Photo
SUM
Dispos.
Conf. fav.
Selecc.
Saltar
Opción
image_1.jpg
Mensual : Ene
Fecha : Ene.01.2008
Color : Gris
Composición :
Carpeta : P-other
Favoritos : ★ ★ ★
Preferencias
Mensual
Cronología
Ene Nov
▲
▲
Rep.gr.act.
Borrar
Información
Retirar con seguridad
WISELINK Pro
Photo
SUM
Dispos.
Volver
Music Setup
PHOTO
SUM
851.98MB/995.00MB Free
Movie
BN68-01757A-Spa.indb 33 2008-9-24 15:55:52
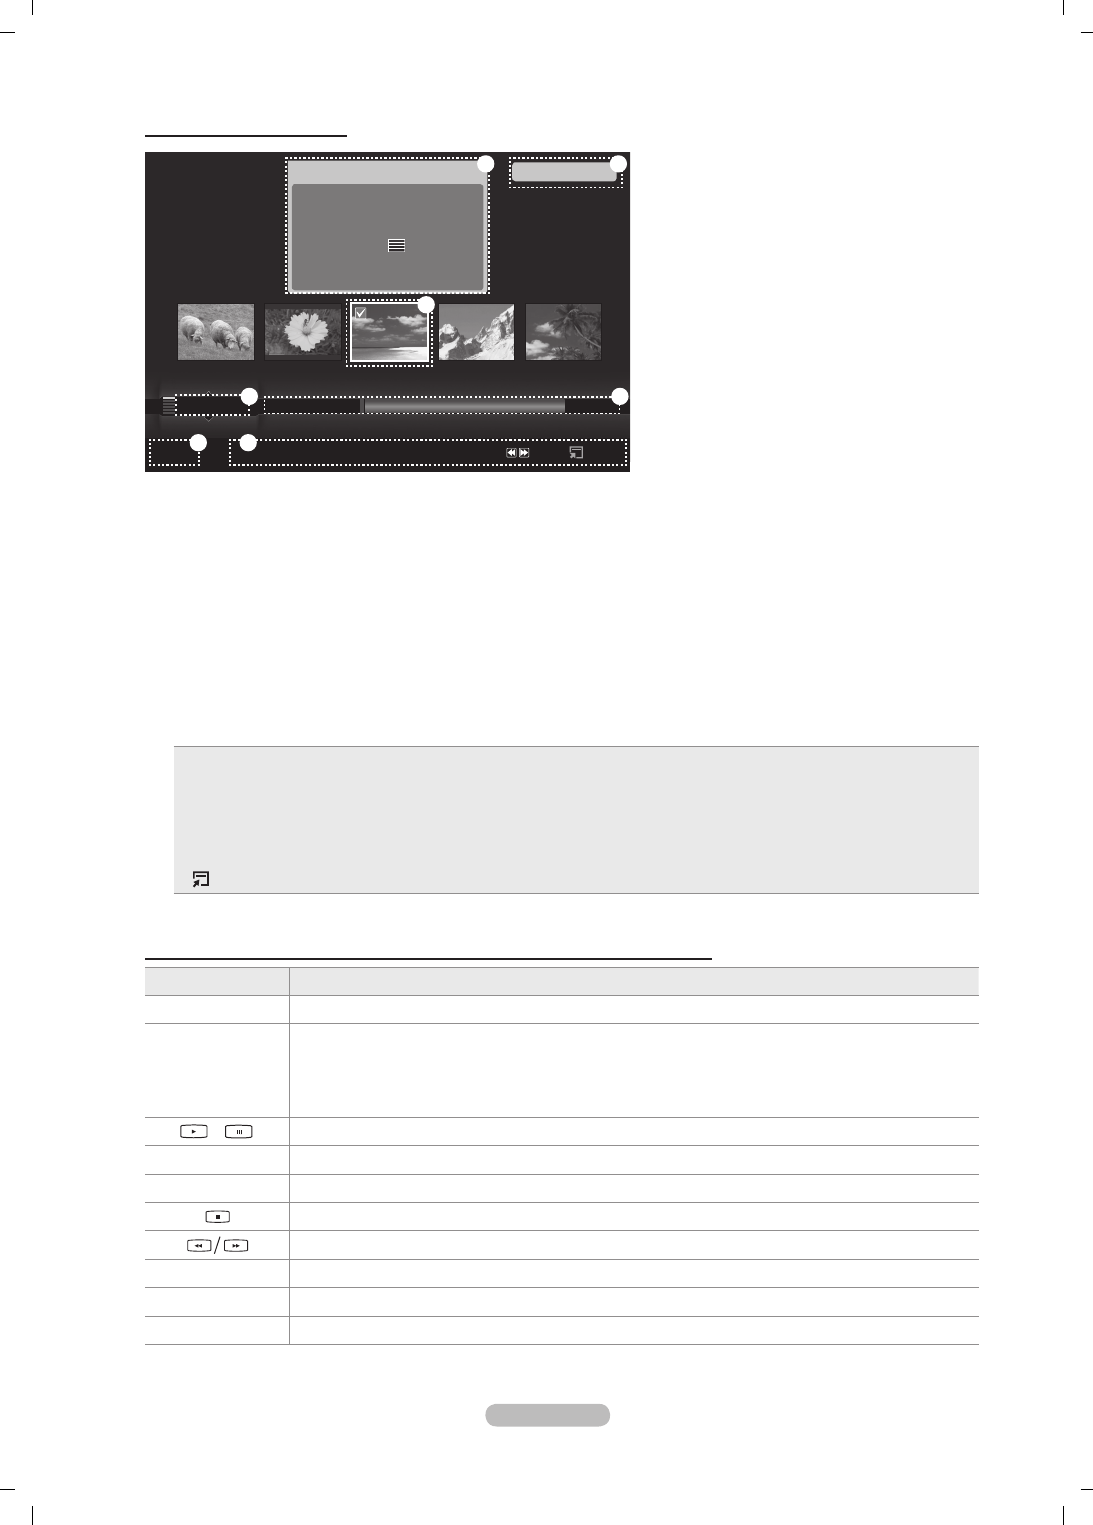
Español - 34
Pantalla de visualización
1. Archivo seleccionado actualmente: Se resalta el archivo seleccionado actualmente. Los archivos de fotos y películas se
muestran como imágenes en miniatura.
2. Ventana de información: Muestra la información sobre el archivo actualmente seleccionado. Es una ventana de información
independiente sólo para archivos de fotos y películas. Las información de los archivos de música aparece en la ubicación
donde se muestra el archivo.
3. Norma de clasicación actual: Este campo muestra la norma actual para la clasicación de los archivos. Pulse los botones ▲
o ▼ para cambiar la norma de clasicación de los archivos.
4. Ver grupos: Muestra los grupos de clasicación. El grupo de clasicación que incluye la foto seleccionada se resalta.
5. Dispositivo actual: Muestra el nombre del dispositivo actualmente seleccionado. Pulse el botón rojo para seleccionar un
dispositivo.
6. Información de selección del elemento: Muestra el número de fotos seleccionadas cuando se pulsa el botón amarillo.
7. Elementos de ayuda
Botón rojo (dispositivo): Selecciona un dispositivo conectado.
Botón verde (Conf. fav.): Cambia la conguración de favorito del archivo seleccionado. Pulse este botón varias veces
hasta que se muestre el valor que desee.
Botón amarillo (seleccionar): Selecciona un archivo en la lista de archivos c. Los archivos seleccionados se indican
con el símbolo c. Vuelva a pulsar el botón amarillo para cancelar la selección del archivo.
πµ (saltar): Salta al grupo de clasicación anterior/Salta al grupo de clasicación siguiente.
Botón TOOLS (opciones): Muestra los menús de opciones. (El menú de opciones cambia según el estado actual.)
•
•
•
•
•
Uso de los botones del mando a distancia con el menú WISELINK Pro
Botón Función
▲/▼/◄/► Mover el cursor y seleccionar una opción.
ENTER
E
Seleccionar el elemento actual seleccionado.
Mientras se está reproduciendo una presentación de diapositivas, una película o un archivo de música:
- Pulsando el botón ENTER
E
durante la reproducción se hace una pausa.
- Pulsando el botón ENTER
E
durante la pausa se reanuda la reproducción.
Reproducir o interrumpir el archivo de la presentación o de música.
RETURN Volver al menú anterior.
TOOLS Ejecutar diversas funciones desde los menús Foto, Música y Película.
Detener la presentación, la película o el archivo de música.
Saltar al grupo anterior/Saltar al grupo siguiente.
INFO Mostrar información del archivo.
W.LINK Salir del modo WISELINK Pro.
EXIT Detener la función actual y volver al menú principal WISELINK Pro.
Photo
SUM
Dispos.
Conf. fav.
Selecc.
Saltar
Opción
image_1.jpg
Mensual : Ene
Fecha : Ene.01.2008
Color : Gris
Composición :
Carpeta : P-other
Favoritos :
★ ★ ★
Preferencias
Mensual
Cronología
Ene Nov
▲
1File(s) Selected
2 6
1
3 4
75
BN68-01757A-Spa.indb 34 2008-9-24 15:55:54
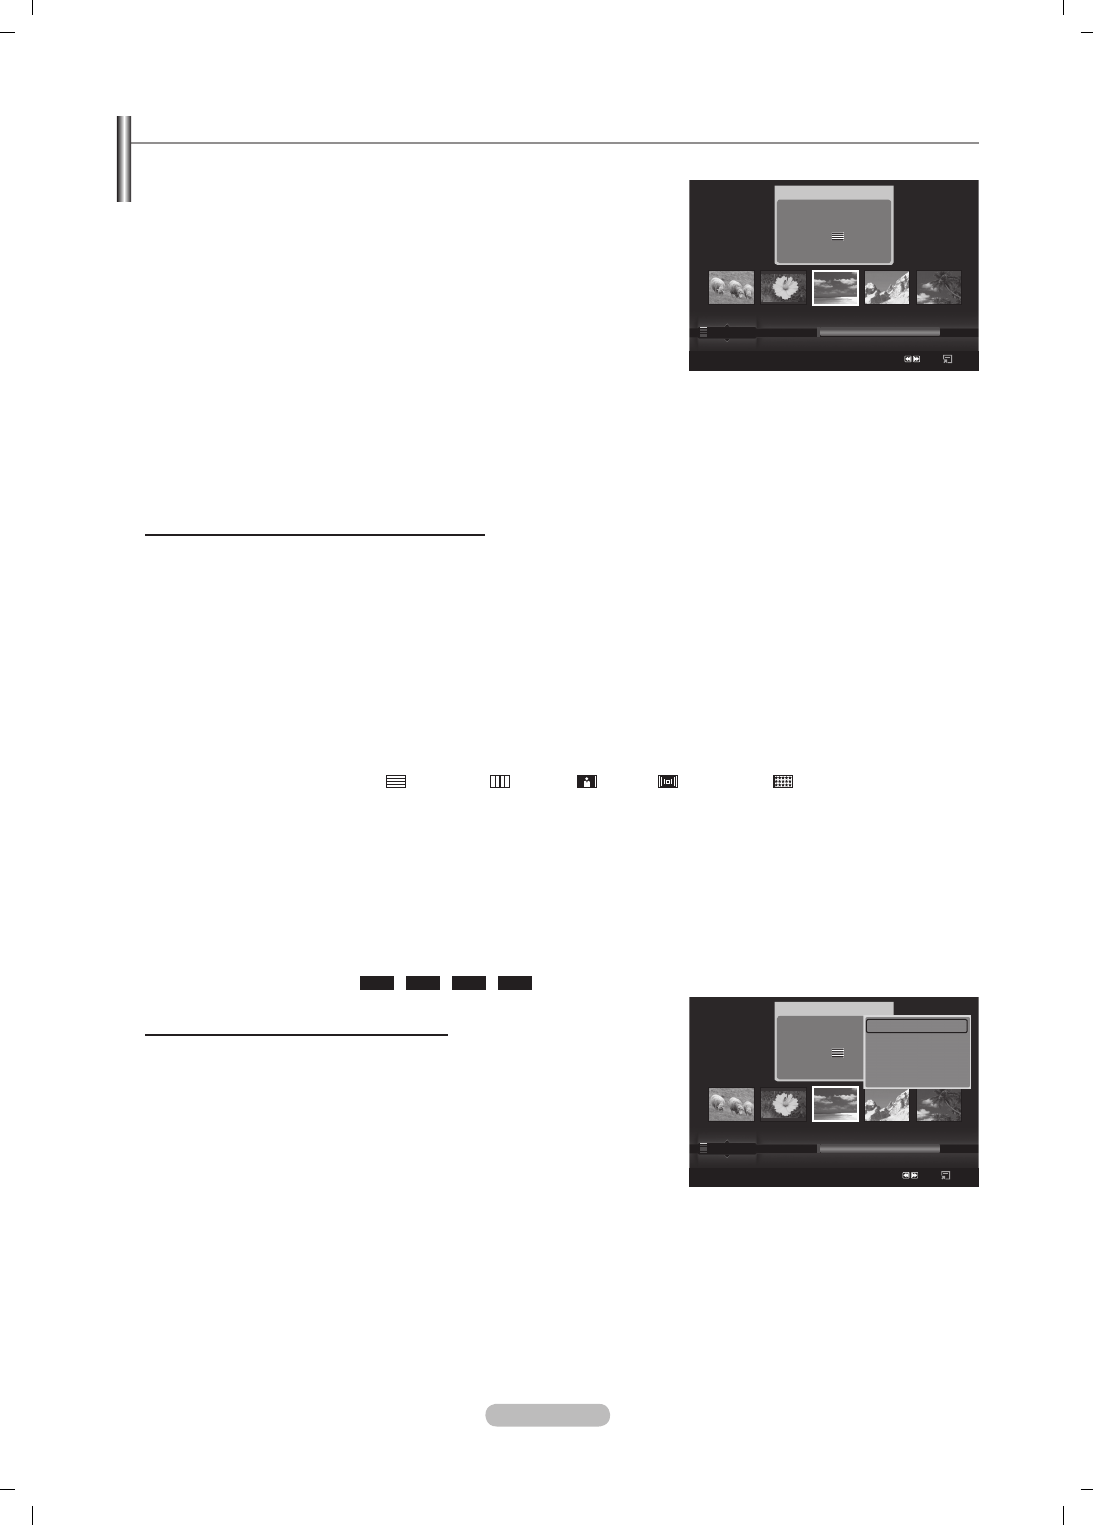
Español - 35
Uso y clasicación de la lista de fotos
Se pueden clasicar las fotos de la lista siguiendo una norma personal.
1. Pulse los botones ▲ o ▼ para seleccionar una norma de clasicación en la
lista de fotos.
Las fotos se clasican según la última norma de clasicación
seleccionada.
Para ir al grupo anterior/siguiente, pulse los botones
π
(REW) o
µ
(FF).
2. Pulse el botón
∂
(reproducir)/ENTER
E
para iniciar la presentación en
el orden elegido.
La información del archivo de foto se congura automáticamente.
La información de Color y Composición extraída de un archivo de foto
puede diferir de la que el usuario espera.
La información de la foto se establece automáticamente. Se puede
cambiar Color, Composición y Favoritos.
Las fotos cuya información no se puede mostrar se establecen como
Sin clasicar.
PTP no admite el modo de clasicación de la carpeta.
Norma de clasicación en la lista de fotos
Mensual
Ordena y muestra las fotos del archivo por mes. Ordena sólo por meses (de enero a diciembre) sin tener en cuenta el año.
Cronología
Ordena y muestra las fotos por fechas. Ordena por años y meses empezando por las más antiguas.
Color
Ordena las fotos por color. Se puede cambiar la información del color de la foto.
Opciones de Color: Rojo, Amarillo, Verde, Azul, Magenta, Negro, Gris, Sin clasicar.
Composición
Ordena las fotos por composición. Se puede cambiar la información de la composición de la foto.
Opciones de Composición: (horizontal), (vertical), (objeto), (perspectiva), (patrón), Sin clasicar.
Carpeta
Ordena las fotos por carpetas. Si hay varias carpetas en USB, los archivos de fotos se muestran ordenados en cada carpeta.
El archivo de fotos de la carpeta raíz se muestra primero y los otros se muestran ordenados alfabéticamente por nombre.
Preferencias
Ordena las fotos por preferencias (Favoritos). Se puede cambiar las preferencias de la foto.
Cambio de la conguración de favorito
Seleccione la foto que desee en la lista de fotos y pulse varias veces el botón Verde hasta que aparezca la conguración
deseada.
Opciones de Favoritos:
★ ★ ★
,
★ ★ ★
,
★ ★ ★
,
★ ★ ★
Menú de opciones de la lista de fotos
Secuencia
Con este menú se puede reproducir una presentación de archivos de fotos
del dispositivo de memoria USB.
Rep.gr. act.
Con este menú se puede reproducir una presentación sólo de archivos de
fotos del grupo de clasicación actualmente seleccionado.
Borrar
Con este menú se puede borrar los archivos de fotos seleccionados.
Cambiar info grupo
Se puede cambiar la información de Color y
Composición
de los archivos de fotos.
La información del grupo del archivo actual se ha actualizado y el archivo se ha movido al nuevo grupo.
Para cambiar la información de varios archivos, seleccione los archivos que desee con el botón amarillo.
N
N
N
N
N
N
N
N
N
N
N
N
N
Photo
SUM
Dispos.
Conf. fav.
Selecc.
Saltar
Opción
image_1.jpg
Mensual : Ene
Fecha : Ene.01.2008
Color : Gris
Composición :
Carpeta : P-other
Favoritos : ★ ★ ★
Preferencias
Mensual
Cronología
Ene Nov
▲
Photo
SUM
Dispos.
Conf. fav.
Selecc.
Saltar
Opción
image_1.jpg
Mensual : Ene
Fecha : Ene.01.2008
Color : Gris
Composición :
Carpeta : P-other
Favoritos : ★ ★ ★
Preferencias
Mensual
Cronología
Ene Nov
▲
Secuencia
Rep.gr. act.
Borrar
Información
▼
BN68-01757A-Spa.indb 35 2008-9-24 15:55:56
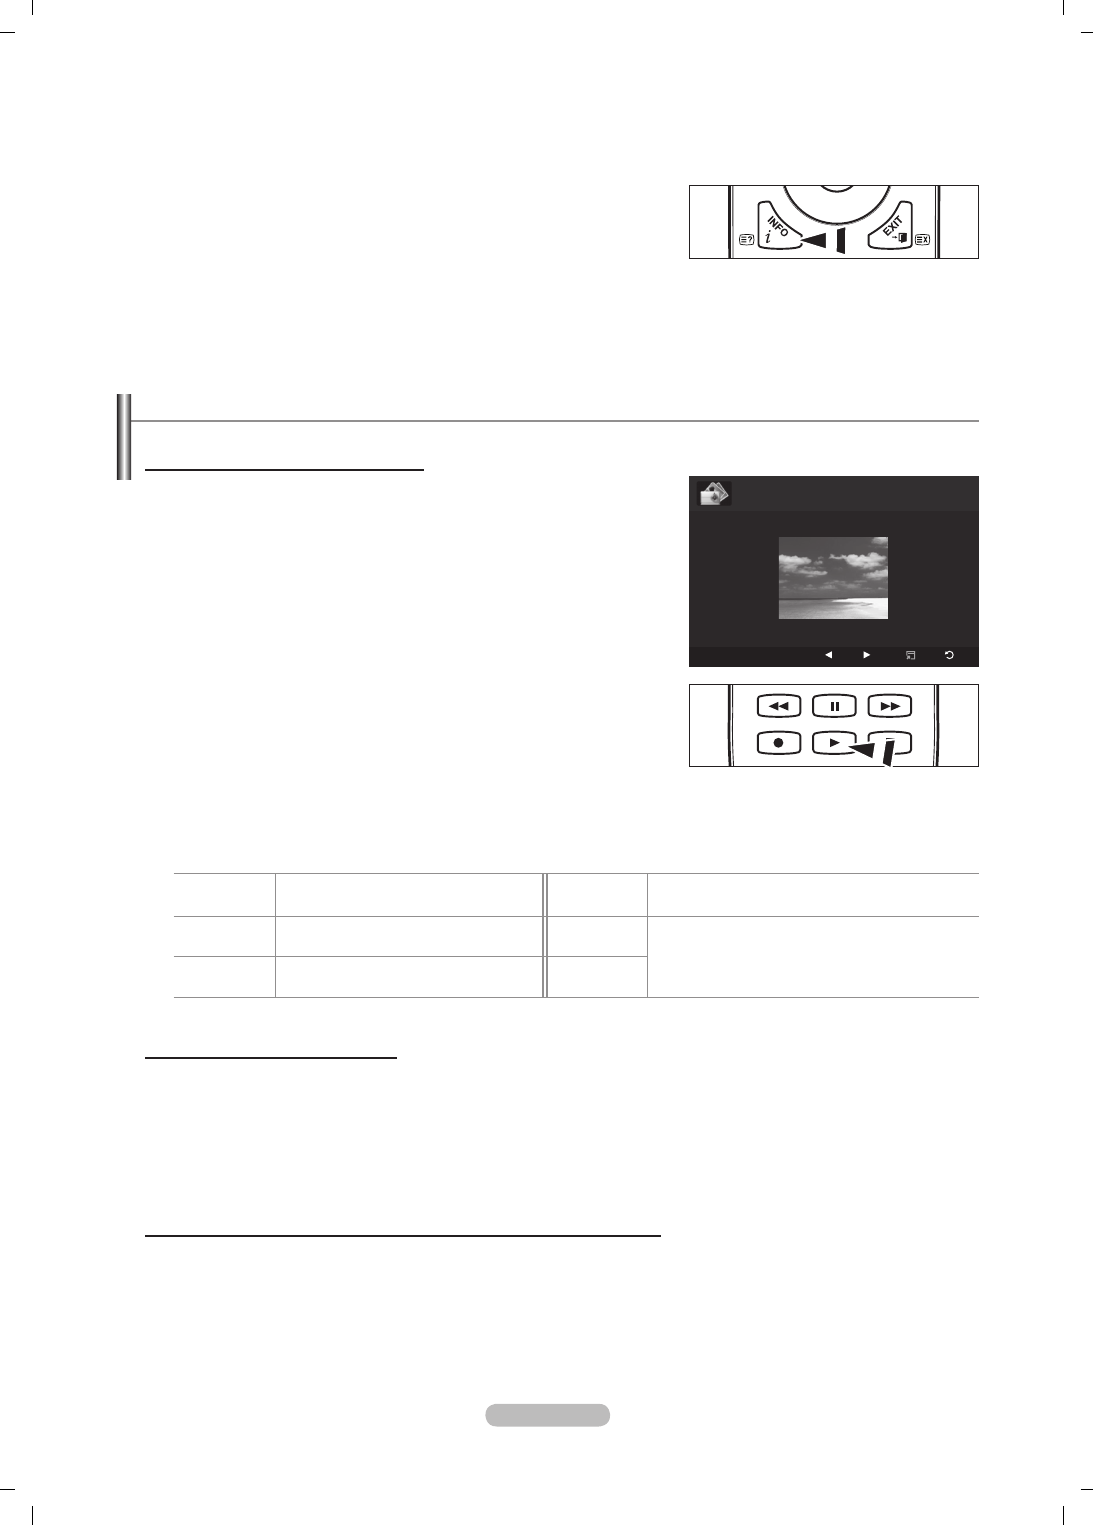
Español - 36
Visualización de una foto o una presentación
Visualización de una presentación
1. Pulse los botones ◄ o ► para seleccionar la foto que desee de la lista.
2. Pulse el botón TOOLS.
3. Pulse los botones ▲ o ▼ para seleccionar Secuencia y pulse el botón
ENTER
E
.
En la presentación se usan todos los archivos de la lista de fotos.
En la presentación, los archivos se muestran en orden a partir del archivo
que se muestra en este momento.
La presentación se ejecuta según el orden de la clasicación de la lista de
fotos.
Los archivos de música se pueden reproducir automáticamente durante
la presentación si Música de fondo está congurado como Encendido.
(Consulte la página 37.)
Mientras se muestra una lista de fotos, pulse los botones
∂
(reproducir)/ENTER
E
del mando a distancia para iniciar la presentación.
Botones de control de la presentación
ENTER
E
Reproduce o hace una pausa en la
presentación.
∫
Salir de la presentación y volver a la lista de
fotos.
∂
Reproduce una presentación. TOOLS Ejecuta diversas funciones desde los menús de
las fotos.
Cambia la velocidad de reproducción de la
presentación.
∑
Hace una pausa en la reproducción.
π
/
µ
Reproducción del grupo actual
1. Pulse los botones ▲ o ▼ para seleccionar una norma de clasicación. (Mensual, Cronología, Color, Composición,
Carpeta, Preferencias)
2. Pulse los botones
π
(REW) o
µ
(FF) para seleccionar el grupo deseado.
3. Pulse el botón TOOLS.
4. Pulse los botones ▲ o ▼ para seleccionar Rep.gr. act., a continuación pulse el botón ENTER
E
.
En la presentación se usan sólo las fotos del grupo de clasicación que incluye los archivos seleccionados.
Para ver una presentación sólo con los archivos seleccionados
1. Pulse los botones ◄ o ► para seleccionar la foto que desee de la lista.
2. Pulse el botón amarillo. Repita el proceso anterior para seleccionar varias fotos.
La marca
c
aparece a la izquierda de la foto seleccionada.
Si selecciona sólo un archivo, la presentación no se efectuará.
Para cancelar la selección de todos los archivos, pulse el botón TOOLS y seleccione Deselecc. todos.
3. Pulse los botones
∂
(reproducir)/ENTER
E
.
Los archivos seleccionados se usan en la presentación.
N
N
N
N
O
N
N
N
N
N
O
Información
Se muestra la información del archivo de foto, incluidos el orden del archivo en el directorio actual, el nombre, el tamaño, la
resolución, la fecha de modicación y la ruta.
De la misma manera se puede ver la información de los archivos de fotos
durante una presentación.
De manera alternativa, puede seleccionar una foto en la lista y pulsar el
botón INFO para ver la información.
Retirar con seguridad
Se puede quitar el dispositivo del televisor con seguridad.
N
O
SUM
E
Pausa
Anterior
Siguiente
Opción
Volver
►
Normal
20/22 image_1.jpg 440x440 2.0KB 2008/1/1
BN68-01757A-Spa.indb 36 2008-9-24 15:55:56

Español - 37
Menú de opciones de la presentación
Detener secuencia/Iniciar visionado automático
Se puede iniciar o detener una presentación.
Girar
Se pueden girar las fotos guardadas en el dispositivo de memoria USB.
Con cada pulsación del botón ◄ , la imagen gira 270˚, 180˚, 90˚ y 0˚.
Con cada pulsación del botón ► , la imagen gira 90˚, 180˚, 270˚ y 0˚.
Zoom
Se pueden ampliar las fotos guardadas en el dispositivo de memoria USB.
(x1 → x2 → x4)
Para mover una foto ampliada, pulse el botón ENTER
E
y a
continuación los botones ▲/▼/◄/►. Tenga en cuenta que si una
imagen ampliada es menor que el tamaño de la pantalla original, la
función de cambio de ubicación no está operativa.
El archivo ampliado no se guarda.
Si ha seleccionado Girar, la función Zoom está desactivada.
Velocidad de secuencia
Se puede seleccionar la velocidad de la presentación.
Sólo se puede seleccionar la velocidad de una presentación durante la presentación.
Durante la presentación, también se puede cambiar la velocidad de ésta con los botones
π
(REW) o
µ
(FF).
Música de fondo → Encendido/Apagado
Si congura Música de fondo como Encendido, la música de fondo se reproducirá cuando se vean las fotos una a una o en
una presentación.
Si se congura Música de fondo como Encendido, se abre inmediatamente una pantalla donde se puede ajustar la música
de fondo.
Para usar esta función debe haber archivos de música y de fotos almacenados en el dispositivo USB.
Configuración de la música de fondo
Puede seleccionar la música de fondo de una presentación.
Si desactiva Música de fondo, aunque haya establecido Conguración de la música de fondo la música de fondo no
se reproducirá.
Es necesario cargar los archivos de música para cambiar el modo BGM. Reproduzca los archivos de música en la
categoría de música para cargar.
Modo BGM → Ánimo/Arch. Sel./Aleatorio
Modo BGM → Enérgico/Rítmico/Triste/Excitante/Tranquilo
Si se establece Modo BGM como Ánimo, se puede seleccionar un estado de ánimo.
No se puede seleccionar un estado de ánimo que no forme parte de los archivos de música del dispositivo de memoria
USB.
Seleccionar archivo de música
Si se congura Modo BGM como Arch. Sel., se puede seleccionar un archivo de música.
Configuración de la imagen / Configuración del sonido
Consulte la página 43.
Información
Se muestra la información del archivo de foto
Retirar con seguridad
Se puede quitar el dispositivo del televisor con seguridad.
N
N
N
N
N
N
N
N
N
•
•
N
N
•
N
Herramientas
Detener presentación
Girar
Zoom
Vel.secuencia : Normal
Música de fondo : Desactivado
Configuración de la Music de fondo
Configuración de la imagen
Configuración del sonido
Información
U
Mover
E
Entrar
e
Salir
BN68-01757A-Spa.indb 37 2008-9-24 15:55:56

Español - 38
Uso y clasicación de la lista de música
Se pueden clasicar los archivos de música de la lista siguiendo una norma personal.
1. Pulse los botones ▲ o ▼ para seleccionar una norma de clasicación en la
lista de música.
Los archivos de música se clasican según la nueva norma de
clasicación seleccionada.
Para ir al grupo anterior/siguiente, pulse los botones
π
(REW) o
µ
(FF).
2. Pulse el botón ENTER
E
para iniciar la reproducción de música en el
orden elegido.
La información del archivo de música se congura automáticamente.
La información de Ánimo extraída del archivo de música puede diferir
de la que el usuario espera.
La información de la música se establece automáticamente. Se puede cambiar Ánimo y Favoritos.
Los archivos de música cuya información no se puede mostrar se establecen como Sin clasicar.
Si no hay información del título de un archivo de música, se muestra el nombre del archivo.
Si la información de Género, Artista, Álbum o Año no está disponible, el elemento correspondiente se muestra vacío.
Norma de clasicación en la lista de música
Título:
Ordena los títulos de música en orden alfabético y muestra el archivo de música.
Artista:
Ordena los archivos de música por artista y en orden alfabético.
Ánimo:
Ordena los archivos de música por el estado de ánimo. Se puede cambiar la información del estado de ánimo
de la música.
Opciones de Ánimo: Enérgico, Rítmico, Triste, Excitante, Tranquilo, Sin clasicar
Género:
Ordena los archivos de música por el género.
Carpeta:
Ordena los archivos de música por la carpeta. Si hay varias carpetas en USB, los archivos se muestran
ordenados en cada carpeta. El archivo de música en la carpeta raíz se muestra primero y los otros se muestran
ordenados alfabéticamente por nombre.
Preferencias:
Ordena los archivos de música por preferencias (Favoritos). Se puede cambiar las preferencias de los
archivos de música.
Cambio de la conguración de favorito
Seleccione el archivo de música deseado en la lista y pulse el botón
Verde varias veces hasta que se muestre la conguración deseada.
Para cambiar la información de varios archivos, seleccione los archivos
que desee con el botón amarillo.
Opciones de Favoritos:
★ ★ ★
,
★ ★ ★
,
★ ★ ★
,
★ ★ ★
Menú de opciones de la lista de música
Rep.gr. act.
: Con este menú sólo se pueden reproducir archivos de
música en el grupo de clasificación actualmente seleccionado.
Borrar
: Con este menú se pueden borrar los archivos de música
seleccionados.
Cambiar info grupo
:
Se puede cambiar la información del estado de
ánimo de la música. La información del grupo del archivo actual se ha
actualizado y el archivo se ha movido al nuevo grupo.
Para cambiar la información de varios archivos, seleccione los archivos que desee con el botón amarillo.
Información
: Se muestra la información del archivo de música, incluidos el orden del archivo en el directorio actual, el
nombre, el tamaño, la fecha de modificación y la ruta.
De la misma manera se puede ver la información de los archivos de música durante una presentación.
De manera alternativa, puede seleccionar un archivo de música en la lista y pulsar el botón INFO para ver la información.
Retirar con seguridad
: Se puede quitar el dispositivo del televisor con seguridad.
N
N
N
N
N
N
N
N
N
N
N
N
N
N
O
Music
SUM
Dispos.
Conf. fav.
Selecc.
Saltar
Opción
Preferencias
Título
Artista
Enérgico ★ ★ ★
Jee
Album 1
2005
Pop
Thanks
Triste ★ ★ ★
Darby
Album 2
2005
Pop
I Love You
Tranquilo ★ ★ ★
Catherine
Album 3
2005
Pop
Better than yesterday
F G H I J L P S T V
▲
Music
SUM
Dispos.
Conf. fav.
Selecc.
Saltar
Opción
Artista
Ánimo
Género
Triste ★ ★ ★
Jee
Album 1
2005
Pop
Thanks
Triste ★ ★ ★
Darby
Album 2
2005
Pop
I Love You
Excitante ★ ★ ★
Catherine
Album 3
2005
Pop
Better than yesterday
Rhythmical Triste Excitante Tranquilo ...
▲
Play Current Group
Borrar
Cambiar info grupo
Información
▼
BN68-01757A-Spa.indb 38 2008-9-24 15:55:57
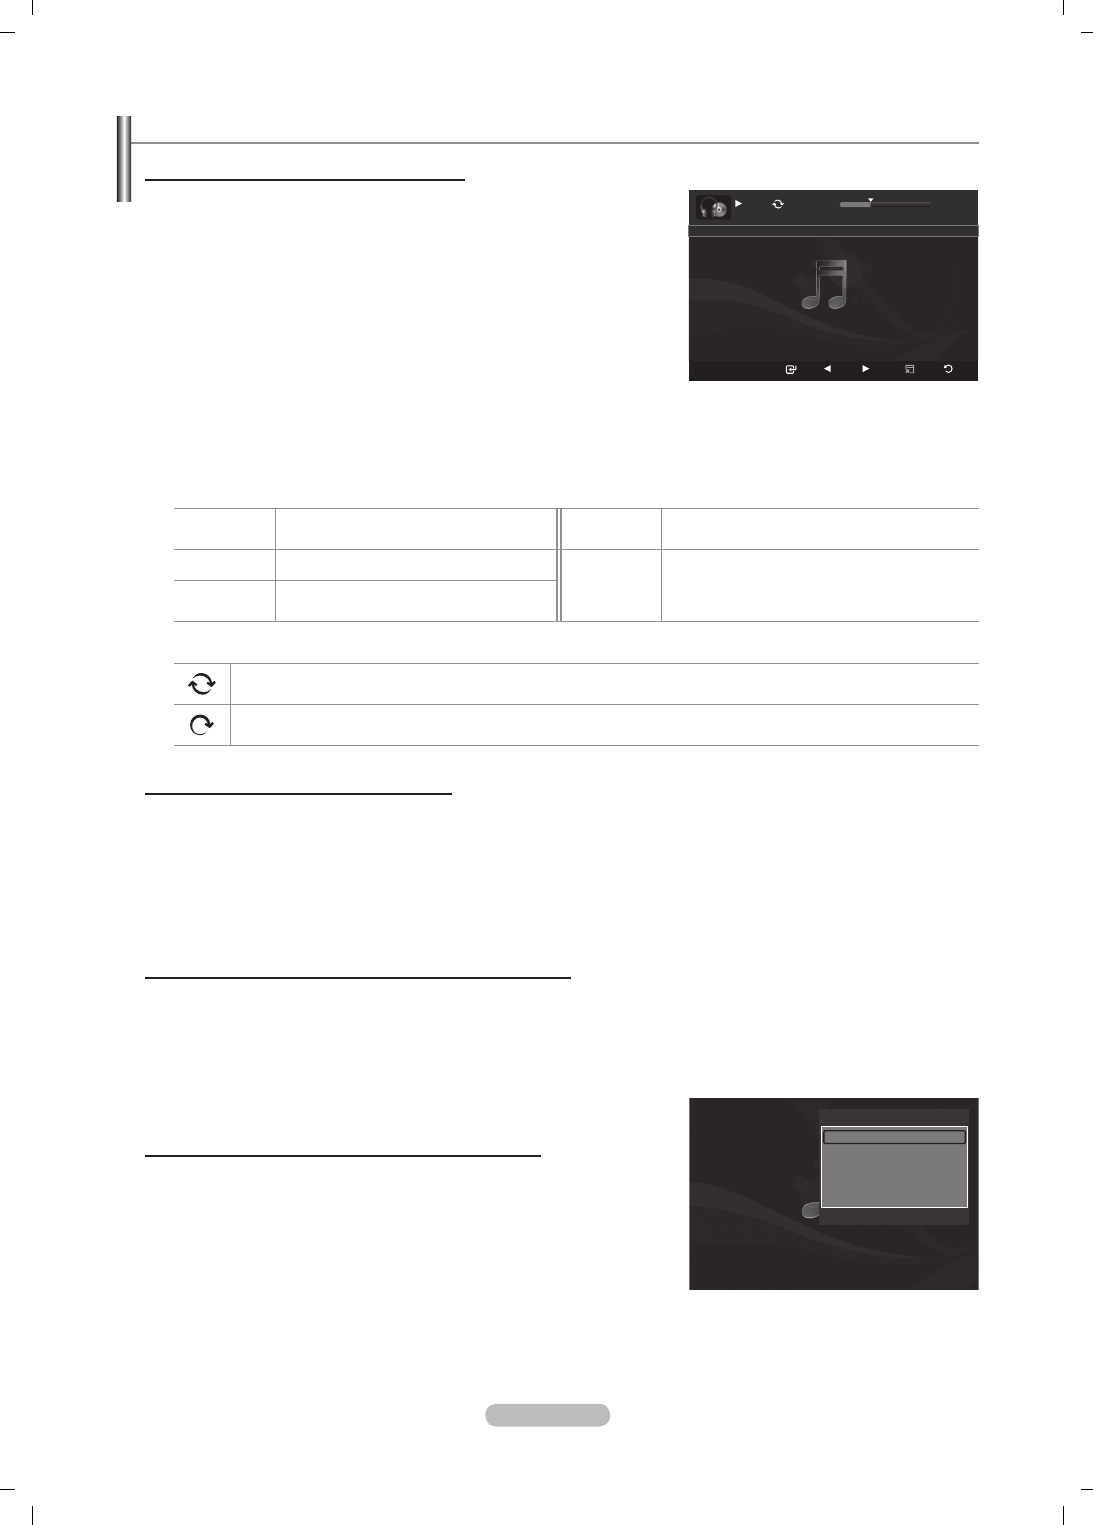
Español - 39
Reproducción de música
Reproducción de un archivo de música
1. Pulse los botones ◄ o ► para seleccionar el archivo de música que desea
reproducir.
2. Pulse los botones
∂
(reproducir)/ENTER
E
.
Este menú sólo muestra archivos con la extensión .mp3. Los archivos
con otras extensiones no se muestran, aunque se hayan guardado en
el mismo dispositivo USB.
Los botones
π
(REW) o
µ
(FF) no funcionan durante la
reproducción.
El archivo seleccionado se visualiza en la parte superior con su tiempo
de reproducción.
Para ajustar el volumen de la música, pulse el botón del volumen del mando a distancia. Para silenciar el sonido, pulse el
botón MUTE del mando a distancia.
La duración de la reproducción de un archivo de música puede visualizarse como ‘00:00:00’ si la información del tiempo
de reproducción no se encuentra al inicio del archivo.
Botones de control de la reproducción de música
ENTER
E
Reproduce o hace una pausa en el
archivo de música.
∫
Sale del modo de reproducción y vuelve a la
lista de música.
∂
Reproduce el archivo de música
TOOLS Ejecuta diversas funciones desde los menús
de música.
∑
Hace una pausa en la reproducción del
archivo de música
Icono de información sobre la función de música
Cuando todos los archivos de música de la carpeta (o el archivo seleccionado) se repiten. Modo de repetición
está establecido como Encendido.
Cuando todos los archivos de música de la carpeta (o el archivo seleccionado) se reproducen una vez. Modo de
repetición está establecido como Apagado.
Reproducción de un grupo de música
1. Pulse los botones ▲ o ▼ para seleccionar una norma de clasicación.
(Título, Artista, Ánimo, Género, Carpeta, Preferencias)
2. Pulse los botones
π
(REW) o
µ
(FF) para seleccionar el grupo deseado.
3. Pulse el botón TOOLS.
4. Pulse los botones ▲ o ▼ para seleccionar Rep.gr. act., a continuación pulse el botón ENTER
E
.
Se reproducen los archivos de música del grupo de clasicación que incluye el archivo seleccionado.
Reproducción de archivos de música seleccionados
1. Pulse los botones ◄ o ► para seleccionar el archivo de música que desee en la lista.
2. Pulse el botón amarillo. Repita el proceso anterior para seleccionar varios archivos de música.
La marca
c
aparece a la izquierda del archivo de música seleccionado.
3. Pulse los botones
∂
(reproducir)/ENTER
E
.
Sólo se reproduce el archivo seleccionado.
Menú de opciones de la reproducción de música
Modo de repetición → Encendido/Apagado
Se puede reproducir la música repetidamente.
Configuración de la imagen / Configuración del sonido
Consulte la página 43.
Información
Se muestra la información del archivo de música.
Retirar con seguridad
Se puede quitar el dispositivo del televisor con seguridad.
N
N
N
N
N
N
N
N
N
N
SUM
Pausa
Anterior
Siguiente
Opción
Volver
7/14 00:01:15 00:05:41
I Love You
Herramientas
Modo de repetición
◄ Activado ►
Configuración de la imagen
Configuración del sonido
Información
Retirar con seguridad
U
Mover
L
Ajustar
e
Salir
BN68-01757A-Spa.indb 39 2008-9-24 15:55:58
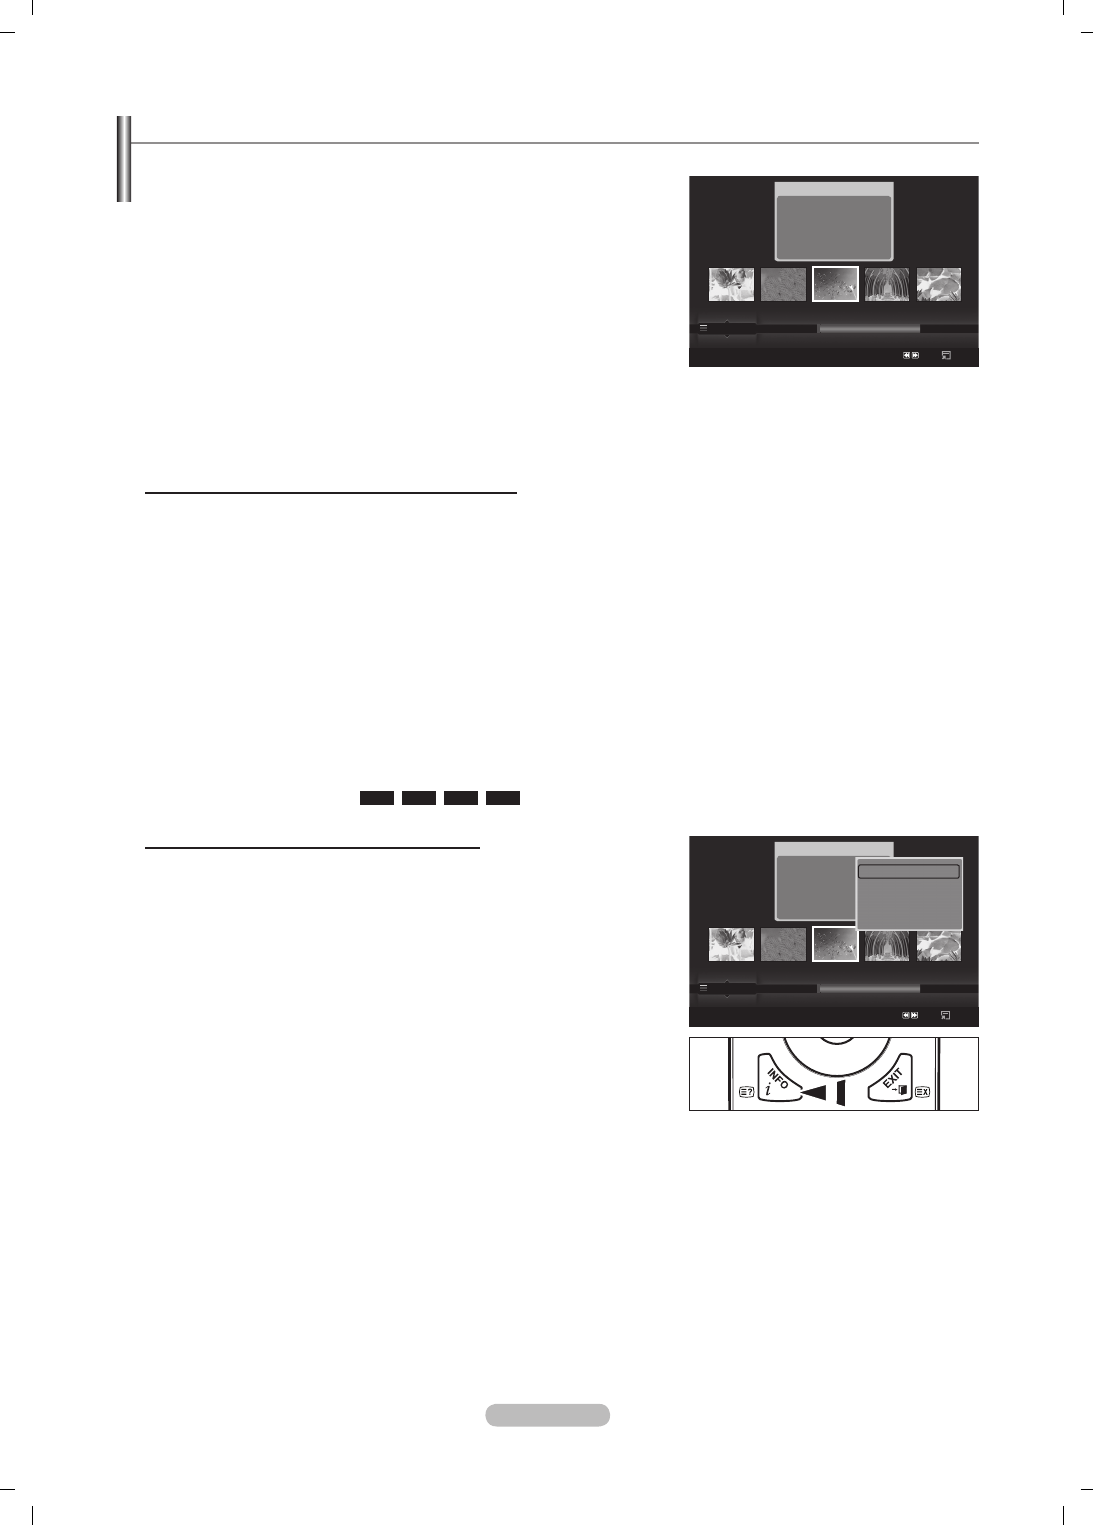
Español - 40
Uso y clasicación de la lista de películas
Se pueden clasicar las películas de la lista siguiendo una norma personal.
1. Pulse los botones ▲ o ▼ para seleccionar una norma de clasicación en la
lista de películas.
Los archivos de películas se clasican según la última norma de
clasicación seleccionada.
Para ir al grupo anterior/siguiente, pulse los botones
π
(REW) o
µ
(FF).
En la función de películas no se admiten los subtítulos
(por ejemplo, no se admiten los archivos smi, srt, sub, et., ni tampoco
los subtítulos incluidos en los archivos de películas).
2. Pulse el botón
∂
(reproducir)/ENTER
E
para reproducir una película en
el orden elegido.
Las películas se clasican según la nueva norma de clasicación
seleccionada.
La información de la película se establece automáticamente. Puede cambiar Favoritos.
Norma de clasicación en la lista de películas
Título
Ordena y visualiza los títulos de películas en orden alfabético.
Cronología
Ordena y muestra las películas por fechas. Ordena por años y meses empezando por las más antiguas.
Carpeta
Si hay varias carpetas en USB, los archivos se muestran ordenados en cada carpeta. El archivo de películas de la carpeta
raíz se muestra primero y los otros se muestran ordenados alfabéticamente por nombre.
Preferencias
Ordena las películas por preferencias. (Favoritos) Se pueden cambiar las preferencias de las películas.
Cambio de la conguración de favorito
Seleccione el archivo de película deseado en la lista y pulse el botón Verde varias veces hasta que se muestre la
conguración deseada.
Opciones de Favoritos:
★ ★ ★
,
★ ★ ★
,
★ ★ ★
,
★ ★ ★
Menú de opciones de la lista de películas
Rep.gr. act.
Con este menú sólo se pueden reproducir archivos de películas en el grupo
de clasicación actualmente seleccionado.
Borrar
Con este menú se puede borrar los archivos de películas seleccionados.
Información
Se muestra la información del archivo de película, incluidos el orden
del archivo en el directorio actual, el nombre, el tamaño, la fecha de
modicación y la ruta.
De manera alternativa, se puede seleccionar una película en la lista y
pulsar el botón INFO para ver la información.
Retirar con seguridad
Se puede quitar el dispositivo del televisor con seguridad.
N
N
N
N
N
N
N
O
Movie
SUM
Dispos.
Conf. fav.
Selecc.
Saltar
Opción
Película_1.jpg
Fecha : Ene.01.2008
Carpeta :
Película-Carpeta
Favoritos : ★ ★ ★
Preferencias
Título
Cronología
A M
SÍMBOLO
▲
□
ENG
Movie
SUM
Dispos.
Conf. fav.
Selecc.
Saltar
Opción
Película_1.jpg
Fecha : Ene.01.2008
Carpeta : Película-folder
Favoritos : ★ ★ ★
Preferencias
Título
Cronología
A M
SÍMBOLO
▲
□
ENG
Rep.gr.act.
Borrar
Información
Retirar con seguridad
BN68-01757A-Spa.indb 40 2008-9-24 15:55:59
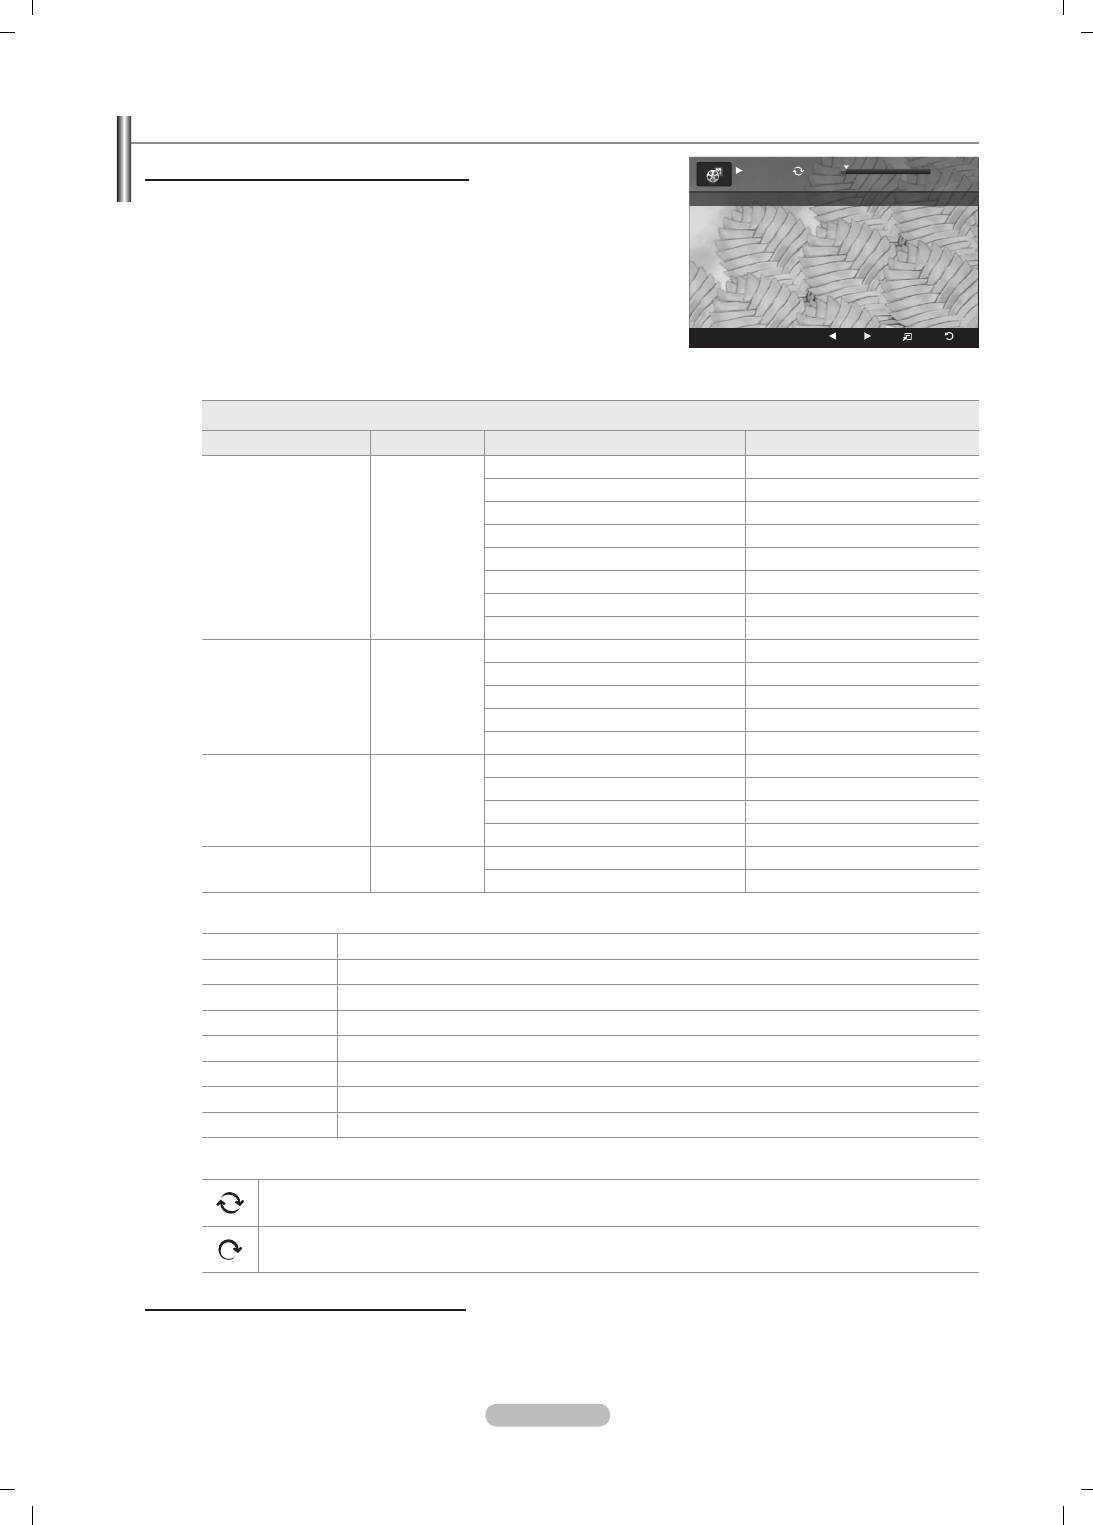
Español - 41
Reproducción de un archivo de película
Reproducción de un archivo de película
1. Pulse los botones ◄ o ► para seleccionar la película que desea reproducir.
2. Pulse los botones
∂
(reproducir)/ENTER
E
.
El archivo seleccionado se reproduce.
El archivo seleccionado se visualiza en la parte superior con su tiempo
de reproducción.
La duración de la reproducción de un archivo de película puede
visualizarse como ‘00:00:00’ si la información del tiempo de
reproducción no se encuentra al inicio del archivo.
Formatos de vídeo admitidos
Códec de vídeo
Extensión de archivo Contenedor Decodi cador de vídeo Resolución máxima Sti
*.avi AVI
XviD 720x576
MPEG1 720x576
MPEG2 720x576
H.264 BP 1920x1088
H.264 BP 1920x1088
H.264 HP 1920x1088
MPEG-4 SP 720x576
MPEG-4 ASP 720x576
*.mp4 MP4
H.264 BP 1920x1088
H.264 MP 1920x1088
H.264 HP 1920x1088
MPEG-4 SP 720x576
MPEG-4 ASP 720x576
*.mpg
PS
MPEG1 (Flujo de programa) 1920x1088
*.mpeg MPEG2 (Flujo de programa) 1920x1088
*.vro MPEG2 VOB 1920x1088
*.vob MPEG2 VRO 1920x1088
otros
(ts) TS MPEG2 (Flujo de transporte) 1920x1088
H.264 (Flujo de transporte) 1920x1088
Botones de control de la reproducción de vídeo
ENTER
E
Reproduce o hace una pausa en la presentación.
∂
Reproduce un archivo de película
∑
Hace una pausa en la reproducción de la película
∫
Sale del modo de reproducción y vuelve a la lista de películas.
TOOLS Ejecuta diversas funciones desde los menús de las películas.
◄/► Salta hacia adelante o hacia atrás durante la reproducción en intervalos de 20 segundos.
µ
Cambia la velocidad de reproducción.
▲/▼ Ir a la primera o a la última vista del archivo actual.
Icono de información sobre la función de la películas
Cuando todos los archivos de película de la carpeta (o el archivo seleccionado) se repiten.
Modo de repetición está establecido como Encendido.
Cuando todos los archivos de película de la carpeta (o el archivo seleccionado) se reproducen una vez.
Modo de repetición está establecido como Apagado.
Reproducción de un grupo de películas
1. Pulse los botones ▲ o ▼ para seleccionar una norma de clasi cación. (Título, Cronología, Carpeta, Preferencias)
2. Pulse los botones π (REW) o µ (FF) para seleccionar el grupo deseado.
3. Pulse el botón TOOLS.
4. Pulse los botones ▲ o ▼ para seleccionar Rep.gr. act., a continuación pulse el botón ENTER
E
.
N
N
N
N
N
N
SUM
E
Pausa
-20sec
+20sec
Opción
Volver
1/5 00:00:48 00:23:05
ABC.avi
BN68-01757A-Spa.indb 41 2008-9-24 15:56:00
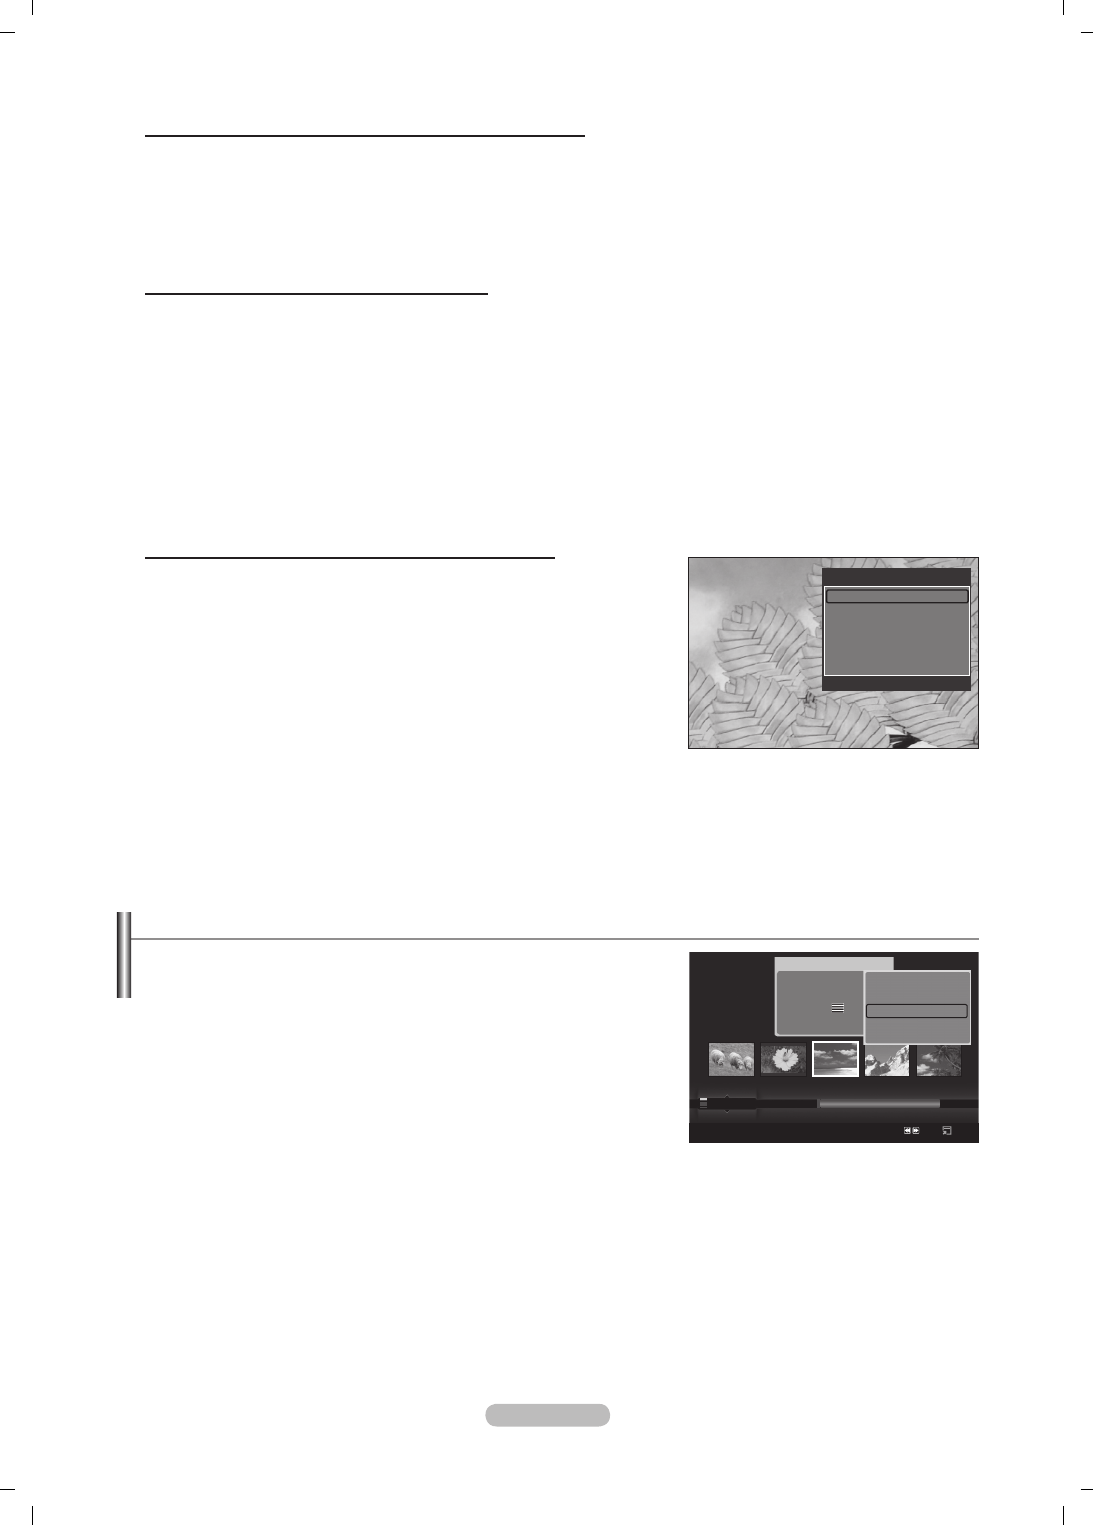
Español - 42
Supresión de archivos de fotos, música y películas
1. Pulse los botones ◄ o ► para seleccionar el archivo que desee de la lista
de fotos, música o películas.
Para borrar varios archivos, selecciónelos con el botón amarillo.
2. Pulse el botón TOOLS.
3. Pulse los botones ▲ o ▼ para seleccionar Borrar (o Borrar archivo sel.) y,
a continuación, pulse el botón ENTER
E
.
4. Pulse los botones ◄ o ► para seleccionar Aceptar y, a continuación, pulse
el botón ENTER
E
.
El archivo se borra.
Cuando se borra un archivo de sólo lectura, aparece el mensaje Arc
sólo lect. ¿Bor?.
Los archivos de sólo lectura que se encuentran entre varios archivos no se pueden borrar.
Si selecciona Cancelar, se cancela la operación de borrar.
Mientras se borran los archivos, no retire el dispositivo de memoria USB.
No se puede eliminar archivos de imágenes de una cámara digital conectada vía PTP.
No se puede restaurar los archivos de películas suprimidos.
N
N
N
N
N
N
N
N
Reproducción de archivos de películas seleccionados
1. Pulse los botones ◄ o ► para seleccionar la película que desee en la lista.
2. Pulse el botón amarillo. Repita el proceso anterior para seleccionar varios archivos de película.
La marca c aparece a la izquierda de los archivos de película seleccionados.
3. Pulse los botones ∂ (reproducir)/ENTER
E
.
Sólo se reproduce el archivo seleccionado.
Reproducción de películas a continuación
Si se sale de la reproducción de una película, posteriormente se puede reproducir ésta desde donde se dejó.
Con la función Contin. se puede ver una película sin que sea necesario volver a verla desde el principio o realizar molestas
búsquedas.
1.
Seleccione el archivo de la película que desee Contin. pulsando los botones ◄ o ► en la lista de películas.
2. Pulse los botones ∂ (reproducir)/ENTER
E
.
3. Seleccione la opción de reproducir a continuación con el botón azul.
La película se reproducirá desde el punto en que se detuvo la reproducción.
Si la función Recordar contin. pelíc. está congurada como Encendido, aparece un mensaje emergente cuando se
reproduce el archivo de película que se desea Contin. . (Consulte la página 43.)
4.
Para salir del modo WISELINK Pro, pulse el botón W.LINK del mando a distancia.
Menú de opciones de la reproducción de películas
Modo de repetición
Se puede reproducir repetidamente la película.
Configuración de la imagen / Configuración del sonido
Consulte la página 43.
Tamaño de imagen
Ajustar: Reproduce vídeo al tamaño de la pantalla de TV.
Original: Reproduce vídeo al tamaño original.
Información
Se muestra la información del archivo de película.
Retirar con seguridad
Se puede quitar el dispositivo del televisor con seguridad.
N
N
N
N
•
•
Herramientas
Modo de repetición ◄ Activado ►
Configuración de la imagen
Configuración del sonido
Tamaño de imagen : Ajustar
Información
Retirar con seguridad
U
Mover
L
Ajustar
e
Salir
Photo
SUM
Dispos.
Conf.fav.
Selecc.
Saltar
Opción
image_1.jpg
Mes : Ene
Fecha : Ene.01.2008
Color : Gris
Composición :
Carpeta : P-other
Favoritos : ★ ★ ★
Preferencias
Mensual
Cronología
Ene Nov
▲
Secuencia
Play Current Group
Borrar
Información
▼
BN68-01757A-Spa.indb 42 2008-9-24 15:56:02
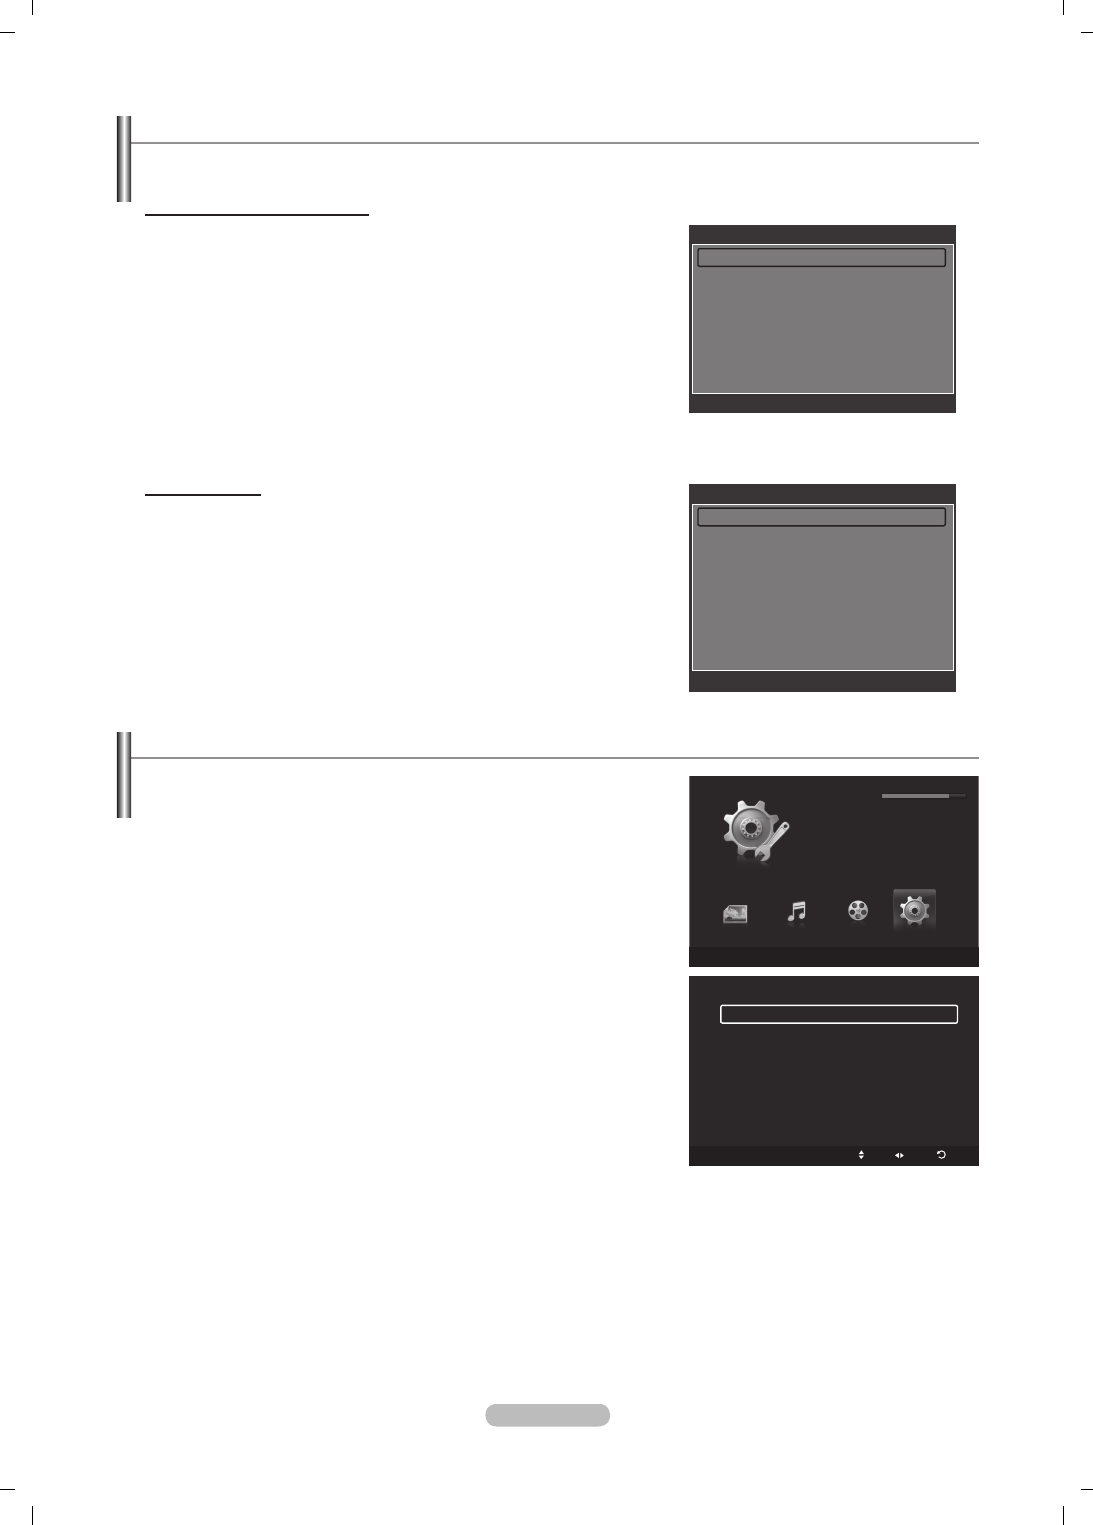
Español - 43
Conguración de imagen y música con WISELINK Pro
Cuando se ve una presentación o se escucha música con WISELINK Pro, se puede congurar la imagen y el sonido.
Conguración de la imagen
1. Pulse el botón TOOLS durante la presentación o mientras se oye la música.
2. Pulse los botones ▲ o ▼ para seleccionar Conguración de la imagen.
3. Pulse los botones ◄ o ► para seleccionar Modo Cine (Dinámico, Normal
o Película).
4. Pulse los botones ▲ o ▼ para desplazarse hasta un elemento. (Contraste,
Brillo, Color, Contraste Dinám., Ajuste del negro, o Reiniciar)
Seleccione Reiniciar para inicializar la conguración de la imagen.
5. Pulse los botones ◄ o ► para ajustar la conguración.
Para obtener más información sobre la conguración de la imagen, consulte
las páginas 15 a 18.
Sound Setting
1. Pulse el botón TOOLS durante la presentación o mientras se oye la música.
2. Pulse los botones ▲ o ▼ para seleccionar Conguración del sonido.
3. Pulse los botones ◄ o ► para seleccionar Modo de sonido. (Normal,
Música, Cine, Diálogo o Favorito)
4. Pulse los botones ▲ o ▼ para desplazarse hasta un elemento.
Seleccione Reiniciar para inicializar la conguración del sonido.
5. Pulse los botones ◄ o ► para ajustar la conguración.
Para obtener más información sobre la conguración del sonido, consulte la
página 21 a 22.
Uso del menú de conguración
El menú de conguración muestra al usuario la conguración del menú
WISELINK Pro.
1. Pulse el botón W.LINK del mando a distancia para mostrar el menú
WISELINK Pro.
2. Pulse los botones ◄ o ► para seleccionar Conguración y, a
continuación, pulse el botón ENTER
E
.
3. Pulse los botones ▲ o ▼ para seleccionar la opción deseada.
4. Pulse los botones ◄ o ► para seleccionar una opción y, a continuación,
pulse el botón ENTER
E
.
Para salir del modo WISELINK Pro, pulse el botón W.LINK del mando a
distancia.
Velocidad de secuencia → Rápida/Lenta/Normal
Permite seleccionar la velocidad de la presentación.
Modo de repetición de Música→ Encendido/Apagado
Puede seleccionar que los archivos de música se repitan continuamente.
Modo de repetición de Película→ Encendido/Apagado
Puede seleccionar que los archivos de película se repitan continuamente.
Recordar contin. pelíc.→ Encendido/Apagado
Seleccione para mostrar el mensaje de ayuda emergente para la reproducción de una película desde el punto en que se dejó
de ver anteriormente.
Tiemp ejec.protecc.pant. → 1 min/3 min/5 min
Seleccione para congurar el tiempo de espera necesario para que se ejecute el salvapantallas.
Información
Seleccione para ver la información del dispositivo conectado.
Retirar con seguridad
Se puede quitar el dispositivo del televisor con seguridad.
N
N
N
N
N
Setup
SUM
Dispos.
Mover Ajustar
Volver
Velocidad de secuencia ◄ Normal ►
Música Modo de repetición : Activado
Película Modo de repetición : Activado
Recordar contin. pelíc. : Activado
Tiemp ejec.protecc.pant. : 3 min
Información
Retirar con seguridad
WISELINK Pro
Photo
SUM
Dispos.
e
Volver
Music Setup
SETUP
SUM
851.98MB/995.00MB Free
Movie
Configuración de la imagen
Modo imagen ◄ Estándar ►
Contraste : 90
Brillo : 45
Color : 50
Contraste dinám. : Desactivado
Ajuste del negro : Desactivado
Rest.
U
Mover
L
Ajustar
E
Entrar
R
Volver
Configuración del sonido
Modo de sonido ◄ Personal ►
Balance : l50D50
100Hz : 0
300Hz : 0
1KHz : 0
3KHz : 0
10KHz : 0
Rest.
U
Mover
L
Ajustar
E
Entrar
R
Volver
BN68-01757A-Spa.indb 43 2008-9-24 15:56:02
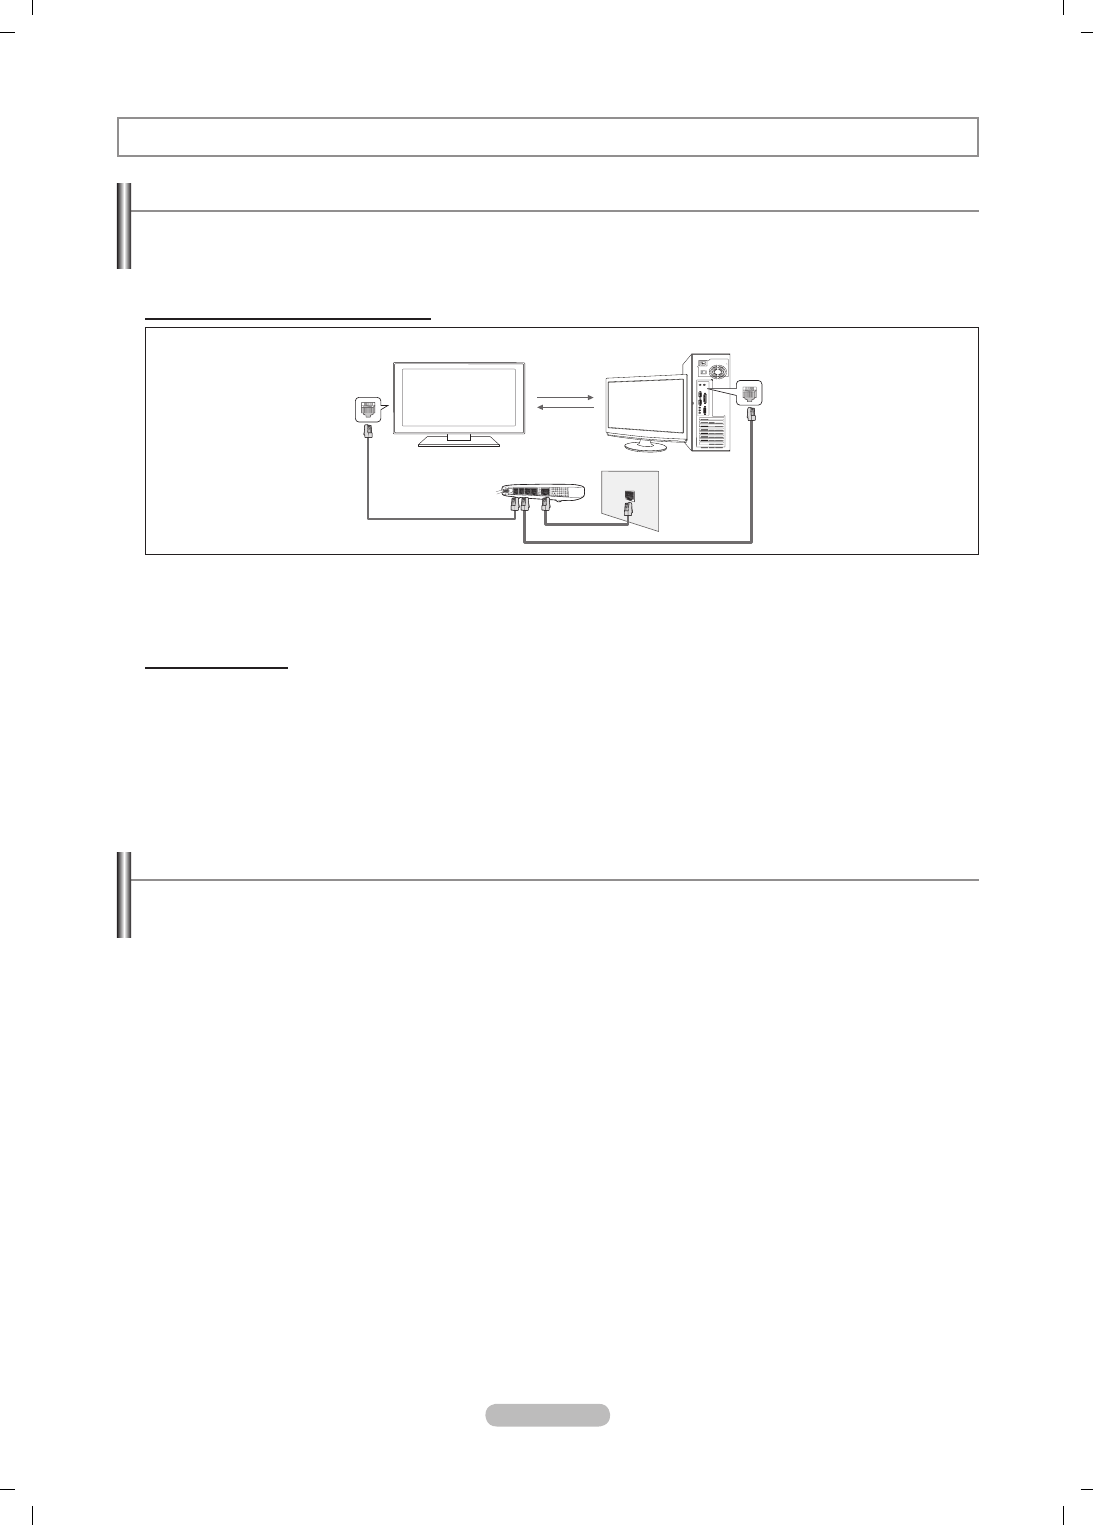
Español - 44
Conguración de la red DLNA
DLNA permite ver en el televisor vídeos e imágenes guardados en el ordenador a través de una conexión de red en modo
Wiselink Pro. De esta forma se elimina la necesidad de copiarlos en un dispositivo de almacenamiento USB y después conectar
éste al televisor. Para utilizar DLNA, es necesario conectar el televisor a la red e instalar la aplicación DLNA en el ordenador.
Diagrama de las conexiones de red
1. Conecte el puerto [LAN] del panel posterior del televisor y el módem externo con un cable LAN.
2. Conecte el ordenador en el que se instalará el programa “DLNA PC Share Manager” y el módem externo con un cable LAN.
3. Conecte el puerto LAN de la pared y el módem externo con un cable de módem.
Conexión a la red
1. Cuando haya nalizado la conexión a la red, congure ésta en el televisor.
Las conexiones inalámbricas a Internet no son compatibles con DLNA.
Los 3 primeros dígitos (dirección de subred) de las direcciones IP del televisor y del ordenador deben coincidir (por
ejemplo, dirección IP: 123.456.789.XX )
2. Realice una Prueba de red para comprobar la conguración de la red.
Instalación de la aplicación DLNA
Para reproducir contenidos del ordenador en el televisor, primero hay que instalar la aplicación.
Requisitos del sistema
1. Inserte en el ordenador el CD del programa suministrado con el televisor.
2. Se necesitan 20 MB de espacio en el disco para la instalación del programa.
Si se comparten archivos, se necesitan hasta 20 MB de espacio en disco duro por cada 100 archivos.
Si se cancela el acceso compartido a archivos, también se libera el espacio en disco duro utilizado para la información de
las miniaturas.
Formatos compatibles
1. Imagen: JPEG (jpg, jpeg)
2. Audio: MP3 (mp3)
3. Vídeo: MPEG1(mpg, mpeg), MPEG2 PS/TS(mpg, mpeg, trp, ts, tp), divx(mpg, mpeg, avi), MPEG4 / H.264 (mpg, mpeg)
N
N
N
N
WISELINK Pro-DLNA
TV
Módem externo
(ADSL/VDSL/TV por cable)
LAN
PC
LAN
1
2
3
BN68-01757A-Spa.indb 44 2008-9-24 15:56:03

Español - 45
Instalación de la aplicación
1. Ejecute el archivo Setup.exe que se encuentra en el CD del programa suministrado con el producto.
También puede descargar el archivo desde www.samsung.com.
2. Instale SAMSUNG PC Share Manager como se muestra en las guras siguientes.
► ►
► ►
►
3. Cuando la instalación haya nalizado, se mostrará en el escritorio el icono de PC Share Manager.
Haga doble clic sobre el icono para ejecutar el programa.
N
N
BN68-01757A-Spa.indb 45 2008-9-24 15:56:05
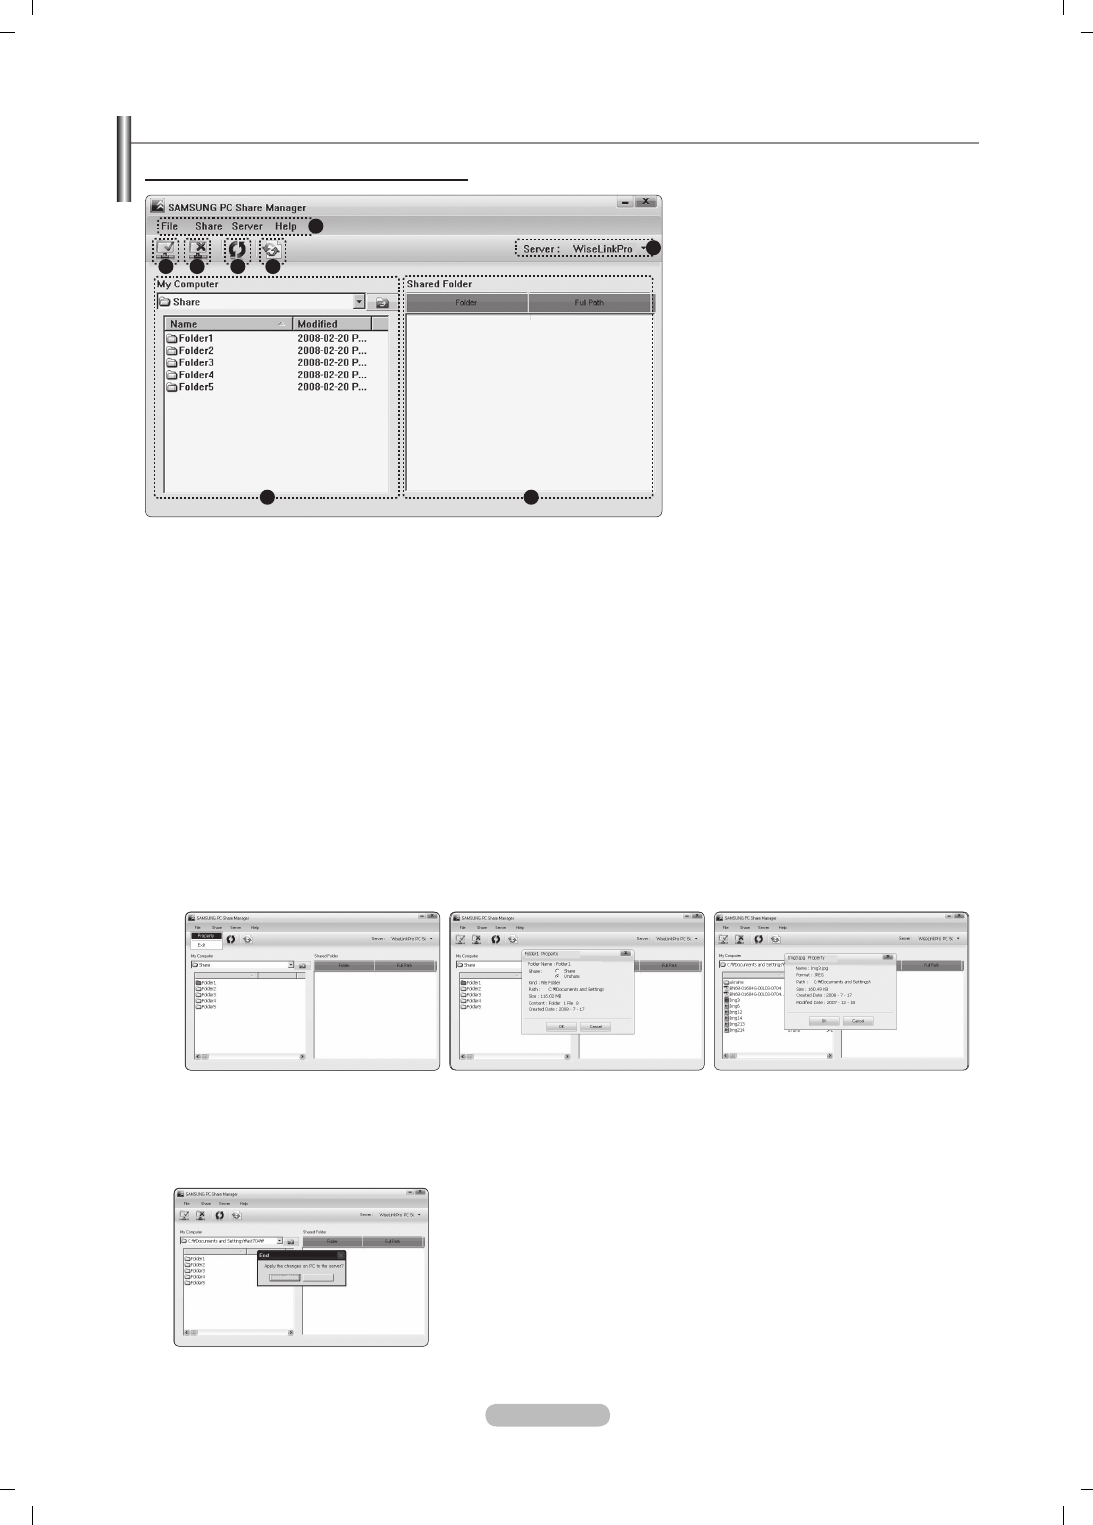
Español - 46
Uso de la aplicación DLNA
Disposición de la pantalla del programa
1. Menús: La aplicación incluye los menús siguientes: arch., compartir, Servidor y Ayuda.
2. Haga clic para compartir la carpeta del servidor PC seleccionado.
3. Haga clic para cancelar el acceso compartido.
4. Haga clic para actualizar la carpeta y los archivos del ordenador.
5. Haga clic para sincronizar el estado de acceso compartido.
6. Se mostrarán las carpetas y los archivos del ordenador que se compartirán.
7. Se mostrarán las carpetas que comparte el usuario.
8. El nombre del servidor PC que se muestra en la lista de dispositivos de WISELINK Pro: Haga clic para cambiar el nombre.
arch.
propiedad
: Muestra información sobre el archivo o la carpeta seleccionados.
Método 1: Seleccione un archivo o una carpeta, seleccione el menú arch y, a continuación, seleccione el submenú
propiedad.
Método 2: Seleccione un archivo o una carpeta, haga clic con el botón derecho sobre el archivo o la carpeta seleccionados
y después seleccione propiedad desde el menú emergente.
<Método 1> <Método 2>
Name ModiedName Name
Name
Yes No
Name ModiedName Name
Name
Yes No
Name ModiedName Name
Name
Yes No
Salir: Sale de la aplicación DLNA.
Si selecciona Salir sin aplicar los cambios después de cambiar el estado del acceso compartido, se mostrará un mensaje que
pregunta si desea aplicar al ordenador los ajustes que se han cambiado. Seleccione Sí para aplicar los cambios y salir de la
aplicación.
Name ModiedName Name
Name
Yes No
❑
-
-
1
2 3 4 5
6 7
8
BN68-01757A-Spa.indb 46 2008-9-24 15:56:07
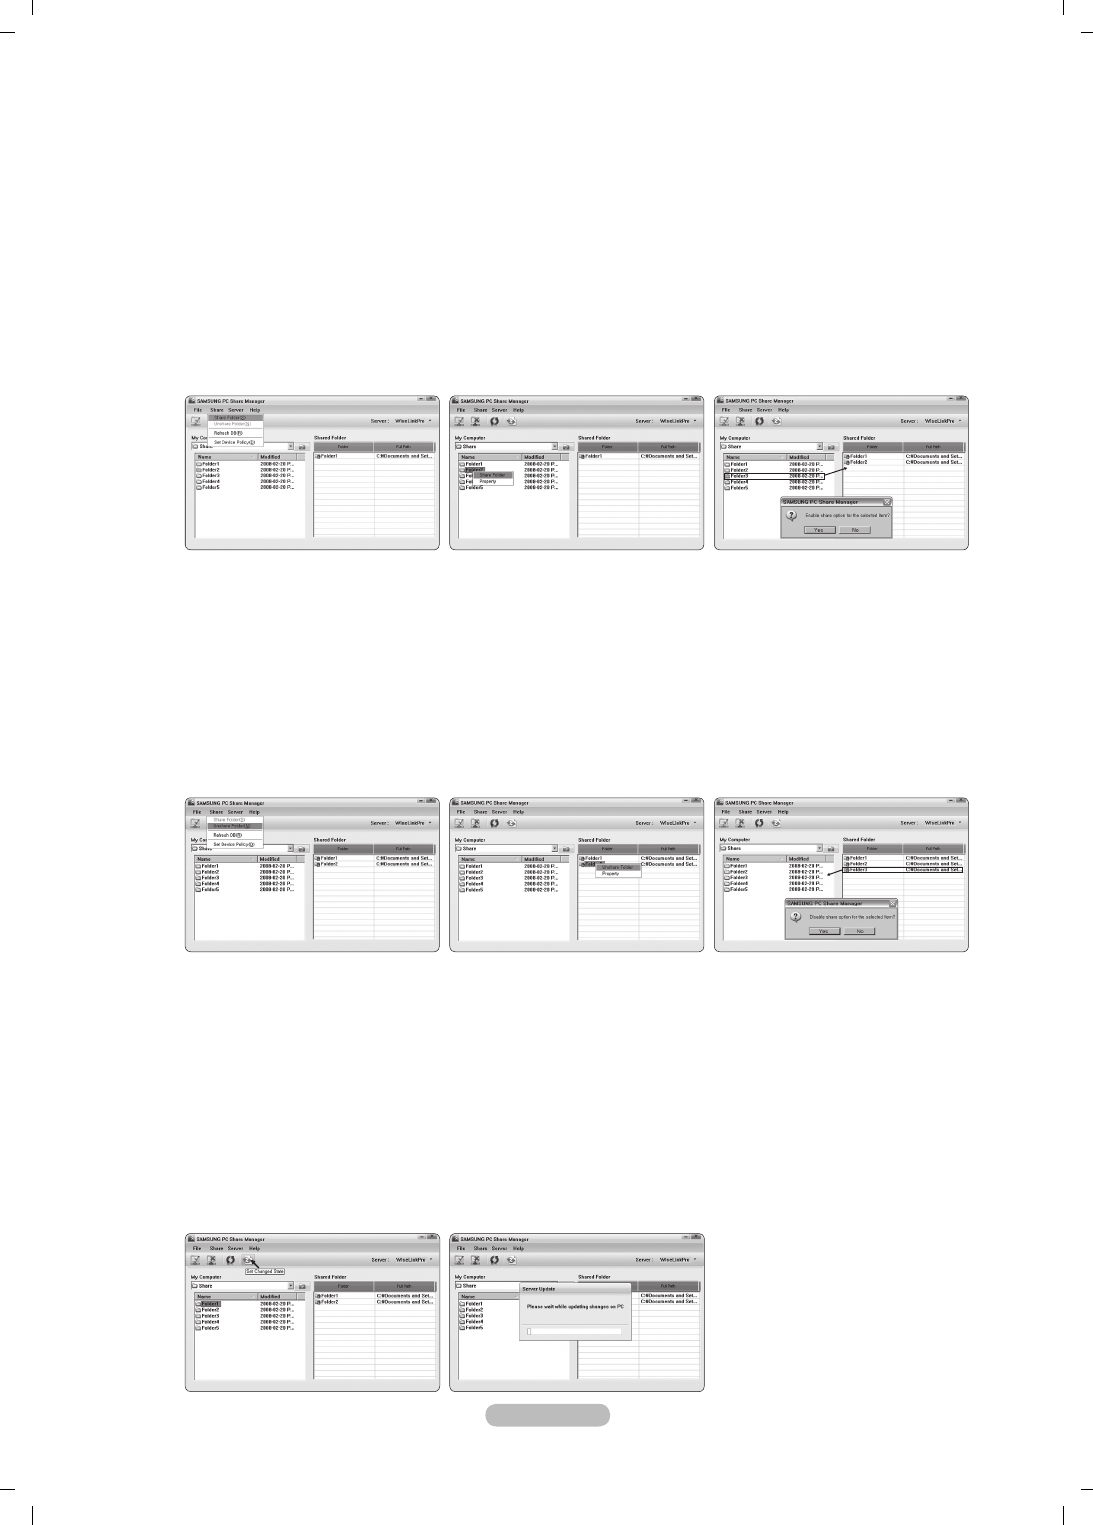
Español - 47
compartir
Acceso compartido a una carpeta
Se pueden compartir carpetas entre el ordenador y el televisor. El número máximo de carpetas que se pueden compartir es de 32.
El ordenador actuará como servidor del televisor.
Método 1: Seleccione una carpeta desde Mi PC, seleccione el menú compartir y, a continuación, seleccione el submenú
compartir carpeta.
Método 2: Seleccione una carpeta desde Mi PC, haga clic con el botón derecho sobre la carpeta seleccionada y seleccione
compartir carpeta desde el menú emergente.
Método 3: Sitúe el puntero del ratón sobre una carpeta de la lista de carpetas del panel izquierdo de Mi PC y arrastre
y suelte la carpeta en el panel de carpetas compartidas. Si aparece un mensaje que le pide que conrme la carpeta
compartida, seleccione Sí.
<Método 1> <Método 2> <Método 3>
Cancelación de una carpeta compartida
Se puede cancelar el acceso a una carpeta compartida en el ordenador. Seleccione una carpeta del panel compartir carpeta
y seleccione no compartir carpeta.
Método 1: Seleccione una carpeta del panel compartir carpeta, seleccione el menú compartir y después seleccione no
compartir carpeta.
Método 2: Seleccione una carpeta del panel compartir carpeta, haga clic con el botón derecho sobre la carpeta
seleccionada y seleccione no compartir carpeta desde el menú emergente.
Método 3: Sitúe el puntero del ratón sobre una carpeta del panel compartir carpeta y arrastre y suelte la carpeta en el
panel Mi PC. Si aparece un mensaje que le pide que conrme la cancelación, seleccione Sí.
<Método 1> <Método 2> <Método 3>
Aplicación de los ajustes actuales
Realice este procedimiento cuando sea necesario sincronizar debido a la creación de una nueva carpeta compartida o
a la cancelación de una carpeta compartida. El menú Congurar estado cambiado aplica los cambios a las carpetas
compartidas según los datos guardados con el programa de acceso compartido del ordenador.
Como aplicar los cambios a los datos internos es un proceso lento, esta función permite a los usuarios aplicar los cambios en
los datos sólo cuando resulta necesario.
Los cambios en el estado de la carpeta compartida no se aplican al servidor hasta que se selecciona el menú Congurar
estado cambiado.
Los cambios en las carpetas compartidas no se aplican al ordenador hasta que se selecciona el menú Congurar estado
cambiado.
Método 1: Seleccione el menú compartir y seleccione el submenú Actualizar DB.
Método 2: Haga clic en el icono Congurar estado cambiado.
❑
N
-
-
-
-
-
-
-
-
BN68-01757A-Spa.indb 47 2008-9-24 15:56:08
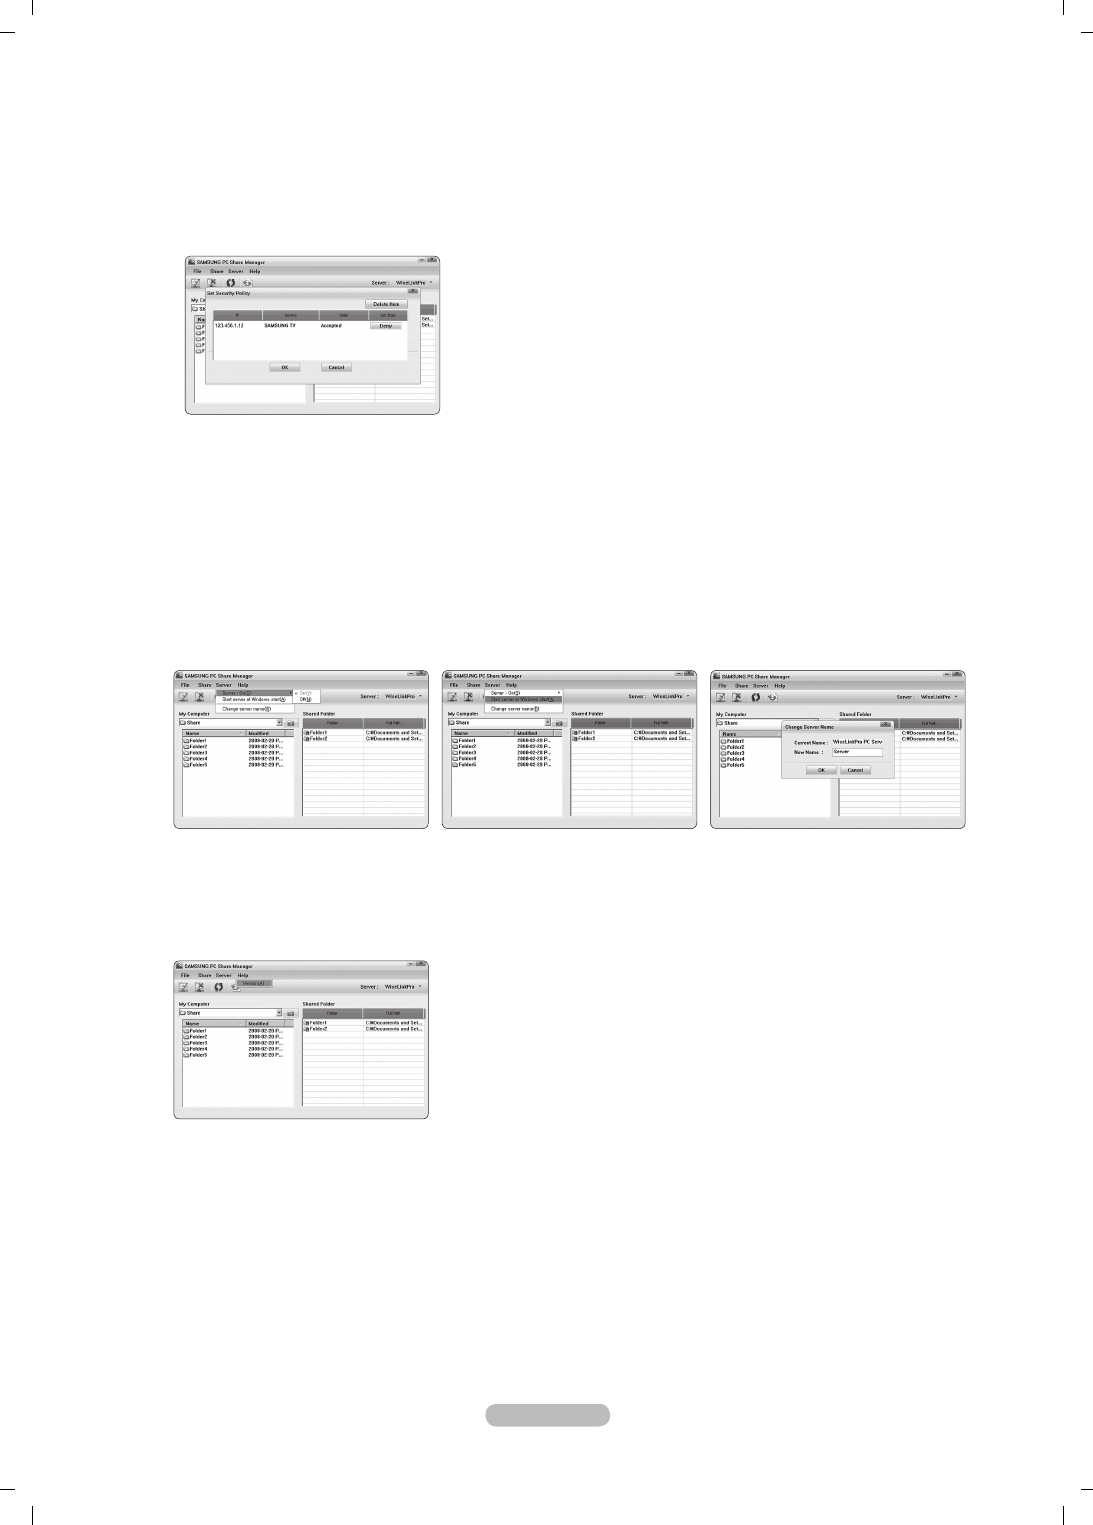
Español - 48
Ajuste de los permisos de acceso
Para permitir que el televisor encuentre el ordenador, es necesario ajustar el televisor en Cong. norma dispositivo en la
ventana de Ajuste de los permisos de acceso. Además, es necesario que el ordenador servidor y el televisor se encuentren
en la misma subred.
Método: Seleccione el menú compartir y seleccione Cong. norma dispositivo. Los elementos rechazados se
representan en color gris. Puede cambiar los permisos de acceso con el botón Allow aceptar/Denegar. Para eliminar un
elemento, selecciónelo y después elija borrar elemento seleccionado.
Servidor
Servidor
La función de servidor del ordenador se puede iniciar o detener.
Iniciar servidor al arrancar Windows
Puede determinar si desea que el servidor del ordenador se inicie automáticamente cuando Windows se inicie.
Change server name
Es posible cambiar el nombre del servidor del ordenador. Escriba un nuevo nombre y haga clic en Aceptar. El nuevo nombre
aparecerá en la parte superior derecha de la ventana y se mostrará en el televisor.
Ayuda
Version
Se muestra un cuadro de mensaje con información sobre la versión del programa.
-
❑
❑
BN68-01757A-Spa.indb 48 2008-9-24 15:56:08

Español - 49
Uso de la función DLNA
Uso del menú DLNA
DLNA (Digital Living Network Alliance) permite reproducir el contenido guardado
en un servidor DLNA (normalmente un ordenador) conectado al televisor o a
través de una red.
Wiselink Pro permite reproducir contenidos guardados en un dispositivo de
memoria USB conectado al televisor, mientras que DLNA permite reproducir
contenido guardado en un servidor DLNA (el ordenador) conectado al televisor o
a través de la red. Los procedimientos para usar los contenidos son los mismos
que los de WISELINK Pro.
Si instala en un ordenador el programa PC Share Manager que se suministra
con el televisor, puede hacer que el ordenador actúe como servidor DLNA de la
red.
1. Pulse el botón W.LINK del mando a distancia para mostrar el menú DLNA.
2. Pulse los botones ◄ o ► para seleccionar un icono (Foto, Música, Película, Conguración) y, a continuación, pulse el botón
ENTER
E
.
Para salir del modo DLNA, pulse el botón W.LINK del mando a distancia.
Photo
Menú de opciones de la lista de fotos
Sorting Photo List/Viewing the Information/Rotating the Photo le/Viewing a Slide Show
Durante el menú de opciones de la presentación
Reproducir & Pausa/Velocidad de secuencia/Zoom/Girar
Music
Menú de opciones de la lista de música
Sorting Music List/Viewing the Information/Playing a music le
Menú de opciones de la reproducción de música
Reproducir & Pausa/Modo de repetición
Movie
Menú de opciones de la lista de películas
Sorting Movie List/Viewing the Information/Playing a Movie le
Menú de opciones de la reproducción de películas
Reproducir & Pausa/Modo de repetición
Setup
Velocidad de secuencia/Modo de repetición de Música/Modo de repetición de Película/Tiemp ejec.protecc.pant./Información
DLNA no es compatible con las funciones siguientes.
Las funciones de música de fondo y conguración de la música de fondo.
La clasicación de archivos por preferencias en las carpetas Foto, Música y Película.
La función del cambio de información del grupo.
La función de eliminar.
La función de extracción segura.
El botón π (REW)/µ (FF) funciona durante la reproducción de las películas.
Es posible que las funciones de omitir (botones ◄/►) y de pausa no funcionen mientras se reproduce una película para
el DLNA de otros fabricantes, según la información de contenidos correspondiente.
Es posible que no se muestre el tiempo de reproducción mientras se visualiza una película.
N
❑
❑
❑
❑
N
-
-
-
-
-
-
N
N
WISELINK Pro
Photo
SUM
Dispos.
e
Volver
Music Setup
Foto
DLNA : Server
Movie
BN68-01757A-Spa.indb 49 2008-9-24 15:56:08
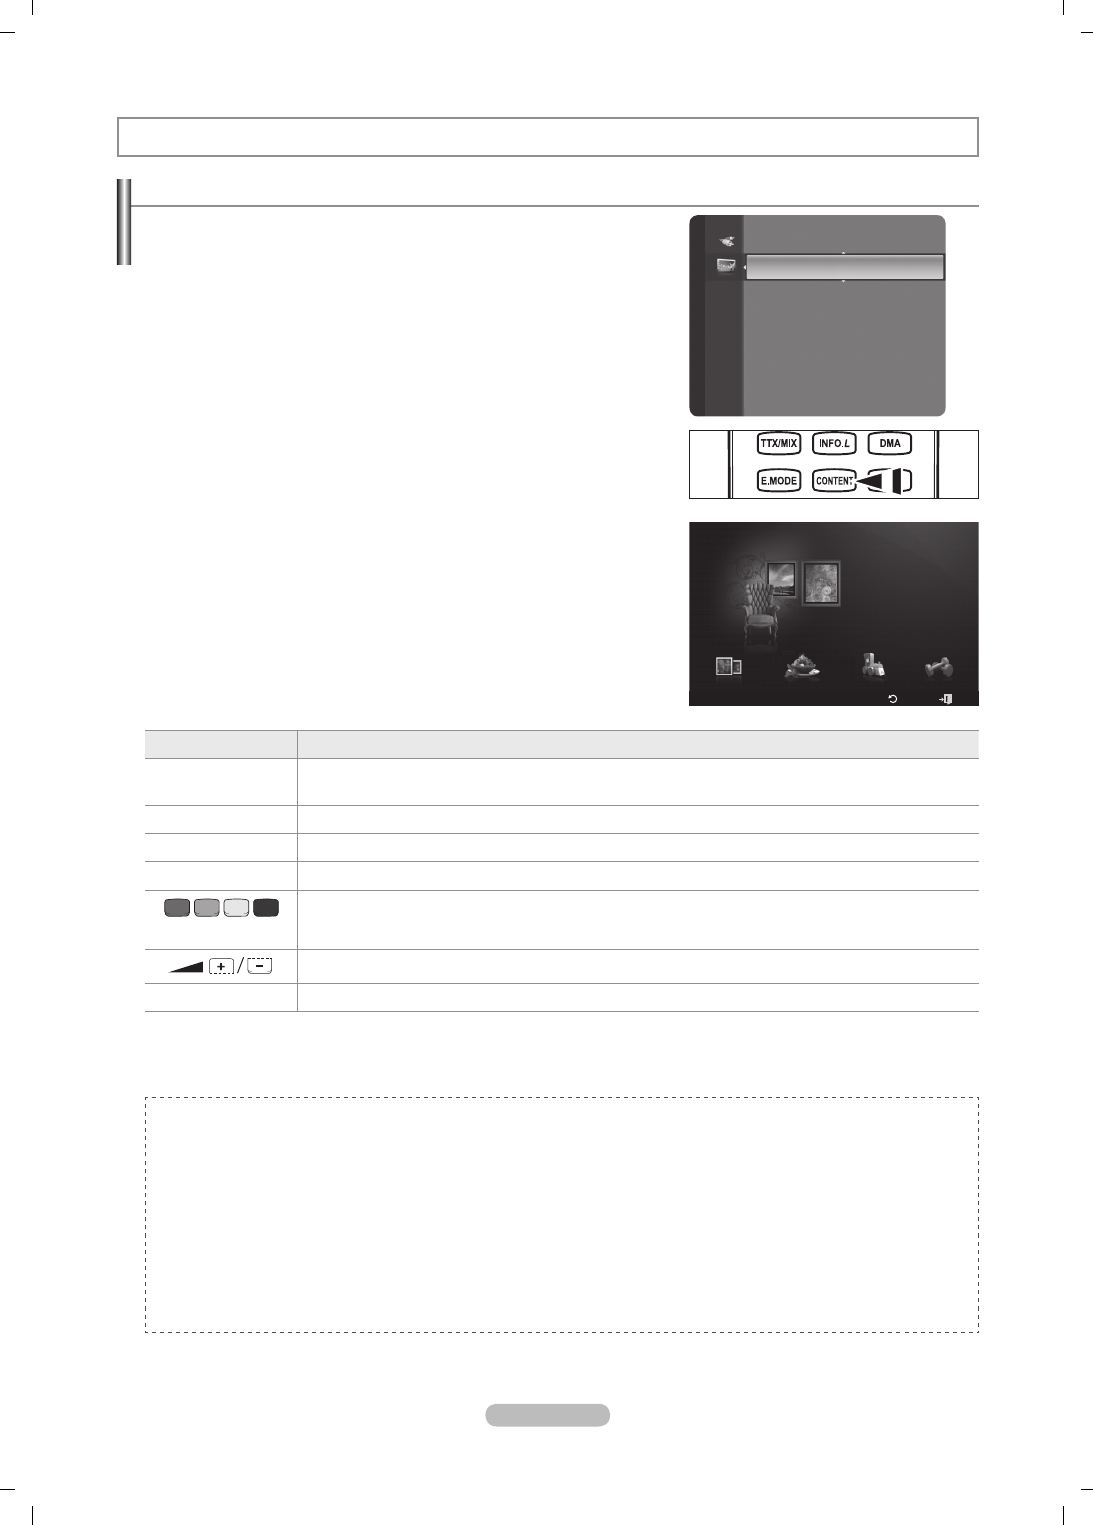
Español - 50
Activación de la biblioteca de contenidos
La Content Library permite ver o reproducir los contenidos incorporados en
el TV o almacenados en un dispositivo USB. Las funciones de borrar, mover y
actualizar no funcionarán con los contenidos incorporados en el TV.
1. Pulse el botón MENU. Pulse los botones ▲ o ▼ para seleccionar
Aplicaciones y, a continuación, pulse el botón ENTER
E
.
2. Pulse los botones ▲ o ▼ para seleccionar Content Library y, a
continuación, pulse el botón ENTER
E
.
Aparece el menú principal Content Library.
Pulse el botón CONTENT del mando a distancia para que se muestre el
menú Content Library.
3. Pulse los botones ◄ o ► para seleccionar un icono (Galería, Cocina, Inglés
para niños, Fitness) y después pulse el botón ENTER
E
.
Se ejecuta el elemento seleccionado.
Consulte las explicaciones del botón en la pantalla cuando el usuario lo
utiliza durante la ejecución del contenido.
Botón Función
(▲/▼/◄/►)
Rueda Mover el cursor y seleccionar una opción.
ENTER
E
Seleccionar la opción marcada.
RETURN Volver al menú anterior.
EXIT Detiene la función actual y vuelve al menú principal Content Library.
Botones de colores
El botón que ofrece cada función se describe en la página correspondiente.
Se puede controlar el volumen del contenido que se reproduce.
CONTENT Salir del modo Content Library.
Si pulsa los botones de volumen o MUTE, no se mostrará la pantalla OSD, pero el volumen cambiará correctamente.
La biblioteca de contenidos incluye textos, grácos, imágenes, multimedia y otros materiales con nes sólo
informativos y publicitarios. Los materiales de la biblioteca de contenidos se han modicado y se mantienen
revisados y actualizados. Los materiales de la biblioteca de contenidos pueden no ser apropiados para todas las
audiencias.
La información de la biblioteca de contenidos se proporciona “tal cual”. Aunque la información proporcionada en
la biblioteca de contenidos se ha obtenido o recopilado en fuentes que consideramos ables, Samsung no puede
garantizar ni garantiza la precisión, validez, vigencia o integridad de cualquier información o dato disponible
para un propósito en particular. Bajo ninguna circunstancia, incluida negligencia, Samsung se hace responsable,
ya sea por contrato ya sea por agravio, de cualquier daño directo, indirecto, incidental, especial o consecuente,
honorarios legales, gastos y cualquier otro daño derivados de o relacionados con cualquier información incluida,
o como resultado del uso de la biblioteca de contenidos, ni siquiera en el caso de que se haya advertido de la
posibilidad de tales daños.
N
N
N
N
N
N
Biblioteca de contenidos
Application
WISELINK Pro
Anynet+ (HDMI-CEC)
Content Library ►
InfoLive
Guía de producto
Configuración
USB
Regresar
Salir
Cocina Inglés para niños Fitness
Galería
Galería
Content Library
BN68-01757A-Spa.indb 50 2008-9-24 15:56:09

Español - 51
Uso de la biblioteca de contenidos
Galería
Arte/Relajación/Fiestas
: Esta función reproduce una presentación de fotos con imágenes en alta resolución y música
de fondo, y produce varios ambientes. Con la función Gallery del TV, se puede cambiar el ambiente de casa.
Pulse el botón amarillo para reproducir todas las imágenes.
Existe una música predeterminada en cada una de las opciones Arte,Relajación y Fiestas.
Pulse el botón INFO para ver información sobre los autores y las imágenes. Pulse el botón INFO otra vez o pulse el
botón ► para que desaparezca la información sobre los autores.
Los copyrights de los contenidos del apartado Galería y todas las cuestiones relacionadas con los mismos están
reservados por Gallery Player, Inc.
Para obtener más contenidos de Galería, consulte la información en www.samsung.com. Consulte el apartado Uso de
contenidos adicionales con almacenamiento de memoria USB externa para averiguar cómo reproducir imágenes
adicionales.
Cocina
Entrantes/Platos principales/Postres
: Muestra varias recetas que después se pueden seguir fácilmente paso a paso.
Disfrute de estos contenidos que le ofrecen excelentes sugerencias para preparar comidas.
Las recetas incluidas en el apartado Cocina del TV Samsung se basan en recetas publicadas por Anness Publishing.
Los copyrights de los contenidos de Cocina y todas las cuestiones relacionadas con los mismos están reservados por
Practical Pictures.
Inglés para niños
Historia/Canción/Juego:
Incluye contenido educativo e interactivo que pueden ver los niños indefinidamente. Disfrute
de las historias, las canciones y los juegos incluidos con los personajes Boowa y Kwala.
Los copyrights de los contenidos del apartado Inglés para niños y todas las cuestiones relacionadas con los mismos
están reservados por UpToTen.
Fitness
Estiramientos básicos/Masaje
: Incluye contenidos para un estilo de vida saludable, como ejercicios de estiramientos y
masajes, de los que puede disfrutar toda la familia.
Incluye contenidos para un estilo de vida saludable, como ejercicios de estiramientos y masajes, de los que puede
disfrutar toda la familia. Los contenidos de Estiramientos básicos del TV Samsung se basan en el libro Stretching de
Suzanne Martin, publicado por DK, los contenidos de Masaje se basan en los libros publicados por Anness Publishing.
Los copyrights de Estiramientos básicos están reservados por DK Publishing Company. Los copyrights de los
contenidos de Masaje están reservados por Practical Pictures. Todas las cuestiones relacionadas con los copyrights
están reservadas por la compañía correspondiente.
Uso de los botones del mando a distancia en el menú Fitness
Botón Función
◄/►
(Rueda) Ver el paso anterior / Ver el paso siguiente
ENTER
E
Reproducir o detener (en los estiramientos básicos y avanzados)
Tiemp ejec.protecc.pant.
Seleccione para congurar el tiempo de espera necesario para que se ejecute el salvapantallas.
Pulse el botón amarillo para seleccionar Connguración en el menú principal Content Library.
❑
N
N
N
N
N
❑
N
N
❑
N
❑
N
N
❑
BN68-01757A-Spa.indb 51 2008-9-24 15:56:09

Español - 52
Uso de contenidos adicionales con almacenamiento de memoria USB externa
Se pueden descargar contenidos adicionales en un dispositivo de memoria USB y reproducirlos en el televisor. (Los contenidos
del dispositivo USB externo se reproducen directamente, sin copiarlos en la memoria Flash incorporada en el televisor.)
Cómo reproducir y salir de contenidos nuevos
1. Pulse el botón rojo en el menú principal Content Library.
Aparecerá la pantalla principal del explorador de USB.
Se mostrará una lista con los archivos guardados en el dispositivo USB.
2. Pulse los botones ▲ o ▼ para ir al archivo (o a la carpeta) que desee
reproducir. Pulse el botón ENTER
E
.
Se reproducirán los contenidos seleccionados.
Los contenidos se manejan de la misma forma que los incluidos en la
memoria del televisor.
Para volver a la pantalla principal del explorador de USB, pulse el botón
EXIT.
Contents Library sólo admite dispositivos USB de clase de
almacenamiento masivo (MSC). MSC es un dispositivo de clase
de almacenamiento masivo sólo de transporte de gran capacidad.
Ejemplos de MSC son unidades de almacenamiento en miniatura y
lectores de tarjetas Flash (no se admite ni disco duro de USB ni de
HUB).
Descarga de contenidos nuevos
Además de los contenidos incorporados, se ofrecerán contenidos nuevos (gratuitos o de pago) a través del sitio web Samsung.
com.
Descarga de contenidos
1. Visite el sitio web www.samsung.com y abra la página de la biblioteca de contenidos.
2. Introduzca el número del producto (UDN, número de dispositivo exclusivo) cuando se le solicite.
3. Seleccione un elemento de contenido en la página de descargas de contenidos.
4. Descargue los contenidos en el dispositivo de memoria USB.
Contents Library sólo admite dispositivos USB de clase de almacenamiento masivo (MSC). MSC es un dispositivo
de clase de almacenamiento masivo sólo de transporte de gran capacidad. Ejemplos de MSC son unidades de
almacenamiento en miniatura y lectores de tarjetas Flash (no se admite ni disco duro de USB ni de HUB).
5. Vaya al menú principal Content Library pulsando el botón Contenido o eligiendo Content Library (Menú → Aplicaciones
→ Content Library)
6. Enchufe la memoria USB en el puerto USB situado en el lateral del televisor.
Búsqueda del número de producto (número de dispositivo exclusivo, UDN)
1. Inserte la memoria USB en el puerto USB situado en el lateral del televisor.
2. Pulse el botón verde (mostrar UDN) desde la pantalla principal del explorador de USB.
3. El código numérico de 18 dígitos que aparece en pantalla es el código del producto.
Contenidos incluidos
En www.samsung.com hay disponible contenido adicional.
N
N
N
N
N
N
N
-
Configuración
USB
Regresar
Salir
Cocina Inglés para niños Fitness
Galería
Galería
Content Library
Memoria TV
Show UDN
Volver
Content Library
USB
<<
1/1
>>
Fitness
Inglés para niños
Cocina
Galería
Living
Inglés para niños
▼ ▲
Others
Sub Item : 2
BN68-01757A-Spa.indb 52 2008-9-24 15:56:10
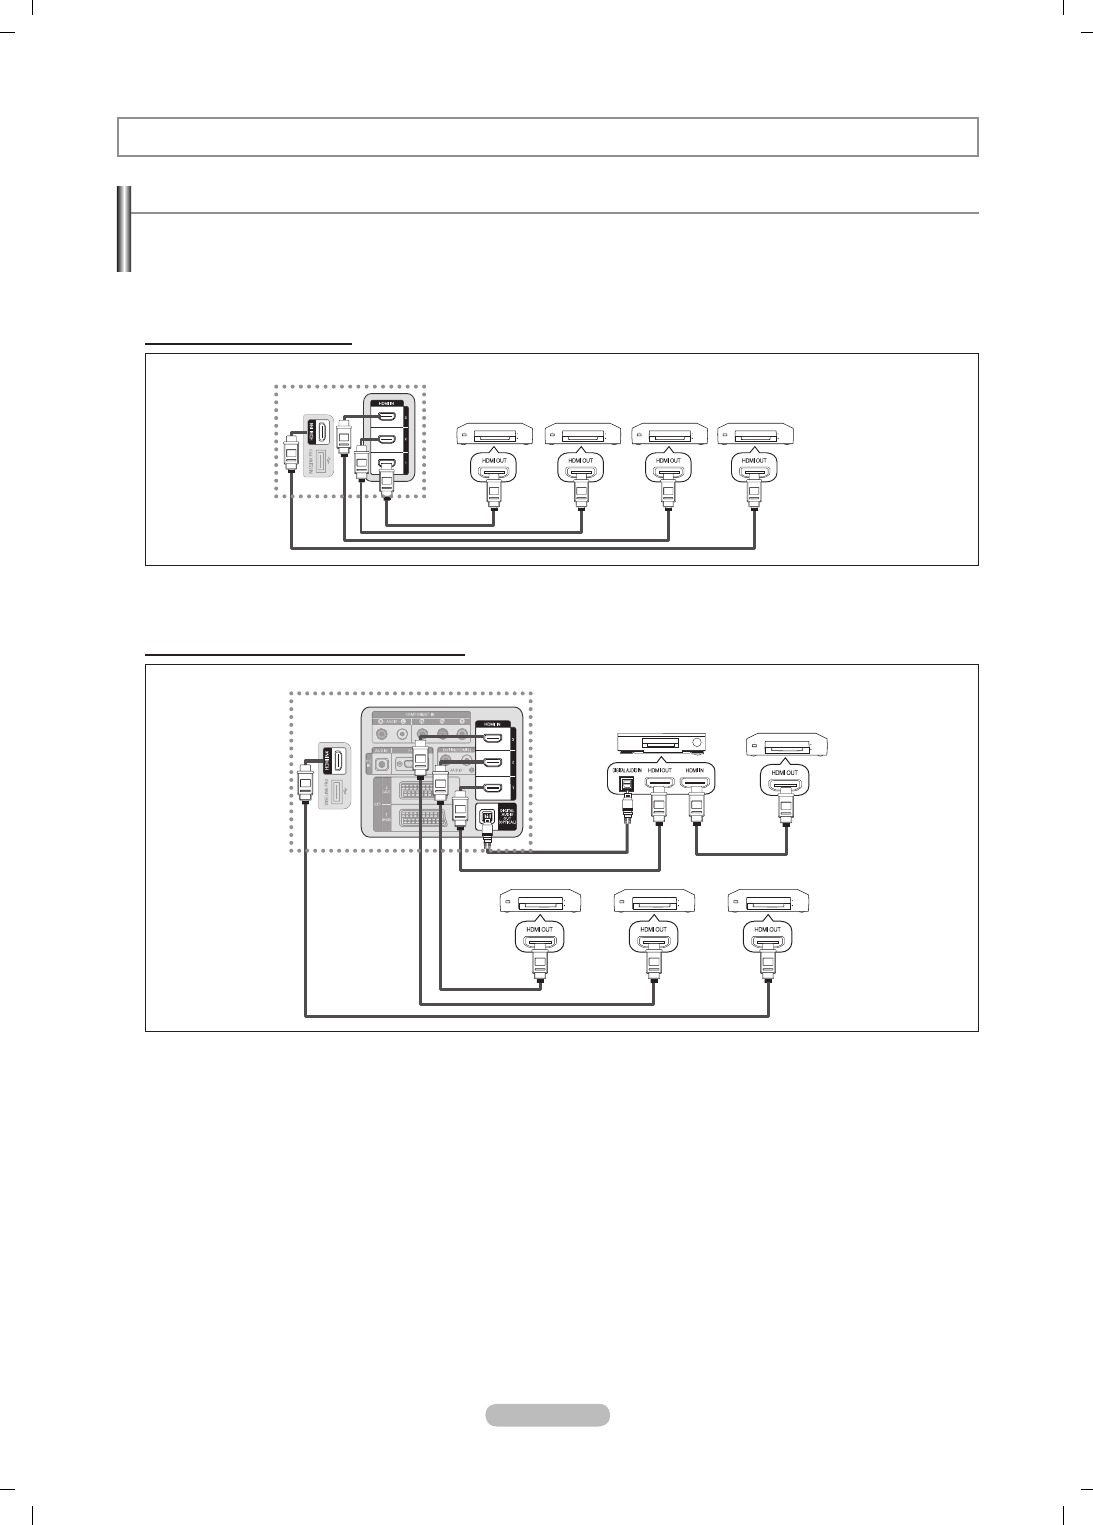
Español - 53
Conexión de dispositivos Anynet+
Anynet+ es una función que permite controlar con el mando a distancia del televisor Samsung todos los dispositivos de Samsung
conectados que sean compatibles con Anynet+.
El sistema Anynet+ sólo se puede usar con dispositivos de Samsung que tengan la función Anynet+. Para asegurarse de que el
dispositivo de Samsung tenga dicha función, compruebe si lleva el logotipo Anynet+.
Para conectar al televisor
1. Conecte los terminales [HDMI 1], [HDMI 2], [HDMI 3] o [HDMI 4] del televisor y el terminal HDMI OUT del dispositivo Anynet+
correspondiente mediante un cable HDMI.
Para conectar al sistema Home Cinema
1. Conecte los terminales [HDMI 1], [HDMI 2], [HDMI 3] o [HDMI 4] del televisor y el terminal HDMI OUT del dispositivo Anynet+
correspondiente mediante un cable HDMI.
2. Conecte el terminal HDMI IN del sistema Home Cinema y el terminal HDMI OUT del dispositivo Anynet+ correspondiente
mediante un cable HDMI.
Conecte el cable óptico entre el terminal Digital Audio Out (Optical) del televisor y el terminal Digital Audio Input del sistema
Home Cinema.
Si se sigue la conexión anterior, la toma Optical sólo produce la salida de 2 canales de audio. Sólo oirá sonido de los
altavoces frontales izquierdo y derecho y del subwoofer del sistema Home Cinema. Para escuchar el canal de audio 5.1,
conecte el terminal Digital Audio Out (Optical) del reproductor de DVD o del decodi cador de cable/satélite (dispositivo Anynet
1 o 2) directamente al ampli cador o al sistema Home Cinema, no al televisor.
Conecte sólo un sistema Home Cinema.
Puede conectar un dispositivo Anynet+ mediante el cable HDMI 1.3. Algunos cables HDMI pueden no admitir las funciones
Anynet+.
Anynet+ funciona cuando el dispositivo de AV que admite Anynet+ se encuentra en estado de espera o de encendido.
Anynet+ admite hasta 12 dispositivos de AV en total. Tenga en cuenta que puede conectar hasta 3 dispositivos del mismo
tipo.
N
N
N
N
N
N
Acerca de Anynet+
Anynet+
Dispos. 1
Anynet+
Dispos. 2
Anynet+
Dispos. 3
TV
HDMI 1.3 Cable HDMI 1.3 Cable HDMI 1.3 Cable HDMI 1.3 Cable
Anynet+
Dispos. 4
TV
Anynet+ Dispos. 1
Anynet+ Dispos. 2 Anynet+ Dispos. 3
HDMI 1.3 Cable
HDMI 1.3 Cable
HDMI 1.3 Cable
HDMI 1.3 Cable
Home Theatre
Anynet+ Dispos. 4
HDMI 1.3 Cable
Optical Cable
BN68-01757A-Spa.indb 53 2008-9-24 15:56:12
Español - 54
Búsqueda y cambio de dispositivos Anynet+
1. Pulse el botón TOOLS. Pulse el botón ENTER
E
para seleccionar Anynet+
(HDMI-CEC).
2. Pulse los botones ▲ o ▼ para seleccionar Lista de dispositivos y, a
continuación, pulse el botón ENTER
E
.
Se muestran todos los dispositivos Anynet+ conectados al televisor. Si no
encuentra el dispositivo que desea, pulse el botón rojo para buscar los
dispositivos.
Sólo cuando la opción Anynet+ (HDMI-CEC) está establecida como On en
el menú Conguración, aparece el menú Lista de dispositivos.
3. Pulse los botones ▲ o ▼ para seleccionar un dispositivo concreto y pulse el botón ENTER
E
. Se cambia al dispositivo
seleccionado.
El cambio a los dispositivos seleccionados puede tardar unos 2 minutos. No se puede cancelar la operación de cambio de
dispositivo mientras ésta se está efectuando.
El tiempo necesario para la búsqueda de dispositivos depende de la cantidad de dispositivos conectados.
Cuando naliza la búsqueda de dispositivos, no se muestra el número de dispositivos encontrados.
Aunque el televisor busca automáticamente la lista de dispositivos cuando se enciende con el botón de alimentación, los
dispositivos que se conectan cuando el televisor está encendido o en algunas circunstancias determinadas no aparecen
automáticamente en la lista. Pulse el botón rojo para buscar el dispositivo conectado.
Si ha seleccionado el modo de entrada externa pulsando el botón SOURCE, no podrá usar la función Anynet+. Asegúrese de
cambiar al dispositivo Anynet+ mediante la Lista de dispositivos.
N
N
N
N
N
N
N
Conguración de Anynet+
Anynet+(HDMI-CEC)
Herramientas → Anynet+(HDMI-CEC) realiza la misma función.
Configuración
Anynet+(HDMI-CEC) → Desactivado / Activado: Para usar la función
Anynet+, Anynet+ (HDMI-CEC) debe estar congurado como Activado.
Cuando la función Anynet+ (HDMI-CEC) está desactivada, todas las
operaciones relacionadas con Anynet+ se desactivan.
Apagado automático → No / Sí: Conguración de un dispositivo Anynet+
para que se desactive automáticamente cuando el televisor se apaga
La fuente activa del mando a distancia del televisor se debe congurar
para que éste utilice la función Anynet+.
Si establece Apagado automático como Sí, los dispositivos externos
conectados también se desactivan cuando se apaga el televisor. Si un
dispositivo externo todavía está grabando, puede apagarse o no.
❑
•
N
•
N
N
Application
WISELINK Pro
Anynet+ (HDMI-CEC) ►
Content Library
InfoLive
Guía de producto
Lista de dispositivos
Configuración
U
Mover
E
Entrar
R
Volver
View TV
Lista de dispositivos
Grabación : DVDR
DVDR Operation
Receptor : Activado
Configuración
U
Mover
E
Entrar
R
Volver
Anynet+ (HDMI-CEC) : ON
Apagado automático : Yes
U
Mover
E
Entrar
R
Volver
Configuración
Desactivado
Activado
BN68-01757A-Spa.indb 54 2008-9-24 15:56:13
Español - 55
Menú Anynet+
El menú Anynet+ cambia según el tipo y el estado de los dispositivos Anynet+ conectados al televisor.
Menú Anynet+Descripción
Ver la televisión El modo Anynet+ cambia al modo de emisión de TV.
Lista de dispositivos Muestra la lista de dispositivos de Anynet+.
Menú (nombre_dispositivo) Muestra los menús del dispositivo conectado. Por ejemplo, si se ha conectado un grabador
de DVD, se muestra el menú del disco del grabador de DVD.
Funcionamiento (nombre_
dispositivo)
Por ejemplo, si se ha conectado un grabador de DVD, se muestra el menú del disco del
grabador de DVD.
Grabar: (*grabador) Inicia inmediatamente la grabación en el grabador. (Sólo está disponible en los dispositivos
que admiten la función de grabación.)
Reservar grabación (*grabador) Permite reservar una grabación en el grabador. (Sólo está disponible en los dispositivos que
admiten la función de reserva de la grabación.)
Detener la grabación: (*grabador) Detiene la grabación.
Receptor La reproducción del sonido se efectúa a través del receptor.
Cuando hay conectados varios dispositivos de grabación, éstos se muestran como (*grabador), pero si sólo hay conectado un
dispositivo, éste se muestra como (*nombre_dispositivo).
Botones del mando a distancia del televisor disponibles en el modo Anynet+
Tipo de
dispositivo
Estado de funcionamiento Botones disponibles
Dispositivo
Anynet+
Después de cambiar al dispositivo,
cuando el menú de éste aparece
en la pantalla.
Botones numéricos
▲/▼/◄/►/Botones ENTER
E
Botones de colores/botón EXIT
Después de cambiar al dispositivo,
mientras se reproduce un archivo
π
(Búsqueda atrás) /
µ
(Búsqueda adelante)
∫
(Detener) /
∂
(Reproducir) /
∑
(Pausa)
Dispositivo con
sintonizador
incorporado
Después de cambiar al dispositivo,
mientras se ve un programa de TV Botones P /
Dispositivo de
audio
Cuando la opción Receiver está
activada
Botones VOL /
Botón MUTE
La función Anynet+ sólo funciona cuando la fuente activa del mando a distancia del televisor está ajustada en TV.
El botón
∏
funciona sólo cuando la grabación es posible.
Los dispositivos Anynet+ no se pueden controlar con los botones del TV. Los dispositivos Anynet+ sólo se pueden controlar
mediante el mando a distancia del televisor.
El mando a distancia del televisor puede no funcionar en determinadas circunstancias. En ese caso, vuelva a seleccionar el
dispositivo Anynet+.
Las funciones Anynet+ no funcionan con los productos de otros fabricantes.
Las funciones de
π
,
µ
pueden diferir según el dispositivo.
Grabación
El grabador de Samsung permite efectuar una grabación de un programa de
televisión.
1. Pulse el botón TOOLS. Pulse el botón ENTER
E
para seleccionar Anynet+
(HDMI-CEC).
2. Pulse los botones ▲ o ▼ para seleccionar Grabación: (nombre_dispositivo)
y pulse el botón ENTER
E
. Comienza la grabación.
Cuando hay más de un dispositivo de grabación
Cuando se conectan varios dispositivos de grabación, éstos se muestran
en una lista. Pulse los botones ▲ o ▼ para seleccionar el dispositivo de
grabación que desee y pulse el botón ENTER
E
. Comienza la grabación.
Cuando no se muestra el dispositivo de grabación
Seleccione Lista de dispositivos y pulse el botón rojo para buscar los dispositivos.
3. Pulse el botón EXIT para salir.
Se pueden grabar las transmisiones de la fuente seleccionando Grabación: (nombre_dispositivo).
Si pulsa el botón
∏
, grabará lo que está viendo en ese momento. Si está viendo un vídeo desde otro dispositivo, se graba
el vídeo de éste.
Antes de grabar, compruebe si la toma de antena está conectada correctamente al dispositivo de grabación. Para conectar
correctamente una antena a un dispositivo de grabación, consulte el manual del usuario de los dispositivos de grabación.
N
N
N
N
N
N
N
N
N
N
N
N
Ver la televisión
Lista de dispositivos
Grabación : DVDR
DVDR Funcionamiento
Receptor : Activado
Configuración
U
Mover
E
Entrar
R
Volver
BN68-01757A-Spa.indb 55 2008-9-24 15:56:13

Español - 56
Escucha a través de un receptor (sistema Home Cinema)
Se puede escuchar sonido a través de un receptor en lugar de hacerlo mediante el
altavoz del TV.
1. Pulse el botón TOOLS. Pulse el botón ENTER
E
para seleccionar Anynet+
(HDMI-CEC).
2. Pulse los botones ▲ o ▼ para seleccionar Receptor. Pulse los botones ◄ o ►
para seleccionar Activado o Desactivado.
3. Pulse el botón EXIT para salir.
Si el receptor sólo admite audio, quizás no se muestre la lista de dispositivos.
El receptor no funcionará si no se ha conectado correctamente el terminal
Optical IN del receptor con el terminal Optical OUT del televisor.
Cuando el receptor (sistema Home Cinema) está establecido en On, se puede oír la salida de sonido del terminal Optical del
televisor. Cuando se ve la televisión a través de un DTV (aéreo), el televisor envía el sonido de 5.1 canales al receptor del
sistema Home Cinema. Cuando la fuente es un componente digital, como un DVD, y está conectada al televisor a través de
HDMI, sólo se oye el sonido de 2 canales del receptor del sistema Home Cinema.
Cuando se usa la función WISELINK Pro, el sonido puede no oírse adecuadamente a través del receptor.
Cuando se escucha a través del receptor, hay restricciones para el uso de los menús PIP y los relativos al audio (MTS,
idiomas preferidos).
Si hay una interrupción en la alimentación del televisor con la opción Receptor congurada en Activado (por desconectar el
cable de alimentación o por un fallo de corriente), puede que Seleccionar altavoz esté establecido como Altavoz externo al
volver a encender el televisor. (consulte la página 22)
Solución de problemas de Anynet+
Síntoma Solución
Anynet+ no funciona. Compruebe si el dispositivo es un dispositivo Anynet+. El sistema Anynet+ sólo admite
dispositivos Anynet+.
Conecte sólo un receptor (sistema Home Cinema).
Compruebe si el cable de alimentación del dispositivo Anynet+ está debidamente conectado.
Compruebe las conexiones de los cables de Vídeo/Audio/HDMI 1.3 del dispositivo Anynet+.
Compruebe si Anynet+ (HDMI-CEC) está establecido en On en el menú de conguración de Anynet+.
Compruebe si el mando a distancia del televisor está en modo TV.
Compruebe si es un mando a distancia exclusivo para Anynet+.
Anynet+ no funciona en algunas situaciones. (Búsqueda de canales, funcionamiento de
WISELINK, Plug & Play, etc.)
Cuando se conecta o se desconecta el cable HDMI 1.3, se han de buscar de nuevo los
dispositivos o volver a apagar y encender el televisor.
Compruebe si la función Anynet+ del dispositivo Anynet+ está activada.
•
•
•
•
•
•
•
•
•
•
Deseo iniciar Anynet+.Compruebe si el dispositivo Anynet+ está debidamente conectado al televisor y si la opción
Anynet+ (HDMI-CEC) está establecida en On en el menú de conguración de Anynet+.
Pulse el botón TV del mando a distancia del televisor para cambiar a TV. A continuación pulse
el botón TOOLS para visualizar el menú Anynet+ y seleccionar el menú que desee.
•
•
Deseo salir de Anynet+.Seleccione View TV en el menú de Anynet+.
Pulse el botón SOURCE del mando a distancia del televisor y seleccione un dispositivo que no
sea Anynet+.
(Tenga en cuenta que el botón de canal sólo funciona cuando no hay ningún dispositivo
Anynet+ con sintonizador incorporado conectado.)
•
•
•
En la pantalla aparece el
mensaje Connecting to
Anynet+ device…
El mando a distancia no se puede utilizar cuando se está congurando Anynet+ o cambiando a
un modo de visualización.
Utilice el mando a distancia cuando haya terminado la conguración de Anynet+ o el cambio al
modo de visualización.
•
•
El dispositivo Anynet+ no
reproduce. No se puede usar la función de reproducción mientras se efectúa una conexión Plug & Play.
El dispositivo conectado
no se muestra. Compruebe si el dispositivo admite las funciones Anynet+.
Compruebe si el cable HDMI 1.3 está debidamente conectado.
Compruebe si Anynet+ (HDMI-CEC) está establecido en On en el menú de conguración de Anynet+.
Vuelva a efectuar una búsqueda de dispositivos Anynet+.
Sólo puede conectar un dispositivo Anynet+ mediante el cable HDMI 1.3. Algunos cables HDMI
pueden no admitir las funciones Anynet+.
Si se ha interrumpido por una situación anormal como la desconexión del cable HDMI o el de
alimentación o por un fallo en la corriente eléctrica, deberá repetir la búsqueda del dispositivo.
•
•
•
•
•
•
El programa de televisión
no se puede grabar. Compruebe la conexión de la toma de antena del dispositivo de grabación.
El sonido del televisor no
sale a través del receptor. Conecte el cable óptico entre el televisor y el receptor.
N
N
N
N
N
N
Ver la televisión
Lista de dispositivos
Grabación : DVDR
DVDR Funcionamiento
Receptor ◄ Activado ►
Configuración
U
Mover
L
Ajustar
R
Volver
BN68-01757A-Spa.indb 56 2008-9-24 15:56:13
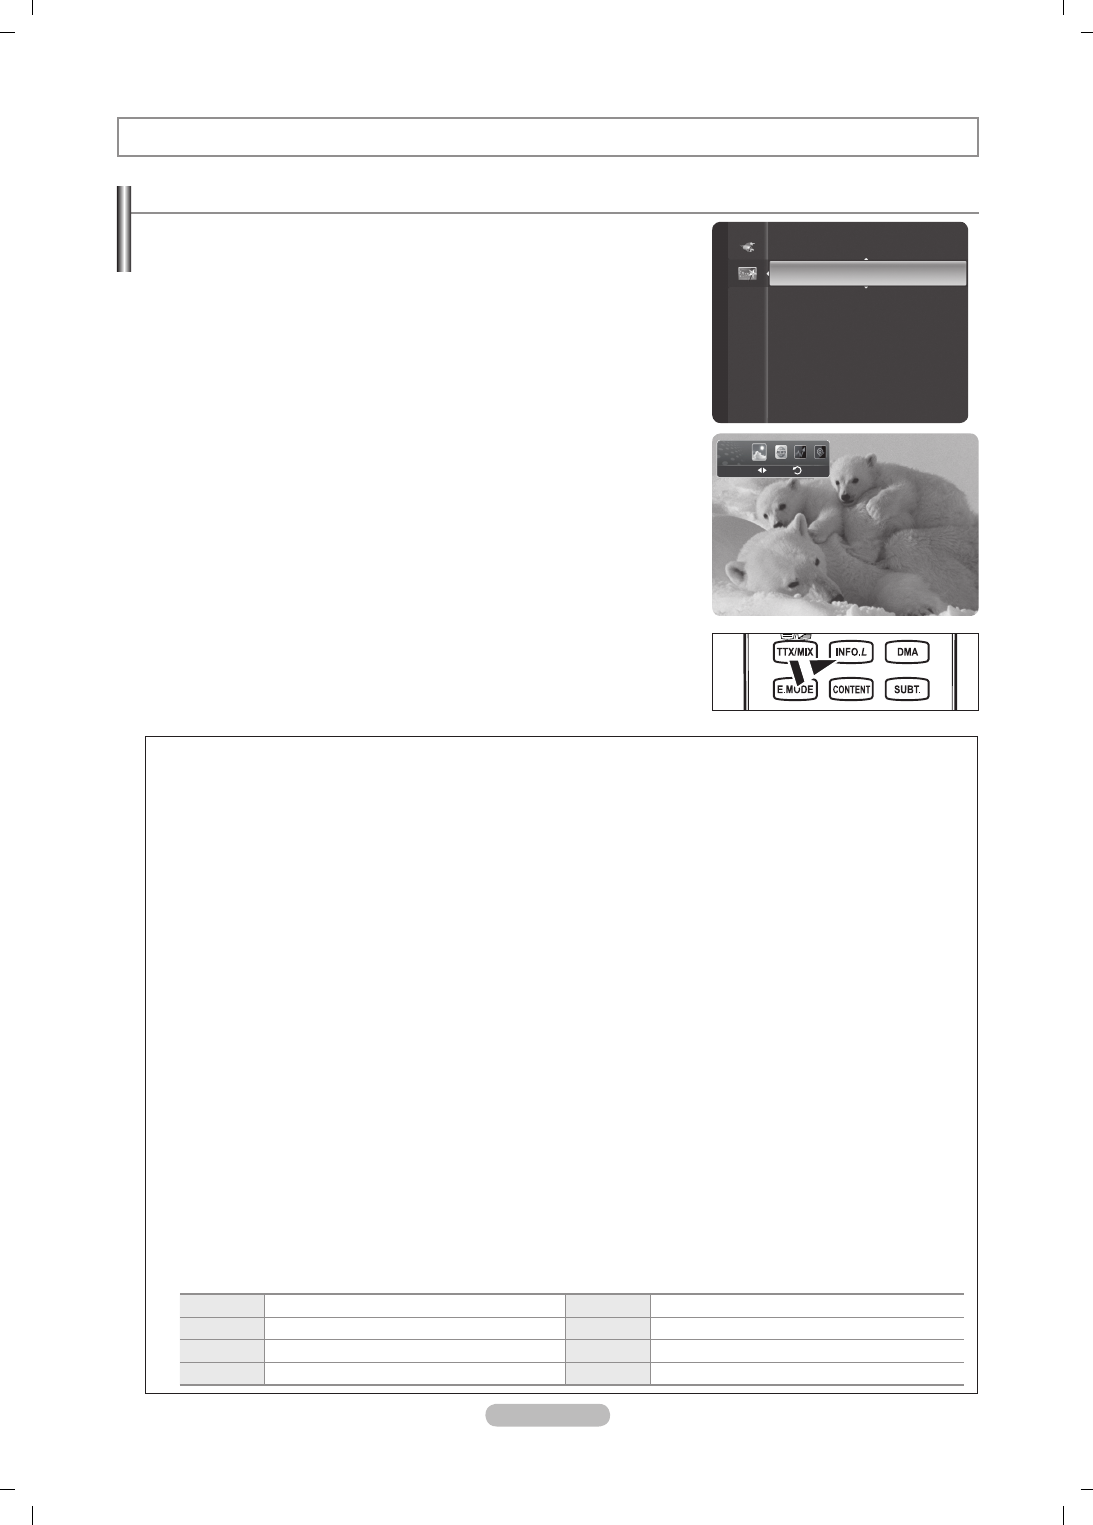
Español - 57
Uso de InfoLive
Puede ver servicios de noticias, bursátiles y meteorológicos con el servicio InfoLive de
Samsung.
Congure la red. (Consulte las páginas 27 a 28.)
InfoLive sólo está disponible en el Reino Unido, Francia, Alemania, Italia, España,
Noruega, Suecia, Dinamarca, Finlandia y Rusia. El país se selecciona de acuerdo
con el país establecido en Plug & Play.
1. Pulse el botón MENU para ver el menú. Pulse los botones ▲ o ▼ para
seleccionar Aplicación y, a continuación, pulse el botón ENTER
E
.
2. Pulse los botones ▲ o ▼ para seleccionar InfoLive y, a continuación, pulse el
botón ENTER
E
.
3. Pulse los botones ◄ o ► para seleccionar un servicio (Tiempo, Noticias,
Mercados o Conguración) y pulse el botón ENTER
E
.
Puede seleccionar y ver más de un servicio al mismo tiempo sólo en ‘Noticias
(sin información detallada)’, ‘Tiempo-Tiempo de hoy’ y ‘Mercados-Mercados
favoritos, Resumen mercados’.
Pulse el botón INFO.L del mando a distancia para mostrar el menú InfoLive.
N
N
N
N
InfoLive
TODOS LOS MATERIALES DISPONIBLES A TRAVÉS DE INFOLIVE [‘INFOLIVE CONTENT’] SON PROPIEDAD DEL CREADOR DEL
CONTENIDO [‘PROPIETARIO DEL CONTENIDO’] Y SUS AFILIADOS O LICENCIATARIOS, Y ESTÁN PROTEGIDOS POR LAS LEYES DE
COPYRIGHT, MARCAS COMERCIALES Y OTRAS DE PROPIEDAD INTELECTUAL. EL CONTENIDO DE INFOLIVE SE PROPORCIONA
SÓLO PARA USO PERSONAL NO COMERCIAL. NO SE PUEDE USAR NINGÚN CONTENIDO DE INFOLIVE DE UNA MANERA QUE
CONSTITUYA UN INFRINGIMIENTO DE LOS DERECHOS DE LOS PROPIETARIOS DEL CONTENIDO O QUE NO SEA AUTORIZADA
POR EL PROPIETARIO DEL CONTENIDO. MÁS ESPECIFÍCAMENTE, A MENOS QUE SEA AUTORIZADO EXPLÍCITAMENTE EN ESTE
DESCARGO DE RESPONSABILIDAD O POR EL PROPIETARIO DEL CONTENIDO, NO SE PUEDE MODIFICAR, COPIAR, REPRODUCIR,
VOLVER A PUBLICAR, CARGAR, ENVIAR POR CORREO, TRANSMITIR, TRASLADAR, VENDER, CREAR TRABAJOS DERIVADOS DE
ELLOS, EXPLOTAR NI DISTRIBUIR DE NINGUNA MANERA O POR NINGÚN MEDIO (INCLUIDO EL CORREO ELECTRÓNICO U OTROS
MEDIOS ELECTRÓNICOS) NINGÚN CONTENIDO DE INFOLIVE NI OTRO MATERIAL DESDE EL SERVICIO DE INFOLIVE. EL CONTENIDO
PROPORCIONADO EN CONEXIÓN CON EL SERVICIO DE INFOLIVE SE PUEDE TEMPORIZAR DE ACUERDO CON LO ESPECIFICADO POR
EL PROPIETARIO DEL CONTENIDO Y SUS AFILIADOS.
INFOLIVE SE PROPORCIONA GRACIAS A UN ACUERDO ENTRE SAMSUNG Y EL PROPIETARIO DEL CONTENIDO. SAMSUNG O EL
PROVEEDOR DEL CONTENIDO PUEDEN TERMINAR O INTERRUMPIR INFOLIVE EN CUALQUIER MOMENTO O POR LA FINALIZACIÓN
DEL ACUERDO ENTRE ELLOS. BAJO NINGUNA CIRCUNSTANCIA, INCLUIDA NEGLIGENCIA, SAMSUNG NI EL PROVEEDOR DEL
CONTENIDO SE HACEN RESPONSABLES, YA SEA POR CONTRATO YA SEA POR AGRAVIO, DE CUALQUIER DAÑO DIRECTO, INDIRECTO,
INCIDENTAL, ESPECIAL O CONSECUENTE, GASTOS LEGALES, PAGOS Y CUALQUIER OTRO DAÑO DERIVADOS DE O RELACIONADOS
CON DICHA FINALIZACIÓN O INTERRUPCIÓN. PUESTO QUE EL CONTENIDO TRANSMITIDO POR INFOLIVE SE RECIBE POR UNA RED
O POR DISPOSITIVOS DE TRANSMISIÓN SOBRE LOS QUE SAMSUNG NO TIENE NINGÚN CONTROL, SAMSUNG EXPRESAMENTE
DECLINA CUALQUIER RESPONSABILIDAD POR LA INTERRUPCIÓN O LA SUSPENSIÓN DEL SERVICIO INTERLINK O POR LA AUSENCIA
DE CONTENIDO DERIVADA DE ÉSTAS.
LA INFORMACIÓN DE INFOLIVE SE PROPORCIONA “TAL CUAL,” Y EN CONSECUENCIA, SAMSUNG NO GARANTIZA ESTA
INFORMACIÓN, NI EXPRESA NI IMPLÍCITAMENTE, PARA UN PROPÓSITO DETERMINADO; Y SAMSUNG EXCLÍCITAMENTE RECHAZA LA
RESPONSABILIDAD SOBRE LAS GARANTÍAS IMPLÍCITAS, INCLUIDAS PERO SIN LIMITARSE A, LAS GARANTÍAS DE COMERCIABILIDAD
O DE IDONEIDAD PARA UN PROPÓSITO DETERMINADO . SAMSUNG NO GARANTIZA LA PRECISIÓN, VALIDEZ, VIGENCIA, LEGALIDAD O
INTEGRIDAD DE CUALQUIER INFORMACIÓN O DATO PROPORCIONADO A TRAVÉS DE INFOLIVE PARA UN PROPÓSITO DETERMINADO
Y BAJO NINGUNA CIRCUNSTANCIA, INCLUIDA NEGLIGENCIA, SAMSUNG SE HARÁ RESPONASBALE, YA SEA POR CONTRATO YA SEA
POR AGRAVIO, DE CUALQUIER DAÑO DIRECTO, INDIRECTO, INCIDENTAL, ESPECIAL O CONSECUENTE, GASTOS LEGALES, PAGOS
Y CUALQUIER OTRO DAÑO DERIVADOS DE O RELACIONADOS CON CUALQUIER INFORMACIÓN INCLUIDA, O COMO RESULTADO DEL
USO DE INFOLIVE POR EL USUARIO O POR UN TERCERO, NI SIQUIERA EN EL CASO DE QUE SE HAYA ADVERTIDO DE LA POSIBILIDAD
DE TALES DAÑOS.
EL ACCESO A INFOLIVE ESTÁ SUJETO A LOS TÉRMINOS DE SERVICIO DE YAHOO’S DISPONIBLES EN LA PÁGINA
67.
LOS TÉRMINOS DE SERVICIO DE YAHOO EN **IDIOMA** ESTÁN DISPONIBLES EN LA WEB EN LA **DIRECCIÓN**.
Francés http://fr.docs.yahoo.com/info/utos.html Sueco http://se.docs.yahoo.com/seterms.html
Alemán http://de.docs.yahoo.com/info/utos.html Danés http://dk.docs.yahoo.com/termsofservice.html
Italiano http://it.docs.yahoo.com/info/utos.html Finlandés http://.docs.yahoo.com/info/terms/?fr=sfp
Español http://es.docs.yahoo.com/info/utos.html
N
N
Application
Anynet+ (HDMI-CEC)
Content Library
InfoLive
Guía de producto
Tiempo Volver
Mover
BN68-01757A-Spa.indb 57 2008-9-24 15:56:14
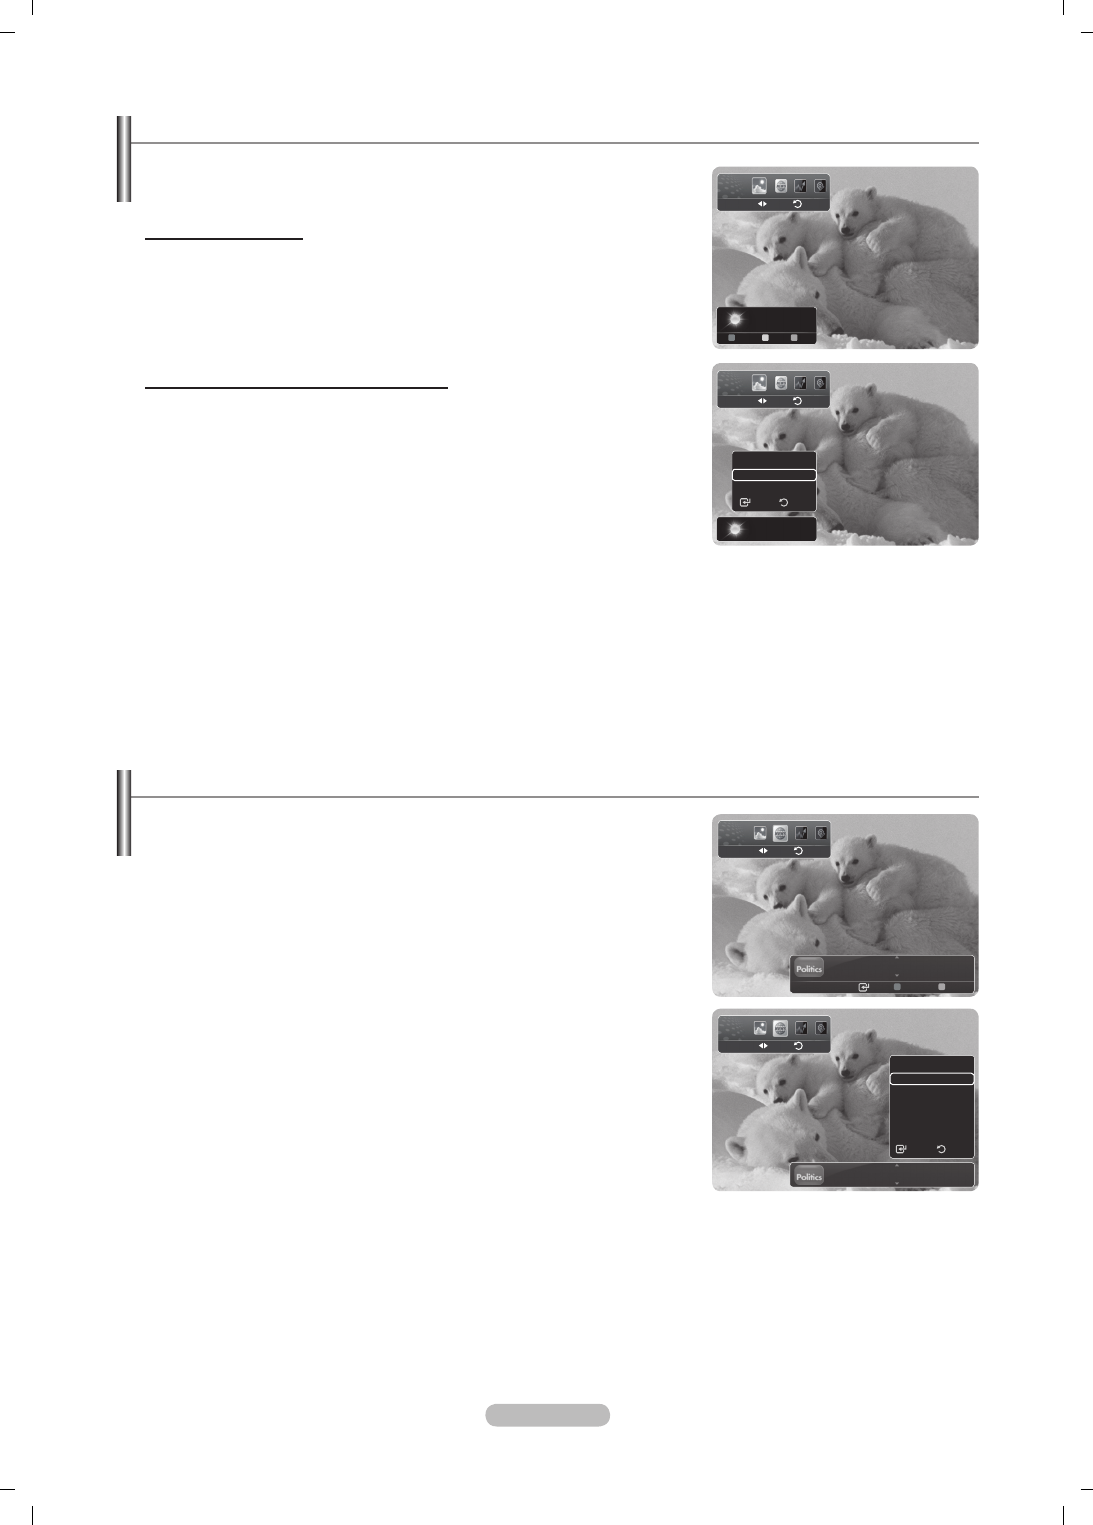
Español - 58
Uso del servicio de noticias
El proveedor de noticias puede cambiar en el futuro.
1. Pulse el botón INFO.L del mando a distancia.
2. Pulse los botones ◄ o ► para ir al servicio Noticias y pulse el botón ENTER
E
.
Pulse el botón ENTER
E
para ver un artículo en detalle.
Pulse los botones ▲ o ▼ para ver el artículo anterior o siguiente.
3. Pulse el botón rojo mientras usa el servicio para cambiar la opción del servicio
Noticias.
4. Pulse los botones ▲ o ▼ y seleccione la opción del servicio Noticias.
La opción del servicio Noticias cambia de acuerdo con el servicio Web
proporcionado.
Para salir del servicio Noticias pulse el botón azul.
Para salir del servicio InfoLive pulse el botón EXIT.
N
N
N
N
N
N
Uso del servicio meteorológico
1. Pulse el botón INFO.L del mando a distancia.
2. Pulse los botones ◄ o ► para ir al servicio Tiempo y pulse el botón ENTER
E
.
Ajuste de la región.
3. Pulse el botón amarillo. Pulse los botones ▲ o ▼ para seleccionar la letra inicial
(A~Z) de la región que desee y pulse el botón ENTER
E
.
4. Pulse el botón ► para desplazarse a la categoría. Pulse los botones ▲ o ▼ para
seleccionar la región que desee y pulse el botón ENTER
E
.
Podrá consultar el tiempo de la región seleccionada.
Conguración de la opción “Tiempo”
5. Pulse el botón rojo mientras usa el servicio para cambiar la opción del servicio
Tiempo.
6. Pulse los botones ▲ o ▼ y seleccione la opción Tiempo.
Para salir del servicio Tiempo pulse el botón azul.
Para salir del servicio InfoLive pulse el botón EXIT.
N
N
N
Sarreguemines
-00°C
Opciones Ubicac. Cerrar
Tiempo Volver
Mover
Sarreguemines
-00°C
Opciones
Tiempo de hoy
Predicción semanal
Volver
Seleccionar
Tiempo Volver
Mover
GM turns 100 with focus on future
Enter Opciones Cerrar
Noticias Volver
Mover
GM turns 100 with focus on future
Opciones
Politics
Business
Noticias
Entertainment
Sports
Select Volver
Noticias Volver
Mover
BN68-01757A-Spa.indb 58 2008-9-24 15:56:16

Español - 59
Uso del servicio bursátil
1. Pulse el botón INFO.L del mando a distancia.
2. Pulse los botones ◄ o ► para ir al servicio Mercados y pulse el botón
ENTER
E
.
3. Pulse el botón rojo mientras usa el servicio para cambiar la opción del servicio
Mercados.
4. Pulse los botones ▲ o ▼ y seleccione la opción del servicio Mercados y, a
continuación, pulse el botón ENTER
E
.
Cotizaciones bursátiles demoradas al menos 20 minutos. El tiempo de retardo
puede variar según el país.
Para salir del servicio Mercados, pulse el botón azul.
Para salir del servicio InfoLive pulse el botón EXIT.
Favorito Mercados: Se muestra la información de los mercados bursátiles
favoritos. Puede configurar los mercados favoritos pulsando el botón amarillo.
Resumen mercados: Se cambia entre los principales índices y se muestra el
índice completo, el total de subidas y bajadas y el %.
Mercados&Noticias: Se muestra la información de los mercados favoritos, los
índices principales y las noticias financieras.
N
N
N
Conguración de los elementos bursátiles favoritos
1. Pulse el botón amarillo con Mercados favoritos o Mercados y noticias
seleccionados.
2. Pulse los botones ▲ o ▼ para seleccionar el mercado bursátil que desee y pulse
el botón ENTER
E.
Aparece la pantalla para congurar Mercados favoritos.
3. Pulse los botones ◄, ►, ▲ o ▼ para introducir el símbolo del mercado. Pulse el
botón ENTER
E
.
Se muestra el resultado.
Puede comprobar los símbolos de los mercados en el periódico o en Internet.
4. Pulse el botón ENTER
E
para congurar el mercado favorito.
El mercado seleccionado se establece como favorito.
Para borrar los mercados favoritos
Pulse el botón verde con Mercados favoritos o Mercados y noticias
seleccionados. Pulse los botones ▲ o ▼ para seleccionar el mercado que
desee y pulse el botón ENTER
E
. La marca c desaparece a la izquierda
del nombre del mercado. Pulse el botón RETURN.
N
N
N
N
N
No Favorite Stocks
Quotes delayed at least 20 minutes.
Data provided by interastive Data.
Opciones Favorito Cerrar
Mercados Volver
Mover
Opciones
Favorito Mercados
Resumen mercados
Mercados&Noticias
Volver
Seleccionar
Mercados Volver
Mover
Quotes delayed at least 20 minutes.
Brought to you by Yahoo! Finance
12/24 Mon 15:00 Updated 1/2
AAAAAA $0.000,000 ▲ $000,000 +00,00%
BBBBBB $0.000,000 ▲ $000,000 +00,00%
CCCCCC $0.000,000 ▲ $000,000 +00,00%
DDDDDD $0.000,000 $000,000 +00,00%
EEEEEE $0.000,000 ▼ $000,000 -00,00%
– – – – – – help area – – – – – –
Opciones
Favorito Mercados
Market Summary
Mercados&Noticias
Volver
Seleccionar
Mercados Volver
Mover
Quotes delayed at least 15 minutes.
Brought to you by Yahoo! Finance
12/24 Mon 15:00 Updated 1/2
AAAAAA $0.000,000 ▲ $000,000 +00,00%
BBBBBB $0.000,000 ▲ $000,000 +00,00%
CCCCCC $0.000,000 ▲ $000,000 +00,00%
DDDDDD $0.000,000 $000,000 +00,00%
EEEEEE $0.000,000 ▼ $000,000 -00,00%
– – – – – – help area – – – – – –
Configurar mercados favoritos
Seleccionar
Volver
Seleccione el mercado bursátil.
O London Stock Exchange
Configurar mercados favoritos
Ajustar
Mover Seleccionar
Volver
Introducir símbolo bursátil.
BN68-01757A-Spa.indb 59 2008-9-24 15:56:17

Español - 60
Conguración de InfoLive
1. Pulse el botón INFO.L del mando a distancia.
2. Pulse los botones ◄ o ► para seleccionar Conguración y, a continuación,
pulse el botón ENTER
E
.
3. Pulse los botones ▲ o ▼ para seleccionar la opción deseada. (Inicio
automático, Mostrar hora, Tamaño fuente, Color de fondo, Posición de
InfoLive)
4. Pulse los botones ▲ o ▼ para seleccionar una opción y, a continuación, pulse el
botón ENTER
E
.
Inicio automático: Establece si se debe ejecutar InfoLive automáticamente
al encender el televisor. Puede seleccionar Desactivado o Activado.
Mostrar hora: Establece el tiempo de visualización del servicio de noticias
en la pantalla del televisor. Puede seleccionar : 10 minutos, 20 minutos, 1
hora o Siempre.
Tamaño fuente: Puede seleccionar el tamaño de los caracteres Estándar o
Grande del servicio InfoLive.
Color de fondo: Puede seleccionar Color de fondo (negro, azul, rojo,
verde, gris) del servicio InfoLive. El color se aplica a cada ventana del
servicio, de la opción y de la conguración.
Posición de InfoLive: Se puede congurar la posición del servicio InfoLive
en la pantalla. Se pueden seleccionar seis posiciones preseleccionadas de
InfoLive (Posición 1~Posición 6).
•
•
•
•
•
Para salir del servicio Conguración pulse el botón RETURN.
Para salir del servicio InfoLive pulse el botón EXIT.
Posición de InfoLink
Mercados
Tiempo Noticias
Tiempo
Noticias Mercados
Noticias
Mercados Tiempo
Posición 1 Posición 2 Posición 3
Mercados
Tiempo Noticias
Tiempo
Noticias Mercados
Noticias
Mercados Tiempo
Posición 4 Posición 5 Posición 6
N
N
InfoLive’s Configuración
Mover Seleccionar
Volver
Inicio automático : Desactivado
Mostrar hora : 10 minutes
Tamaño fuente : Estándar
Color de fondo : Negro
Posición de InfoLive
Configuración
Volver
Mover
BN68-01757A-Spa.indb 60 2008-9-24 15:56:18
Español - 61
Recomendaciones de uso
Función de teletexto
La mayoría de los canales de televisión proporcionan servicios de información escrita mediante el teletexto. La página de índice
de dicho servicio proporciona información sobre el uso de éste. Asimismo, se pueden seleccionar diversas opciones mediante el
mando a distancia para ajustar el servicio a las necesidades del usuario.
Para que la información del teletexto se visualice correctamente, la recepción del canal debe ser estable; En caso contrario,
puede perderse información o algunas páginas pueden no visualizarse.
1
: (salir)
Sale de la visualización de teletexto.
2
6 (índice)
Se utiliza para mostrar la página de índice (contenido) en cualquier momento
durante la visualización de teletexto.
3
8 (guardar)
Se utiliza para guardar las páginas del teletexto.
4
4 (tamaño)
Se utiliza para mostrar caracteres de doble tamaño en la parte superior de la
pantalla. Si desea mostrarlos también en la parte inferior, vuelva a pulsar el botón.
Púlselo de nuevo para volver a la presentación normal.
5
5 (mostrar)
Se usa para mostrar el texto oculto (respuestas a juegos, por ejemplo). Púlselo de
nuevo para volver a la presentación normal.
6
/ (activar teletexto/mezcla)
Se utiliza para activar el modo de teletexto tras seleccionar el canal que
proporciona el servicio. Pulse dos veces para superponer el teletexto a la pantalla
de emisión actual.
7
1 (página secundaria)
Se utiliza para mostrar la página secundaria disponible.
8
2 (avanzar página)
Se utiliza para mostrar la siguiente página de teletexto.
9
3 (retroceder página)
Se utiliza para mostrar la página anterior de teletexto.
0
0 (modo)
Se utiliza para seleccionar el modo de teletexto (LIST/FLOF). Si lo pulsa en el
modo LIST (LISTA), cambia al modo de guardar List (Lista). En dicho modo se
puede guardar la página de teletexto en la lista mediante el botón 8(almacenar).
!
9 (retener)
Se utiliza para retener la presentación en una página determinada si ésta está
enlazada con varias páginas secundarias que se muestran automáticamente.
Para reanudar, vuelva a pulsar el botón.
@
7 (cancelar)
Se utiliza para visualizar la emisión cuando se busca una página.
#
Botones de colores (rojo/verde/amarillo/azul)
Si una emisora utiliza el sistema FASTEXT, los distintos temas cubiertos en una
página de teletexto se codicarán en color y podrá seleccionarlos pulsando los
botones de color. Pulse el correspondiente al tema deseado. La página muestra
otra información con código de color que se puede seleccionar de la misma forma.
Pulse el botón del color correspondiente para ver la página anterior o la siguiente.
Puede cambiar páginas de teletexto pulsando los botones numéricos del mando a distancia.
N
N
1
3
4
5
6
2
7
8
9
0
!
@
#
BN68-01757A-Spa.indb 61 2008-9-24 15:56:19
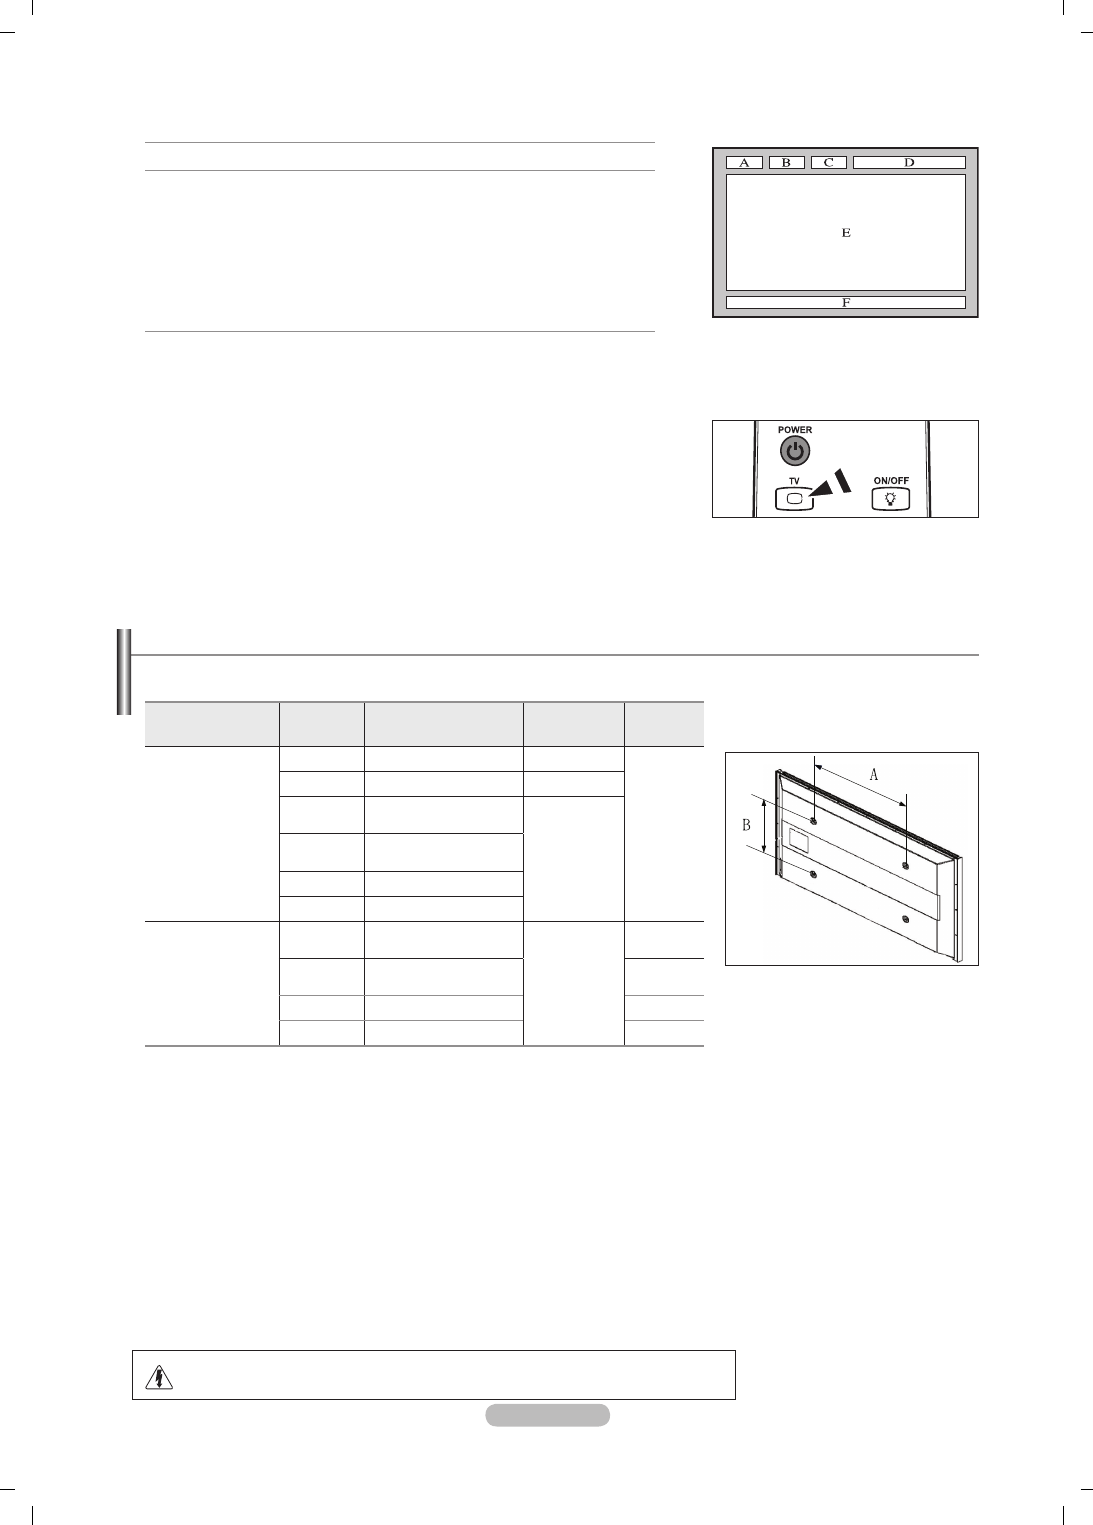
Español - 62
Las páginas de teletexto se organizan en seis categorías:
Parte Contenido
A Número de página seleccionado.
B Identidad del canal.
C Número de página actual o indicaciones de la búsqueda.
D Fecha y hora.
E Texto.
F Información de estado.
Información FASTEXT.
La información de teletexto se suele dividir en varias páginas que aparecen en
secuencia y a las que se puede acceder:
Introduciendo el número de página.
Seleccionando un título de la lista.
Seleccionando un encabezado de color (sistema FASTEXT).
Pulse el botón TV para salir de la visualización de teletexto.
N
-
-
-
O
Ajuste de montaje mural automático (se vende por separado)
Una vez instalado el montaje mural automático, la posición del televisor se puede ajustar fácilmente.
Product Family inch VESA Spec. (A * B) Standard
Screw Quantity
LCD-TV
23 ~ 26 200 * 100 M4
4
32 ~ 40 200 * 200 M6
46 ~ 52 400 * 400
600 * 400
M8
57 700 * 400
(No VESA)
57 ~ 70 800 * 400
80 ~ 1400 * 800
PDP-TV
42 ~ 58 400 * 400
600 * 400
M8
4
63 676 * 407
(No VESA) 6
63 ~ 70 800 * 400 4
80 ~ 1400 * 800 4
Se ofrecen las dimensiones estándar para los equipos de montaje mural, como se muestra en la tabla anterior.
Al adquirir el equipo de montaje mural, también se distribuye un manual de instalación detallado y todas las piezas necesarias
para el montaje.
No use tornillos con un tamaño superior al estándar, ya que pueden causar daños en el interior del televisor.
Para montajes murales que no cumplen las especificaciones de tornillos estándar VESA, la longitud de éstos puede variar
dependiendo de las especificaciones.
No use tornillos que no cumplan las especificaciones de tornillos estándar VESA
No apriete excesivamente los tornillos, ya que podría dañar el producto o provocar la caída de éste con riesgo de causar
lesiones personales. Samsung no se hace responsable de este tipo de accidentes.
Samsung no se hace responsable de daños o lesiones personales cuando se usa un montaje mural que no es VESA o que
no cumple las especificaciones, o si el cliente no sigue las instrucciones de instalación del producto.
Nuestros modelos de 57” y 63” no son compatibles con las especificaciones VESA. Por ello, debe usar un equipo de montaje
mural exclusivo para este modelo.
No se deben superar los 15 grados de inclinación cuando se instala este televisor.
N
N
N
N
N
N
N
N
No instale el equipo de montaje mural mientras el televisor está encendido. Se
podría producir una descarga eléctrica con riesgo de causar lesiones personales.
BN68-01757A-Spa.indb 62 2008-9-24 15:56:19
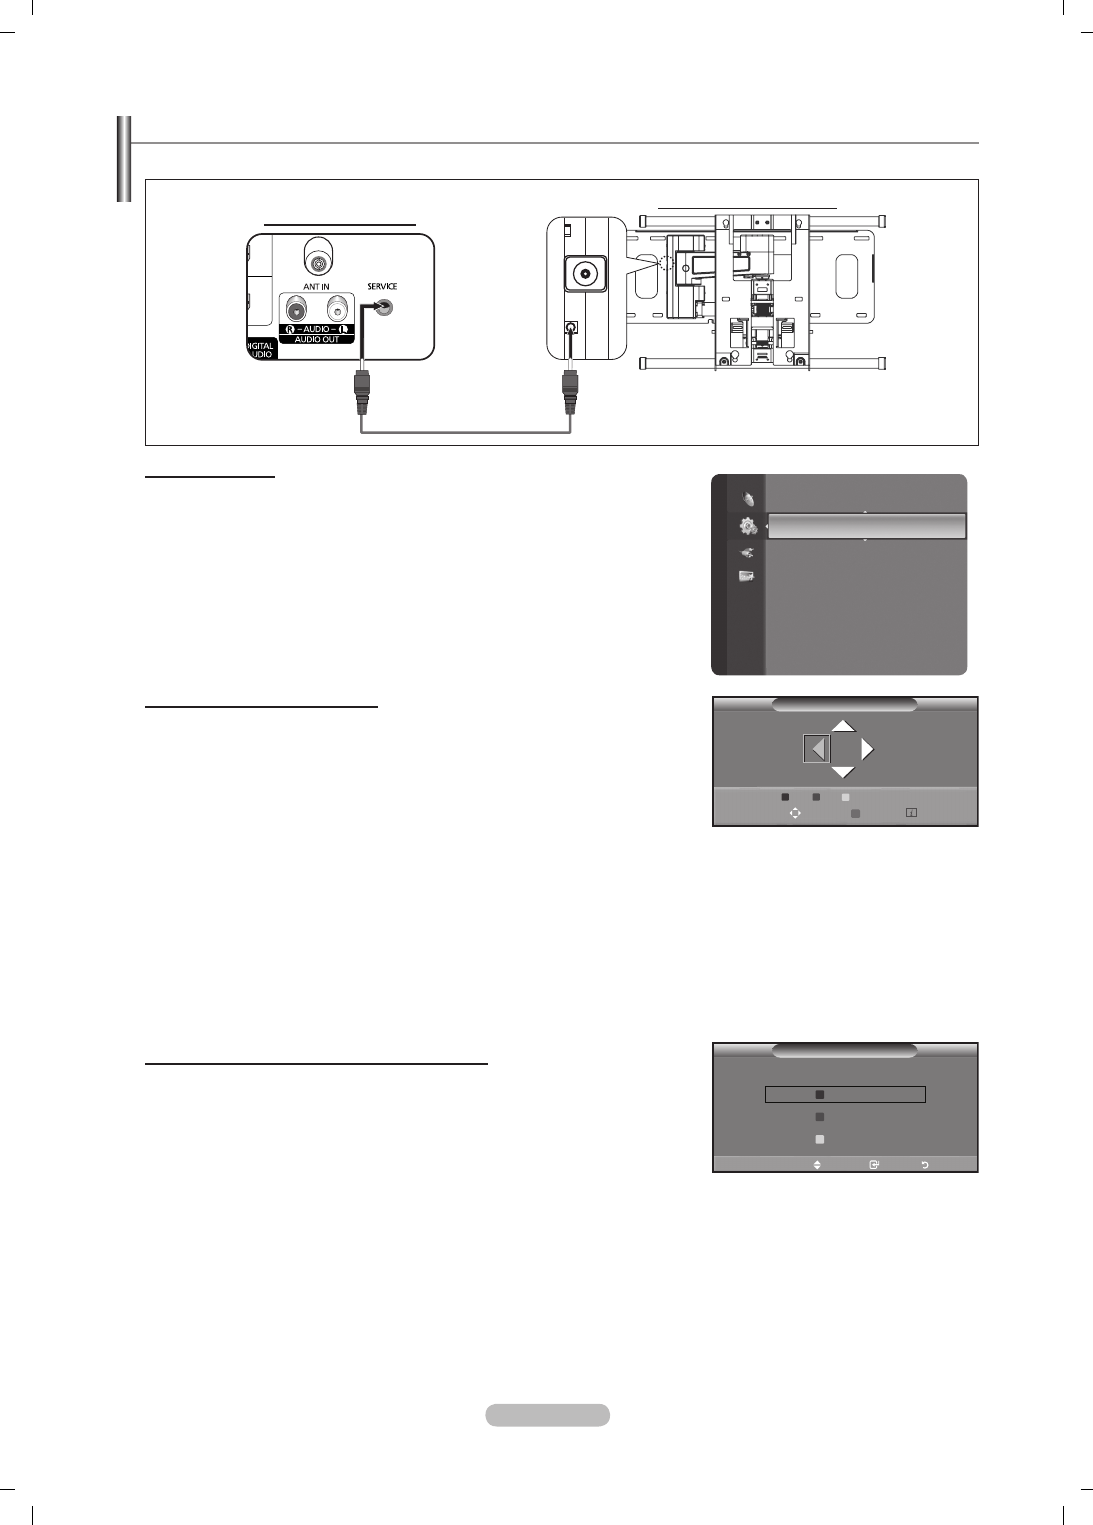
Español - 63
Ajuste de montaje mural automático (se vende por separado)
Una vez instalado el montaje mural automático, la posición del televisor se puede ajustar fácilmente.
Acceso al menú
1. Pulse los botones ▲, ▼, ◄ o ► del mando a distancia.
Se muestra la pantalla del Ajuste del montaje mural.
Si no se muestra la pantalla del montaje mural automático cuando se
hace clic en un botón de dirección mientras se está viendo la televisión, se
puede usar el menú para mostrar la pantalla.
Pulse el botón MENU para ver el menú. Pulse los botones ▲ o ▼ para
seleccionar Conguración y, a continuación, pulse el botón ENTER
E
.
Pulse los botones ▲ o ▼ para seleccionar Ajuste del montaje mural y,
a continuación, pulse el botón ENTER
E
.
Memorización de la posición
2. Ajuste la posición deseada mediante los botones ▲, ▼, ◄, ►.
Si pulsa un botón de echa sin que haya aparecido un OSD en la pantalla
del televisor, aparece la pantalla de ajuste.
Pulse el botón INFO para reiniciar. Pulse los botones ◄ o ► para
seleccionar Sí y, a continuación, pulse el botón ENTER
E
. La posición se
inicializa con la conguración predeterminada.
3. Pulse el botón azul. Pulse los botones ▲ y ▼ para seleccionar un modo de
guardar entre Posición 1, Posición 2 o Posición 3 en este orden para guardar la
posición actual.
Si no desea guardar la posición actual, pulse el botón RETURN.
Cuando se selecciona un modo de guardar, no se pueden usar los botones de colores.
4. Pulse el botón ENTER
E
para guardar.
Cuando se selecciona Posición 1, se muestra el mensaje Posición actual guardada como Posición1.
5. Pulse el botón ENTER
E
.
La posición guardada se muestra en la parte izquierda de la OSD.
Desplazamiento a la posición memorizada
1. Complete el paso 1 de Entering the menu.
2. Pulse un botón de color (rojo, verde, amarillo) para mover el montaje mural a la
posición guardada.
Se puede mover el montaje mural a una de las tres posiciones
preconfiguradas con los botones rojo (Posición 1), verde (Posición 2) o
amarillo (Posición 3).
Si después de usar una posición precongurada se ajusta ésta, la visualización de la posición desaparece.
Para la instalación, consulte el manual de instalación proporcionado con el equipo de montaje mural.
Para la instalación del producto, así como la instalación y movimiento del montaje en la pared, consulte a una empresa
especializada en instalaciones.
Este manual de instalación se debe usar para colocar el equipo de montaje en una pared. Para colocarlo en otros materiales
de construcción, póngase en contacto con el distribuidor más cercano.
El montaje mural no está operativo con Anynet+ o WISELINK Pro.
N
N
-
-
N
N
N
O
N
N
N
N
N
N
N
N
Conguración
Texto digital : Enable
Efecto de luz : Modo enc. act.
Ajuste del montaje mural ►
Melodía : Desactivado
Ocio : Desactivado
Ahorro energía : Desactivado
PIP
Software superior
Interfaz común
Ajuste del montaje mural
Posición 1 2 3
Ajustar Save Centre
Save
Select a mode to save.
Mover Entrar Volver
Posición1
Posición2
Posición3
Cable de SERVICIO (no suministrado)
Panel posterior del TV Montaje mural automático
BN68-01757A-Spa.indb 63 2008-9-24 15:56:21
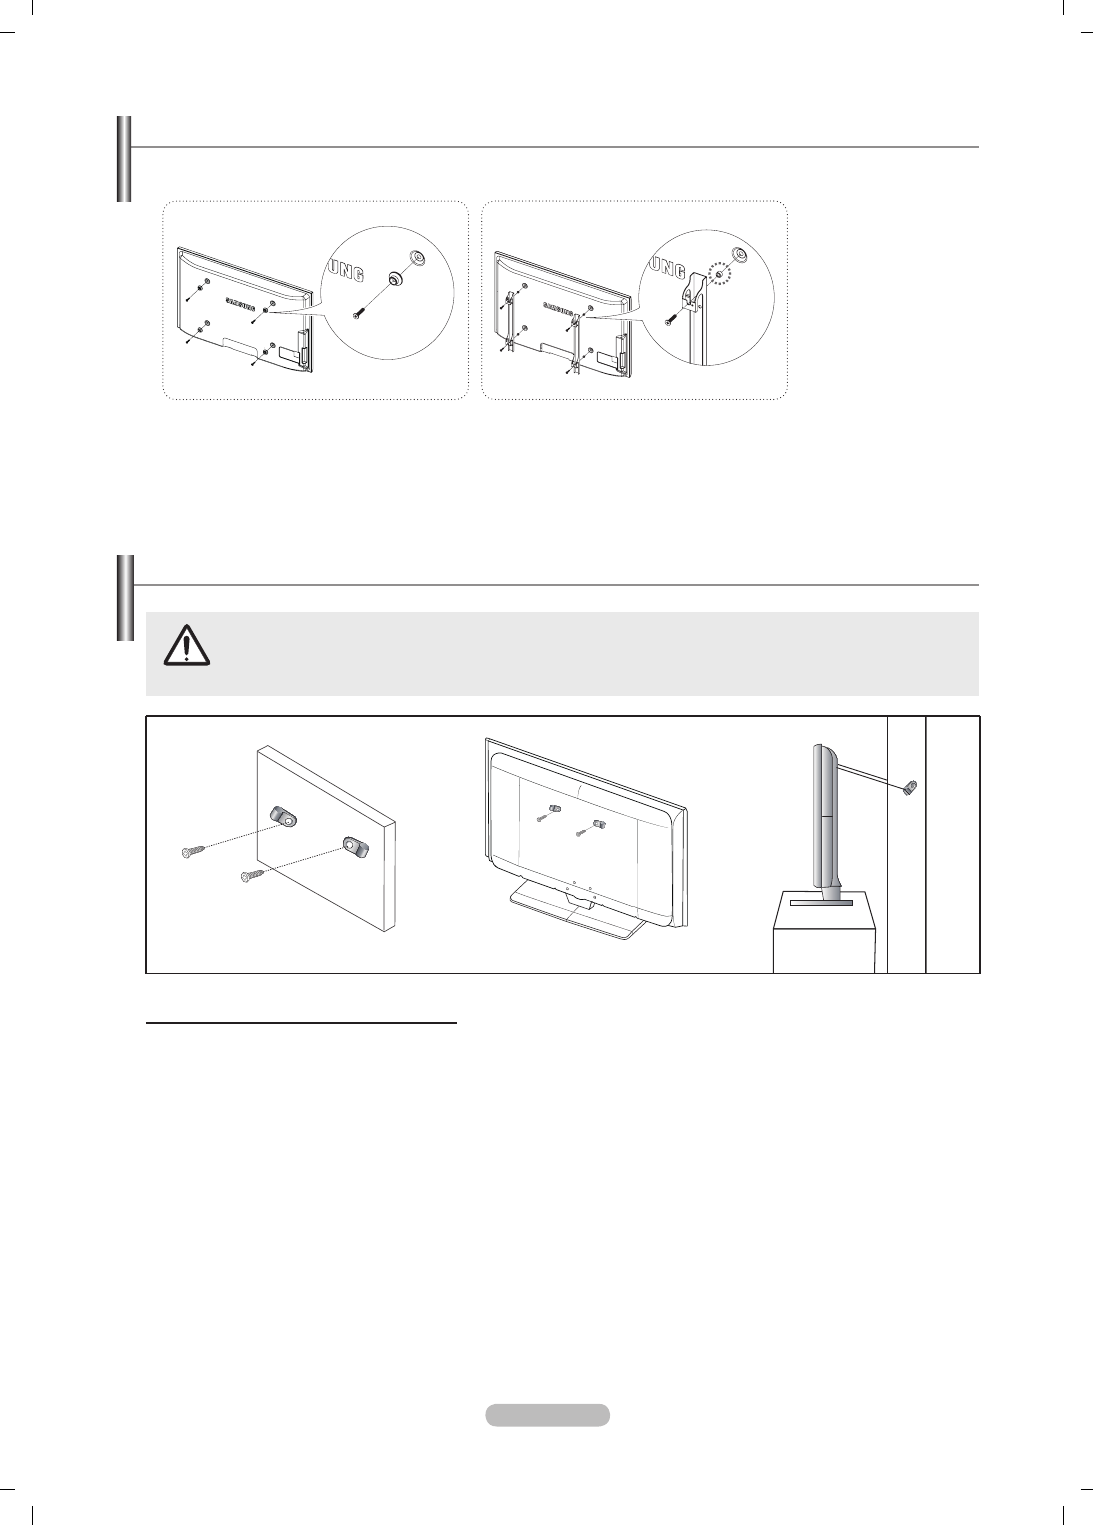
Español - 64
Preparación para instalar el montaje mural
1. Instale el montaje mural con un par de apriete de 15 kgf cm o menos. Tenga en cuenta que las piezas se pueden dañar si el
par de apriete es diferente del especificado.
2.
El juego de accesorios incluye soporte y anilla [①] para la instalación de un televisor SAMSUNG en un montaje mural de otra
empresa. (Caso B)
Caso A. Instalación del montaje mural de
SAMSUNG
Caso B. Instalación del montaje mural de otra
empresa
Tirar del televisor, empujarlo o colgarse de él puede provocar su caída. En especial, procure que los niños no se
cuelguen del televisor ni lo desestabilicen; éste podría caerse sobre ellos y causarles lesiones graves o incluso
la muerte. Siga las precauciones de seguridad del folleto de seguridad incluido con el producto. Para mejorar la
estabilidad instale un dispositivo antivuelco, como se explica a continuación.
Para impedir que el televisor se caiga:
1. Apriete rmemente las grapas sobre la pared con los tornillos. Asegúrese de que los tornillos estén bien armados en la
pared.
Según el tipo de pared quizás necesite algún material adicional para el anclaje.
Las grapas, los tornillos y la cadena no se suministran con el producto; deberá adquirirlos por separado.
2. Quite los tornillos de la parte central posterior del televisor y con ellos monte las grapas en el televisor.
Quizás con el televisor no vayan incluidos los tornillos. En tal caso, los tornillos se venden por separado.
3. Monte una cadena fuerte entre las grapas del televisor y de la pared de manera que quede bien tensada.
Instale el televisor cerca de la pared para evitar que caiga hacia a atrás.
Las grapas de la pared han de estar a la misma o a menor altura que las grapas del televisor.
Cuando se desee mover el televisor deberá aflojar la cadena.
4. Compruebe que todas las conexiones estén bien aseguradas. Compruébelas periódicamente para detectar cualquier signo
de fatiga o de fallo. Si tiene dudas sobre la seguridad de la instalación, póngase en contacto con un instalador profesional.
N
N
N
N
N
N
경고 주의
경고 주의
Fijación del televisor a la pared
Pared
Pared
BN68-01757A-Spa.indb 64 2008-9-24 15:56:22
Español - 65
Solución de problemas
Antes de ponerse en contacto con el Servicio posventa de Samsung, realice las comprobaciones siguientes.
Si no puede resolver el problema con las instrucciones que aparecen a continuación, anote el modelo y el número de serie del
televisor y póngase en contacto con el distribuidor local.
No hay imagen ni sonido Compruebe que el cable de alimentación esté conectado a la red eléctrica.
Compruebe que haya pulsado el botón del equipo.
Compruebe los ajustes de contraste y brillo de la imagen.
Compruebe el volumen.
Compruebe que Seleccionar altavoz esté establecido en Altavoz externo.
•
•
•
•
•
Hay imagen pero no sonido Compruebe el volumen.
Compruebe si se ha pulsado el botón MUTEMM del mando a distancia.
•
•
No aparece ninguna imagen o
está en blanco y negro
Ajuste los valores de color.
Compruebe que el sistema de emisión seleccionado es correcto.
•
•
Hay interferencias en el sonido o
en la imagen
Trate de identicar el aparato eléctrico que está afectando al aparato y aléjelo.
Enchufe el televisor en una toma eléctrica distinta.
•
•
La imagen está borrosa o
presenta niebla y el sonido está
distorsionado.
Compruebe la dirección, ubicación y conexiones de la antena.
Con frecuencia, este tipo de interferencias se deben al uso de una antena interior.
•
•
El mando a distancia funciona
mal
Sustituya las pilas del mando a distancia.
Limpie el borde superior del mando a distancia (ventana de transmisión).
Compruebe que los polos + y – de las pilas estén correctamente colocados.
Compruebe que las pilas estén secas.
•
•
•
•
La pantalla está en blanco
y el indicador de encendido
parpadea constantemente
En el ordenador, compruebe los cables de señal y de alimentación.
Mueva el ratón del ordenador o pulse una tecla.
En el equipo, compruebe (STB, DVD, etc.); el cable de señal y el de alimentación.
El televisor está usando su sistema de gestión de energía.
Pulse el botón Source del mando a distancia o del panel.
Encienda y apague el televisor.
•
•
•
•
•
•
La imagen dañada aparece en la
esquina de la pantalla
Si se ha seleccionado Sólo exploración en algún dispositivo externo, la imagen dañada
puede aparecer en la esquina de la pantalla. Este síntoma se origina en los dispositivos
externos, no en el televisor.
Aparece el mensaje “Resets all
settings to the default values”.
Aparece cuando el botón EXIT se mantiene pulsado durante unos momentos. La
conguración del producto se reinicia con los valores predeterminados.
BN68-01757A-Spa.indb 65 2008-9-24 15:56:22
Español - 66
Especicaciones
Las descripciones y características de este folleto se facilitan con fines informativos solamente y están sujetas a modificación sin
previo aviso.
Nombre del modelo PS50A756 PS63A756
Tamaño de pantalla (diagonal) 50 inch 63 inch
Resolución del PC 1920 x 1080 @ 60 Hz 1920 x 1080 @ 60 Hz
Salida de sonido 10 W x 2 15 W x 2
Dimensiones (An x Al x P)
Cuerpo principal
Con soporte
1240 x 766 x 96 mm
1240 x 830 x 315 mm 1531 x 932 x 99 mm
1531 x 1005 x 418 mm
Peso
Cuerpo principal
Con soporte 39 kg
44 kg 67 kg
84 kg
Consideraciones medioambientales
Temperatura de funcionamiento
Humedad de funcionamiento
Temperatura de almacenamiento
Humedad en almacenamiento
50 °F to 104 °F (10 °C to 40 °C)
10% to 80%, non-condensing
-4 °F to 113 °F (-20 °C to 45 °C)
5% to 95%, non-condensing
El diseño y las especicaciones pueden cambiar sin previo aviso.
Este dispositivo es un aparato digital de la Clase B.
Para conocer la fuente de alimentación y el consumo de energía, consulte la etiqueta adherida al producto.
N
N
N
BN68-01757A-Spa.indb 66 2008-9-24 15:56:22

Eliminación correcta de este producto
(Material Eléctrico y Electrónico de Descarte)
(Aplicable en la Unión Europea y en países europeos con sistenmas de recogida selectiva de
residuos)
La presencia de esta marca en el producto o en el material informativo que lo acompaña, indica
que al finalizar su vida útil no deberá eliminarse junto con otros residuos domésticos. Para
evitar los posibles daños al medio ambiente o a la salud humana que representa la eliminación
incontrolada de residuos, separe este producto de otros tipos de residuos y recíclelo
correctamente para promover la reutilización sostenible de recursos materiales.
Los usuarios particulares pueden contactar con el establecimiento donde adquirieron el
producto, o con las autoridades locales pertinentes, para informarse sobre cómo y dónde
pueden llevarlo para que sea sometido a un reciclaje ecológico y seguro.
Los usuarios comerciales pueden contactar con su proveedor y consultar las condiciones
del contrato de compra. Este producto no debe eliminarse mezclado con otros residuos
comerciales.
BN68-01757A-Spa.indb 67 2008-9-24 15:56:22
