Samsung Yp P2 Users Manual YPP2 USA ENGLISH3.0_080808
YP-P2 - User Manual YPP2J-USA-ENGLISH4.0 Free User Guide for Samsung Player, Manual
2015-08-20
: Samsung Samsung-Yp-P2-Users-Manual-796002 samsung-yp-p2-users-manual-796002 samsung pdf
Open the PDF directly: View PDF ![]() .
.
Page Count: 146 [warning: Documents this large are best viewed by clicking the View PDF Link!]
- features of your new MP3 Player
- safety information
- contents
- the basics
- WHAT’S INCLUDED
- YOUR MP3 PLAYER
- SCREEN DISPLAYS
- USING THE TOUCH SCREEN
- CHARGING THE BATTERY
- CARING FOR THE BATTERY
- TURNING THE POWER ON & OFF
- PLAYING A VIDEO FILE
- CONTROLLING THE VOLUME
- DISABLING THE BUTTONS
- BROWSING FOR FILES USING “File Browser”
- DELETING FILES WITH “File Browser”
- CHANGING THE SETTINGS AND PREFERENCES
- RESETTING THE SYSTEM
- EmoDio
- watching a video
- listening to music
- LISTENING BY CATEGORY
- PAUSING
- PLAYING FROM THE BEGINNING OF THE CURRENT TRACK
- PLAYING THE PREVIOUS TRACK
- PLAYING THE NEXT TRACK
- SEARCHING WITHIN A TRACK
- REPEATING A SECTION
- TO VIEW THE ALBUM COVER AND THE ALBUMINFORMATION SIMULTANEOUSLY
- CREATING A PLAYLIST USING EMODIO
- CREATING A PLAYLIST ON YOUR MP3 PLAYER
- PLAYING A PLAYLIST
- DELETING A FILE FROM THE PLAYLIST
- DELETING ALL FILES FROM THE PLAYLIST
- USING THE MUSIC MENU
- viewing pictures
- listening to FM radio
- using the datacast
- enjoying the prime pack
- using bluetooth
- upgrading firmware
- troubleshooting
- appendix

MP3 Player
user manual
imagine the possibilities
Thank you for purchasing this Samsung product.
To receive more complete service, please
register your product at
www.samsung.com/global/register
YP-P2

features of your new MP3 Player
Good looking. Smart. Reliable. And lots of fun. Your new MP3 player is
all this and more. Its state-of-the-art technology delivers rich sound, and
vibrant pictures. You’ll love your new MP3 player, whether you’re exercising,
downloading your favorite tunes, watching videos, or even listening to FM
Radio.
Use it once, and you’ll wonder how you ever lived without it.
PUTTING THE “MULTI” IN MULTIMEDIA
We call it an MP3 player, but it’s much more
than that. It allows you to view pictures, text,
videos and listen to FM radio.
The built-in Bluetooth wireless technology
turns your MP3 player into your own
personal network.
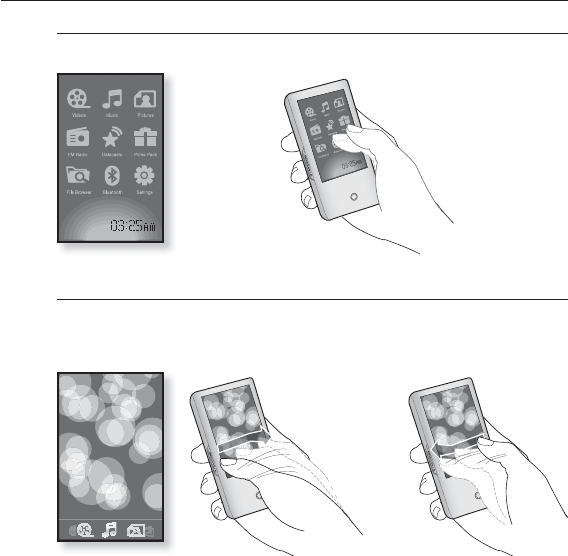
TOUCH NAVIGATION!
You can tap on the touch screen to navigate
through the menus.
COLOR LCD SCREEN DESIGN
Vivid color and images are delivered on the
wide LCD screen.
WHERE FORM MEETS FUNCTION
Sure, it’s sleek and good-looking. But it’s
easy to hold and use, too.
EASY SEARCH!
You can search for fi les with the easy-to-
use File Brower, and also navigate through
menus while listening to music.
LONGER PLAY TIME AND SHORTER
DOWNLOADING!
A fully charged battery can play up to 35
hours of music and 5 hours of video.
Download times are shorter. Because of its
USB 2.0 capability, the player is much faster
than models with USB 1.1.
ACOUSTIC WONDER
Your new MP3 player has built-in DNSe™
(Digital Natural Sound engine), Samsung’s
unique sound technology created to deliver
richer, deeper sound for an unbelievable
listening experience.
safety information
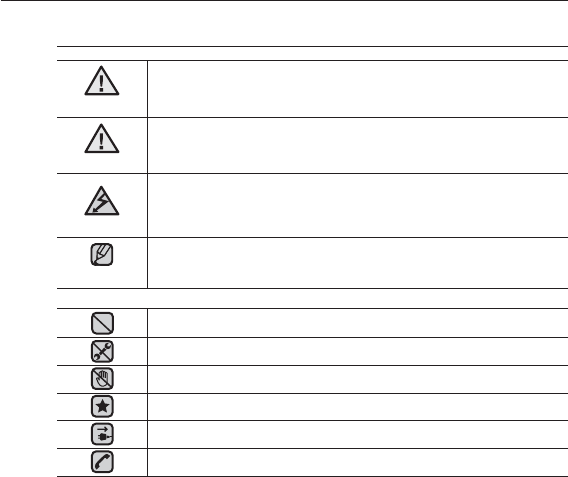
What the icons and signs in this user manual mean :
WARNING
Means that death or serious personal injury is a risk.
CAUTION
Means that there is a potential risk for personal injury or
material damage.
CAUTION
To reduce the risk of fi re, explosion, electric shock, or
personal injury when using your MP3 Player, follow
these basic safety precautions:
NOTE
Means hints or referential pages that may be helpful to
operate the player.
Do NOT attempt.
Do NOT disassemble.
Do NOT touch.
Follow directions explicitly.
Unplug the power plug from the wall socket.
Call the service center for help.
These warning signs are here to prevent injury to you and others.
Please follow them explicitly.
After reading this section, keep it in a safe place for future reference.
safety information
This manual describes how to properly use your new mp3 player.
Read it carefully to avoid damaging the player and injuring yourself.
Pay particular attention to the following serious warnings:
PROTECT YOURSELF
Do not disassemble, repair, or modify this product on your own.
Do not get the product wet or drop it in water. If the product gets wet, do
not switch it on because you could get an electric shock. Instead, contact
a Samsung Customer Service Center at 1-800-SAMSUNG.
Do not use the product during a thunderstorm, as it may cause
malfunction or a risk of electric shock.
Do not use the earphones while you are driving a bicycle, automobile or
motorcycle.
It can cause a serious accident, and furthermore, is prohibited by law in some
areas.
Using the earphones while walking or jogging on a road, in particular, on a
crosswalk can lead to a serious accident.
For your safety, make sure the earphone cable does not get in the way of
your arm or other surrounding objects while you are taking exercise or a
walk.
Do not place the product in damp, dusty, or sooty areas because these
environments could lead to fi re or electric shock.
CAUTION
WARNING
CAUTION

PROTECT YOURSELF
Using earphones or headphones for an extended time may cause serious
damage to your hearing.
If you are exposed to sound louder than 85db for an extended time, you may
adversely affect your hearing. The louder the sound is, the more seriously damaged
your hearing may be (an ordinary conversation is between 50 to 60db and road
noise is approximately 80db).
You are strongly advised to set the volume level to medium (the medium level is
usually less than 2/3 of the maximum).
If you feel a ringing in the ear(s), lower the volume or stop using the
earphones or headphones.
PROTECT YOUR MP3 PLAYER
Do not leave the player in temperatures above 95°F (35°C), such as a
sauna or a parked car.
Do not cause excessive impact on the player by dropping it.
Do not place heavy objects on top of the player.
Prevent any foreign particles or dust from entering into the product.
Do not place the product near magnetic objects.
Be sure to backup important data. Samsung is not responsible for data loss.
Use only accessories provided by or approved by Samsung.
Do not spray water on the product. Never clean the product with chemical
substances such as benzene or thinner, as it may cause fi re, electric
shock or deteriorate the surface.
Failure to follow these instructions may lead to physical injuries or damage to
the player.
When printing this user manual, we recommend that you print in color and
check “Fit to Page” in the print option for better viewing.
CAUTION
NOTE
WARNING
CAUTION

SAFETY INFORMATION
FCC
This device complies with part 15 of the FCC Rules.
Operation is subject to the following two conditions:
(1) This device may not cause harmful interference, and
(2) This device must accept any interference received, including interference
that may cause undesired operation.
Caution: Any changes or modifi cations in construction of this device which are not
expressly approved by the party responsible for compliance could void the user’s
authority to operate the equipment.
Note: This equipment has been tested and found to comply with the limits for a Class
B digital device, pursuant to part 15 of the FCC Rules. These limits are designed
to provide reasonable protection against harmful interference in a residential
installation. This equipment generates, uses and can radiate radio frequency
energy and, if not installed and used in accordance with the instructions, may cause
harmful interference to radio communications, However, there is no guarantee that
interference will not occur in a particular installation.
If this equipment does cause harmful interference to radio or television reception,
which can be determined by turning the equipment off and on, the user is encouraged
to try to correct the interference by one or more of the following measures:
-Reorient or relocate the receiving antenna.
-Increase the separation between the equipment and receiver.
-Connect the equipment to an outlet on a circuit different from that to which
the receiver is connected.
-Consult the dealer or an experienced radio/TV technician for help.
Declaration of Conformity
We, Samsung Electronics Co.,Ltd., declares under its sole responsibility that
the product, Trade name Samsung & Model name YP-P2, has been tested
according to the part 15 of the FCC Rules.
Party responsible for Product Compliance
Samsung Electronics America QA Lab.
18600 Broadwick Street, Rancho Dominguez, CA 90220

contents
THE BASICS
11
11 What’s included
12 Your MP3 Player
14 Screen displays
18 Using the touch screen
22 Charging the battery
23 Caring for the battery
23 Turning the Power on & off
24 Playing a video fi le
24 Controlling the volume
25 Disabling the buttons
26
Browsing for fi les using “File Browser”
26 Deleting fi les with “File Browser”
27 Changing the settings and
preferences
27 Menu Style Settings
30 Sound Settings
31 Display Settings
32 Language Settings
34 Time Settings
35 System Settings
39 Resetting the system
EMODIO
40
40 PC requirements
41 Installing EmoDio
42 Transferring fi les to the player with
EmoDio

contents
WATCHING A VIDEO
45
45 Pausing
46 To move to a specifi c frame
47 To play the previous video fi le
47 To play the next video fi le
48 Using the video menu
LISTENING TO MUSIC
55
55 Listening by category
57 Pausing
57 Playing from the beginning of the
current track
57 Playing the previous track
58 Playing the next track
58 Searching within a track
59 Repeating a section
60 To view the album cover and the
album information simultaneously
61 Creating a playlist using EmoDio
61 Creating a playlist.
62 Adding music fi les to a playlist you’ve
created
63 Transferring a playlist to your player
using EmoDio
64 Creating a playlist on your mp3
player
65 Playing a playlist
66 Deleting a fi le from the playlist
66 Deleting all fi les from the playlist
67 Using the music menu

contents
USING THE
DATACAST
91
91 Registering a channel
92 Creating a new channel group
92
Transferring a datacast from <EmoDio>
93 Viewing Datacasts
ENJOYING THE
PRIME PACK
94
94 Reading text
95 Using the text menu
99 Playing video games
103 Setting the alarm
106 Viewing the calendar
107 Viewing the address book
108 Viewing the world clock
109 Using the Calculator
110 Voice recording
112 Viewing the World Subway Map
LISTENING TO FM RADIO
83
83 To use the mute function
84 To search for FM stations
85 Using the FM radio menu
VIEWING PICTURES
77
77 Viewing pictures
78 Using the picture menu

TROUBLESHOOTING
134
134 Troubleshooting
USING BLUETOOTH
113
113 What is bluetooth?
115 Using a bluetooth stereo headset
118 Using a bluetooth mobile phone
124 Transferring fi les to/from a bluetooth
device
129 Using the bluetooth menu
130 Bluetooth settings
UPGRADING FIRMWARE
132
132 Upgrading fi rmware
APPENDIX
137
137 Menu tree
138 Product specifi cations
140 License
141 Warranty
contents
the basics _ 11
the basics
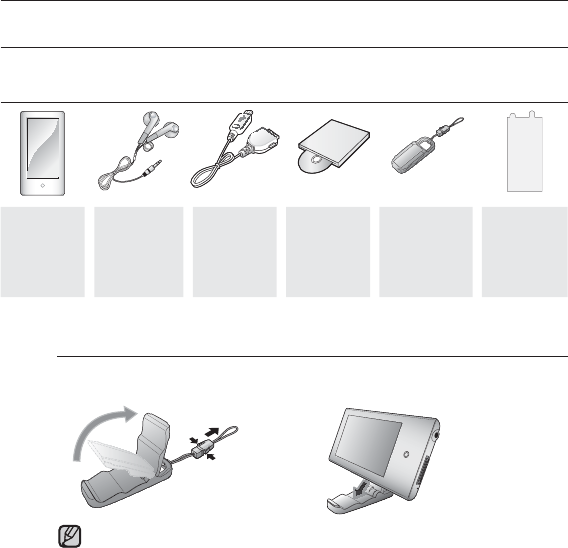
WHAT’S INCLUDED
Your new mp3 player comes with these accessories. If you’re missing any of these
items, contact Samsung Customer Service at 1-800-SAMSUNG (1-800-726-7864).
Player
Earphones
Black :
AH30-00087E
White :
AH30-00086H
USB
Cable
AH39-
00899A
Installation
CD
AH46-
00050A
Easy
Holder
AH97-
02397A
LCD
Protective
Film
AH63-
01482A
The accessories in your box may look slightly different than these.
Using the Easy Holder
Mount the player onto the easy holder in a fl at surface place. Doing this,
you can enjoy video without holding the player.
This is not a fi xed holder, so be careful not to shake it.
NOTE
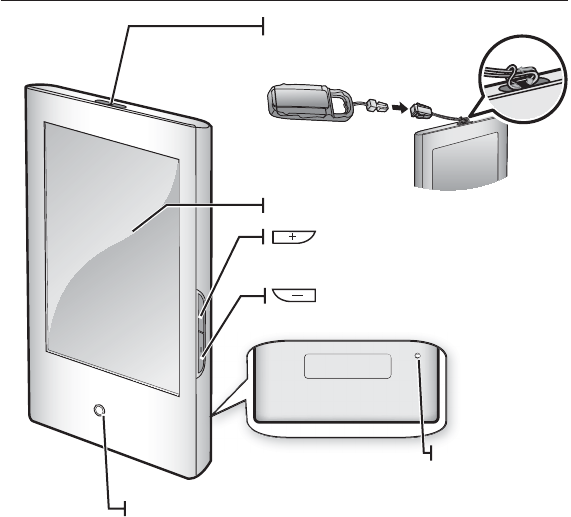
12 _ the basics
Easy holder hook
Touch screen
Power LED
The Power LED is lit in red while
the battery is being charged.
When done, it turns green.
Up volume button
Press to increase the volume
Down volume button
Press to reduce the volume
Reset hole
If a player
malfunction occurs,
press the reset hole
with a pointed object
to re-initialize the
system.
Tying the easy holder strap
YOUR MP3 PLAYER
the basics _ 13
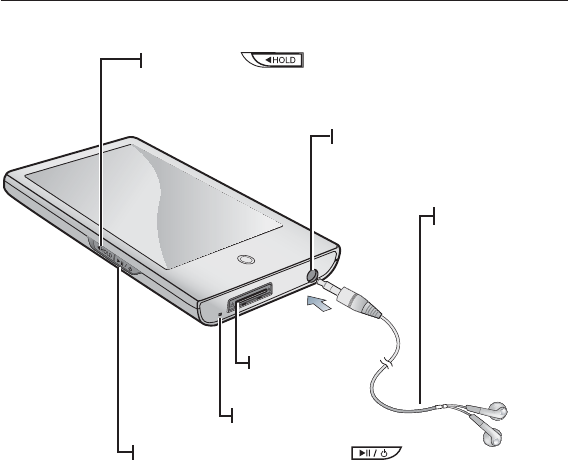
YOUR MP3 PLAYER (Continued)
Hold switch
Push in the direction of the arrow to lock
the button functions.
USB
connection
port
Power & Play/Pause button
Press for play/pause.
Press and briefl y hold for power on/off.
Earphone connection jack
Earphones
Labeled “L” for
the left earpiece
and “R” for the
right earpiece.
Also serves as an
antenna for FM
Radio in the MP3
player.
Microphone
14 _ the basics
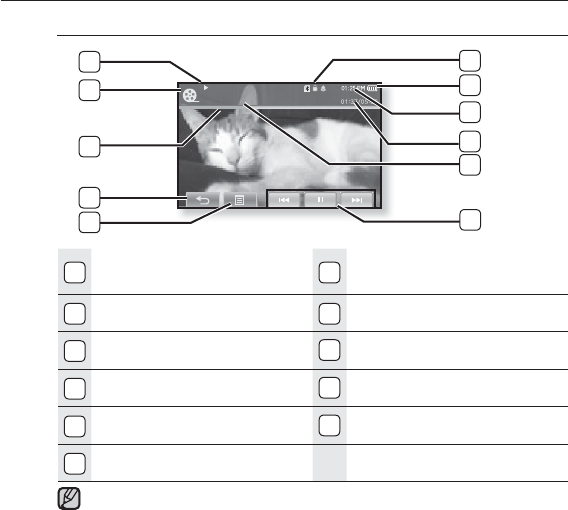
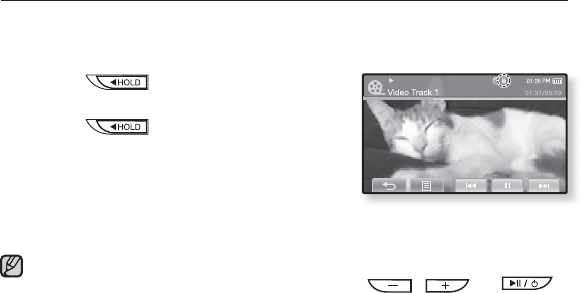
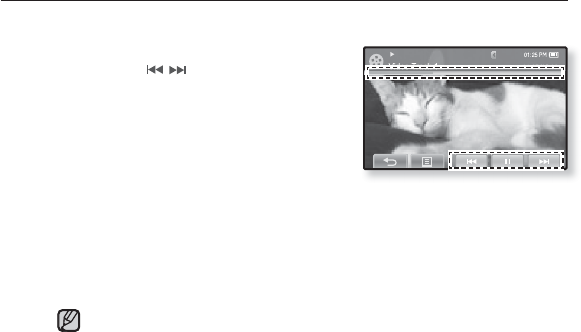
SCREEN DISPLAYS
Video
1Bluetooth/Lock/Alarm
Indicator 7Play/Pause, Search
Indicator
2Battery Status 8Video Mode Indicator
3Current Time 9Play Status Bar
4Current /Total Play Time
10
Back Icon
5
File Name
11
Menu Icon
6Play/Pause, Search Icon
The screen pictures are for illustration purposes only. The actual screen
may differ.
Information and icons on the current video playback will disappear shortly. Tap
on the screen if you want to display the video playback information and icons
again.
NOTE
Video Track 1
11
3
1
2
8
7
4
6
9
10
5
the basics _ 15
SCREEN DISPLAYS (Continued)
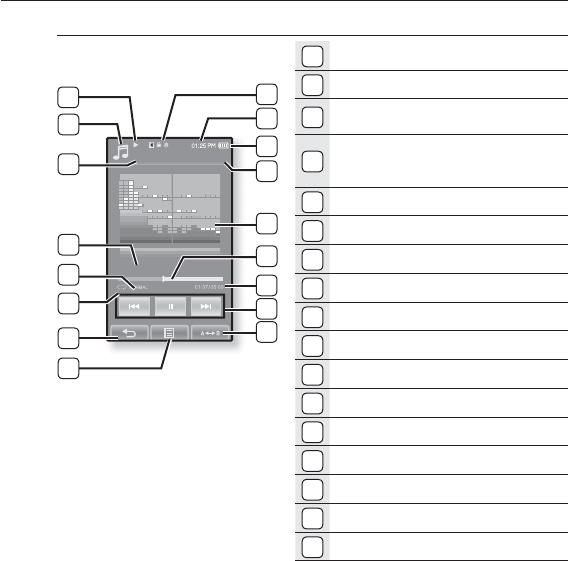
Music
1
Bluetooth/Lock/Alarm Indicator
2Current Time
3
Battery Status
4
Current track playing /
Total number of tracks
Indicator
5
Music Play Screen
6
Play Status Bar
7
Current /Total Play Time
8
Play/Pause, Search Icon
9
A-B Repeat Icon
10
Play/Pause, Search Indicator
11
Music Mode Indicator
12
Parent Menu Indicator
13
Music Title
14
DNSe Mode Indicator
15
Play Mode Indicator
16
Back Icon
17
Menu Icon
Songs
1/52
5
11
3
4
1
2
12
6
7
8
9
16
17
10
15
14
13
Rising Sun
16 _ the basics
SCREEN DISPLAYS (Continued)
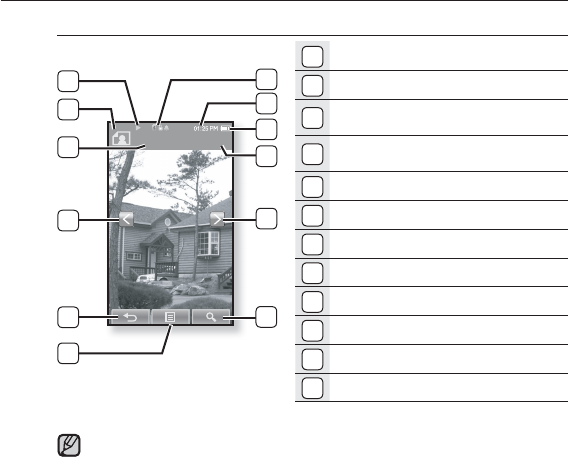
Picture
1
Bluetooth/Lock/Alarm Indicator
2Current Time
3
Battery Status
4
Current fi le /
Total number of fi les Indicator
5Next Image Icon
6
Zoom Icon
7Music Play Status
8
Picture Mode
Indicator
9
File Name
10
Previous Image Icon
11
Back Icon
12
Menu Icon
Information and icons in the current picture display will disappear shortly.
Tap on the screen if you want to display the picture information and icons
again.
NOTE
[Picture View Screen]
Photo image 1 2/8
3
4
1
2
7
9
8
5
10
6
11
12
the basics _ 17
SCREEN DISPLAYS (Continued)
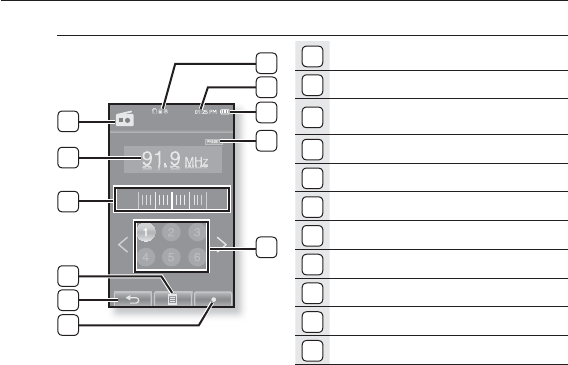
FM Radio
1
Bluetooth/Lock/Alarm Indicator
2Current Time
3
Battery Status
4
Manual/Preset Indicator
5
Preset Number Icon
6
Radio Mode Indicator
7Current Frequency(MHz) Indicator
8
Frequency location Indicator
9
Menu Icon
10
Back Icon
11
Record Icon
FM Radio
3
1
2
5
8
10
9
4
7
6
11
18 _ the basics
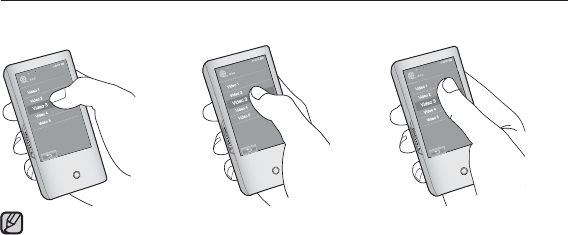
USING THE TOUCH SCREEN
Tap on the touch screen with your thumb or fi ngertip.
incorrect correct incorrect
Do not use force when touching the touch screen, as it may cause damage to the
screen.
To avoid damage to the touch screen, do not use any object other than your thumb
or fi ngers to operate it.
Do not tap on the touch screen if your thumb or fi ngers are not clean.
Do not tap on the touch screen with gloves on.
The touch screen may not function if you use a fi ngernail or other instruments such
as a ballpoint pen.
NOTE
the basics _ 19
USING THE TOUCH SCREEN (Continued)
You can tap on the screen in four directions – up, down, left and right, according
to the function.
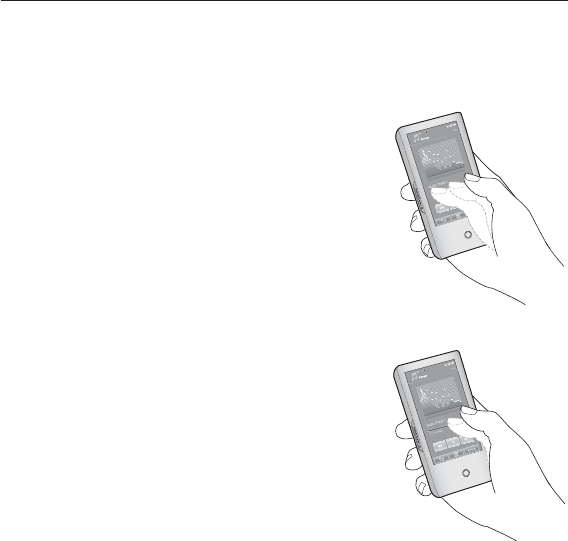
ex) Play status bar for music
How To 1
Tap on and hold the play status bar on the
screen and move your thumb or fi ngers to a
desired point before releasing it.
The player resumes playing at the point of release.
How To 2
Tap on a desired point in the play status bar.
20 _ the basics
USING THE TOUCH SCREEN (Continued)
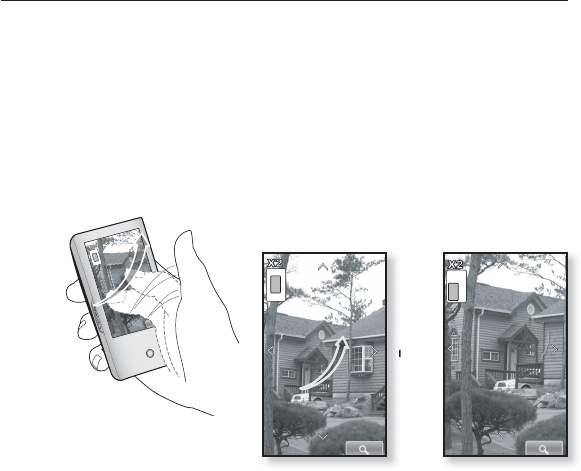
ex) Zoomed image
How To 3
Tap on and hold the screen and slide your thumb or fi ngers in the
desired direction before releasing it as in the fi gure below.
In zoom mode, move your thumb or fi ngers in the desired direction.
The picture moves and appears in that direction.
Ä
the basics _ 21
USING THE TOUCH SCREEN (Continued)
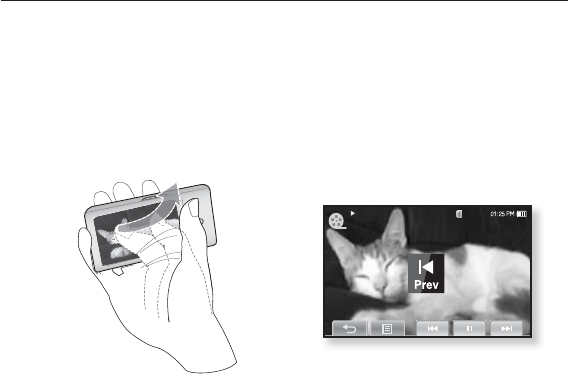
ex) Play the previous/next video fi le
How To 4
Slide your thumb or fi ngers to the left or right.
Left : Moves to the next fi le (depending on the the horizontal stroke setting. See
page 53).
Right : Moves to the previous fi le (depending on the the horizontal stroke setting.
See page 53).
Video Track 1
22 _ the basics
CHARGING THE BATTERY
Charge it before using the player for the fi rst time and when you haven’t used it
for a long time.
The battery for your mp3 player will fully charge in about 4 and a half hours,
although total charging time varies depending on your PC environment.
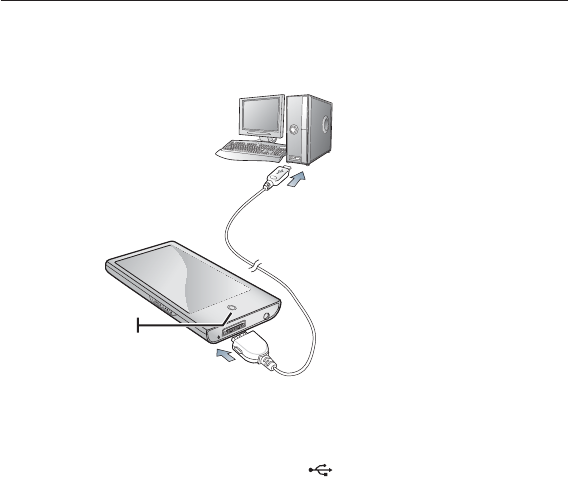
1. Connect the larger end of the USB cable to the USB Connection Port on the
bottom of the player.
2. Connect the USB cable to the USB port ( ) on your PC.
The Power LED is lit in red while the battery is being charged. When done, it turns
green.
1
2
Power LED
the basics _ 23
CARING FOR THE BATTERY
Your battery will last longer if you follow these simple guidelines for caring for
and storing it.
•Recharge and store the battery within the temperature range of 40°F~95°F
(5°C~35°C ).
•Do not overcharge (longer than 12 hours).
Excessive charging or discharging may shorten the battery’s life.
•Battery life naturally shortens slowly over time.
If you are charging the player while it is connected to a laptop computer, make sure
the laptop’s battery is also fully charged or that the laptop is plugged into its power
source.
The battery is not charged in the PC Standby mode or when the hardware is safely
removed.
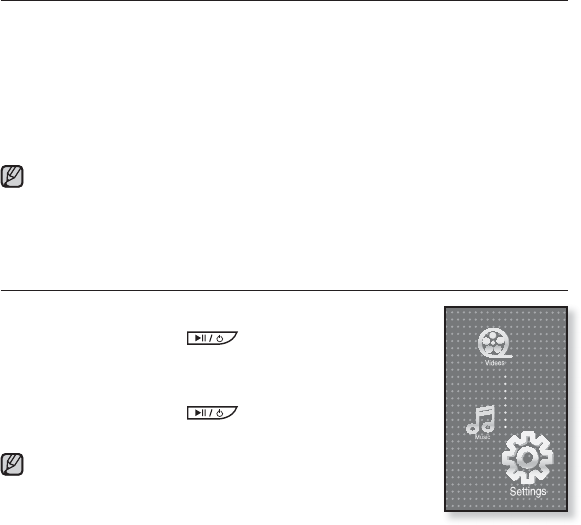
TURNING THE POWER ON & OFF
Turning the Power on
Press and briefl y hold the button.
Power is turned on.
Turning the Power off
Press and briefl y hold the button.
Power is turned off.
Your mp3 player will be automatically turned off when none of
the buttons and icons have been pressed for a specifi c length
of time in the pause mode. The factory setting for
<Auto Power Off> is 1 minute, but you can change this length
of time. See page 35 for more information.
For using <Cosmos> in the main menu, refer to page 28.
NOTE
NOTE
24 _ the basics
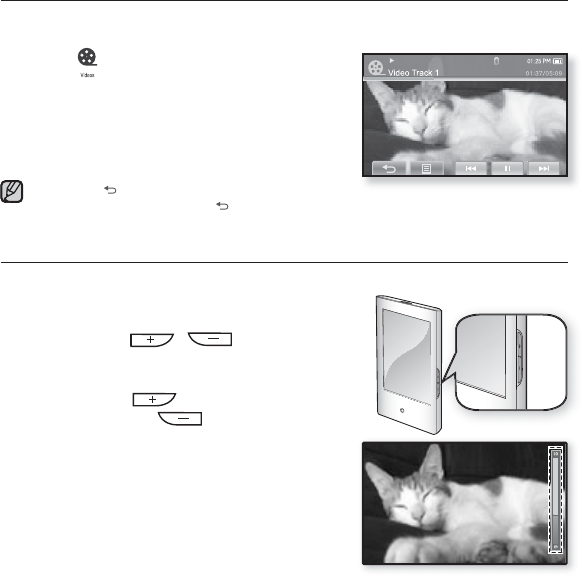
PLAYING A VIDEO FILE
Load video fi les onto your new mp3 player using EmoDio.
Learn more about EmoDio on page 42.
1. Tap the icon on the main menu screen.
The video list appears.
2. Select a video fi le to play and tap on it.
The selected video fi le starts to play horizontally.
Tap the [ ] icon to move to the previous screen.
Press and briefl y hold the [] icon to move to the main menu screen.
CONTROLLING THE VOLUME
You can adjust the volume while a fi le is stopped or in its playback.
How To 1
Press the , button.
The volume control bar appears.
The range of volume is set between 0 to 30.
Press the button to increase the
volume or the button to decrease it.
How To 2
Slide your thumb or fi ngers up or down
from the middle right of the screen.
The volume control bar appears.
Sliding your thumb or fi ngers upward will
increase the volume and downward will
decrease it.
NOTE
the basics _ 25
DISABLING THE BUTTONS
The hold function disables all the other buttons and icons on the mp3 player,
so that if you accidentally bump one-while working out, for example-your music
won’t be interrupted.
1. Push the switch in the direction of the
arrow.
2. Push the switch in the opposite
direction of the arrow to release the hold
function.
If <Touch Screen Only> is selected from <Settings> ĺ <System> ĺ<Hold Option>,
locks only the touch screen and allows operation of , and
buttons. See page 36.
NOTE
26 _ the basics
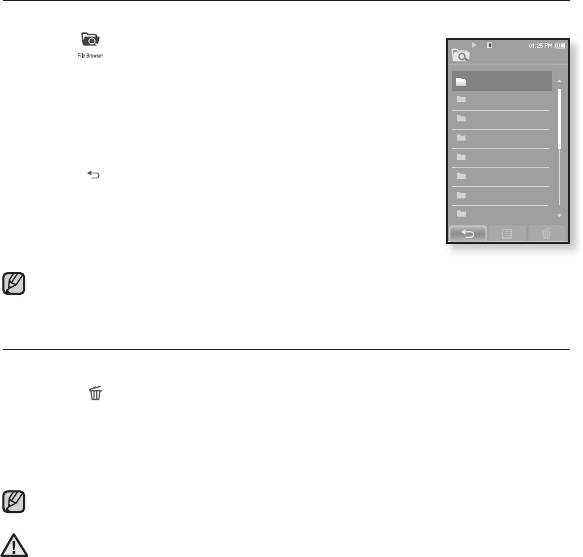
BROWSING FOR FILES USING “File Browser”
Search easily for fi les using the “File Browser” function.
1. Tap the icon on the main menu screen.
The <File Browser> folder list containing “Video, Music, Playlists,
Pictures, Datecasts, Texts, Games, Received Files, My Pack and
Recorded Files” appears.
2. Select a desired folder.
3. Tap on a selected folder to bring up the fi le list.
Tap the [ ] icon to move to the previous screen.
4. Select a desired fi le.
5. Tap on a selected fi le.
The fi le will start playing.
<My Pack> of <File Browser> is the folder storing myDNSe or UCI fi les transferred
by <EmoDio>. For further information on myDNSe and UCI, refer to <EmoDio>.
DELETING FILES WITH “File Browser”
Follow the steps 1-4 above.
5. Tap the [] icon.
The delete confi rmation window appears.
6. Tap <Yes>.
The selected fi le is deleted.
The selected fi le cannot be deleted while its playing back.
Once fi les are deleted, they cannot be recovered.
Video
Music
Playlists
Pictures
Datacasts
Text s
Games
Received Files
File Browser
1/8
NOTE
NOTE
CAUTION
the basics _ 27
Settings
Menu Style
Sound
Display
Language
Time
System
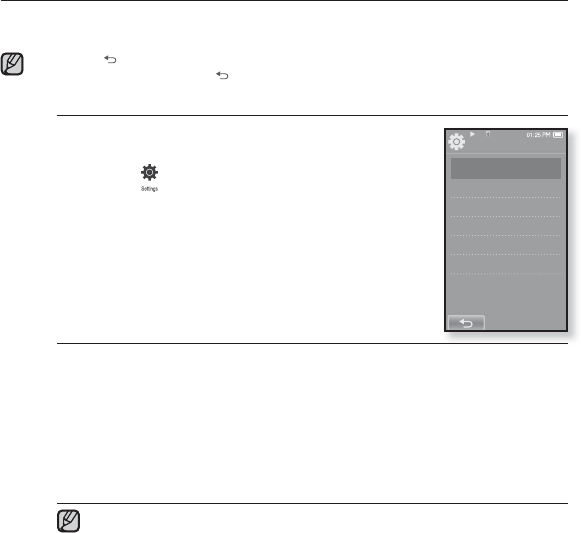
CHANGING THE SETTINGS AND PREFERENCES
Your mp3 player comes with settings and preferences that were set up at the
factory, but you can change these pre-set values to truly customize your player.
Tap the [ ] icon to move to the previous screen.
Press and briefl y hold the [] icon to move to the main menu screen.
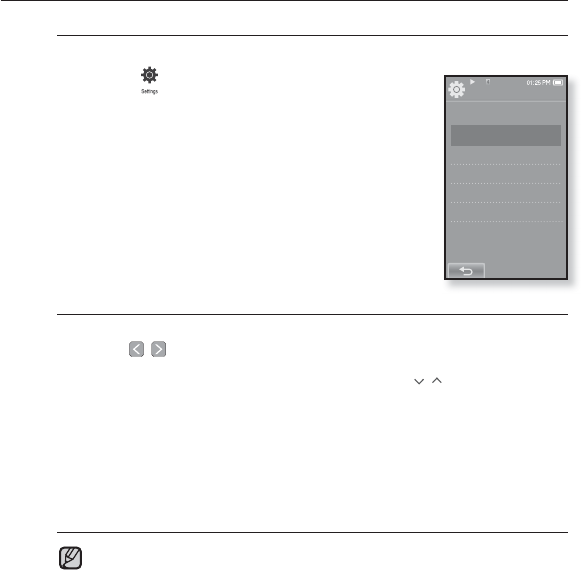
Menu Style Settings
You can change the menu design and font and delete
the background image of the main menu.
1.
Tap the icon on the main menu screen.
The <Settings> menu appears.
2.
Select <Menu Style> and tap on it.
The <Menu Style> menu appears.
3. Tap on a desired menu.
4. Set the options you prefer and tap <OK>.
Menu Style Setting Options
Menu Design : You can change the style of the main menu screen. Select
from <Cosmos>, <Matrix>, <My Skin>, <Dandy_Cosmos>, <Dandy_Matrix>,
<Dandy_MySkin>, <Sammy_Matrix>, <Toy_Cosmos>, <Toy_Matrix>,
<Toy_MySkin>, <Woody_Cosmos>, <Woody_Matrix> and <Woody_MySkin>.
See pages 28~29.
Font : You can change the font type of the menu language. Select one from 3
font types. In some menu languages, <Font> will be disabled.
Reset My Skin : Initializes the background image of the touch screen to its
default image.
If the <Settings> screen is open and you don’t push any buttons for about
1 minute, the unsaved settings will be lost, and the player will return to the
previous function.
Transferred UCI fi les using <EmoDio> can be found in <Menu Design>. For
further information on UCI, refer to <EmoDio>.
NOTE
NOTE
28 _ the basics
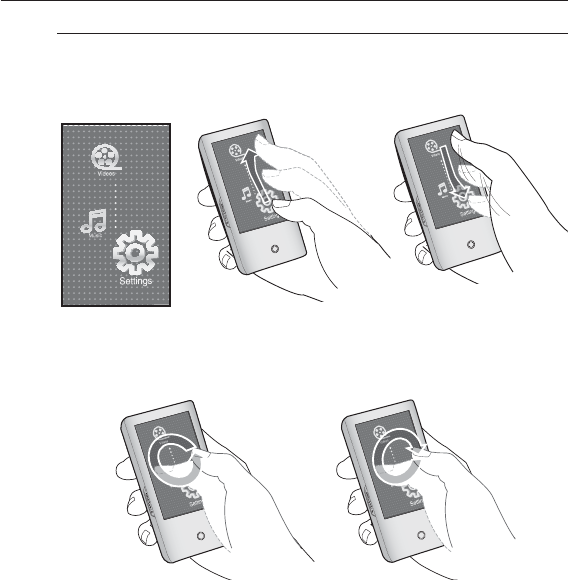
CHANGING THE SETTINGS AND PREFERENCES (Continued)
Using the Cosmos Menu
How To 1
Position your thumb or fi ngers on the touch screen and slide upward or
downward.
Tap on the icon of the desired main menu.
How To 2
Position your thumb or fi ngers on a blank space of the touch screen and
circle around softly.
Tap on the icon of the desired main menu.
the basics _ 29
CHANGING THE SETTINGS AND PREFERENCES (Continued)
Using the Matrix Menu
Tap on the icon of the desired main menu.
Using the My Skin Menu
Position your thumb or fi ngers on the touch screen and scroll and
release left or right by moving your fi ngertip. Tap on the icon of the
desired main menu.
<Matrix> menu
<My Skin> menu
30 _ the basics
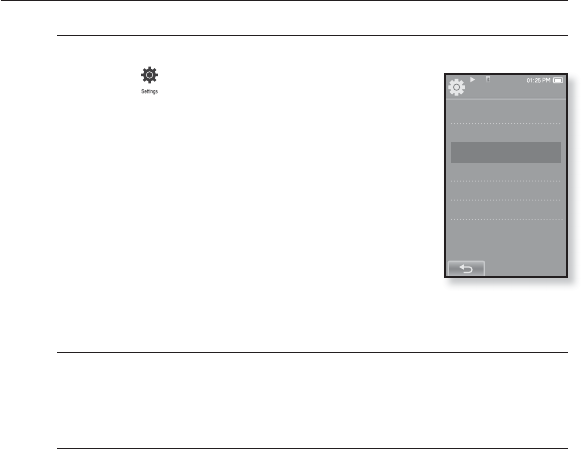
CHANGING THE SETTINGS AND PREFERENCES (Continued)
Sound Settings
You can set the master EQ, beep sound, volume limit.
1.
Tap the icon on the main menu screen.
The <Settings> menu appears.
2.
Select <Sound> and tap on it.
The <Sound> menu appears.
3. Tap on a desired menu.
4. Set the options you prefer and tap <OK>.
Sound Setting Options
Master EQ : You can optimize sound settings.
Tap the [
,
] icon to select the frequency you want to adjust.
The frequencies that can be adjusted are <60Hz>, <150Hz>, <400Hz>,
<1.1KHz>, <3.5KHz>, <8KHz> and <14KHz>. Tap the [
,
] icon to adjust the
selected frequency’s level and tap <OK>.
Beep Sound : Sets the beep sound for touch screen operations to on or off.
Select from <Off> and <On>.
Volume Limit : You can avoid hearing damage by setting the limit of the volume
when using the earphone. <On> will limit the maximum volume level to 15.
The maximum volume level when volume limit is set to <Off> is 30.
Even if you have selected <Off>, the volume will be set back to 15 to avoid
hearing damage when you turn the player back on.
You can not set the <Master EQ> while the player is connecting to the
Bluetooth stereo headset.
NOTE
Settings
Menu Style
Sound
Display
Language
Time
System
the basics _ 31
CHANGING THE SETTINGS AND PREFERENCES (Continued)
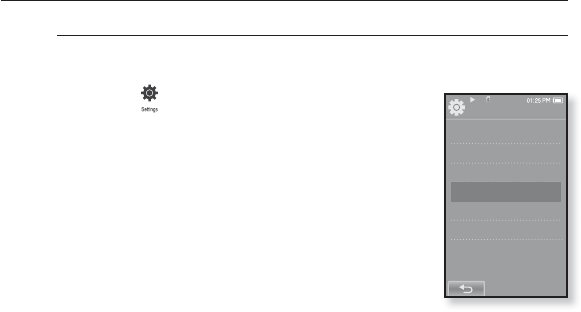
Display Settings
Change the display off time and brightness of your screen.
1.
Tap the icon on the main menu screen.
The <Settings> menu appears.
2.
Select <Display> and tap on it.
The <Display> menu appears.
3. Tap on a desired menu.
4. Set the options you prefer and tap <OK>.
Display Setting Options
Display Off : If no buttons or icons are tapped within the time set shown below,
the touch screen will automatically be turned off. Select from <15sec>, <30sec>,
<1min>, <3min>, <5min> and <Always On>. Press any button to turn it back on.
Brightness : You can adjust the brightness of the screen. Select a level from
<0-10>, where 10 is the brightest.
Settings
Menu Style
Sound
Display
Language
Time
System
32 _ the basics
CHANGING THE SETTINGS AND PREFERENCES (Continued)
Language Settings
The menus on your new mp3 player can be set to appear in any one of
multiple languages. You can change your preference language easily.
1.
Tap the icon on the main menu screen.
The <Settings> menu appears.
2.
Select <Language> and tap on it.
The <Language> menu appears.
3. Tap on a desired menu.
4. Set the options you prefer and tap <OK>.
Settings
Menu Style
Sound
Display
Language
Time
System

the basics _ 33
CHANGING THE SETTINGS AND PREFERENCES (Continued)
Language Setting Options
Menu : Set the menu language. Tap the [
a
,
b
] icon to move to the previous/
next page.
Select from <English>, <䚐ạ㛨>, <Français>, <Deutsch>, <Italiano>, <襲莇蛑>,
<ㅔԧЁ᭛>, <㐕储Ё᭛>, <Español>, <Ɋɭɫɫɤɢɣ>, <Magyar>, <Nederlands>,
<Polski>, <Português>, <Svenska>, <ѳъѕ>, <ýeština>, <
ƧnjnjLjǎNJNjƽ
>,
<Türkçe>, <Norsk>, <Dansk>, <Suomi>, <Español (Sudamérica)>, <Português
(Brasil)>, <Indonesia>, <TiӃng ViӋt>, <Bulgarian>, <Română>, <ɍɤɪɚʀɧɫɶɤɚ>,
<Slovenšþina> or <Slovenský>.
Contents :
Set the language in which the track information and Text will appear.
Tap the [
a
,
b
] icon to move to the previous/next page.
Select from <English>,
<Korean>, <French>, <German>, <Italian>, <Japanese>,
<Simplifi ed Chinese>
,
<Tranditional Chinese>
, <Spanish>, <Russian>, <Hungarian>, <Dutch>,
<Polish>, <Portuguese>, <Swedish>, <Thai>, <Finnish>, <Danish>,
<Norwegian>, <Farsi>, <Afrikaans>, <Basque>, <Catalan>, <Czech>,
<Estonian>, <Greek>, <Hrvatski>, <Icelandic>,
<Rumanian>
, <Slovak>,
<Slovene>, <Turkish> or <Vietnamese>.
The supported languages can be changed or added.
NOTE
34 _ the basics
CHANGING THE SETTINGS AND PREFERENCES (Continued)
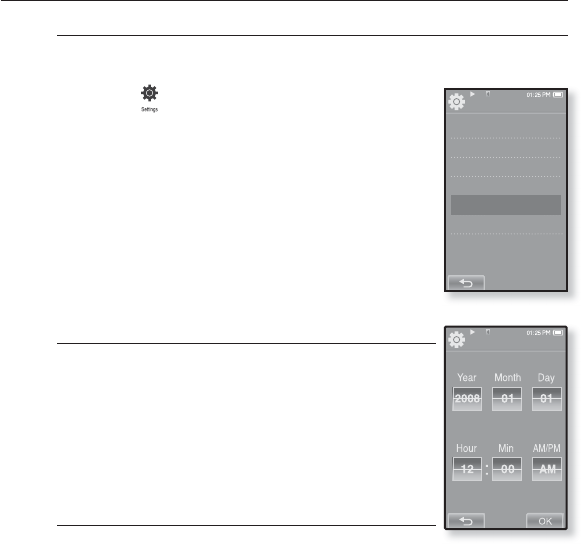
Time Settings
Setting the time allows you to use the date/time set, date type and even
time zone.
1.
Tap the icon on the main menu screen.
The <Settings> menu appears.
2.
Select <Time> and tap on it.
The <Time> menu appears.
3. Tap on a desired menu.
4. Set the options you prefer and tap <OK>.
Time Setting Options
Date/Time Set : Set the current date and time. Set each
item of <Year>, <Month>, <Day>, <Hour>, <Min> and
<AM/PM> by sliding your fi nger upward or downward.
Date Type : You can set the time display type for the world
clock. Select from <YY-MM-DD>, <MM-DD-YY> and <DD-
MM-YY>.
Time Zone : You can change the current time by selecting
an international city specifi c time zone. You must set
the time zone before you can display the world time
information. See page 108
Settings
Menu Style
Sound
Display
Language
Time
System
Date&Time
the basics _ 35
CHANGING THE SETTINGS AND PREFERENCES (Continued)
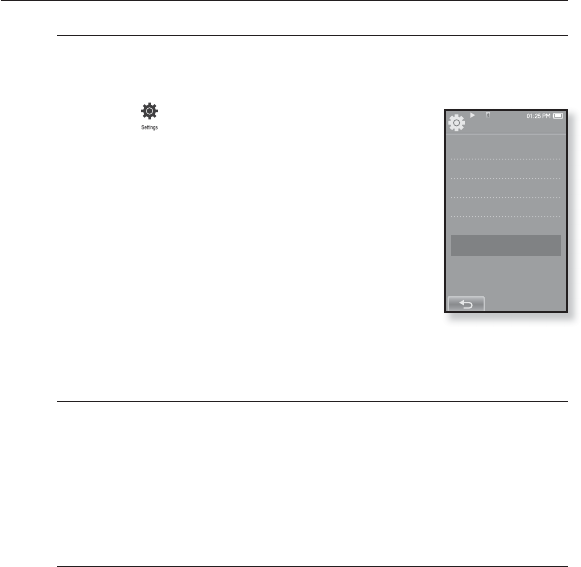
System Settings
System settings such as Sleep, Start Mode, Auto Power Off/On,
Password, Hold Option, Default Set, Format and About are available in
this menu.
1.
Tap the icon on the main menu screen.
The <Settings> menu appears.
2.
Select <System> and tap on it.
The <System> menu appears.
3. Tap on a desired menu.
4. Set the options you prefer and tap <OK>.
System Setting Options
Sleep : Turns off power automatically after the preset time. Select either <Off>,
<15min>, <30min>, <60min>, <90min>, or <120min>.
Start Mode : You can set the start screen displayed when you turn on the
player. Select from <Home> and <Last State>. Select <Home> to start the
system with the main menu screen while <Last State> will use the last used
menu screen.
Auto Power Off : Automatically turns power off when there is no button
operation after the preset time in the pause mode. Select either <15sec>,
<30sec>, <1min>, <3min>, <5min> or <Always On>.
Settings
Menu Style
Sound
Display
Language
Time
System

36 _ the basics
CHANGING THE SETTINGS AND PREFERENCES (Continued)
System Setting Options (Continued)
Lock: Locks your player to prevent unauthorized access, using password
protection.
To lock the player, select <On> and set your password. See page 37.
To disable locking, select <Off>.
Change Password: You can change the password of the Lock function.
Hold Option: You can select the hold function to lock all buttons including touch
screen or touch screen only. Select either one of <All> and <Touch Screen
Only>. See page 25.
Default Set : Returns all settings to the default value. Select either <Yes> or
<No>. <Yes> initializes all settings to default. <No> cancels default settings.
Format : Formats the internal memory. Select either <Yes> or <No>. Selecting
<Yes> will format the internal memory and delete all fi les on the player.
Selecting <No> does not format the internal memory. Check before formatting it.
About : Checks the fi rmware version and memory capacity.
Firmware - Displays the current fi rmware version.
Memory - Indicates the remaining memory capacity. <Used> indicates
the usage, <Remaining> indicates the remaining capacity and
<Total> indicates the total memory capacity.
Regarding the Built-In Memory
1GB=1,000,000,000 bytes : actual formatted capacity may be less as the
internal fi rmware uses a portion of the memory.
NOTE
the basics _ 37
CHANGING THE SETTINGS AND PREFERENCES (Continued)
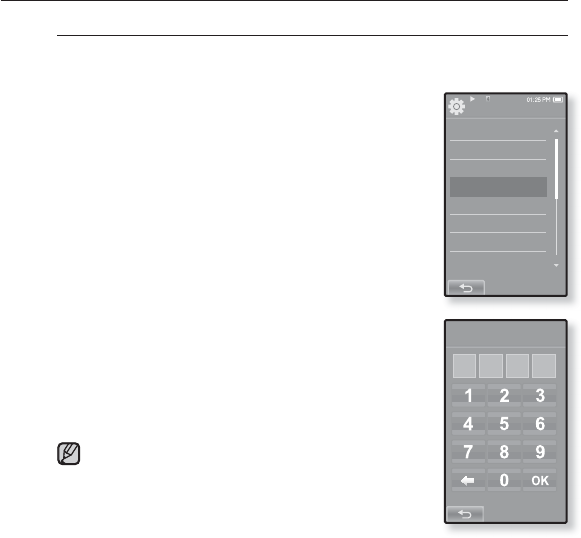
Setting the Lock function
Locks your player to prevent unauthorized access, using password
protection.
1. Select <System> in the setting menu and tap on
it.
The <System> menu appears.
2.
Select <Lock> and tap on it.
Lock Screen appears.
3. Select <On> and tap <OK>.
The new password input screen will appear.
4. Set the desired 4-digit password and then tap
<OK>.
The confi rm password input screen will appear.
5. Enter the same password set in step 4 and tap
<OK>.
The lock setting is completed.
Turning power on will activate the Lock function.
If <Default Set> is selected from <Settings> ĺ <System>,
set the Lock function to <Off>.
Enter New Password
System
Sleep
Start Mode
Auto Power Off
Lock
Change Password
Hold Option
Default Set
Format
NOTE
38 _ the basics
CHANGING THE SETTINGS AND PREFERENCES (Continued)
Releasing the Lock function
After setting the Lock function, the password input screen will appear
when you turn on the player. Enter your 4-digit password, and tap <OK>.
<Lock> function is released.
<Lock> function provides protection from unauthorized
access only, not the data protection in your player. For
example, connecting a locked player to a PC using USB
cable allows accessing all data stored in the player.
If you forgot your Lock password, connect to a
PC and run the EmoDio and reset the password
in <myEmoDio>. For further information, refer to
<EmoDio>.
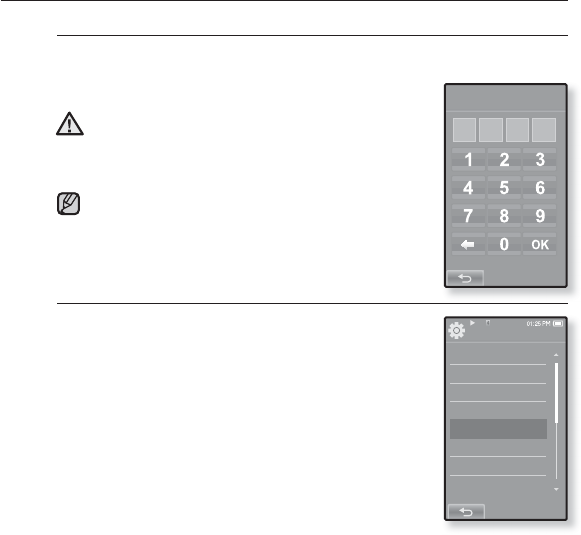
Changing Password
1. Select <System> in the setting menu and tap on
it.
The <System> menu appears.
2.
Select <Change Password> and tap on it.
Password input screen appears.
3. Enter the password, and tap <OK>.
The change password input screen will appear.
4. Enter desired 4-digit password and tap <OK>.
The confi rm password input screen will appear.
5. Enter the same password set in step 4 and tap
<OK>.
The password will be changed.
NOTE
Enter Password
CAUTION
System
Sleep
Start Mode
Auto Power Off
Lock
Change Password
Hold Option
Default Set
Format

the basics _ 39
RESETTING THE SYSTEM
If your mp3 player won’t turn on, won’t play music, or isn’t recognized by your
computer when you connect it, you may have to reset the system.
Press the Reset hole at the rear of the
player with a pointed object such as a
safety clip.
The system will be initialized.
Your settings and fi les will not be affected.

40 _ EmoDio
EmoDio
EmoDio is the easy-to-use software application that helps you organize
your fi les on your PC. With your fi les already sorted and organized in
EmoDio, you can quickly transfer them to your mp3 without searching
your entire hard drive for the right fi le.
PC REQUIREMENTS
Your PC system must meet the following minimum specifi cations in order to
install and run EmoDio:
•Pentium 500MHz or higher
•USB Port 2.0
•Windows XP Service Pack 2 or higher
•DirectX 9.0 or higher
•100MB of free hard disc space
•CD Rom Drive (2X or higher)
•Windows Media Player 10.0 or higher
•Resolution 1024 X 768 or higher
•Internet Explorer 6.0 or higher
•512 MB RAM or higher
EmoDio _ 41
INSTALLING EMODIO
Ensure that you run the <EmoDio> installer in your PC’s administrator account.
Otherwise, <EmoDio> will not be installed. To fi nd the administrator account, please
refer to your PC’s user manual.
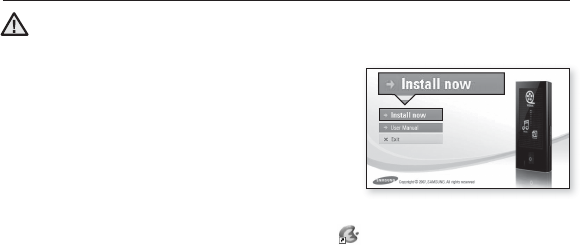
1. Insert the Installation CD provided with
the player into the CD-ROM drive of your
computer.
2. Click <Install Now>.
Follow the instruction to start installation.
<EmoDio> installation starts and then creates an icon on your desktop when
installation is complete.
CAUTION
42 _ EmoDio
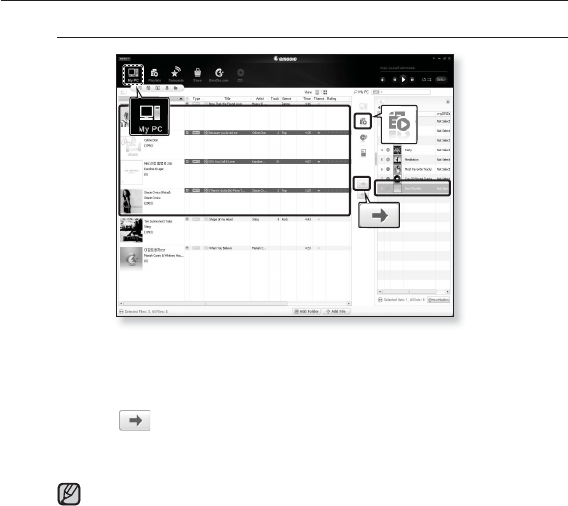
TRANSFERRING FILES TO THE PLAYER WITH EMODIO
<EmoDio> enables you to select and organize fi les and folders before
transferring them to your player. This will make scanning fi les on your mp3
player easier and faster. <EmoDio>fi le transfer is the easiest way to get fi les
from your PC to your mp3 player.
1
2
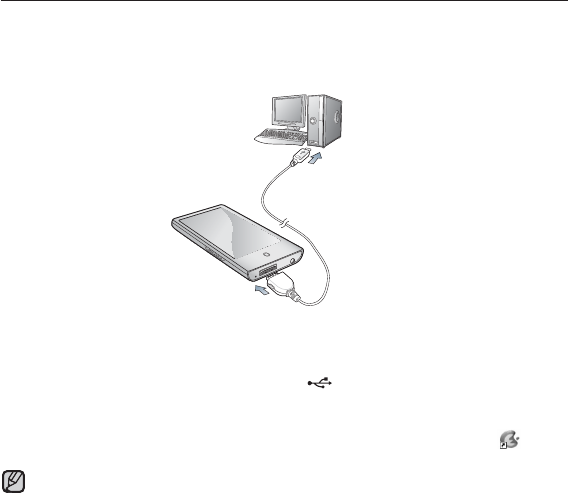
1. Connect the larger end of the USB cable to the USB Connection Port on the
bottom of the player.
2. Connect the USB cable to the USB port ( ) on your PC.
<USB connected> appears on the touch screen of the player.
<EmoDio> will automatically start when the player is connected to your PC.
If the program does not start automatically, double click the <EmoDio> icon
on the desktop.
Music recognition technology and related data are provided by Gracenote and
Gracenote CDDB® Music Recognition ServiceSM.
CDDB is a registered trademark of Gracenote. The Gracenote logo and logotype,
the Gracenote CDDB logo and logotype, and the “Powered by Gracenote CDDB”
logo are trademarks of Gracenote. Music Recognition Service and MRS are service
marks of Gracenote.
NOTE
EmoDio _ 43
7
6
TRANSFERRING FILES TO THE PLAYER WITH
EMODIO (Continued)
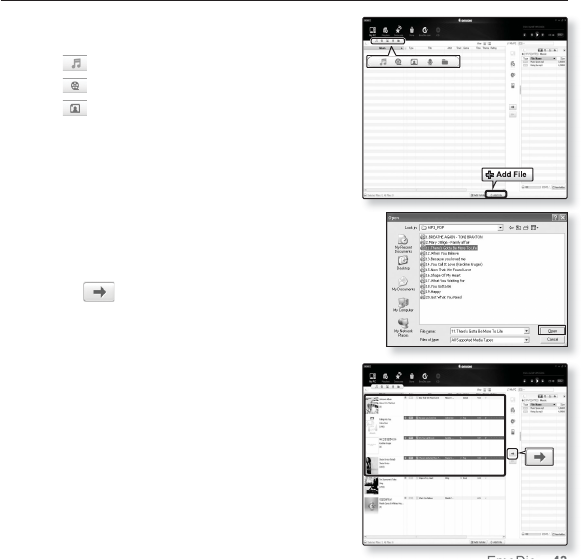
3. Click the icon for the type of fi le you want to
transfer.
Click to display music list.
Click to display video list.
Click to display picture list
4. Click <Add File> on the bottom of <EmoDio>.
The <Open> window will appear.
5. Select the fi les to add and click <Open>.
The fi les are added to the list on the left side the
<EmoDio> Screen.
6. Select the fi le to transfer from the list on the left
side.
7. Click the icon.
The fi le you selected is transferred to the player.
4
3
5

44 _ EmoDio
TRANSFERRING FILES TO THE PLAYER WITH
EMODIO (Continued)
Do not disconnect the USB cable during fi le transfer. Disconnecting during transfer
may damage the player or your PC.
Connect the player to your computer directly rather than through a USB hub to
avoid an unstable connection.
When transferring a video fi le to the player using <EmoDio>, it is automatically
converted into .svi format before transfer. The fi le size is automatically adjusted too.
A video fi le that is not converted into .svi format cannot be played on your player.
EmoDio supported video fi les
- Mpeg Files (.mpg, .mpeg), AVI Files (.avi), WMV Files (.wmv), ASF Files (.asf),
SVI Files (.svi), MP4 Files (.mp4), Real Media Files (.rm, .rmvb), MOV Files
(.mov), SMF Files (.smf).
- Files that EmoDio supports may change in the future.
When transferring a picture to the player using <EmoDio>, it is automatically
converted into JPG format before transfer. The fi le size is automatically adjusted,
too.
GA picture that is transferred to the player without using <EmoDio> can look different
on the screen from the original picture.
All functions are disabled during connection.
If you connect the USB cable to the PC in the Low Battery condition, the player will
be charged for several minutes before connecting to the PC.
EmoDio has a thorough Help function. If you can’t fi nd the answer to your question
about EmoDio, click <MENU> ĺ <Help> ĺ <Help> on the top of the <EmoDio>
program.
An audio book with DRM (Digital Rights Management) is not supported.
What is SVI?
Samsung Audio Video interleaving(SVI) is a new video format developed and
controlled by Samsung.
CAUTION
NOTE
watching a video _ 45
watching a video
Before you start - Transfer video fi les to the player using <EmoDio>. See page 42.
Connect the earphones, then turn on the player, and check the battery.
Tap the [ ] icon to move to the previous screen.
Press and briefl y hold the [] icon to move to the main menu screen.
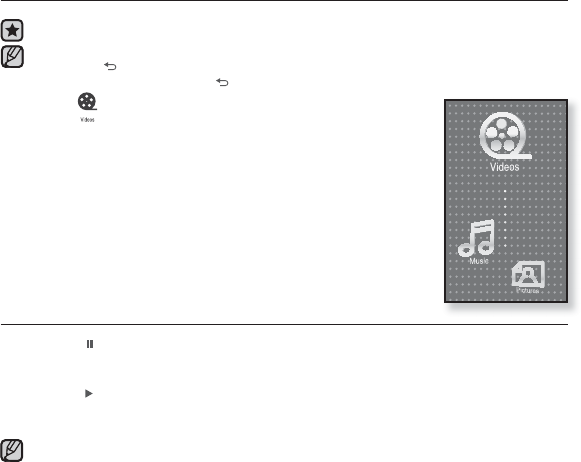
1. Tap the icon on the main menu screen.
The video list appears.
2. Select a video fi le to play and tap on it.
The selected video fi le starts to play horizontally.
PAUSING
1. Tap the [ ] icon during playback.
The video playback will be paused.
2. Tap the [] icon to resume playing.
The video will play from the point where it stopped.
Information and icons on the current video playback screen will disappear shortly. Tap
on the screen if you want to display the video playback information and icon again.
When transferring a video fi le to the player using <EmoDio>, it is automatically
converted into SVI format before transfer. The fi le size is automatically adjusted,
too.
NOTE
NOTE
46 _ watching a video
TO MOVE TO A SPECIFIC FRAME
How To 1
1. I
n horizontal view, press and briefl y
hold the [
,
] icon during playback .
This enables you to move backwards or
forwards in the current video fi le.
2. Release the icon when you have
moved to the position you want.
The video starts playing from the position.
How To 2
Tap on the point on the video play status bar where you want playback
to start.
The video starts playing from the point you have selected.
Sliding your thumb or fi ngers in the left / right direction will move playback
forward or backward depending on the Horizontal Stroke setting. See page 53.
NOTE
Video Track 1
watching a video _ 47
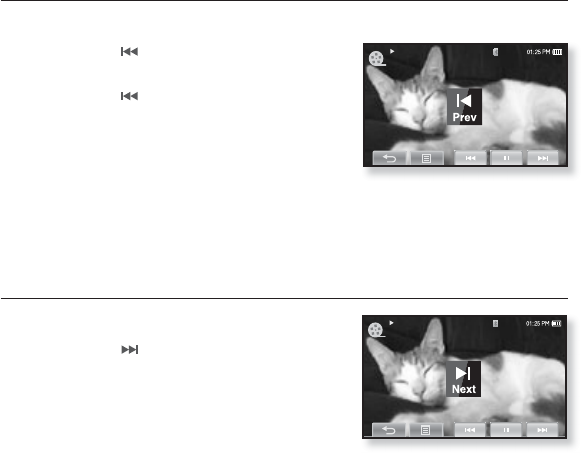
TO PLAY THE PREVIOUS VIDEO FILE
How To 1
Tap the [] icon within 3 seconds after
the current video started playing.
Tap the [] icon twice 3 seconds after
the current video started playing
How To 2
Slide your thumb or fi ngers to the right.
This will return to the previous video.
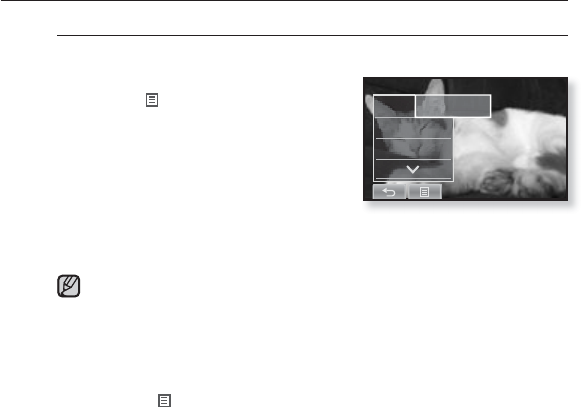
TO PLAY THE NEXT VIDEO FILE
How To 1
Tap the [] icon.
How To 2
Slide your thumb or fi ngers to the left.
This will move to the next video.
How To 2
How To 2
Video Track 0
Video Track 2
48 _ watching a video
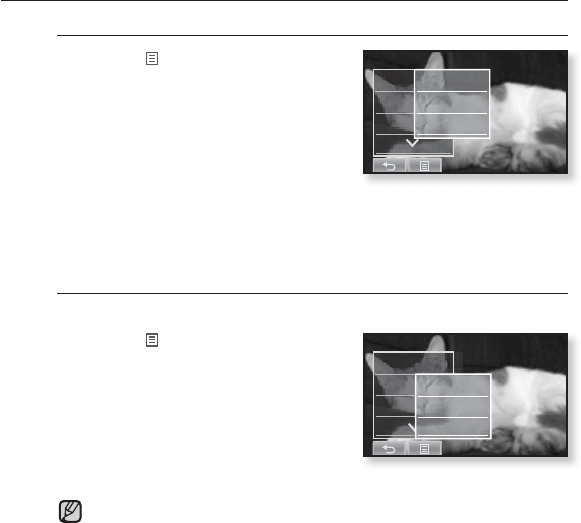
USING THE VIDEO MENU
To set a bookmark
Once you bookmark a specifi c scene that you want to see again, you
can enjoy it at any time you want.
1. Tap the [ ] icon at the scene you
want during video playback.
The <Video> menu appears.
2. Tap <Bookmark>.
The <Bookmark> menu appears.
3. Tap <Add>.
The currently played/stopped point is set to a bookmark.
You will see the [ | ] symbol on the play status bar.
The Overwrite window appears if there is a bookmark previously set. If you
select <Yes>, the previously set bookmark is deleted and a new bookmark
is added.
A bookmark can be set one for each video fi le, and you can set a maximum
of 100 bookmarks.
The bookmark point can be slightly different from the actual point.
Tap the [ ] icon to exit the menu.
NOTE
Bookmar
DNSe
Play Speed
Add
watching a video _ 49
USING THE VIDEO MENU (Continued)
To move to (play) / remove the bookmark
1. Tap the [ ] icon on the video
playback screen.
The <Video> menu appears.
2. Tap <Bookmark>.
The <Bookmark> menu appears.
3. Tap <Go to> or <Delete>.
When you selected <Go to> then the player will move to the selected
bookmark and start playback.
<Delete> will remove the selected bookmark from the video fi le.
To set the Digital Natural Sound engine (DNSe)
Select the right sound for each video genre.
1. Tap the [] icon on the video
playback screen.
The <Video> menu appears.
2. Tap <DNSe>.
The <DNSe> menu appears.
3. Tap on a desired DNSe.
Select from <Normal>, <Drama> and <Action>.
What is DNSe?
Digital Natural Sound Engine (DNSe) is a sound effect function for MP3 players
developed by Samsung. It provides various sound settings to enhance the type
of music you’re listening to.
Bookmar
DNSe
Play Spe
Add
Go to
Delete
Bookmark
DNSe
Play Spe
Normal
Drama
Action
NOTE
50 _ watching a video
USING THE VIDEO MENU (Continued)
To set the play speed
Speed up or slow down your favorite video by adjusting the play speed.
1. Tap the [] icon on the video
playback screen.
The <Video> menu appears.
2. Tap <Play Speed>.
The play speed setting screen appears.
3. Tap the [
,
] icon to select a
desired play speed and tap <Yes>.
Select from <X0.5>, <X0.6>, <X0.7>, <X0.8>, <X0.9>, <X 1.0(Normal)>,
<X1.1>, <X1.2>, <X1.3>, <X1.4> and <X1.5>.
The higher the number is, the faster the speed is.
The adjusted play speed may differ from the actual speed, depending on
the fi le.
For a .wmv fi le, the play speed may not appear up to X1.5.
Bookmark
DNSe
Play Speed
NOTE
watching a video _ 51
USING THE VIDEO MENU (Continued)
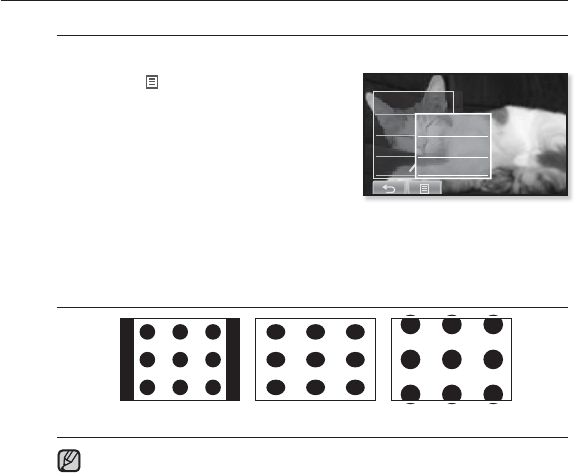
To select the screen size
You can select the display size of the video playback.
1. Tap the [] icon on the video
playback screen.
The <Video> menu appears.
2. Tap <Display>.
The <Display> menu appears.
3. Tap <Screen Size>.
The <Screen Size> menu appears.
4. Tap on a desired Screen Size.
Select from <Actual>, <Standard>, <Full> and <Zoom>.
Screen Size Menu
<Standard> <Full> <Zoom>
For some video fi les, <Screen Size> or other related menus may not be
displayed.
NOTE
Play Speed
Display
Horizont
Screen Size
Brightness
Display Off
52 _ watching a video
USING THE VIDEO MENU (Continued)
To adjust the brightness
You can adjust the brightness of the video screen.
1. Tap the [] icon on the video
playback screen.
The <Video> menu appears.
2. Tap <Display>.
The <Display> menu appears.
3. Tap <Brightness>.
The brightness setting screen appears.
4. Select a desired brightness and tap <Yes>.
Select a level from <0-10>.
The brightness adjustment menu only applies to the video screen.
To set the display off
You can turn off the touch screen and only listen to the sound for power
saving purpose.
Follow the same steps 1~2 above.
3. Tap <Display Off>.
The touch screen turns off.
To turn the screen back on, tap on the
touch screen
Play Speed
Display
Horizont
Screen Size
Brightness
Display Off
Play Speed
Display
Horizont
Screen Size
Brightness
Display Off
NOTE
watching a video _ 53
USING THE VIDEO MENU (Continued)
To set the horizontal stroke
You can fast forward through a fi le at various intervals when you touch
the screen to the left or right. Skip a whole fi le or skip several seconds
at a time.
1. Tap the [ ] icon on the video
playback screen.
The <Video> menu appears.
2. Tap <Horizontal Stroke>.
The <Horizontal Stroke> menu appears.
3. Tap on a desired horizontal stroke.
Select from <1 File>, <Seek>, <10sec
Skip>, <30sec Skip> and <1min Skip>.
Left : Moves forward depending on the horizontal stroke interval setting.
Right : Moves backward depending on the horizontal stroke interval setting.
<1 File> : If you set <Horizontal Stroke> to <1 File>, the previous or next fi le
will be selected.
When the <Seek> option is set, sliding your thumb or fi ngers to the left / right
cycles through the <x2> ĺ <x4> ĺ <x8> playback speeds.
The horizontal stroke interval can be different from the actual skip interval,
depending on the fi le.
NOTE
Play Spe
Display
Horizont
1 File
Seek
10Sec Skip
54 _ watching a video
USING THE VIDEO MENU (Continued)
Before you start - Use only a Bluetooth-certifi ed stereo headset.
Check if to make sure your Bluetooth stereo headset has been registered.
<Connect to Headset> appears when there is a registered headset. For more
information, refer to <Using a Bluetooth Stereo Headset>. See page 115.
To connect a Bluetooth stereo headset
You can directly connect to a registered Bluetooth headset during video
playback.
1. Tap the [] icon on the video
playback screen.
The <Video> menu appears.
2. Tap <Connect to Headset>.
GIf <Bluetooth Mode> is set to <Off>, it will
be changed to <On>.
When the connection is successfully
done, you will see the [ ] icon on the screen.
You can enjoy listening to audio on a video fi le via the Bluetooth headset.
To disconnect the Bluetooth stereo headset
1. Tap the [] icon on the video
playback screen.
The <Video> menu appears.
2. Tap <Disconnect Headset>.
The Bluetooth headset is disconnected.
You can not select <DNSe> and <Play Speed> while the player is connecting
to the Bluetooth stereo headset in video mode.
NOTE
Display
Horizontal Stroke
Connect to Headset
Bookmark
Display
Horizontal Stroke
Disconnect Headset
listening to music _ 55
NOTE
listening to music
Before you start - Connect the earphones, then turn on the player, and check the battery.
Tap the [ ] icon to move to the previous screen.
Press and briefl y hold the [] icon to move to the main menu screen.
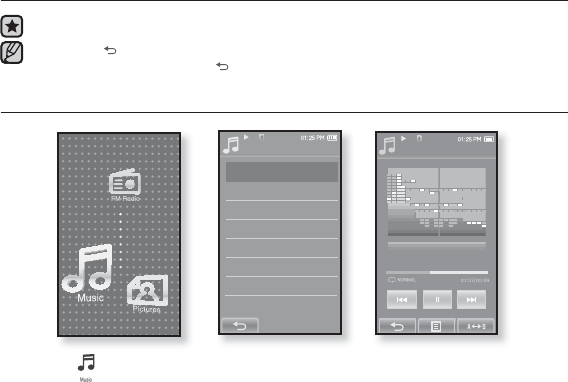
LISTENING BY CATEGORY
1. Tap the icon on the main menu screen.
The <Music> list will appear.
2. Select a desired item in the music list and tap on it.
The music fi le appear.
3. Select a music fi le to play and tap on it.
The music will start playing.
Music
Now Playing
Artists
Albums
Songs
Genres
Playlists
Recorded Files
Music Browser
Songs
1/52
Rising Sun

56 _ listening to music
LISTENING BY CATEGORY (Continued)
Music List
File information including the artist name, album name, music title and genre will be
displayed according to the ID3 Tag information on the appropriate music fi le. A fi le without
an ID3 Tag is displayed as [Unknown].
Now Playing : Plays a recently played fi le or moves to the playback screen of the current
fi le.
Artists : To play by artist
Albums : To play by album. The album cover image will be displayed.
Songs : To play in numeric or alphabetical order
Genres : To play by genre
Playlists : To play by Playlist.
Recorded Files : Shows all recorded fi les.
Music Browser : Shows all the music fi les stored in the Music Folder.
MP3, WMA and AAC music fi les are compatible with the player.
MP1 or MP2 fi les which only have a changed extension to MP3 may not play on the
player.
What is an ID3 Tag?
This is what is attached to an MP3 to carry information relevant to the fi le such as
the title, artist, album, year, genre and a comment fi eld.
NOTE
listening to music _ 57
PAUSING
1. Tap the [] icon or press the button while the music is playing.
The music playback will be paused.
2. Tap the [] icon or press the button again.
The music will play from the point where it stopped.
PLAYING FROM THE BEGINNING OF THE CURRENT TRACK
1. Tap the [] icon after 3 seconds of play.
The current track starts playing from the beginning.
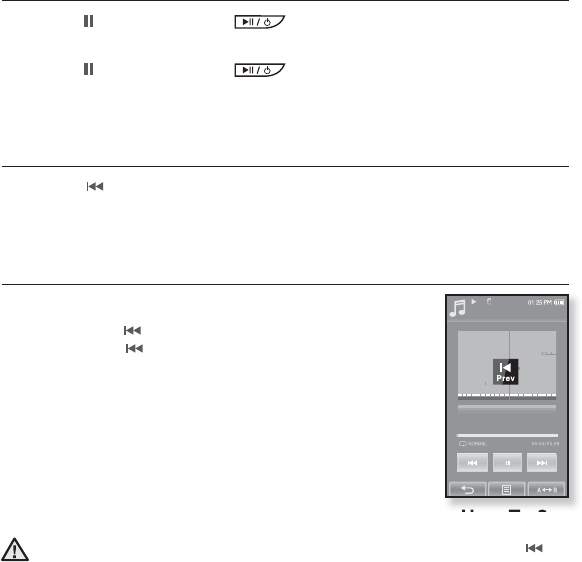
PLAYING THE PREVIOUS TRACK
How To 1
Tap the [] icon within 3 seconds of play.
Tap the [] icon twice after 3 seconds of play.
How To 2
Slide your thumb or fi ngers to the right.
The previous track will start playing.
When playing VBR fi les, the previous track may not play even if you tap the []
icon within 3 seconds.
How To 2
Rising Sun
Songs
52/52
CAUTION
58 _ listening to music
Rising Sun
Songs
1/52
Rising Sun
Songs
2/52
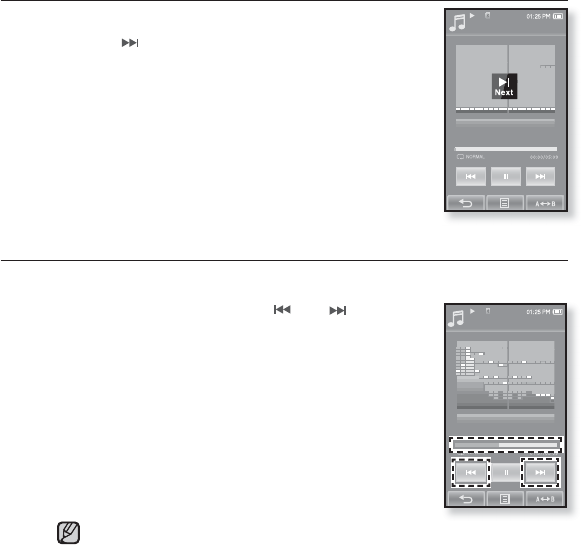
PLAYING THE NEXT TRACK
How To 1
Tap the [ ] icon.
How To 2
Slide your thumb or fi ngers to the left.
The next track will start playing.
SEARCHING WITHIN A TRACK
How To 1
1. Press and briefl y hold the [ ] or [] icon while
the selected track is playing.
It searches to the beginning or the end of the track.
2. Release the icon at the point you wish to start.
It starts playing from the point you release the icon.
How To 2
Tap on a desired point in the play status bar.
Sliding your thumb or fi ngers in the left / right direction will move playback
forward or backward depending on the Horizontal Stroke setting. See page 75.
How To 2
NOTE
listening to music _ 59
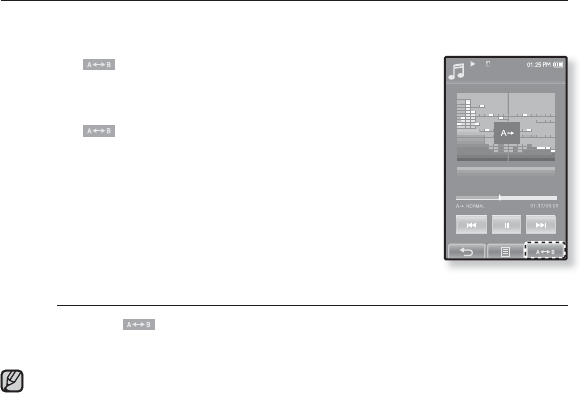
REPEATING A SECTION
This function enables you to listen to specifi c parts of a track repeatedly.
It’s helpful when learning a language, for example.
1. Tap the [ ]icon at the beginning of the section you
want to repeat.
The starting point is set and <AJ> will appear.
2. Tap the [ ]icon again to set the ending of the section
you want to repeat.
<AB> will appear and the specifi ed section starts to play
repeatedly.
To cancel Repeating
Tap the [ ]icon again during Section Repeat.
Section Repeat will be canceled.
You can set the start and end points for repeating only within one fi le at a time.
Rising Sun
Songs
1/52
NOTE
60 _ listening to music
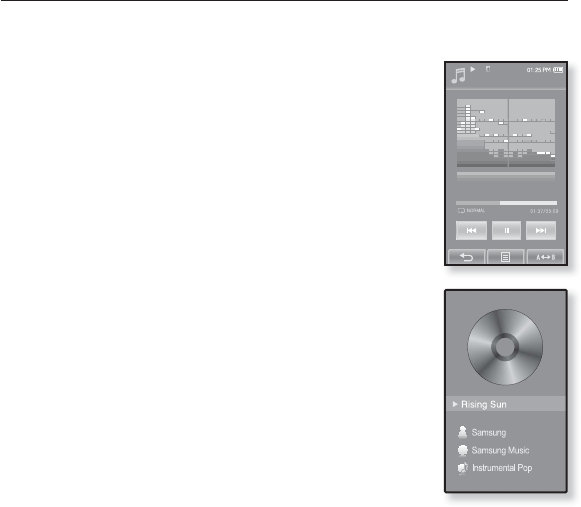
TO VIEW THE ALBUM COVER AND THE ALBUM
INFORMATION SIMULTANEOUSLY
You can view the album cover image as well as the album information
on the zoomed screen.
In the music playback screen, double-tap on the touch
screen.
You can view the album cover image and the album information
simultaneously.
To return to the previous screen, double-tap on the touch screen
again.
Songs
1/52
Rising Sun
listening to music _ 61
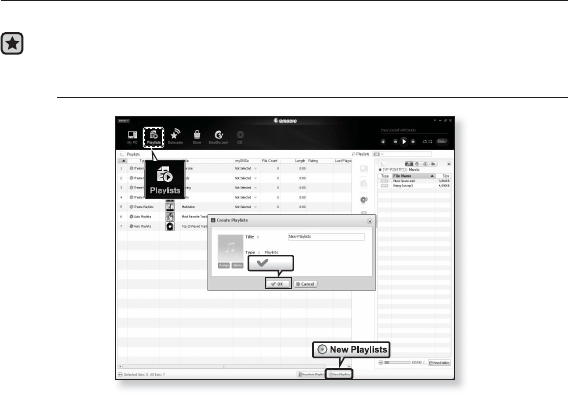
CREATING A PLAYLIST USING EMODIO
With <EmoDio>, you can create your own collection, or playlist, of audio fi les.
Before you start - Connect the player to your PC.
EmoDio must be installed on your PC.
Creating a Playlist
1. Click <Playlists> on the top of <EmoDio>.
The <Playlists> window appears.
2. Click <New Playlists> on the bottom.
The <Create Playlists> window appears.
3. Type in the playlist title and click [OK].
A new playlist will be named and stored in the <Playlists> section
of <EmoDio>.
2
1
OK 3
62 _ listening to music
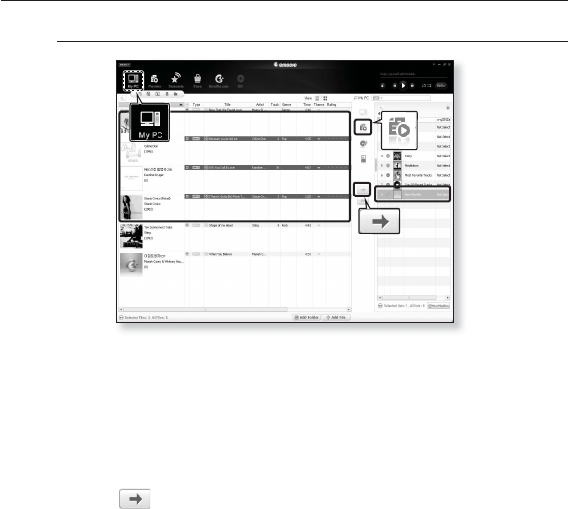
CREATING A PLAYLIST USING EMODIO (Continued)
Adding music fi les to a Playlist you’ve created
1. Click <My PC> on the top of <EmoDio>.
The <My PC> window appears.
2. Click <Playlists> in the right corner of the window.
The <Playlists> window appears.
3. Double click on a playlist in the right window.
4. Select fi les that you want to transfer in the <My PC> window.
5. Click .
The selected fi les will be added to the playlist.
5
1
43
2
listening to music _ 63
CREATING A PLAYLIST USING EMODIO (Continued)
Transferring a Playlist to your player using EmoDio
1. Click <Playlists> on the top of <EmoDio>.
The <Playlists> window appears.
2. Select a playlist in the <Playlists> section.
3. Click .
The selected playlist will be transferred to the player folder by folder in <File
Browser> ĺ <Playlists>.
GThe player can play up to 400 playlists and up to 400 music fi les for each
playlist.
For further information on Playlist DNSe, refer to <EmoDio>.
NOTE
5
1
43
2
64 _ listening to music
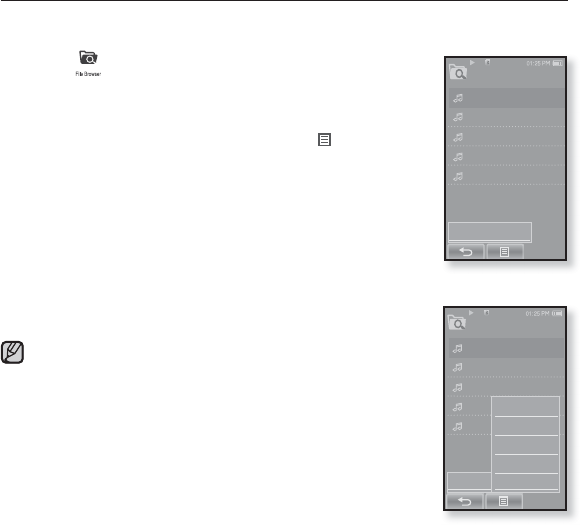
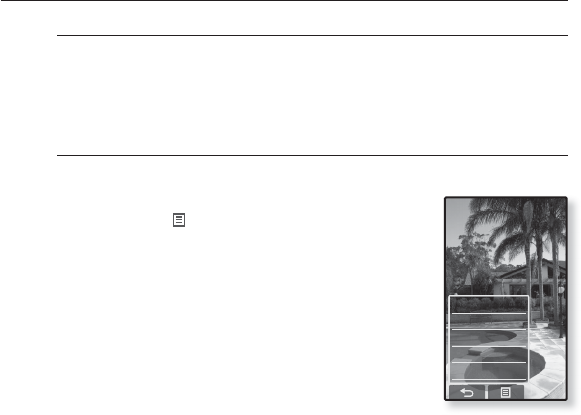
CREATING A PLAYLIST ON YOUR MP3 PLAYER
If you’ve already downloaded fi les to your mp3 player, you can create a
“Favorites” playlist without EmoDio or your PC.
1. Tap the icon on the main menu screen.
2. Select <Music> and tap on it.
The music fi le list appears.
3Select a fi le to add to the playlist and tap [] icon.
The Playlist menu appears.
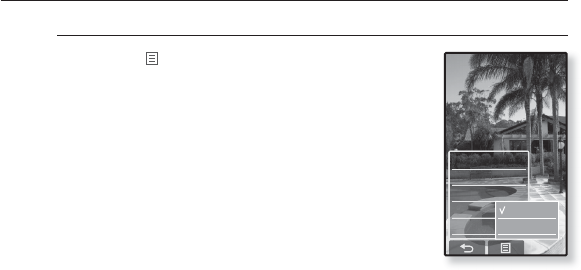
4. Tap <Add to Playlist>.
<Playlist 1> to <Playlist 5> appears.
5. Tap on the playlist number you want to add the selected fi le
to.
The selected fi le is included in the playlist.
You can check the playlist in <Music> ĺ <Playlists> ĺ
<Playlist 1> to <Playlist 5> in the main menu.
You can add up to 200 music fi les to each playlist(<Playlist 1>
to <Playlist 5>).
NOTE
Music
1/5
Add to Playlist
Song 1
Song 2
Song 3
Song 4
Song 5
Music
1/5
Add to Playlist
Song 1
Song 2
Song 3
Song 4
Song 5
Playlist 1
Playlist 2
Playlist 3
Playlist 4
Playlist 5
listening to music _ 65
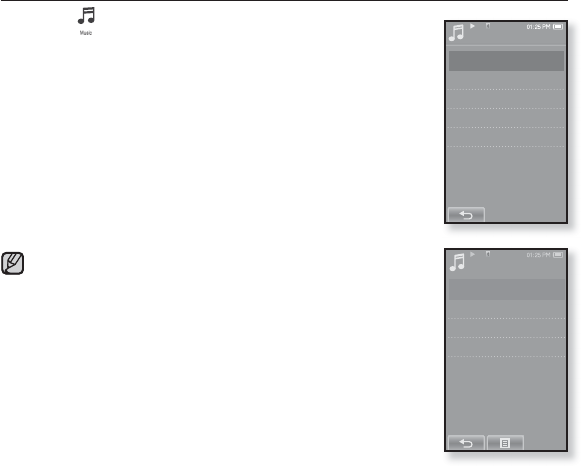
PLAYING A PLAYLIST
1. Tap the icon on the main menu screen.
The music list appears.
2. Select <Playlists> and tap on it.
The Playlist(s) will appear.
3.GSelect a desired playlist and tap on it.
The music fi les saved in the selected playlist will appear.
If there is no playlist found, you will see a <No fi le> message on
the screen.
4. Select a music fi le to play and tap on it.
The music fi le will start playing.
See pages 61 and 63 to see how to transfer the playlist using
<EmoDio>.
Playlists
Playlist 1
Playlist 2
Playlist 3
Playlist 4
Playlist 5
Playlist 1
1/5
Song 1
Song 4
Song 6
Song 8
NOTE
66 _ listening to music
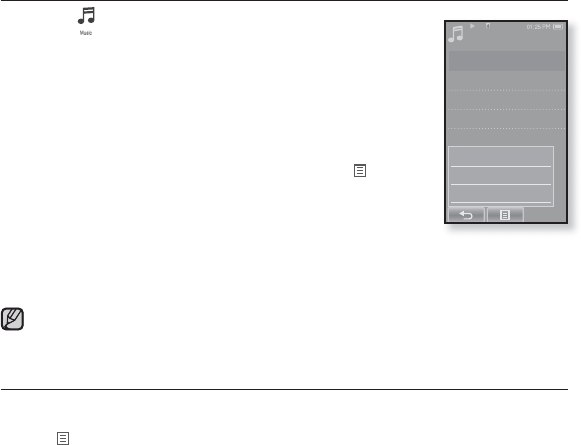
DELETING A FILE FROM THE PLAYLIST
1. Tap the icon on the main menu screen.
The music list appears.
2. Select <Playlists> and tap on it.
The Playlist(s) will appear.
3.GSelect a desired playlist and tap on it.
The music fi les saved in the selected playlist will appear.
4. Select a fi le to delete from the playlist and tap [] icon.
The Playlist menu appears.
5. Tap <Delete from Playlist>.
The delete confi rmation window appears.
6. Tap <Yes>.
The selected fi le is deleted from the playlist.
The selected fi le in the playlist cannot be deleted while its playing back.
DELETING ALL FILES FROM THE PLAYLIST
Follow steps 1-3 above.
4. Tap [] icon.
The Playlist menu appears.
5. Tap <Delete All from Playlist>.
The delete confi rmation window appears.
6. Tap <Yes>.
All fi les are deleted from the playlist.
Playlist 1
1/5
Song 1
Song 4
Song 6
Song 8
Add to Playlist
Delete from Playlist
Delete All from Playlist
NOTE
listening to music _ 67
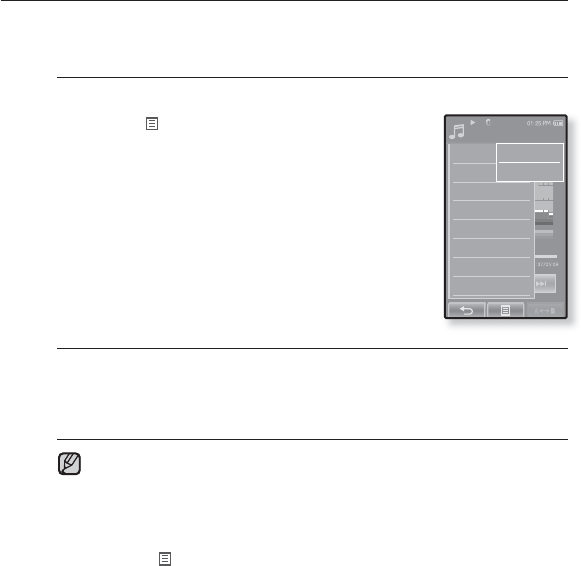
USING THE MUSIC MENU
The Music menu allows you manage all facets of listening - from repeating
tracks and albums to choosing the background on the screen as you listen.
To set the sound effect
You can enjoy clearer sound.
1. Tap the [] icon on the music play screen.
The <Music> menu appears.
2. Tap <Sound Effect>.
The <Sound Effect> menu appears.
3. Tap on a desired sound effect.
Select from <Street Mode> and <Playlist DNSe>.
Sound Effect Options
Street Mode : Allows you to hear the music outdoors clearly by fi ltering out
some of the street noise. Select either <Off> or <On>
Playlist DNSe : If a playlist transferred to the player using <EmoDio> includes
a User DNSe, the Sound Effect will be set to the Playlist DNSe. If you select
<Off>, it will be changed to the previous sound effect.
Setting the <Playlist DNSe> to <On> when a playlist transferred to the
player using <EmoDio> includes a User DNSe, the <Playlist DNSe>
appears in the <DNSe> menu and allows changing to another Sound
Effect.
For further information on Playlist DNSe, refer to <EmoDio>.
Tap the [] icon to exit the menu.
Songs
1/52
Sound Effect
DNSe
Play Mode
TTS
Music Play Screen
Play Speed
Add to Alarm
Horizontal Stroke
Street Mode
Playlist DNSe
NOTE
68 _ listening to music
USING THE MUSIC MENU (Continued)
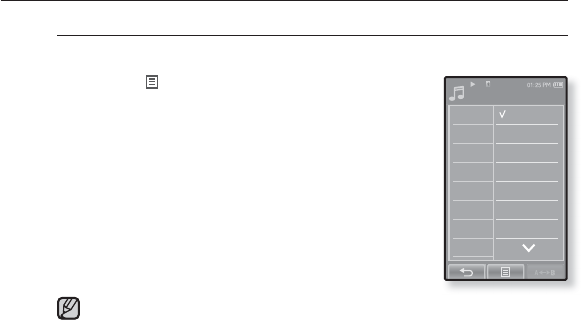
To set the Digital Natural Sound engine (DNSe)
Select the right sound for each music genre.
1. Tap the [] icon on the music play screen.
The <Music> menu appears.
2. Tap <DNSe>.
The <DNSe> menu appears.
3. Tap on one of the DNSe options.
Select from <Normal>, <Studio>, <Rock>, <Classical>,
<Jazz>, <Ballad>, <Club>, <Rhythm & Blues>,
<Dance>, <Concert Hall> and <myDNSe>.
Selecting <myDNSe> allows setting up User DNSe.
See page 69.
What is DNSe?
Digital Natural Sound Engine (DNSe) is a sound effect function for MP3
players developed by Samsung. It provides various sound settings to
enhance the type of music you’re listening to.
NOTE
Songs
2/52
Sound Effect
DNSe
Play Mode
TTS
Music Play Screen
Play Speed
Add to Alarm
Horizontal Stroke
Normal
Studio
Rock
Classical
Jazz
Ballad
Club
listening to music _ 69
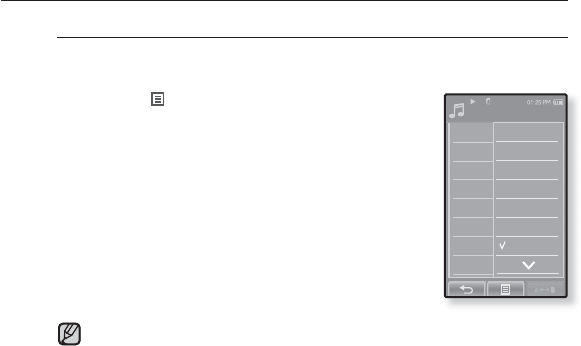
USING THE MUSIC MENU (Continued)
To select myDNSe
You can set a User DNSe on your player or the User DNSe transferred
from <EmoDio>.
1. Tap the [] icon on the music play screen.
The <Music> menu appears.
2. Tap <DNSe>.
The <DNSe> menu appears.
3. Tap <myDNSe>.
The <myDNSe> menu appears.
4. Select a desired User DNSe and tap on it.
The selected User DNSe is set.
You can set <EQ>, <3D&Bass> and <Clarity> when
you have selected <myDNSe>. See page 70~71.
For further information on setting a User DNSe using <EmoDio>, refer to
<EmoDio> help.
Up to 97 User DNSe settings excluding <User 1> to <User 3> can be
transferred to the player.
NOTE
Songs
2/52
Sound Effect
DNSe
Play Mode
TTS
Music Play Screen
Play Speed
Add to Alarm
Horizontal Stroke
Jazz
Ballad
Club
Rhythm & Blues
Dance
Concert Hall
myDNSe
70 _ listening to music
User
OK Cancel
User
OK Cancel
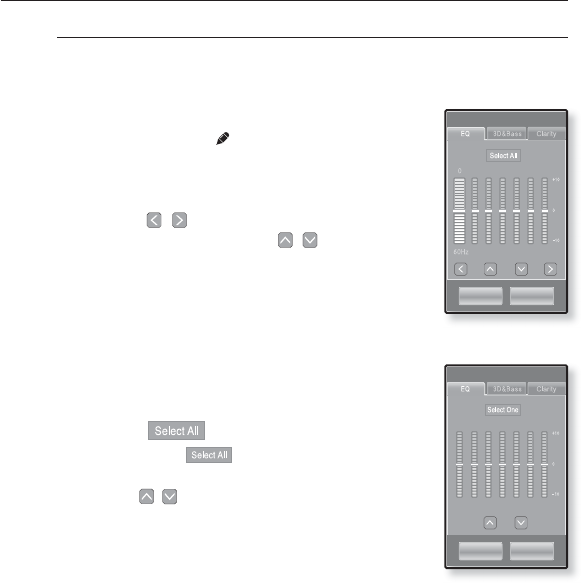
USING THE MUSIC MENU (Continued)
To select myDNSe (Continued)
<EQ>
You can adjust individual frequencies to adjust the sound to your preference.
If you set the frequency by selecting one by one :
1Select a desired User DNSe in the myDNSe
menu and tap the [] icon.
User screen appears.
2. Tap <EQ>.
The <EQ> setting screen appears.
3. Tap the [
,
]icon to select the frequency you
want to adjust and tap the [
,
] icon to adjust
the selected frequency’s level.
You can select from <–10 ~ +10> for the selected
frequency’s level.
The frequencies that can be adjusted are <60Hz>,
<150Hz>, <400Hz>, <1.1KHz>, <3.5KHz>, <8KHz>, <14KHz>.
4. Tap <OK>.
The setting is completed.
If you set the entire frequency :
Follow the steps 1-2 above.
3. Tap the [ ]icon.
Each tap of the [ ] toggles between the
<Select One>/<Select All>.
4. Tap the [
,
] icon to adjust the frequency’s
level.
The entire frequencies will be changed.
5. Tap <OK>.
The setting is completed.
listening to music _ 71
USING THE MUSIC MENU (Continued)
To select myDNSe (Continued)
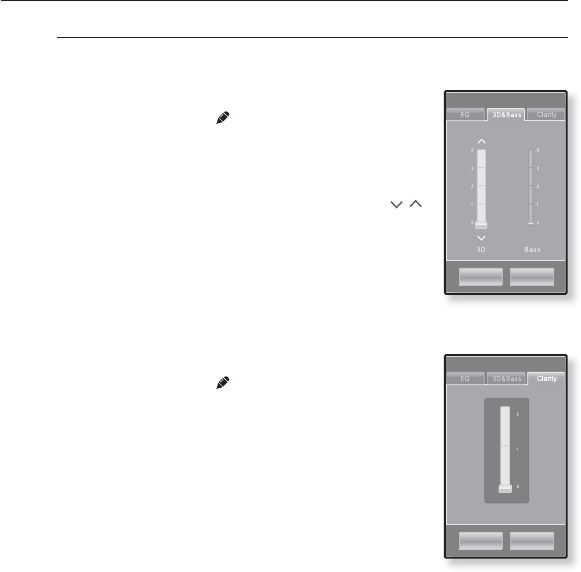
<3D&Bass>
Sets 3D sound effect and bass enhancement.
1Select a desired User DNSe in the myDNSe
menu and tap the [] icon.
User screen appears.
2. Tap <3D&Bass>.
The <3D&Bass> setting screen appears.
3. Select either <3D> or <Bass> and tap the [
,
]
icon to set the point you want.
You can select from <0-4> for the <3D> and <Bass>.
4. Tap <OK>.
The setting is completed.
<Clarity>
You can enjoy clearer sound with improved quality.
1Select a desired User DNSe in the myDNSe
menu and tap the [] icon.
User screen appears.
2. Tap <Clarity>.
The <Clarity> setting screen appears.
3. Tap on the desired level.
You can select from <0-2>.
4. Tap <OK>.
The setting is completed.
User
OK Cancel
User
OK Cancel
72 _ listening to music
Songs
1/52
Sound Effect
DNSe
Play Mode
TTS
Music Play Screen
Play Speed
Add to Alarm
Horizontal Stroke
Off
On
USING THE MUSIC MENU (Continued)
To set the play mode
Select playback mode such as repeat settings.
1. Tap the [] icon on the music play screen.
The <Music> menu appears.
2. Tap <Play Mode>.
The <Play Mode> menu appears.
3. Tap on a desired play mode.
Select from <Normal>, <Repeat>, <Repeat One> and
<Shuffl e>.
Play Mode Options
Normal : To play all the tracks in order one time.
Repeat : To repeat all fi les in the current folder.
Repeat One: To repeat one fi le.
Shuffl e: To play fi les at random.
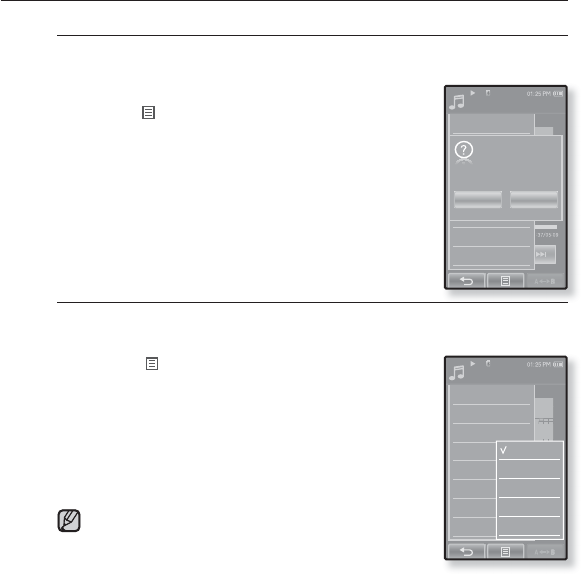
To listen to TTS (Text to Speech)
Using TTS function of <EmoDio>, you can convert a
text fi le into an MP3 fi le and listen to it.
1. Tap the [] icon on the music play screen.
The <Music> menu appears.
2. Tap <TTS>.
The <TTS> menu appears.
3. Tap <On>.
You can listen to the fi le.
For further information on TTS function of <EmoDio>,
refer to <EmoDio> help.
Songs
1/52
Sound Effect
DNSe
Play Mode
TTS
Music Play Screen
Play Speed
Add to Alarm
Horizontal Stroke
Normal
Repeat
Repeat One
Shuffle
NOTE
listening to music _ 73
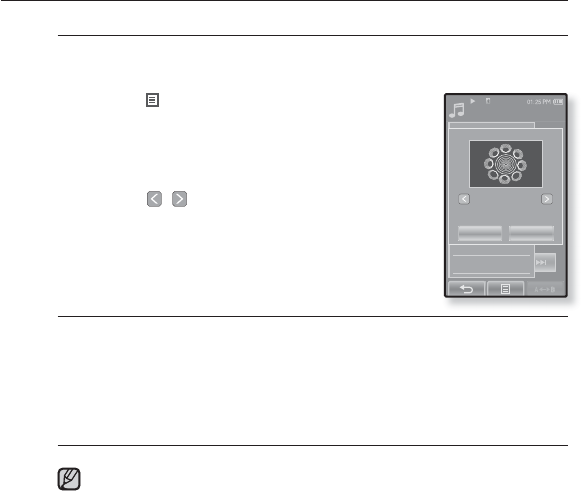
USING THE MUSIC MENU (Continued)
To select the music play screen
Choose a background image from those provided, or choose an image
of your own to be displayed as you listen to music.
1. Tap the [ ] icon on the music play screen.
The <Music> menu appears.
2. Tap <Music Play Screen>.
The <Music Play Screen> menu appears.
3. Tap the [
, ]
icon to select a desired music
play screen and tap <OK>.
Select from <Type 1>, <Type 2>, <Type 3>,
<Type 4>, <Album Info.> and <Album Art>.
Music Play Screen Options
Type 1 ~ Type 4 :You can select a desired music play screen.
Album Info. :Information on the artist name, album and genre displays if ID3
Tag information is stored on the music fi le.
Album Art :The album cover image displays if an album cover image is
included in the ID3 Tag information of the music fi le.
Album cover images less than 200 pixel (horizontal) x 200
pixel(vertical) in size are supported.
You can also change the Music Play Screen by simply tapping on it when
music is playing.
What is an ID3 Tag?
This is what is attached to an MP3 to carry information relevant to the such
as the title, artist, album, year, genre and a comment fi eld.
NOTE
Songs
1/52
Sound Effect
DNSe
Play Mode
TTS
Music Play Screen
Play Speed
Add to Alarm
Horizontal Stroke
Type 4
OK Cancel
74 _ listening to music
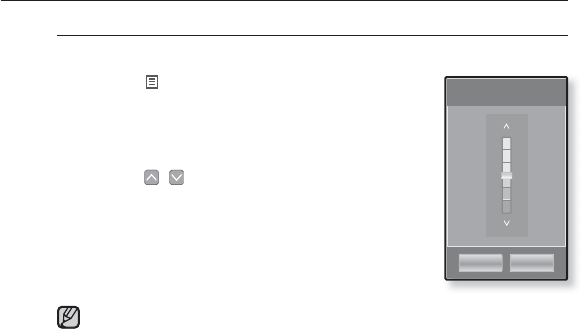
USING THE MUSIC MENU (Continued)
To set the play speed
Speed up or slow down your favorite music by adjusting the play speed.
1. Tap the [] icon on the music play screen.
The <Music> menu appears.
2. Tap <Play Speed>.
The <Play Speed> menu appears.
3. Tap the [,]icon to select a desired play
speed.
Select from <X 0.7>, <X 0.8>, <X 0.9>,
<X 1.0 (Normal)>, <X 1.1>, <X 1.2>, <X 1.3>.
The higher the number is, the faster the speed is.
The adjusted play speed may differ from the actual speed, depending on
the fi le.
x 1.3
x 1.2
x 1.1
x 1.0
x 0.9
x 0.8
x 0.7
Play Speed
OK Cancel
NOTE
listening to music _ 75
Songs
1/52
Sound Effect
DNSe
Play Mode
TTS
Music Play Screen
Play Speed
Add to Alarm
Horizontal Stroke
Yes
Save?
No
Songs
1/52
Sound Effect
DNSe
Play Mode
TTS
Music Play Screen
Play Speed
Add to Alarm
Horizontal Stroke
1 File
5sec Skip
10sec Skip
30sec Skip
1min Skip
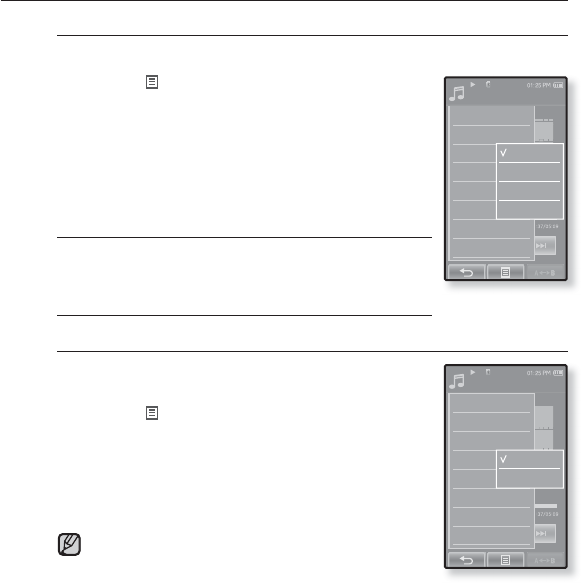
USING THE MUSIC MENU (Continued)
To add to alarm sound
You can add your favorite music fi le to the alarm sound list, so it can be
heard the next time the alarm goes off. See page 103 to set the alarm.
1. Select a music fi le to add to the alarm sound and
tap the [] icon.
The <Music> menu appears.
2. Tap <Add to Alarm>.
The Save window appears.
3. Tap <OK>.
The selected music will be added to the alarm sound list.
One music fi le can be added to the alarm sound.
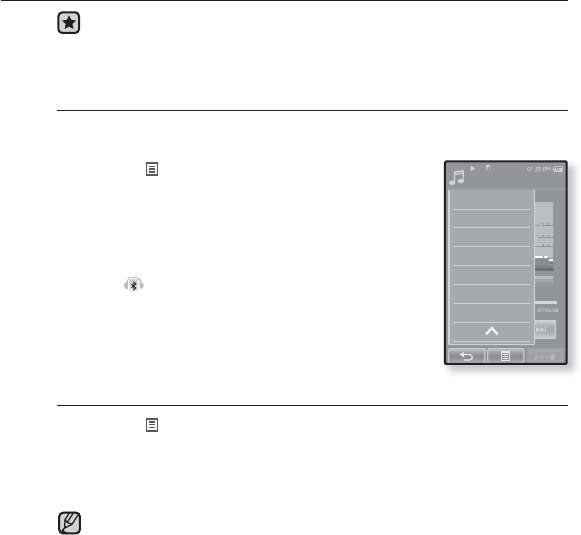
To set the horizontal stroke
You can set the stroke interval of scrolling music fi le playback by sliding
your thumb or fi ngers to the left or right.
1. Tap the [] icon on the music play screen.
The <Music> menu appears.
2. Tap <Horizontal Stroke>.
The <Horizontal Stroke> menu appears.
3. Tap on a desired horizontal stroke.
Select from <1 File>, <5sec Skip>, <10sec Skip>,
<30sec Skip> and <1min Skip>.
If the fi le was developed with a variable bit rate(VBR),
the actual length of the horizontal stroke may not be
exactly what you select.
NOTE
76 _ listening to music
USING THE MUSIC MENU (Continued)
Before you start - Use only the Bluetooth-certifi ed stereo headset.
Check if your Bluetooth stereo headset has been registered.
<Connect to Headset> appears when there is a registered headset. For more
information, refer to <Using a Bluetooth Stereo Headset>. See page 115.
To connect a Bluetooth stereo headset
You can connect directly to the registered Bluetooth stereo headset
during music playback.
1. Tap the [ ] icon on the music play screen.
The <Music> menu appears.
2. Tap <Connect to Headset>.
If <Bluetooth Mode> is set to <Off>, it will be changed
to <On>.
When the connection is successfully done, you will see
the [ ] icon on the screen.
You can listen to music through the Bluetooth headset.
To disconnect the Bluetooth stereo headset
1. Tap the [] icon on the music play screen.
The <Music> menu appears.
2. Tap <Disconnect Headset>.
The Bluetooth headset is disconnected.
You can not select <Play Speed>, <DNSe> and <Sound Effect> while the
player is connecting to the Bluetooth stereo headset in music mode.
NOTE
Songs
1/52
Play Mode
TTS
Music Play Screen
Play Speed
Add to Alarm
Horizontal Stroke
Connect to Headset
viewing pictures _ 77
viewing pictures
Before you start - Connect the earphones, then turn on the player, and check the battery.
Tap the [ ] icon to move to the previous screen.
Press and briefl y hold the [] icon to move to the main menu screen.
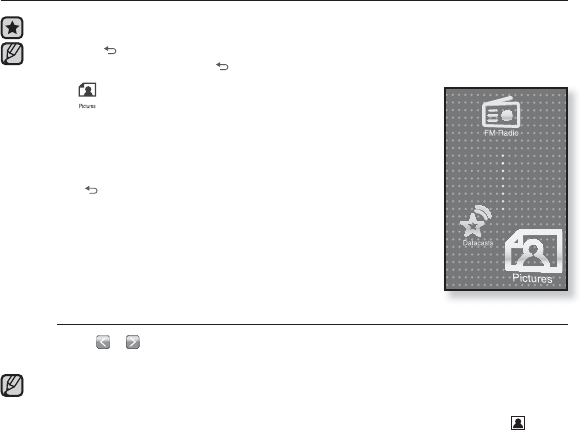
1. Tap the icon on the main menu screen.
The picture preview window appears.
2. Select a picture to view and tap on it.
The selected picture is displayed.
Tap the [ ] icon to move to the preview window.
To move to the previous/next picture
Tap [ , ] icon on the picture view screen.
The previous/next picture will be displayed.
Information and icons on the currently viewed picture will disappear shortly. Tap on the
screen if you want to display the picture information and icons again.
Those JPG fi les with no thumbnail or wrong thumbnail information are displayed [ ].
Some pictures can be displayed slowly.
When transferring a picture to the player using <EmoDio>, it is automatically
converted into JPG format before transfer. The fi le size is automatically adjusted, too.
You can also use the <File Browser> to search for a picture. See page 26.
You can keep listening to music even if you select <Pictures> to view a picture.
NOTE
NOTE
78 _ viewing pictures
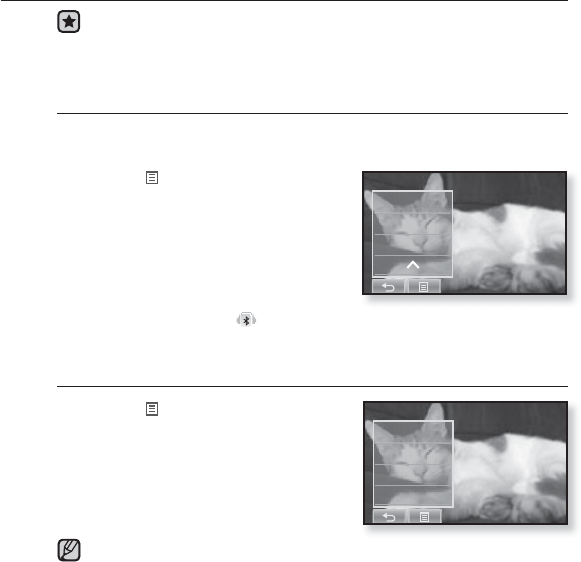
USING THE PICTURE MENU
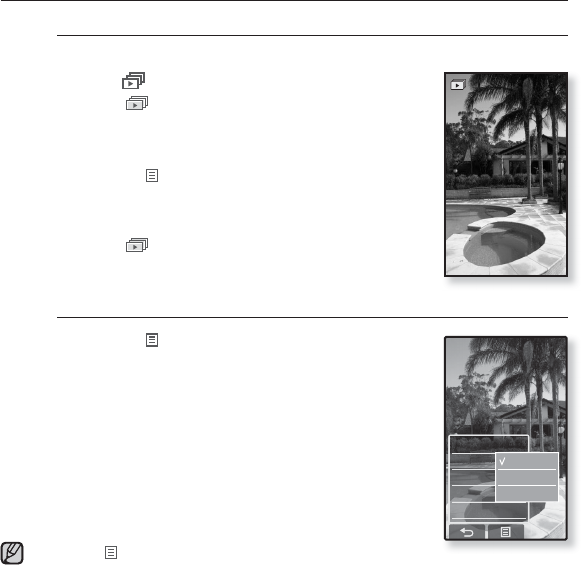
To watch a slideshow
How To 1
Tap the [] icon on the preview screen.
The [ ] icon on the screen appears on the screen,
and the slideshow will start.
How To 2
1. Tap the [] icon on the picture view screen.
The <Pictures> menu appears.
2. Tap <Start Slideshow>.
The [ ] icon on the screen appears on the screen,
and the slideshow will start.
To set the slideshow speed
1. Tap the [] icon on the picture view screen.
The <Pictures> menu appears.
2. Tap <Slideshow Speed>.
The <Slideshow Speed> menu appears.
3. Tap on a desired speed.
Select from <Fast>, <Normal>, and <Slow>.
Tap the [] icon to exit the menu.
NOTE
Start Slideshow
Slideshow Speed
Select as My Skin
View Mode
Rotate
Fast
Normal
Slow
viewing pictures _ 79
USING THE PICTURE MENU (Continued)
To stop the slideshow
Tap on the screen in the slideshow mode.
This will stop the slideshow.
To select a picture as a background image
You can set a desired picture to the background image for the screen.
1. Select a picture to set as a background image
and tap the [ ]icon.
The <Pictures> menu appears.
2. Tap <Select as My Skin>.
The Save window appears.
3. Tap <Yes>.
The selected picture is set to a background image.
Start Slideshow
Slideshow Speed
Select as My Skin
View Mode
Rotate
80 _ viewing pictures
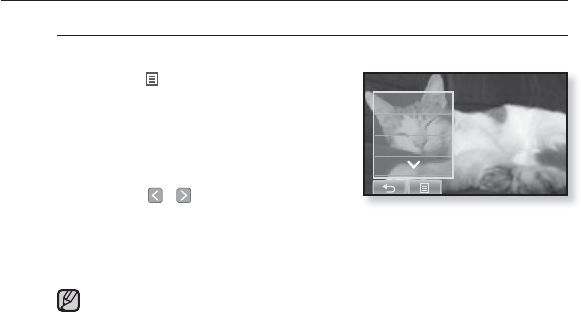
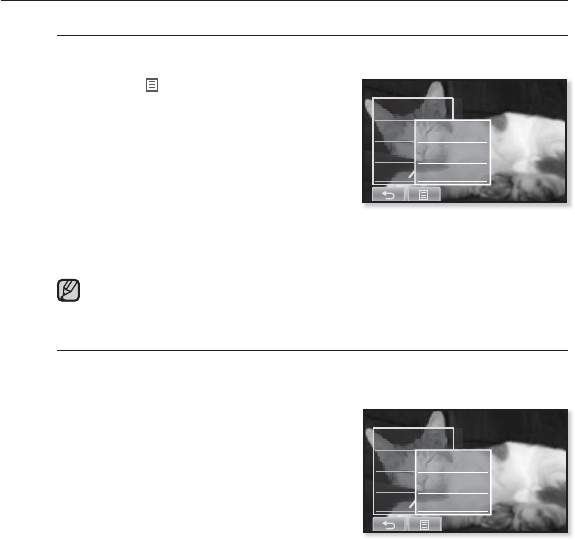
USING THE PICTURE MENU (Continued)
To select the picture view mode
1. Tap the [] icon on the picture view screen.
The <Picture> menu appears.
2. Tap <View Mode>.
The <View Mode> menu appears.
3. Tap on a desired mode.
Select from <Auto> and <Horizontal>.
If you select <Horizontal>, the picture is displayed
horizontally.
Start Slideshow
Slideshow Speed
Select as My Skin
View Mode
Rotate
Auto
Horizontal
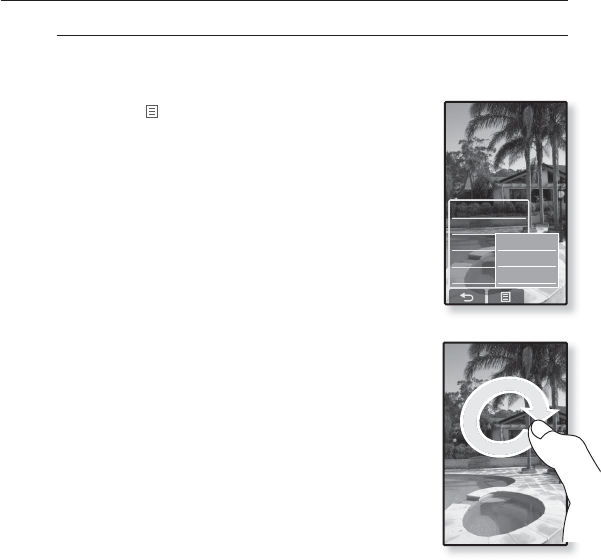
viewing pictures _ 81
USING THE PICTURE MENU (Continued)
To rotate a picture
You can rotate a picture for your convenience.
How To 1
1. Tap the [] icon on the picture view screen.
The <Picture> menu appears.
2. Tap <Rotate>.
The <Rotate> menu appears.
3. Tap on a desired angle.
Select from <Left 90°>, <Right 90°>, and <180°>.
How To 2
Position your fi ngers on the touch screen and circle
around softly in the desired direction.
The photo will be rotated.
Start Slideshow
Slideshow Speed
Select as My Skin
View Mode
Rotate
Left 90°
Right 90°
180°
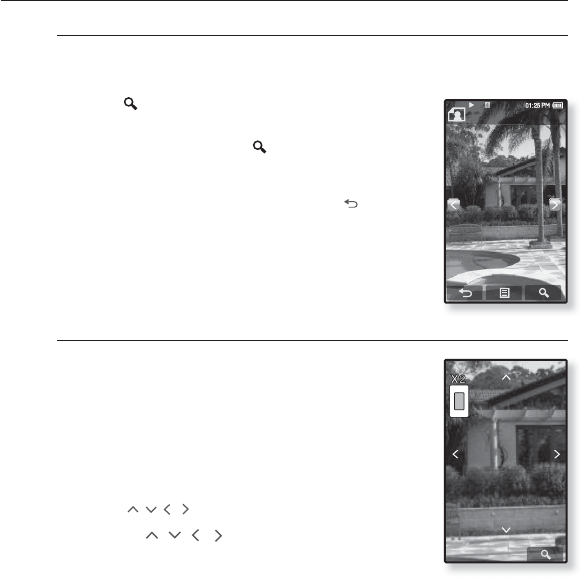
82 _ viewing pictures
USING THE PICTURE MENU (Continued)
To enlarge a picture
You can zoom in a picture.
How To 1
Tap the [] icon on the picture view screen.
The picture is enlarged.
Each time you press the [ ] icon, the size of the
picture is enlarged in the sequence of <x2> ĺ <x3>
ĺ <x4>.
To cancel the picture enlarging, tap the [ ] icon.
How To 2
Tap on the screen twice on the picture view screen.
Each time you tap on the screen twice, the size of the picture
is enlarged in the sequence of <x2> ĺ <x3> ĺ <x4>.
To view the enlarged photo
How To 1
Slide the enlarged photo in a desired direction as if
you fl ip it.
The picture moves and appears in that direction.
How To 2
1. Tap on the screen in a condition where no picture
information nor icons are displayed.
The [
, , ,
] icons appear.
2. Tap the [ , , , ] icon to move the picture in
a desired direction.
wallpaper_01
1/15
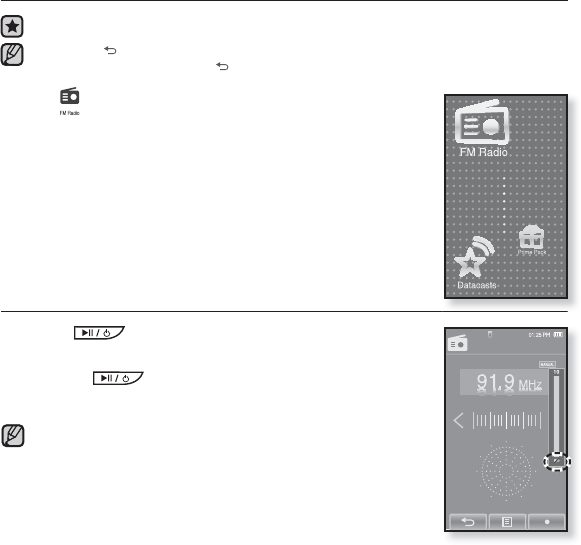
listening to FM radio _ 83
listening to FM radio
Before you start - Connect the earphones, then turn on the player, and check the battery.
Tap the [ ] icon to move to the previous screen.
Press and briefl y hold the [] icon to move to the main menu screen.
Tap the icon on the main menu screen.
FM radio reception will start.
TO USE THE MUTE FUNCTION
Press the button while listening to FM Radio.
Sound is muted.
Press the button once again to resume listening.
Always connect your earphones to the player when searching
or setting frequencies. The earphones serve as antennas to
receive FM Radio reception.
In poor reception areas, the player may not fi nd an available
FM frequency.
The Bluetooth function cannot be used while you are listening
to FM Radio.
NOTE
NOTE
FM Radio
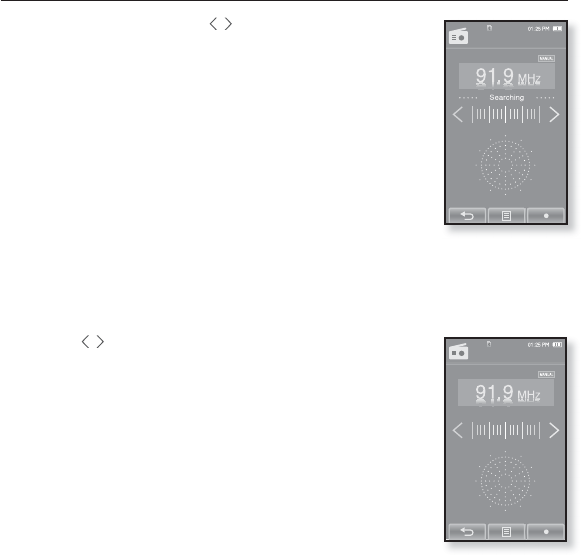
84 _ listening to FM radio
TO SEARCH FOR FM STATIONS
1. Press and briefl y hold the [,]icon and then release in
Manual mode.
<Searching> appears on the screen.
The search will stop at the frequency nearest from the point the
button is released.
OR,
1. Tap the [,]icon to progress through the frequencies
one by one in Manual mode.
Moves to frequencies whenever the icon is pressed.
FM Radio
FM Radio
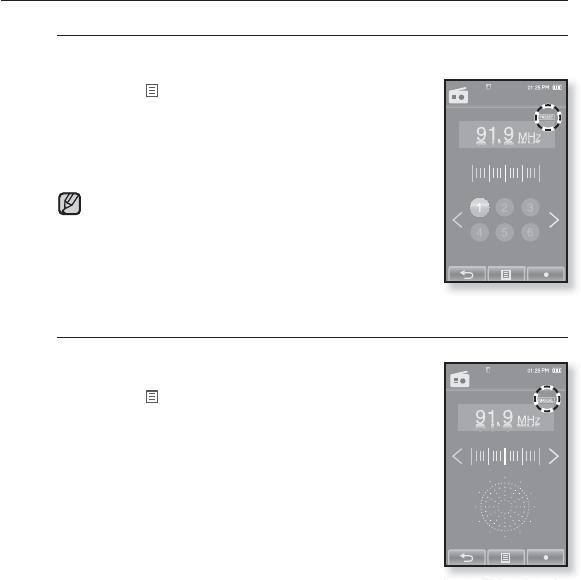
listening to FM radio _ 85
FM Radio
USING THE FM RADIO MENU
To switch to Preset Mode
Select this mode if you want to search through your saved FM presets
one preset at a time.
1. Tap the [] icon in Manual mode.
The <FM Radio> menu appears
2. Tap <Go to Preset Mode>.
FM radio reception will start.
You will see <PRESET> on the screen.
If no frequencies were preset, <Preset list does not
exist> will appear and the player will not switch to
Preset mode.
If <Default Set> is selected from <Settings>ĺ
<System> , the saved preset lists are deleted.
Preset frequencies are stored in numeric sequence.
To switch to Manual Mode
Select this mode if you want to manually search through the FM band
one frequency at a time.
1. Tap the [] icon in Preset mode.
The <FM Radio> menu appears
2. Tap <Go to Manual Mode>.
You will see <MANUAL> on the screen.
NOTE
FM Radio
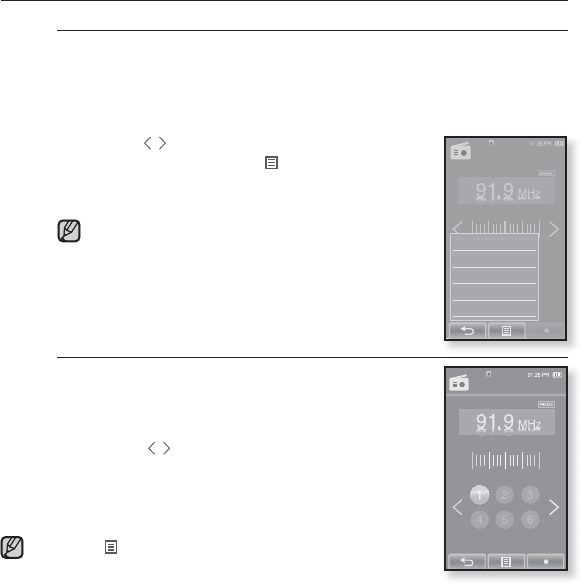
86 _ listening to FM radio
USING THE FM RADIO MENU
(Continued)
To store stations in the preset memory
You can store up to 30 stations in your MP3 player’s memory and return
to them with the press of just one number. Have the MP3 player choose
only the stations you want using the manual process, or fi nd and store
the local stations automatically.
Manual - choose only the stations you want to store
1. Tap the [
,
] icon to select a frequency to preset
in Manual mode and tap [] icon.
2. Tap <Add to Preset>.
The selected station is set as a preset number.
If the same frequency is already set, the <This preset
already exists> message appears and the setting is
disabled.
To listen to preset stations
Tap on a desired preset number in Preset mode.
The preset number is selected and you can listen to
the radio frequency that is previously stored for the
number.
Tap the [ ,] icon to move to the previous or the next
number list.
Tap the [] icon to exit the menu.
NOTE
NOTE
FM Radio
Go to Preset Mode
Add to Preset
Auto Preset
FM Sensitivity
FM Region
FM Radio
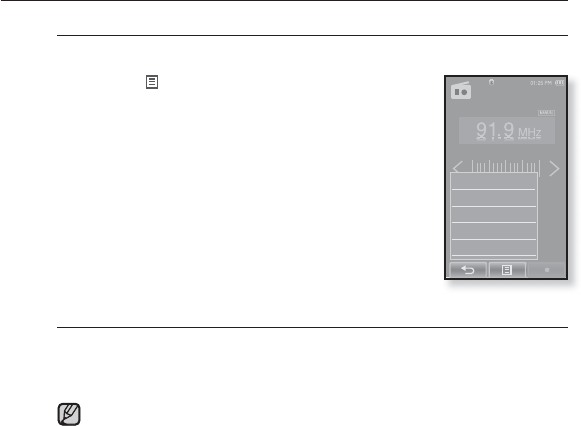
listening to FM radio _ 87
USING THE FM RADIO MENU
(Continued)
To store stations in the preset memory (Continued)
Automatic – automatically store all the stations the player receives
1. Tap the [] icon on the FM Radio screen.
The <FM Radio> menu appears.
2. Tap <Auto Preset>.
The< Auto Preset> window appears.
3. Tap <Yes>.
Up to 30 frequencies are automatically set.
To cancel Auto Preset
If you want to cancel the auto preset, touch the screen in the process.
The auto preset setting is canceled, and only frequencies set up to that point are
stored.
You may want to re-set the stored stations if you’re going to listen to your
MP3 player in a different city. To delete the preset stations and store new
ones, simply repeat the process.
NOTE
Go to Preset Mode
Add to Preset
Auto Preset
FM Sensitivity
FM Region
FM Radio
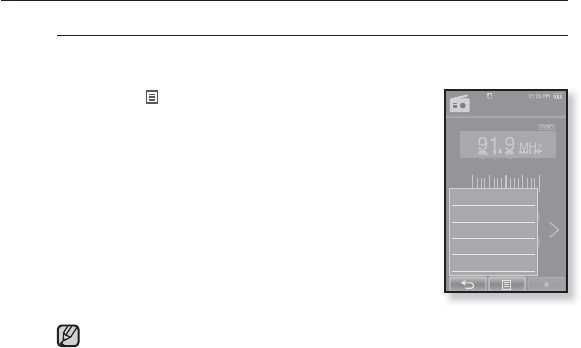
88 _ listening to FM radio
USING THE FM RADIO MENU
(Continued)
To delete a preset
Follow the steps below to delete frequencies while listening to FM
Radio.
1. Tap the [] icon in Preset mode.
The <FM Radio> menu appears
2. Tap <Delete from Preset>.
The preset frequency list appears.
3. Select a frequency to delete and tap on it.
The confi rmation window will appear.
4. Tap <Yes>.
The selected preset number is deleted.
If you don’t want to delete the preset number, select
<No>.
When a preset frequency is deleted, the numbers of the following presets
are moved up by one.
NOTE
Go to Manual Mode
Delete from Preset
Auto Preset
FM Sensitivity
FM Region
FM Radio

listening to FM radio _ 89
USING THE FM RADIO MENU
(Continued)
To set the FM sensitivity
To receive more or fewer FM radio frequencies, adjust
the <FM Sensitivity>.
1. Tap the [] icon on the FM Radio screen.
The <FM Radio> menu appears
2. Tap <FM Sensitivity>.
The <FM Sensitivity> menu appears.
3. Tap on a desired reception sensitivity.
Select from <High>, <Middle> and <Low>.
If you select <High>, more frequencies will be
received.
To set the FM region
You can change an FM region setting in preparation for overseas travel.
1. Tap the [] icon on the FM Radio screen.
The <FM Radio> menu appears
2. Tap <FM Region>.
The <FM Region> menu appears.
3. Tap on a desired FM region.
Select from <Korea/US>, <Japan> and
<Other Countries>.
Frequency range by region
- Korea/US: Search for FM frequencies in 100 kHz increments
between 87.5 MHz~108.0 MHz.
- Japan: Search for FM frequencies in 100 kHz increments between
76.0 MHz~108.0 MHz.
- Other Countries: Search for FM frequencies in 50 kHz increments between 87.50 MHz~108.00 MHz.
Your previously stored radio frequencies will be deleted when you change
the <FM Region> on your player.
NOTE
Go to Preset Mode
Delete from Preset
Auto Preset
FM Sensitivity
FM Region
FM Radio
Korea/US
Japan
Other Countries
Go to Preset Mode
Delete from Preset
Auto Preset
FM Sensitivity
FM Region
FM Radio
High
Middle
Low
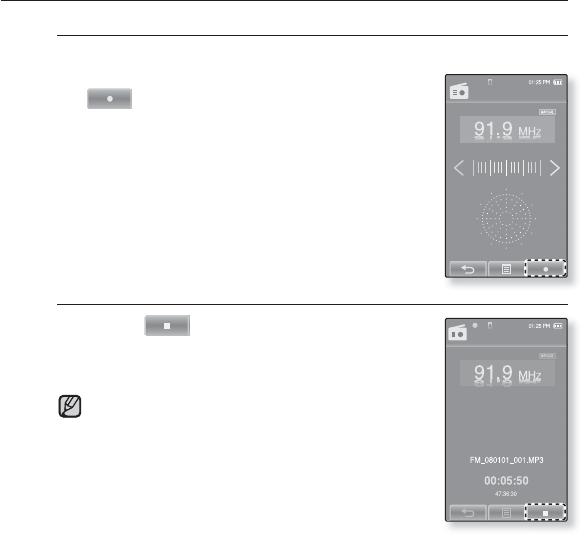
90 _ listening to FM radio
USING THE FM RADIO MENU
(Continued)
To record FM Radio broadcasting
You can record a FM radio program at any time while listening to the radio.
1. Select a radio frequency to record and tap the
[] icon.
The <FM Recording> window appears.
2. Tap <Yes>.
An automatically created fi le name appears and the
recording starts.
To stop recording
1. Tap the [] icon during the recording.
The recorded fi le is stored in <File Browser> ĺ
<Recorded Files>.
You can make a recording for up to approximately 18
hours (based on 128Kbps, 1GB)
You can store a maximum of 999 fi les by the date for FM
radio recording.
The recording fi le name will be automatically specifi ed,
for example, as such as “FM_YYMMDD_XXX.MP3”.
“FM” indicates FM radio recording, “YYMMDD” means
recording date and “XXX” means the number of the
recording fi le.
FM Recording
FM Recording
NOTE
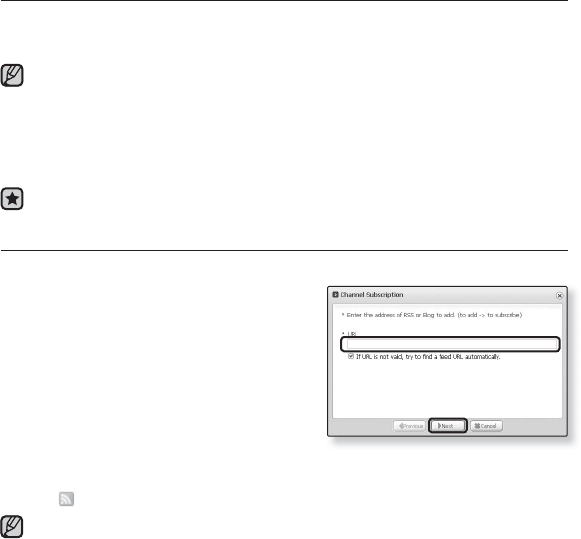
using the datacast _ 91
using the datacast
Using <EmoDio>, you can transfer blog information and fi les registered on RSS
to the player for your entertainment.
What is RSS?
RSS stands for Rich Site Summary or Really Simple Syndication. It is a xml-based data
transmission system used to deliver information on frequently updated web sites such as
news and blogs to users in a more convenient and easier way.
What are Datacasts?
You can automatically receive updated information without having to visit your frequently
visited news, blog and UCC sites every time.
Before you start - EmoDio must be installed on your PC. See page 41.
REGISTERING A CHANNEL
You can create a new channel by registering RSS-supported web sites or web pages.
1. Click the <Subscribe> on the bottom of
the <Datacasts> of <EmoDio>.
2. Enter an address in the <URL> and Click
<ŹNext>.
When you copy a web address and click
<Subscribe>, the copied address is displayed
automatically in the <URL>.
The setting confi rmation window appears if the
Web address supports RSS.
3. Click <OK>.
The channel you want is registered.
The icon appears in Datacasts for the registered channel.
Refer to the <Datacasts> of <EmoDio> for detailed instructions.
NOTE
2
2
NOTE
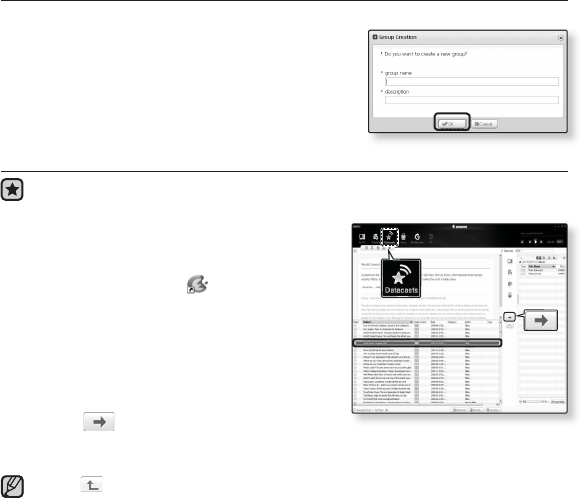
92 _ using the datacast
2
CREATING A NEW CHANNEL GROUP
You can create a new group to manage channels by the category.
1. Click <New Group> on the bottom of
<Datacasts> of <EmoDio>.
2. Type in a group name and description and
click <OK>.
TRANSFERRING A DATACAST FROM <EMODIO>
Before you start - Connect the player to your PC.
EmoDio must be installed on your PC. See page 41.
1.
<EmoDio> will automatically start when the
player is connected to your PC.
If the program does not start automatically, double
click the <EmoDio> icon on the desktop.
2. Click <Datacasts> on the top of <EmoDio>.
Datacasts group channel list appears.
3. Click a desired group channel.
4. Click a desired channel.
5. Select the post you want to transfer.
6. Click the icon.
The Post of the selected channel will be transferred to the player in <File Browser> ĺ
<Datacasts>.
Click on the top of <EmoDio> to move to the previous screen.
In <Datacasts> of <EmoDio>, if the post has the attachment, you can download
the attachment to the player. However, the attachment may not be downloaded,
depending on the policy of the applicable website.
NOTE
6
5
2
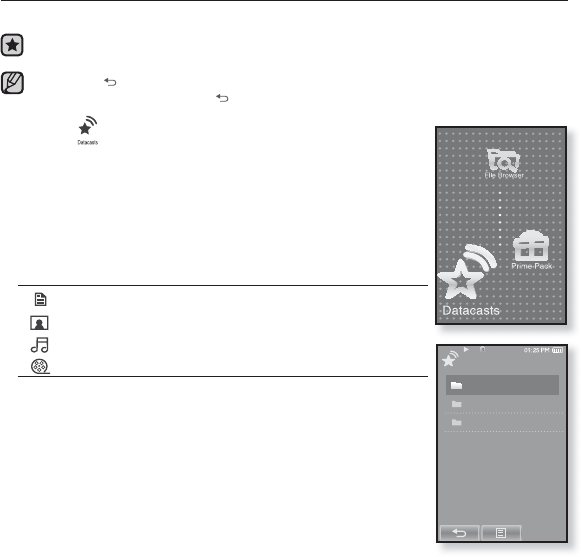
using the datacast _ 93
VIEWING DATACASTS
You can view channel posts added to <Datacasts>.
Before you start - Transfer a desired channel post to the player using <EmoDio>.
See page 92.
Tap the [ ] icon to move to the previous screen.
Press and briefl y hold the [] icon to move to the main menu screen.
1. Tap the icon on the main menu screen.
The Datacast list appears.
2.GSelect a desired channel title and tap on it.
The title is the same as that of the channel added to <
Datacasts
>
in <EmoDio>.
3.GSelect a desired post title and tap on it.
The fi le list appears.
icon: main text for the transferred post
icon: picture fi le
icon: music fi le
icon: video fi le
4. Select a fi le and tap on it.
The selected fi le will start playing.
NOTE
Datacasts
1/3
Datacast 1
Datacast 2
Datacast 3
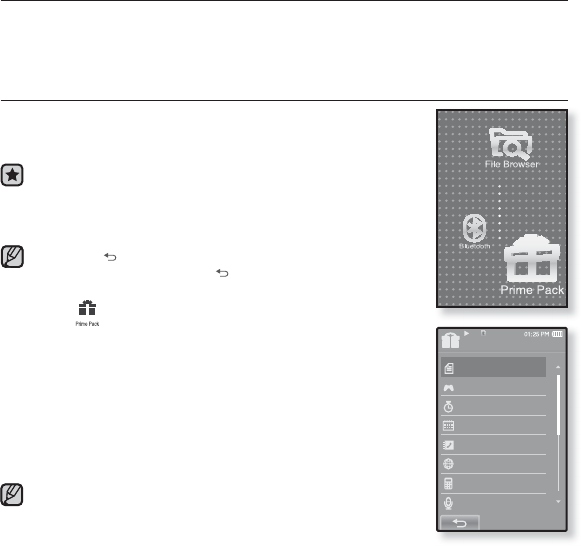
94 _ enjoying the prime pack
enjoying the prime pack
Prime Pack enables you to enjoy various functions such as reading text,
the alarm setting and viewing the calendar or world clock.
READING TEXT
Whether it’s a novel, the manuscript of a new story, or your
research paper, your mp3 player allows you to read it… all
while listening to music!
Before you start - Turn on the player and check the battery.
Transfer text fi les to the player using <EmoDio>. See page
42.
Set a preferred text language for text in <Settings> ˧
<Language> ˧<Contents>. See page 33.
Tap the [ ] icon to move to the previous screen.
Press and briefl y hold the [] icon to move to the main
menu screen.
1. Tap the icon on the main menu screen.
The <Prime Pack> list appears.
2. Select <Texts> and tap on it.
The text fi le list appears.
3. Select a text fi le and tap on it.
You will see the text on the screen.
Press and briefl y hold the touch screen to display in full screen.
To return to the previous screen, press and briefl y hold the
touch screen again.
You can also use the <File Browser> to search for a text fi le.
Your mp3 player supports the TXT fi le format in Text mode.
You can keep listening to music even if you select text fi le.
NOTE
NOTE
Prime Pack
Texts
Games
Alarm
Calendar
Address Book
World Clock
Calculator
Record
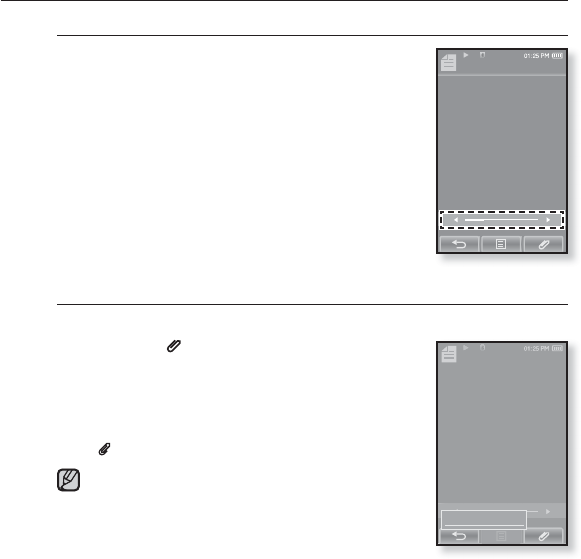
enjoying the prime pack_ 95
USING THE TEXT MENU
To move to previous/next page
How To 1
Tap the [Ż,Ź] icon on the bottom of the touch screen.
How To 2
Slide your thumb or fi ngers to the left or right.
Sliding your thumb or fi ngers to the left will display the
next page, while to the right will display the previous
page.
To set a bookmark
Set a bookmark to return to that point in the text at any time.
1. Tap on the [ ] icon at the desired page you
want on the text view screen.
The <Bookmark> menu appears.
2. Tap <Add Bookmark>.
The current text screen is set to a bookmark with the
[] symbol displayed on the top left corner.
The Overwrite window appears if there is a bookmark
previously set. If you select <Yes>, the previously set
bookmark is deleted and a new bookmark is added.
The bookmark can be set one for each text fi le, and
you can set a maximum of 100 bookmarks.
NOTE
Texts 1
7.0%
My doggy likes to disco dance.
He boogies every night.
He dances in his doghouse
till the early morning light.
The other dogs come running
when they hear my doggy swing.
A few will bring play their instruments
The others dance and sing.
They pair off with their partners
as their tails begin to wag.
My doggy likes to disco dance.
He boogies every night.
Add Bookmark
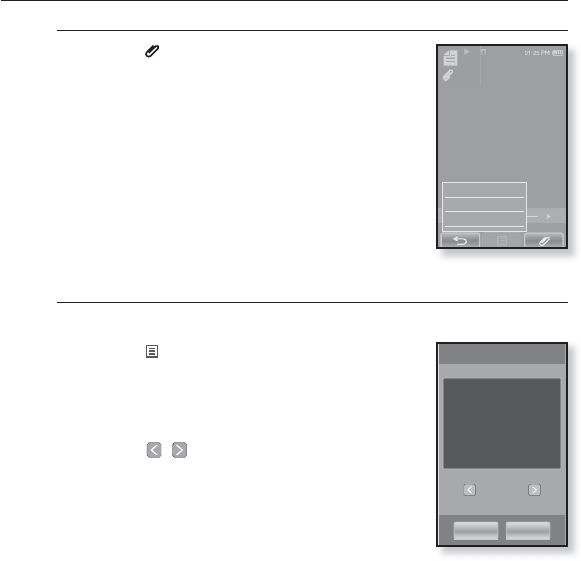
96 _ enjoying the prime pack
USING THE TEXT MENU (Continued)
To move to/remove the bookmark
1. Tap the [ ] icon on the text view screen.
The <Bookmark> menu appears.
2. Tap <Go to Bookmark> or <Delete Bookmark>.
When you selected <Go to Bookmark> then it
will move to the selected bookmark and <Delete
Bookmark> will remove the selected bookmark from
the text fi le.
To set the text viewer color
Choose what color you’d like the text to appear.
1. Tap the [] icon on the text view screen.
The <Text> menu appears.
2. Tap <Text Viewer Color>.
The <Text Viewer Color> menu window appears.
3. Tap the [
,
] icon to select a color for the text
viewer.
Select from <Type 1> to <Type 7>.
4. Tap <OK>.
The selected text viewer color is displayed.
Texts 1
7.0%
My doggy likes to disco dance.
He boogies every night.
He dances in his doghouse
till the early morning light.
The other dogs come running
when they hear my doggy swing.
A few will bring play their instruments
The others dance and sing.
They pair off with their partners
as their tails begin to wag.
My doggy likes to disco dance.
He boogies every night.
Add Bookmark
Go to Bookmark
Delete Bookmark
My doggy likes to disco dance.
He boogies every night.
He dances in his doghouse
till the early morning light.
The other dogs come running
when they hear my doggy swing.
My doggy likes to disco dance.
Text Viewer Color
Type 1
OK Cancel
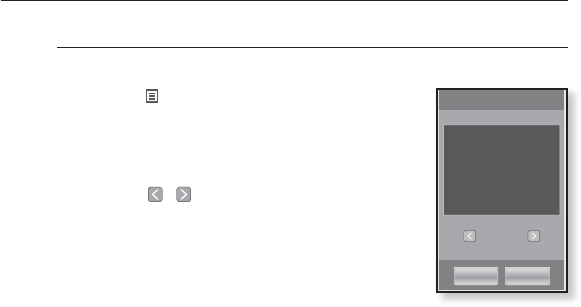
enjoying the prime pack_ 97
USING THE TEXT MENU (Continued)
To change the font size
You can change the font size of the text.
1. Tap the [] icon on the text view screen.
The <Text> menu appears.
2. Tap <Font Size>.
The <Font Size> menu appears.
3. Tap the [
,
] icon to select a desired font
size.
Select from <Small>, <Medium> and <Large>.
4. Tap <OK>.
The font size is changed.
My doggy likes to disco dance.
He boogies every night.
He dances in his doghouse
till the early morning light.
The other dogs come running
when they hear my doggy swing.
My doggy likes to disco dance.
Font Size
Small
OK Cancel
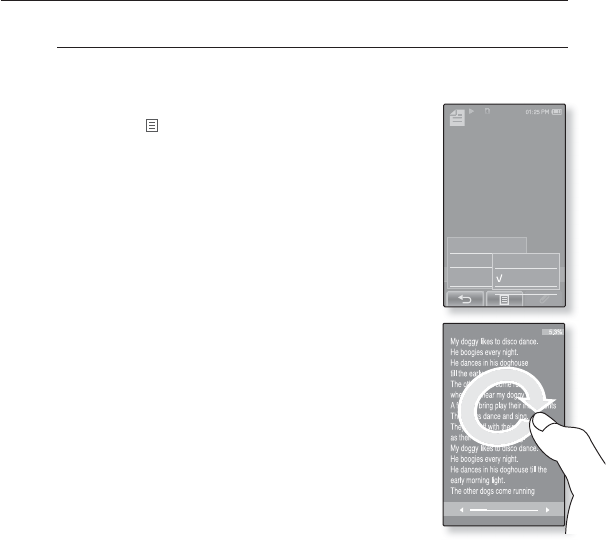
98 _ enjoying the prime pack
USING THE TEXT MENU (Continued)
To set the Text View Mode
You can view text horizontally or vertically.
How To 1
1. Tap the [] icon on the text view screen.
The <Text> menu appears.
2. Tap <View Mode>.
The <View Mode> menu appears.
3. Tap <Horizontal>.
The text screen will be rotated in horizontal view.
Tapping <Vertical> will rotate the screen in a vertical view.
How To 2
Position your fi ngers on the touch screen and circle
around softly in the desired direction.
This will rotate the screen in a horizontal or vertcial
view mode.
Text 1
7.0%
My doggy likes to disco dance.
He boogies every night.
He dances in his doghouse
till the early morning light.
The other dogs come running
when they hear my doggy swing.
A few will bring play their
instruments
The others dance and sing.
They pair off with their partners
as their tails begin to wag.
Text Viewer Color
Font Size
View Mode
Vertical
Horizontal
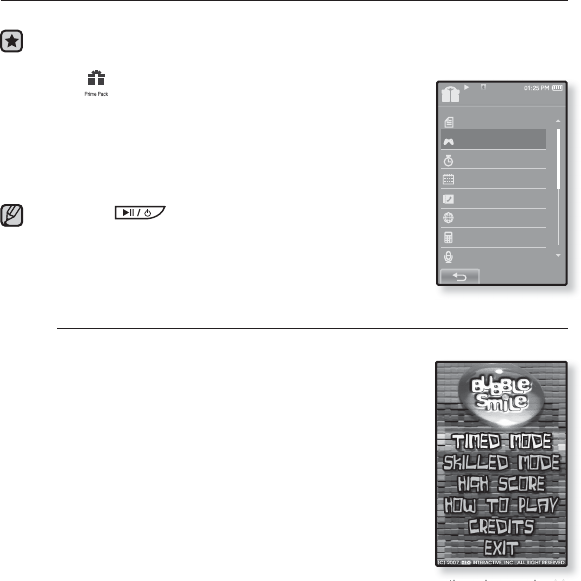
enjoying the prime pack_ 99
PLAYING VIDEO GAMES
Your mp3 player comes with exciting games already loaded!
Before you start - Connect the earphones, then turn on the player, and check the
battery.
1. Tap the icon on the main menu screen.
The <Prime Pack> list appears.
2. Select <Games> and tap on it.
The game list appears.
3. Select a desired game and tap on it.
Press the [ ] button to set a game sound or the
current music as a background music.
If you select a music fi le to listen to, the game navigation
may be slow down, depending on the use of the Bluetooth
device or the fi le.
Bubble Smile
You have to gain as many scores as possible by changing the order of
three bubbles to fi t them horizontally or diagonally.
Turn the three adjacent bubbles clockwise or
counter clockwise in order.
The bubble will be moved in the selected direction.
You will gain scores only if three or more bubbles
are fi tted together.
NOTE
Prime Pack
Texts
Games
Alarm
Calendar
Address Book
World Clock
Calculator
Record
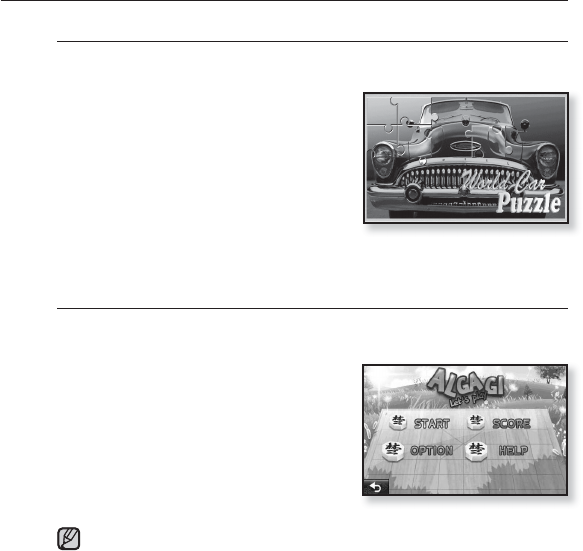
100 _ enjoying the prime pack
PLAYING VIDEO GAMES (Continued)
World Car Puzzle
You have the chance to enjoy the world’s renowned cars while putting
together the mosaic pieces.
The game will be displayed in the
horizontal view.
Select a desired car and set the number
of puzzles and hints, shape and the time
limt.
Tap and hold an image piece and drag it
to a desired position before releasing it.
The puzzle pieice will be moved to the
release point.
ALGGAGI
To win this game, remove all the opponent’s pieces from the
chessboard by hitting them with your piece.
The game will be displayed in the
horizontal view.
Slide one of your pieces in the direction
of your opponent’s piece to remove it
from the chessboard.
If you have not played your turn within
the timeout, the turn goes to the
opponent.
To exit from the game screen in the middle of a round, tap on the bottom
left corner of the touch screen.
NOTE
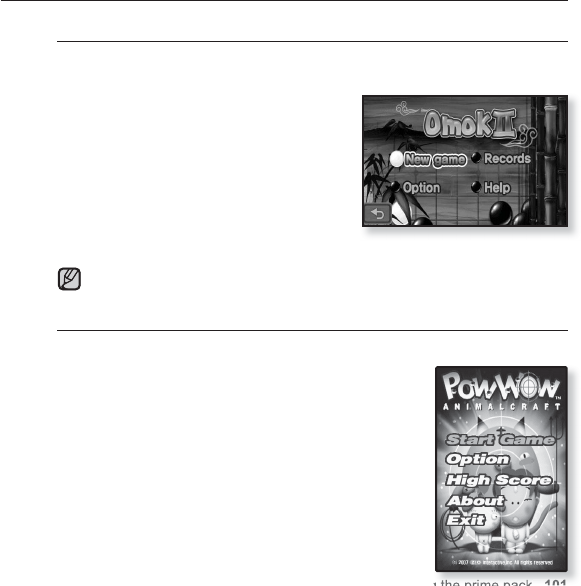
enjoying the prime pack_ 101
PLAYING VIDEO GAMES (Continued)
Omok2
To win this strategy board game, put your pieces to make an unbroken row
of fi ve stones horizontally, vertically or diagonally before the opponent.
The game will be displayed in the
horizontal view.
Tap on the area you want to put your
stone, and the area is enlarged.
Tap on the exact position to put your
stone while the area is enlarged.
Your stone is placed on the position.
If you have not played your turn within
the timeout, the turn goes to the opponent.
To exit from the game screen in the middle of a round, tap on the bottom
left corner of the touch screen.
Pow Wow
This is a shooting game where you can gain scores by shooting the
moving target.
Tap the moving target.
If you want to reload your gun, tap <Reload> on the
screen.
NOTE
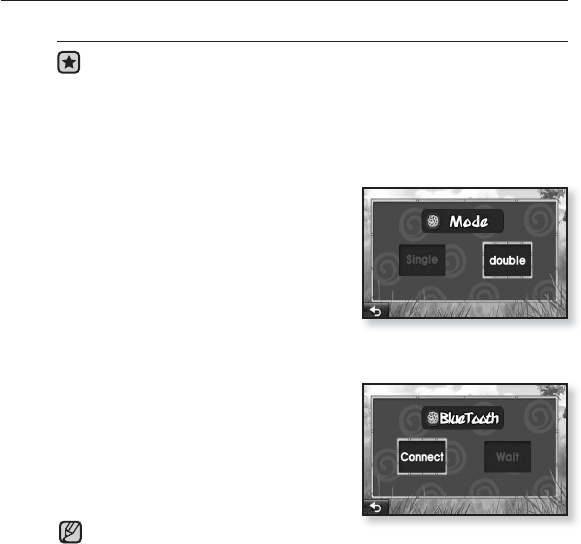
102 _ enjoying the prime pack
PLAYING VIDEO GAMES (Continued)
To play 2-player battle in Bluetooth mode
Before you start - Connect the earphones, then turn on the player, and
check the battery.
If the player is connected to a Bluetooth stereo headset, mobile phone or
external device, set the connection to off fi rst.
Set <Bluetooth> ĺ <Bluetooth Mode> to <On>.
Set to <Discoverable> from <Bluetooth> ĺ <Bluetooth Settings> ĺ
<Discover Option>.
1. Run the same game(<Omok2>
or <AlGGAGI>) on the two YP-P2
models and select the <Double>
mode.
Bluetooth <Connect> and <Wait> screen
appears.
2. Select <Wait> on one player and
select <Connect> on the other player.
YP-P2 appears on the YP-P2 selected
<Connect>.
3. Tap on the <YP-P2> on the YP-P2
selected <Connect>.
The Bluetooth connection is done and
starts the 2-player battle.
When the player is connecting to the
Bluetooth stereo headset, the 2-player
battle Bluetooth game is not available.
Ex) Alggagi game – Mode Selection
Screen
Ex) Bluetooth Wait/Connect Screen
NOTE
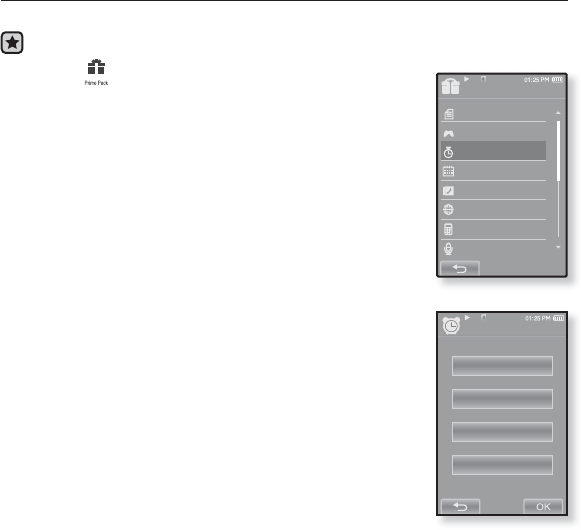
enjoying the prime pack_ 103
SETTING THE ALARM
This player has an alarm which can be set to go off at a scheduled time.
Before you start - First, you should set the clock for the current time. See page 34.
1. Tap the icon on the main menu screen.
The <Prime Pack> list appears.
2. Select <Alarm> and tap on it.
3. Tap <New Alarm>.
The alarm setting screen appears.
4. Tap on the fi rst item repeatedly to select the alarm
frequency.
Select from <Once>, <Everyday>, <Mon~Fri>, <Mon~Sat>,
<Sat~Sun> and <Off>.
5. Tap on the second item.
The alarm time setting screen appears.
Once
12 : 40 AM
Alarm Sound 1
Interval : 5min
Alarm
Prime Pack
Texts
Games
Alarm
Calendar
Address Book
World Clock
Calculator
Record
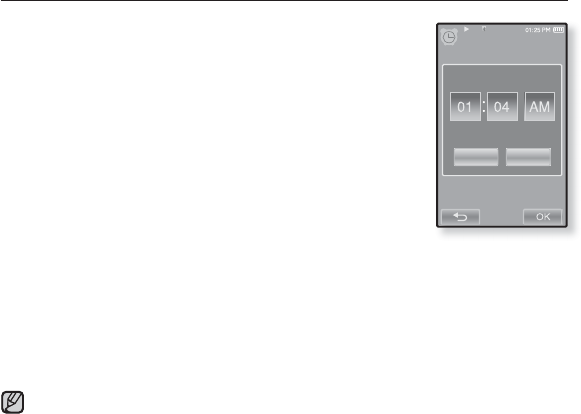
104 _ enjoying the prime pack
SETTING THE ALARM (Continued)
6. Set each item of the hour, minute and AM/PM by sliding
up or down.
7. Tap <OK>.
8. Tap on the third item repeatedly to select the alarm
sound.
You can select from <Alarm Sound 1> to
<Alarm Sound 3> or music fi les added as alarm sound. See
page 75.
9. Tap on the fourth item repeatedly to set the alarm
interval.
Once you set the interval, the alarm repeats in the set time
interval. Select from <Interval: 3min>, <Interval: 5min> and <Interval: 10min>.
10. Tap <OK>.
The save confi rmation window will appear.
11. Tap <Yes>.
The alarm setting is added to the alarm list.
You can store up to 7 alarms.
NOTE
Alarm
OK Cancel
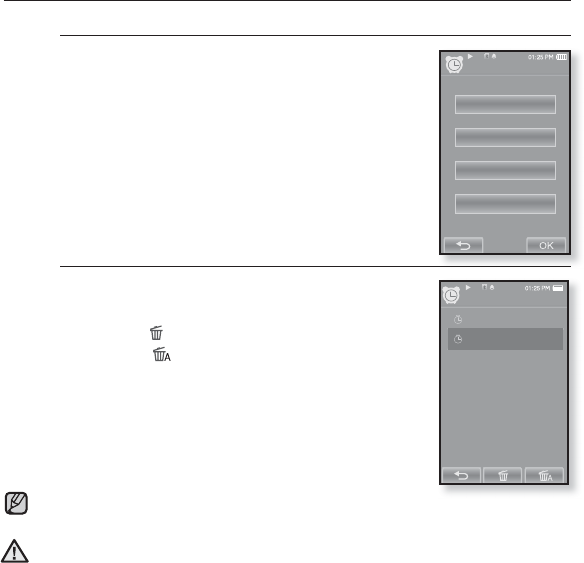
enjoying the prime pack_ 105
Alarm
New Alarm
AM 01 : 53
Once
12 : 40 AM
Alarm Sound 1
Interval : 5min
Alarm
SETTING THE ALARM (Continued)
To edit the alarm setting
1. In the Alarm screen, select an alarm setting to
change and tap on it.
The alarm setting screen appears.
2. Follow the same steps as the new alarm setting
above to edit the setting. See page 103.
To delete an alarm setting
1. Tap on an alarm setting to delete on the alarm
screen.
2. Tap the [] icon.
Tap the [ ] icon to delete all of the alarm setting.
The Delete window appears.
3. Tap <Yes>.
The selected alarm will be deleted.
The player will sound the alarm when it reaches the scheduled time. To end the alarm, tap
<Alarm Off>. And to sound the alarm again, tap on the alarm interval.
If the USB cable is connected to the player, the alarm function does not work.
NOTE
CAUTION
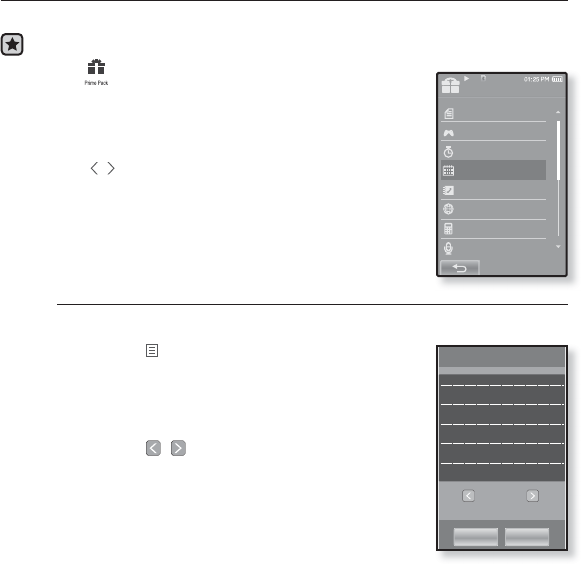
106 _ enjoying the prime pack
VIEWING THE CALENDAR
You can check the calendar.
Before you start - First, you should set the clock for the current time. See page 34.
1. Tap the icon on the main menu screen.
The <Prime Pack> list appears.
2. Select <Calendar> and tap on it.
The <Calendar> screen appears.
3. Tap the [ ,] icon to select a desired month.
To set the type of the calendar
You can view the calendar by changing the order of days of the week.
1. Tap the [] icon on the calendar view screen.
The <Calendar> menu appears.
2. Tap <View Type>.
The <View Type> screen appears.
3. Tap the [
,
] icon to select the view mode
you want and tap <OK>.
Select either <Type 1> or <Type 2>.
<Type 1> displays Sunday through Saturday while
<Type 2> displays Monday through Sunday.
SUN MON TUE WED THU FRI SAT
1 2 3 4 5 6
7 8 9 10 11 12 13
14 15 16 17 18 19 20
21 22 23 24 25 26 27
28 29 30 31
View Type
Type 1
OK Cancel
Prime Pack
Texts
Games
Alarm
Calendar
Address Book
World Clock
Calculator
Record
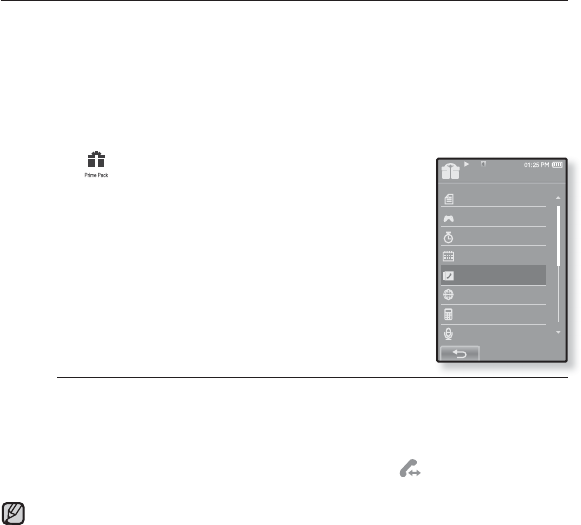
enjoying the prime pack_ 107
VIEWING THE ADDRESS BOOK
You can download the address book using Bluetooth function to check the
phone number and directly call the other person on the player.
Before you start - First, use the Bluetooth-based fi le transfer function to download
the address book from an external device. For more information, refer to <To
transfer a fi le on the external device to the player>. See page 128.
You must pair your mobile phone with the player before you make a call in the
address book window.
For more information, refer to <Using A Bluetooth Mobile Phone>. See page 118.
1. Tap the icon on the main menu screen.
The <Prime Pack> list appears.
2. Select <Address Book> and tap on it.
The Address Book window appears.
3. Select a name to check in the Address Book window,
and tap on it.
The selected address information will appear.
To make a call in the address book
1. Select a name to make a call in the Address Book window, and tap
on it.
The selected address information will appear.
2. Select a desired phone number and tap the [] icon.
You are now placing a call to the other person.
The address book will be displayed in alphabetical order.
The address book fi les transferred to the player are saved in <File Browser> ĺ
<Received Files> folder.
Only the vCard fi le format is supported for the address book.
NOTE
Prime Pack
Texts
Games
Alarm
Calendar
Address Book
World Clock
Calculator
Record
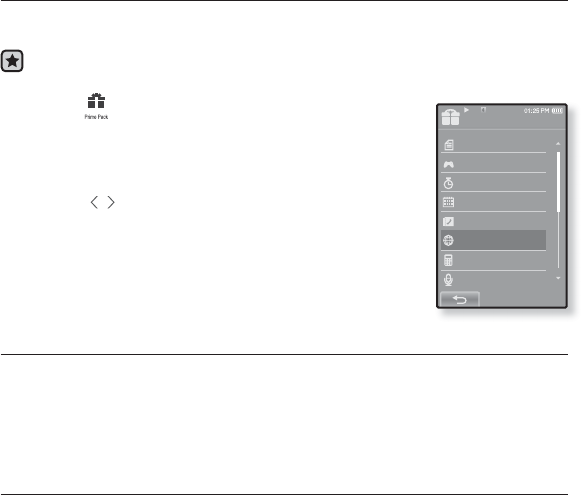
108 _ enjoying the prime pack
VIEWING THE WORLD CLOCK
You can check the location and date/time of major world cities based on their
respective time zone.
Before you start - First, you should set the clock for the current time. See page 34.
Set the time zone you want in the <Settings> ˧<Time> ˧<Time Zone>.
1. Tap the icon on the main menu screen.
The <Prime Pack> list appears.
2. Select <World Clock> and tap on it.
The <World Clock> screen appears.
3. Tap the [ , ] icon to select a time zone.
You can view the date/time of the city you select.
You can check local time of the following time zone.
(‘/’ indicates the standard time zone in the region)
Cape Verde, London/Lisbon, Rome/Paris, Athens/Helsinki, Moscow/Riyadh,
Abu Dhabi/Muskat, Tashkent/Ashgabat, Alma Ata/Kathmandu, Bangkok/Jakarta,
Hongkong/Beijing, Seoul/Tokyo, Guam/Sydney, Okhotsk, Wellingtons/Oakland,
Samoa/Midway, Honolulu/Hawaii, Alyeska, Los Angeles/Seattle, Denver/Phoenix,
Chicago/Mexico City, New York/Miami, Caracas/Santiago, Buenos Aires/Brasilia,
The middle Atlantic
Prime Pack
Texts
Games
Alarm
Calendar
Address Book
World Clock
Calculator
Record
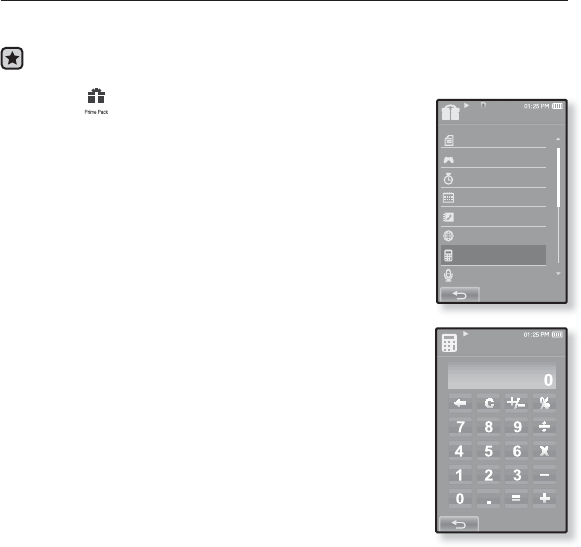
enjoying the prime pack_ 109
Calculator
USING THE CALCULATOR
The calculator helps you with the four rules of arithmetic (addition, subtraction,
multiplication and division).
Before you start - Connect the earphones, then turn on the player, and check the
battery.
1. Tap the icon on the main menu screen.
The <Prime Pack> list appears.
2. Select <Calculator> and tap on it.
The calculator screen appears.
3. Calculate numbers by tapping on the touch screen.
Prime Pack
Texts
Games
Alarm
Calendar
Address Book
World Clock
Calculator
Record
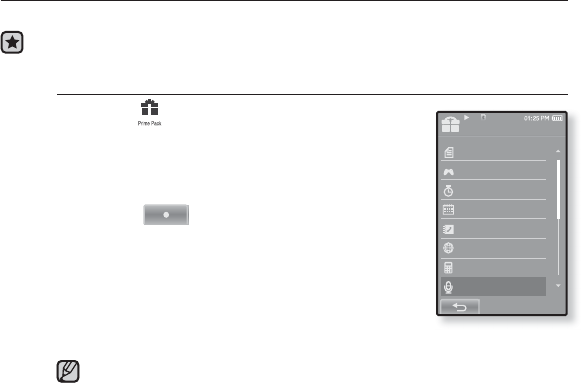
110 _ enjoying the prime pack
VOICE RECORDING
You can make a voice recording.
Before you start - Connect the earphones, then turn on the player, and check the
battery.
To make a voice recording
1. Tap the icon on the main menu screen.
The <Prime Pack> list appears.
2. Select <Record> and tap on it.
Voice Recording screen appears.
3. Tap the [ ] icon.
The recording confi rmation window appears.
4. Tap <Yes>.
Recording starts and the screen will be automatically
turned off for better recording quality.
Do not put the microphone too close to or far away from your mouth as it
may cause a poor recording.
Voice recording does not perform properly when the battery is low.
NOTE
Prime Pack
Texts
Games
Alarm
Calendar
Address Book
World Clock
Calculator
Record
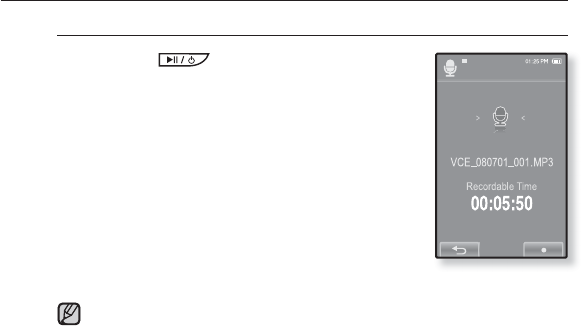
enjoying the prime pack_ 111
VOICE RECORDING (Continued)
To stop voice recording
1. Press the [] button during the recording.
The screen will be turned on again and the recorded
fi le is stored.
The recorded fi le is stored in <File Browser> ĺ <Recorded Files>.
You can make a recording for up to approximately 18 hours (based on
128Kbps, 1GB)
You can store a maximum of 999 fi les by the date for voice recording.
Each voice recording fi le can be as long as 5 hours.
The recording fi le name will be automatically specifi ed, for example, as such
as “VCE_YYMMDD_XXX.mp3”. “VCE” means voice recording, “YYMMDD”
indicates the recording date and “XXX” is the recording fi le number.
Record Voice
NOTE
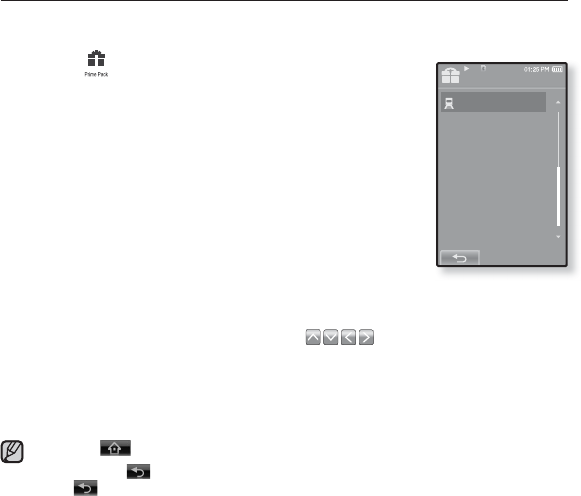
112 _ enjoying the prime pack
VIEWING THE WORLD SUBWAY MAP
You can browse through the World Subway Map and noted places around
stations.
1. Tap the icon on the main menu screen.
The <Prime Pack> list appears.
2. Select <Subway Route Map> and tap on it.
World Region selection screen appears.
3. Tap on the desired region.
Select one from <AMERICA>, <EUROPE>, <ASIA
OCEANIA>.
Cities with Subway Map within the selected region are
displayed.
4. Tap on the city name to display its subway map.
The subway map of the selected city is displayed.
5. To enlarge the map, tap on the portion to enlarge.
Tap on the enlarged map again to display [] icons, and move the map
using these buttons.
In case of having noted places near a station on the enlarged map, tap on the icon to
display information on the place.
Tap the [ ] icon to return to World Region selection screen.
Tapping the [ ] icon moves back to the previous screen, and pressing and hold
the [ ] icon moves to the main menu.
It may differ from the actual subway map.
NOTE
Prime Pack
Subway Route Map

using bluetooth_ 113
using bluetooth
Using Bluetooth wireless, you can connect your player wirelessly to other
Bluetooth devices and exchange data with them, talk hands-free or enjoy music
using a Bluetooth stereo headset.
Tap the [ ] icon to move to the previous screen.
Press and briefl y hold the [] icon to move to the main menu screen.
WHAT IS BLUETOOTH?
Bluetooth is an industry specifi cation that describes how Bluetooth-compliant
stereo headsets, mobile phones, and external devices can easily interconnect
with each other using a short wireless connection.
The Bluetooth device can cause a noise or malfunction, depending on the use
conditions.
Physical signal interference, for instance, if you hold the player in the hand and wear a
stereo headset in your ears.
When a part of the body is in contact with the receiving/transmitting system of the player or
the stereo headset.
Electrical variation from electrical jamming by the wall, corner or offi ce partitioning.
Electrical interference from the same frequency-band devices including medical equipment,
microwave oven and wireless LAN.
When pairing the Bluetooth device with the player, make it within as short distance
as possible.
The farther the distance between player and stereo headset is, the worse the
quality is. If the distance exceeds the limit, the communications are disconnected.
We do not recommend you use text and picture view modes while listening to
the music with the stereo headset as it can cause deterioration of both player
performance and Bluetooth communications.
Depending on the model of the stereo headset, fi les less than 32 kHz can not be
played.
In poor reception-sensitivity areas such as inside an elevator or underground, the
Bluetooth connection may not work properly.
NOTE

114 _ using bluetooth
WHAT IS BLUETOOTH? (CONTINUED)
The maximum distance that enables wireless connection between the player and
the Bluetooth device is 32.8 feet. The connection will be automatically cut off if
the distance is out of this range. Even within this range, the sound quality may be
deteriorated by obstacles such as walls or doors.
When not in use, set the <Bluetooth Mode> to <Off>. If you stay in <On> for
<Bluetooth Mode>, the battery usable time is reduced.
The Bluetooth features of the player are optimized with Samsung products. If used with
third party products, the Bluetooth features may not work properly.
Do not use the Bluetooth function for illegal purposes (pirated copy, illegal wireless
tapping and communications, etc. for commercial purposes) Samsung is not responsible
for any of these illegal uses and the consequent results.
NOTE
CAUTION
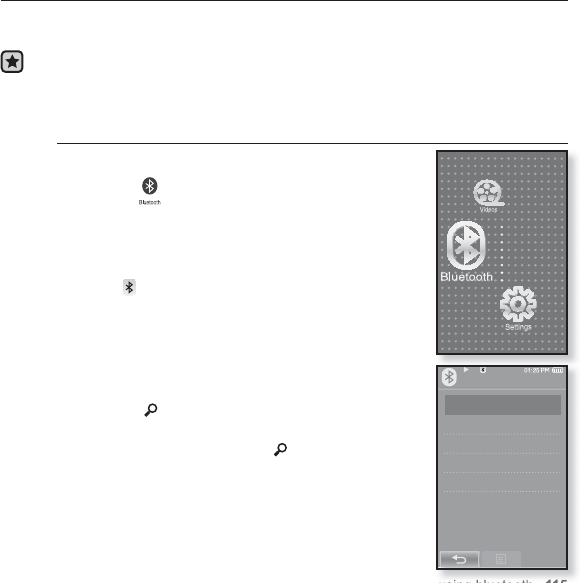
using bluetooth_ 115
Bluetooth
Stereo Headset
Mobile Phone
File Transfer
Bluetooth Mode
Bluetooth Settings
USING A BLUETOOTH STEREO HEADSET
You can use a Bluetooth stereo headset to let you enjoy music with high quality
stereo sound, all without wires!
Before you start - If the player is connected to a Bluetooth mobile phone or
external device, set the connection to off fi rst. Ensure that the
Bluetooth device to connect is ready for pairing. (refer to the
device’s user manual)
To register the Bluetooth Stereo Headset
(you only need to register it once)
1. Tap the icon on the main menu screen.
The Bluetooth settings window appears.
2. Tap <Yes>.
The <Bluetooth Mode> is set to <On>.
The icon will light.
3. Set the stereo headset ready for pairing.
To set the headset ready for the pairing mode, refer to
the headset’s user manual.
4. Tap <Stereo Headset>
5. Tap the [] icon.
This player automatically starts to search for any
Bluetooth device even if the [ ] icon was not
pressed.
The headset to be registered will be listed.
116 _ using bluetooth
USING A BLUETOOTH STEREO HEADSET (Continued)
To register the Bluetooth Stereo Headset (continued)
6. Tap on the name of headset you want to register.
The password input window appears if the password for the headset is other
than 0000. Refer to the headset’s manual for the password.
The registration of the headset is completed.
You can use the Bluetooth function only when playing music, video and
games. It is not supported while you are listening to FM Radio.
Description of the Bluetooth icon
: Bluetooth mode off : Bluetooth mode on
:Connected to a stereo headset :Connected to a mobile phone
If you want to turn off the Bluetooth function, set the Bluetooth Mode to
<Bluetooth>
ĺ
<Bluetooth Mode>
ĺ <Off>
.
Use only a Bluetooth-certifi ed stereo headset. Mono hands-free headsets
are not supported.
When not in use, set the <Bluetooth Mode> to <Off>. If you stay in <On>
for <Bluetooth Mode>, the battery usable time is reduced.
You can add up to 20 devices for the Bluetooth connection.
This player may not be compatible with all Bluetooth stereo headsets.
NOTE
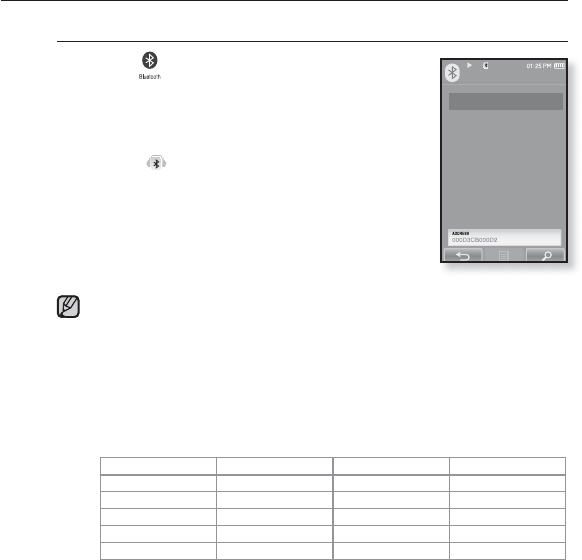
using bluetooth_ 117
USING A
BLUETOOTH
STEREO HEADSET (Continued)
To connect the registered Bluetooth stereo headset
1. Tap the icon on the main menu screen.
2. Tap <Stereo Headset>
3. Tap on the stereo headset to connect.
When the connection is successfully done, you will
see the [ ] icon.
You can connect up to 2 headsets.
4. Play a fi le of your choice.
You can listen to the music using a stereo headset.
If you can’t fi nd the desired headset to connect, register it fi rst. See page 115.
If you turn off the player or the headset, and then turn it on, the bluetooth
communication may be disconnected. If you want to listen to the music
again using the stereo headset, repeat the instructions above.
When two headsets are connected, the fi rst-connected headset alone can
be enabled for functional operation such as play/stop and volume control.
For more information, refer to the headset’s user manual.
Bluetooth-compliant Stereo Headsets
Company Model Company Model
Plantronics
PULSAR 590 LUBIX NC1
wiREVO S300 SAMSUNG SBH-170
Sony Ericsson
HBH-DS970 Jabra BT-620S
SONY DR-BT30Q Motorola HT-820
Fusion NFC BT-55D
NOTE
Stereo Headset
SBH-170
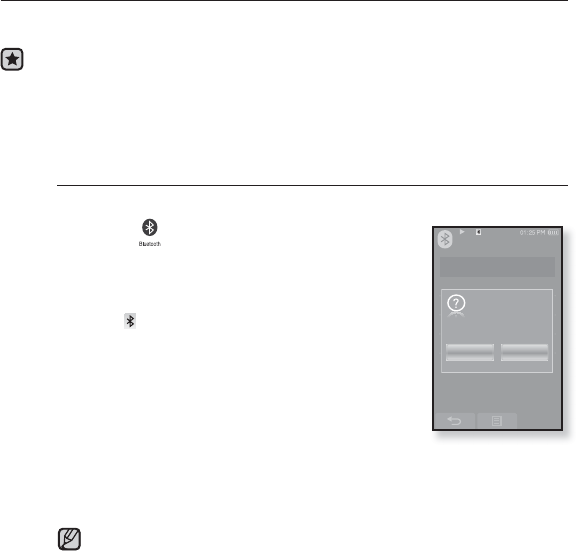
118 _ using bluetooth
USING A BLUETOOTH MOBILE PHONE
You can make and receive phone calls on your player once you connect a
Bluetooth mobile phone. The player will function as a hands-free device.
Before you start - If the player is connected to a Bluetooth stereo headset or
external device, set the connection to off fi rst.
Ensure that the Bluetooth mobile phone you are going to
connect is ready for pairing. (refer to the mobile phone’s user
manual)
Set to <Discoverable> from <Bluetooth Settings> ĺ <Discover
Option>. See page 130.
To register the Bluetooth mobile phone
(you only need to register it once)
1. Tap the icon on the main menu screen.
The Bluetooth settings window appears.
2. Tap <Yes>.
The <Bluetooth Mode> is set to <On>.
The icon will light.
3. Search for YP-P2 in your mobile phone’s menu.
If you renamed the YP-P2 player, search the new name.
4.
Enter the password when the password input
window appears on the mobile phone.
5.
If you see the message of <Connect?>, and tap
<Yes>.
The PIN code (password) input window appears.
The password digits may differ, depending on the mobile phone. (refer to the
mobile phone’s user manual)
Bluetooth
Stereo Headset
Mobile Phone
File Transfer
Yes
Connect
?
No
NOTE
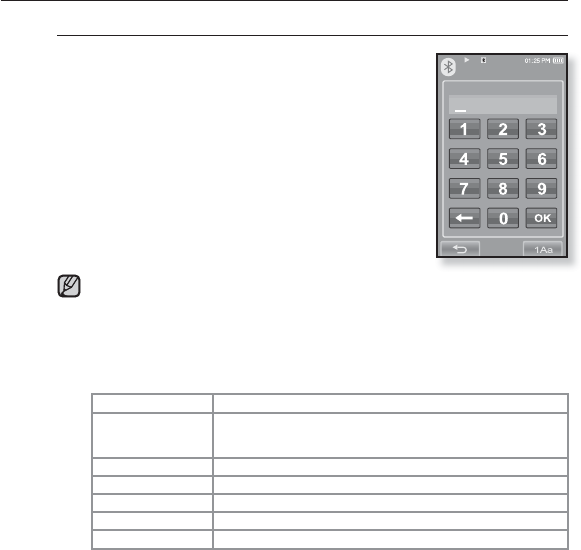
using bluetooth_ 119
USING A BLUETOOTH MOBILE PHONE (Continued)
To register the
Bluetooth
mobile phone (Continued)
6.
Enter the password for the mobile phone to add
to the player.
Make sure to enter the same password as in step 4
above.
7. Tap <OK>.
The mobile phone registration is complete.
With some mobile phones, the search device and mobile conversation
(placing/receiving calls) functions may not work properly.
If you press a button on the mobile phone or make or end a call when there
is a Bluetooth connection between the player and the mobile phone, you may
hear a noise from the player.
We recommended using English for the device name of the mobile phone.
Bluetooth-compliant Mobile Phones
Company Model
SAMSUNG
SPH-C3250, SPH-W2700, SPH-V7400, SPH-V6900, SCH-W270,
SPH-B5600, SPH-B3200, SGH-X828, SGH-I718, SGH-E908, SGH-U608
LG LG-KH1000, LG-KV2400, LG-KG90, LG-KG77
SKY
IM-U130
NOKIA N72
PHILIPS S900
MOTOROLA Z3
NOTE
Enter PIN code
Connect Device
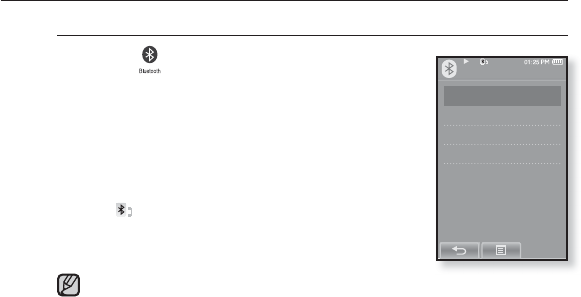
120 _ using bluetooth
USING A BLUETOOTH MOBILE PHONE (Continued)
To connect to the registered Bluetooth mobile phone
1. Tap the icon on the main menu screen.
2.
In the Bluetooth screen, select <Mobile Phone>
and tap on it.
3. Select <Mobile Phone> and tap on it.
4.
Select a mobile phone to connect to and tap on it.
When the connection is successfully done, you will see
the icon.
If you can’t fi nd a phone to connect to, register the phone with the player
fi rst. See page 118.
The mobile phone connection can be set off if you turn off and restart the
player. If the connection is set off, refer to the steps above to connect
again.
NOTE
Mobile Phone
Mobile Phone
Redial
Call by Number
Call History

using bluetooth_ 121
USING A BLUETOOTH MOBILE PHONE (Continued)
To dial the last used number
1.
In the Bluetooth screen, select <Mobile Phone>
and tap on it.
2. Select <Redial> and tap on it.
You are now placing a call to the last used phone
number.
The recent call history may appear depending on the
mobile phone. Select the latest phone number in the
call history to call.
To make a call using the player
1.
In the Bluetooth screen, select <Mobile Phone>
and tap on it.
2. Select <Call by Number> and tap on it.
The phone number input window appears.
3. Enter the phone number for the other person.
4. Tap the [ ] icon.
You are now placing a call to the other person.
If the connected mobile phone has set shortcut numbers, you can
directly make a call on the player by pressing and holding the last
number of the shortcut.
To end the phone call
Tap <Disconnect > while making conversations.
The call is hung up.
Mobile Phone
Mobile Phone
Redial
Call by Number
Call History
Mobile Phone
Mobile Phone
Redial
Call by Number
Call History
NOTE
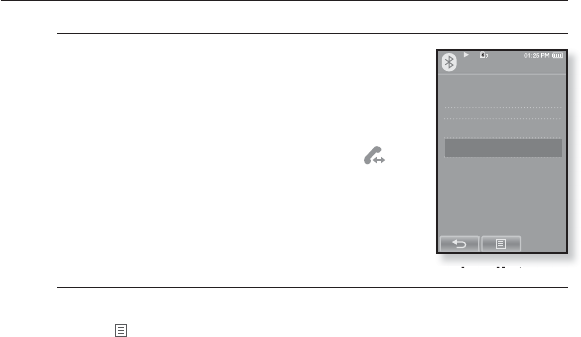
122 _ using bluetooth
USING A BLUETOOTH MOBILE PHONE (Continued)
To make a call using the phone number list
1.
In the Bluetooth screen, select <Mobile Phone>
and tap on it.
2. Select <Call History > and tap on it.
The phone number list appears.
3.
Select a desired phone number and tap the [ ]icon.
You are now placing a call to the other person.
To delete a phone number in the phone number list
1.
In the <Call History>, select a phone number to delete and tap
the [ ]icon.
2. Tap <Delete>.
If you want to delete all numbers in the phone number list, select<Delete All>.
The confi rmation window appears.
3. Tap <Yes>.
The selected number will be deleted.
Mobile Phone
Mobile Phone
Redial
Call by Number
Call History

using bluetooth_ 123
USING A BLUETOOTH MOBILE PHONE (Continued)
To answer the phone
1.
You will see <Connect?> when you have an incoming call.
2. Tap <Yes>.
You can now make conversations.
To switch to the mobile phone while talking on the player (YP-P2)
While talking on the player, tap <Voice to Phone>.
You can now make conversations on the mobile phone.
To switch to the player (YP-P2) while talking on the mobile phone
While talking on the mobile phone, tap <Voice to Hands-free>.
You can now make conversations on the hands-free device.
To adjust the volume
While talking on the hands-free, press the [ +, – ] button to adjust the volume.
You can select the volume from 0 to 30.
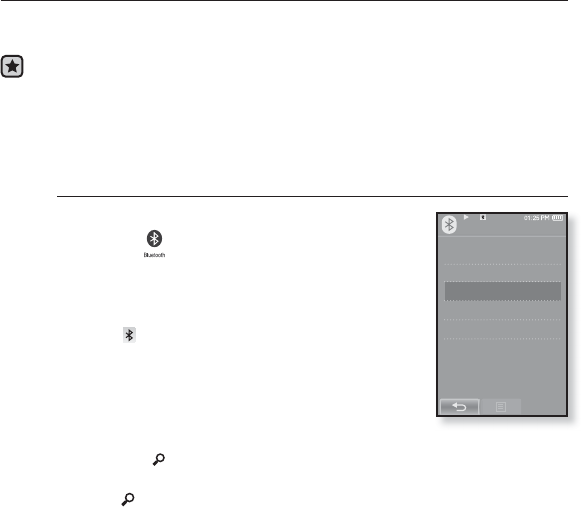
124 _ using bluetooth
TRANSFERRING FILES TO/FROM A BLUETOOTH
DEVICE
You can transfer music, picture and video fi les to Bluetooth-compliant external
devices such as an MP3 player, mobile phone, etc. to the player or vice versa.
Before you start - If the player is connected to a Bluetooth stereo headset or
mobile phone, set the connection to off fi rst.
Ensure that the Bluetooth device you are going to connect is ready for pairing. (refer
to the device’s user manual)
Check if the Bluetooth device to supports the fi le transfer function. (refer to the
device’s user manual)
To register an external device on the player
(you only need to register it once)
1. Tap the icon on the main menu screen.
The Bluetooth settings window appears.
2. Tap <Yes>.
The <Bluetooth Mode> is set to <On>.
The icon will light.
3. Set the external device so it is ready for pairing.
For information on setting the external device so it is
ready for pairing, refer to the device’s user manual.
4.
Select <File Transfer> and tap on it.
5
.Tap the [ ]icon.
This player automatically starts to search for any Bluetooth device even if
the [ ] icon was not pressed.
The device to be registered will be listed.
Bluetooth
Stereo Headset
Mobile Phone
File Transfer
Bluetooth Mode
Bluetooth Settings
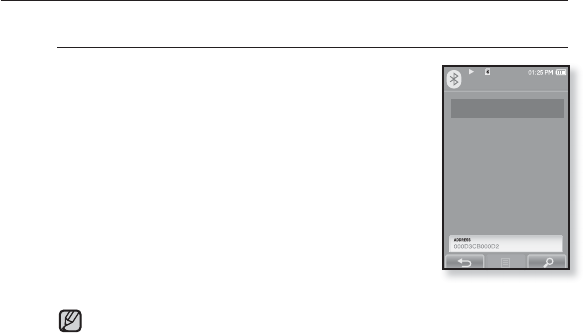
using bluetooth_ 125
TRANSFERRING FILES TO/FROM A BLUETOOTH
DEVICE (Continued)
To register an external device on the player (Continued)
6
.Tap on the name of device you want to register.
The password input window appears if the password
for the external device is other than 0000. Refer to the
external device’s manual for the password.
7
.Enter the password when the password input
window appears on the external device.
You must enter the same password as in step 6 above.
When the pairing is completed, you will see the File
Transfer screen.
See step 3 of page 126 to transfer fi les on the player to an
external device.
The password digits may differ, depending on the external device. (refer to
the device’s user manual)
GSome functions may not work properly if you use a Bluetooth device other
than YP-P2 for fi le transfer.
NOTE
File Transfer
Samsung YP-P2
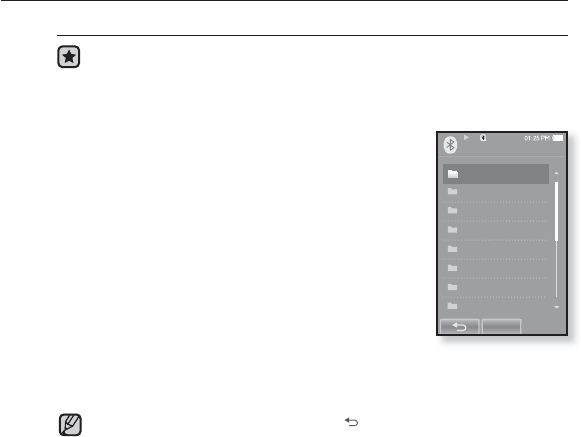
126 _ using bluetooth
OK
Video
Music
Playlists
Pictures
Datacasts
Text s
Games
Received Files
File Transfer
1/8
TRANSFERRING FILES TO/FROM A BLUETOOTH
DEVICE (Continued)
To transfer a fi le on the player to the external device
Before you start - If you can’t fi nd the external device to connect to,
register it with the player fi rst. See page 124. Ensure that the Bluetooth
device you are connecting is ready for pairing. (refer to the device’s user
manual)
1
.
In the Bluetooth screen, select <File
Transfer> and tap on it.
2
.Select an external device to connect to and tap
on it.
When the connection is completed, you will see the File
Transfer screen.
3
.Select a desired folder and tap <OK>
4
.Select a fi le to transfer and tap <OK>.
The selected fi les on the player will be transferred to the
external device.
When the fi le transfer is done, tap the [ ] icon to exit the fi le transfer
mode. See page 127.
DRM fi les (chargeable) can not be played on the player.
The connection can be set off if you turn off and restart the player or
external device. If the connection is set off, refer to the steps above to
connect again.
NOTE
Ex) <File Transfer>
screen of the player

using bluetooth_ 127
TRANSFERRING FILES TO/FROM A BLUETOOTH
DEVICE (Continued)
To cancel transferring the fi le
Tap <Cancel> during the transfer.
The fi le transfer is stopped.
To exit the File Transfer mode
1
.
Press and briefl y hold the [ ]icon in the fi le list window.
Each time you tap the [ ] icon, the player will return to the previous screen and
you will see the fi le transfer close window.
2
.Tap <Yes>.
The fi le transfer mode is closed.
128 _ using bluetooth
TRANSFERRING FILES TO/FROM A BLUETOOTH
DEVICE (Continued)
To transfer a fi le on the external device to the player
If you want to transfer an external fi le to the player, you must fi rst make it
ready for pairing.
Before you start - If the player is connected to a Bluetooth stereo headset
or mobile phone, set the connection to off fi rst.
Ensure that the Bluetooth device you are going to connect is ready for
pairing. (refer to the device’s user manual)
Check if the Bluetooth device to supports the fi le transfer function.
(refer to the device’s user manual)
Set <Discoverable> from <Bluetooth Settings> ĺ <Discover Option>. See
page 130.
1
.Tap the icon on the main menu screen.
The Bluetooth settings window appears.
2
.Tap <Yes>.
The <Bluetooth Mode> is set to <On>.
The icon will light.
You can transfer a fi le on the external device to the player.
For pairing the external device with and transferring it to the player, refer to the
device’s user manual.
Files transferred to the player are saved in <File Browser>
ĺ
<Received Files>
folder.
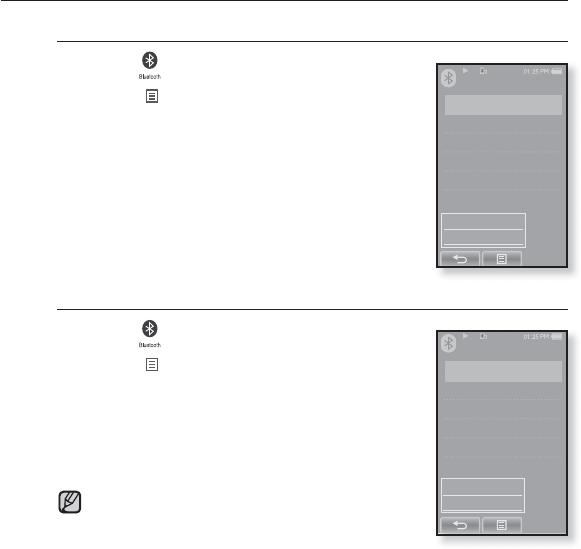
using bluetooth_ 129
USING THE BLUETOOTH MENU
To disconnect the Bluetooth Device
1. Tap the icon on the main menu screen.
2. Tap the [ ] icon.
The <Bluetooth> menu appears.
3. Tap <Disconnect>
The Disconnection confi rmation window appears.
4. Tap <Yes>.
The currently connected device will be disconnected.
To check the Bluetooth Device connected
1. Tap the icon on the main menu screen.
2. Tap the [] icon.
The <Bluetooth> menu appears.
3. Tap <Connected Device>
You can see information of the connected device.
You can disconnect or check the connected device
only when connecting Bluetooth stereo headset or
mobile phone.
Bluetooth
Stereo Headset
Mobile Phone
File Transfer
Bluetooth Mode
Bluetooth Settings
Disconnect
Connected Device
Bluetooth
Stereo Headset
Mobile Phone
File Transfer
Bluetooth Mode
Bluetooth Settings
Disconnect
Connected Device
NOTE
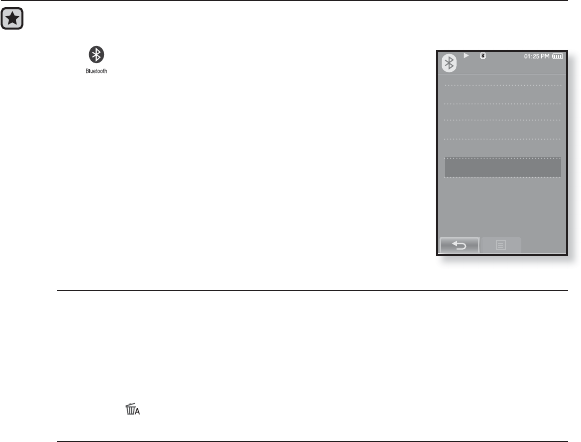
130 _ using bluetooth
BLUETOOTH SETTINGS
Before you start - Set <Bluetooth Mode> to <On>.
1. Tap the icon on the main menu screen.
2. Select <Bluetooth Settings> and tap on it.
The <Bluetooth Settings> menu appears.
3. Set necessary options.
Bluetooth Settings Options
Discover Option : You can set the Bluetooth device to detect this player.
<Discoverable> sets it to detect and <Non-Discoverable> turns off detection.
Search Timeout : You can select the search time period for a new device. After
setting a time, a new device will be searched for the time limit you set. Select
one from <10sec>, <20sec>, <30sec>, <45sec> and <60sec>.
Delete Device : You can delete a registered device in the player. See page 131.
Tap the [ ] icon to delete all of the devices paired.
My Device Info. : You can check the name and address of your player.
Bluetooth
Stereo Headset
Mobile Phone
File Transfer
Bluetooth Mode
Bluetooth Settings
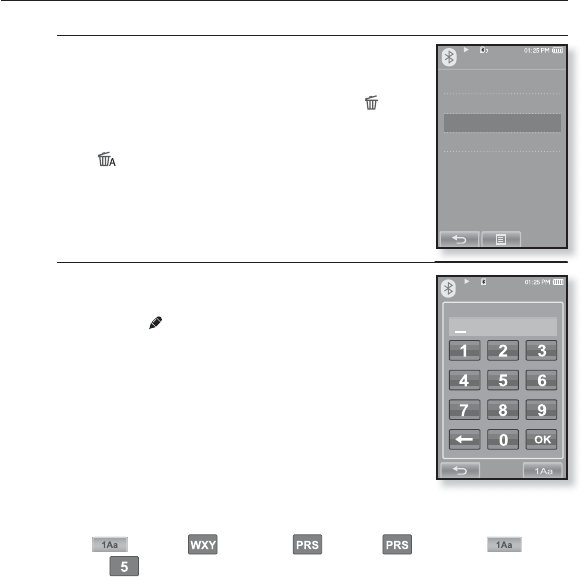
using bluetooth_ 131
BLUETOOTH SETTINGS (Continued)
To delete a Bluetooth device
1. Select <Delete Device> and tap on it.
You will see the list of the registered devices.
2. Select a device to remove and tap the [ ]
icon.
If you want to delete all of the devices paired, tap the
[] icon.
3. Tap <Yes>.
The selected device will be removed.
To rename a Bluetooth device
1. Select <My Device Info.> and tap on it.
The My Device Info screen appears.
2. Tap the [] icon.
The Edit Device Name window appears.
3. Rename the device by tapping on the number or
English character icon.
[1Aa] : The input mode switches from number to
uppercase English and to lowercase English.
[] : You can delete the characters one at a time.
[ – ] : You can add space between characters.
You can insert ‘–‘.
[OK] : Confi rm your change.
E.g. To enter “YPS5”
-Move to the corresponding key icon and tap on it.
(once) ¨(3 times) ¨(once) ¨(3 times) ¨(twice)
¨(once)
Bluetooth Settings
Discover Option
Search Timeout
Delete Device
My Device lnfo.
My Device Info.
Edit Device Name
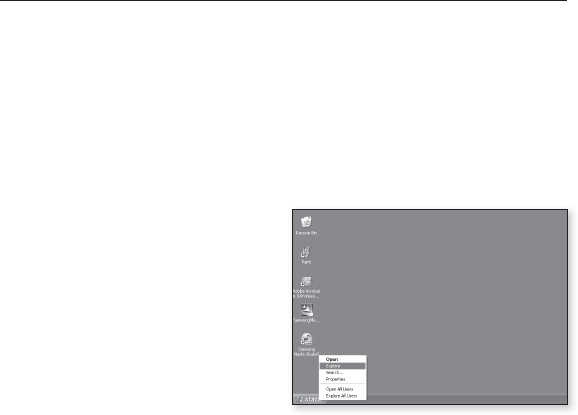
132 _ upgrading fi rmware
upgrading fi rmware
Future upgrades may be available for this player to enhance performance and
compatibility.
1. Connect to http://www.samsung.com, select [SUPPORT] [DOWNLOAD
CENTER] and then select your player.
2. When the player page appears, select [Firmware] below the model name to
download the latest fi rmware.
3. Uncompress the downloaded fi le onto your Desktop.
The uncompressed fi les will be displayed.
4. Connect the player to your PC with
the USB cable.
5. Right click on the Start button on the
bottom left of your PC’s screen, then
choose Explore to Open Windows
Explorer on your PC.
[P2] is displayed in Windows Explorer.
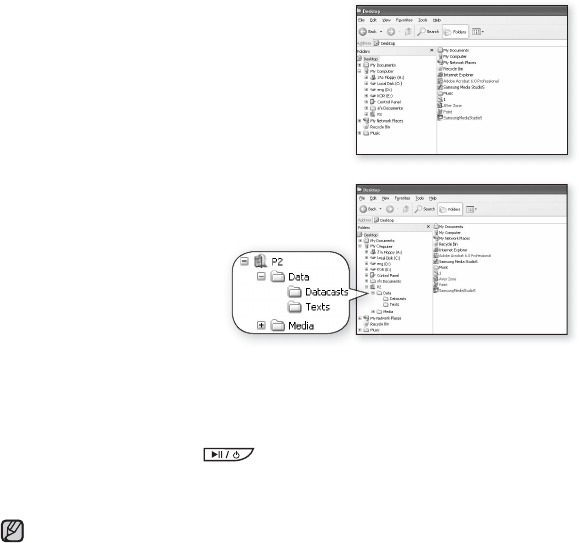
upgrading fi rmware _ 133
6. Locate and click on the Desktop icon in
Windows Explorer (left column).
The contents of the Desktop will appear in the
right column.
7. (Windows Media Player 10)
Locate and select the Firmware update fi les
(right column) and drag-and-drop it into the
folder of [P2] [Data].
OR,
(Windows Media Player 11)
Locate and select the
Firmware update fi les (right column) and drag-and-drop it into the [P2]
[Internal Storage].
8. After disconnecting the USB cable, the player will be turned off automatically.
9. Press and briefl y hold the button.
The fi rmware will be upgraded.
When upgrading is complete, the player will be turned off automatically.
Check the battery charge status of the player. If the battery is not suffi ciently
charged, the fi rmware will not be upgraded.
You need to have at least 50 MB of free space on the player for the upgrade.
NOTE
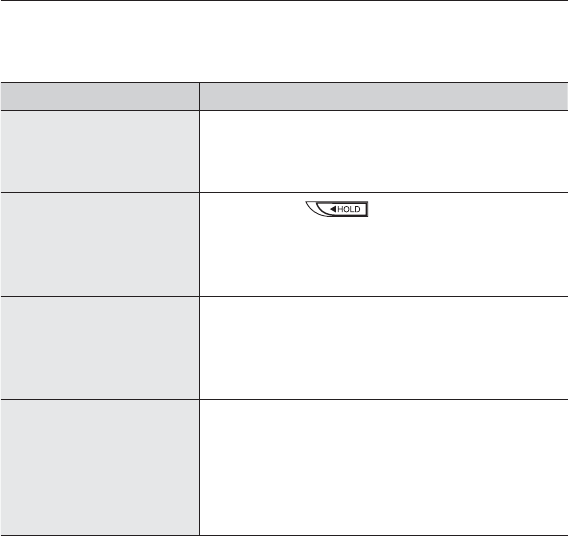
134 _ troubleshooting
troubleshooting
If you have a problem with your new mp3 player, check for a solution in
this list. If the problem persists, contact Samsung Customer Service at
1-800-SAMSUNG (1-800-726-7864).
PROBLEM SOLUTION
Power will not turn on.
•Power will not turn on if the battery is completely
drained. Recharge the battery and turn the power
on again.
•Press the Reset hole.
Buttons do not work.
•Check if the switch is in the direction of
the arrow position.
•Ensure that you press the right button and icon
before trying.
•Press the Reset hole.
The screen will not
turn on.
•The screen may not be visible under direct sunlight.
•When <Display Off> is selected from <Settings>
ĺ<Display>, the touch screen will be turned off.
Tap any button or on the screen and see if it turns
on.
Power is turning off.
•Check the battery status.
•The power is automatically turned off when the
battery is completely drained. Recharge the battery.
•
If <Auto Power Off> is selected from <Settings>
ĺ<System>, the Power will be turned off when the
player is in Pause mode for the set time period. Turn
on the Player.

troubleshooting _ 135
PROBLEM SOLUTION
Battery life differs from
the manual.
•The battery life can vary depending on the sound
mode and display setting.
•Battery life may be shortened when the player is left
for extended periods in low or high temperatures.
EmoDio Program
Malfunction
•Check if your PC meets the basic system
requirements.
Connection to your PC
is disabled.
•Check if the USB cable is correctly connected and
try again.
•Press <Start> on the toolbar of your PC to run
Windows Update. Select Key Updates and Service
Packs, then update all. Reboot your PC and
reconnect.
The fi le transfer rate is
too slow.
•If you are running multiple programs including
<EmoDio> on your PC, the fi le transfer rate will
be slow. Exit unnecessary programs and try
transferring again.
Player isn’t playing.
•Check if the available fi le has been saved in the
memory.
•Check if the music fi le is damaged.
•Check if there is enough battery power.
File upload doesn’t
work.
•Check if the USB cable is securely connected.
Reconnect if necessary.
•Check if the memory is full.
•Press the Reset hole.

136 _ troubleshooting
PROBLEM SOLUTION
Files or data are
missing.
•Check if the USB cable has been disconnected
during fi le or data transmission. If this is the case, it
may cause serious damage not only to fi les/data but
also to the product. You have to be extra cautious
as Samsung is not responsible for data loss.
Abnormal play time
display during play.
•Check if the fi le is in Variable Bit Rate (VBR) format.
Abnormal display of fi le
name.
•Go to <Settings> ĺ<Language> ĺ<Contents>
in the Main Menu screen and set an appropriate
language.
The product is hot.
•Heat may be generated during recharging. This has
no effect on the product life or functions.
A message appears
while watching a video.
•Try to download the video clip through EmoDio
again.
Bluetooth connections
could not be made.
•Check if the stereo headset is Bluetooth-certifi ed.
The mono hands-free headset is not supported.
•The Bluetooth connection can be set off if you turn
the player or stereo headset off and on. In this case,
try to connect again.
•If you want to talk on your mobile phone, check if
you have set off the Bluetooth connections between
player and stereo headset.
•If you want to talk on your mobile phone, check if
you have set the player to <Discoverable> in the
<Bluetooth Settings> ĺ<Discover Option>.
If set to <Non-Discoverable>, you can’t fi nd the
player on your mobile phone.
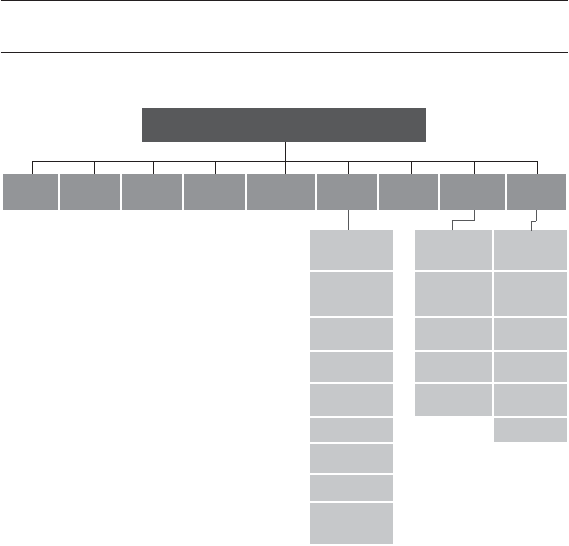
appendix _ 137
appendix
MENU TREE
Here’s a quick look at how the menus and functions are organized on your new
mp3 player.
Menu Select Screen
Videos Music Pictures FM
Radio Datacasts Prime
Pack
File
Browser Bluetooth Settings
Texts Stereo
Headset Menu Style
Games Mobile
Phone Sound
Alarm File Transfer Display
Calendar Bluetooth
Mode Language
Address Book Bluetooth
Settings Time
World Clock System
Calculator
Record
Subway
Route Map
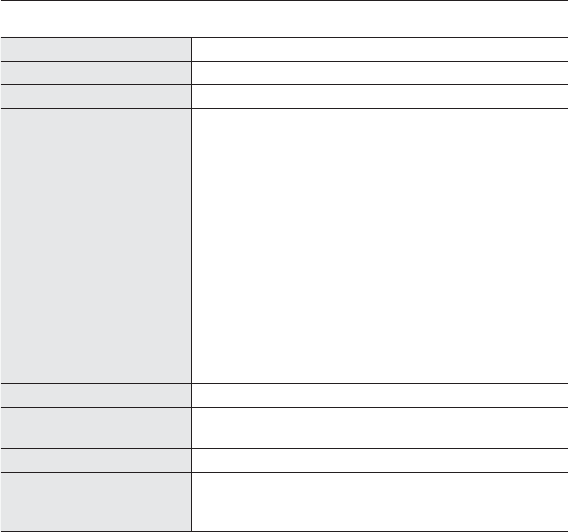
138 _ appendix
PRODUCT SPECIFICATIONS
Model Name YP-P2
Rating DC 5.0V / 500mA
Built-in Battery Power 830 mAh / DC 3.7V
File Compatibility
AUDIO :
MPEG1/2/2.5 Layer3(8kbps~320kbps,
8kHz~48kHz) WMA(8kbps~320kbps,
8kHz~48kHz)
AAC-LC (16kbps ~ 256kbps, 8kHz~48kHz)
AAC-Plus ( 16kbps ~ 256kbps, 16kHz~44.1kHz)
Enhanced-AAC-Plus : (16kbps ~ 56kbps,
32kHz~44.1kHz)
VIDEO :
SVI (Video: MPEG4, Audio: MP3 (CBR 44.1kHz
16bit Stereo, 128kbps),
Resolution: 480x272,
Frame Rate:
30fps)
WMV9 (Video: WMV9 Simple Profi le,
Audio:WMA9 (Max 860kbps),
Resolution: 320x240 or 480x272,
Frame
Rate:
30fps)
IMAGE : JPG (Baseline olny )
Earphone Output 20mW/Ch. (based on 16ȍ)
Output Frequency
Range 20Hz~20KHz
Signal to Noise Ratio 89 dB with 20 KHz LPF(based on 1kHz 0 dB)
Play Time
Maximum of 35 hours for music playback (based
on : MP3 128kbps, Volume 20, Normal sound
mode), Maximum of 5 hours for video playback

appendix _ 139
Temperature Range
for Operation
-5~35°C (23~95°F)
Case PMMA, Stainless
Weight 3.03 oz
Dimensions (WxHxD)
2.05˝ X 3.94˝ X 0.39˝
FM Radio
FM Frequency
87.5~108.0MHz FM T.H.D 0.8%
FM Signal to
Noise Ratio 59 dB FM Useable
Sensitiivity 5dB
Wireless System
Emission Type F1D
RF Power 2.4mW
Transmit Frequency 2402MHz ~ 2480MHz
Receive Frequency 2402MHz ~ 2480MHz
No. of channels 79 ch
Temperature -10°C~ +50°C (14 ~ 122°F)
Modulation System GFSK
Communication Mode Semi-duplex Operation
Humidity 0 ~ 95%
Spec Version Supported
2.0
Module BCM2048
The contents of this Manual are subject to change without prior notice for further
improvement.

140 _ appendix
LICENSE
The product unit accompanying this user manual is licensed under certain
intellectual property rights of certain third parties. In particular, this product is
licensed under the following US patents : 5,991,715, 5,740,317, 4,972,484,
5,214,678, 5,323,396, 5,539,829, 5,606,618, 5,530,655, 5,777,992, 6,289,308,
5,610,985, 5,481,643, 5,544,247, 5,960,037, 6,023,490, 5,878,080, and under
US Published Patent Application
No. 2001-44713-A1.
This license is limited to private non-commercial use by end-user consumers for
licensed contents. No rights are granted for commercial use. The license does
not cover any product unit other than this product unit and the license does not
extend to any unli-censed product unit or process conforming to ISO/IEC 11172-
3 or ISO/IEC 13818-3 used or sold in combination with this product unit. The
license only covers the use of this product unit to encode and/or decode audio
fi les conforming to the ISO/IEC 11172-3 or ISO/IEC 13818-3. No rights are
granted under this license for product features or func-tions that do not conform
to the ISO/IEC 11172-3 or ISO/IEC 13818-3.

appendix _ 141
WARRANTY
Samsung warrants this product as free of defects in material, design and
workmanship for a period of twelve (12) months from the original date of
purchase.
If during the period of warranty this product proves defective under normal use
and service, you should return the product to the retailer from whom it was
originally purchased.
The liability of Samsung and its appointed maintenance company is limited to
the cost of repair and/or replacement of the unit under warranty.
Return of the product for defective reasons should be to the original purchaser;
however, Samsung Authorized Dealers and Authorized Service Centers will
comply with the warranty on the terms issued to purchasers in the country
concerned. For further information relating to the Authorized Service Centers
contact; 1-800-SAMSUNG (1-800-726-7864).
www.samsung.com/us
WARANTY CONDITIONS:
1. The warranty is only valid when the warranty card is properly completed,
and upon presentation of the proof of purchase consisting of original invoice
or sales slip confi rmation, indicating the date of purchase, dealer’s name,
model, serial No. and product number.
Samsung reserves the right to refuse warranty service if this information
has been removed or changed after the original purchase of the product
from the dealer.

142 _ appendix
WARRANTY (Continued)
2. Samsung’s obligations are to the repair of the defective part, and at its
discretion, replacement of the product (service exchange unit).
3. Warranty repairs must be carried out by an Authorized Samsung Dealer/
Service Center. No reimbursement will be made for repairs carried out by non
Samsung Centers, and warranty coverage will not be valid for any repairs or
damage caused by such repairs.
4. Repair or replacement under the terms of this warranty does not give right
to extension to or a new starting of the period of warranty. Repair or direct
replacement under the terms of this warranty may be fulfi lled with functionally
equivalent service exchange units.
5. The warranty is not applicable in cases other than defects in material, design
and workmanship.
The warranty does not cover the following:
-Periodic checks, maintenance, repair and replacement of parts due to
normal wear and tear.
-Abuse or misuse, including but not solely limited to the failure to use
this product for its normal purposed or in accordance with Samsung’s
instructions usage and maintenance.
-Use of the product in conjunction with accessories not approved by
Samsung for use with this product.

appendix _ 143
WARRANTY (Continued)
- Failure of the product arising from incorrect installation or use not
consistent with technical or safety standardsin current force, or failure to
comply with productmanual instructions.
- Accidents, Acts of God or any cause beyond the control of Samsung
caused by lightning, water, fi re, public disturbances and improper
ventilation.
- Unauthorized modifi cations carried out for the product to comply with
local or national technical standards in countries for which the Samsung
product was not originally designed.
- Repairs performed by non-authorized service centers such as opening of
the product by a non-authorized person.
- The model, serial No. and product number on the product has been
altered, deleted, removed or made illegible.
6. This warranty does not affect the consumer’s statutory rights nor the
consumers rights against the dealer from their purchase/sales agreement.

144 _ appendix
WARRANTY (Continued)
THERE ARE NO EXPRESS WARRANTIES OTHER THAN THOSE LISTED
AND DESCRIBED ABOVE, AND NO WARRANTIES WHETHER EXPRESS OR
IMPLIED, INCLUDING, BUT NOT LIMITED TO, ANY IMPLIED WARRANTIES
OF MERCHANTABILITY OR FITNESS FOR A PARTICULAR PURPOSE,
SHALL APPLY AFTER THE EXPRESS WARRANTY PERIODS STATED
ABOVE, AND NO OTHER EXPRESS WARRANTY OR GUARANTY GIVEN
BY ANY PERSON, FIRM OR CORPORATION WITH RESPECT TO THIS
PRODUCT SHALL BE BINDING ON SAMSUNG, SAMSUNG SHALL NOT
BE LIABLE FOR LOSS OF REVENUE OR PROFITS,FAILURE TO REALIZE
SAVINGS OR OTHER BENEFITS, OR ANY OTHER SPECIAL, INCIDENTAL
OR CONSEQUENTIAL DAMAGES CAUSED BY THE USE, MISUSE OR
INABILITY TO USE THIS PRODUCT, REGARDLESS OF THE LEGAL
THEORY ON WHICH THE CLAIM IS BASED, AND EVEN IF SAMSUNG HAS
BEEN ADVISED OF THE POSSIBILITY OF SUCH DAMAGES.
NOR SHALL RECOVERY OF ANY KIND AGAINST SAMSUNG BE GREATER
IN AMOUNT THAN THE PURCHASE PRICE OF THE PRODUCT SOLD BY
SAMSUNG AND CAUSING THE ALLEGED DAMAGE.
WITHOUT LIMITING THE FOREGOING,

appendix _ 145
WARRANTY (Continued)
PURCHASER ASSUMES ALL RISK AND LIABILITY FOR LOSS, DAMAGE
OR INJURY TO PURCHASER AND PURCHASER’S PROPERTY AND TO
OTHERS AND THEIR PROPERTY ARISING OUT OF THE USE, MISUSE OR
INABILITY TO USE THIS PRODUCT SOLD BY SAMSUNG NOT CAUSED
DIRECTLY BY THE NEGLIGENCE OF SAMSUNG.
THIS LIMITED WARRANTY SHALL NOT EXTEND TO ANYONE OTHER THAN
THE ORIGINAL PURCHASER OF THIS PRODUCT, IS NONTRANSFERABLE
AND STATES YOUR EXCLUSIVE REMEDY.
Some states do not allow limitations on how long an implied warranty lasts, or
the exclusion or limitation of incidental or consequential damages, so the above
limitations or exclusions may not apply to you.
This warranty gives you specifi c legal rights, and you may also have other rights
which vary from state to state.
This product is for personal use only, and is only for use in compliance with the
limitations of copyright and other laws.
To obtain warranty service, please contact SAMSUNG at: Samsung Electronics
America, Inc. 400 Valley Road, Suite 201 Mount Arlington, NJ 07856
1-800-SAMSUNG (1-800-726-7864)
www.samsung.com/us 081299

REV. 3.0
QUESTIONS OR COMMENTS?
COUNTRY CALL
OR VISIT US ONLINE AT
WRITE
IN THE US 800-SAMSUNG
(800-726-7864) www.samsung.com/us
Samsung Electronics America, Inc.
105 Challenger Road
Ridgefi eld Park, NJ 07660-0511
