Sandmartin CTG4-HD Digital Video Broadcasting User Manual CTG4 HD English V1 1 0
Sandmartin(Zhong Shan) Electronic Co., Ltd. Digital Video Broadcasting CTG4 HD English V1 1 0
UserManual.wiki
>
Sandmartin
>
CTG4 HD User Manual
user manual 7.08
Navigation menu
Upload a User Manual
Namespaces
Wiki Guide
HTML
PDF
Info
Views
User Manual
Discussion / Help
Navigation
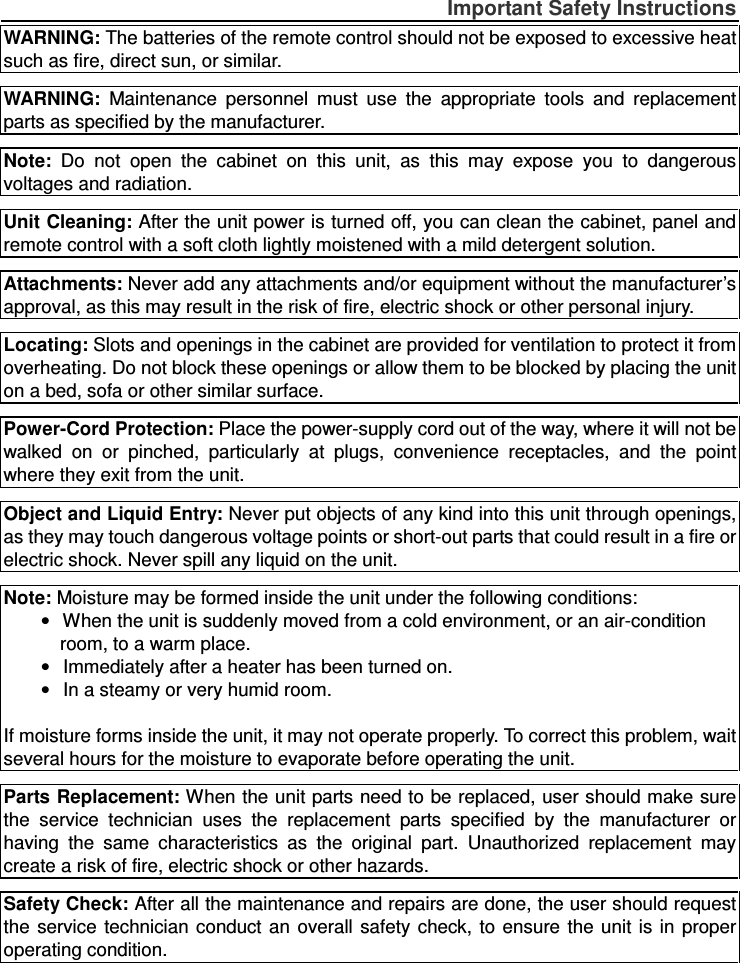

![7 Basic Operation 2. Basic Operation 2.1 Switch ‘ON’ the Settop First, plug in your Settop. Next, set the Power ON/OFF switch on the rear panel of the Settop to ‘ON’. Then, press the [Power] button on the front panel or remote control, to turn the Settop ON. When the Settop is first used, it will start a ‘First Time Setup’ walk-thru operation. ? Frequently Asked Question Q: My Settop is powered on, but the TV screen shows nothing: A: Make sure your TV is set to the correct video input. For example, if you have connected the Settop to the HDMI1 input of your TV, then you need to select the corresponding input of the TV. Q: My Settop is powered on, but only a “No Signal” display is shown. A: The channel you selected has no signal. This can be caused by several reasons: 1. The channel you selected currently has no programming from your cable provider. Select another channel. 2. The signal of the current TV channel is too weak. You can try changing to another channel with a stronger signal. If the problem still exists, please consult your local Cable TV Provider. 2.2 Standby Mode 1. Press the [Power] button on the front panel or remote control, to switch from operational mode [ON] to standby mode [OFF]. 2. In standby mode, press the [Power] button on the front panel or remote control, to switch to operational mode [ON]. The last active channel will be tuned and displayed. 3. To switch the Settop off completely, set the Power ON/OFF button on the Rear Panel to [OFF]. Or, you may unplug the main power cord from the AC wall outlet.](https://usermanual.wiki/Sandmartin/CTG4-HD/User-Guide-1577611-Page-10.png)
![8 Basic Operation 2.3 MUTE 1. Press the [Mute] button to mute the sound. An icon will be displayed on the screen to indicate the sound has been muted. 2. Press the [Mute] button again to restore the sound. 2.4 AUDIO 1. Press the [Audio] button to open the Audio Mode window. 2. Select the desired audio program with [CH▲/▼] and change the value with [VOL◄/►]. 2.5 RECALL Press the [Recall] button to toggle between the current channel and the previously selected channel. *You may also use this [PGDN / RECALL] button when in the GUIDE to quickly page down thru the available channels. 2.6 Channel Numbers Enter the channel number directly with your remote control and confirm the number with the [OK] button, to change to the desired channel.](https://usermanual.wiki/Sandmartin/CTG4-HD/User-Guide-1577611-Page-11.png)
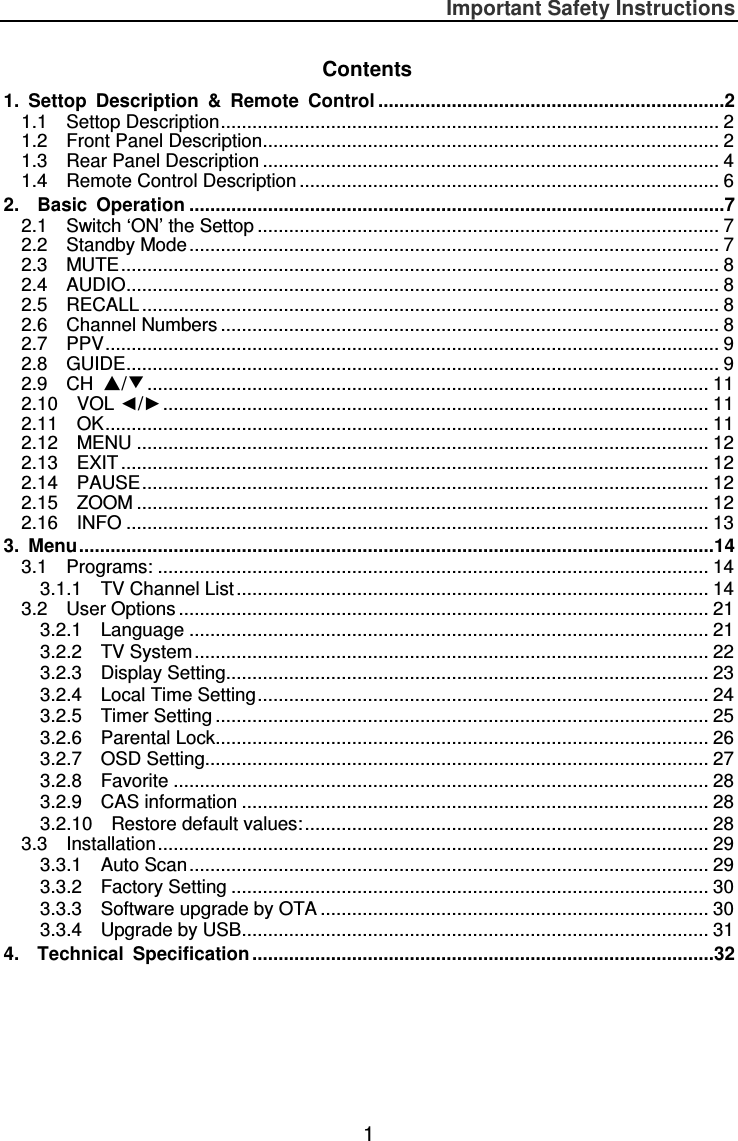
![9 Basic Operation 2.7 PPV <This section left blank intentionally> 2.8 GUIDE The Settop has an Electronic Program Guide (EPG) to help you navigate through all available channels. The EPG supplies information such as channel listings, program descriptions, and starting/ending times for all programs. Press the [GUIDE] button to display the Electronic Program Guide. NOTE: When in this menu, use the color buttons on your remote control to correspond to the color coded function (for example, the Green-Time feature is accessed by pressing the Green-GUIDE button on your remote). 1. Press the RED button on the remote control, which corresponds to the RED (Time) command on the bottom of the screen. You will then enter into the following screen.](https://usermanual.wiki/Sandmartin/CTG4-HD/User-Guide-1577611-Page-12.png)
![10 Basic Operation 2. Use the [VOL◄/►] buttons to select the chosen icon, then press the [OK] button to set that action. Press the [EXIT] button to return to the original EPG screen. 3. Press the GREEN button on the remote control, which corresponds to the GREEN (Timer) command on the bottom of the screen. You will then enter into the following screen. Icons to navigate around the EPG Back to actual time Navigate at a “30 minute interval“ Navigate at a “2 hour interval“ Navigate at a “daily interval“](https://usermanual.wiki/Sandmartin/CTG4-HD/User-Guide-1577611-Page-13.png)
![11 Basic Operation To navigate, press the [CH, VOL◄►] buttons and set related date, as well start time and duration. Using this Timer menu, you may set the Settop to tune your desired channel (or tune and record) at a preset time. Save your settings by highlighting ‘Save’ and pressing the [OK] button. 2.9 CH ▲/▼ Press the [CH▲/▼] buttons to change the channel. 2.10 VOL ◄/► Press the [VOL◄►] buttons to adjust the volume. 2.11 OK 1. Press the [OK] button to open the Channel List window. You can also select your different “Favorites” groups by pressing [VOL◄/►]. 2. Once you’ve selected the desired Channel / Favorites list, you can select the desired channel by pressing the [CH▲/▼] buttons to highlight the channel, then confirm it by pressing the [OK] button. 3. Press the [EXIT] button to return to normal TV viewing.](https://usermanual.wiki/Sandmartin/CTG4-HD/User-Guide-1577611-Page-14.png)
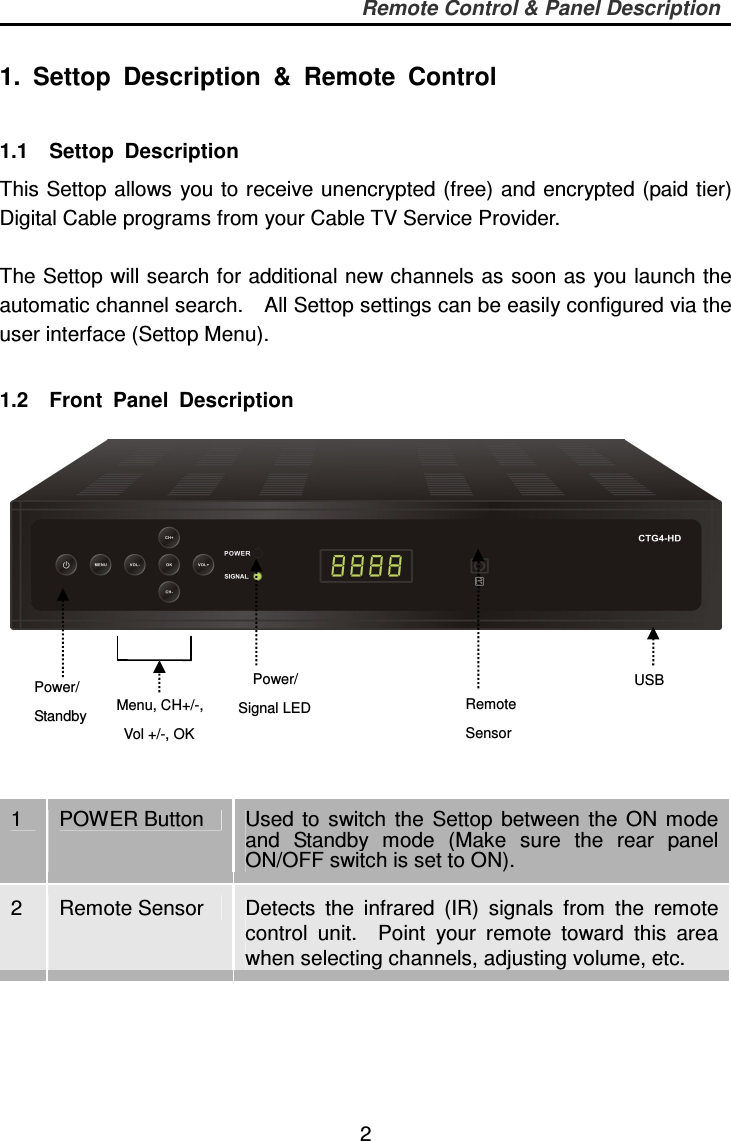
![12 Basic Operation You may also use the [OK] button to direct tune a channel. First, enter the desired Channel number using the remote control number keys, then press [OK] to tune that channel. You also use this [OK] button while setting features in the Settop Menu system. 2.12 MENU Press the [Menu] button to enter or exit the current menu. 2.13 EXIT Press the [Exit] button to exit the current menu. You may press this button to escape any on screen display or function, including: ZOOM, INFO, GUIDE, Channel List, etc.. 2.14 PAUSE 1. Press the [PAUSE] button and the picture will be paused, but the sound of the channel will still continue. 2. Press the [PAUSE] button again to return to normal viewing. 2.15 ZOOM 1. The [Zoom] button allows you to magnify the video. You may use this button during normal viewing, or you may press [PAUSE] and zoom a still picture. 2. Press the [Zoom] button the first time and you will see ‘ZOOM x1’ displayed in the lower right corner of the TV screen. Press [ZOOM] again and the image will enlarge to ‘ZOOM x2’. Press [Zoom] again, and repeat until you reach the desired magnification (Zoom has the following possible magnification settings: x1, x2, x4, x6, x8, x12, x16). 3. In “x2 ~ x16” Zoom mode, use the [CH▲/▼ / VOL◄/►] buttons to move the image center area to the portion of the video you want to view. 4. Press the [Exit] button to close the “Zoom” window.](https://usermanual.wiki/Sandmartin/CTG4-HD/User-Guide-1577611-Page-15.png)
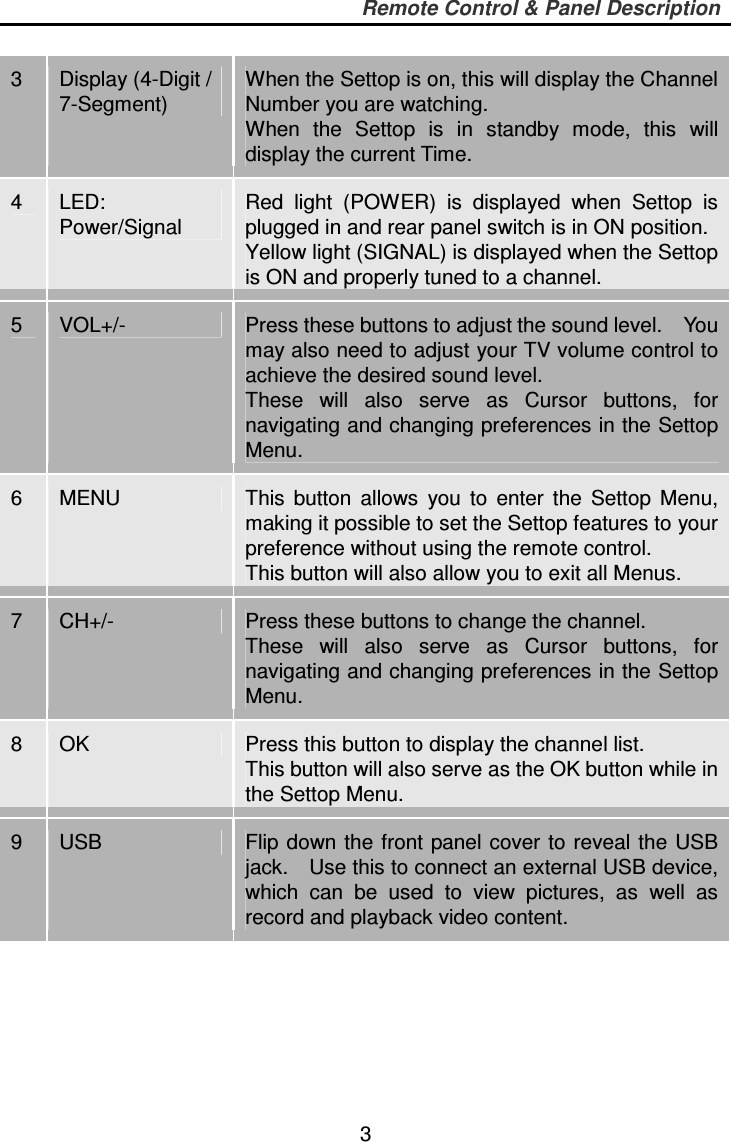
![13 Basic Operation *You may also use this [PGUP / ZOOM] button when in the GUIDE to quickly page up thru the available channels. 2.16 INFO Press the [INFO] button to open the information screen. This window will show the channel number being received, the channel ID, program description, and the current date and time. Service Information Channel name Channel number](https://usermanual.wiki/Sandmartin/CTG4-HD/User-Guide-1577611-Page-16.png)
![15 Menu Settings Move the “highlighted” selection to the desired channel by pressing the [CH] buttons. Then press the [OK] button to preview the current highlighted program in the top, right preview window. 3.1.1.1 Lock 1. Press the [RED] button on the remote, to enable the “Lock” mode. Use the [CH] buttons to highlight a channel you wish to protect/Lock, and confirm the action with the [OK] button. Enter the PIN code (default is ‘0-0-0-0’). Once a channel is Locked, a small Icon will be visible next to the channel. 2. Press the [RED] button again, or press the [EXIT] button, to exit “Lock” mode. Once all “Lock” changes have been made, press the [EXIT] button to return to the main ‘Channel List’ menu. At this time, a message will appear asking, “Are you sure to save?”. Select yes, press the [OK] button, and all of your ‘Lock’ settings are saved.](https://usermanual.wiki/Sandmartin/CTG4-HD/User-Guide-1577611-Page-18.png)
![16 Menu Settings 3.1.1.2 Edit Press the [GREEN] button to enable the “Edit” mode. You can then select between “Sort”, “Edit” and “Delete”. 3.1.1.2.1 Sort Press the [RED] button to “Sort” the channels, then select the sorting method you prefer. There are eight sorting methods available. Press the [CH] buttons to highlight the desired sorting method and press the [OK] button to confirm.](https://usermanual.wiki/Sandmartin/CTG4-HD/User-Guide-1577611-Page-19.png)
![17 Menu Settings Available sorting options. - Name (A-Z): Sorting in Alphabetical order. - Name (Z-A): Sorting in reverse Alphabetical order. - Free/Scramble: All Free channels will be listed first and Scrambled (paid tier) channels will be listed next. - Lock: All locked channels will be listed first in channel list. - Service ID: Sorting the channels by Channel Number. - HD/SD: All HD channels will be listed first and SD channels will be listed next. - Favorite: All Favorite channels will be listed first. - Default: 3.1.1.2.2 Edit Press the [GREEN] button, then press the [CH] buttons to highlight a channel you wish to Edit, and confirm the action with the [OK] button. This will open the “Rename” window as shown below: 1. Press the [YELLOW] button to select ‘CAPS’, this will set the letters to capital case or lower case. 2. Press the [RED] button to select ‘Del’, this will delete the last character shown.](https://usermanual.wiki/Sandmartin/CTG4-HD/User-Guide-1577611-Page-20.png)
![18 Menu Settings 3. Press the [BLUE] button to select ‘OK’, this will save the Rename changes you have made. 4. Press the [EXIT] button to cancel the operation and Exit the “Rename” window. 3.1.1.2.3 Delete 1. Press the [BLUE] button, then press the [CH] buttons to select a channel you wish to Delete from the channel list, and confirm the action with the [OK] button. An ‘x’ will appear next to the channel you have chosen to delete. 2. Press the [BLUE] button again, or press the [EXIT] button, to exit “Delete” mode. Once all “Delete” changes have been made, press the [EXIT] button to return to the main ‘Channel List’ menu. At this time, a message will appear asking, “Are you sure to save?”. Select yes, press the [OK] button, and all of your Delete changes are saved. NOTE: If you delete a channel from the main TV Channel list and would like to add it back, you must perform an ‘Auto Scan’.](https://usermanual.wiki/Sandmartin/CTG4-HD/User-Guide-1577611-Page-21.png)
![19 Menu Settings 3.1.1.3 Move 1. Press the [YELLOW] button, then press the [CH] buttons to highlight the channel you wish to move, and confirm the action by pressing the [OK] button. A small icon will appear next to the channel you have chosen to Move. 2. Press the [CH] buttons to Move the selected channel to the desired location in the Channel List. 3. Press the [OK] button to drop the channel into the desired location in the Channel List. 4. Press the [YELLOW] button again, or press the [EXIT] button, to exit “Delete” mode. Once all “Move” changes have been made, press the [EXIT] button to return to the main ‘Channel List’ menu. At this time, a message will appear asking, “Are you sure to save?”. Select yes, press the [OK] button, and all of your Move changes are saved.](https://usermanual.wiki/Sandmartin/CTG4-HD/User-Guide-1577611-Page-22.png)
![20 Menu Settings 3.1.1.4 Favorites 1. Press the [BLUE] button, then press the [CH] buttons to highlight the channel you wish to add to your Favorite List. 2. Press the [OK] button and a drop down menu of ‘Favorite Lists’ will appear. 3. Press the [CH] buttons to highlight the ‘Favorite List’ you would like to add the selected channel to. 4. Press the [OK] button to add the channel, a small icon will appear next to the ‘Favorite List’ you have chosen. 5. Press the [BLUE] button again, or press the [EXIT] button, to exit “Favorite” mode. Once all “Favorite” changes have been made, press the [EXIT] button to return to the main ‘Channel List’ menu. At this time, a message will appear asking, “Are you sure to save?”. Select yes, press the [OK] button, and all of your Favorite changes are saved.](https://usermanual.wiki/Sandmartin/CTG4-HD/User-Guide-1577611-Page-23.png)
![21 Menu Settings 3.2 User Options 3.2.1 Language 1. Press the [CH] buttons to highlight ‘Language’. Then press the [VOL◄►] buttons to select from the many available menu languages, including: English, French, German, Russian, Arabic, Portuguese, Turkish, Spanish, Polish and Italian. 2. Closed Caption: You can set the Closed Caption language if the operator provides such service. 3. Press the [Exit] button to return to the ‘User Options’ menu.](https://usermanual.wiki/Sandmartin/CTG4-HD/User-Guide-1577611-Page-24.png)
![22 Menu Settings 3.2.2 TV System 3.3.2.1 Video Resolution Press the [CH] buttons to highlight ‘Video Resolution’. Then press the [VOL◄►] buttons to cycle through the available Video Resolutions: -> 480P -> 720P -> 1080i. NOTE: a. This setting only affects the HDMI and Component (YPbPr) output. b. Be sure your TV supports the format you select. 3.2.2.2 Aspect Mode Press the [CH] buttons to highlight ‘Aspect Mode’. Then press the [VOL◄►] buttons to cycle through the available Aspect Modes: Auto -> 4:3PS -> 4:3LB -> 16:9](https://usermanual.wiki/Sandmartin/CTG4-HD/User-Guide-1577611-Page-25.png)
![23 Menu Settings 3.2.2.3 RF Channel Press the [CH] buttons to highlight ‘RF Channel’. Then press the [VOL◄►] buttons to select CH3 or CH4. NOTE: This will set the ‘TO TV’ output connection on the rear of your Settop. This is used to connect to an analog TV set using a standard RF cable. 3.2.3 Display Setting This menu allows you to set the picture Brightness, Contrast, and Saturation levels.](https://usermanual.wiki/Sandmartin/CTG4-HD/User-Guide-1577611-Page-26.png)
![24 Menu Settings 3.2.4 Local Time Setting 1. GMT-Usage: Refers to the time provided by the TV signal. Press the [VOL◄►] buttons to change the settings between ‘ON’ and ‘OFF’. Select ‘OFF’ if you would like to set the time manually. 2. GMT-Offset: This option is available only when you set the GMT-Offset to ‘ON’. Press the [VOL◄►] buttons, to set “GMT Offset”. Select the appropriate ‘Time Zone’ for your location. 3. Daylight Savings Time: You can set to’ ON’ or ‘OFF’. 4. Date and Time: These options are only available if you set GMT-Offset to ‘OFF’. Press the [VOL◄►] buttons to move the cursor and use the number buttons to set the date and time. NOTE: There may be instances when your TV signal does not provide the time and date signal. In this case, please set this data manually. 5. Press the [Exit] button to return to the ‘User Options’ menu.](https://usermanual.wiki/Sandmartin/CTG4-HD/User-Guide-1577611-Page-27.png)
![25 Menu Settings 3.2.5 Timer Setting 1. Timer Setting: Press the [CH] buttons to highlight one of the 8 available Timers. Press [VOL◄►] to enter into the following menu: 2. Timer Mode: Select the required Timer mode with the [VOL◄►] buttons. Select between ‘OFF’, ‘Once’ or ‘Daily’. 3. Timer service: Select between ‘Record’ or ‘Channel’. • If Record is chosen, the Receiver will tune the channel and begin Recording at the set time. • If Channel is chosen, the Receiver will tune the channel at the set time.](https://usermanual.wiki/Sandmartin/CTG4-HD/User-Guide-1577611-Page-28.png)
![26 Menu Settings 4. Wakeup Channel: Press the [OK] button to enter the channel list and select the related channel you want to set. 5. Wakeup Date: Use the number keys to input your wakeup date. 6. On Time: Use number keys to set the wakeup time. 7. Duration: Set the duration (length of the program you will record or watch) of the selected service. 3.2.6 Parental Lock Allows you to protect the main menu and the channels (which are previously set in the ‘Channel List – Edit’ menu) with a PIN code. The default password is “0000”: 1. Menu Lock: Press the [VOL◄►] button to set ‘ON’ or ‘OFF’ • When this is set to ‘ON’, you must enter the password before you are allowed to access the Settop menus. • When this is set ‘OFF’, no password is required to access the Settop menus 2. Channel Lock: Press the [VOL◄►] buttons to set ‘ON’ or ‘OFF’. When this is set to ‘ON’, the channels which are previously marked as ‘Lock’ in the ‘Channel List – Edit’ menu may only be viewed if the correct PIN code is entered. The default password is “0000”. 3. New Password: You can change the default password from “0000“ to any 4 digit number you choose.](https://usermanual.wiki/Sandmartin/CTG4-HD/User-Guide-1577611-Page-29.png)
![27 Menu Settings NOTE: If you change your password, make sure you do not forget or lose it. If the password is lost, you will have to contact your cable TV Provider for assistance. 4. Confirm Password 5. Press [EXIT] to return to the ‘User Options’ menu. 3.2.7 OSD Setting 1. OSD Timeout: When you are changing channels during normal Settop use, an ‘Information Banner’ will appear, which gives detailed information about the current channel. This ‘OSD Timeout’ setting will change the length of time this Information Banner is shown. • Press the [VOL◄►] buttons to set the time. The amount of time this banner will appear can be changed between “1 second ~ 10 seconds”. 2. OSD Transparency: Press the [VOL◄►] buttons to select one of the 5 possible levels of transparency, 10%, 20%, 30%, and 40% and “OFF” (this means OSD is NOT transparent). 3. OSD Banner position: You can adjust the Information Banner position to one of 14 possible levels, from -10 ~ +3. • Selecting the +3 setting will move the Information Banner to the lowest part of your TV screen.](https://usermanual.wiki/Sandmartin/CTG4-HD/User-Guide-1577611-Page-30.png)
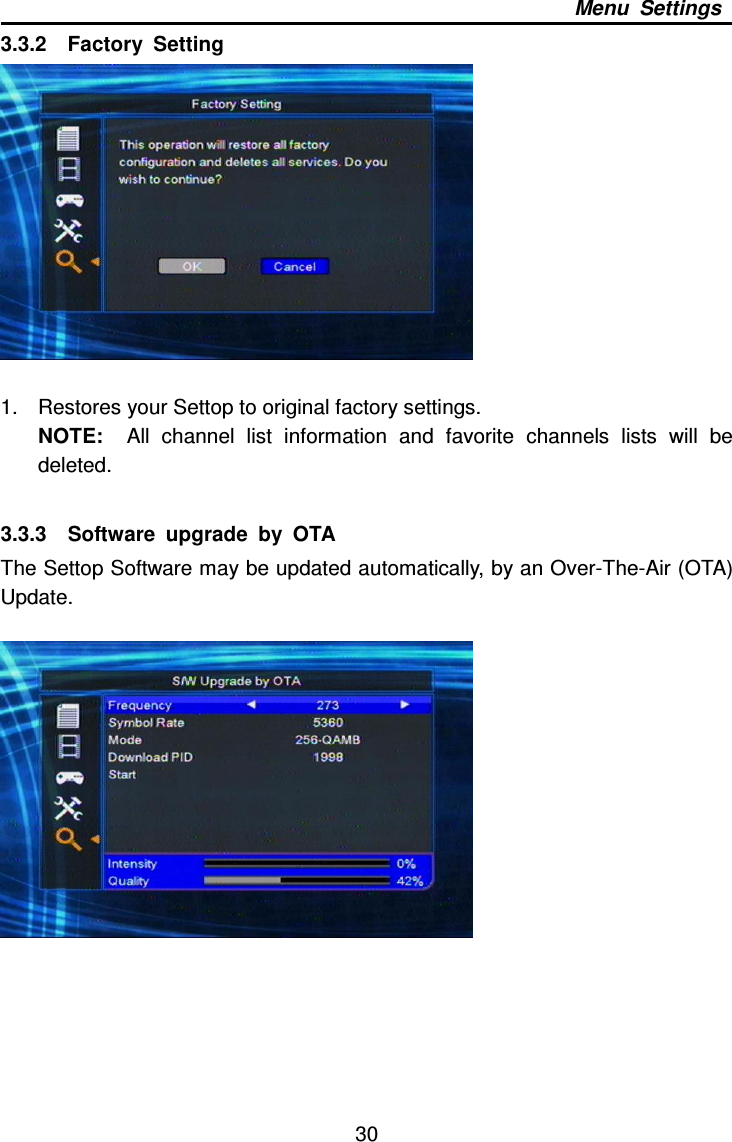
![29 Menu Settings 3.3 Installation 1. Press the [CH] buttons to highlight the desired function. 2. Press the [OK] button to enter. 3.3.1 Auto Scan 1. Allows you to automatically scan in all available Cable TV channels.](https://usermanual.wiki/Sandmartin/CTG4-HD/User-Guide-1577611-Page-32.png)