Sandmartin DCM4-HD Digital Video Broadcasting User Manual rev2
Sandmartin(Zhong Shan) Electronic Co., Ltd. Digital Video Broadcasting rev2
User manual rev2

1
Contents
SAFETY PRECAUTION
Important Safety Instructions
1, Read these instructions
2, Keep these instructions
3, Heed all warnings
4, Follow all instructions
5, Do not use this apparatus near water
6, Clean only with dry cloth
7, Do not block any ventilation openings. Install in accordance with the
manufacturer’s instructions.
8, Do not install near any heat sources such as radiators, heat registers, stoves,
or other apparatus(including amplifiers) that produce heat.
9, Do not defeat the safety purpose of the polarized or grounding-type plug. A
polarized plug has two blades with one wider than the other. A grounding type
plug has two blades and a third grounding prong. The wide blade or the third
prong are provided for your safety. If the provided plug does not fit into your
outlet, consult an electrician for replacement of the obsolete outlet.
10, Protect the power cord from being walked on or pinched particularly at plugs,
convenience receptacles, and the point where they exit from the apparatus.
11, Only use attachments/accessories specified by the manufacturer.
12, Use only with the cart, stand, tripod, bracket, or table specified by the
manufacturer, or sold with the apparatus. When a cart is used, use cautions
when moving the cart/apparatus combination to avoid injury from tip-over.
13, unplug this apparatus during lighting storms or when unused for long
periods of time.
14, Refer all servcing to qualified service personnel. Servicing is required when
the apparatus has been damaged in any way, such as power-supply cord or
plug is damaged. Liquid has been spilled or objects have falled into the
apparatus, the apparatus has been exposed to rain or moisture, does not
operate normally, or has been dropped.
15, WARNING:to reduce the risk of fire or electric shock, do not expose this
apparatus to rain or moisture.
16, The mains plug is used as the disconnect device, the disconnect device
shall remain readily operable.
2
Contents
CAUTION:
The lightening flash with
arrowhead symbol, within
an equilateral triangle, is
intended to alert the user
to "dangerous voltage"
and to prevent from a risk
of electric shock.
Warning:
To reduce the risk of
electric shock, don't open
the cabinet. Refer
servicing to qualified
personnel only.
The exclamation point
within an equilateral
triangle is intended to
alert the user to important
operating and
maintenance(servicing).
Caution:
The user is cautioned that changes or modifications not expressly
approved by the party responsible for compliance could void the user's authority
to operate the equipment.
For a Class B digital device or peripheral, the instructions furnished the user
shall include the following or similar statement, placed in a prominent location in
the text of the manual:
Note: This equipment has been tested and found to comply with the limits for a
Class B digital device, pursuant to part 15 of the FCC Rules. These limits are
designed to provide reasonable protection against harmful interference in a
residential installation. This equipment generates, uses and can radiate radio
frequency energy and, if not installed and used in accordance with the
instructions, may cause harmful interference to radio communications.
However, there is no guarantee that interference will not occur in a particular
installation. If this equipment does cause harmful interference to radio or
television reception, which can be determined by turning
the equipment off and on, the user is encouraged to try to correct the
interference by one or more of the following measures:
—Reorient or relocate the receiving antenna.
—Increase the separation between the equipment and receiver.
—Connect the equipment into an outlet on a circuit different from that to which
the receiver is connected.
—Consult the dealer or an experienced radio/TV technician for help
This decive is verified to comply with part 15 of the FCC Rules for use with cable
television service.
This device is intended to be attached to a receiver that is not used
to receive over-the-air broadcast signals. Connection of this device
in any other fashion may cause harmful interference to radio
communications and is in violation of the FCC Rules, Part 15.
WARNING: The apparatus shall not
be exposed to dripping or splashing and
that no objects filled with liquids, such as vases, shall be
placed on the
apparatus.
WARNING: Do not put the candle or lamp stand on the cabinet; otherwise,
there
is the danger of fire.

3
Contents
WARNING:
The unit should be connected to a power supply only of the type
descry bed in the operating instructions or as mar
ked on the unit. If you are not
sure of the type of power supply(for example: 120 or 230V) to your home,
consult your local dealer or local power company.
WARNING: Do not open the cabinet or touch any parts in the inner mechanism.
Consult your local dealer for technical service if the opening is required.
WARNING: The mains plug is used as the disconnect device, the disconnect
device shall remain readily operable.
WARNING:
The battery of remote control should not be exposed excessive
heat such as sunshine, fire or the like.
WARNING: Maintenance man must use the appointed screw in the rear plate.
Note: Do not open the cabinet to avoid the unit direct exposure to radiation.
Unit Cleaning: After the unit power is turned off, you can clean the cab
inet,
panel and remote control with a soft cloth lightly moistened with a mild detergent
solution.
Attachments: Never add any attachments and/or equipment without
the
manufacturer consent; as such additions may result in the risk of fire, electric
shock or other personal injury.
Locating:
Slots and openings in the cabinet are provided for ventilation to
protect it from overheating. Do not block these openings or allow them to be
blocked by placing the STB on a bed, sofa or other similar surface, nor sho
uld it
be placed over a radiator or heat register.
Power-Cord Protection: Place the power-
supply cord out of the way, where it
will not be walked on. Please take special attentions to cords at plugs,
convenience receptacles and the point where they exit from the unit.
Object and Liquid Entry: Never put objects of any kind into this STB
through
openings, as they may touch dangerous voltage points or short-
out parts that
could result in a fire or electric shock. Never spill any liquid on the STB.
Note: Moisture may be formed inside the unit in the following conditions:
When the unit is suddenly moved from a cold environment or an air-
condition
room to a warm place.
Immediately after a heater has been turned on.
In a steamy or very humid room.
If the m
oisture forms inside the unit, it may not operate properly. To correct this
problem, turn on the power and wait about two hours for the moisture to
evaporate.

4
Contents
Parts Replacement:
When the unit parts need to be replaced, user should
make sure the service t
echnician use the replacement parts specified by the
manufacturer or having the same characteristics as the original part.
Unauthorized replacement may put the unit in the risk of fire, electric shock or
other hazards.
Safety Check: After all the mainte
nances and repairs are done, user is required
to request the service technician to conduct the overall safety check to ensure
the machine is in the proper condition.
Contents
1. Receiver Description & Remote Control ..............................................................6
1.1 Receiver Description ........................................................................................... 6
1.2 Front Panel Description....................................................................................... 6
1.3 Rear Panel Description ....................................................................................... 7
1.4 Remote Control Description ................................................................................ 8
2. Basic Operations ....................................................................................................9
2.1 Switch on STB..................................................................................................... 9
2.2 Standby Mode..................................................................................................... 9
2.3 Mute.................................................................................................................. 10
2.4 Audio................................................................................................................. 10
2.5 TV/Radio ........................................................................................................... 10
2.6 RECALL ............................................................................................................ 10
2.7 Channel Number ............................................................................................... 10
2.8 FAV +/-.............................................................................................................. 11
2.9 EPG .................................................................................................................. 11
2.10 FAV................................................................................................................. 13
2.11 CH ▲/▼.......................................................................................................... 13
2.12 VOL ▲/▼........................................................................................................ 13
2.13 OK................................................................................................................... 13
2.14 MENU ............................................................................................................. 13
2.15 EXIT ................................................................................................................ 13
2.16 PAUSE............................................................................................................ 13
2.17 ZOOM ............................................................................................................. 14
2.18 INFO ............................................................................................................... 14
2.19 LNB short circuit.............................................................................................. 15
3. Menu.........................................................................................................................16
3.1 Programs: ......................................................................................................... 16
3.1.1 TV Channel List....................................................................................... 16
3.1.2 Radio Channel List .................................................................................. 20
3.2 DVR Management............................................................................................. 20
3.2.1 Record Manager...................................................................................... 21
3.2.2 HDD Format ............................................................................................ 23
3.2.3 DVR Configuration .................................................................................. 23
3.2.4 Jump........................................................................................................ 24
3.2.5 USB......................................................................................................... 24
3.2.6 Remove USB Device safely .................................................................... 28
3.3 Games .............................................................................................................. 29
3.3.1 Tetris ....................................................................................................... 29
3.3.2 Othello..................................................................................................... 29

5
Contents
3.3.3 Soduku .................................................................................................... 30
3.4 User Options ..................................................................................................... 30
3.4.1 Language ................................................................................................ 31
3.4.2 TV System............................................................................................... 31
3.4.3 Display setting ......................................................................................... 32
3.4.4 Local Time Setting................................................................................... 32
3.4.5 Timer Setting ........................................................................................... 33
3.4.6 Parental Lock......................................................................................... 35
3.4.7 OSD Setting........................................................................................... 35
3.4.8 Favorite.................................................................................................. 36
3.4.9 Firmware Information............................................................................. 37
3.4.10 CAS information .................................................................................... 37
3.4.11 Restore default values:........................................................................ 37
3.5 Installation......................................................................................................... 38
3.4.1 TP Search ............................................................................................... 38
3.4.2 Auto Scan................................................................................................ 39
3.4.3 Factory Setting ........................................................................................ 39
3.4.4 Software upgrade by OTA....................................................................... 40
3.4.5 Updated by USB...................................................................................... 40
3.4.6 Delete all ................................................................................................. 42
3.4.7 Installation Password .............................................................................. 42
4. Technical Specification ........................................................................................43
6
Remote Control & Panel Description
1. Receiver Description & Remote Control
1.1 Receiver Description
This receiver allows you to receive unencrypted (free-to-air) and encrypted
(depending on smart card) digital terrestrial programs over a antenna for
personal, non-commercial use.
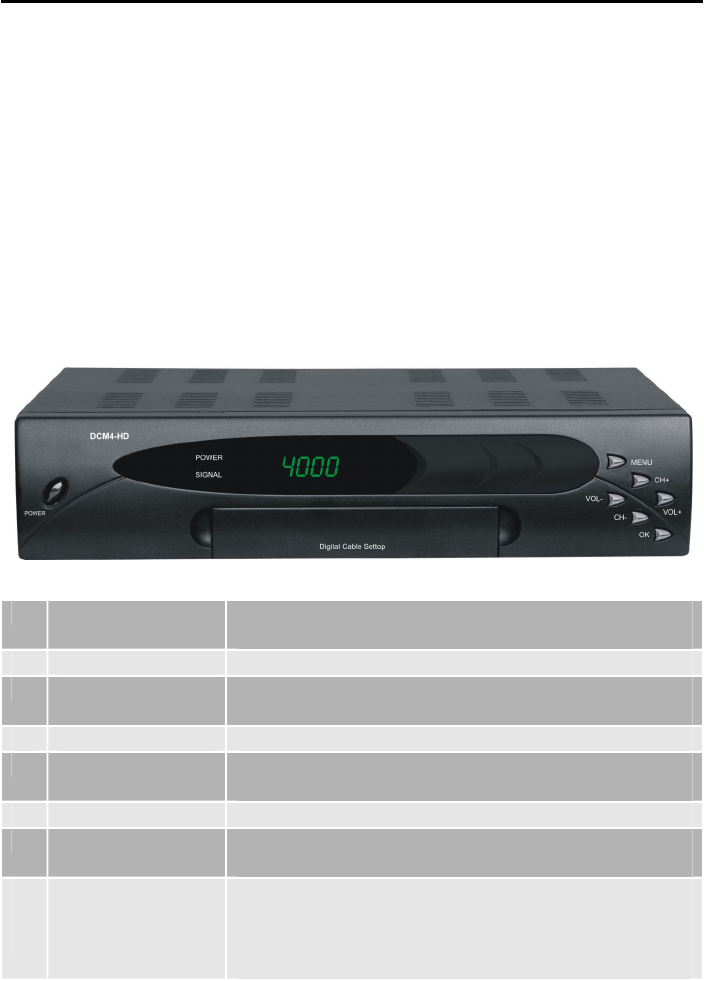
1.2 Front Panel Description
1 POWER Is used to switch between the working mode and the
standby mode.
2 Remote Sensor Detects the infrared signals from the remote control unit.
3 Display (4-Digit /
7-Segment)
Displays the received channel number while operating
and time while in standby mode.
4 LED SIGNAL Yellow light when receiving a channel signal.
5 VOL+/- To change volume to move cursor, change numbers
in the menu or to change the choice
6 MENU To enter into the main menu and exit all menus.
7 CH+/- To change channels or for navigating and changing
values in menus.
8
9
OK
USB
To select an item in the menu and confirm it or pop
up channel list when no menu.
To connect with USB disk
7
Remote Control & Panel Description
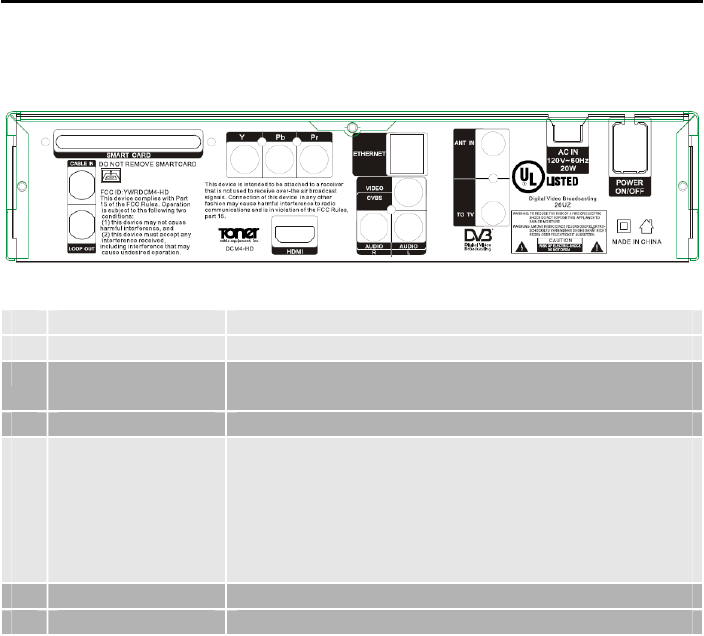
1.3 Rear Panel Description
1 CABLE IN CABLE input of the tuner.
2 LOOP OUT CABLE output for cascading to others devices.
3 HDMI Digital Out for the transmission of Audio- and Video
Data
4 VIDEO CVBS video output for TV AV in.
5
6
7
8
9
AUDIO
CA
TO TV
ANT IN
Y Pb Pr
AUDIO output for stereo set.
De-scramble pay TV services in combination with the
related smart card
Modulator output for the connection to a TV set
Antenna input for the terrestrial antenna
Component Out
10
AC IN Mains input cable.
11
POWER ON/OFF Allows to completely switch off the receiver.

8
Remote Control & Panel Description
1.4 Remote Control Description
9
2. Basic Operations
2.1 Switch on STB
First, press the [Device’s Main Power] to turn on the unit. When the STB is first
used, there will play the first channel from the default Channel List. If the STB is
not first used, STB will play the same channel as last time before turning off..
? Frequently Asked Question
Q: The power of my STB is on and it is running in TV mode but the TV
screen shows nothing:
A: Make sure the TV set has been set to the correct video input(not the
TV channels). For example, if you have connected the unit to the
video1 input of the TV set then you need to select the corresponding
input of the TV. Mostly it is done with the AV button of the TVs remote
control unit.
Q: My STB is running in TV mode but the TV screen shows nothing
except one ball and “No Signal”.
A: That means the channel you selected has no signal. This can be
caused by several reasons:
1. The channel you selected is not from the satellite to which your dish is
pointing. Select another channel.
2. The signal of current TV channel is too weak. You can try to change to other
channels with a stronger signal. If the problems still exist, please consult
your local dealer or installer for technical service.
3. You selected the wrong LNB type in the installation menu or your DiSEqC
switch configuration is not correct.
2.2 Standby Mode
1. Press [Power] button to switch from TV/radio mode to standby mode
2. In standby mode press [Power] button again to switch back to TV/radio
mode. The last active channel will be showed.
3. To switch off the STB complete press the main power button.
10
2.3 Mute
1. Press the [Mute] button to mute the sound. On the screen an icon will be
displayed to indicate the muted sound.
2. Press the [Mute] button again to restore the sound.
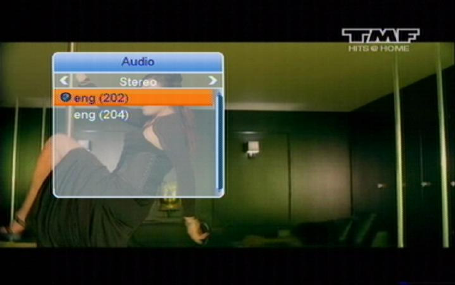
2.4 Audio
1. In TV mode, press the [Audio] button to open the Audio Mode window.
2. Select the item you want to adjust with [CH▲/▼] and change the value
with [VOL◄/►].
2.5 TV/Radio
In TV mode, press [TV/Radio] to switch to Radio mode. In Radio mode press
[TV/Radio] again to switch back to TV mode.
2.6 RECALL
Pressing the [Recall] button allows you to toggle between the actual and the last
selected channel.
2.7 Channel Number
In TV mode you can enter the channel number directly with your remote control
unit and confirm the number with the OK button to change to the desired
channel.

11
2.8 FAV +/-
1. In full screen, press [FAV +/-] keys can switch the favorite channels in
current satellite channels list directly.
2. The sequence of the switch favorite channels is following the sequence
that in the current satellite channel list, not follow the sequence in the
favorite group.
2.9 EPG
The STB has an Electronic Program Guide (EPG) to help you navigate
channels through all the possible viewing options. The EPG supplies
information such as channel listings and starting and ending times for all
available channels.
Press [EPG] key to display EPG screen.
1. Press red [Timer] key to enter into following screen.
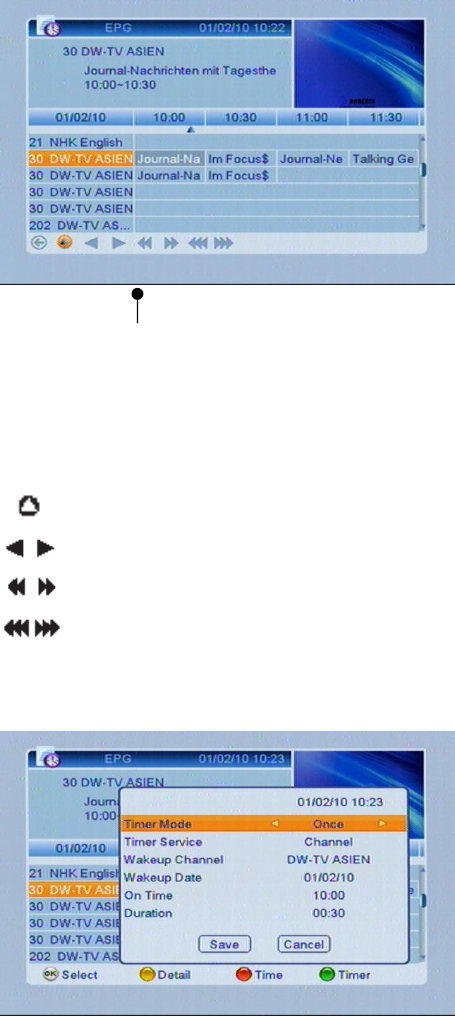
12
2. Press [OK] key in each item can see more detail information and press [Red]
key to cancel.
3. Press [GREEN] (Timer), to open the Timer Sub Menu.
Icons to navigate
in the EPG
Back to actual time
Navigate in a „30 minutes interval“
Navigate in a „2 hour interval“
Navigate in a „daily interval“
13
To navigate, press [CHVO] and set related date, as well start and stop
time. Save your settings.
2.10 FAV
1. In TV mode press the [FAV] button to display the Favorite Group window on
the screen as the picture beside shows.
2. In the Favorite Group window you can select the desired favorite channel
with [CH▲/▼] and confirm it with [OK] to switch to it.
3. With [VOL◄/►]. You can select different Favorite Groups.
4. Press [Exit] to close the Favorite Group window.
2.11 CH ▲/▼
In TV/Radio mode press [CH▲/▼] to change channel.
2.12 VOL ▲/▼
In TV/Radio mode, press [Vol◄/►] to adjust volume.
2.13 OK
In TV mode press [OK] button to open the Channel List window.
2.14 MENU
Press [Menu] button to enter or exit the current menu.
2.15 EXIT
Press [Exit] button to exit the current menu.
2.16 PAUSE
1. In playing mode, press [PAUSE], the picture will be paused, but the sound
of the channel will still continues.
2. Press [PAUSE] again, the screen’s picture will skip over to the current
playing picture, and the sound of the channel will corresponding playing.

14
2.17 ZOOM
1. The [Zoom] key allows you to magnify a certain area on the images and the
current screen will show
2. Press [Zoom] key again, the image will enlarge rotate as x1, x2, x4, x6, x8,
x12, x16.
3. In “x2 ~ x16” image, using [CH▲/▼ / VOL◄/►] keys to move the image
center area you want to see.
4. In zoom mode, press [Exit] to close “Zoom” window.
2.18 INFO
In full screen, press [INFO] key can open information screen, in the window
shows the parameters of current channel.

15
2.19 LNB short circuit
In case of LNB short circuit you see “LNB” in the box display. Please check your
cable connections carefully. If LNB short circuit has been resolved the message
disappears.
Service
Information
Channel name
Channel
number
16
3. Menu
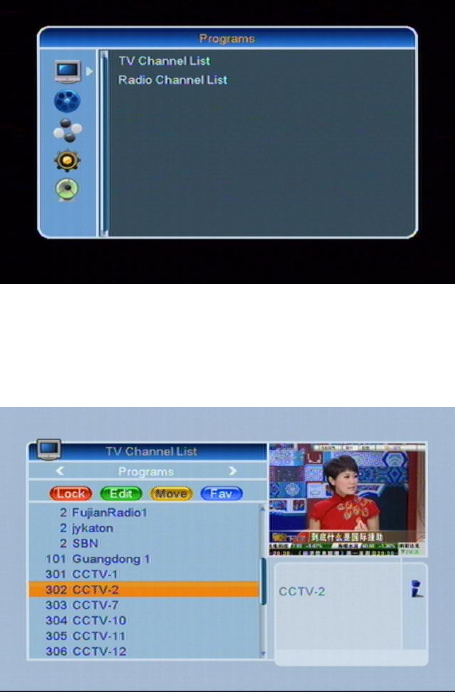
3.1 Programs:
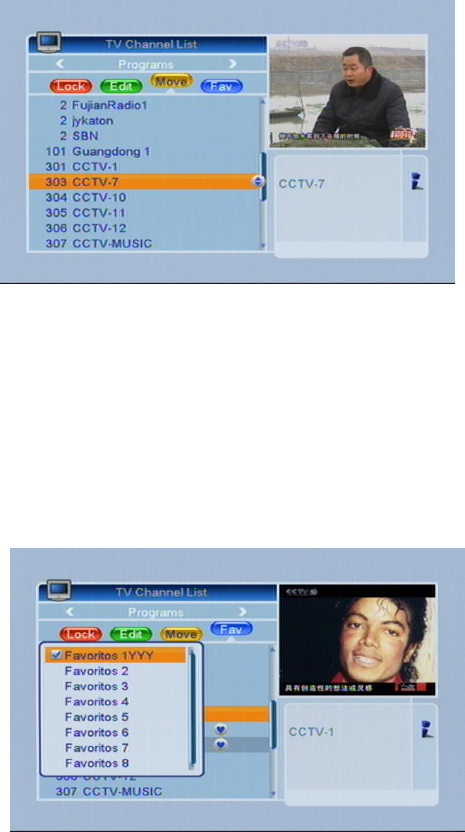
3.1.1 TV Channel List
The TV Channel List allows editing your services.
You can move the “highlighted” services by pressing [CH] key and press
[OK] key to preview the current highlighted program in the right scaled video.
17
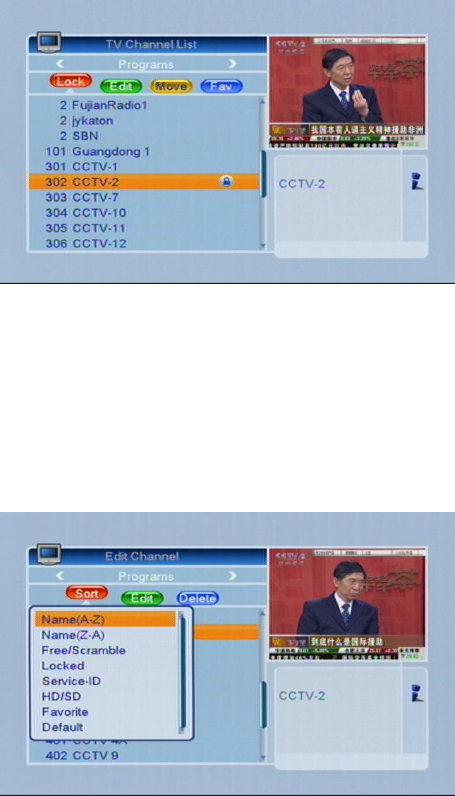
3.1.1.1 Lock
Press [RED] to enable the lock mode, select a service a confirm with [OK]. Enter
the PIN code:”0000”,
and a small Icon will be visible behind the selected service.
3.1.1.2 Edit
Press [GREEN] to “Edit”. You can select between “Sort”, “Edit” and “Delete”.
3.1.1.2.1 Sort
Press [RED] key to “Sort”. There are eight types to sort. Press [CH] key to
move the highlighted service and press [OK] key to confirm.
Please select different options.
18
- Name (A-Z): Sorting in Alphabetical order, ignore “$” symbol.
- Name (Z-A): Sorting in Alphabetical order, ignore “$” symbol.
- Free/Scramble: Sort channel through free and scramble sequence. Free
channel will in the front of channel list and scramble channel will at the rear
of channel list
- Lock: All locked channels.
- Service ID
- HD/SD
- Favorite
- Default
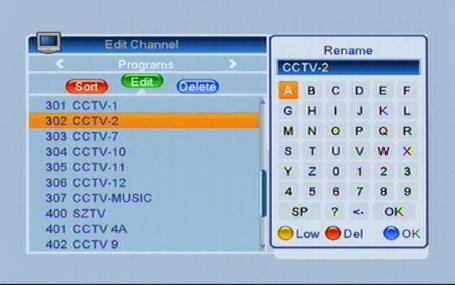
3.1.1.2.2 Edit
In “Edit Channel” menu, press [GREEN], then press [CH] key to move the
highlighted service and press [OK] key to open the “Rename” window as
follows:
1. Press [YELLOW] key to select “CAPS”.
2. Press [RED] key to delete the char on the cursor.
3. Press [BULE] key to save the modification
4. Press EXIT key to cancel the operation
19
3.1.1.2.3 Delete
1. Press [BLUE] key, then press [CH] key to move the highlighted service
and press [OK] key to mark as deleted.
2. Exit the menu to delete the services.
3.1.1.3 Move
1. Press [YELLOW] key, then press [CH] key to move the highlighted
service and press [OK] key to mark.
2. A small Icon will be visible behind the selected service.
3.1.1.4 Favorites
If you want to add services to your favorite list, press [FAV] and confirm with
[OK]. A small Icon will be visible behind the selected service.
20
1. You can move between 8 favorite groups by pressing [CH] key and
press [OK] key to mark a favorite.
2. Press [EXIT], to close the Favorites.
3.1.2 Radio Channel List
Operation is identical to the TV Channel List.
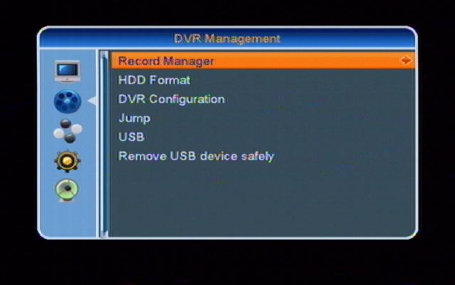
3.2 DVR Management
If you select DVR Management please find the following menu:
DVR/PVR (Digital/Personal Video Recorder)
Your PVR-Ready Receiver (PVR = Personal Video Recorder) is prepared with a
USB 2.0 slot to fit external Hard Drive Disk. This would allow that you do not
need any longer an analog Video Recorder. The maximal recording time
depends on the capacity of the USB device and bandwidth of the selected
service.
Note !
You can only record and watch the one service at the same time.
21
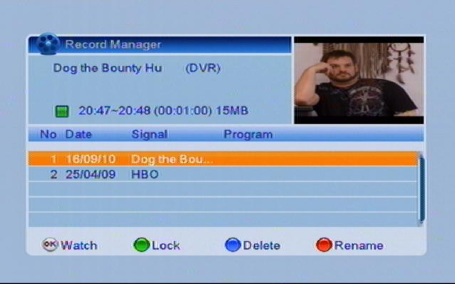
3.2.1 Record Manager
The Record Manager shows all recorded Video Services, the menu looks as
follows:
1. You can lock the recorded services individually with the [GREEN] key
following by the PIN code.
2. You also can delete recorded services with [BLUE]. The services will be
marked with.
3. You also can rename the recorded services with [RED].
To playback a recorded service, press [OK]. The playback screen looks as
follows:

22
Service Lapsed time Total duration of the recorded event Aufnahme
Trick Modes: You can search the recording with the buttons [Rewind / Rewind slow /Fast
Forward Slow / FFW]
Trick Mode indication (select required FFW/RW buttons)
23
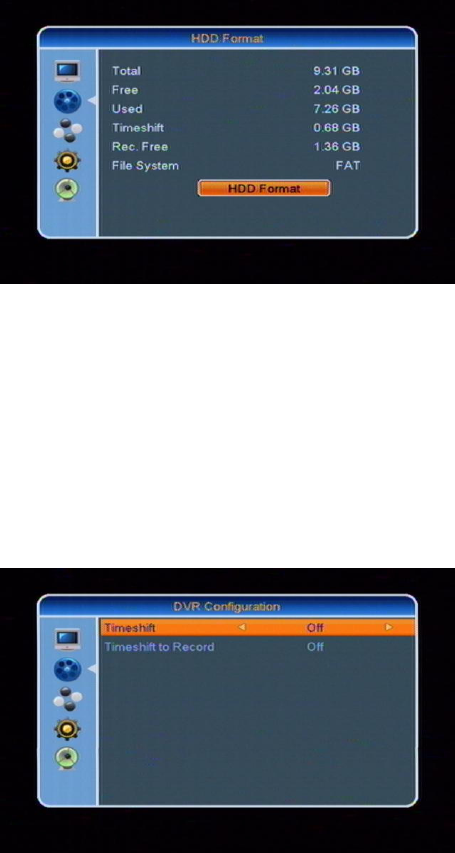
3.2.2 HDD Format
In case you want to format your USB device please enter into HDD Format:
Note !
In case you format your USB Devices, please be aware that all Multimedia-Files
will be deleted.
3.2.3 DVR Configuration
Entering the DVR Configuration you have the following options:
24
1. With time shift you can playback and record one service at the same time.
2. If you set “Timeshift recording“ with [VOL] to “ON”, any service will be
recorded during watching.
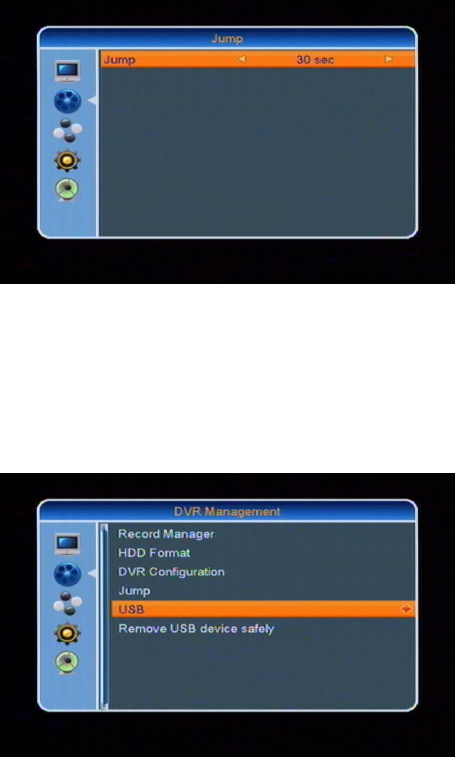
3.2.4 Jump
To change the time shift duration here.
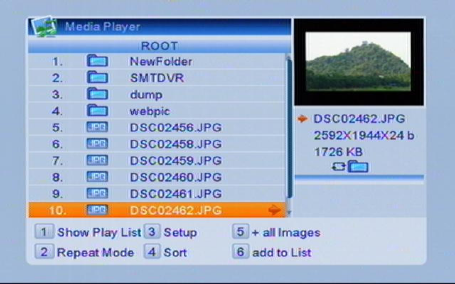
3.2.5 USB
The USB menu appears automaticly when a USB device is inserted except
during the autoscan option, multi image and USB upodating is running,
You can also enter DVR Management -> Tools-> USB.
25
The USB menu is not available when any USB device is connected. The
reproduction list is not going to be saving if you unplug the device or the
decoder is on stand-by mode or switch off. The USB menu is shown at this
image.
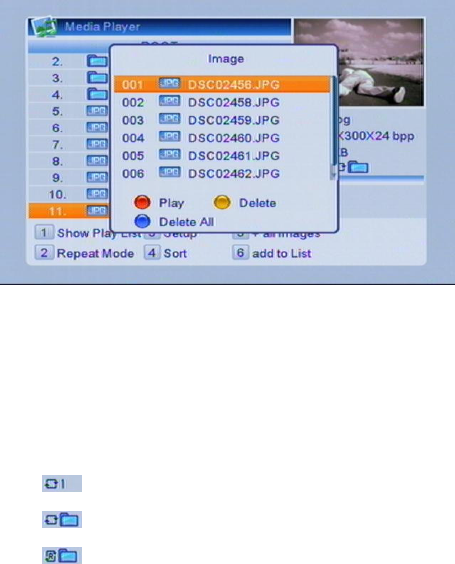
3.2.5.1 Show Play List
Enter [1] you can find play list.
3.2.5.1.1 Play
Press [RED] button, the image searching start, press (OK) button the image is
be display on the screen.
With the (EXIT) button you exit and go to the menu before.
3.2.5.1.2 Delete
Press Yellow button, Delete the selected image file.
3.2.5.1.3 Delete all
Press Blue button, you will delete all files.
before this action a banner inform “are you sure” before finish the operation, if
the “Yes” option is chosen all the image file are delete it and the window close
26
3.2.5.2 Repeat mode
All image file of the folder are going to add the list pressing the (2) button, the
banner message will disappear in a few seconds.
Only the selected picture will be displayed.
All pictures in the activated folder will be displayed.
All pictures in the activated folder will be displayed endless.
3.2.5.3 Set up
Slide Show Time
Slide show repeat

27
Sort
When you press [4] you can sort according to Default, Name (A-Z), Name (Z-A)
Enter into the Media Player menu with [VOL]:
3.2.5.5 All images
When you press [5], you can find all images in USB
Preview
Name of file
Resolution
Size of file
Repeatmode with
button [2]

28
3.2.5.6 Add to list
When you press [6], you can add USB images to show play list.
3.2.6 Remove USB Device safely
In case you want to remove the USB device please always do this as follows:
Press [VOL] to disable/remove USB Medium safely. This avoids any
potential data loss in case of unauthorized remove of the USB device.
29
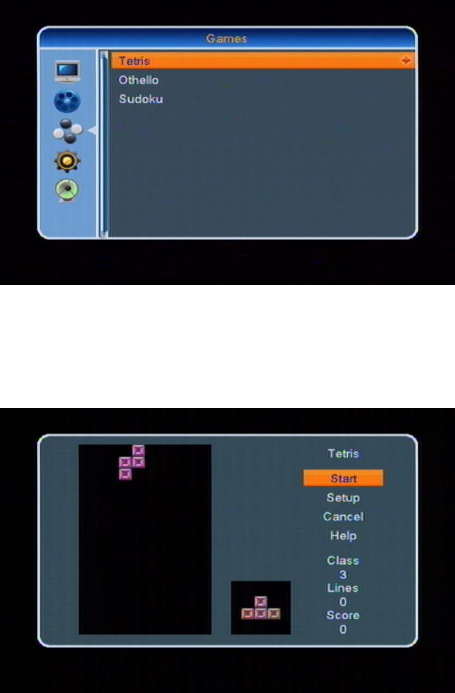
3.3 Games
Your receiver supports three games.
3.3.1 Tetris
Select the game with [VOL] to enter into the following dialog:
To set level of difficulty please press [VOL]. Press “Help” and [OK] for
further information of [EXIT] to leave.
3.3.2 Othello
Select the game with [VO] to enter into the following dialog:
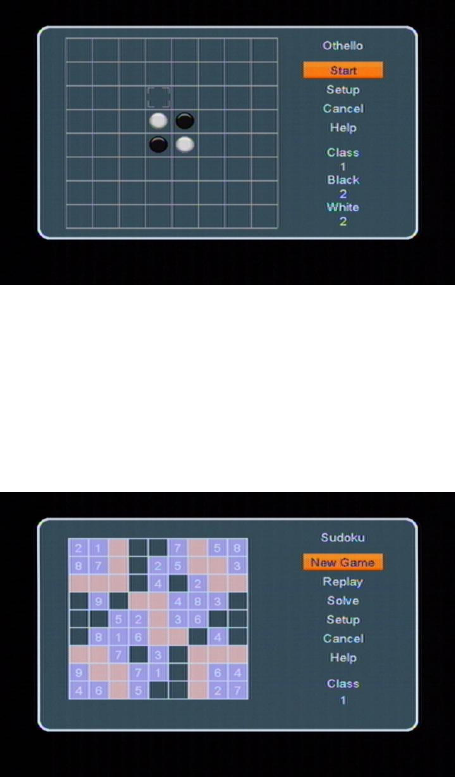
30
To set level of difficulty please press [VOL]. Press “Help” and [OK] for
further information of [EXIT] to leave.
3.3.3 Soduku
Select the game with [VOL] to enter into the following dialog:
To set level of difficulty please press [VOL]. Press “Help” and [OK] for
further information of [EXIT] to leave.
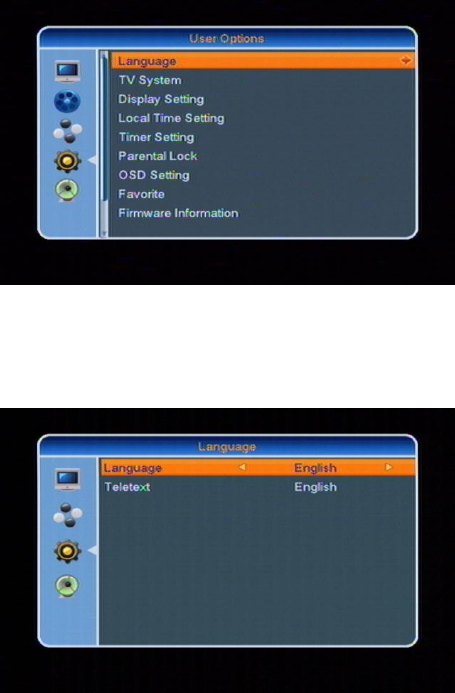
3.4 User Options
31
3.4.1 Language
Please select the language menu as follows:
1. Language: press [VOL] key to select menu languages, the selections
of languages include: English, French, German, Russian, Arabic,
Portuguese, Turkish, Spanish, Polish and Italian.
2. Teletext: You can set the teletext language if the operator provides such
service otherwise a pop up message show: “No Teletext”.
3. [Exit] to leave the menu.
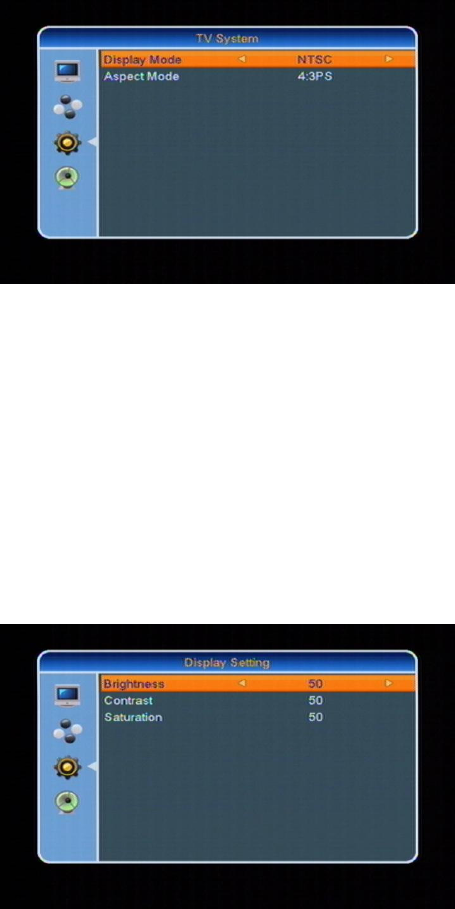
3.4.2 TV System
In the Sub menu TV System you have the following screen:
32
1. You have the option between various modes dependent on your TV Set:
NTSC -> PAL-N -> PAL-M Press [VOL], to select the required TV
Mode.
2. Aspect mode allows to switch between 4:3 PS / 4:3 LB / 16:9. Press
[VOL], to select the required mode.
3.4.3 Display setting
There are three items in display setting:
Brightness, contrast, saturation
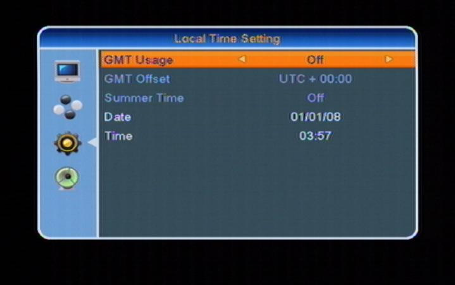
3.4.4 Local Time Setting
33
1. GMT-Usage: Refers to the time provided by terrestrial stream. Press
[VOL] to change the settings.
2. GMT-Offset: This option is available if you set GMT-Offset to „ON“. Press
[VOL], to set “GMT Offset”. Every selection increase/decrease the
GMT Offset for 30 minutes.
3. Summertime: You can set the summertime.
4. Date and Time: These options are only available if you set GMT-Offset to
„OFF“. Press [VOL], to navigate and use the number buttons to set
the date and time.
NOTE: In case the selected service do not provide date and time
information, please set these data manually. But the most of the satellite
services do provide date and time information.
5. Press [Exit], to leave the menu.
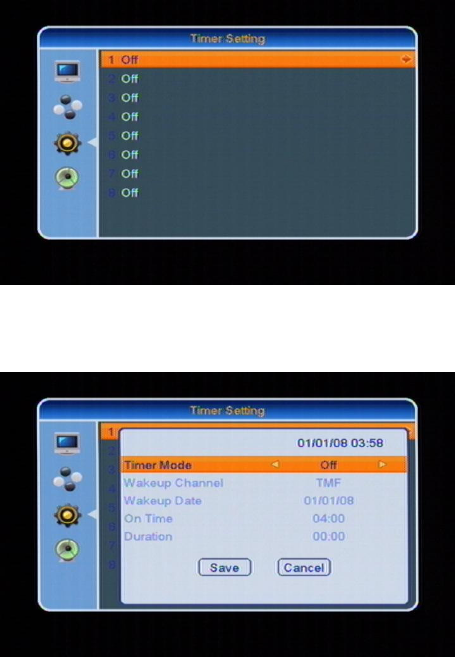
3.4.5 Timer Setting
34
The Timer menu looks as follows:
1. Timer Setting: Select „Timer“ and “Timer” and choose up to 8 Timer. Press
[VOL] to enter into the following menu:
2. Select the required Timer mode with [VOL]. Select between “OFF”,
“once” or “daily”.
3. Timer service: Change Record
4. Wakeup Channel: press [OK] key to enter channel list and select the
related channel you want to set.
5. Wakeup Date: use the number keys to input your wakeup date.
6. On Time: use number keys to set the wakeup time.
7. Duration: Please set the duration (start – and end time) of the selected
service.
35
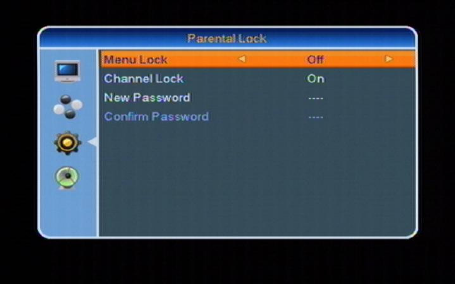
3.4.6 Parental Lock
“Parental Lock” allows to protect the main menu and the channels (which are
previously marked as “lock” in the Edit menu) with a PIN code. The default
password is “0000”:
1. “Menul Lock” please press [VOL] to set „ON“ to force a password entry
for every menu you like to enter. If you set „OFF“ no password is required.
2. Channel Lock” please press [VOL] to set „ON“ to protect the channels
which are previously marked as “lock” in the Edit menu with a PIN code.
The default password is “0000”.
3. New Password: You can change the default password from „0000“ to any
individual. Please note, that once you lost your password the Receiver
becomes a service issue.
4. Confirm Password
5. Press [EXIT] to leave the menu.
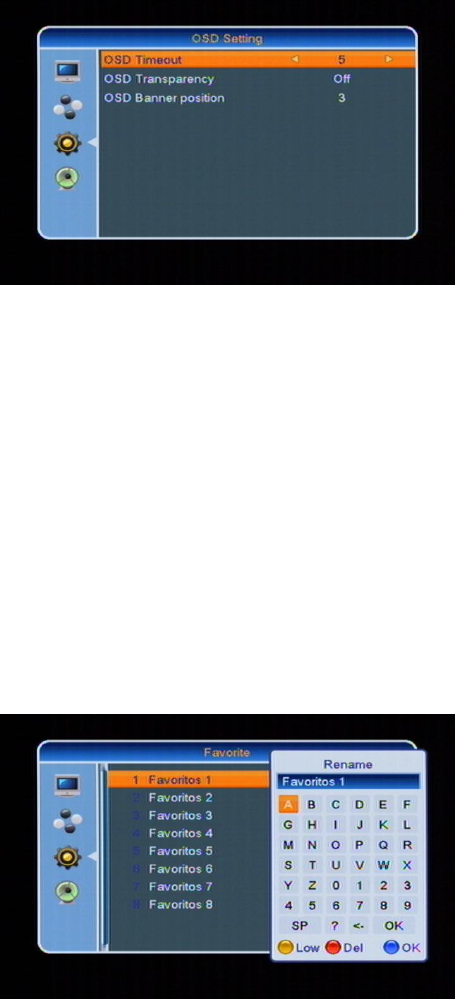
3.4.7 OSD Setting
36
1. OSD Timeout: When you switch channels in full screen, there will show up
some information about current channel on the lower of the screen. And
regarding to the duration of these information show up on the screen, you
can press [VOL] key to set the time. The range of the duration is “1
second ~ 10 seconds”.
2. OSD Transparency: You can press [VOL] key to select the values.
There are 5 levels of transparency, 10%, 20%, 30%, and 40% and “NO”
(means no transparency function).
3. OSD Banner position: You can adjust Banner position within 14 levels.
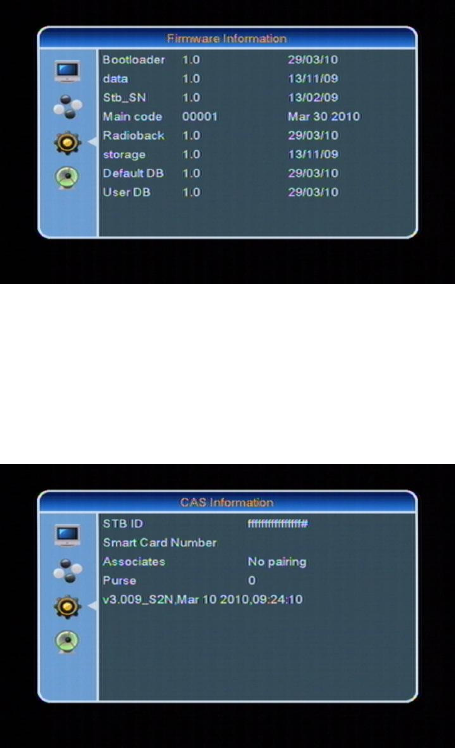
3.4.8 Favorite
You can rename Favorite items by your willing.
37
3.4.9 Firmware Information
If you select “Firmware Information” you will have the following screen:
This is for service issues only.
3.4.10 CAS information
If you select “CAS Information” you will have the following screen:
This is for service only.
3.4.11 Restore default values:
Default above user options.
38
3.5 Installation
Press [MENU] key to enter into the main menu,
And Password is “2147”.
1. Press [CHVOL], to select between different functions.
2. Press [OK], to enter.
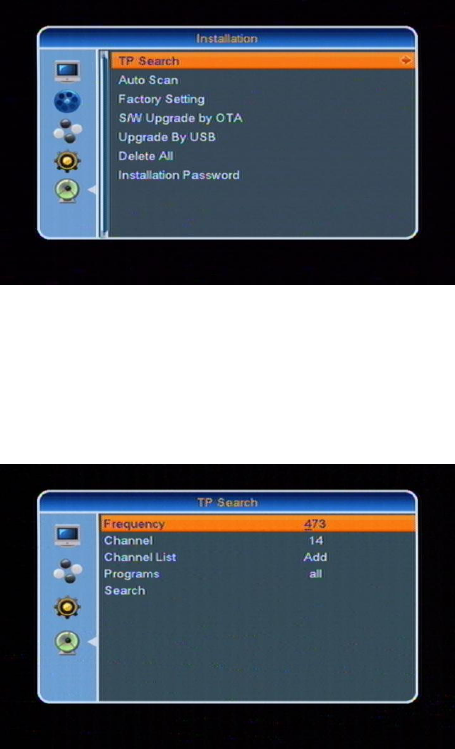
3.4.1 TP Search
1. ” Frequency”: to set up Frequency by select number key-press.
2. ” Channel”: will match with Frequency which select by customer.
3. ” Channel list”: Press [VOL] to choose Add or New channel list.

39
4. ”Programs”: to select with [VOL], between free to air, scrambled, or all
services
5. Navigate to “Search“ with [CH] and press [OK], then start to search
programs.
3.4.2 Auto Scan
Operation is similar with TP search.
If customer do not have special request, STB will search default programs auto.
3.4.3 Factory Setting
If you enter into Factory Settings:
40
1. If you select „YES“ the Receiver will be set to standard settings as originally
delivered.
2. Press [EXIT] to leave the menu or select “NO“.
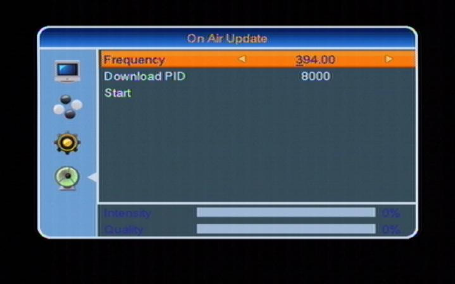
3.4.4 Software upgrade by OTA
The receiver is fitted with Software update by OTA. The screen looks as follows:
You must point specify satellite system to carry out the software update.
This operation is only to update the operating software on the receiver.
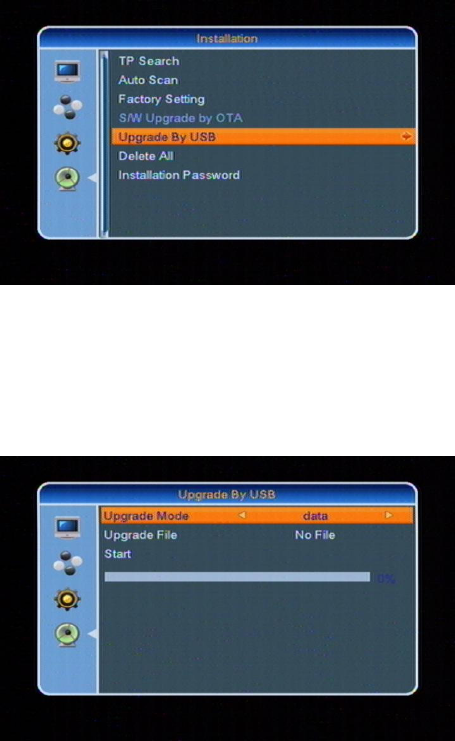
3.4.5 Updated by USB
Another option to update the operating software on the receiver is to “Updated
by USB”.
41
If you want to update the receiver by using a USB 2.0 compatible Stick or such
USB Hard Drive Disk,
please press [VOL]. Select the Upgrade-file and start by press the
[VOL] key.
Note: Do not remove the USB stick or power off during operation, otherwise you
may cause a service issue!
42
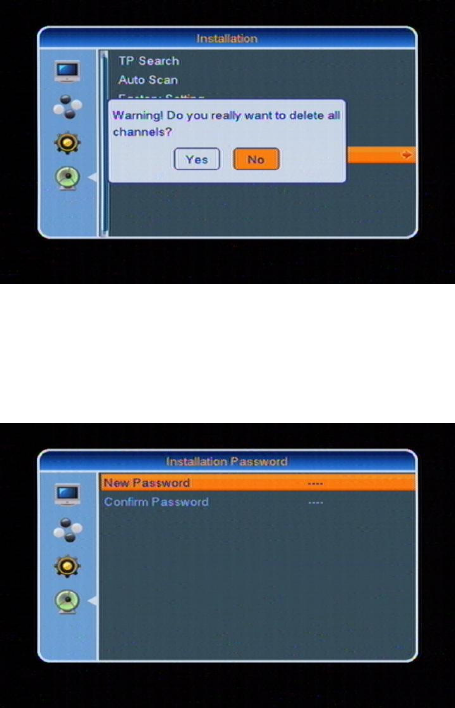
3.4.6 Delete all
Delete all channels.
3.4.7 Installation Password
You can change Password of Installation

43
Technical Specification
4. Technical Specification
VIDEO
Decoding MPEG4, H.264, MPEG-2 & MEPG-1 compatible
Bit rate Max 20Mbps
Output PAL/NTSC / Auto
Aspect ratio 4:3PS, 4:3LB, 16:9, Auto
Active pixel 720x480 @ 30fps; 720x576 @25fps
Output connector RCA
AUDIO
Decoding MPEG-2/MPEG-1 layer I & II
Sampling rate 32 / 44, 1 / 48
DEMODULATOR
Demodulation COFDM 2k, 8k
Guard 1/4, 1/8, 1/16, 1/32
Input data rate 5-31
INPUT SIGNAL
Frequency VHF-UHF
Input level -78dBm -20dBm
MISCELLANEOUS
Supply voltage 120V~, 60Hz
Power consumption 20 watts max
Operation temperature +5° to +40°
Storage temperature -20° to +70°
Dimension (W * D * H) 280*210*65MM
Weight 1.9 Kg