Sangean Electronics 013 FM RDS / INTERNET CLOCK RADIO User Manual 20090317 381S501 A RCR 7WF RCR 8WF GB p65
Sangean Electronics Inc FM RDS / INTERNET CLOCK RADIO 20090317 381S501 A RCR 7WF RCR 8WF GB p65
UserManual.wiki
>
Sangean Electronics
>
013 User Manual
User manual
Navigation menu
Upload a User Manual
Namespaces
Wiki Guide
HTML
PDF
Info
Views
User Manual
Discussion / Help
Navigation


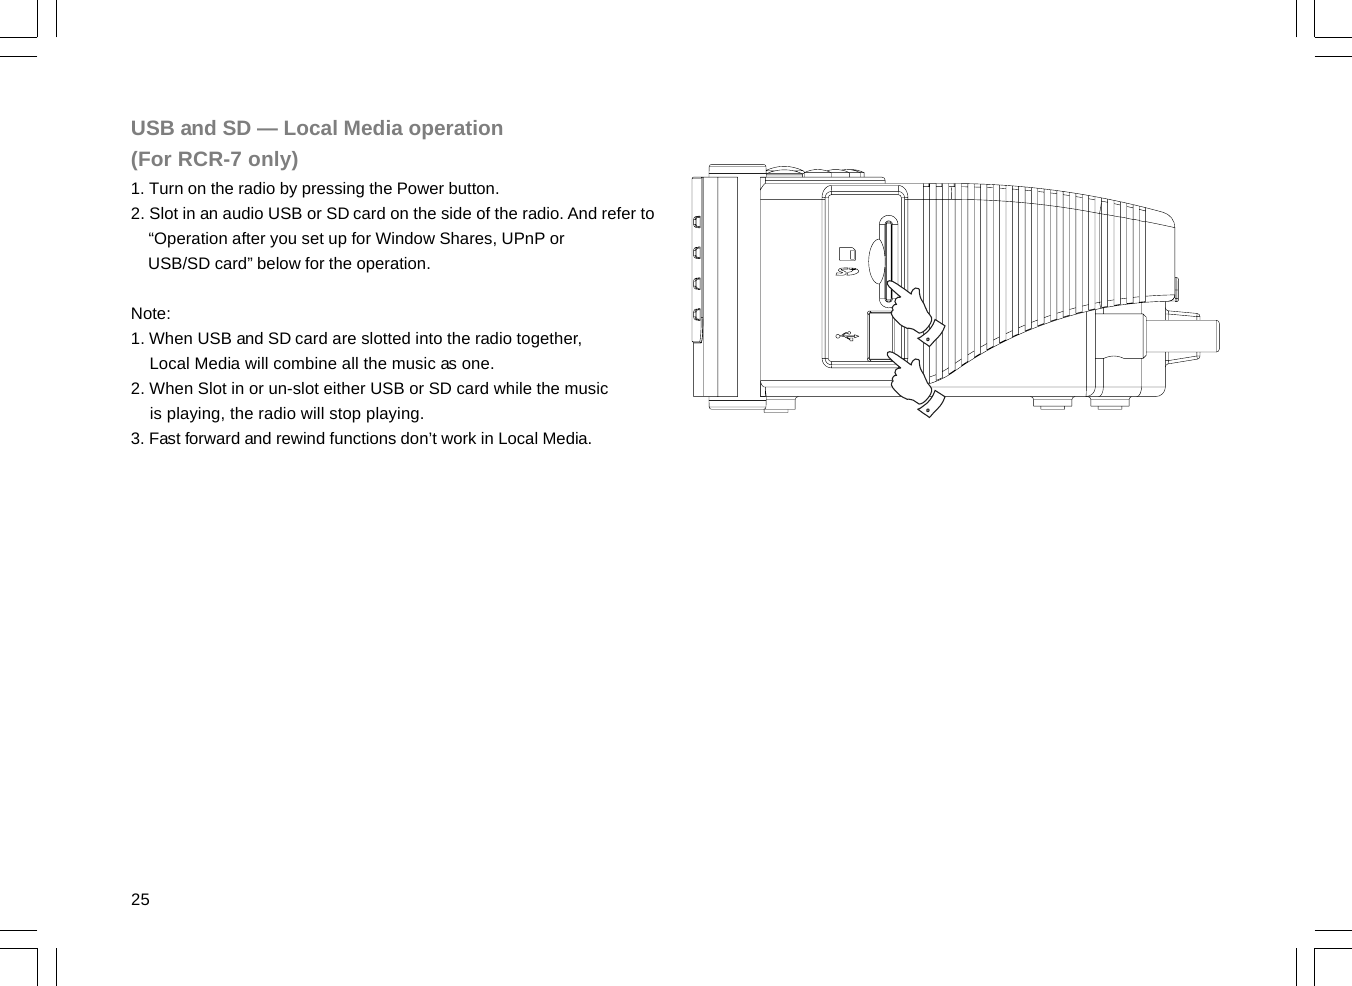
![26GBOperation after you set up for Window Shares,UPnP or USB/SD cardWhether you access your files using Windows Shares, UPnP or USBand SD card, the file selection mechanisms are the same. The onlydifference is that when using UPnP you will generally have a widerchoice of search criteria, as determined by the UPnP server software onyour computer. Some third party server applications allow customizationof the search criteria and indexing methods, which can be useful if youhave a very large collection of stored music files.The selection mechanism allows you to search by a given informationtype (Album, Artist, etc.) and then to narrow the search, either just toan album or to a particular track within an album. The selected album ortrack is then added to a queue of tracks to be played. You can add morealbums or tracks to the queue while music is playing, or you can jumpbetween tracks in the queue. You can also clear the queue if you wishto make a fresh selection. The searches described here are examplesof the possibilities available.Listening to a complete album1. Now the radio is under either <Windows Shares> or <UPnP> or <Local Media> under <Media Player>.2. Press the Tuning+/- buttons until <By Artist>. And the press the Select button.3. Press the Tuning+/- buttons until the required artist is shown on the display. Press the Select button.4. Press the Tuning+/- buttons until the album name is shown on the display. Press the Select button. “<[Add to Queue]>” will be shown on the display.5. Press the Select button. The album will begin playing and all of the tracks in the album will be stored in the queue.Queuing up albums for playback laterWhile the Media Player is playing, you may add additional albums ortracks to the media queue.1. Press the Tuning+/- buttons (with the Back button as needed) to search for the required album.2. Press the Select button to choose the album.3. Press the Tuning+/- buttons until the display shows “<[Add to Queue]>” and then press the Select button. “Tracks Added to Queue” will be displayed. And the album is added to Queue.](https://usermanual.wiki/Sangean-Electronics/013/User-Guide-1091820-Page-27.png)