Sarotech DVP-370 Multimedia Player User Manual
Sarotech Co., Ltd. Multimedia Player Users Manual
UserManual.wiki
>
Sarotech
>
DVP 370 User Manual
Users Manual
Navigation menu
Upload a User Manual
Namespaces
Wiki Guide
HTML
PDF
Info
Views
User Manual
Discussion / Help
Navigation


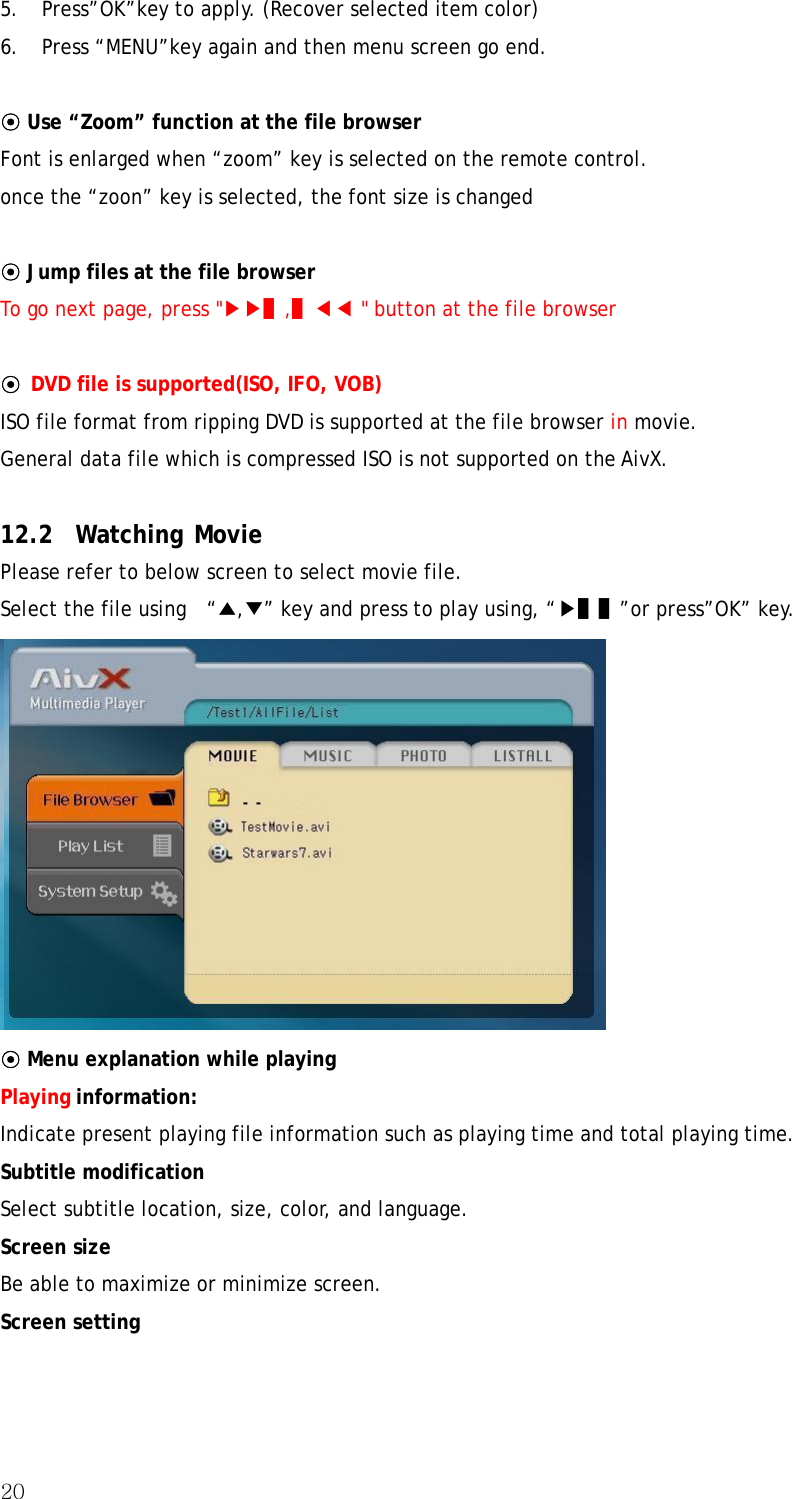
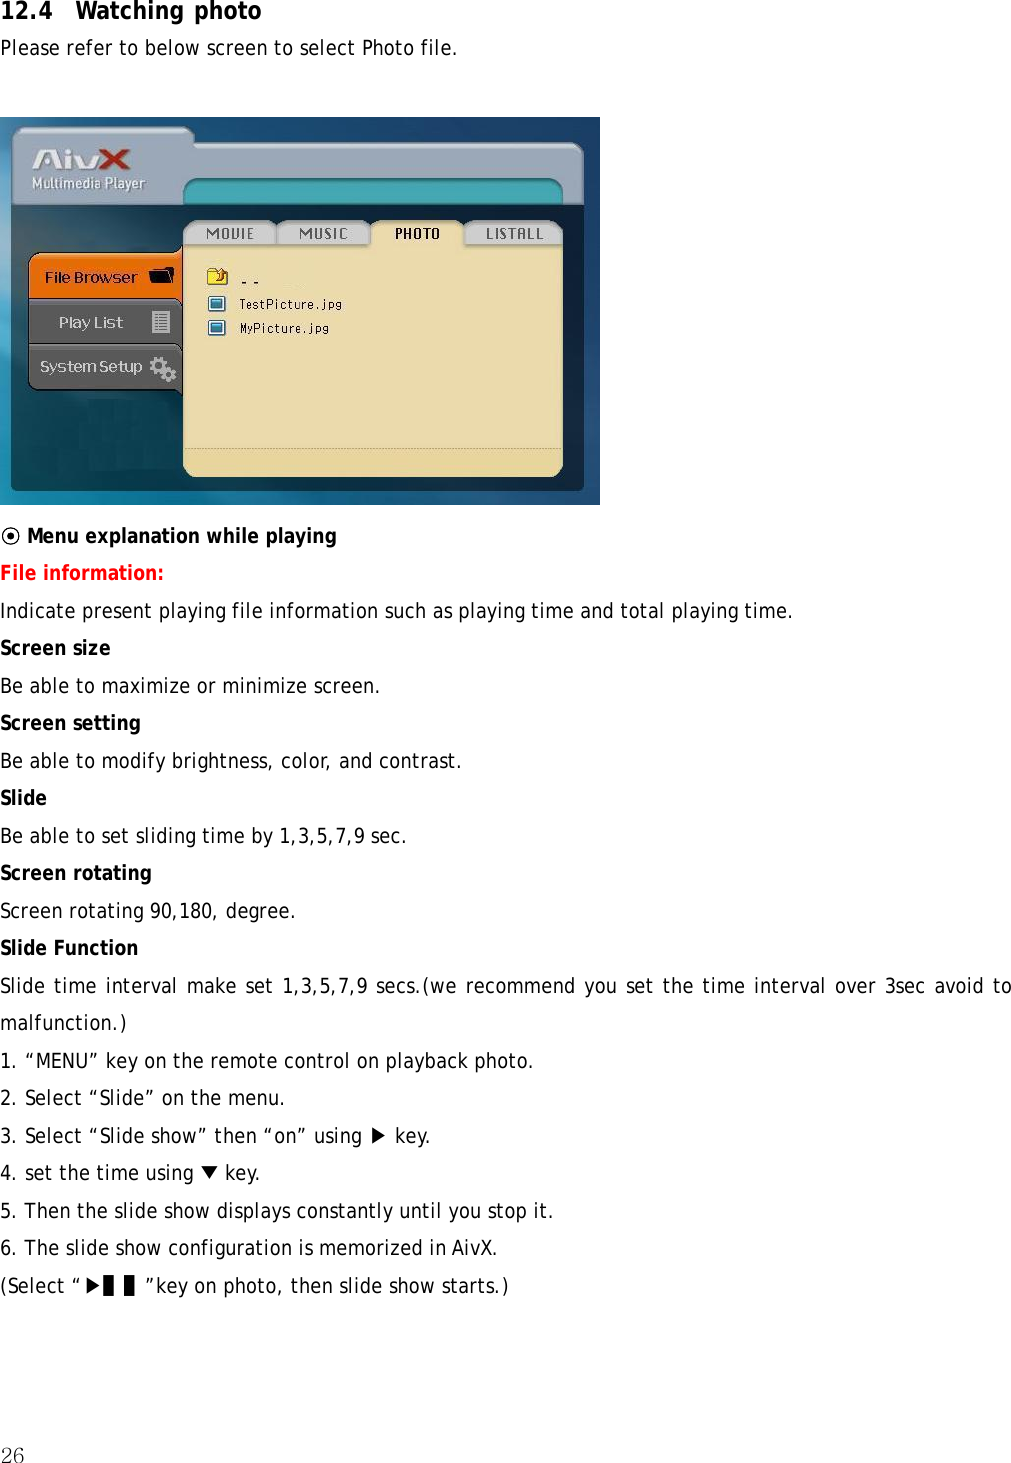
![19 2. Watching Movie/Music/Photo ★ Language is set as “English “when the unit was shipped by factory. 12.1 Using file and menu while playing (Movie/Music/Photo) ⊙ Go to [File Browser] screen 1. Press “MENU” key. 2. Using “▲,▼”key and move to [File Browser ]. 3. Press “OK”key to select. ⊙ Playback movie files 1. AT [File Browser] screen, using “◀,▶” key to select a target among [Movie]/[Music]/[Photo]/[all]. If you select “all”, you may see all the files. 2. Select a file using “▲,▼”key. 3. Play file if you press “▶▌▌”or “OK” key (Movie, music, Photo). ⊙ use menu during playback 1. Press “MENU”key brings menus that you may change. 2. Select set up item using “▲,▼”key. 3. Press “OK”to appoint setup item.(Selected item turn color) 4. Input modification value using “◀,▶” .](https://usermanual.wiki/Sarotech/DVP-370/User-Guide-642211-Page-19.png)
![277. Hot key: Use “0” to stop/start picture slide show. 12.5 How to use Play List (Only movie file is possible) ⊙ Go to [Play List] screen 1. Press “MENU” key or “▲, ▼” key. 2. Move to [Play List] using “▲, ▼” key. 3. Select using press “OK”key. ⊙ Play 1. Select [Play/order] from [Play List]screen using “◀,▶” key. 2. Select and press movie file using “▲, ▼” key. 3. To play, press “▶▌▌”or “OK”key. ⊙ Changing Play order 1. At [Play List] screen, select [Play/order] using “◀, ▶”key. 2. Select movie file to play using “▲, ▼” key. 3. Select file to move using “OK”key (Left side icon is activated). 4. Select location to move using “▲, ▼” key (Selected file moved simultaneously). 5. Press “OK”key then present location is applied. ⊙ Setup/cancel 1. Select [ADD/DEL] from [play list] using “◀, ▶”key.](https://usermanual.wiki/Sarotech/DVP-370/User-Guide-642211-Page-27.png)
![28 2. Select additional file to add on Play List using “▲, ▼” key. 3. Press “OK”key to add on to Play List (check mark). And Press “ok” again and then Play List will be deleted. ⊙ Delete 1. Select [Remove] from [Play List] using “◀, ▶”key. 2. Select delete file from Play List using “▲, ▼” key. 3. To execute press “OK”key.](https://usermanual.wiki/Sarotech/DVP-370/User-Guide-642211-Page-28.png)
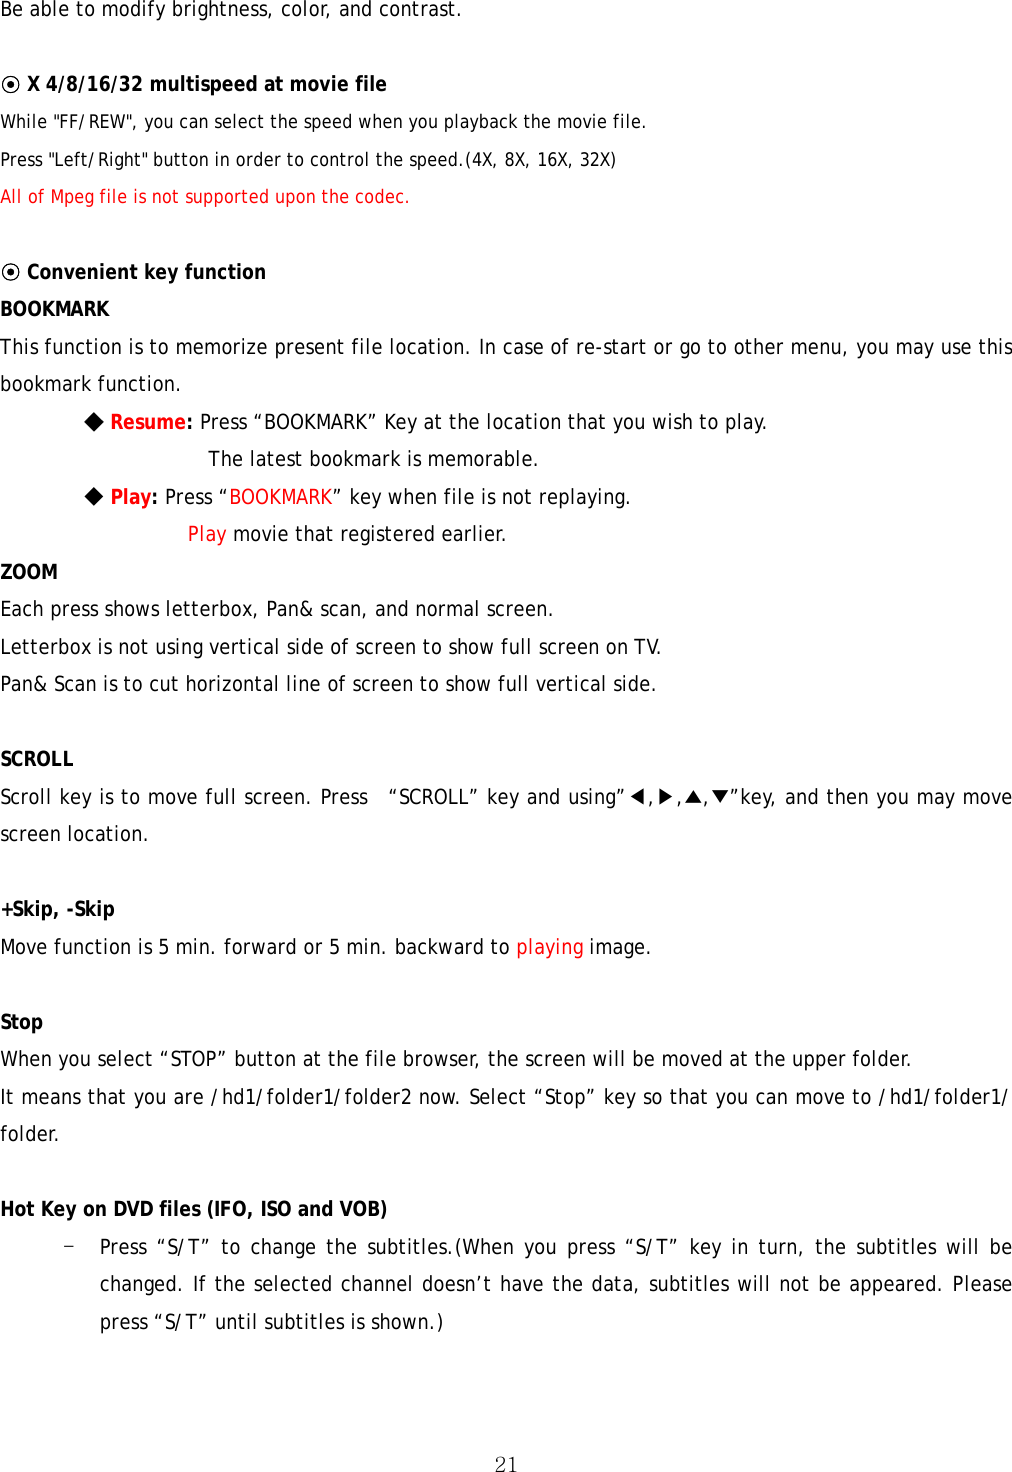
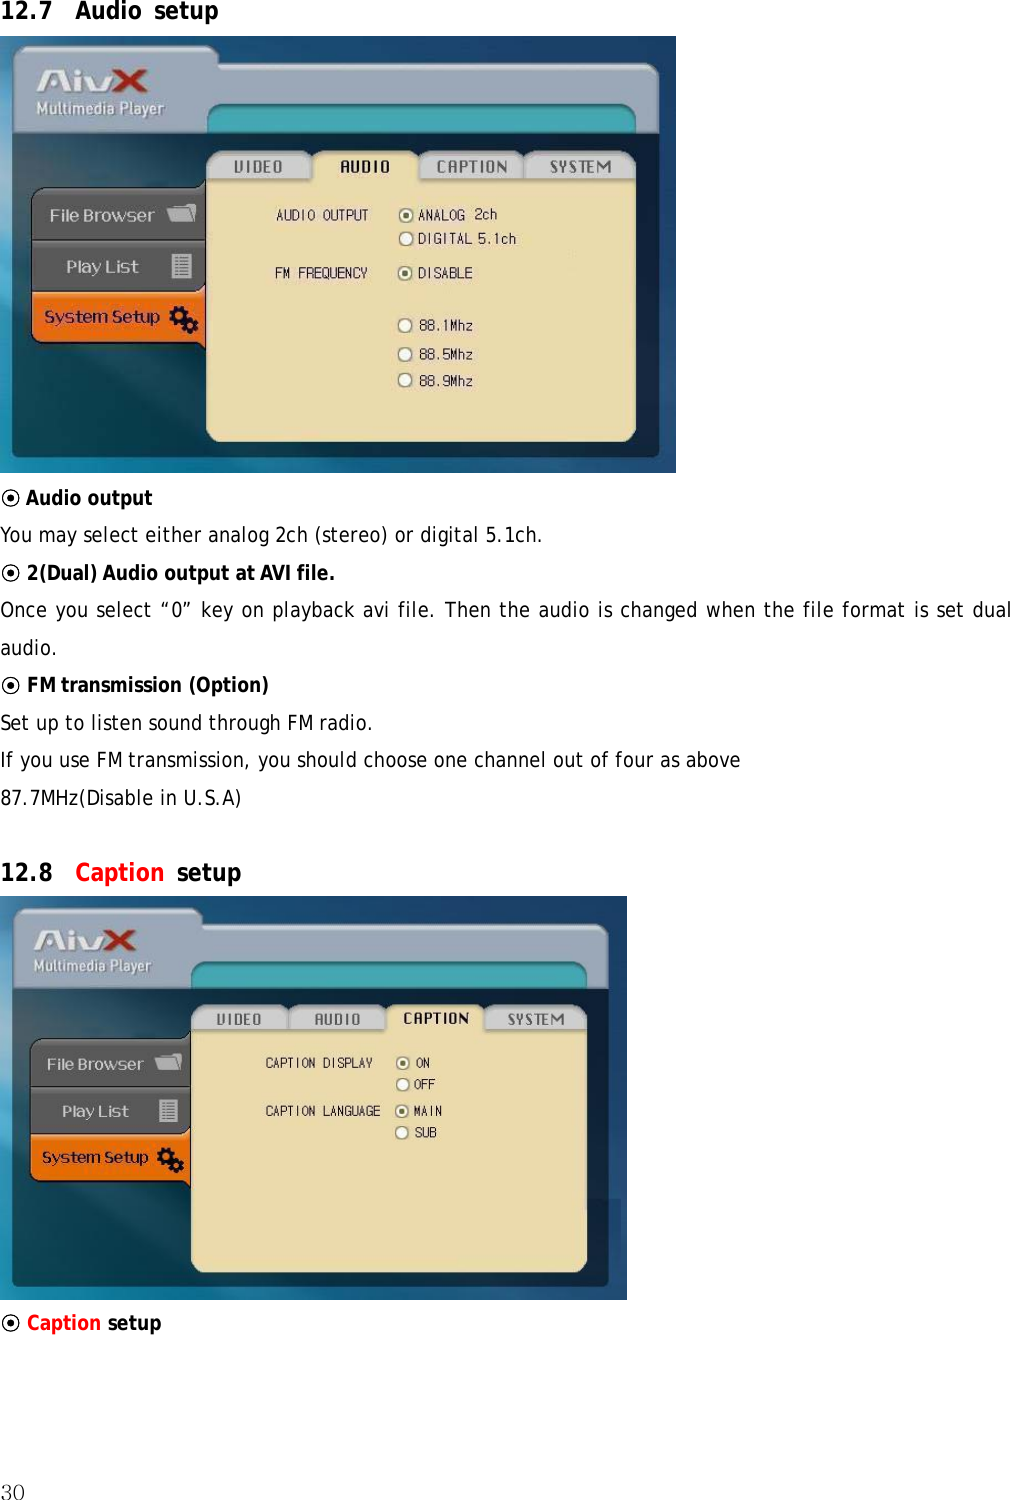
![293. System setup 13.1 How to set up the list 1. Press “MENU” key or “◀, ▶” key. 2. Move to [system setup] menu using “▲, ▼”key. 3. Press “OK” key to select [system setup] 4. Press “◀, ▶” key to select a menu among [video]/[audio]/[subtitle]/[system]. 5. Press “▲, ▼”key to select detailed setup list.. 6. Press “OK”key to check or not check upon clicking. 12.6 Video setup ⊙ HDTV, TV Form This category is to select what kind of TV. ★Caution: If this setup is not completed, you may not see correct image. In this case, press “T/O(TV OUT)”key a couple of times until fine image comes out. If you change to automatic, then TV form would be automatically set. ⊙ Screen setup Select various screen type like letterbox or Pan &Scan.](https://usermanual.wiki/Sarotech/DVP-370/User-Guide-642211-Page-29.png)
![31Be able to select hide or display caption. ⊙ Caption language Select one caption as you wish. 12.9 System setup ⊙ Initialization System initialization function used as initializing a factory output. ⊙ Language Select language to use. ★Caution: Language is set as “English “when the unit was shipped by factory. Please select language as you wish. ⊙ Firmware upgrade Using for firmware upgrade. “A new firmware version ”indicate version “/update/update.bin”of HDD. “Present firmware version”is a present version using the AivX system now. ⊙ How to upgrade firmware. 1. Connect AivX to PC. 2. Create a folder “/update”from AivX HDD. 3. Download update.bin file from AivX homepage and save to “/update”folder. 4. Detach AivX from PC. 5. Connect AivX to TV and turn on the power. 6. Press “MENU”key. 7. Move to [system setup] menu using “▲, ▼”key. 8. Press “OK”key or “◀, ▶” key to select [system setup].](https://usermanual.wiki/Sarotech/DVP-370/User-Guide-642211-Page-31.png)