Contents
User Manual

1
No.1 How to make the HDD 2
How to make USB products 2
How to make the IEEE 1394, or COMBO(USB2.0 + Firewire) 3
No.2 PACKAGE CONTAINS 4
No.3 CAUTION FOR USB 2.0 4
No.4 System Requirement 4
No.5 Driver Installation 4
Driver Installation for USB 1.1 4
1. For Windows 98/ME/2000 5
2. For Windows XP User <USB 1.1(I)> 6
3. For MAC OS 8.6/9.x/x.1 version 8
4. Check the Driver Installation 8
5. How to stop the product 8
Installation for USB 2.0 9
1. Windows 98 SE/ME/2000 user 9
2. Windows XP User <USB 2.0(I)> 10
3. For MAC 10
4. Check the driver Installation 11
5. How to stop the product 11
Driver Installation for IEEE 1394 12
1. For Windows 98 SE 12
2. For Windows ME 12
3. For Windows 2000/XP 13
4. For MAC 13
How to Partition or Format 14
1. For Windows 98/ME 14
2. For Windows 2000/XP 15
For MAC 15
Specification 16
I n f o r m a t i o n
I n f o r m a t i o nI n f o r m a t i o nI n f o r m a t i o n
I n f o r m a t i o nI n f o r m a t i o n
I n f o r m a t i o n
I n f o r m a t i o nI n f o r m a t i o n
I n f o r m a t i o n
I n f o r m a t i o n
I n f o r m a t i o nI n f o r m a t i o n
I n f o r m a t i o nI n f o r m a t i o nI n f o r m a t i o nI n f o r m a t i o nI n f o r m a t i o nI n f o r m a t i o nI n f o r m a t i o n
I n f o r m a t i o nI n f o r m a t i o n
I n f o r m a t i o n
I n f o r m a t i o n
I n f o r m a t i o nI n f o r m a t i o n
I n f o r m a t i o n
I n f o r m a t i o nI n f o r m a t i o n
I n f o r m a t i o nI n f o r m a t i o nI n f o r m a t i o n
I n f o r m a t i o n
I n f o r m a t i o n
2
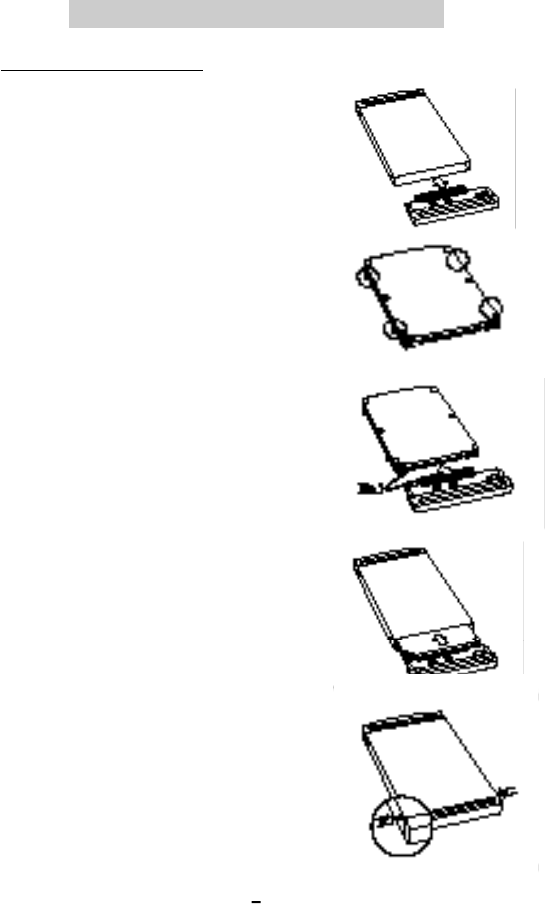
1. Find the disconnected part in the side of FHD-254
product.Hold that part and separate the case from
the PCB.
2. Insert the 4pieces of the Nylon screws with Ivory
color to the side of The Hard Disk.
3. Connect the Hard Disk to the 44pin connector of
PCB.Make sure that the HDD and PCB connector
should be fixon the basis of the "NO.1"pin.
C a u t i o n: The 4pieces of the pins in the right
side of the HDD are forthe fixing of
master/ slave.
Do not connect to the PCB.
4. Insert the Hard Disk, which is connected to PCB,
in the case.
5. Fix the two screws with the screwdriver in the both
sides of the case.
How to make USB products
1. How to make HDD
1. How to make HDD1. How to make HDD1. How to make HDD
1. How to make HDD1. How to make HDD
1. How to make HDD
1. How to make HDD
1. How to make HDD1. How to make HDD
1. How to make HDD
1. How to make HDD1. How to make HDD
1. How to make HDD1. How to make HDD1. How to make HDD
1. How to make HDD
1. How to make HDD1. How to make HDD1. How to make HDD
1. How to make HDD1. How to make HDD
1. How to make HDD
1. How to make HDD1. How to make HDD
1. How to make HDD
1. How to make HDD
1. How to make HDD1. How to make HDD
1. How to make HDD1. How to make HDD1. How to make HDD1. How to make HDD
1. How to make HDD
3
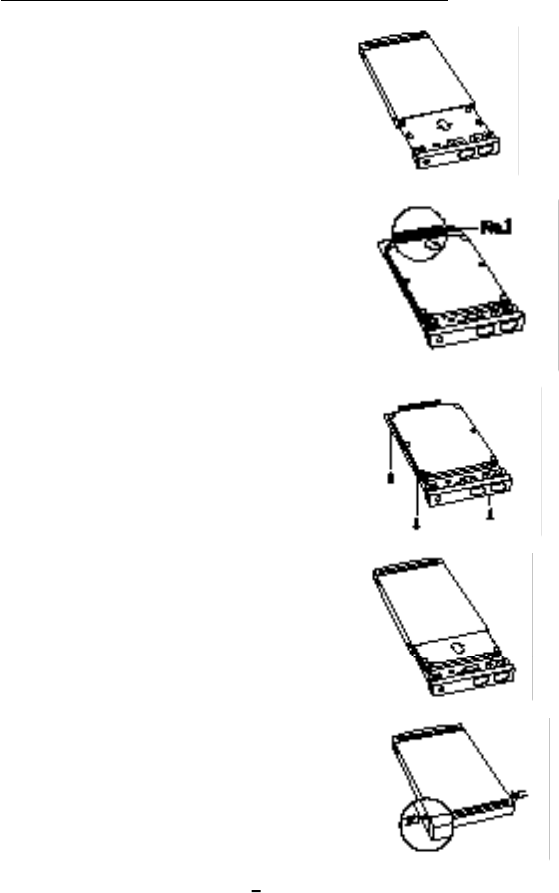
1. Find the disconnected part in the side of FHD-254
product. Hold that part and separate the case from
the PCB.
2. Connect the Hard Disk to the "NO.44" pin of
PCB.Make sure that the HDD and PCB connector
should be fixOn the basis of the "NO.1" pin.
C a u t i o n: The 4 pieces of the pins in the left
side of the HDD are for thefixing of
master/ slave.Do not connect to the
FOB.
3. Fix the PCB and Hard Disk . with 4 offered
screws.
4. Insert the Hard Disk, which is connected to PCB,
in the case.
5. Fix the two screws with the screwdriver in the both
sides ofthe case
How to make the IEEE 1394, or COMBO(USB2.0 + Firewire)

1)FHD-254 case 2)CD Driver
3)Carrying bag 4)Interface Cable
5)User Manual 6)Screw
7)Driver 8)Ps2 Power Cable do USB Power Cable
1) If the USB 1.1 Host Adapter is connected to USB 2.0 product,It will be operated as
speed 1.1 (12Mbps).
2) If you want to use the USB 2.0 products as 480Mbps, you have to use USB 2.0 Host
Adapter that has a USB 2.0 Controller.
3) If the USB 2.0 product is used with USB 2.0Host Adapter, the power will so please
use the PS2 power cable or Adapter.
586,Pentium or greater
System can use the Interface Port
Included CD-ROM Drive or you can download the Driver from Internet Web site.
Driver Installation for USB 1.1
r e f . : 1) Find the Interface on the back of the product, Combo 1.1 product can be
installed refer to the USB 1.1 drive installation and IEEE 1394 drive
installation.
2) Find the interface on the back of the product, Combo 2.0 product can be
installed refer to the USB 2.0 drive installation and IEEE 1394 drive
installation.
4
2. PACKAGE CONTA I N S
2. PACKAGE CONTA I N S2. PACKAGE CONTA I N S2. PACKAGE CONTA I N S
2. PACKAGE CONTA I N S
2. PACKAGE CONTA I N S2. PACKAGE CONTA I N S
2. PACKAGE CONTA I N S
2. PACKAGE CONTA I N S
2. PACKAGE CONTA I N S2. PACKAGE CONTA I N S
2. PACKAGE CONTA I N S
2. PACKAGE CONTA I N S2. PACKAGE CONTA I N S2. PACKAGE CONTA I N S
2. PACKAGE CONTA I N S2. PACKAGE CONTA I N S2. PACKAGE CONTA I N S
2. PACKAGE CONTA I N S2. PACKAGE CONTA I N S2. PACKAGE CONTA I N S
2. PACKAGE CONTA I N S
2. PACKAGE CONTA I N S2. PACKAGE CONTA I N S
2. PACKAGE CONTA I N S
2. PACKAGE CONTA I N S
2. PACKAGE CONTA I N S2. PACKAGE CONTA I N S
2. PACKAGE CONTA I N S
2. PACKAGE CONTA I N S2. PACKAGE CONTA I N S2. PACKAGE CONTA I N S2. PACKAGE CONTA I N S
2. PACKAGE CONTA I N S
3. CAUTON FOR USB 2.0
3. CAUTON FOR USB 2.0
3. CAUTON FOR USB 2.03. CAUTON FOR USB 2.03. CAUTON FOR USB 2.0
3. CAUTON FOR USB 2.0
3. CAUTON FOR USB 2.03. CAUTON FOR USB 2.0
3. CAUTON FOR USB 2.0
3. CAUTON FOR USB 2.0
3. CAUTON FOR USB 2.03. CAUTON FOR USB 2.0
3. CAUTON FOR USB 2.0
3. CAUTON FOR USB 2.03. CAUTON FOR USB 2.03. CAUTON FOR USB 2.03. CAUTON FOR USB 2.03. CAUTON FOR USB 2.03. CAUTON FOR USB 2.03. CAUTON FOR USB 2.0
3. CAUTON FOR USB 2.0
3. CAUTON FOR USB 2.03. CAUTON FOR USB 2.0
3. CAUTON FOR USB 2.0
3. CAUTON FOR USB 2.0
3. CAUTON FOR USB 2.03. CAUTON FOR USB 2.0
3. CAUTON FOR USB 2.0
3. CAUTON FOR USB 2.03. CAUTON FOR USB 2.03. CAUTON FOR USB 2.0
3. CAUTON FOR USB 2.03. CAUTON FOR USB 2.0
3. CAUTON FOR USB 2.0
4. System Require m e n t
4. System Require m e n t4. System Require m e n t
4. System Require m e n t4. System Require m e n t
4. System Require m e n t
4. System Require m e n t4. System Require m e n t
4. System Require m e n t
4. System Require m e n t
4. System Require m e n t4. System Require m e n t
4. System Require m e n t4. System Require m e n t
4. System Require m e n t4. System Require m e n t4. System Require m e n t4. System Require m e n t4. System Require m e n t
4. System Require m e n t4. System Require m e n t
4. System Require m e n t4. System Require m e n t
4. System Require m e n t
4. System Require m e n t
4. System Require m e n t4. System Require m e n t
4. System Require m e n t
4. System Require m e n t4. System Require m e n t
4. System Require m e n t4. System Require m e n t4. System Require m e n t
4. System Require m e n t
5. Driver Installation
5. Driver Installation5. Driver Installation
5. Driver Installation5. Driver Installation
5. Driver Installation
5. Driver Installation5. Driver Installation
5. Driver Installation
5. Driver Installation
5. Driver Installation5. Driver Installation
5. Driver Installation5. Driver Installation
5. Driver Installation5. Driver Installation5. Driver Installation5. Driver Installation5. Driver Installation
5. Driver Installation5. Driver Installation
5. Driver Installation5. Driver Installation
5. Driver Installation
5. Driver Installation
5. Driver Installation5. Driver Installation
5. Driver Installation
5. Driver Installation5. Driver Installation
5. Driver Installation5. Driver Installation5. Driver Installation
5. Driver Installation
5
Caution: 1) Make sure the Tppinst. Exe, before connect the product.
2) The data can be lost when you use the Hard disk under 2GB,We advise
you to use over 2GB Hard disk.
3) The new hard disk, that doesn't have F disk and Format, can not be
recognizedIn "My computer". So follow the way in "NO.4: How to install
the PARTITIN and FORMAT".
Then the drive will be installed in "my computer".
1. For Windows 98/ME/2000
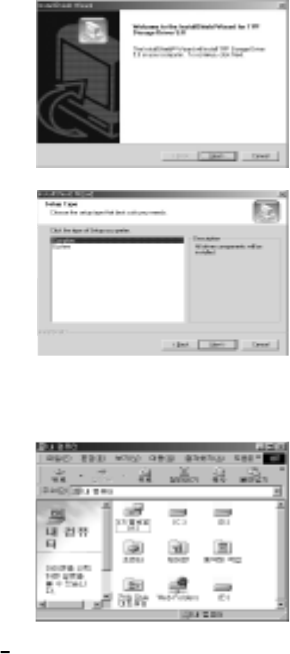
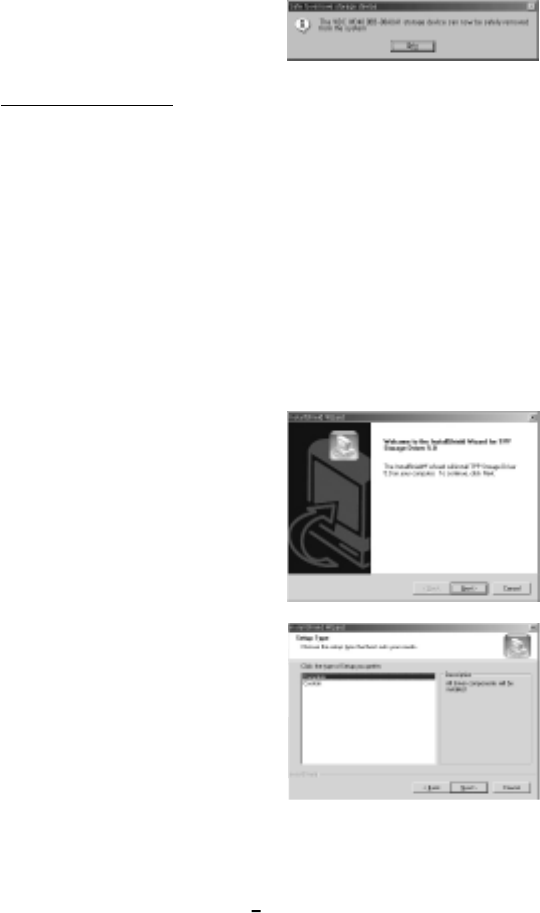
1) Do not connect the product, first.Insert the offered CD to the CD-ROM drive.
2) carry out the "tappinst.exe " which is in
the USB folder under. The window
Folder in the CD-ROM. And then Click
the "Next".
3) Make sure if the "complete" is selected in
"set up type " then Click the "next".The
drive will be installed successfully.
4) Connect the USB cable to FHD-254.
5) Connect the opposite side of the USB cable to the USB port in computer.
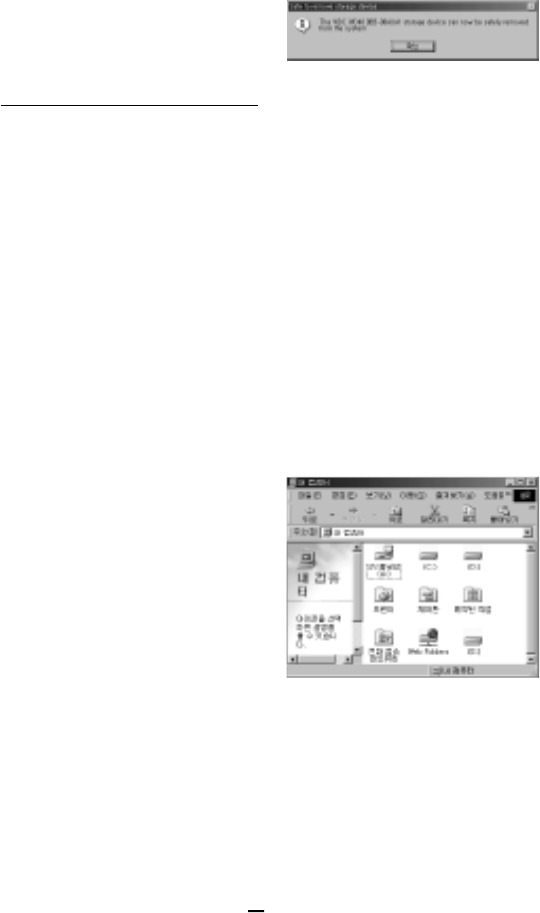
6) <HDD model(ex: SAMSUNG SV 4002H USB DISK)>USB DEVICE.
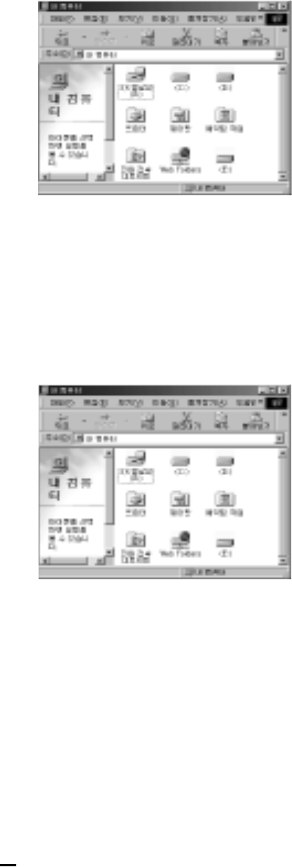
7) Coming out to "USB,Disk", the drive
Icon will be appeared in "My computer".
2. For Windows XP User <USB 1.1(I)>
1) Do not connect the product, first, booting the "window XP".
2) Insert the offered CD to the CD-ROM
drive.
3) Carry out the "Tappinst.exe" which is in the USB folder under the windowFolder in the
CD-ROM, and then Click the "next".
4) Make sure if the "complete" is selected in
"set up type". Then Click the "Next".The
drive will be installed successfully.
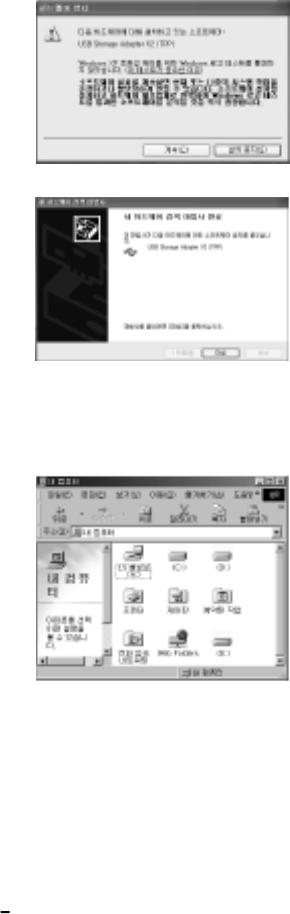
5) Ignore the message which windows logo
has not tested for compatibleWindow XP.
6) Appearing the "New hardware searching
???, choose the "automaticallyInstallation
of software.
6
7
7) Ignore the message which windows logo
has not tested for compatible Window XP.
8) finding the message "complete the new
hard ware searching ???". And then click
the "Finish".
9) Connect the USB cable to the FHD-254.
10) Connect the opposite side of USB cable to the USB port in computer.
11) HDD model : (SAMSUNG SV 4002H USB Disk) USB DEVICE
12) Coming out to the "USB disk", the drive
Icon will be appearing in "my computer".
C a u t i o n: 1) The hand disk which doesn't have FDISK and FORMAT can not be
recognized.
2) If you want to use it in MAC and IBM, please carry out the FDISK and
FORMAT in IBM Computer.
8
3. For MAC OS 8.6/ 9.x/ x.1 version
1) Booting the MAC OS, before connect the product.
2) Install the driver under position in offered drive CD.
Carry out the MAC OS/ USB/ OS 8.6/ 9.X/ X.1/ install ISD Storage driver.
3) Re-booting the computer and then connect the FHD-254U11(I).
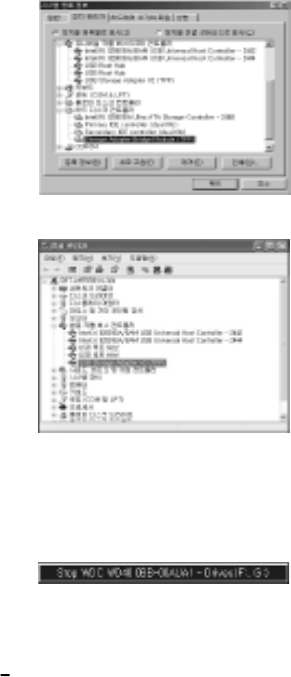
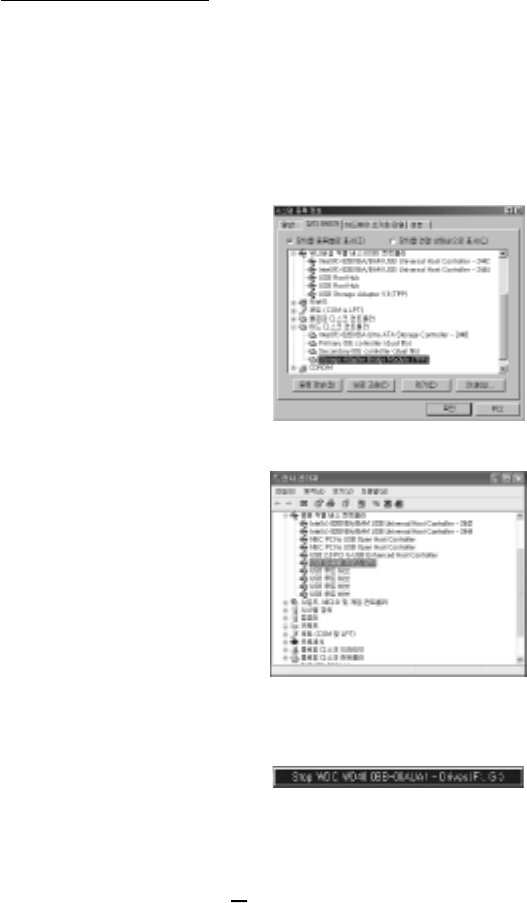
4. Check the driver Installation
Make sure if the drive is connected successfully on the OS position.
1) Windows 98/ ME
Control panel - System - Device manager
- Universal series bus controller
2) Windows 2000/ XP
Control panel - System - Hardware -
Device manager - Universal series bus
controller
5. How to stop the product
If you want to separate the product when you are using it, pleases following the below.
1) Click the "Tray icon" under the "start".
and then you can find the below drawing.
9
2) If you choose it ,and read the message; at
that time, separate the product from USB
port.
Installation for USB 2.0
Caution: 1) Carry out "Tppinst.exe" before connect the product.
2) The data can be lost when you use the Hard disk under 2GB. we advise
you to use over 2GB Hard disk.
3) The new Hard disk, that doesn't have Fdisk and Format, can not be
recognized in "My computer", so follow the way in "NO.4: How to install
the PARTIN and FORMA".
Then the drive will be installed in "My computer".
1. Windows 98 SE/ ME/ 2000 user
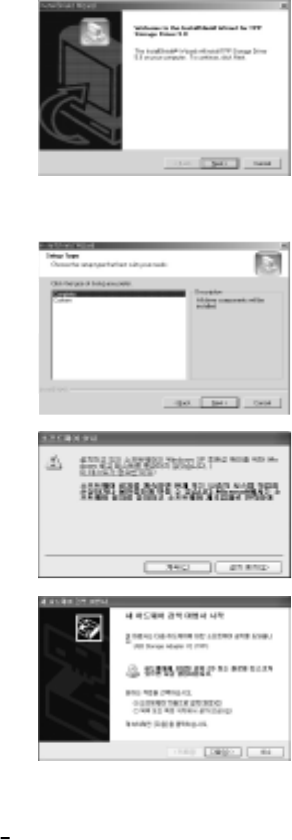
1) Insert the offered CD to the CD-ROM in computer before connect the product.
2 ) Carry out "Tppinst.exe" which is in the
USB Folder under the window folder in
the CD-ROM. then, Click the "Next".
3) Make sure if the "complete" is selected in
"set up type".
Click the "Next". The drive will be
installed successfully.
4) Connected the USB cable to FHD-253+.
5) Connect the opposite side of the USB port in computer.
6) HDD Model (ex : SAMSUNG SV 4002H USB Disk)USB DEVICE.
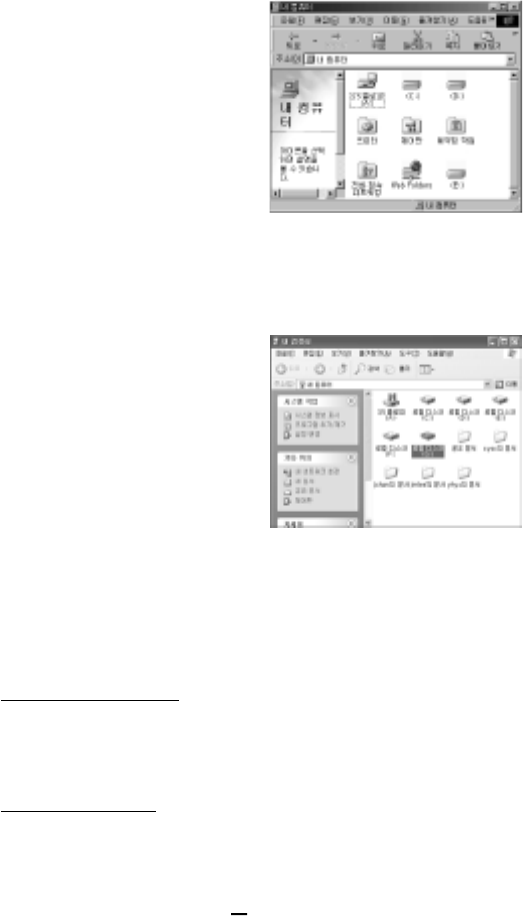
7) Come out to "USB Disk", the drive Icon
will be appeared in "My computer".
2. Windows XP User <USB 2.0(I)>
1) Booting the Windows XP.
2) Connect the USB cable to FHD-254.
3) Connect the opposite side of USB cable to USB port in computer.
4) The "USB Big capacity storage installation" will be created Automatically.
5) HDD Model (ex : SAMSUNG SV 4002H USB DISK) USB DEVICE.
6) Coming out "USB Disk", the drive
Icon will be appeared in "My
computer".
3. For MAC
C a u t i o n: 1) The new Hard disk that doesn't have Fdisk and Format can not be
recognized.
2) If you want to use it in MAC and IBM computer, please, carry out the
Fdisk and Format in IBM computer.
3) The USB2.0 Controller and over MAC OS x will be supported. when
you use "USB 2.0" speed.
1 0
1 1
For MAC OS 8.6/ 9.0/ x.1Version
1) Booting the MAC OS before connect the product.
2) Install the driver under position in offered drive CD.
3) Re-Booting the computer and then connect the FHD - 254U2(I).
4. Check the Driver Installation
Make sure if the drive is connected successfully on the OS position.
1) For Windows 98 se/ me
Control panel - System - Device manager
- Universal series Bus controller
2) For Windows 2000/ XP
Control panel - System - Hardware -
Device manager - Universal series Bus
controller
5. How to stop the product
1) Click the "Trey Icon" under the "Start"
and then you can find the below drawing.
1 2
2) Choose it and read the message, separate
the product from USB port.
Driver0 Installation for IEEE 1394
1) Booting the window XP
2) Connect the USB cable to FHD-254
3) Connect the opposite side of the USB cable to USB port in computer.
1. For Windows 98 SE
Caution: "windows 98 SE CD-ROM" is needed to install FHD-254.
Please ready the "windows 98 SE CD-ROM" before start.
1) Booting the "windows 98 SE"
2) Connect the IEEE 1394 cable to FHD-254.
3) Then connect to IEEE 1394 port in computer.
4) Finding out "Insert the Disk", insert the "window 98 SE CD-ROM" to the CD-ROM
drive, Then click the "confirmation" The drive will be created automatically.
5 ) Make sure if the "Hard disk Icon" is
created in "My computer".
2. For windows ME
1) Booting the windows ME
2) Connect the IEEE 1394 cable to FHD-254
3) Then connect to IEEE 1394 port in computer.
1 3
4 ) Make sure if the "Hard disk Icon" is
created in "My computer".
3. For windows 2000/ XP
1) Booting the windows 2000/ XP
2) Connect the IEEE 1394 cable to FHD-254, first.
3) Then. connect to the IEEE 1394 port in computer.
4 ) Make sure if the "Hard disk Icon" is
created in "My computer".
4. For MAC
Caution: 1) Over MAC OS 8.6
2) The Hard disk that doesn't have Fdisk and Format can not be recognized.
3) If you want to use it in MAC and IBM computer, please carry out the
Fdisk and Format in IBM computer.
For MAC OS 8.6/ 9.x version
1) Booting the MAC OS before connect the product.
2) Install the driver under position in offered drive CD
3) Re-Booting the computer and then connect the FHD-254U2(I)
For MAC OS X.1 version
It will be recognized automatically without any additional drive.

1 4
How to Partition or Format
Caution : Install the driver before "PARTIN and FORMAT".
1) For windows 98/ ME
The way to Fdisk and Format with new Hard disk (with one drive)
Install the driver before connect the product to computer
Install the driver - program - Korean MS-DOS
Type "Fdisk" directly and press the "Enter"
Type "Fdisk" directly and press the "Enter"
Find the question "will you use the Big Disk support function?".
Type "Y" and press "Enter".
Choose the "NO.5 change the present hard disk drive" among the Fdisk options.
Choose the last number in change the "Hard disk drive"
Type the Hard disk number of Fdisk in "Type the "Hard disk number" - press
the "Enter"
Press "ESC" - choose the "No1. select the logic dos drive. or partition" among
the Fdisk option items - Type "No.1"- press "Enter"
After finish the "No formation test, you can find the message" will you use the
whole capacity for basic Dos partition".
The type "Y" and press the "Enter"
Type "Needed capacity or %" directly and press "Enter".-After finish the No
formation test again. you can find the message "Select basic Dos partition, the
drive word is changed or added".
Then press "ESC" to return to Fdisk option.
Press "ESC" - Find the message "Re-start the computer"- press "ESC" again -
If you find <C: - windows> press "EXIT" to return to window.
Separate FHD-254 from the computer.
Connect the FHD-254 to USB port in computer, again
The "Drive word" will be created in "My computer"
Choose the drive - press the right side of the Mouse and do the Format(M).

1 5
2) For windows 2000/ XP
Click the "My computer" with right side of Mouse in the screen.
Management "Disk management"The way to Fdisk and Format with a new Hard
disk (with one drive)
Click the drive of "Not allotted" in Disk management with the right side of the
mouse. - Carry out the "Making partition".
After complete the "Making partition magician" click the "Next"
After check if the "main partition(P)" is selected in kinds of partition. Then click
the "Next"
Type the needed capacity at "Disk space" in partition size. Then click "Next"
If the drive word is allotted, click "Next"
Choose one from the kind of file System (NTFS, FAT32)
Among the partition Format, then click "Next"
Caution : The "NTFS File system" will be recognized only in "windows 2000" If you
want it use with "windows 98/ ME", please choose "FAT32".system
After the "Making partition magician", click the "Finish".
For MAC
Caution : 1) Over MAC OS 8.6
2) The Hard disk that doesn't have Fdisk and Format can not be recognized.
Install the driver, first then initialization.
3) If you want to use it in MAC and IBM, please carry out the Fdisk and
Format in IBM computer.
First install the "Install ISD storage driver" in USB Folder of MAC
OS Folder. That is in offered CD
Re-booting the computer.
Connect the USB cable to FHD-254.
Connect the opposite side of USB cable to USB port in computer.
The drive Icon will be created in the screen

1 6
Model
Interface
Max Data transfer
Size
Weight
Power
OS supported
FHD-254
127.2x 75.6x 15.5mm
180g(With Hard) 90g(With out Hard)
Power or External power Adapter
98 SE/ ME/ 2000/ XP, MAC OS 8.6/ 9.x/ x.1
USB 1.1(I)
12Mbps 480Mbps 400Mbps
USB 2.0(I)
IEEE 1394(FireWire, iLink)
S p e c i f i c a t i o n
S p e c i f i c a t i o nS p e c i f i c a t i o nS p e c i f i c a t i o n
S p e c i f i c a t i o nS p e c i f i c a t i o n
S p e c i f i c a t i o n
S p e c i f i c a t i o n
S p e c i f i c a t i o nS p e c i f i c a t i o n
S p e c i f i c a t i o n
S p e c i f i c a t i o nS p e c i f i c a t i o n
S p e c i f i c a t i o nS p e c i f i c a t i o n
S p e c i f i c a t i o nS p e c i f i c a t i o nS p e c i f i c a t i o n
S p e c i f i c a t i o nS p e c i f i c a t i o n
S p e c i f i c a t i o nS p e c i f i c a t i o n
S p e c i f i c a t i o n
S p e c i f i c a t i o nS p e c i f i c a t i o n
S p e c i f i c a t i o n
S p e c i f i c a t i o n
S p e c i f i c a t i o nS p e c i f i c a t i o n
S p e c i f i c a t i o nS p e c i f i c a t i o nS p e c i f i c a t i o nS p e c i f i c a t i o n
S p e c i f i c a t i o n
*LABELLING REQUIREMENTS
This device complies with Part 15 of the FCC Rules. Operation is subject to the following two conditions
(1) this device may not cause harmful interference, and (2) this device must accept any interference
received, including interference that may cause undesired operations.
*INFORMATION TO THE USER
This equipment has been tested and found to comply with the limits for a Class B digital device,
pursuant to part 15 of the FCC Rules. These limits are designed to provide reasonable protection against
harmful interference in a residential installation. This equipment generates, uses and can radiate radio
frequency energy and, if not installed and used in accordance with the instructions, may cause harmful
interference to radio communications. However, there is no guarantee that interference will not
occur in a particular installation. If this equipment does cause harmful interference to radio or television
reception, which can be determined by turning the equipment off and on, the user is encouraged
encouraged to try to correct the interference by one more of the following measures:
- Reorient or relocate the receiving antenna.
-Increase the separation between the equipment and receiver.
- Connect the equipment into an outlet on a circuit different from that to which the receiver is connected.
-Consult the dealer or an experienced radio/TV technician for help.
*WARNING
Changes or modifications not expressly approved by the manufacturer could void the user's authority to
operate the equipment.

U s e r 's G u i d e
Connecting External HDD Disk Case (FHD-254)
INSTALLATION MANUAL
We strongly recommend reading the MANUAL before
using the product