Satellite Electronic TR06C CEILING FAN REMOTE CONTROLLER User Manual
Satellite Electronic(Zhong Shan)Ltd. CEILING FAN REMOTE CONTROLLER Users Manual
User Manual

CEILING FAN REMOTE CONTROLLER
OPERATION AND INSTALLATION INSTRUCTIONS
(Please keep this instruction pamphlet.)
IMPORTANT POINTS TO REMEMBER:
1. Please read and save these instructions.
2. Please note that all fixed wiring appliances should be installed by a qualified electrician.
3. The supply to the remote control receiver should be connected through a mains switch, i.e. existing
wall switch.
4. Disconnect from power supply at wall switch before working on remote control receiver or ceiling fan.
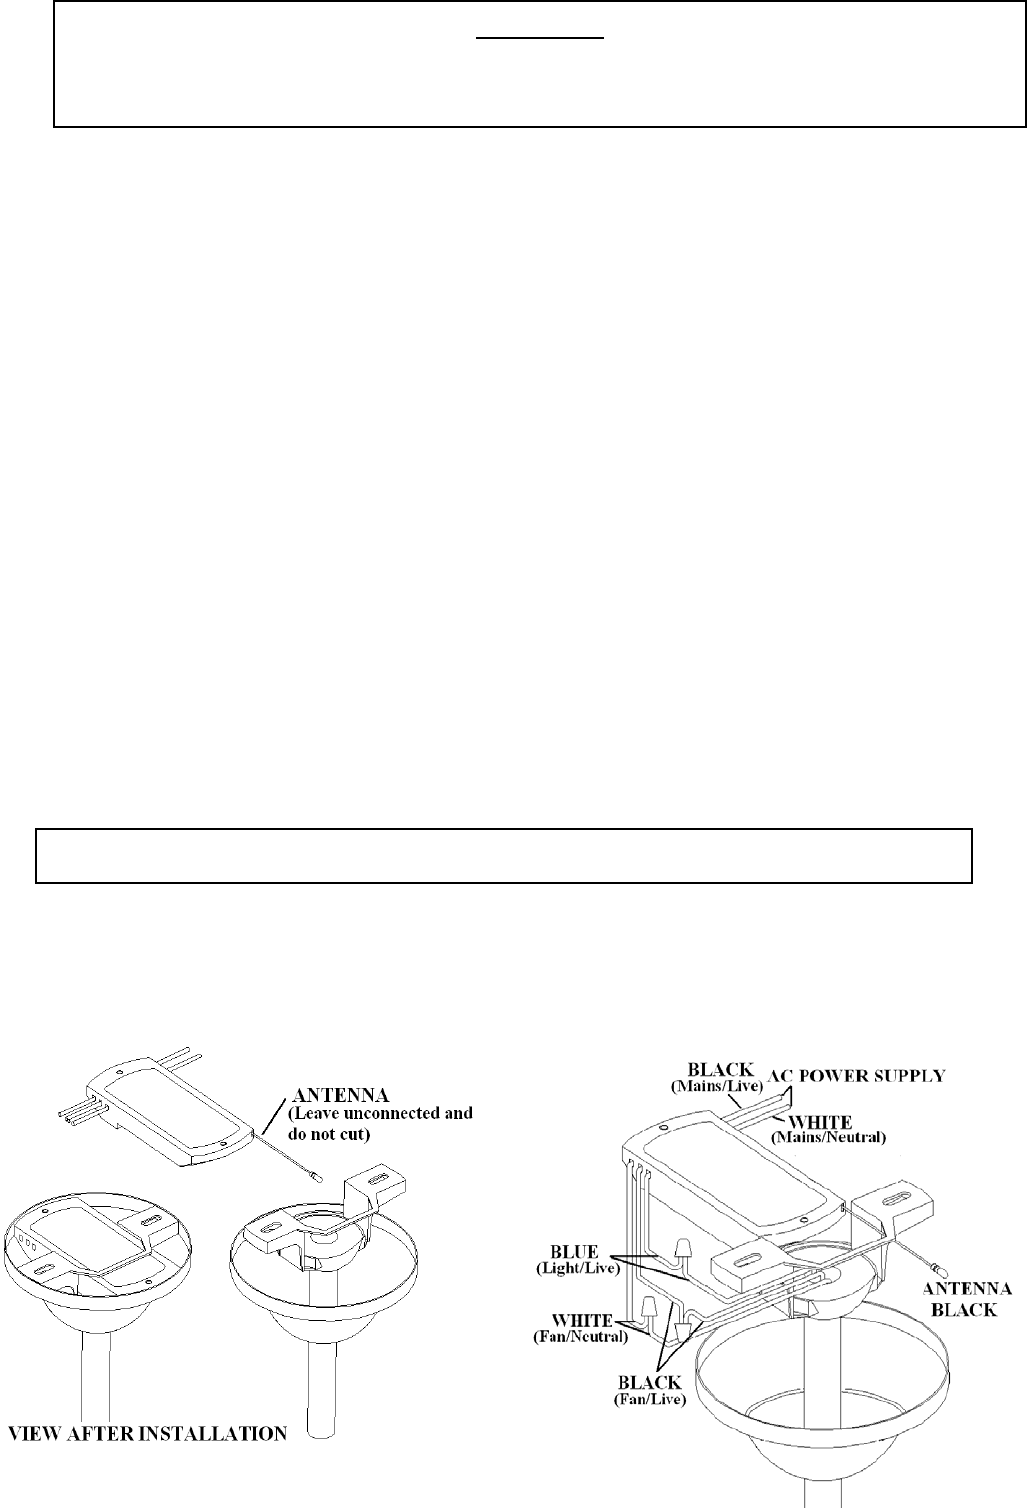
5. Install receiver into the ceiling fan canopy of the fan to ensure proper protection.
6. This unit is to be used for the control of ceiling fan and in an AC120V 60Hz power supply only, rated
max 1.25A for fan, max 300W for light.
7. Do not install in damp locations or immerse in water. (For indoor use only.)
8. Do not pull on or cut leads shorter.
9. Do not drop or bump the unit.
10. PLEASE NOTE: The battery will weaken with age and should be replaced before leaking takes place
as this will damage the transmitter. Dispose of used battery properly, keep the battery out of reach of
children.
11. CAUTION: To reduce the risk of fire or injury, do not use this product in conjunction with any variable
(rheostat) wall control.
INSTALLATION INSTRUCTIONS
1. Ceiling fan must be set at HIGH speed and light kit (If any) at ON position by pressing the “Light
Switch” after installation.
2. Once the connection has been made, the receiver inserts into the drop rod hanging bracket. The
canopy comes up to cover the receiver and bracket.
IMPORTANT
YOU MUST SET CEILING FAN MANUAL SWITCH TO HIGH SPEED AND LIGHT KIT (IF ANY)
TO ON POSITION BEFORE OPERATING REMOTE CONTROL.
CAUTION: INCORRECT WIRE CONNECTION WOULD DAMAGE THIS RECEIVER.

CODE SWITCH
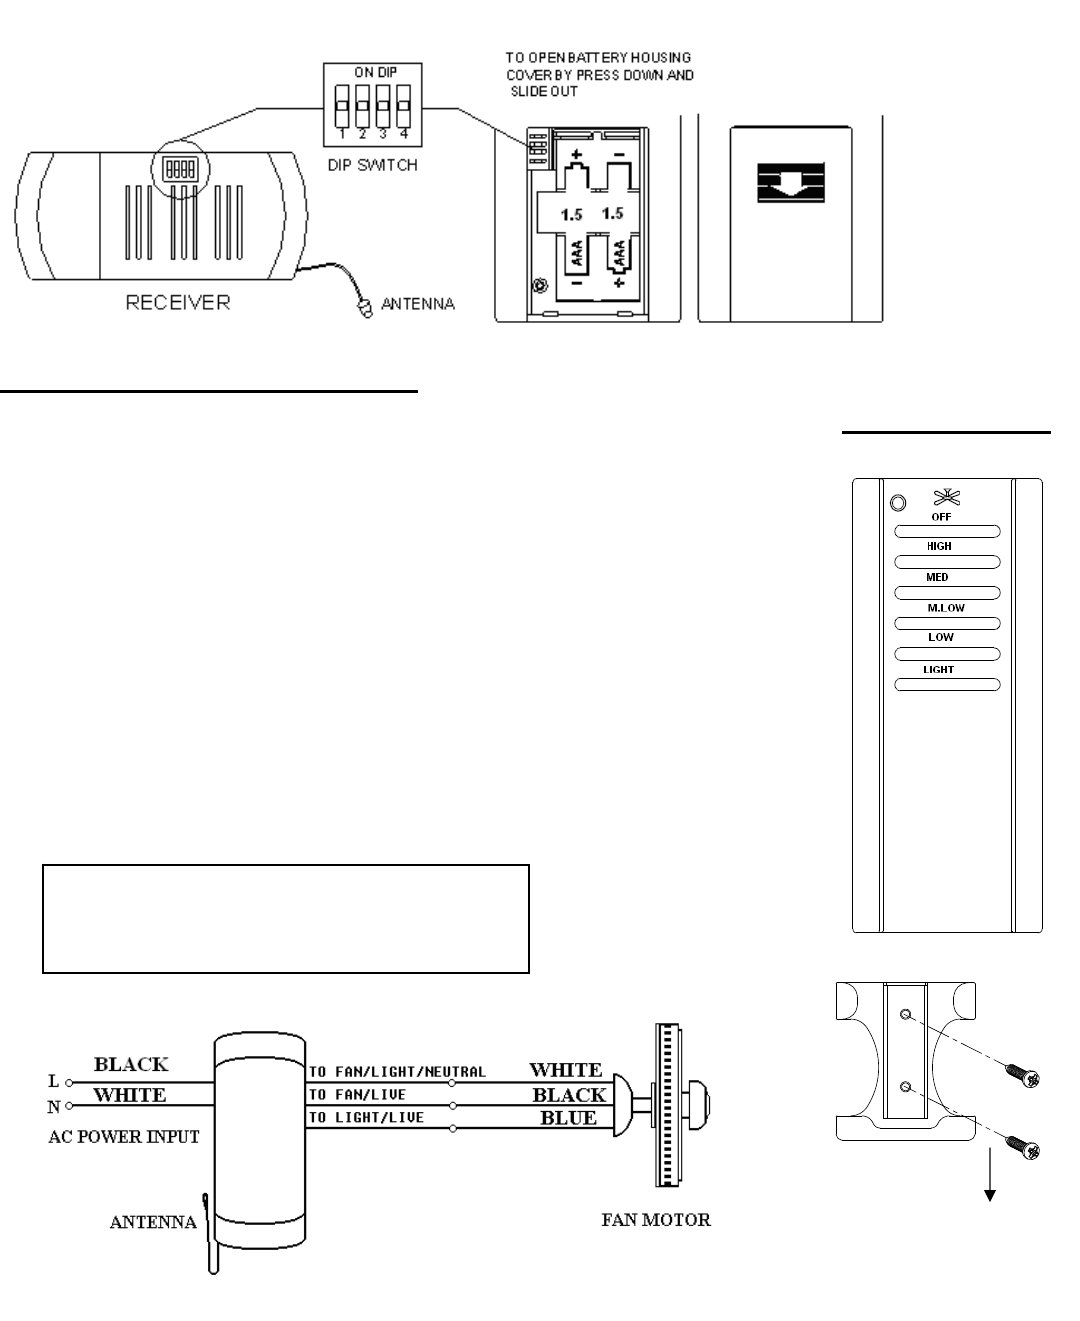
1. CODE SWITCH: Codes are set by pushing dip switches up or down. It is imperative that the code
used for both transmitter and receiver is exactly the same, otherwise remote controller will not work.
Please note the code switch will enable you to operate a second remote controller independently. For
example, if you have two ceiling fans with 2 remote control units, set 2 different codes for each set of
transmitter/receivers. This means you can operate each ceiling fan independently.
2. Your remote control is ready for use after batteries installation(need AAA 1.5V*2pcs ).
FUNCTIONS OF TRANSMITTER
HIGH :Turn on the fan at high speed
MED :Turn on the fan at medium speed
M.LOW : Turn on the fan at m.low speed
LOW: Turn on the fan at low speed
OFF : Turn off the ceiling fan.
LIGHT ON/OFF: Press and release immediately to turn on or off the light.
DIMMER : Press and hold to dim or brighten lights to the desired level
and release.
Ceiling Fan Remote Control
Wiring Connection
TRANSMITTER
To install the Transmitter
Wall Mount Holder with two
screws.
FCC Warning
This device complies with Part 15 of the FCC Rules. Operation is subject to the following two
conditions:
(1) This device may not cause harmful interference, and
(2) this device must accept any interference received, including interference that may cause undesired
operation.
NOTE 1: Any changes or modifications to this unit not expressly approved by the party responsible for
compliance could void the user's authority to operate the equipment.