Satellite Tracking of People 1106MM1 Blu+ User Manual Chapter 1
Satellite Tracking of People LLC Blu+ Chapter 1
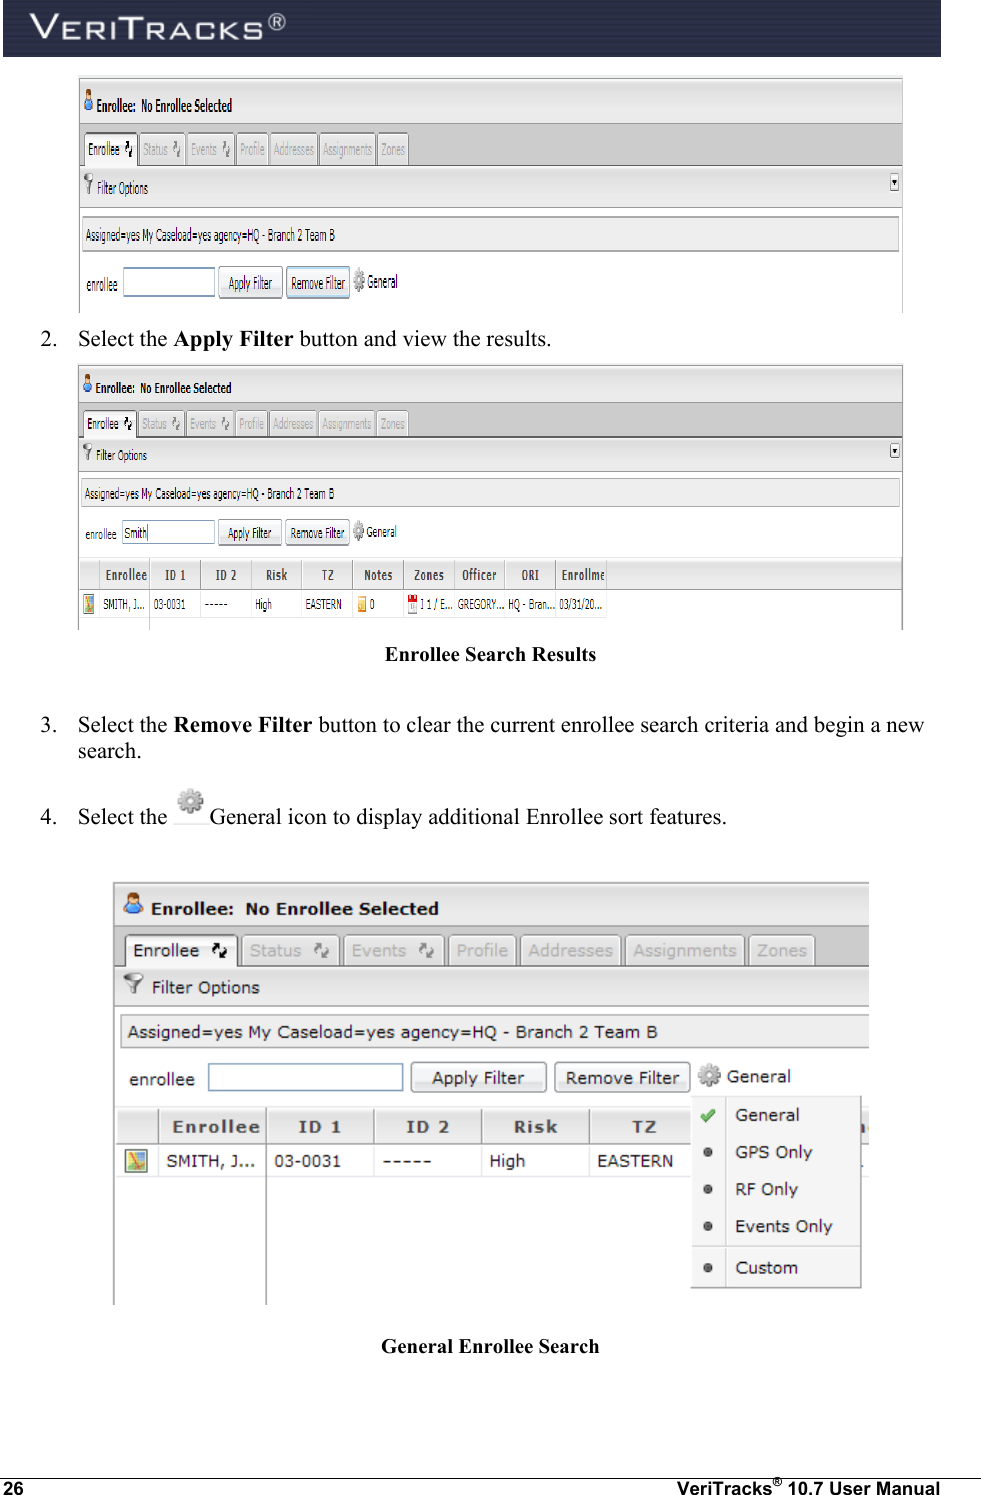
UserManual.wiki
>
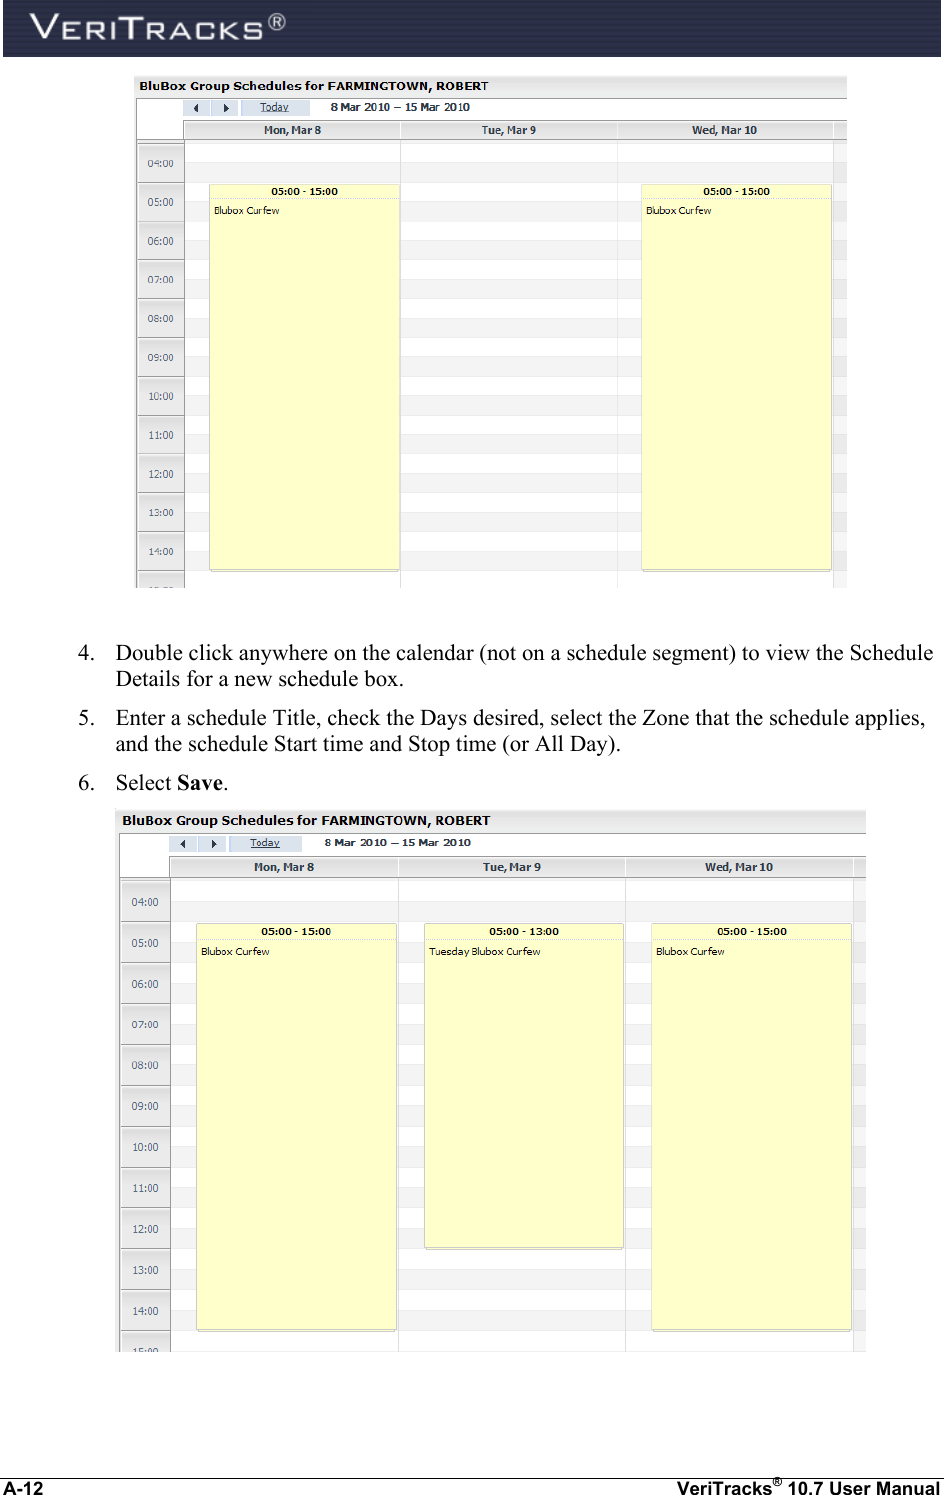
Satellite Tracking of People
>
1106MM1 User Manual
User Manual
Navigation menu
Upload a User Manual
Namespaces
Wiki Guide
HTML
PDF
Info
Views
User Manual
Discussion / Help
Navigation
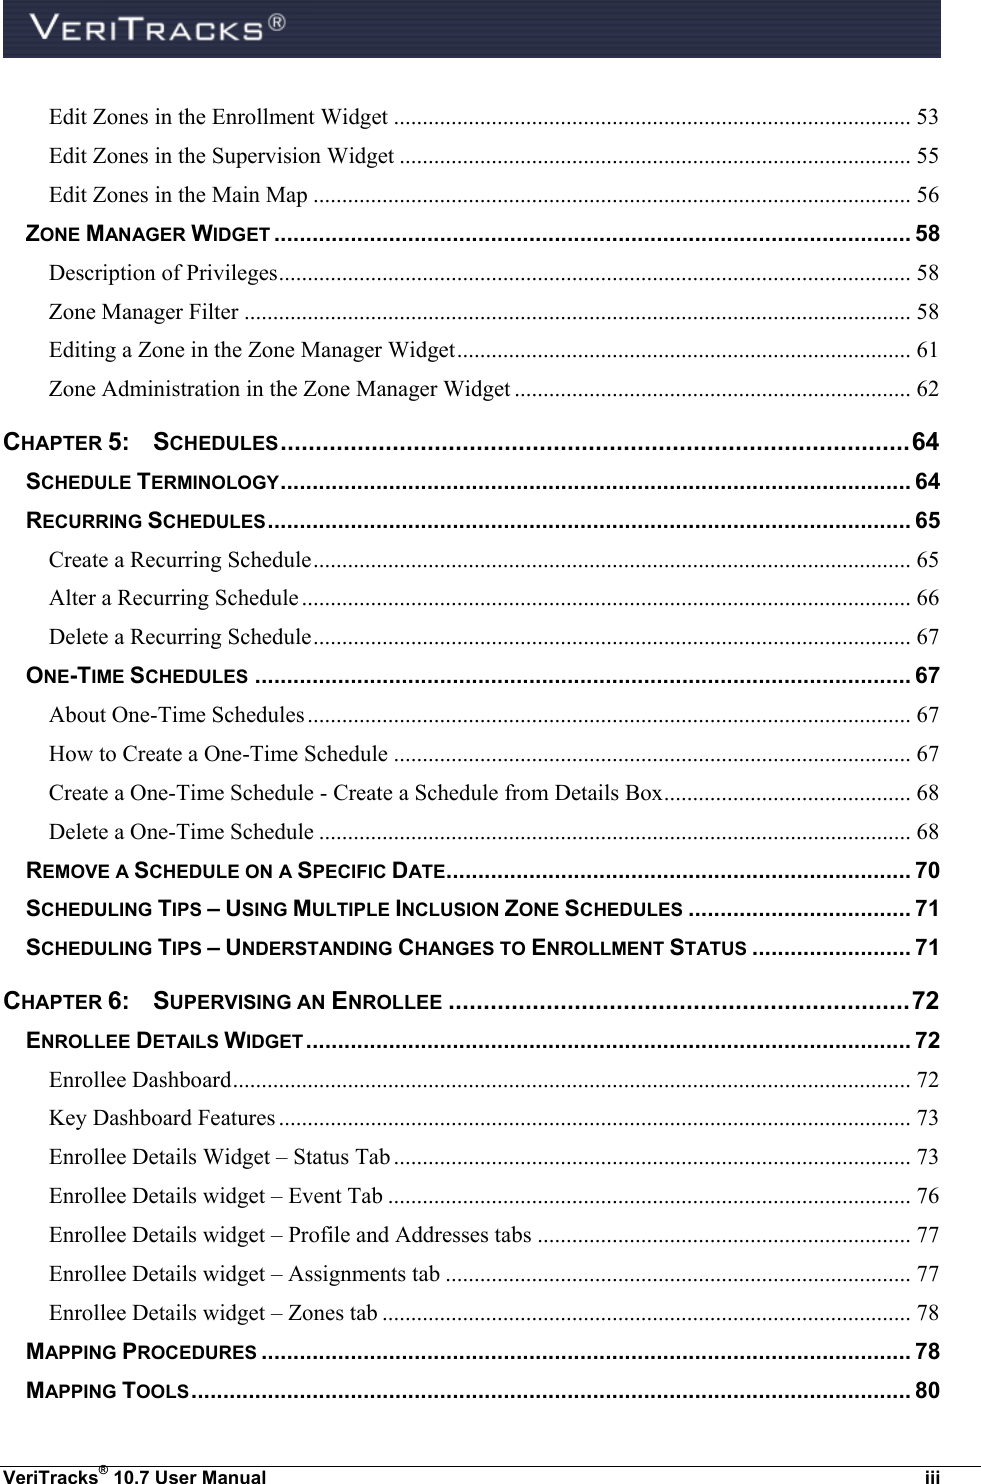


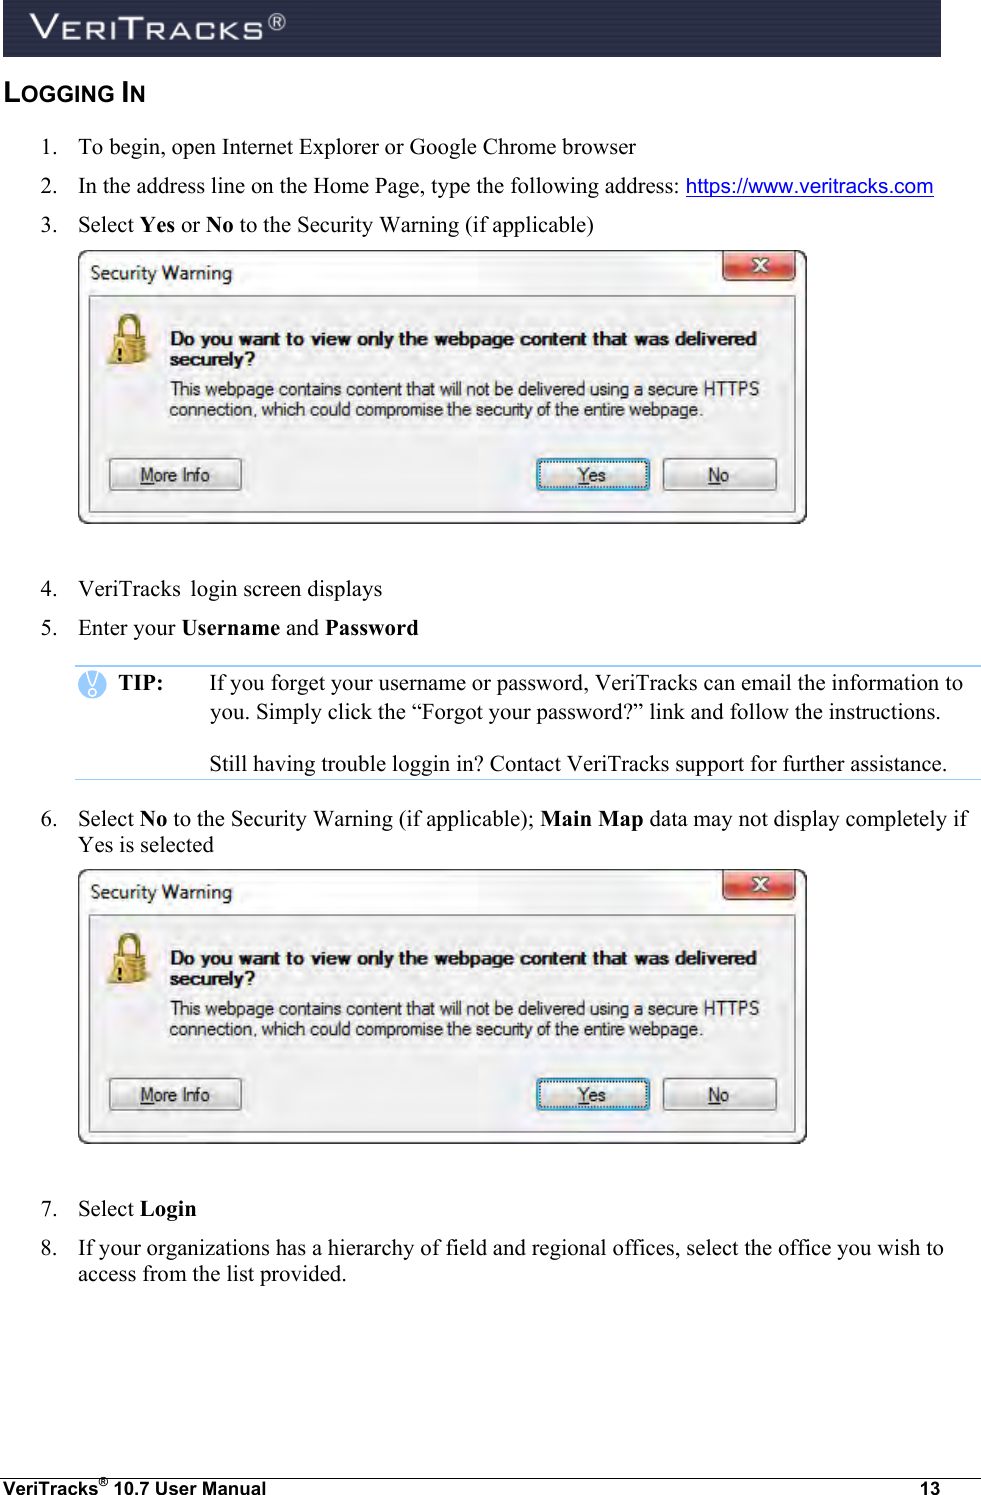
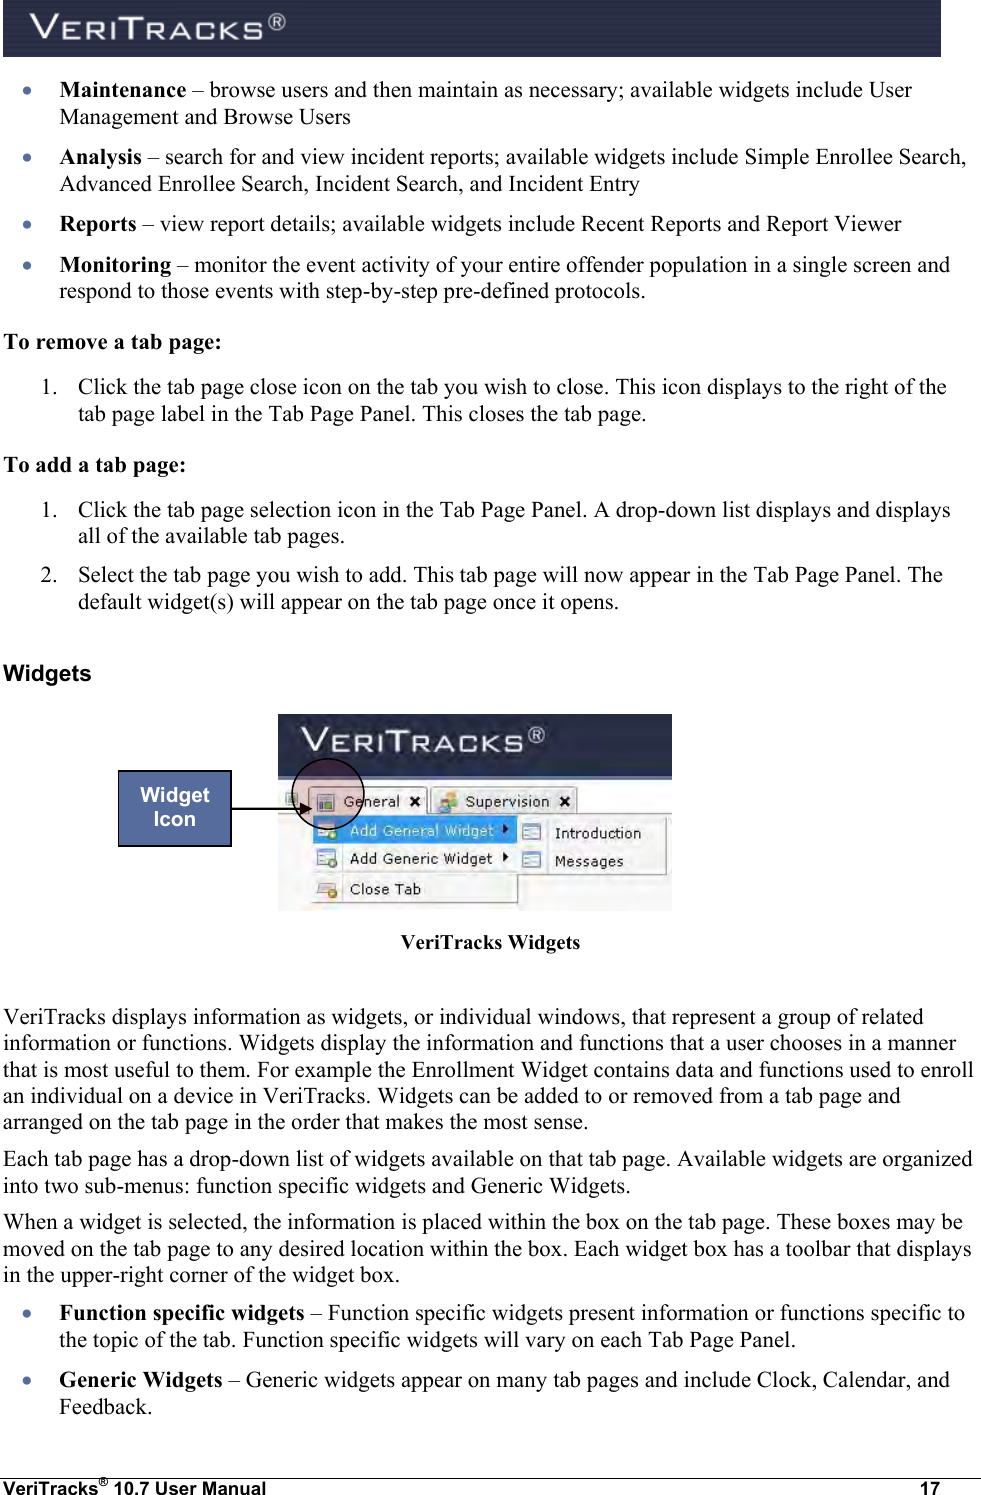
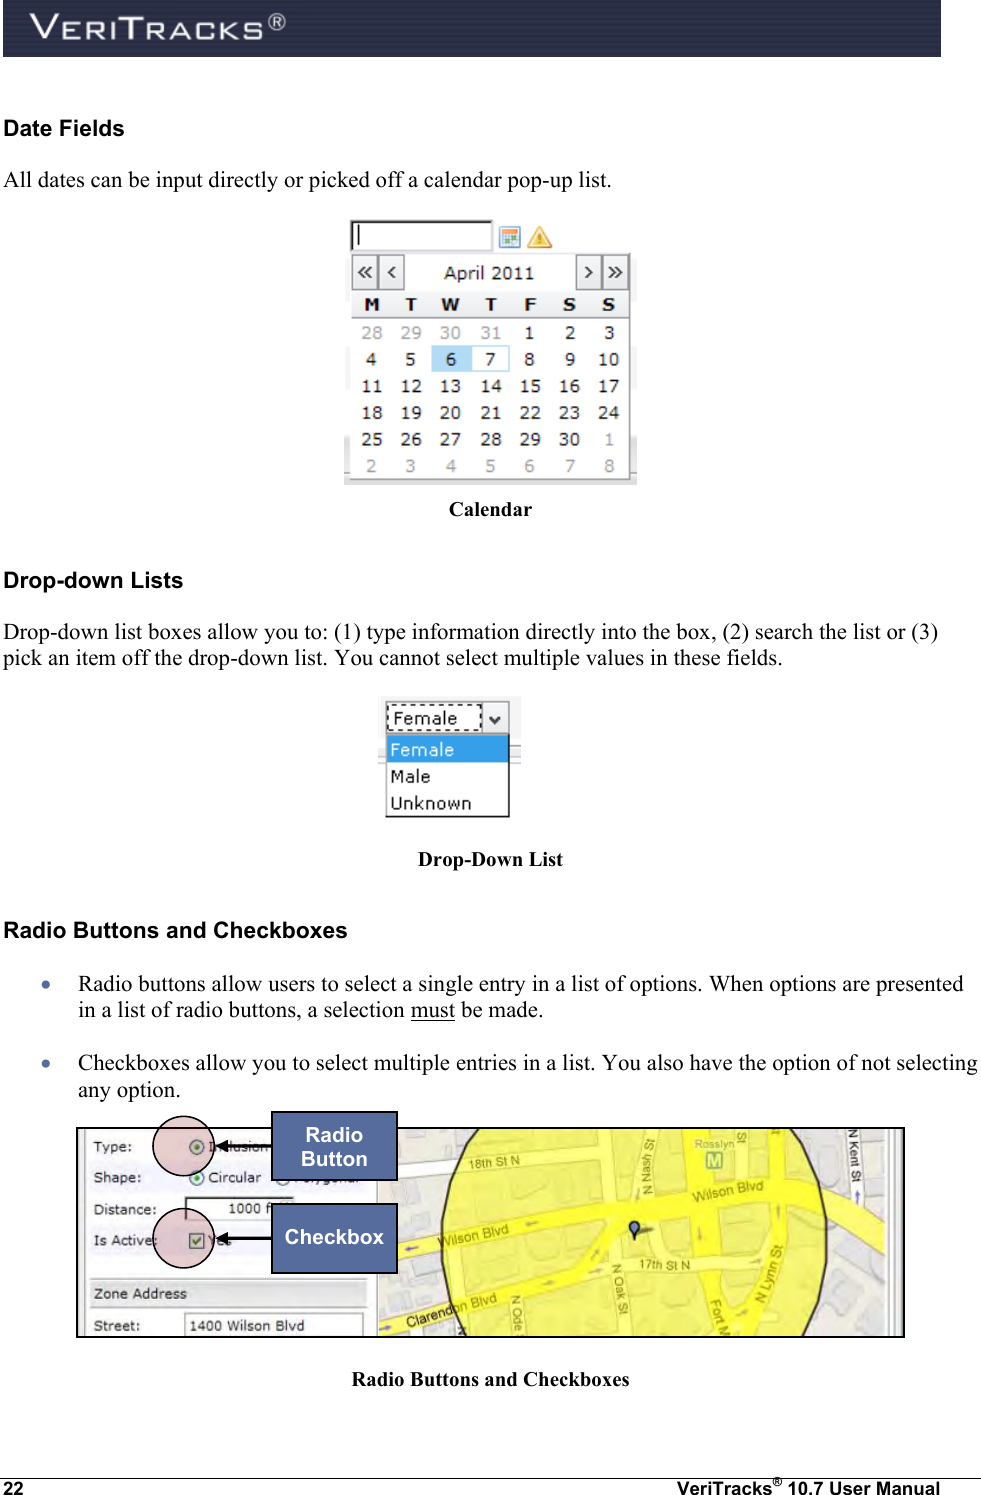
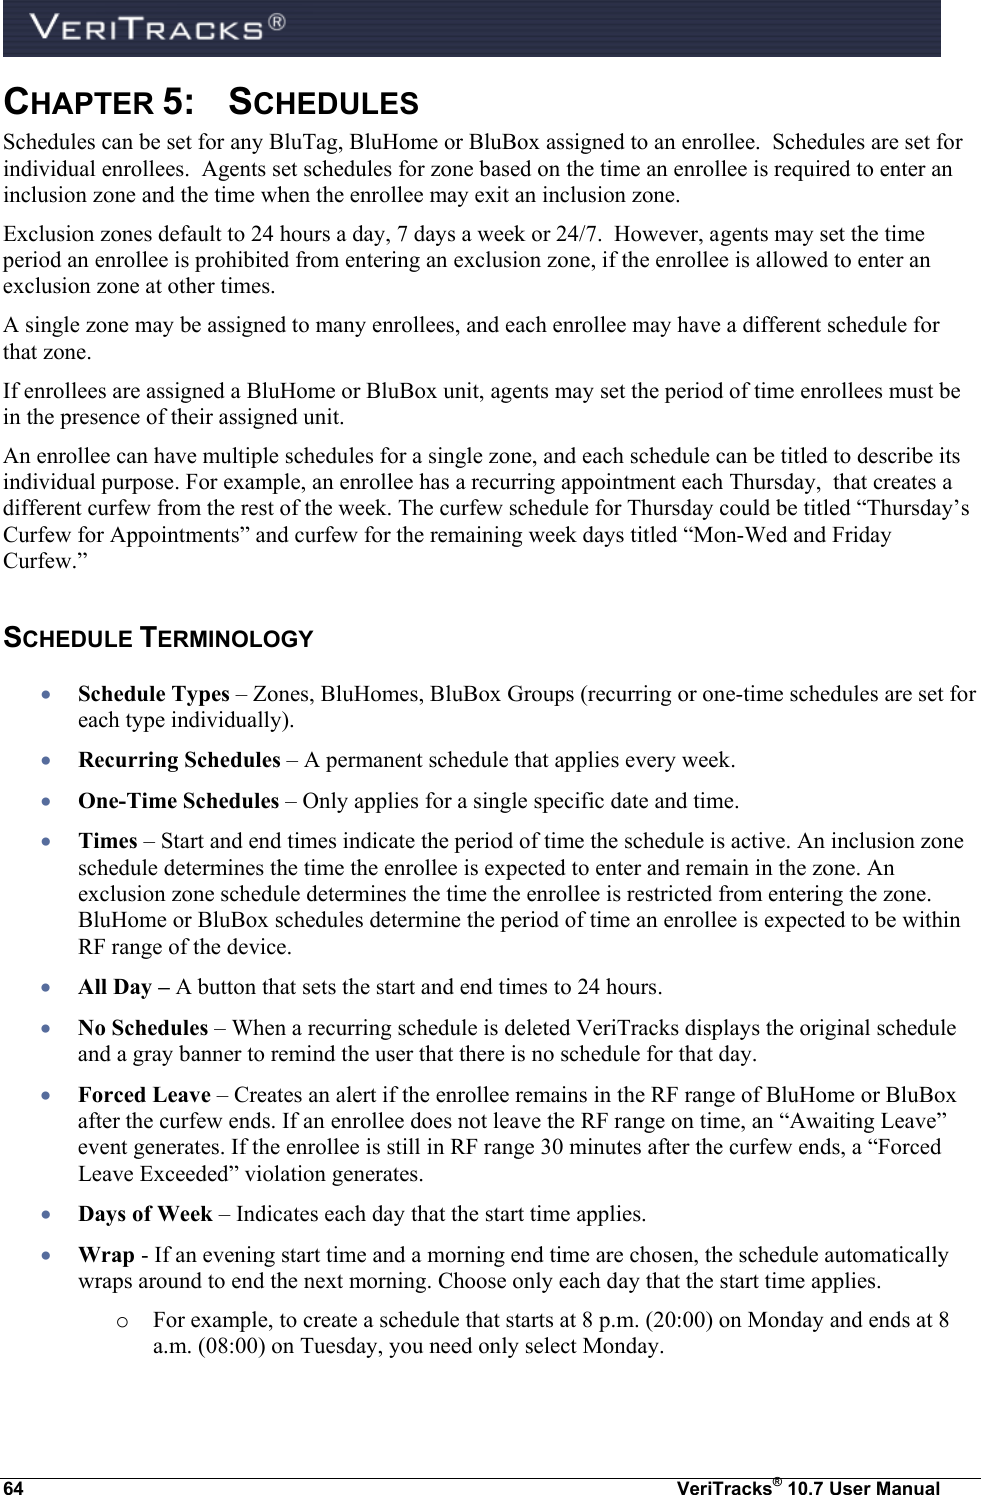
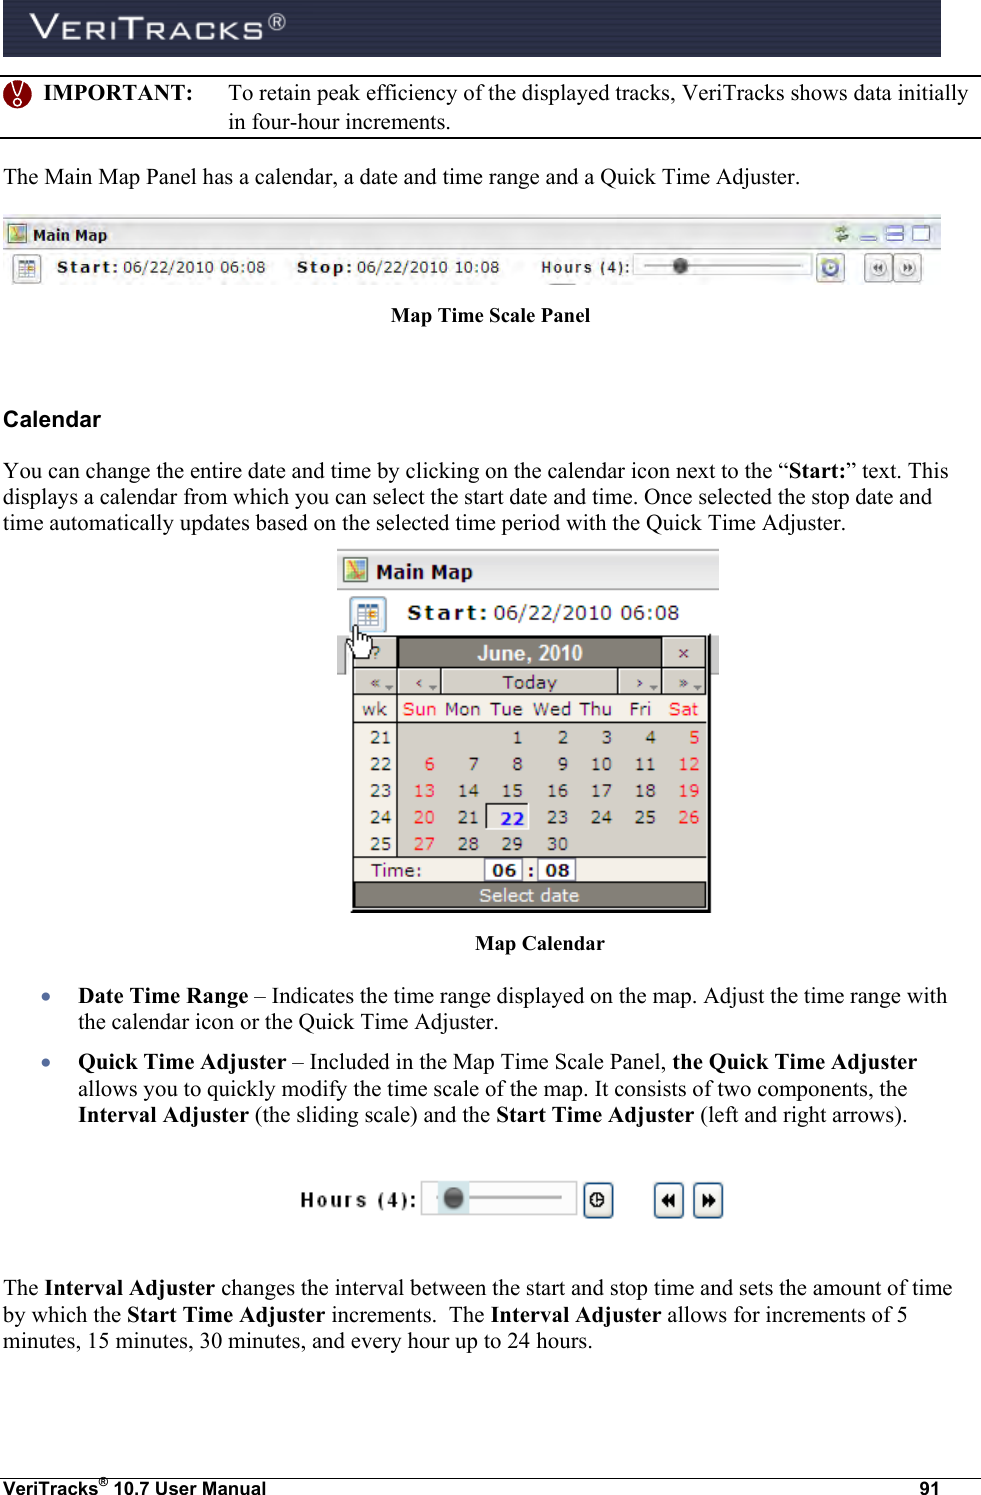
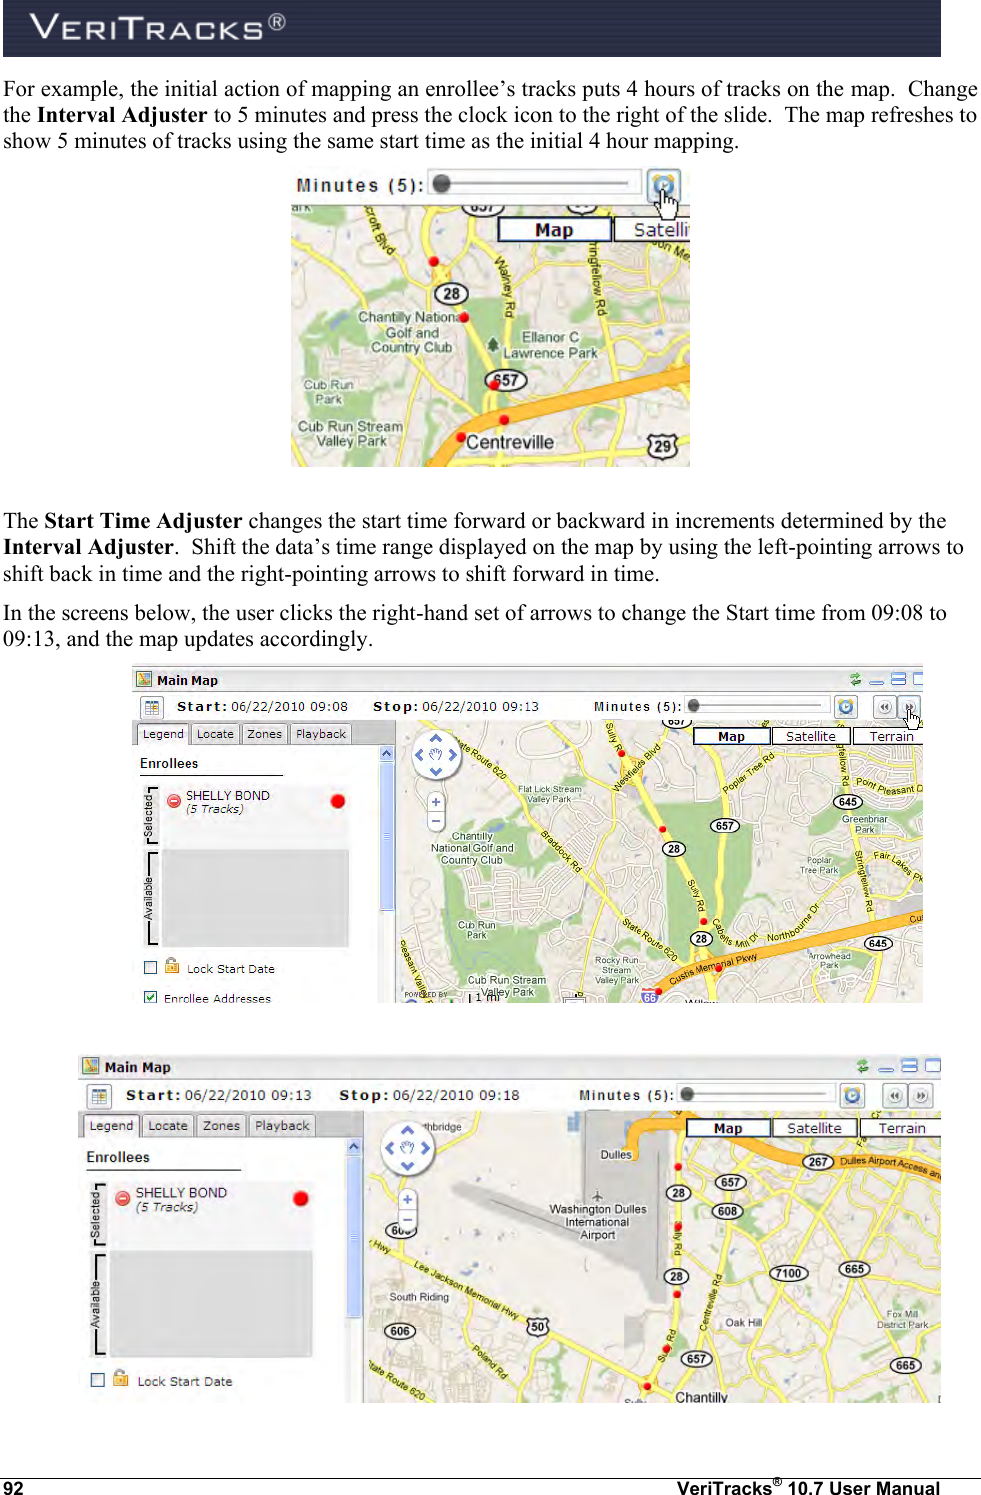
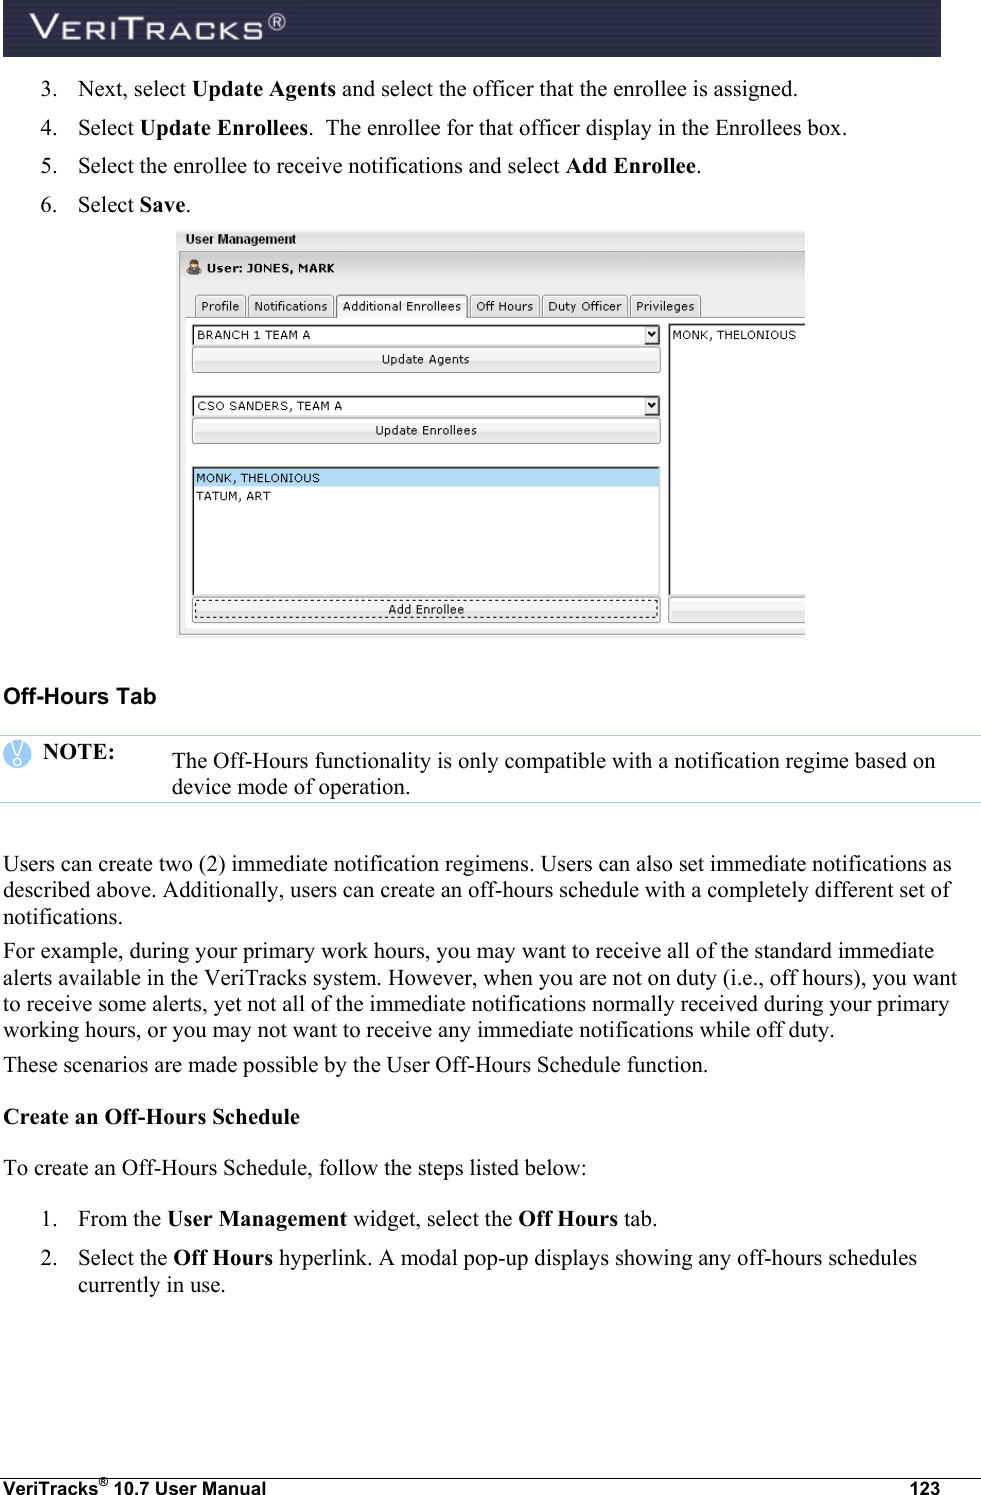
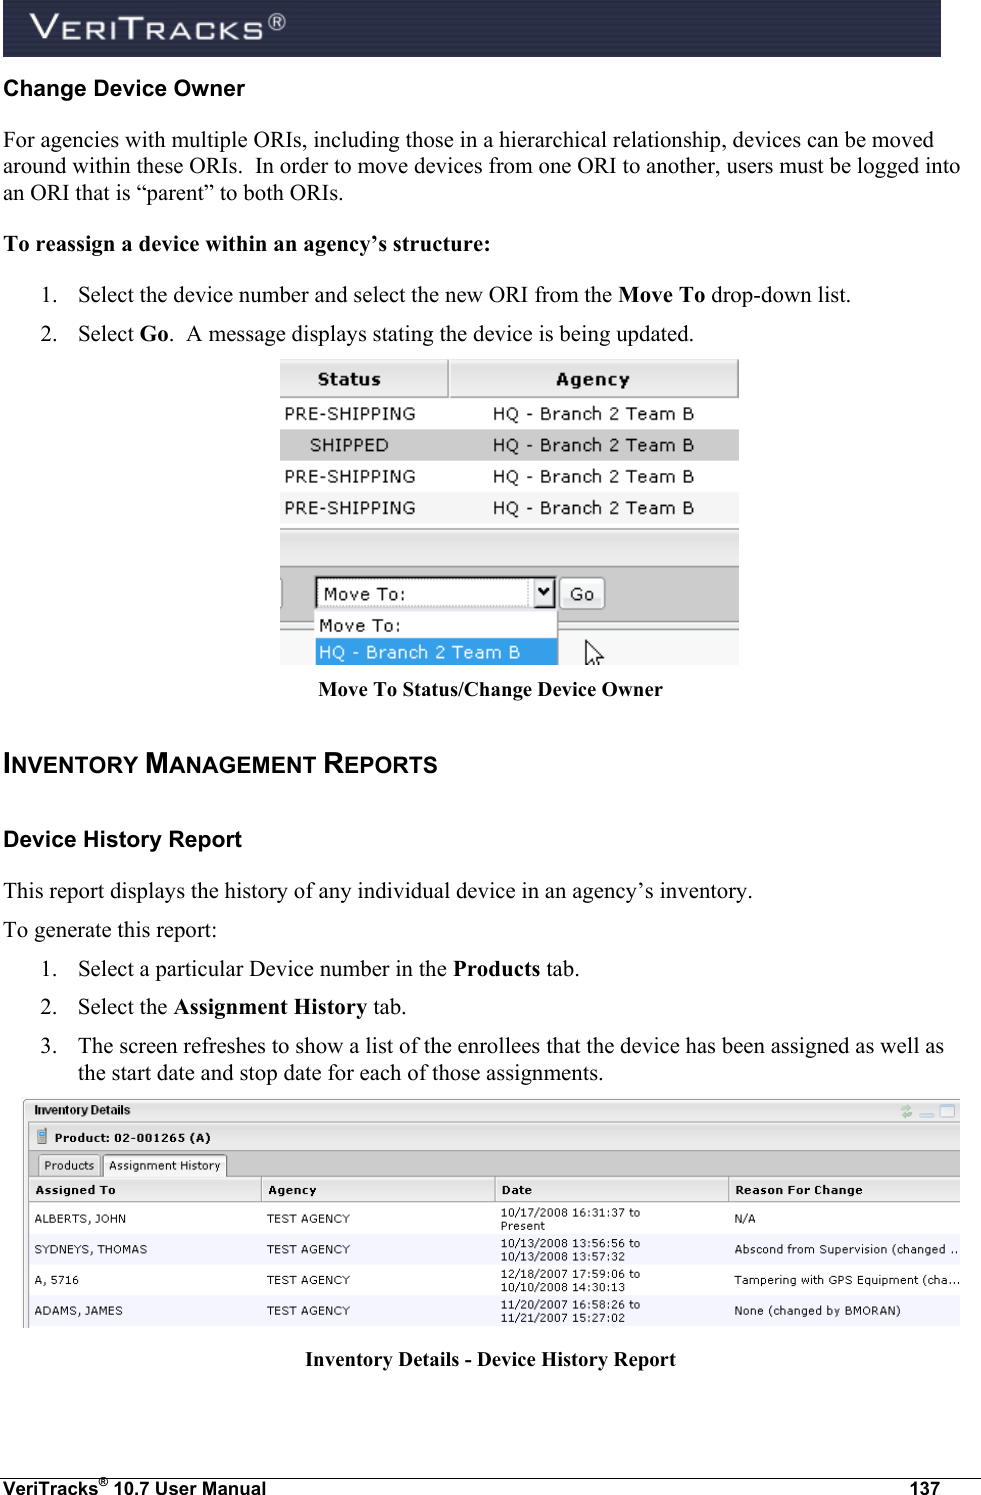
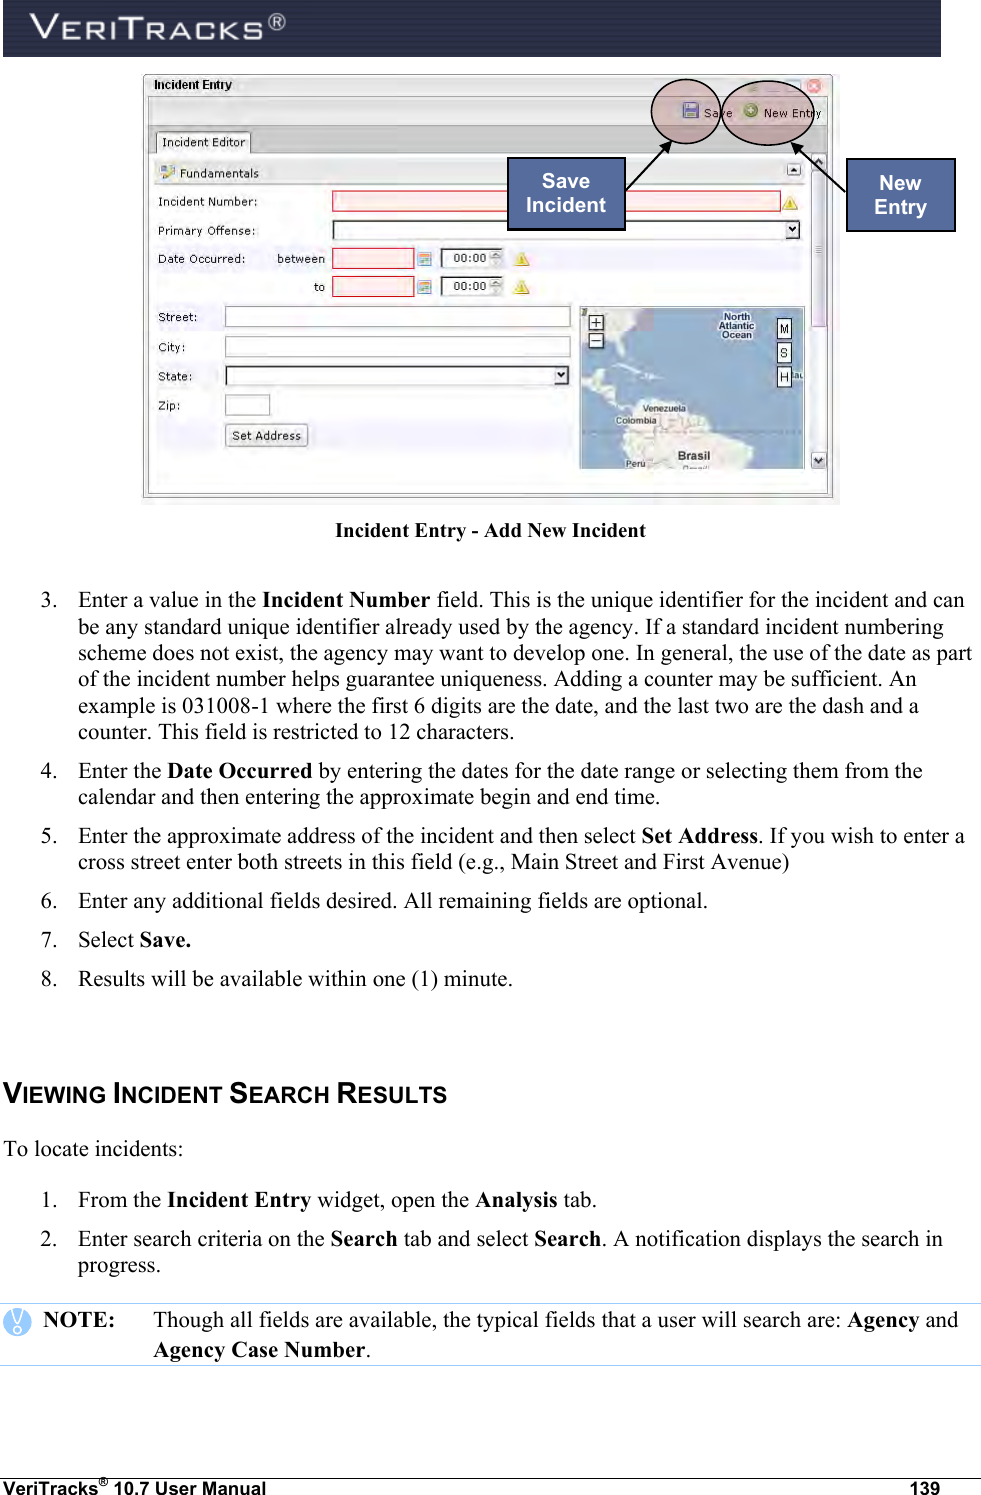
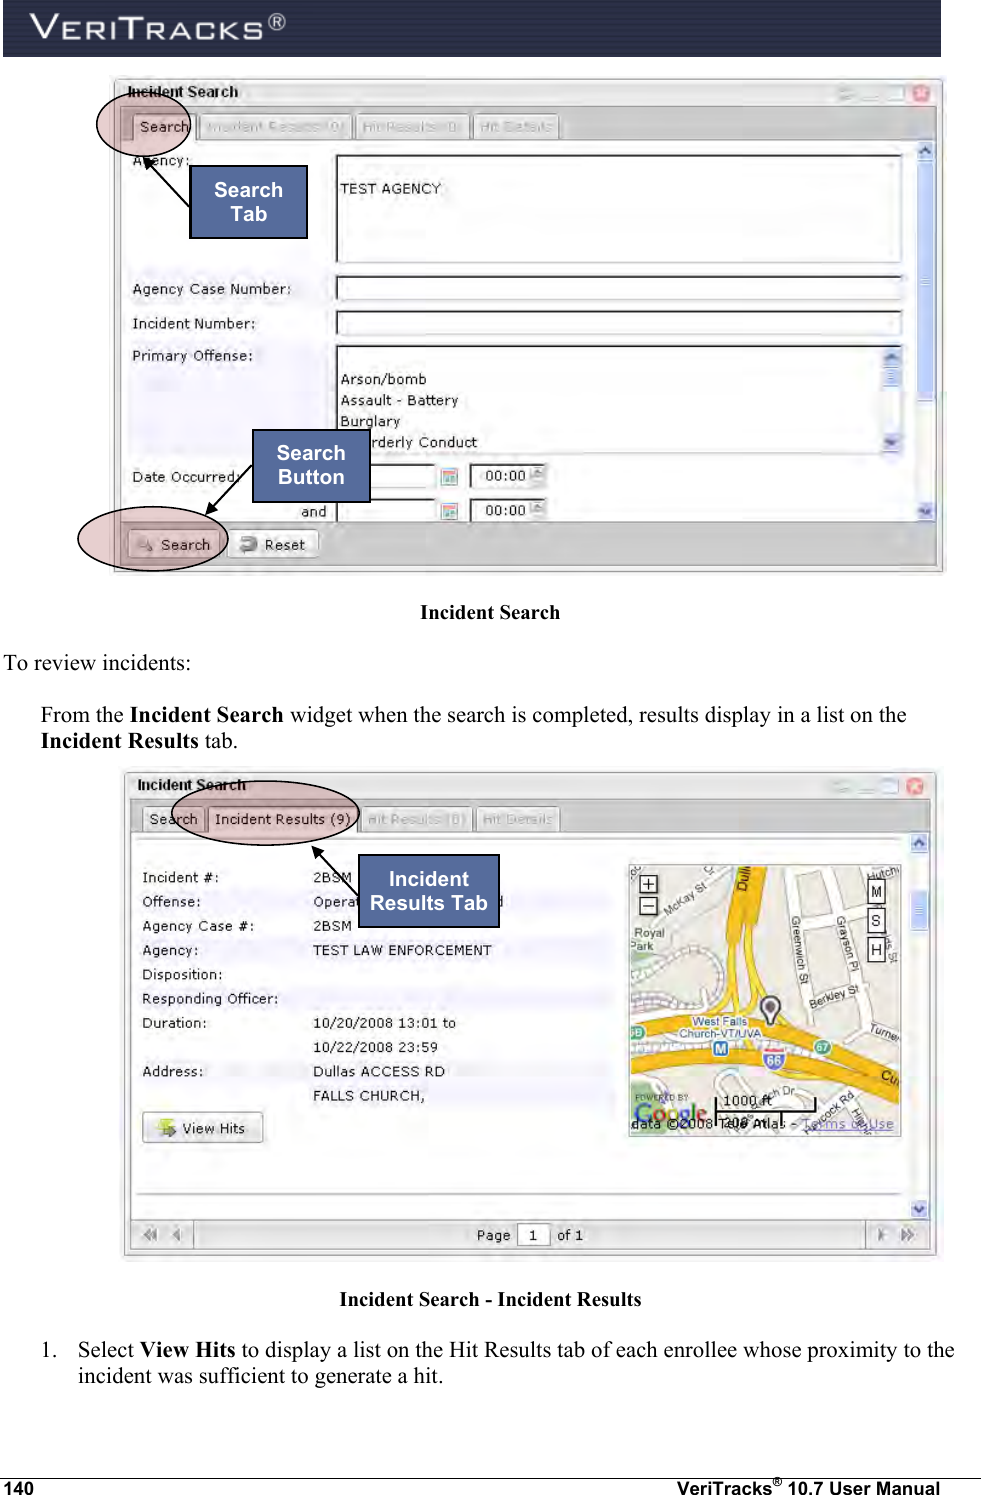
![VeriTracks® 10.7 User Manual 21 My Account Modal CUSTOMIZING VERITRACKS One unique advantage of VeriTracks is the software remembers the pages, widgets, and settings you select to display in a former session. Each time a user logs out VeriTracks takes a snapshot of the current pages and widgets you opened during a current session. This recall function makes it very convenient by displaying the same pages, widgets and settings you use most. Your settings are automatically saved by VeriTracks. However, to ensure your configuration is saved, use the Logout [username] link in the upper right corner of VeriTracks. For more details on customization of VeriTracks refer to Chapter 8: Maintenance. UNDERSTANDING DATA ENTRY FEATURES Text Boxes Text boxes allow direct data entry using the keyboard. Text Box](https://usermanual.wiki/Satellite-Tracking-of-People/1106MM1/User-Guide-1721660-Page-35.png)
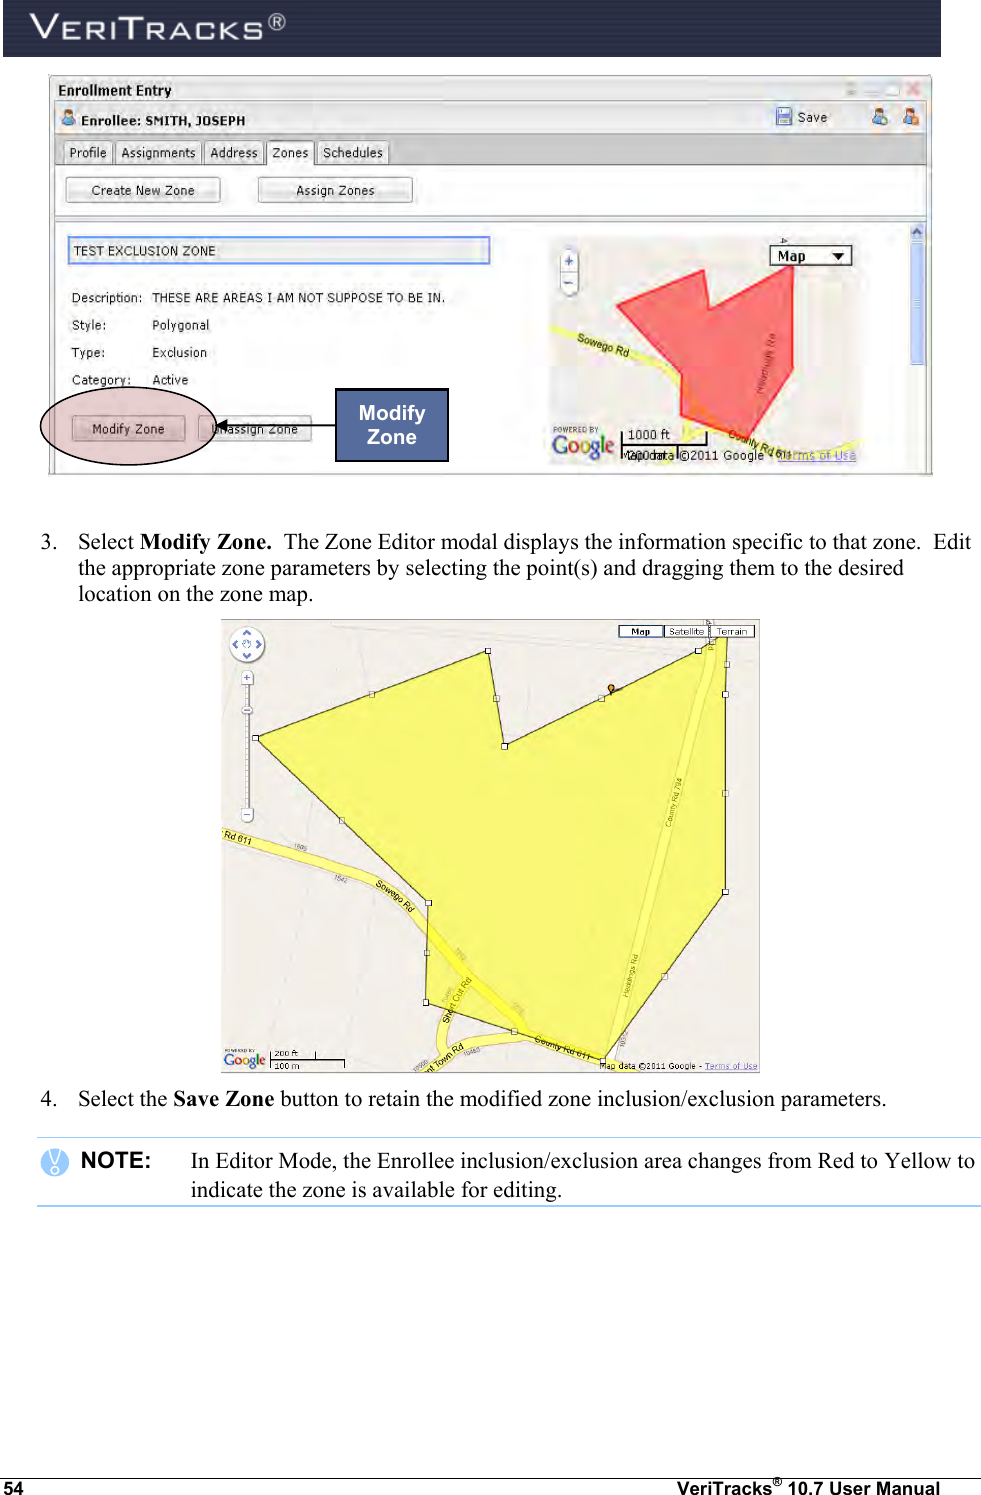
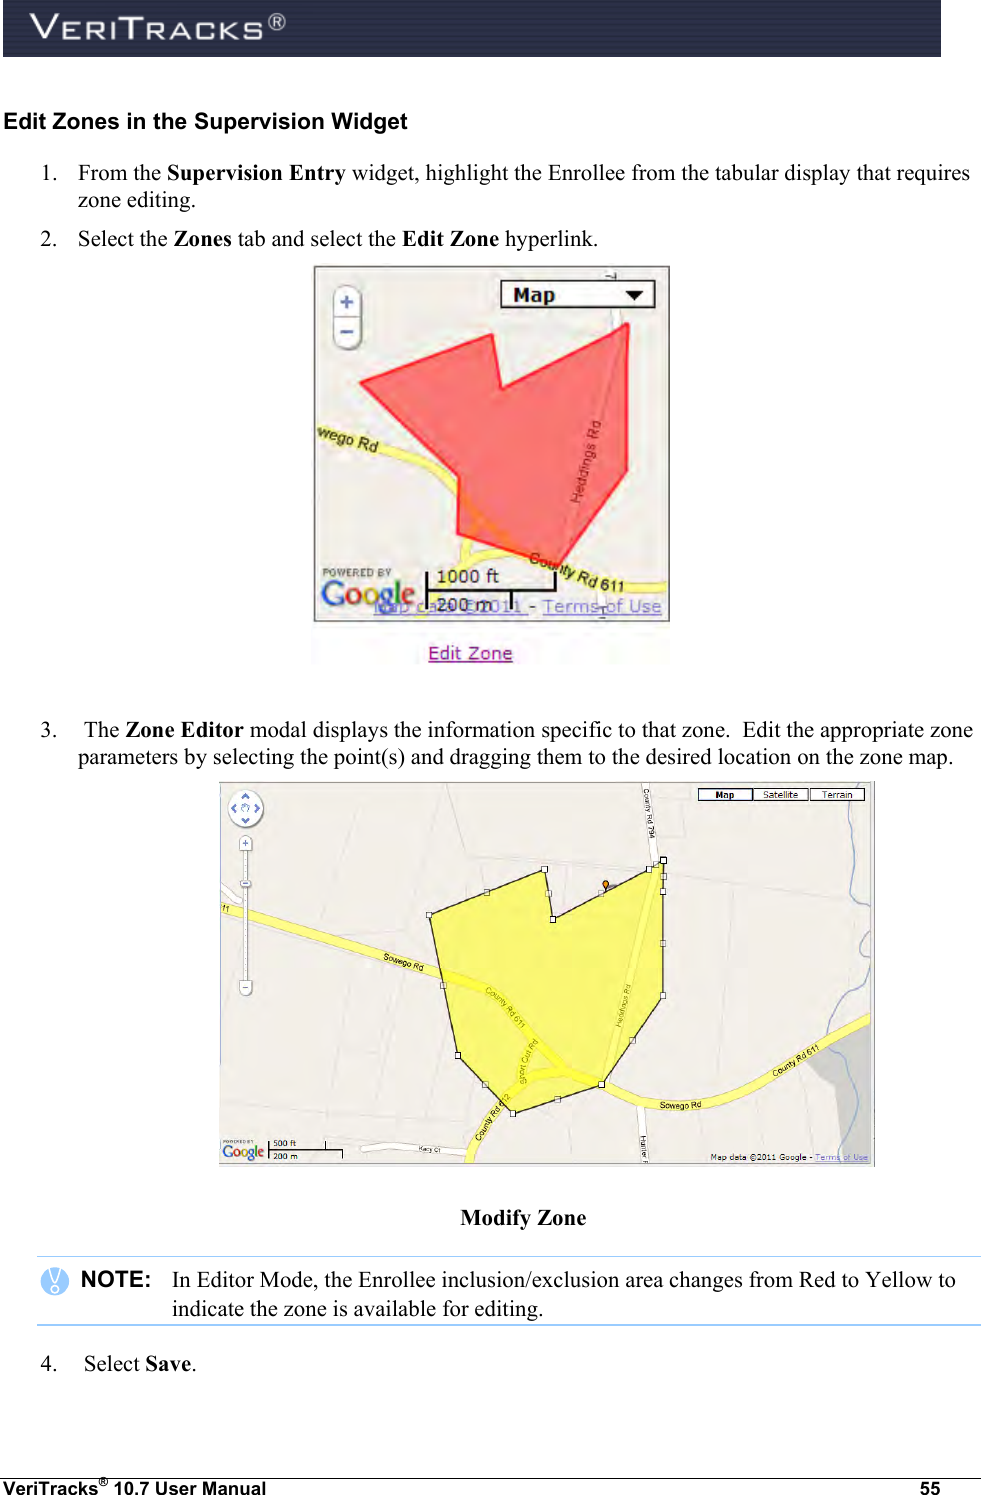
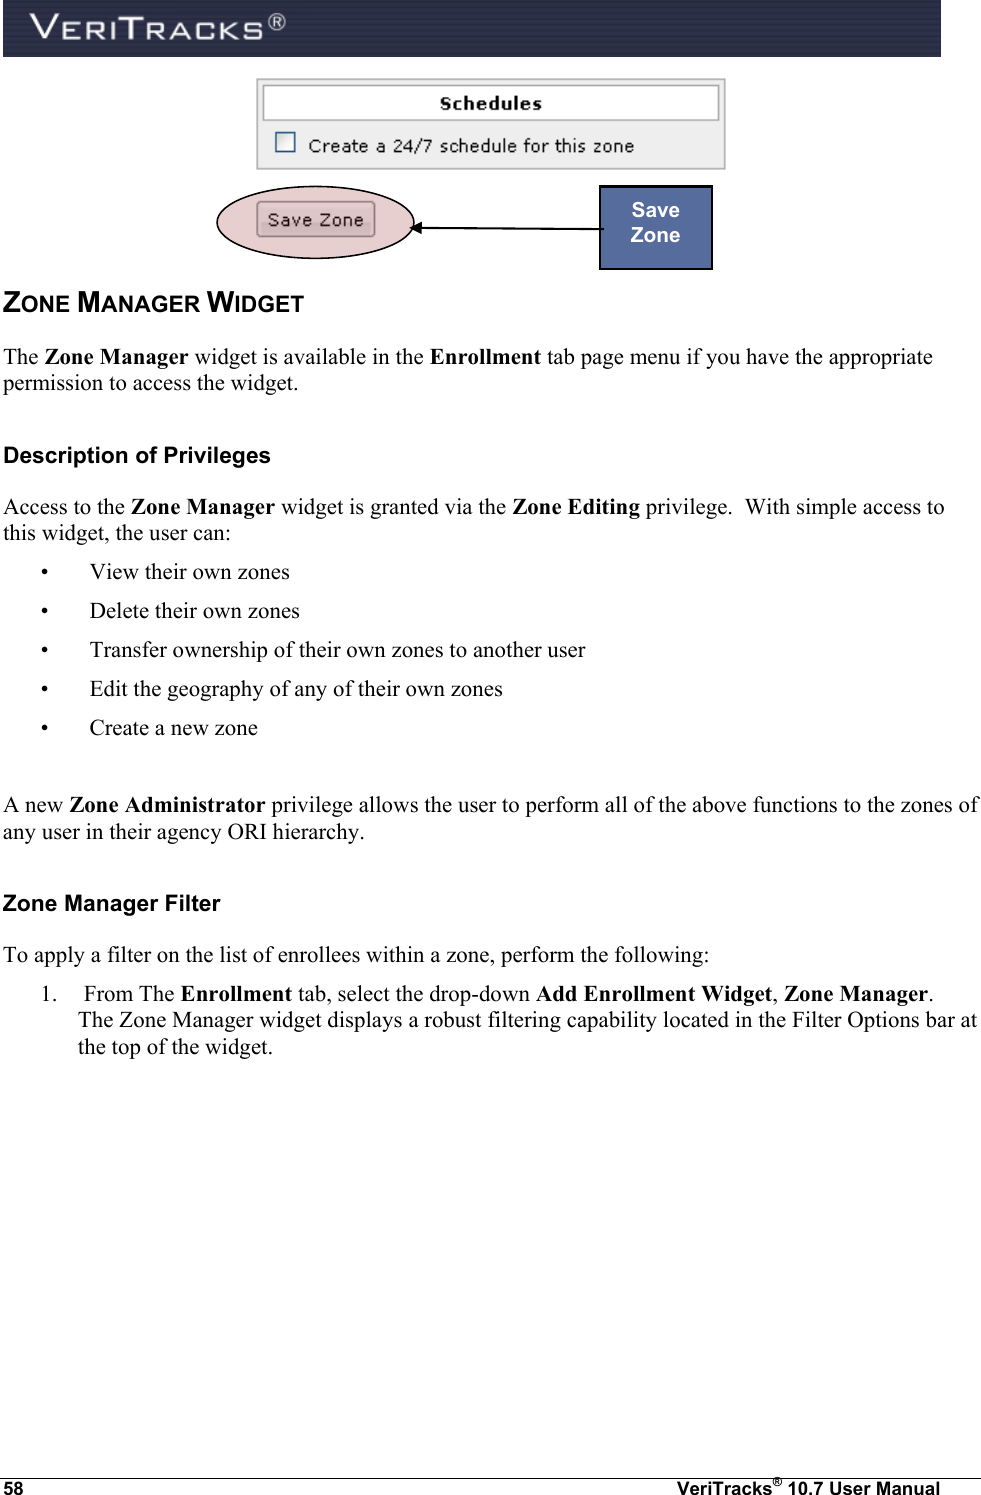
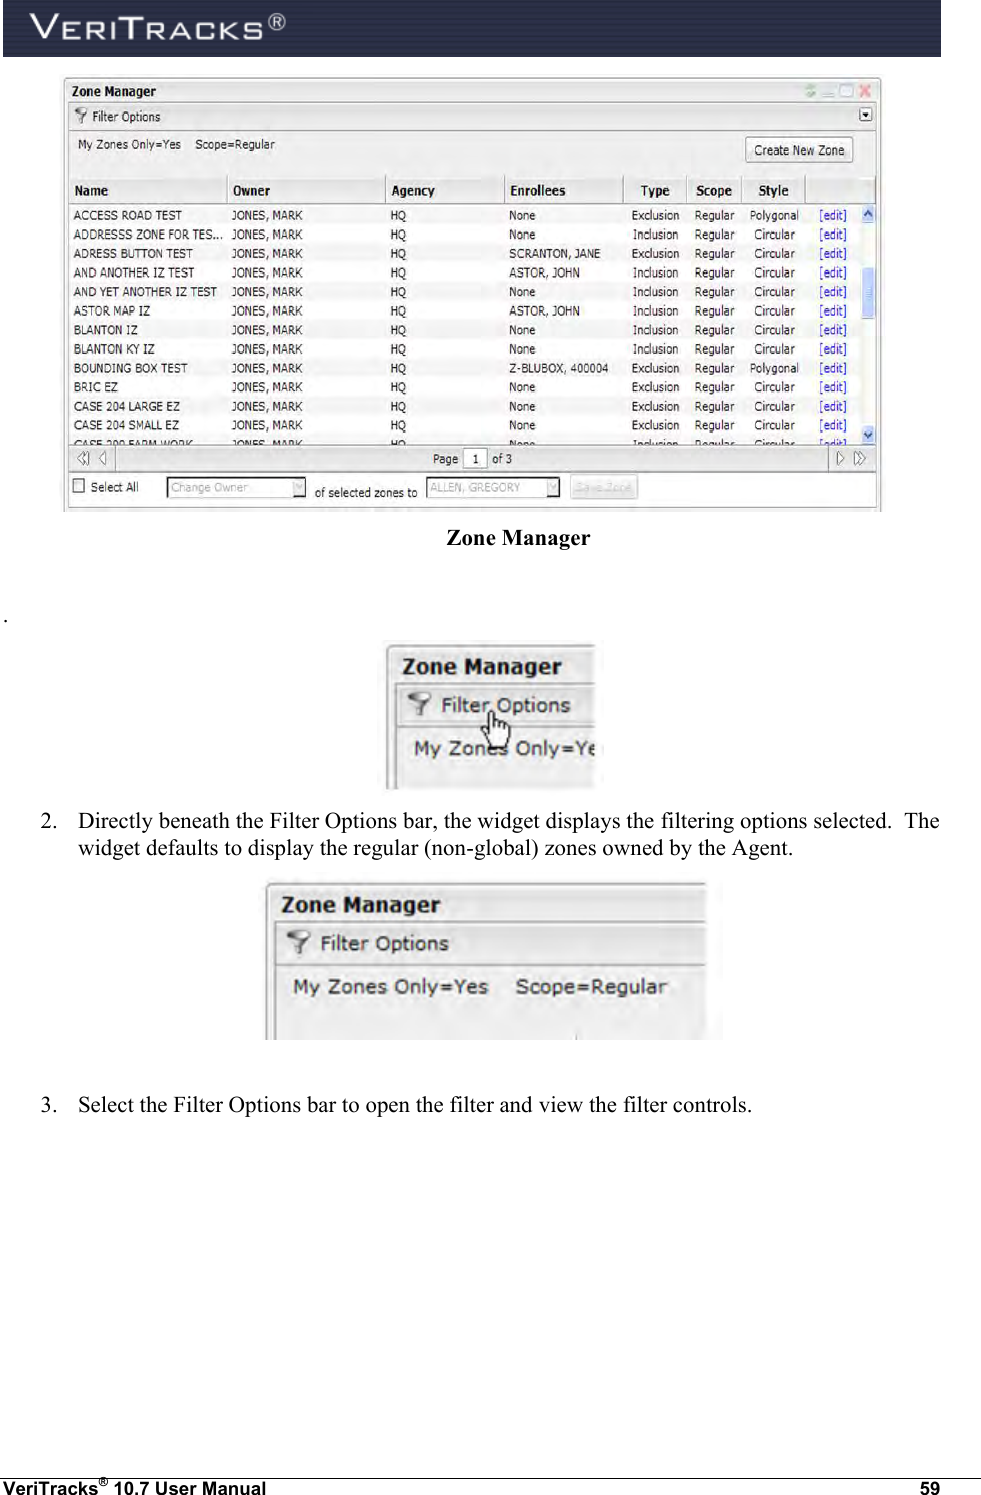
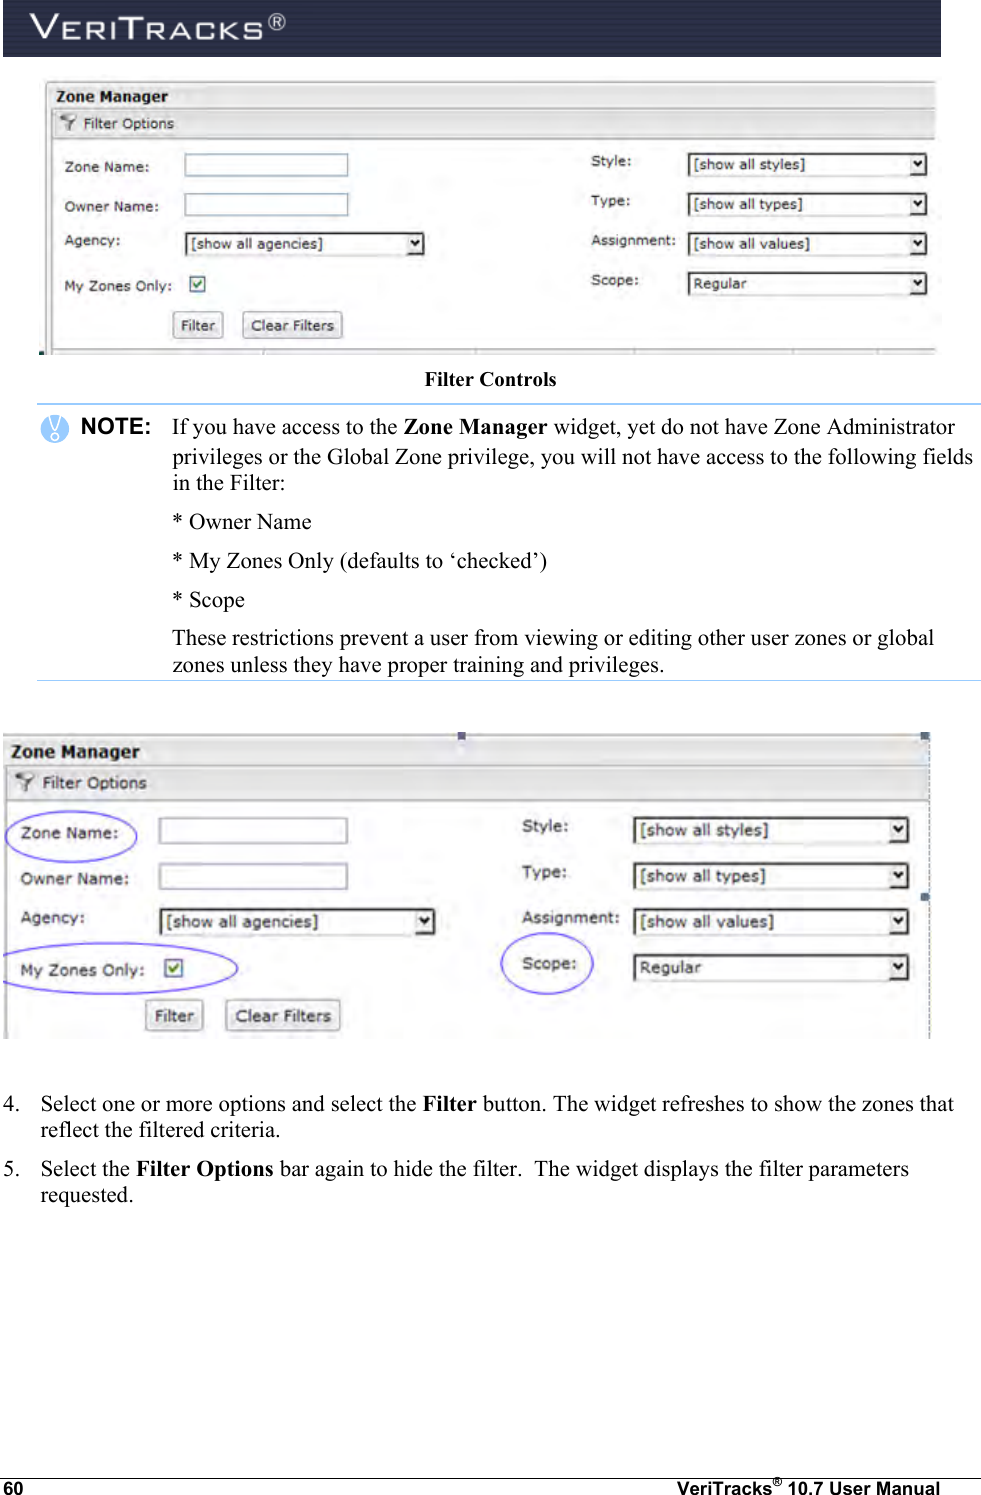
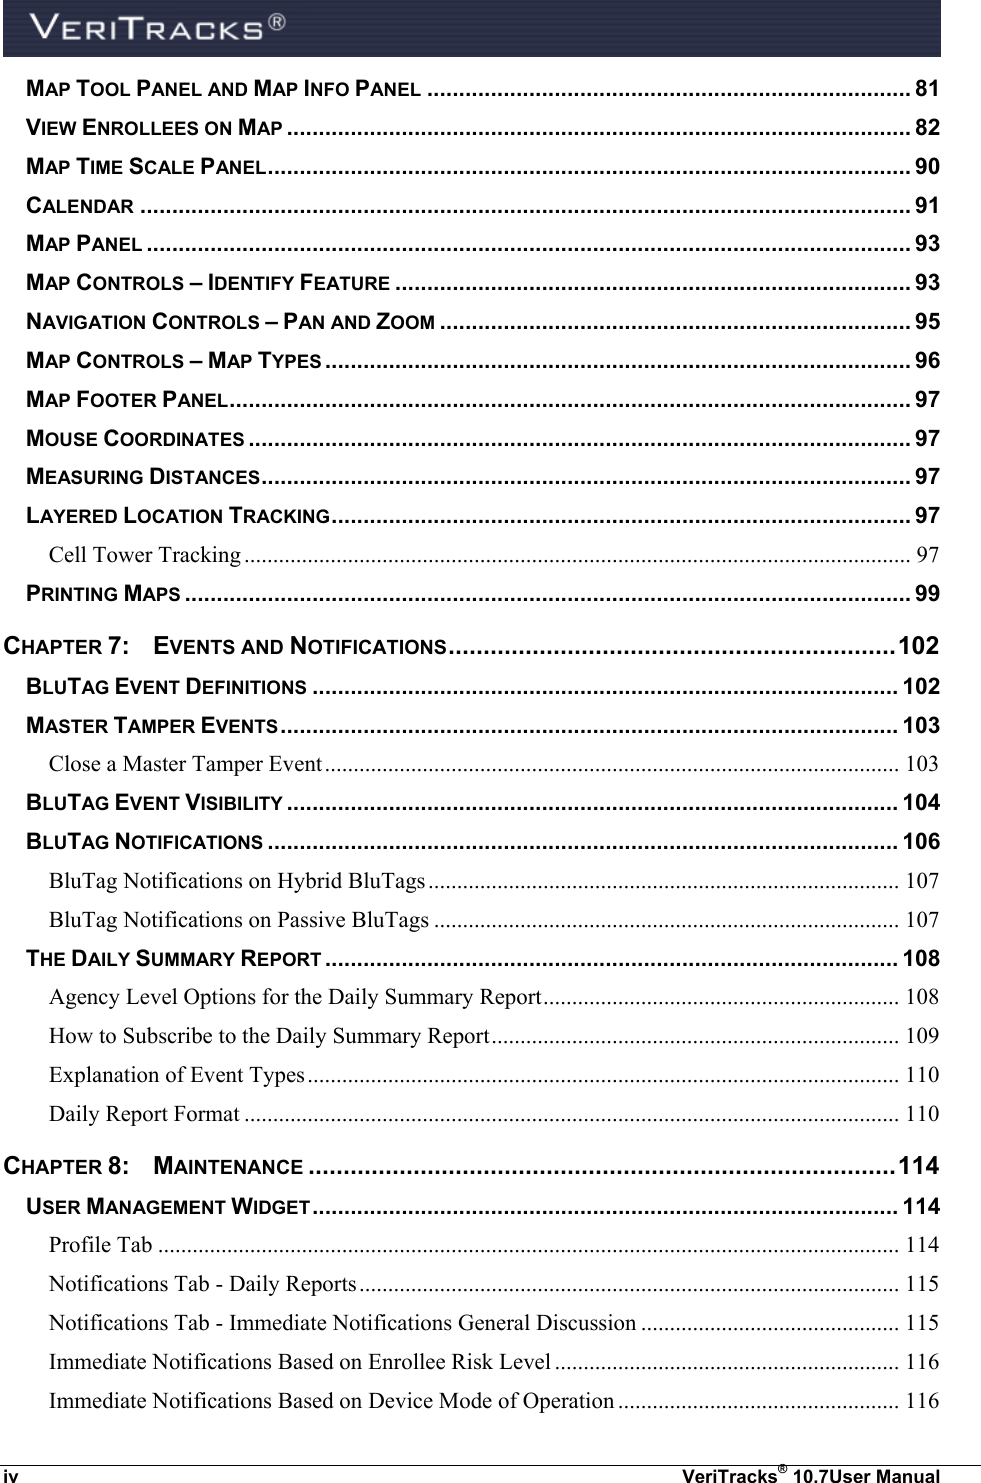
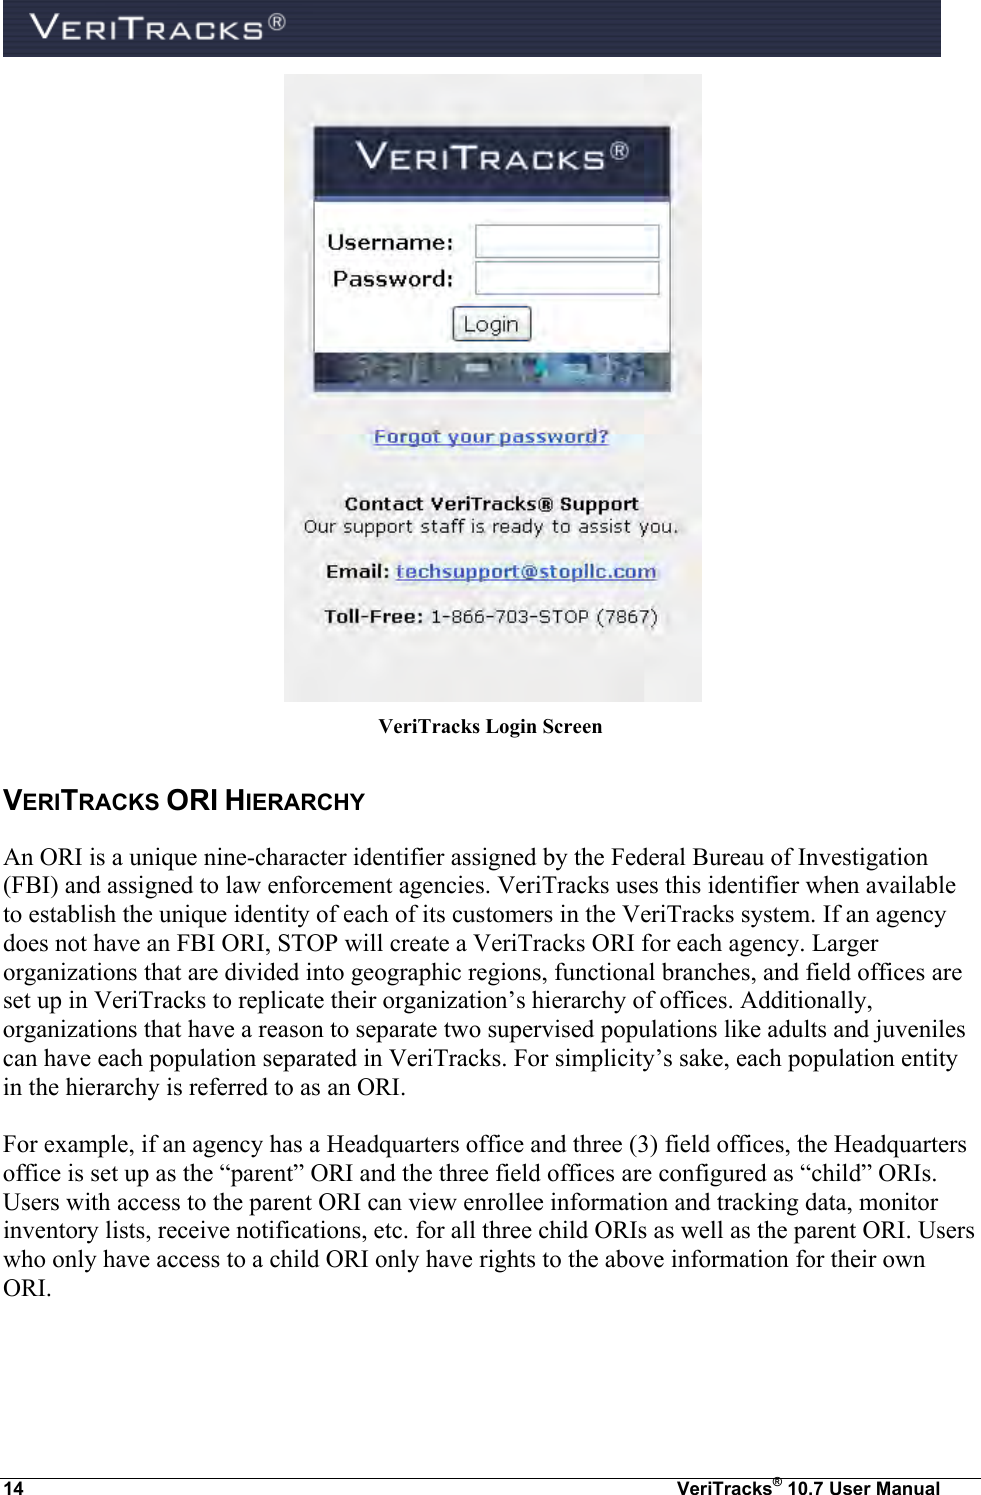
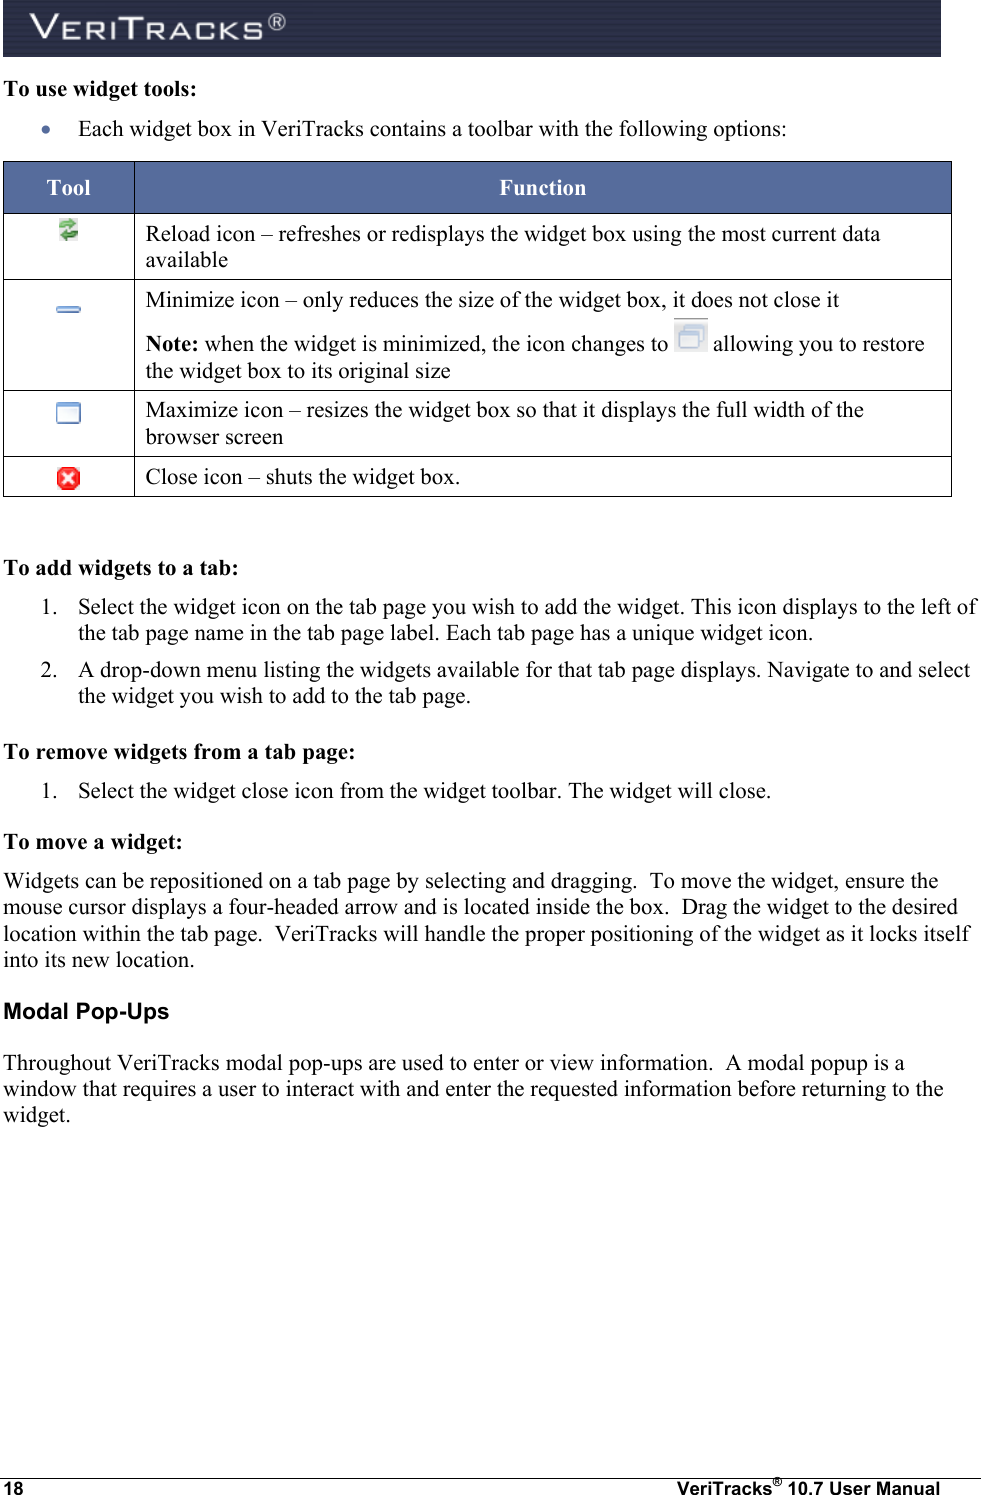
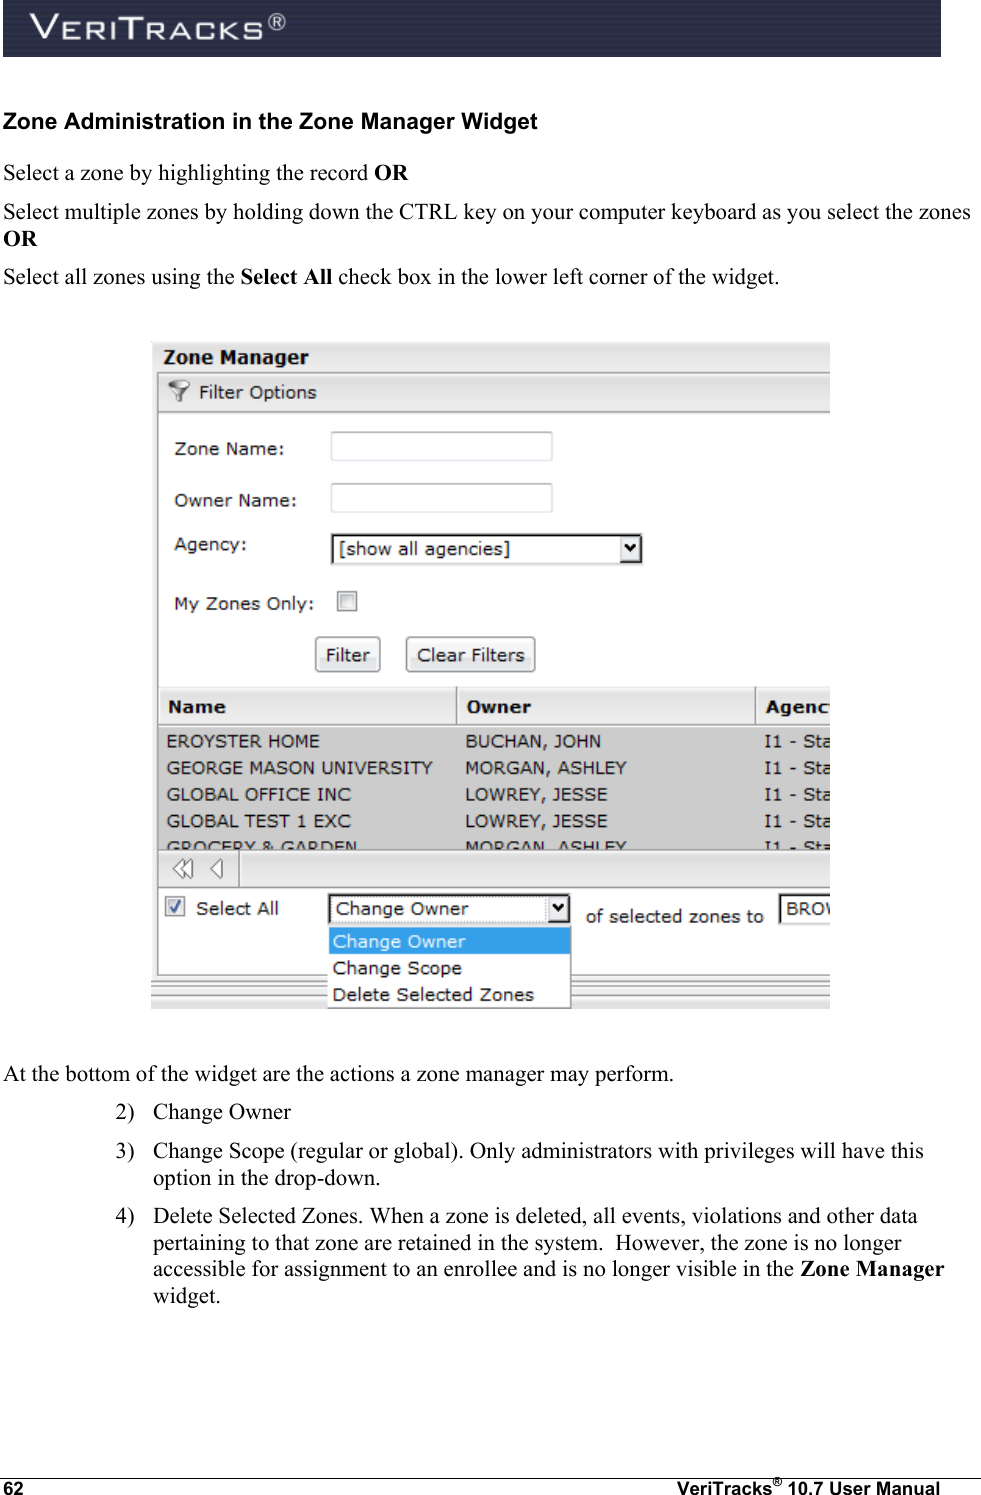
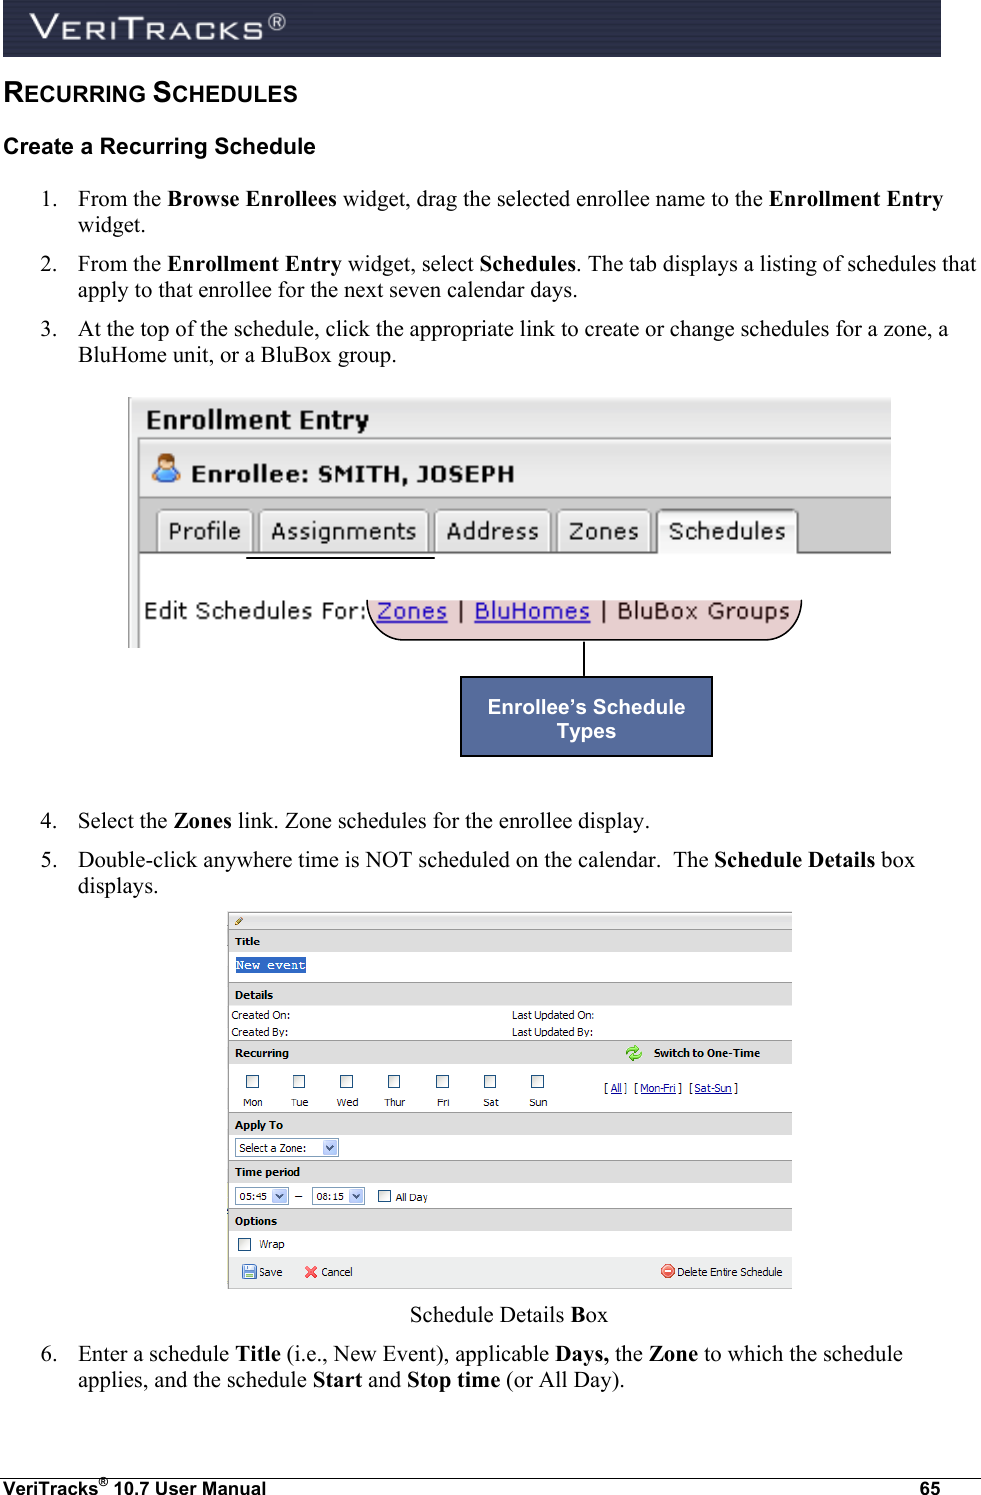
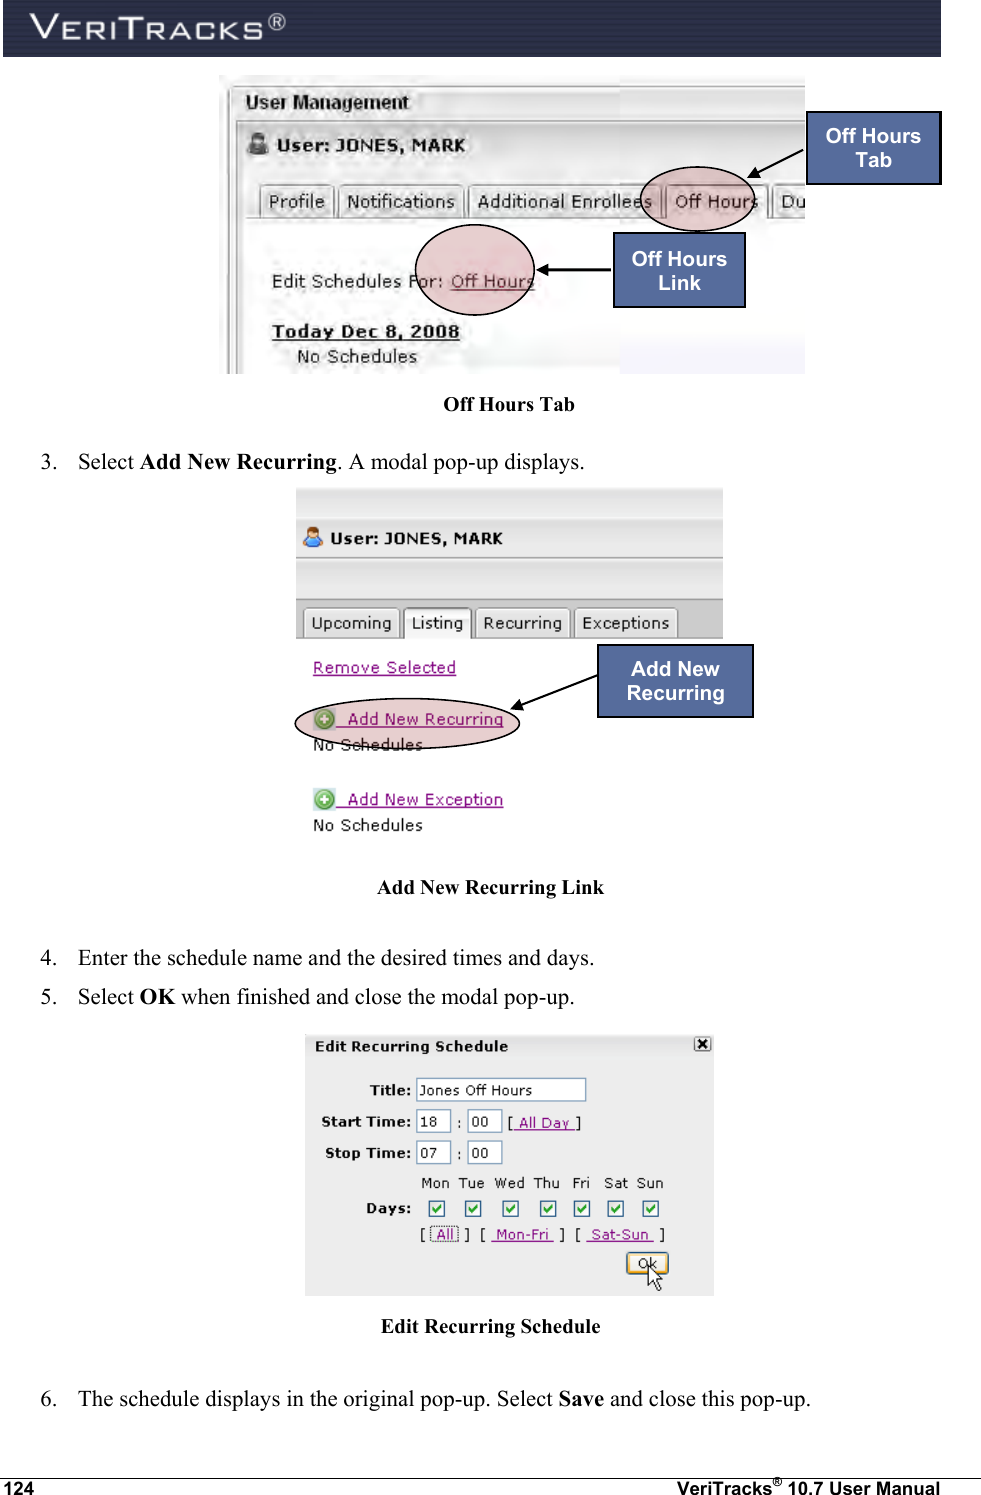
![VeriTracks® 10.7 User Manual 61 Editing a Zone in the Zone Manager Widget To change the zone parameters within Zone Manager widget, perform the following: 1. From the Zone Manager widget, select the [edit] link to access the Editor screen. All information for the zone will be brought forward in the modal. Edit Enrollee Zone 2. Make any necessary changes to the zone and then select Save Zone.](https://usermanual.wiki/Satellite-Tracking-of-People/1106MM1/User-Guide-1721660-Page-75.png)

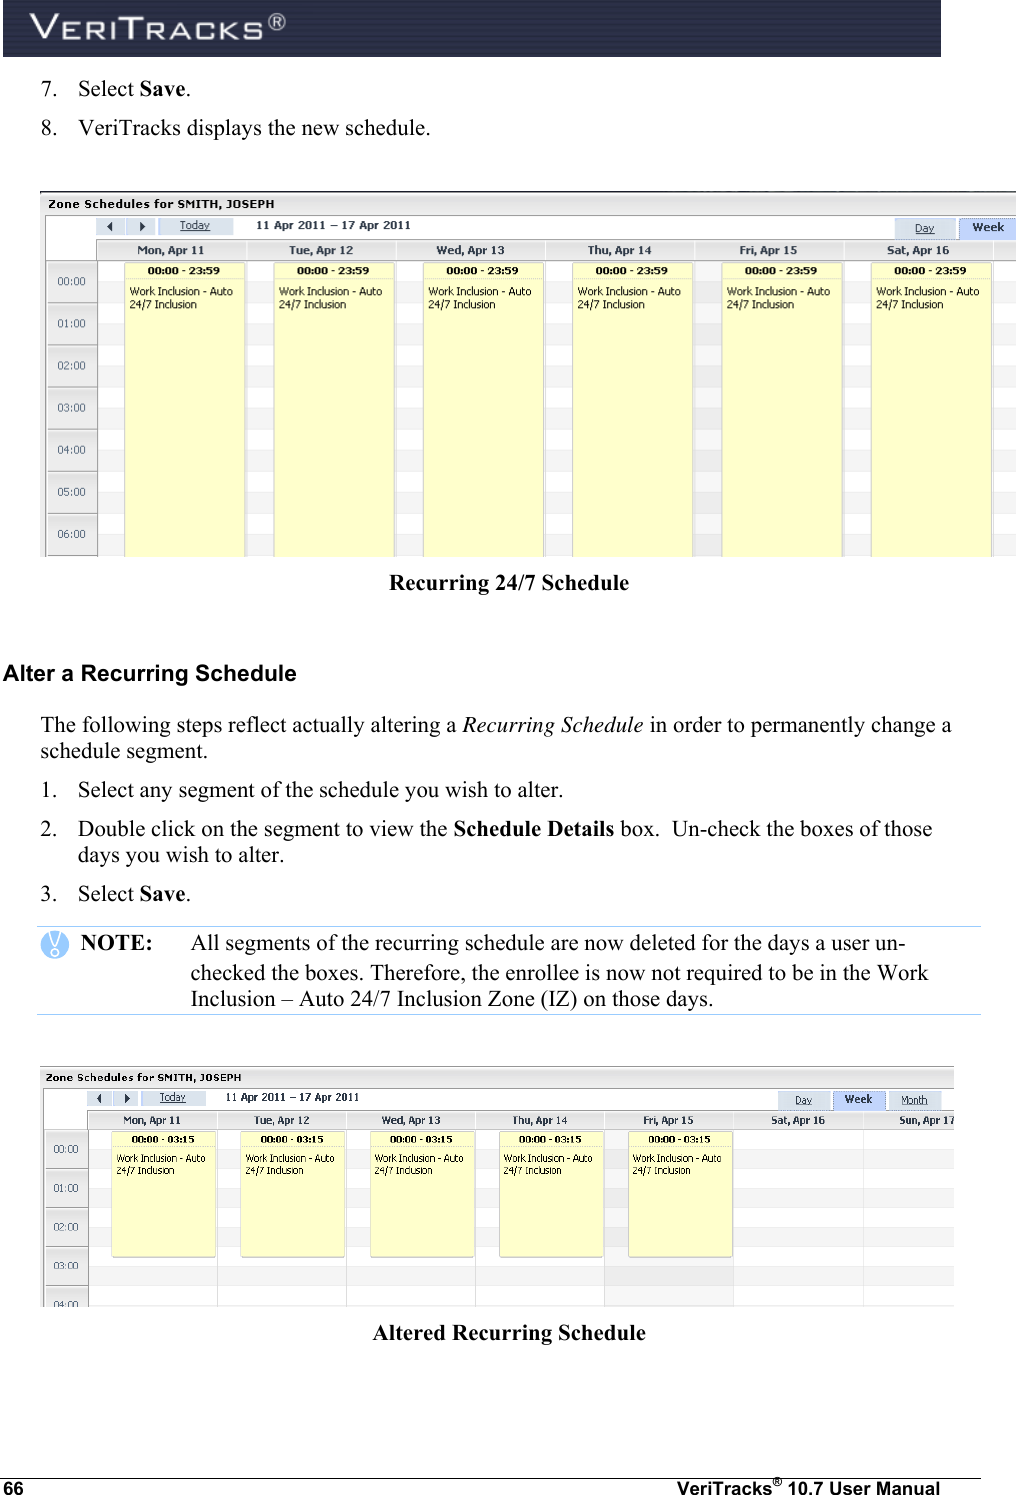
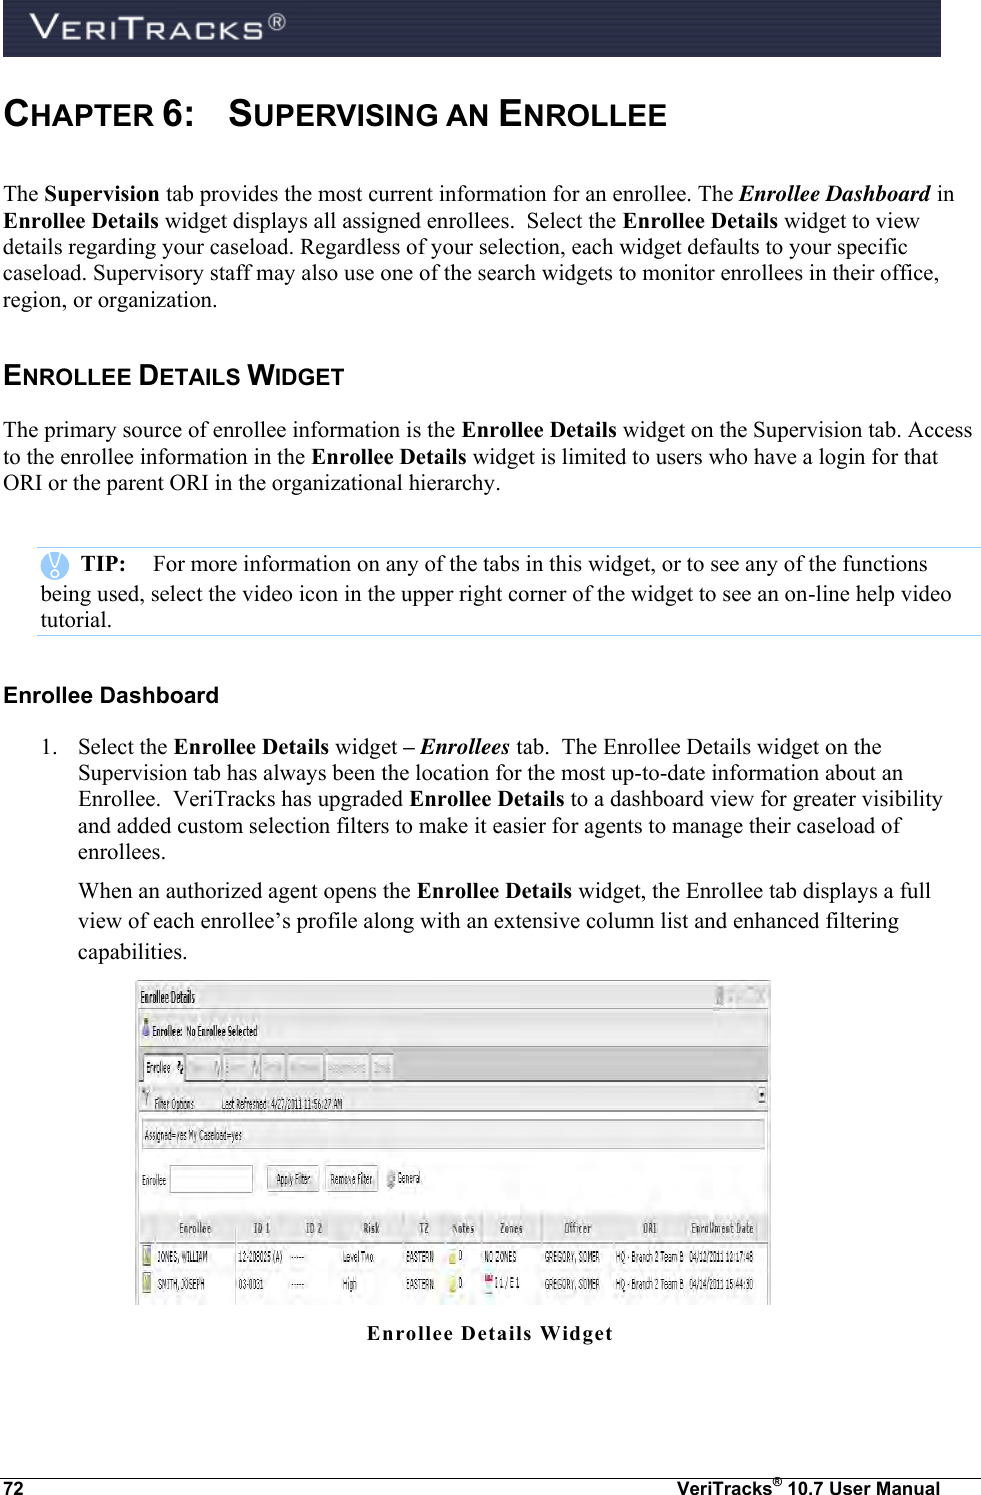
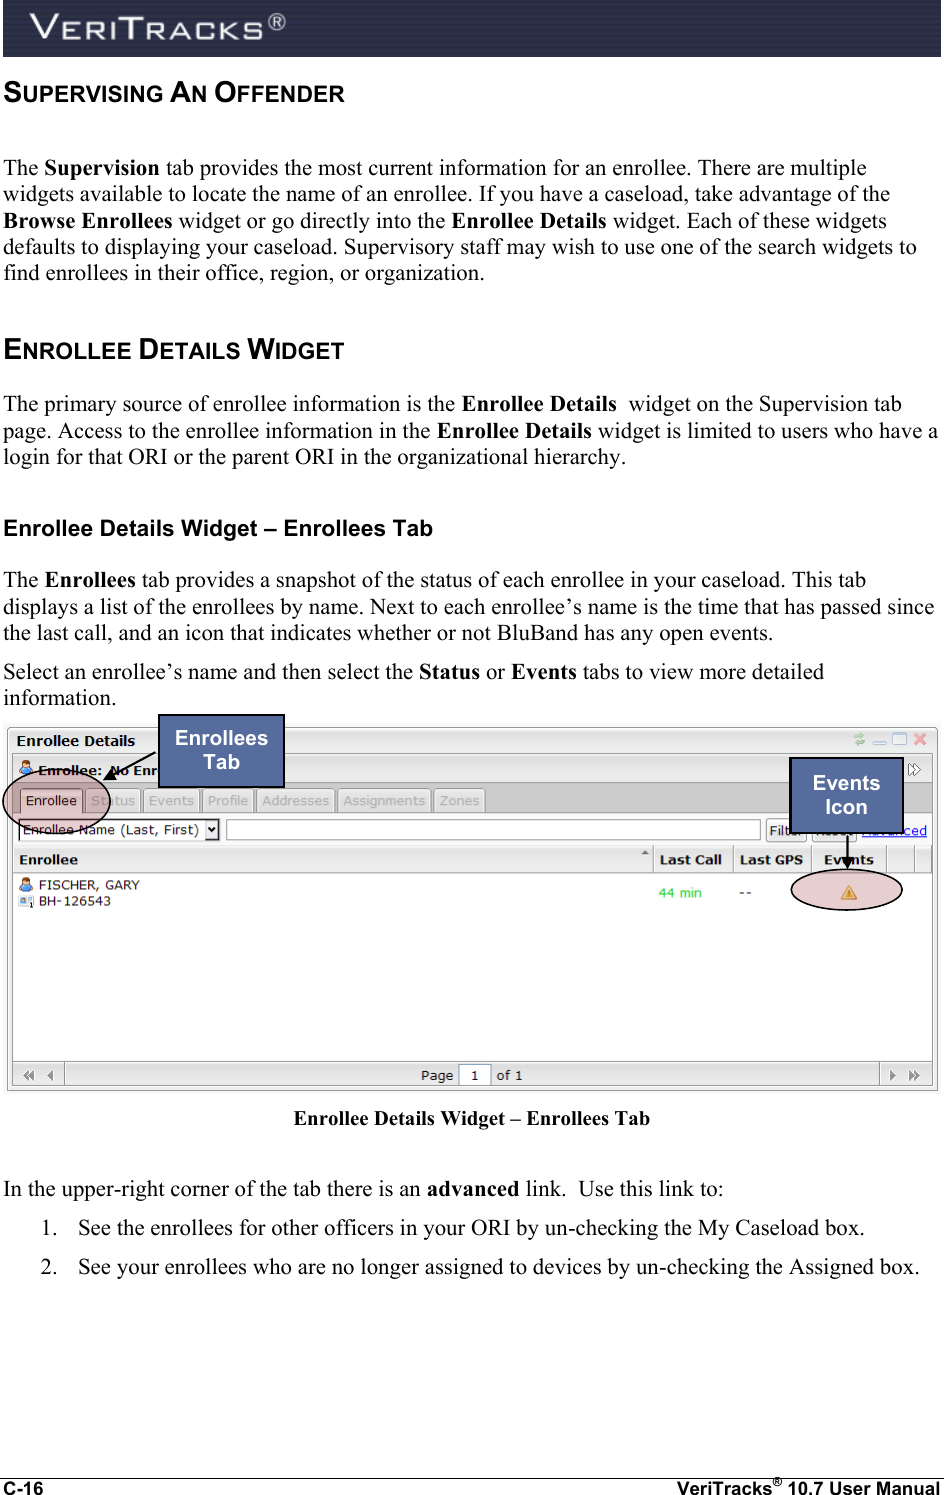
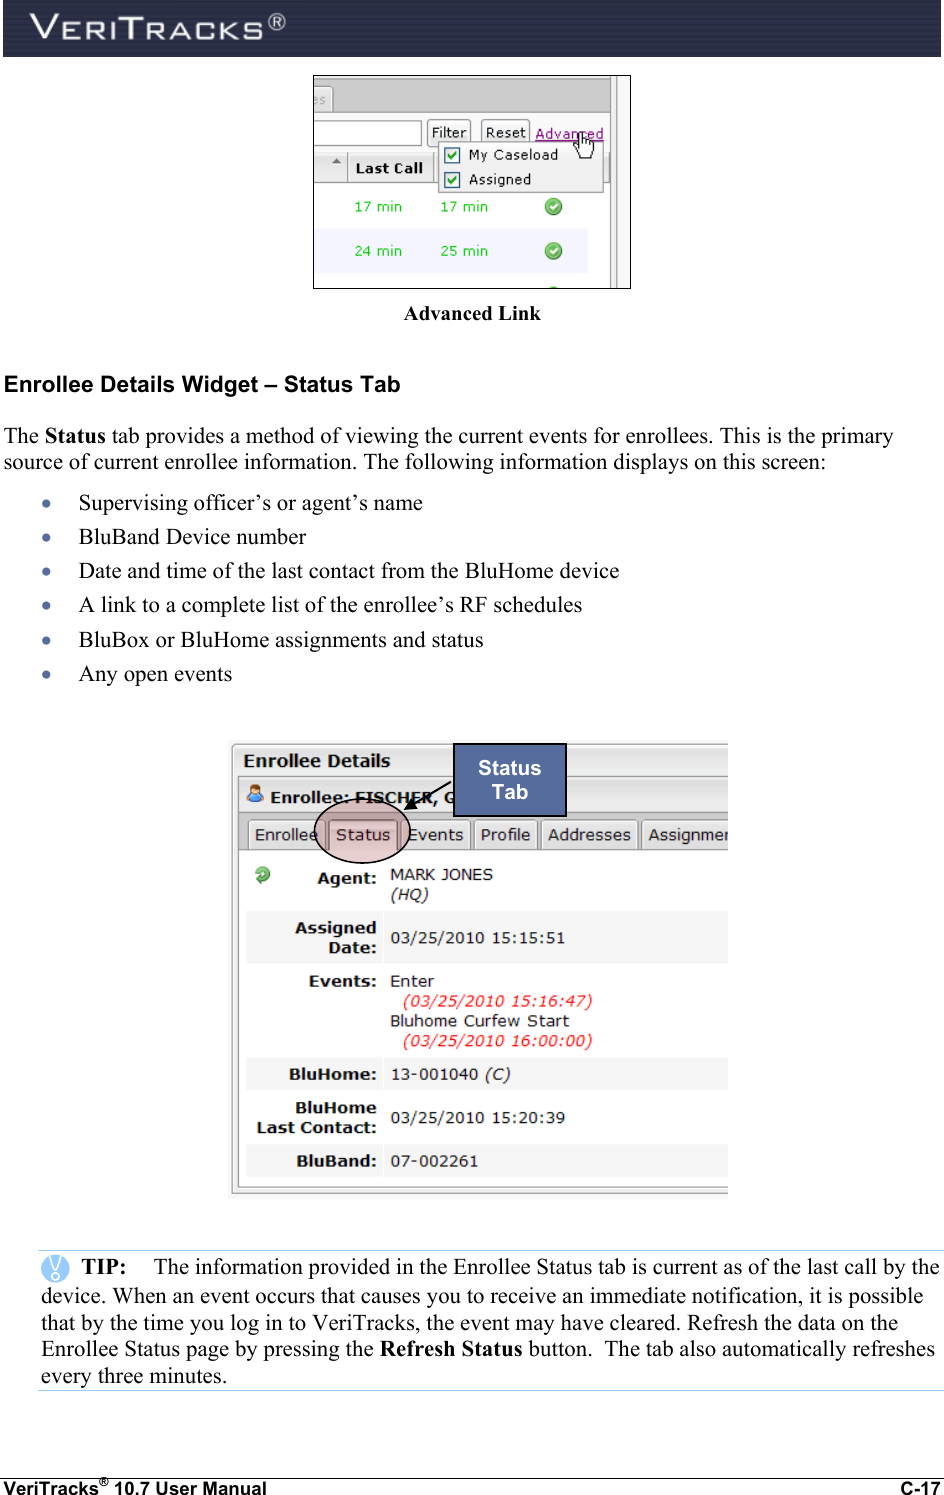
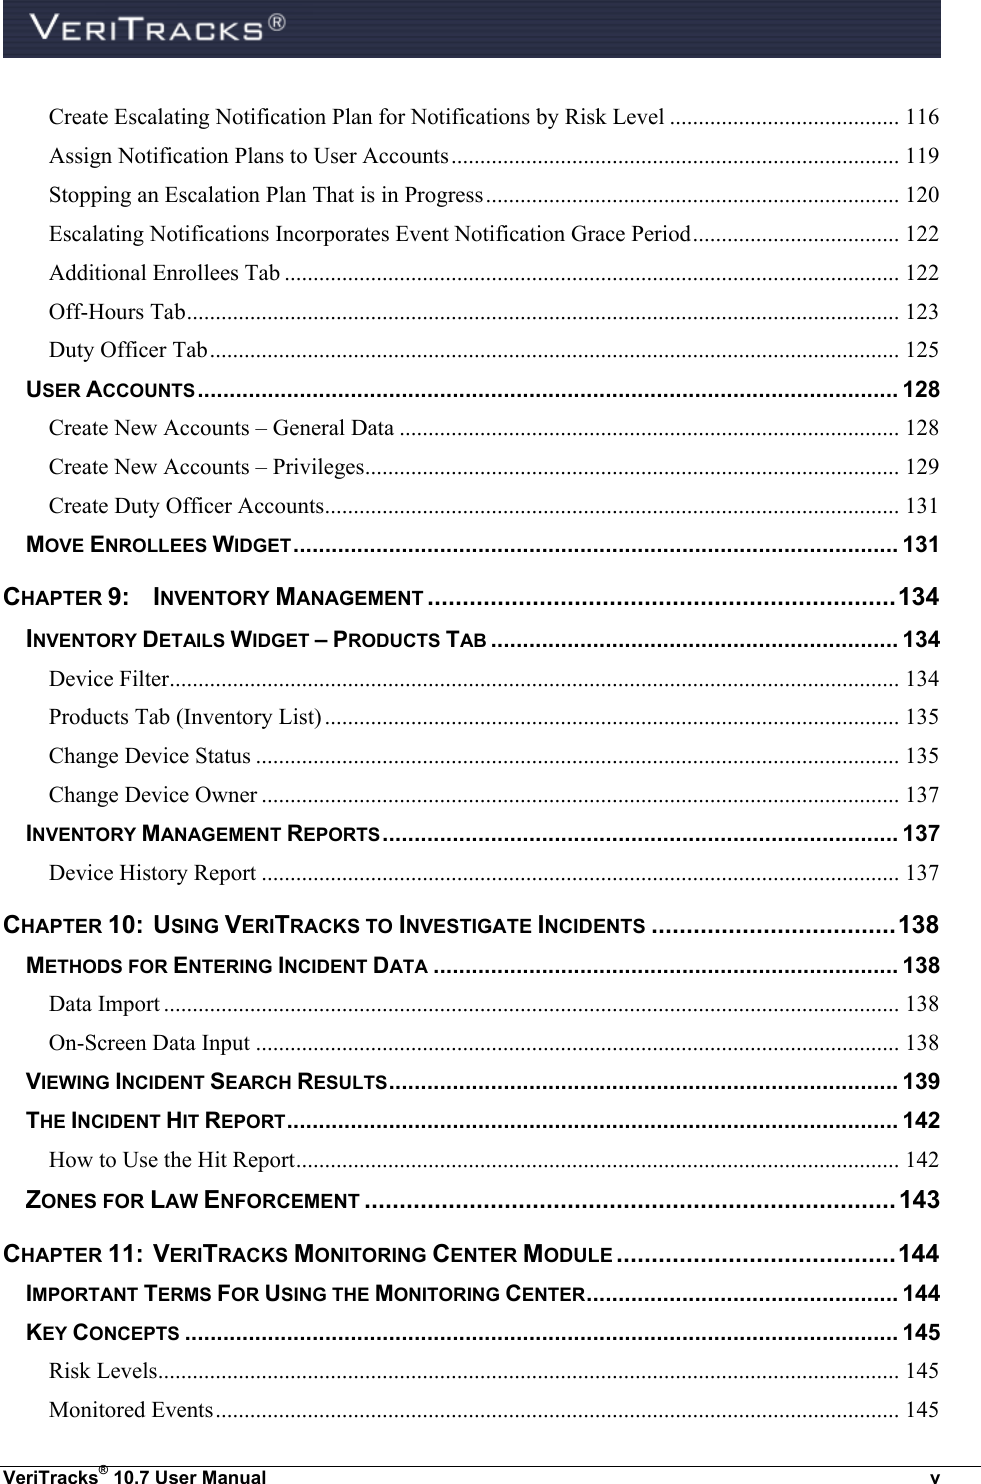
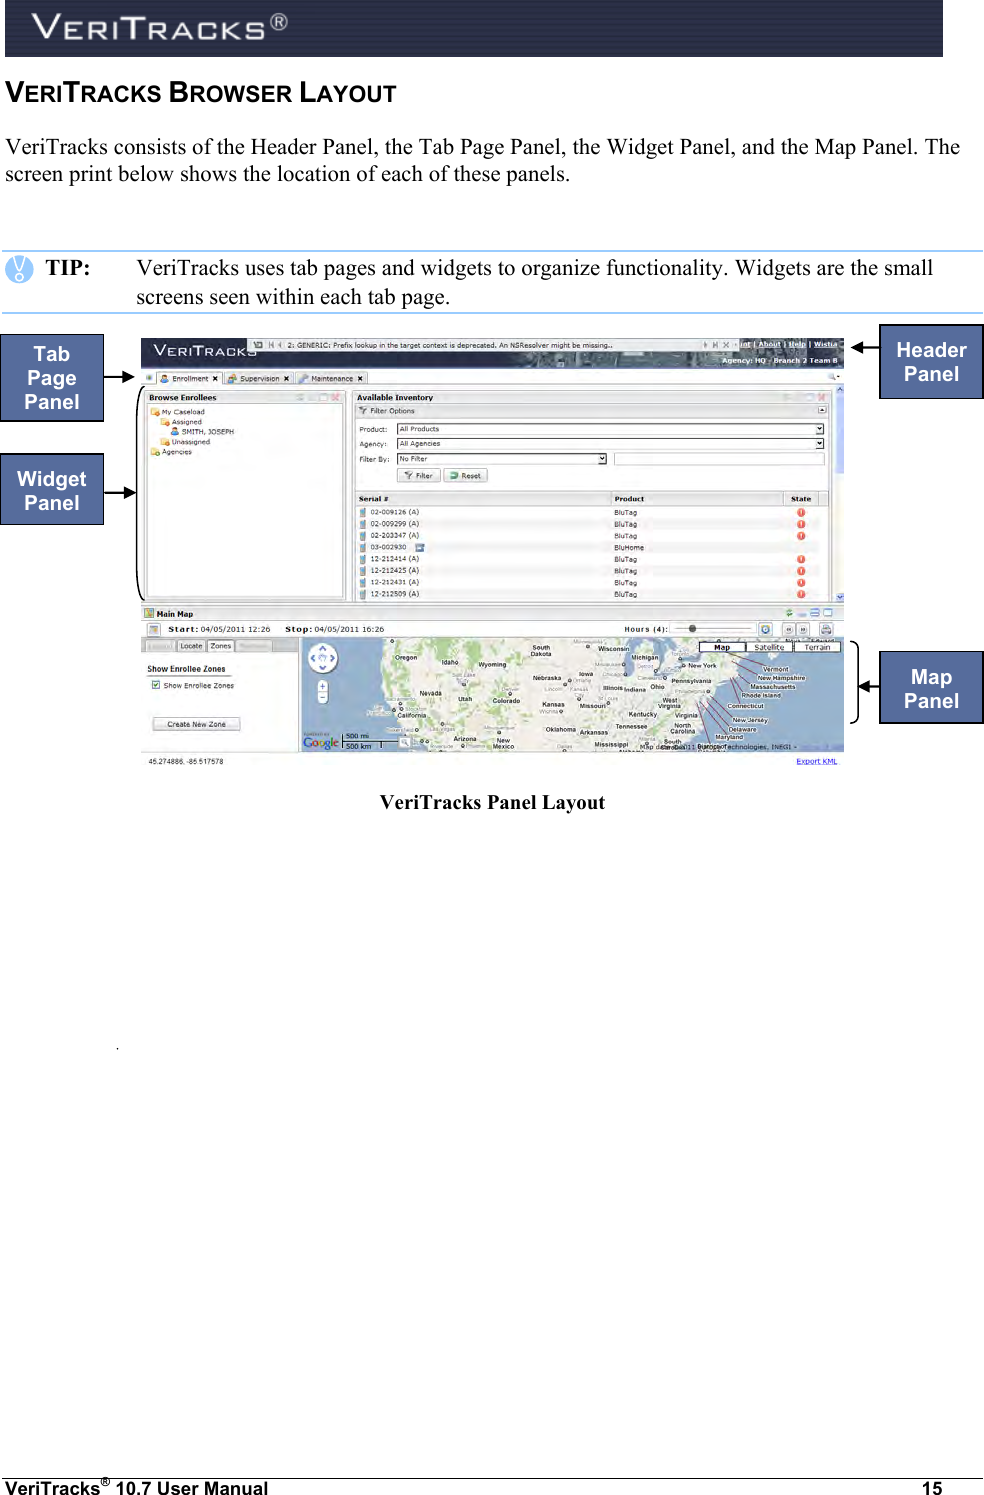
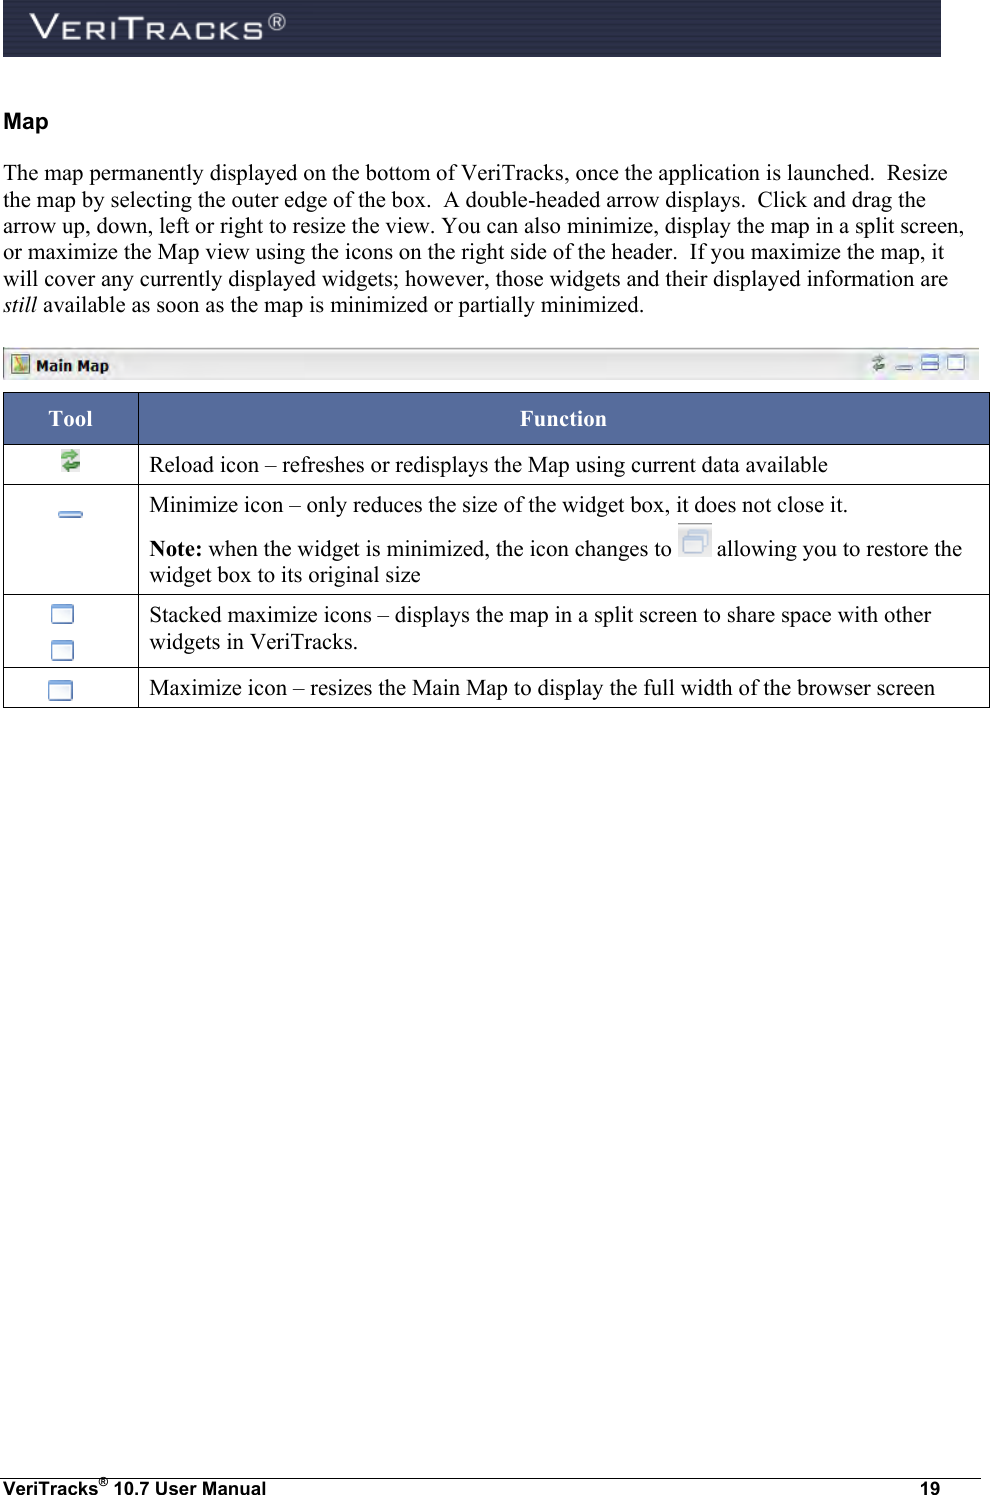
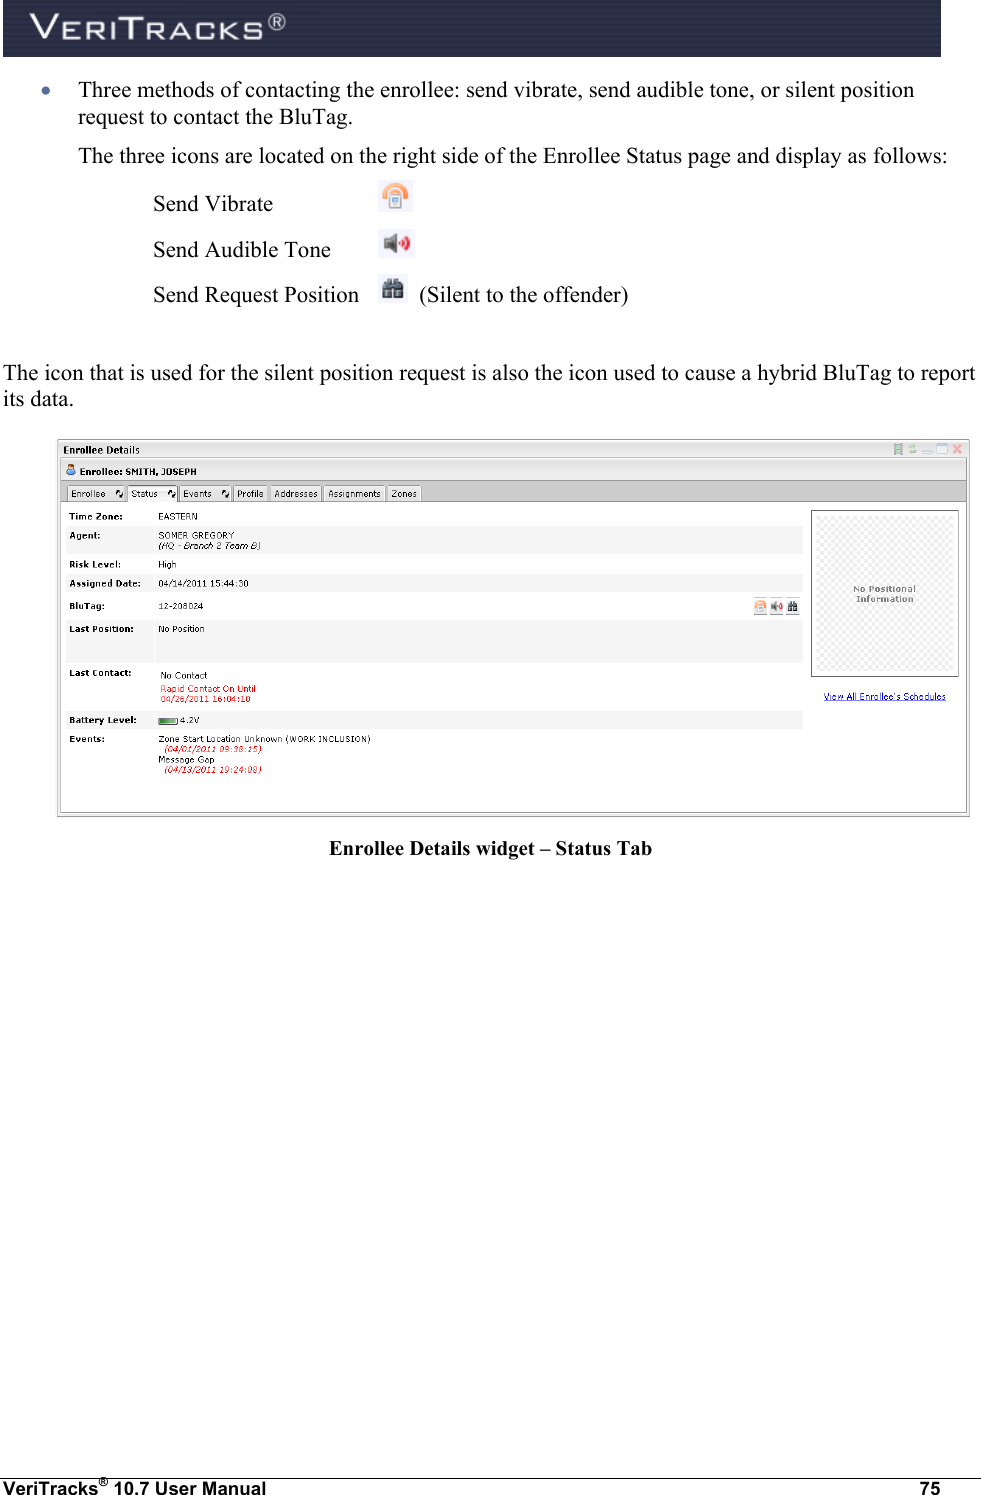
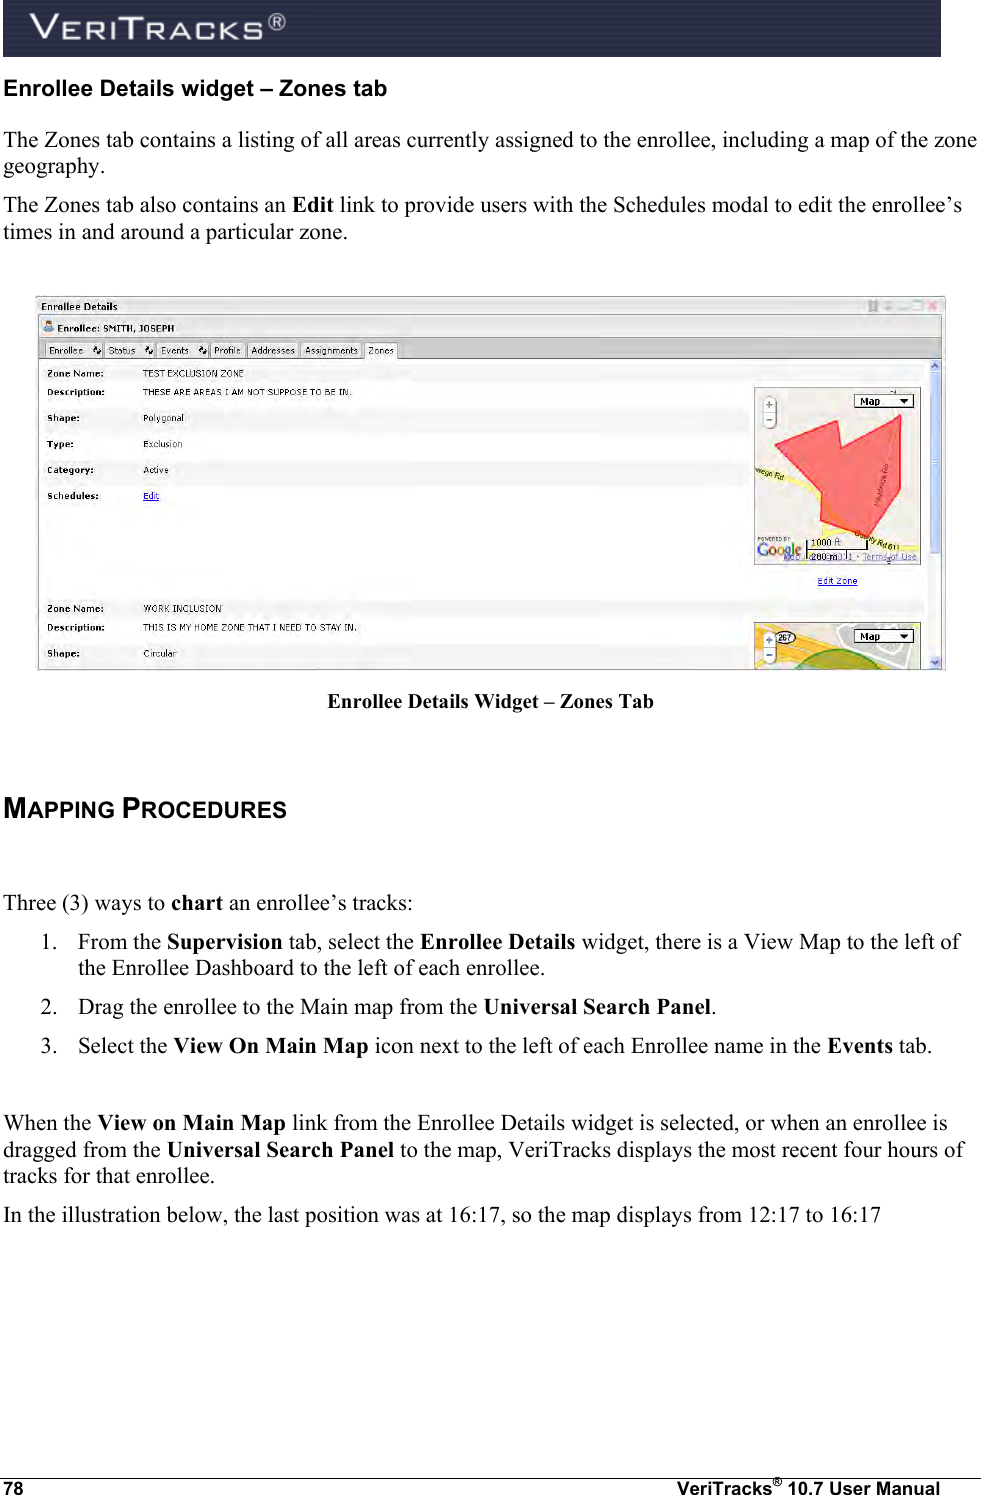
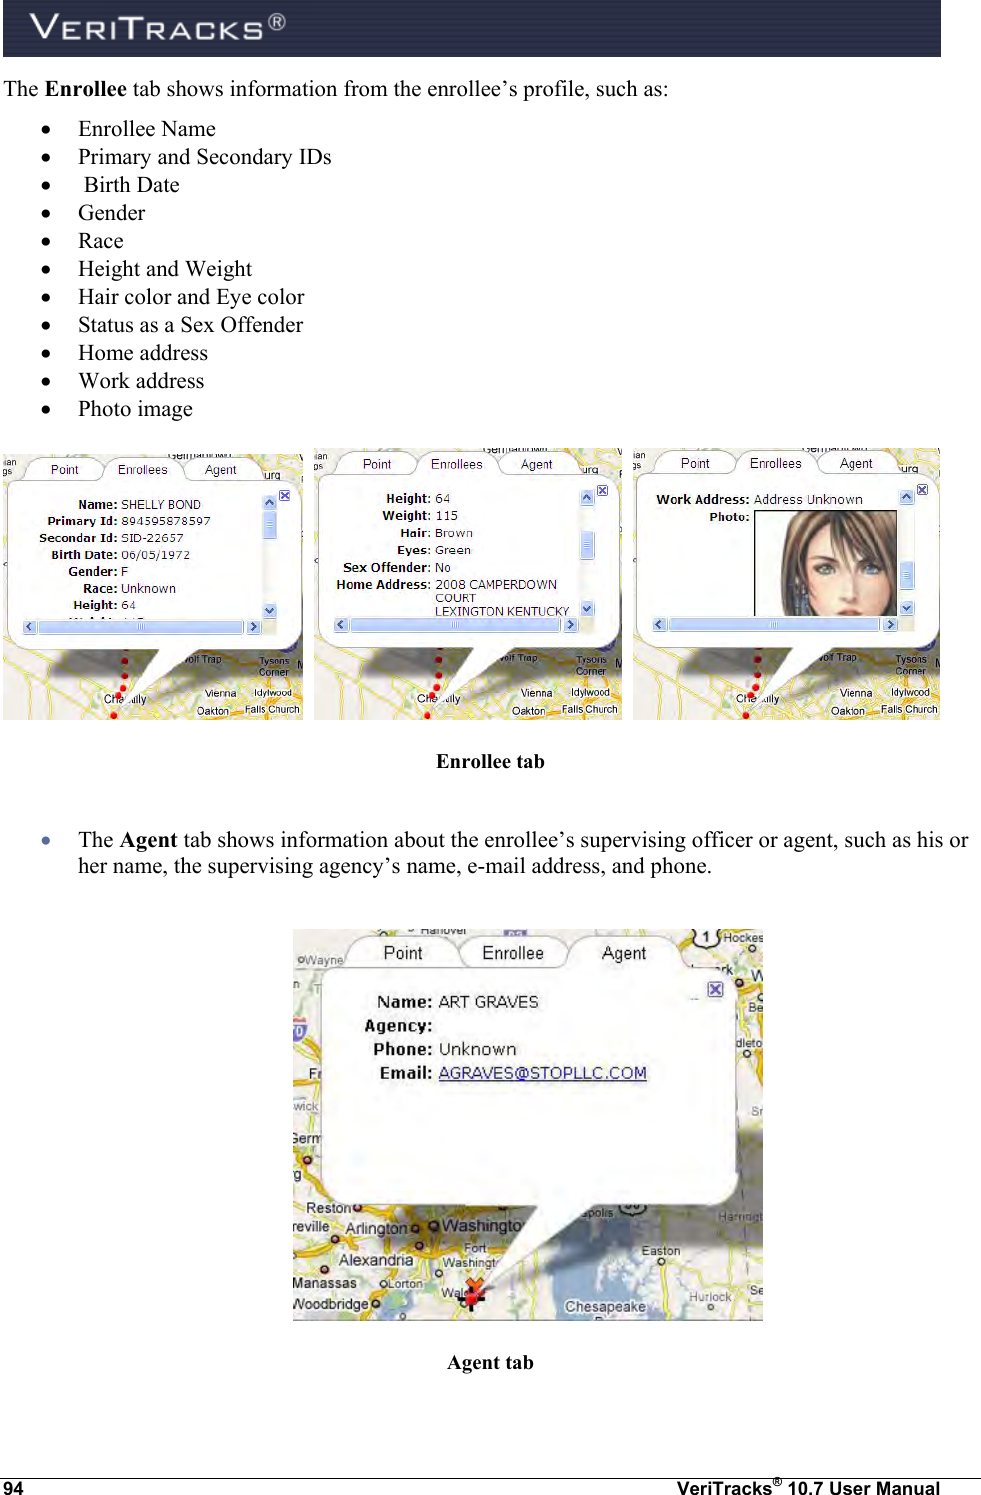
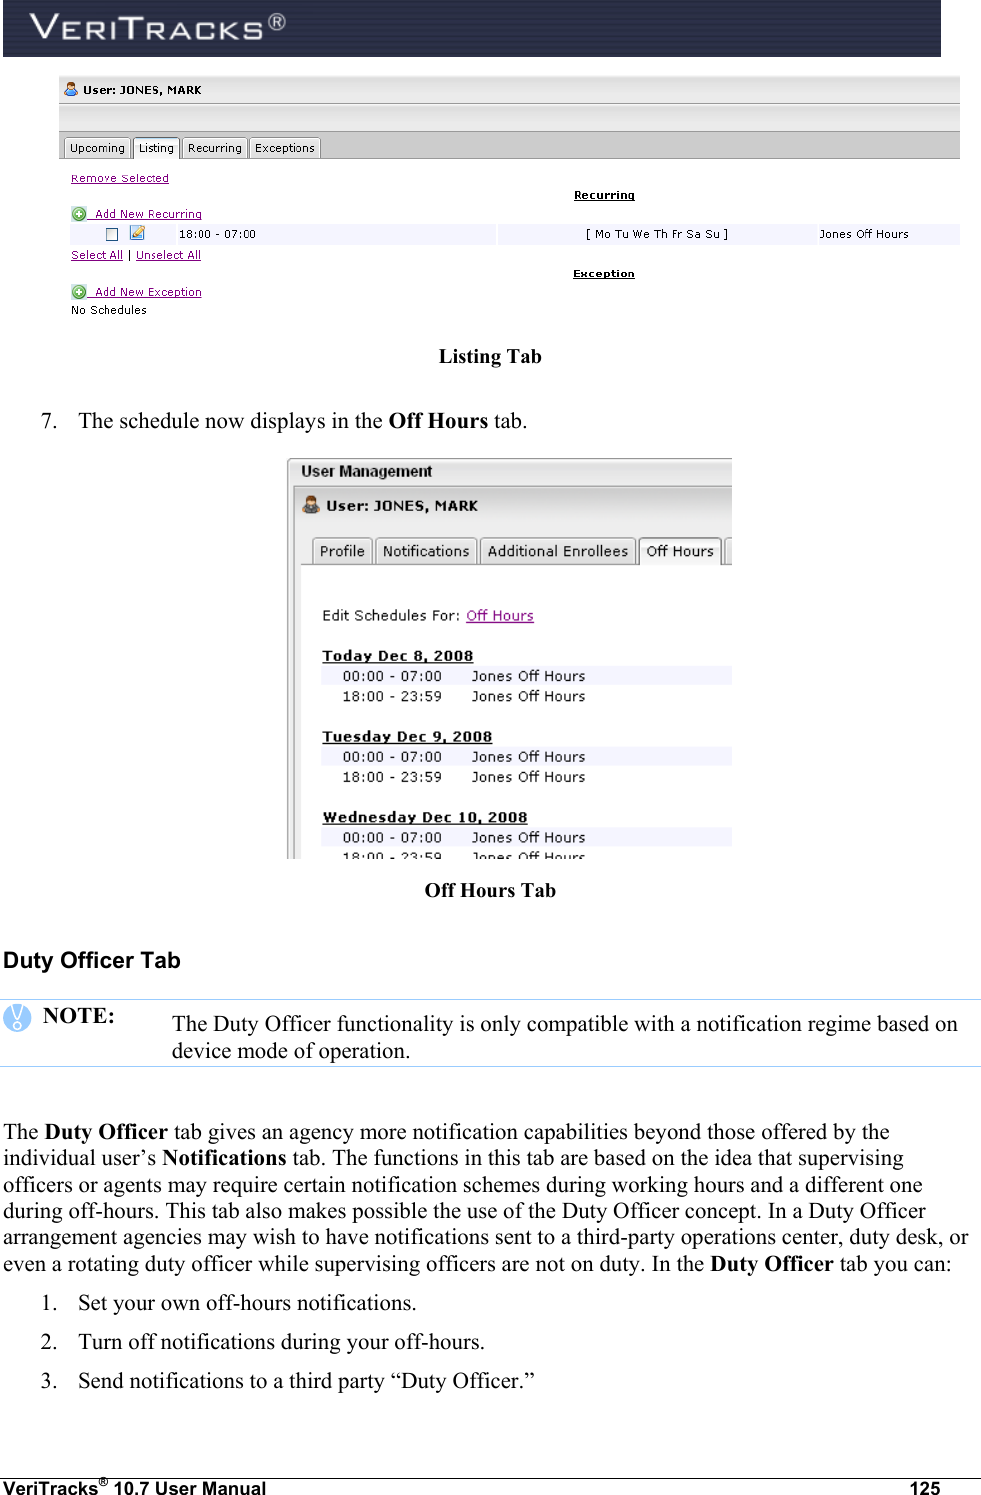
![VeriTracks® 10.7 User Manual 73 It is important to note that when a supervising agent initially visits the Enrollee Details widget, the view defaults to display “Assigned” and “My Caseload” enrollees that are listed in the Enrollee column of the widget. The supervising agent may easily browse the entire list of enrollees’ profiles from this page or search for a specific enrollee by typing as much of the Enrollee’s name as possible then select [Apply Filter]. NOTE: VeriTracks conducts Boolean (that is, a partial word or character) filtered searches. However, the more detailed information entered in the Enrollee search field - the greater the success rate of exact Enrollee matches being returned. Key Dashboard Features The dashboard features a number of columns with special features and data. A description of all the columns is in the section on customizing the dashboard. Below are a few of the most popular features. Enrollee Details Widget – Enrollee Tab Enrollee Details Widget – Status Tab The Status tab, located within the Enrollee Dashboard, provides the opportunity to view the current details and most recent GPS tracking information for particular enrollees. This information is as current as of the last call by the device. When an event occurs on an enrollee, users receive an immediate notification on your cellular device; however, it is possible that by the time you log in to VeriTracks, the event may have cleared the queue. Refresh the data on the Status page by pressing the Refresh Status button (the circular arrows within the Status tab itself). The tab also automatically refreshes every three (3) minutes. The following information displays on this screen: Supervising officer or agent name and ORI Enrollee risk level (or “VICTIM” if individual is enrolled as a victim) Device number Enrollee Tab](https://usermanual.wiki/Satellite-Tracking-of-People/1106MM1/User-Guide-1721660-Page-87.png)
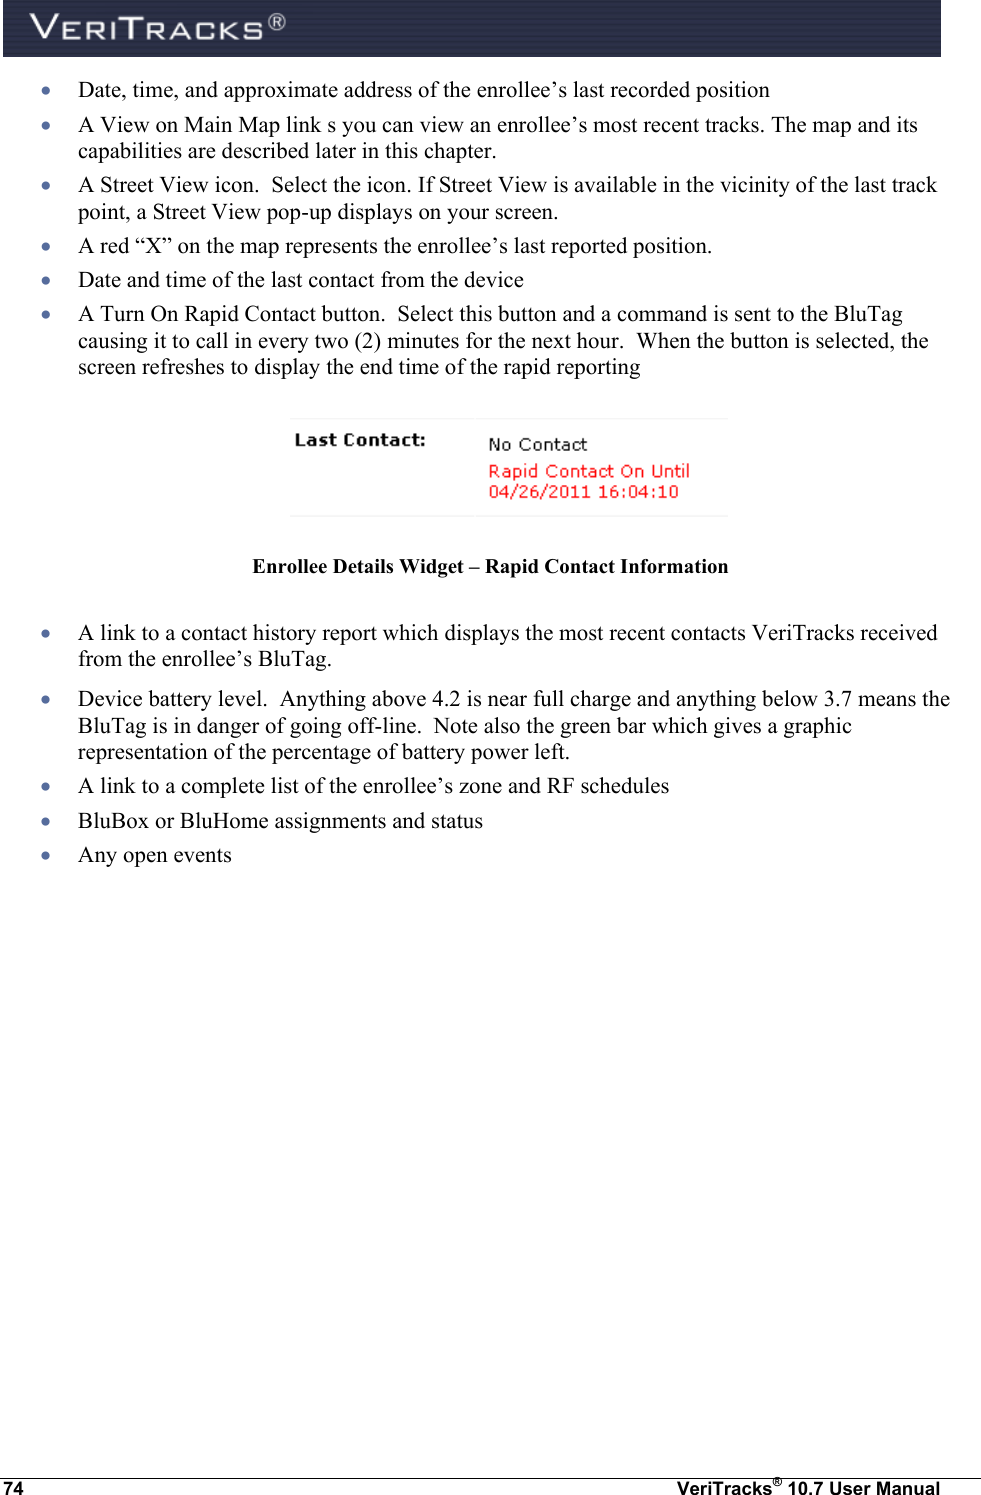
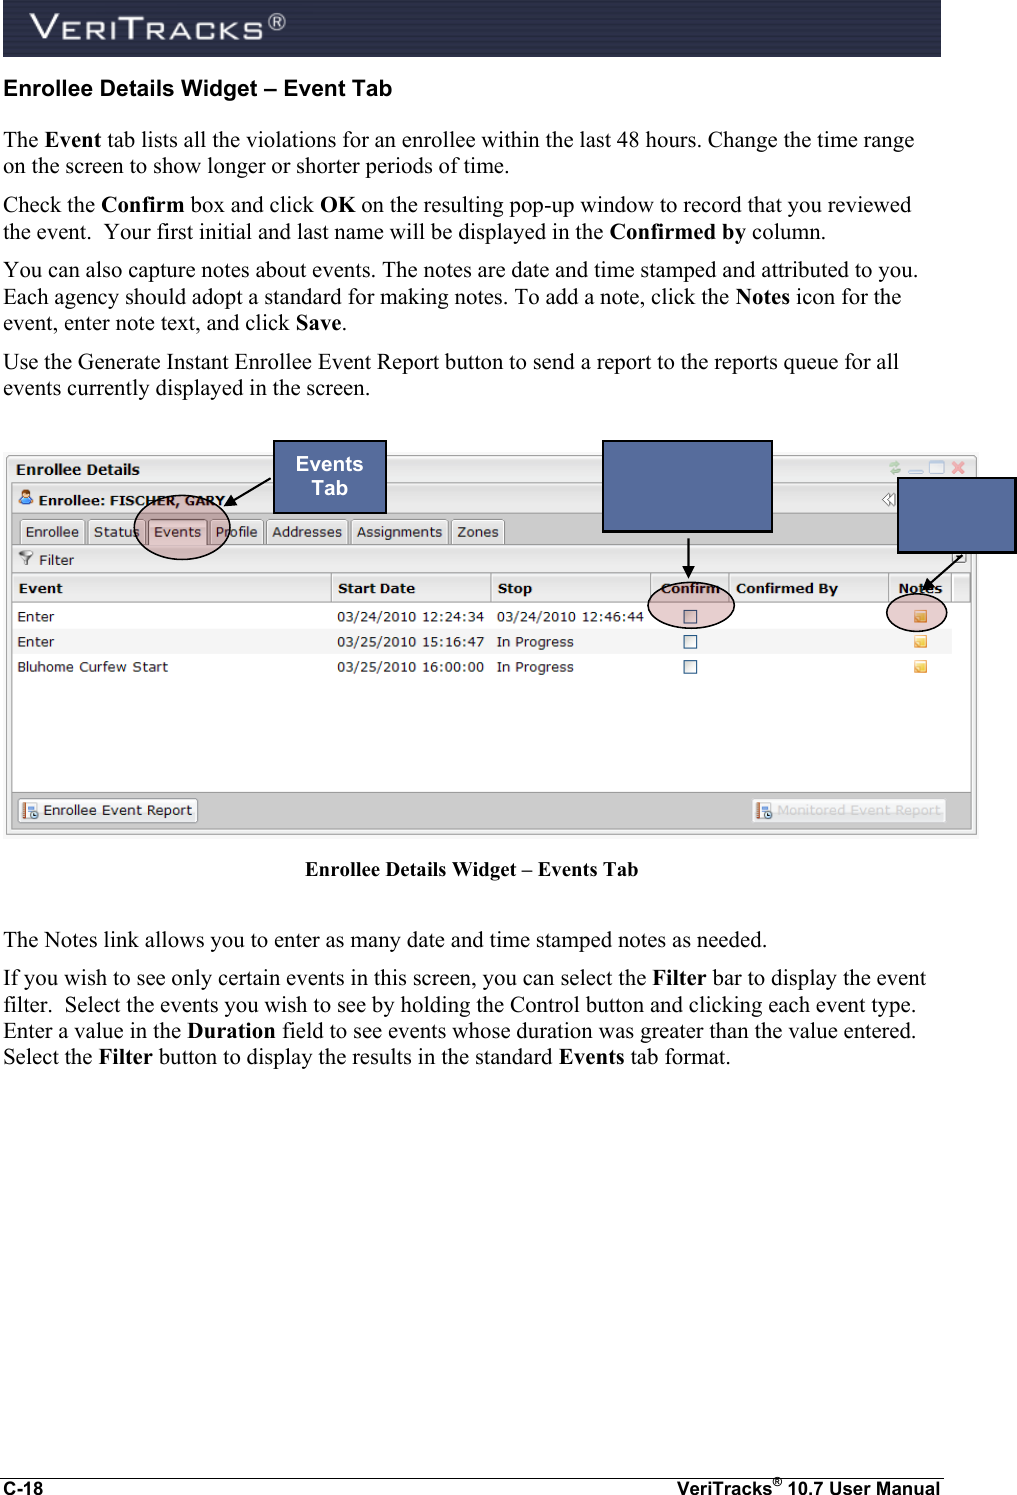
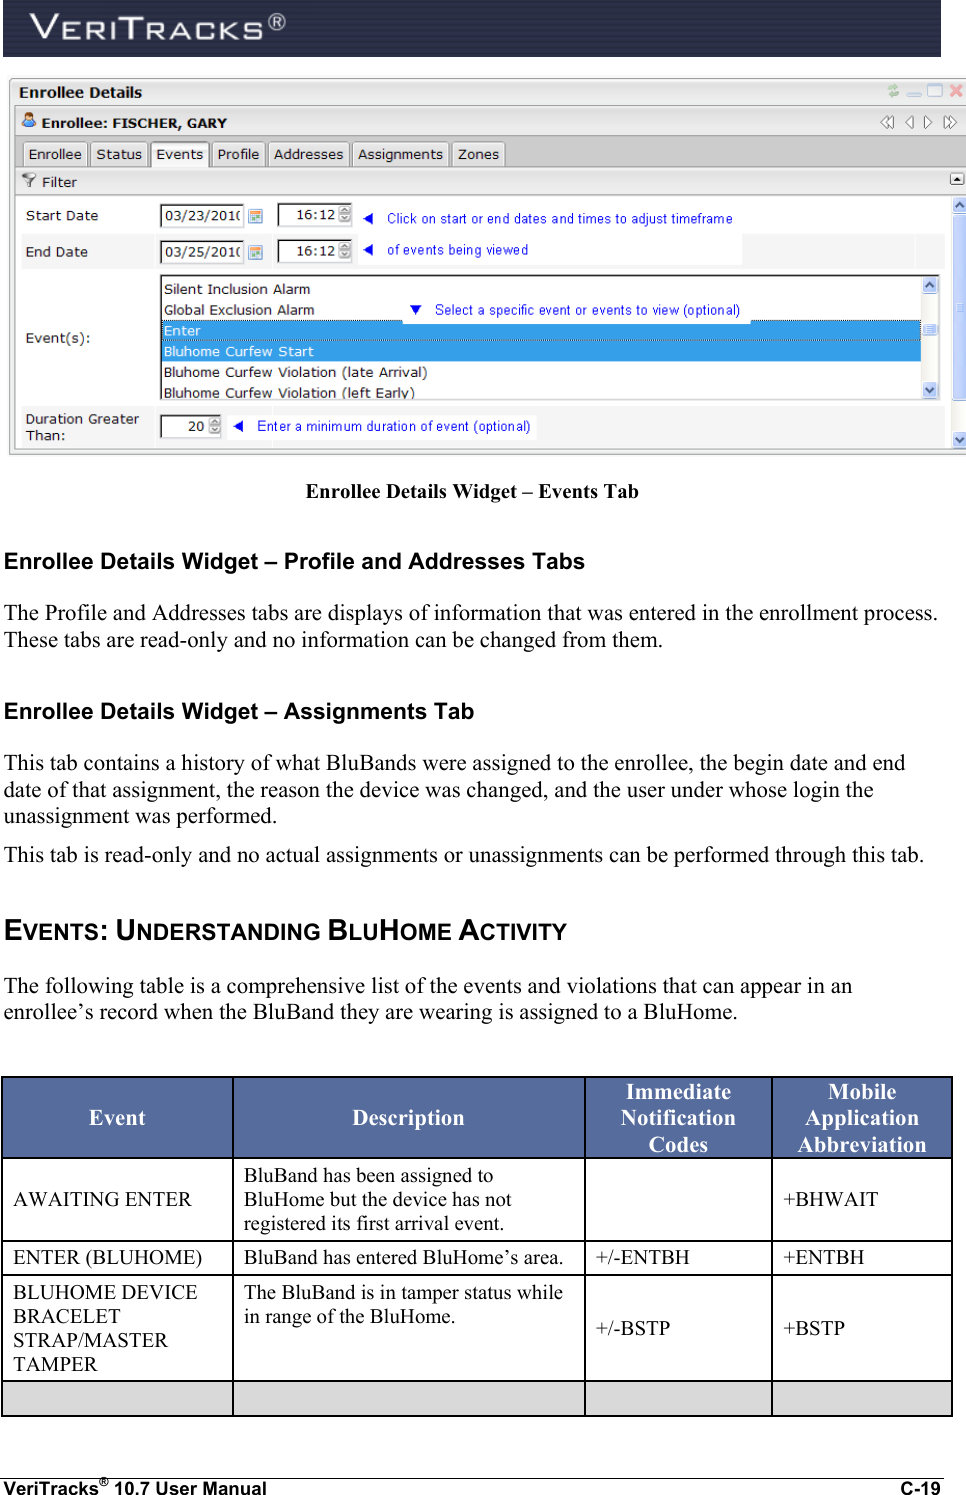
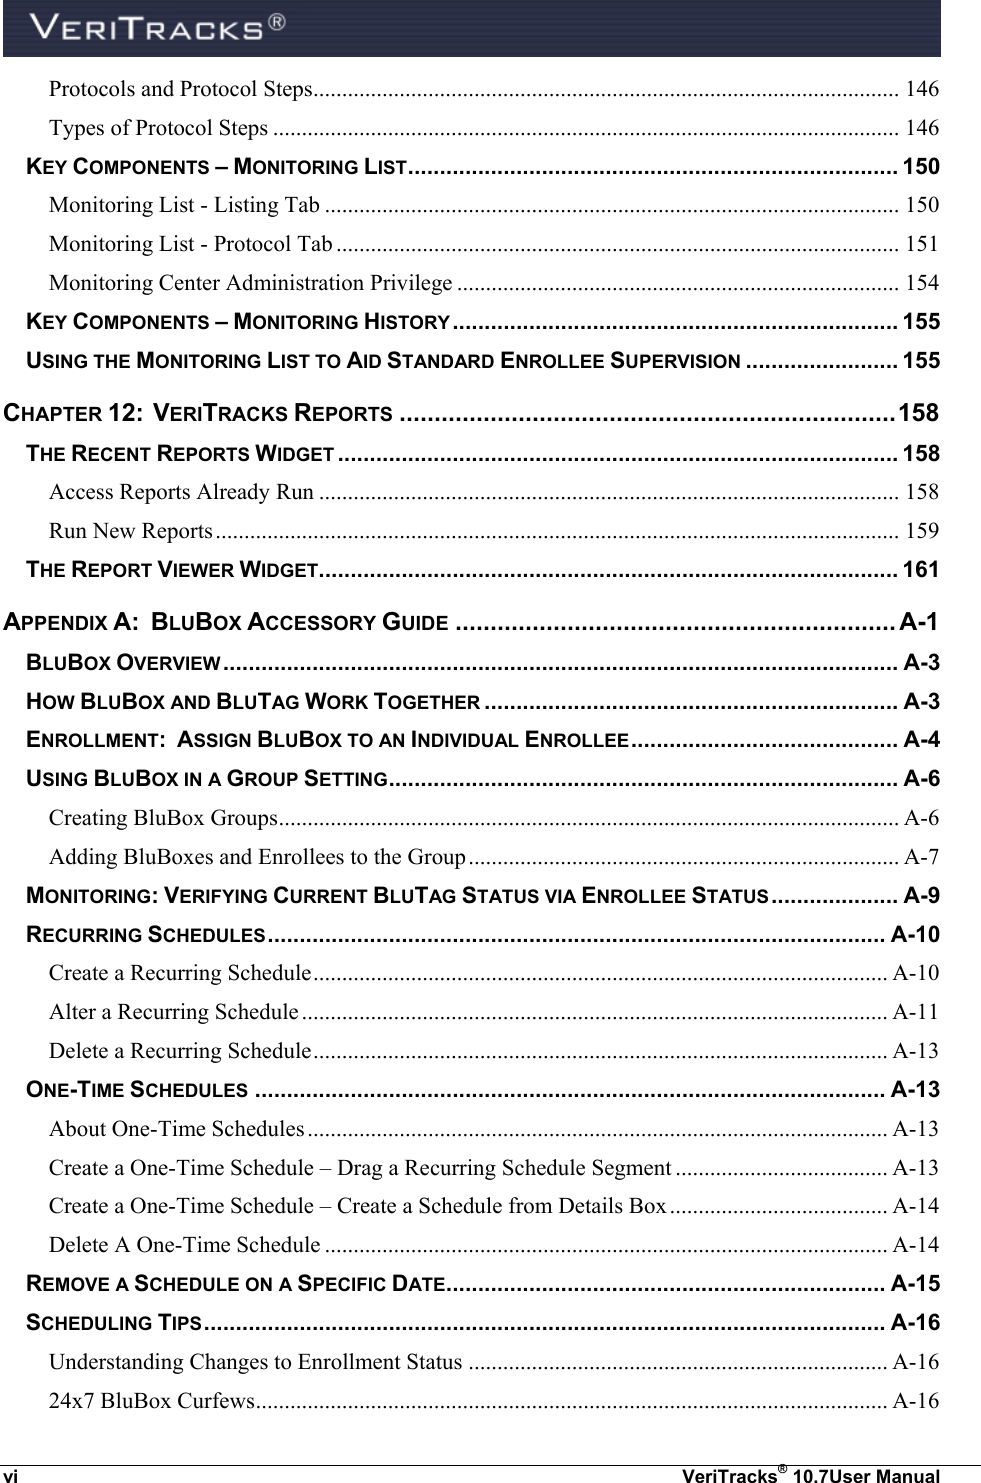
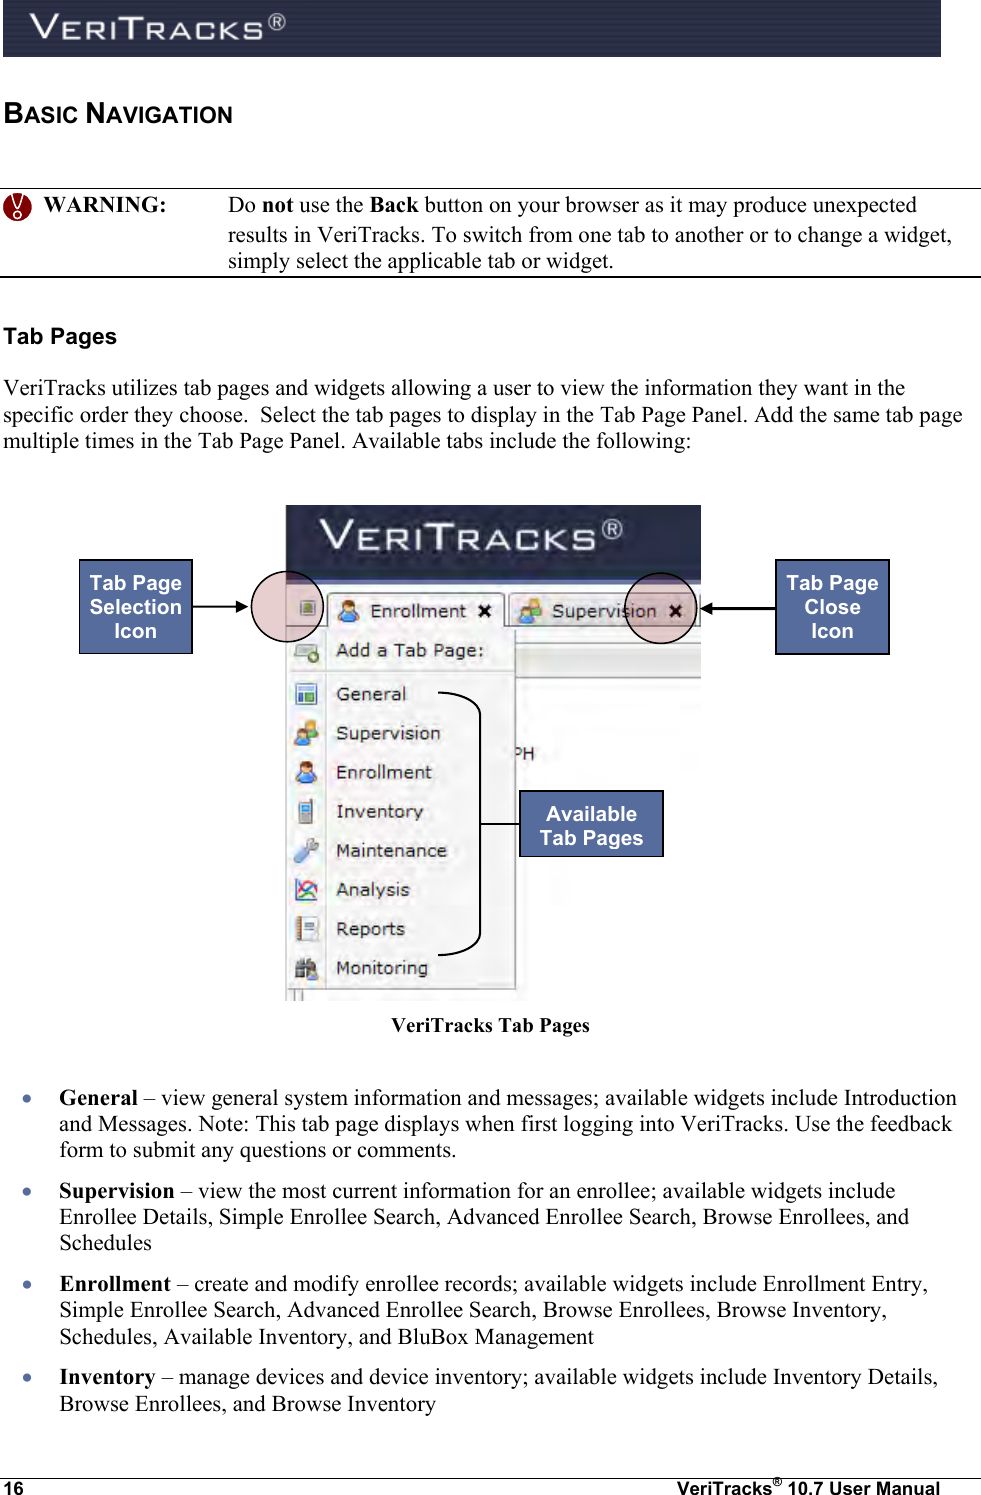
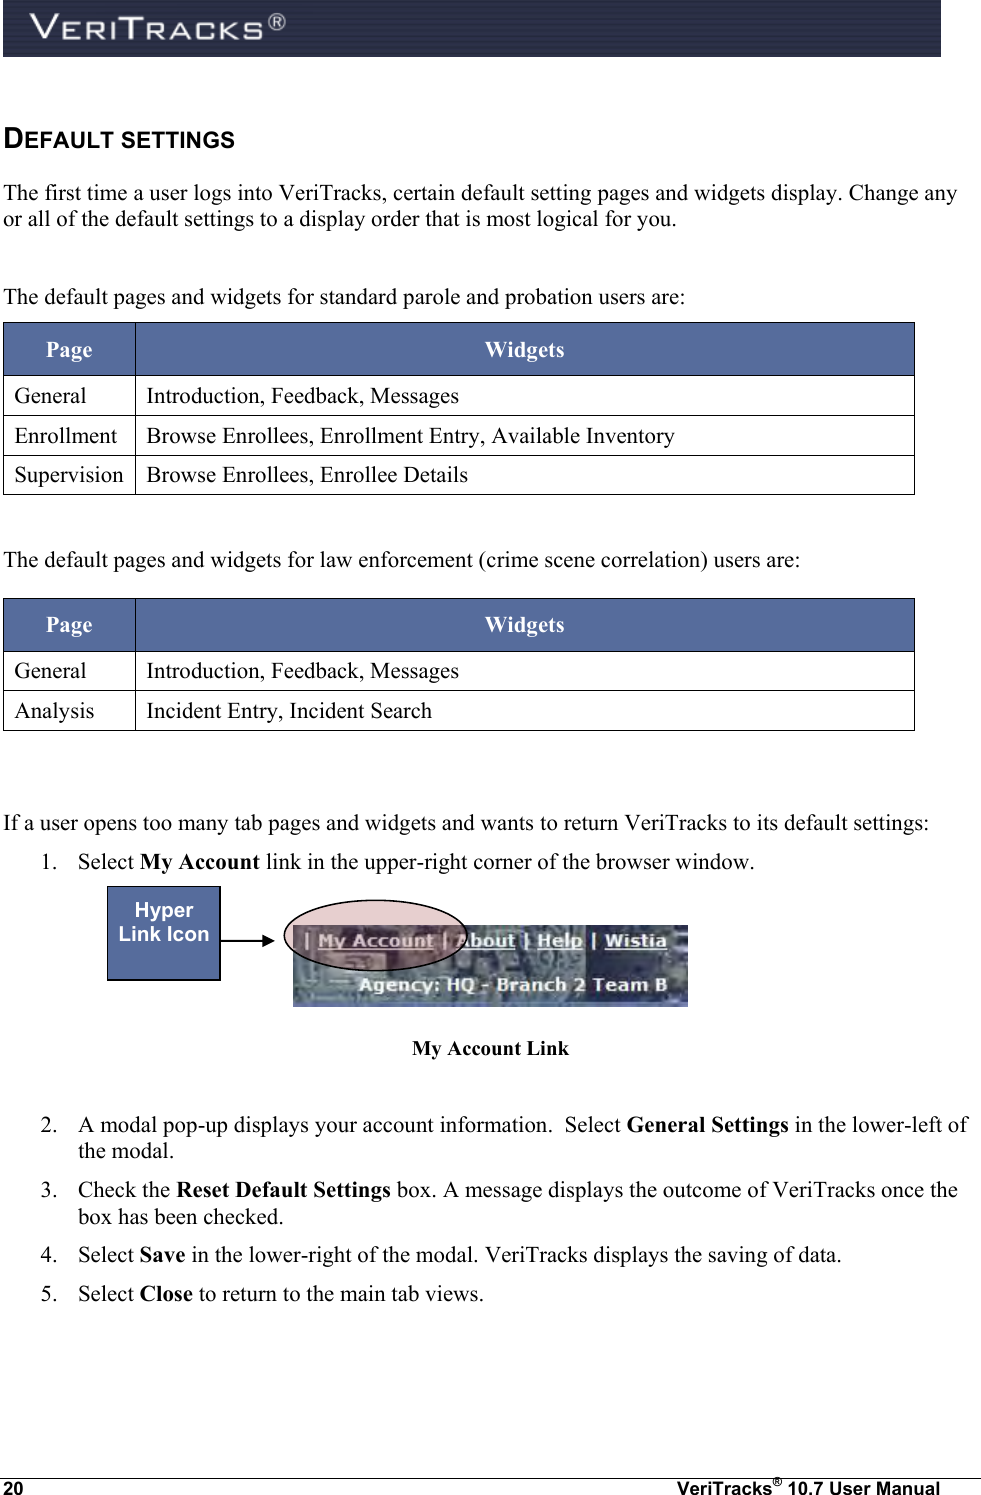
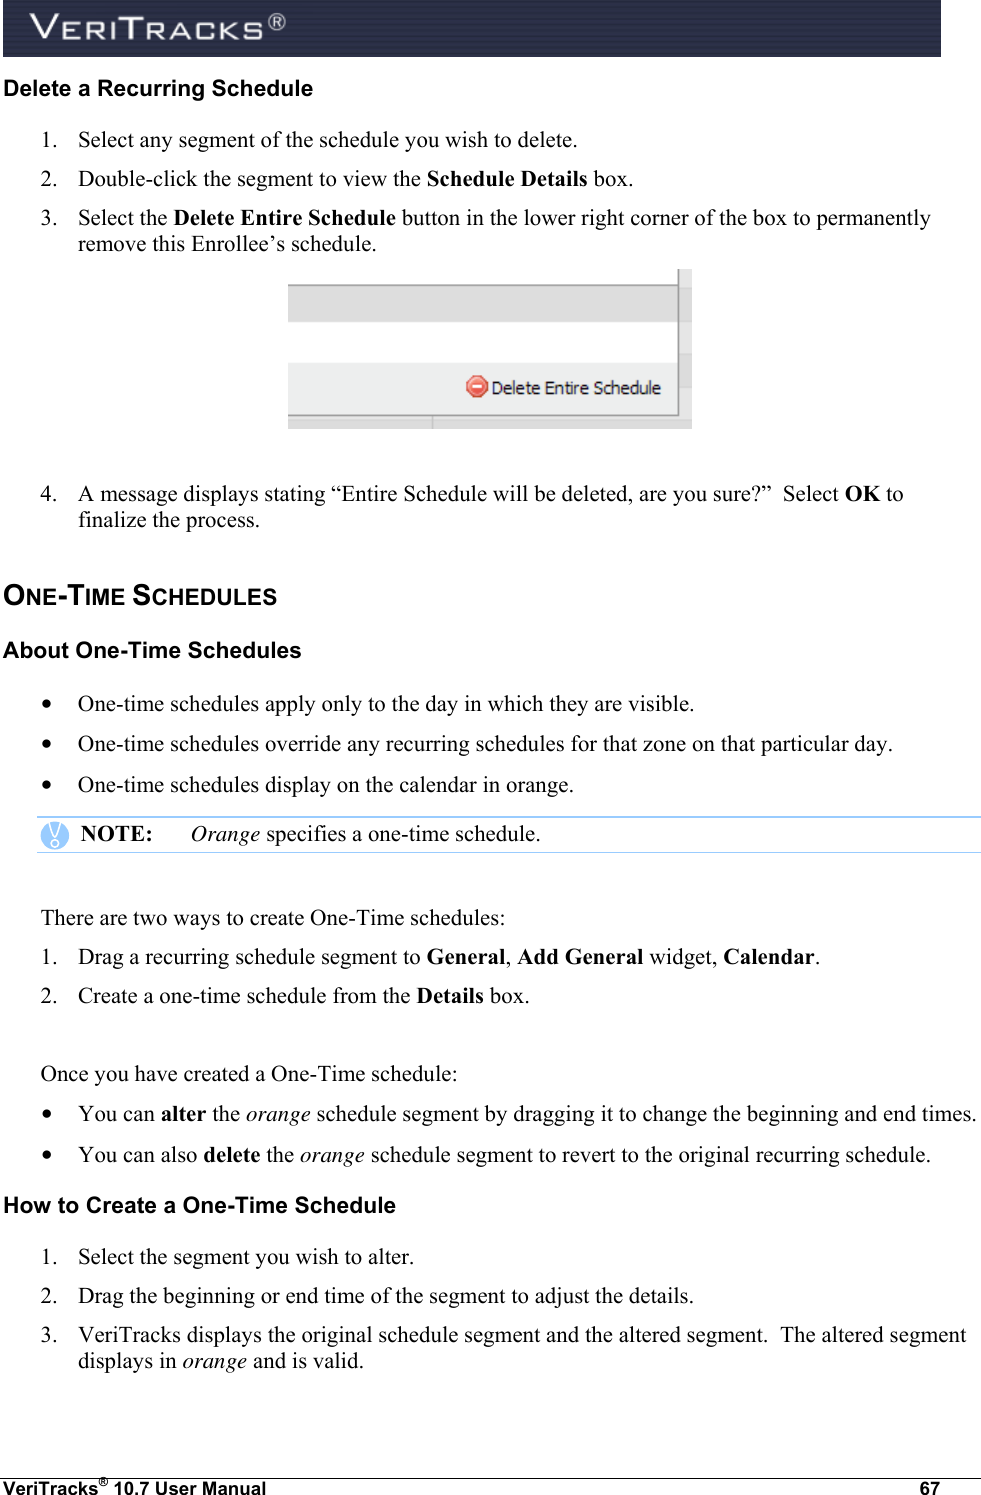
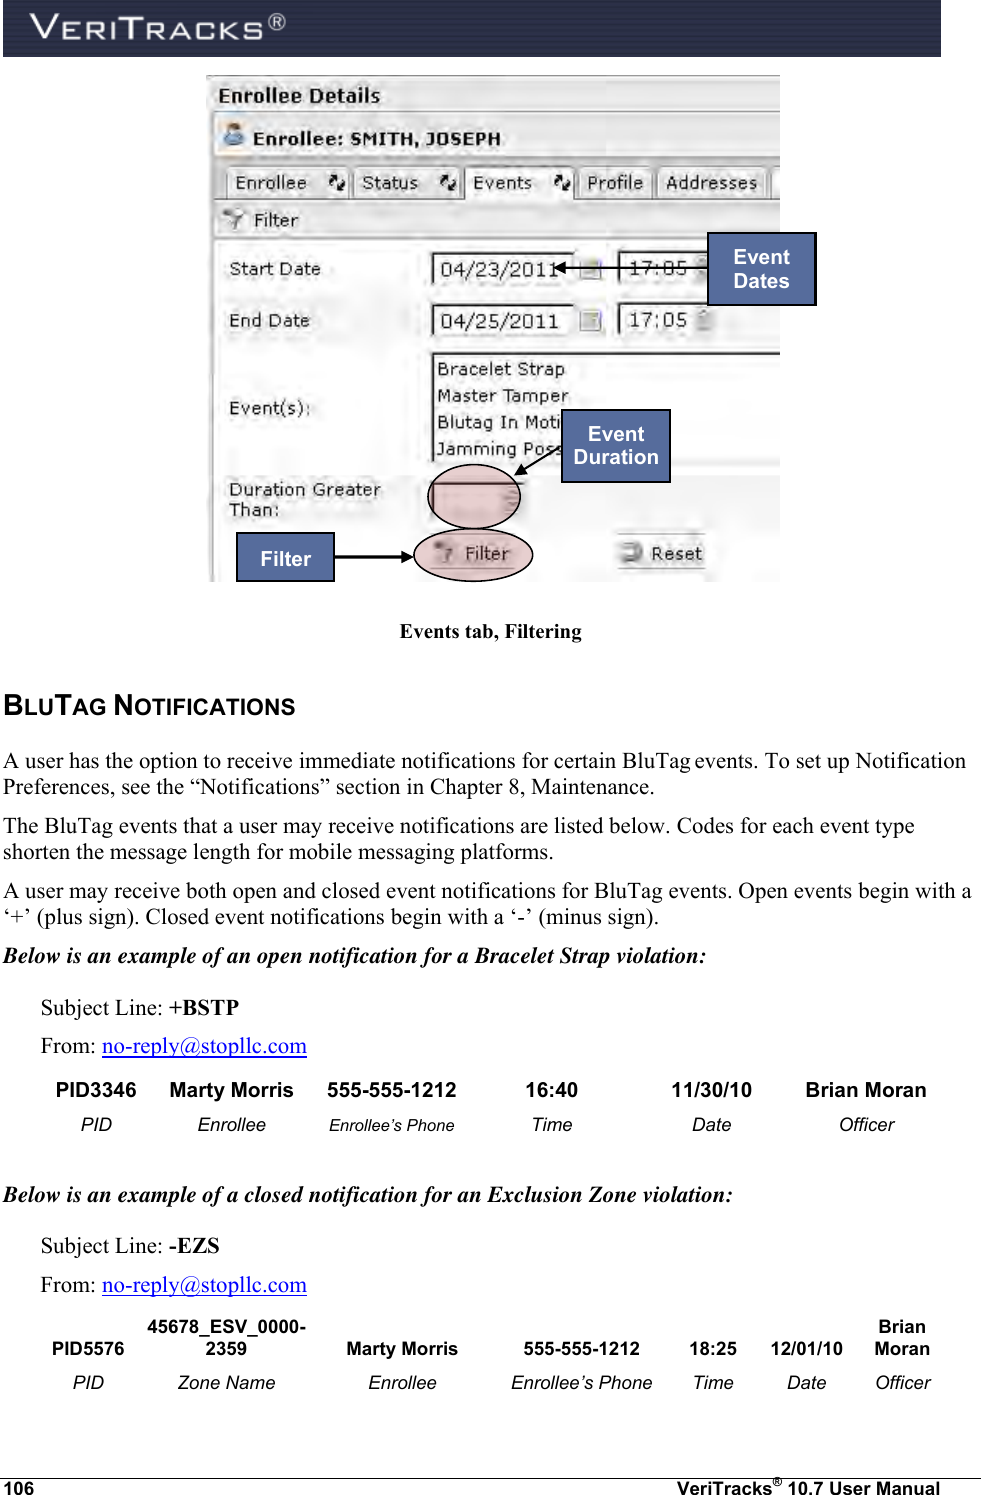
![76 VeriTracks® 10.7 User Manual Enrollee Details widget – Event Tab The Event tab, also located within the Enrollee Details view, lists all the violations for an enrollee within the last 48 hours. Change the time range on the screen to display longer or shorter periods of event time for the enrollee. Select View On Main Map icon to the left of the event name to map the tracks recorded by the BluTag during the event. Check the Confirm box and click OK on the resulting pop-up window to record that you reviewed the event. The check box will be replaced by your first initial and last name. You can also capture notes about events. The notes are date and time stamped and attributed to you. Each agency should adopt a standard for making notes. To add a note, click the Notes icon for the event, enter note text, and click Save. Use the Generate Instant Enrollee Event Report button to send a report to the reports queue for all events currently displayed in the screen. The Notes link allows users to enter as many date and time stamped notes as needed. View Filtered Events To view certain events for an enrollee, perform the following: 1. Select the Filter bar to manipulate and display the enrollee’s events in a filtered view. 2. Select the Start and End Dates for the filtered request. 3. Select the Events you wish to view by holding [Ctrl] and selecting each event type that is included in the filtered view. 4. Enter a value in the Duration field greater than the value entered, if any. 5. Select the Filter button located at the bottom of the Event’s tab to display the results in the standard Events tab format. Filter Display Bar View On Main Map Store Notes Confirm Event](https://usermanual.wiki/Satellite-Tracking-of-People/1106MM1/User-Guide-1721660-Page-90.png)
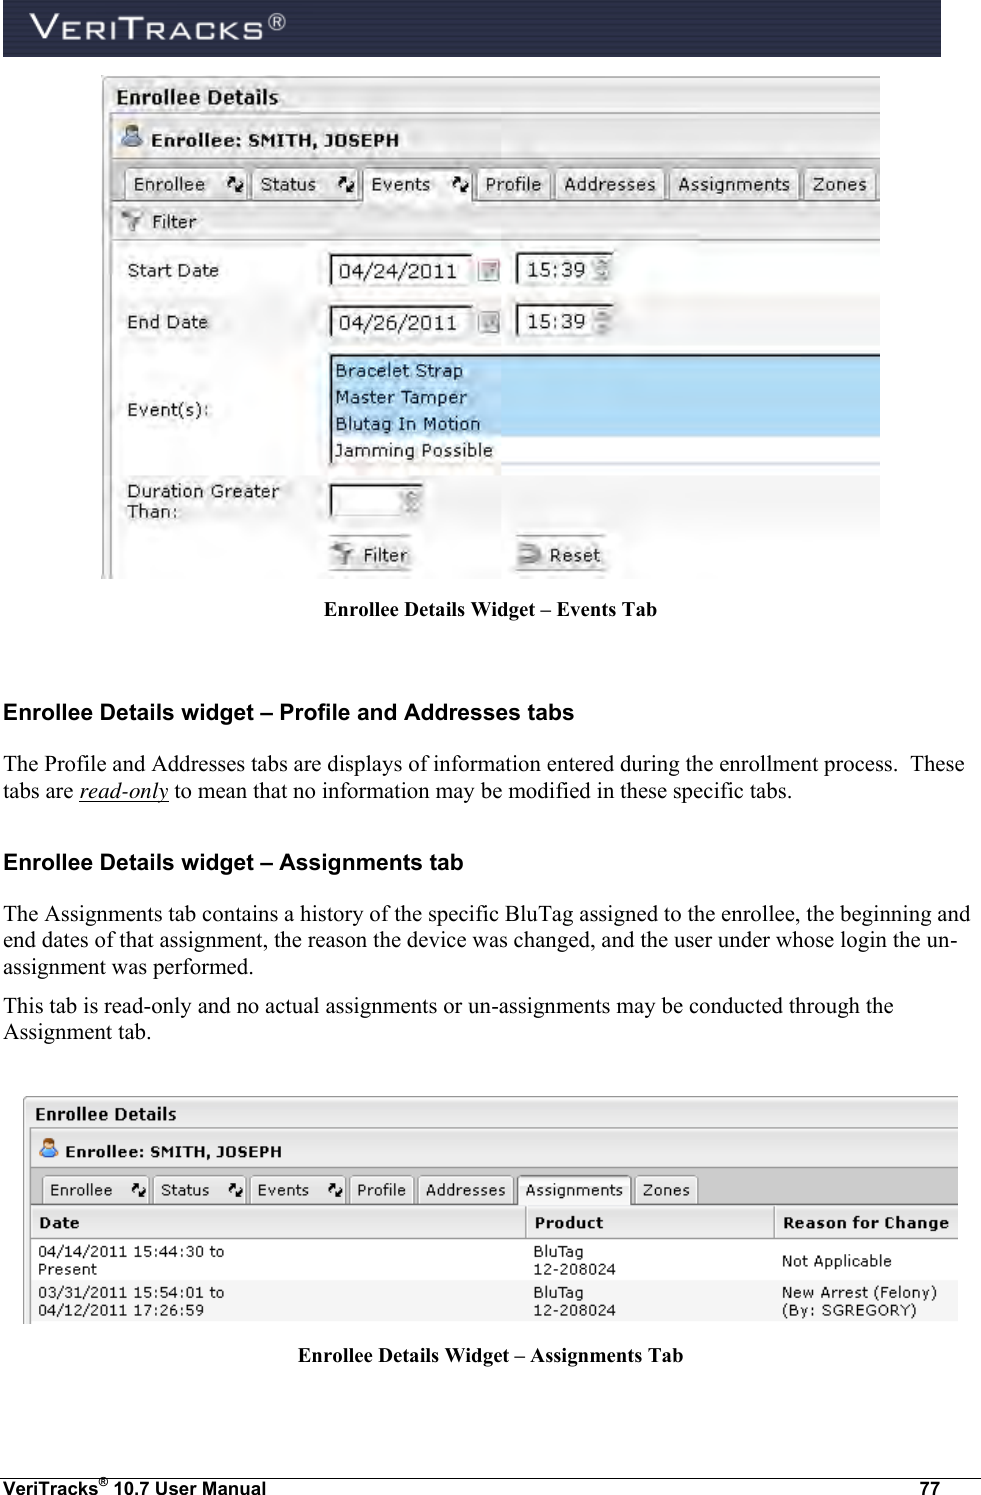
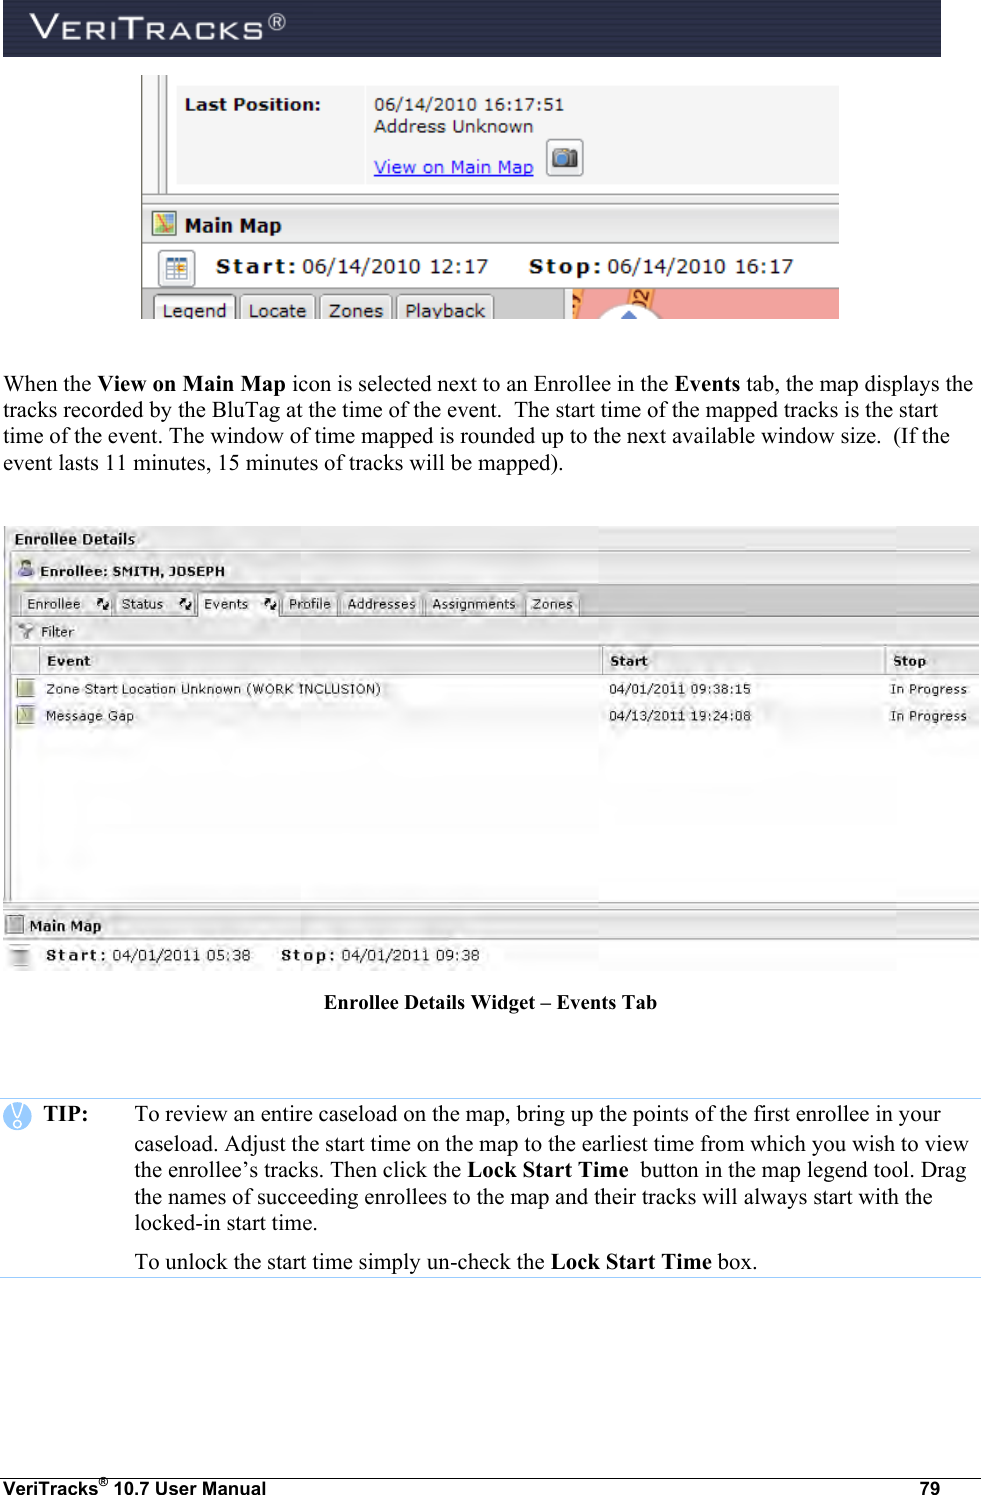


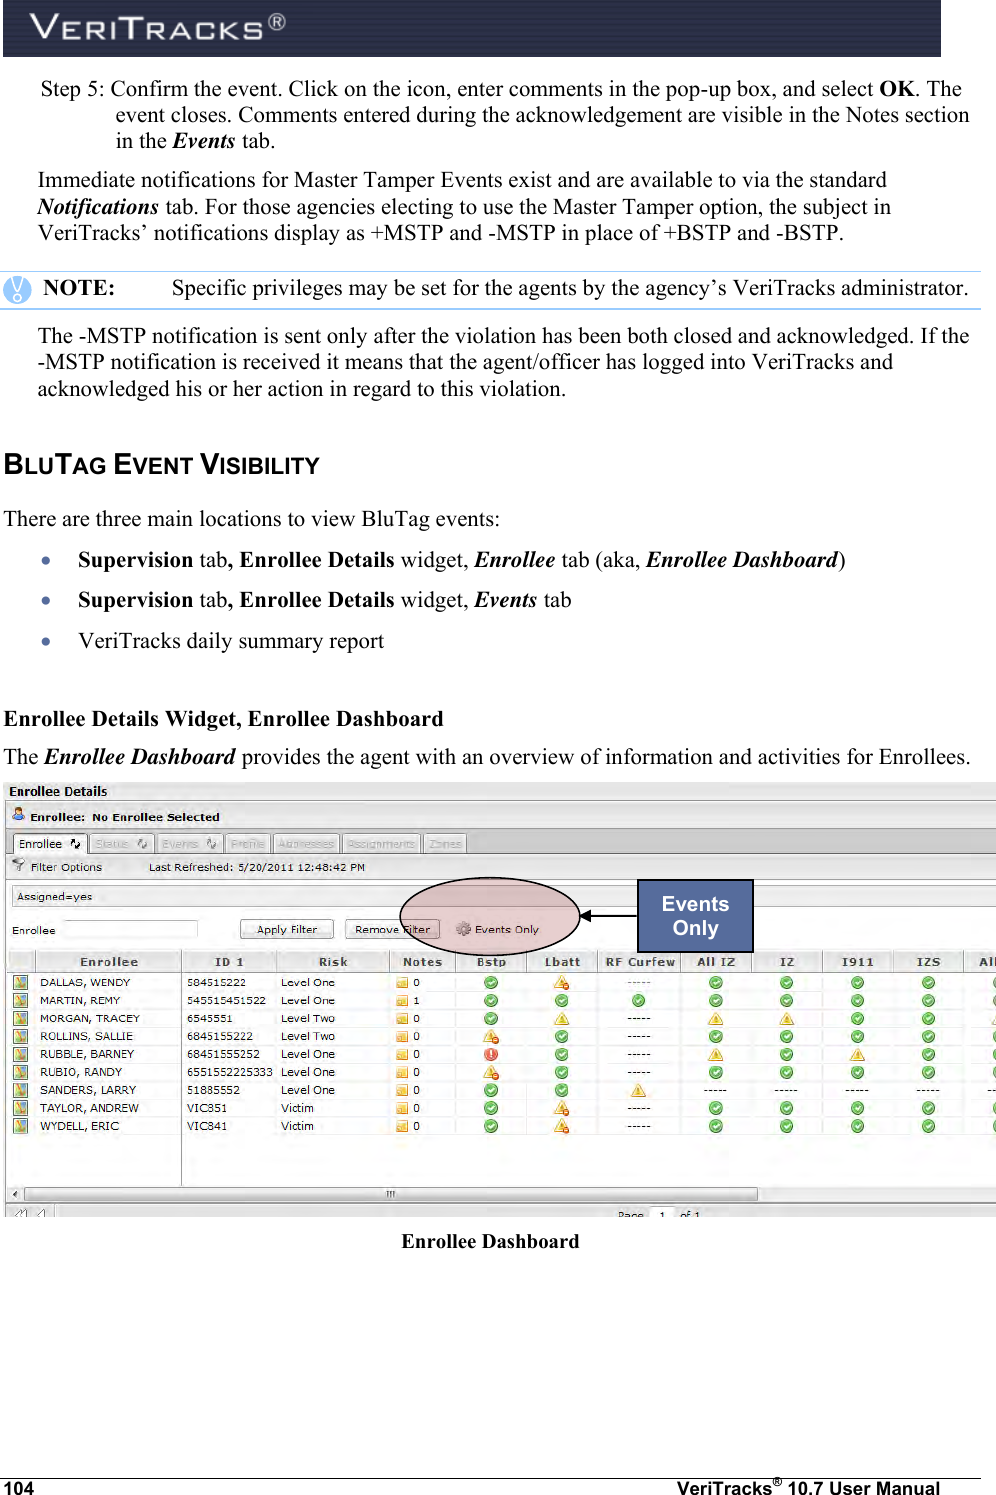
![VeriTracks® 10.7 User Manual 105 To view current Enrollee events: 1. Launch the Supervision tab, select the Enrollee Details widget. 2. Select Events Only (adjacent to the icon). All enrollee events within the previous 48 hours display. Enrollee Details Widget, Events Tab Another option for viewing individual enrollee is to go to the Events tab within the Enrollee Details widget. To view Enrollee events for the past 48 hours: 1. Launch the Supervision tab, select Enrollee Details widget. 2. Select an Enrollee name on the Enrollee tab, then 3. Select the Events tab. The screen refreshes to display the listing of events for this Enrollee over the previous 48 hours. To view any Enrollee Events in history: Users have the option of modifying event date range to review event history for any period of time the enrollee was enrolled. 1. From the Events tab, select the Filter icon. 2. Place your cursor in the Start Date field and/or End Date field; a pop-up calendar displays - select the start and end dates. 3. Locate and select the Filter button. The screen refreshes to display all events that occurred within the selected date range. Use the scroll arrows to review events below the free-form text block. Two additional filter functions are: By event type. To select multiple event types, hold down [Ctrl] and select the event(s).](https://usermanual.wiki/Satellite-Tracking-of-People/1106MM1/User-Guide-1721660-Page-119.png)


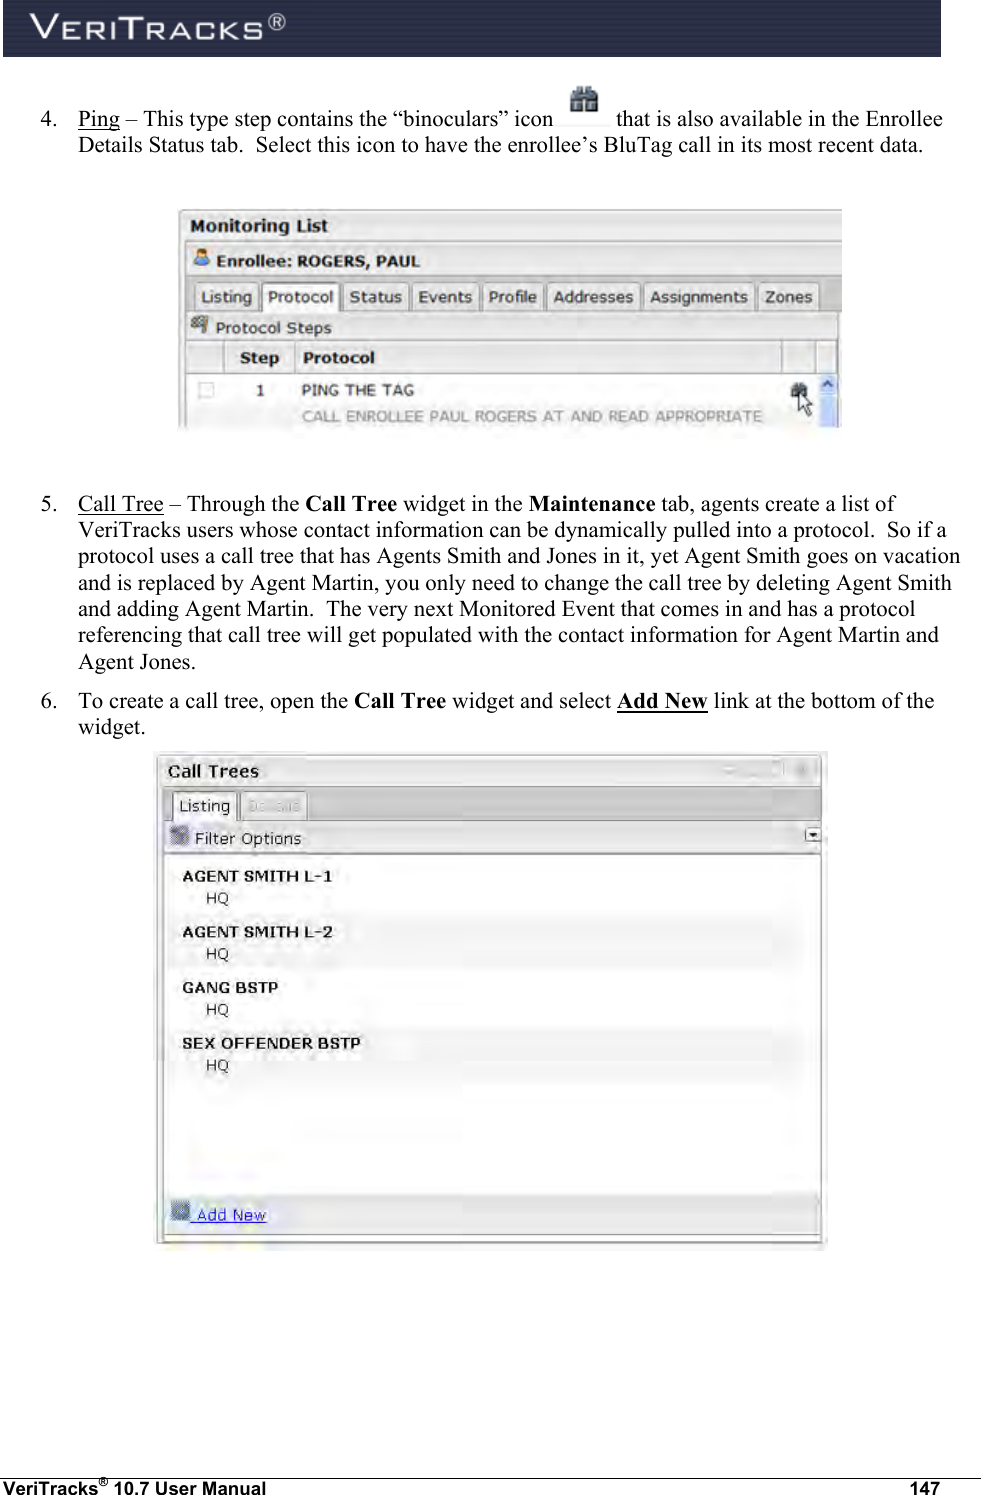
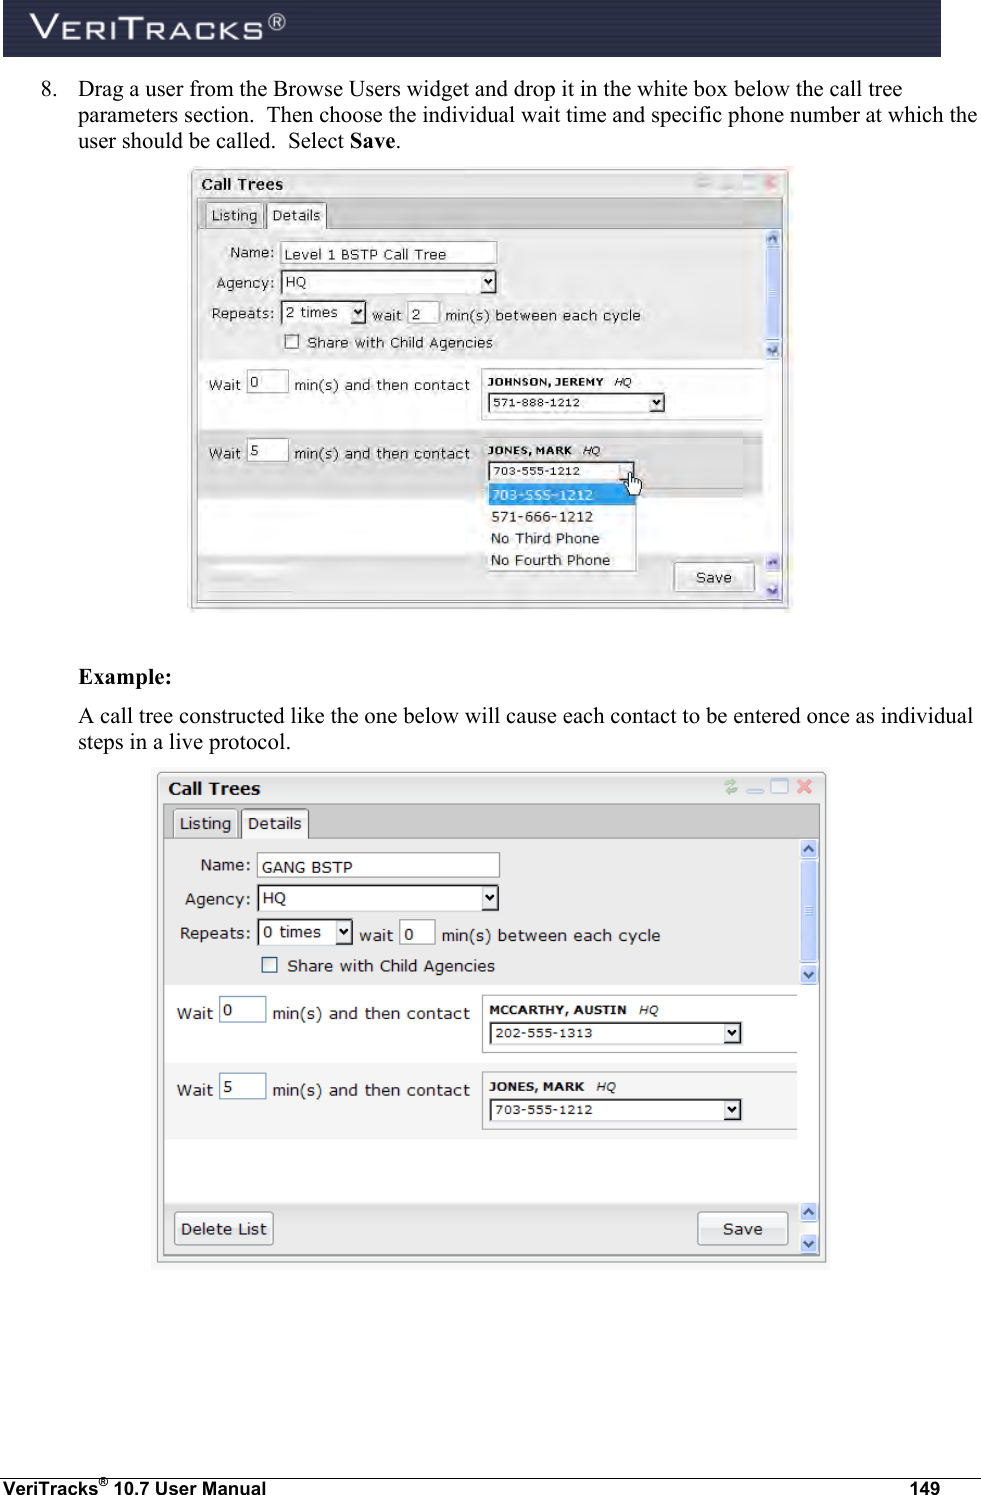
![148 VeriTracks® 10.7 User Manual Enter a name for the call tree, designate an agency, and click the Save button. 7. Set the parameters for the call tree: Repeats – this action determines how many times the steps will be created in the live protocol. If the ‘repeats’ setting is 2, the steps will be created three (3) times in the live protocol (one original and two [2] repeats). Wait between cycles – this action determines the time that will be inserted between the last step of a cycle and the first step of the next cycle (if there is a repeat value greater than zero[0]). Share with child agencies – This action permits users to create a call tree in a parent ORI and make it available in all of that ORI’s children’s view as well.](https://usermanual.wiki/Satellite-Tracking-of-People/1106MM1/User-Guide-1721660-Page-162.png)