Scientific Toys 5201-24GR R/C CAR User Manual OI 6127 27810 Eng ai
Scientific Toys Ltd R/C CAR OI 6127 27810 Eng ai
User Manual
HOW TO PLAY
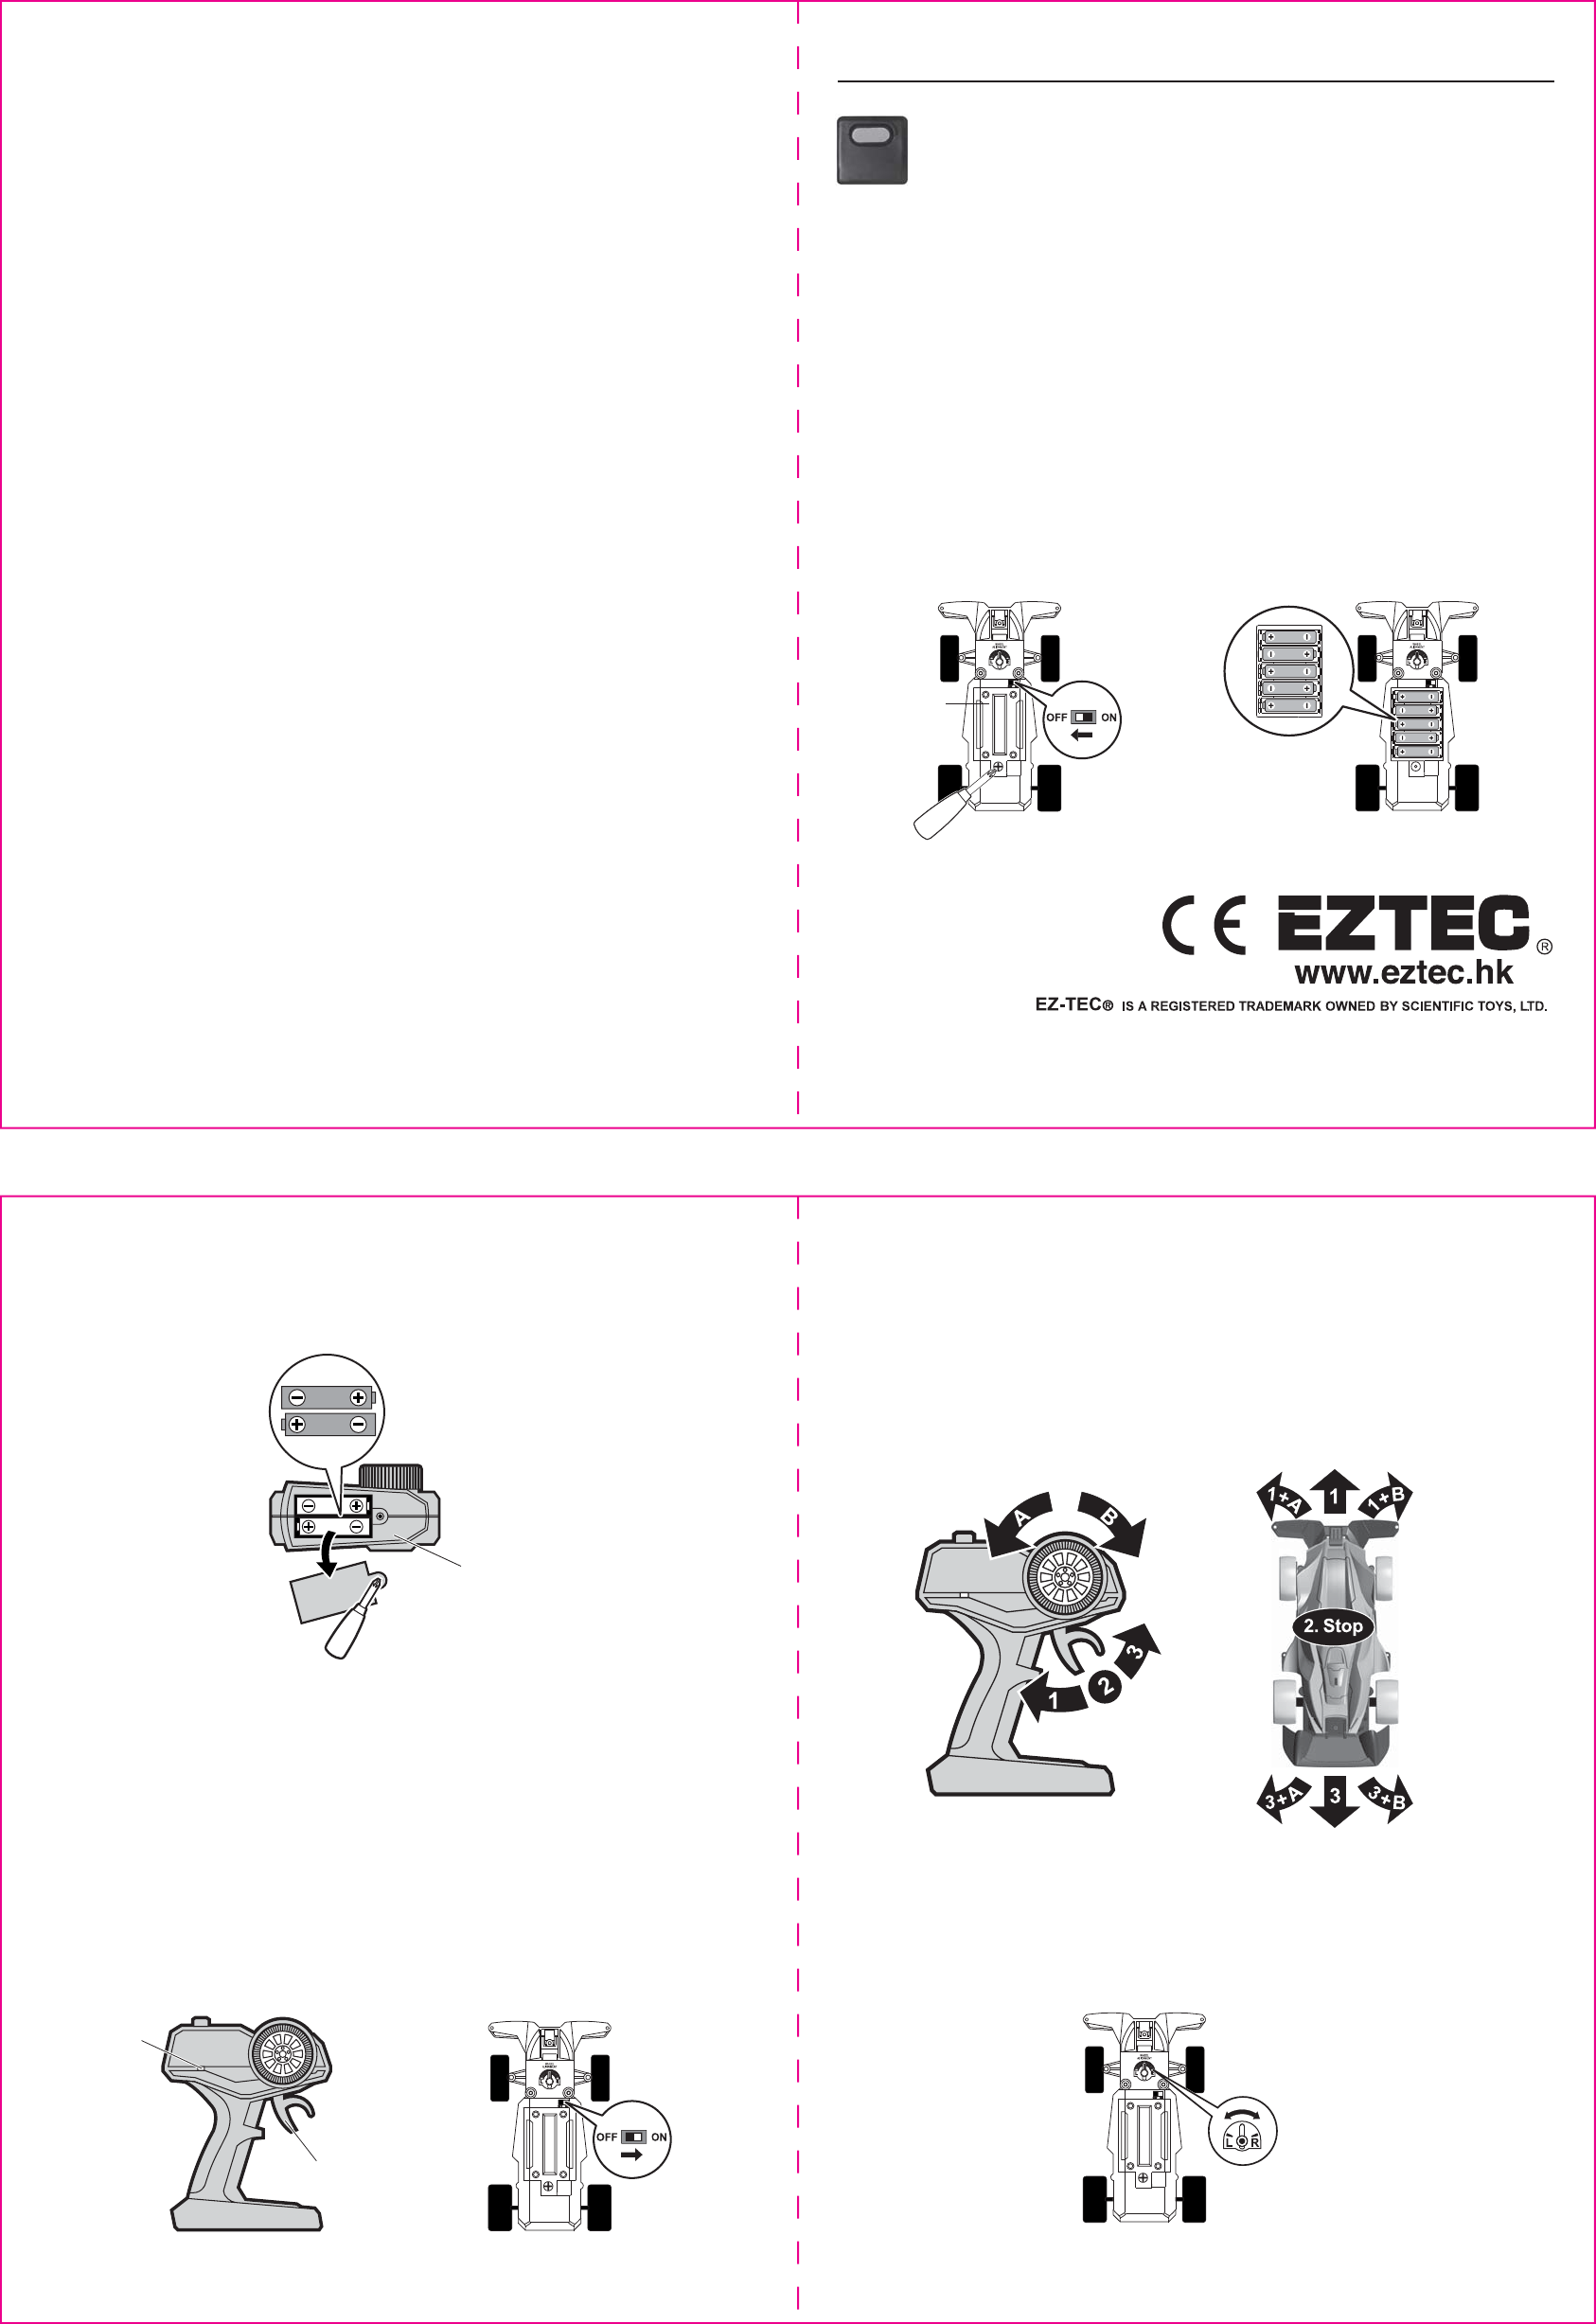
PAIRING TRANSMITTER WITH VEHICLE
1. Turn ON the vehicle (See Diagram #5).
2. Install 2 x AA battery in the transmitter, the pairing LED light on the transmitter will flash
(See Diagram #3).
3. If pairing success, the pairing LED light will turn OFF
4. You must pairing the transmitter with the vehicle within 45 seconds, after 45 seconds you
must push the control on the transmitter to pair again.
5. You must repeat pairing again when the transmitter needs to replace new batteries.
DIAGRAM 5
DIAGRAM 6
© 2017 SCIENTIFIC TOYS LTD. 1108, TOWER B,
14 SCIENCE MUSEUM ROAD, TSIMSHATSUI, HONG KONG.
PRINTED IN CHINA
O.I. NO.6127
OPERATING INSTRUCTIONS:
PERFORMANCE TIPS
1. Operate your vehicle in a safe place. Do not drive in the street. Avoid driving through sand, mud, and water,
which can impair the performance of your vehicle.
2. Do not leave your vehicle near sources of heat or under direct sunlight for long periods of time.
3. Do not expose your transmitter or car to humidity for long periods of time as dampness can damage interior
mechanism.
4. Clean the toy vehicle regularly with a slightly damp cloth.
5. When the vehicle slows down or begins to move erratically, replace the batteries with new ones.
6. Concrete walls, metal posts, wire fence, and other electrical appliances and machineries can interfere with the
transmission signal of your transmitter and result in erratic performance of your car. In this case, change to a
different location.
7. If another radio control vehicle or CB radio is operating at your same location, they may interfere with the
performance of your vehicle.
8. Alkaline batteries are highly recommended.
BATTERY CAUTIONS
1. For maximum performance, use alkaline batteries.
2. Do not mix old and new batteries.
3. Do not mix alkaline, standard (carbon-zinc), or rechargeable batteries
4. Do not recharge non-rechargeable battery.
5. Ensure batteries are inserted with the correct polarity.
6. Remove batteries when toy is not in use.
7. Remove exhausted batteries from toy and dispose of in accordance with the makers recommendation
8. Rechargeable batteries should only be charged under adult supervision.
9. Remove rechargeable batteries from toy before charging.
10. The supply terminals are not to be short-circuited.
Battery/Batteries should be installed by adult only. The toy is not intended for children under 3 years old.
Keep packing for reference since it contains important information.
Exhausted batteries are to be removed from the toy.
WARNING:
NOT SUITABLE FOR CHILDREN UNDER THE AGE OF 36 MONTHS AS SMALL PART(S) AND ENTANGLEMENT/
STRANGULATION HAZARDS.
PACKAGING MATERIALS ARE NOT TOYS.
PLEASE REMOVE ALL PACKAGING AND PACKING TAGS/WIRES BEFORE GIVING THIS TOY TO YOUR CHILD.
COLOUR, DESIGNS AND DECORATIONS MAY VARY FROM THOSE SHOWN IN THE PHOTOGRAPHS.
HAIR ENTANGLEMENT MAY RESULT IF THE CHILD'S HEAD IS TOO CLOSE TO THE MOTORISED UNIT OF THIS TOY.
FCC Information
This equipment has been tested and found to comply with the limits for a Class B digital device, pursuant to Part 15 of
the FCC Rules. These limits are designed to provide reasonable protection against harmful interference in a residential
installation. This equipment generates, uses, and can radiate radio frequency energy and, if not installed and used in
accordance with the instructions, may cause harmful interference to radio communications. However, there is no
guarantee that interference will not occur in a particular installation. If this equipment does cause harmful interference
to radio or television reception, which can be determined by turning the equipment off and on, the user is encouraged
to try to correct the interference by one or more of the following measures:
• Reorient or relocate the receiving antenna.
• Increase the separation between the equipment and receiver.
• Connect the equipment into an outlet on a circuit different from that to which the receiver is connected.
• Consult the dealer or an experienced radio/TV technician for help.
If you cannot eliminate the interference, the FCC requires that you stop using your equipment. Changes or
modifications not expressly approved by the party responsible for compliance could void the user’s authority to
operate the equipment. This device complies with Part 15 of the FCC Rules. Operation is subject to the following two
conditions: (1) this device may not cause harmful interference, and (2) this device must accept any interference
received, including interference that may cause undesired operation.
WARNING:
NOT SUITABLE FOR CHILDREN UNDER
3 YEARS OF AGE, DUE TO SMALL PARTS.
BATTERY INSTALLATION
BATTERY REQUIREMENT:
Vehicle: 5 x AA battery (not included)*USE ONLY ALKALINE AAA BATTERIES
Transmitter: 2 x AA batteries (not included)
ATTENTION PARENTS
It is recommended that this toy and all accessories be periodically examined for potential
hazards and that any potentially hazardous parts be repaired or replaced.
HOW TO INSTALL BATTERY IN VEHICLE
1. Turn over the vehicle and push the ON/OFF to "OFF" position. (See Diagram #1)
2. Open the battery cover. (See Diagram #1)
3. Insert 5 x “AA” alkaline batteries by matching the (+) and (–) signs as indicated in the
battery compartment (See Diagram #2)
4. Replace the battery cover.
DIAGRAM 1 DIAGRAM 2
5 x AA
alkaline
batteries
HOW TO INSTALL BATTERY IN TRANSMITTER
1. Remove battery cover and install 2 x AA batteries by matching + and – poles as indicated
in the battery compartment. (See Diagram #3)
2. Replace the battery cover.
Note: Remove battery after you have finished using your vehicle.
Unscrew
to open
DIAGRAM 3
Bottom Panel
of transmitter
2 x AA
batteries
DIAGRAM 4
Trigger
LED
Notes:
1. If pairing failed, reinstall the battery of transmitter, move closer and then try again.
2. If more then one vehicle are pairing at the same time, pair each vehicle one by one.
Vehicle has memory to store the paired data, no need to pair each time play until replace
the battery in transmitter
OPERATION
1. Operate the vehicle with the transmitter (See Diagram #6).
2. Turn OFF the vehicle after playing and remove all batteries from the transmitter and the car.
3. To adjust steering alignment, adjust the "Steering Alignment Lever" on the underside of the
vehicle when the vehicle does not run straight forward (See Diagram #7).
DIAGRAM 7
Steering
alignment
lever
TRY ME UNIT:
Try Me button box is for demonstration purpose only.
Dispose of this unit by detaching the wires connecting
to the car before playing.
TRY ME
UNIT
Unscrew
to open
Battery cover On/Off
switch
On
SIZE: 297MM X 210MM OI PN#65-6127-000-0100