Se Jin Electron SMP-2010U MP3 Internet Music Player User Manual SMP 2010U UserMan
Se Jin Electron Inc MP3 Internet Music Player SMP 2010U UserMan
UserManual.wiki
>
Se Jin Electron
>
SMP 2010U User Manual
users manual
Navigation menu
Upload a User Manual
Namespaces
Wiki Guide
HTML
PDF
Info
Views
User Manual
Discussion / Help
Navigation
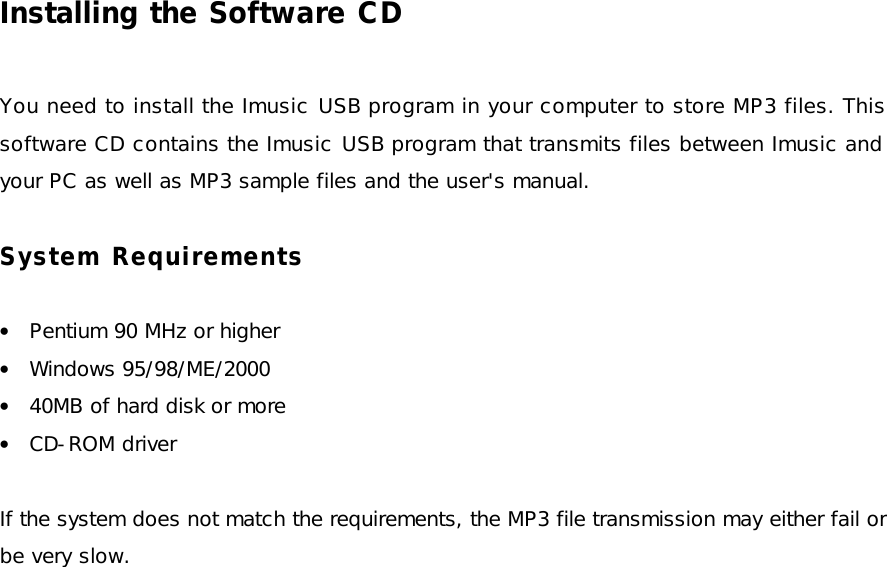

![Installing the Driver STEP1 After you have installed the Imusic USB, connect the MP3 Player to USB port of your PC. You will see the screen on the left side. STEP2 After you click on “search for most suitable driver for this device”, click on ‘Next’. STEP3 You will see the window to appoint the path of its driver database. After you click on “specify location”, specify the path as following. [c:] -> {Program Files} -> [Imusic USB] -> [Driver Files] (After full installation of Imusic USB software, you will find a new folder as above and data file will be in the folder.) STEP4 Click on ‘Next’. STEP5 You finish the installation of driver if click on ‘Finish’.](https://usermanual.wiki/Se-Jin-Electron/SMP-2010U/User-Guide-159545-Page-9.png)