Select Comfort 5000A NXT Remote User Manual
Select Comfort Corp NXT Remote
User Manual

TEMPERATURE BALANCING LAYER INSTRUCTION MANUAL
Dual
TempSM
If you ever have product questions or need additional assistance obtaining optimal comfort,
please visit us at sleepnumber.com or call 1.800.472.7185
Representatives are available:
(Central Standard Time):
Monday–Friday 8 a.m. – 6 p.m.
Saturday 8:30 a.m. – 5 p.m.
Sunday Closed
Connect with us on Facebook and Twitter
Facebook.com/SleepNumber Beds.com/Twitter
Help is just a click or phone call away.
®
Click to see DualTemp™
in action
FPO
2:00 2:00
Sara
TEMPERATURE BALANCING LAYER INSTRUCTION MANUAL
Dual
TempSM
If you ever have product questions or need additional assistance obtaining optimal comfort,
please visit us at sleepnumber.com or call 1.800.472.7185
Representatives are available:
(Central Standard Time):
Monday–Friday 8 a.m. – 6 p.m.
Saturday 8:30 a.m. – 5 p.m.
Sunday Closed
Connect with us on Facebook and Twitter
Facebook.com/SleepNumber Beds.com/Twitter
Help is just a click or phone call away.
2:00 2:00
Sara
5 6
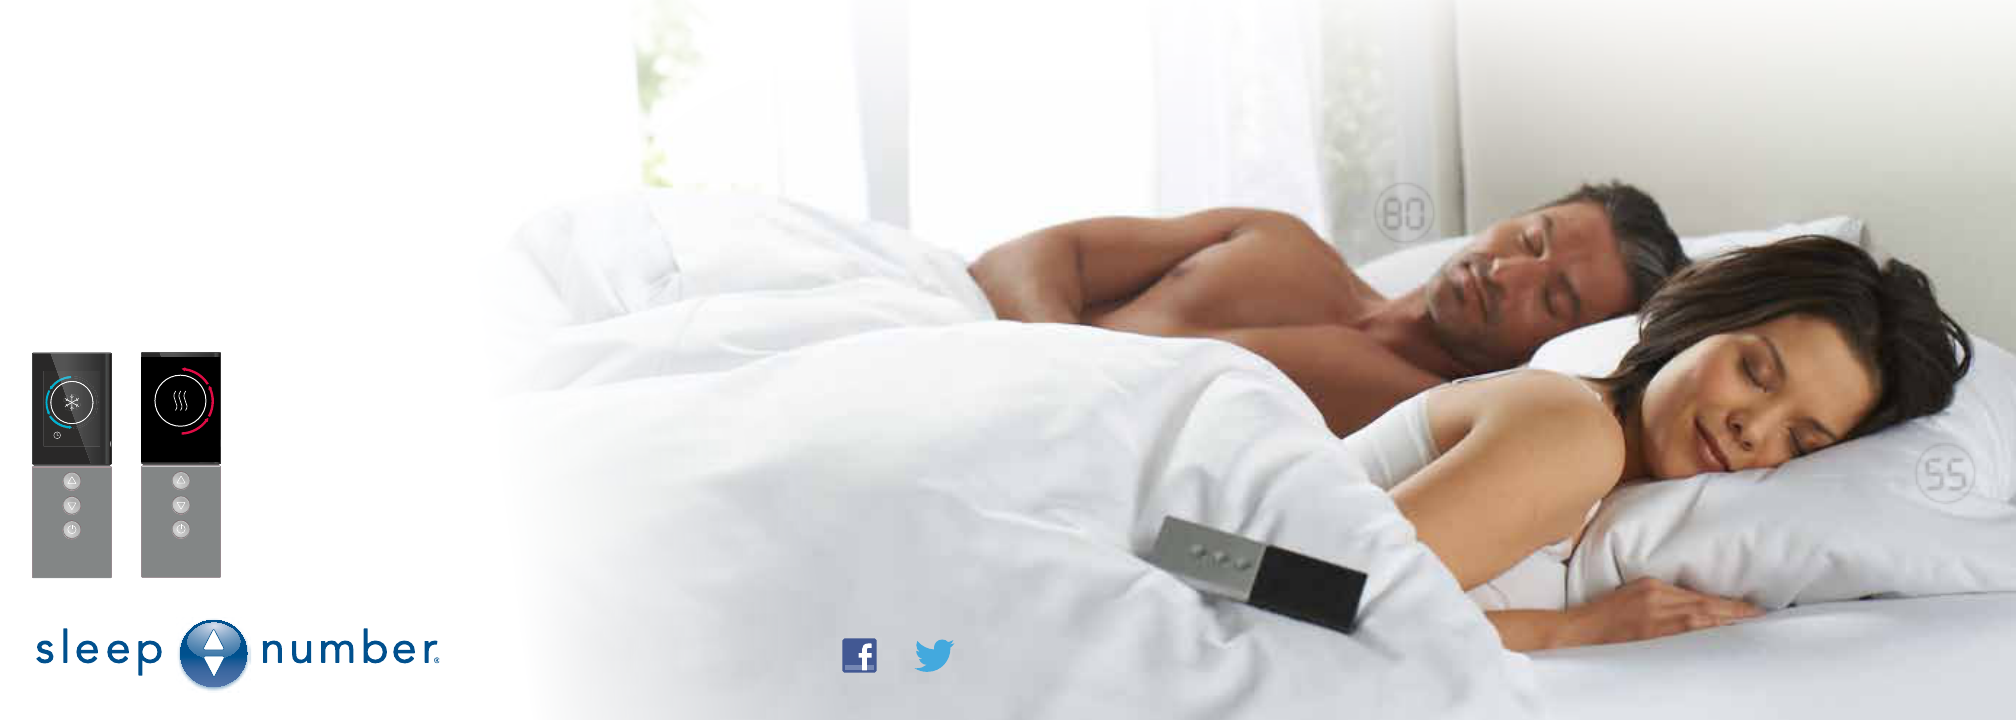
The DualTemp™ system features an extraordinary comfort
layer that can be added to any bed and an innovative
cooling and heating source. It allows you to select your ideal
temperature on each side at the simple touch of a button.
So you both can achieve a balanced, blissful night’s sleep.
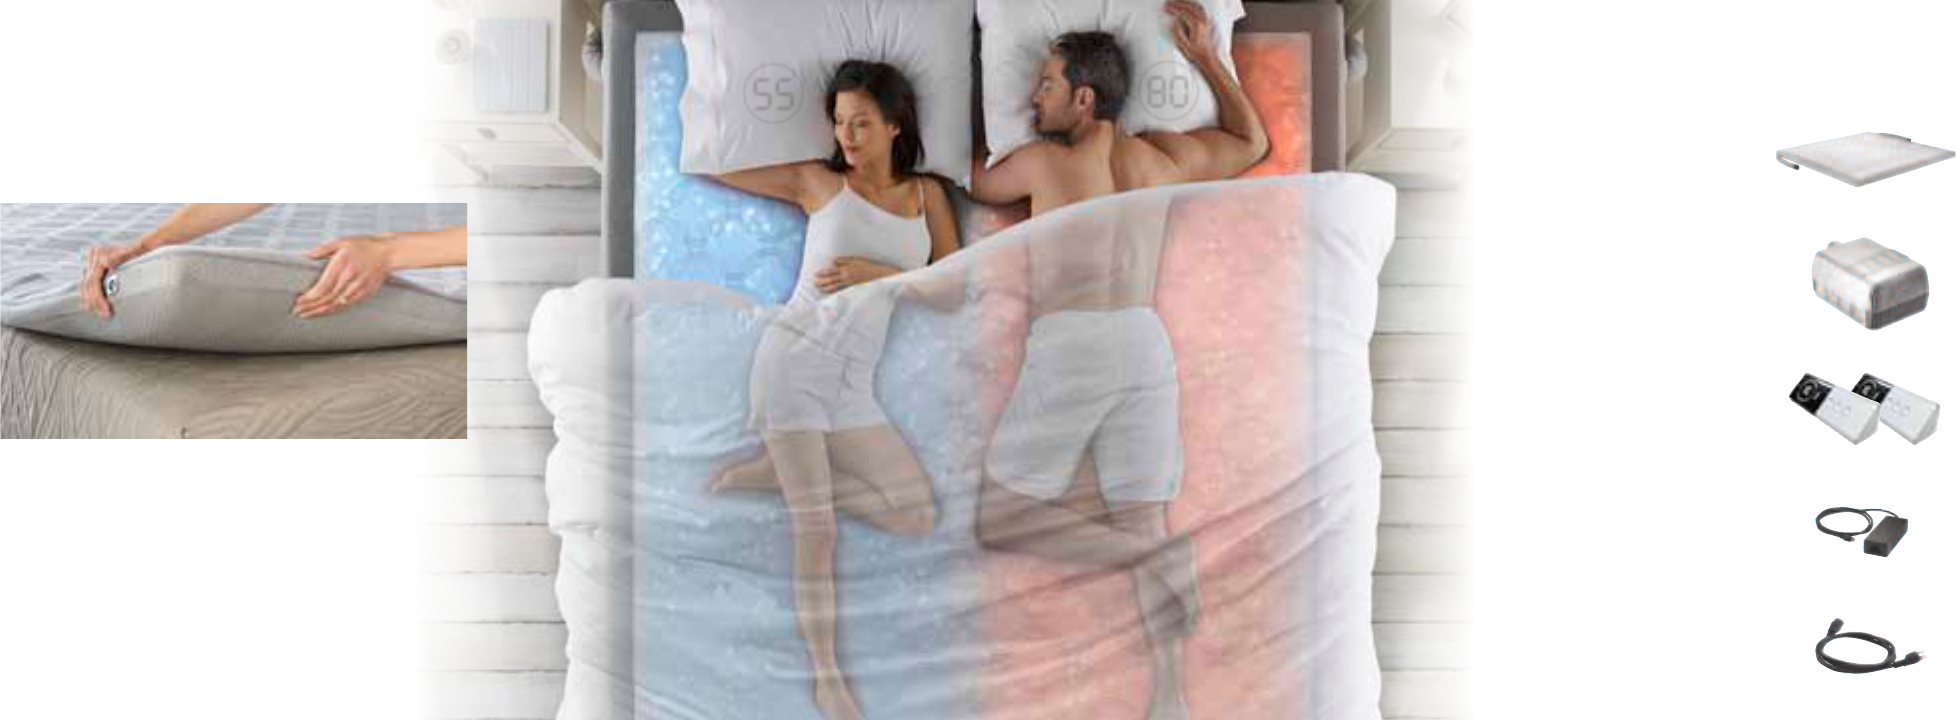
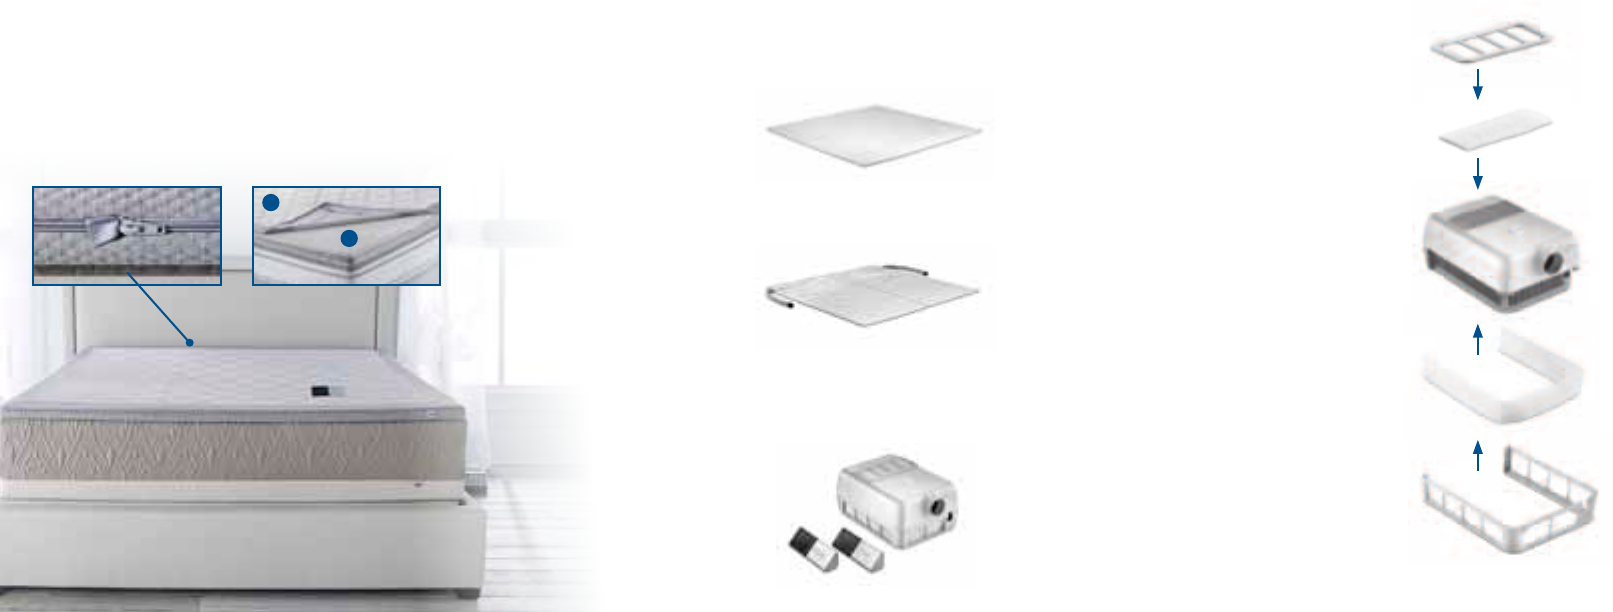
DualTemp™ Comfort Layer (1)
Heating and Cooling Source (2)
Remote (2)
Batteries included
Power Supply (2)
Power Cord (2)
DualTemp™
Layer
It’s a new degree of sleep.
What’s Inside.
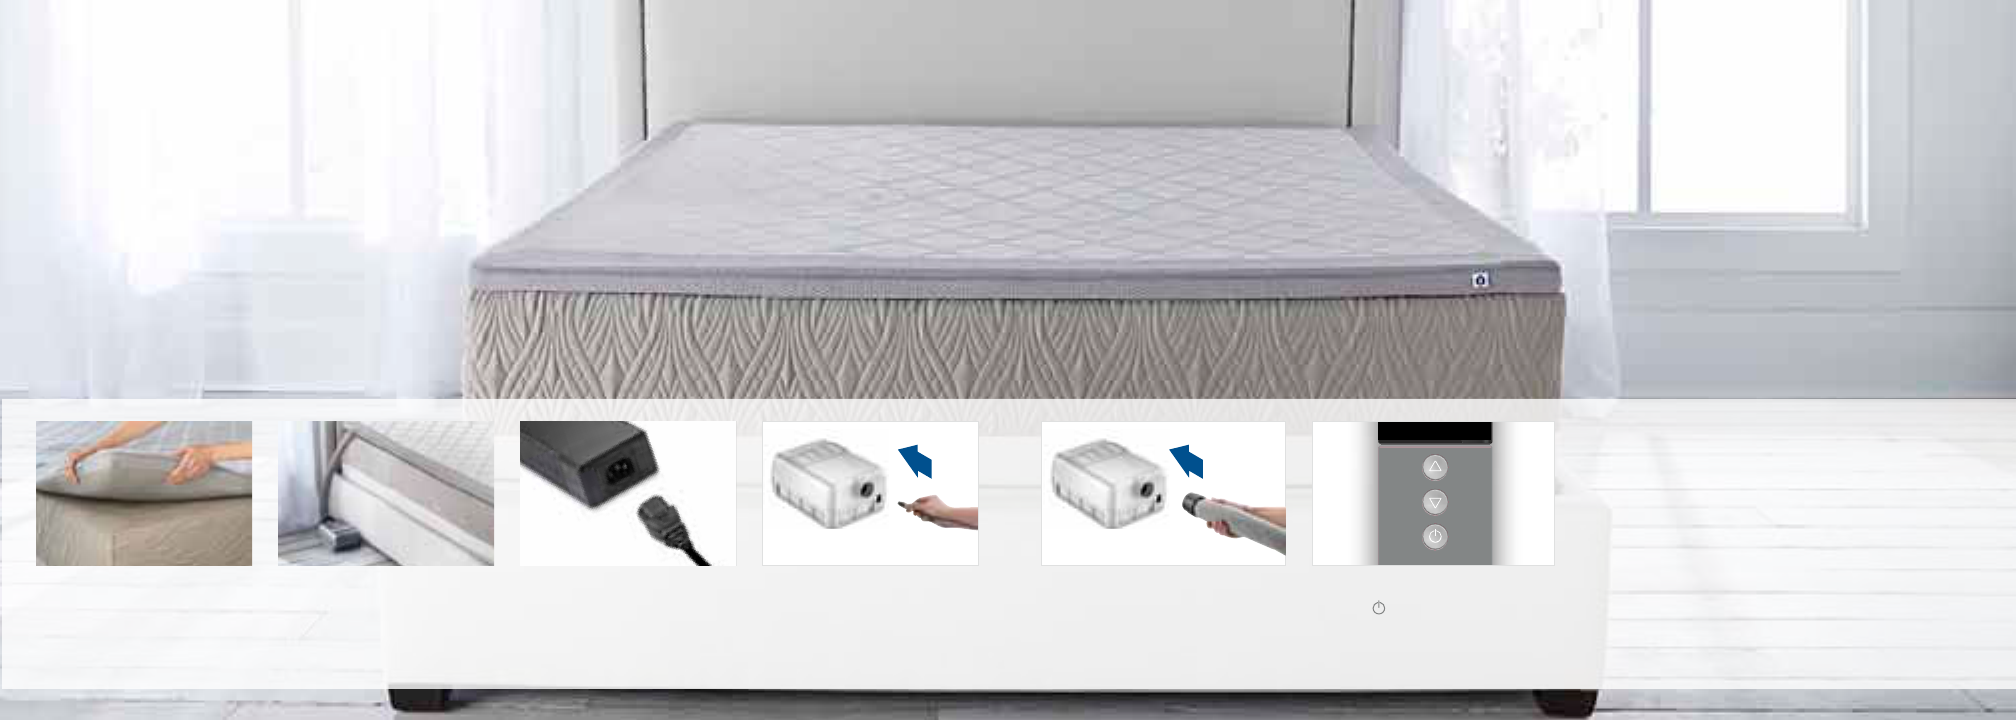
Assembly
Follow these 6 simple steps to correctly assemble
your DualTemp™ comfort layer.
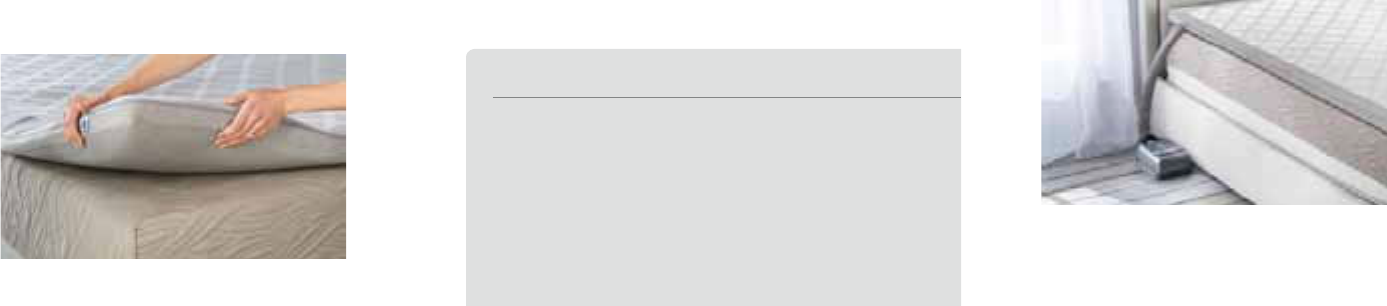
Place the DualTemp™ comfort
layer on the bed with the lighter
side facing up.
1
Place the heating and cooling
source on the floor next to
your bed or underneath it on
a level surface.
2
Insert batteries in the remote and
press the button to bind the remote
to the heating and cooling source.
2:00
Sara
6
Connect the power supply to
the heating and cooling source
and to the power cord. Plug the
power cord into an outlet or surge
protector.
3
Plug the power supply into the
first heating and cooling source.
4
Attach the connector to the heating
and cooling source by aligning the
notch on the connector to the silver
ball on the heating and cooling source.
Push together until you hear a click.
5
Repeat steps 2–6 on the other side of the DualTemp™
comfort layer with the second heating and cooling
source and it’s remote.
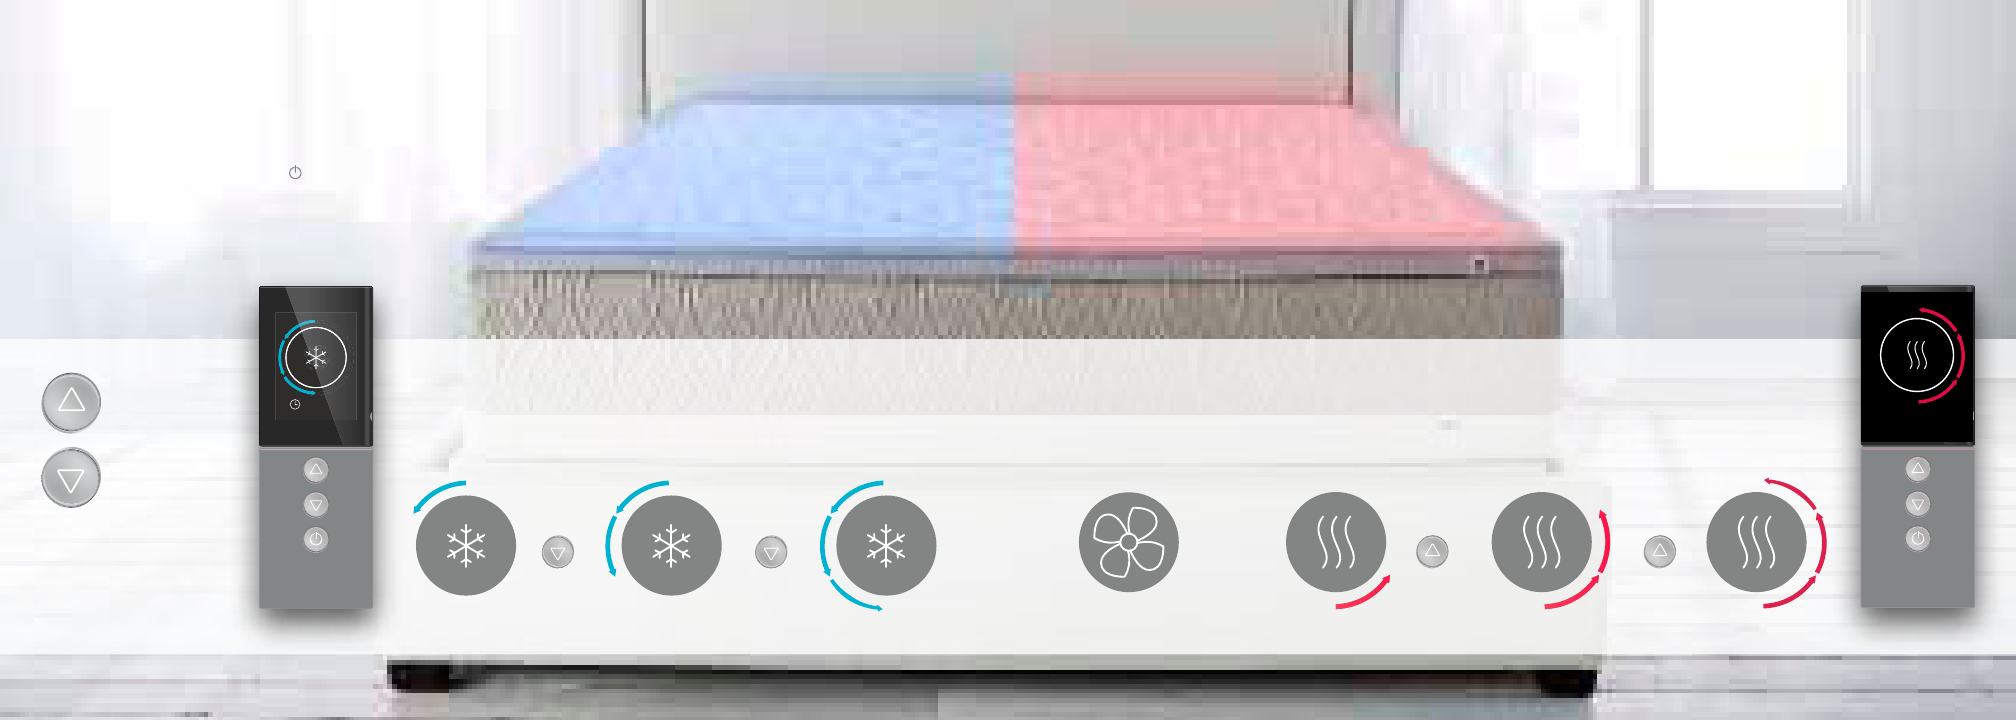
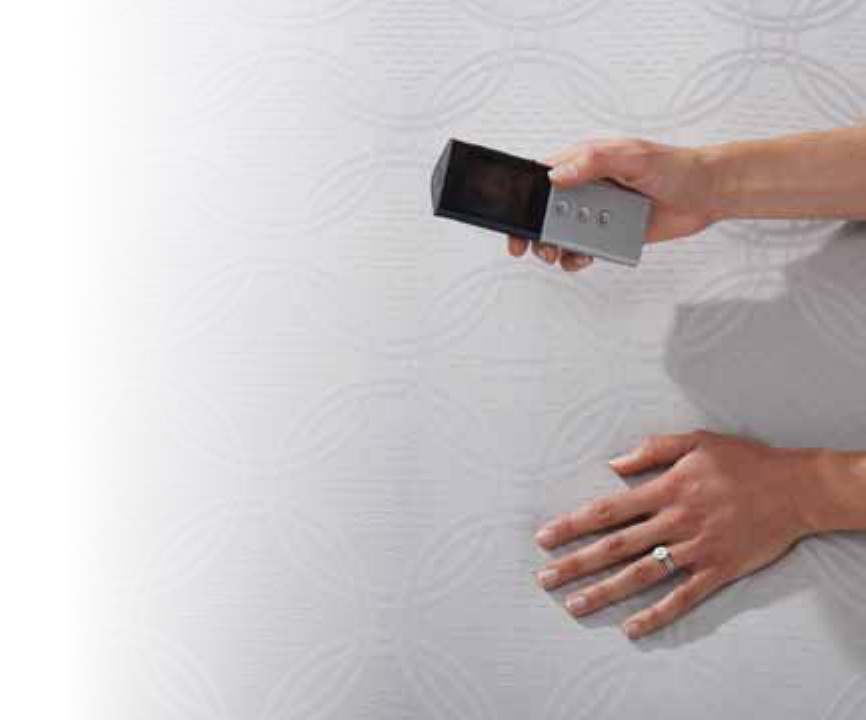
Remote Function
Use the up/down buttons
to control the warming/
cooling levels
Cooling levels
low medium high
2:00
Heating levelsFan
low medium high
After installing batteries, press the button and follow
the on-screen instructions to set up your remotes.
2:00
Sara
There are three levels of cooling, with the fan speed increasing as the setting
gets cooler. The cool air circulates underneath you to keep you sleeping cool
and comfortably, so you won’t wake up hot.
Blows room-temperature
air underneath you for
extra breathability;
it may feel cool.
There are three levels of heating, with the fan speed increasing as the setting
gets warmer. The warm air circulates underneath you to keep you comfy and
cozy with a warm sleeping environment.
Optimize DualTemp™ comfort layer performance
• Tomaximizethermalcomfort,itisrecommendedtoturnon
the DualTemp™ comfort layer 20 minutes prior to going to
bed. Keep the layer covered with a blanket/comforter/quilt
to maintain the desired temperature.
• TheDualTemp™ comfort layer is meant to be used on top of
your mattress/mattress pad and underneath a fitted sheet
only. For best results, place a blanket/comforter/quilt on top
of the bed to create a comfortable micro-climate.
• DonotplaceamattresspadontopoftheDualTemp™
comfort layer. Doing so will greatly reduce the performance
of the system.
• Usesheetsmadefromabreathablematerialthatwillallow
the air to flow through.
Flannel and micro-fleece sheets
are not recommended; they will reduce the airflow and the
effectiveness of the system.
• Optional:Formoreairowtothefootofthebed,orto
reduce the level of white noise created from air blowing in
the DualTemp™ comfort layer, you may place the layer on the
bed with the connectors at the foot of the bed. Be sure the
lighter gray side of the comfort layer is facing up.
• Ifyouoftenwakeuptoowarmortoocold,itis
recommended to set the timer for your DualTemp™
system to turn off after 3-5 hours.
Optimize heating and cooling source performance
• Systemairtemperatureisdependentontheroom
temperature. In a cool room, the settings will be cooler,
than in a warmer room.
• TheDualTemp™ system is not a replacement for
air-conditioning or heating your home.
• Ifyouhaveabedskirtandwanttooptimizethecomfort
layer’s thermal performance you may need to place the
heating and cooling source next to the bed vs. underneath,
or consider removing your bed skirt.
• Ifyoustoreitemsunderyourbed,ensureyouhavea1foot
open perimeter around the heating and cooling source.
• Theltersontheheatingandcoolingsourceshouldbe
cleaned or replaced every 6 months. They may be washed
and reused or additional filters may be purchased from
Sleep Number. See page 13 for instructions on cleaning/
replacing filters.
NOTE: When using the cooling mode in a high humidity
environment, water can collect in the bottom of the
heating and cooling source. The water will automatically
be removed during the refreshing system cycle. Do not
unplug and avoid moving the heating and cooling source
until the cycle is complete.
Warnings
• TheDualTemp™ System is not to be used with an
adjustable base.
• Theconnectorattheheadofthebedshouldnotbe
pinched between the bed and any other object, as this will
degrade system performance.
DualTemp™ System Operation
Using the Timer
The timer may be set to turn off the DualTemp
™
system after a
specified length of time. The timer can be set for 1–9 hours. To
set the timer, press the button on the side of the remote. Then
press the up arrow on the front of the remote until you reach the
desired length of time. If you do not set the timer, the system will
automatically shut off after 10 hours.

My heating and cooling source will not turn on
• Makesurethepowersupplyissecurelypluggedintothe
heating and cooling source and the power cord is securely
plugged into a working wall outlet or surge protector.
NOTE: A grounded electrical surge protection device is
recommended. Test outlet by plugging in another working
appliance.
• Checktomakesuretheoutletisnotcontrolledbya
wall switch.
• Verifythatthepowersupplylightisilluminated.
My DualTemp™ comfort layer is not getting warm/cool
• ItisimportanttoturnontheDualTemp™ comfort layer for 20
minutes to achieve the desired temperature.
•Thesystemwarms/coolsbasedontheroomtemperature.
If your room is extremely cold it may affect the comfort
layer’s performance. Increasing the temperature of your
bedroom should assist the layer in achieving the warmth
level desired.
•Iftheroomistoohotitmayaffectthelayer’sperformance.
Decreasing the temperature of your bedroom should
assist the layer in achieving the level of coolness desired.
• Coverthebedwithablanket/comforter/quilttoinsulateand
keep the warm/cool air from escaping
My remote does not work
•Checkthebatteries.Ifthebatteriesarenotworkingthey
should be replaced.
• Verifythatyouareusingthecorrectremoteforthe
appropriate side of the bed.
My heating and cooling source does not shut off
• Therefreshingsystemcyclemayrunthedryingfansupto14
hours after use. Once the system has completed refreshing
it will shut off on its own.
One or both of the sides of the DualTemp™ system turn off
while in use
• TheDualTemp
™
system is designed for 10 hours of continuous
use. There is an automatic shutoff after 10 hours of use.
• Checktoensuretheconnectorisattachedtotheheatingand
cooling source.
• Verifythatthesleeptimerwasnotset.
The foam has an odor
• WhenremovingyourDualTemp™ comfort layer from its
packaging, you may notice a new product scent. The scent
is non-toxic, normal and is associated with the production of
the foam.
• Ifyouwishtoreducethevolumeofthescent,simplyallow
the product to air out in a well-ventilated, shaded, open
space for up to 48 hours.
The system is noisy
• Youmayexperiencethewhitenoiseofthefansasthey
operate the heating and cooling source. Wood or tile floors
may create slightly more white noise. Place a carpet or other
sound absorbing material directly beneath the heating and
cooling source.
• Operateatalowersettingtoreducewhitenoise.
My connector is not long enough or my heating and
cooling source does not touch the floor
• Placetheheatingandcoolingsourceonabookorboxto
lift it.
Troubleshooting
DualTemp™ comfort layer care
1. Outer Cover
• Machinewashgentlecycleincoldwater.Linedry.
NOTE: The top of the comfort layer can be zipped off for
washing. It is recommended that only the top portion of the
cover be removed for washing.
2. Comfort layer
• Ifnecessary,spotcleanfoamwithawarm,soapysolution
using a mild detergent. Do not saturate. Air dry.
3. Active layer
• Ifnecessary,spotcleanwithawarm,soapysolutionand
damp cloth using a mild detergent. Do not saturate.
Air dry.
4. Heating and cooling source and remote
•Wipebodyofheatingandcoolingsourceandremote
with a clean cloth dampened with a mild soap and water
solution. Do not immerse in water or place in dishwasher.
•Wipethedisplayscreenoftheremotewithaclean,dry,
lint-free cloth.
Replacing the filters
•Removethemagneticlterframefromthe
top of the heating and cooling source.
Next, remove the used filter and replace
it with the new shorter filter. Replace the
magnetic filter frame.
•Removethemagneticlterframefrom
the front/side of the heating and cooling
source. Remove the used filter and replace
it with the new longer filter. Replace the
magnetic filter frame.
•Replacementlterscanbeordered
at a Sleep Number® store, online at
sleepnumber.com or by telephone at
1-800-472-7185.
Cleaning the filters
•Removethemagneticlterframefromthetopof
the heating and cooling source, then remove the
filter. Replace the magnetic filter frame. Remove
the magnetic filter frame from the front/side of the
heating and cooling source and remove the second
(longer) filter. Replace the magnetic filter frame.
•Heatingandcoolingsourcelterscanbehand
washed with a mild liquid soap. Air dry the filters
completely before replacing them in the heating
and cooling source.
•Toreplacethecleanlters,removethemagnetic
filter frame from the top of the heating and cooling
source and place the shorter filter in the rectangular
space. Replace the magnetic filter frame. Repeat
with the magnetic filter frame on the front/side of
the heating and cooling source and the longer filter.
Product Care
1
2
30 Day In-Home Trial
We are confident that you will be completely satisfied with
your Sleep Number DualTemp™ system. Please take into
consideration that it may take several weeks to adjust and get
completely comfortable. After 30 days, if for any reason you
decide to return the system, contact Customer Service before
packing it up. Simply call us toll-free within 45 days of delivery
to authorize its return. Upon receipt, we’ll reimburse the full
purchase price less your initial shipping or Home Delivery and
Setup fees. You pay return shipping. All merchandise being
returned must be in good condition and be given a Return
Merchandise Authorization number from Customer Service,
which will expire 30 days from date of issue. All refunds
will be issued to the original method of payment within
approximately 15 business days after all products have been
received at Sleep Number. All shipping and incidental charges
to return the bed are the customer’s responsibility.
3-Year Limited Warranty
What is covered:
• SelectComfort(“SleepNumber”)providesalimited
warranty for your DualTemp™. The limited warranty provides
protection from defects in materials and workmanship for a
period of 20 years from the original purchase date. Warranty
is limited to product repair or replacement only.
• SleepNumber,atitsoption,willrepairorreplacethe
warranted product or component.
• SleepNumberreservestherighttosubstituteproducts
or components of equal or better quality, and to use or
deliver refurbished products or components in the repair or
replacement of any product under this Limited Warranty.
What is not covered:
• Conditionsarisingfromnormalwearandtear.(Conditions
arising from normal wear and tear include, but are
not limited to: foam compression or discoloration of
components)
• Damagefromtamperingwithanycomponentorfrom
opening the heating and cooling system
• Damagefrommisuseorabuseofthewarrantedproductor
component
• Damagefromlaunderingordry-cleaning
• Actsofnature,suchasbutnotlimitedtolightningdamage
• Sale,transferorotherdisposalofthewarrantedproduct
or component
What you must do:
• Returnthewarrantedproductorcomponentinsanitary
condition to an authorized Sleep Number® service center.
Sleep Number will incur the cost of shipping.
• PleasetelephoneourCustomerServicedepartmentatthe
number on the back cover to locate the nearest authorized
service center and arrange for the return of the warranted
product or component.
Important Safety Instructions
• Theremoteisnotatoyandshouldonlybeusedunder
adult supervision.
• Donotopenheatingandcoolingsourceorremote(s)
(with the exception of the battery compartment). The warranty
is void if these units are tampered with.
• Keeptheheatingandcoolingsourceandremote(s)awayfrom
heat sources such as radiators, heat registers, etc.
• Heatingandcoolingsourceandremote(s)arenotwaterresistant.
Do not use or store near water – for example, in a wet basement,
near an open window, etc
Warning: There are no user serviceable parts inside the heating
and cooling source. Any attempt to do so shall void the warranty.
FCC Compliance
Electrical components are rated for 110/120 voltage, 60Hz, 3.9 amp.
Components meet Class B digital device rating (Part 15, FCC rules) for
residential use.
Warning: Any attempt to make changes or modifications to the remote (e.g.
an intentional radiator) could void the user’s authority to operate the remote
according to FCC certification (section 15.231).
Per FCC 15.19(a)(3) and (a)(4) This device complies with part 15 of the FCC
Rules. Operation is subject to the following two conditions: (1) This device may
not cause harmful interference, and (2) this device must accept any interference
received, including interference that may cause undesired operation.
Warranty & Notification