Senao Co CB32106001 11g Wireless Multi-Client Bridge/ Router/AP/WDS User Manual NCB 3220 UsersManual V1 36 A
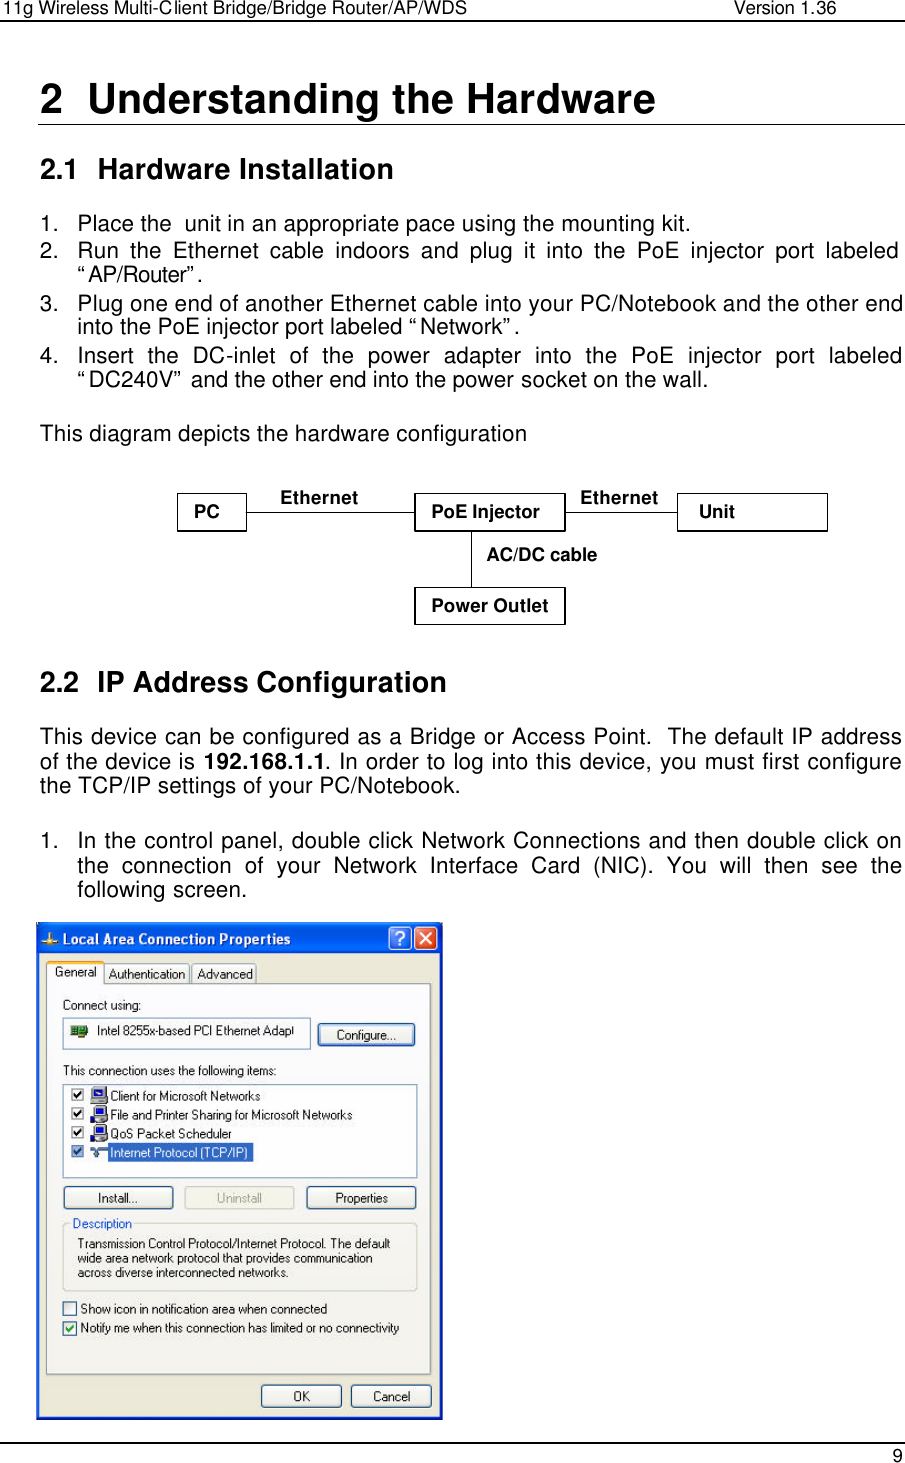
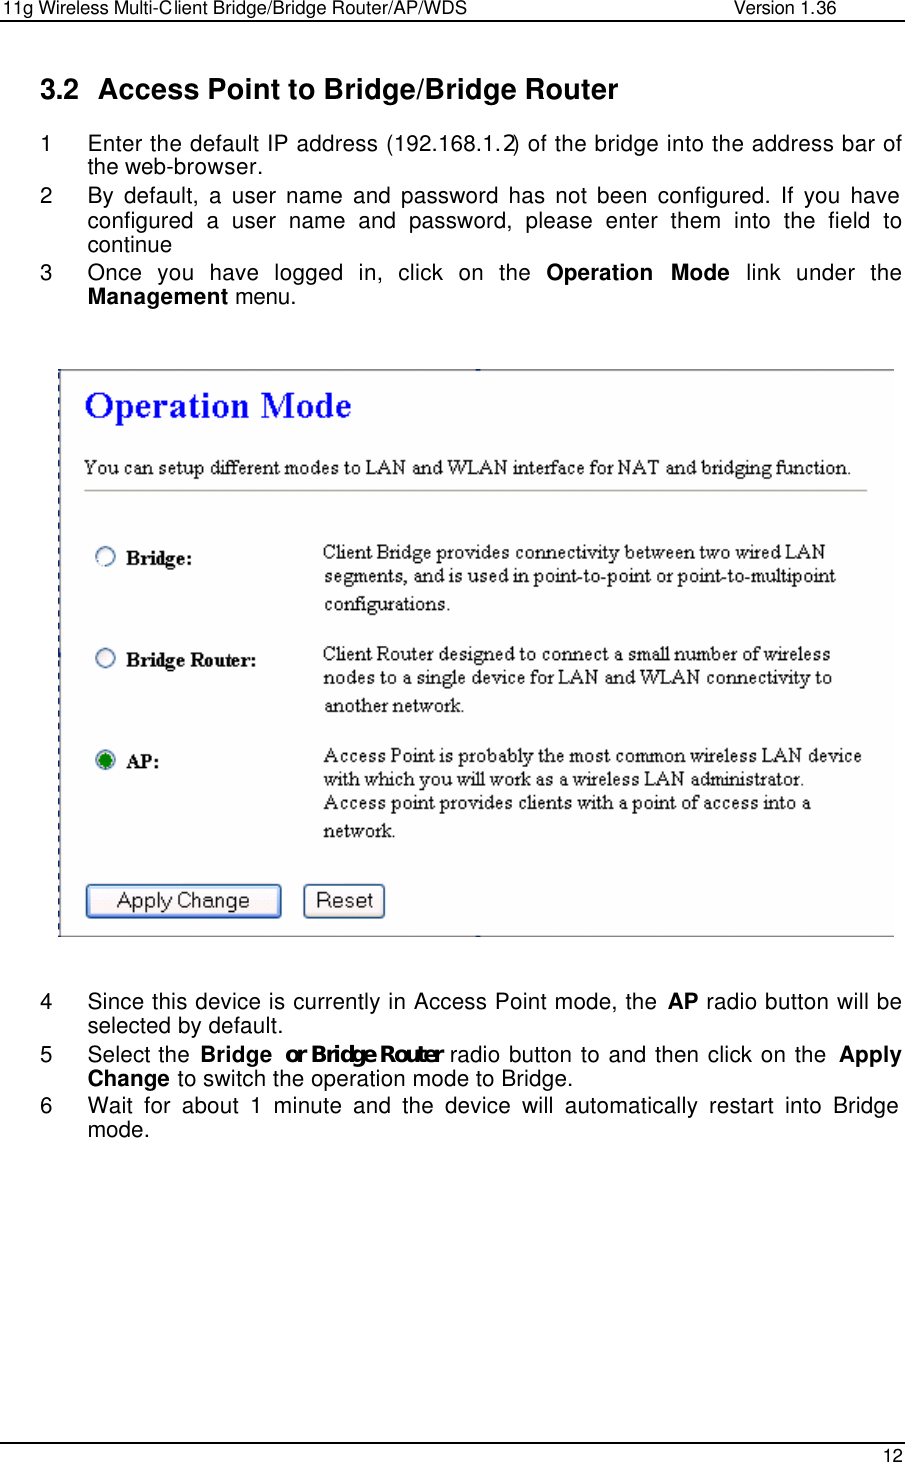
Senao International Co Ltd 11g Wireless Multi-Client Bridge/ Router/AP/WDS NCB 3220 UsersManual V1 36 A
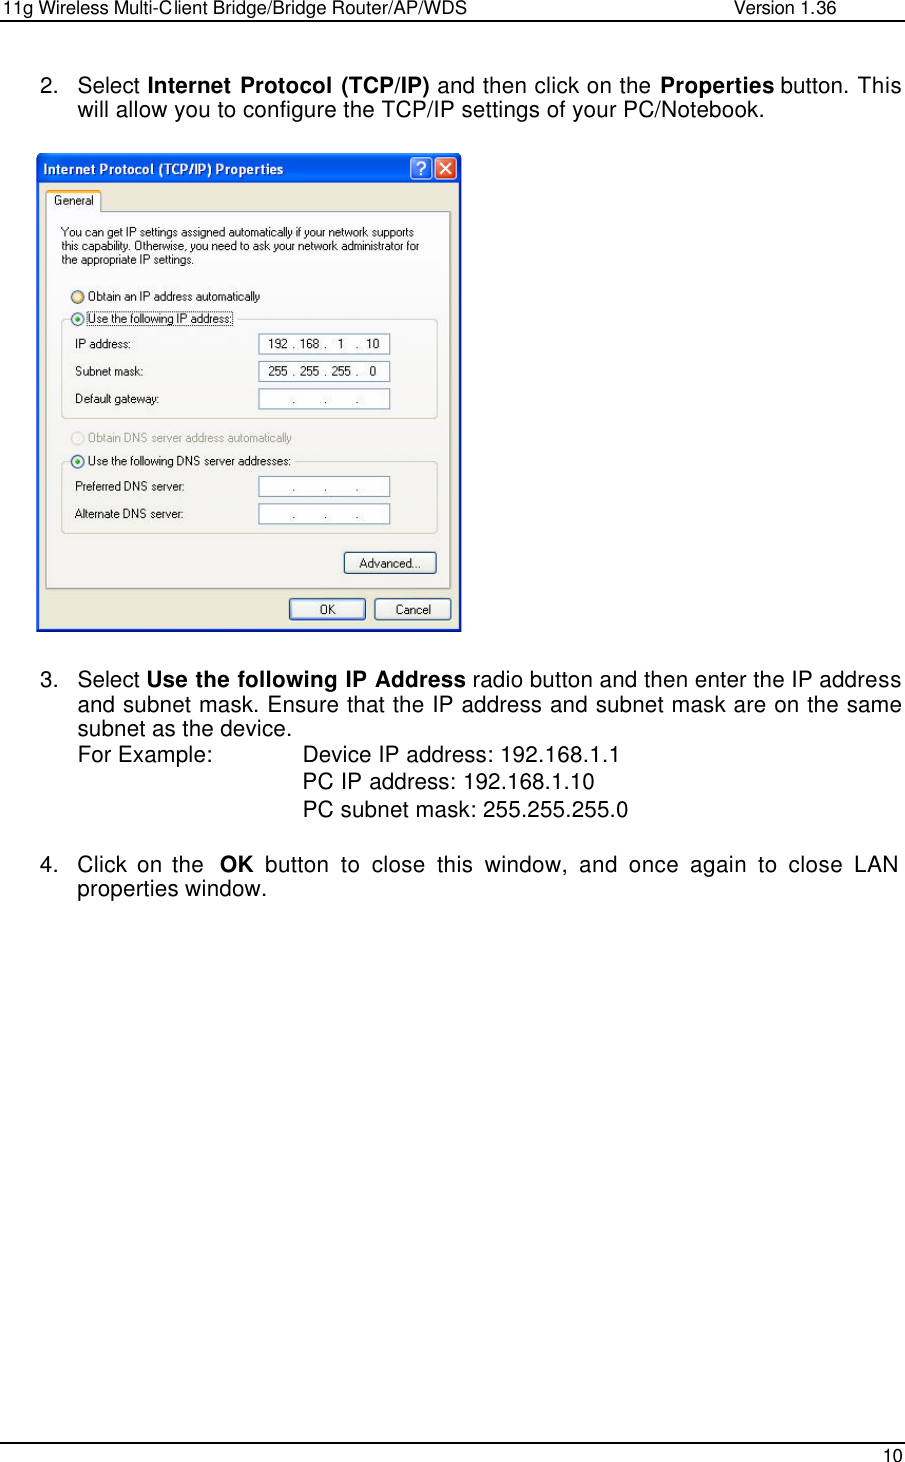
Senao Co >
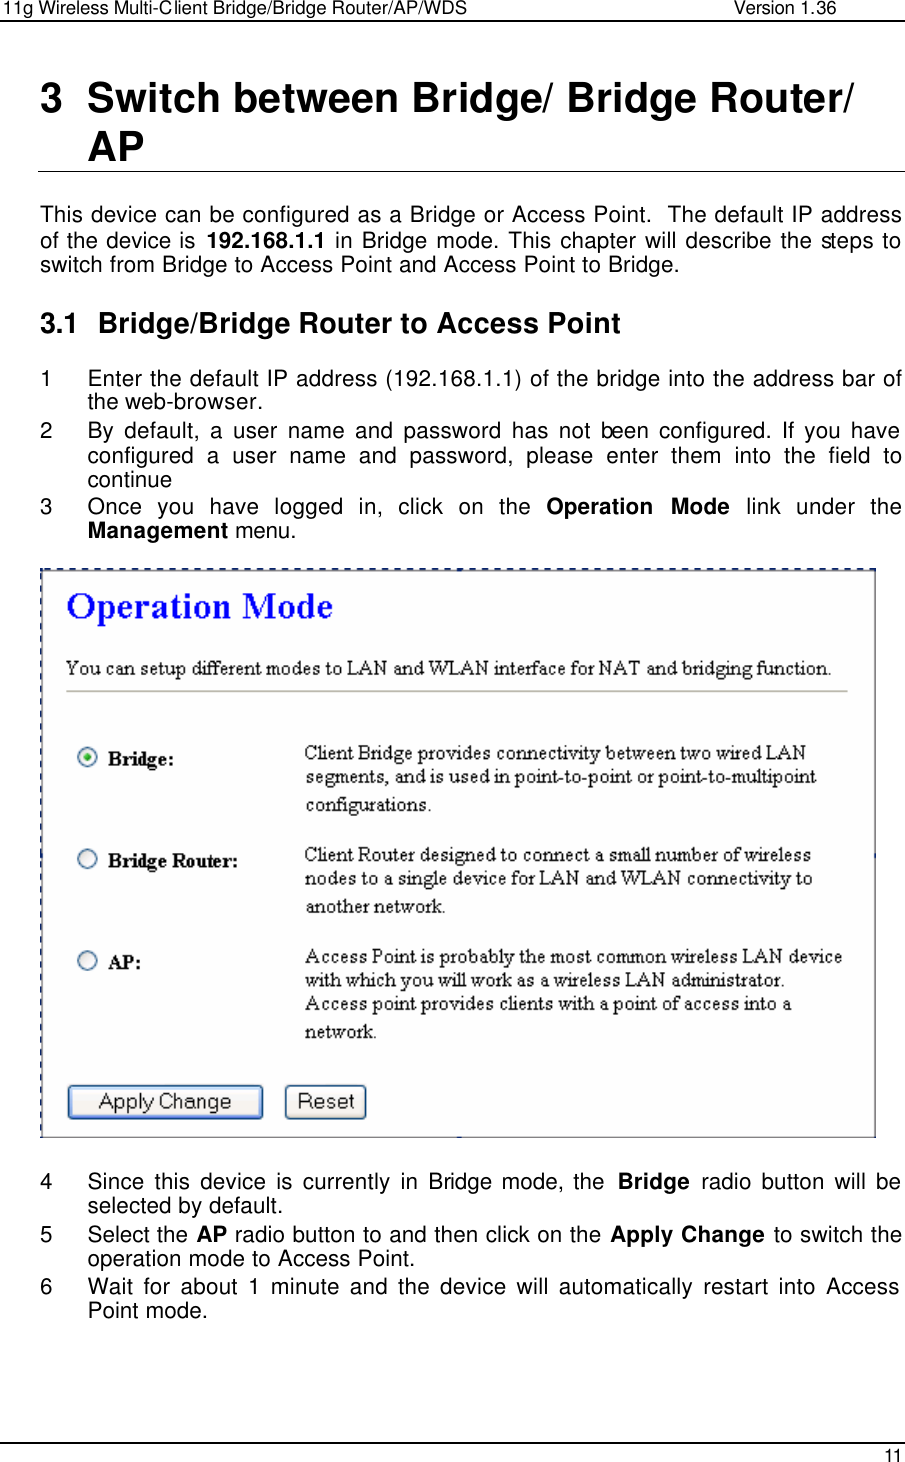
Contents
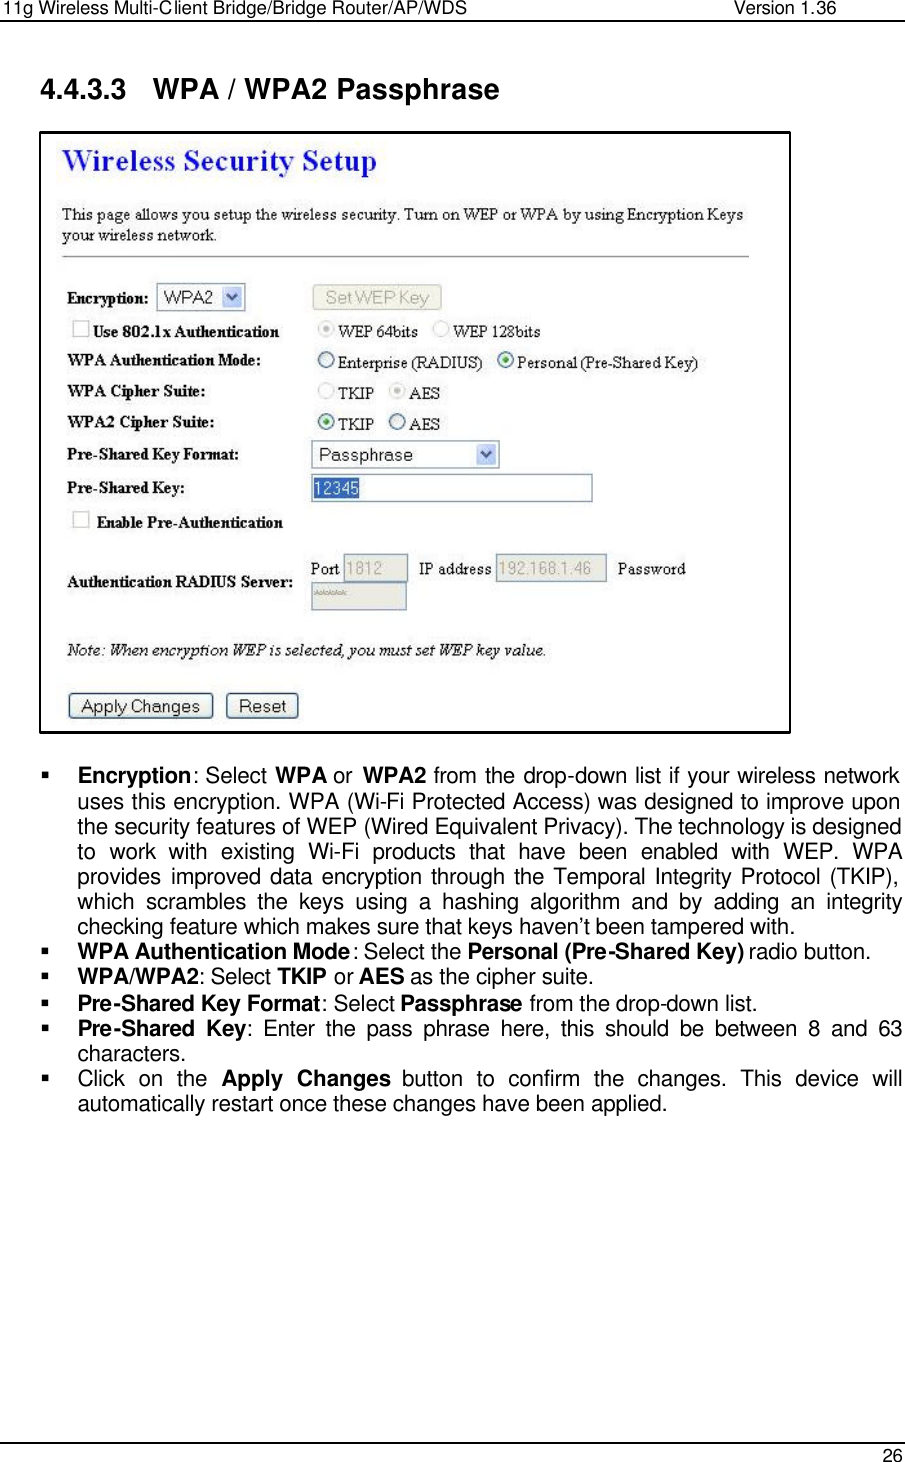
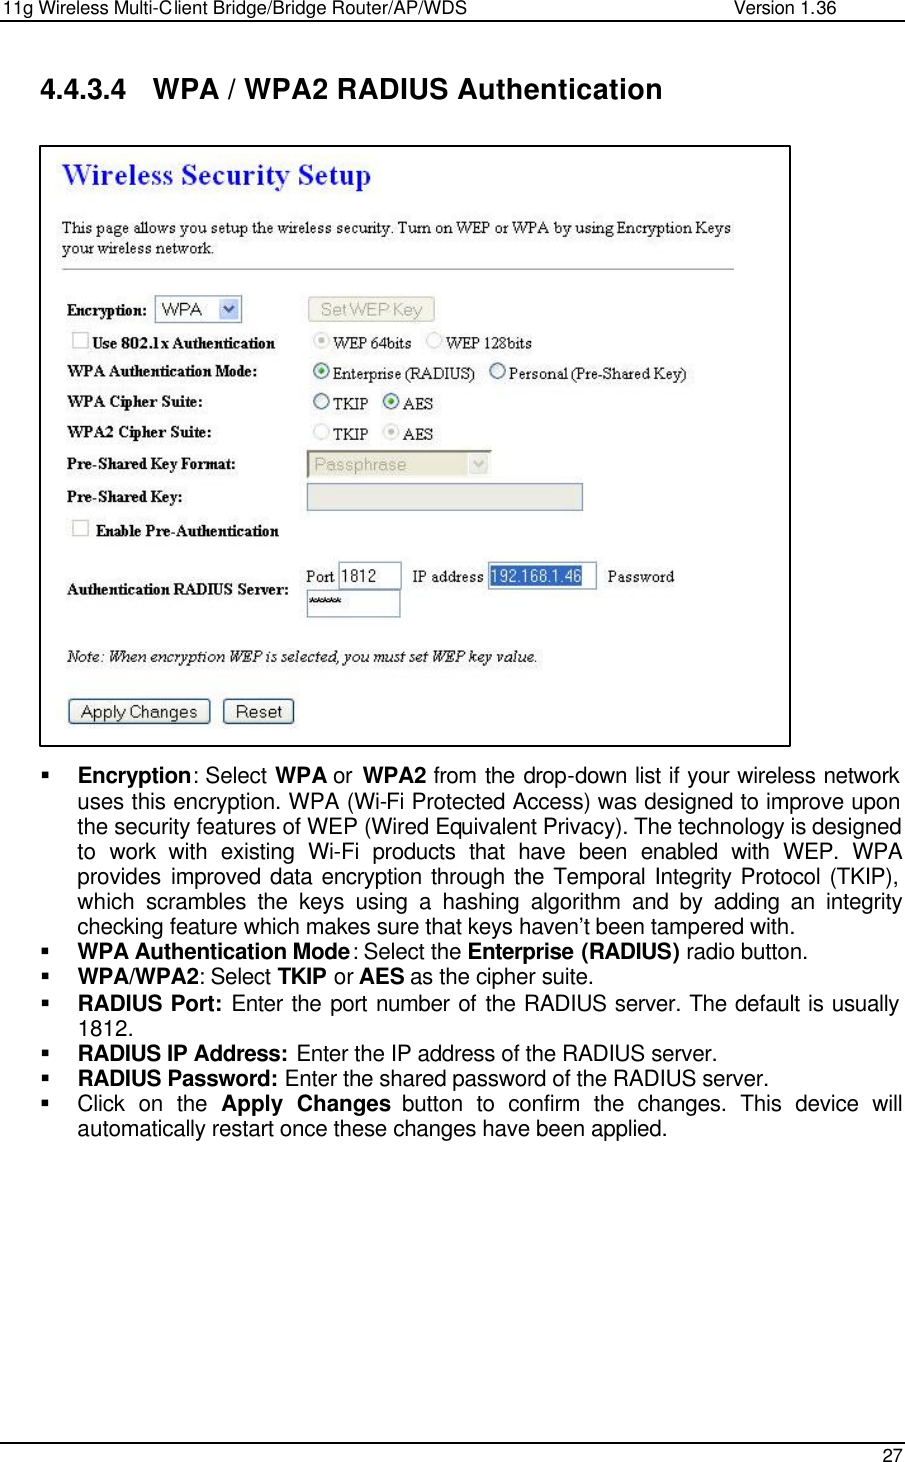
- 1. Manual 1
- 2. Manual 2
Manual 1