Senao Co IS30V122 Wireless 11g Broadband Router User Manual 8801
Senao International Co Ltd Wireless 11g Broadband Router 8801
UserManual.wiki
>
Senao Co
>
IS30V122 User Manual
Users Manual
Navigation menu
Upload a User Manual
Namespaces
Wiki Guide
HTML
PDF
Info
Views
User Manual
Discussion / Help
Navigation
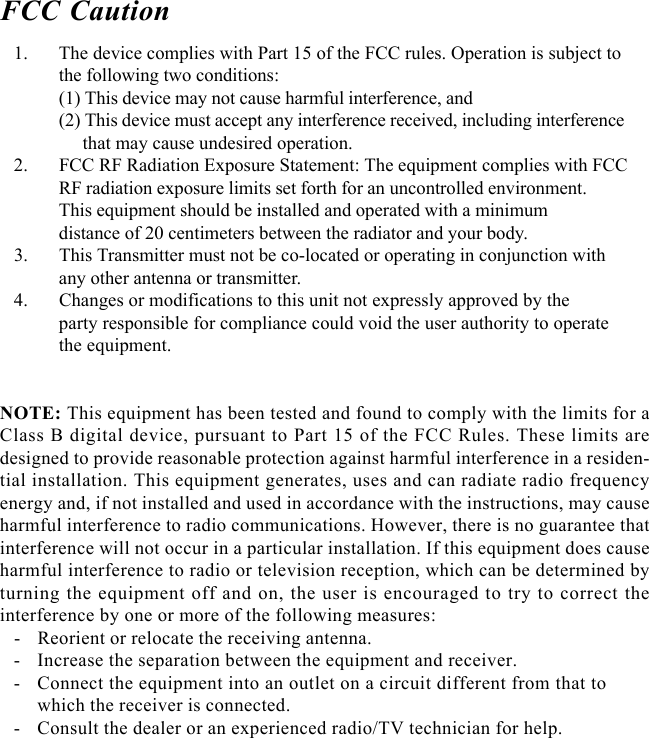
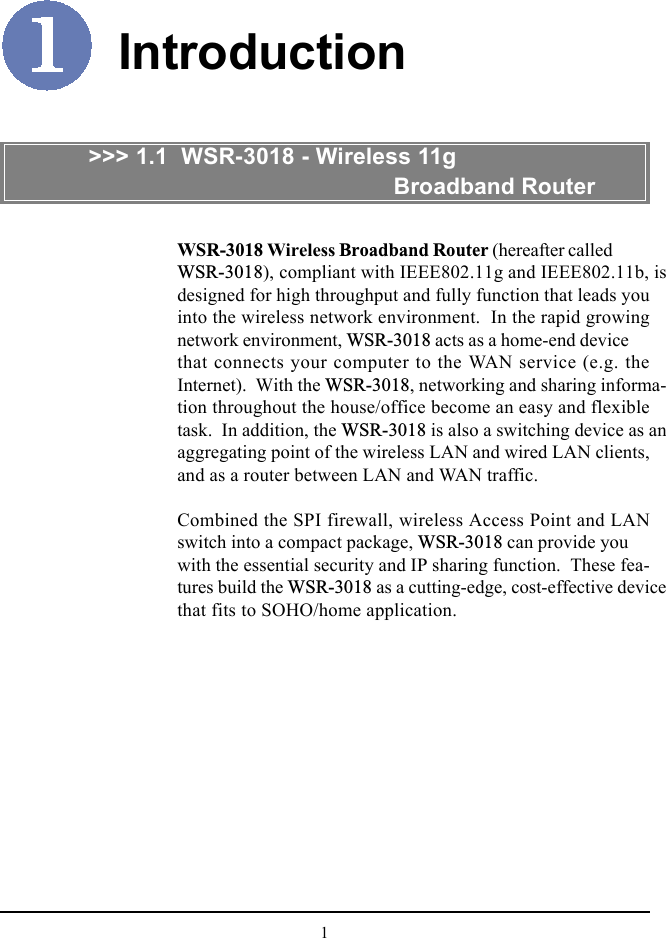

![13Configuration>>> 3.1 Configuration Utility* admin is the defaultpassword setting of thewireless gateway, andcan be changed in theConfiguration Utility.Refer to section 3.3.1for details.Since the WSR-3018 supports DHCP Server and which is ena-bled by default, the computer connected to it is automaticallyassigned a dynamic IP address that is allowed to enter the Con-figuration Utility. Otherwise, you have to assign a fixed IPaddress to this computer within the IP address range of theWSR-3018. For example, you can assign a fixed IP address of192.168.1.253 with a Subnet Mask of 255.255.255.0. (For moreinstruction, please refer to Appendix - A, Assigning a Fixed IPAddress.)The WSR-3018 provides you with a convenient utility tocustomize the network settings. Whenever you want toconfigure the respective settings, open your web browser (e.g.Internet Explorer), and type the default IP address 192.168.1.254 in the Address bar and press [Enter]. When the passwordpage appears, type admin* in the Password box and clickLOGIN.ClickEnter the PasswordOpen the web browser andenter the IP Address of thewireless gateway.](https://usermanual.wiki/Senao-Co/IS30V122/User-Guide-450039-Page-18.png)


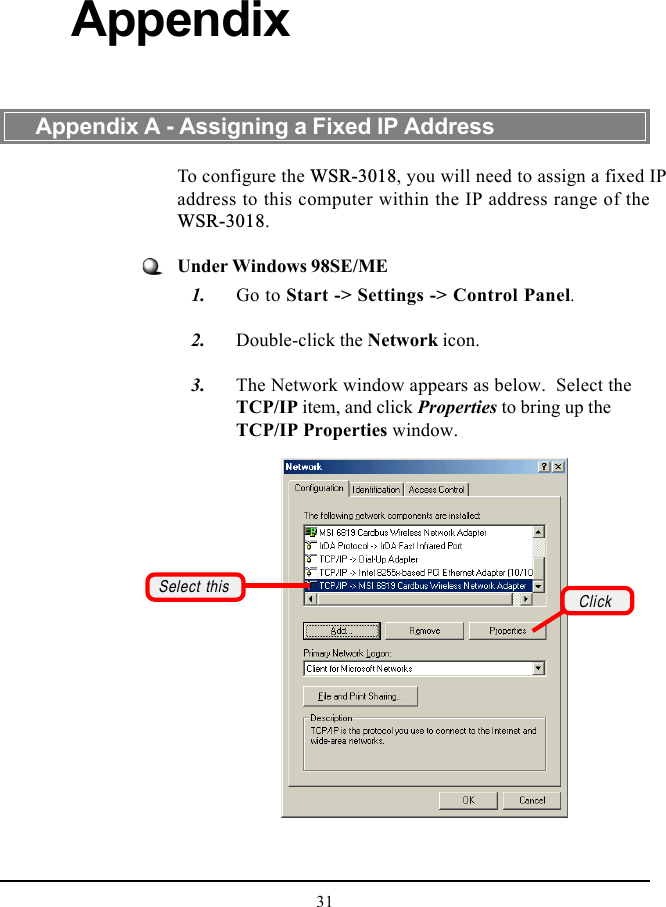
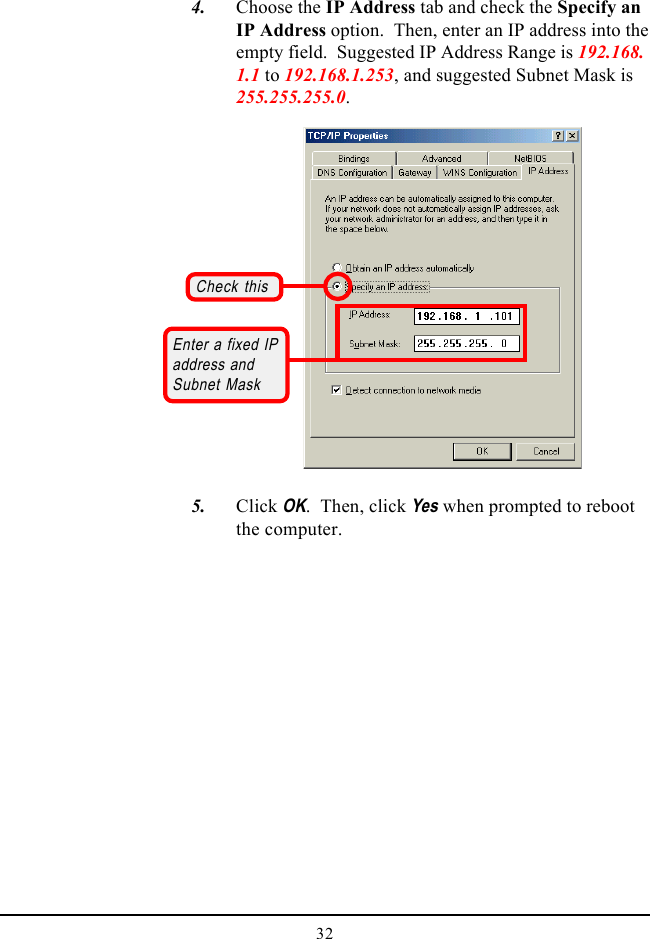
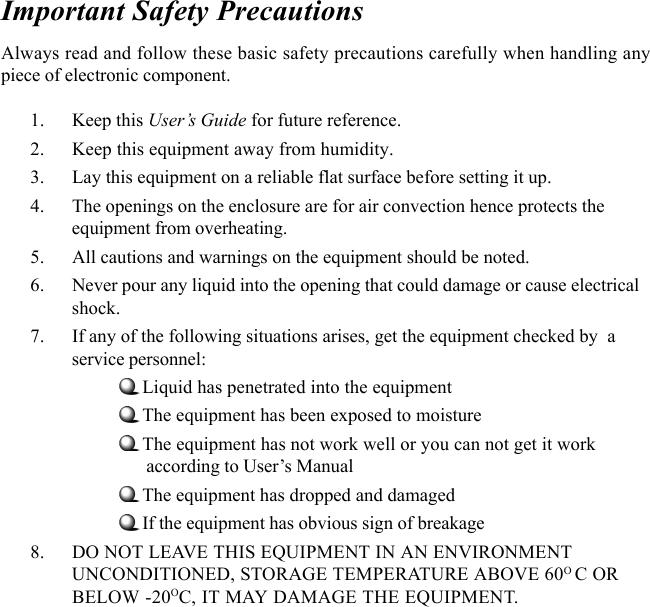
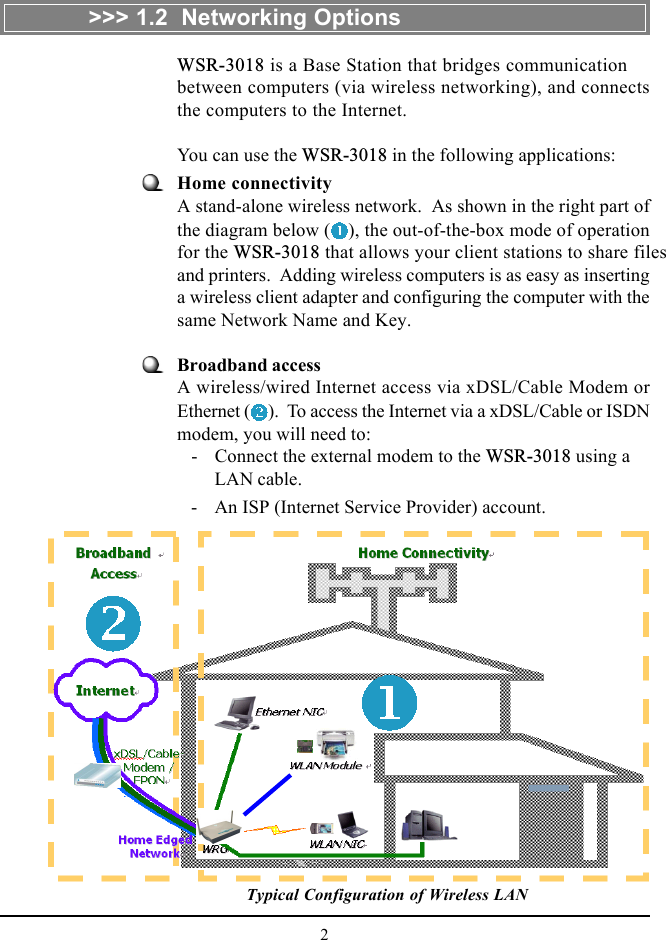
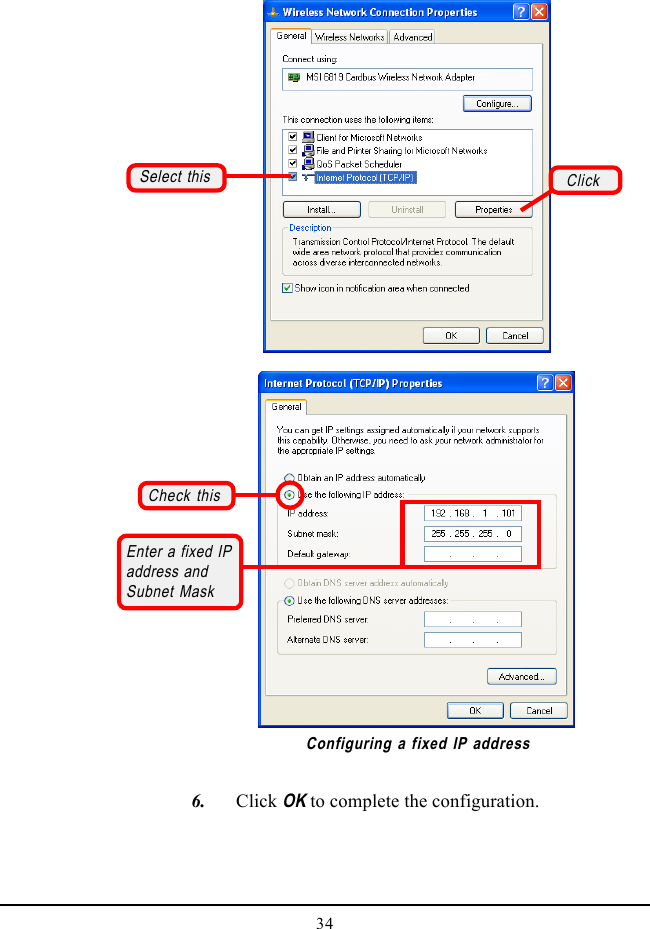
![33Under Windows 2000/XP 1. Click Start and choose Control Panel to open theControl Panel window. 2. Double-click the Network Connection icon to openthe Network Connection window. 3. Right-click the Network Adapter icon and clickProperties from the shortcut menu. 4. When the Connection Properties window appears,choose the General tab and select InternetProtocol [TCP/IP], and click Properties to bring upthe Internet Protocol [TCP/IP] Propertieswindow. 5. Check Use the following IP address. Then, enteran IP address into the empty field. Suggested IPAddress Range is 192.168.1.1 to 192.168.1.253, andsuggested Subnet Mask is 255.255.255.0.Click](https://usermanual.wiki/Senao-Co/IS30V122/User-Guide-450039-Page-38.png)
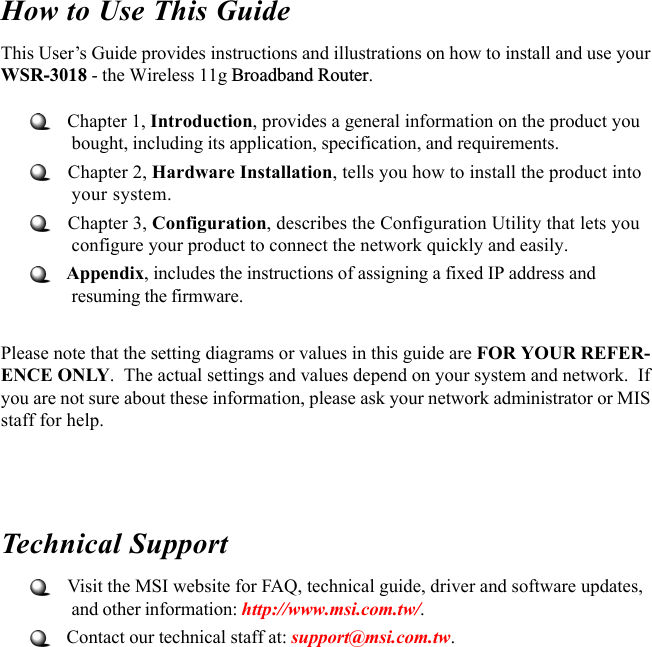
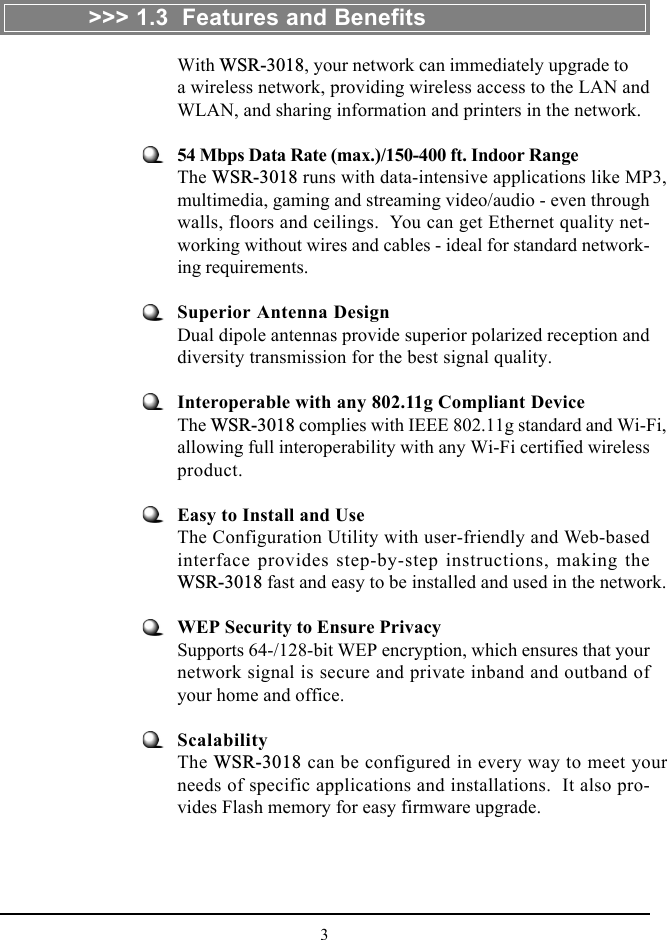
![35The WSR-3018 allows you to upgrade its firmware convenientlyfrom the Configuration Utility. It means that you can obtainthe latest function and take most advantage of your WSR-3018.However, there is some risk when your are upgrading firmware,such as power failure. If, unfortunately, power failure occursduring upgrading firmware, the WSR-3018 may not work anymore.To protect your investment, SANEO provides a second way toresume the gateway’s original firmware before upgrading, andkeep the gateway working normally.To resume the firmware: 1. Connect the gateway to a computer, and then connectthe power cable. Assign a fixed IP address to thiscomputer within the IP address range of the gateway.(See Appendix A for detail instruction.) 2. Click Start at the taskbar and select Run. 3. If you are using Window 2000/XP operating system,type cmd in the Open box and press [Enter]. (ForWindows 98SE/ME, you should type command.) 4. Type tftp -i [host IP address] put [source]* in thepop-up DOS window and press [Enter]. 5. Wait for a few seconds, and the original firmware willbe re-loaded into the gateway. Then, you can enterthe Configuration Utility and use the gateway again.* host IP address - thegateway’s IP address,such as 192.168.1.254.source - the path andfilename of the firmware,such as D:\WSR-3018.gzh.Appendix B - Resuming the Previous FirmwareTip: Type tftp and press[Enter] in the DOSwindow can bring up therespective instructionfor its parameter.](https://usermanual.wiki/Senao-Co/IS30V122/User-Guide-450039-Page-40.png)