Senao Networks 9603H Wireless 11N USB Adapter User Manual EUB Realtek UM 20100224 Aimee
Senao Networks, Inc. Wireless 11N USB Adapter EUB Realtek UM 20100224 Aimee
UserManual.wiki
>
Senao Networks
>
9603H User Manual
Manual
Navigation menu
Upload a User Manual
Namespaces
Wiki Guide
HTML
PDF
Info
Views
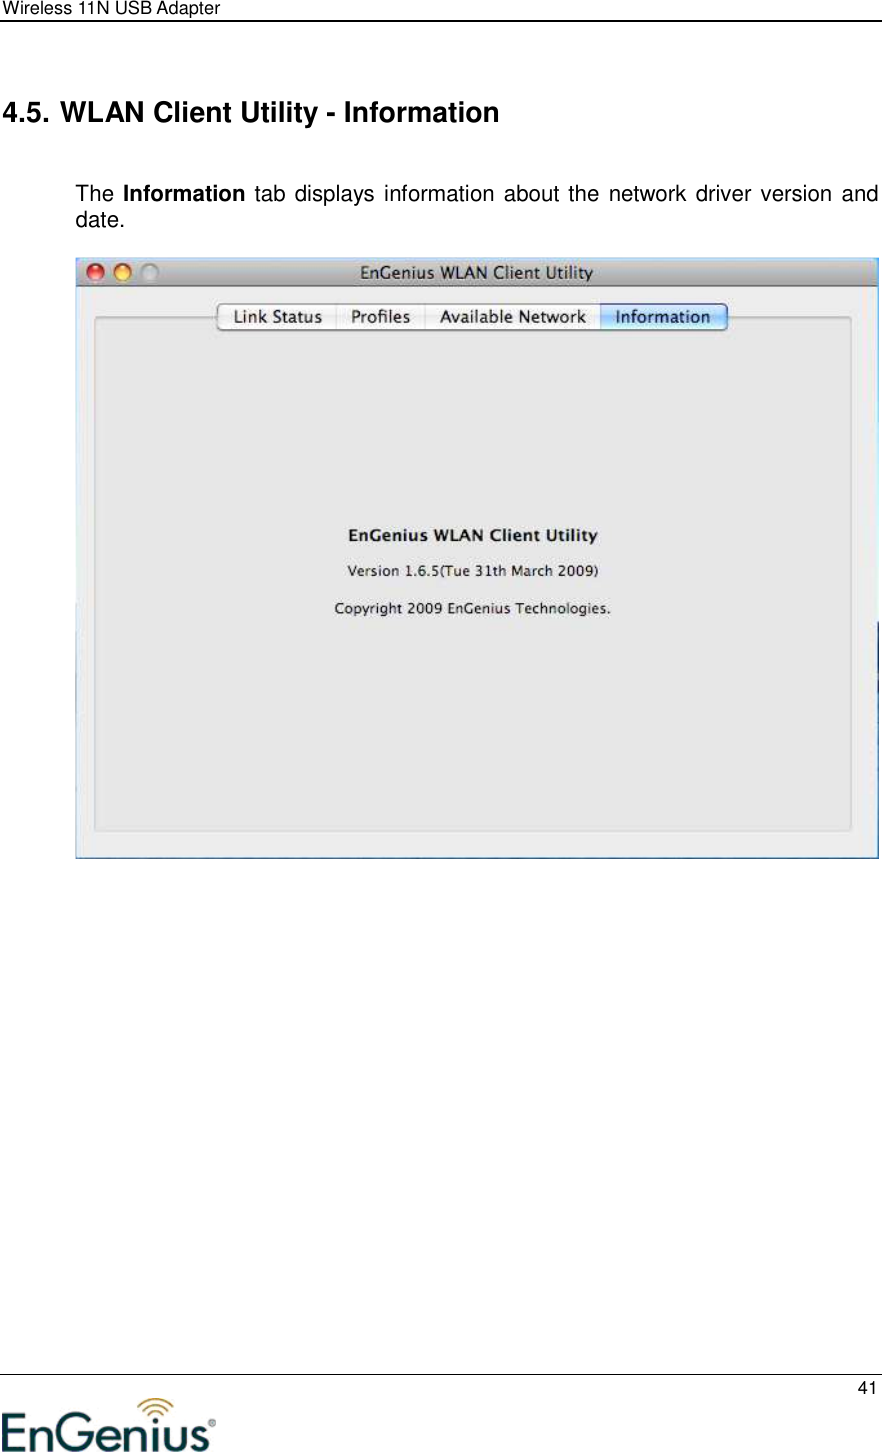
User Manual
Discussion / Help
Navigation
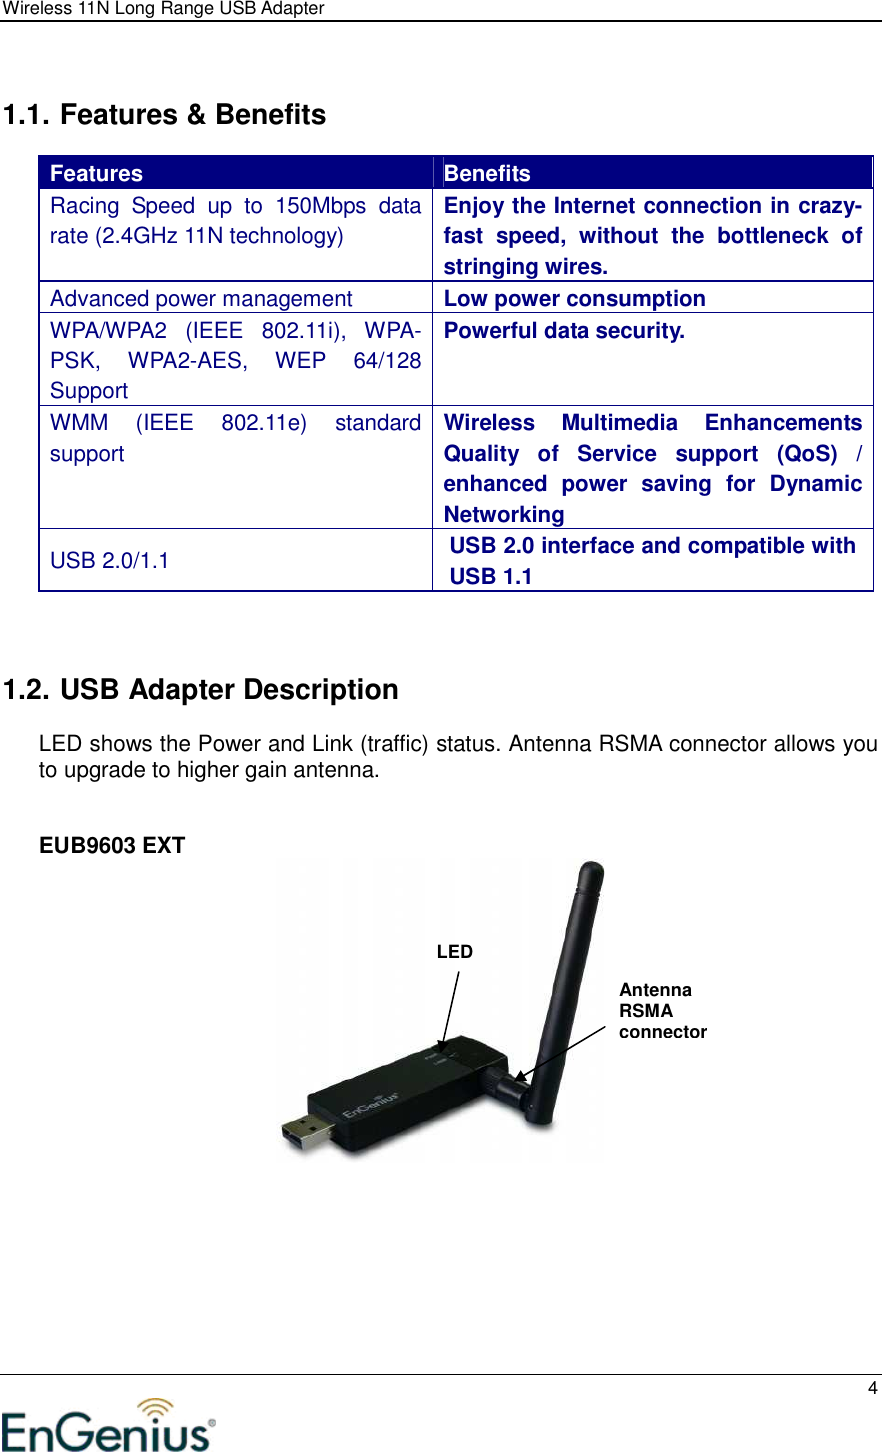
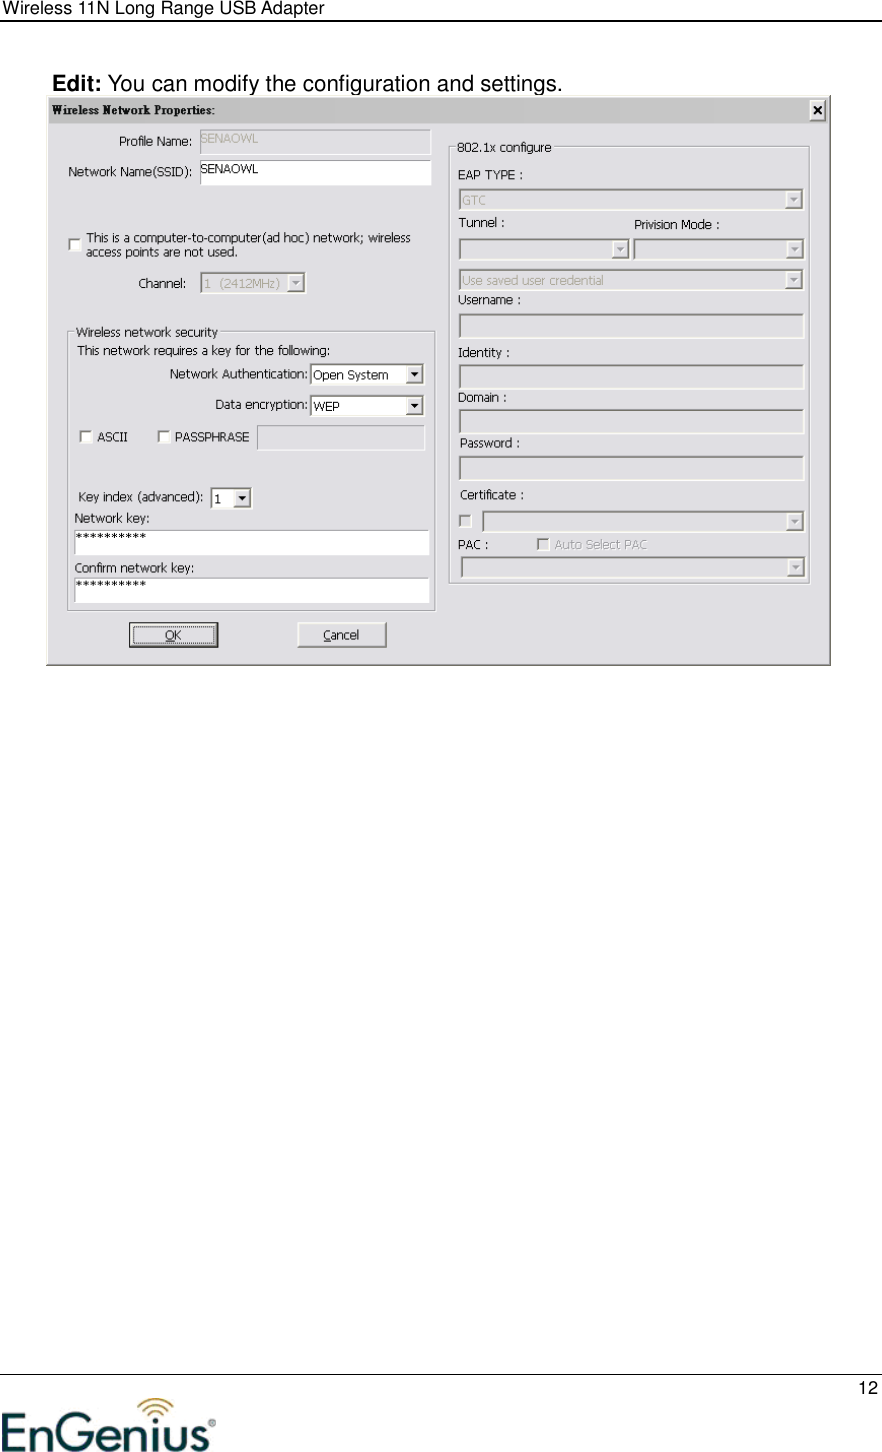

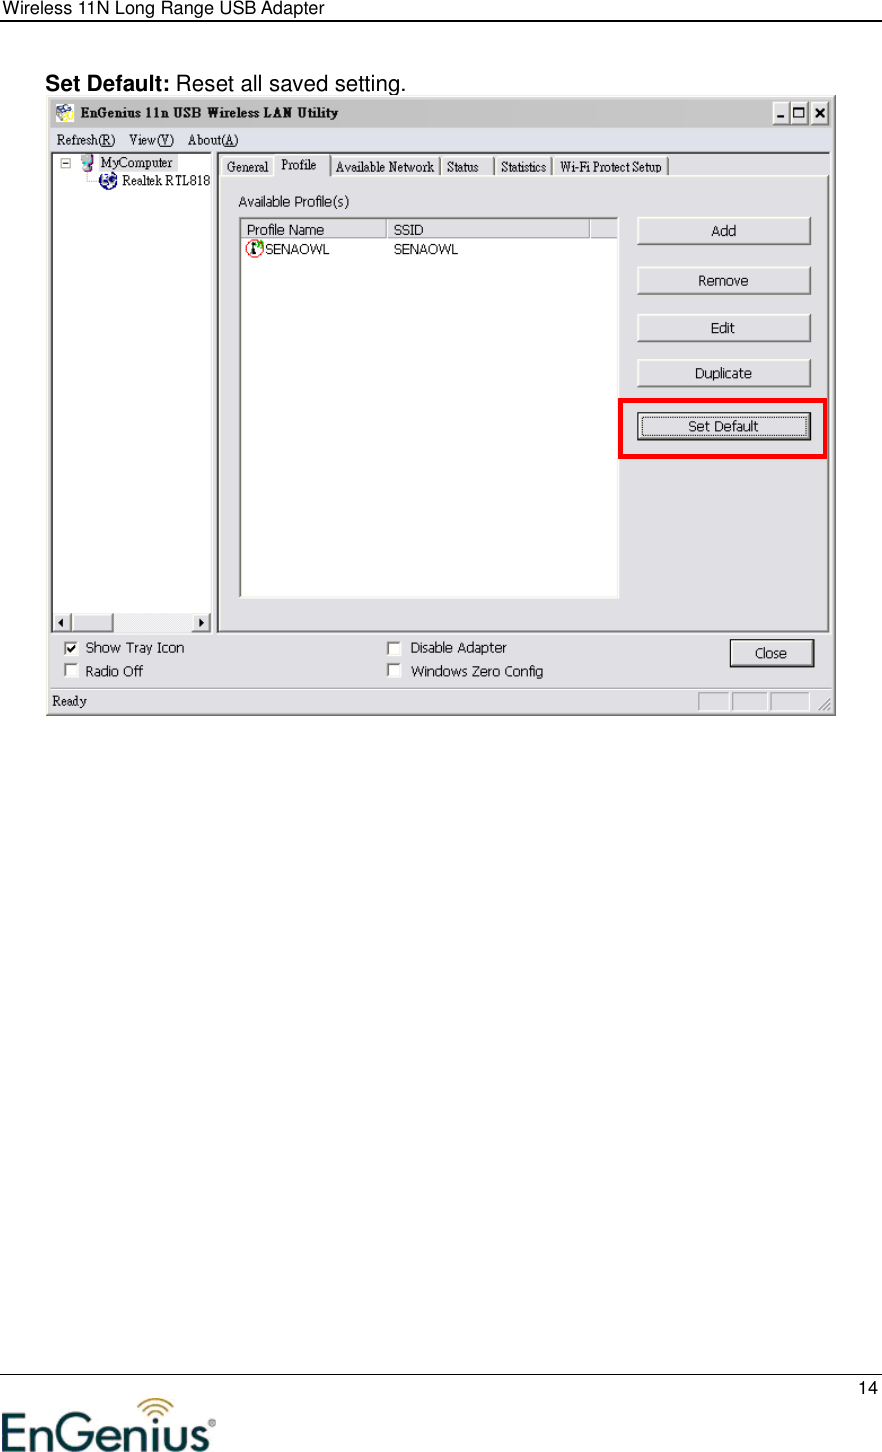
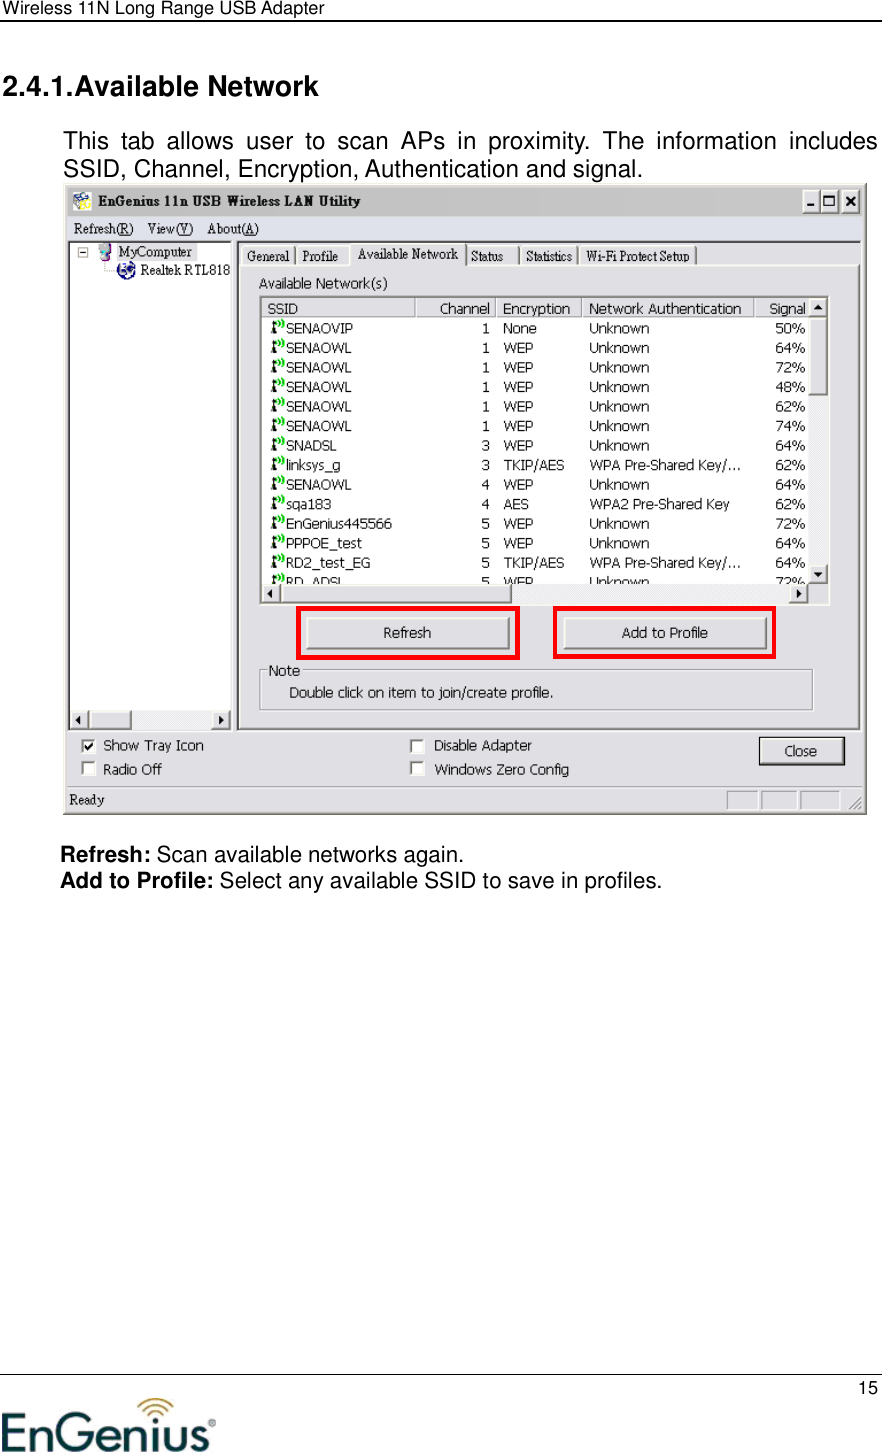
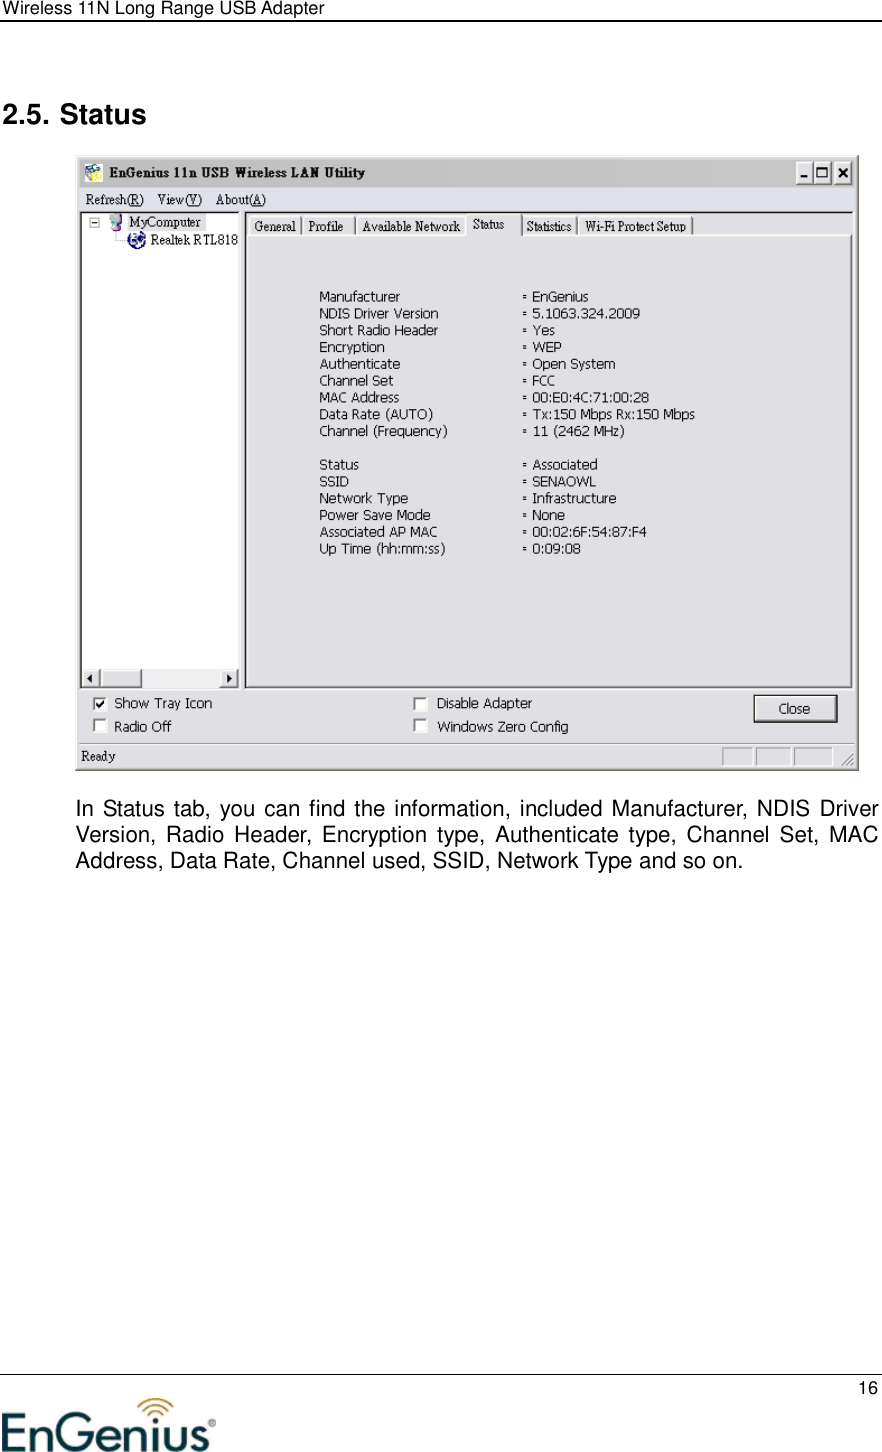
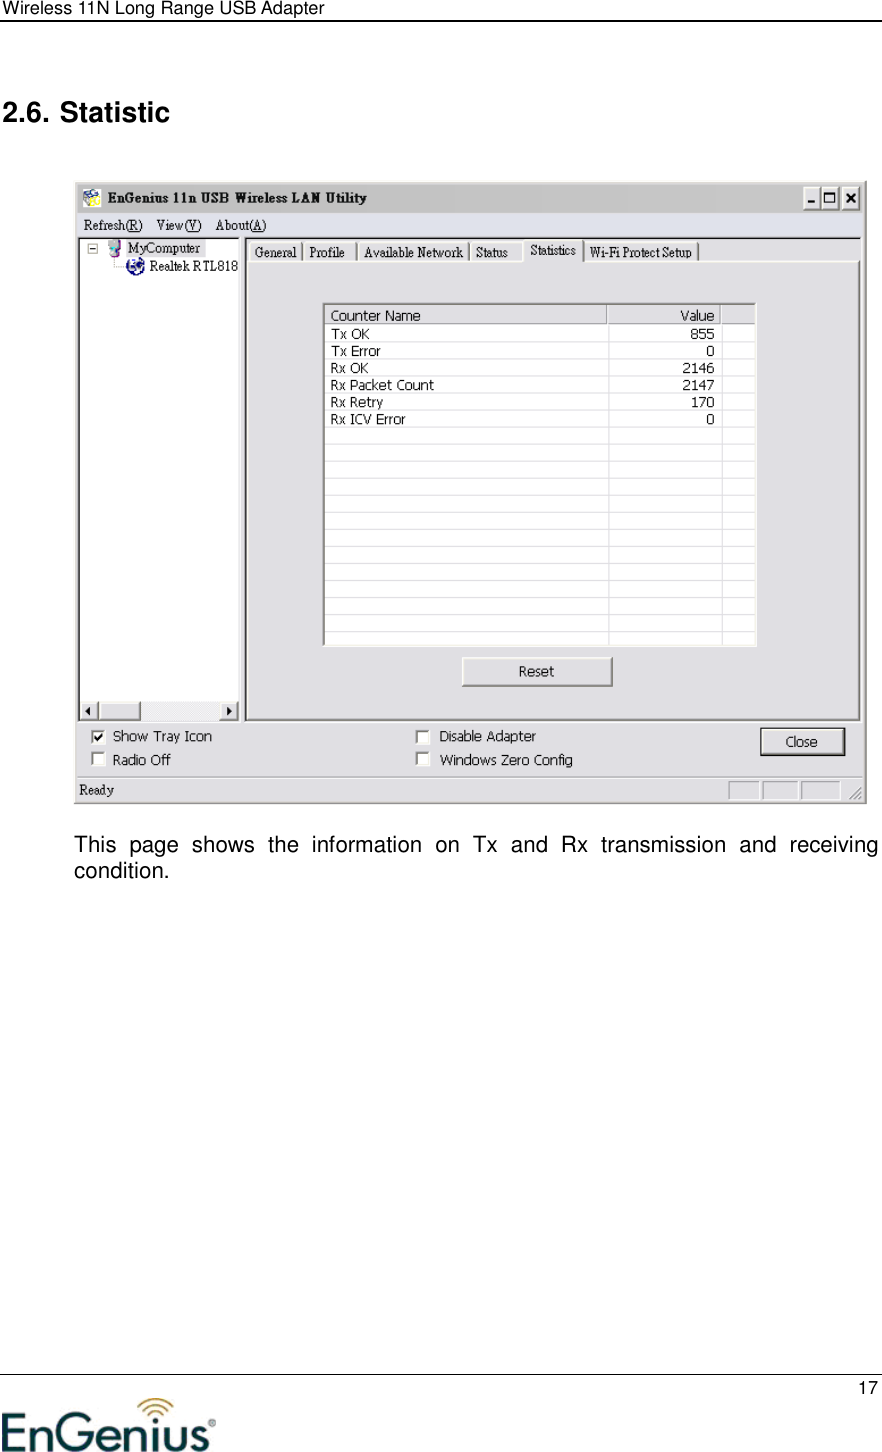
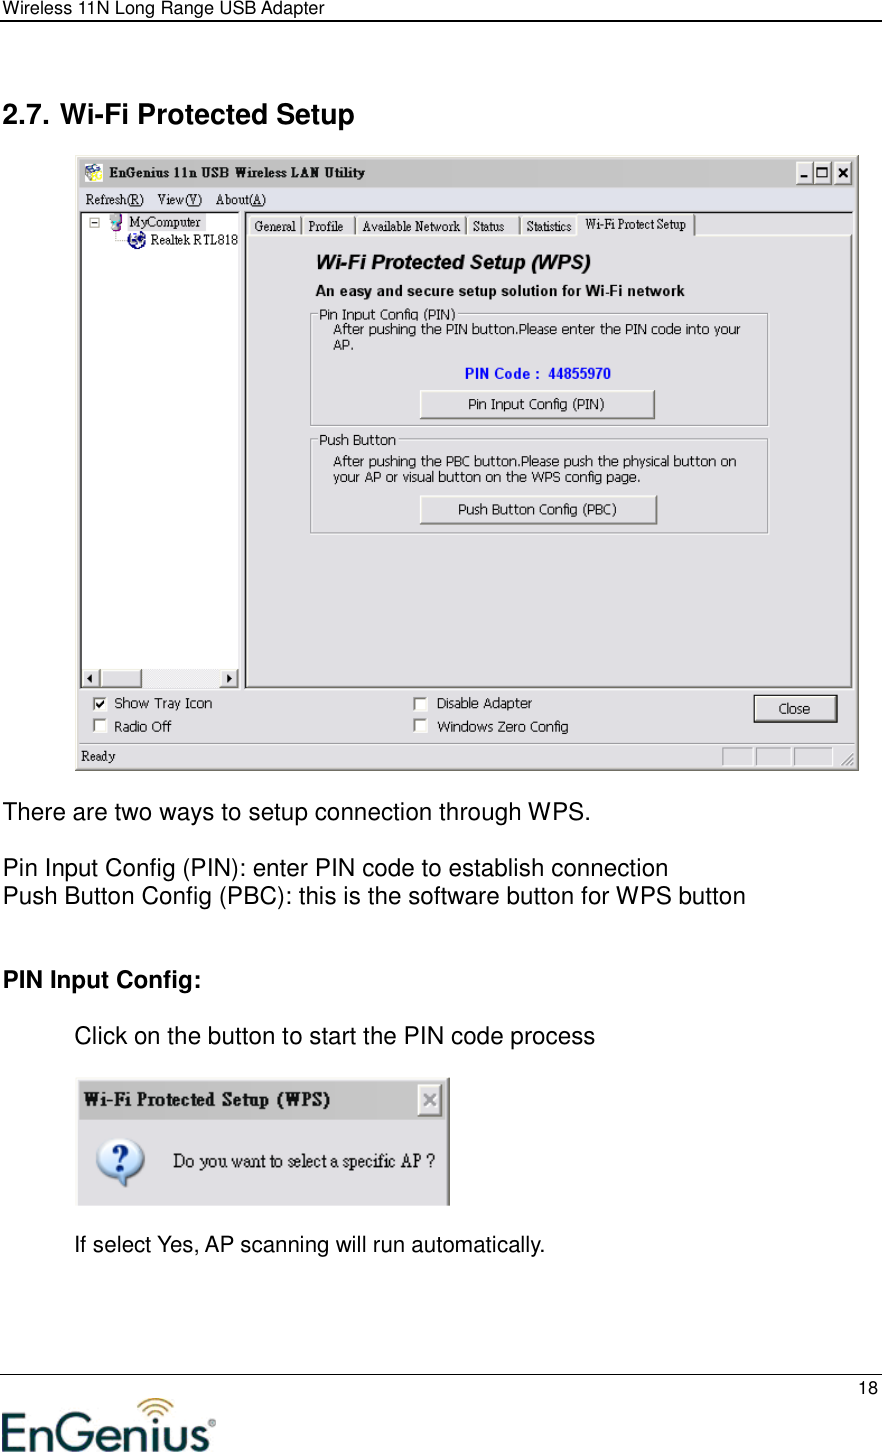
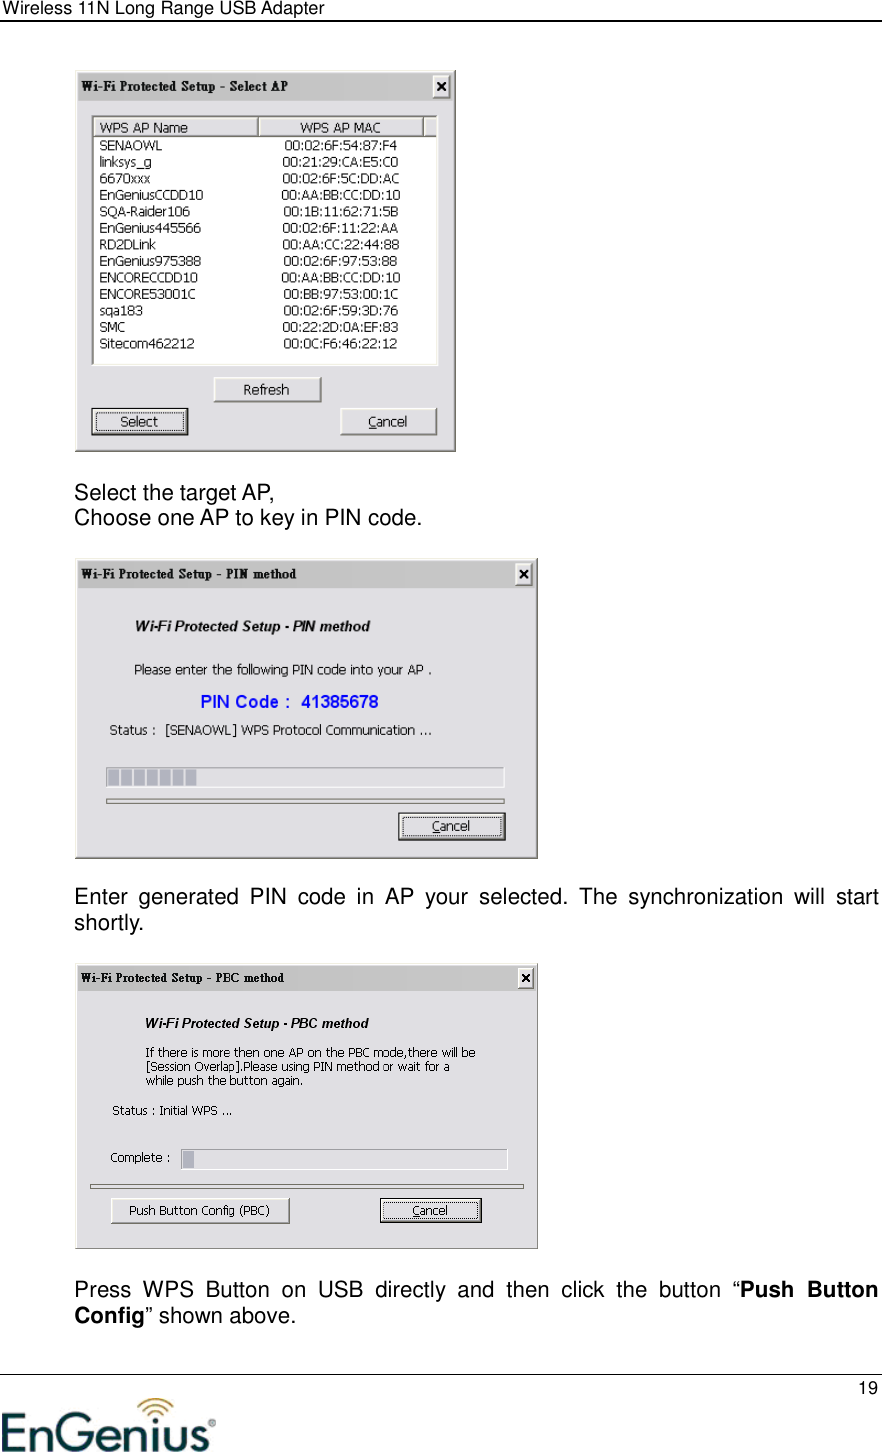
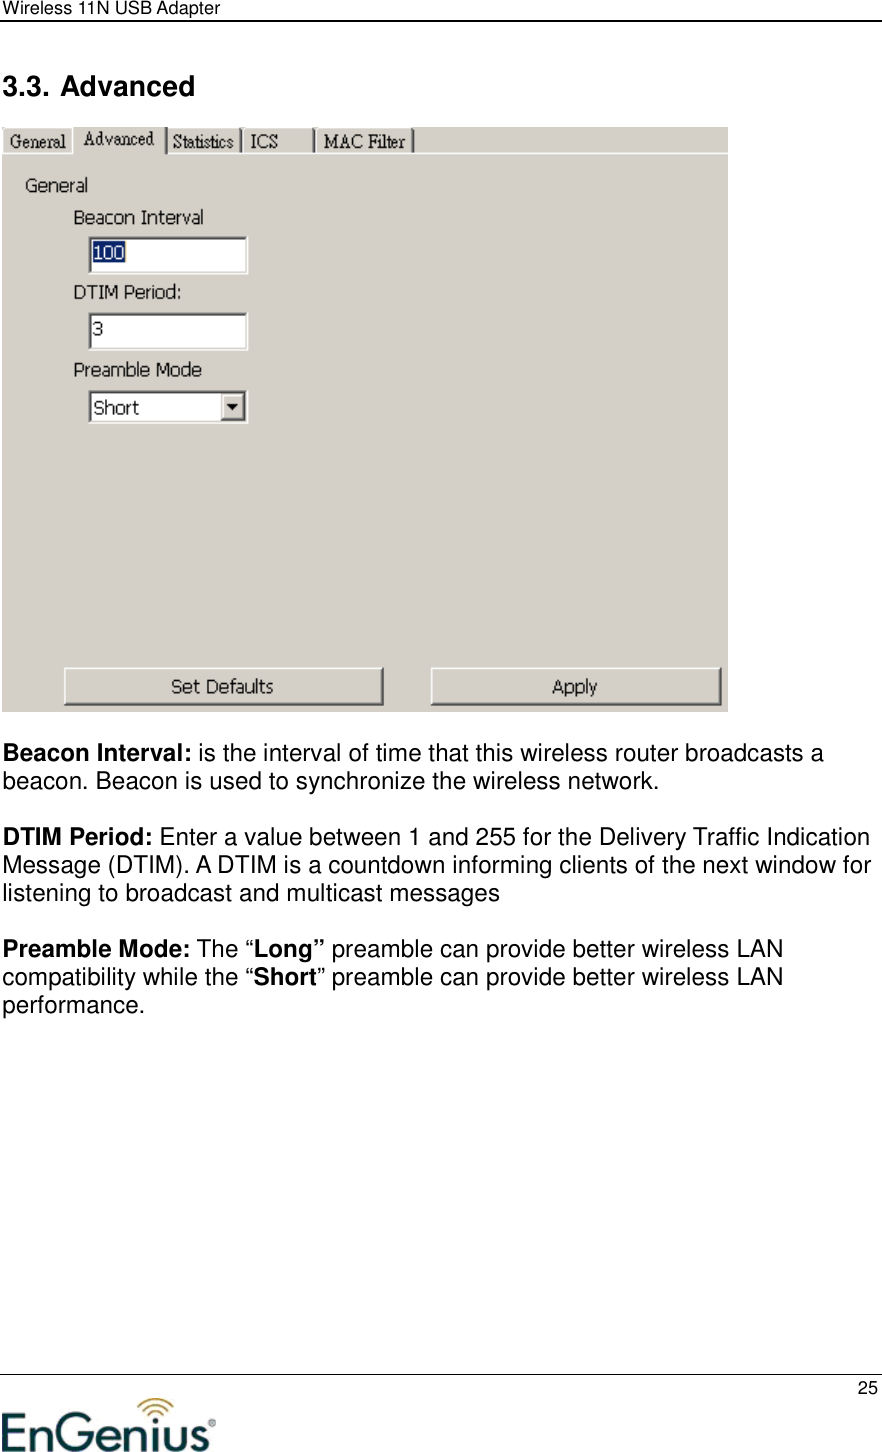
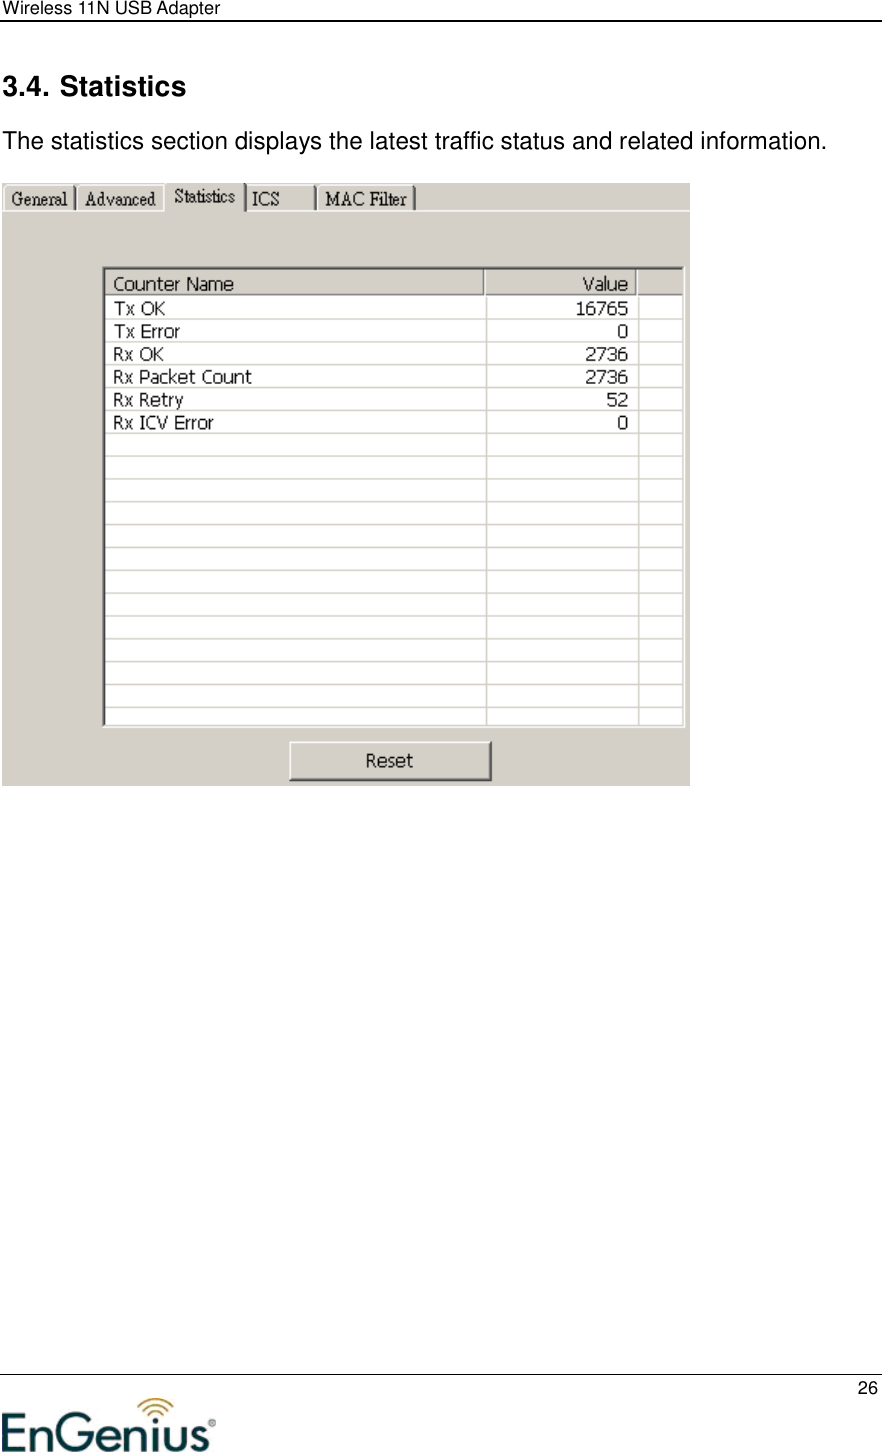
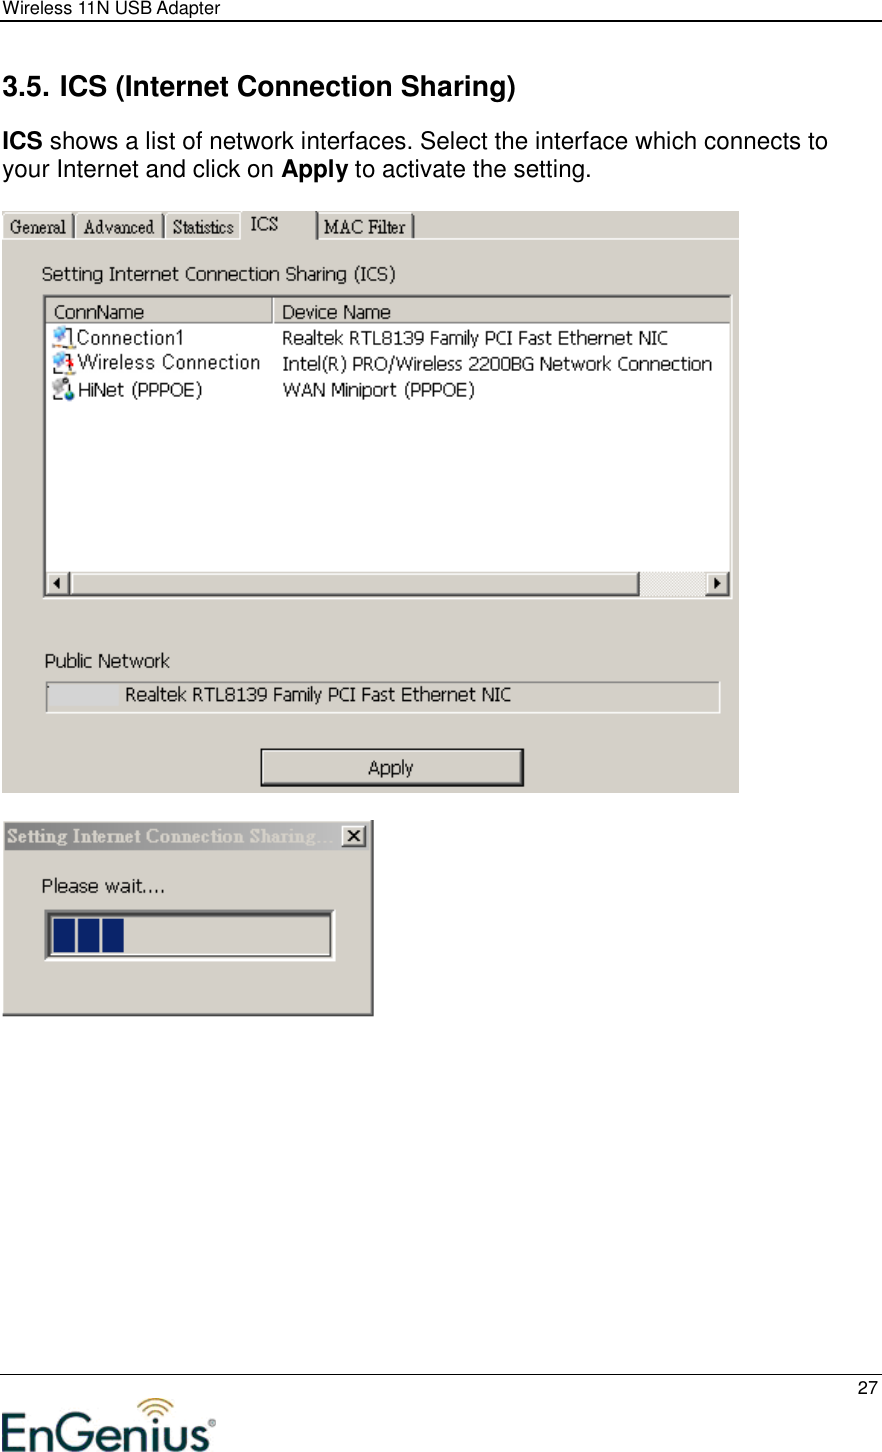
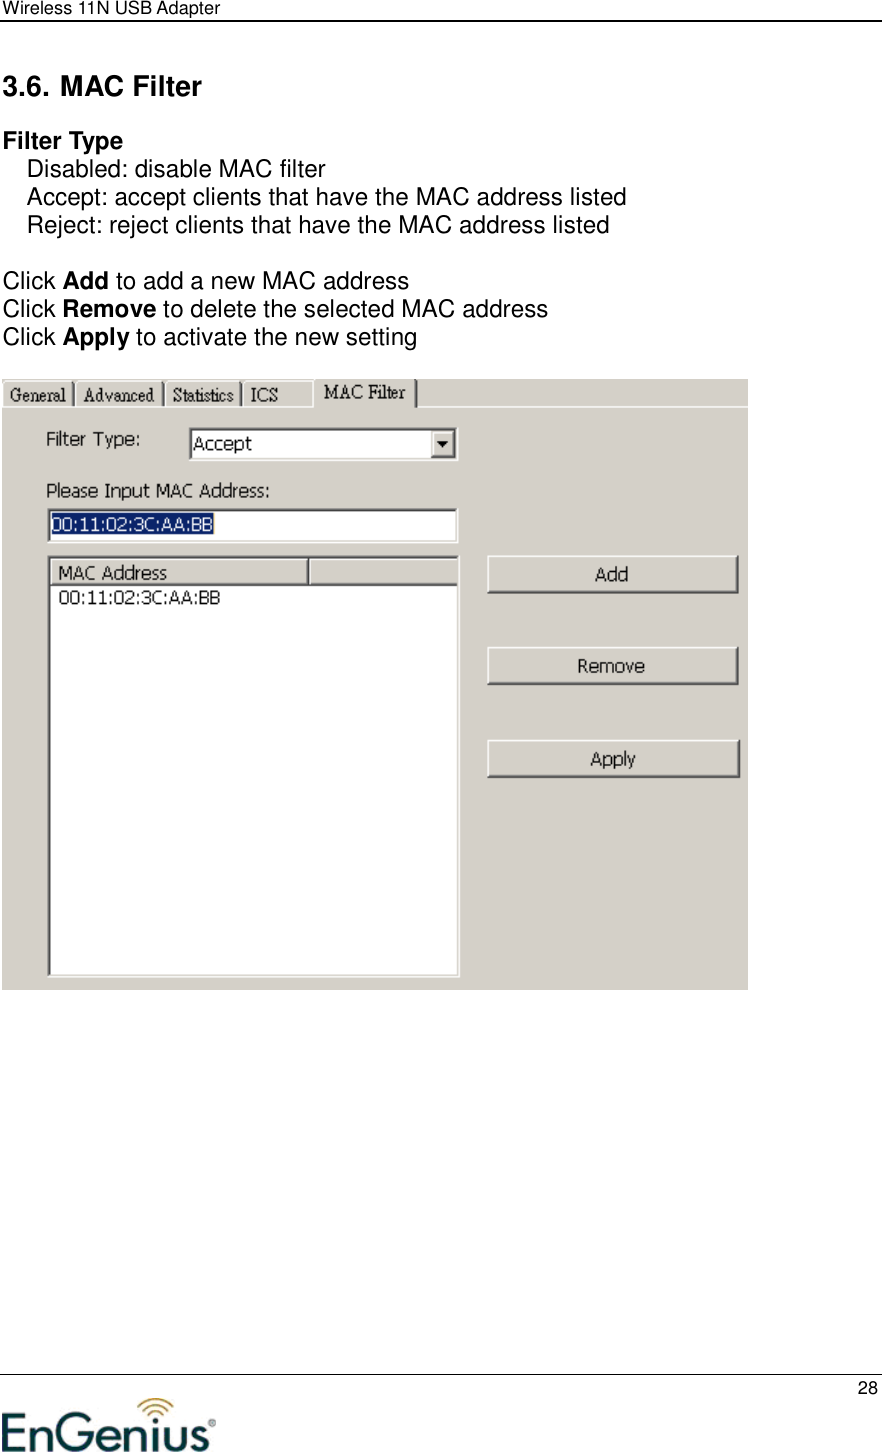
![Wireless 11N Long Range USB Adapter 20 Push Button Config: Click on the [Push Button Config] button Press WPS button on the AP The connection will be established in a few seconds..](https://usermanual.wiki/Senao-Networks/9603H/User-Guide-1246485-Page-20.png)