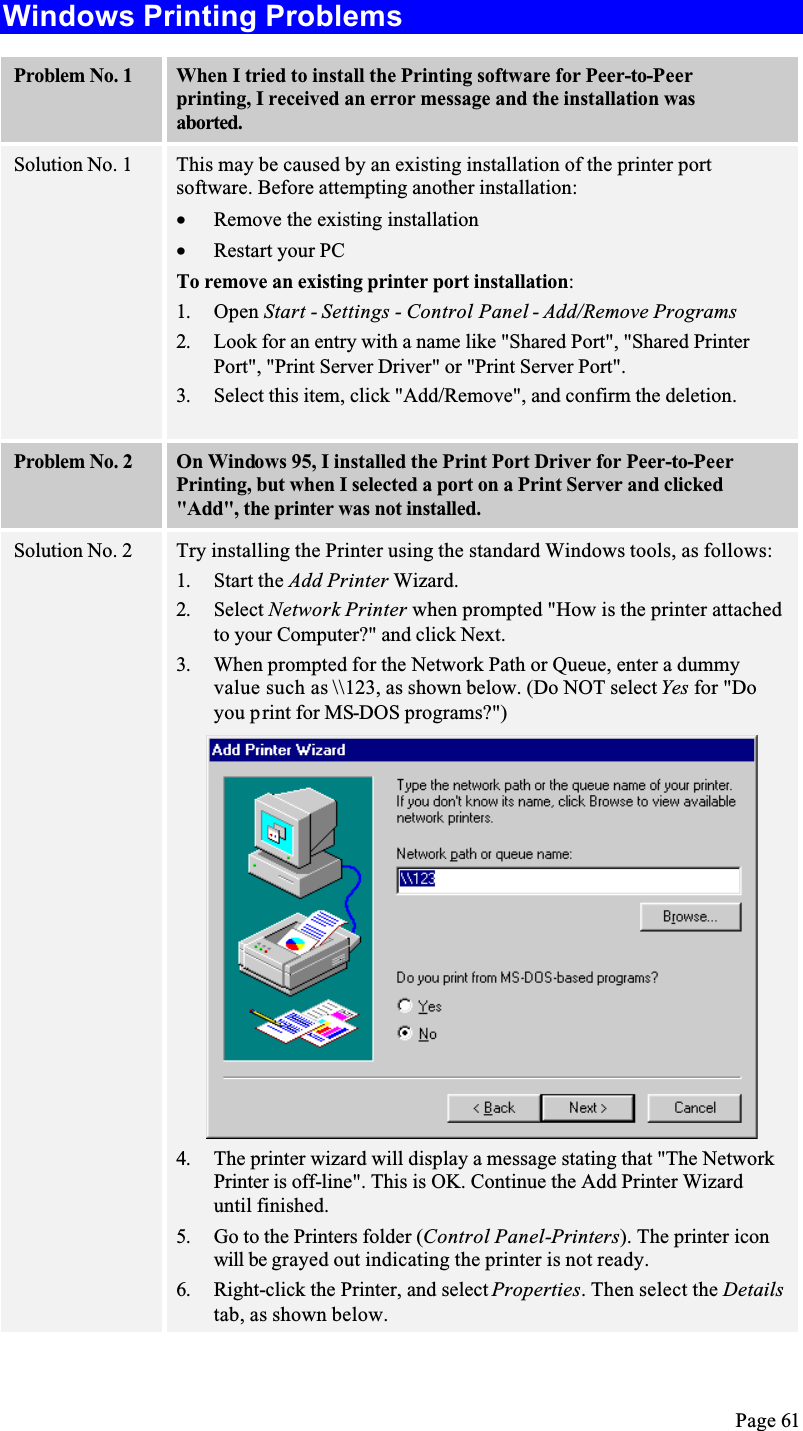
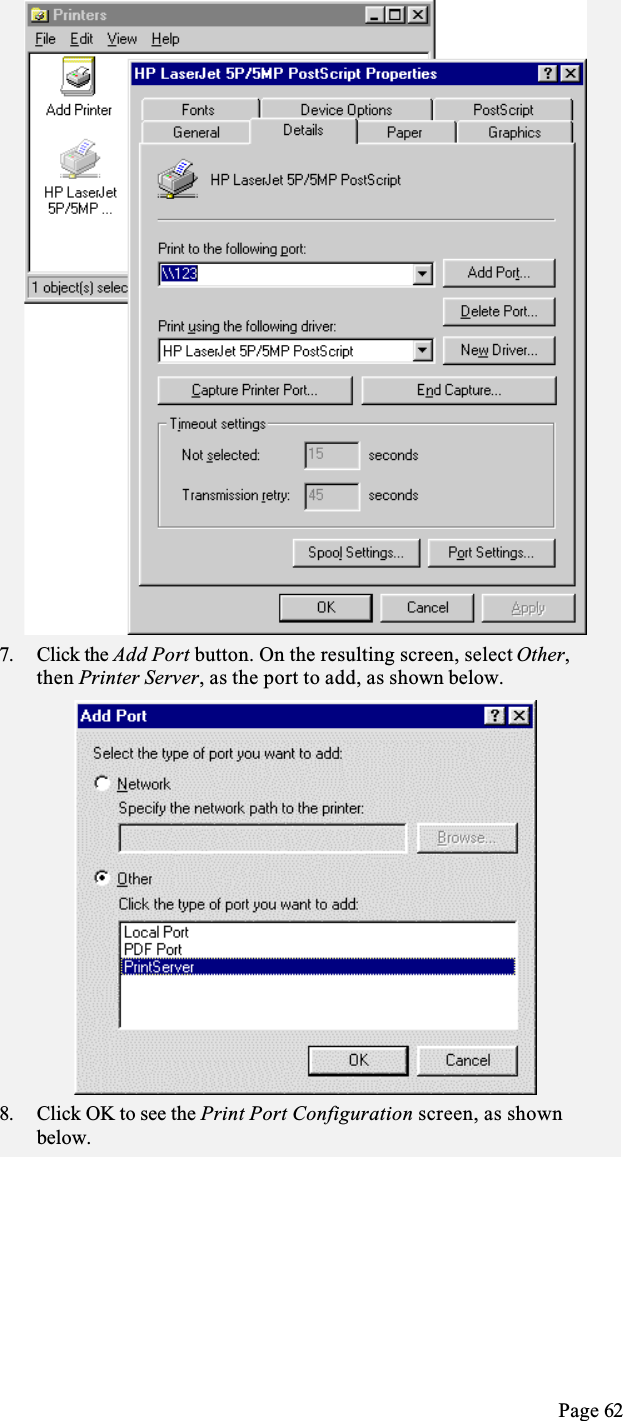
Sercomm 970F208F4 WLAN Printer Server User Manual WPS11 PS7100 PD507B UserMan
Sercomm Corporation WLAN Printer Server WPS11 PS7100 PD507B UserMan
UserManual.wiki
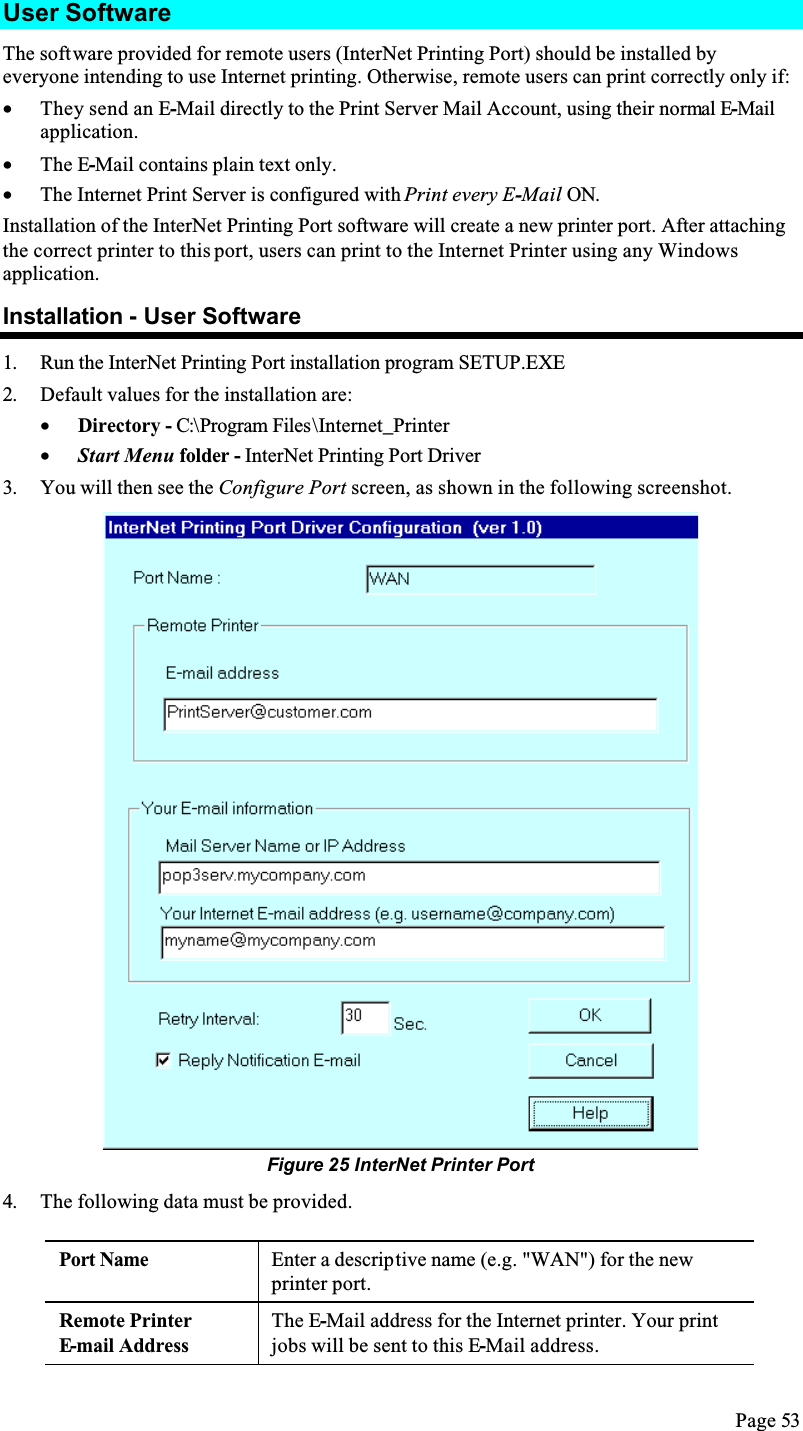
>
Sercomm
>
970F208F4 User Manual
users manual
Navigation menu
Upload a User Manual
Namespaces
Wiki Guide
HTML
PDF
Info
Views
User Manual
Discussion / Help
Navigation


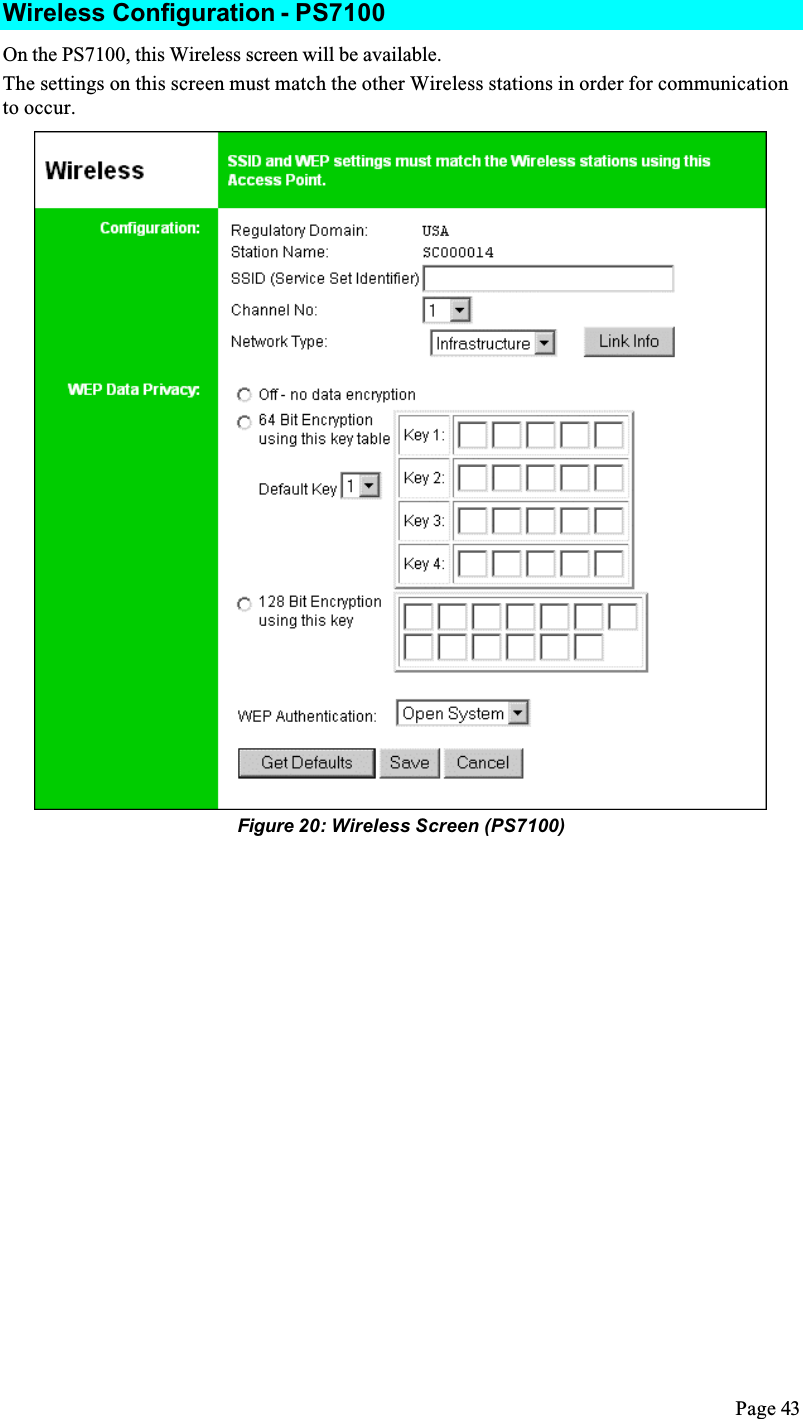
![Page 28Operation• Start the program by using the icon created by the setup program.• When run, the program searches the network for all active Print Servers, and then lists them on screen, as shown by the example screen below.Main ScreenFigure 11: BiAdmin Main ScreenGroupsOn the left side of the screen is a column for Groups. Each Print Server may be placed in a group, using the Configuration-System Configuration-Groups menu option.• If a group is selected, only Print Servers in that group will be listed on the right side of the screen.• By default, all Print Servers will appear in the [ROOT] group.• A Print Server can only be a member of one (1) group, and will always be a member of a group.• Use the Configuration-System Configuration-Groups menu option to select a group for the current Print Server.• To create a new Group and add the current Print Server to it, just enter a group name in the dialog. (See example screen below)](https://usermanual.wiki/Sercomm/970F208F4/User-Guide-225460-Page-30.png)