Sercomm SZDWS04 Micro Door Window Sensor User Manual SZ DWS04 QIG V1 0
Sercomm Corporation Micro Door Window Sensor SZ DWS04 QIG V1 0
Sercomm >
User Manual

1
SZ-DWS04 ZigBee Door/Window Sensor Installation Guide
Specification
Frequency 2.4GHz
Batter Type CR2032 Battery
Sensitivity > 3 cm ( 1.18 inch )
Operating Temperature 0° C to 40° C (32° - 104°F)
Storage Temperature -20° C to 60° C (-4° - 140°F)
Battery Life 3 years
RF Range 40M
Dimension Main Unit: 51 mm x 26 mm x 7.4 mm (2" x 1.02" x 0.29")
Magnet Unit: 28.3 mm x 15.5 mm x 7.4 mm (1.11" x 0.61" x 0.29")
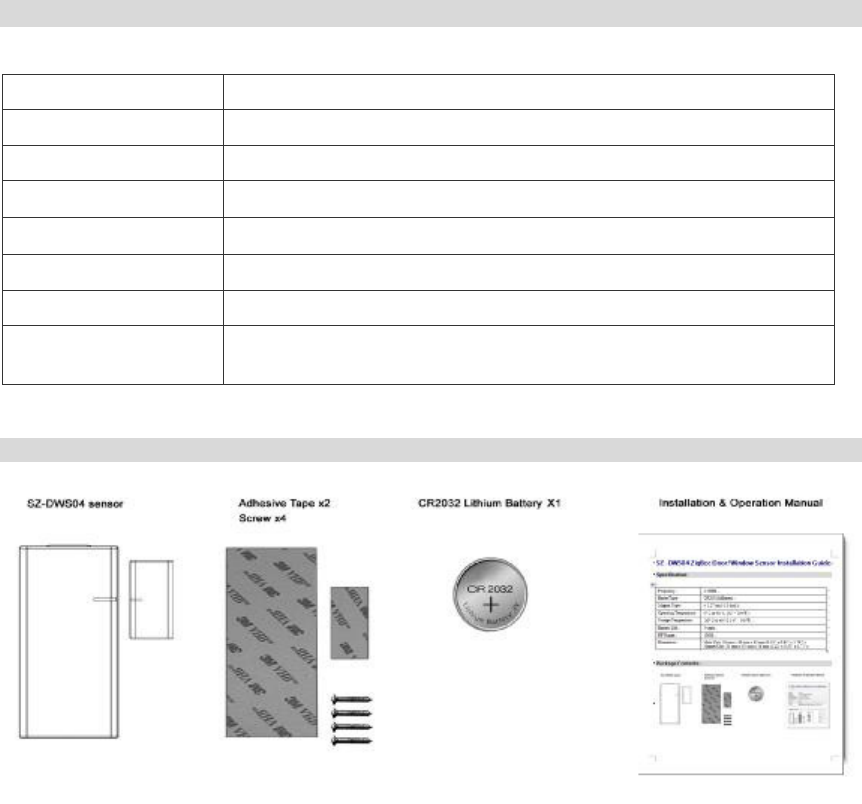
Package Contents

2
Intallation
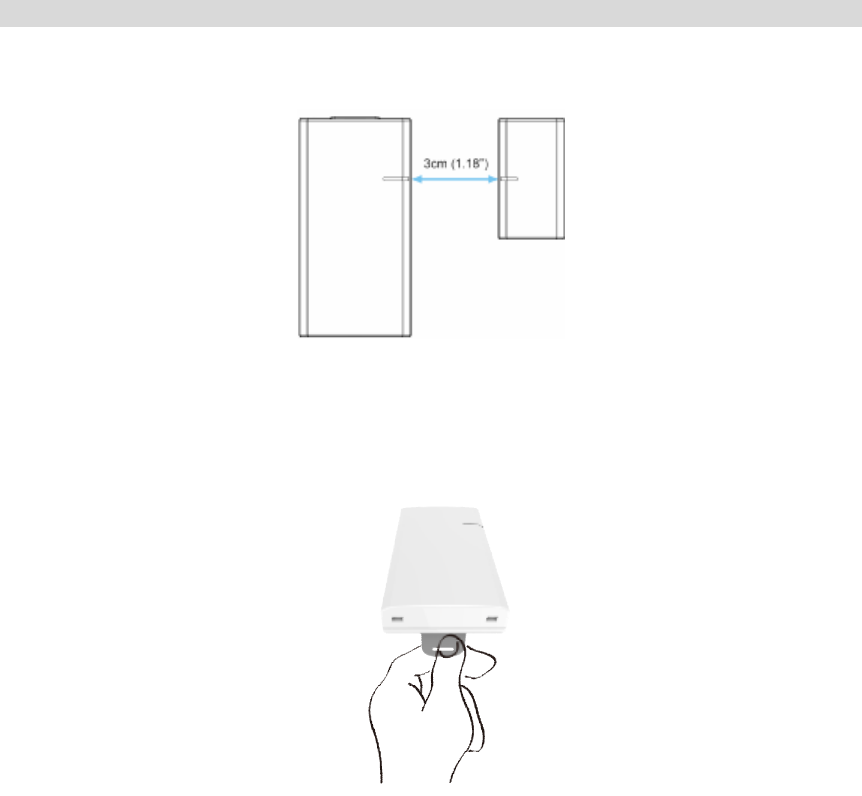
NOTE: Please make sure that the sensor and magnet is located less then 1.27cm (0.5 inch) from each
other.
Intallation
1. Hold the sensor near the top of the door, close to the opening edge of the door. This is the mounting
location for the sensor.
2. Pull the exposed plastic pull tab from the sensor
3. Use either one of the following methods to install the sensor:
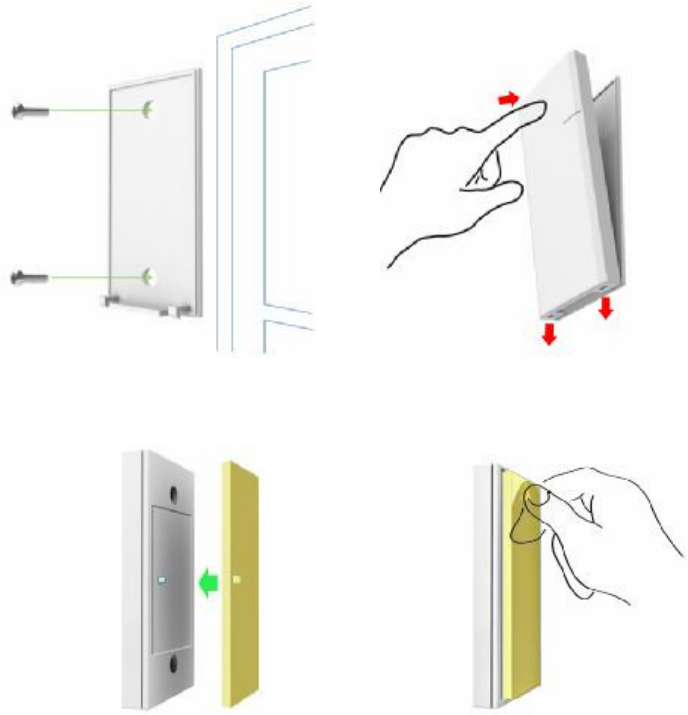
• Remove the back plate of the sensor; use this as the mounting bracket. Use the screwdriver to
secure the back plate to the wall with the screws provided.
Then place the hooks into the two holes of the cover and attach the cover to the plate.

3
• Use provided adhesive on the sensor. Attach the sensor to the door. Press firmly and hold in place
for a few seconds.
Magnet Setup
1. Attach the magnet on the location next to the sensor by using either one of the following methods:
• Remove the back plate of the magnet; use this as the mounting bracket. Use the screwdriver to
secure the back plate to the wall with the screws provided.
• Use provided adhesive on the magnet. Attach the sensor to the door. Press firmly and hold in
place for a few seconds.
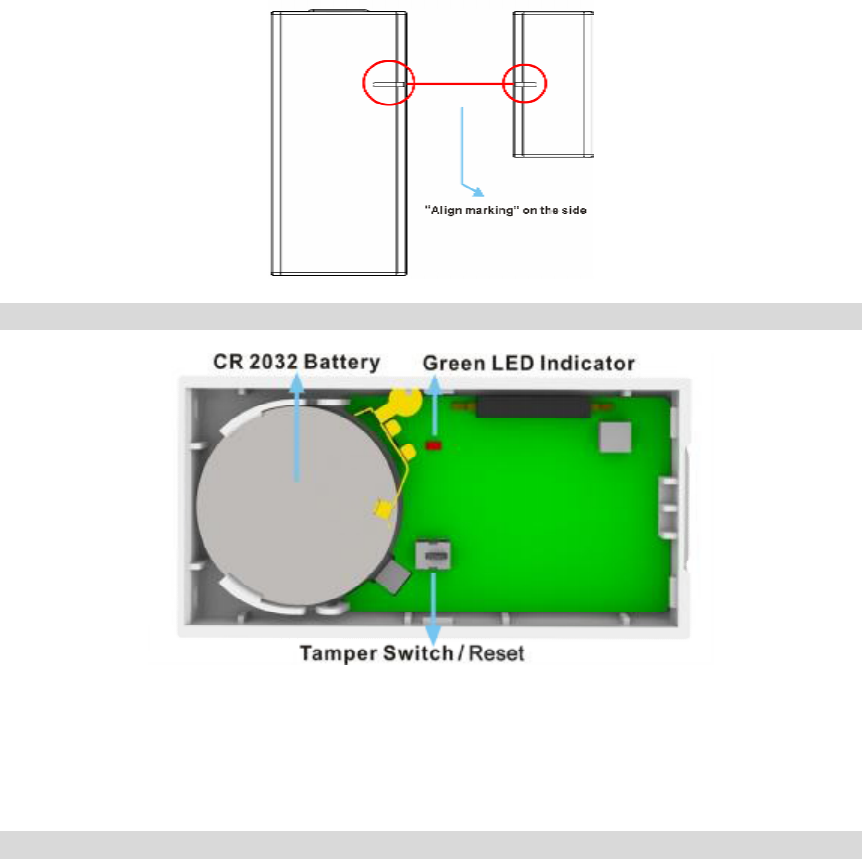
2. Make sure the alignment marks of both devices are facing each other.

4
Operation
• The LED will stay off during the normal operation.
• The sensor is equipped with a tamper switch. If the cover of sensor is removed, the sensor will send
an alarm to the ZigBee coordinator. The sensor will be in "Awake" mode before replacing the cover.
Reset to Factory Defaults
A security sensor should be able to be manually defaulted from the device by putting it into a state where
it is ready to be paired to a CPE. The process shall be as follows:
• Depress the tamper switch after removing the battery from the sensor.
• Insert the battery. The sensor should illuminate the LED once all bootup/initialization tasks are
complete
• Release the tamper switch while the LED is illuminated (4 seconds)
The sensor should then reset to default and begin searching for a new network

FCC Statement
This equipment generates, uses and can radiate radio frequency energy and, if not installed and used in
accordance with the instructions, may cause harmful interference to radio communications. However,
there is no guarantee that interference will not occur in a particular installation. If this equipment does
cause harmful interference to radio or television reception, which can be determined by turning the
equipment off and on, the user is encouraged to try to correct the interference by one of the following
measures:
Reorient or relocate the receiving antenna.
Increase the separation between the equipment and receiver.
Connect the equipment into an outlet on a circuit different from that to which the receiver is
connected.
Consult the dealer or an experienced radio/TV technician for help.
To assure continued compliance, any changes or modifications not expressly approved by the party
responsible for compliance could void the user's authority to operate this equipment. (Example - use
only shielded interface cables when connecting to computer or peripheral devices).
FCC Radiation Exposure Statement
This equipment complies with FCC RF radiation exposure limits set forth for an uncontrolled
environment. This equipment should be installed and operated with a minimum distance of 20
centimeters between the radiator and your body.
This device complies with Part 15 of the FCC Rules. Operation is subject to the following two
conditions:
(1) This device may not cause harmful interference, and
(2) This device must accept any interference received, including interference that may cause undesired
operation.
This transmitter must not be co-located or operating in conjunction with any other antenna or
transmitter.
IC Approvals
CAN-ICES-3 (B)/ NMB-3(B)
This device complies with RSS-210 of the Industry Canada Rules. Operation is subject to the following
two conditions: (1) This device may not cause harmful interference, and (2) this device must accept any
interference received, including interference that may cause undesired operation.

Ce dispositif est conforme à la norme CNR-210 d'Industrie Canada applicable aux appareils radio
exempts de licence. Son fonctionnement est sujet aux deux conditions suivantes: (1) le dispositif ne
doit pas produire de brouillage préjudiciable, et (2) ce dispositif doit accepter tout brouillage reçu, y
compris un brouillage susceptible de provoquer un fonctionnement indésirable.
Radiation Exposure Statement:
This equipment complies with IC radiation exposure limits set forth for an uncontrolled environment.
This equipment should be installed and operated with minimum distance 20cm between the radiator &
your body.
Déclaration d'exposition aux radiations:Cet équipement est conforme aux limites d'exposition aux
rayonnements IC établies pour un environnement non contrôlé. Cet équipement doit être installé et
utilisé avec un minimum de 20 cm de distance entre la source de rayonnement et votre corps.
UL Approvals
UL Notices: This device complies with UL Standard UL634.