Sercomm SZSMK01 ZigBee Smoke Detector User Manual Exhibit 08 Users Manual
Sercomm Corporation ZigBee Smoke Detector Exhibit 08 Users Manual
Sercomm >
Exhibit 08 Users Manual

1
SZ-SMK01 ZigBee SMOKE ALARM Installation Guide
The SZ-SMK01 is a Smoke Alarm that is designed to detect smoke, which maybe a signal of a fire. This device can provide more
time by making alarms for you and your family to escape before a fire spreads.
Specification
Batter Type 3V lithium battery (CR123A 3V)
Operating Temperature -10 C to 50 C (14° - 122°F)
Operating Humidity 10% to 85% Non-condensing
Alarm Audibility At least 85 dB at 3 meters
Dimention 120mm (diameter) x 53mm (depth)
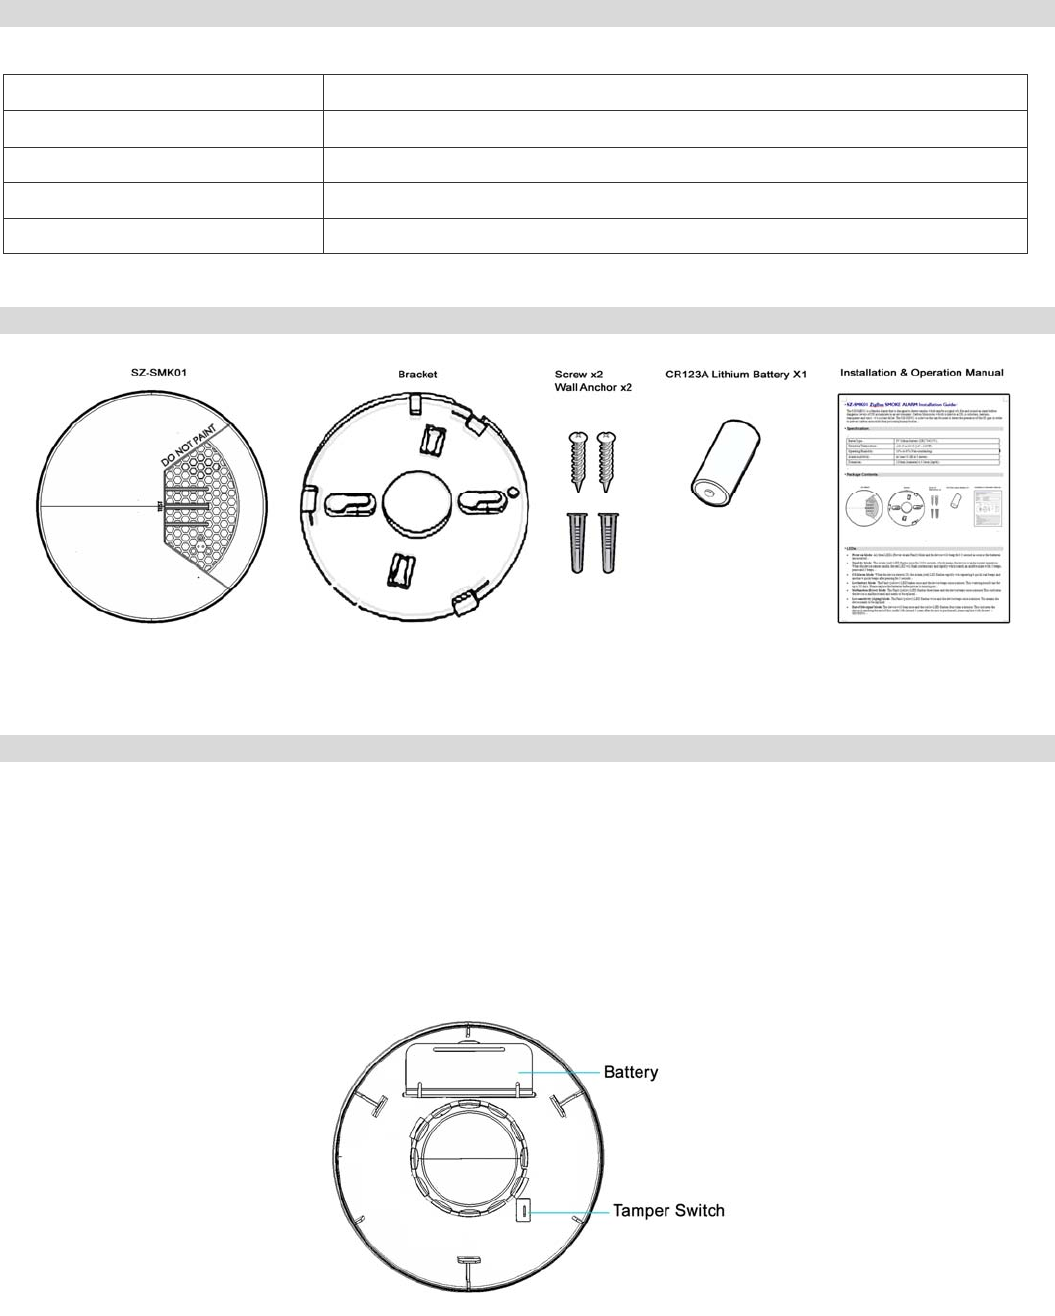
Package Contents
LEDs
Stand-by Mode: The device is under normal operation if the red LED flashes once for 1034 seconds. When the device senses
smoke, the red LED will flash continuously and rapidly while sounds an audible alarm with 3 beeps, pause and 3 beeps.
Low Battery Mode: The red LED flashes and the device begins to chirp once in 43 seconds. This warning should last for up
to 30 days. Please replace the battery before power is running out to secure your protection.
Malfunction (Error) Mode: The yellow LED flashes three times and the device generates 3 beeps within 43 seconds. This
indicates the device is malfunctioned and needs to be repaired or serviced.
Tamper Mode: The device will generate 3 beeps and the yellow LED is steadily on if the smoke alarm is not mounted into
the bracket properly within 5 minutes after the battery is installed.

2
Intallation
Battery Installation/Replacement
1. Open the battery cover of the device.
2. Install the supplied battery correctly.
3. Close the battery cover.
4. Install the bracket.
Note: you will hear a chirp after install the bracket which indicates the device is receiving battery power.
Recommended Battery Type
Please use the following suggested battery. Use of a different battery may cause a detrimental effect on alarm operation.
CR123A 3V battery
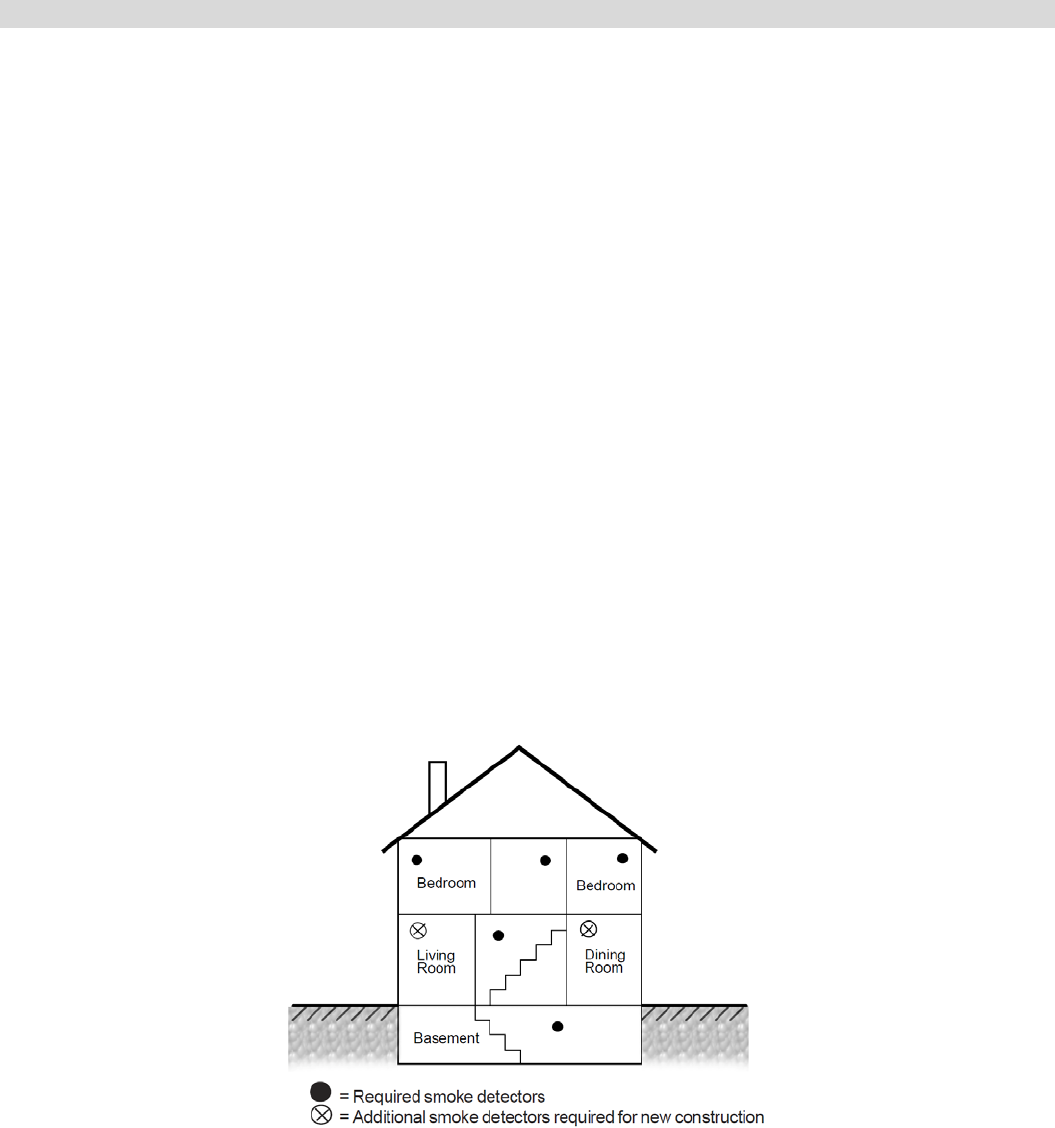
Locations to install your SZ-SMK01
Smoke alarms should be installed in accordance with the NFPA Standard 72 (National Fire Protection Association, Battery march
Park, Quincy, MA 02169). For complete coverage, smoke alarms should be installed in all rooms, halls, storage areas, basements,
and attics in each family. Minimum coverage is one device in each floor and another one in sleeping area.
Install a smoke alarm in the hallway outside every bedroom area. For example, two alarms are required for homes with two
bedroom areas.
Install a smoke alarm on every floor of a multi-floor home or apartment.
Install at least two alarms in a household.
Install a smoke alarm inside every bedroom.
Install smoke alarms at both ends of a bedroom hallway if the hallway is more than 40 feet (12 meters) long.
Install a smoke alarm inside every room where a person sleeps with the door partly or completely closed, since smoke could
be blocked by the closed door and a hallway alarm may not wake up the person if the door is closed.
Do not place the device in the following areas:
Combustion particles are the by-products of something that is burning. Thus, in or near areas where combustion particles are
present you do not install the smoke alarms to avoid nuisance alarms, such as kitchens with few windows or poor ventilation,
garages where there may be vehicle exhaust, near furnaces, hot water heaters, and space heaters.
Do not install smoke alarms less than 20 feet (6 meters) away from places where combustion particles are normally present,
like kitchens. If a 20-foot distance is not possible, e.g. in a mobile home, try to install the alarm as far away from the
combustion particles as possible, preferably on the wall. To prevent nuisance alarm alarms, provide good ventilation in such
places. Within 5 feet (1.5 meter) of open flame appliances such as furnaces, stoves and fireplaces

3
Wall Mounting
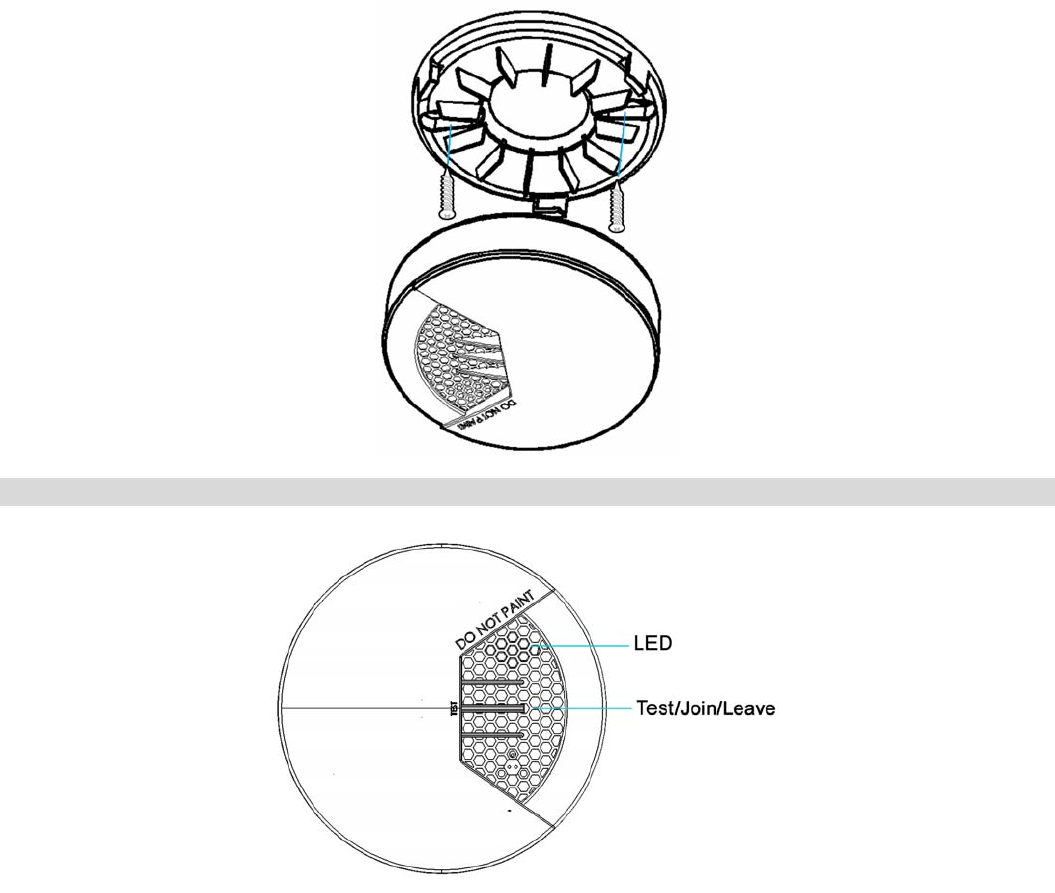
1. Draw a six inches horizontal line at the place where you are going to install the device.
2. Rotate the mounting bracket counterclockwise to remove it from the device.
3. Draw 2 marks to locate the screws.
4. Drill two holes at the marks and insert screws and wall plugs.
5. Attach the bracket to the wall by using the supplied two screws and wall plugs.
6. Attach the device onto the mounting bracket and turn it clockwise to fix it into place. Make sure it is securely attached to the
mounting bracket.
Adding/Leaving to a ZigBee Network
1. Join Function
For "Join" a network, please do the following instruction:
Press the Test button for less than 1 second. The Join/Leave LED is blinking while processing. If the device has been
joined with the controller successfully, the Join/Leave LED will be on for 2 seconds and then off. The Join/Leave LED
will be off instantly if failed.
2. Leave Function
For "Leave" a network, please do the following instruction:
Press Test button for 10 seconds to let the device disassociate from the controller. The Join/Leave LED will be on for 1
second and then off.

4
3. Test/Silence Button
The Test button is used to test if the device is working properly and mute the SZ-SMK01 during alarm.
Test
Press the Test button for about 4 seconds until it alarms. The device will generate 3 beeps, pause and 3 beeps. While the
Alarm (red) LED will flash continuously and rapidly.
Silence
If the device is alarming, press the Test button will have it silenced. If the smoke still remains after 10 minutes, the device will
alarm again.
FCC Statement
This equipment has been tested and found to comply with the limits for a Class B digital device, pursuant to Part 15 of the FCC
Rules. These limits are designed to provide reasonable protection against harmful interference in a residential installation.
This equipment generates, uses and can radiate radio frequency energy and, if not installed and used in accordance with the
instructions, may cause harmful interference to radio communications. However, there is no guarantee that interference will not
occur in a particular installation. If this equipment does cause harmful interference to radio or television reception, which can be
determined by turning the equipment off and on, the user is encouraged to try to correct the interference by one of the following
measures:
Reorient or relocate the receiving antenna.
Increase the separation between the equipment and receiver.
Connect the equipment into an outlet on a circuit different from that to which the receiver is connected.
Consult the dealer or an experienced radio/TV technician for help.
To assure continued compliance, any changes or modifications not expressly approved by the party responsible for compliance
could void the user's authority to operate this equipment. (Example - use only shielded interface cables when connecting to
computer or peripheral devices).
FCC Radiation Exposure Statement
This equipment complies with FCC RF radiation exposure limits set forth for an uncontrolled environment. This equipment should
be installed and operated with a minimum distance of 20 centimeters between the radiator and your body.
This device complies with Part 15 of the FCC Rules. Operation is subject to the following two conditions:
(1) This device may not cause harmful interference, and
(2) This device must accept any interference received, including interference that may cause undesired operation.
This transmitter must not be co-located or operating in conjunction with any other antenna or transmitter.
CE Approval
CE Standards
This product complies with the 99/5/EEC directives, including the following safety and EMC standards:
EN301489-1/-17
EN300328
EN14604
CE Marking Warning
This is a Class B product. In a domestic environment this product may cause radio interference in which case the user may be
required to take adequate measures.
UL Notices: This device complies with UL Standard 217.
SZ-SMK01 V1.0
PN: 956ALJ0001
Issue date: 2013/1/21