Sercomm SZSRN02SA ZigBee Safeawake Siren Repeater User Manual SZ SRN02 SA QIG
Sercomm Corporation ZigBee Safeawake Siren Repeater SZ SRN02 SA QIG
Sercomm >
User Manual.pdf
1
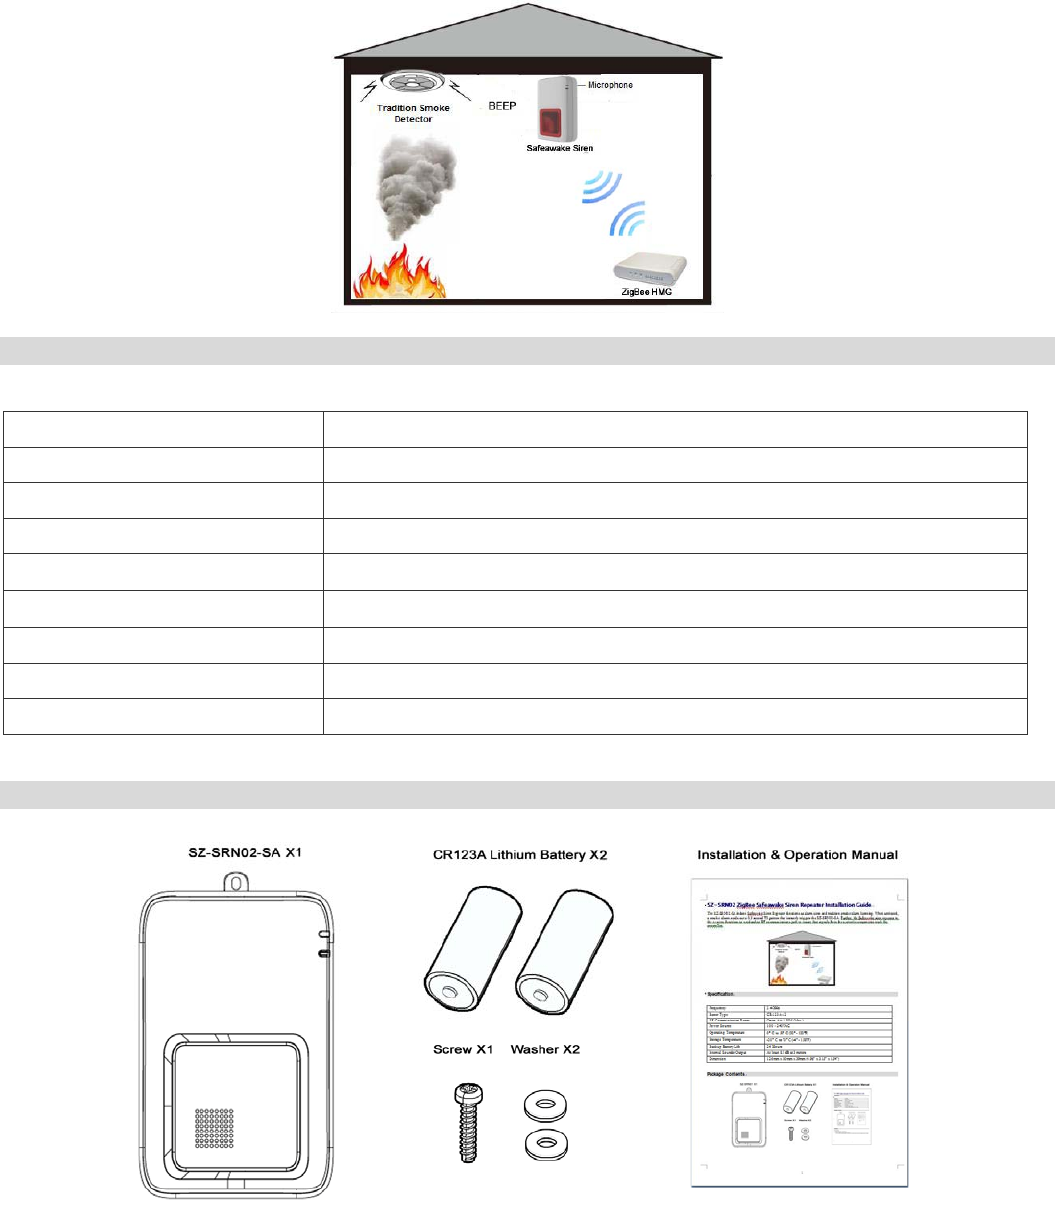
SZ-SRN02-SA ZigBee Safeawake Siren Repeater Installation Guide
The SZ-SRN02-SA indoor Safeawake Siren Repeater can function as an alarm siren and work with the existing traditional smoke
alarm to provide more protection. When a smoke alarm sends out a 0.5 second T3 pattern, the SZ-SRN02-SA will hear and be
triggered instantly. Furthermore, this device extends the range of your Home Security system's wireless network to ensure that
signals from the other devices reach the coordinator
Specification
Frequency 2.4GHz
Batter Type CR123A x 2
RF Communication Range Open Air: 150M (Max.)
Power Source 100 - 240VAC
Operating Temperature 0° C to 50° C (32° - 122°F)
Storage Temperature -20° C to 70° C (-4° - 158°F)
Backup Battery Life 24 Hours
Internal Sounder Output At least 85 dB at 3 meters
Dimension 126mm x 80mm x 39mm (4.96" x 3.15" x 1.54")
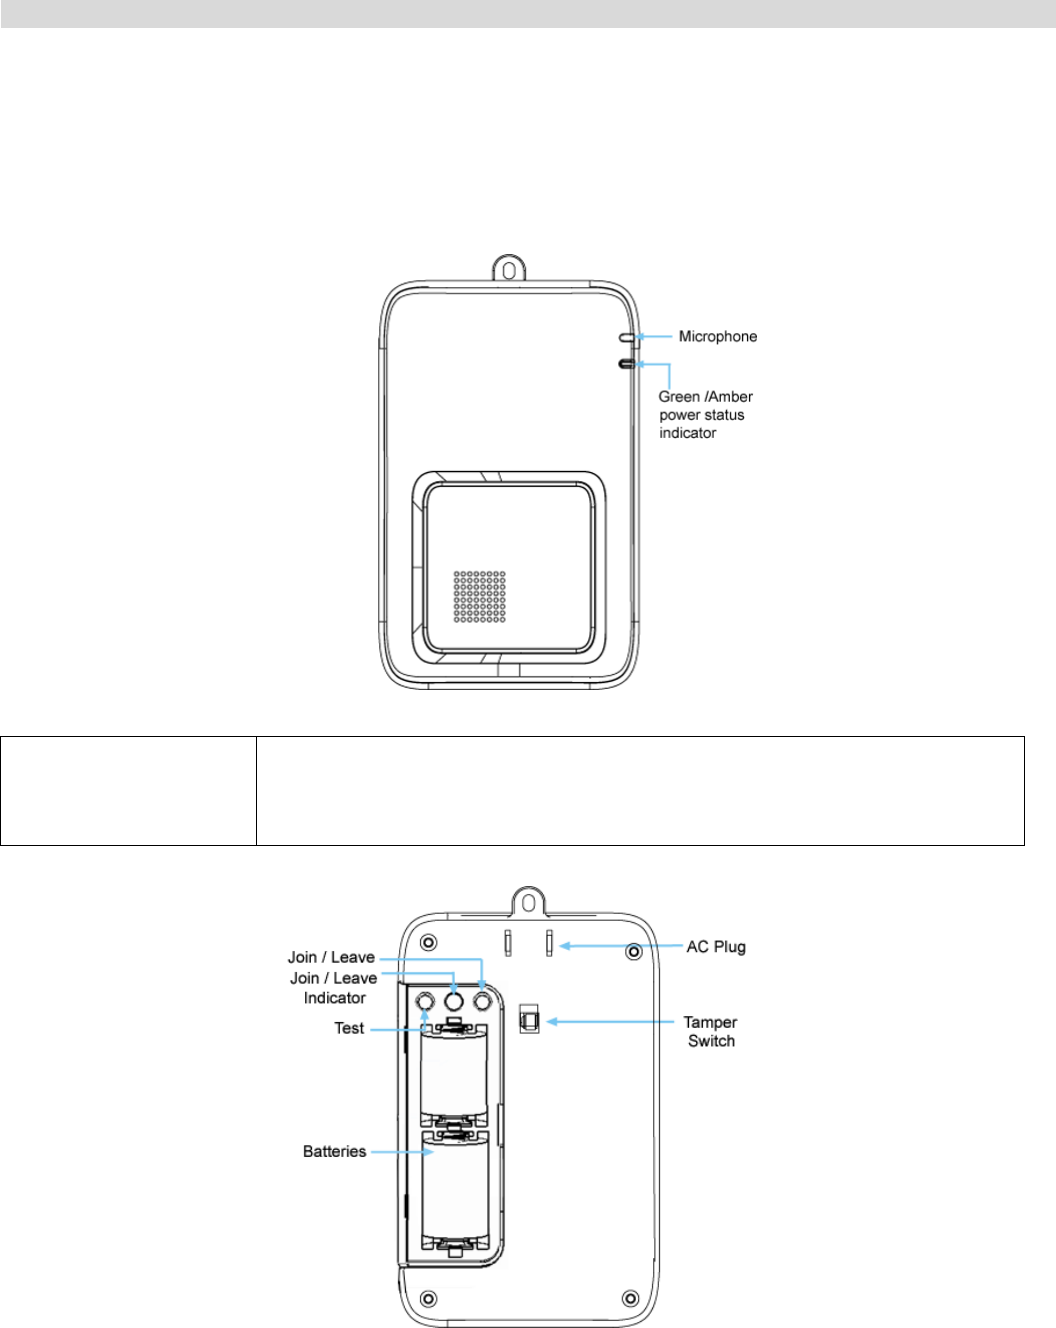
Package Contents
2
Intallation
Pre-Intallation
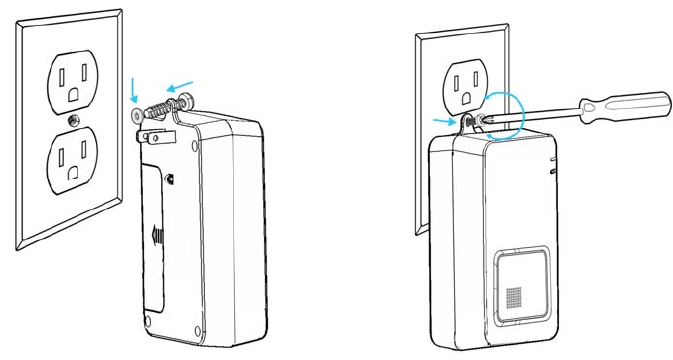
1. Remove the battery cover of the device.
2. Install the supplied two CR123A batteries correctly.
Note: For safety reason, please replace the backup CR123A batteries after the siren has been triggered (except self-testing).
Operation
Power Status LED
(Green/Amber) On (Green) - AC power mode.
On (Amber) - DC battery mode.
Blinking (Amber) - Low battery mode.
3
1. Join Function
For "Join" a network, please do the following instruction:
• Set the ZigBee Coordinator into “Permit-Joining” mode.
• Press the Join/Leave button for less than 1 second. The Join/Leave LED is blinking while processing. If the siren has
been joined with the coordinator successfully, the Join/Leave LED will be on for 2 seconds and then off. The Join/Leave
LED will be off instantly if failed.
2. Leave Function
For "Leave" a network, please do the following instruction:
• Press Join/Leave button for 3 seconds to let the siren disassociate from the coordinator. The Join/Leave LED will be on
for 1 second and then off.
3. Test Function
• Remove the battery cover before testing.
• Press the Test button for 3 seconds.
When pressing the Test button, the device will generate low level sounds and flash light to indicate that the siren is
serviceable.
Note:
• The Join/Leave LED will stay off during the normal operation.
• The siren is equipped with a tamper switch. If the device is removed, the siren will send an alarm message to the ZigBee
coordinator.
• For safety reason, please replace the backup CR123A batteries after the siren has been triggered (except self-testing).
Procedure
1. Remove the screw of the outlet’s cover plate. Plug the device into the 110V outlet.
Note: Make sure that the outlet is not controlled by a wall switch.
2. Tighten the device to the outlet with the supplied screw. The supplied washer can be used as a spacer between the screw and
the outlet, if required.
4
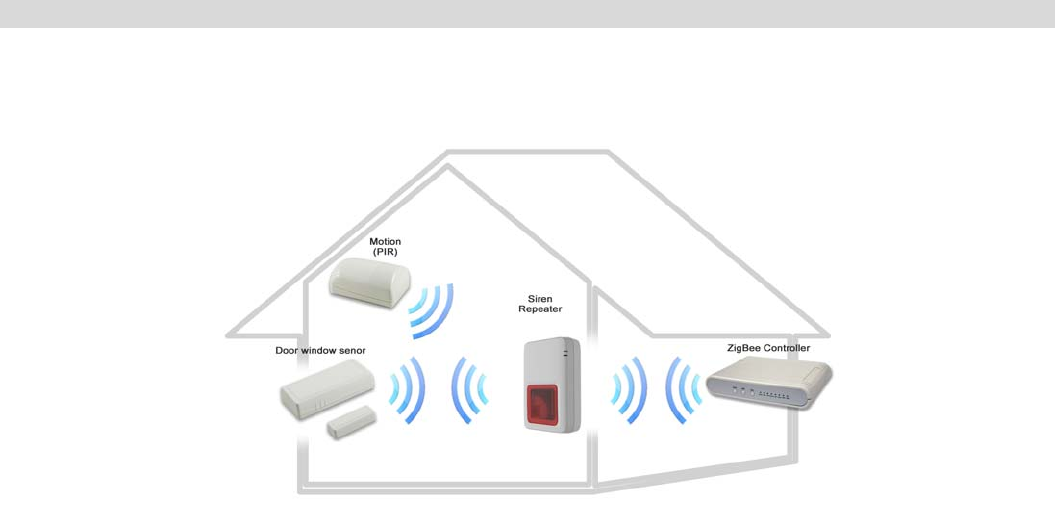
Repeater Setup
The siren can also be used as a repeater that lets you extend the security range of your home. When using the device as a repeater,
just locate it in a suitable place, which has average signal strength and is at the halfway between the coordinator and the furthest
sensor. The repeater can even boost signals weakened by walls and other obstructions.

5
FCC Statement
This equipment has been tested and found to comply with the limits for a Class B digital device, pursuant to Part 15 of the FCC
Rules. These limits are designed to provide reasonable protection against harmful interference in a residential installation.
This equipment generates, uses and can radiate radio frequency energy and, if not installed and used in accordance with the
instructions, may cause harmful interference to radio communications. However, there is no guarantee that interference will not
occur in a particular installation. If this equipment does cause harmful interference to radio or television reception, which can be
determined by turning the equipment off and on, the user is encouraged to try to correct the interference by one of the following
measures:
• Reorient or relocate the receiving antenna.
• Increase the separation between the equipment and receiver.
• Connect the equipment into an outlet on a circuit different from that to which the receiver is connected.
• Consult the dealer or an experienced radio/TV technician for help.
To assure continued compliance, any changes or modifications not expressly approved by the party responsible for compliance
could void the user's authority to operate this equipment. (Example - use only shielded interface cables when connecting to
computer or peripheral devices).
FCC Radiation Exposure Statement
This equipment complies with FCC RF radiation exposure limits set forth for an uncontrolled environment. This equipment should
be installed and operated with a minimum distance of 20 centimeters between the radiator and your body.
This device complies with Part 15 of the FCC Rules. Operation is subject to the following two conditions:
(1) This device may not cause harmful interference, and
(2) This device must accept any interference received, including interference that may cause undesired operation.
This transmitter must not be co-located or operating in conjunction with any other antenna or transmitter.