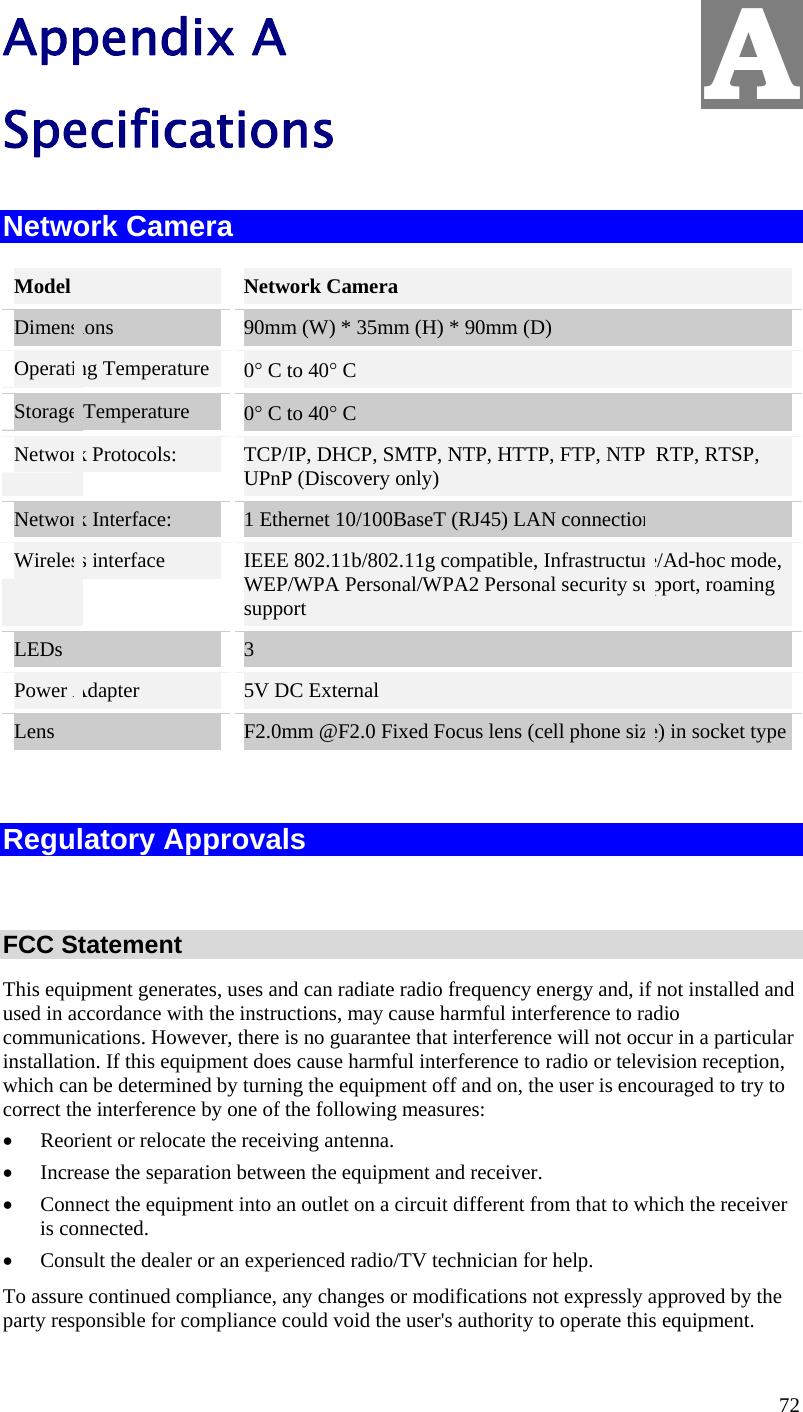
Sercomm YL500 Wireless Network Camera User Manual RC8021 4021manual
Sercomm Corporation Wireless Network Camera RC8021 4021manual
UserManual.wiki
>
Sercomm
>
YL500 User Manual
manual
Navigation menu
Upload a User Manual
Namespaces
Wiki Guide
HTML
PDF
Info
Views
User Manual
Discussion / Help
Navigation


![83 Lesser GNU General Public License GNU LESSER GENERAL PUBLIC LICENSE Version 2.1, February 1999 Copyright (C) 1991, 1999 Free Software Foundation, Inc. 51 Franklin St, Fifth Floor, Boston, MA 02110-1301 USA Everyone is permitted to copy and distribute verbatim copies of this license document, but changing it is not allowed. [This is the first released version of the Lesser GPL. It also counts as the successor of the GNU Library Public License, version 2, hence the version number 2.1.] Preamble The licenses for most software are designed to take away your freedom to share and change it. By contrast, the GNU General Public Licenses are intended to guarantee your freedom to share and change free software--to make sure the software is free for all its users. This license, the Lesser General Public License, applies to some specially designated software packages--typically libraries--of the Free Software Foundation and other authors who decide to use it. You can use it too, but we suggest you first think carefully about whether this license or the ordinary General Public License is the better strategy to use in any particular case, based on the explanations below. When we speak of free software, we are referring to freedom of use, not price. Our General Public Licenses are designed to make sure that you have the freedom to distribute copies of free software (and charge for this service if you wish); that you receive source code or can get it if you want it; that you can change the software and use pieces of it in new free programs; and that you are informed that you can do these things. To protect your rights, we need to make restrictions that forbid distributors to deny you these rights or to ask you to surrender these rights. These restrictions translate to certain responsibilities for you if you distribute copies of the library or if you modify it. For example, if you distribute copies of the library, whether gratis or for a fee, you must give the recipients all the rights that we gave you. You must make sure that they, too, receive or can get the source code. If you link other code with the library, you must provide complete object files to the recipients, so that they can relink them with the library after making changes to the library and recompiling it. And you must show them these terms so they know their rights. We protect your rights with a two-step method: (1) we copyright the library, and (2) we offer you this license, which gives you legal permission to copy, distribute and/or modify the library. To protect each distributor, we want to make it very clear that there is no warranty for the free library. Also, if the library is modified by someone else and passed on, the recipients should know that what they have is not the original version, so that the original author's reputation will not be affected by problems that might be introduced by others.](https://usermanual.wiki/Sercomm/YL500/User-Guide-980299-Page-87.png)

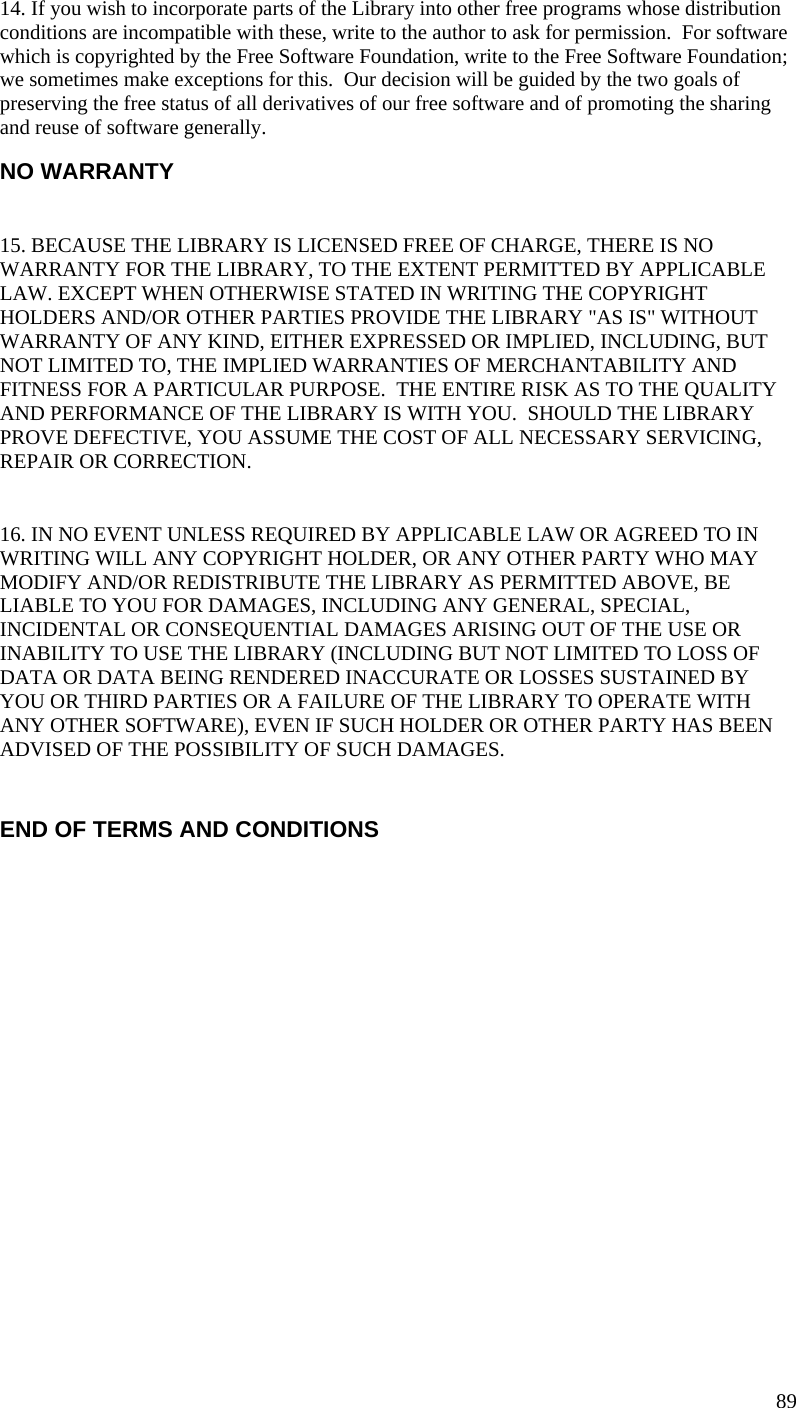
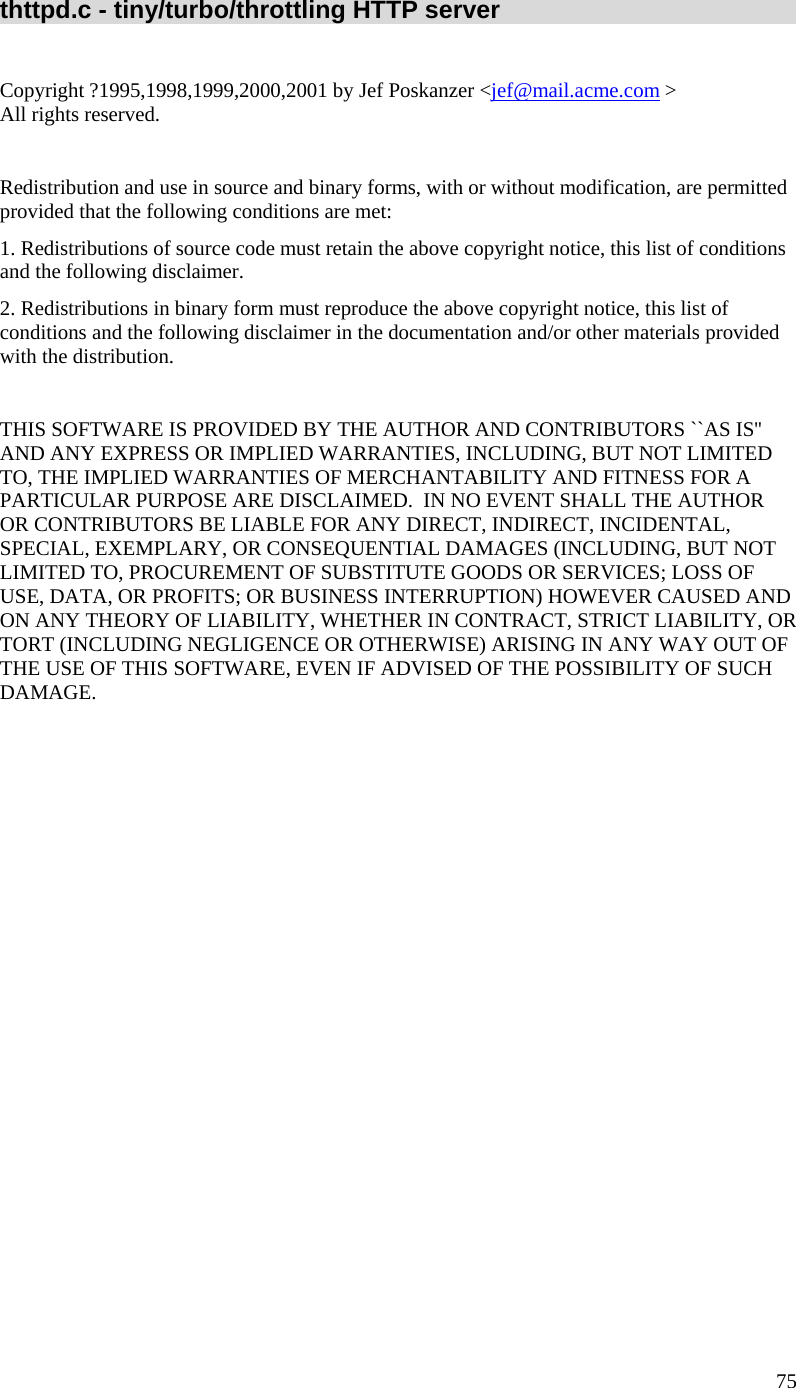
![90 Appendix B Streaming Video/Audio Solution Overview Streaming video is a sequence of "moving images" that are sent in compressed form over the Internet and displayed by the viewer as they arrive. With streaming, a Web user does not have to wait to download a large file before seeing the video or hearing the sound. Instead, the media is sent in a continuous stream and is played as it arrives. Streaming Video/Audio through Internet Camera To snapshot a JPEG image from the Internet Camera with specified resolution and quality: http://<ip>/img/snapshot.cgi?[size=<value>][&quality=<value>] Size = 1 (160*120) 2 (320*240) 3 (640*480) Quality = 1 (Very high) 2 (High) 3 (Normal) 4 (Low) 5 (Very low) To stream M-JPEG video from the Internet Camera (M-JPEG mode only) http://<ip>/img/mjpeg.htm To stream video through the RTP/RTSP protocol from Internet Camera (MPEG-4 mode only) rtsp://<ip>/img/media.sav Note: Users need to specify the desired protocol in the players. To snapshot a JPEG image (160*120, very low quality) through a mobile phone: http://<ip>/img/mobile.cgi B](https://usermanual.wiki/Sercomm/YL500/User-Guide-980299-Page-94.png)