Sharp DMR0168 Microwave Oven User Manual 1107 Mix R CD1800 CD2200 indd
Sharp Corporation Microwave Oven 1107 Mix R CD1800 CD2200 indd
UserManual.wiki
>
Sharp
>
DMR0168 User Manual
Users Manual
Navigation menu
Upload a User Manual
Namespaces
Wiki Guide
HTML
PDF
Info
Views
User Manual
Discussion / Help
Navigation
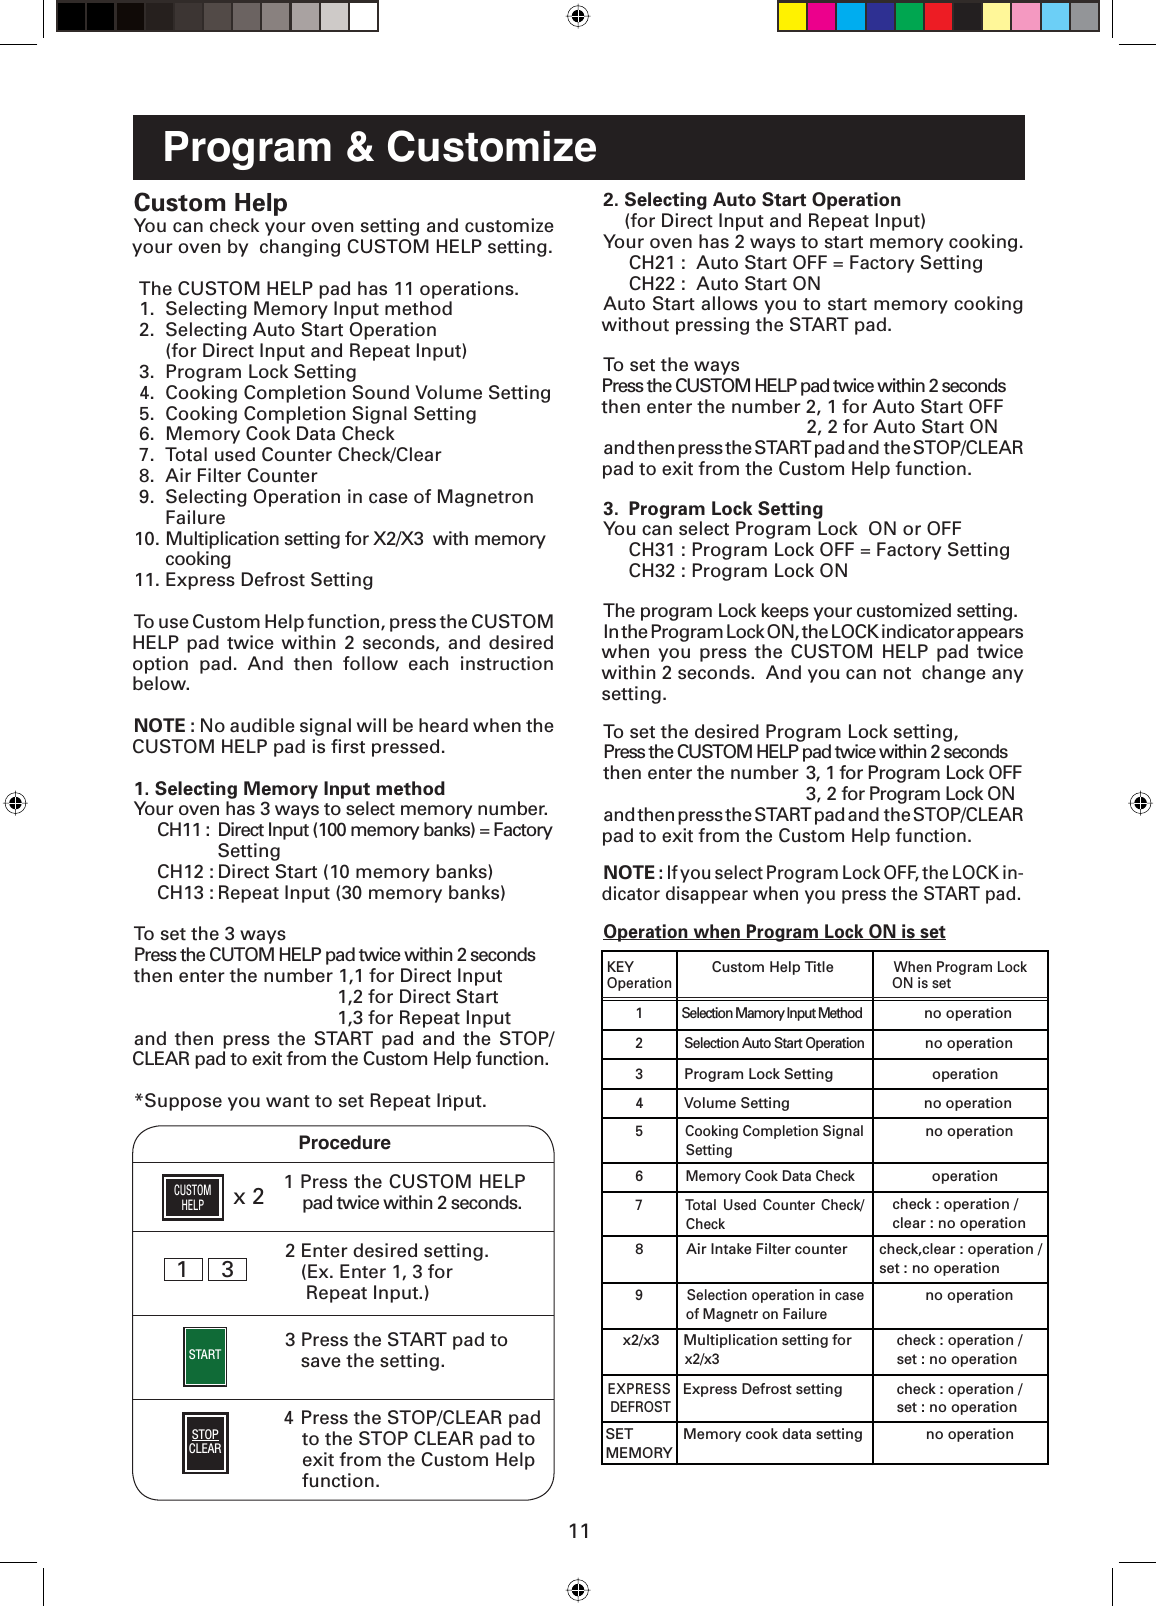
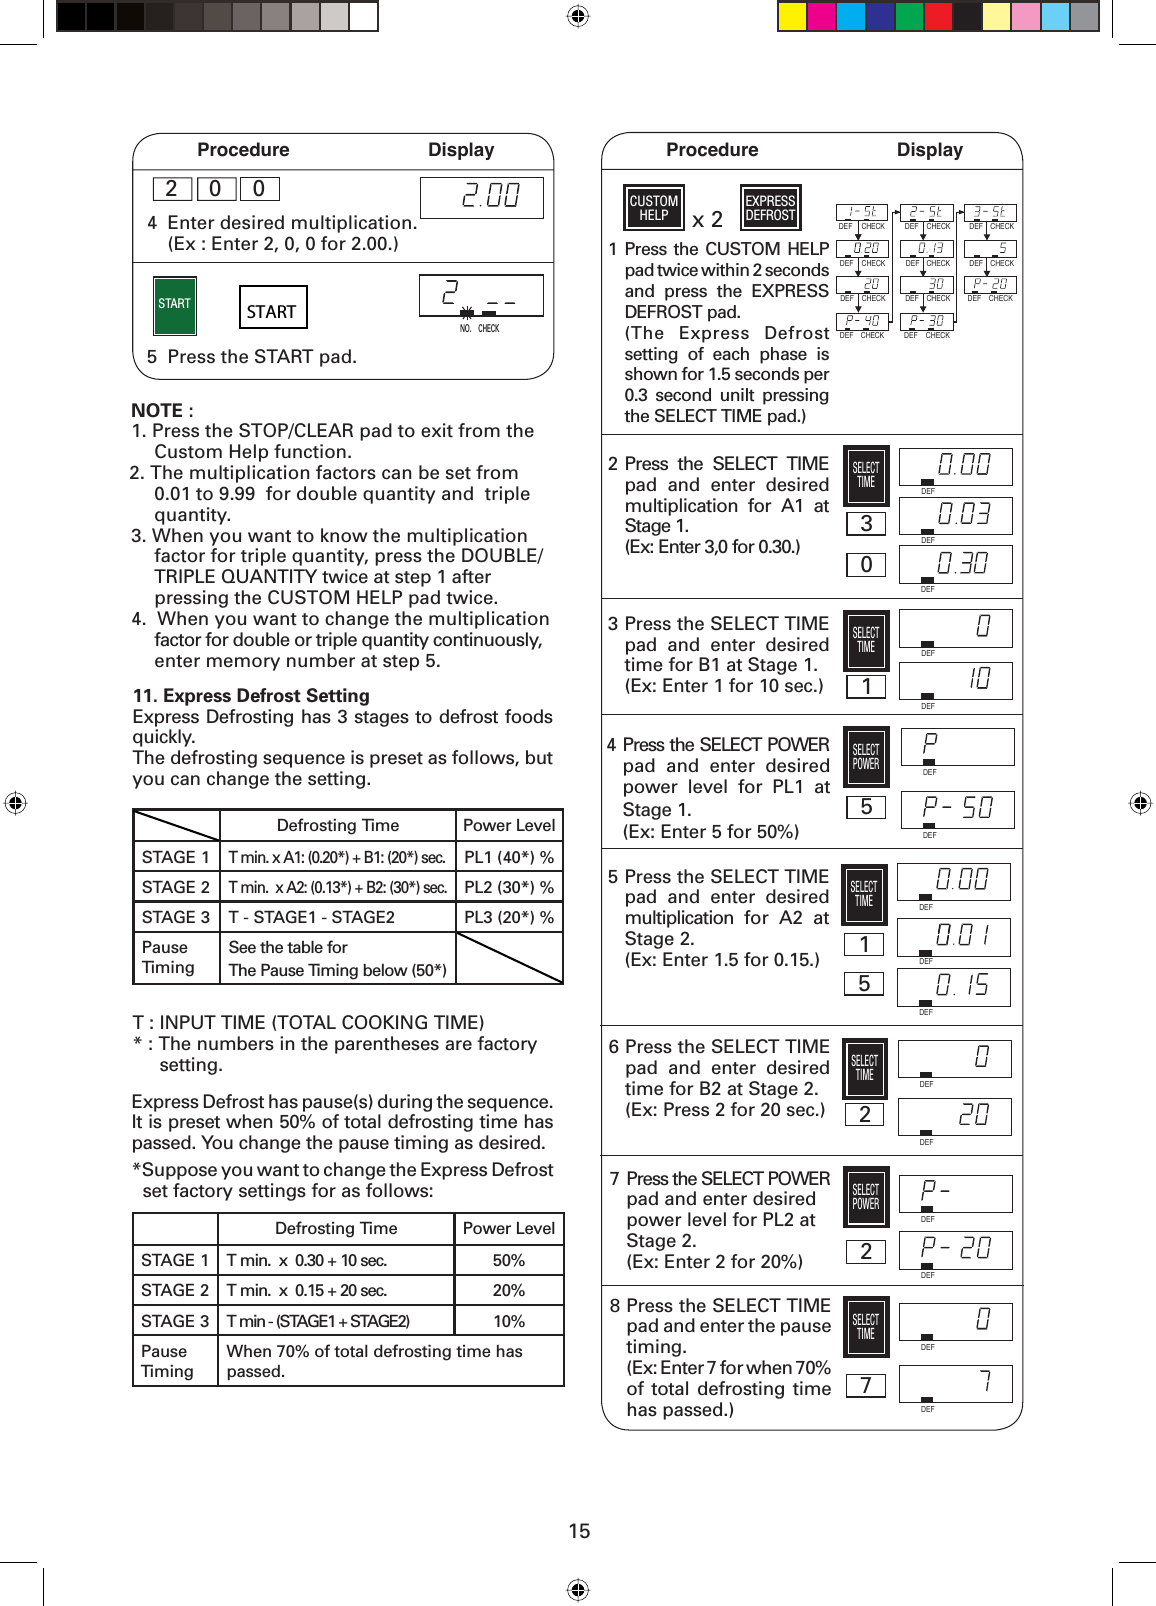
![19Procedure Display5NOSET MEMORY Press the SET MEMORY pad. Note: 1. If you do not press the SET MEMORY pad within 2 sec. at step 1, the SET MEMORY mode will be invalid. 2. If the cooking time is over the maximum time, the display will show “EE9” therefore to cancel it press the STOP/CLEAR pad.6 Press the STOP/CLEAR pad.STOP/CLEAR * Suppose you want to set the total cooking time of EXPRESS DEFROST to 30 minutes in the memory 2 in case of Direct start.1Procedure DisplayX 2SET MEMORY Press the SET MEMORY pad twice within 2 sec.2 Enter memory number.NONO2Note: Please follow the page E-18-19 at step 3 to 6.* Suppose you want to set the total cooking time of EXPRESS DEFROST to 30 minutes in the memory 12 in case of Repeat input.Note: Please follow the page E-18-19 at step 3 to 6.1X 2SET MEMORY Press the SET MEMORY pad twice within 2 sec.NO2 Enter memory number.2 2NOProcedure DisplayNO4 Enter cooking time.DEF3 0 0 0Maximum cooking time1. In case of 100%~60% power level, The total cooking time of all cooking stages is maximum 60 minutes.2. In case of 50%~10% power level, The total cooking time of all cooking stages is maximum 120 minutes.3. When a multiple sequence cooking has the stages of 100~60% power level and the stages of 50~10% power level, the maximum cooking time is limited by following expression. Expression of maximum cooking time * For example, you can cook 5 minutes at 100% for 1st stage, 15 minutes at 80% for 2nd stage, 40 minutes at 30% for 3rd stage and 20 minutes at 10% for 4th stage but actual total cooking time is 80 minutes. Because [5min + 15min] + [(40min + 20min)/2] 60 min.4. In case of 0% power level, Maximum 99 minutes and 99 seconds can be input at one stage (Max. 4 stages).5. In case of EXPRESS DEFROST The maximum defrosting time is 90 minutes. And also the maximum defrosting time is limited by the expression of maximum cooking time above.Is it possible to write these two sentences in one line?Link this.total cooking time of 100~60% power level 2+ total cooking time of 50~10% power level 60 minutes](https://usermanual.wiki/Sharp/DMR0168/User-Guide-873025-Page-20.png)