Sharp HRO00033 850/1900 GSM Cellular Phone With Bluetooth User Manual 2
Sharp Corporation 850/1900 GSM Cellular Phone With Bluetooth 2
UserManual.wiki
>
Sharp
>
HRO00033 User Manual
>
User Manual 2
Contents
1.
User Manual 1
2.
User Manual 2
User Manual 2
Navigation menu
Upload a User Manual
Namespaces
Wiki Guide
HTML
PDF
Info
Views
User Manual
Discussion / Help
Navigation

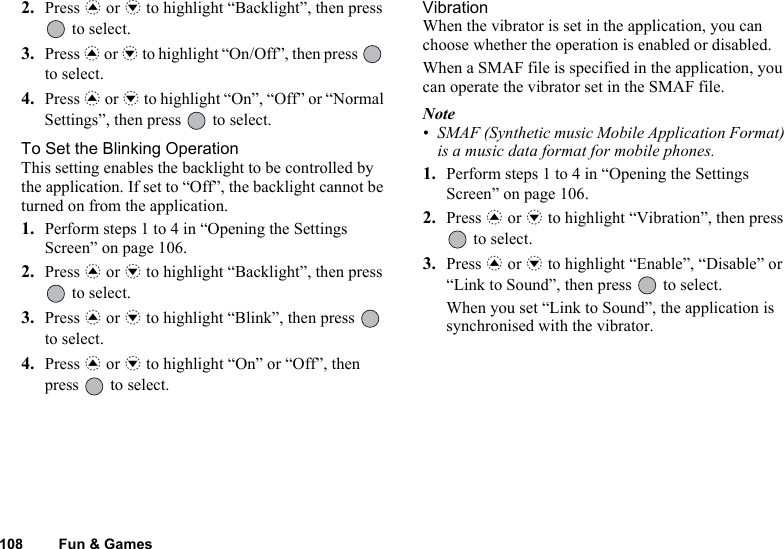
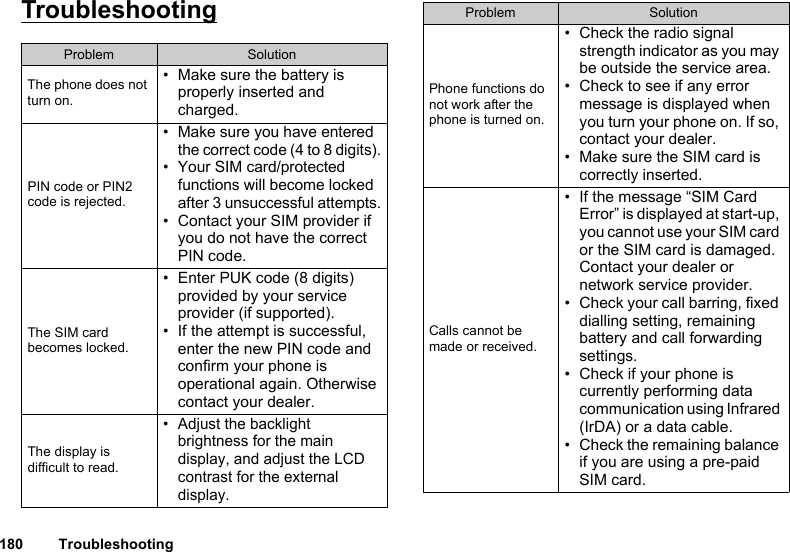
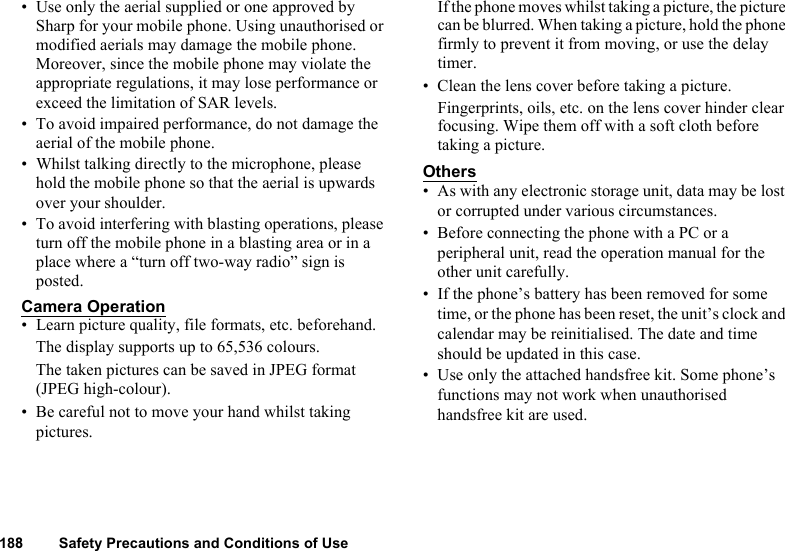
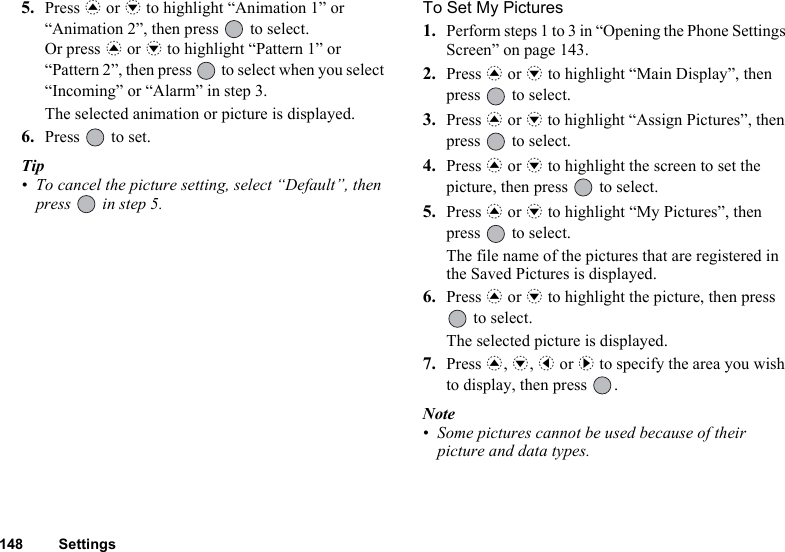
![Fun & Games 109Online ConfirmationYou can adjust the display settings of the confirmation screen of the application on application startup.1. Perform steps 1 to 4 in “Opening the Settings Screen” on page 106.2. Press a or b to highlight “Online Confirmation”, then press to select.3. Press a or b to highlight “On”, then press to select.To cancel confirmation, highlight “Off”, then press to select.ResetTo Reset All Items in Settings Menu1. Perform steps 1 to 4 in “Opening the Settings Screen” on page 106.2. Press a or b to highlight “Reset”, then press to select.3. Enter your handset code, then press .The default handset code is “0000”. For details on changing the handset code, see “To Change Handset Code” on page 172.If you enter a wrong handset code, the screen will return to step 4 in “Opening the Settings Screen” on page 106.4. Press a or b to highlight “Settings Reset”, then press to select.5. Press A [Yes].All items in Settings menu and screensaver settings are reset.To cancel resetting, press C [No] in step 5.](https://usermanual.wiki/Sharp/HRO00033.User-Manual-2/User-Guide-391573-Page-5.png)
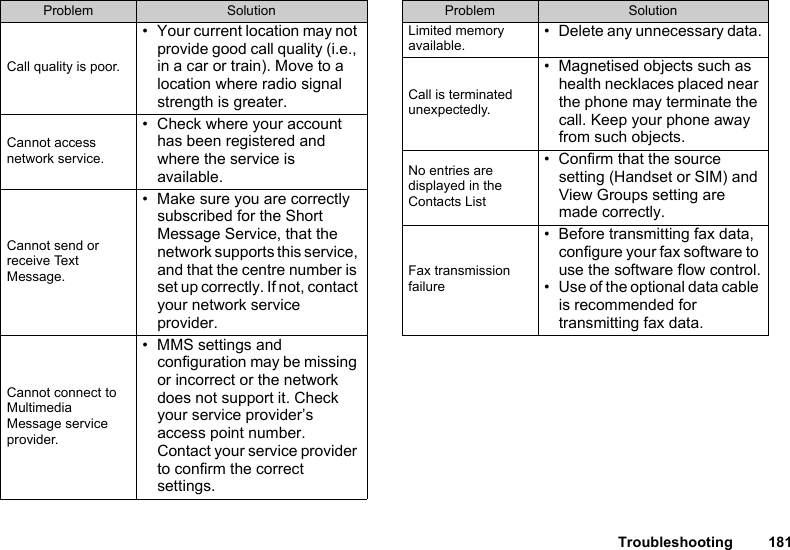
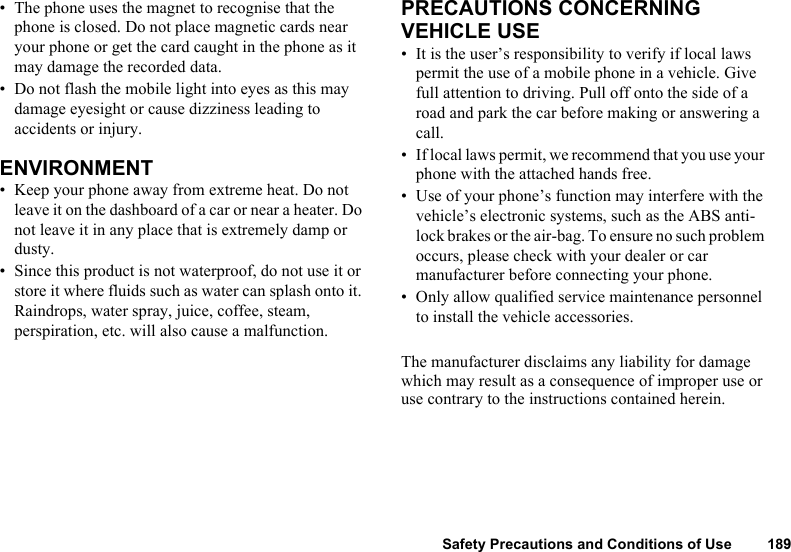
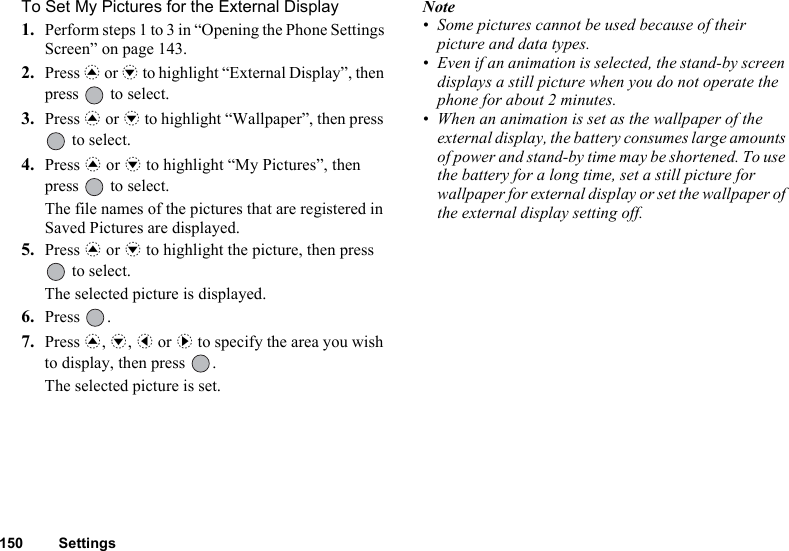
![110 Fun & GamesTo Clear All ApplicationsAll applications stored in Applications are cleared. The preloaded application cannot be deleted.1. Perform steps 1 to 4 in “Opening the Settings Screen” on page 106.2. Press a or b to highlight “Reset”, then press to select.3. Enter your handset code, then press .If you enter a wrong handset code, the screen will return to step 4 in “Opening the Settings Screen” on page 106.4. Press a or b to highlight “All Clear”, then press to select.5. Press A [Yes].All applications are cleared.To cancel clearing, press C [No] in step 5.Java™ Information (M 1-1-5)The information about the license belonging to Java™ can be displayed.MP3 Player The MP3 Player allows you to play back MP3 sound files.: Appears when MP3 files are played back over the handset.: Appears when MP3 files are played back from SD/MMC cards.: Appears when MP3 files are played back from DCF cards.Playing Back MP3 Files1. Press to display the Main menu.2. Press a, b, c or d to highlight “Fun & Games”, then press to select.(M 1-2)](https://usermanual.wiki/Sharp/HRO00033.User-Manual-2/User-Guide-391573-Page-6.png)
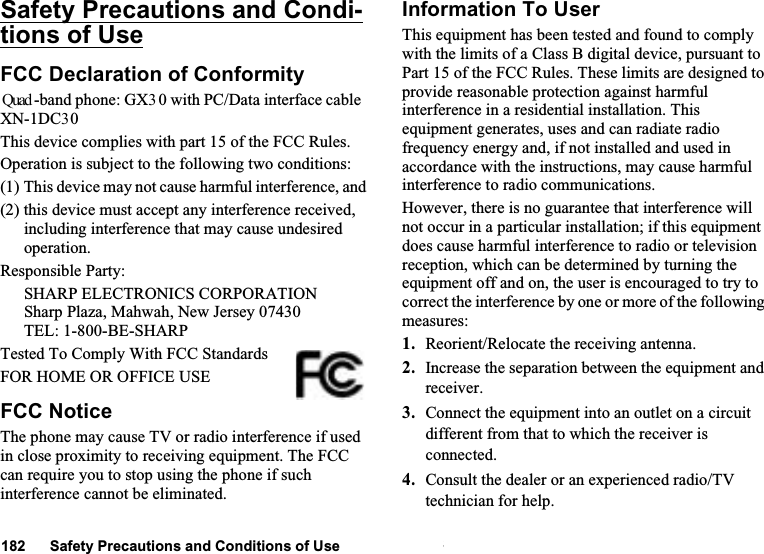
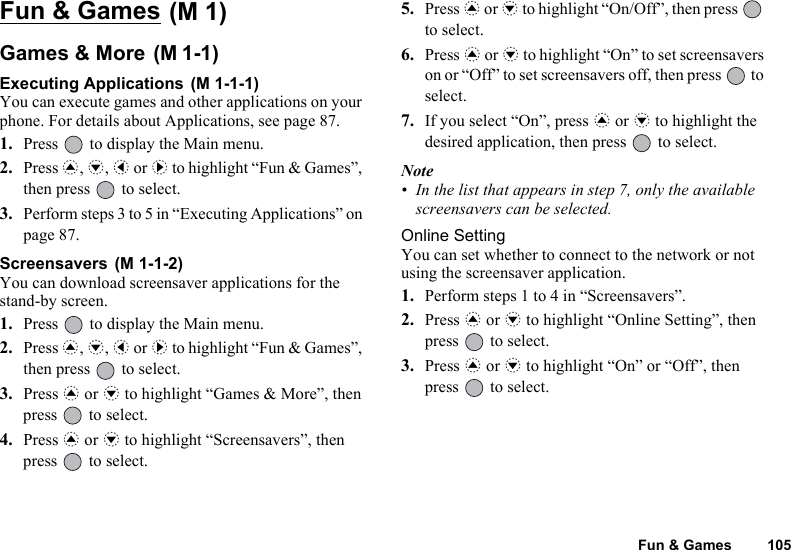
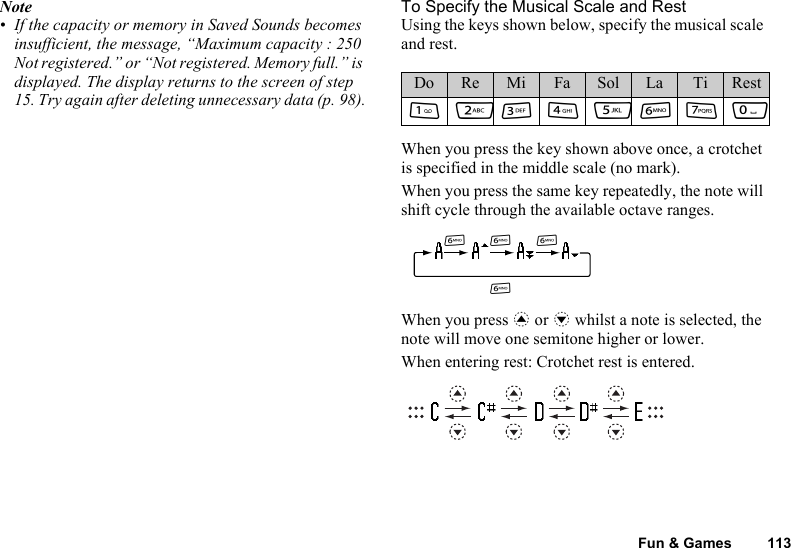
![Fun & Games 1113. Press a or b to highlight “MP3 Player”, then press to select.The MP3 application will be activated, and it will display the MP3 files stored in the phone.Press A [Options] in order to switch the memory source.Press a or b to highlight desired source, then press or A [Select] to select. MP3 files from the selected source are listed.4. Press [Play] to start playback.To pause, press [Pause] or P. To repeat playback, press A [Options], then press a or b to highlight “Repeat”, then press to select.To adjust the volume, press a (up) or b (down) on the menu screen.To move to the previous or next title, press a or b during playback.Tip• Whilst performing step 4, press A [Options] instead in order to play back files from SD/MMC cards, and press a or b to highlight “Source”, then press to select. Then press a or b to highlight “SD card”, then press to select.Melody Editor You can create an original ringtone, or you can send a melody attached to a multimedia message.You can input up to 190 tones × 16 voices, or 380 tones × 8 voices per melody.The original ringtone is registered in Saved Sounds.Creating Your Original Ringtone 1. Press to display the Main menu. 2. Press a, b, c or d to highlight “Fun & Games”, then press to select.3. Press a or b to highlight “Melody Editor”, then press to select.4. Press a or b to highlight “Create New”, then press to select.5. Enter the title.Up to 24 characters can be entered.For details on entering characters, see “Entering Characters” on page 31.6. Press .(M 1-3)(M 1-3-1)](https://usermanual.wiki/Sharp/HRO00033.User-Manual-2/User-Guide-391573-Page-7.png)
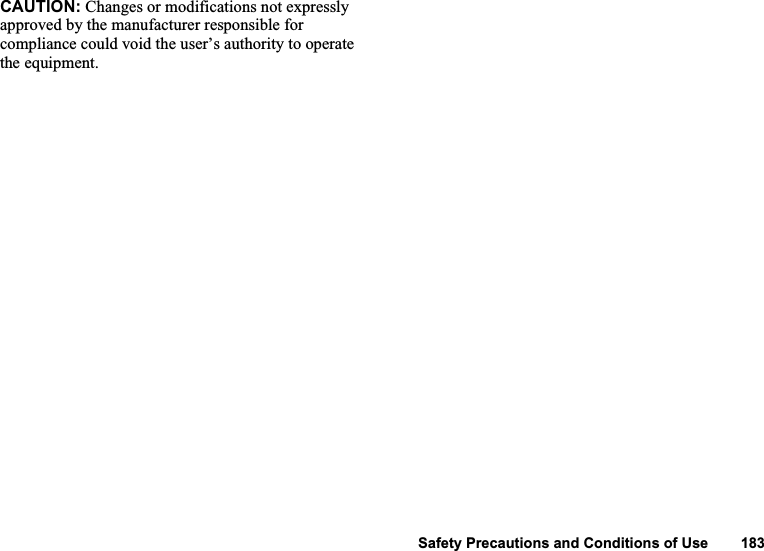
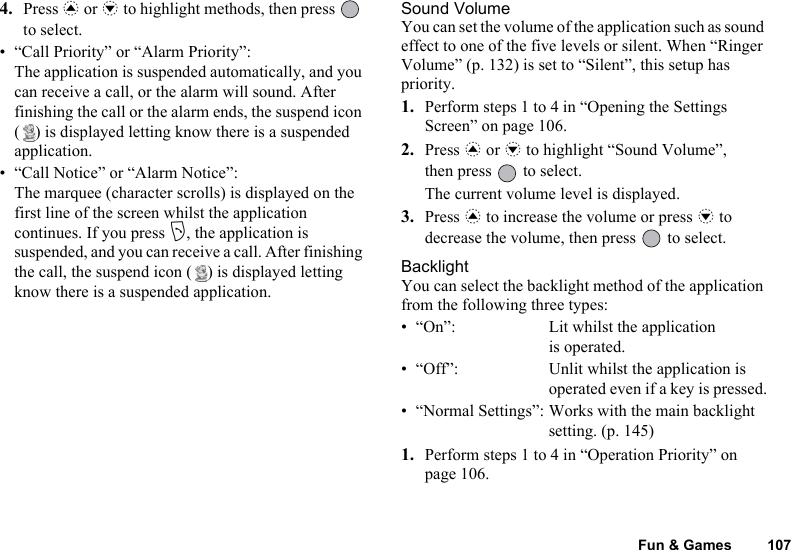
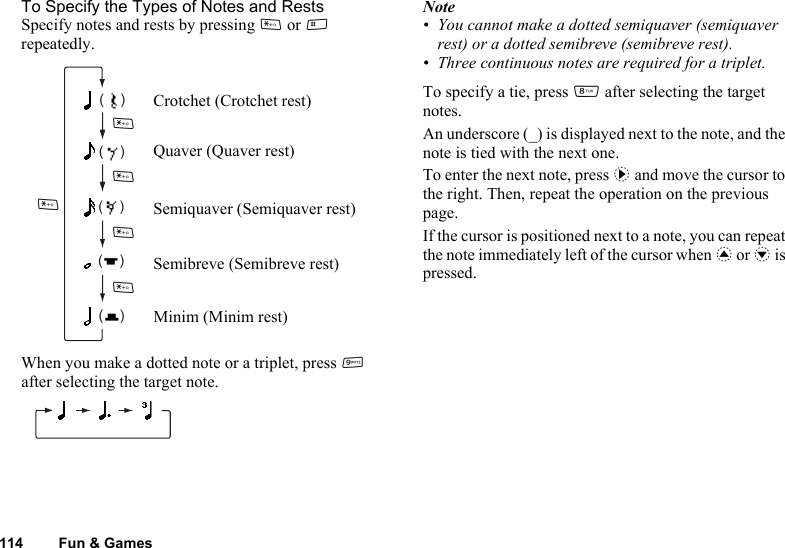
![112 Fun & Games7. Press a or b to highlight a tempo, then press to select.The music tempo is described below.• “Allegro (Fast)”: 150• “Moderato (Normal)”: 125• “Andante (Slow)”: 107• “Adagio (Very Slow)”: 94Tempo is defined by the number of crotchets ( ) played per minute.8. Press a or b to highlight “8 Chords”, “16 Chords” or “32 Chords”, then press to select.9. Press the digit keys to specify the musical scale and rest.For details on specifying the sound level and rest, see “To Specify the Musical Scale and Rest” on page 113.10.Press P or R to specify the types of musical notes or rest.For details on specifying the musical notes and rest, “To Specify the Types of Notes and Rests” on page 114.11.Press d after inputting one note.Input the next note after the cursor moves to the right.12.Repeat steps 9 to 11 to input notes.When you press during input, the melody that you have entered is played back.When you press A [Options] and select “Play before Cursor” whilst entering notes, the melody, that is displayed on the screen, is played back up to the cursor position.When you press A [Options] and select “Select Chord”, you can select another chord. Repeat steps 9 to 11 to input notes for the new chord.13.When you finish inputting, press A [Options] to display the Options menu.14.Press a or b to highlight “Save”, then press or A [Select] to select.15.Press a or b to highlight “Save to My Stuff”, then press to select.Your original ringtone is registered in Saved Sounds.](https://usermanual.wiki/Sharp/HRO00033.User-Manual-2/User-Guide-391573-Page-8.png)
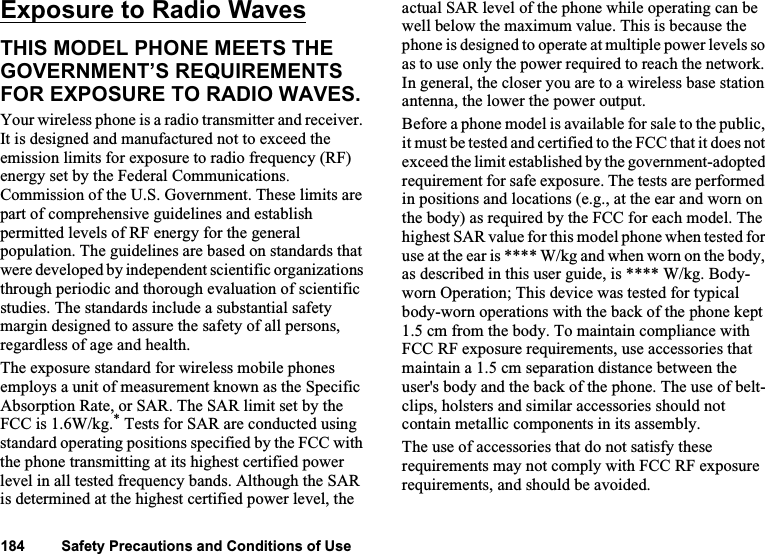
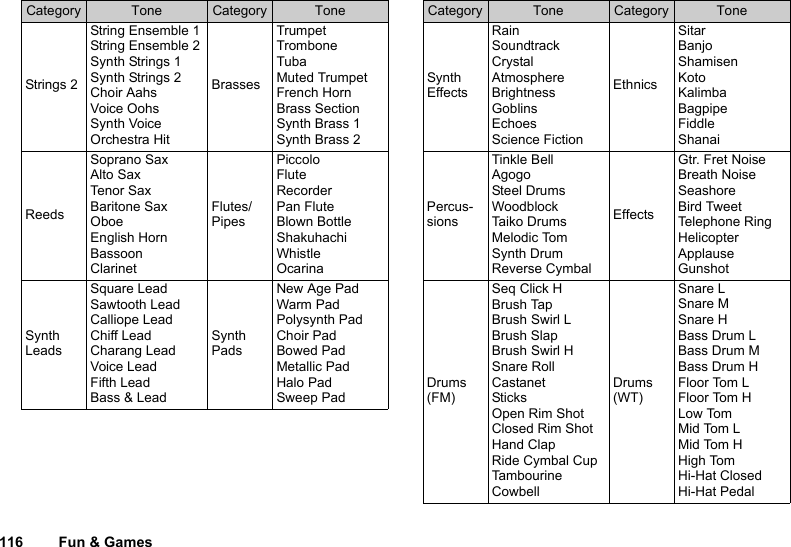
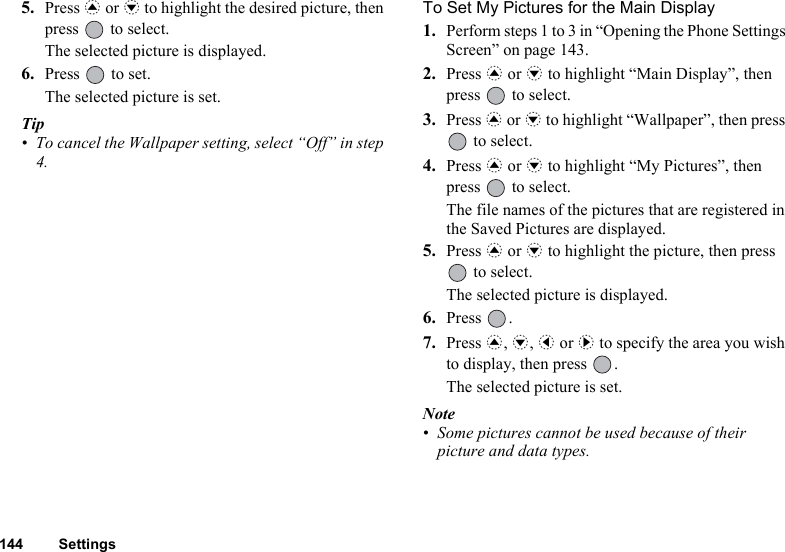
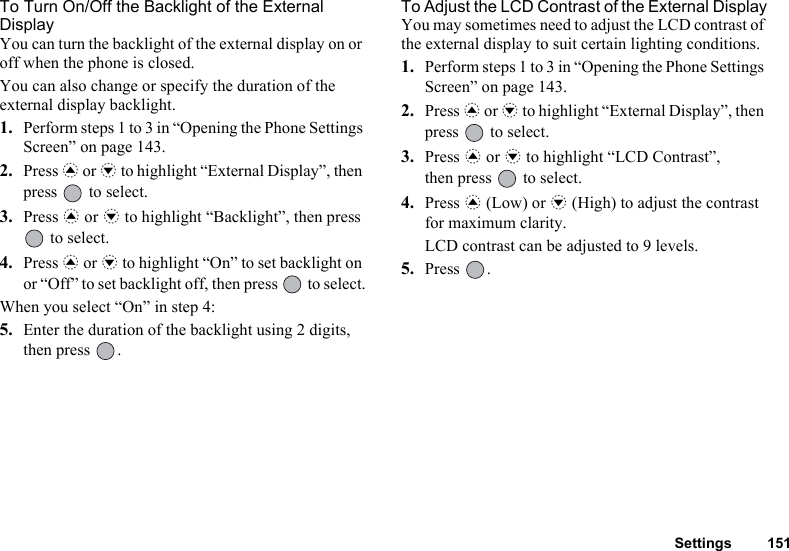
![Fun & Games 115To Set the ToneThe phone can play notes using different instruments.1. Perform steps 1 to 13 in “Creating Your Original Ringtone” on page 111.2. Press a or b to highlight “Set Tone”, then press to select.3. Press c or d to highlight a category of the tone.4. Press a or b to highlight a tone.When you press A [Options] and select “Play Current Chord”, the melody entered is played back in the selected tone.When you press A [Options] and select “Confirm Tones”, the syllable names are played back in the selected tone.5. Press .Now you can create a melody.You can select from the following 128 tones.Category Tone Category TonePianosPianoBright PianoE. Grand PianoHonky-tonkElectric Piano 1Electric Piano 2HarpsichordClaviChimesCelestaGlockenspielMusic BoxVibraphoneMarimbaXylophoneTubular BellsDulcimerOrgansDrawbar OrganPercussive OrganRock OrganChurch OrganReed OrganAccordionHarmonicaTango AccordionGuitarsNylon GuitarSteel GuitarJazz GuitarClean GuitarMuted GuitarOverdriven GuitarDistortion GuitarGuitar HarmonicsBassesAcoustic BassFinger BassPick BassFretless BassSlap Bass 1Slap Bass 2Synth Bass 1Synth Bass 2Strings 1ViolinViolaCelloContrabassTremolo StringsPizzicato StringsHarpTimpani](https://usermanual.wiki/Sharp/HRO00033.User-Manual-2/User-Guide-391573-Page-11.png)
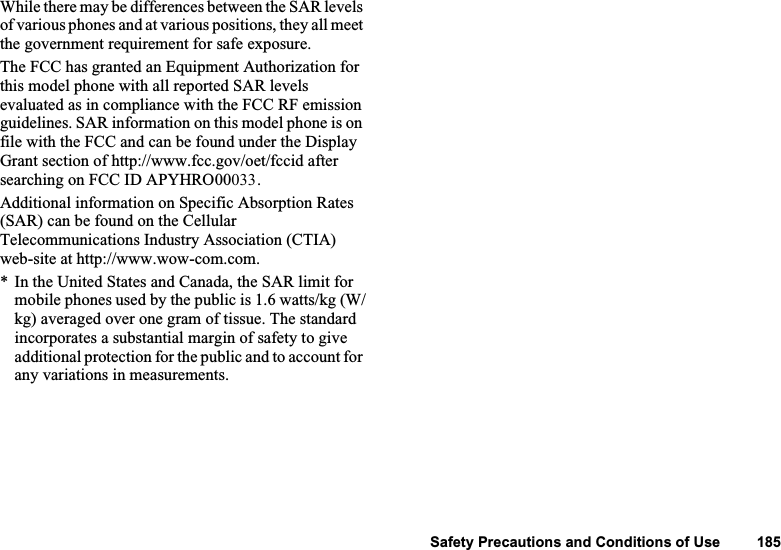
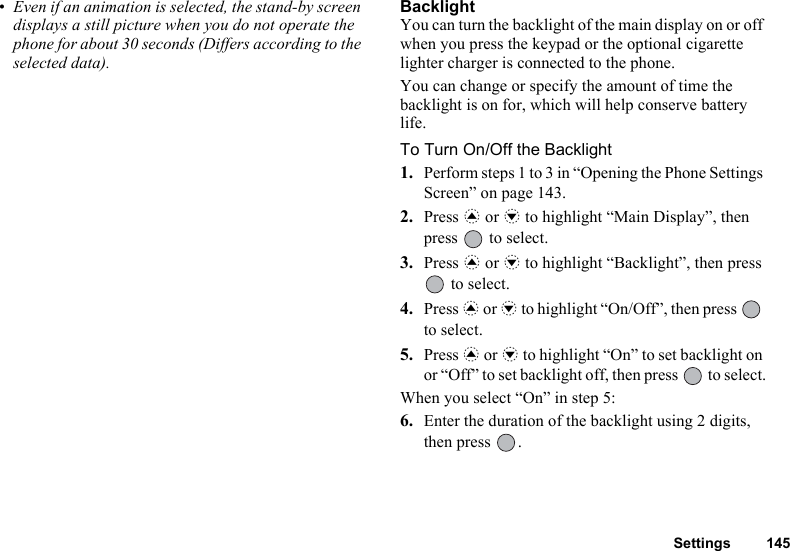
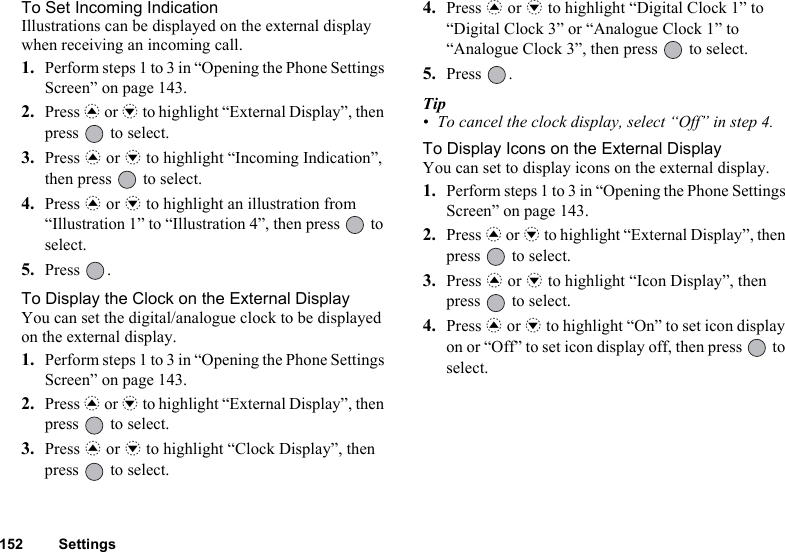
![Fun & Games 117To Set the Strength of the Original RingtoneThe strength of the original ringtone can be set in 3 levels for each melody.When you purchase this phone, the strength of the original ringtone is set to “Loud”.1. Perform steps 1 to 13 in “Creating Your Original Ringtone” on page 111.2. Press a or b to highlight “Set Strength”, then press .3. Press a or b to highlight a strength of the tone.When A [Play] is pressed, the original ringtone entered is played back in the selected strength of the tone.4. Press .Now you can create an original ringtone.Drums (FM)VibraslapBongo HBongo LConga H MuteConga H OpenConga LTimbale HTimbale LAgogo HAgogo LCabasaMaracasSamba Whistle HSamba Whistle LGuiro ShortGuiro LongClavesWood Block HWood Block LCuica MuteCuica OpenTriangle MuteTriangle OpenShakerJingle BellBelltreeDrums (WT)Hi-Hat OpenCrash Cymbal 1Crash Cymbal 2Ride Cymbal 1Ride Cymbal 2Chinese CymbalSplash CymbalCategory Tone Category Tone](https://usermanual.wiki/Sharp/HRO00033.User-Manual-2/User-Guide-391573-Page-13.png)
![118 Fun & GamesEditing Original Ringtones1. Press to display the Main menu. 2. Press a, b, c or d to highlight “Fun & Games”, then press to select.3. Press a or b to highlight “Melody Editor”, then press to select.4. Press a or b to highlight “Existing Melodies”, then press to select.5. Press a or b to highlight an original ringtone you wish to edit, then press A [Options].The Options menu is displayed.6. Press a or b to highlight “Edit Data”, then press or A [Select] to select.7. Edit the title, then press .8. Press a or b to highlight a tempo, then press to select.9. Press a or b to highlight the number of voices, then press to select.10.Press c or d to highlight a note you wish to change, then edit notes.When you add notes, enter the note correctly on the cursor.To delete a note, press C [Clear] briefly. Press and hold C [Clear] to clear all tones.11.When you finish editing, press A [Options] to display the Options menu.12.Press a or b to highlight “Save”, then press or A [Select] to select.13.Press a or b to highlight “Save to My Stuff”, then press to select.14.Press a or b to highlight “Overwrite”, then press to select.The original ringtone is changed.If you select “New”, the melody before the correction is not modified. The original ringtone is registered as a new original ringtone.](https://usermanual.wiki/Sharp/HRO00033.User-Manual-2/User-Guide-391573-Page-14.png)
![Fun & Games 119Note• When the number of voices is modified in step 9, the confirmation screen may be displayed. When you press A [Yes], a section of the melody may be deleted.• When you are going to add notes in step 10, you cannot add any notes if you have already entered 380 notes (for 8 voices melodies) or 190 notes (for 16 voices melodies).Tip• To delete the continuous melody, press A [Options] and then press or A [Select] after selecting “Delete after Cursor” or “Delete before Cursor”. You can delete the melody after the cursor or before the cursor.Copying and Pasting NotesYou can copy and move a part of the melody to another position.Only original ringtones or editable melodies can be copied or moved.1. Perform steps 1 to 9 in “Editing Original Ringtones” on page 118.2. Press A [Options] to display the Options menu.3. Press a or b to highlight “Copy” or “Cut”, then press or A [Select] to select.4. Press c or d to move the cursor to the first note to be copied or to be cut, then press .5. Press c or d to move the cursor to the last note to highlight the area, then press .The highlighted area is saved temporarily in the memory. If you select “Cut” in step 3, the highlighted area is cut.6. Press A [Options] to display the Options menu.7. Press a or b to highlight “Paste”, then press or A [Select] to select.8. Press c or d to move the cursor to the point you wish to paste the notes, then press .Saved notes are pasted.](https://usermanual.wiki/Sharp/HRO00033.User-Manual-2/User-Guide-391573-Page-15.png)
![120 ApplicationsApplications SIM Application You can refer to the information on the SIM. Contact your service provider for further details.Calendar The Calendar function helps you organise and manage your busy schedule. You can view the stored schedule on a monthly basis.1. Press to display the Main menu. 2. Press a, b, c or d to highlight “Applications”, then press to select.3. Press a or b to highlight “Calendar”, then press to select.The current month is displayed and the current date is highlighted.4. Press a, b, c or d to highlight the day for the schedule, then press to select.5. Press a or b to highlight the note number, then press to select.6. Enter the schedule content, then press .Up to 3 schedule items can be stored.For details on entering characters, see “Entering Characters” on page 31.If you wish to add another item, repeat steps 5 and 6.7. When you have finished entering, press C [Back].The screen returns to the calendar. Dates with scheduled tasks/meetings are underlined.Note• The calendar can be displayed for dates from January 2000 through to December 2099.To Find a Particular DateYou can move the view to a specified date in the calendar.1. Press A [Options] to display the Options menu.2. Press a or b to highlight “Go to Date”, then press or A [Select] to select.3. Enter the date of the calendar to be displayed, then press .The specified date is displayed.(M 3)(M 3-1)(M 3-2)](https://usermanual.wiki/Sharp/HRO00033.User-Manual-2/User-Guide-391573-Page-16.png)
![Applications 121To Change to Weekly FormatYou can change the Calendar to weekly format.1. Perform steps 1 to 3 in “Calendar” on page 120.The current month is displayed and the current date is highlighted.2. Press A [Options] to display the Options menu.3. Press a or b to highlight “Weekly Format”, then press or A [Select] to select.4. Press a or b to highlight “Monday-Sunday” to display weekly format from Monday or “Sunday-Saturday” to display weekly format from Sunday, then press to select.Deleting SchedulesTo Delete Schedule Items1. Perform steps 1 to 3 in “Calendar” on page 120.2. Press a, b, c or d to highlight the day, then press to select.3. Press a or b to highlight the item you wish to delete, then press A [Options].The Options menu is displayed.4. Press a or b to highlight “Delete”, then press or A [Select] to select.5. Press a or b to highlight “1 data”, then press to select.6. Press A [Yes].To cancel deleting, press C [No] in step 6.To Delete All Scheduled Tasks/Meetings for a Specific Day1. Perform steps 1 to 3 in “Calendar” on page 120.2. Press a, b, c or d to highlight the day you wish to delete, then press A [Options].The Options menu is displayed.3. Press a or b to highlight “Delete”, then press or A [Select] to select.4. Press a or b to highlight “1 day” to delete all contents for a day, then press to select.5. Press A [Yes].To cancel deletion, press C [No] in step 5.](https://usermanual.wiki/Sharp/HRO00033.User-Manual-2/User-Guide-391573-Page-17.png)
![122 ApplicationsTo Delete All Scheduled Entries1. Perform steps 1 to 3 in “Calendar” on page 120.2. Press A [Options] to display the Options menu.3. Press a or b to highlight “Delete” to delete all scheduled entries, then press or A [Select] to select.4. Press a or b to highlight “All Data” to delete all scheduled entries, then press to select.5. Press A [Yes].To cancel deletion, press C [No] in step 5.Alarm Setting the Alarm The alarm function allows you to be alerted at a specified time.Note that the alarm may not function correctly if the clock has not been set.The alarm functions only if the phone is switched on.1. Press to display the Main menu. 2. Press a, b, c or d to highlight “Applications”, then press to select.3. Press a or b to highlight “Alarm”, then press to select.4. Press a or b to highlight “List Alarms”, then press to select.5. Press a or b to highlight the desired alarm number, then press to select.Up to 5 alarm times can be specified.6. Press a or b to highlight “Set Time”, then press to select.7. Enter the alarm time using the digit keys, then press .When you enter the alarm time in the 12-hour clock format, press P to switch between am and pm.(M 3-3)(M 3-3-1)](https://usermanual.wiki/Sharp/HRO00033.User-Manual-2/User-Guide-391573-Page-18.png)
![Applications 1238. Press a or b to highlight “Repeat Daily”, then press to select.9. Press a or b to highlight “On” or “Off”, then press to select.10.Press a or b to highlight “Alarm Status”, then press to select.11.Press a or b to highlight “On”, then press to select.12.Press C [Save].To Change the Type of Alarm Tone1. Perform steps 1 to 5 in “Setting the Alarm” on page 122.2. Press a or b to highlight “Alarm Tone”, then press to select.3. Press a or b to highlight “Tone”, then press to select.4. Press a or b to highlight “Preset Melodies” or “My Sounds”, then press to select.5. Press a or b to highlight the alarm tone.If you wish to hear the demo play, press .To stop playing, press .6. When selection is complete, press A [Options] to display the Options menu.7. Press a or b to highlight “Assign”, then press or A [Select] to select.](https://usermanual.wiki/Sharp/HRO00033.User-Manual-2/User-Guide-391573-Page-19.png)
![124 ApplicationsTo Change the Vibration of the Alarm1. Perform steps 1 to 5 in “Setting the Alarm” on page 122.2. Press a or b to highlight “Alarm Tone”, then press to select.3. Press a or b to highlight “Vibration”, then press to select.4. Press a or b to highlight “Enable”, “Disable” or “Link to Sound”, then press to select.To Change the Duration of the Alarm1. Perform steps 1 to 5 in “Setting the Alarm” on page 122.2. Press a or b to highlight “Alarm Tone”, then press to select.3. Press a or b to highlight “Duration”, then press to select.The current duration is displayed.4. Enter the length of the duration in 2 digits (02 to 59 seconds) using the digit keys, then press .Changing Alarm Settings1. Perform steps 1 to 4 in “Setting the Alarm” on page 122.2. Press a or b to highlight the number you wish to change, then press to select.3. Change Alarm settings.For details on changing Alarm settings, see “Setting the Alarm” on page 122.Disabling the Alarm Function1. Perform steps 1 to 5 in “Setting the Alarm” on page 122.2. Press a or b to highlight “Alarm Status”, then press to select.3. Press a or b to highlight “Off”, then press to select.4. Press C [Save].](https://usermanual.wiki/Sharp/HRO00033.User-Manual-2/User-Guide-391573-Page-20.png)
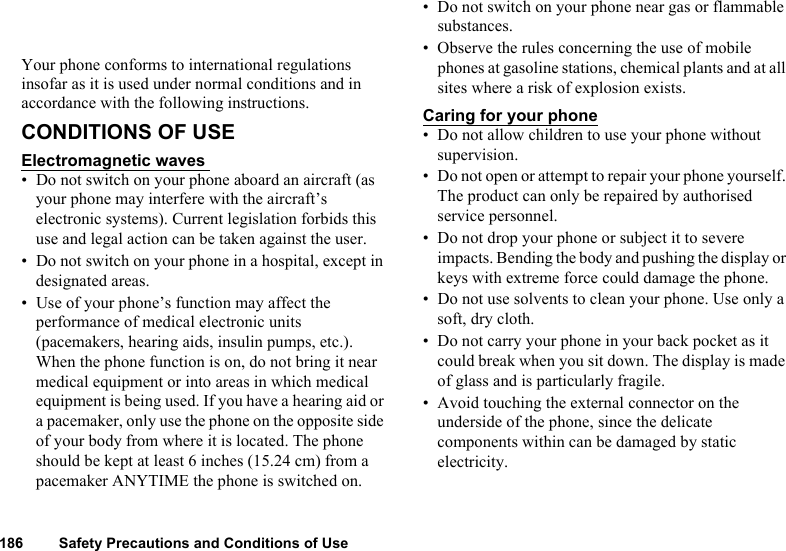
![Applications 125Resetting an Alarm Setting1. Perform steps 1 to 4 in “Setting the Alarm” on page 122.2. Press a or b to highlight the number you wish to reset, then press to select.3. Press a or b to highlight “Reset Alarm”, then press to select.4. Press A [Yes].To cancel resetting, press C [No] in step 4.Resetting All Alarm Settings1. Perform steps 1 to 3 in “Setting the Alarm” on page 122.2. Press a or b to highlight “Clear All”, then press to select.3. Press A [Yes].To cancel resetting, press C [No] in step 3.Calculator The calculator function performs the 4 arithmetic calculations using up to 12 digits.1. Press to display the Main menu.2. Press a, b, c or d to highlight “Applications”, then press to select.3. Press a or b to highlight “Calculator”, then press to select.4. Press a or b to highlight “Calculator”, then press to select.The calculator is displayed on the display.5. Key operations for calculation are as follows.(M 3-4)](https://usermanual.wiki/Sharp/HRO00033.User-Manual-2/User-Guide-391573-Page-21.png)
![126 ApplicationsTo enter a decimal point, press R.To clear the entered number or operand, press C [Clear].To do the calculations, press .6. If you wish to start a new calculation, press C [Clear].Rate ConversionYou can also use the calculator as a currency calculator to convert from/to a home currency using a conversion rate that you enter.To Set a Currency Conversion Rate1. Perform steps 1 to 3 in “Calculator” on page 125.2. Press a or b to highlight “Exchange Rate”, then press to select.3. Press a or b to highlight “Foreign Domestic” or “Domestic Foreign”, then press to select.4. Enter the currency conversion rate, then press .To delete all digits, press C [Clear]. To Convert a Value1. Perform steps 1 to 4 in “Calculator” on page 125.2. Enter the value to be converted, then press A [Options].The Options menu is displayed.3. Press a or b to highlight “In Domestic” or “In Foreign”, then press or A [Select] to select.The result is displayed.If you select “Exchange Rate” in step 3, you can set a currency conversion rate.Note• You cannot perform step 2 when an arithmetic symbol (+, –, × or ÷ ) is displayed.](https://usermanual.wiki/Sharp/HRO00033.User-Manual-2/User-Guide-391573-Page-22.png)
![Applications 127Voice Recorder This allows you to record a voice message of up to 10 seconds, which can be used to remind you of schedule entries or be sent within a multimedia message. The recorded voice message is registered in Saved Sounds.To Record a Voice Message1. Press to display the Main menu.2. Press a, b, c or d to highlight “Applications”, then press to select.3. Press a or b to highlight “Voice Recorder”, then press to select.4. Press to start recording.To stop recording before the recording time is over, press .5. Press a or b to highlight “Save” to save the voice message, then press to select.Tip• You can also record a voice message by pressing during stand-by, then press R whilst the Main menu is displayed, instead of steps 1 to 3.• If you wish to record a voice message again, press C [Cancel] in step 5. The screen will return to step 4.• Whilst performing step 4, press A [Options] instead in order to switch the memory source back and forth to either the internal memory or the SD/MMC cards, then press a or b to highlight “Save to”, then press to select. Then press a or b to highlight “Handset” or “SD Card”, then press to select.To Play Back the Saved Voice Message1. Perform steps 1 to 4 in “To Record a Voice Message”.2. Press a or b to highlight “Playback”, then press to select.3. Press .The recorded voice message is played back.To stop playback, press .(M 3-5)](https://usermanual.wiki/Sharp/HRO00033.User-Manual-2/User-Guide-391573-Page-23.png)
![128 ApplicationsTip• Whilst performing step 4, press A [Options] instead in order to play back files from My Sounds, then press a or b to highlight “My Sounds”, then press to select. Then press a or b to highlight the desired file, then press to select.To Send Voice Messages1. Perform steps 1 to 4 in “To Record a Voice Message” on page 127.2. Press to stop recording.3. Press a or b to highlight “Send Message”, then press to select.4. Perform steps 5 and 6 in “Creating a New MMS” on page 62. PC Link You can connect your phone to a PC using either the infrared link or the cable connection. PC software is necessary for a PC connection. For details on how to get the link software and the functions, see page 178.1. Press to display the Main menu.2. Press a, b, c or d to highlight “Applications”, then to select.3. Press a or b to highlight “PC Link”, then press to select.4. Press a or b to highlight “Data Cable” for cable connection or “Infrared” for infrared link, then press to select.(M 3-6)](https://usermanual.wiki/Sharp/HRO00033.User-Manual-2/User-Guide-391573-Page-24.png)
![Applications 129Phone Help You can view the help list and use it to guide you in the phone’s functions.1. Press to display the Main menu.2. Press a, b, c or d to highlight “Applications”, then press to select.3. Press a or b to highlight “Phone Help”, then press to select.The help list is displayed.4. Press a or b to highlight the desired function.5. When you have finished, press C [Back].(M 3-7)](https://usermanual.wiki/Sharp/HRO00033.User-Manual-2/User-Guide-391573-Page-25.png)
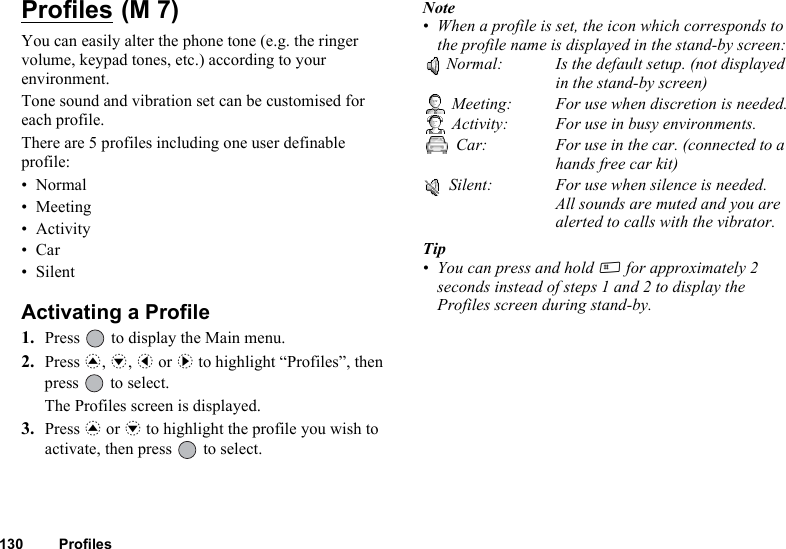
![Profiles 131Customising Profiles1. Press to display the Main menu.2. Press a, b, c or d to highlight “Profiles”, then press to select.3. Press a or b to highlight the profile you wish to customise, then press A [Options].4. Press a or b to highlight “Personalise”, then press or A [Select] to select.5. Press a or b to highlight the setting you wish to customise, then press to select.6. Change the desired setting.For details about settings, see pages 132 to 136.7. When you have finished, press A [Save] to save the modifications.Resetting Profile Settings1. Perform steps 1 and 2 in “Customising Profiles”.2. Press a or b to highlight the profile you wish to reset, then press A [Options].3. Press a or b to highlight “Set to Default”, then press or A [Select] to select.4. Enter your handset code, then press .5. Press A [Yes].To cancel the resetting, press C [No] in step 5.Note• If you enter a wrong handset code in step 4, the screen returns to step 3.](https://usermanual.wiki/Sharp/HRO00033.User-Manual-2/User-Guide-391573-Page-27.png)
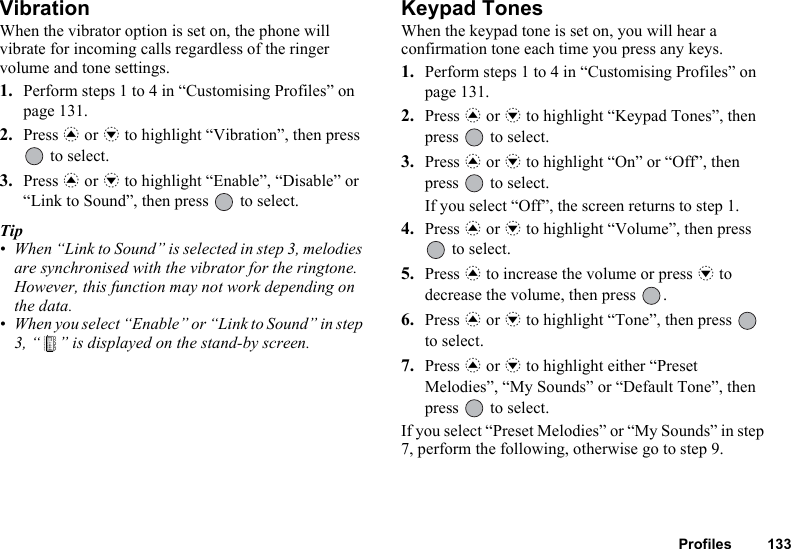
![132 ProfilesRinger VolumeYou can adjust the ringer volume to one of 6 levels or a step tone.When it is set to “Silent”, the volume of applications is muted.1. Perform steps 1 to 4 in “Customising Profiles” on page 131.2. Press a or b to highlight “Ringer Volume”, then press to select.The current volume level is displayed.3. Press a to increase the ringer volume or press b to decrease the ringer volume and then press .To select “Step Tone”, press a at level 5.To select “Silent”, press b at level 1.Assigning MelodyYou can select the ringtone from 28 tones including 5 patterns, 13 sound effects and 10 melodies. You can also select a sound in Saved Sounds as the default ringtone excluding the AMR/WAVE format. 1. Perform steps 1 to 4 in “Customising Profiles” on page 131.2. Press a or b to highlight “Assign Melody”, then press to select.3. Press a or b to highlight “Preset Melodies” or “My Sounds”, then press to select.4. Press a or b to highlight the ringtone you wish to use.If you wish to hear the demo play, press .To stop playing, press .5. When selection is complete, press A [Options] to display the Options menu.6. Press a or b to highlight “Assign”, then press or A [Select] to select.Note• If you delete a ringtone that uses a sound in Saved Sounds, the default ringtone is set.](https://usermanual.wiki/Sharp/HRO00033.User-Manual-2/User-Guide-391573-Page-28.png)
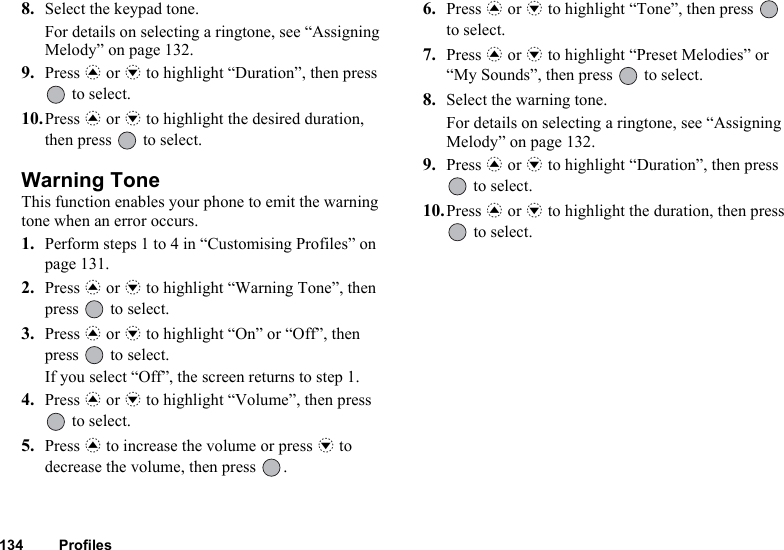
![136 Profiles8. Select the ringtone.For details on selecting a ringtone, see “Assigning Melody” on page 132.9. Press a or b to highlight “Vibration”, then press to select.10.Press a or b to highlight “Enable”, “Disable” or “Link to Sound”, then press to select.11.Press a or b to highlight “Duration”, then press to select.12.Enter the duration of ringtone in 2 digits (01 to 15 seconds) using the digit keys, then press .Low Battery AlertAdjust the volume of the alarm when the battery becomes low.1. Perform steps 1 to 4 in “Customising Profiles” on page 131.2. Press a or b to highlight “Low Battery Alert”, then press to select.3. Press a to increase the volume or press b to decrease the volume and then press .Any Key AnswerYou can also answer a call by pressing any key except F, C [Busy], c and d. For details, see page 25.1. Perform steps 1 to 4 in “Customising Profiles” on page 131.2. Press a or b to highlight “Any Key Answer”, then press to select.3. Press a or b to highlight “On” or “Off”, then press to select.](https://usermanual.wiki/Sharp/HRO00033.User-Manual-2/User-Guide-391573-Page-32.png)
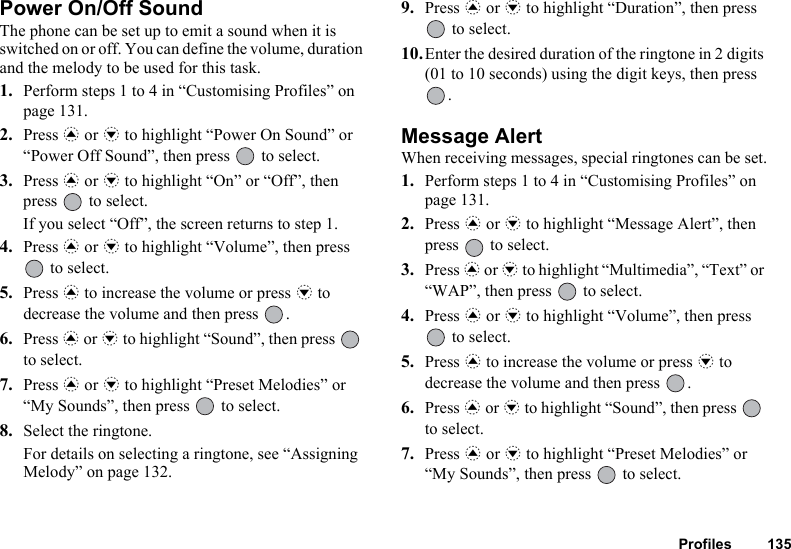
![Contacts 137Contacts Call Log The phone will record the last 10 missed calls, received calls and dialled numbers.Viewing Call Log1. Press to display the Main menu.2. Press a, b, c or d to highlight “Contacts”, then press to select.3. Press a or b to highlight “Call Log”, then press to select.4. Press a or b to highlight “Missed Calls”, “Received Calls” or “Dialled Numbers”, then press to select.The selected call log list is displayed.5. Press a or b to highlight the number you wish to view.6. Press .Call log “1” is the most recent.When you press b, call log “2” is displayed.If you wish to dial the number, press D.7. When you have finished, press C [Back] to return to step 4.Tip• You can also confirm call logs by pressing D during stand-by mode.• You can switch between histories by pressing c or d in step 5 only when you enter by D in stand-by mode.Sending Messages1. Perform steps 1 to 5 in “Viewing Call Log”.2. Press a or b to highlight the call log you wish to send, then press to select.The selected call record is displayed in detail.3. Press A [Options] to display the Options menu.4. Press a or b to highlight “Send Message”, then press or A [Select] to select.5. Press a or b to highlight “Multimedia” or “Text”, then press to select.6. Enter your message.For details on creating a message, see “Creating a New MMS” on page 62 or “Creating a New SMS” on page 73.(M 8)(M 8-3)](https://usermanual.wiki/Sharp/HRO00033.User-Manual-2/User-Guide-391573-Page-33.png)
![138 ContactsDeleting a Call LogTo Delete a Single Call Log1. Perform steps 1 to 5 in “Viewing Call Log” on page 137.2. Press a or b to highlight the call log you wish to delete, then press to select.The selected call log is displayed in detail. 3. Press A [Options] to display the Options menu.4. Press a or b to highlight “Delete”, then press or A [Select] to select.5. Press A [Yes].The selected call log is deleted.To cancel deletion, press C [No] in step 5.Call Timers This function lets you check the duration of your calls.Checking the Duration of the Last Call1. Press to display the Main menu. 2. Press a, b, c or d to highlight “Contacts”, then press to select.3. Press a or b to highlight “Call Log”, then press to select.4. Press a or b to highlight “Call Timers”, then press to select.5. Press a or b to highlight “Last Call”, then press to select.The duration of the last call is now displayed.6. When you have finished, press C [Back] to return to call timers menu.Checking the Total Call Time1. Perform steps 1 to 4 in “Checking the Duration of the Last Call”.2. Press a or b to highlight “All Calls”, then press to select.3. When you have finished, press C [Back].(M 8-3-4)](https://usermanual.wiki/Sharp/HRO00033.User-Manual-2/User-Guide-391573-Page-34.png)
![Contacts 139Resetting All Call Timers1. Perform steps 1 to 4 in “Checking the Duration of the Last Call” on page 138.2. Press a or b to highlight “Clear Timers”, then press to select.3. Enter your handset code, then press .4. Press A [Yes].The Call Timers are reset to zero.To cancel resetting, press C [No] in step 4.Call Costs This function lets you check the charges for your calls. Some networks do not support Charging Advice. Please check with your service provider for availability.Checking the Cost of the Last Call1. Press to display the Main menu. 2. Press a, b, c or d to highlight “Contacts”, then press to select.3. Press a or b to highlight “Call Log”, then press to select.4. Press a or b to highlight “Call Costs”, then press to select.5. Press a or b to highlight “Last Call”, then press to select.The cost of the last call is now displayed.6. When you have finished, press C [Back] to return to call costs menu.Checking the Total Call Cost1. Perform steps 1 to 4 in “Checking the Cost of the Last Call”.2. When you have finished, press C [Back].(M 8-3-5)](https://usermanual.wiki/Sharp/HRO00033.User-Manual-2/User-Guide-391573-Page-35.png)
![140 ContactsSetting the Charge RateSet the charge rate to calculate the call cost and set the maximum limit for call cost.1. Perform steps 1 to 4 in “Checking the Cost of the Last Call” on page 139.2. Press a or b to highlight “Cost Units”, then press to select.3. Press a or b to highlight “Set Units”, then press to select.4. Enter your PIN2 code, then press .5. Enter a cost per unit, then press .To enter a decimal point, press R.6. Enter a currency unit (up to 3 characters), then press .Checking the Charge Rate1. Perform steps 1 to 4 in “Checking the Cost of the Last Call” on page 139.2. Press a or b to highlight “Cost Unit”, then press to select.3. Press a or b to highlight “Read Units”, then press to select.The charge rate is now displayed.4. When you have finished, press C [Back].Setting the Charge LimitThis function is useful if you wish to make sure you do not exceed a certain charge limit.1. Perform steps 1 to 4 in “Checking the Cost of the Last Call” on page 139.2. Press a or b to highlight “Max Cost”, then press to select.3. Press a or b to highlight “Set Limit”, then press to select.4. Enter your PIN2 code, then press .5. Enter a value, then press .To enter a decimal point, press R.Checking the Charge Limit1. Perform steps 1 to 4 in “Checking the Cost of the Last Call” on page 139.2. Press a or b to highlight “Max Cost”, then press to select.3. Press a or b to highlight “Read Limit”, then press to select.The value of the charge limit is displayed.4. When you have finished, press C [Back].](https://usermanual.wiki/Sharp/HRO00033.User-Manual-2/User-Guide-391573-Page-36.png)
![Contacts 141Resetting All Call Costs 1. Perform steps 1 to 4 in “Checking the Cost of the Last Call” on page 139.2. Press a or b to highlight “Clear Costs”, then press to select.3. Enter your PIN2 code, then press .4. Press A [Yes].The Call Costs are reset to zero.To cancel resetting, press C [No] in step 4.Checking the Residual Credit1. Perform steps 1 to 4 in “Checking the Cost of the Last Call” on page 139.2. Press a or b to highlight “Residual Credit”, then press to select.3. When you have finished, press C [Back].Data Counter You can confirm the amount of bytes which you used in the GPRS transmission.1. Press to display the Main menu. 2. Press a, b, c or d to highlight “Contacts”, then press to select.3. Press a or b to highlight “Call Log”, then press to select.4. Press a or b to highlight “Data Counter”, then press to select.5. Press a or b to highlight “Last Data” or “All Data”, then press to select.You can now check the amount of bytes.6. When you have finished, press C [Back].Resetting All Data Counter1. Perform steps 1 to 4 in “Data Counter”. 2. Press a or b to highlight “Clear Counter”, then press to select.3. Press A [Yes].The Data Counter is reset to zero. To cancel resetting, press C [No] in step 3.(M 8-3-6)](https://usermanual.wiki/Sharp/HRO00033.User-Manual-2/User-Guide-391573-Page-37.png)
![142 ContactsSpeed Dial List You can view and perform other operations for phone numbers registered in the Speed Dial List.1. Press to display the Main menu.2. Press a, b, c or d to highlight “Contacts”, then press to select.3. Press a or b to highlight “Speed Dial List”, then press to select.The names and phone numbers stored in the Speed Dial List are displayed in order.Registering the Phone Numbers in the Speed Dial List1. Perform steps 1 to 3 in “Speed Dial List”.2. Press a or b to highlight the phone number you wish to register in the Speed Dial List.3. Press A [Options] to display the Options menu.4. Press a or b to highlight “Assign” (or “Re-assign”), then press or A [Select] to select.5. Press a or b to highlight the name you wish to register in the Speed Dial List, then press .Tip• You can select other options in step 4:“Delete”:Deletes the selected entry.“Clear All”:Deletes all registered entries.My Numbers You can check your own voice, data and fax phone numbers.1. Press to display the Main menu.2. Press a, b, c or d to highlight “Contacts”, then press to select.3. Press a or b to highlight “My Numbers”, then press to select.4. Press a or b to highlight the phone number you wish to check from either “Voice”, “Data” or “Fax”, then press to select.Note• “Data” or “Fax” may not be displayed depending on the SIM card.(M 8-4)(M 8-5)](https://usermanual.wiki/Sharp/HRO00033.User-Manual-2/User-Guide-391573-Page-38.png)


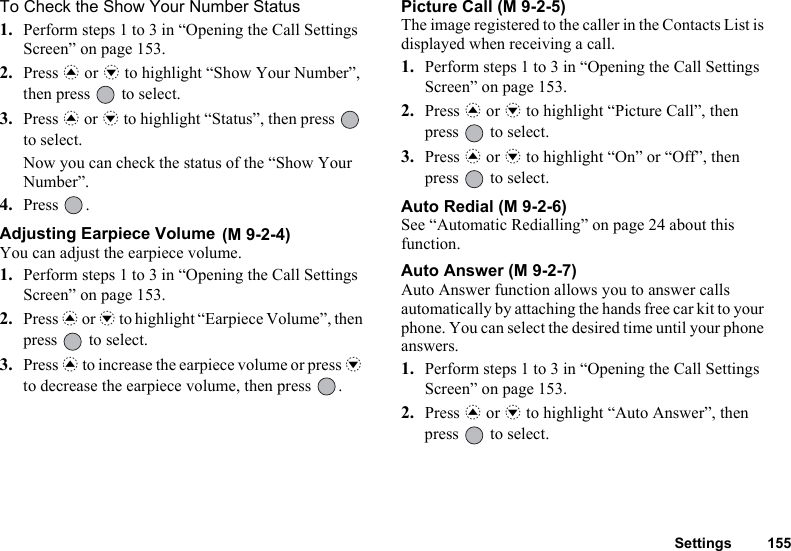
![Settings 153Phone Setting Reset (M 9-1-4)The phone settings can be reset to their default settings.1. Perform steps 1 to 3 in “Opening the Phone Settings Screen” on page 143.2. Press a or b to highlight “Set to Default”, then press to select.3. Enter your handset code, then press .4. Press A [Yes].To cancel resetting, press C [No] in step 4.Note• If you enter a wrong handset code in step 3, the operation is cancelled.Call Settings Set various types of functions and services.Opening the Call Settings Screen1. Press to display the Main menu. 2. Press a, b, c or d to highlight “Settings”, then press to select.3. Press a or b to highlight “Call Settings”, then press to select.The Call Settings screen is displayed. The following settings can be made.Call Waiting If you wish to be able to receive another incoming call whilst you have a call in progress, you must activate the Call Waiting service. 1. Perform steps 1 to 3 in “Opening the Call Settings Screen”.2. Press a or b to highlight “Call Waiting”, then press to select.3. Press a or b to highlight “On” to activate the Call Waiting service or “Off” to deactivate it, then press to select.4. Press .(M 9-2)(M 9-2-1)](https://usermanual.wiki/Sharp/HRO00033.User-Manual-2/User-Guide-391573-Page-49.png)
![154 SettingsNote• The Call Waiting service may not be available on all mobile phone networks. Contact your network operator for more information.To Check the Call Waiting Service Status1. Perform steps 1 to 3 in “Opening the Call Settings Screen” on page 153.2. Press a or b to highlight “Call Waiting”, then press to select.3. Press a or b to highlight “Status”, then press to select.Now you can check the status of the Call Waiting service.4. Press C [Back].Displaying Call Timers (M 9-2-2)1. Perform steps 1 to 3 in “Opening the Call Settings Screen” on page 153.2. Press a or b to highlight “Display Call Timers”, then press to select.3. Press a or b to highlight “On” or “Off”, then press to select.Showing Your Phone Number This lets you control whether to show your phone number when calling another party or not.Some networks do not support this service. Please check with your service provider for availability.1. Perform steps 1 to 3 in “Opening the Call Settings Screen” on page 153.2. Press a or b to highlight “Show Your Number”, then press to select.3. Press a or b to highlight “On” to show your phone number or “Off” not to show your phone number, then press to select.(M 9-2-3)](https://usermanual.wiki/Sharp/HRO00033.User-Manual-2/User-Guide-391573-Page-50.png)
![156 Settings3. Press a or b to highlight the desired duration, then press to select. To disable the auto answer function, select “Off” in step 3.Minute Minder (M 9-2-8)Minute Minder function informs you of your talk time by sounding a tone after every minute.1. Perform steps 1 to 3 in “Opening the Call Settings Screen” on page 153.2. Press a or b to highlight “Minute Minder”, then press to select.3. Press a or b to highlight “On” or “Off”, then press to select.Call Setting Reset (M 9-2-9)The call settings can be reset to their default settings.1. Perform steps 1 to 3 in “Opening the Call Settings Screen” on page 153.2. Press a or b to highlight “Set to Default”, then press to select.3. Enter your handset code, then press .4. Press A [Yes].To cancel resetting, press C [No] in step 4.Note• If you enter the wrong handset code in step 3, the operation is cancelled and the screen returns to step 3 in “Call Waiting” on page 153.](https://usermanual.wiki/Sharp/HRO00033.User-Manual-2/User-Guide-391573-Page-52.png)

![158 SettingsNote• When a divert is set to “All Calls”, “ ” is displayed on the stand-by screen.Tip• If you select “By Service” in step 5, you can select further divert options in the selected option in step 4.Checking the Divert Status1. Perform steps 1 to 3 in “Diverting Calls” on page 157.2. Press a or b to highlight the divert option you wish to check, then press to select.3. Press a or b to highlight “Status”, then press to select.You can now check the status of the selected divert option. 4. When you have finished, press C [Back].Cancelling All Divert Settings1. Perform steps 1 to 3 in “Diverting Calls” on page 157.2. Press a or b to highlight “Cancel All”, then press to select.3. Press A [Yes].To cancel resetting, press C [No] in step 3.4. Press .All divert settings are cancelled.To Cancel the Divert Settings Individually1. Perform steps 1 to 3 in “Diverting Calls” on page 157.2. Press a or b to highlight the divert option you wish to cancel, then press to select.3. Press a or b to highlight “Off”, then press to select.4. Press .The selected divert has been cancelled.](https://usermanual.wiki/Sharp/HRO00033.User-Manual-2/User-Guide-391573-Page-54.png)

![168 SettingsTo Set Up Your Account InformationThis information should be supplied by your Internet service provider.1. Press to display the Main menu.2. Press a, b, c or d to highlight “Settings”, then press to select.3. Press a or b to highlight “Internet Settings”, then press to select.4. Press a or b to highlight “WAP Settings” or “MMS Settings”, then press to select.5. Press a or b to highlight the profile name you wish to edit, then press A [Options].6. Press a or b to highlight “Edit”, then press or A [Select] to select.7. Press a or b to highlight the item you wish to edit, then press to select.8. Edit each item.9. When you have finished editing, press A [Save].To Select Network Connection Profile1. Perform steps 1 to 4 in “To Set Up Your Account Information”.2. Press a or b to highlight the profile name to use, then press to select.](https://usermanual.wiki/Sharp/HRO00033.User-Manual-2/User-Guide-391573-Page-64.png)
![Settings 169Connections You can use the built-in infrared modem to establish contact between your phone and a PC equipped with an infrared port, and can use the Bluetooth interface to establish contact with other Bluetooth-enabled device.Selecting Infrared Interface1. Press to display the Main menu.2. Press a, b, c or d to highlight “Settings”, then press to select.3. Press a or b to highlight “Connections”, then press to select.4. Press a or b to highlight “Infrared”, then press to select.5. Press a or b to highlight “On”, then press to select.“ ” will appear on the screen. The infrared setting will return to off when no data is transmitted/received via infrared communication.Selecting Bluetooth Interface1. Perform steps 1 to 3 in “Selecting Infrared Interface”.2. Press a or b to highlight “Bluetooth”, then press to select.3. Press a or b to highlight “On”, then press to select.If the infrared setting has been activated, you will be asked whether you wish to deactivate it or not. Press A [Yes].4. Press A [OK].The Bluetooth setting is activated, and “ ” is displayed on the stand-by mode screen.To search for other devices to be paired1. Perform steps 1 to 4 in “Selecting Infrared Interface”.2. Press a or b to highlight “Search Devices”, then press or A [Select] to select.Your phone begins searching. The list of devices detected is displayed.:Handset:Car kit:Others (e. g. PC)3. Press a or b to highlight the desired device, then press or A [Select] to select.4. Enter a pass key, then press A [OK].5. Press A [OK].(M 9-7)](https://usermanual.wiki/Sharp/HRO00033.User-Manual-2/User-Guide-391573-Page-65.png)
![170 SettingsNote• Pairing can only be done with a headset or a hands free car kit.Pairing Searched Devices1. Perform steps 1 to 4 in “Selecting Infrared Interface” on page 169.2. Press a or b to highlight “Paired Devices”, then press or or A [Select] to select.3. Press a or b to highlight the desired device, then press A [Options].4. Press a or b to highlight “Activate”, then press to select.Note • Incoming calls can be answered with the headset or hands free car kit whilst devices are paired. Use the keys on either device to answer or end calls.• To rename a device, press a or b to highlight “Assign Nickname” in step 2 instead, then press or A [Select] to select. Rename the device, then press A [OK].• To clear one or all device names from the Paired Devices list, press a or b to highlight “Delete” or “Delete All”, then press to select.Then press A [Yes] or C [No].Disconnecting Paired Devices1. Press the switch on the paired device.2. Perform steps 1 to 2 in “Selecting Bluetooth Interface”.3. Press a or b to highlight “Off”, then press to select.Formatting SD/MMC Cards1. Perform steps 1 to 3 in “Selecting Infrared Interface” on page 169.2. Press a or b to highlight “SD Card”, then press or A [Select] to select.3. Press a or b to highlight “Format”, then press to select.A confirmation message is displayed.4. Press A [Yes].When formatting is complete, a message is displayed.5. Press A [OK].Note• If the card is locked, you will be requested to unlock it and then perform the aforementioned steps once again.• If cards are damaged, they cannot be formatted.](https://usermanual.wiki/Sharp/HRO00033.User-Manual-2/User-Guide-391573-Page-66.png)
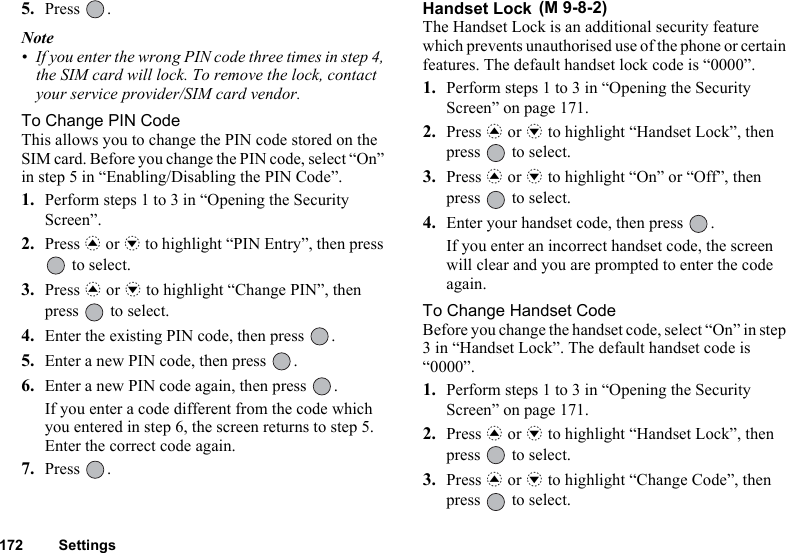
![Settings 171Viewing SD/MMC Card InformationYou can see the card type (SD or MMC), capacity, and used and free space of memory.1. Perform steps 1 to 3 in “Selecting Infrared Interface” on page 169.2. Press a or b to highlight “SD Card”, then press or A [Select] to select.3. Press a or b to highlight “Card Details”, then press to select.If necessary, press a or b to scroll through the screen.4. When viewing is complete, press A [OK].Security Opening the Security Screen1. Press to display the Main menu.2. Press a, b, c or d to highlight “Settings”, then press to select.3. Press a or b to highlight “Security”, then press to select.The Security screen is displayed. The following settings can be made.Enabling/Disabling the PIN Code If the PIN code is enabled you are asked to enter the PIN code each time the phone is switched on. Your PIN code is stored on the SIM card and you should have been made aware of the code when you purchased the SIM card. Contact your service provider for further details.1. Perform steps 1 to 3 in “Opening the Security Screen”.2. Press a or b to highlight “PIN Entry”, then press to select.3. Press a or b to highlight “On” or “Off”, then press to select.4. Enter your PIN code, then press .(M 9-8)(M 9-8-1)](https://usermanual.wiki/Sharp/HRO00033.User-Manual-2/User-Guide-391573-Page-67.png)
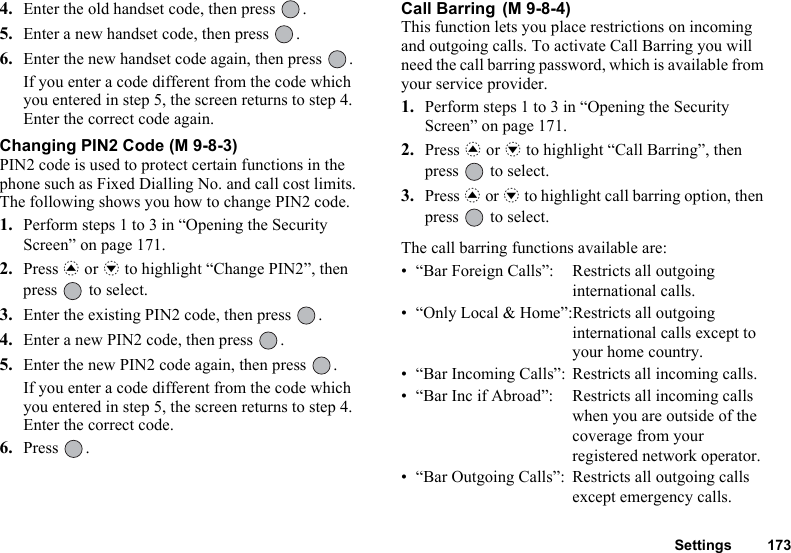
![174 Settings4. Press a or b to highlight one of the call barring options, then press to select.The call barring options available are:• “All services”: Restricts all services.• “Voice Calls”: Restricts all voice calls.• “Data”: Restricts all data calls.• “Fax”: Restricts all fax calls.• “Messages”: Restricts all messages.• “All except msgs”: Restricts all services except messages.5. Press a or b to highlight “On”, then press to select.If you select “Off”, the selected call barring setting is cancelled.If you select “Status”, you can check the status of the selected call barring option.When you finish the confirmation, press C [Back].6. Enter the network password, then press .To change the network password, see “Changing the Network Password” on page 162.7. Press .The selected call barring function is activated.If you enter a wrong network password, the entered password is cleared. Enter the correct the password.To Cancel All Call Barring Settings1. Perform steps 1 to 3 in “Opening the Security Screen” on page 171.2. Press a or b to highlight “Call Barring”, then press to select.3. Press a or b to highlight “Cancel All”, then press to select.4. Enter the network password, then press .5. Press .All call barring settings are cancelled.To Cancel the Call Barring Setting Individually1. Perform steps 1 to 3 in “Opening the Security Screen” on page 171.2. Press a or b to highlight “Call Barring”, then press to select.3. Press a or b to highlight the call barring option, then press to select.4. Press a or b to highlight the call barring option you wish to cancel, then press to select.5. Press a or b to highlight “Off”, then press to select.](https://usermanual.wiki/Sharp/HRO00033.User-Manual-2/User-Guide-391573-Page-70.png)
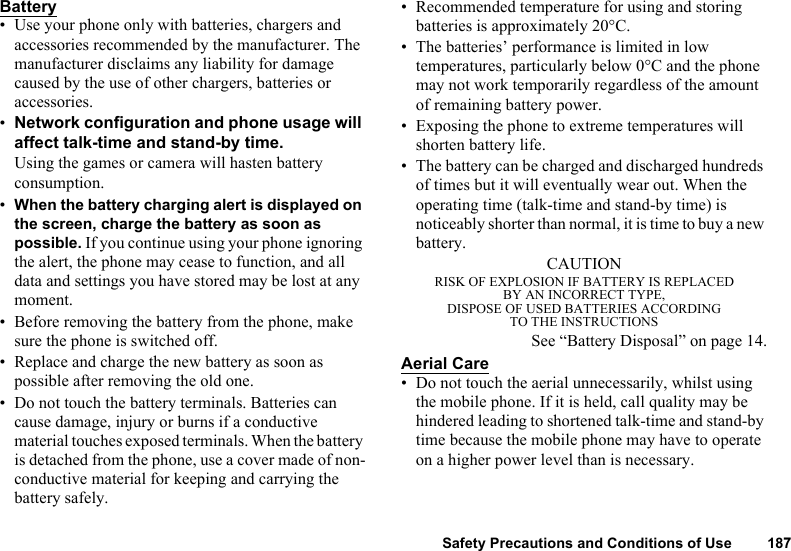
![Settings 1756. Enter the Barring password, then press .The selected call barring setting is cancelled.Fixed Dialling No. (M 9-8-5)When the Fixed Dialling No. is enabled, you can only call predefined numbers.To Enable Fixed Dialling No.1. Perform steps 1 to 3 in “Opening the Security Screen” on page 171.2. Press a or b to highlight “Fixed Dialling No.”, then press to select.3. Enter a PIN2 code, then press .4. Press a or b to highlight “Settings”, then press to select.5. Press a or b to highlight “On”, then press to select.If you select “Off”, Fixed Dialling No. is disabled.To Add a New Name1. Perform steps 1 to 3 in “Opening the Security Screen” on page 171.2. Press a or b to highlight “Fixed Dialling No.”, then press to select.3. Enter a PIN2 code, then press .4. Press a or b to highlight “Edit Dial List”, then press to select.5. Press A [Options] to display the Options menu.6. Press a or b to highlight “Add New Contact”, then press or A [Select] to select.7. Add a name and a phone number.For details on adding a name and a phone number, see “Creating a New Entry” on page 38.8. Press C [Save] to save.](https://usermanual.wiki/Sharp/HRO00033.User-Manual-2/User-Guide-391573-Page-71.png)
![176 SettingsTo Search a Registered Name1. Perform steps 1 to 3 in “Opening the Security Screen” on page 171.2. Press a or b to highlight “Fixed Dialling No.”, then press to select.3. Enter a PIN2 code, then press .4. Press a or b to highlight “Edit Dial List”, then press to select.5. Press A [Options] to display the Options menu.6. Press a or b to highlight “Search”, then press to select.7. Search for the desired name.For details on searching a name, see “Finding a Name and Number” on page 42.To Edit a Registered Name1. Perform steps 1 to 3 in “Opening the Security Screen” on page 171.2. Press a or b to highlight “Fixed Dialling No.”, then press to select.3. Enter a PIN2 code, then press .4. Press a or b to highlight “Edit Dial List”, then press to select.5. Press a or b to highlight a name you wish to edit, then press A [Options] to display the Options menu.6. Press a or b to highlight “Edit”, then press or A [Select] to select.7. Edit the selected name.For details on editing a name, see “Editing Contacts List Entries” on page 43.To Delete a Registered Name1. Perform steps 1 and 3 in “Opening the Security Screen” on page 171.2. Press a or b to highlight “Fixed Dialling No.”, then press to select.3. Enter a PIN2 code, then press .4. Press a or b to highlight “Edit Dial List”, then press to select.5. Press a or b to highlight a name you wish to delete, then press A [Options] to display the Options menu.6. Press a or b to highlight “Delete”, then press or A [Select] to select.](https://usermanual.wiki/Sharp/HRO00033.User-Manual-2/User-Guide-391573-Page-72.png)
![Settings 1777. Press A [Yes].The selected name is deleted.To cancel deletion, press C [No] in step 7.Master Reset All settings can be reset to their default settings.1. Press to display the Main menu. 2. Press a, b, c or d to highlight “Settings”, then press to select.3. Press a or b to highlight “Master Reset”, then press to select.4. Enter your handset code, then press .5. Press A [Yes].To cancel resetting, press C [No] in step 5.All settings are reset.Note• If you enter a wrong handset code in step 4, the operation is cancelled.(M 9-9)](https://usermanual.wiki/Sharp/HRO00033.User-Manual-2/User-Guide-391573-Page-73.png)
![178 Connecting GX30 to Your PCConnecting GX30 to Your PCYou can use the following functions by connecting the GX30 to your PC using an infrared port or RS232C port*:• GSM/GPRS modem• Handset Manager for GX30* Requires an optional data cable XN-1DC30 for RS232C (COM) port connection.System RequirementsOperating System: Windows® 98*, Windows® Me, Windows® 2000**, Windows® XP* Windows® 98 Second Edition, Windows® 98 with Internet Explorer 5.01 or later**Service Pack 3Interface: Infrared port or RS232C portCD-ROM driveGSM/GPRS ModemYou can use GX30 as a GSM/GPRS modem to access the Internet from your PC.For details on software support, refer to the following site:http://www.sharp-mobile.comHandset ManagerYou can transmit picture, sound and video clip, and Contacts List entries between your phone and your PC, and can use Contacts List entries on your PC.For details on software support, refer to the following site:http://www.sharp-mobile.comSoftware Installation1. Insert the supplied CD-ROM into your CD-ROM drive.The GX30 CD-ROM screen is displayed.If the GX30 CD-ROM screen is not displayed, double-click [Launcher.exe] in your CD-ROM.2. Press the desired button.The installation starts. 3. Follow the on-screen instructions to complete installation.](https://usermanual.wiki/Sharp/HRO00033.User-Manual-2/User-Guide-391573-Page-74.png)