Sharp HRO00222 Phablet (Handheld mini tablet) User Manual 12 UserManual draft APYHRO00222
Sharp Corporation Phablet (Handheld mini tablet) 12 UserManual draft APYHRO00222
UserManual.wiki
>
Sharp
>
HRO00222 User Manual
>
User manual
Contents
1.
User manual
2.
User Manual
User manual
Navigation menu
Upload a User Manual
Namespaces
Wiki Guide
HTML
PDF
Info
Views
User Manual
Discussion / Help
Navigation
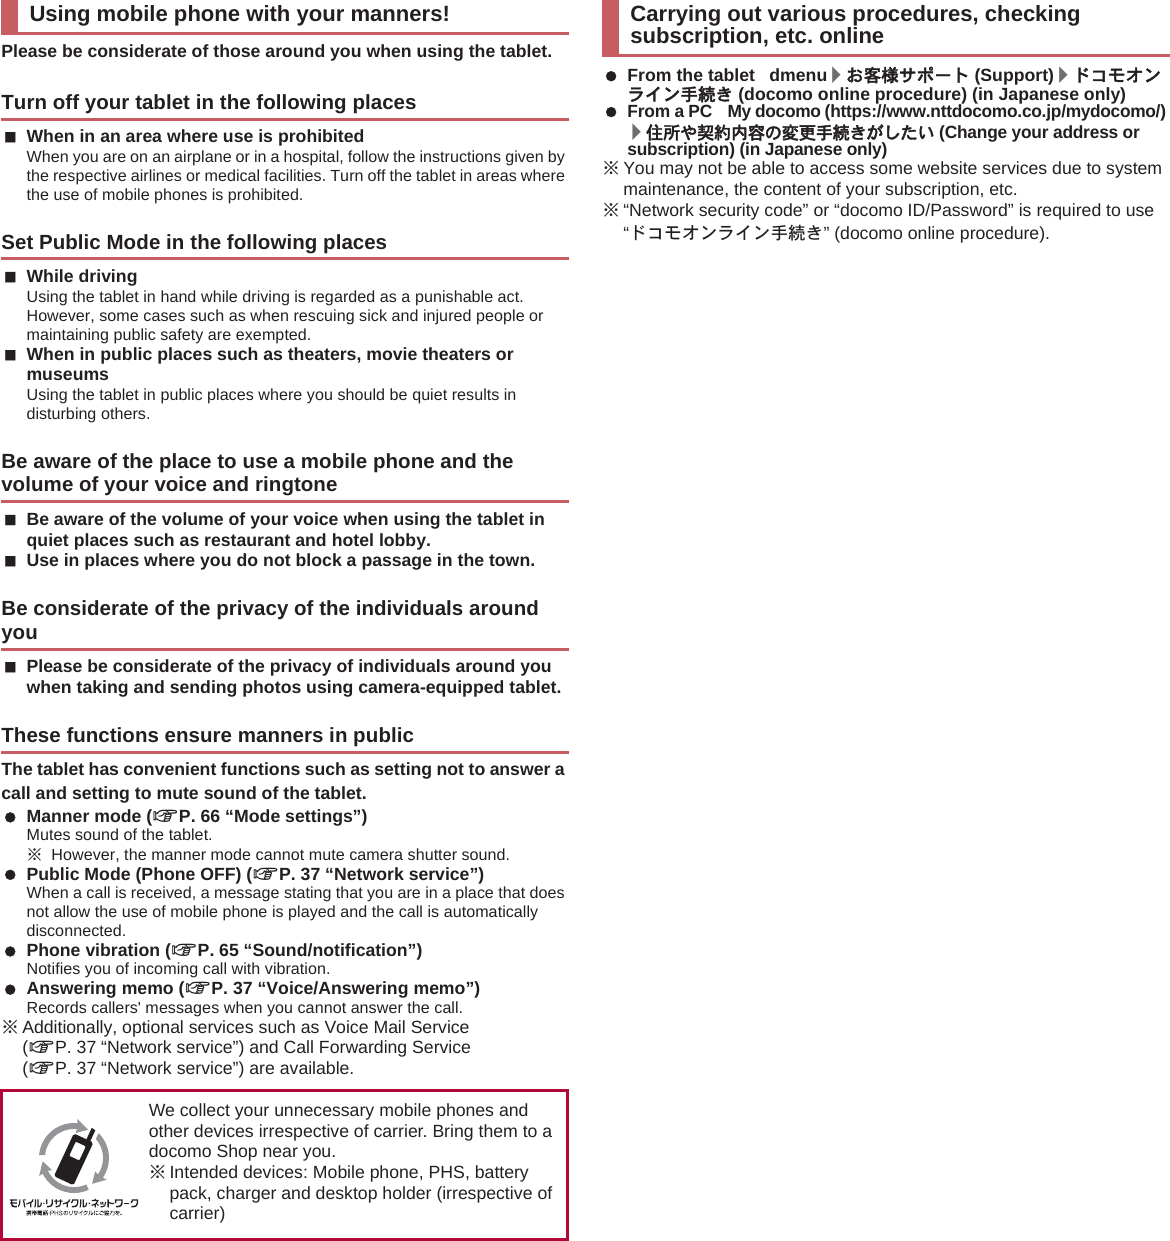
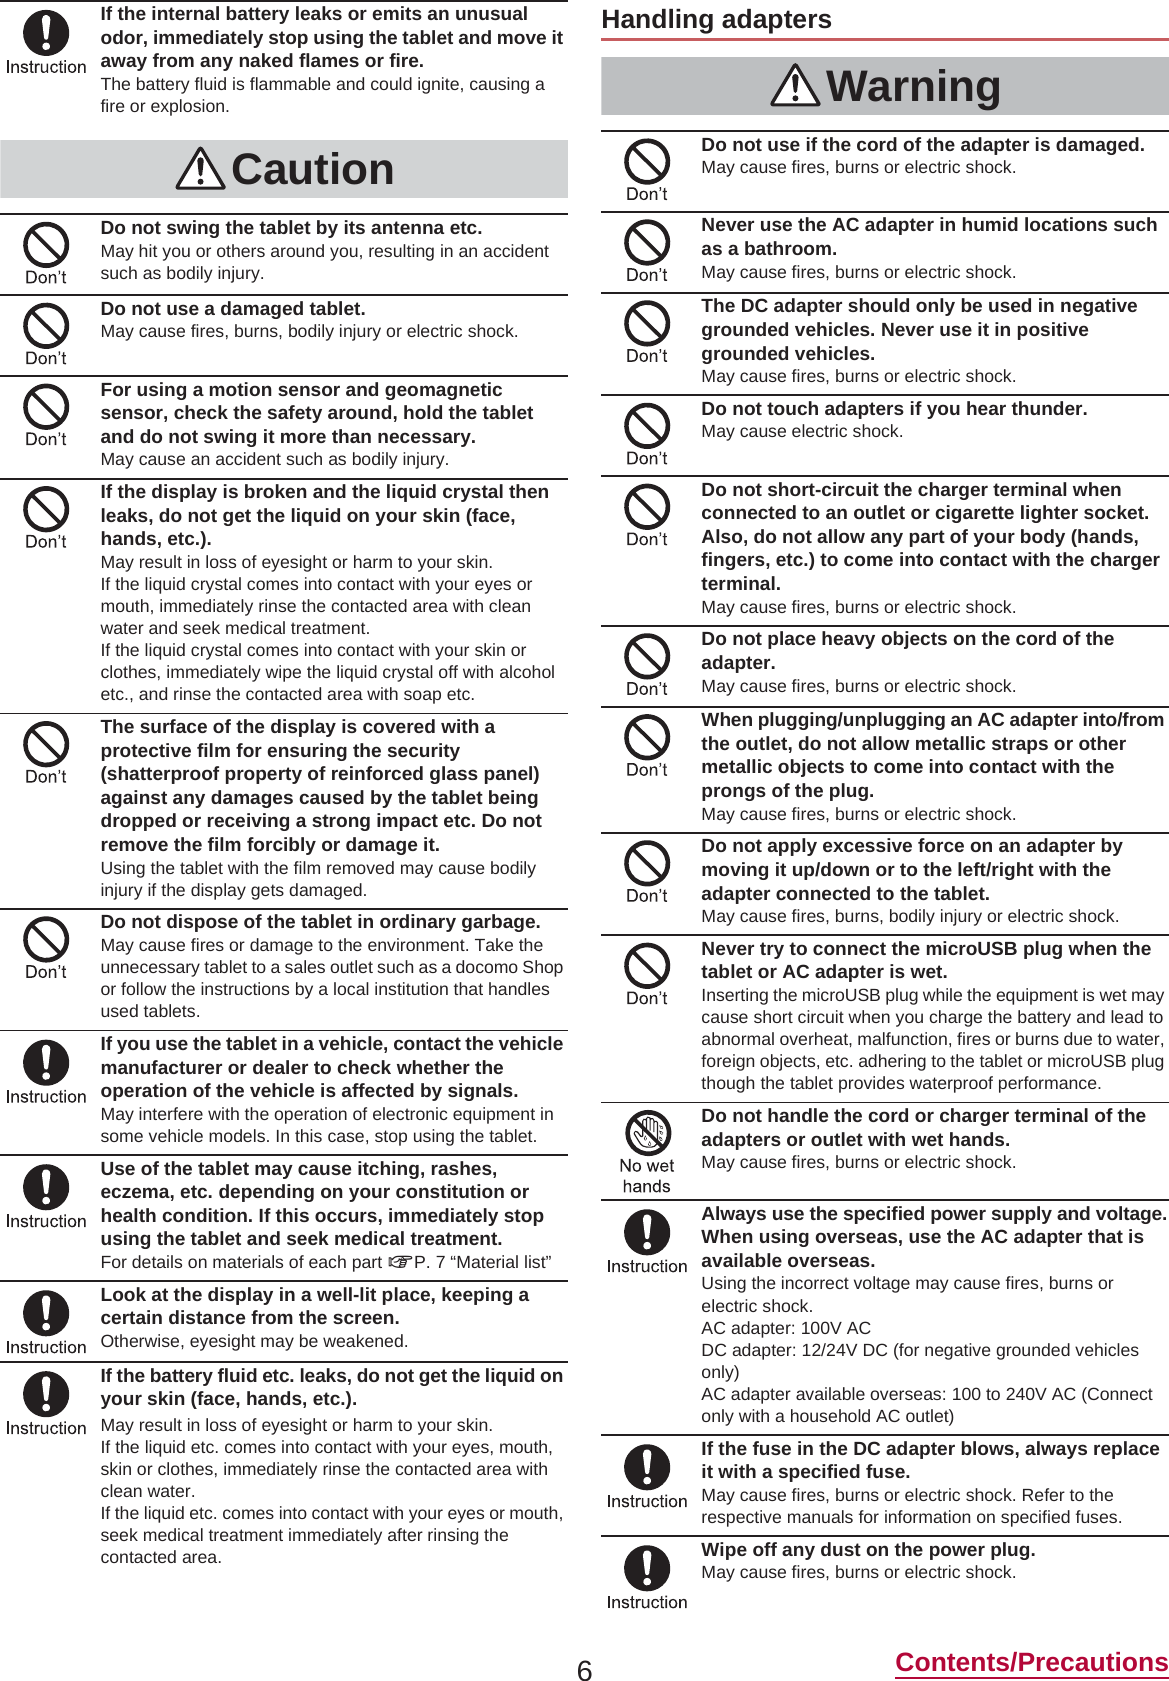
![IntroductionThank you for purchasing “SH-05G”.Be sure to read this manual before and during use to ensure proper operation. For optional parts (sold separately) compatible with the tablet, refer to the DOCOMO website.(https://www.nttdocomo.co.jp/product/option/) (in Japanese only)Checking operation methodQuick Start Guide (Basic package)(in Japanese only)This guide describes operations of basic functions.User's Manual (App of the tablet)(in Japanese only)This manual describes detailed guidance and operations of functions.In the home screen, [R]/[Instruction Manual]User's Manual (in PDF format)This manual describes detailed guidance and operations of functions.Download from the DOCOMO website(https://www.nttdocomo.co.jp/english/support/trouble/manual/download/index.html) ɦThe URL and contents are subject to change without prior notice. The screens and illustrations in this manual are shown as examples. The actual screens and illustrations may differ. The explanations in this manual are based on the case when the home app is docomo LIVE UX. If you change the home app, operation procedures etc. may be different from the explanations of this manual. Note that “SH-05G” is referred to as “tablet” in this manual. This manual refers to microSD Card, microSDHC Card or microSDXC Card as “microSD Card” or “microSD”. Reproduction of this manual in part or in whole without prior permission is prohibited. The contents of this manual are subject to change without prior notice.Basic packageSH-05G(includes warranty)Quick Start Guide (in Japanese only)Notes on usage(in Japanese only)](https://usermanual.wiki/Sharp/HRO00222.User-manual/User-Guide-2642621-Page-2.png)
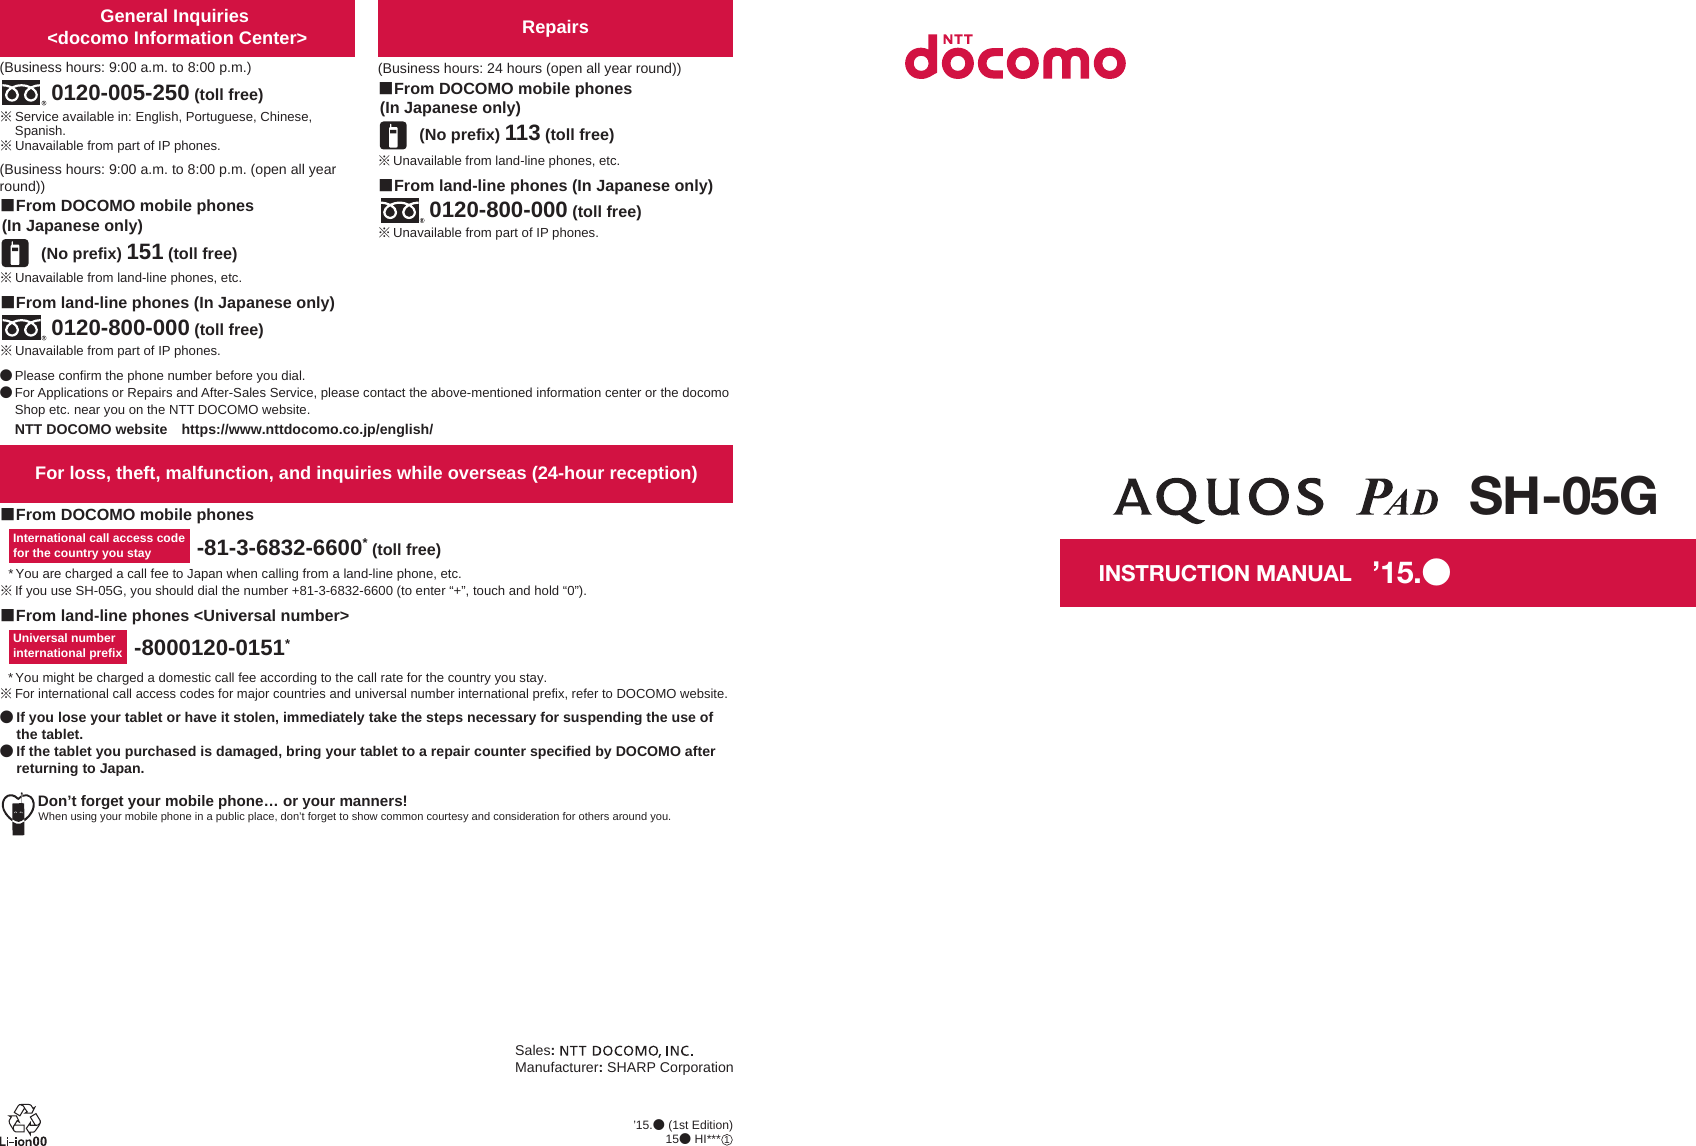
![9Contents/Precautions To protect the environment, please take any unneeded docomo nano UIM cards to a sales outlet such as a docomo Shop. Do not damage, touch haphazardly or short-circuit the IC.May cause data loss or a malfunction. Do not drop or otherwise subject the docomo nano UIM card to severe impact.May cause a malfunction. Never bend the docomo nano UIM card or place heavy objects on it.May cause a malfunction. Do not insert the docomo nano UIM card to the tablet with a label, sticker, etc. attached on the card.May cause a malfunction. The tablet supports the security function that meets the Bluetooth specification for security during communication using Bluetooth functions. However, the security may not be sufficient depending on the configuration etc. Take care of the security while making communication using Bluetooth function. Even if any leak of data or information occurs while making communication using Bluetooth function, DOCOMO shall not be liable for any loss of content. Radio frequenciesIn the home screen, [R]/[Settings]/[About tablet]/[Authentication] to confirm the radio frequencies the Bluetooth function of the tablet uses. The followings are the descriptions:ӱ2.4: This radio equipment uses the 2,400 MHz band.ӲFH: The modulation system is the FH-SS system.ӳ1: The estimated coverage distance is 10 m or less.ӴXX: Another modulation system is used.ӵ4: The estimated coverage distance is 40 m or less.Ӷ: All radio frequencies between 2,400 MHz and 2,483.5 MHz are used and the frequencies for mobile object identifiers cannot be avoided. Cautions on using Bluetooth devicesBluetooth operates at radio frequencies assigned to the in-house radio stations for a mobile object identifier that have to be licensed and are used in production lines of a factory, specific unlicensed low power radio stations, and amateur radio stations (hereafter, referred to as “another radio station”) in addition to industrial, scientific and medical devices or home electric appliances such as microwave ovens.1. Before using the tablet, make sure that “another radio station” is not operating nearby.2. If radio interference between the tablet and “another radio station” occurs, avoid interference by moving immediately to another place or “turning off the power”.3. Contact the number listed in “General Inquiries” on the last page for further details. Wireless LAN (WLAN) uses radio waves to communicate information. Therefore, it has an advantage of freely connecting to the LAN within the service area. On the other hand, if security setting is not set, it is possible for a malicious third party to intercept the communication contents or hack. It is recommended to set security setting at your own risk and judgement. Wireless LANDo not use wireless LAN near magnetic devices such as electric appliances or AV/OA devices or in radio waves.ƦMagnetism or radio waves may increase noises or disable communications (especially when using a microwave oven).ƦWhen used near TV, radio, etc., reception interference may occur or channels on the TV screen may be disturbed.ƦIf there are multiple wireless LAN access points nearby and the same channel is used, search may not work correctly. Radio frequenciesIn the home screen, [R]/[Settings]/[About tablet]/[Authentication] to confirm the radio frequencies the WLAN-installed devices use. The followings are the descriptions:ӱ2.4: This radio equipment uses the 2,400 MHz band.ӲDS: The modulation system is the DS-SS system.ӳOF: The modulation system is the OFDM system.Ӵ4: The estimated coverage distance is 40 m or less.ӵ: All radio frequencies between 2,400 MHz and 2,483.5 MHz are used and the frequencies for mobile object identifiers can be avoided.Available channels for the tablet's wireless LAN are between 1 and 13. Note that other channel access points cannot be connected.Available channels may vary depending on the country.For use in an aircraft, contact the airline beforehand. Cautions on using 2.4 GHz devicesWLAN-installed devices operate at radio frequencies assigned to the in-house radio stations for a mobile object identifier (radio stations requiring a license) used in production lines of a factory, specific low power radio stations (radio stations requiring no license), and amateur radio stations (radio stations requiring a license) in addition to industrial, scientific and medical devices or home electric appliances such as microwave ovens.1. Before using this device, make sure that the in-house radio stations for a mobile object identifier, specific low power radio stations and amateur radio stations are not operating nearby.2.If the device causes harmful radio interference to the in-house radio stations for a mobile object identifier, immediately change the radio frequency or stop use, and contact the number listed in “General Inquiries” on the last page for crosstalk avoidance, etc. (e.g. partition setup).3. If the device causes radio interference to specific low power radio stations for a mobile object identifier or amateur radio stations, contact the number listed in “General Inquiries” on the last page for further details. Cautions on using 5 GHz devicesIn the 5 GHz frequency band, three bands of 5.2 GHz/5.3 GHz/5.6 GHz band (W52/W53/W56) are available.ƦW52 (5.2 GHz band/36, 40, 44, 48 ch)ƦW53 (5.3 GHz band/52, 56, 60, 64 ch)ƦW56 (5.6 GHz band/100, 104, 108, 112, 116, 120, 124, 128, 132, 136, 140 ch)Using 5.2 GHz/5.3 GHz band wireless LAN (W52/W53) outdoors is prohibited by the Radio Law.Notes on using Bluetooth functionӱġ Ӳġ ӳġ Ӵġ ӵġӶġNotes about wireless LAN (WLAN)ӱġ Ӳġ ӳġ Ӵġӵġ](https://usermanual.wiki/Sharp/HRO00222.User-manual/User-Guide-2642621-Page-8.png)
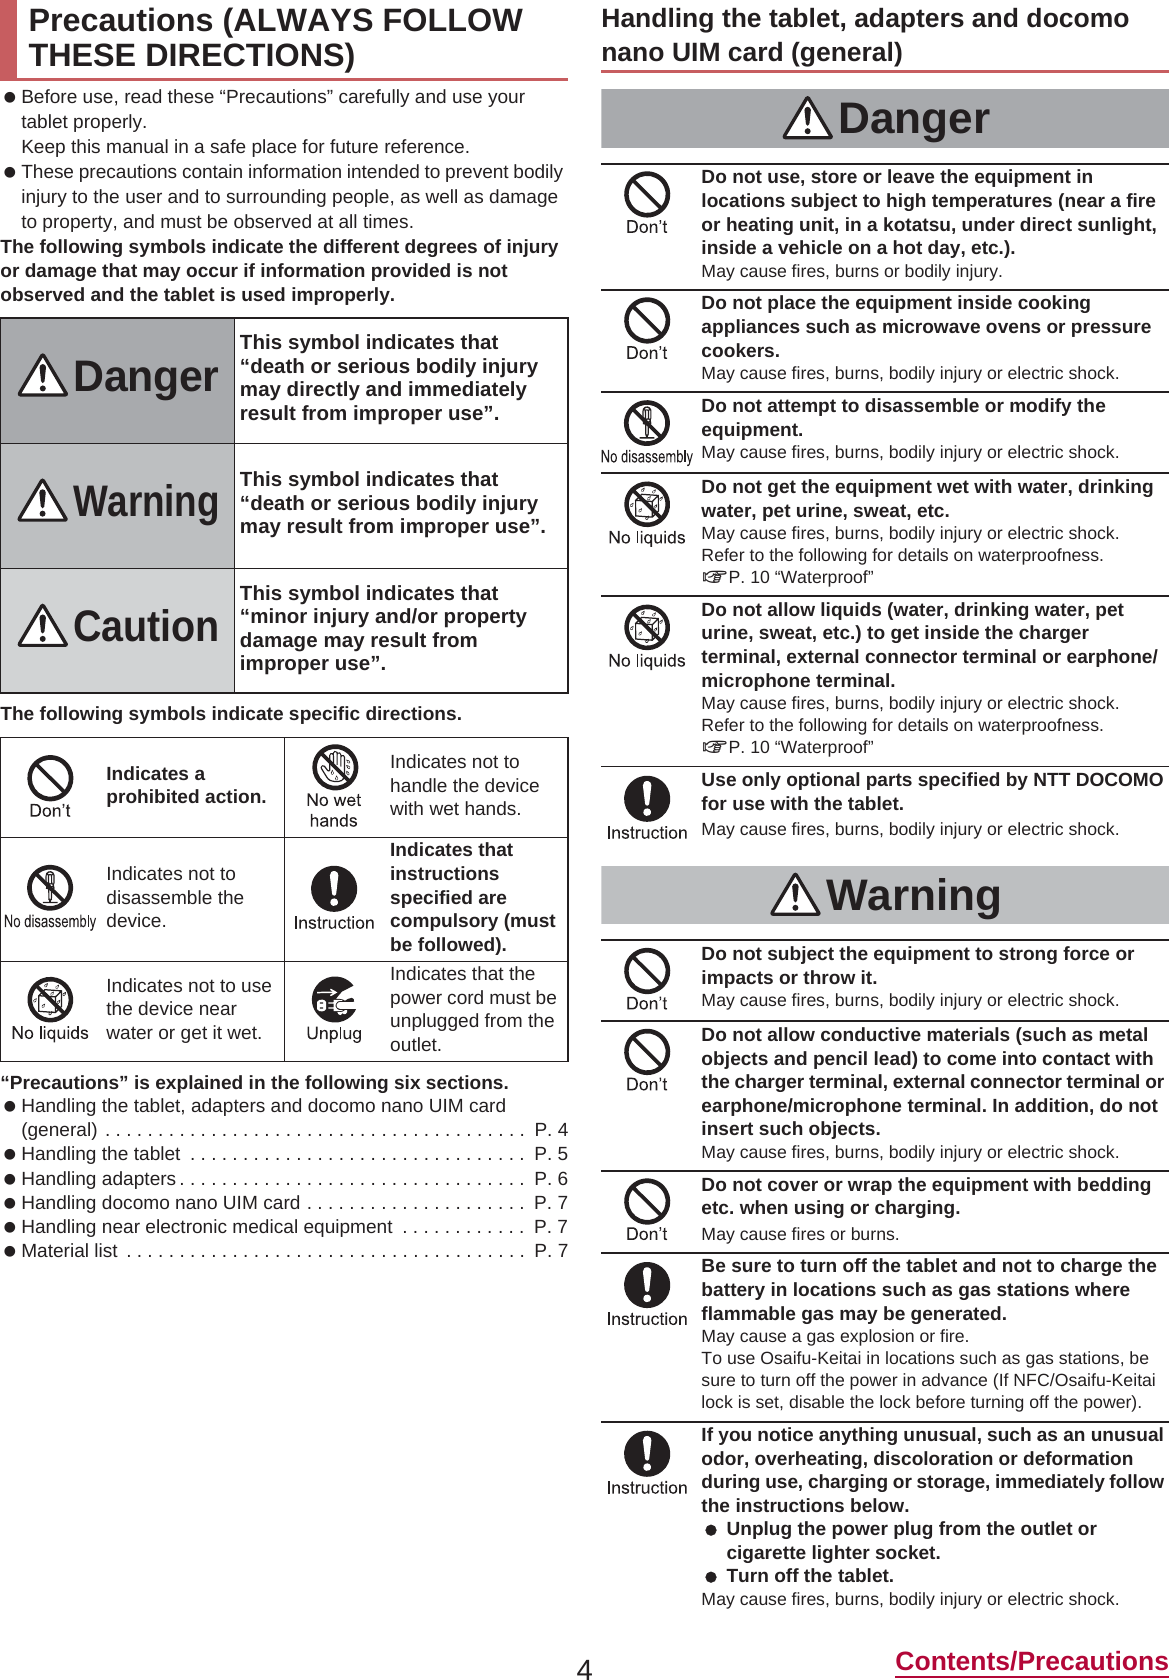
![10 Contents/Precautions The FeliCa, NFC reader/writer and P2P function of the tablet use weak radio waves whose handling does not require a license of radio station. The frequency in use is the 13.56 MHz band. When another reader/writer or P2P function is being used nearby, keep enough distance from it. Make sure that there is no radio station using the same frequency band in the nearby area. For use in an aircraft, contact the airline beforehand. Use of the function may be restricted in some countries.Check conditions such as regulations of the country/region to use the function. Never use the tablet that is modified. Using a modified device violates the Radio Law and/or the Telecommunications Business Law.The tablet follows the regulations regarding the certification of conformity with technical regulations for specific radio stations etc. based on the Radio Law and authentication of conformity with technical regulations for devices etc. based on the Telecommunications Business Law, and the “Technical Conformity Mark ” can be displayed on the electronic nameplate of the tablet as a proof. You can see it by operating as follows.In the home screen, [R]/[Settings]/[About tablet]/[Authentication]If the screws of the tablet are removed and a modification is given to the inside, the certification of conformity with technical regulations etc. will become invalid. Never use the tablet without the valid certification etc. Doing so violates the Radio Law and/or the Telecommunications Business Law. Be careful when using the tablet while driving a motor vehicle.Using the tablet in hand while driving is regarded as a punishable act.However, the punishment has no application in some cases such as when rescuing sick and injured people or maintaining public safety. Use the FeliCa reader/writer function only in Japan.The FeliCa reader/writer function of the tablet conforms to the domestic radio wave standards. Using the function overseas may result in punishment. Never change the basic software improperly.This may be regarded as a conversion of software and repairs may be refused. Use the tablet at least 15 mm away from your body during data communication.SH-05G is waterproof to IPX5*1 and IPX7*2 standards if the docomo nano UIM card/microSD Card slot cover is securely closed.*1 IPX5 means that tablet keeps functioning after being subjected to a jet flow (12.5 liters/min) discharged from a nozzle (inner diameter: 6.3 mm), from all directions (approximately 3 m from the tablet) for 3 minutes or more.*2 IPX7 means that SH-05G tablet keeps functioning after it is slowly submerged to depth of 1 m in static tap water at room temperature, left there for approximately 30 minutes and then taken out. You can call without using an umbrella in the rain (for rainfall of approximately 20 mm per hour). You can rinse off dirt from the tablet. Wash the tablet with low-pressure water flow (6 liters/min or lower and tap water at room temperature (between 5°C and 35°C)), holding it approximately 10 cm below faucet or shower head. Wash by using only your hands, not a brush or sponge, with the docomo nano UIM card/microSD Card slot cover held in position. Drain the tablet before use (nP. 11 “Draining water when the tablet gets wet”). You can use the tablet at a poolside. Do not throw water in a swimming pool on the tablet or soak the tablet in the water of a swimming pool.To maintain waterproof performance, check the followings. Securely close the docomo nano UIM card/microSD Card slot cover. Be careful not to apply excessive force on the rubber gasket when opening and closing. Make sure that the docomo nano UIM card/microSD Card slot cover is completely closed without floating. To maintain waterproof performance, the tablet has the docomo nano UIM card/microSD Card slot cover that allows you to close securely. Note that opening it forcibly may cause injuries to your nails, fingers, etc. For details on how to open/close the docomo nano UIM card/microSD Card slot cover nP. 14 “Inserting docomo nano UIM card” When your hands or the tablet is wet, do not open/close the docomo nano UIM card/microSD Card slot cover. Close the docomo nano UIM card/microSD Card slot cover securely. Even a fine obstacle (one hair, one grain of sand, tiny fiber, etc.) put between contact surfaces may allow water to get inside. If the tablet gets wet with water or other liquids with the docomo nano UIM card/microSD Card slot cover opened, the liquid may get inside causing electric shocks or malfunction. Stop using the tablet, turn off the power and contact a repair counter that DOCOMO specifies.FeliCa and NFC reader/writerCautionWaterproofWhat you can do with waterproof of SH-05GThings to keep in mind To maintain waterproof performance, replacement of parts is recommended every 2 years regardless of whether the tablet appears normal or abnormal. DOCOMO replaces the parts as a chargeable service. Bring the tablet to a repair counter that DOCOMO specifies.Precautions](https://usermanual.wiki/Sharp/HRO00222.User-manual/User-Guide-2642621-Page-9.png)
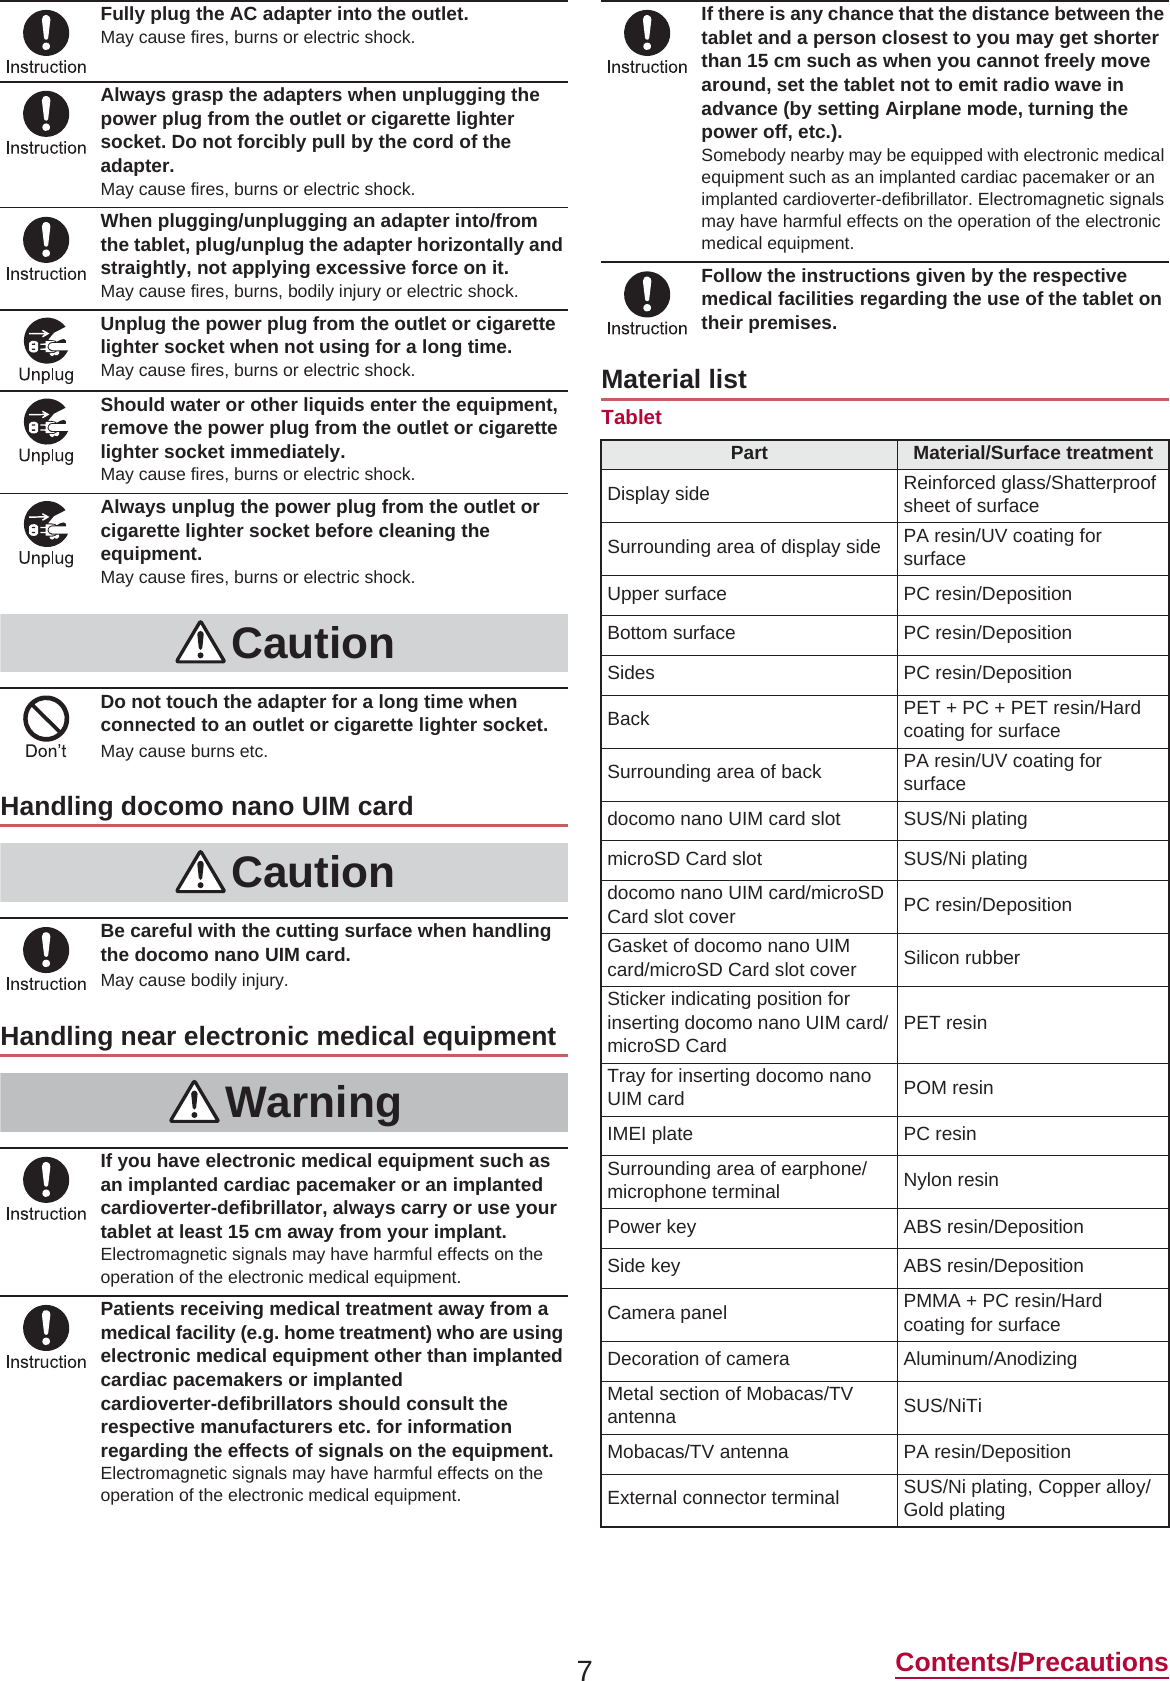
![15 Before Using the TabletThe internal battery is not fully charged at the time of purchase. Be sure to charge the battery before use.ɡCautions while charging For details on the estimated charge time nP. 93 “Main specifications” The battery can also be charged with the tablet turned on (While charging, the battery icon appears with [w] superimposed). Do not charge for a long time with the power left turned on. If the tablet is left turned on after charging is complete, the internal battery charge level decreases.In this case, an AC or DC adapter (sold separately) charges the battery again. However, depending on the time when the tablet is disconnected from the AC or DC adapter, the battery charge level may be low or the battery may only be usable for a short time. If the tablet is left for a long time even after the charging is completed, the battery level may decrease. When the battery is empty and the tablet is being charged, the charging lamp may not illuminate immediately. However, charging is in progress. If the battery empty alert is displayed and the power cannot be turned on, charge the battery for a while. While charging, the tablet may not be turned on even when the charging lamp is illuminated in red. Charge longer and try turning the power on again. Frequently recharging the battery when its power is still remaining enough may shorten the usable life of the internal battery. It is recommended to use the battery to a certain level (e.g. after the battery level decreases) before recharging. When the battery becomes warm, charging may automatically stop even if the battery has not been fully charged. Charging automatically resumes after the temperature lowers to an appropriate temperature. If you watch Mobacas, receive content, etc. while charging, move the tablet as far away as possible from the power plug section of the AC adapter.ɡEstimated battery life when fully charged For details on the battery life nP. 93 “Main specifications”ɡInternal battery usable life Internal battery is a consumable product. Battery life per charge is gradually reduced every time the battery is charged. When battery life per charge is reduced to approximately half of the default time, this means that the internal battery is approaching the end of its usable life. In this case, it is recommended to replace the battery as soon as possible. For details on replacing the internal battery, contact the number listed in “Repairs” (in Japanese only) on the last page or a repair counter that DOCOMO specifies. If you watch TV etc. while charging for a long time, the usable life of the internal battery may become shorter than estimated.ɡAC adapter and DC adapter Refer to user's guide of AC Adapter 05 (sold separately) or DC Adapter 04 (sold separately). AC Adapter 05 covers from 100 to 240V AC. The shape of the plug for the AC adapter is for 100V AC (for domestic use). To use the AC adapter of 100 to 240V AC overseas, a conversion plug adapter applicable to your country of stay is required. Do not use a voltage converter for overseas travel to charge the battery.[Read the user's guides of AC Adapter 05 (sold separately) and DC Adapter 04 (sold separately)] Following operations describe how to charge with AC Adapter 05 or DC Adapter 04.1Insert the microUSB plug of the AC adapter/DC adapter horizontally into the external connector terminal on the tablet with the side marked with “B” turned upIMEI plate A plate on which the IMEI number (International Mobile Equipment Identifier) is printed is stowed near the docomo nano UIM card slot and microSD Card slot. The IMEI number is required when you contact a repair counter that DOCOMO specifies, so do not pull it out. Note that pulling out the IMEI plate forcibly or adding forces on it may damage the plate. If you accidentally pull out the IMEI plate, push it back slowly in the direction of the docomo nano UIM card slot.ChargingContinuous talk timeFOMA/3GApprox. $$ minGSMApprox. $$ minVoLTE (Voice call)Approx. $$ minContinuousstand-by time FOMA/3GAt rest: Approx. $$ hr (Preferred network type: LTE/3G/GSM(Auto))GSMAt rest: Approx. $$ hr (Preferred network type: LTE/3G/GSM(Auto))LTEAt rest: Approx. $$ hr (Preferred network type: LTE/3G/GSM(Auto))Mobacaswatching timeApprox. $$ minTV watching timeFull-Seg: Approx. $$ min1Seg: Approx. $$ minCharging with AC adapter/DC adapter](https://usermanual.wiki/Sharp/HRO00222.User-manual/User-Guide-2642621-Page-11.png)
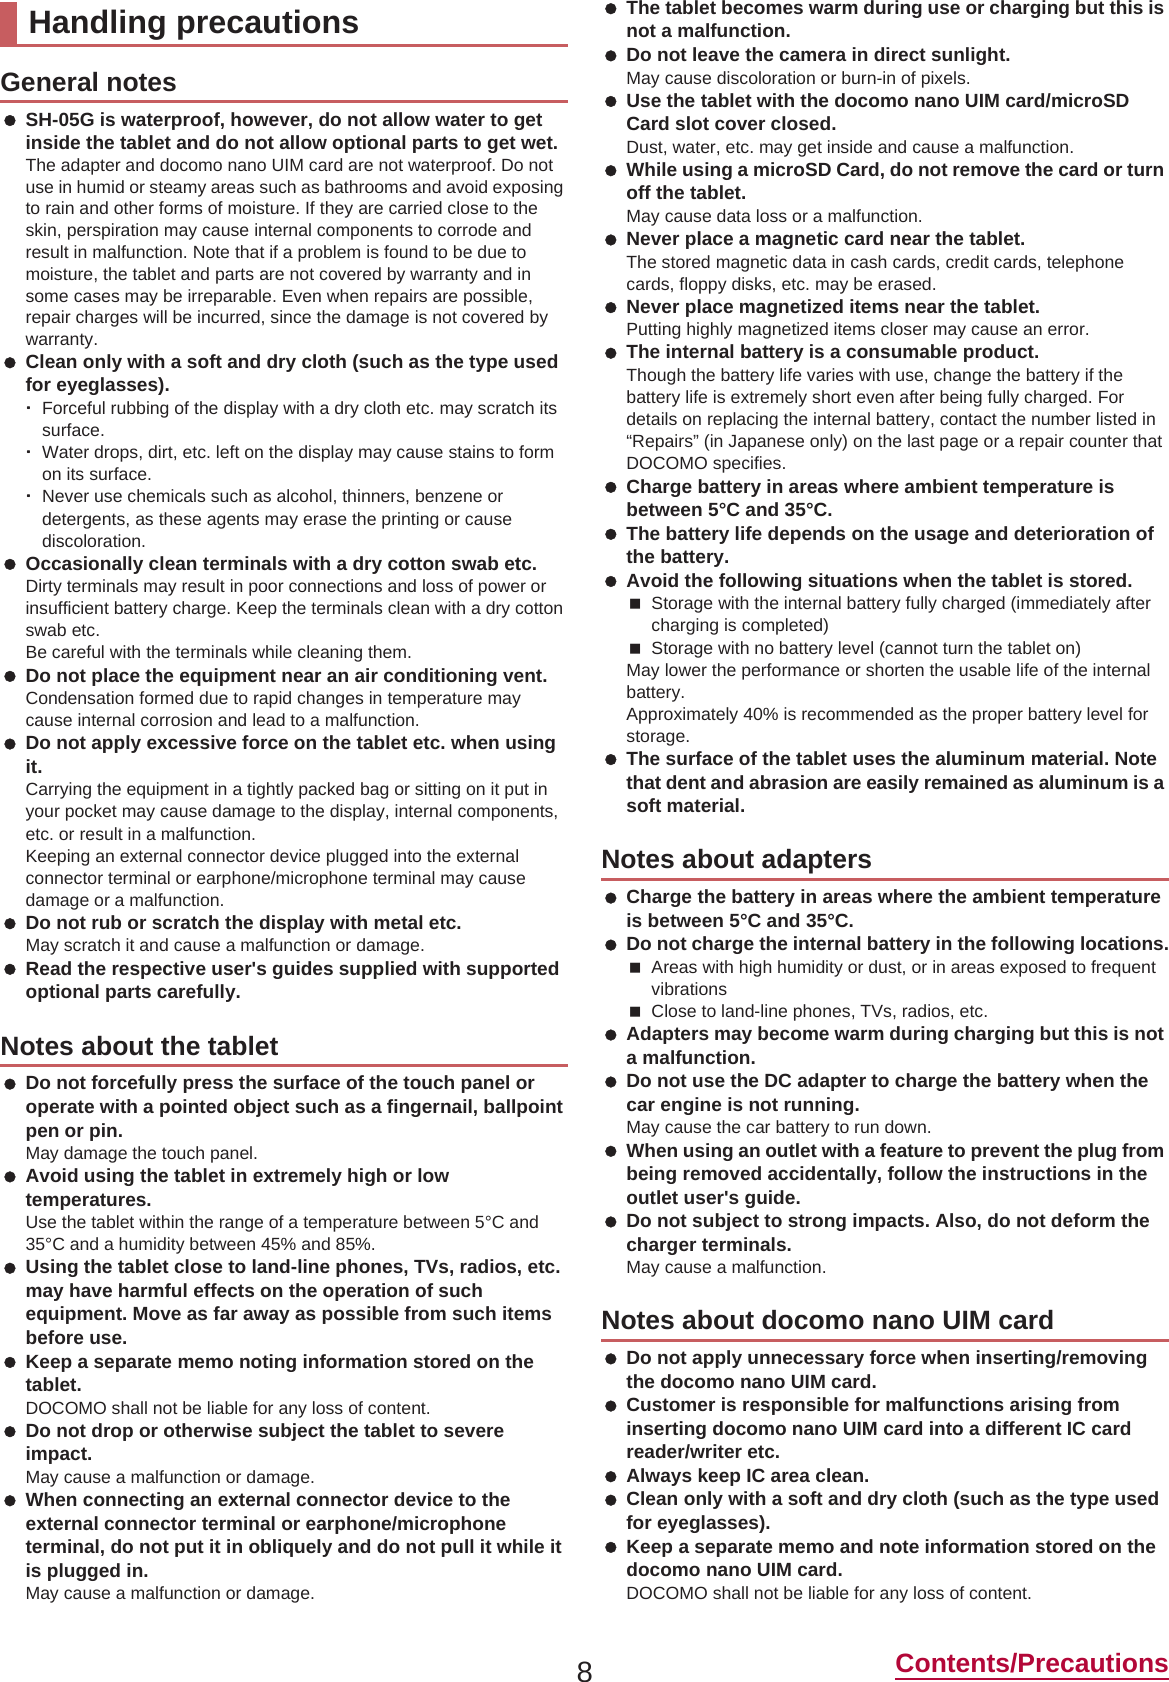
![16 Before Using the Tablet:Check the direction (front or rear) of the microUSB plug and insert it horizontally.2When you erect the AC adapter power plug and insert it into an outlet or insert the DC adapter power plug into a car cigarette lighter socket, the charging lamp illuminates and charging starts3When charging is complete, the charging lamp turns off4Remove the AC adapter power plug from the outlet, or remove the DC adapter power plug from the car cigarette lighter socket5Remove the microUSB plug of the AC adapter/DC adapter horizontally from the external connector terminalYou can charge the tablet by connecting the tablet to a PC with Micro USB Cable 01 (sold separately). For details on connecting to a PC nP. 82 “Connecting the tablet and PC”ɡTurning power on1H (for at least 2 seconds):When you turn the power on for the first time, make the initial settings (nP. 21 “Initial settings”).ɡTurning power off1H (for at least 1 second)/[Power off]/[OK]ɡTurning power off forciblyYou can forcibly turn the power off if the screen does not respond or the power cannot be turned off.1H (for at least 8 seconds):Release your finger after the vibrator is activated to turn the power off.ɡTurning display on/offThe display is turned off when H is pressed or the tablet is not in use for a set length of time.Press H while the display is turned off to turn it on.ɡTouch panel lockWhen the power or the display is turned on, the touch panel is locked.Touch [J] to unlock.Operations in touch panel lock screen To set/disable the manner mode: y (for at least 2 seconds) To turn on/off the mobile light: x (for at least 2 seconds) To activate SH Camera: [K] To activate ̱͓̽̀͝ϋΏͿσ (Shabette-Concier): [W] To display the detailed information on notifications: Drag the clock down To display the status panel: Drag the status bar down Note that inserting or removing the equipment forcibly may cause damage to the external connector terminal and the microUSB plug or result in a malfunction.When using a DC adapter The DC adapter should only be used in negative grounded vehicles (12 and 24V DC). Do not use with the car engine shut off. May drain the car battery. The DC adapter fuse is a consumable product. For replacement, purchase a new fuse at a nearest auto parts retailer etc. Refer to the user's guide of DC Adapter 04 for details.Charging lampmicroUSB plugKeep side marked with “B” upExternal connector terminal100V ACoutletCigarettelighter socketAC adapter DC adapterPower plugPower plugCharging with Micro USB Cable 01Turning power on/off The notifications are displayed in the lock screen of the touch panel. You can make settings for displaying of notifications in [When device is locked] (nP. 65 “Sound/notification”).Mobile light The mobile light may be automatically turned off if you use the tablet for a long time or the tablet becomes warm after the mobile light is turned on. Also, you may not be able to use the mobile light if the tablet is warm.](https://usermanual.wiki/Sharp/HRO00222.User-manual/User-Guide-2642621-Page-12.png)
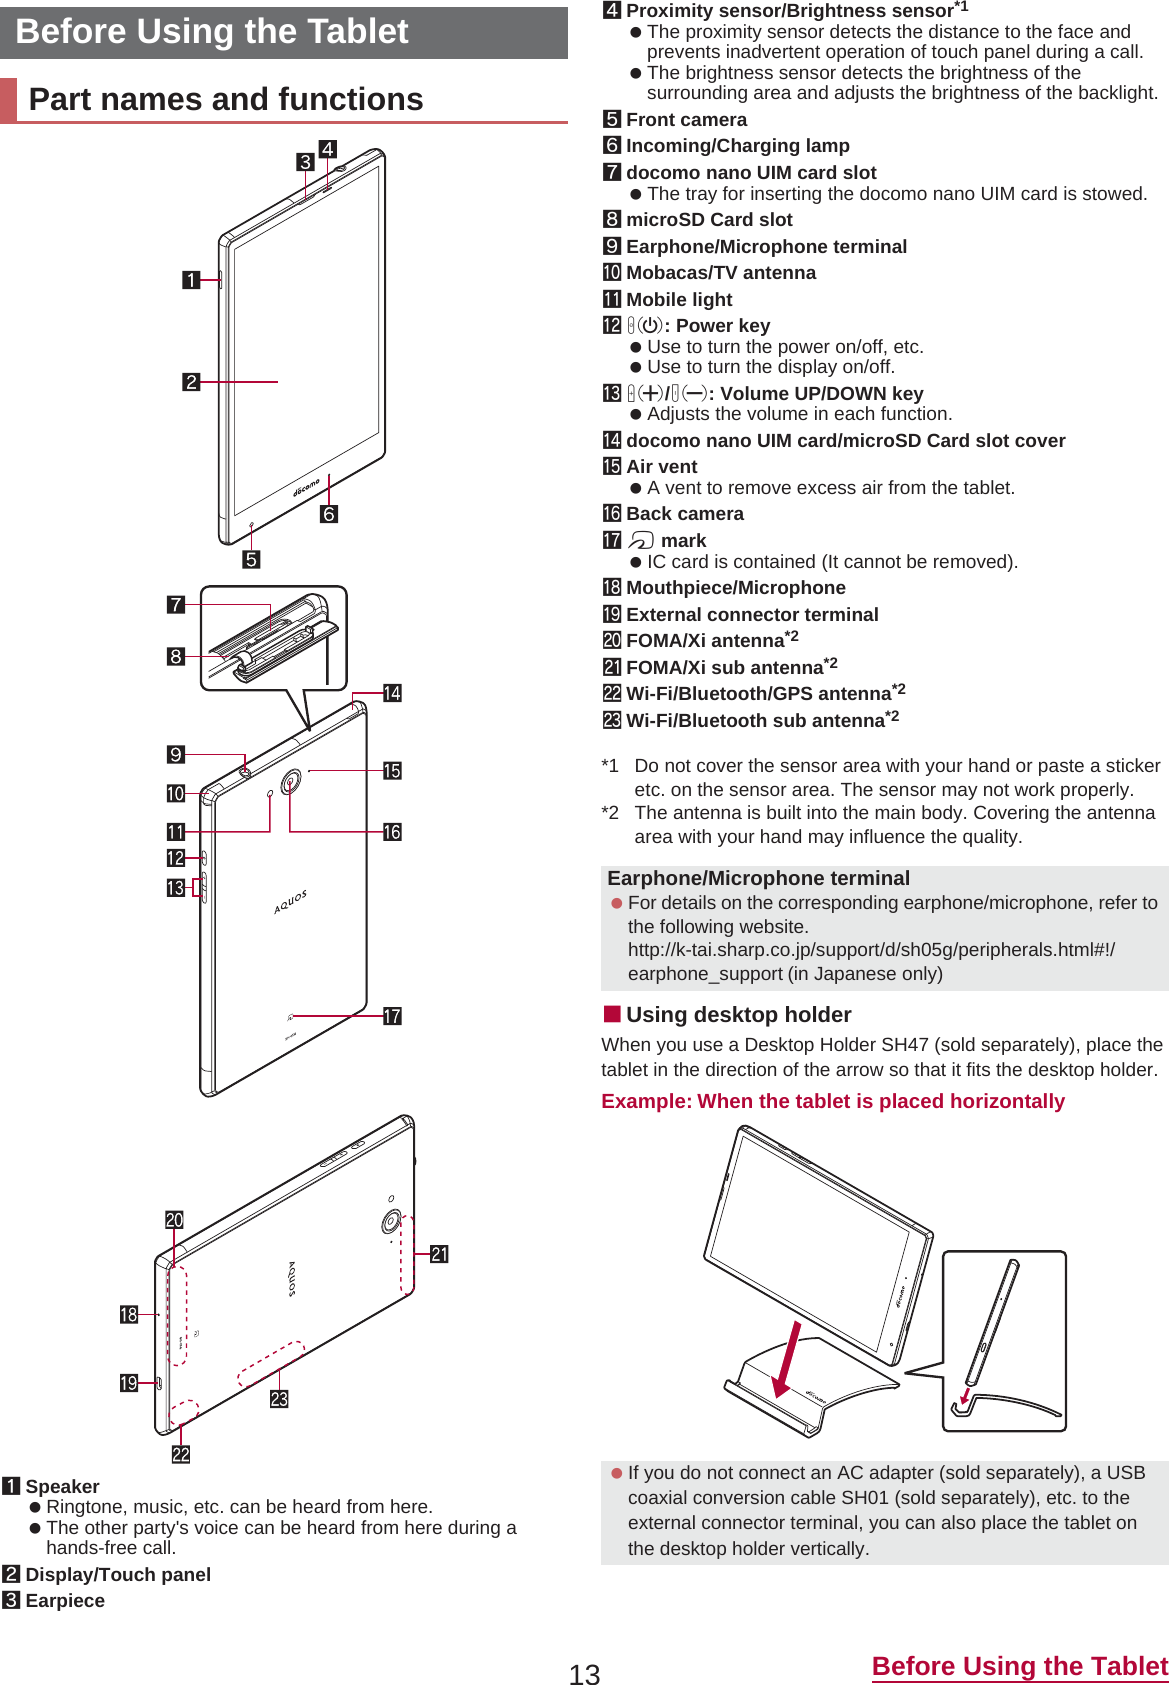
![17 Before Using the TabletThe followings describe basic operations of the tablet such as operations of the touch panel and navigation keys, and operations for shooting screenshot.The followings describe the operations to use the display (touch panel). Operations may differ depending on the function and screen in use.ɡTouchTouch a key or an item displayed on the screen and then release your finger from it to select or set it.ɡTouch and holdWhen you keep your finger on the touch panel, a menu may appear depending on the function and screen in use.ɡSlide (Swipe)/DragMove your finger while keeping it on the touch panel to scroll the screen or move an icon, a widget, etc. to the desired position.In addition, when you touch a menu or an item by mistake, move your finger away from it to cancel the selection.ɡFlickMove your finger like sweeping the touch panel in the home screen etc. to switch pages.ɡPinch out/Pinch inYou may be able to zoom the screen in/out etc. by putting two fingers on the touch panel and moving them with putting a distance between two fingers apart (pinch out)/closer (pinch in) depending on the function and screen in use.ɡNavigation keysUse the navigation keys displayed at the bottom of the screen to perform the basic operations.1{/v: Back key/Close key Return to the previous screen. Close the keyboard.2|: Home key Display the home screen.3}: Recent Apps key Display Quick Launcher or Recent Apps (nP. 26 “Quick Launcher”, P. 28 “Recent Apps”).4[: Trace to search or enlarge Activate Trace to search or enlarge (nP. 28 “Trace to search”, P. 28 “enlarge”).ɡUsing user-aid functionYou can quickly activate apps supporting the user-aid function.1Slide any of the navigation keys up/slide it to [Google]:If there are multiple apps supporting the user-aid function, [q] is displayed and you can select an app to activate.ɡRetrieving menuWhen you touch [{]/[z]/[|] etc., slide the left edge of the screen to the right or touch and hold the screen, functions (menus) available in that screen appear.Example: App screenBasic operationOperation of touch panelCautions when using the touch panel The touch panel is designed to be lightly touched with your finger. Do not forcefully press with your finger or a pointed object (fingernail, ballpoint pen, pin, etc.). In the following cases, the touch panel may not work even if you touch it. May cause a malfunction.Operation with a gloved fingerOperation with the tip of a fingernailOperation with foreign objects placed on the operation padOperation on the touch panel on which a protective sheet, sticker, etc. is putOperation while the touch panel is wetOperation with fingers wet with sweat, water, etc. Operations may be interrupted if you touch an area other than a confirmation screen or the status bar while the confirmation screen etc. is displayed.Operation while using functionMenu](https://usermanual.wiki/Sharp/HRO00222.User-manual/User-Guide-2642621-Page-13.png)
![22 Before Using the TabletɡInitial settings for docomo service1When the initial settings screen for docomo service is displayed, [Agree to all]/[Start settings]2Make the initial settings:The following items can be set.docomo IDdocomo clouddocomo apps passworddocomo location informationRemote Initialization Service*Install all apps* This is not displayed when you have not set a docomo apps password.3[Start using]An access point (sp-mode) for Internet connection is registered by default. You can add other access points and change them if necessary.For details on sp-mode, refer to the DOCOMO website.If you want to use mopera U or Business mopera Internet, add an access point of either provider manually.For details on mopera U, refer to the mopera U website.ɡChecking an access point in use1In the home screen, [R]/[Settings]/[More]/[Cellular networks]/[Access Point Names]ɡSetting additional access points Never set the MCC to a figure other than 440 or the MNC to a figure other than 10. Otherwise the added access point disappears from the screen.1In the home screen, [R]/[Settings]/[More]/[Cellular networks]/[Access Point Names]/[m]2[Name]/enter the name of the network profile to create/[OK]3[APN]/enter the access point name/[OK]4Enter other items required by network operators/[z]/[Save]Reset an access point to default setting.1In the home screen, [R]/[Settings]/[More]/[Cellular networks]/[Access Point Names]2[z]/[Reset to default]If you use Wi-Fi function of the tablet, you can use mail or Internet by connecting to access points of your home, corporate network or public wireless LAN service. Packet communication is also available while [Wi-Fi] is set to On. Wi-Fi connection is prioritized while Wi-Fi connection is set, but the connection is automatically switched to that of LTE/3G/GPRS network once Wi-Fi connection is terminated. Note that packet communication charges may be incurred in this case. Refer to the manual of your wireless LAN base unit when using the access point at home etc. Operate access point registration near the access point. If you use the docomo service by using Wi-Fi function, set a docomo ID in advance. In the home screen, [R]/[Settings]/[docomo service/cloud]/[docomo ID୭] (Set docomo ID) to set it.1In the home screen, [R]/[Settings]/[Wi-Fi]2Set to On3Select an access point:If you select an access point protected by security, enter the password (security key) and select [CONNECT].:To register access points manually: [z]/[Add network]/enter the network name/set security/[SAVE]:WPS compatible access points can be easily registered. In the home screen, [R]/[Settings]/[Wi-Fi]/[z]/[EasySettings]/[WPS Push Button]/[WPS Pin Entry] to register an access point.:Alternatively, in the home screen, [R]/[Settings]/[Wi-Fi]/[z]/[Easy Settings]/[AOSS] to connect to an access point. Follow the instructions on the screen and operate after this step.Setting an access point If the settings of MCC and MNC are changed and the added access point disappears from the screen, reset the settings or set the access point manually.Resetting an access point When sp-mode is not subscribed or if you fail to make automatic setting of an access point due to signal status such as outside the service area, you are required to set the access point again manually.Wi-Fi settingsRadio interference with Bluetooth devices Wireless LANs (IEEE 802.11b/g/n) use the same frequency band (2.4 GHz) as Bluetooth devices. Therefore, using the wireless LAN device near a Bluetooth device may cause radio interference, lowering of communication speed, noise or connection failure. In this case, turn off the Bluetooth device or keep the tablet and the wireless LAN device at least approximately 10 m away from the Bluetooth device. When you select an access point and connect to it with a wrong password (security key), [Avoided poor Internet connection], [Authentication problem] or [Connected (Limited)] is displayed. Confirm the password (security key). When [Avoided poor Internet connection] or [Connected (Limited)] is displayed after entering the correct password (security key), you may not have acquired the correct IP address. Connect to the access point again after confirming signal status. The registration process using WPS takes a few minutes. After completion of the registration of the access point, check that the proper connection to the access point is acquired. As for the manual registration of an access point, this function supports WEP, WPA/WPA2 PSK and 802.1xEAP as the security setting. If you connect to an access point which is not connected to the Internet, [5] is displayed and the communication may be made by mobile networks, not Wi-Fi connection.To make Wi-Fi communication by using such an access point, enable [Using this AP without internet connection] of Advanced options before connecting to the access point.](https://usermanual.wiki/Sharp/HRO00222.User-manual/User-Guide-2642621-Page-14.png)
![23 Before Using the TabletɡDetailed settings1In the home screen, [R]/[Settings]/[Wi-Fi]2[z]/[Advanced]3Select an itemNetwork notification: Set whether to display a notification icon when an open network is detected.ƦSet it after setting [Wi-Fi] is set to On.Scanning always available: Set whether to scan networks by the location information service and other apps even when [Wi-Fi] is set to Off.Wi-Fi sleep policy: Set whether to disconnect Wi-Fi when the display is turned off.Avoid poor connections: Set whether to use the Wi-Fi function only when stable Internet connections are available.Wi-Fi frequency band: Set the frequency band to use.Handover: Set whether to automatically switch access points to use if you use the tablet while moving.Mobile/Wi-Fi simultaneous use: Make settings for simultaneous use of mobile and Wi-Fi networks.Install certificates: Install certificates.Wi-Fi Direct: Make settings for Wi-Fi Direct.Passpoint: Set whether to automatically connect to the available Passpoint compatible access points when [Wi-Fi] is set to On.MAC address: Confirm the MAC address.IP address: Confirm the IP address.ɡMobile/Wi-Fi simultaneous useYou can make settings for the function to automatically switch to mobile networks when communications with Wi-Fi access points slow down (Smooth change mode) or the function to download content at high speed using mobile and Wi-Fi networks at the same time (Dual Speed mode). Set [Wi-Fi] to On and connect to an access point in advance. Since packet communication is also used when you use mobile and Wi-Fi networks at the same time, packet communication charges may be incurred.1In the home screen, [R]/[Settings]/[Wi-Fi]2[z]/[Advanced]3[Mobile/Wi-Fi simultaneous use]4Select an itemSimultaneous use mode setting: Set a mode to use.Advanced settings: Make settings for applicable access points and apps, and inapplicable servers.Notes: Check the precautions.:Touch []] of an item to display its explanations.ɡDisconnecting1In the home screen, [R]/[Settings]/[Wi-Fi]2Select the connected access point/[Disconnect]:Disconnect with the password retained. The access point may be automatically connected again such as when the display is turned on.You can use the tethering function that connects Wi-Fi compatible devices, or PCs etc. connected via Micro USB Cable 01 (sold separately) or Bluetooth communication to the Internet by using the tablet as an access point. You can connect up to $$ devices in total at the same time: $$ PC connected via Micro USB Cable 01, $$ Wi-Fi compatible devices and $$ Bluetooth devices. The tablet supports dial-up connections via DUN profile. Before using Bluetooth tethering, register the other party's Bluetooth device in advance (nP. 80 “Using Bluetooth function”).As for the settings on the Bluetooth device, refer to its manual.1In the home screen, [R]/[Settings]/[More]/[Tethering]2Select an itemUSB tethering: Set whether to use the USB tethering.Wi-Fi tethering: Set whether to use the Wi-Fi tethering.Set up Wi-Fi hotspot: Make settings for Wi-Fi tethering such as network name and security.Wi-Fi tethering Easy Connection: Set whether to use the tethering by connecting to WPS compatible access points.Bluetooth tethering: Set whether to use the Bluetooth tethering.1In the home screen, [R]/[Email]:Only when an account is not set up, the account setup screen appears.2Enter mail address/[a]3Enter password/[a]:Provider information is preset for some mail accounts, and a receiving mail server and a sending mail server are automatically set.:When you use an account whose provider information is not preset, it is necessary to set a receiving mail server and a sending mail server manually. For details on those settings, contact the Internet service provider you use.4Set up an account/[a]5Enter an account name and your name/[a][Handover] You can set it only when you select [2.4 GHz only] of Wi-Fi frequency band and [Setting OFF] of Simultaneous use mode setting.Tethering[USB tethering] The tethering function is available on Windows Vista, Windows 7, Windows 8, Windows 8.1 and Linux. A microSD Card inserted in the tablet cannot be mounted on a PC during USB tethering. For details on USB tethering, refer to the following website.(http://www.android.com/tether#usb)[Wi-Fi tethering] While the tablet is functioning as an access point, it cannot access the Internet via Wi-Fi connection. Make settings for Wi-Fi access points in [Set up Wi-Fi hotspot]. For details on Wi-Fi tethering, refer to the following website.(http://www.android.com/tether#wifi)[Set up Wi-Fi hotspot] At the time of purchase, Network name is set to [SH-05G_AP] and Security is set to [WPA2 PSK] while Password is set randomly. Change the settings if necessary.Setting up mail account](https://usermanual.wiki/Sharp/HRO00222.User-manual/User-Guide-2642621-Page-15.png)
![34 CallYou can use the phone and phonebook, and make settings for call, voice/answering memo, operations available when calls are received, etc.1In the home screen, []]/[Dial]2Enter a phone number:Always enter the city code, even when it is a local number.:You can set to notify/not to notify the other party of your phone number for each call by adding “186”/“184” to the head of the phone number.1Call Make a call. Also, if there are outgoing call history items, touch it to enter the latest one when the phone number has not been entered.2Favorites Display the contacts set as favorites.3Delete Delete an entered number. Touch and hold it to delete all the entered numbers.4Register5Dial Display the dial screen.6Outgoing/Incoming call history7Phonebook Display the phonebook.3[0]:To make a video call: [|]/[Video call]4[End call] to end the callWhen using services in which you are required to enter numbers additionally during a call, such as inquiry about the balance in your bank account or ticket reservation, enter pause (,)/wait (;) after entering a phone number to make a call with an additional number added to the main phone number.ɡAdding 2 seconds pauseAfter making a call to a main phone number, the tablet automatically pauses for 2 seconds and an additional number is sent.1In the home screen, []]/[Dial]2Enter a phone number/[|]/[Add 2-sec pause]3Enter a number to send/[0]ɡAdding waitAfter making a call to a main phone number, the tablet automatically waits and then a screen asking whether to send an additional number is displayed. Touch [Yes] to send an additional number.1In the home screen, []]/[Dial]2Enter a phone number/[|]/[Add wait]3Enter a number to send/[0]4[Yes] during the callBy using video call, you and the other party can talk on the tablet while seeing each other's image. Also, you can switch between voice call and video call while talking on the tablet.CallMaking a call If you talk on the tablet with your hair put between the earpiece and your ear, the proximity sensor may not work properly. The screen may be kept turned on and the call may be interrupted when the screen is touched accidentally.VoLTE VoLTE enables you to use call and video call of high quality. When you use VoLTE, the tablet and the other party's device need to satisfy the following conditions.They are VoLTE compatible modelsThey are inside the Xi service area*Preferred network type is set to [LTE/3G/GSM(Auto)]/[LTE/3G] (nP. 85 “Preferred network type”)Call mode setting is set to [VoLTE/3G] (nP. 37 “Call settings/Other”)* VoLTE is not available outside the Xi service area or during international roaming.Entering touch-tone signalsVideo call Call charges and packet communication charges are incurred when making a video call. In addition, packet communication charges are incurred also when receiving a video call. Quality of image may differ depending on the usage environment because suitable communication levels are applied according to the usage condition. If you cannot switch to a video call during a voice call, [Switching to video call failed] is displayed and the voice call continues. Be careful not to cover the speaker section during a video call. The other party's voice may not be heard well. While using video call in the background, your image is not sent to the other party. As for image displayed during a video call, since processes for displaying image may differ depending on the model to use, ranges of your image displayed on the tablet may differ from those displayed on the other party's device.](https://usermanual.wiki/Sharp/HRO00222.User-manual/User-Guide-2642621-Page-16.png)
![35 CallWORLD CALL is an international calling service available from DOCOMO devices in Japan. To make an international call through a company other than DOCOMO, contact the respective companies for instructions. The caller ID may not be notified or displayed correctly depending on overseas network operators. In this case, making a call with incoming call history is not available.1When a call is received, the ringtone sounds and the incoming lamp flashes2Answer the call:Operate after touching [3].1Reject call with SMS Reject the incoming call and send a selected SMS message to the other party.2Reject Reject the incoming call.3Accept Answer the call.4Accept voice Answer the call using voice call.5Accept video Answer the call using video call.3[End call] to end the callɡAnswering a call while display is turned onWhen a call is received while a screen other than lock screen of the touch panel is displayed, the incoming notification is displayed. You can answer the call by using the notification.1When a call is received, the incoming notification is displayed at the top of the screen2[ACCEPT]/[ACCEPT VIDEO]:Touch the incoming notification to display incoming voice call/video call screen.:Flick the incoming notification to the left/right to hide the notification.ɡPlacing a call on hold1When a call is received, the ringtone sounds and the incoming lamp flashes2[|]/[Put a caller on hold]ɡAnswering a video call without sending your own image1When a video call is received, the ringtone sounds and the incoming lamp flashes2[|]/[Camera OFF response]Emergency callEmergency calls Phone numberPolice 110Fire and ambulance 119Marine emergency 118 The tablet supports “Emergency call location notification”.When you make a call to an emergency number such as 110, 119 and 118, the information of your location (location information) is automatically notified to the agency that has received the emergency call (e.g. the police station). Depending on your location and the reception status of the signal, the agency that has received the emergency call may not be able to confirm the exact location.If you are not sending your caller ID by calling with “184” added or other means, your location information and phone number are not notified. However, if the agency that has received the emergency call considers your location information and phone number necessary for important purposes, such as life saving, the agency may retrieve them regardless of your settings.In addition, the area/timing to introduce “Emergency call location notification” depends on the state of preparation in each agency that receives emergency calls. In Japan, you cannot make a call to the emergency number (110, 119 or 118) when a docomo nano UIM card is not inserted, while the PIN code is locked, from the PUK (PIN Unlock Key) entry screen. When calling 110, 119 and 118 from your tablet, the police or fire stations may return your call for verification purposes. State that you are calling from a mobile phone, and give your phone number and exact present location.Remain stationary to ensure that the call is not disconnected while you are on the line, and keep the tablet turned on to receive calls for approximately 10 minutes afterwards. Depending on the region, calls to the police or fire station of the local area may not be made. When you make a call to the emergency number (110, 119 or 118) while Reject call setting is set, items of Reject call setting are set to [OFF]. Emergency call may not be available in some networks. You cannot make a video call to the emergency number (110, 119 or 118).International call (WORLD CALL)[Calling Method] When calling to a land-line phone: 010/country code/areacode (city code)/the other party's phone number/[0] When calling to a mobile phone: 010/country code/the other party's mobile phone number/[0]ƦAs for the other parties' mobile phone numbers and area codes (city codes) that begin with “0”, omit the first “0” when entering (except some countries or regions such as Italy).ƦAlternatively, enter “009130-010” as usual or “+” instead of “010”.Answering a callIncoming lampIncoming voice call screenIncoming video call screen](https://usermanual.wiki/Sharp/HRO00222.User-manual/User-Guide-2642621-Page-17.png)
![40 Call1Account2Group icon3Group name4Add group Add a group.5Groups6Number of contacts registered in the group7SortɡGrouping/Ungrouping contacts1In the home screen, select “Ρκ·ρ;Ρ”(docomo cloud) folder/[docomo phonebook]/[Group]2Select a group3[Delete member]/[Add member]4Select names/[OK]/[OK]You can display your phone number registered on the docomo nano UIM card. You can also register your name, mail addresses, etc.1In the home screen, select “Ρκ·ρ;Ρ”(docomo cloud) folder/[docomo phonebook]/[My profile]2Check/Use the profile1Image2Registered content3Notice Make settings for Friends notice. Available only when you are using cloud computing.4EditɡEditing My profile1In the home screen, select “Ρκ·ρ;Ρ”(docomo cloud) folder/[docomo phonebook]/[My profile]2[Edit]3Set each item/[Save]You can back up/restore the phonebook by using docomo backup. For details on backing up/restoring phonebook by using docomo backup nP. 64 “Backing up to/Restoring from a microSD Card” You cannot sort groups other than ones created with a docomo account. The group function is available on contacts created with a docomo/Google account etc.My profileBacking up/Restoring phonebook](https://usermanual.wiki/Sharp/HRO00222.User-manual/User-Guide-2642621-Page-18.png)
![41 Mail/Web BrowserYou can send and receive messages using docomo mail, SMS, Gmail, etc., and display websites using Chrome.You can send and receive mails using mail address of DOCOMO (@docomo.ne.jp). Pictograms and Deco-mail are available. Automatic reception is also supported. Mails can be easily transferred when you have lost the tablet or changed models since sent and received mails are saved on the docomo mail server. Moreover, you can use the mailing function on PCs, tablets, etc. if you use a docomo ID. For details on docomo mail, refer to the DOCOMO website.1In the home screen, [^]:Follow the instructions on the screen and operate after this step.You can send and receive text messages with mobile phone numbers serving as destinations.ɦFor details on the number of characters which can be sent and received etc., refer to “Short Message Service (SMS)” on the DOCOMO website. You can also exchange messages with those who use network of overseas network operators. Refer to the DOCOMO website for information on countries where this service is available and available overseas network operators.1In the home screen, [R]/[Messaging]2[NEW MESSAGE]3Enter the destination and message/[@]1In the home screen, [R]/[Messaging]2Select a thread:Messages are grouped into threads according to their destinations/senders and displayed.1Image Displayed if an image of the other party is registered in the phonebook. Touch to select and use an app supporting the registered content of the phonebook. If the person is not registered in the phonebook, you can register the person in the phonebook after touching it.2Destination/Sender3Number of unread messages4NEW MESSAGE5Mail search6Number of messages in thread7Date and time of the message exchange3Check the message1Destination/Sender2Phone call3Date and time of the message exchange4Message1In the home screen, [R]/[Messaging]2Select a thread3Enter the message/[@]1In the home screen, [R]/[Messaging]2Select a thread3Touch and hold a message/[Forward]4Enter the destination and message/[@]1In the home screen, [R]/[Messaging]2Select a thread3Touch and hold a message/[Delete]/[Delete]1In the home screen, [R]/[Messaging]:To delete all threads: [|]/[Delete all threads]/[Delete]2Touch and hold a thread/[DELETE]/[Delete]1In the home screen, [R]/[Messaging]2[|]/[Settings]3Select an itemSMS Enabled: Set an app to send and receive SMSs with.Mail/Web Browserdocomo mailSMS You can switch Default SMS app to Hangouts (nP. 70 “More”). If destinations are devices owned by those who use network of overseas network operators, enter “+”, the country code and the recipient's mobile phone number. If the phone number begins with “0”, omit the first “0”. Alternatively, enter “010”, the country code and the phone number. Half-width katakana and special symbols in SMS messages may not appear correctly for recipient. SMS cannot be sent when “186” or “184” is added.Displaying messageReplying messageForwarding messageDeleting messageDeleting threadSetting Messaging](https://usermanual.wiki/Sharp/HRO00222.User-manual/User-Guide-2642621-Page-19.png)
![42 Mail/Web BrowserDelete old messages: When the number of saved messages reaches its limit, messages are automatically deleted from the oldest one.Text message limit: Set the number of messages to be saved by thread.Delivery reports: Notify you that sent messages have been received every time a message is received.Manage SIM card messages: Manage messages saved on the docomo nano UIM card.Notifications: Notify you that messages have been received on the status bar.Sound: Set the ringtone to be rung when a message is received.Vibrate: Set the vibrator to be activated when a message is received.You can send and receive mails by setting up a mail account provided by a service provider. Set up an account in advance (nP. 23 “Setting up mail account”).1In the home screen, [R]/[Email]2[(]3Compose a mail1Account If you set up multiple accounts, you can switch accounts.2Destination When you enter part of a mail address or a name registered in the phonebook, destination candidates are displayed.3Subject4Message5File attachment6Add destinations Touch it to add Cc or Bcc.4[,] The screen may appear different depending on the account to use.1In the home screen, [R]/[Email]2Select a mail1Box name/Folder name being displayed Touch [/] to switch or set folders/accounts.2Panel menu Display the icon of the account being used. Touch a displayed icon to switch folders.3Switch accounts If you set up multiple accounts, you can switch accounts.4Mail search5Mails The characters of sender or subject are displayed in thin characters when a mail is read. Touch images to checkmark the mails and you can set them to be deleted/unread/read etc. collectively.6Star icon Use it as a mark indicating that the mail is special or supposed to be dealt with later. You can check starred mails in the Starred folder.7Newly compose mail3Check the mail1Subject2Sender/Destination If the sender is registered in the phonebook, available apps supporting the registered content of the phonebook are displayed after touching the image. If the person is not registered in the phonebook, you can register the person in the phonebook after touching the image.3Date and time of reception Touch to display/hide the details of sender, destination or data and time of reception.[Delivery reports] When you send a message to mobile phones of other carriers, the notification for confirming that it has been received may not be sent to you.Email Some receiving side models may not be able to receive the subject completely. Mails sent from a Gmail account are treated as ones from a PC. When receiving side models set PC-mail rejection, mails cannot be sent. Mails that could not be sent for any reason will be saved in Unsent folder as unsent mails. Depending on the signal status etc., characters may not appear correctly on the screen of the other party's device.Attaching file Files of up to approximately 5 MB can be attached. There are no limits to the number of files to be attached. Depending on the receiving side device, files may not be received or correctly displayed/played. Also, the quality of videos may deteriorate or videos may be converted to continuous still pictures.Displaying mail](https://usermanual.wiki/Sharp/HRO00222.User-manual/User-Guide-2642621-Page-20.png)
![43 Mail/Web Browser4Message5Attached file6Star icon Use it as a mark indicating that the mail is special or supposed to be dealt with later. You can check starred mails in the Starred folder.7Menu of each mail Touch to reply to all or print by mail.8Forward9ReplyaDeletebUnread1In the home screen, [R]/[Email]2Select a mail3[)]:To reply to all: [{] of each mail/[Reply all]:To forward: [*]4Compose a mail1Reply type Touch to switch Reply/Reply all/Forward.2Destination3Message4Quote text Touch to display/hide the mail of the sender. You cannot operate it when forwarding mails.5Mail of sender6Subject7Respond inline Enter the mail of the sender in the message.5[,]1In the home screen, [R]/[Email]:To delete selected mails: Touch the images of mails/[+]/[OK]2Select a mail3[+]/[OK]1In the home screen, [R]/[Email]2[/]/[Settings]3Select an itemGeneral settings: Make settings for the whole Email.Add account: Add account.Privacy policy: Check the privacy policy.:Select an account to make settings for the details on the account such as Signature and Email notifications.Gmail is a mail service provided by Google. Set up a Google account in advance (nP. 24 “Setting up Google account etc.”). 1In the home screen, select “Google” folder/[Gmail]2[(]3Compose a mail1Account If you set up multiple accounts, you can switch accounts.2Destination When you enter part of a mail address or a name registered in the phonebook, destination candidates are displayed.3Subject4Message5File attachment6Add destinations Touch to add Cc or Bcc.4[,]1In the home screen, select “Google” folder/[Gmail]2Select a thread:In Gmail, mails are grouped into threads by reply and displayed. If new mails are replied ones of an existing mail, they are grouped into the same thread. A new thread is created for newly composed mails or mails whose subjects have been changed.1Box name/Label name being displayed Touch [/] to switch or set displaying types/accounts.2Panel menu Display the icon of the account being used. Touch a displayed icon to switch displaying types.3Switch accounts If you set up multiple accounts, you can switch accounts.Replying/Forwarding mailDeleting mailSetting EmailGmailDisplaying mail](https://usermanual.wiki/Sharp/HRO00222.User-manual/User-Guide-2642621-Page-21.png)
![80 Data Communication To register/connect a Bluetooth device, the Bluetooth passkey may need to be entered. Before starting the registration, decide one- to sixteen-digit number. Enter the same number on the tablet and the other party's Bluetooth device. Set the other party's Bluetooth device to the registration stand-by status in advance.1In the home screen, [R]/[Settings]/[Bluetooth]2Set to On3Select a Bluetooth device/[PAIR] :The confirmation screen for connection may be displayed.:Entering the Bluetooth passkey may be necessary depending on the other party's Bluetooth device. Also, some Bluetooth devices may start connection after completing registration.:To search for Bluetooth devices: [z]/[Refresh]:Touch [B] of a paired Bluetooth device to set name and intended purpose of the other party's Bluetooth device.ɡWhen receiving registration request from Bluetooth device or connection request from unregistered Bluetooth device1Registration request/Connection request from Bluetooth device2Drag the status bar down/[Pairing request]/[PAIR]:When the confirmation screen about the settings on pairing appears, select [PAIR].:Entering the Bluetooth passkey may be necessary depending on the other party's Bluetooth device.:The confirmation screen for connection may be displayed.ɡUnregistering Bluetooth device1In the Bluetooth screen, [B] of the Bluetooth device to unregister/[FORGET]ɡDisconnecting Bluetooth device1In the Bluetooth screen, select the Bluetooth device to disconnect/[OK]ɡSetting Bluetooth Set after setting [Bluetooth] to On.1In the Bluetooth screen, [z]2Select an itemRefresh: Search for the Bluetooth device.Rename this device: Change the tablet's name.aptX: Set whether to use aptX®.Handsfree setting: Set whether to always have voices output from the connected Bluetooth compatible hands-free device during a voice call.Show received files: Display the history of data received via Bluetooth connection.ɡSending dataExample: Still picture1In the home screen, [R]/[Contents Manager]/[Photo]2Touch and hold a still picture/[Share]/[Bluetooth]:Set the receiver's Bluetooth device to the reception stand-by status.3Select a Bluetooth device to connect toɡReceiving data1Data is sent from the sender's Bluetooth device2Drag the status bar down/select the incoming notification/[ACCEPT]3Drag the status bar down/select the received dataUsing Bluetooth function You can connect up to seven Bluetooth devices at the same time. Bluetooth devices may not work properly or the number of Bluetooth devices which can be connected at the same time may differ depending on the profile. If you fail to connect a Bluetooth device, connection may become available after re-registering it. When [Bluetooth] is set to On, the tablet is set to receive registration requests/connection requests from other Bluetooth devices. Make the setting for displaying the tablet's information on other Bluetooth devices in advance to allow the tablet to be searched for by other Bluetooth devices. While in connection stand-by, even if a connection request from a Bluetooth device is received, connection may not be made depending on the signal status etc. For details on the operations of the other party's Bluetooth device, refer to the manuals of the Bluetooth device to be used.[aptX] When you enable [aptX], sounds may not be output depending on the Bluetooth device. In this case, disable [aptX].Sending and receiving by Bluetooth Note that if you select [Delete and register] when receiving all data, all data registered to the target function are deleted. Receiving all data may not be available depending on the data type. When available space in the save destination becomes insufficient while receiving data, the data being received to that point are saved and receiving ends.](https://usermanual.wiki/Sharp/HRO00222.User-manual/User-Guide-2642621-Page-22.png)
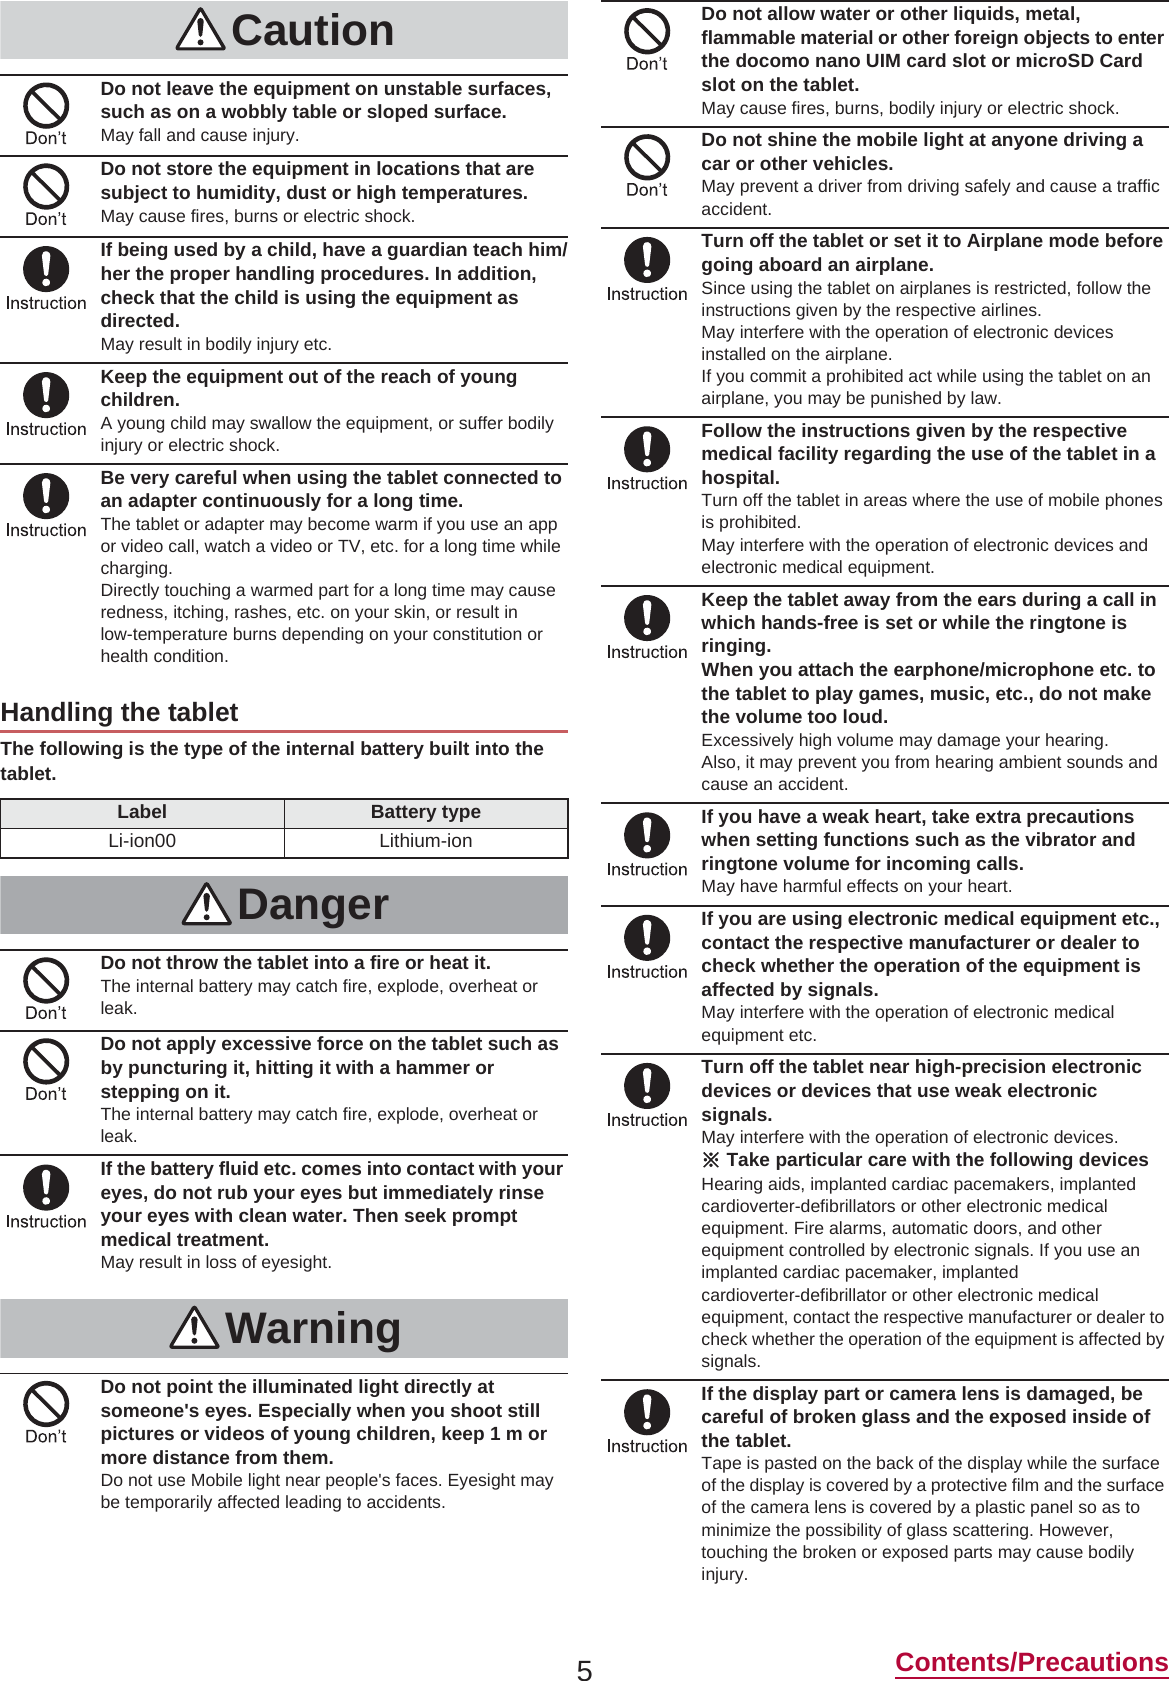
![97 Appendix/Index FeliCa is a contactless IC card technology developed by Sony Corporation. FeliCa is a registered trademark of Sony Corporation. Under the MPEG-4 Visual Patent Portfolio License, customers have licensed permission for the following use of this product to engage in non-profit personal use. Other uses are not permitted.Encoding MPEG-4 standard video (henceforth referred to as MPEG-4 video).Decoding an MPEG-4 video that a customer not engaged in personal commercial activities has encoded.Decoding an MPEG-4 video obtained from a licensed provider.For details on other intended uses, contact MPEG LA, LLC. This product is licensed under the MPEG-4 Systems Patent Portfolio License for encoding in compliance with the MPEG-4 Systems Standard. An additional license and payment of royalties are necessary in the following cases.Data stored or replicated in physical media which is paid for on a title by title basis.Data which is paid for on a title by title basis and is transmitted to an end user for permanent storage and/or use.Such additional license may be obtained from MPEG LA, LLC. Contact MPEG LA, LLC for additional details. This product is licensed under the AVC patent portfolio license for the personal and noncommercial use of a consumer to (i) encode video in compliance with the AVC standard (henceforth referred to as AVC video) and/or (ii) decode AVC video that was encoded by a consumer engaged in a personal and noncommercial activity and/or was obtained from a video provider licensed to provide AVC video. No license is granted or shall be implied for any other use. Additional information may be obtained from MPEG LA, L.L.C.See (http://www.mpegla.com) This product is licensed under the VC-1 Patent Portfolio License for the personal and noncommercial use of a consumer to (i) encode video in compliance with the VC-1 standard (henceforth referred to as VC-1 video) and/or (ii) decode VC-1 video that was encoded by a consumer engaged in a personal and noncommercial activity and/or was obtained from a video provider licensed to provide VC-1 video. No license is granted or shall be implied for any other use. Additional information may be obtained from MPEG LA, L.L.C.See (http://www.mpegla.com) Content owners use Microsoft PlayReady™ content access technology to protect their intellectual property, including copyrighted content. This device uses PlayReady technology to access PlayReady-protected content and/or WMDRM-protected content. If the device fails to properly enforce restrictions on content usage, content owners may require Microsoft to revoke the device's ability to consume PlayReady-protected content. Revocation should not affect unprotected content or content protected by other content access technologies. Content owners may require you to upgrade PlayReady to access their content. If you decline an upgrade, you will not be able to access content that requires the upgrade. The abbreviations of operating systems (Japanese versions) below are used in this manual.Windows 8.1 stands for Microsoft® Windows® 8.1, Microsoft®Windows® 8.1 Pro and Microsoft® Windows® 8.1 Enterprise.Windows 8 stands for Microsoft® Windows® 8, Microsoft®Windows® 8 Pro and Microsoft® Windows® 8 Enterprise.Windows 7 stands for Microsoft® Windows® 7 (Starter, Home Basic, Home Premium, Professional, Enterprise and Ultimate).Windows Vista stands for Windows Vista® (Home Basic, Home Premium, Business, Enterprise and Ultimate). The Bluetooth word mark and logos are owned by the Bluetooth SIG, INC. and any use of such marks by NTT DOCOMO, INC. is under license. Other trademarks and trade names are those of their respective owners. Google, Google logo, Android, Google Play, Google Play logo, Google+, Google+ logo, Gmail, Gmail logo, Google Calendar™,Google Calendar logo, Google Maps™, Google Maps logo, Google Chrome™, Google Chrome logo, Google Voice Search™,Google Voice Search logo, YouTube, YouTube logo, Google Drive, Google Drive logo and Google Now are trademarks of Google Inc. This product includes software based on GNU General Public License (GPL), GNU Lesser General Public License (LGPL) and other licenses.For details on licenses of related software, in the home screen, [R]/[Settings]/[About tablet]/[Legal information]/[Opensource licenses]. Source codes of software based on GPL, LGPL and Mozilla Public License (MPL) can be referred to on the following website for free. For details, refer to the following website.https://sh-dev.sharp.co.jp/android/modules/oss/) (in Japanese only) The tablet can unlock the SIM lock. Unlock the SIM lock to use non-DOCOMO SIM cards. Some services, functions, etc. may be unavailable. DOCOMO shall not guarantee any operation of the tablet. For details on the procedure of unlocking SIM lock, refer to the DOCOMO website.1Insert another carrier's SIM card:For details on how to insert/remove the SIM card (nP. 14 “docomo nano UIM card”)2Turn the power on3Enter the SIM unlock code/[Unlock]OthersOpen source softwareUnlocking SIM lock](https://usermanual.wiki/Sharp/HRO00222.User-manual/User-Guide-2642621-Page-25.png)