Sharp NAR0050 Tablet PC with WLAN User Manual safety TN10
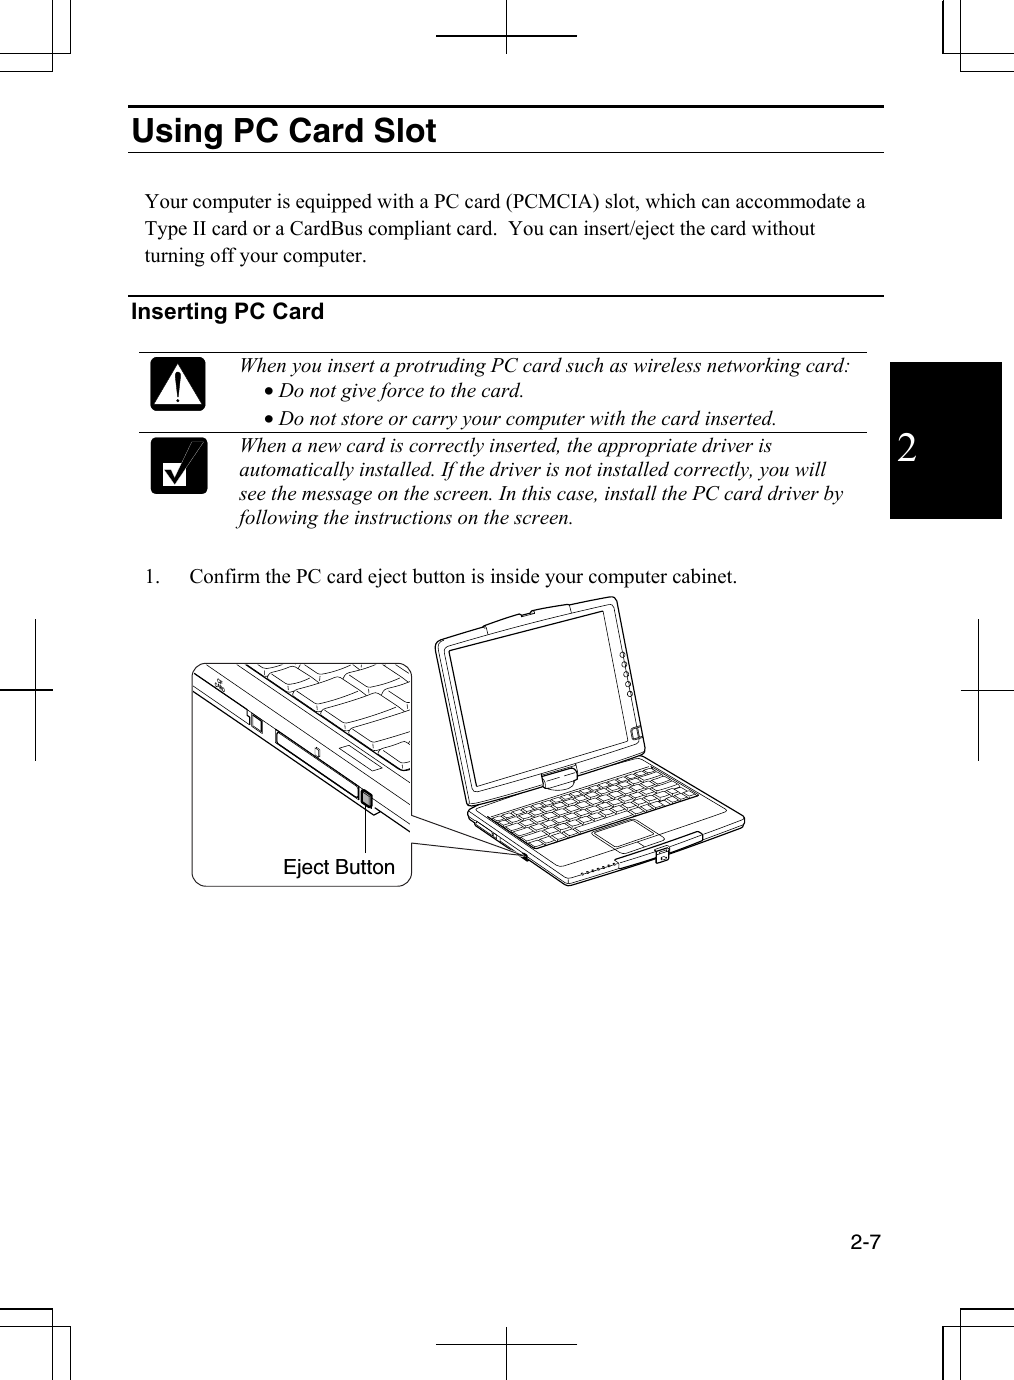
Sharp Corporation Tablet PC with WLAN safety TN10
UserManual.wiki
>
Sharp
>
NAR0050 User Manual
Manual
Navigation menu
Upload a User Manual
Namespaces
Wiki Guide
HTML
PDF
Info
Views
User Manual
Discussion / Help
Navigation


![2-16 2Advanced button. 2. Click Intel(R) Extreme Graphics tab and Graphics Properties… button. 3. Check the box of Full Screen [No Border]. 4. Click OK three times, and then, follow the on-screen instruction. • You cannot switch to display resolutions and number of colors that are not available. • In the Color quality, Medium (16 bit) means 65,536 (64K) colors, and Highest (32 bit) means about 16,770,000 (16M) colors. • If you select Highest; • Drawing speed may be delayed. • When playing animation, the screen may be distorted. Rotating Image on Screen You can adjust the screen orientation depending on the usage situation. Refer to Adjusting Screen Orientation section in Chapter 3. Changing Wallpaper and Setting Screen Saver You can enjoy various desktop patterns or screen savers. Changing Wallpaper 1. In the Display Properties dialog box, select Desktop tab. 2. Select appropriate wallpaper in Background. 3. Click OK. Setting Screen Saver 1. In the Display Properties dialog box, select Screen Saver tab. 2. Select an appropriate screen saver in Screen saver and set time when screen saver starts. 3. Click OK.](https://usermanual.wiki/Sharp/NAR0050/User-Guide-332865-Page-42.png)


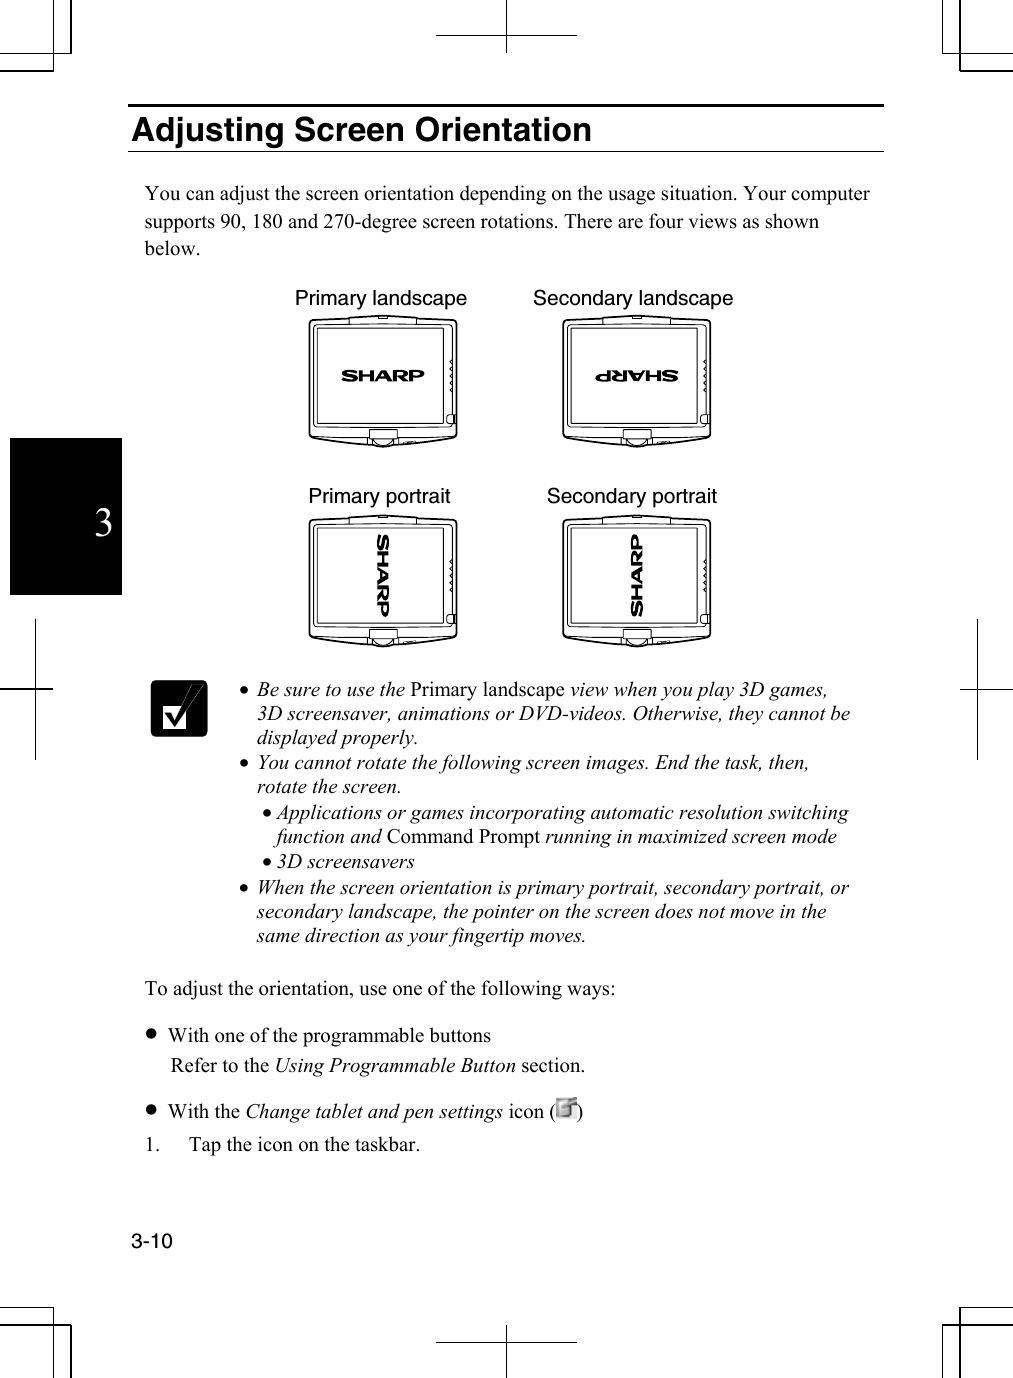
![3-11 3 2. Tap Change screen orientation. • Each time you tap Change screen orientation you will step to the next choice. The choices, in order, are: Primary portrait, Secondary landscape, Secondary portrait, and Primary landscape. • You can change the switch order with the following steps. 1. In Tablet and Pen Settings dialog box, tap Display tab. 2. Tap Change… button. 3. In Orientation Sequence Settings dialog box, change the order and tap OK twice. • With Hot Keys The default settings are below: Key Combination Rotation Degree Screen Orientation Ctrl+Alt+[↑] 0-degree rotation Primary landscape view Ctrl+Alt+[→] 90-degree rotation Primary portrait view Ctrl+Alt+[↓] 180- degree rotation Secondary landscape view Ctrl+Alt+[←] 270-degree rotation Secondary portrait view You can change the hotkey combination with the following steps: 1. Open Display Properties dialog box. 2. Tap Settings tab – Advanced button – Intel(R) Extreme Graphics tab. 3. Tap Graphics Properties button - Hot Keys tab. 4. Tap the key combination in the right column you want to change so that a pull-down menu will appear. 5. Select an appropriate one, then, tap OK three times. • With Control Panel 1. In Tablet and Pen Settings dialog box, tap Display tab. 2. Select an appropriate view from Orientation pull-down menu. 3. Tap OK.](https://usermanual.wiki/Sharp/NAR0050/User-Guide-332865-Page-57.png)