Sharp NAR0051 Notebook Computer with WLAN User Manual safety av18
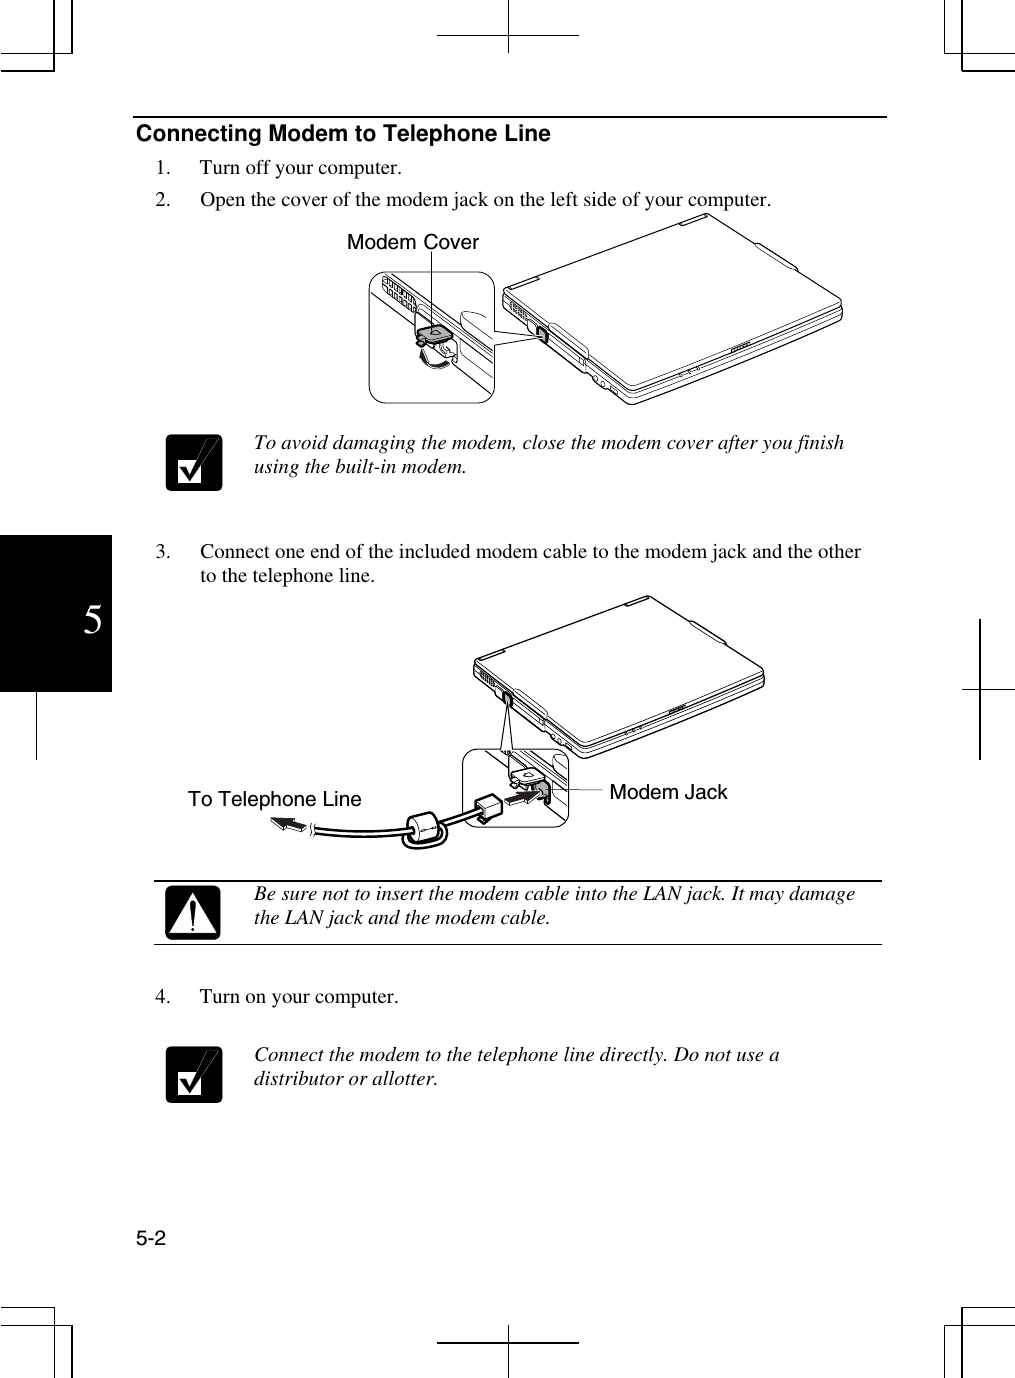
Sharp Corporation Notebook Computer with WLAN safety av18
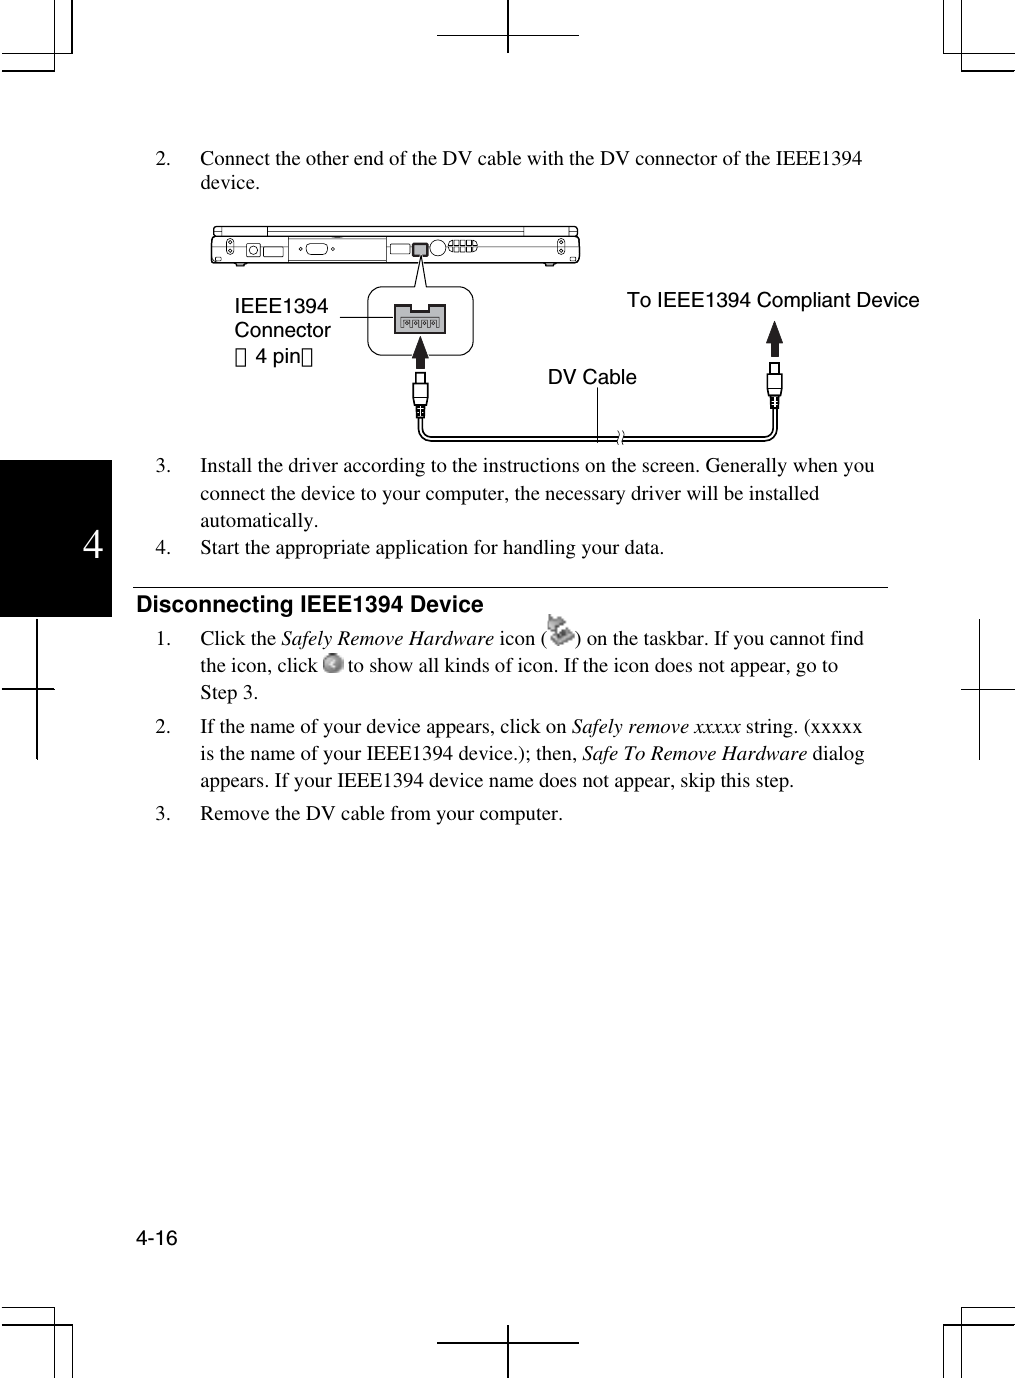
UserManual.wiki
>
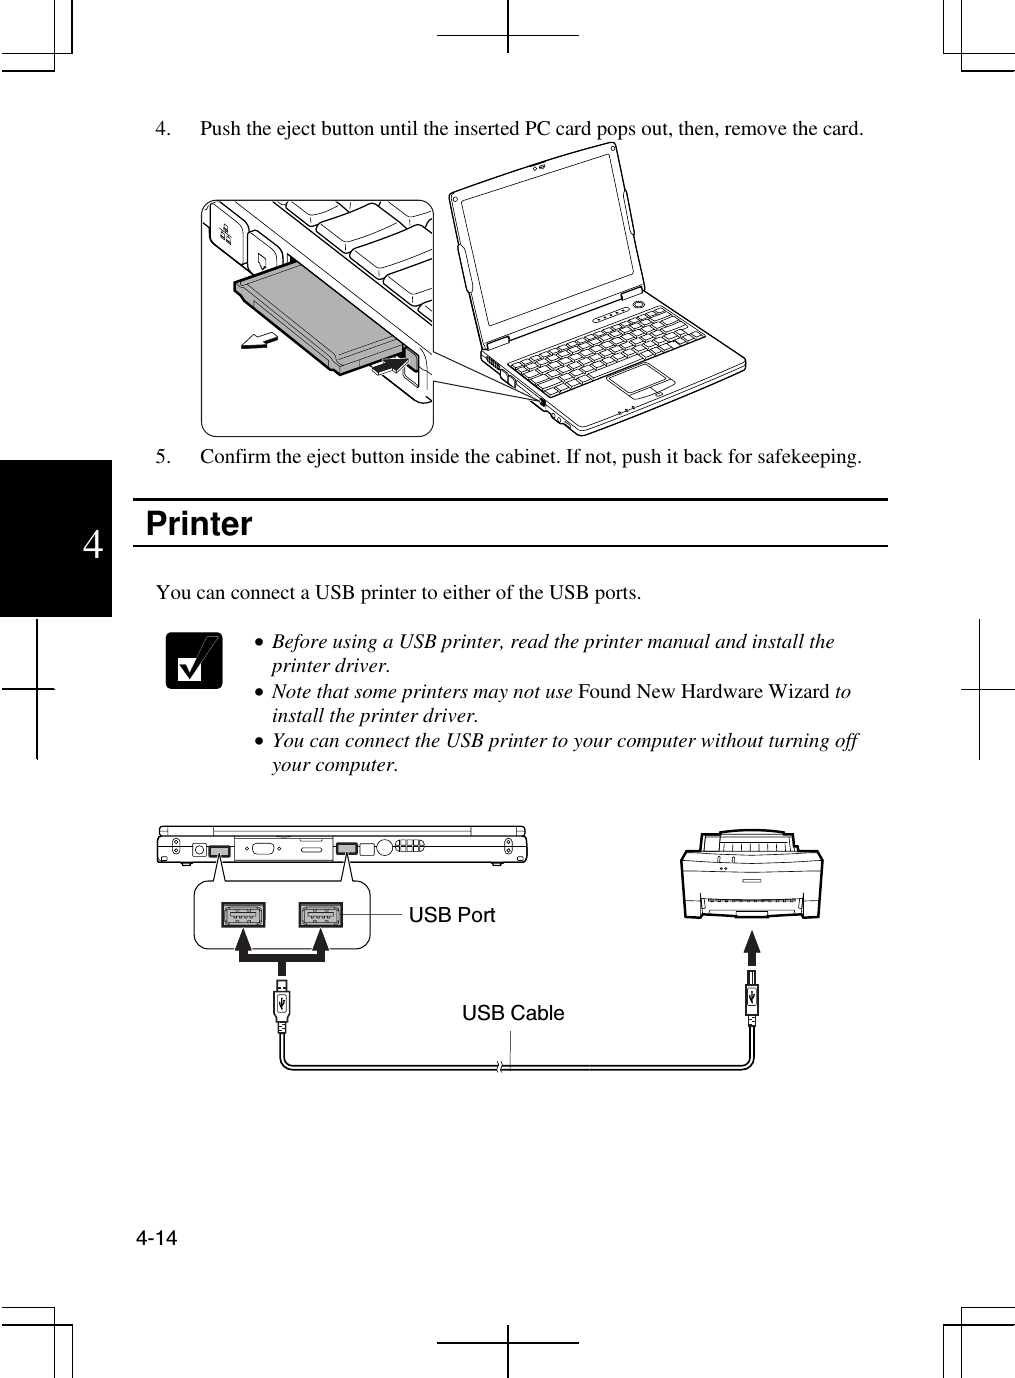
Sharp
>
NAR0051 User Manual
>
Manual
Contents
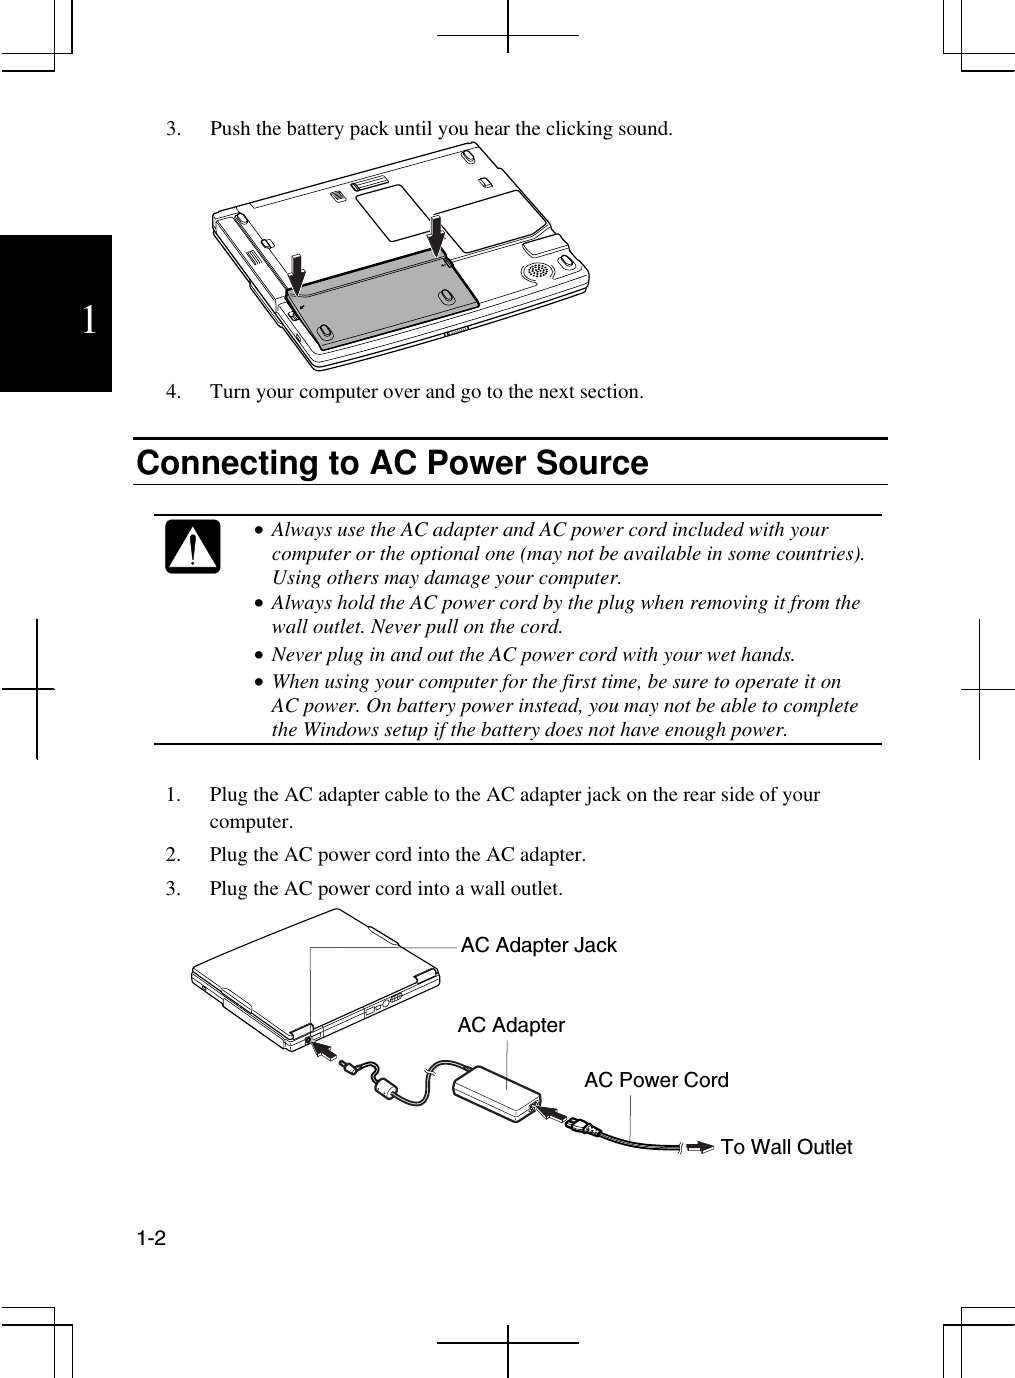
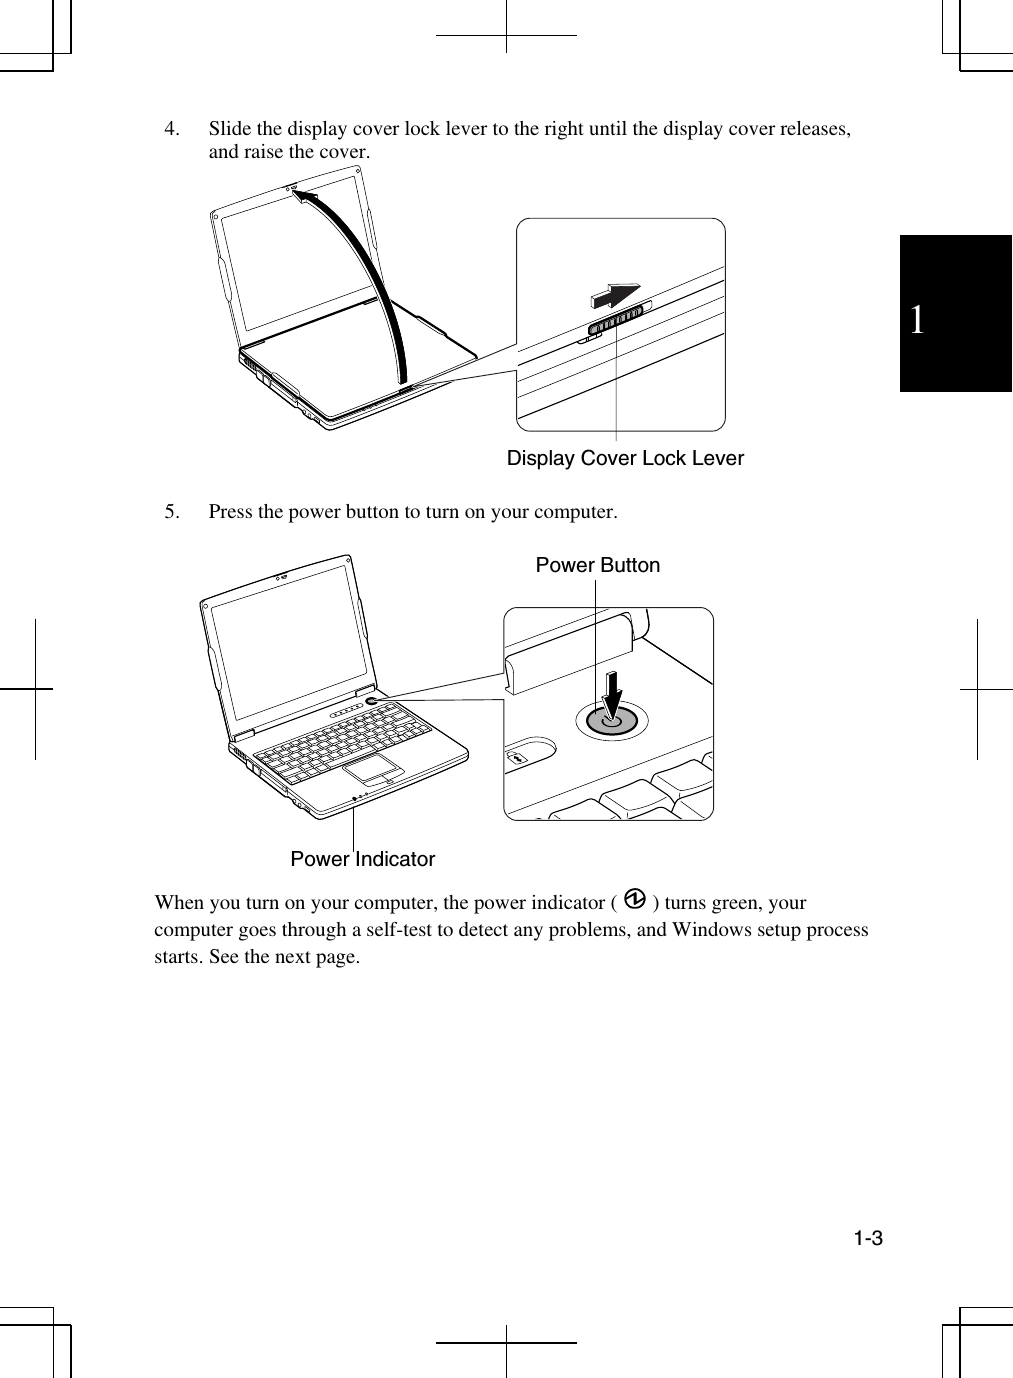
1.
Manual
2.
Manual revised
Manual
Navigation menu
Upload a User Manual
Namespaces
Wiki Guide
HTML
PDF
Info
Views
User Manual
Discussion / Help
Navigation


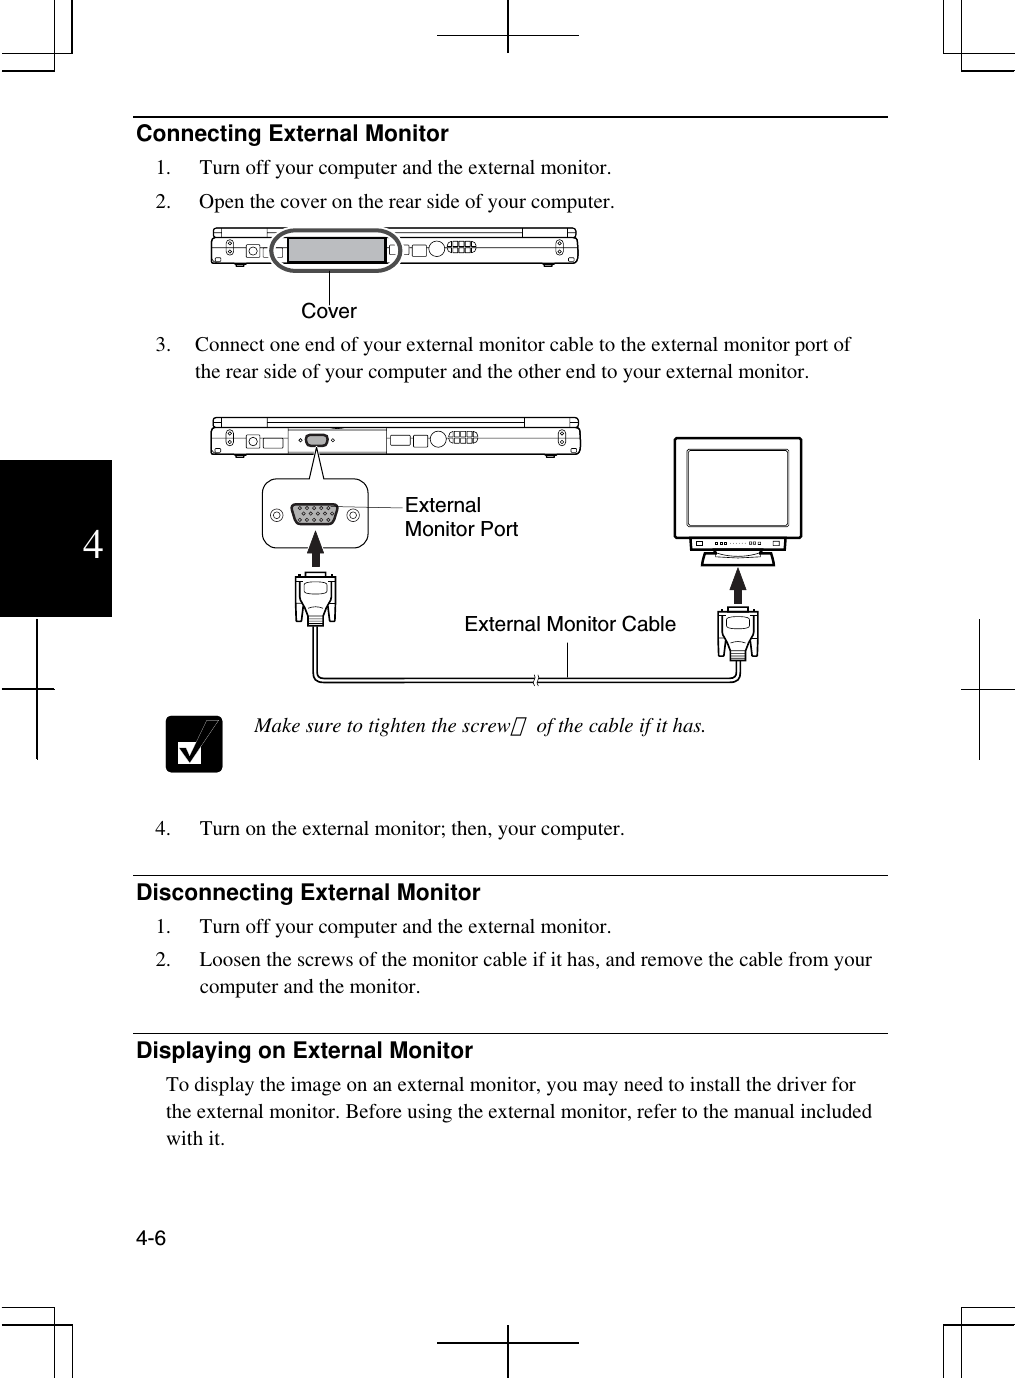
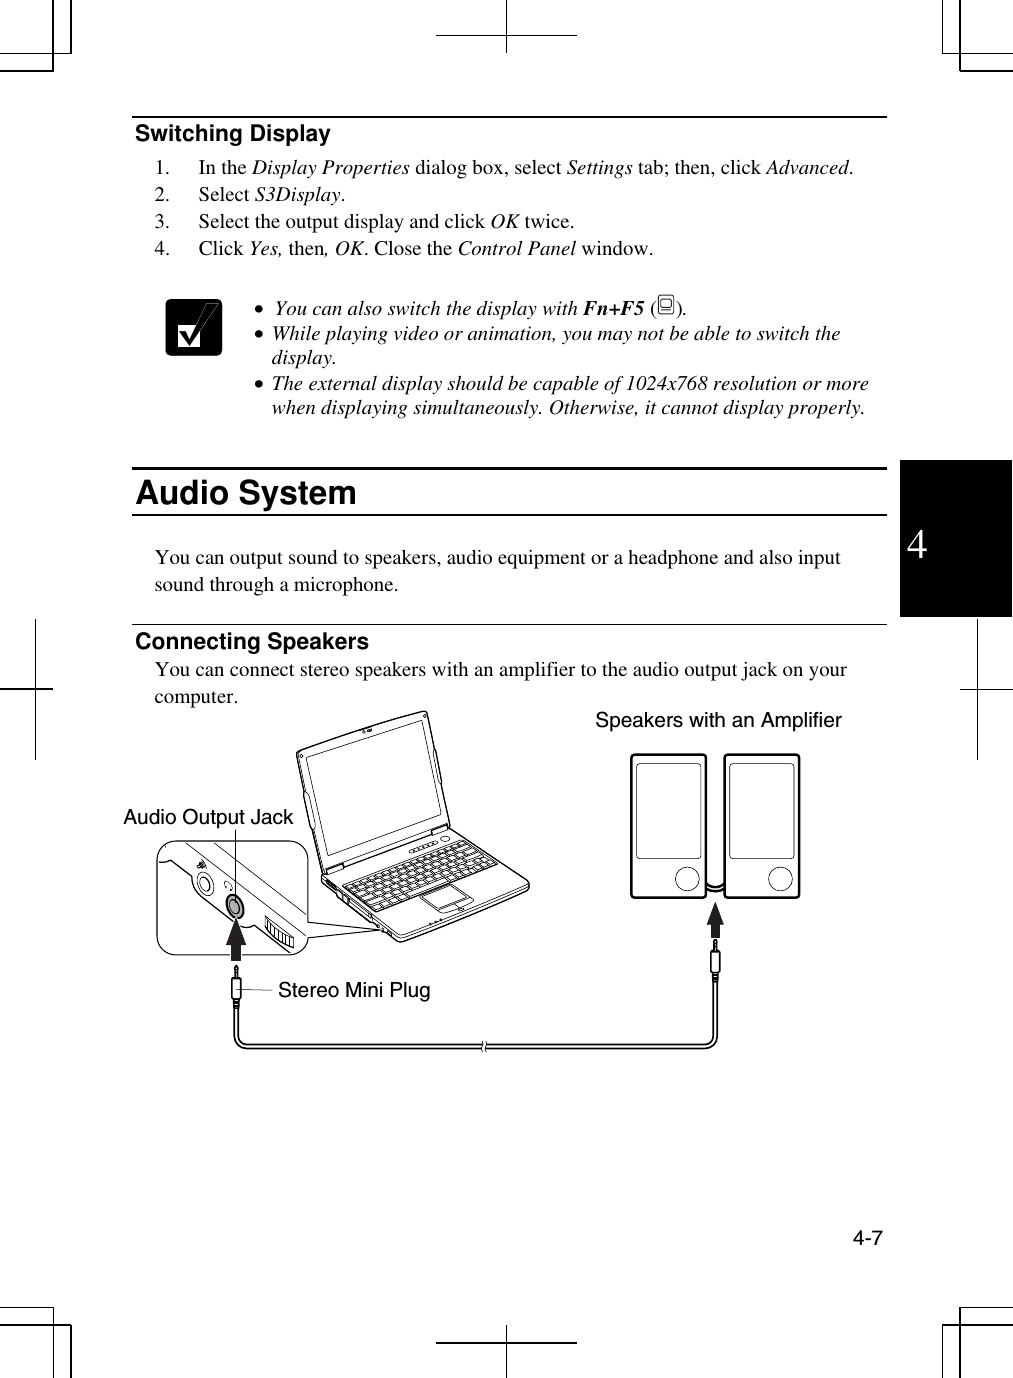
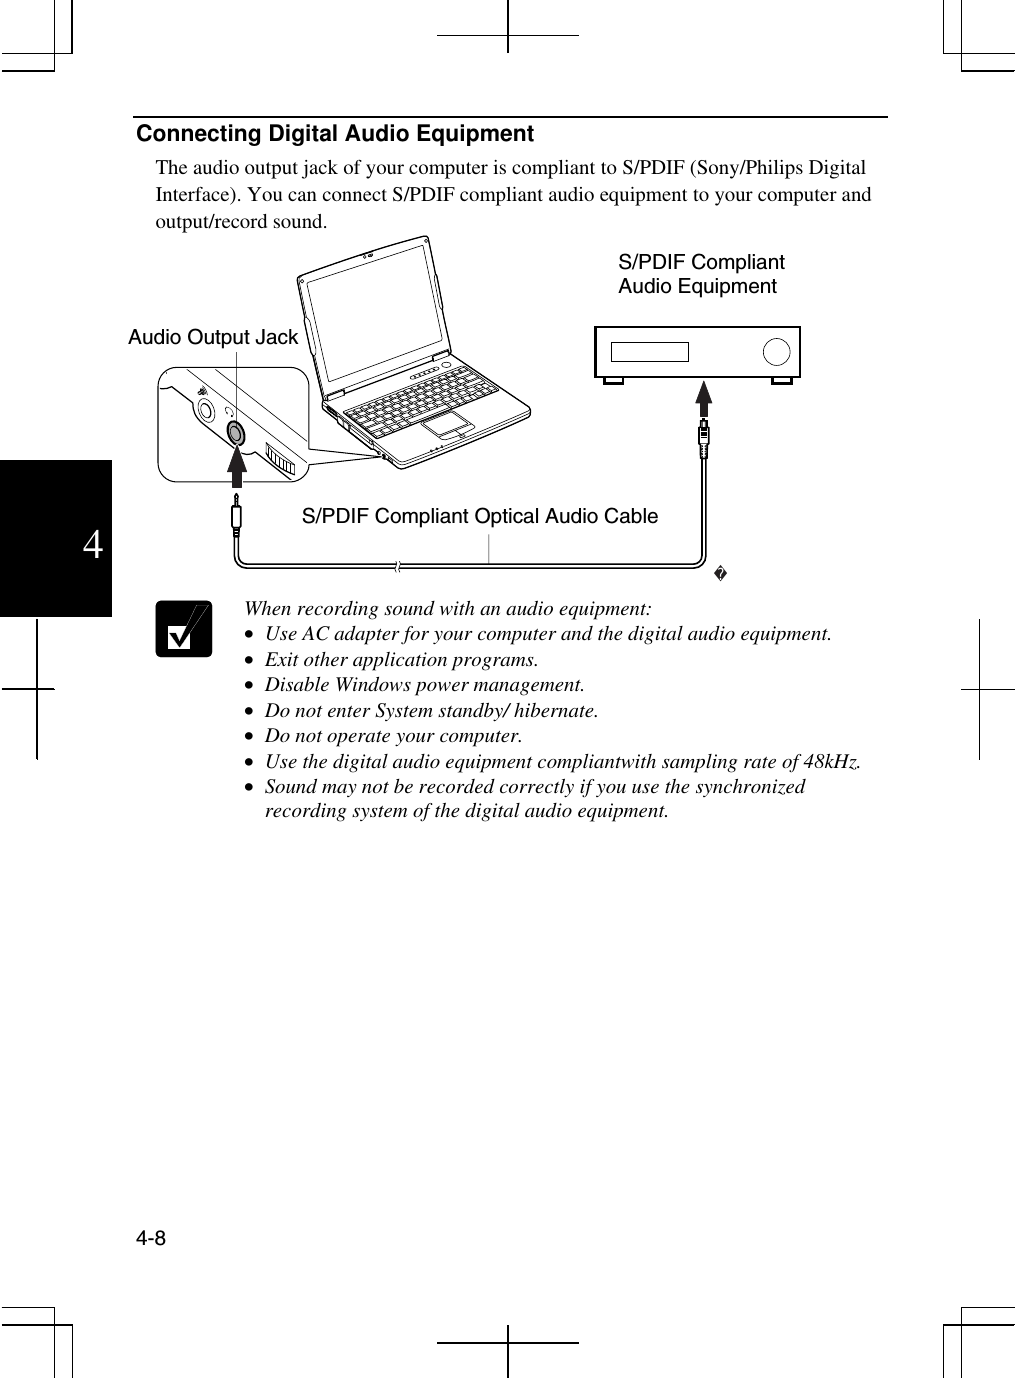
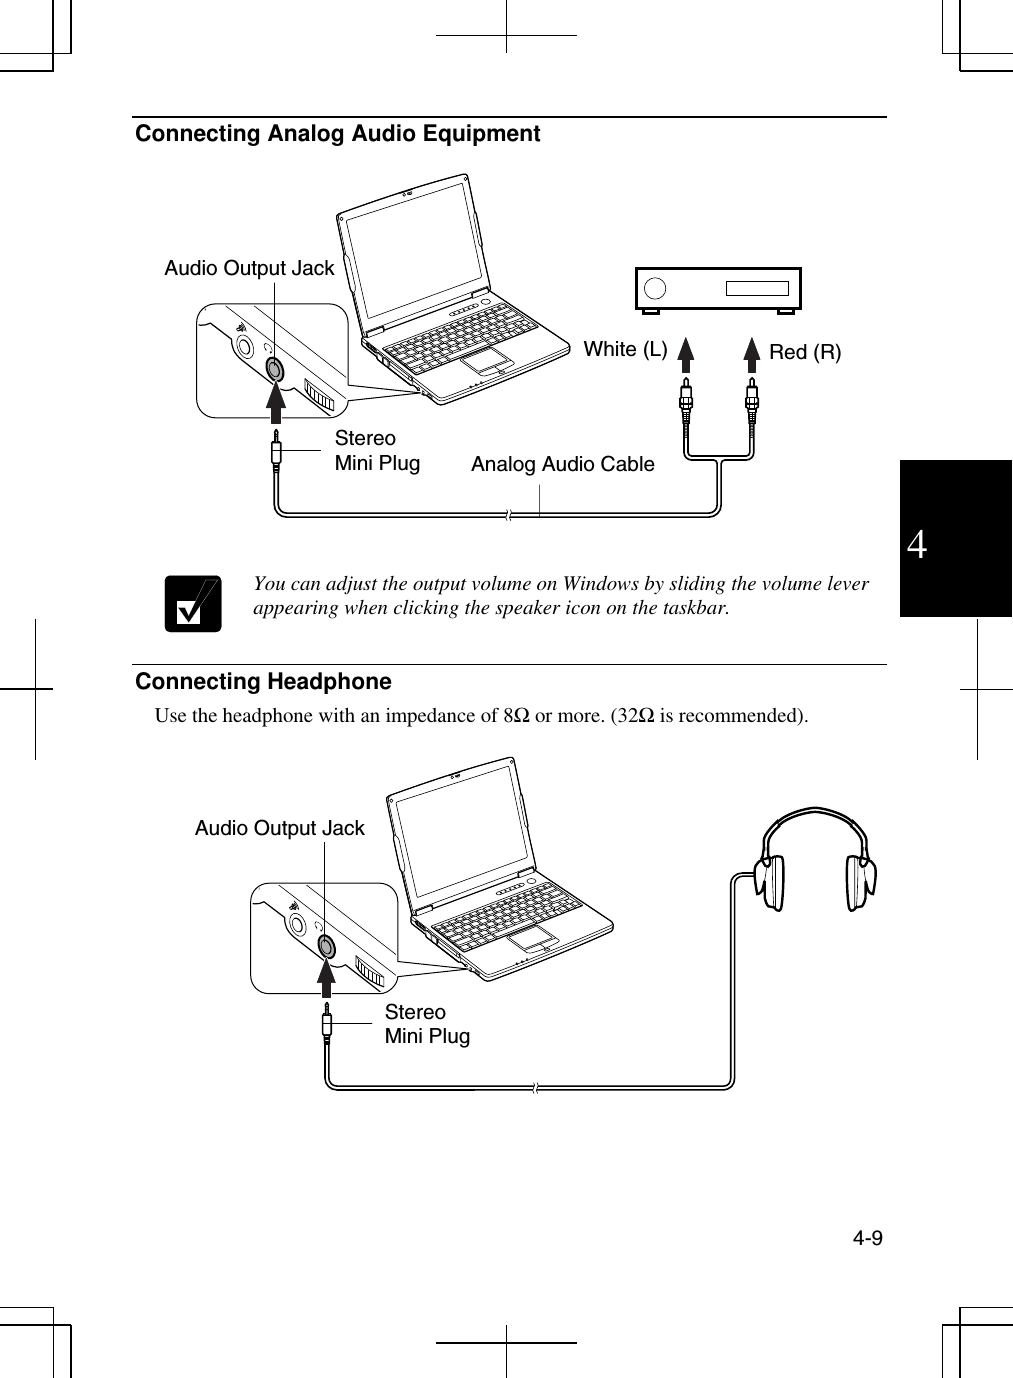
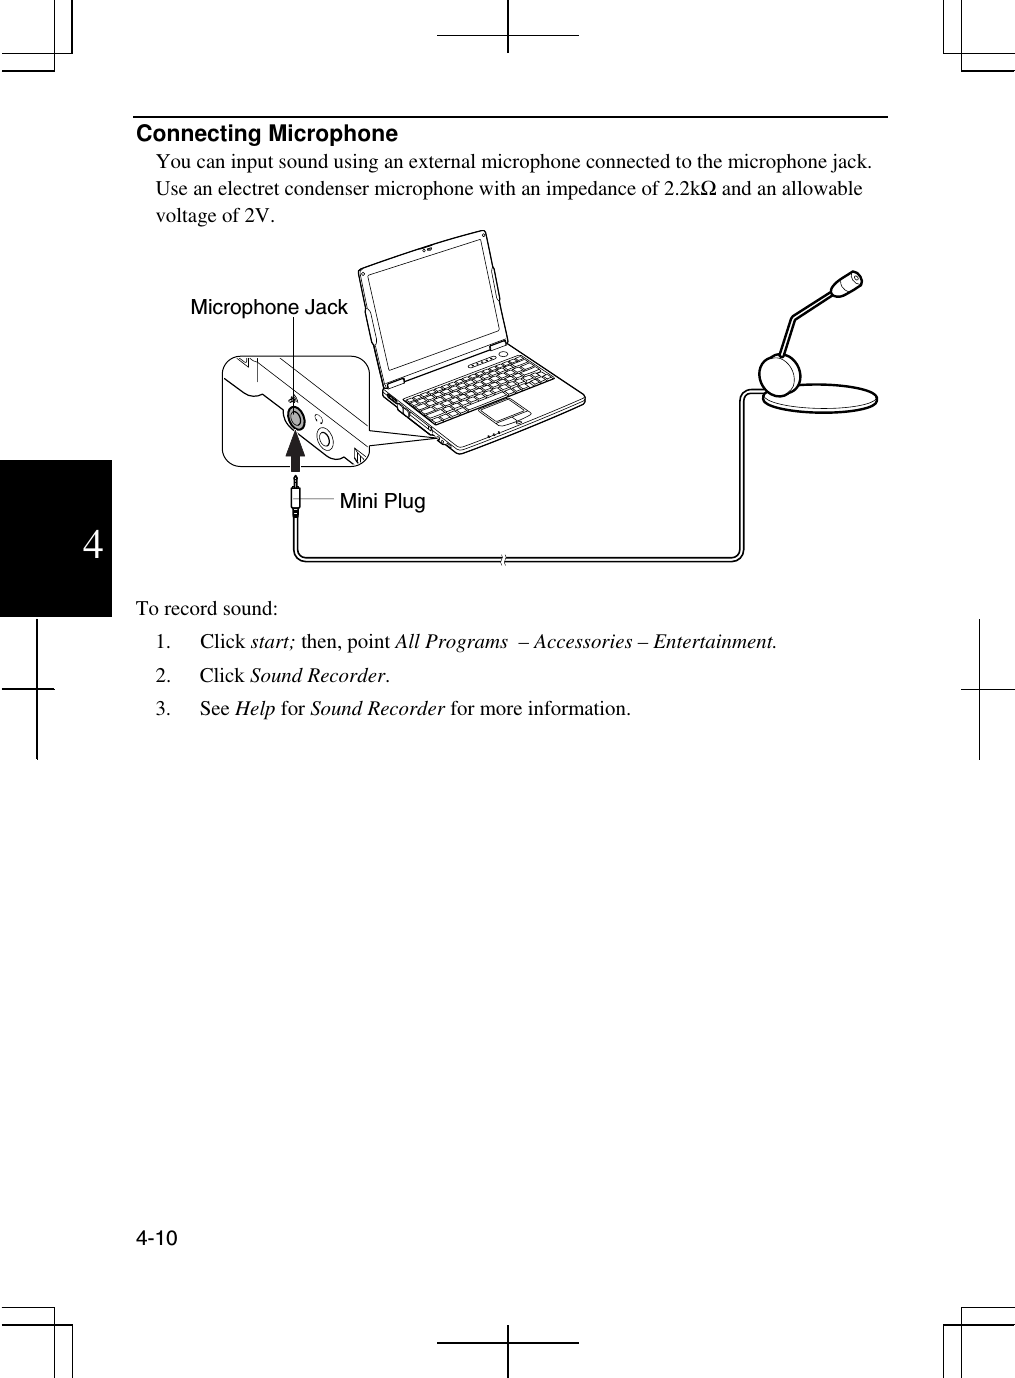
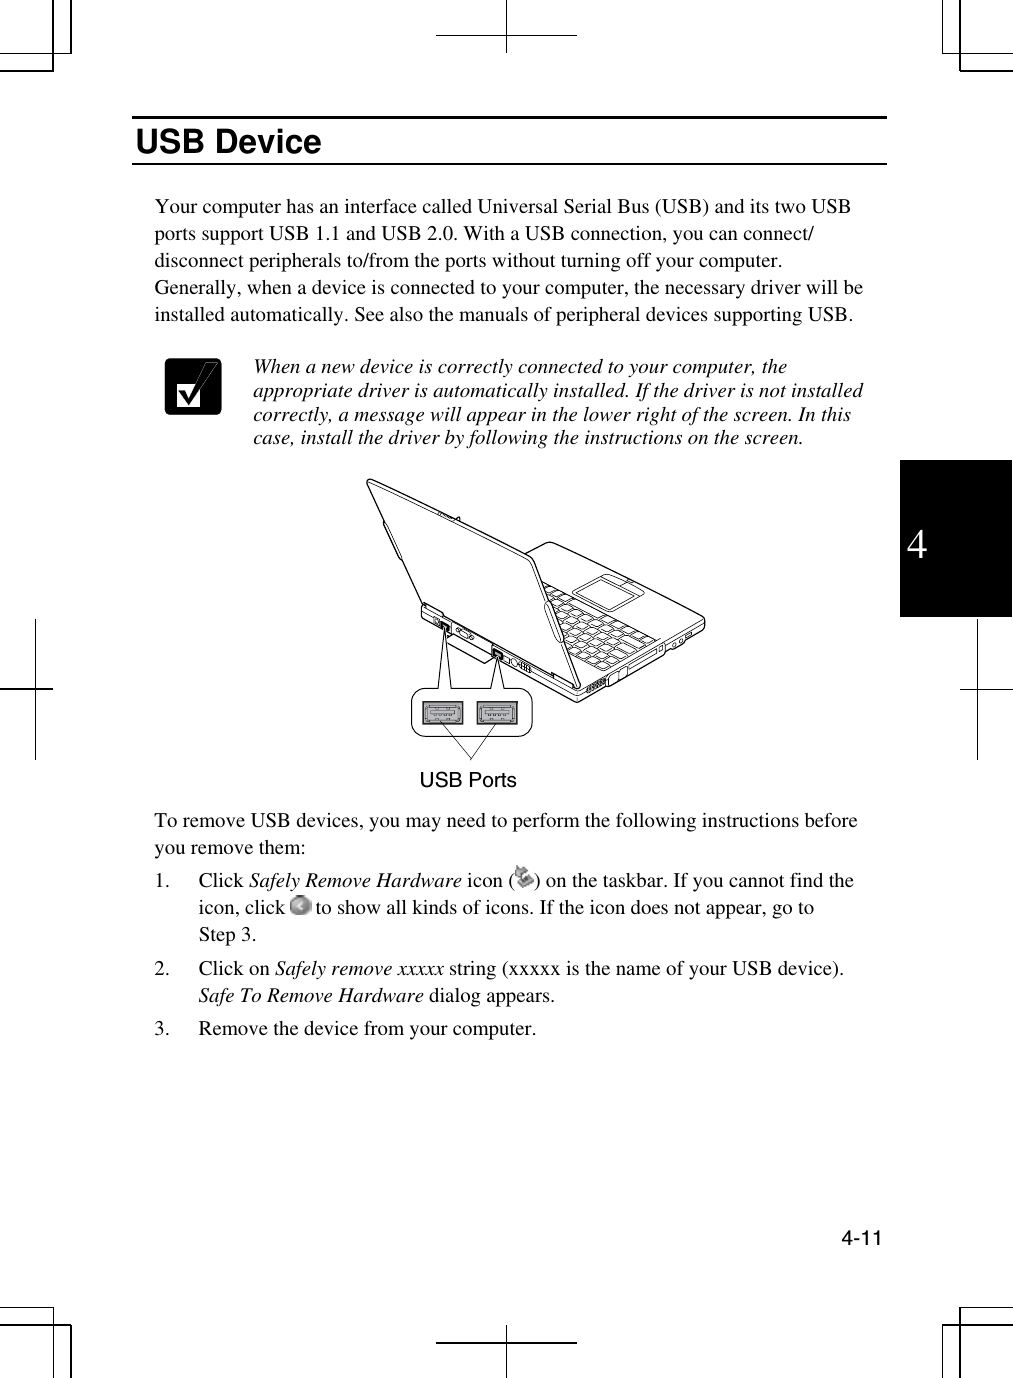
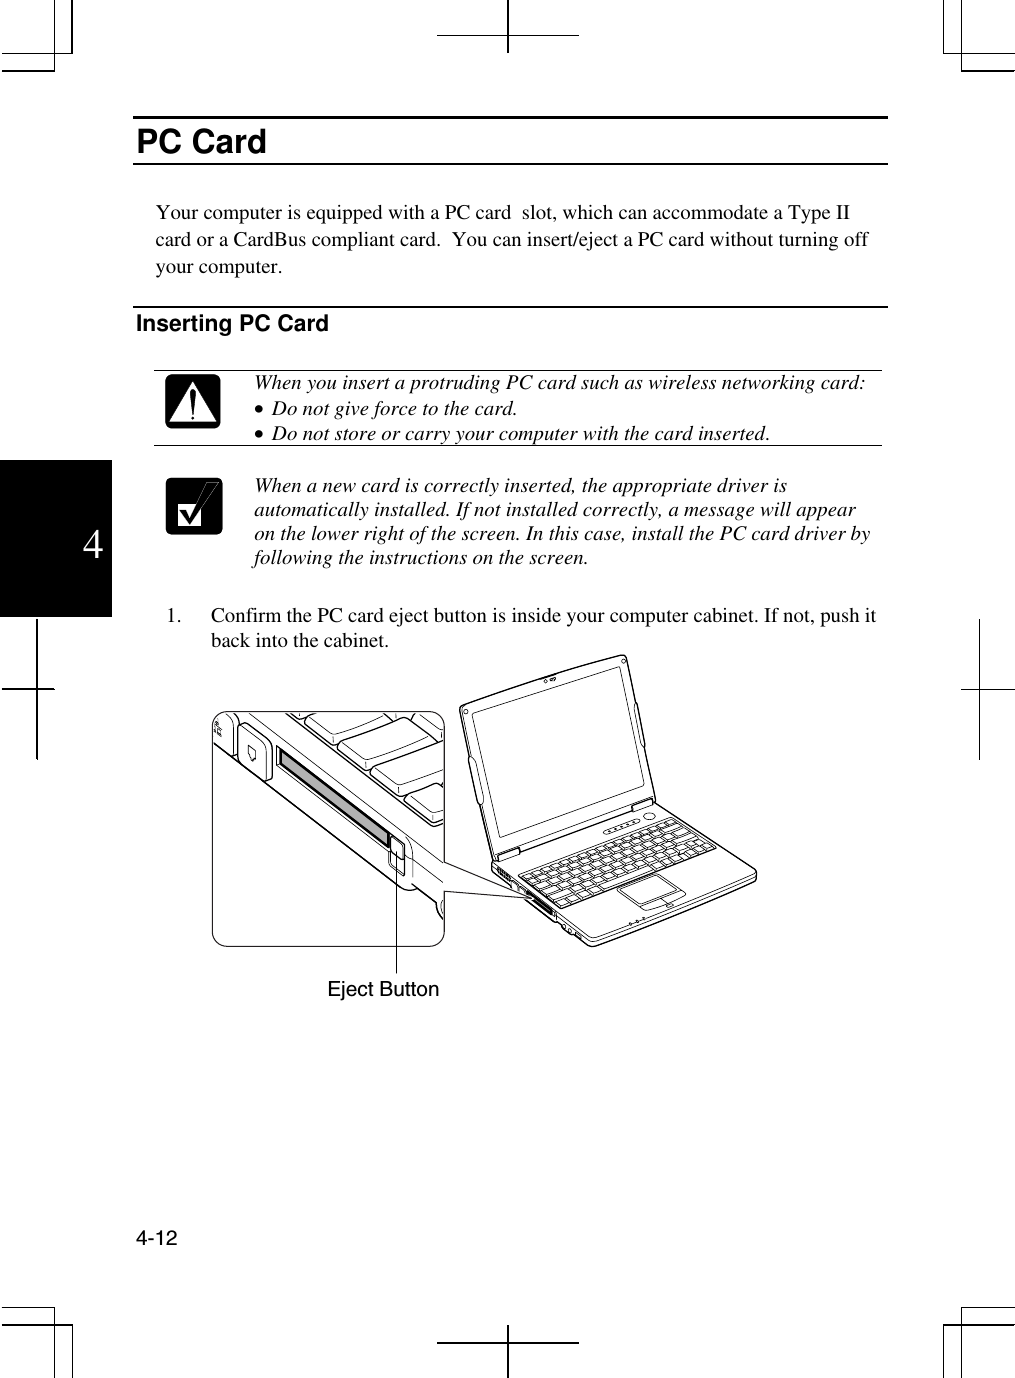
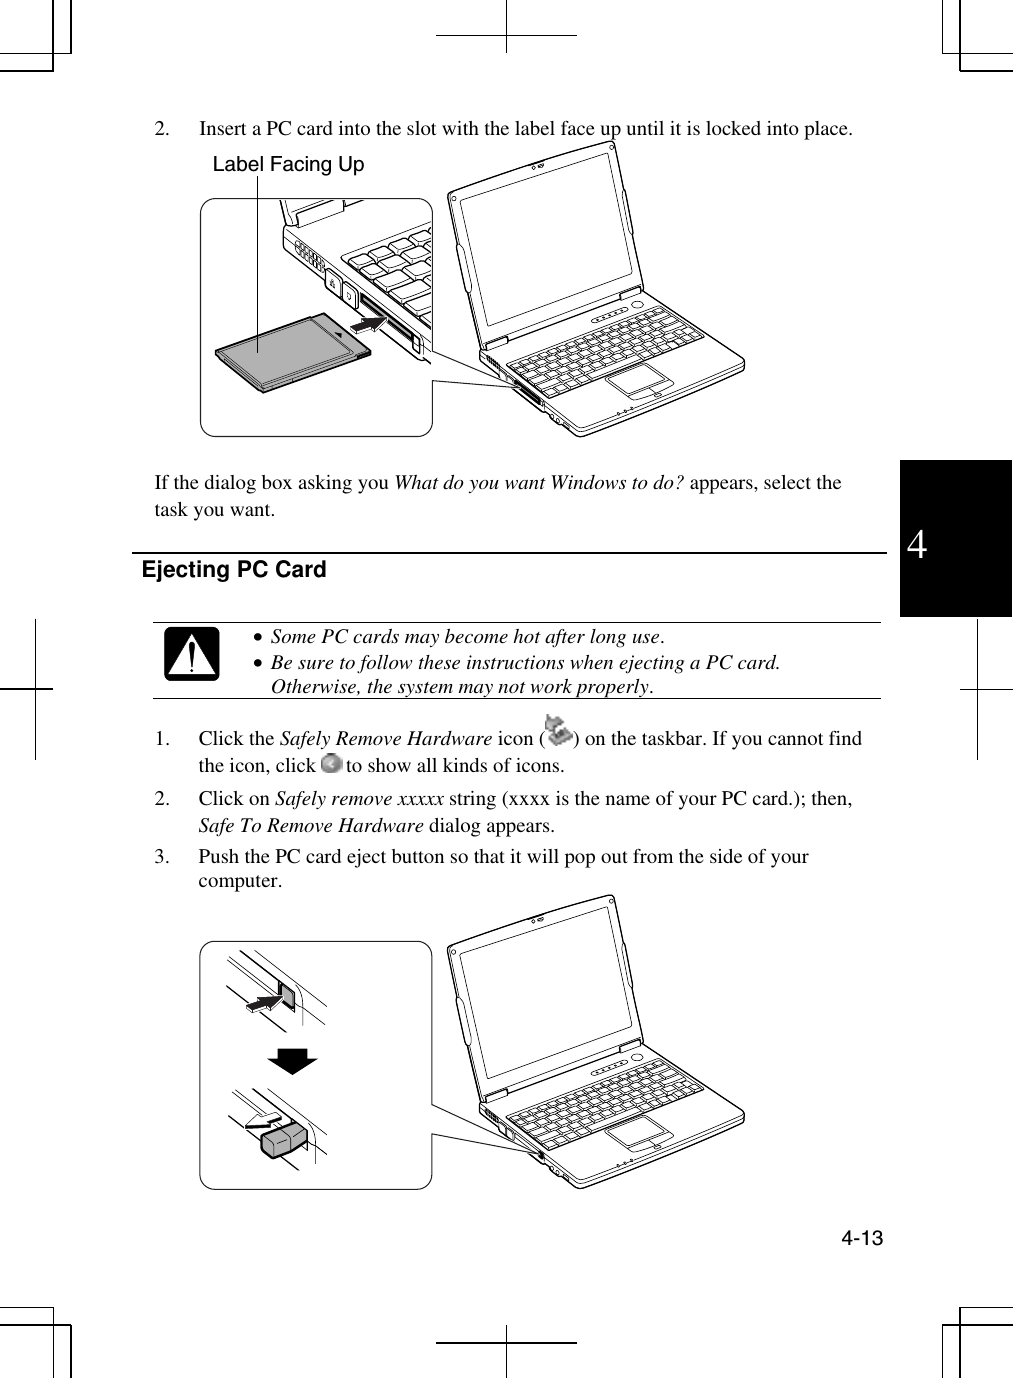
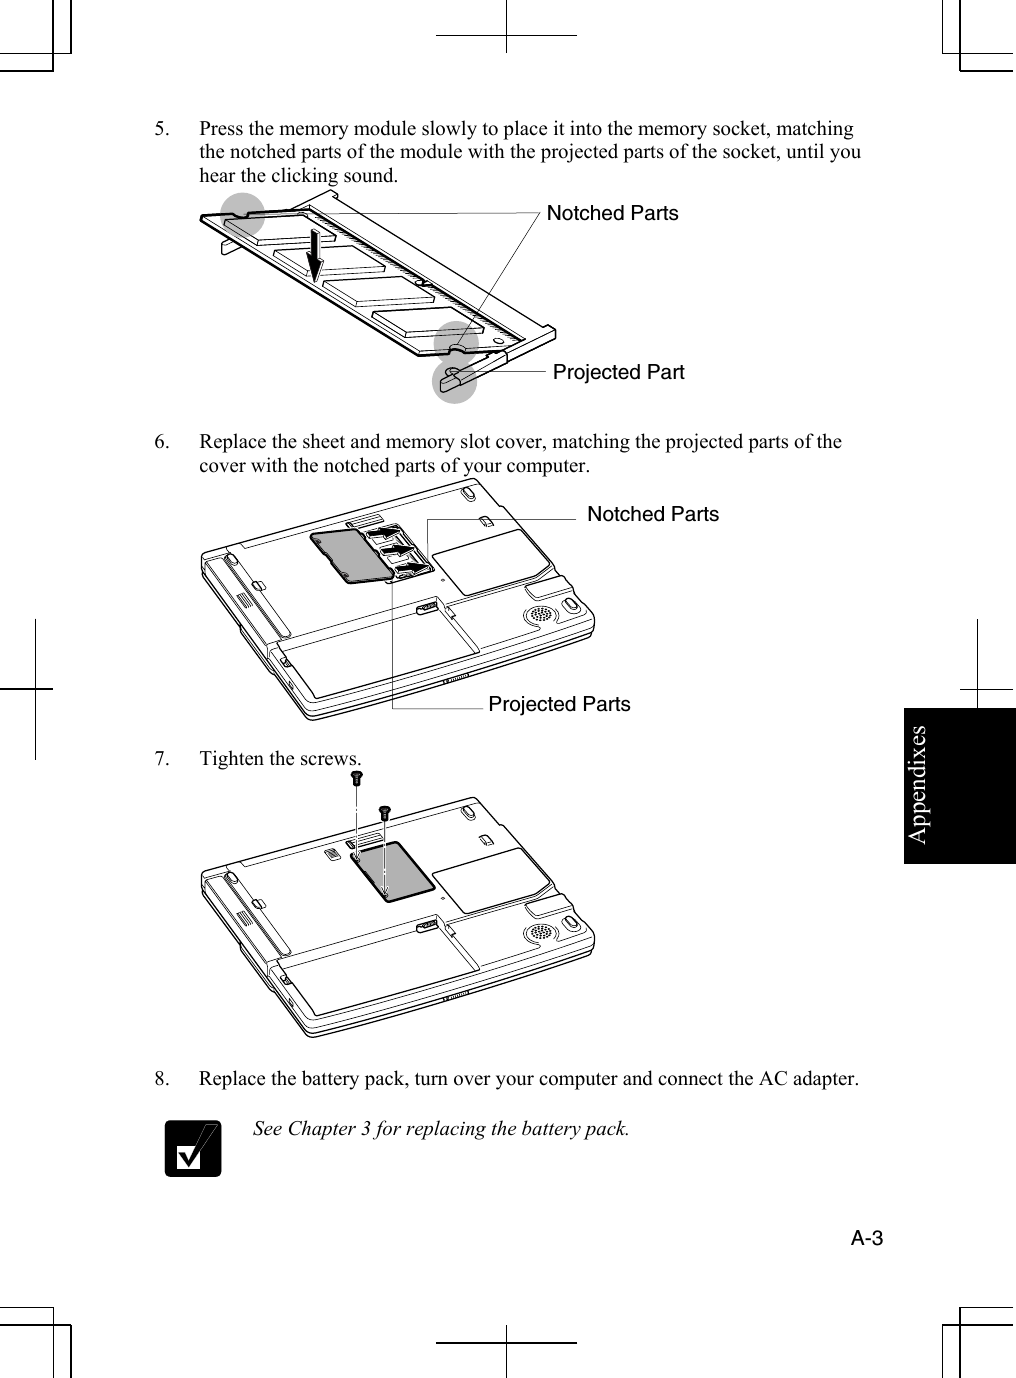
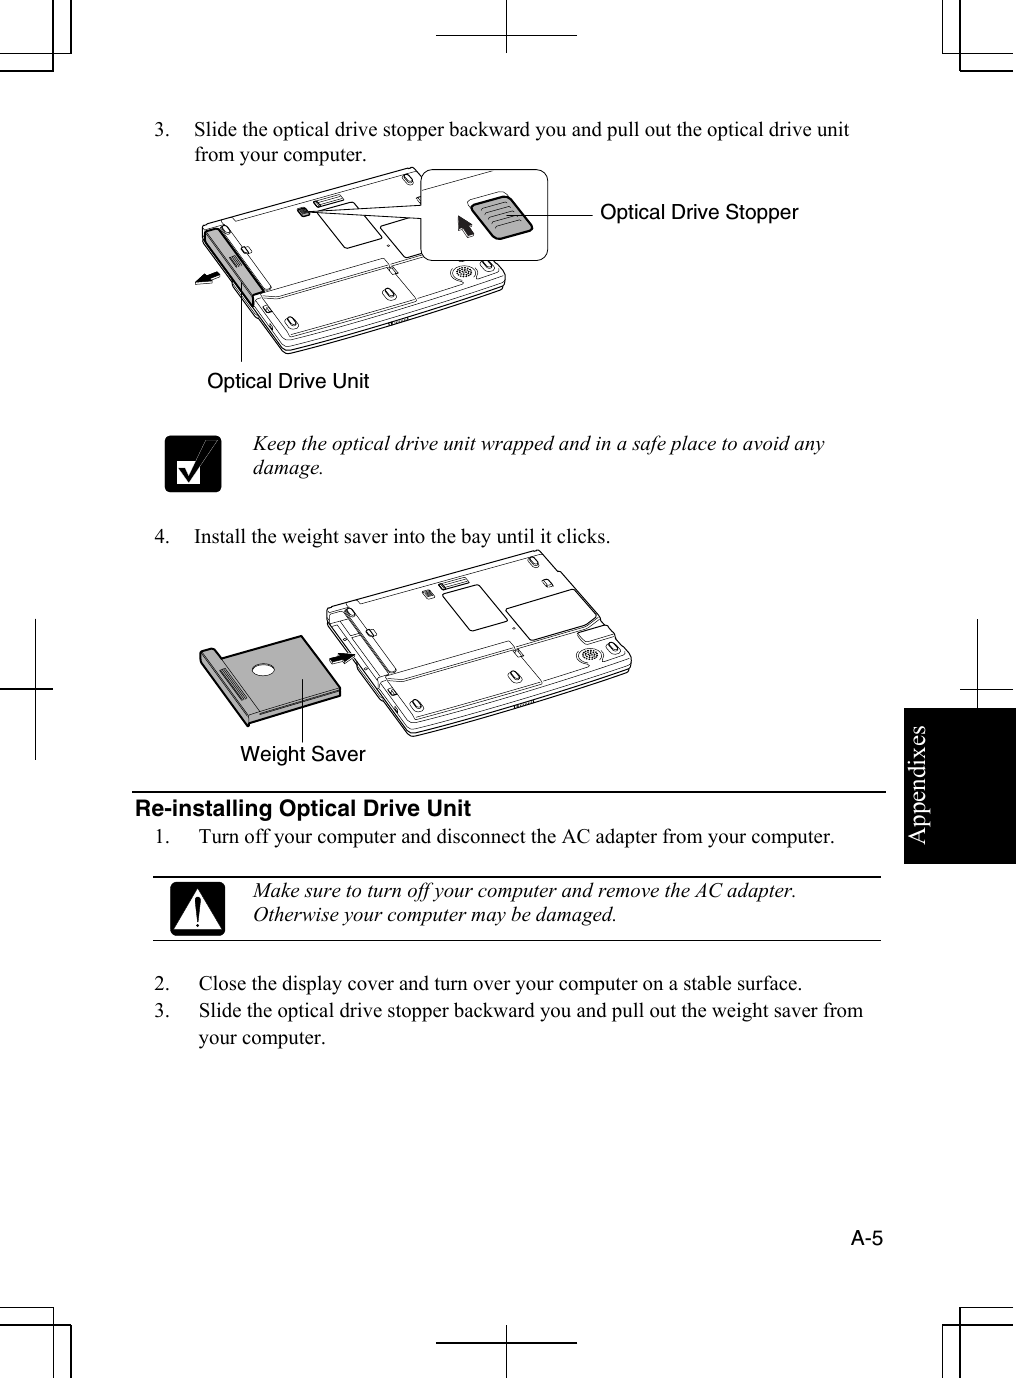
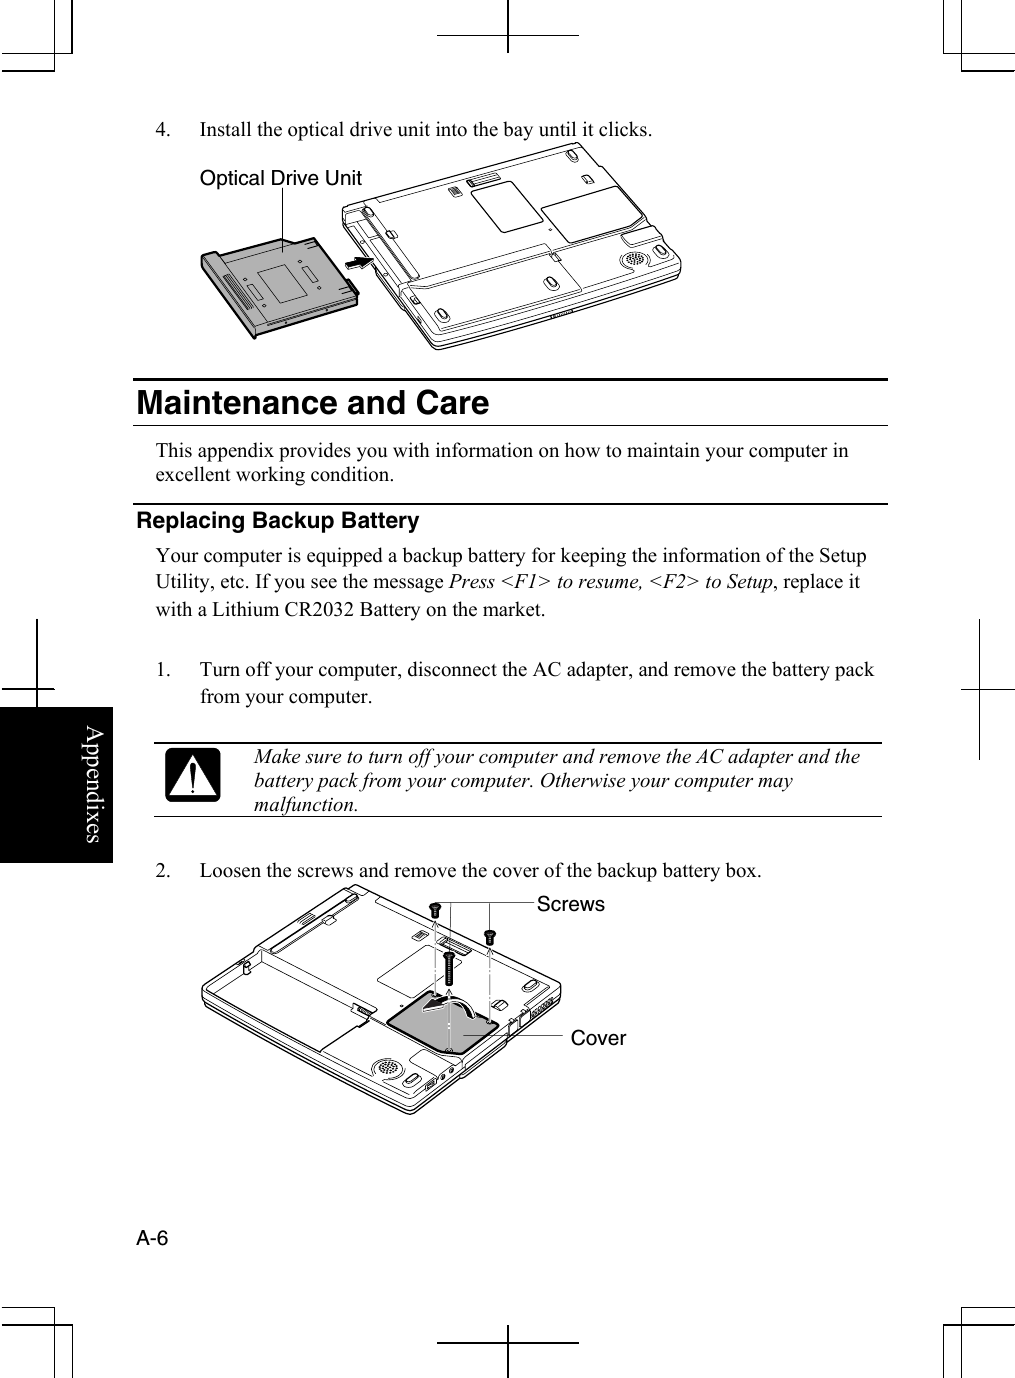
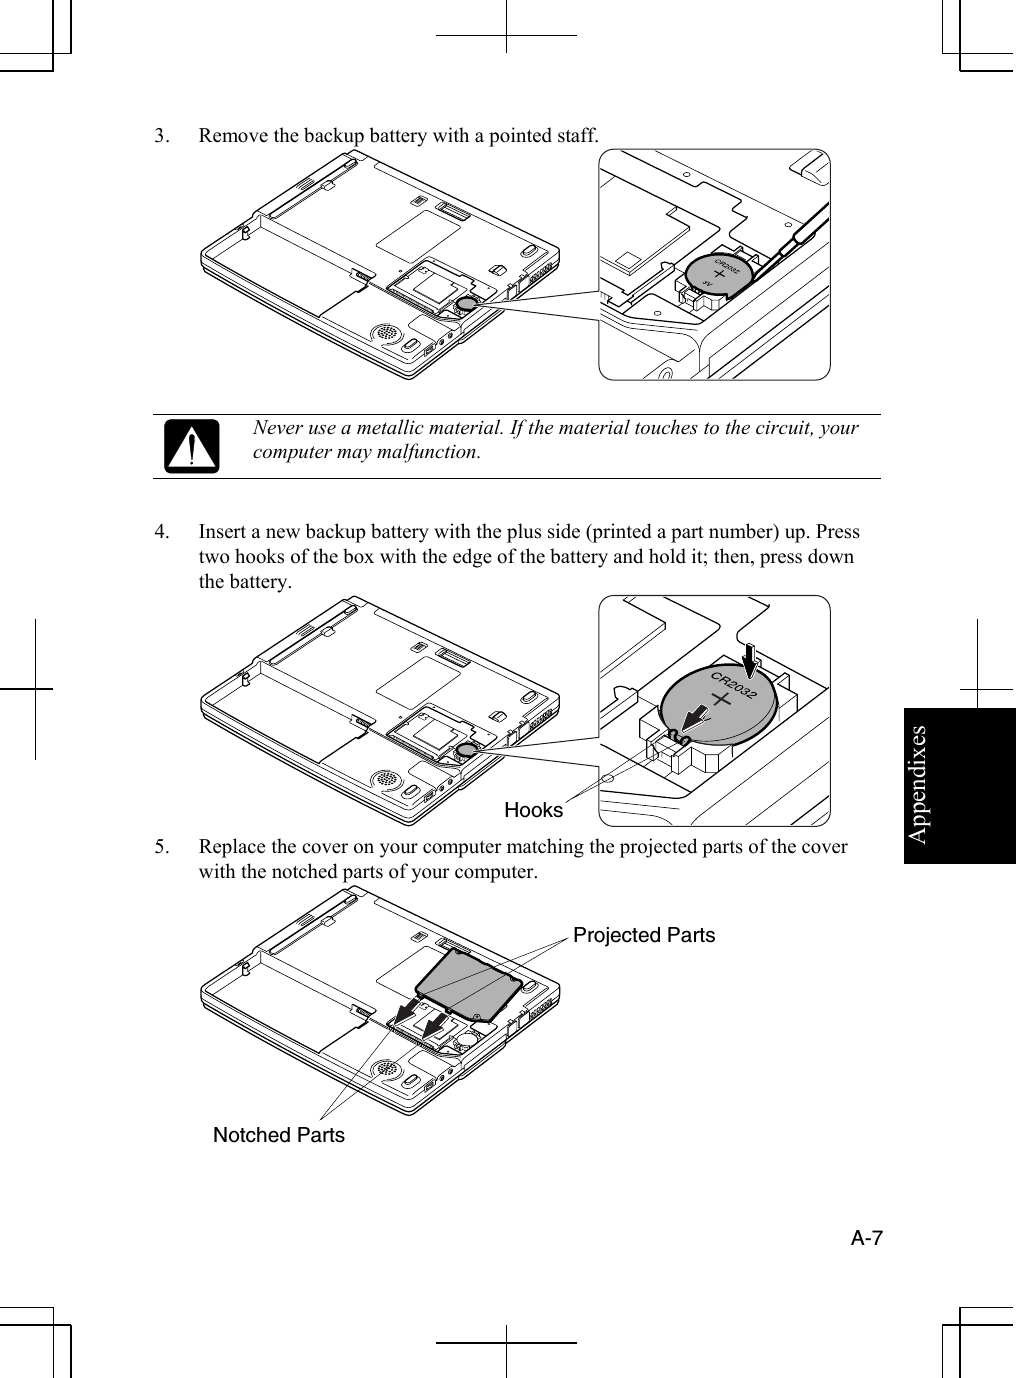
![2-18 2 Changing Wallpaper and Setting Screen Saver You can enjoy various desktop patterns or screen savers. Changing Wallpaper 1. In the Display Properties dialog box, select Desktop tab. 2. Select appropriate wallpaper listed in Background field. 3. Click OK. Setting Screen Saver 1. In the Display Properties dialog box, select Screen Saver tab. 2. Select an appropriate screen saver from the pull-down menu in Screen saver field and set time when screen saver starts. 3. Click OK. To disable the screen saver, select [None] from the Screen saver pull-down menu.](https://usermanual.wiki/Sharp/NAR0051.Manual/User-Guide-349690-Page-40.png)