Sharp NAR0052 Personal Mobile Tool User Manual Manual
Sharp Corporation Personal Mobile Tool Manual
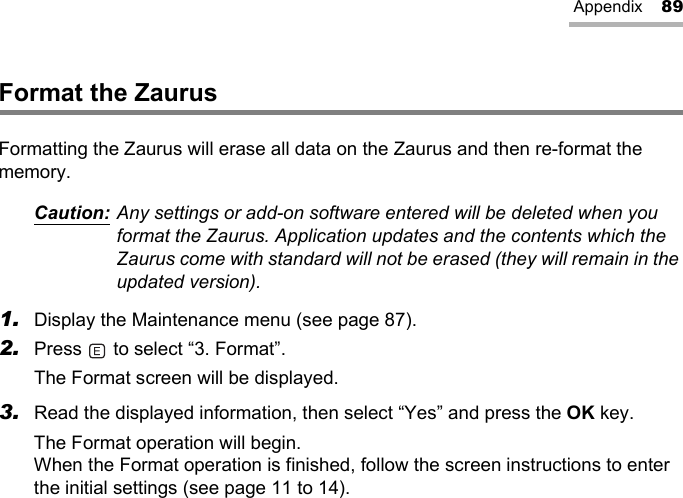
UserManual.wiki
>
Sharp
>
NAR0052 User Manual
Manual
Navigation menu
Upload a User Manual
Namespaces
Wiki Guide
HTML
PDF
Info
Views
User Manual
Discussion / Help
Navigation


![16 Getting StartedAbout USB Ports •Activating the power saving mode (such as suspend, resume, or sleep function) of some PCs may result in the USB port not functioning properly. In this case, disable the power saving mode.•The software may not operate properly when using a commercially available USB card installed in a PCI slot.•If the USB port on your PC or the USB hub connected to the Zaurus does not operate properly, perform the following steps.- When your PC comes equipped with several USB ports, connect the Zaurus to another USB port.- When other USB devices are connected to your PC and used simultaneously, disconnect them from your PC.•If the USB driver does not operate properly when you connect the Zaurus to your PC via the USB hub, connect it directly to the USB port on your PC. Using the USB extension cable may result in the USB driver not operating properly.•Do not remove and connect the USB cable from/to the PC in a short time.Limitations When Using with Windows XP and Windows 2000Windows XP•Log on using an account on the PC that has administrator privileges. The software cannot be installed when logged onto a restricted account. When using the software, log on as an administrator. To do this, click [Start], then [Log Off], select an administrator account for the PC from the displayed screen, and log on. Windows 2000•Log on as the Administrator when installing the software. Also log on as the Administrator when using the software. When using a PC in a company or similar place, contact the administrator of the PC about an Administrator account.](https://usermanual.wiki/Sharp/NAR0052/User-Guide-381531-Page-18.png)
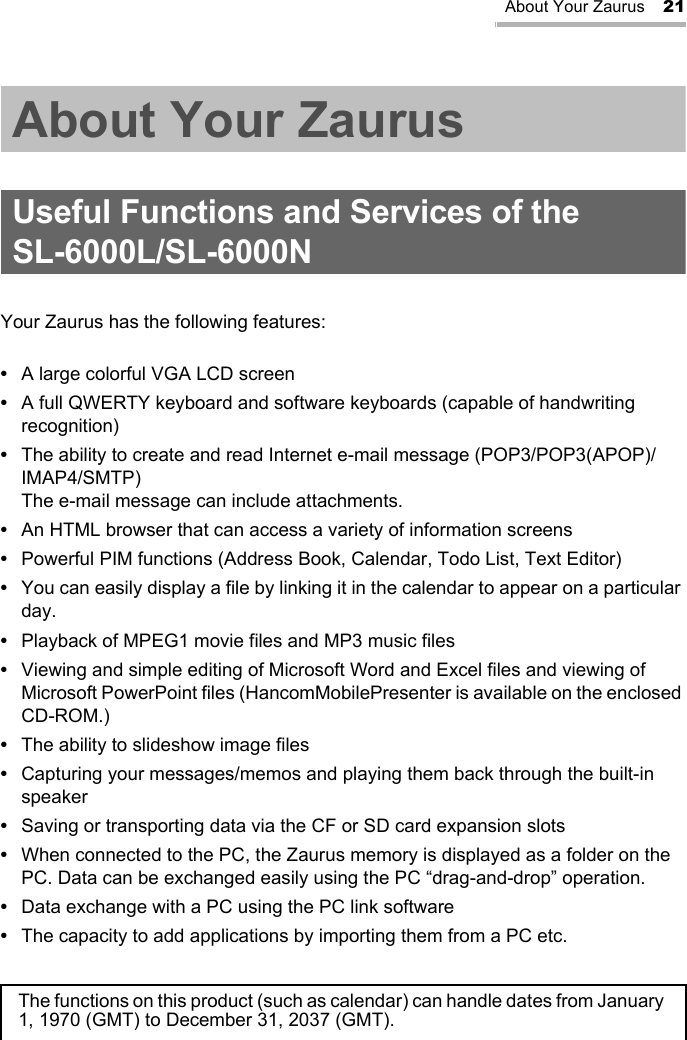
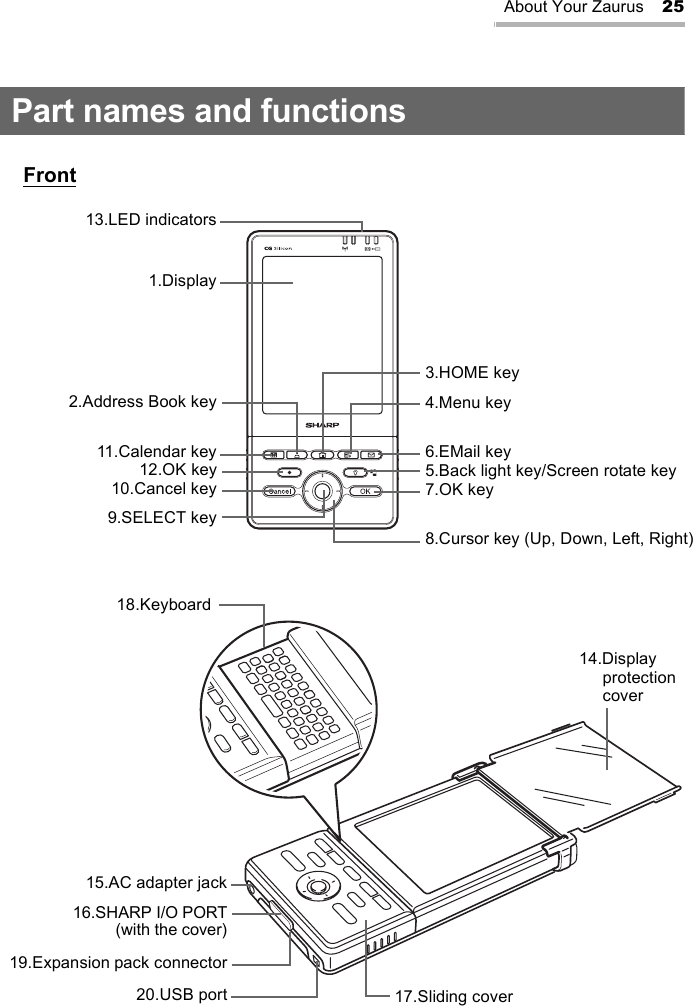
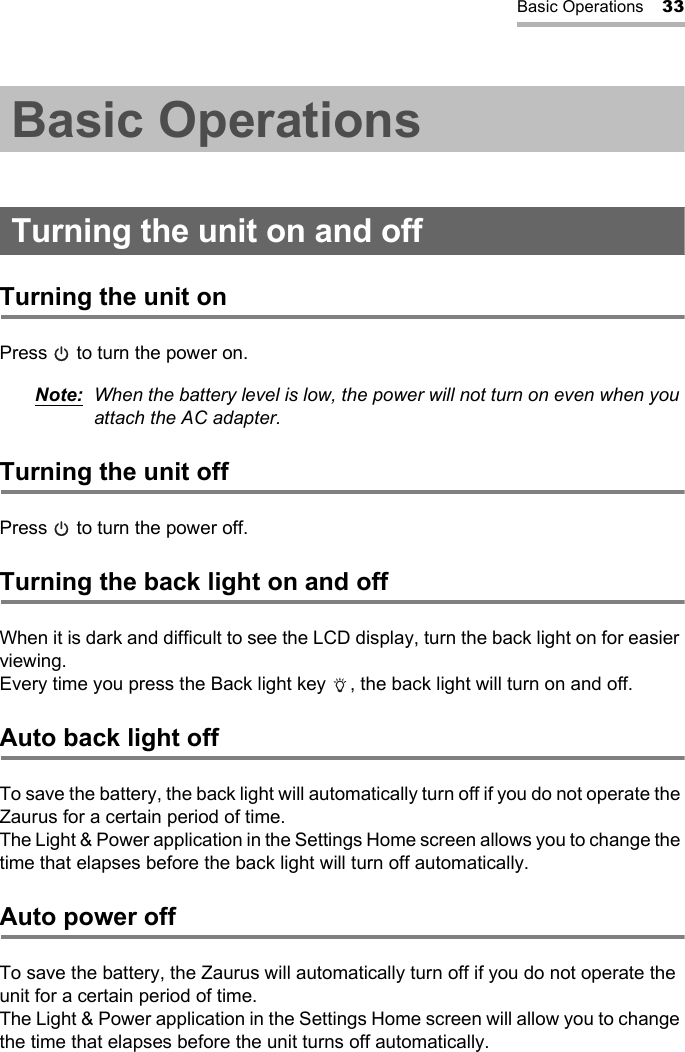

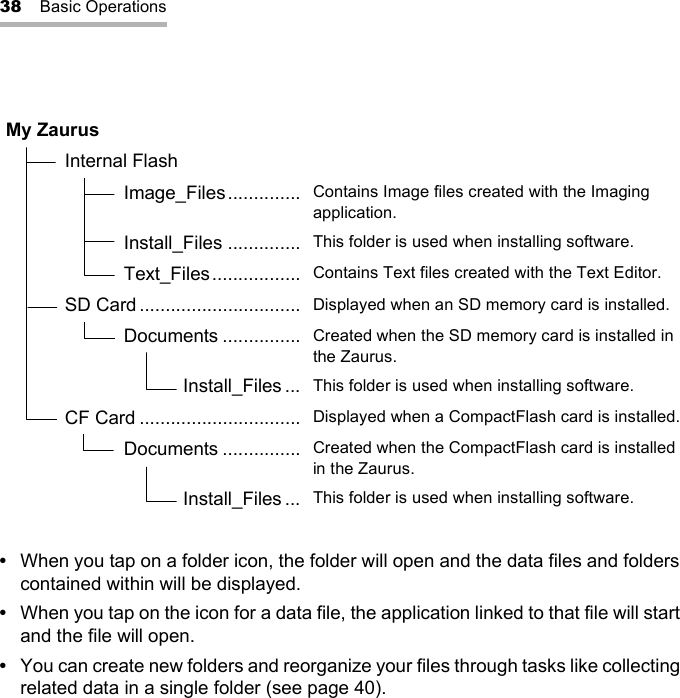
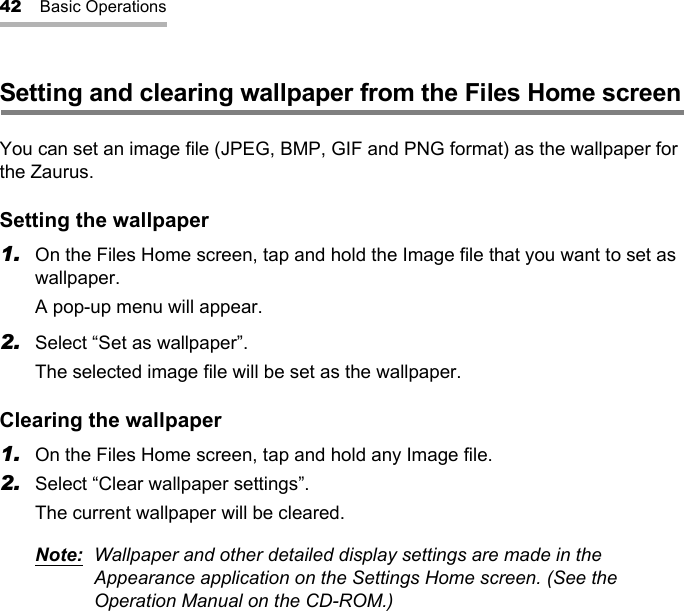

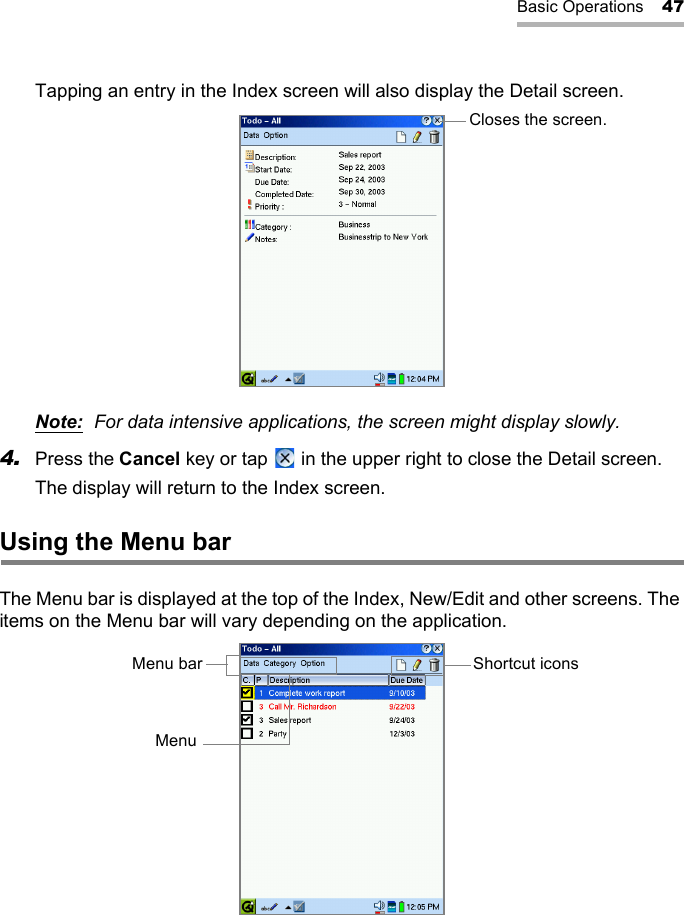
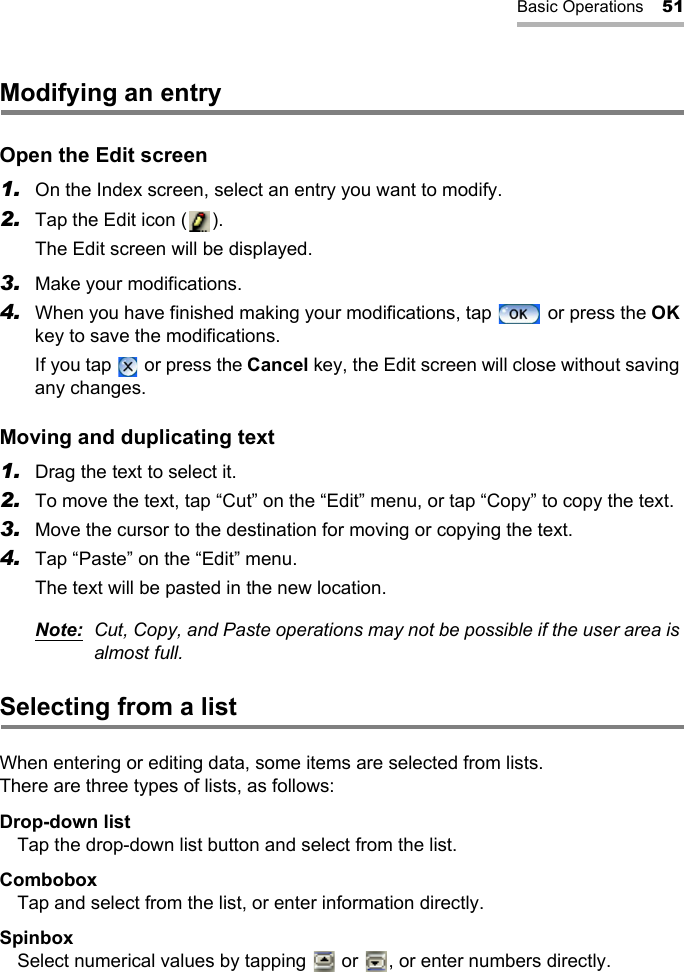
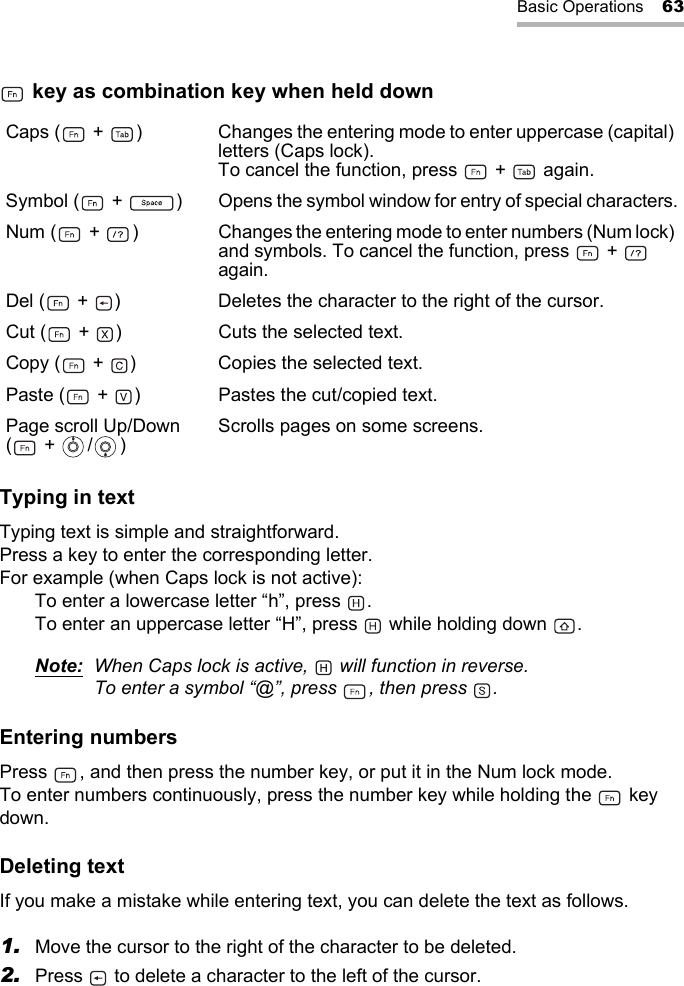
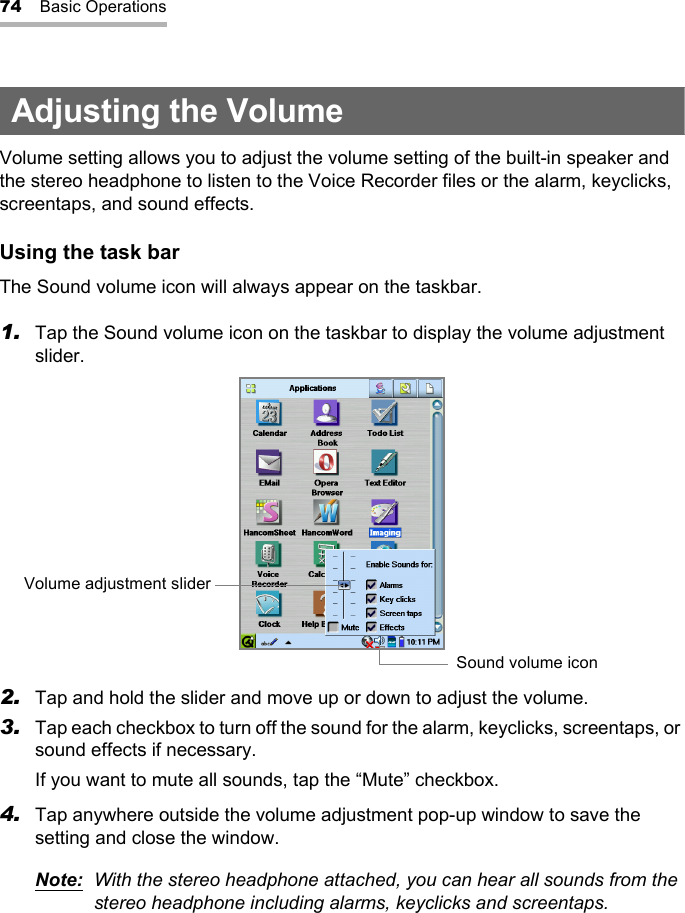
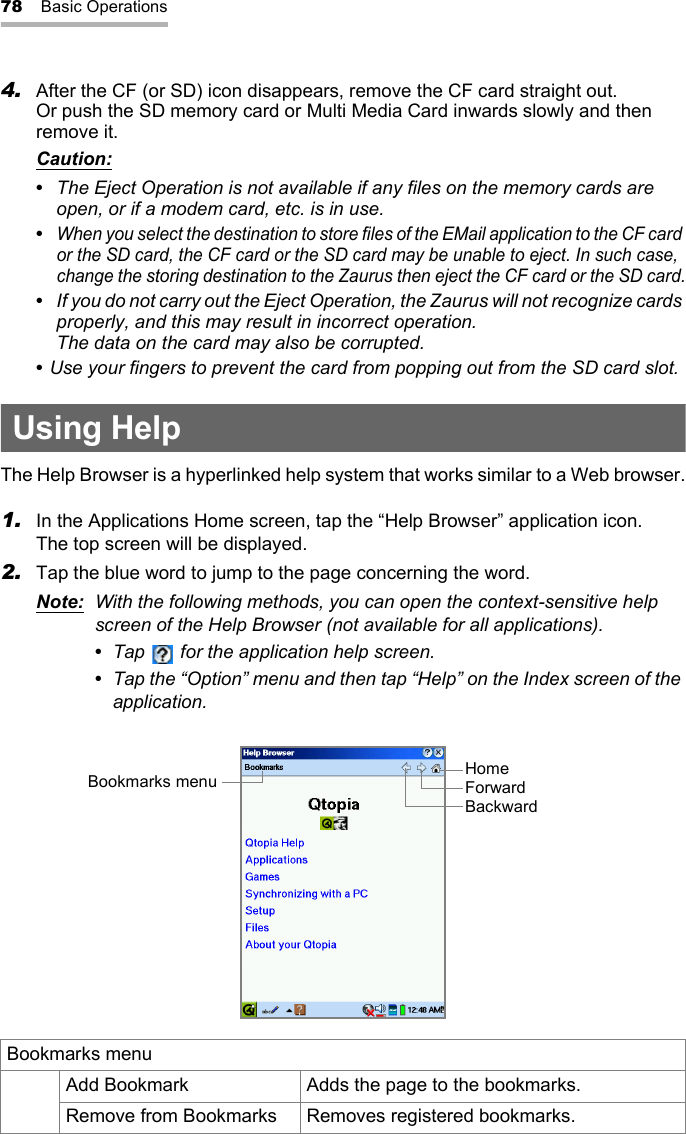
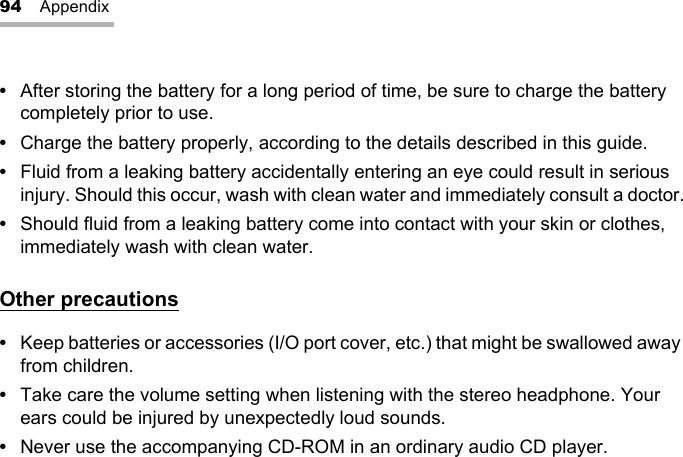
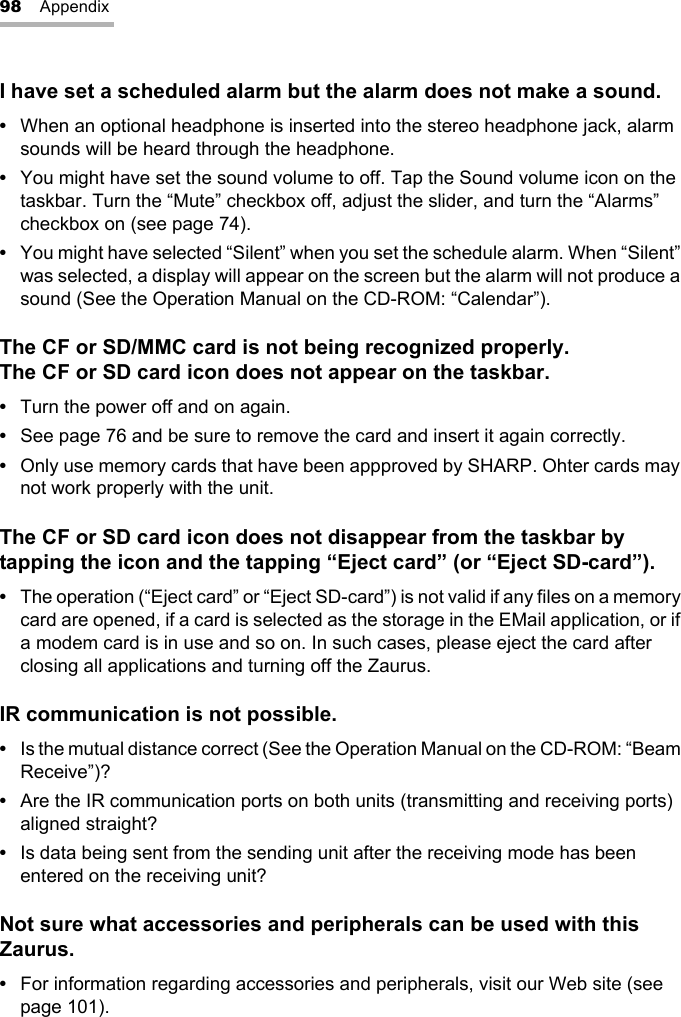
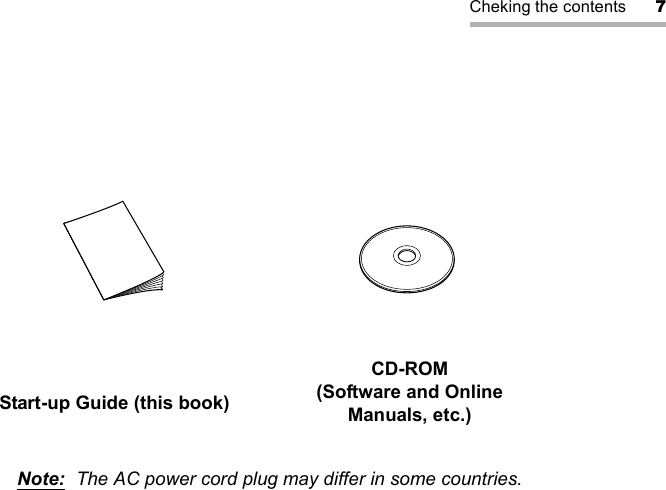
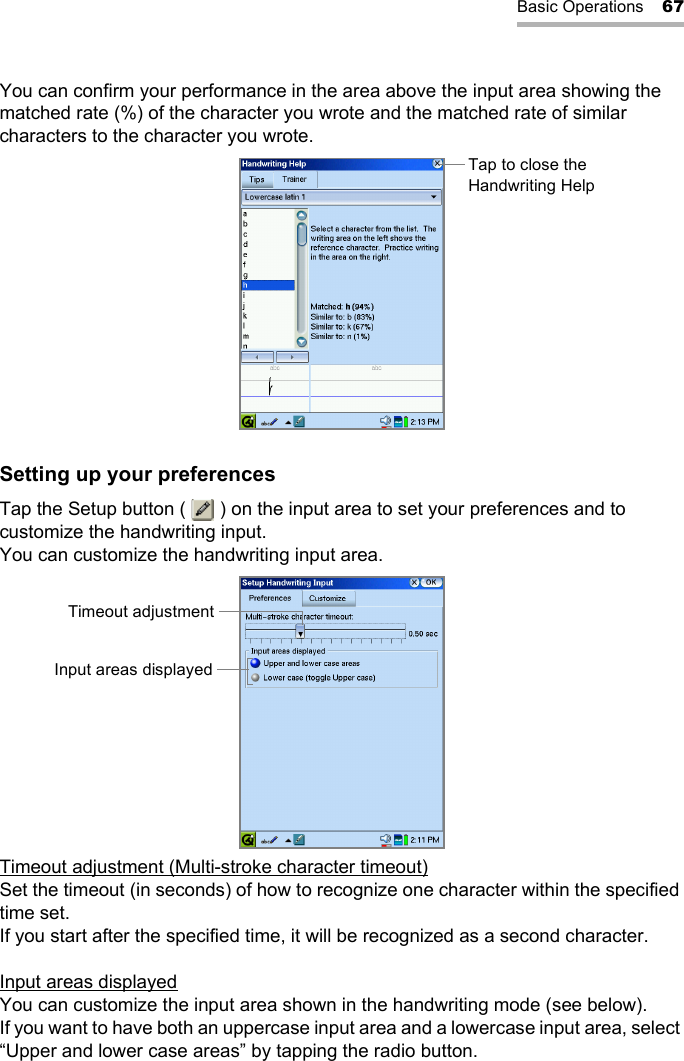
![Basic Operations 65HandwritingPop up the input area in the handwriting mode.Write a letter with the stylus.There are three input areas: Uppercase letter input area, Lowercase letter input area and Symbol input area.As you write letters, a list of words will appear on the Candidates area (top of the input area). Tap it to enter it.Handwriting GesturesTo insert commands other than characters, make handwriting gestures.“Return”, “BackSpace”, “Uppercase”, and “CapsLock”.These are indicated with brackets ([ ]) in the Character list on the Trainer screen of the Handwriting Help (see page 66), and you can learn how they are drawn.Help buttonCandidates areaLowercase letter input areaSymbol input areaBack space buttonReturn buttonSetup buttonUppercase letter input area](https://usermanual.wiki/Sharp/NAR0052/User-Guide-381531-Page-67.png)

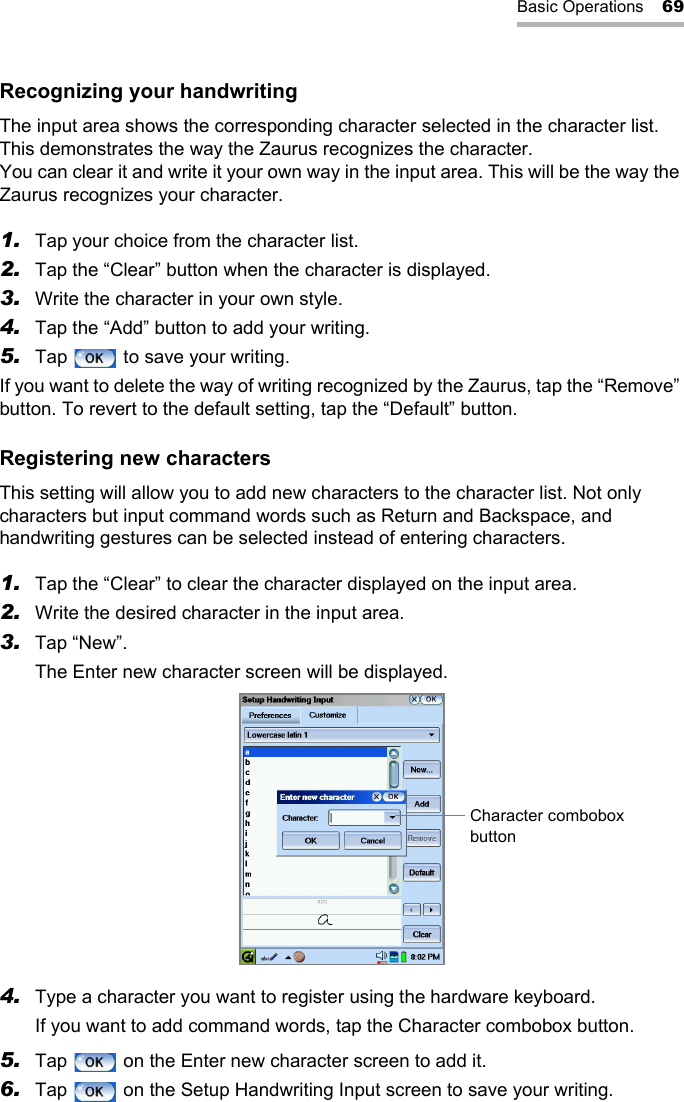
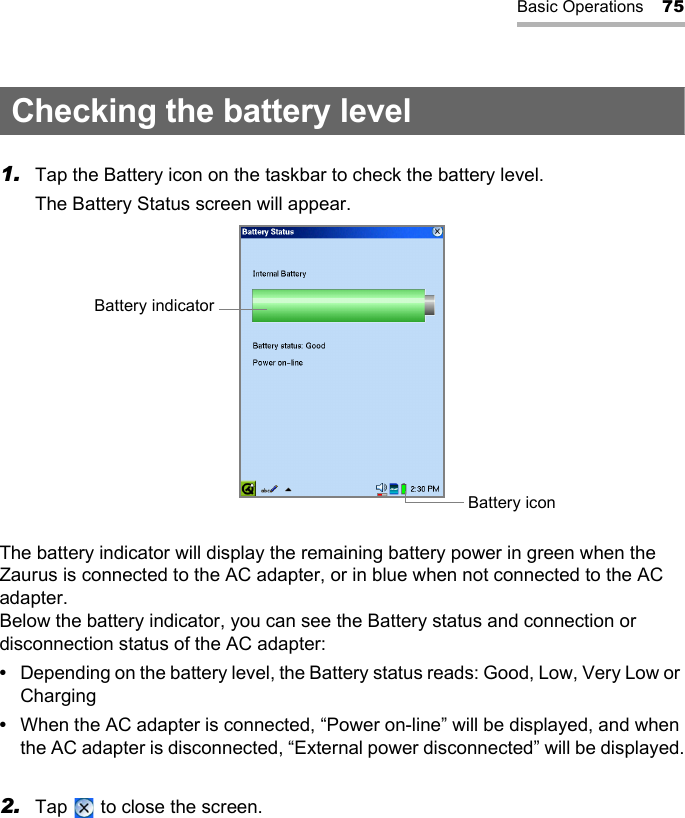
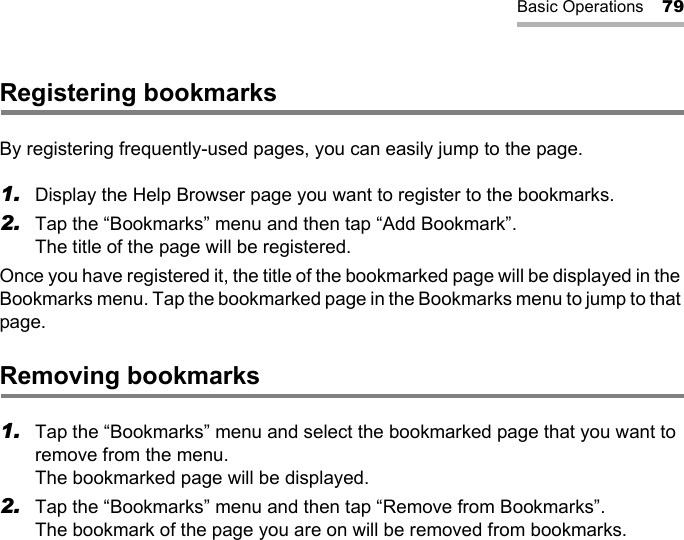
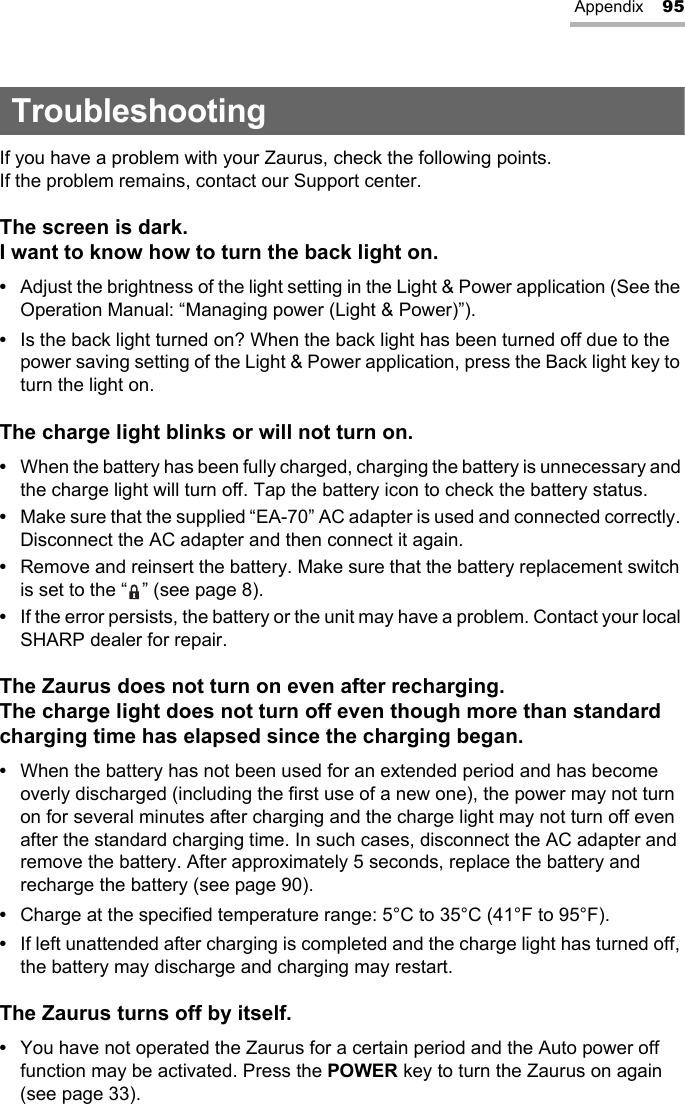
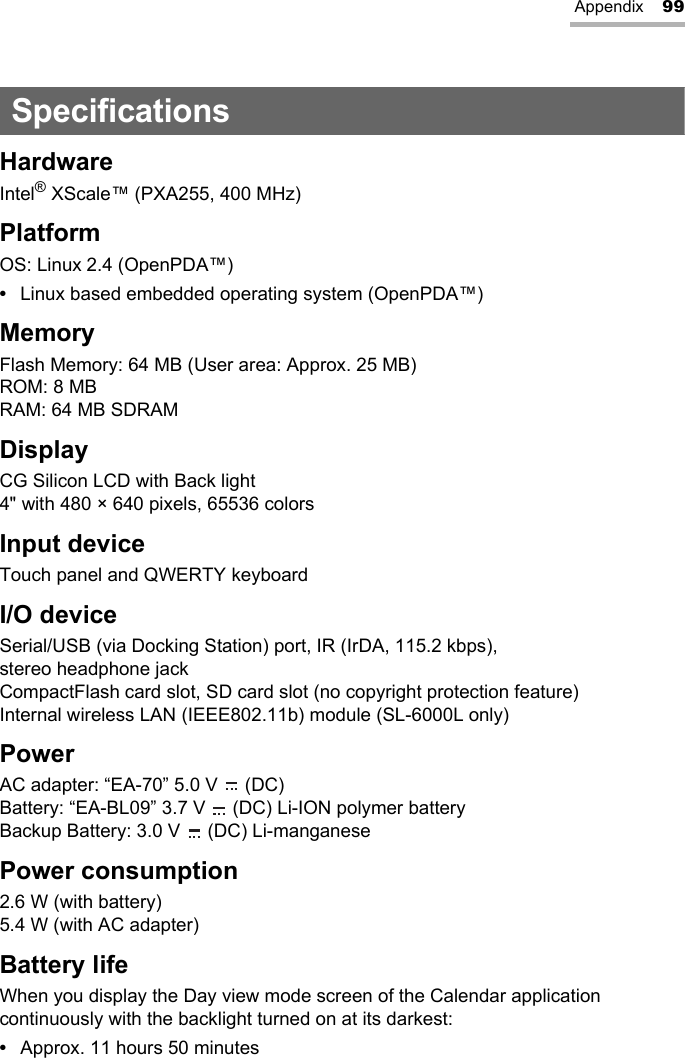
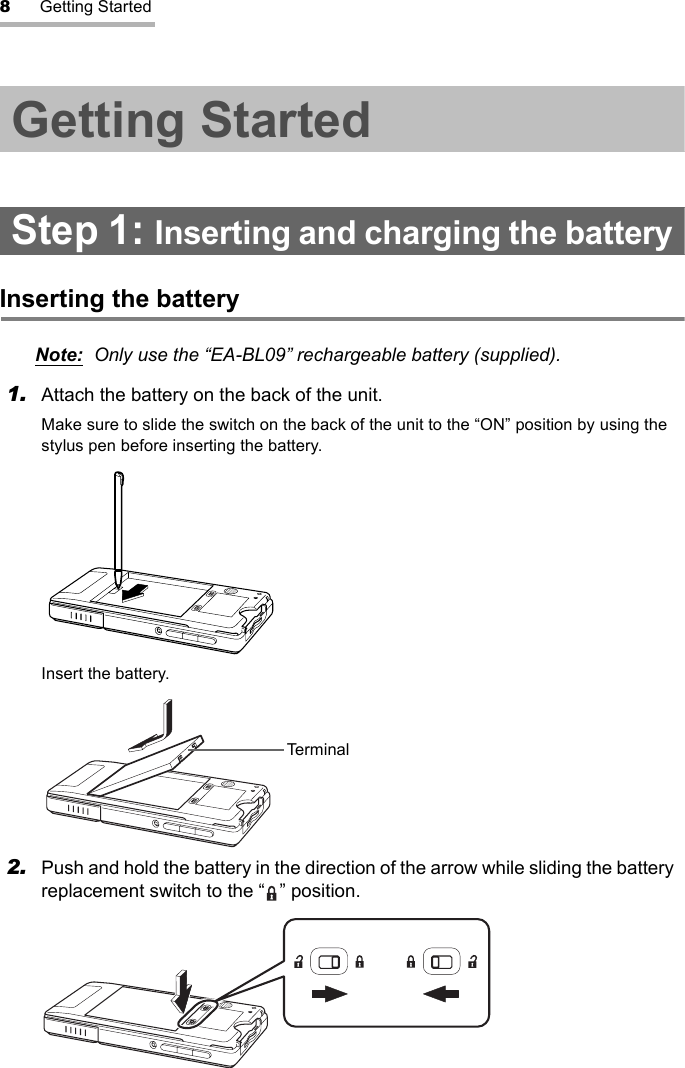
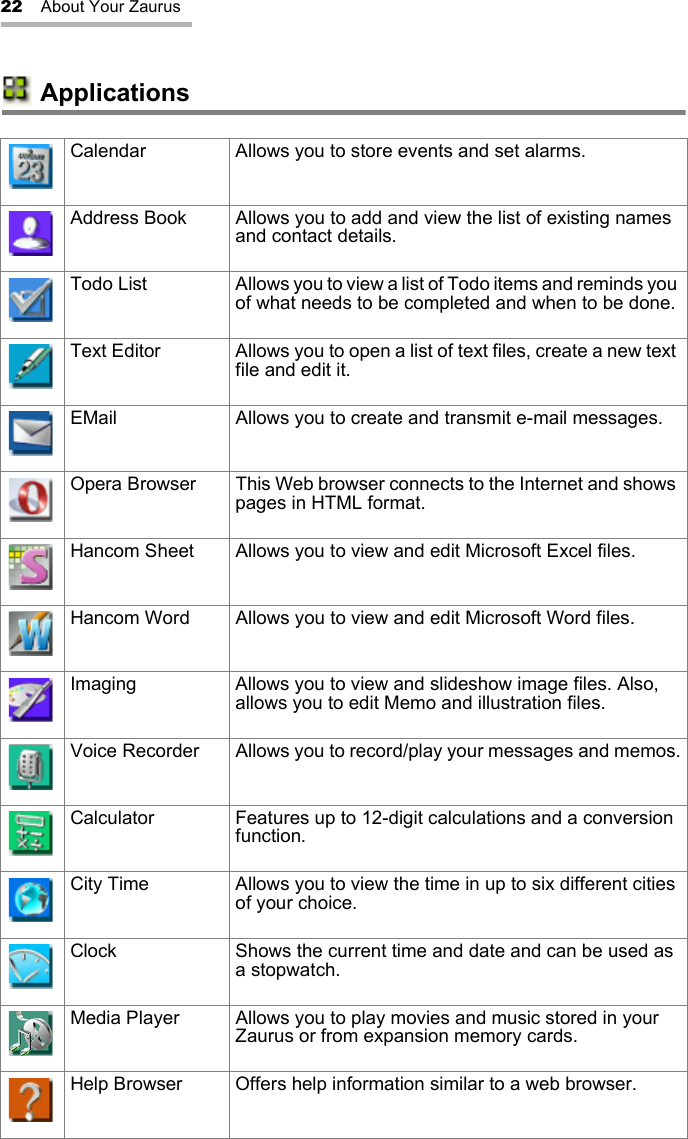
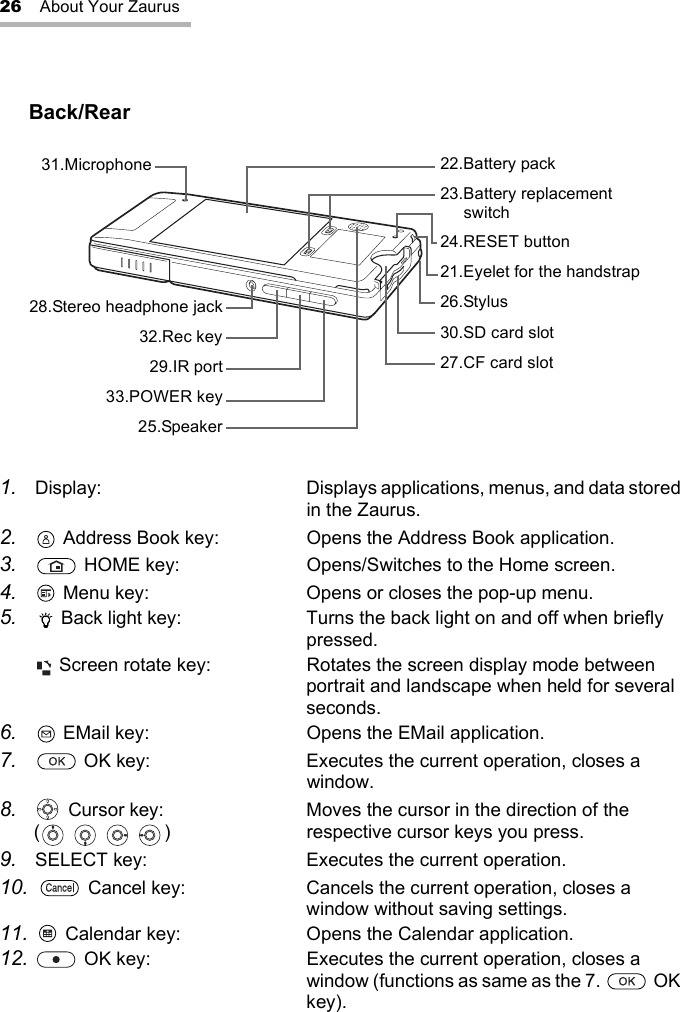
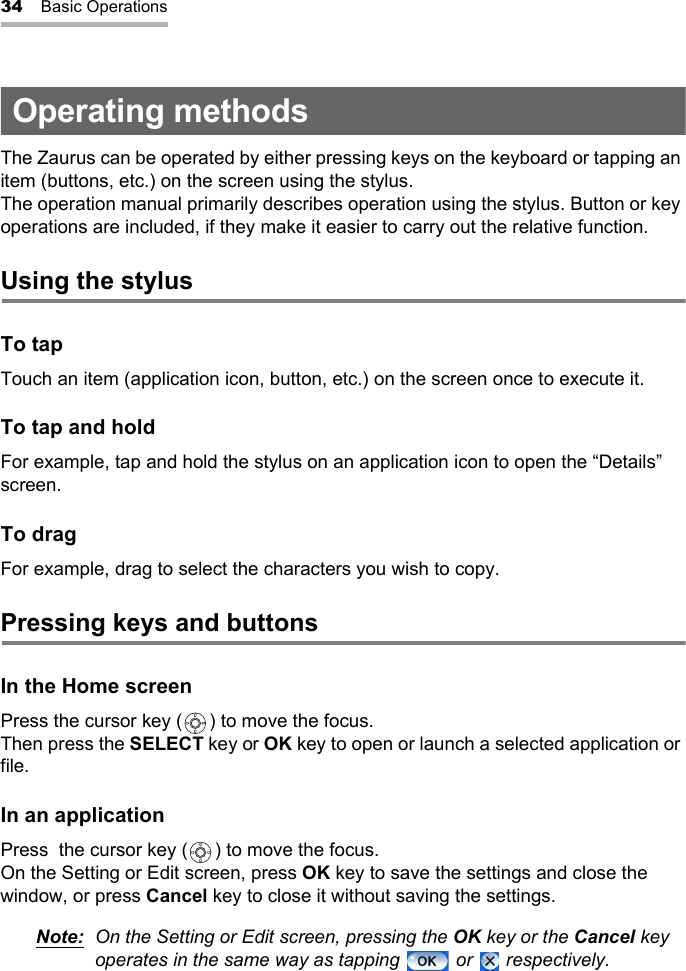
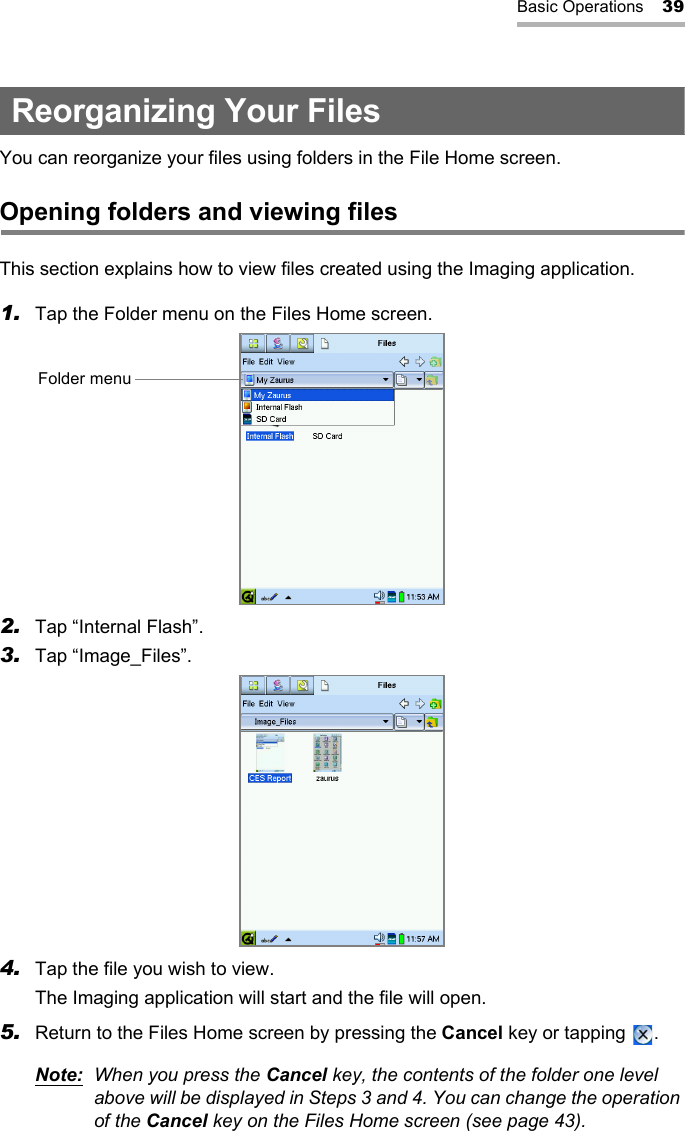
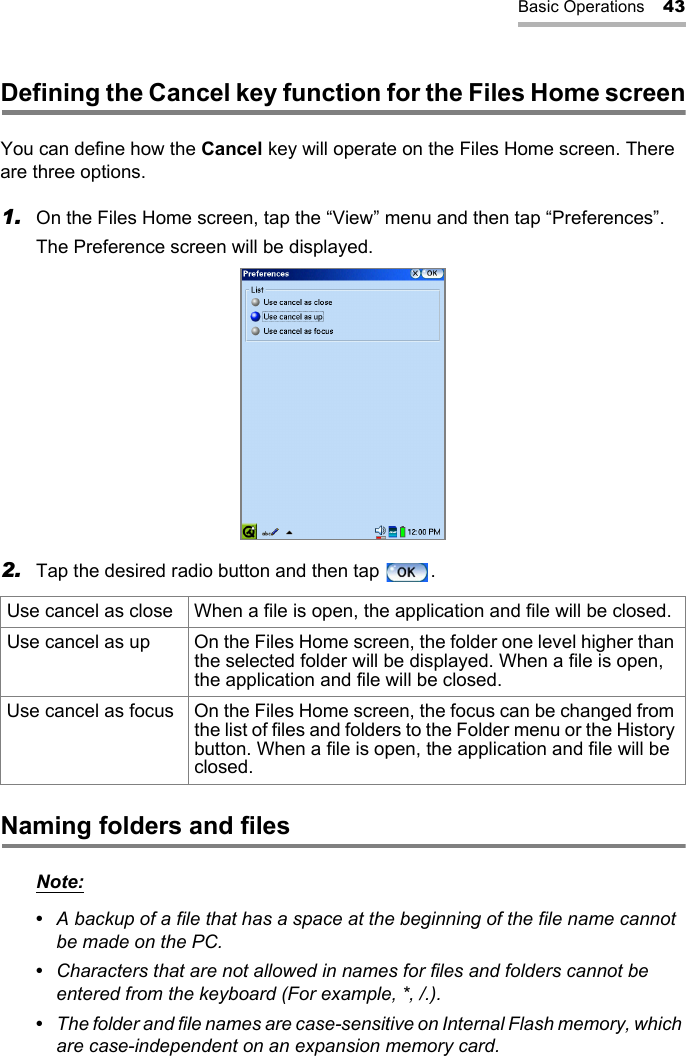
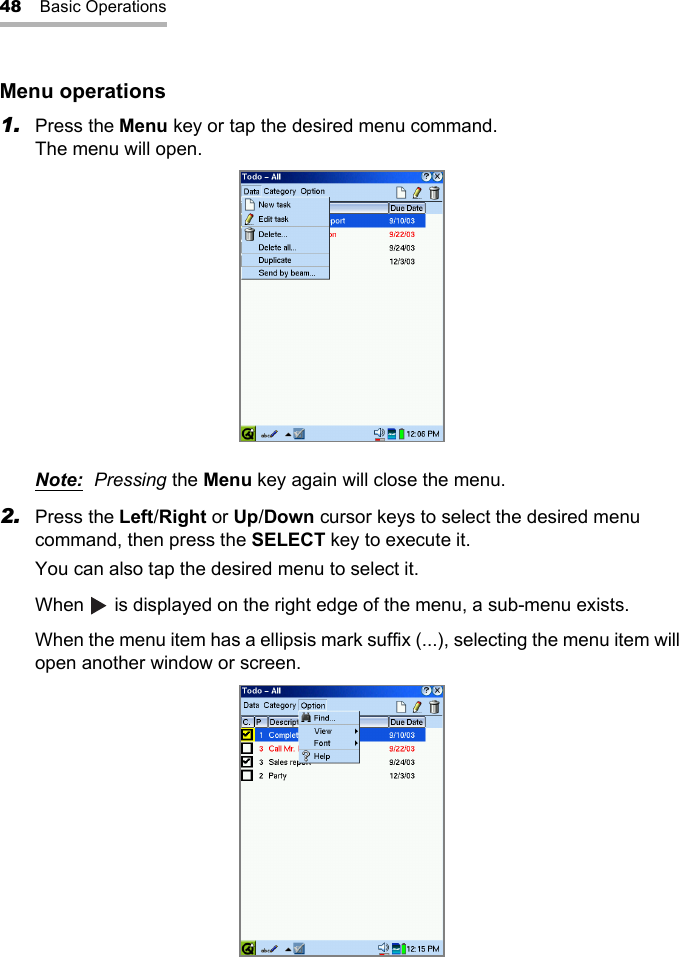
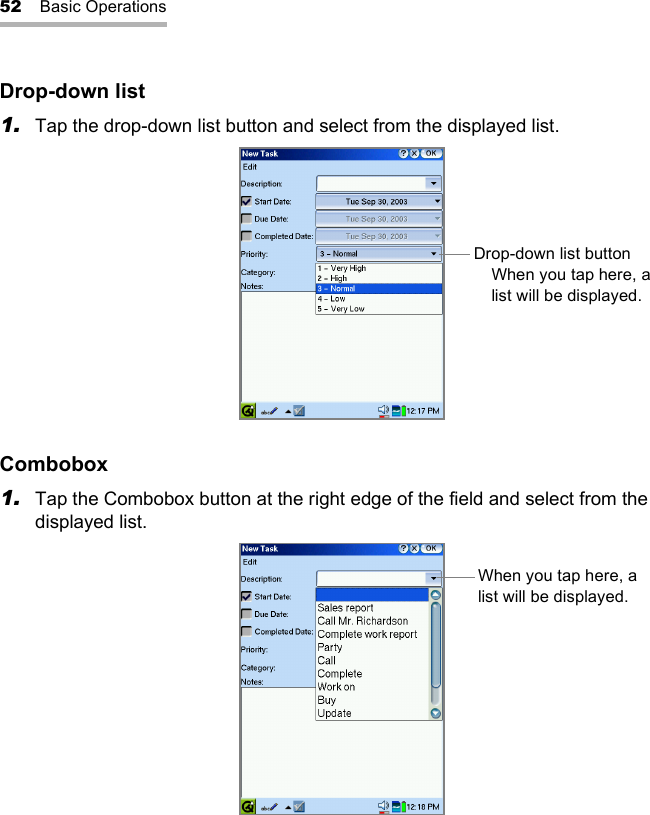
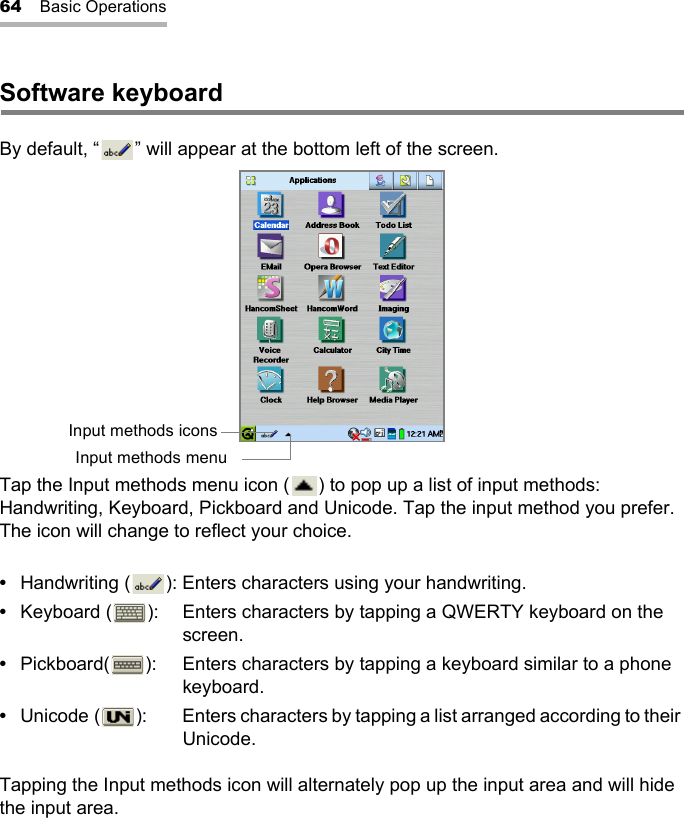
![70 Basic Operations“Character” comboboxThe choices are as follows: [Esc], [Tab], [BackSpace], [Return], [Uppercase], [Caps Lock], [Shortcut], [Punctuation], [Symbol], and [Extended].KeyboardPull up the keyboard mode in the input area.The keyboard will work just like a full-size keyboard, except that you tap the keys instead of typing on them.Entering charactersAs you tap, the character you tapped and candidates including it will appear above the keyboard.Tap the desired character to insert it.If you tap Shift, it will remain down until you tap it again or tap a letter.Switching the keyboard layoutTap the keyboard layout switch button (right arrow key) to switch the keyboard layout.Insert, Home, PageUp, Delete, End, PageDown and arrow keys will be displayed and hidden every time you tap it.Candidatesarea Keyboard layout switch button](https://usermanual.wiki/Sharp/NAR0052/User-Guide-381531-Page-72.png)
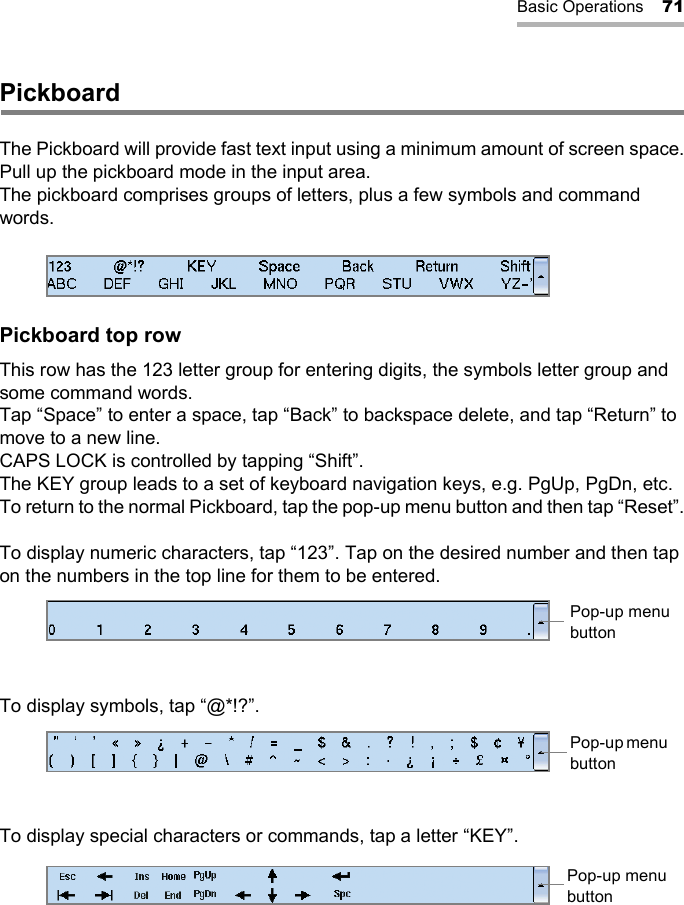
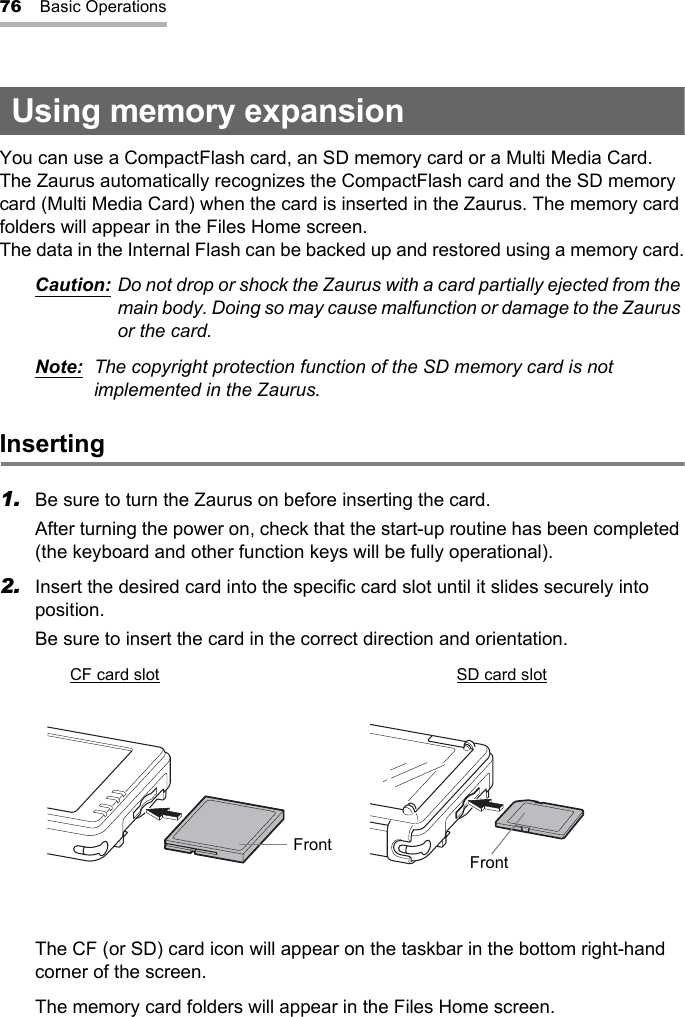
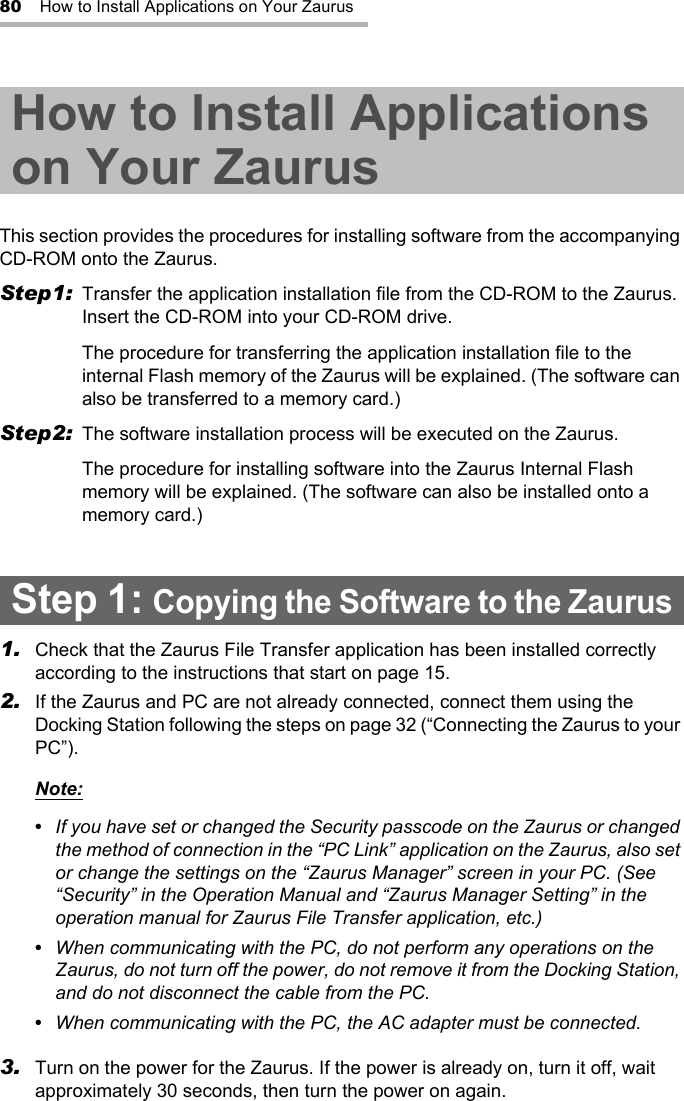
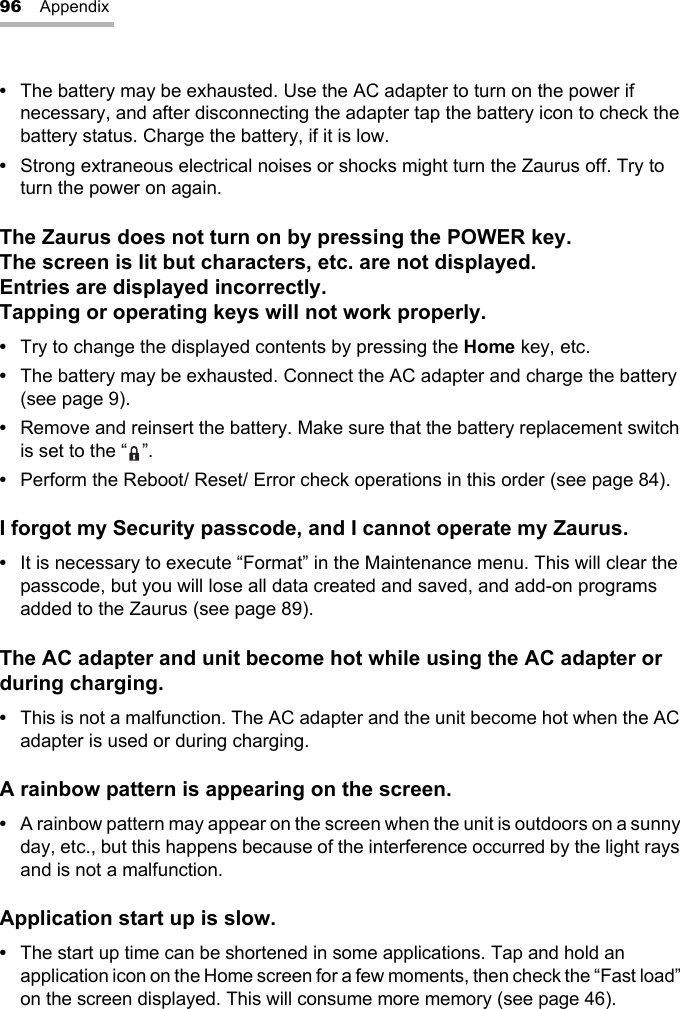
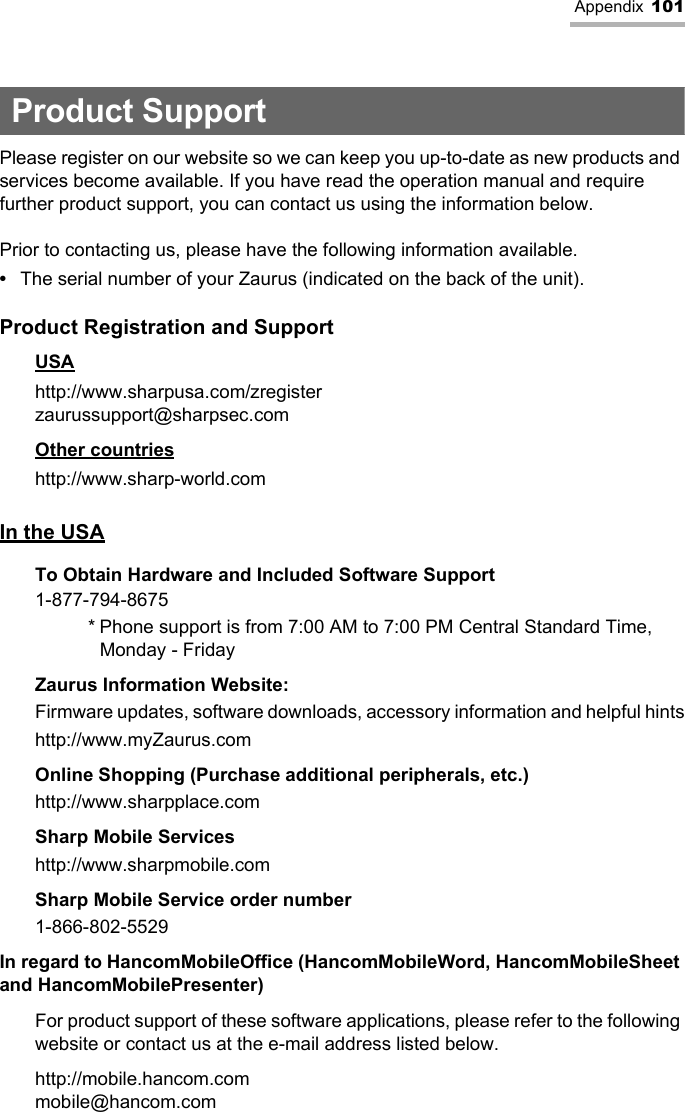
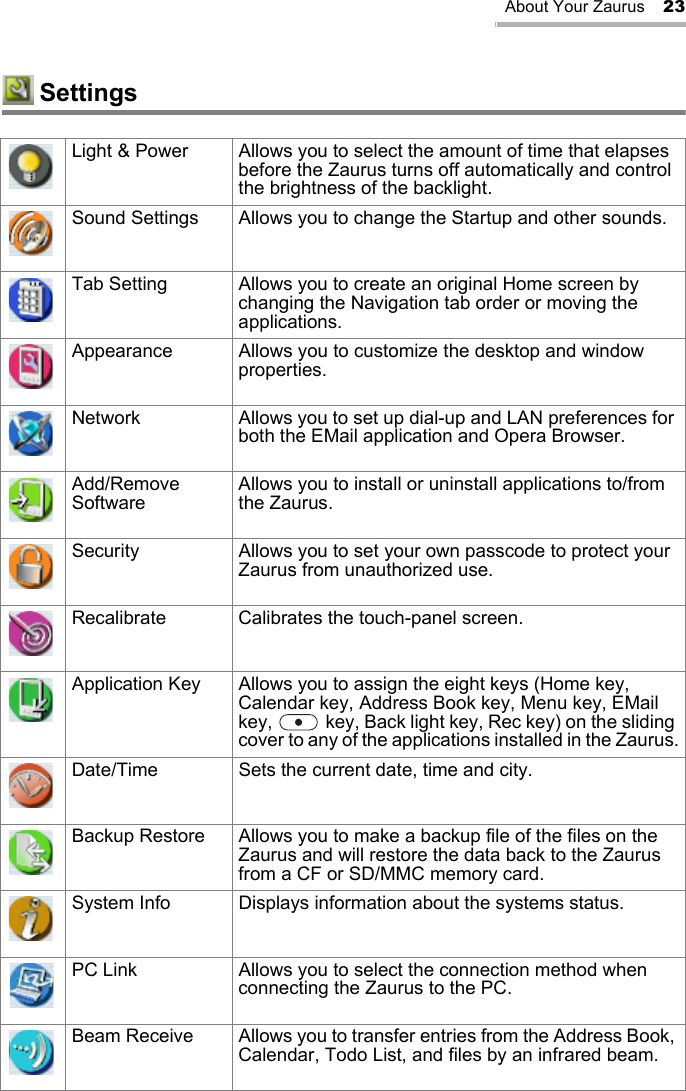
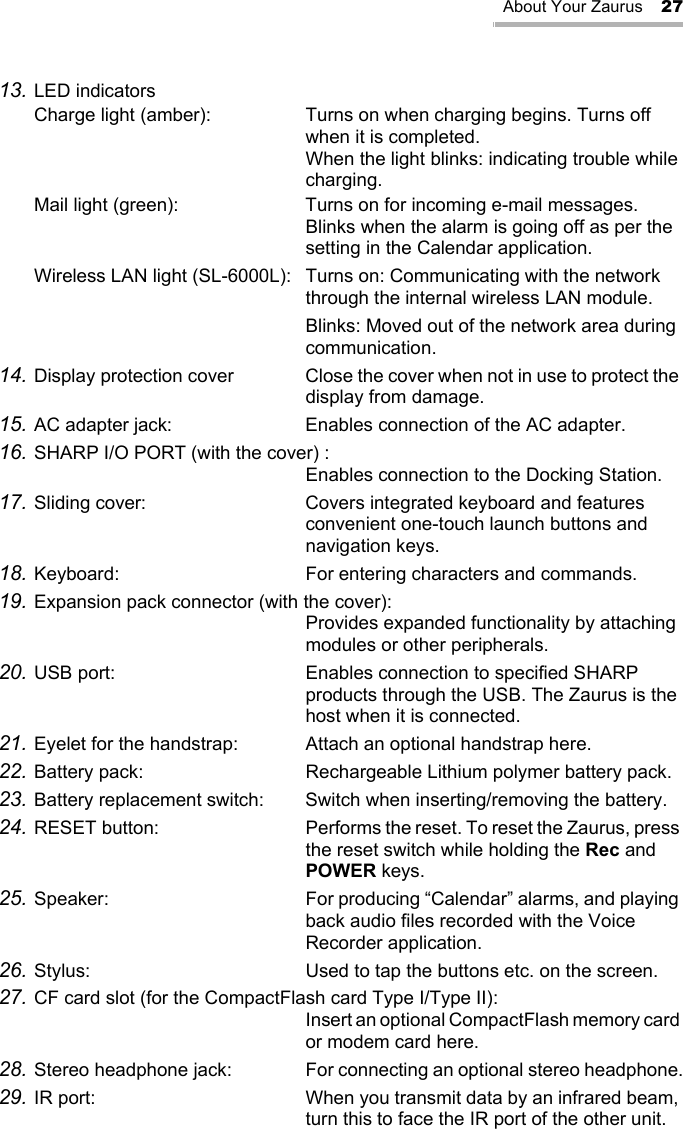
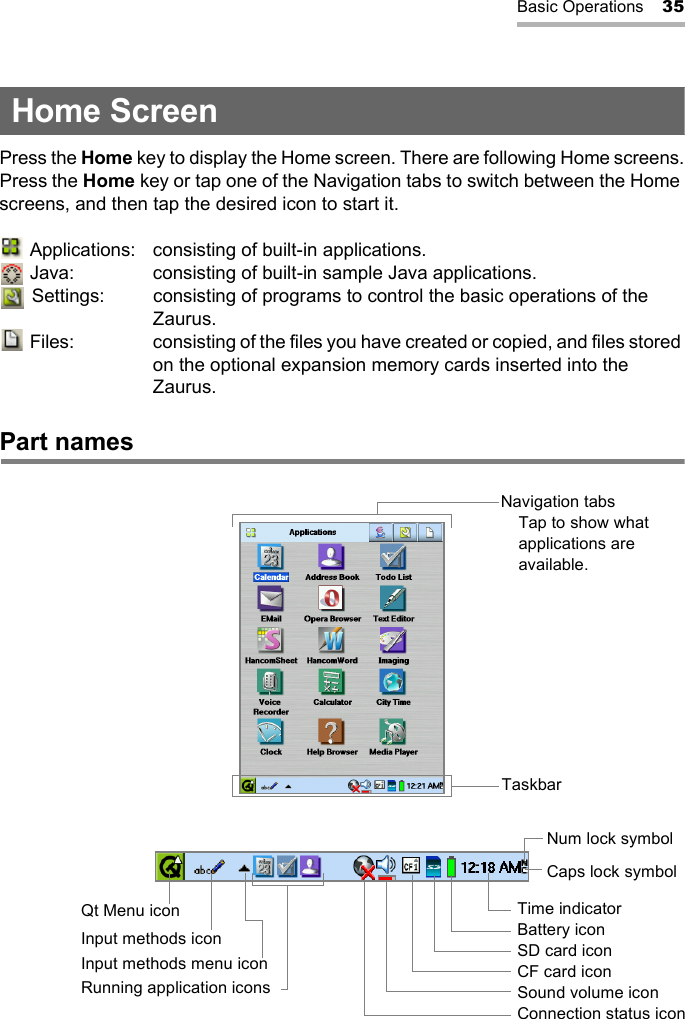
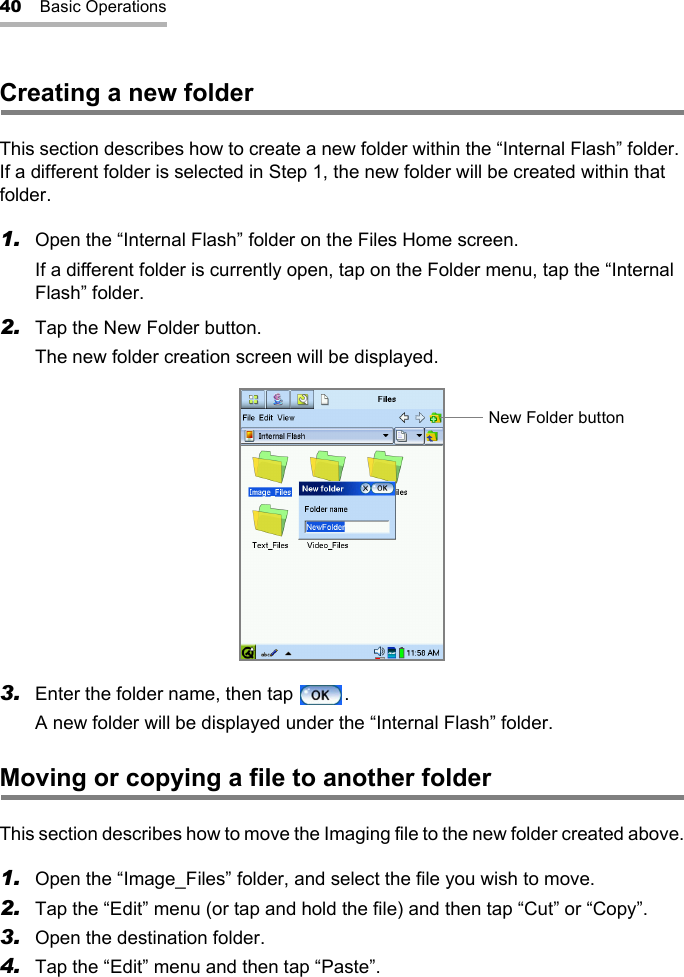
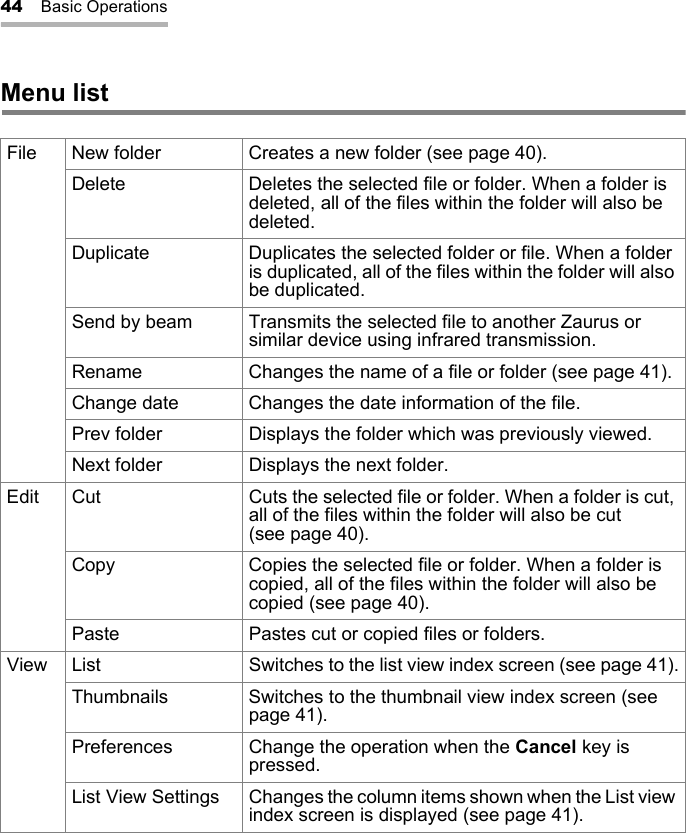
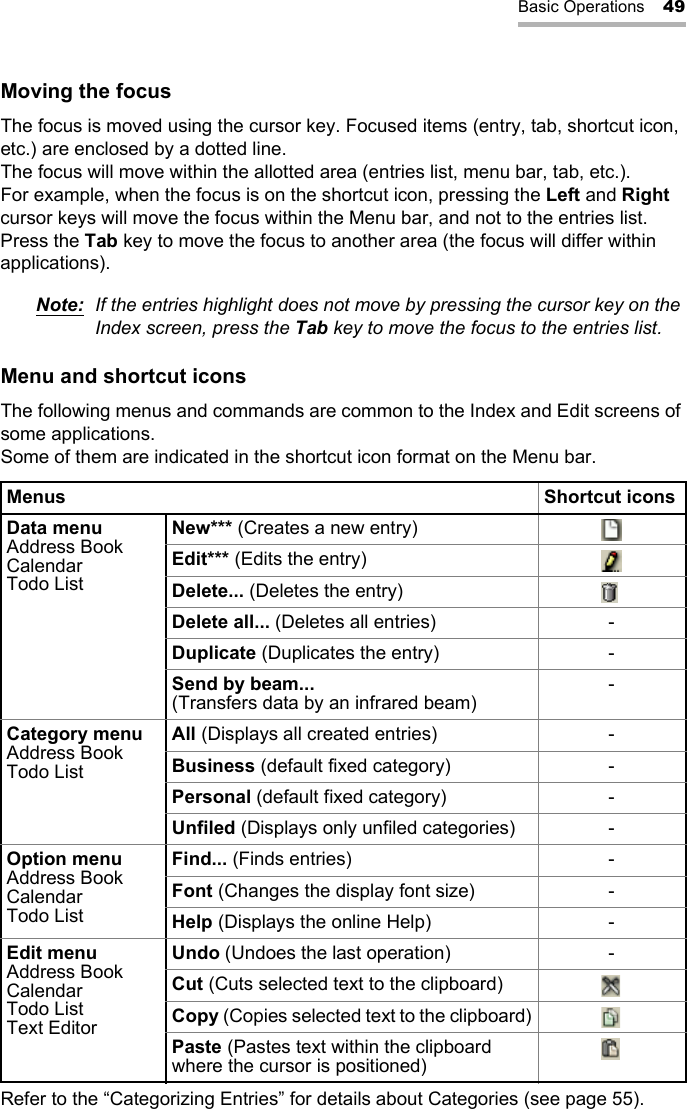
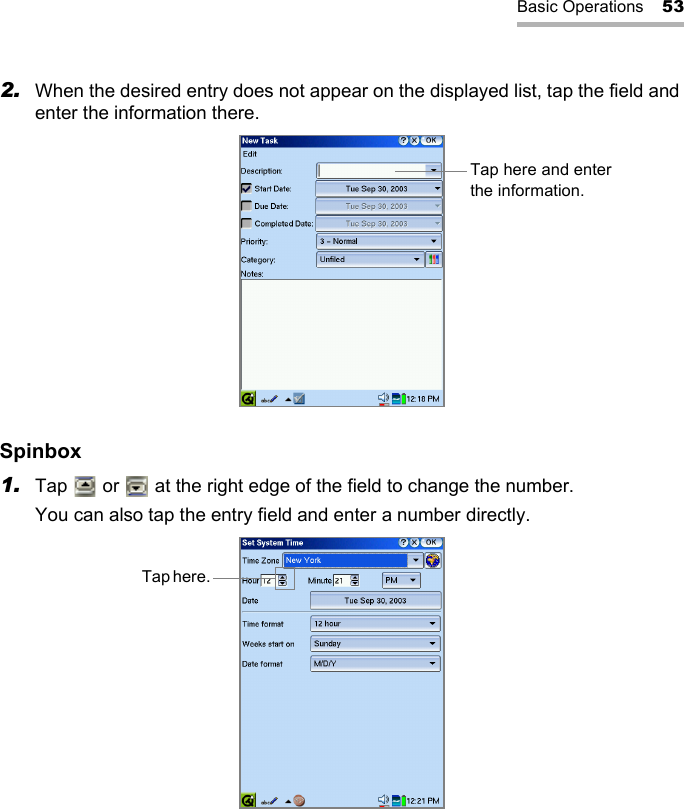
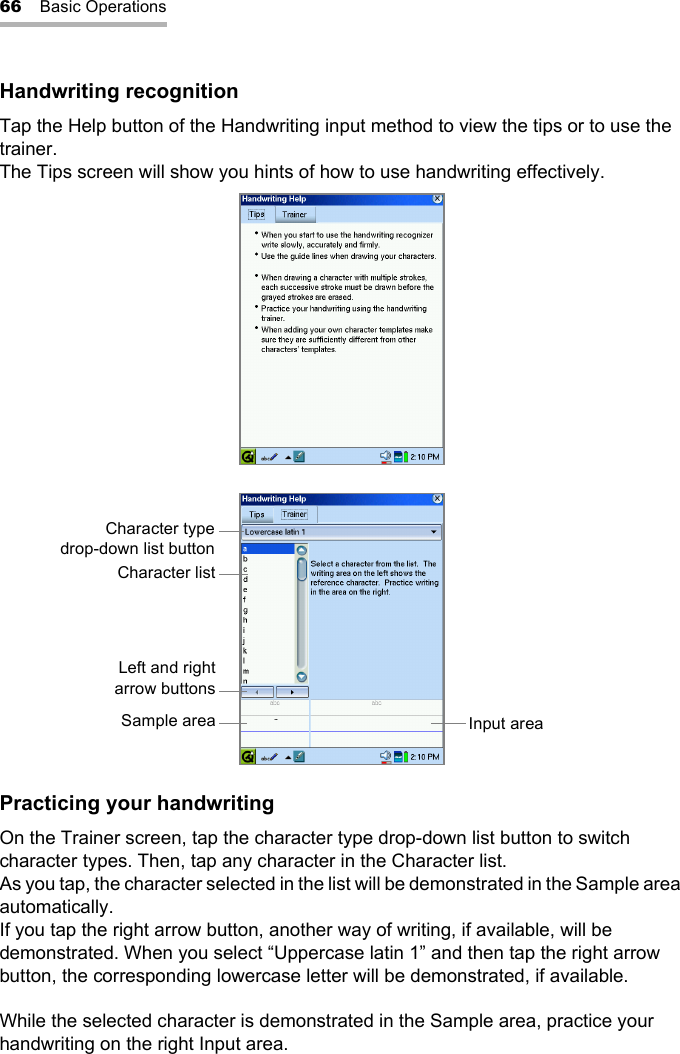
![72 Basic OperationsPickboard bottom rowTapping letter groups will enter words.The Pickboard will present a list of letters and words at the top of the input area.If the word you intend to type appears, tap it to insert it.For example, to enter the word “hotel”, tap the GHI group (for “h”), then the MNO group (for “o”), then the STU group (for “t”), then the DEF group (for “e”), then the JKL group (for “l”). At this point the word “hotel” will appear; tap the word to enter it.Pickboard menuAt the right of the pickboard is a pop-up menu button which offers an Add word option and a Reset option. Use this menu if you were not able to find your word.To add a word, tap each letter of the word in the letter groups in turn, then tap the pop-up menu button and tap “Add...”.To cancel selecting the letter group(s), tap the pop-up menu button and then tap “Reset”.This will pop up the Add dialog which will present a list of letters.To switch between upper and lower case letter, tap a letter button again. The key-top indication will switch between upper and lower case.Tap the letter buttons to compose your word, then tap to add your word to the dictionary.Letter buttonsExample of selecting[“PQR” → “GHI” → “JKL” → “MNO”]](https://usermanual.wiki/Sharp/NAR0052/User-Guide-381531-Page-74.png)