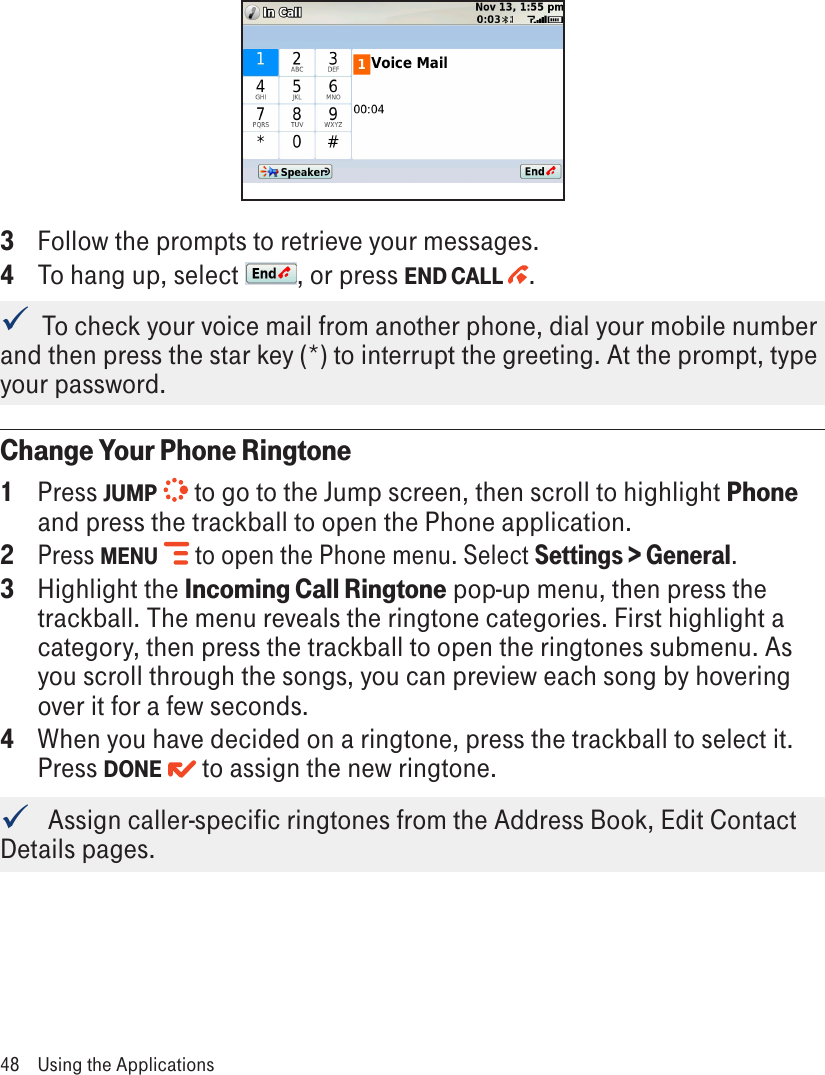
Sharp NAR0065 WCDMA/GSM Mobile Phone with Bluetooth User Manual Manual 2
Sharp Corporation WCDMA/GSM Mobile Phone with Bluetooth Manual 2
UserManual.wiki
>
Sharp
>
NAR0065 User Manual
>
Manual 2
Contents
1.
Manual 1
2.
Manual 2
3.
Manual 3
Manual 2
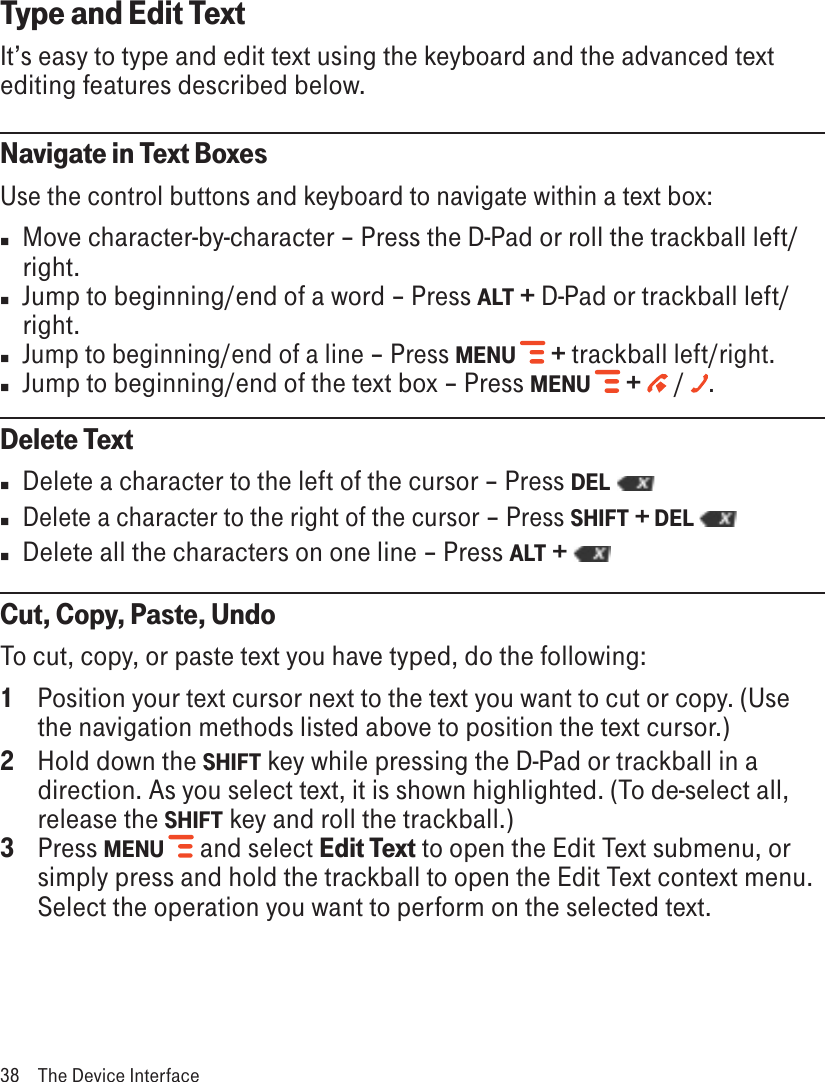
Navigation menu
Upload a User Manual
Namespaces
Wiki Guide
HTML
PDF
Info
Views
User Manual
Discussion / Help
Navigation
![Quick FindTo search for an item on your device (such as a contact, message, note, task, event, song, photo, or video), use the Quick Find dialog. Note that for email and MMS messages, the To, CC, From, Date, and Subject fields are searched, not the message bodies.1 From the Jump screen, press MENU and select Quick Find.2 Type the name of the item or a date into the text field. You can use an asterisk (*) as a wildcard. (To read more about acceptable formats for the find field, press MENU then select Tips.) As you type, the search begins. 3 When the search is complete, you’ll see the results grouped by application in tabs. Press the D-Pad left/right to navigate tabs; roll the trackball up/down to highlight individual results.4 To open an item, highlight and select the item using the trackball. To discard an item, press MENU and select Discard [ + ]. Note that if you discard an item in the find results field, it is moved to the relevant application’s trash.5 To clear the find matches, press CANCEL . To dismiss the Quick Find dialog box, press DONE . The find results will be saved if you did not explicitly clear them.Empty TrashEmptying trash is a good way to make more room on your device if you are running out of storage space. You can empty trash from selected applications or all applications by using this dialog box:1 From the Jump screen, press MENU and select Empty Trash. 2 On the Empty Trash dialog box, check the applications whose trash you want to empty, or check All Applications. ! Once you select the Empty Trash button, all the items selected to be trashed are permanently discarded without confirmation. The Device Interface 37](https://usermanual.wiki/Sharp/NAR0065.Manual-2/User-Guide-1092709-Page-12.png)