Sharp NAR0074 GSM/UMTS Phone with Bluetooth/WiFi User Manual M7 Chateau AT T EN 110218
Sharp Corporation GSM/UMTS Phone with Bluetooth/WiFi M7 Chateau AT T EN 110218
UserManual.wiki
>
Sharp
>
NAR0074 User Manual
>
user manual
Contents
1.
user manual
2.
User Manual
user manual
Navigation menu
Upload a User Manual
Namespaces
Wiki Guide
HTML
PDF
Info
Views
User Manual
Discussion / Help
Navigation

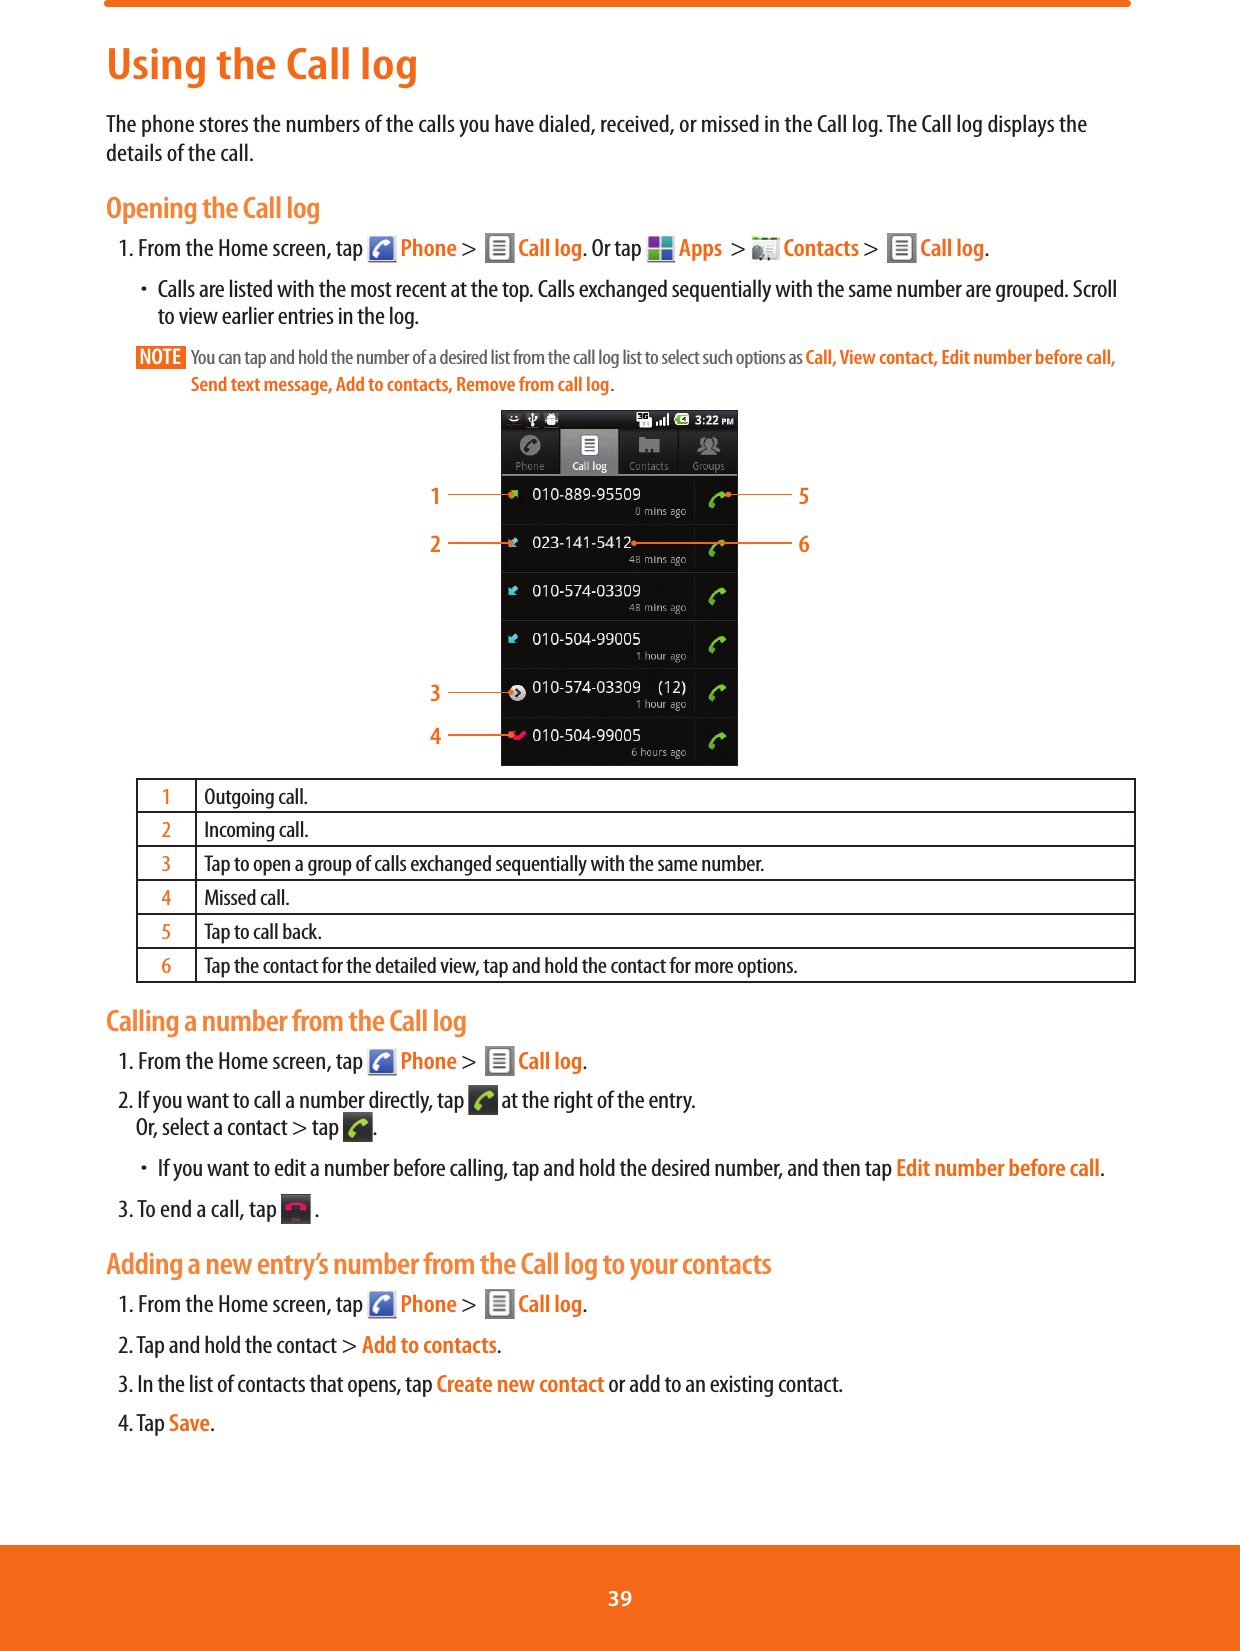
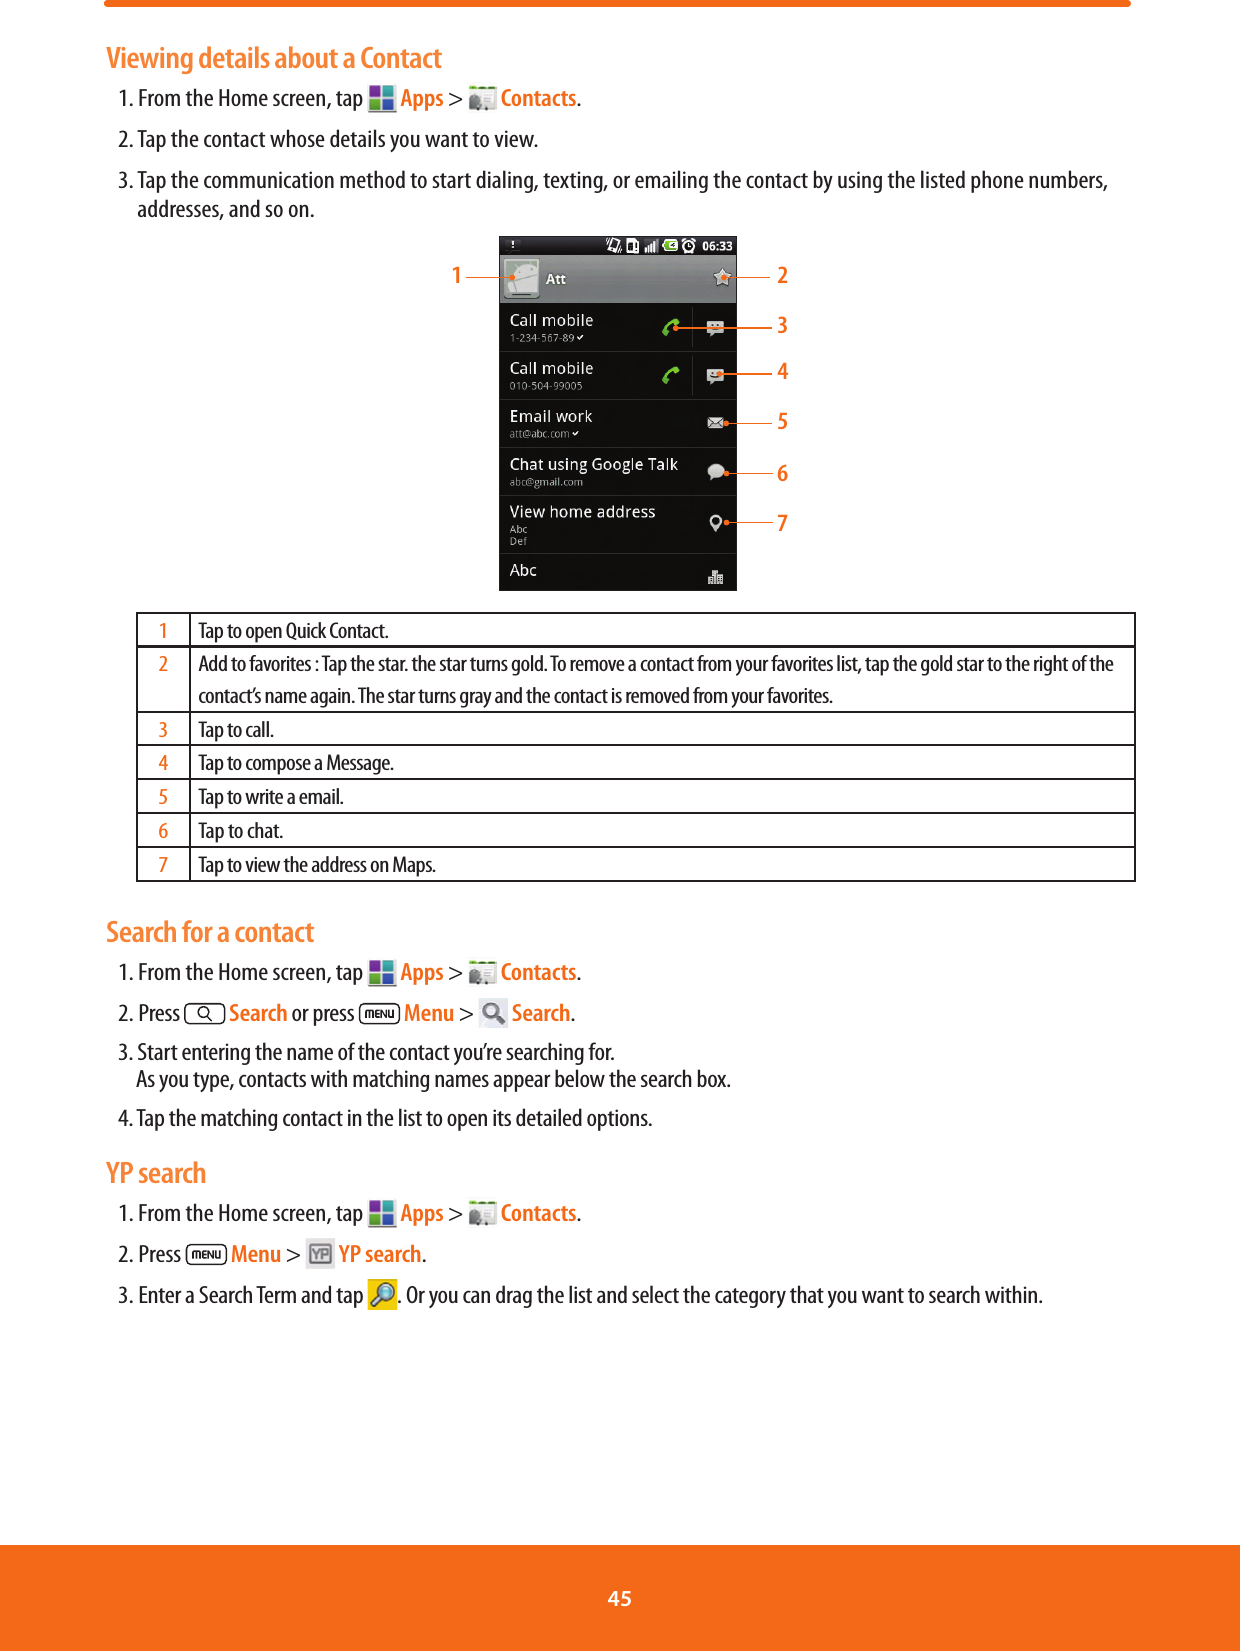
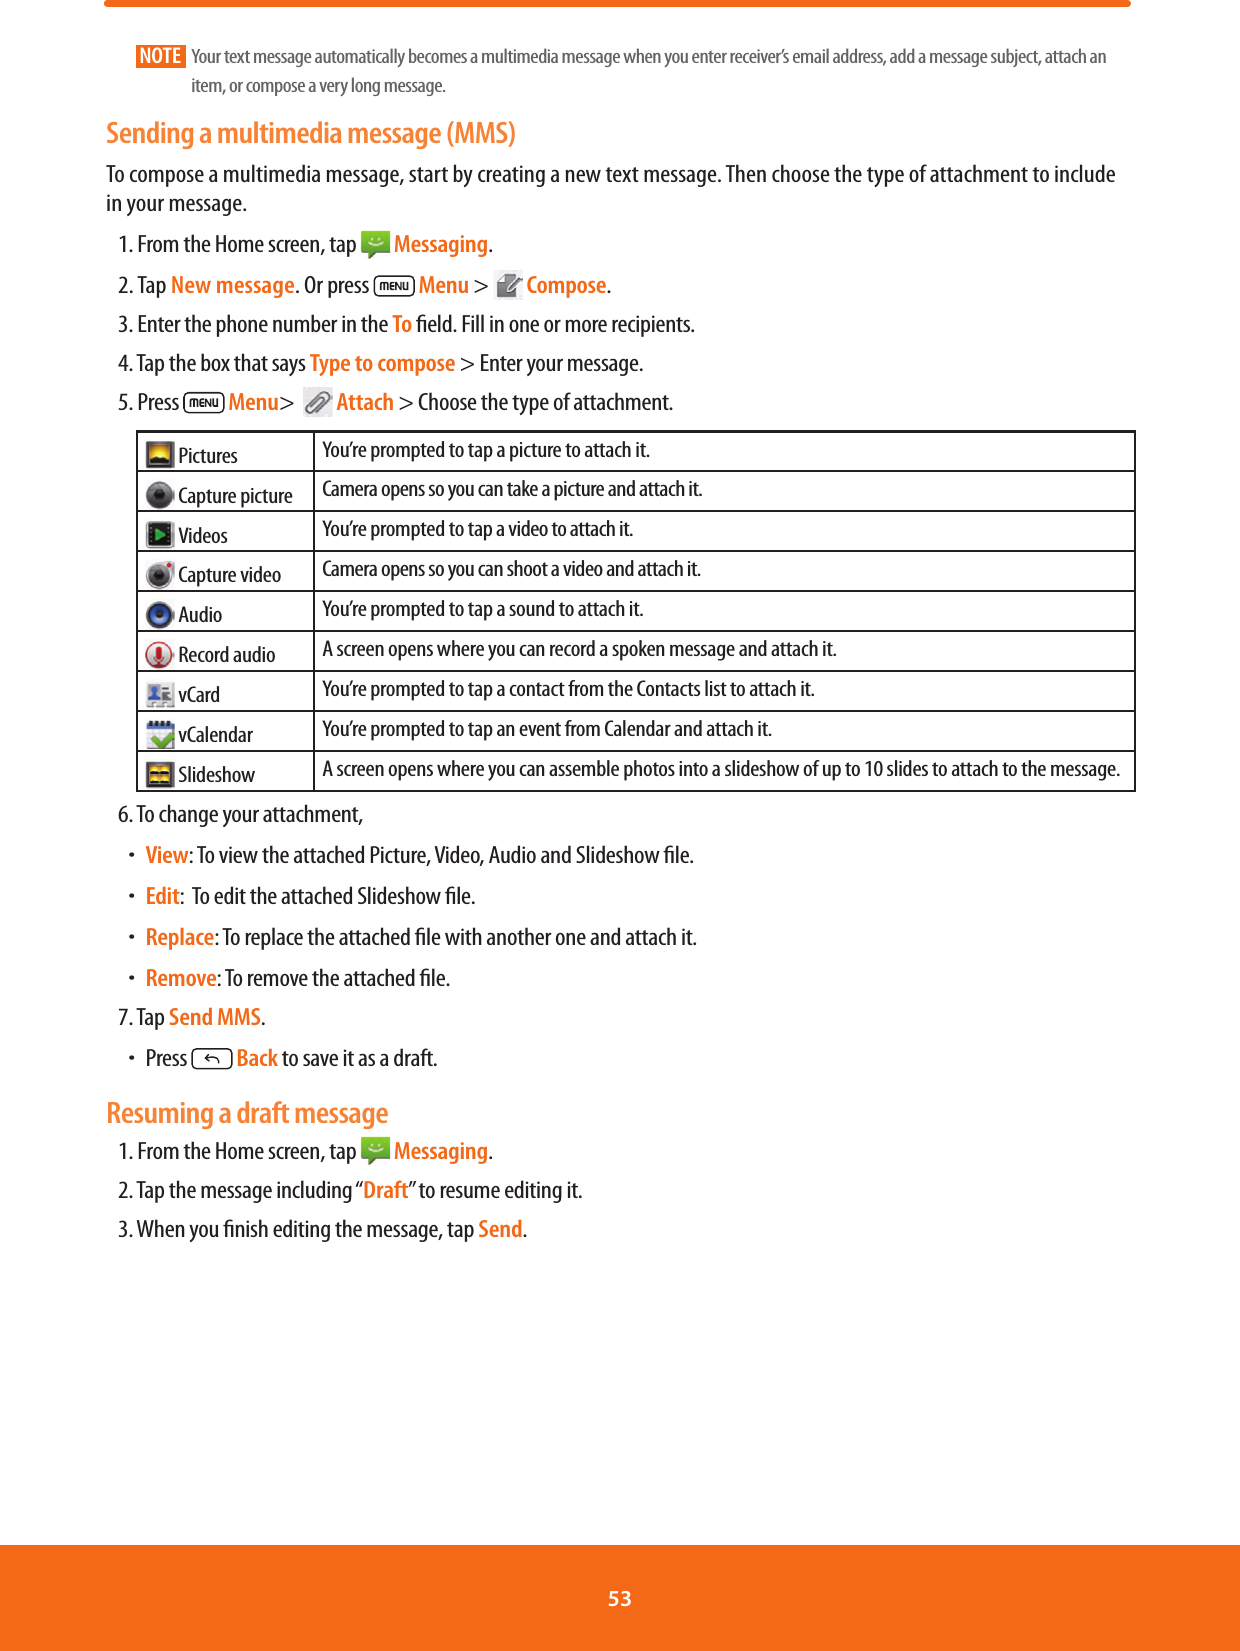
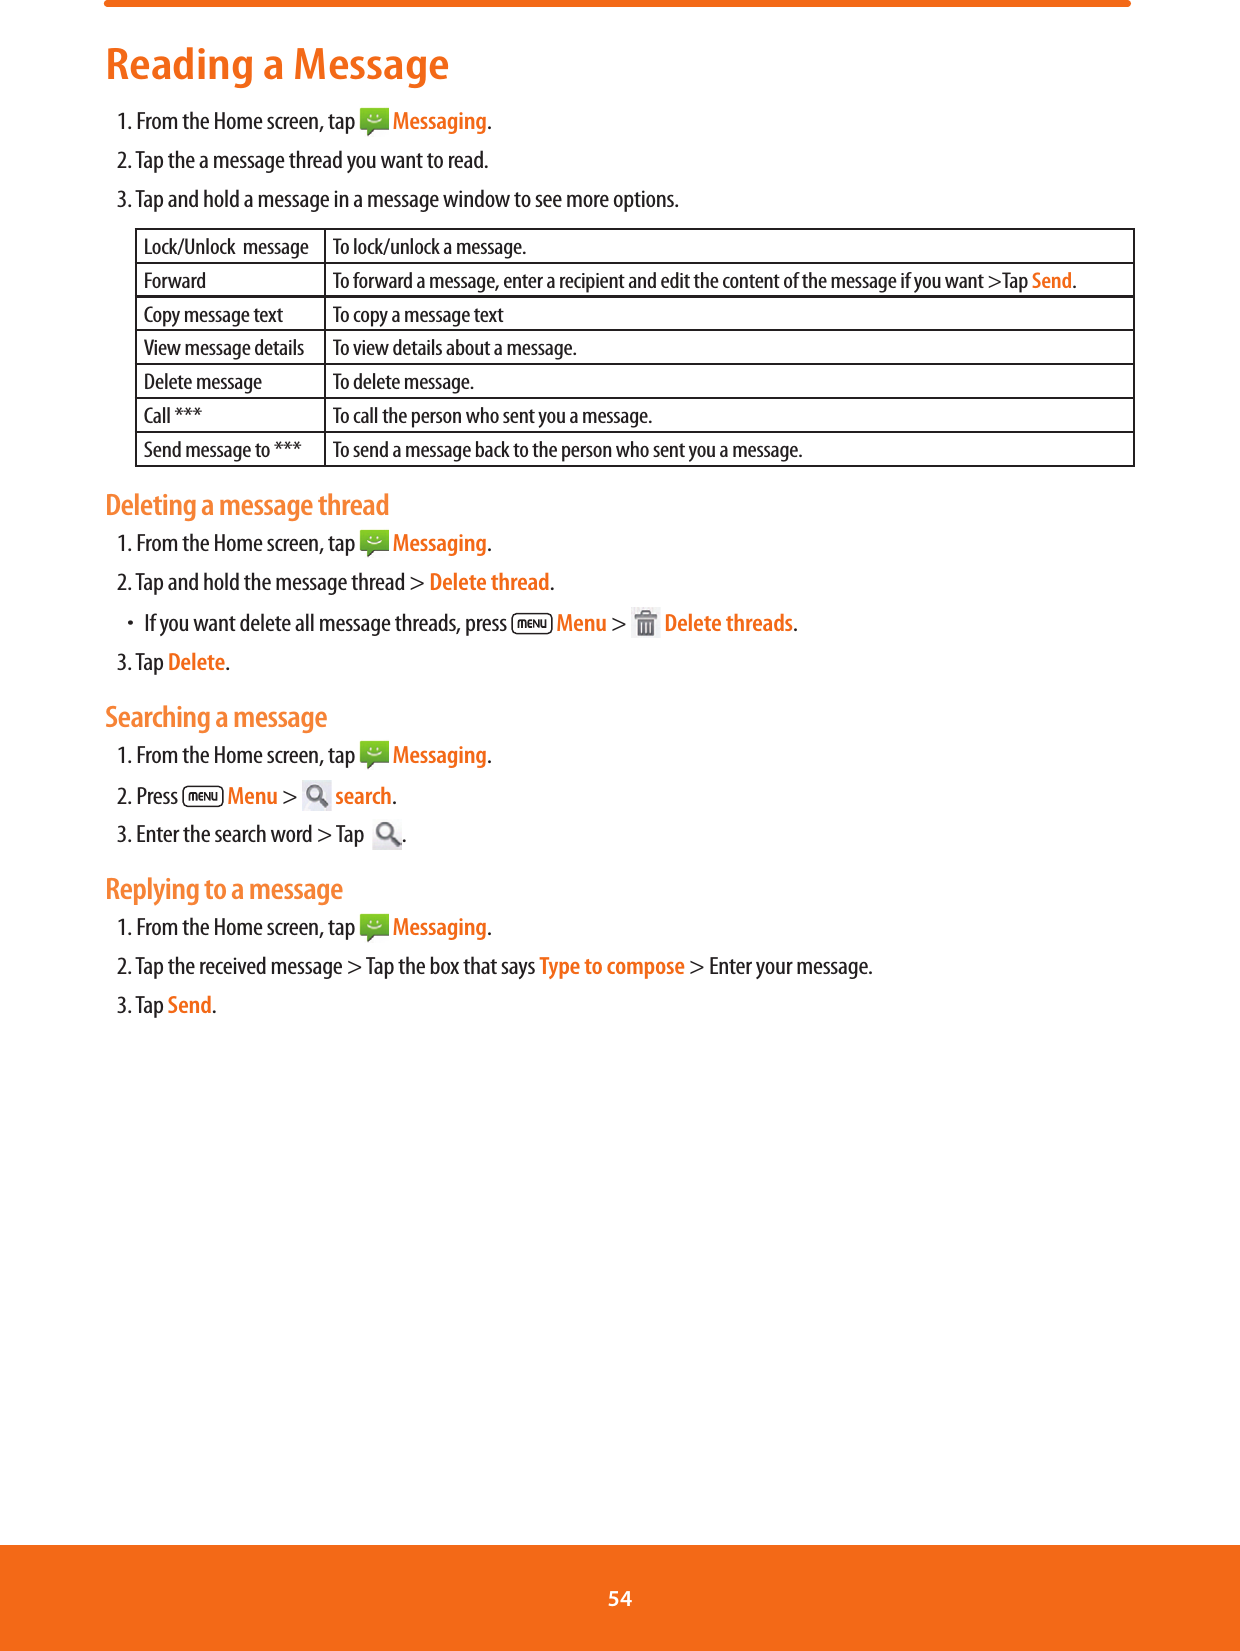
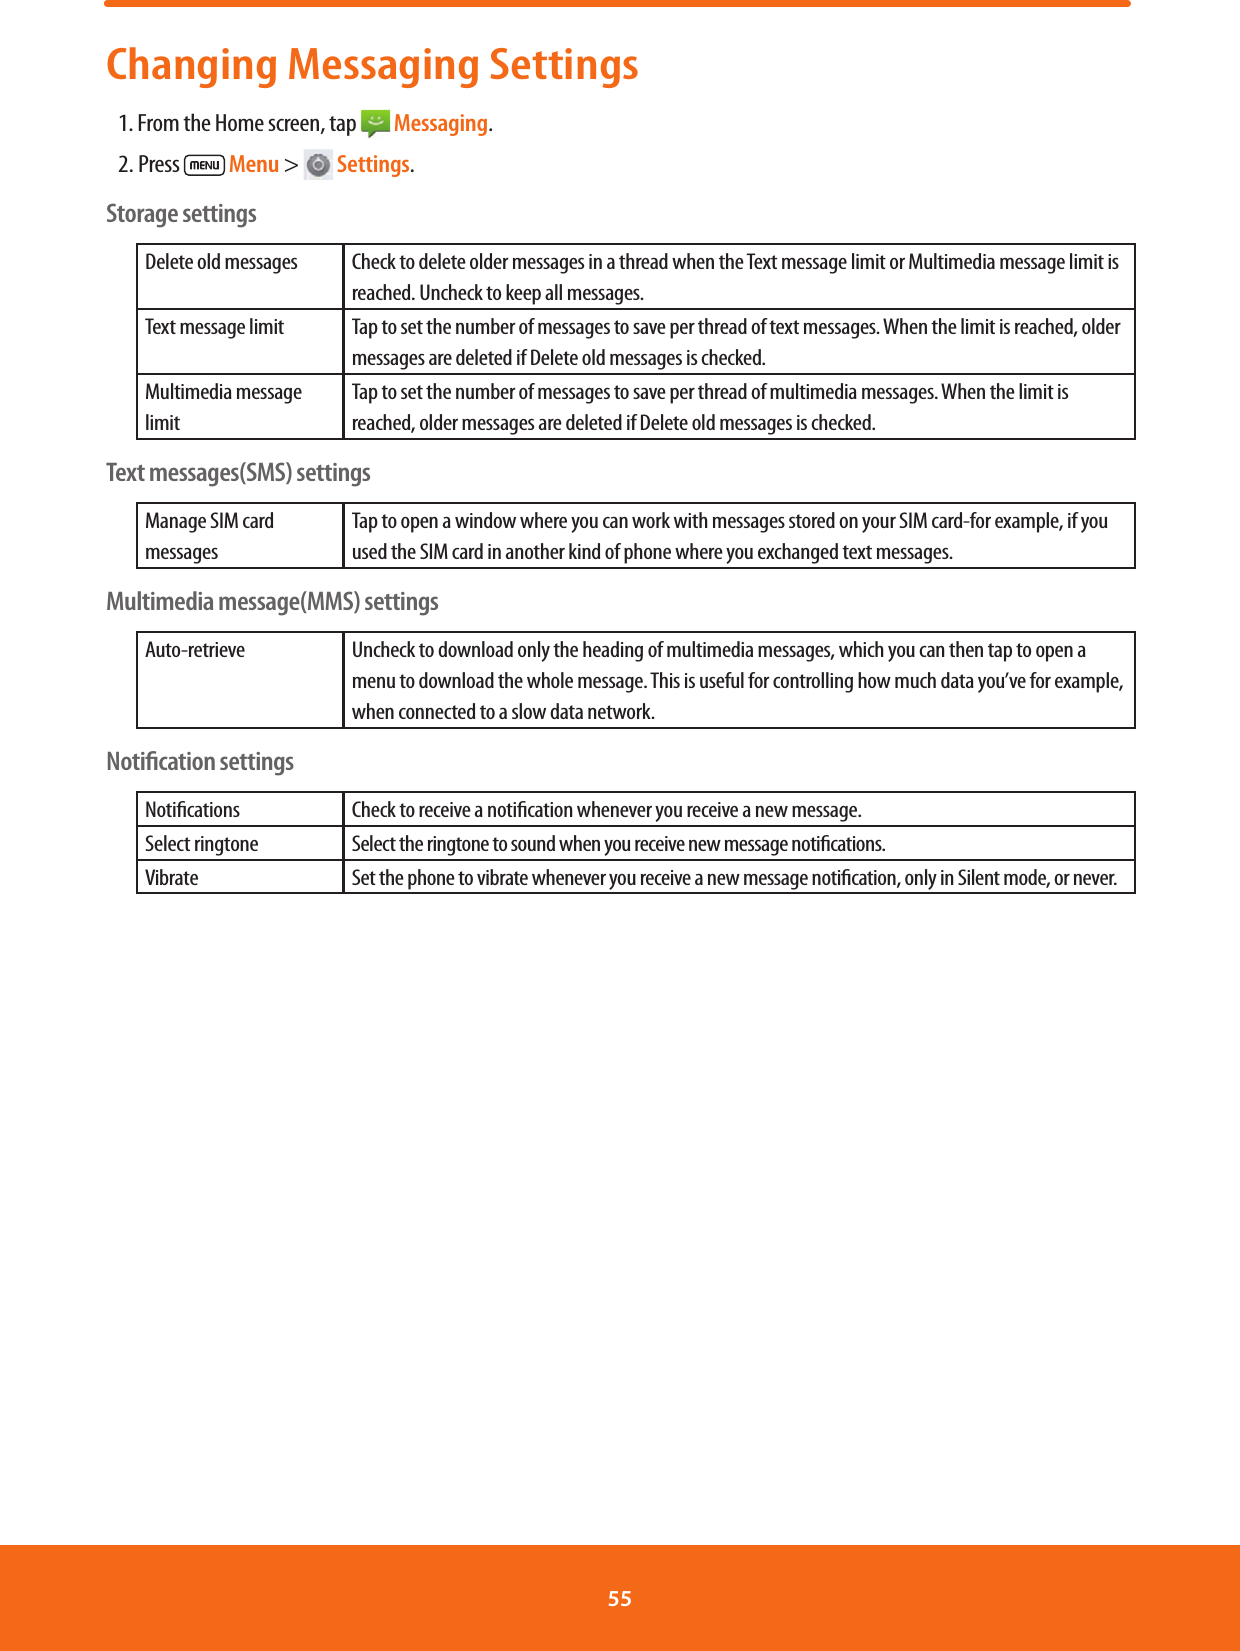
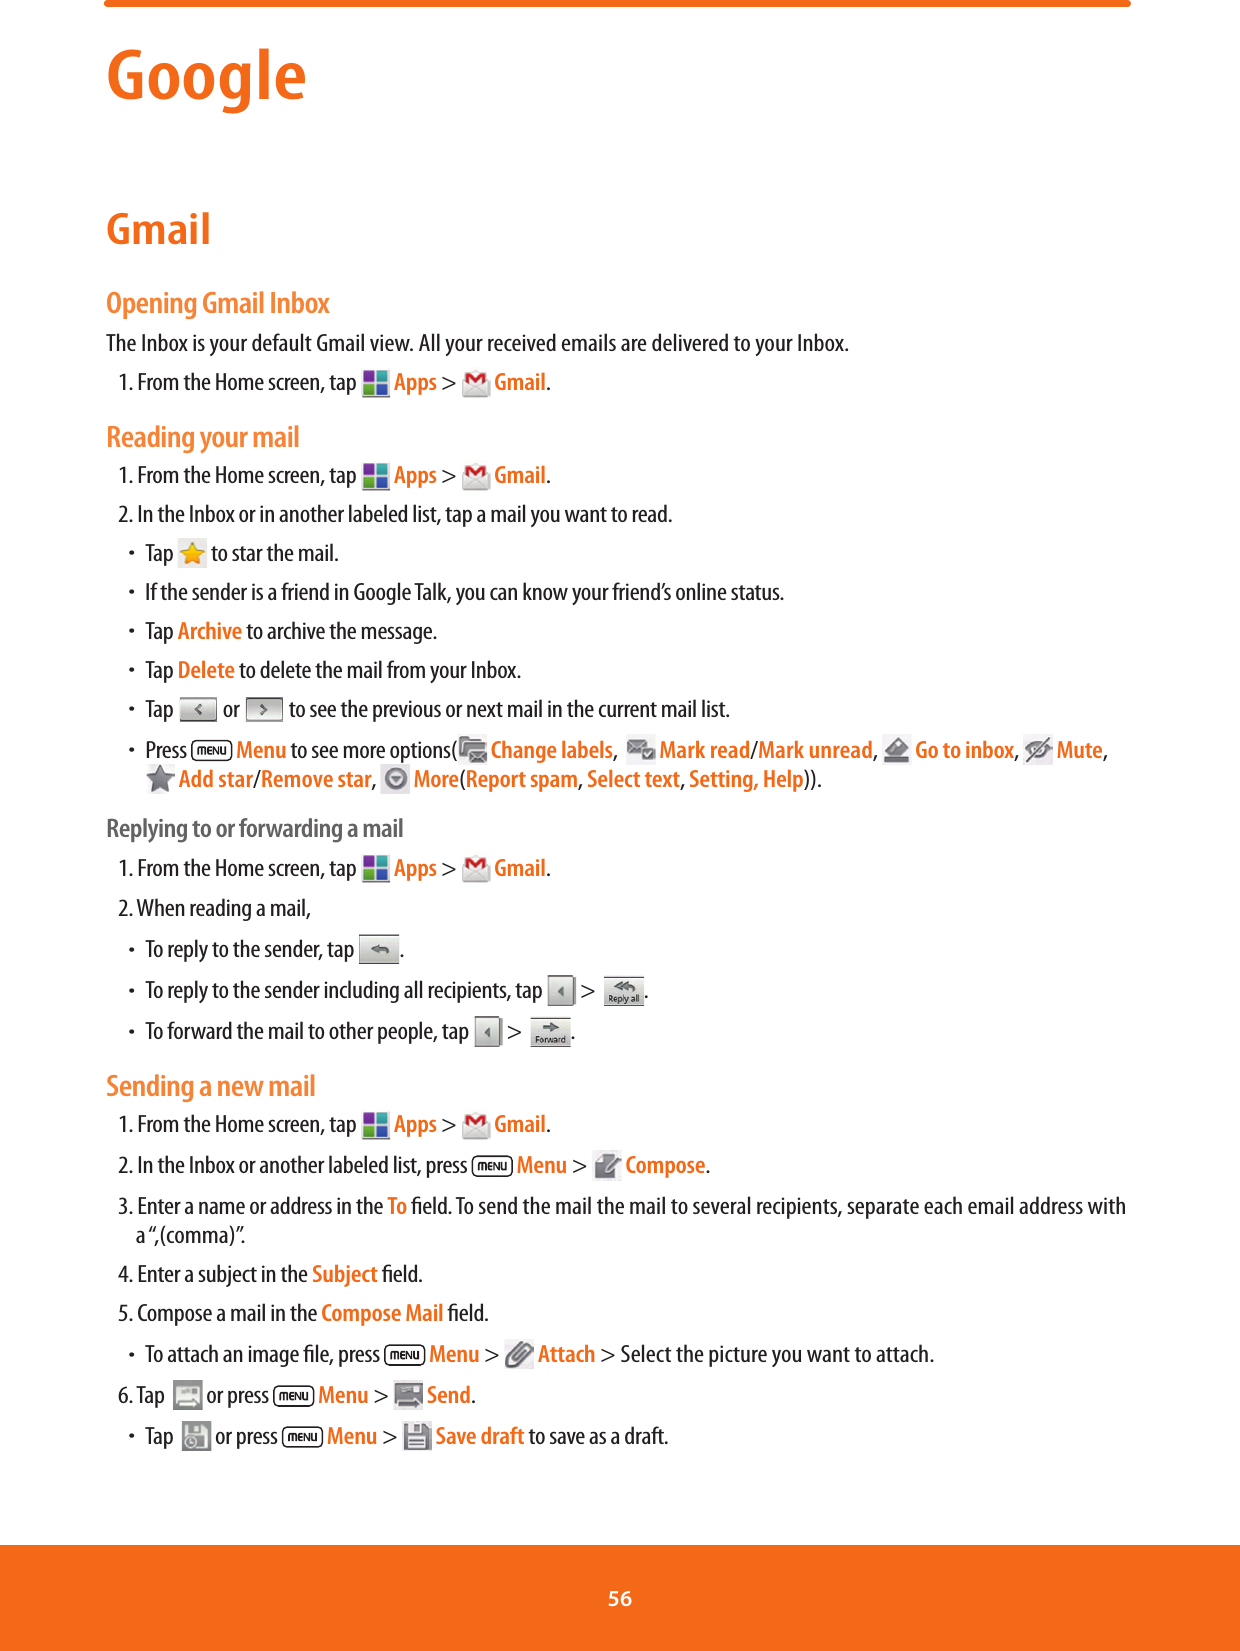
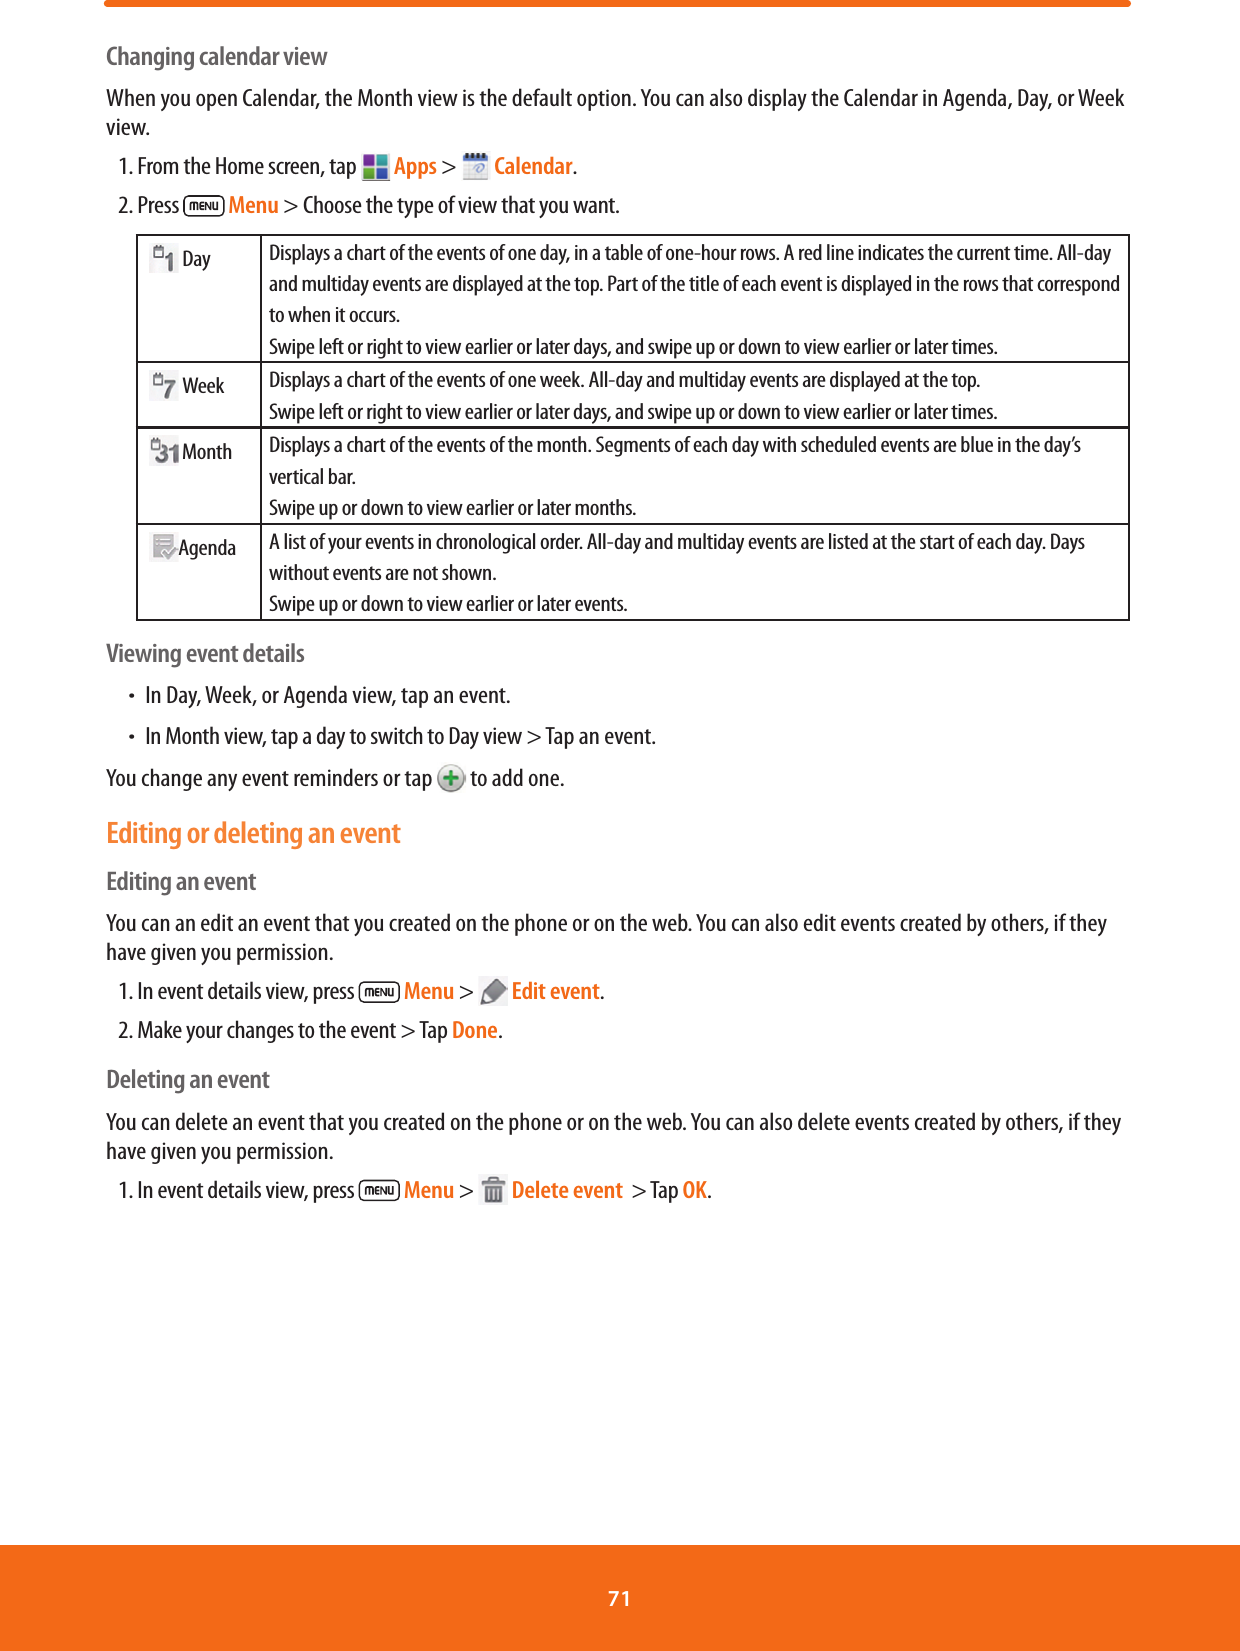
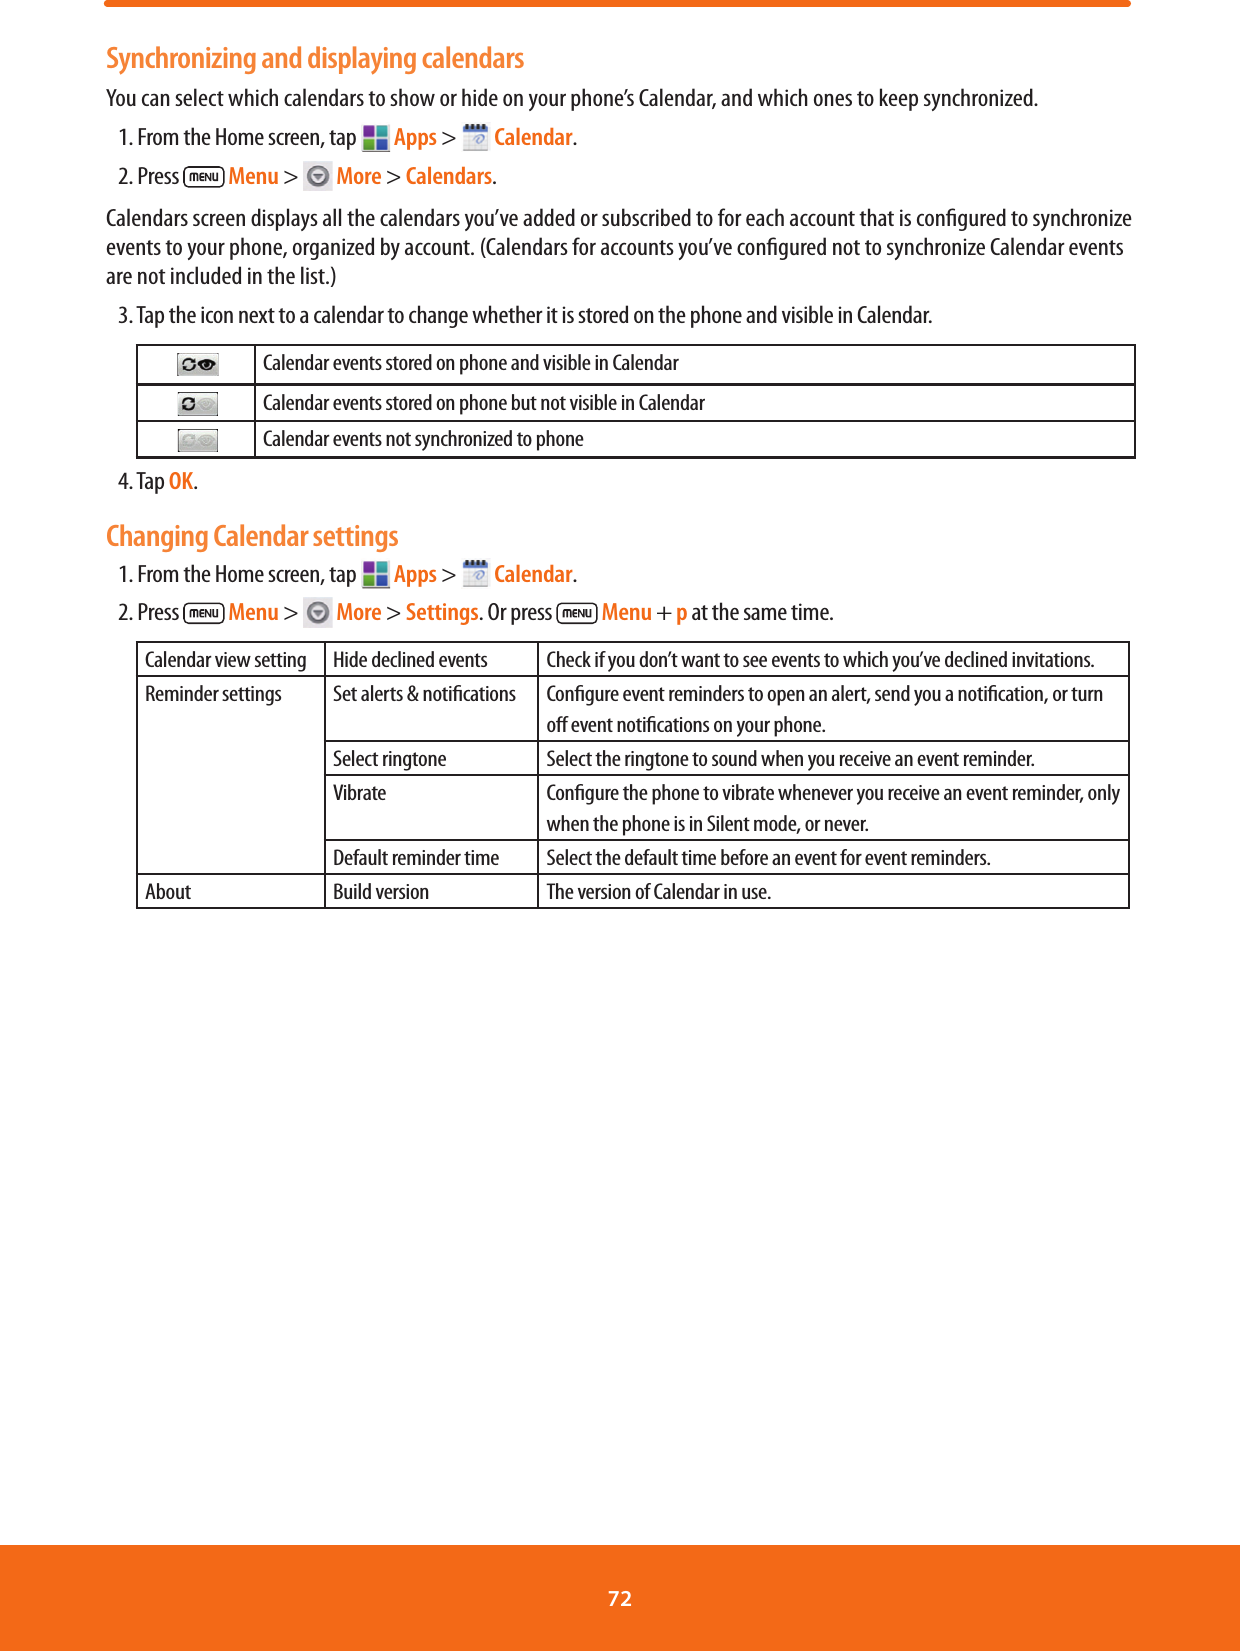
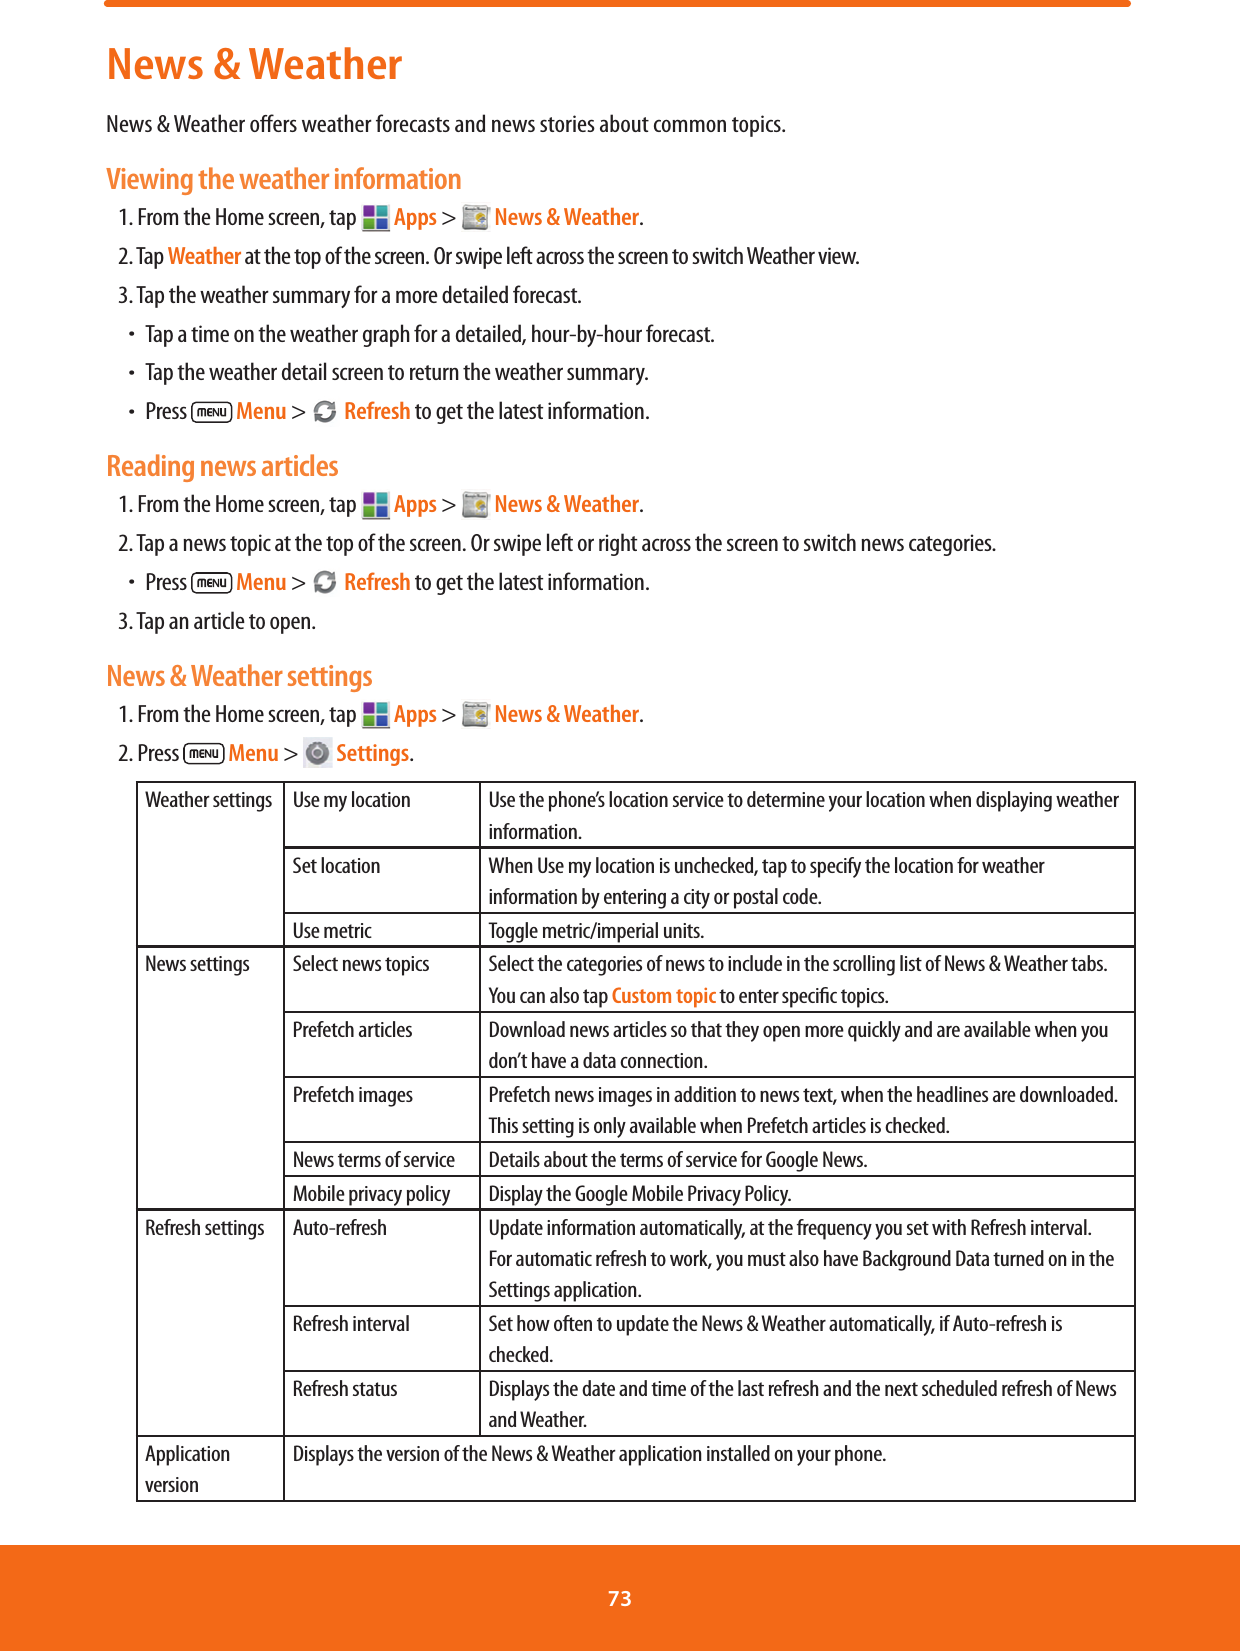
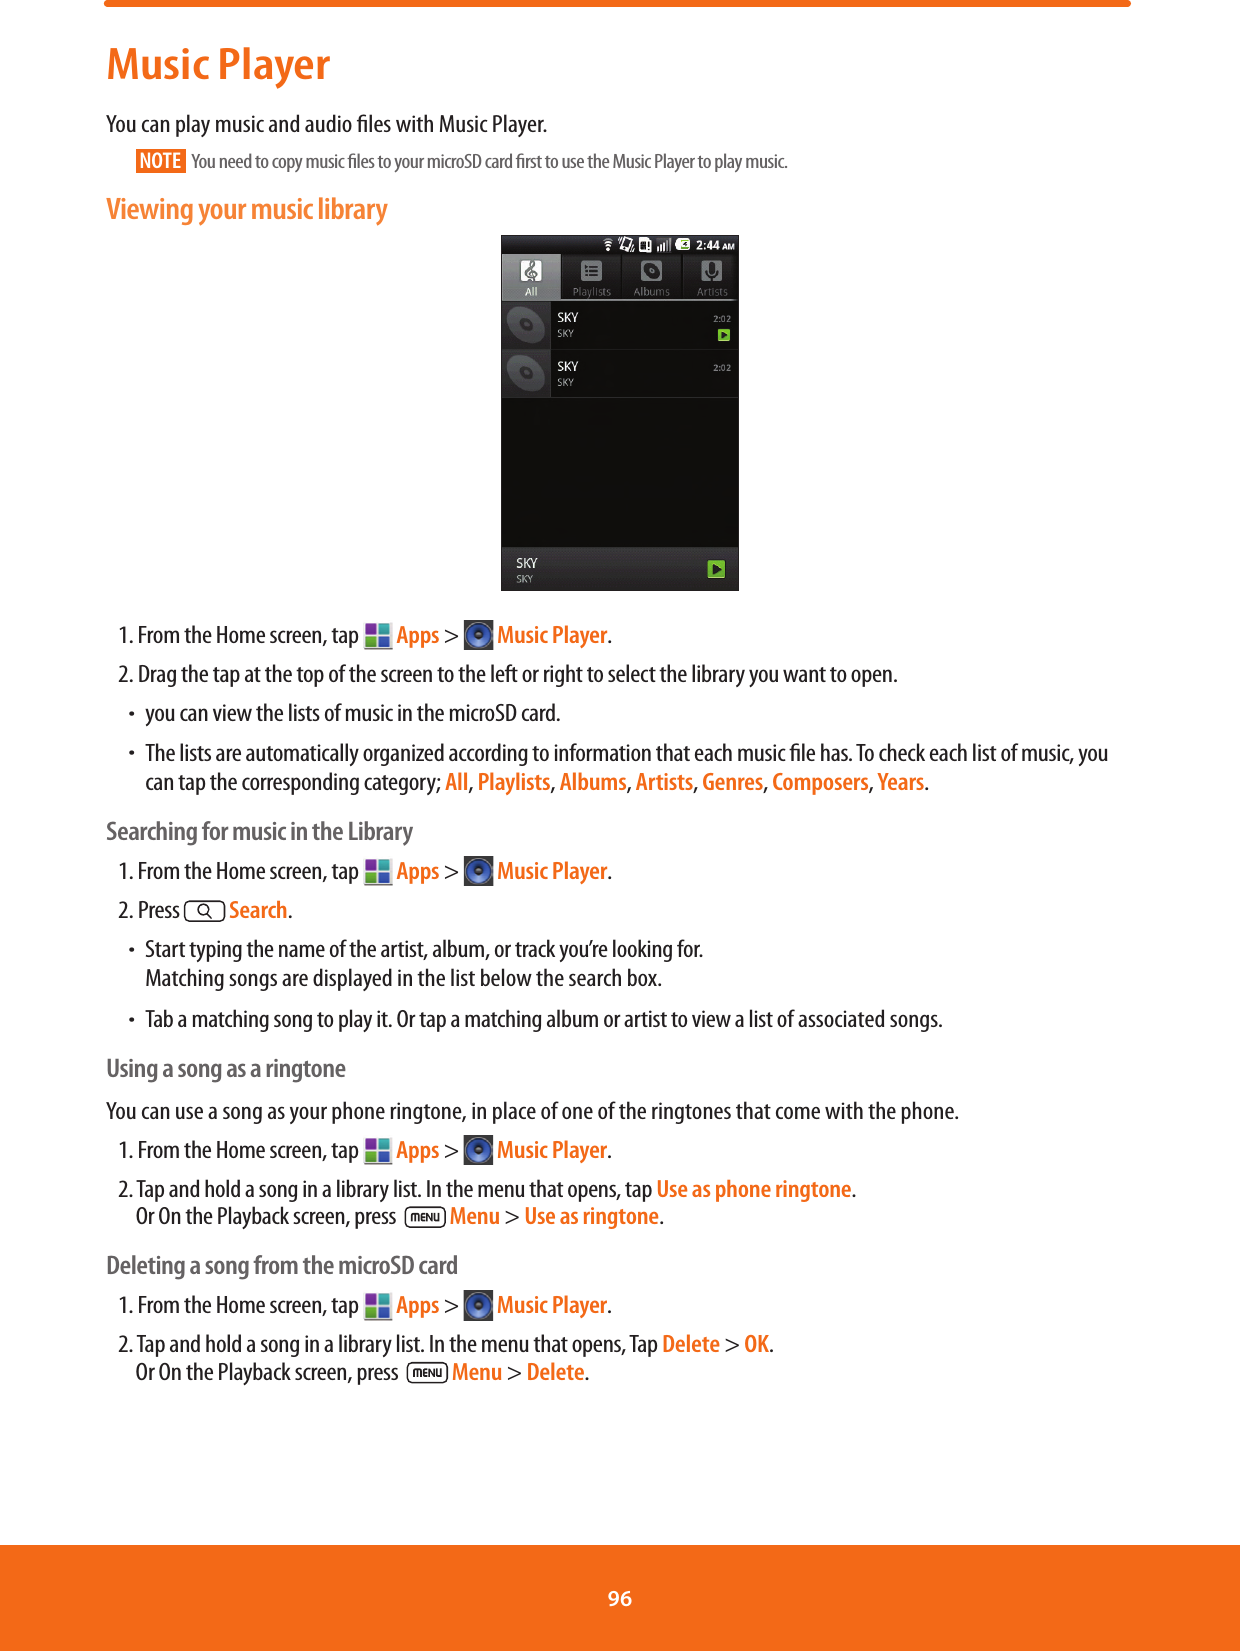
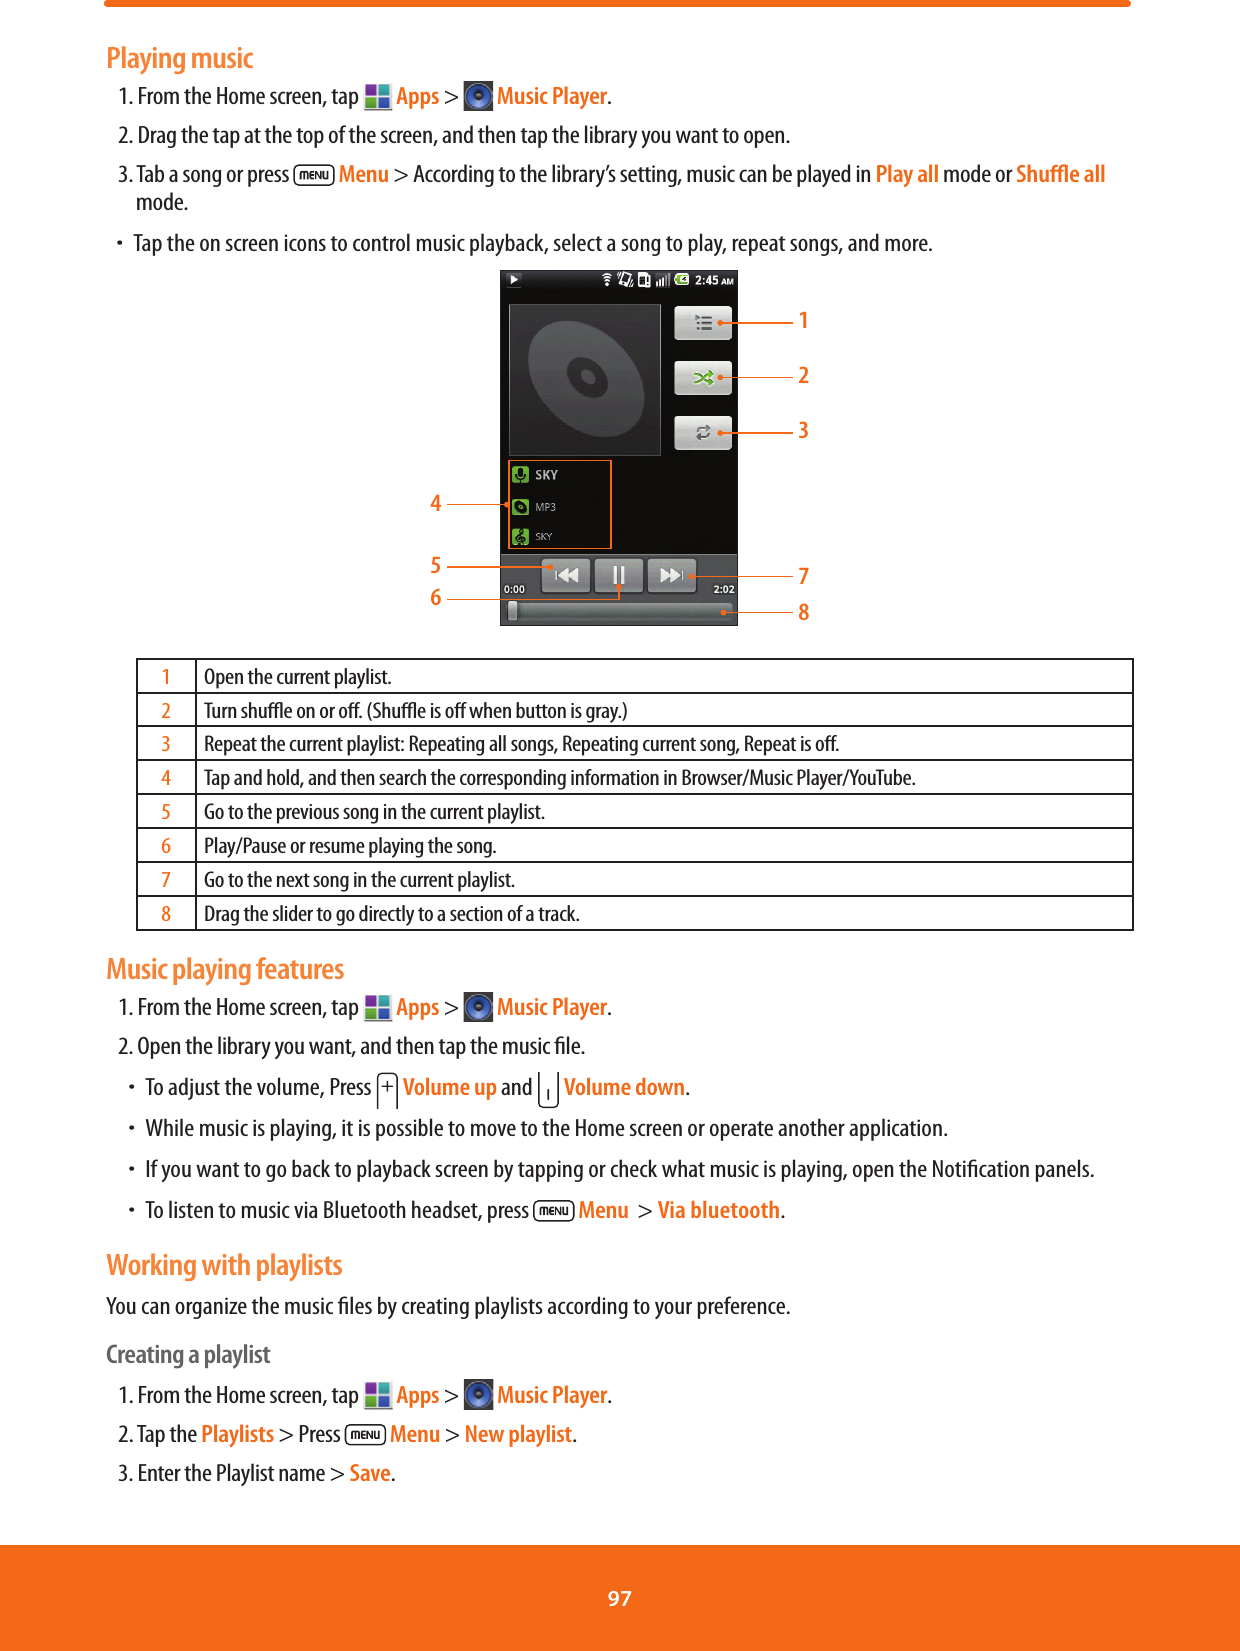
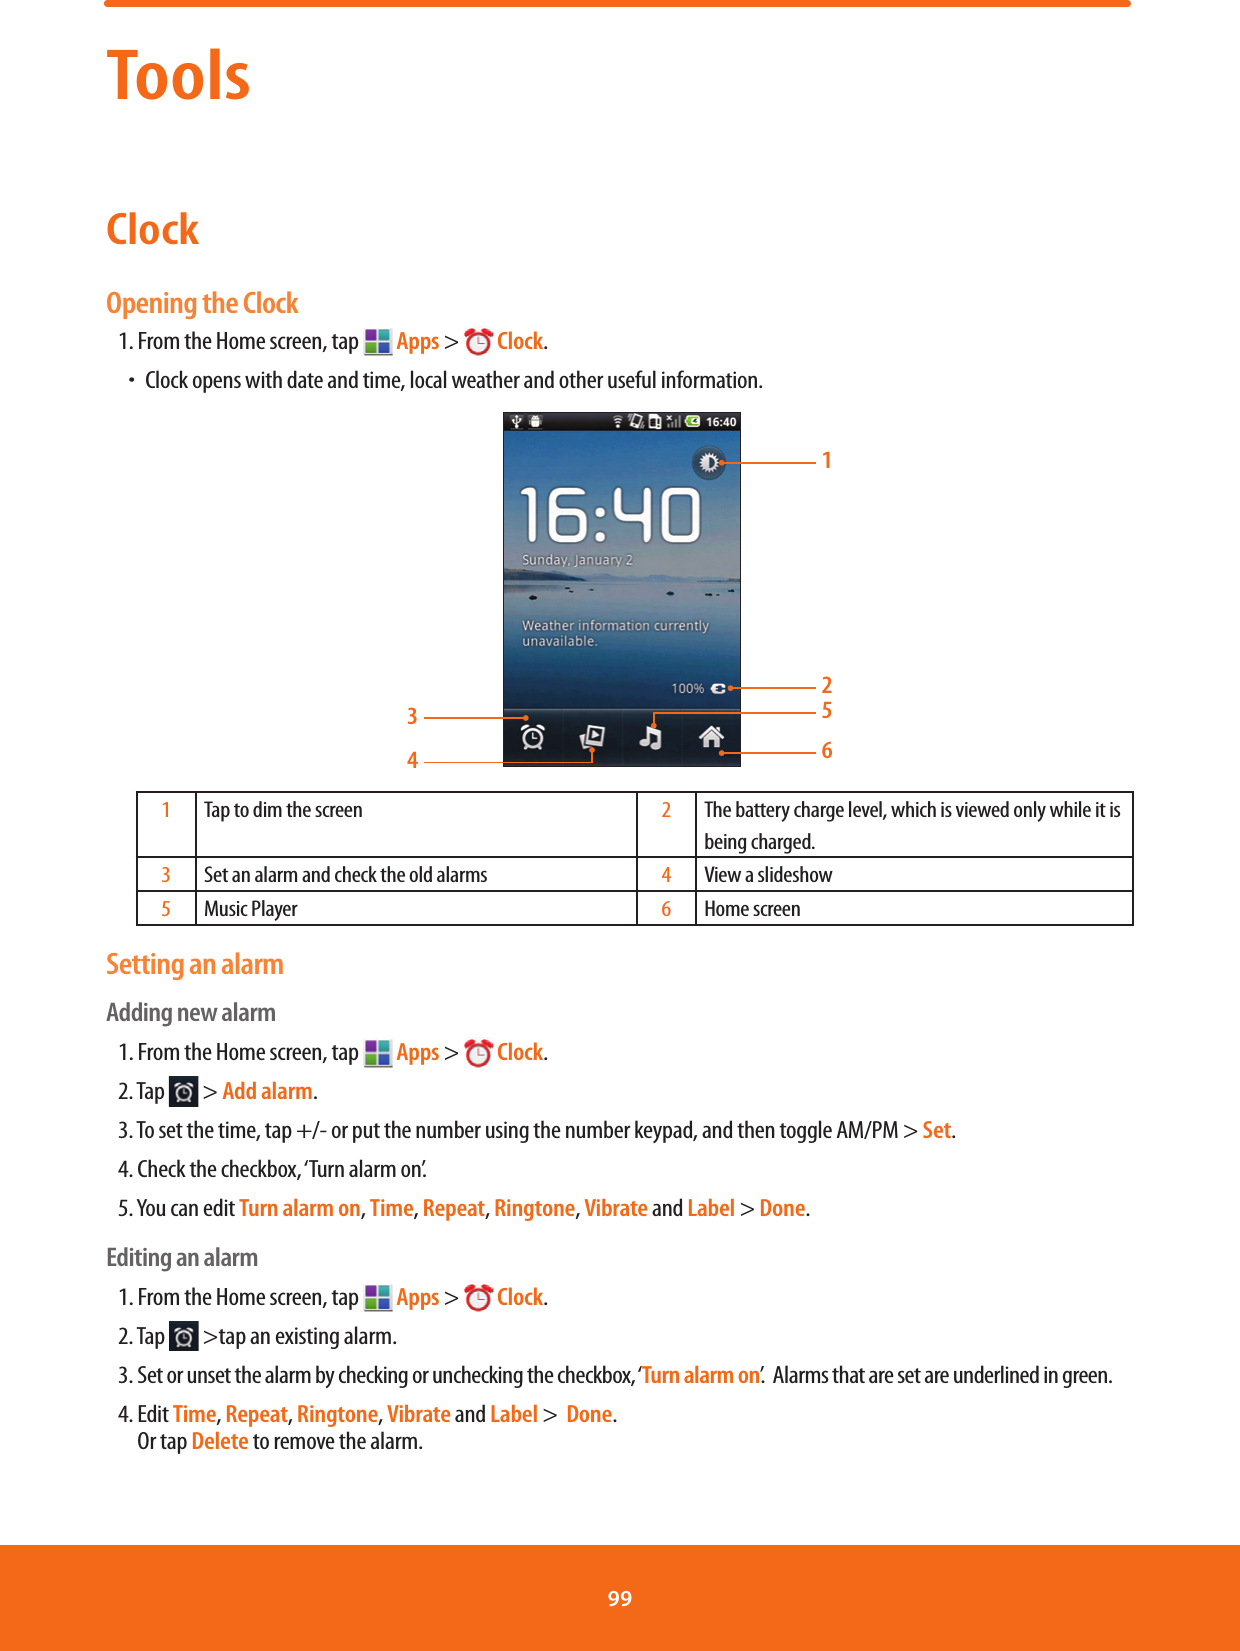
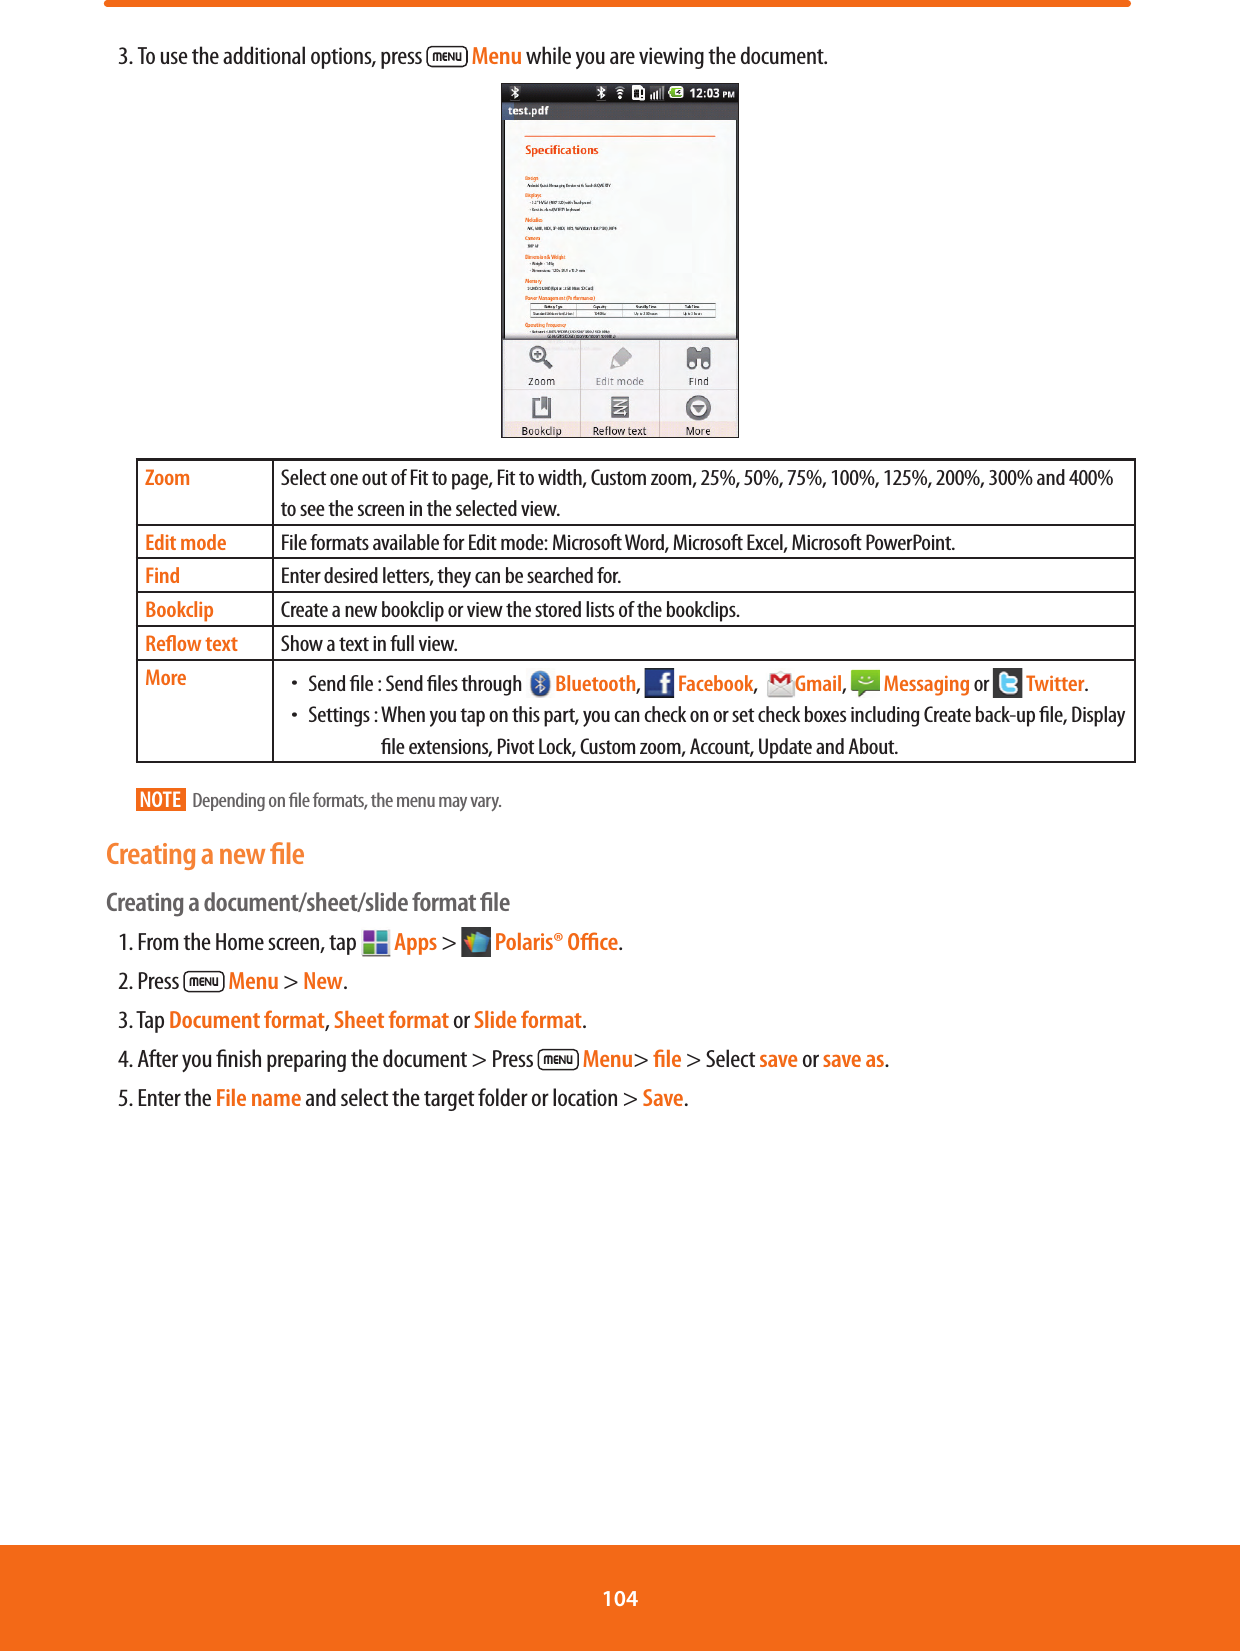
![Specifications DesignAndroid Quick Messaging Device with Touch & QWERTYDisplays3.2” HVGA (480*320)MelodiesAAC, AMR, MIDI, SP-MIDI, MP3, WAV(8bit/16bit PCM), MP4Camera3MP AFDimensions & WeightħDimensions : 120 x 59.9 x 13.9 mm ħWeight : 145gMemory512MB/512MB [External : 2GB microSD Card]Power Management (Performance)Battery Type Capacity Standby Time Talk TimeStandard Lithium-lon(Li-ion) 1240mA Up to 250 hours Up to 3 hoursOperating FrequencyħNetwork : UMTS/HSDPA (850/900/1800/1900 MHz) UMTS/HSDPA(850/900/2100 MHz) Wi-Fi(802.11 b/g/n)ħData Speed : HSDPA 7.2Mbps / HSUPA 2MbpsOperation SystemħAndroid OS 2.2 (Froyo) I/Fħmicro SD card slot, Micro USB, 3.5mm headset jack, Bluetooth 2.1//Wi-Fi (802.11b/g/n), A-GPS, Accelerometer, light sensor, E-Compass, proximity sensor6](https://usermanual.wiki/Sharp/NAR0074.user-manual/User-Guide-1430688-Page-6.png)