Sharp T60H713 802.11b/g MiniPCI module User Manual 399436
Sharp Corporation 802.11b/g MiniPCI module 399436
Sharp >
Contents
- 1. Host PC users manual
- 2. users manual
users manual

802.11g Mini PCI
User Manual
T60H713

Chapter 1 About the Wireless MINI PCI ..................................3
1-1 Features .......................................................................... 3
1-2 Applications.................................................................... 3
1-3 Product Kit ....................Error! Bookmark not defined.
Chapter 2 Network Configuring and Planning.......................... 4
2-1 Network Topology.......................................................... 4
2-2 Roaming ......................................................................... 6
Chapter 3 Installation ................................................................7
3-1 System Requirements....Error! Bookmark not defined.
3-2 Inserting the Wireless Card ............................................ 7
3-3 Installation and Uninstall Process .................................. 7
Chapter 4 Wireless Utility and Configuration......................... 14
4-1 Windows 98/ME/2000 Wireless Utility........................ 14
4-2 Windows XP Wireless Utility....................................... 18
Appendix A Troubleshooting ................................................. 24
Appendix B Glossary ............................................................. 25
Appendix C Specifications for Wireless Card.................Error!
Bookmark not defined.

Chapter 1 About the Wireless MINI PCI
Windows 98/2000/ME/XP will automatically recognize the wireless MINI PCI and
initiate the installation process. Upon successful installation, the wireless MINI PCI
will communicate seamlessly with other IEEE 802.11g wireless products.
1-1 Features
1. Supports up to 54 Mbps data rate.
2. Supports point-to-point and point-to-multipoint access provides increased
flexibility.
3. Seamless connectivity to wired Ethernet and PC network LAN offers quick,
trouble-free integration with existing networks.
4. Direct Sequence Spread Spectrum (DSSS) technology provides secure wireless
connection.
5. Wireless connections eliminate the hassle and cost of cabling.
6. Supports a wide range of LAN (Local Area Network) Network Operating
Systems (NOS)
including Windows 98/2000/XP
8. Omni - directional antenna provides wide range of reception.
9. Greater flexibility to locate or move networked PC
1-2 Applications
This wireless MINI PCI offer a fast, reliable, cost-effective solution for wireless client
access to the network. Refer below for examples :
Remote access to corporate network information
E-mail, file transfer and terminal emulation
Difficult-to-wire environments
Historic or older buildings without Ethernet wiring.
Buildings with asbestos insulation
Open areas where wiring is difficult to employ
Re-layout frequently environments
Retailers, manufacturers or other organizations that frequently rearrange the
workplace or relocate
Temporary LANs for special projects or peak time usage
Trade shows, exhibitions and construction sites that employ temporary
networks.
Retailers, airline and shipping companies that need additional workstations
for a peak period and auditors that require workgroups at customer sites.
Access to database for mobile workers
Medical, technical and retail specialists that require roaming access to a
database or other network resources.
Perfect for users that need a small, easy-to-install network that deploys
rapidly.
Chapter 2 Network Configuring and Planning
The wireless MINI PCI supports legacy Ethernet LAN network configuration
options as defined by the IEEE 802.11g. The wireless MINI PCI can be configured
as:
. Ad-Hoc mode for no Access Point wireless environment.
. Infrastructure mode for wireless environment with Access Point.
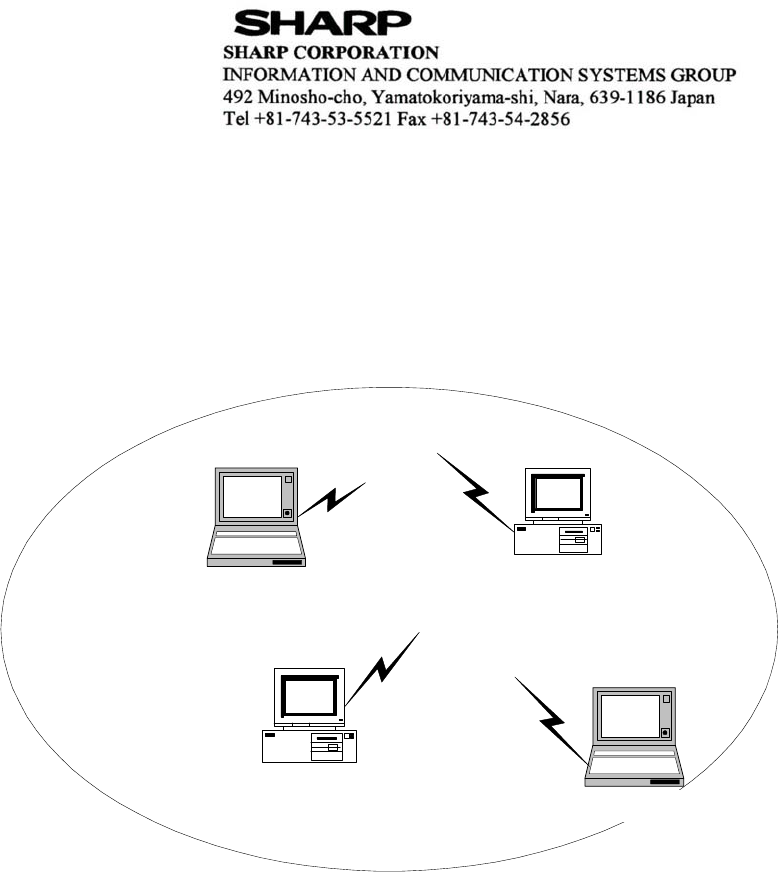
2-1 Network Topology
Ad-Hoc Wireless LAN
Notebook with
T60L198/T60L244
Notebook with
T60L198/T60L244
Desktop PC with
T60L198/T60L244
Desktop PC with
T60L198/T60L244
Fig.1 Ad-Hoc Wireless LAN
An Ad-Hoc wireless LAN is a group of computers. Each computer equipped
with a wireless MINI PCI that configure to same radio channel in order to
communicate with others. Ad-Hoc wireless LAN configurations are appropriate for
branch level departments or SOHO operations.
¤A¤Óºô¸ô
File Server Desktop PC Desktop PC
Desktop PC with
T60L198/T60L244
Desktop PC with
T60L198/T60L244
Access Point Access Point
Notebook with
T60L198/T60L244
Notebook with
T60L198/T60L244
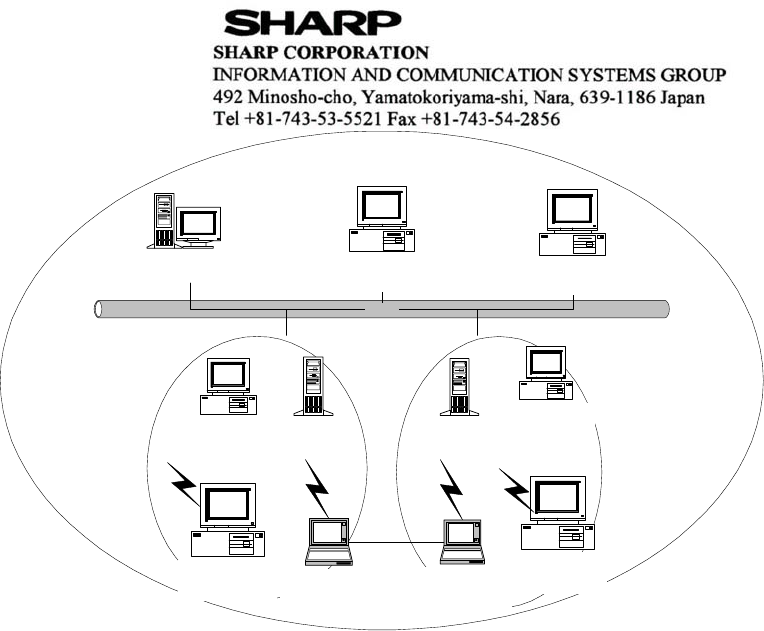
Fig.2 Infrastructure Wireless LAN Configuration
Desktop PC with
T60L198/T60L244
Desktop PC with
T60L198/T60L244
A group of wireless users and an Access Point compose a Basic Service Set (BSS).
Wireless clients can talk to any computer in both wired and wireless LAN network via
the Access Point.
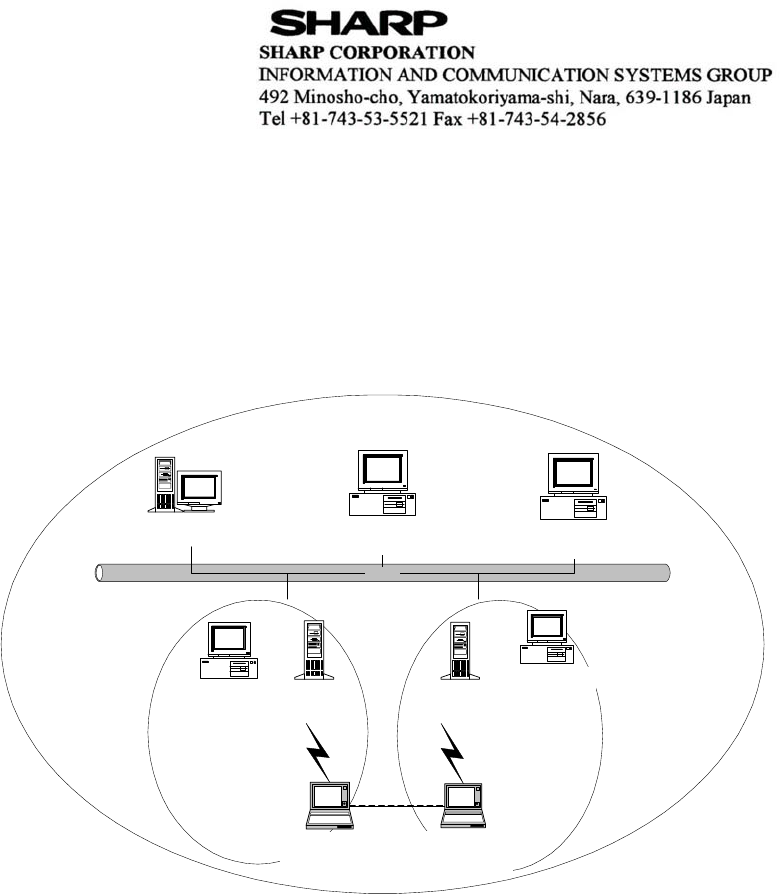
2-2 Roaming
Infrastructure mode also supports roaming capabilities for mobile users. More
than one BSS can be configured as an Extended Service Set (ESS). The continuous
network allows users to roam freely within ESS. All wireless MINI PCI and Access
Point within one ESS must be configured with the same ESSID in order to utilize
roaming function. Properly Access Point positioning with a clear radio signal can
greatly enhance wireless performance.
Ess
BSS1 BSS2
¤A¤Óºô¸ô
File Server Desktop PC Desktop PC
Desktop PC with
T60L198/T60L244
Desktop PC with
T60L198/T60L244
Access Point Access Point
Notebook with
T60L198/T60L244
Notebook with
T60L198/T60L244
Fig.4 Roaming in an Extended Service Set (ESS)
Chapter 3 Installation
3-1 Inserting the Wireless MINI PCI
1. Locate an available Type II PCMCIA slot.
2. With the MINI PCI pin connector facing the MINI PCI slot, you must insert the
card into the slot.
3. After properly inserting the wireless card, you can continue with wireless driver
and utility installation.
3-2 Installation and Uninstall Process
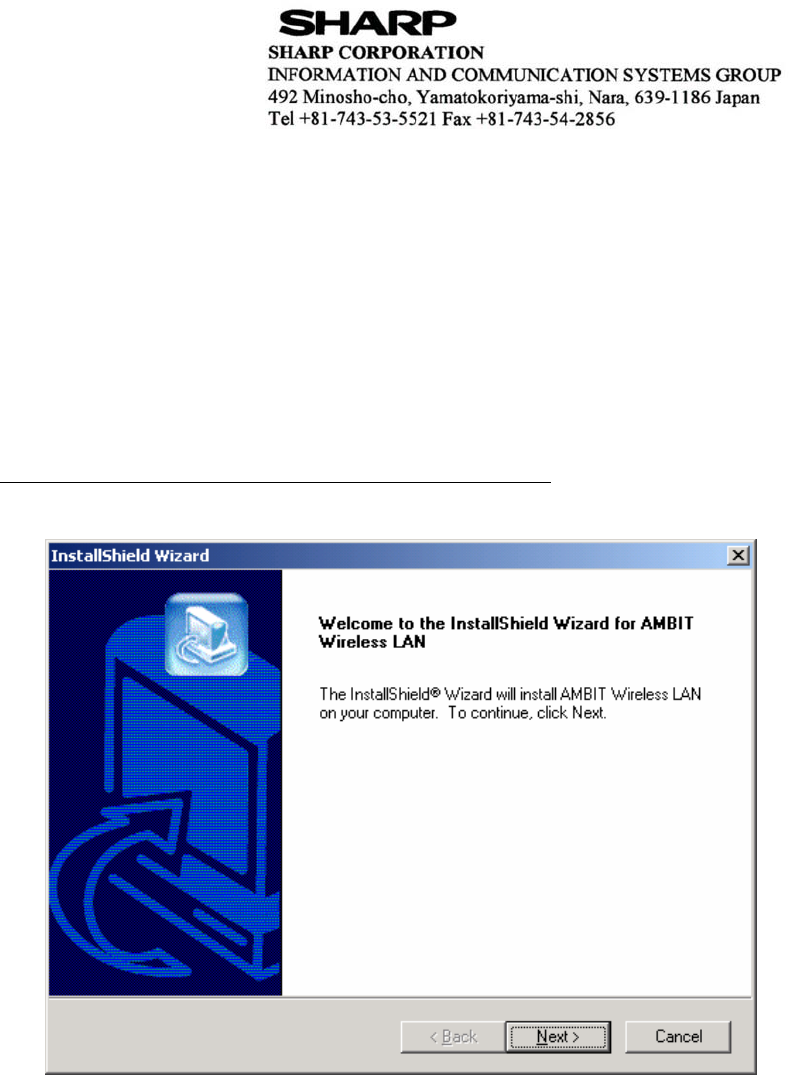
Install AMBIT Wireless LAN (Windows 98/2K/XP)
e Execute the program ‘Setup.exe’ in the CD. Windows displays the dialog as
below. Press ‘Next’ button to continue.
e It displays a License Agreement dialog. Press ‘Next’ to continue.
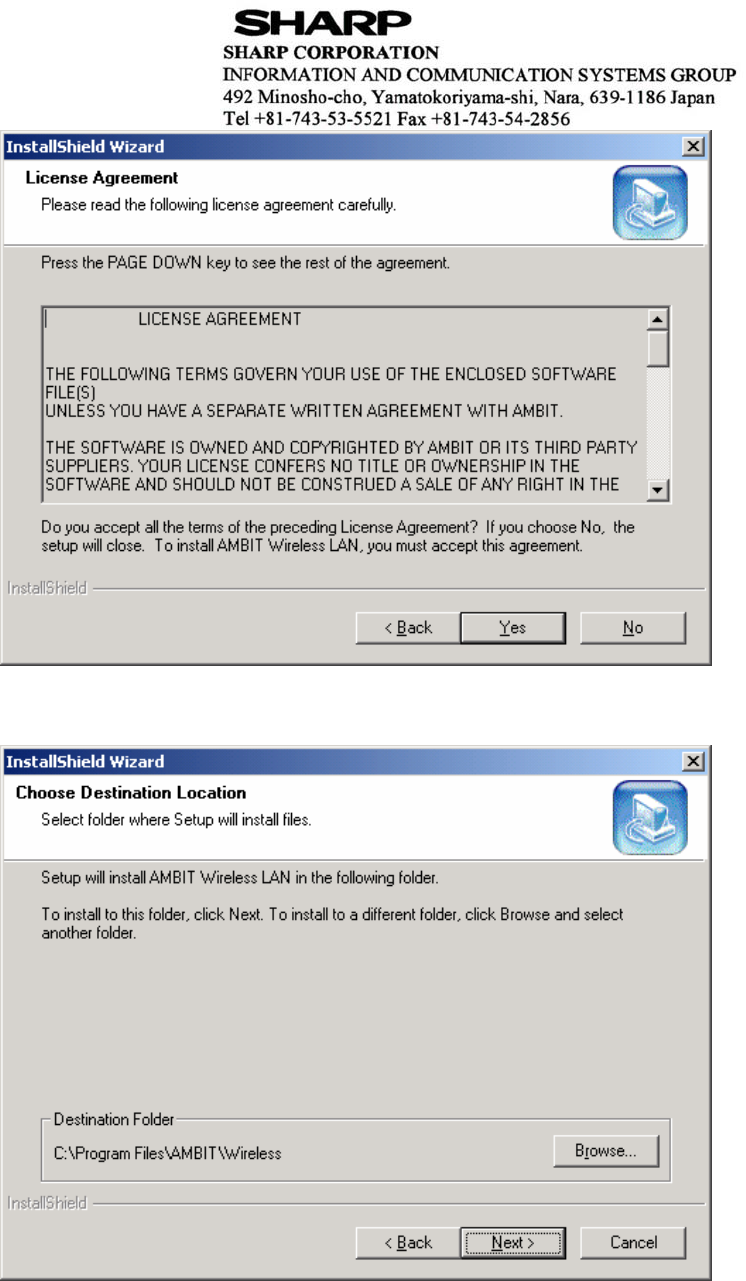
e Select the destination folder that you want to place the files.
e Wait for the install program to do the installation.
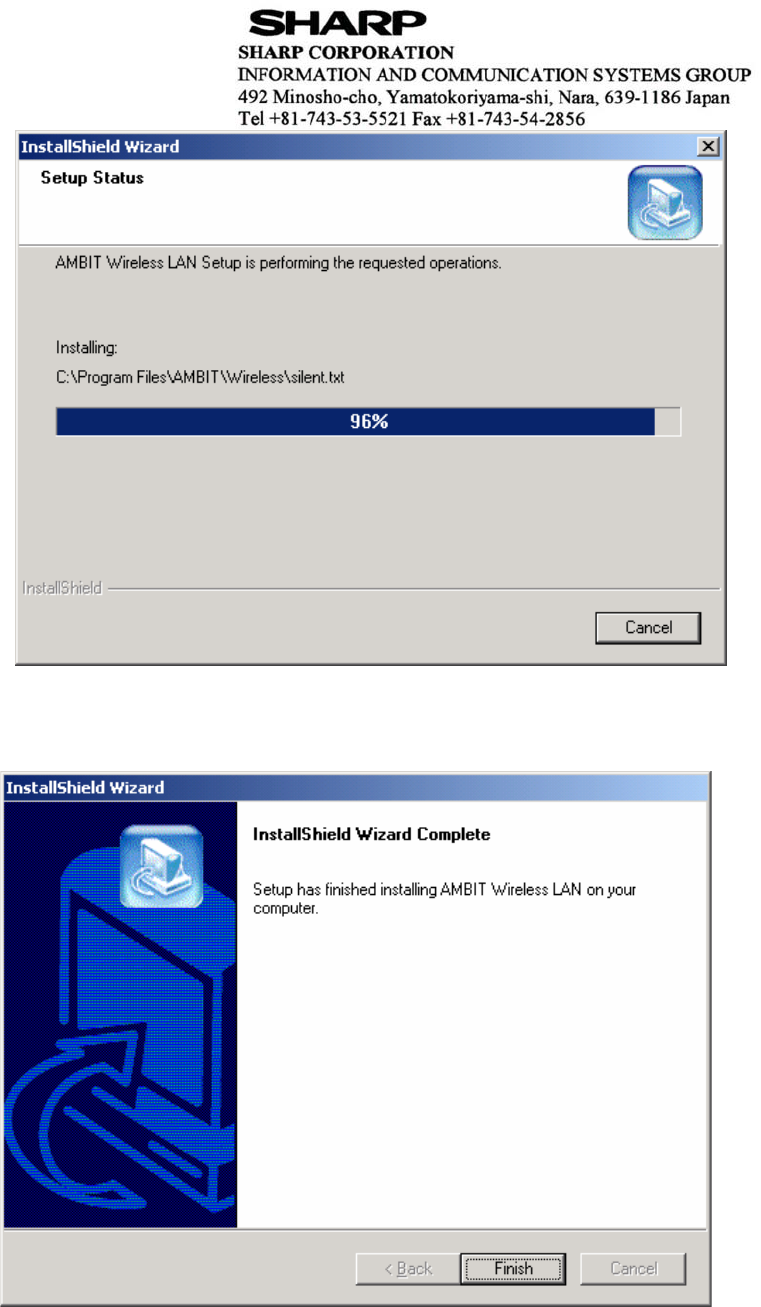
e Congratulations! AMBIT Wireless LAN has been installed successfully.
Please click ‘Finish’ to go to the next step.
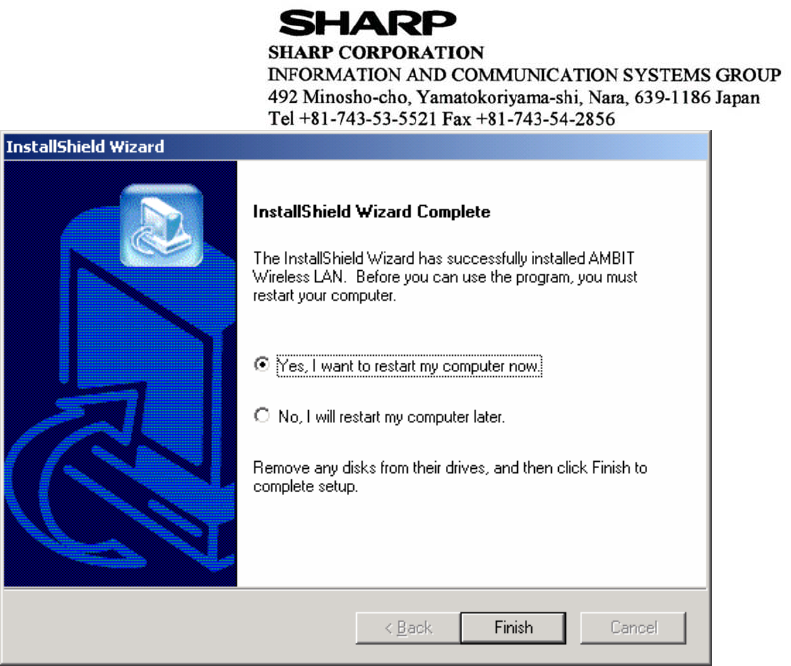
e Please remove any disks from any drives before your click ’Finish’.
Then click ‘Finish’ to complete setup.
Uninstall Wireless LAN (Windows 98/2K/ME/XP)
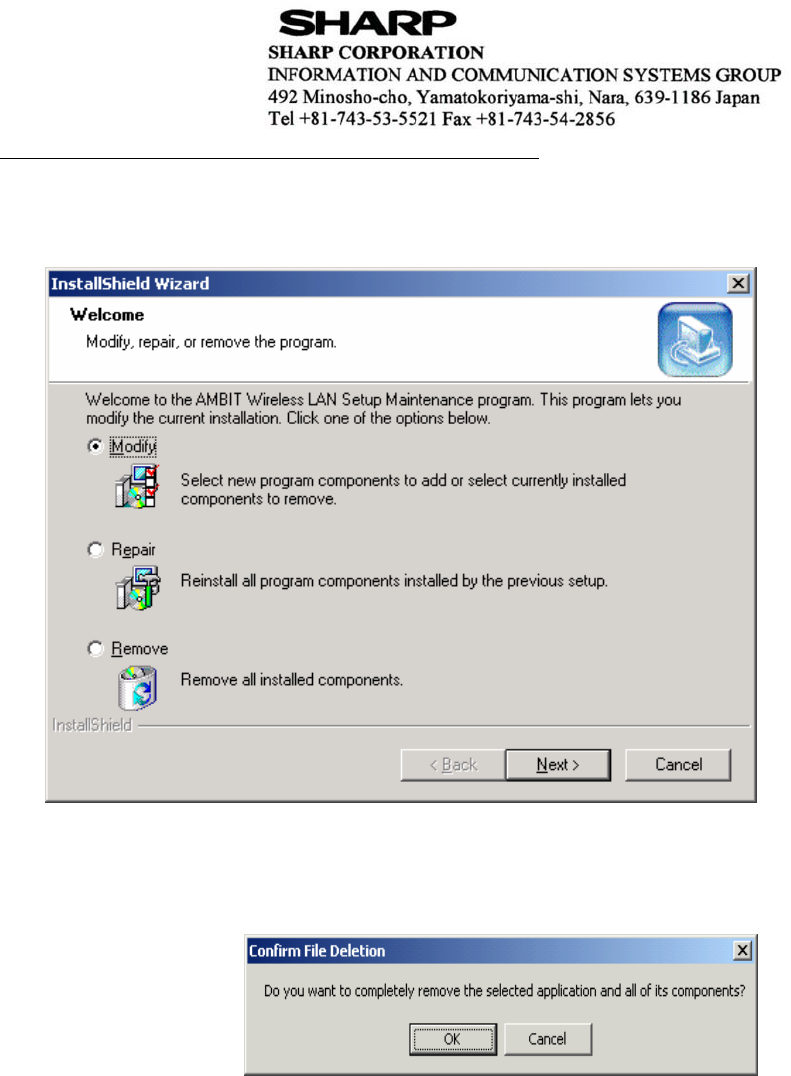
e One can remove the AMBIT Wireless LAN via the Add/Remove Programs’ in
the ’Control Panel’. Select AMBIT Wireless LAN’ and click Add/Remove’
button, the dialog as below displays.
e Select ’Remove’ and then click the ‘Next’ button to perform the un-installation.
Click ’OK’ button if you really want to remove the AMBIT Wireless LAN.
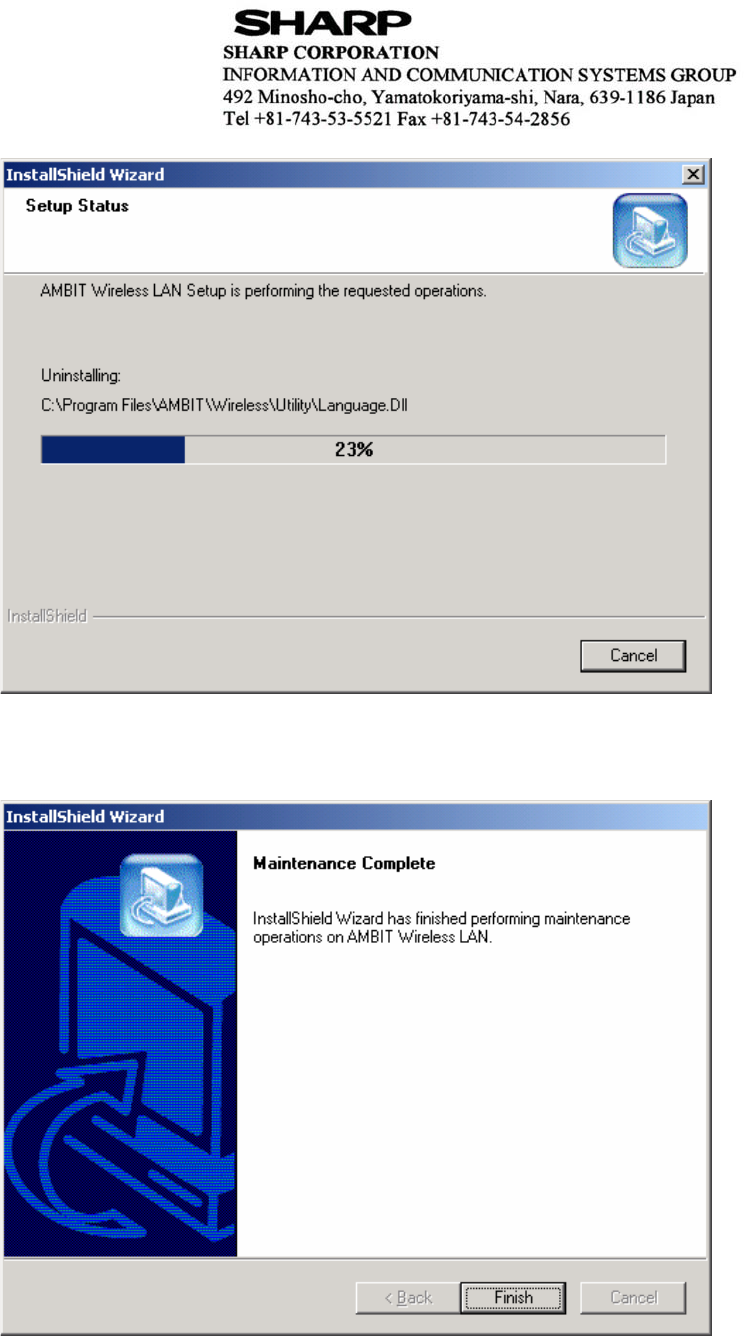
e Wait for the un-installation to do its work.
e Click ‘Finish’ to complete the un-Installation.
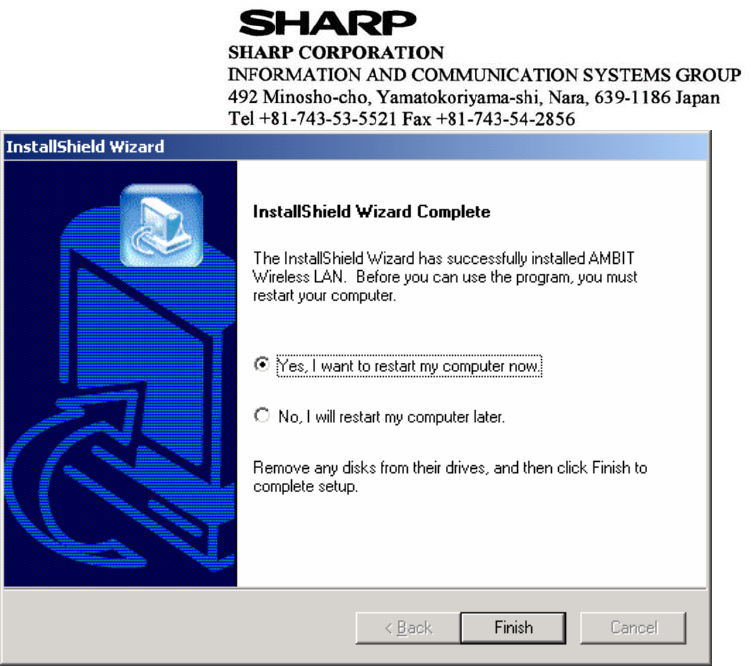
5 If you want to restart your computer now. Please remove any disks from any
drives before your click ‘Finish’. Then click ‘Finish’ to complete uninstallation.
Chapter 4 Wireless Utility and Configuration
The following sections describe the Wireless Network Configuration Utility.
This utility provides quick access and friendly interface to configure the card setup.
4-1 Windows 98/2000 Wireless Utility
After installation is completed, a Wireless LAN Utility icon will appear in
Desktop screen. Click it, then you will see the screen below. If you cannot find the
icon, you can select “Start” ->”Program”->ireless LAN Configuration Utility” Icon.
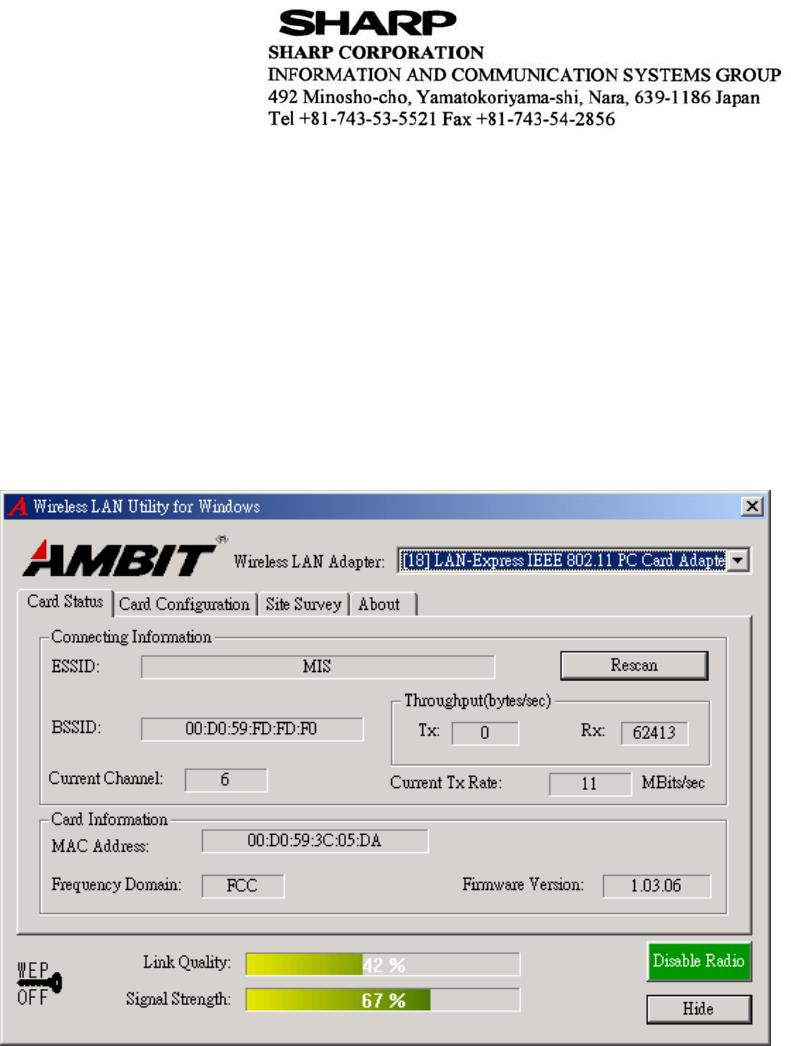
Card Status
You can see the AP information that your card connected. In this page you also can
find which channel and TX rate is used now, and Firmware Version , MAC Address
and Frequency Domain.
ESSID: An acronym for Extended Service Set Identifier, ESSID is the unique name
shared among all clients and Access Points in a wireless network. The ESSID must be
identical for all clients or Access Points participating in the same network. The ESSID
is case sensitive and must not exceed 32 characters. Press ‘Scan’ it will scan the
specific ESSID that your profile set. If your profile set the ESSID to be ANY, then
while you press ‘Scan’, it will scan AP in the nearby area and choose the stronger one.
From Link Quality and Signal Strength, you can tell the wireless transmission quality.
Card Configuration
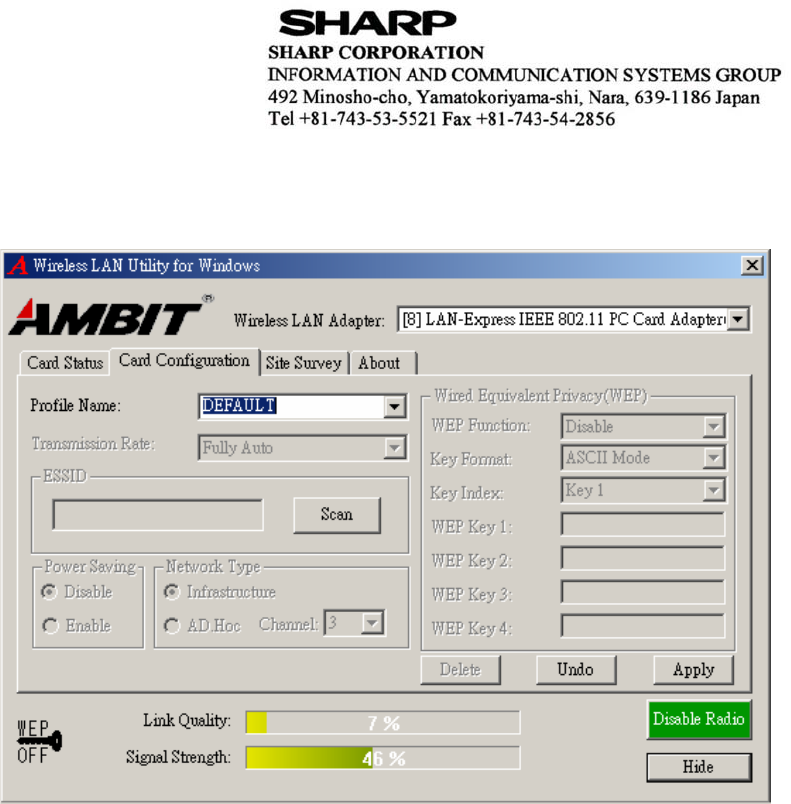
If you have no idea how to fill in these columns, then you can choose the Profile
Name: Default to connect AP nearby. Since it is a default setting and it cannot be
changed the contents of these columns.
If you want to change this Card configuration, then select Profile Name as
PROFILE1, then you can start changing these columns.
There are two network types:
Ad-Hoc: This mode is used for a simple peer-to-peer network. It offers file sharing
between wireless clients without a wireless Access Point (AP).
Infrastructure: This mode allows a wireless LAN to be integrated into an existing
wired network through an AP. Infrastructure type networks also permit roaming
between Access Points while maintaining connection to all network resources.
Infrastructure mode provides additional features, such as WEP security, power saving
and extended range.
ESSID: You can either choose specific AP or connect to any AP in the nearby area.
Power Save: enable it, so it will be triggered when your computer system is inactive.
WEP Key: Wired Equivalent Privacy, WEP is an encryption scheme used to protect
your wireless data communications. WEP uses a combination of 40-bit keys,128-bit
keys to provide data encryption for your wireless network. AP and wireless card
should use the same WEP key in order to communication.
KEY Format: You can choose to enter ASCII Characters (0~9, a~z, A~Z) or
Hexadecimal number (0~9, a~f, A~F)
Default Key: The current KEY you choose.
KEY1~4: If you choose 40-bit keys, then you must enter 5 ASCII Characters or 10
Hexadecimal numbers. If you choose 128-bit keys, then you must enter 13 ASCII
Characters or 26 Hexadecimal numbers.
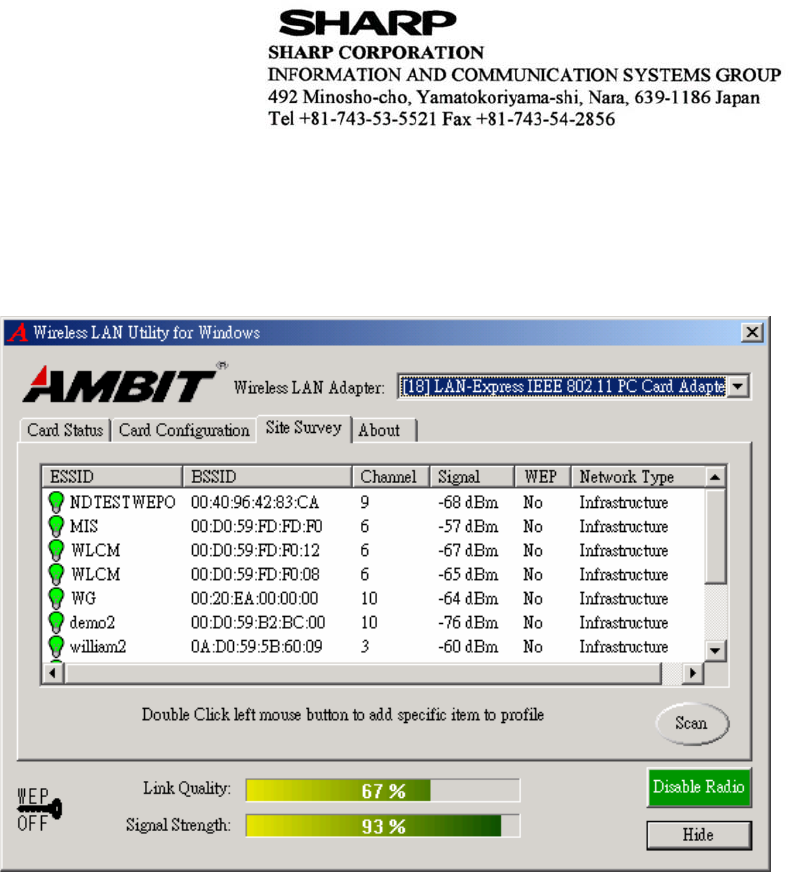
Site Survey
Use the Site Survey Tool. You can identify each AP or Adapter Card current usage
channel , with WEP key or not, Network Type and their signal strength.
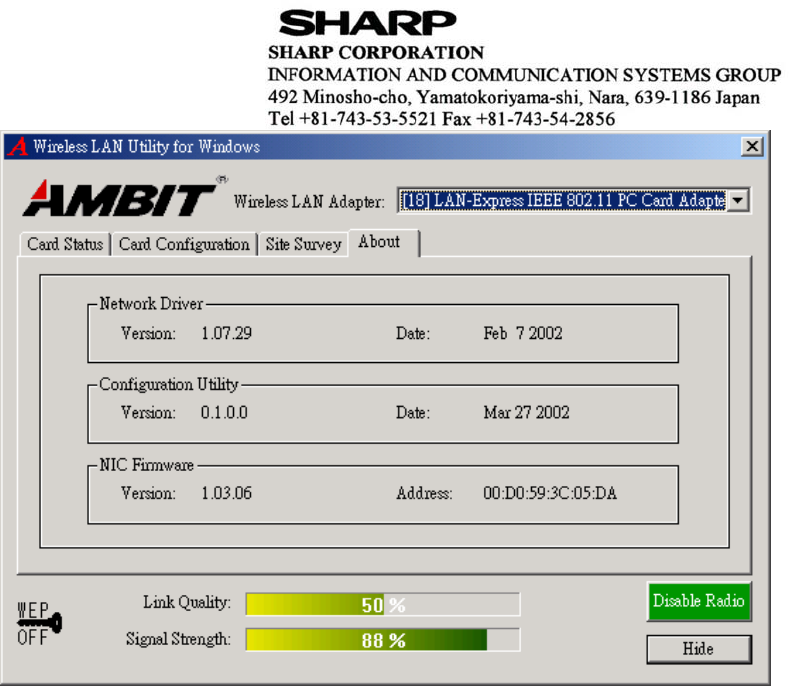
About
You will find the Network Driver, Configuration driver and NIC Firmware at About.
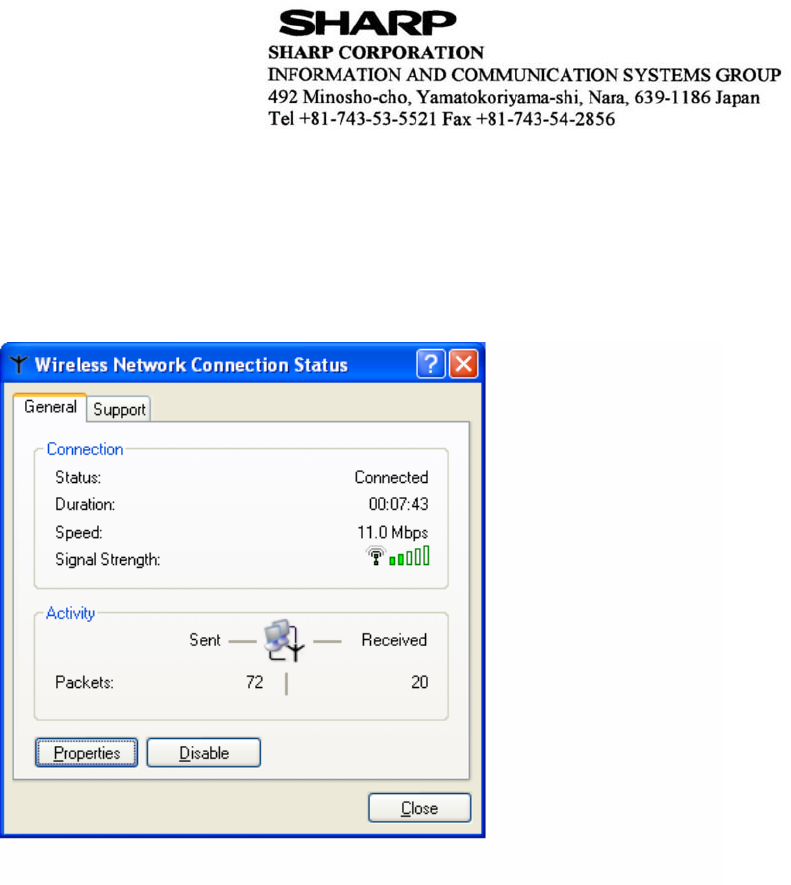
4-2 Windows XP Wireless Utility
1. To configure the wireless card setting, you can select Start\Settings\Network
Connection in the Windows XP. Choose the wireless network connection, then you
will see below screen. From this screen, you can see wireless connection status and
wireless signal level.
e Select roperties’ in the above screen. The following windows will show up.
In eneral’ page, Wireless LAN card information and networking protocol have been
displayed. Extra networking protocol can be installed in this page.

3. Select Wireless Networks page, you can see available wireless networks in your
nearby area. You can add your preferred wireless Access Point to your list, so your
wireless card will search for specific wireless networks.
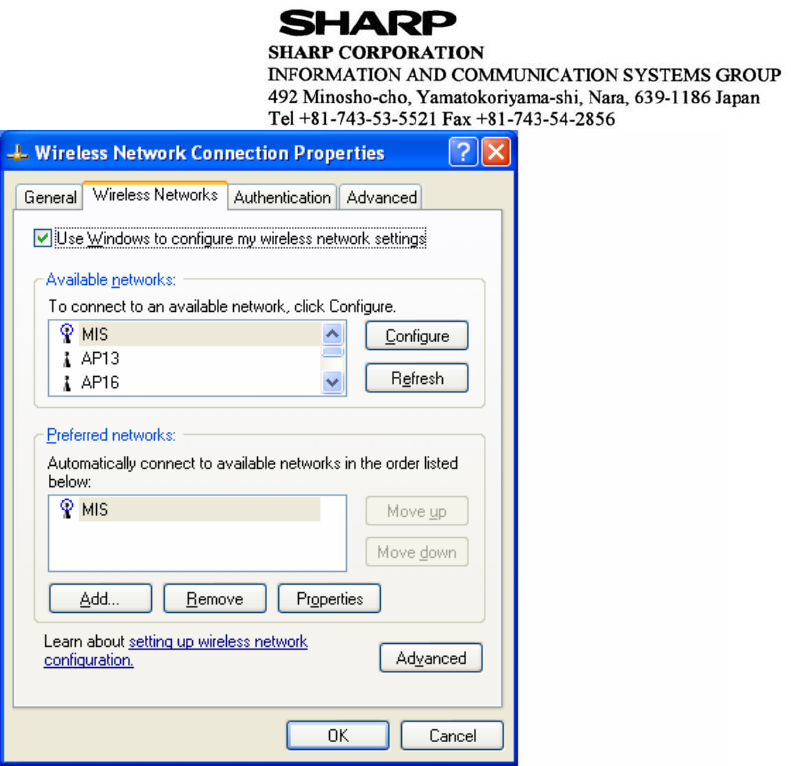
Configure
To connect to an existing access point (infrastructure) network, under Available
networks, click the network name, and then click ‘Configure’ to setup wireless
security and data encryption.
Refresh
To update the list of available networks that are within range of your computer, click
Refresh.
Add
To connect to an access point (infrastructure) network that you know is available but
that does not appear under Available networks, under Preferred networks, click Add.
In Wireless Network Properties, specify the network name (Service Set Identifier).
Remove
To remove a wireless network from the list of preferred networks.
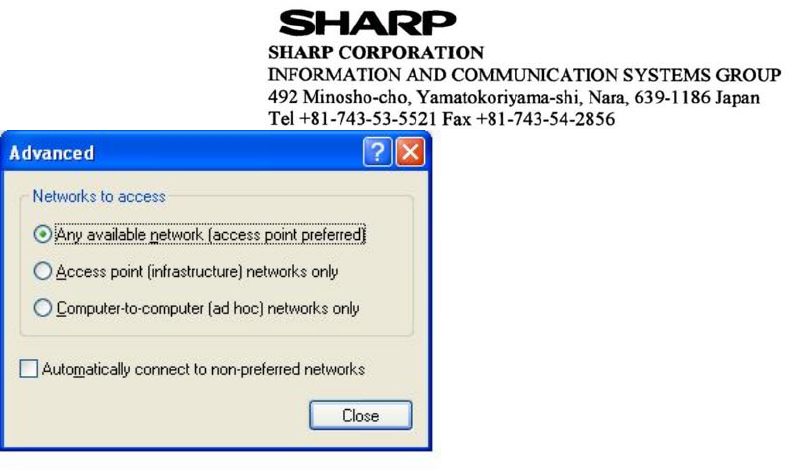
Advanced
*If your network are configuring to a computer-to-computer (ad hoc) network, select
computer-to-computer (ad hoc) network only’.
*If you want to connect to a computer-to-computer and access point (infrastructure)
networks are within range of your computer, click Access point
(infrastructure)network only’.
*If you want to connect to a computer-to-computer (ad hoc) network and both
computer-to-computer and access point (infrastructure) networks are within range of
your computer, click ‘Any available network (access point preferred)’.
To automatically connect to available networks that do not appear in the Preferred
networks list, click Advanced, and then select the Automatically connect to
non-preferred networks check box.
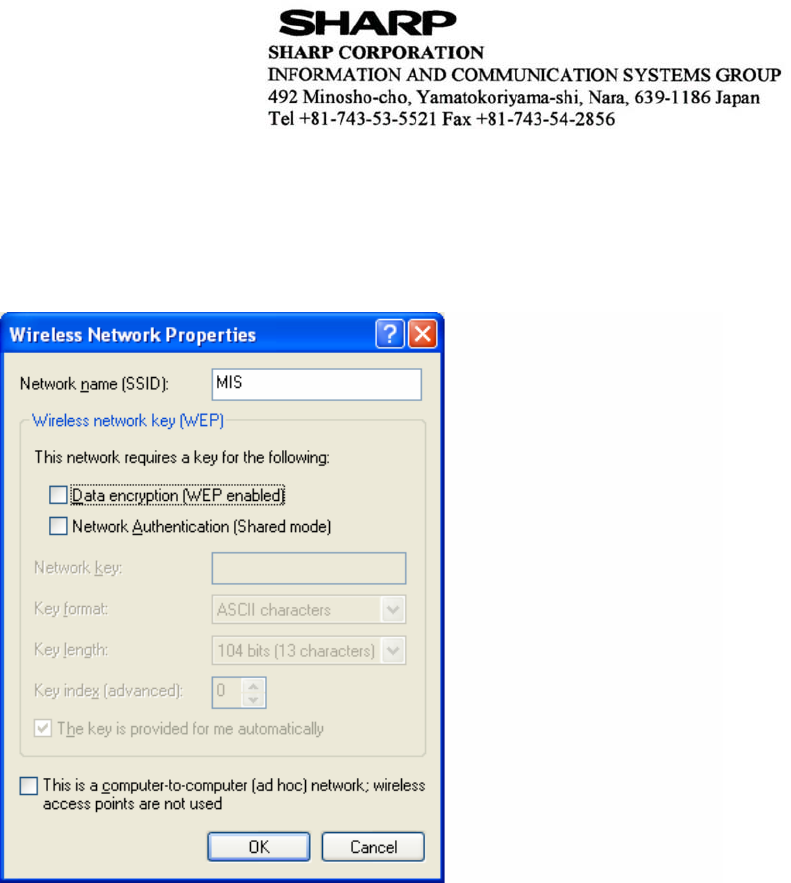
Define your network name (SSID) in the following windows, so your can join a
specific wireless network. Check AP has WEP on or not. You wireless network will
need to have same WEP setting with AP in order to communicate. If your wireless
network don have any AP, check the his is computer-to computer (ad-hoc)
network; wireless access points are not used’
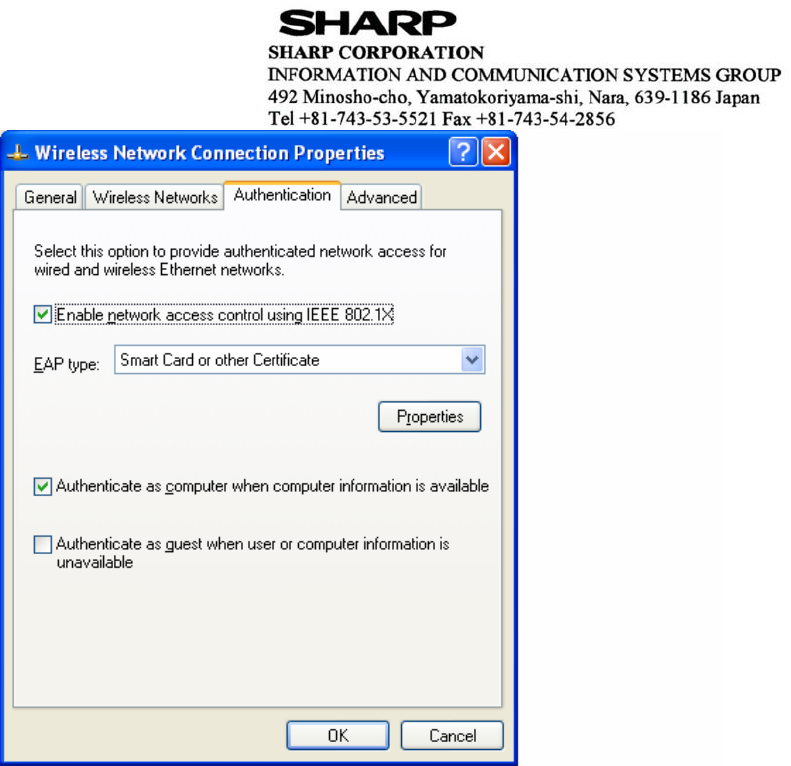
This window provides authentication via 802.1X. 802.1X, an IEEE standard that
provides an authentication framework for 802-based LANs. 802.1X takes advantage
of an existing authentication protocol known as the Extensible Authentication
Protocol. 802.1x, giving someone secure, encrypted, wireless access on a Microsoft
network will be as easy as setting a flag on the users domain account.
What does this mean for the Home Network user?
802.1x will ensure that if and when you make the change over to Wireless Ethernet,
your neighbor will not be able to access your wireless LAN!
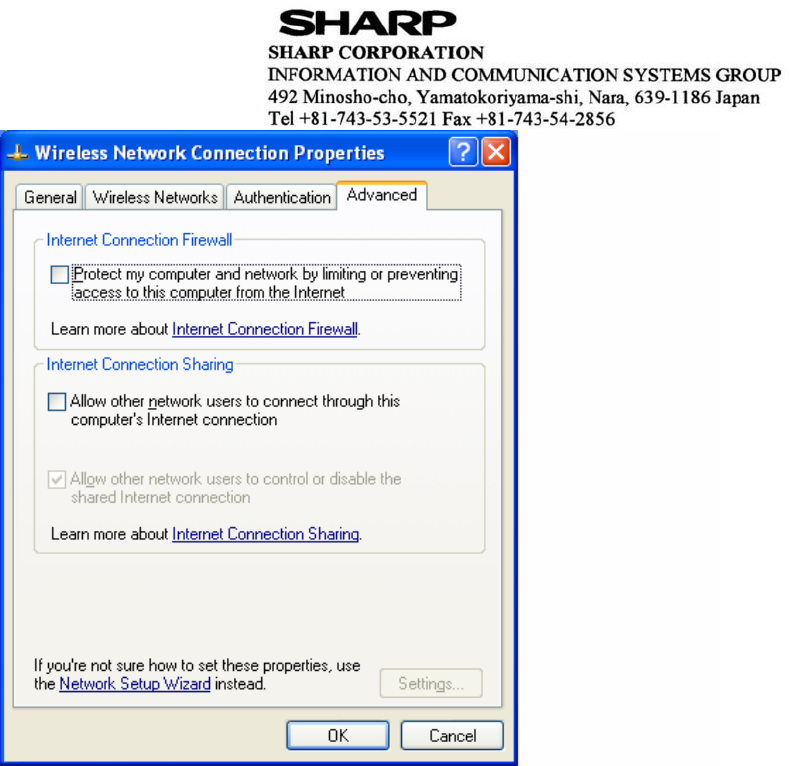
The ‘Advanced’ window offers Firewall and Internet Connection Sharing functions.
Depends on your networking environment, you can select below functions.
Appendix A Troubleshooting
Problem Solving
1. My computer does not recognize the wireless network card.
Solution:
e The wireless network card is not properly inserted into the PCMCIA slot.
e Ensure that the wireless network card has been inserted into an available
PCMCIA slot.
2. The wireless network card does not work properly.
Check and Solution:
e Insert the MINI PCI into Notebook slot again. A beep should be heard if the
card properly inserted.
e The Activity LED indicator is active if the card is properly connected.
e Right click on y Computer” and the select Properties. Select the device
Manager and click on the Network Adapter. You will find AN-Express IEEE
802.11 MINI PCI” if it is installed successfully. If you see the Yellow Question
Mark besides the wireless network card, then the wireless card is not properly
installed. Please check below:
e Check if your Notebook has a free IRQ
e Check that you have inserted the right card and have installed the proper
driver.
e Try to remove driver, install again, and then reboot your computer.
e Confirm the station is configured the same ESSID as the same wireless network.
e Check your channel is the same as AP setting. Try to use escan’ function in

the card status page after launch Wireless Utility.
Appendix B Glossary
Access Point - An internetworking device that seamlessly connects wired and
wireless networks together.
Ad-Hoc - Ad-Hoc is a peer- to-peer wireless network without Access Point. A group
of wireless clients consistent an independent wireless LAN.
Backbone - The core infrastructure of a network, the portion of the network that
transports information from one central location to another central location. The
information is then off-loaded onto a local system.
BSS - Stands for “Basic Service Set.” An Access Point associated with several
wireless stations.
ESS - Stands for “Extended Service Set.” More than one BSS can be configured as an
Extended Service Set. An ESS is basically a roaming domain.
Ethernet - A popular local area data communications network, originally developed
by Xerox Corp., which accepts transmission from computers and terminals. Ethernet
operates on 10/100 Mbps transmission rate over shielded coaxial cable or over
shielded twisted pair telephone wire.
Infrastructure - An integrated wireless and wired LAN is called an Infrastructure
configuration.
PCMCIA - Personal Computer Memory Card International Association, which
develops standards for PC cards, formerly known as MINI PCI, are available in
three ”Types” which are about the same length and width as credit cards, but range in
thickness from 3.3 mm (Type I) to 5.0 mm (Type II) to 10.5 mm (Type III). These
cards can be used for many functions, including memory storage, as landline modems
and as wireless LAN.
Roaming - A function that allows one to travel with a mobile end system (wireless
LAN mobile station, for example) through the territory of a domain (an ESS, for
example) while continuously connecting to the infrastructure.
Warning
• This equipment must be installed and operated in accordance with provided
instructions and a minimum 20 cm spacing must be provided between
computer mounted antenna and person’s body (excluding extremities of
hands, wrist and feet) during wireless modes of operation.
• Optional vehicle mounted antenna must not exceed 5.11 dBi antenna gain and
should be professionally installed.
• This device complies with Part 15 of the FCC Rules. Operation is subject to
the following two conditions: (1) this device may not cause harmful
interference, and (2) this device must accept any interference received,
including interference that may cause undesired operation.
CAUTION
Any changes or modifications not expressly approved by the party responsible for
compliance could void the authority to operate equipment.

Warning
"NOTE: THE MANUFACTURER IS NOT RESPONSIBLE FOR ANY RADIO OR
TV INTERFERENCE
CAUSED BY UNAUTHORIZED MODIFICATIONS TO THIS EQUIPMENT.
SUCH MODIFICATIONS COULD VOID THE USER'S AUTHORITY TO
OPERATE THE EQUIPMENT."
1. T60H424 is for OEM installation only.
2. "The antenna used for this transmitter must be installed to provide a separation
distance of at least
20 cm from all persons and must not be co-located or operating in conjunction with
any other antenna
or transmitter.
3. OEM integrators are instructed to ensure that the End-User has NO manual
instructions to remove or
install the device (EUT).