Shen Zhen MTC 55658645 LED TV User Manual MUAV6550Y 65864
Shen Zhen MTC Co., LTD LED TV MUAV6550Y 65864
UserManual.wiki
>
Shen Zhen MTC
>
55658645 User Manual
User manual
Navigation menu
Upload a User Manual
Namespaces
Wiki Guide
HTML
PDF
Info
Views
User Manual
Discussion / Help
Navigation

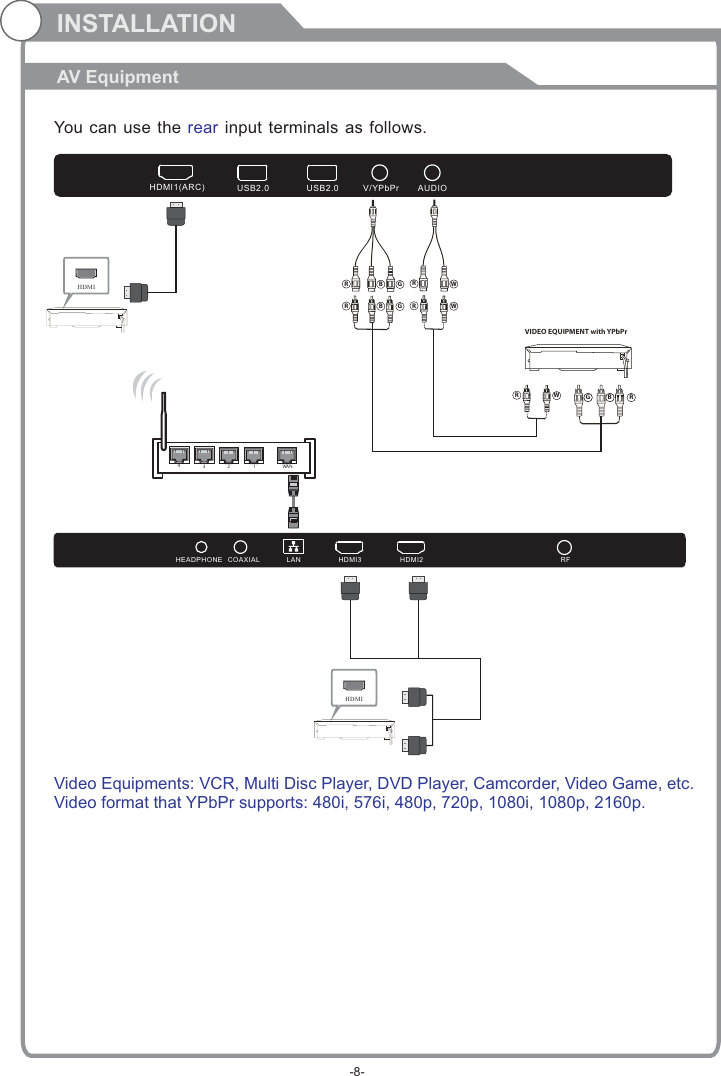

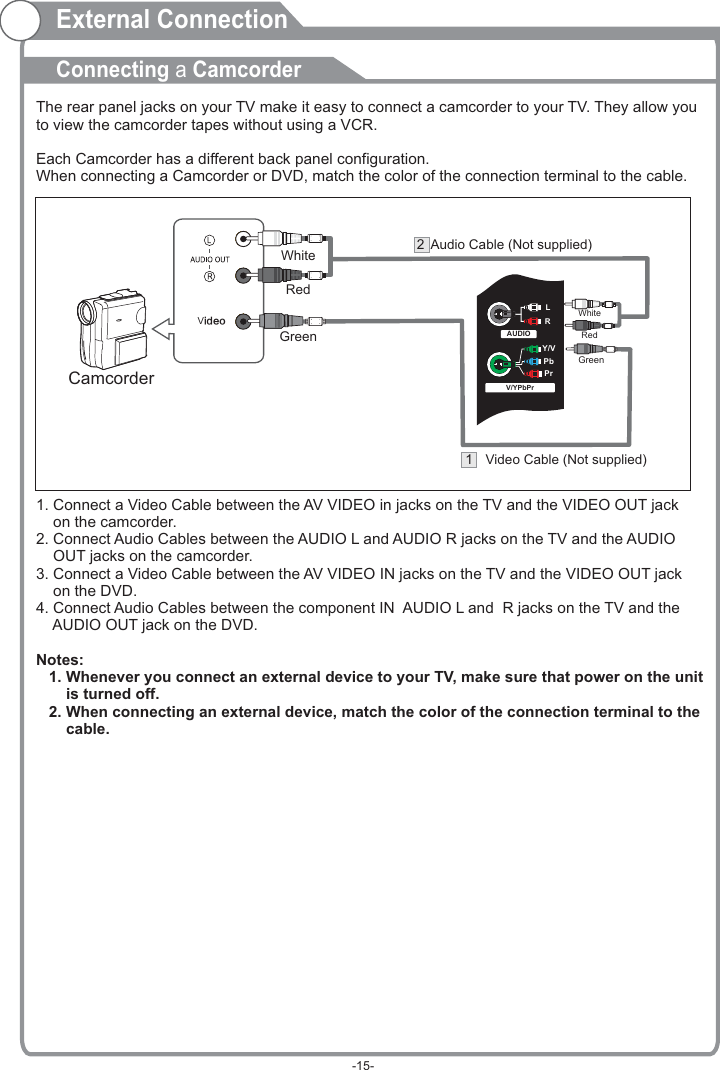
![External ConnectionConnecting VCRThese instructions assume that you have already connected your TV to an antenna or a cable TV system. Skip step 1 if you have not yet connected to an antenna or a cable system. VCR Rear PanelTV Rear PanelWhiteRedANT ANT OUT S-VIDEO AUDIO OUTRedBlueGreenVIDEO OUT231213Audio Cable (Not supplied)YPbPr cable( supplied) Not RF Cable (Not supplied)Follow the instructions in Viewing a VCR or Camcorder Tape to view your VCR tape. Each VCR has a different back panel configuration. When connecting a VCR, match the color of the connection terminal to the cable. 1. Unplug the cable or antenna from the back of the TV.2. Connect the cable or antenna to the ANT IN terminal on the back of the VCR.3. Connect an RF Cable between the ANT OUT terminal on the VCR and the ANT IN terminal on the TV.4. Connect a Component Cable between the COMPONENT [Y, Pb, Pr] jacks on the DVD player and YPbPr jack on the TV. 5. Connect Audio Cables between the AUDIO OUT jacks on the VCR and the AUDIO L and AUDIO R jacks on the TV.Note: 1. Whenever you connect an external device to your TV, make sure that power on the unit is turned off. 2. When connecting an external device, match the color of the connection terminal to the cable.PbPrY/V LRV/YPbPrAUDIO RedBlueGreenRedWhite231-14-HDMI3 HDMI2HEADPHONE COAXIAL LAN RF](https://usermanual.wiki/Shen-Zhen-MTC/55658645/User-Guide-3936125-Page-17.png)