ShenZhen Aoni Electronic Industry IPC936 Smart WiFi Battery Camera User Manual
ShenZhen Aoni Electronic Industry Co., Ltd. Smart WiFi Battery Camera
User manual
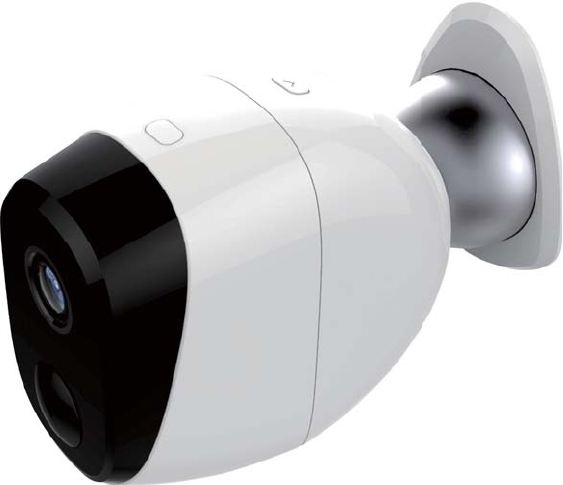
Quick Start Guide
Smart WiFi Battery Camera
Model: E936
Welcome
Thank you for choosing our smart camera.
Getting started is easy.
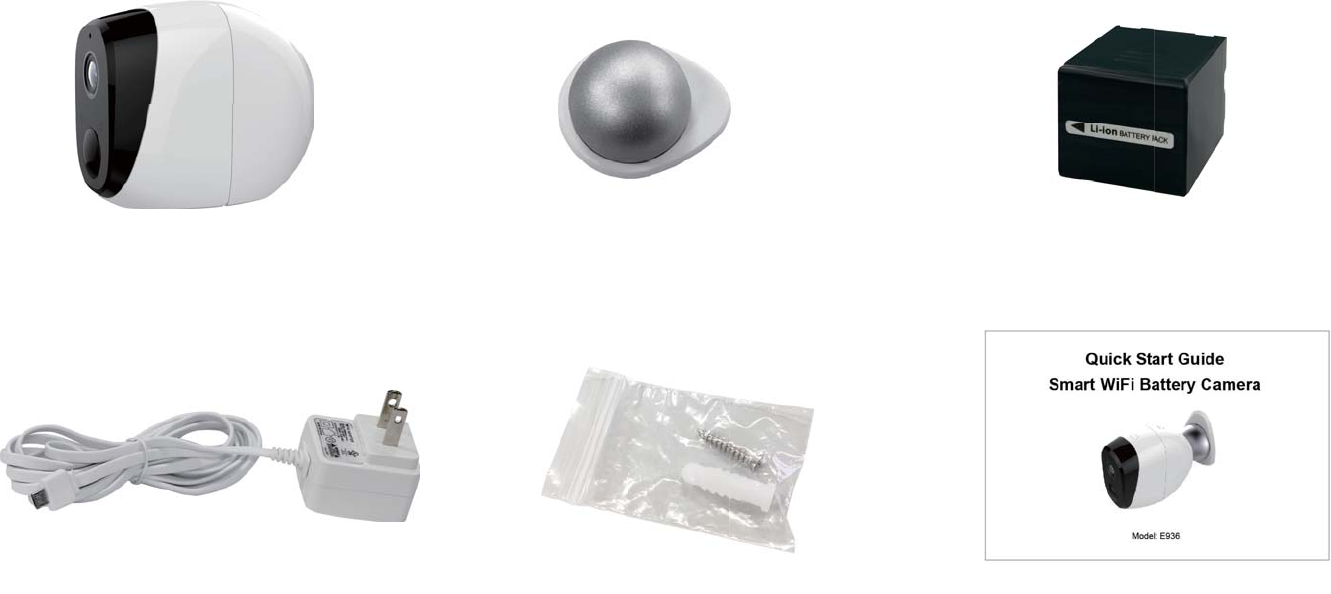
What’s Included
Battery camera Magnetic wall mount Rechargeable battery
Power adapter Wall mount screw sets Quick Start Guide
1
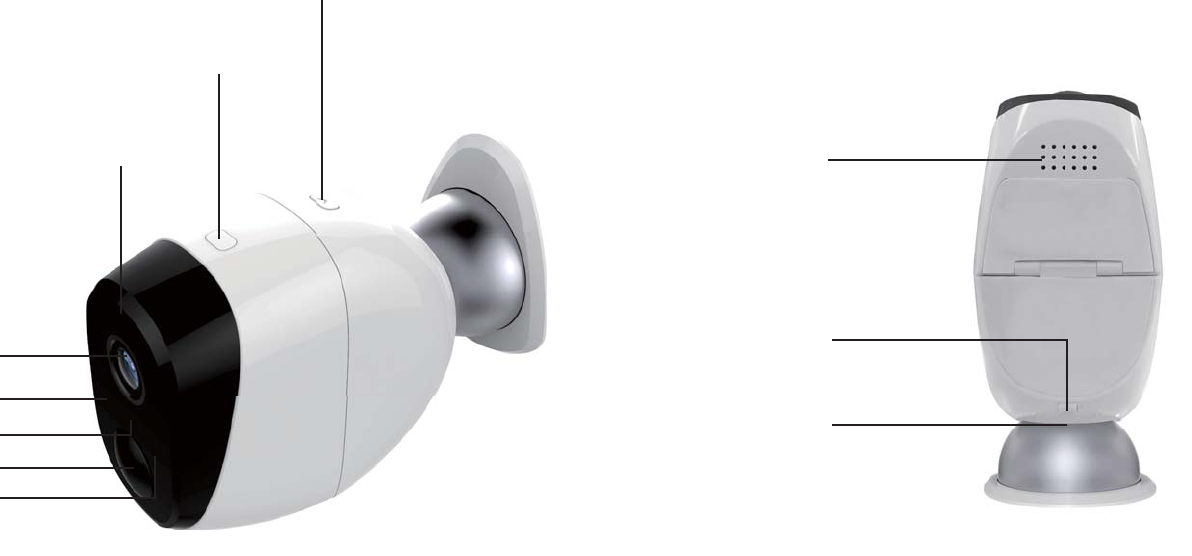
Product Details
Battery door latch
Configure/Reset
Microphone
Lens
Light sensor
PIR sensor
Indicator light
IR flash light
Speaker
Bracket interface
Power interface
2
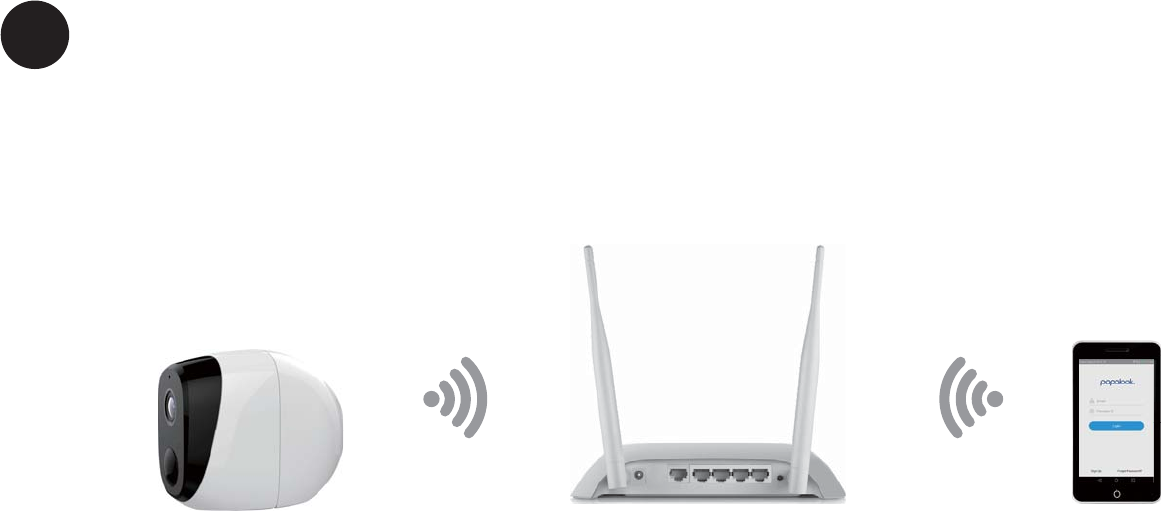
Connection Preparation
Bring the camera and phone within 1 to 3 feet (30 to 100 centimeters) of the router.
Router
30cm~100cm Camera Smartphone
Note: Make sure smart phone is connected with your wireless router.
Please note our camera only works under 2.4G Wi-Fi, it doesn't support 5G Wi-Fi.
3
1

Get the APP and Account
For the best experience, download the “papalook” app for your smartphone by
scanning the QR code below or searching for “papalook” in the app store. The app
icon will be displayed after successful installation.
papalook papalook
Launch the app from your smartphone and click
the register button. Follow the on-screen instructions.
4
2
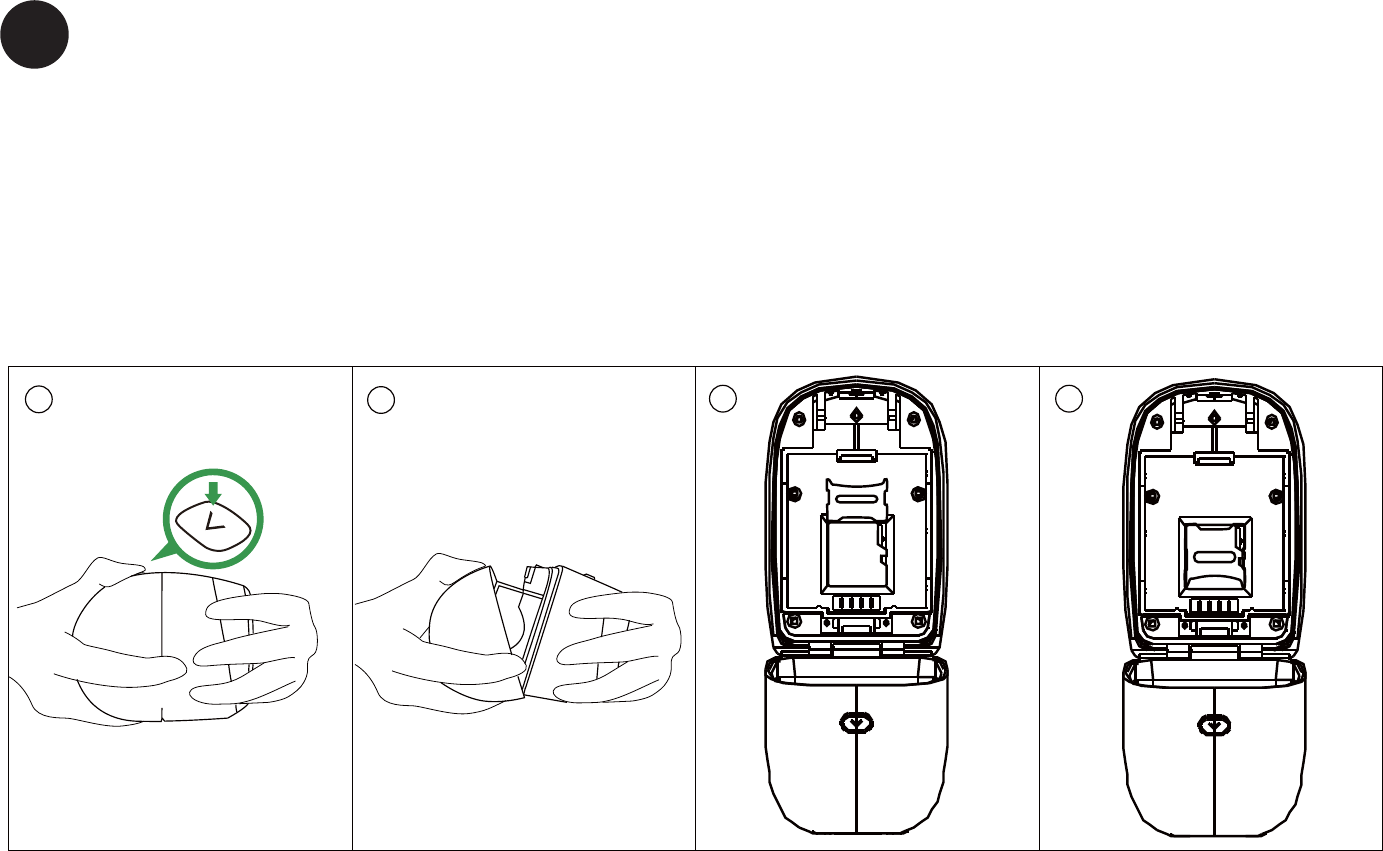
Insert the Micro SD card
1. Unlock the battery compartment by pressing and holding the latch.
2. Gently pull the battery door back to open the compartment.
3. Unlock the sheet metal to open Micro SD card slot, then align the contact pins
to insert Micro SD card to card slot.
4. Pull down the sheet metal and lock Micro SD card.
5
3
123 4
Micro SD
ĺ/2&.
ĺ23(1
ro
ĺ/2&.
ĺ23(1
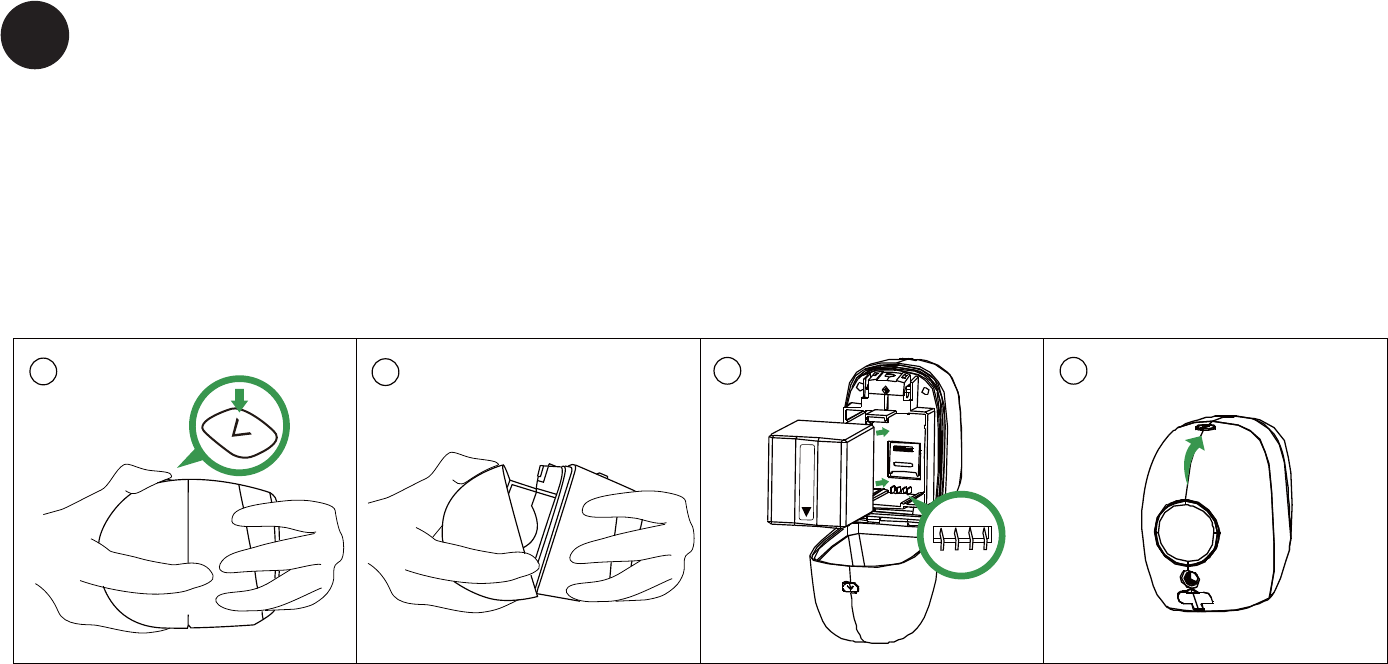
Insert the battery
1. Unlock the battery compartment by pressing and holding the latch.
2. Gently pull the battery door back to open the compartment.
3. Align the battery contacts to insert the battery gently.
4. Close the battery door.
Note: The battery is not fully charged when it leaves the factory for safe delivery,
please recharge the battery for above 5 hours after depleting.
6
4
123 4
Li-ion
BATTERY PACK
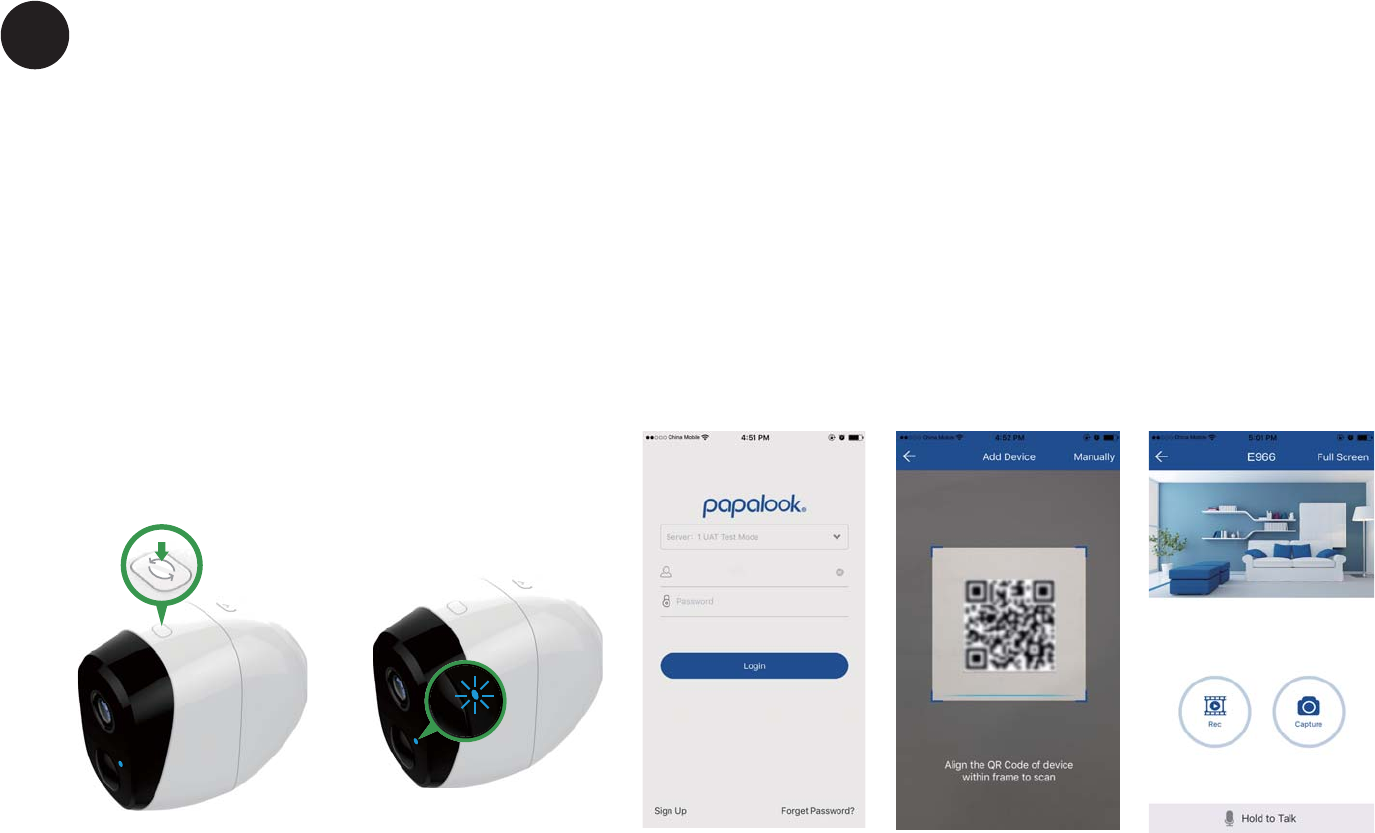
Set up your camera
1. Press the reset button on top of camera for about three seconds and
then release the button, a blue LED in front of camera will blink slowly
when reset process starts.
2. Use APP scan the QR code, enter your Wi-Fi password, the camera will
automatically connect to your Wi-Fi network.
3. The blue light is on, camera is ready for viewing.
7
5
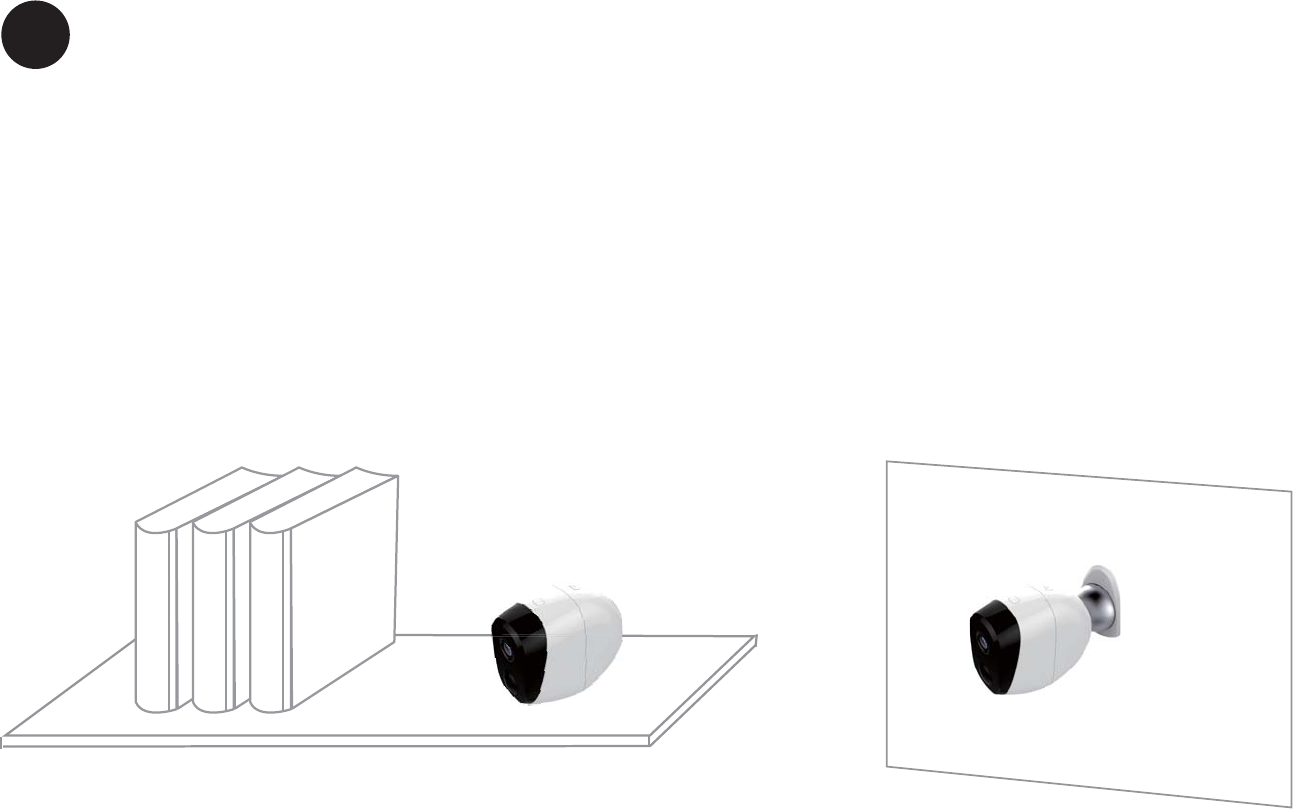
Place or Mount Your Camera
You can place your camera on a shelf or otherflat surface, or you can mount it to the wall.
To mount your camera to the wall:
Fasten the mounting screw into the wall, and hang the magnetic mount from
the screw.
If you’re mounting the camera to drywall, be sure the plastic drywall anchors
that are provided.
8
6

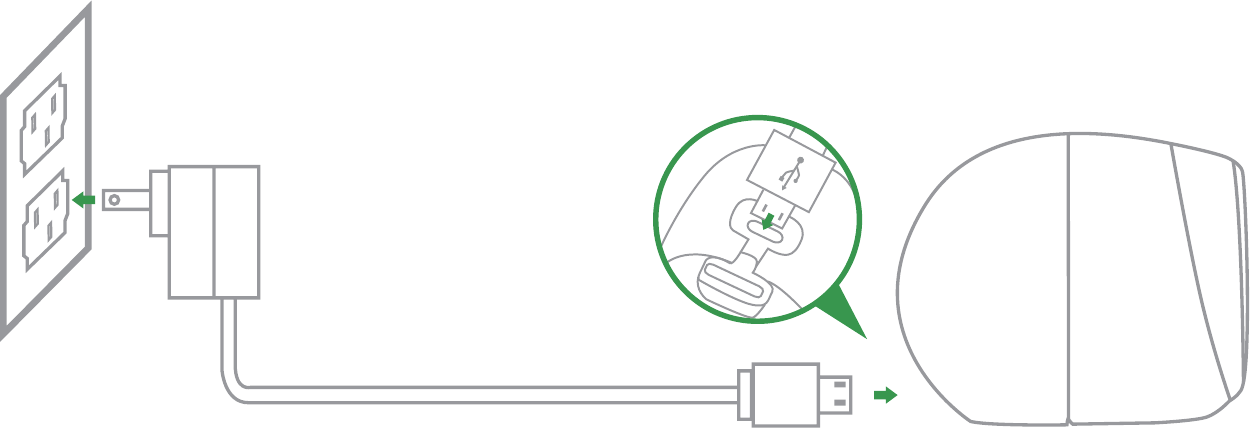
Charge Your Camera Battery
Note: The camera battery is not fully charged when it leaves the factory
for safe delivery.
Note: Please recharge the battery for above 5 hours after depleting,
please note the battery full charging time is above 5 hours.
If you need to recharge the battery:
1. Place the camera indoors.
If you are using the camera outside, bring it inside while charging the battery.
2. Connect the power adapter cable to the camera power adapter.
Note: You must use an original power adapter and cable to charge the battery.
3. Plug the power adapter into an electrical outlet.
9
7
You’re done!
Congratulations! Your camera is set up and ready to go.
10
Align the USB icon to
insert the USB port

Appendix: Camera LED Guide
NO. LED Status Camera Status
1 Standby for configurationSlow blinking blue
2 Network connecting Slow blinking red
3 Networking is successful and working properly Bright blue
4 Networking failed Bright blue and red
5 Sleep standby Blue and red off
6 Watch live video Fast blinking blue
7 PIR alarm Fast blinking red
8 Blinking blue and red 2TA upgrade
11
12
FCC Statement:
This equipment has been tested and found to comply with the limits for a Class B digital device, pursuant
to part 15 of the FCC Rules. These limits are designed to provide reasonable protection against harmful
interference in a residential installation. This equipment generates, uses and can radiate radio frequency
energy and, if not installed and used in accordance with the instructions, may cause harmful interference
to radio communications. However, there is no guarantee that interference will not occur in a particular
installation. If this equipment does cause harmful interference to radio or television reception, which can
be determined by turning the equipment off and on, the user is encouraged to try to correct the interfer-
ence by one or more of the following measures:
5HRULHQWRUUHORFDWHWKHUHFHLYLQJDQWHQQD
,QFUHDVHWKHVHSDUDWLRQEHWZHHQWKHHTXLSPHQWDQGUHFHLYHU
&RQQHFWWKHHTXLSPHQWLQWRDQRXWOHWRQDFLUFXLWGLIIHUHQWIURPWKDWWRZKLFKWKHUHFHLYHULVFRQQHFWHG
&RQVXOWWKHGHDOHURUDQH[SHULHQFHGUDGLR79WHFKQLFLDQIRUKHOS
Caution: Any changes or modifications to this device not explicitly approved by manufacturer could void
your authority to operate this equipment.
7KLVGHYLFHFRPSOLHVZLWKSDUWRIWKH)&&5XOHV2SHUDWLRQLVVXEMHFWWRWKHIROORZLQJWZRFRQGLWLRQV
(1) This device may not cause harmful interference, and (2) this device must accept any interference
received, including interference that may cause undesired operation.
This equipment complies with FCC radiation exposure limits set forth for an uncontrolled environment.
This equipment should be installed and operated with minimum distance 20cm between the radiator &
your body.
All trademarks are used for reference purposes only.
Thanks again for choosing our smart camera! Make life safe in your hands!
Boost security mobility in your smartphone!