Shenyang Tongfang Multimedia Technology TC50CX400 LCD TV User Manual
Shenyang Tongfang Multimedia Technology Co., Limited LCD TV
UserManual.wiki
>
Shenyang Tongfang Multimedia Technology
>
TC50CX400 User Manual
User manual
Navigation menu
Upload a User Manual
Namespaces
Wiki Guide
HTML
PDF
Info
Views
User Manual
Discussion / Help
Navigation

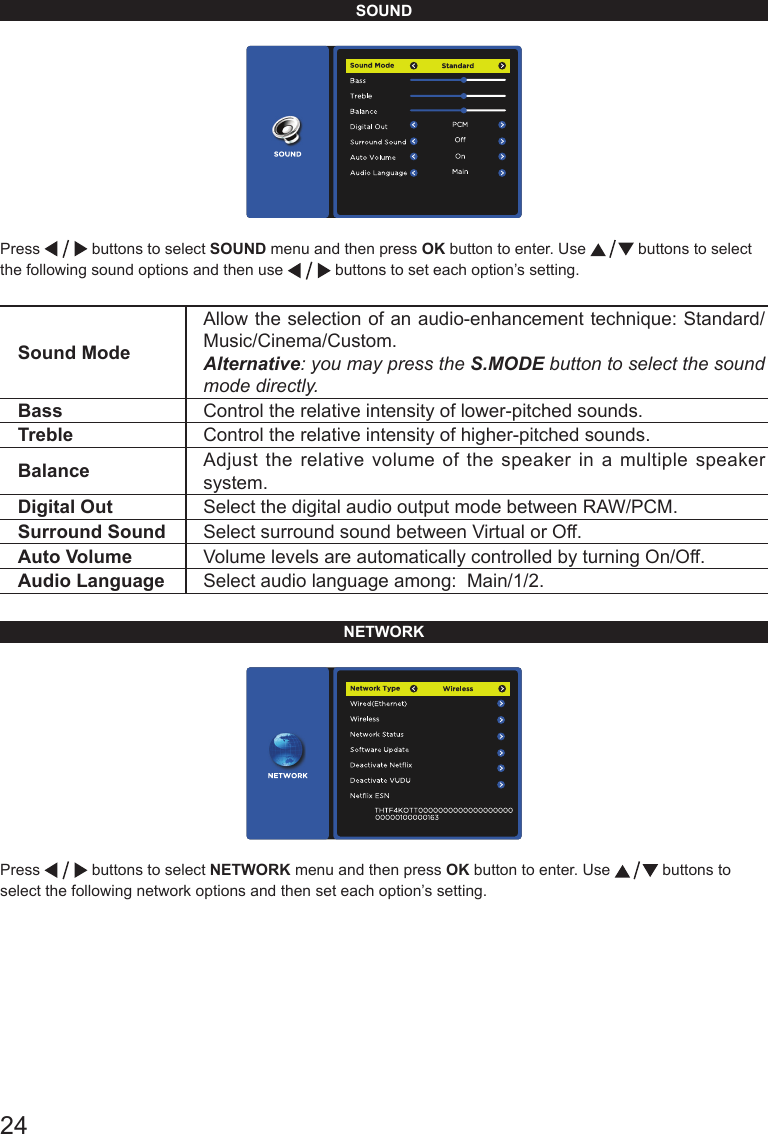
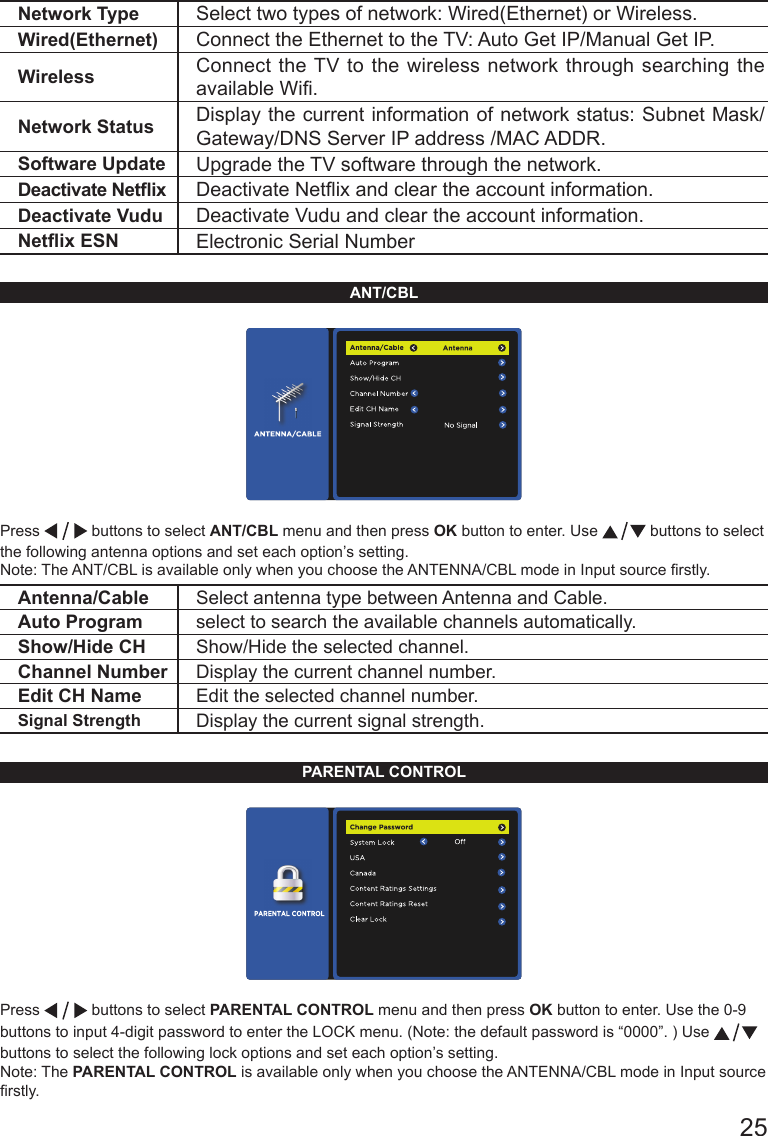
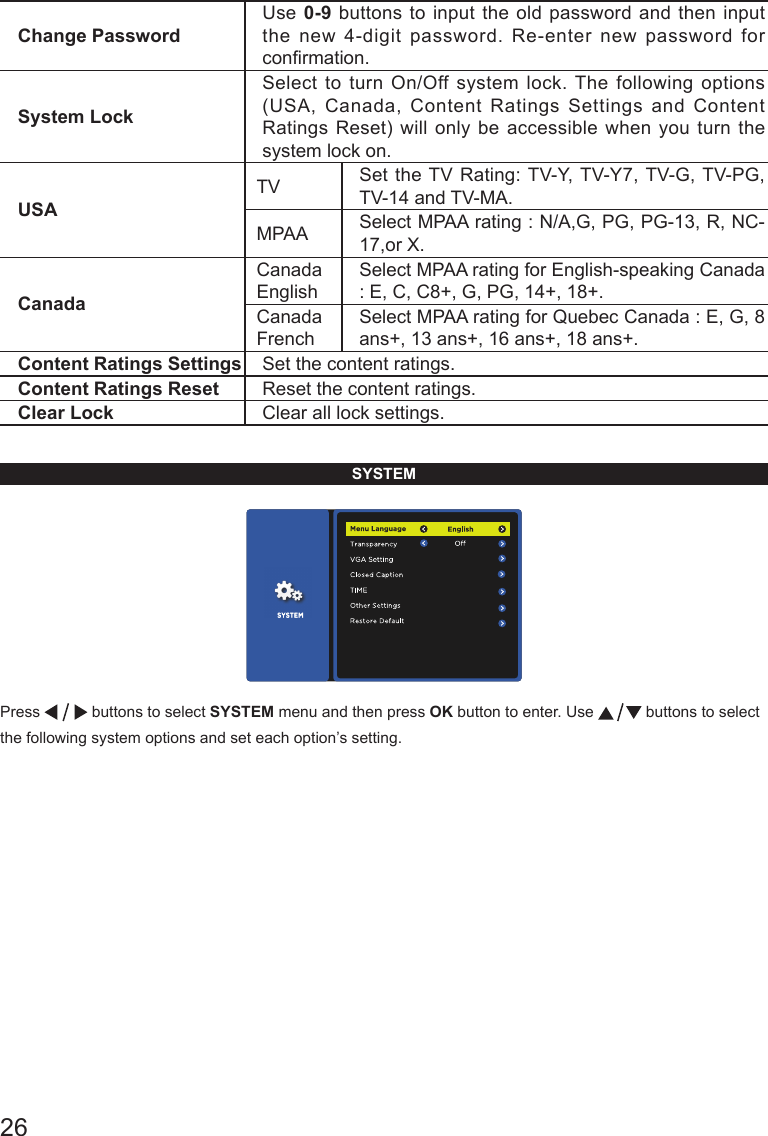
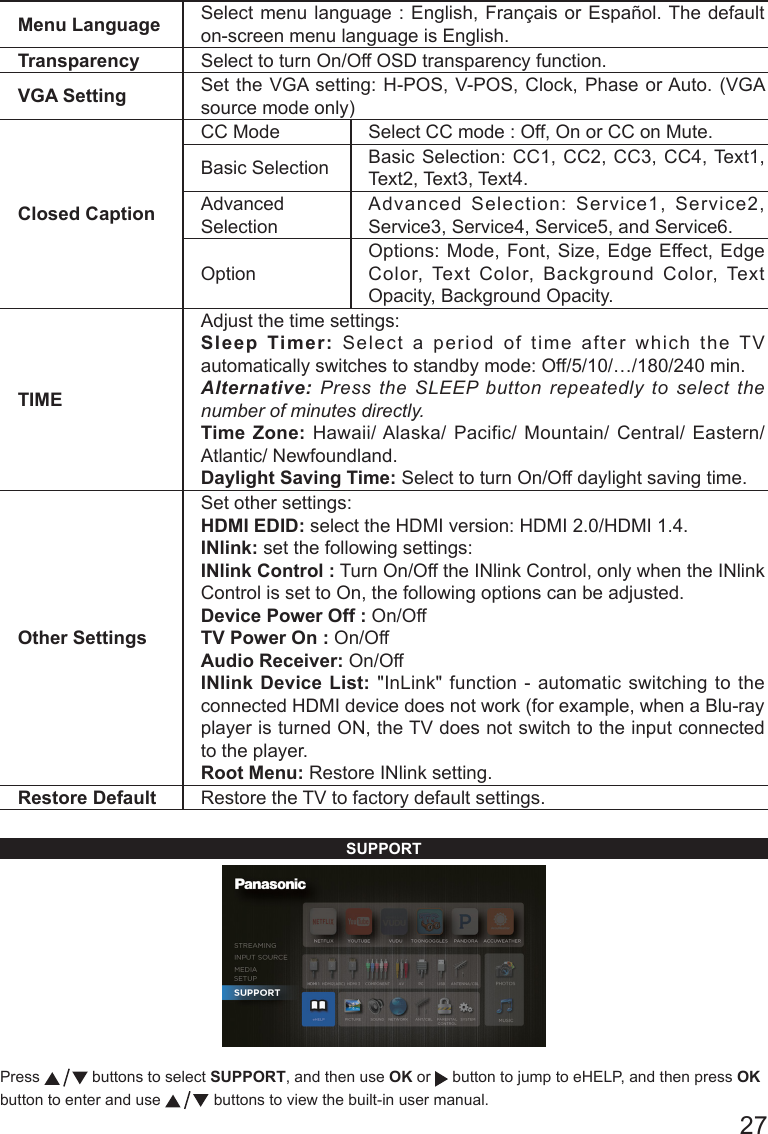

![30SpecicationsTC-50CX400Power Source AC 120 V, 60 HzPower Consumption(Rated power / Standby power)150 W / 0.5 WDisplay PanelPanel System LCD panel (LED backlight)Screen size 50 ” class(49.5 inches measured diagonally)W × H × Diagonal 43.1 ” × 24.2 ” × 49.5 ”(1096.01 mm × 616.68 mm × 1257 mm)Number of pixels 3840 × 2160Speaker Output 20 W [10 W + 10 W] (10 % THD)Channel Capability(Digital/Analog)VHF/ UHF: 2 - 69, CATV: 1 - 135Operating Conditions Temperature: 32 °F - 95 °F (0 °C - 35 °C) Humidity: 20 % - 80 % RH (non-condensing)ConnectionTerminalVIDEO IN RCA PIN (VIDEO, AUDIO-L, AUDIO-R)COMPONENT IN RCA PIN (VIDEO/Y, Pb, Pr, AUDIO-L, AUDIO-R)HDMI IN 1/2/3 TYPE A Connector (supports “HDAVI Control 5” function)USB 2.0 USB2.0 Type A connector DC 5V, Max. 500mAUSB 3.0 USB3.0 Type A connector DC 5V, Max. 900mADIGITAL AUDIO OUTPCM / Dolby Digital, Fiber OpticOTHERS ETHERNET (10BASE-T/100BASE-TX)DimensionsIncluding pedestal(W × H × D)44.4 ” × 27.56 ” × 11.14 ”(1,128 mm × 700 mm × 283 mm)TV Set only(W × H × D)44.4 ” × 25.98 ” × 3.31 ”(1,128 mm × 660 mm × 84 mm)Mass Including pedestal 26.68 lb. (12.1 kg ) NETTV Set only 25.8 lb. (11.7 kg ) NET Wireless LANStandard Compliance andFrequency Range *1, *2IEEE 802.11b/g/n : 2.400 GHz - 2.4835 GHzSecurityWPA2-PSK (TKIP/AES)WPA-PSK (TKIP/AES)WEP (64bit/128bit)*1 The frequency and channel differ depending on the country.*2 802.11b/g/n CH1 ~ CH11 only use for United States and Canada.NoteDesign and Specications are subject to change without notice. Mass and Dimensions shown are approximate.](https://usermanual.wiki/Shenyang-Tongfang-Multimedia-Technology/TC50CX400/User-Guide-2749599-Page-30.png)