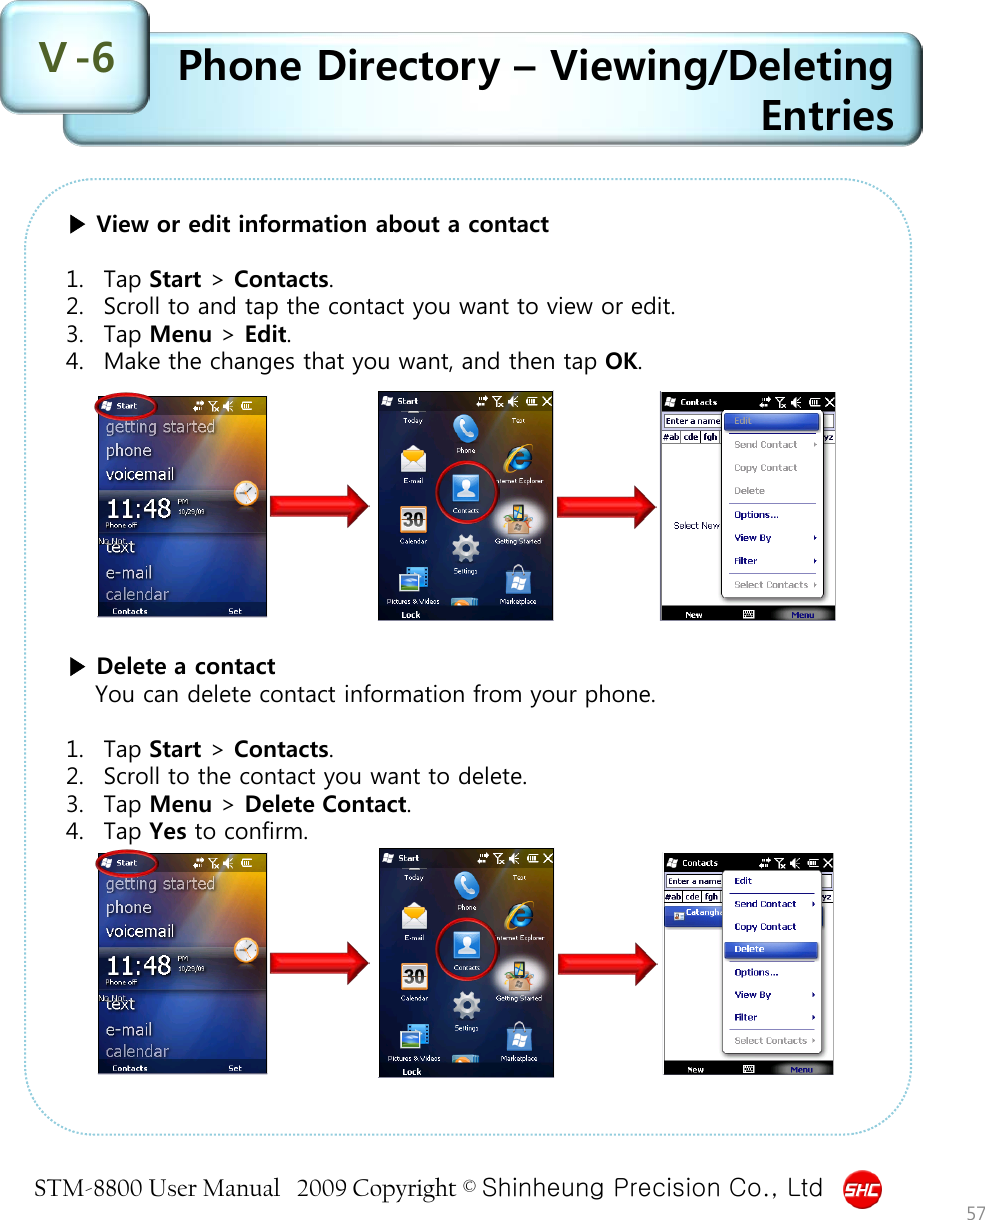
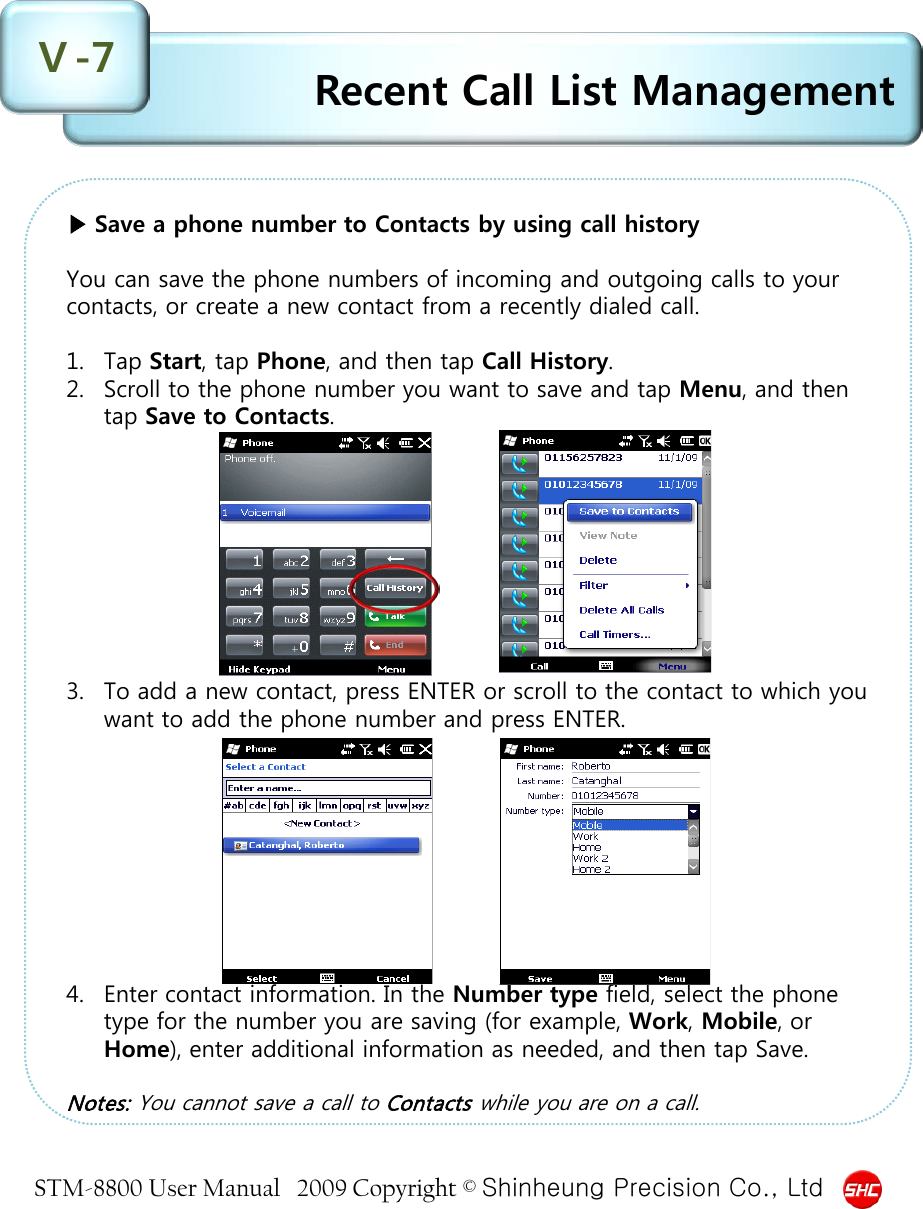
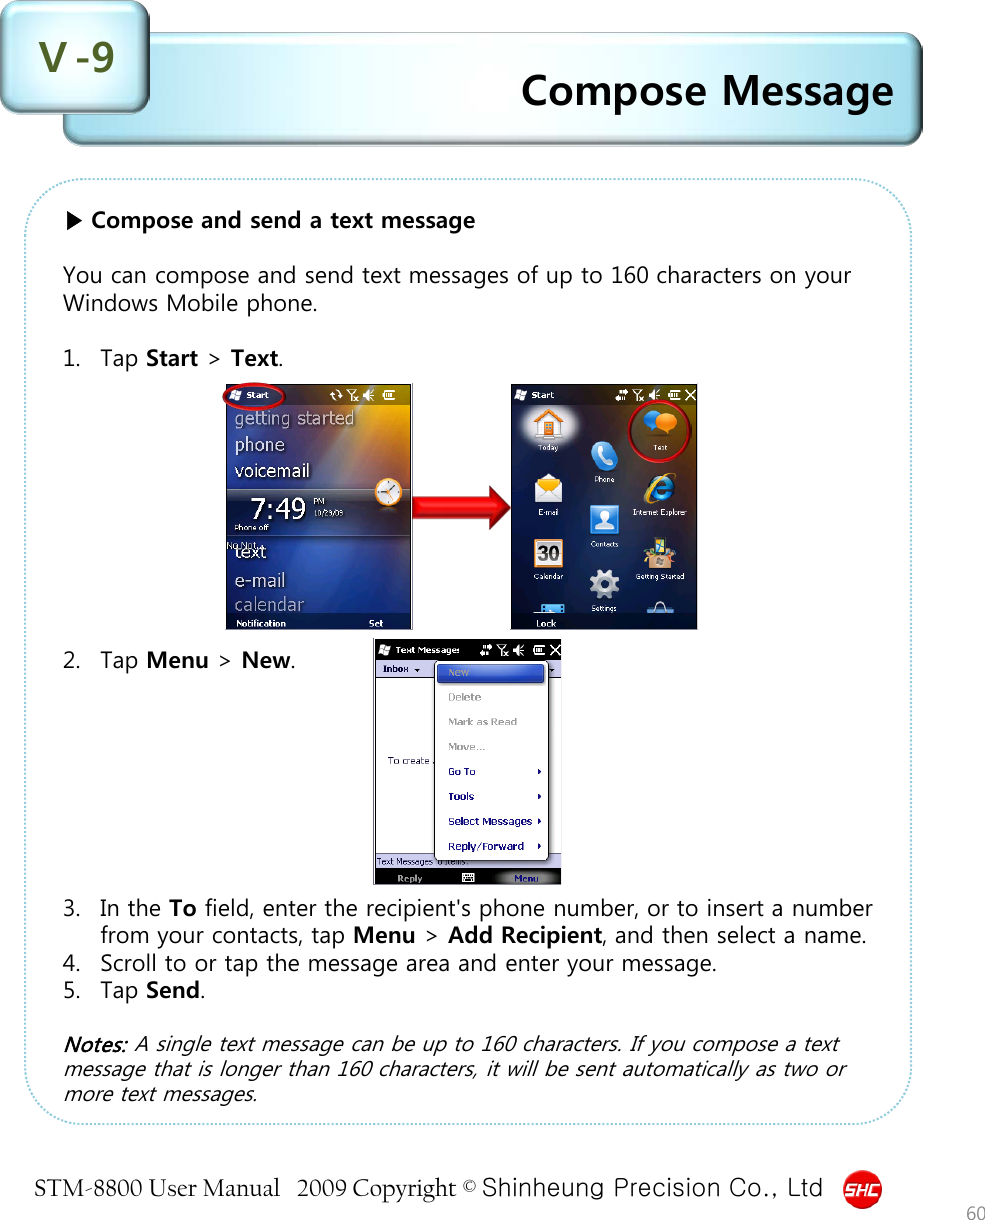
Shin Heung Precision STM-8800 Industrial PDA User Manual
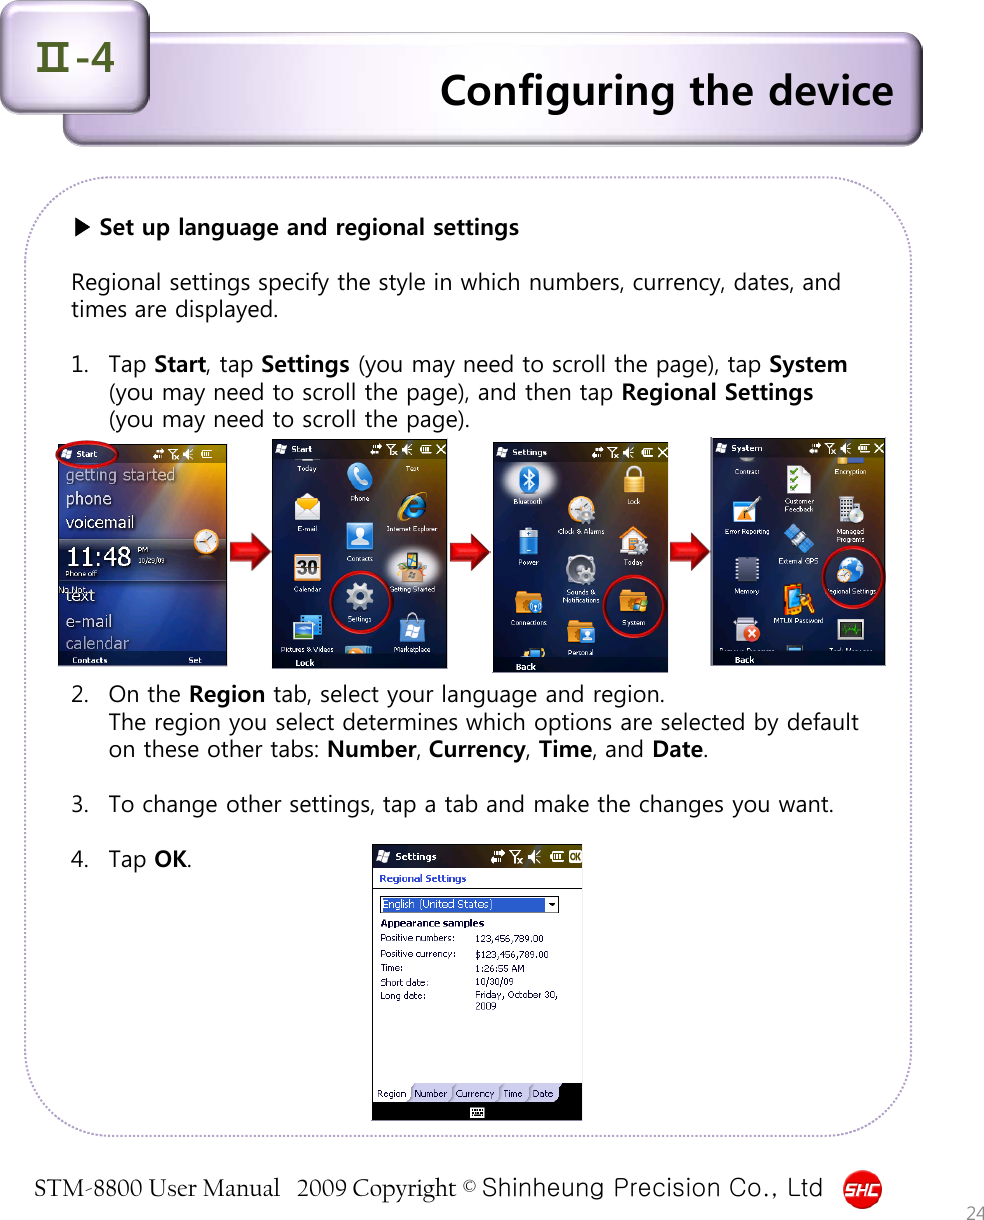
Shin Heung Precision Co., Ltd. Industrial PDA
UserManual.wiki
>
Shin Heung Precision
>
STM 8800 User Manual
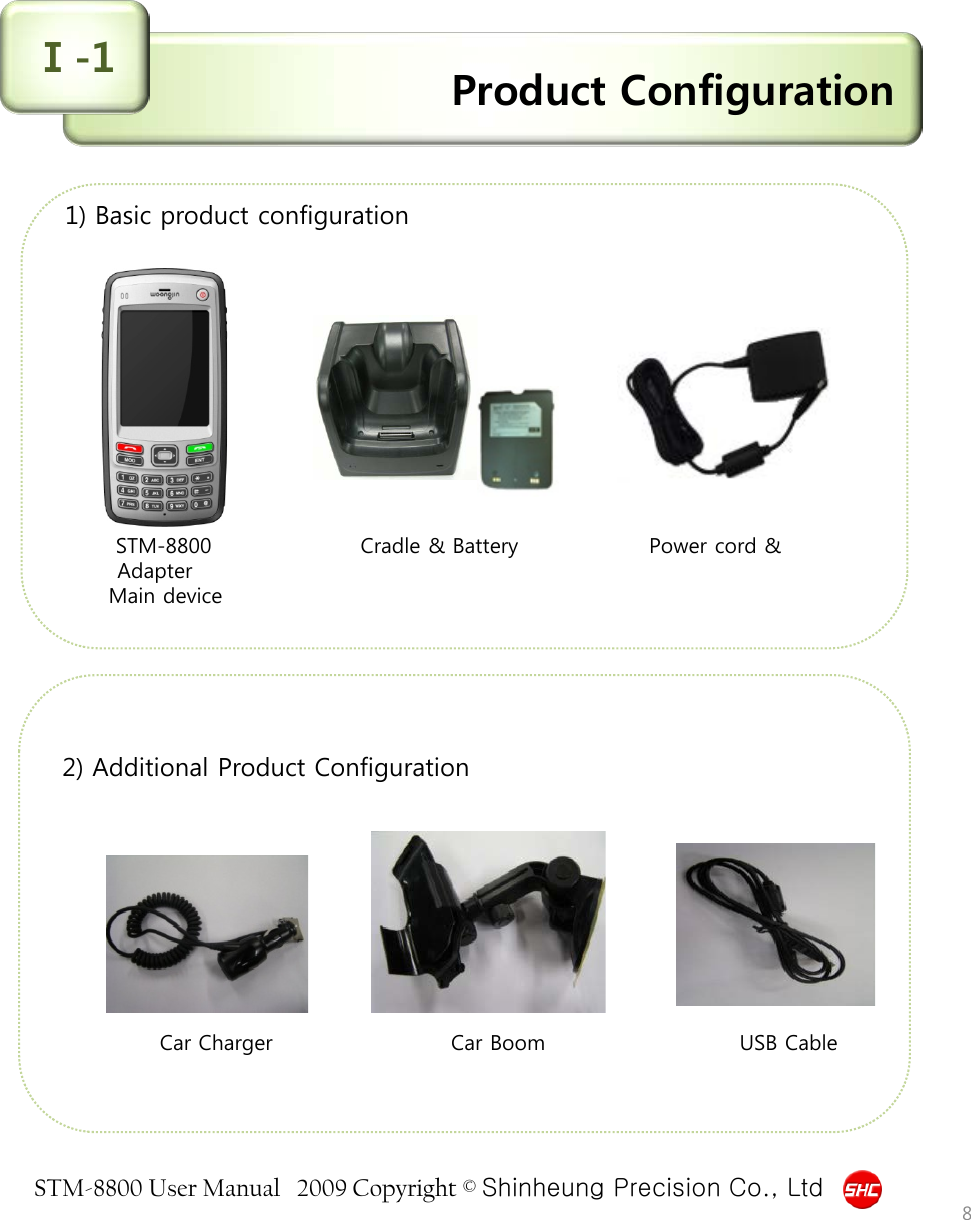
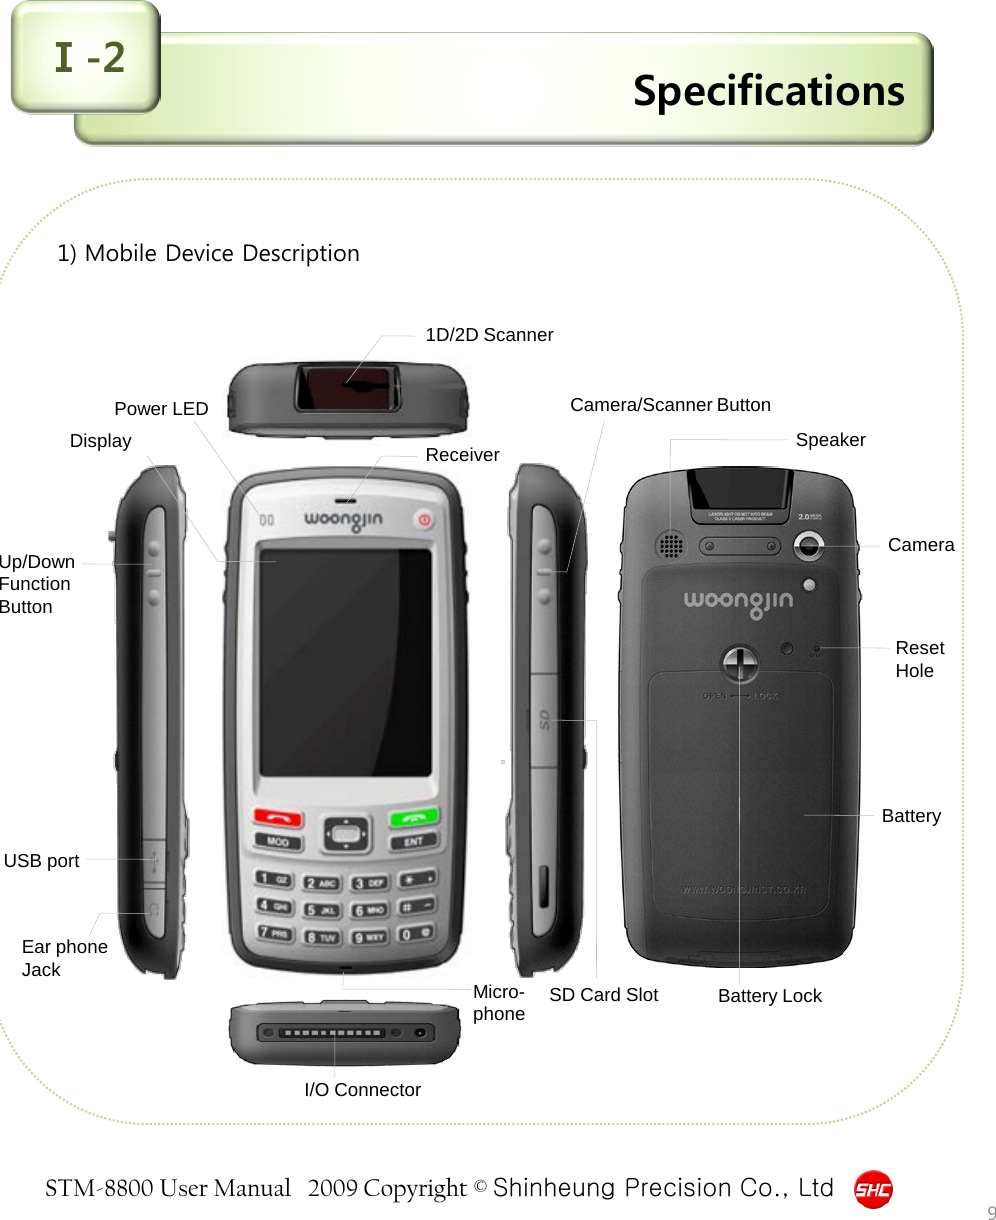
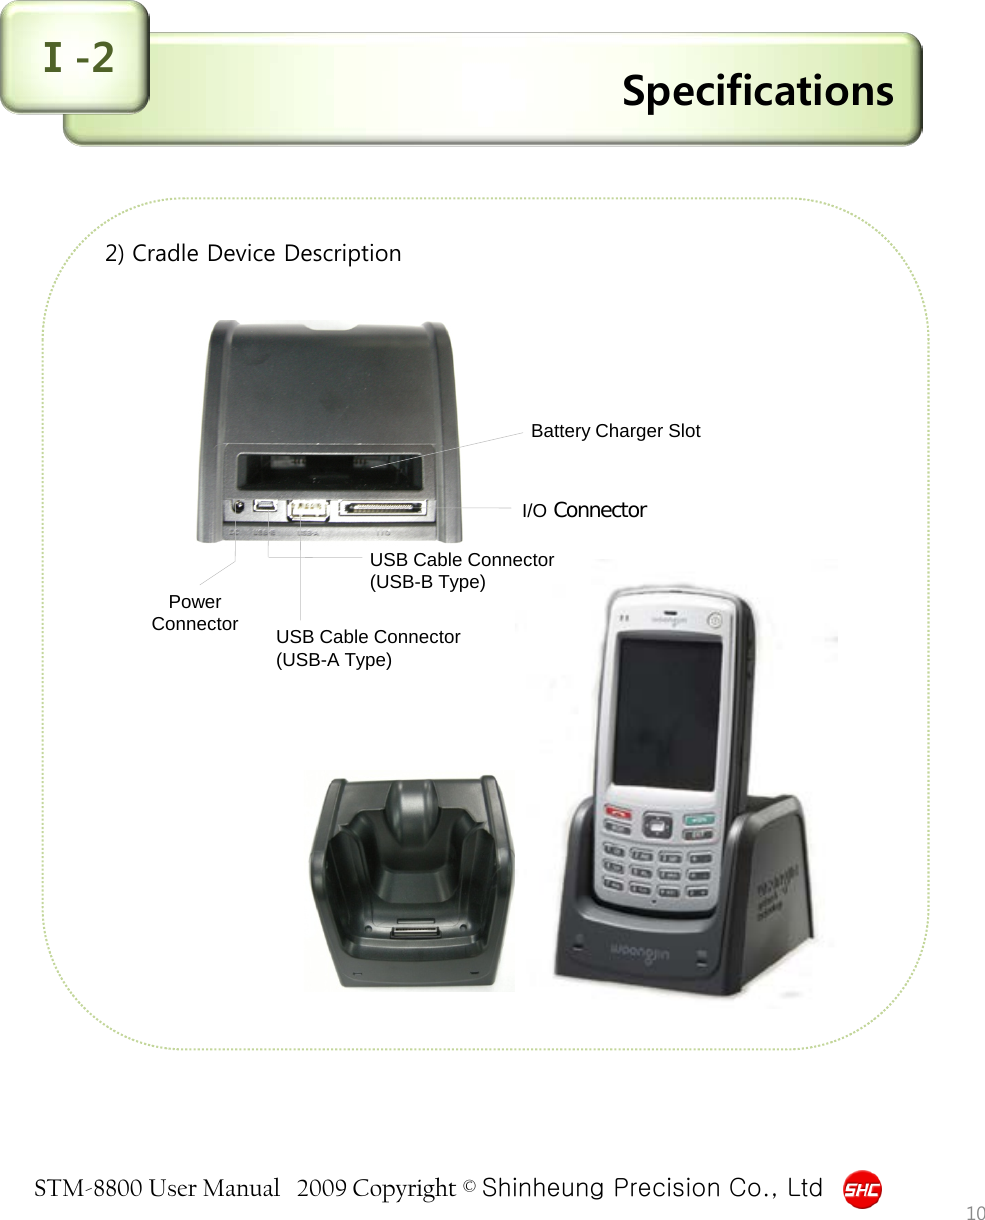
User Manual
Navigation menu
Upload a User Manual
Namespaces
Wiki Guide
HTML
PDF
Info
Views
User Manual
Discussion / Help
Navigation
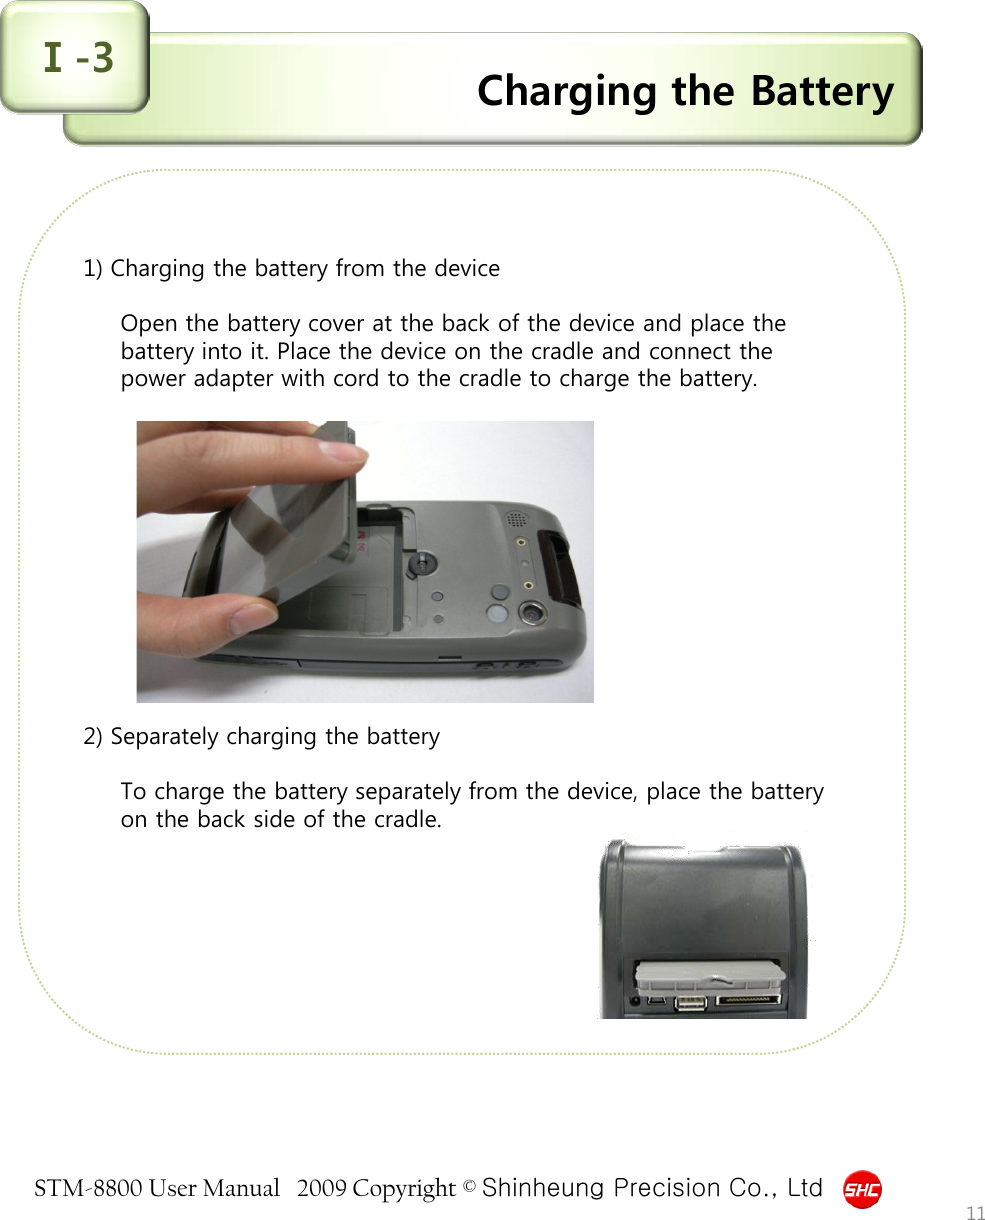
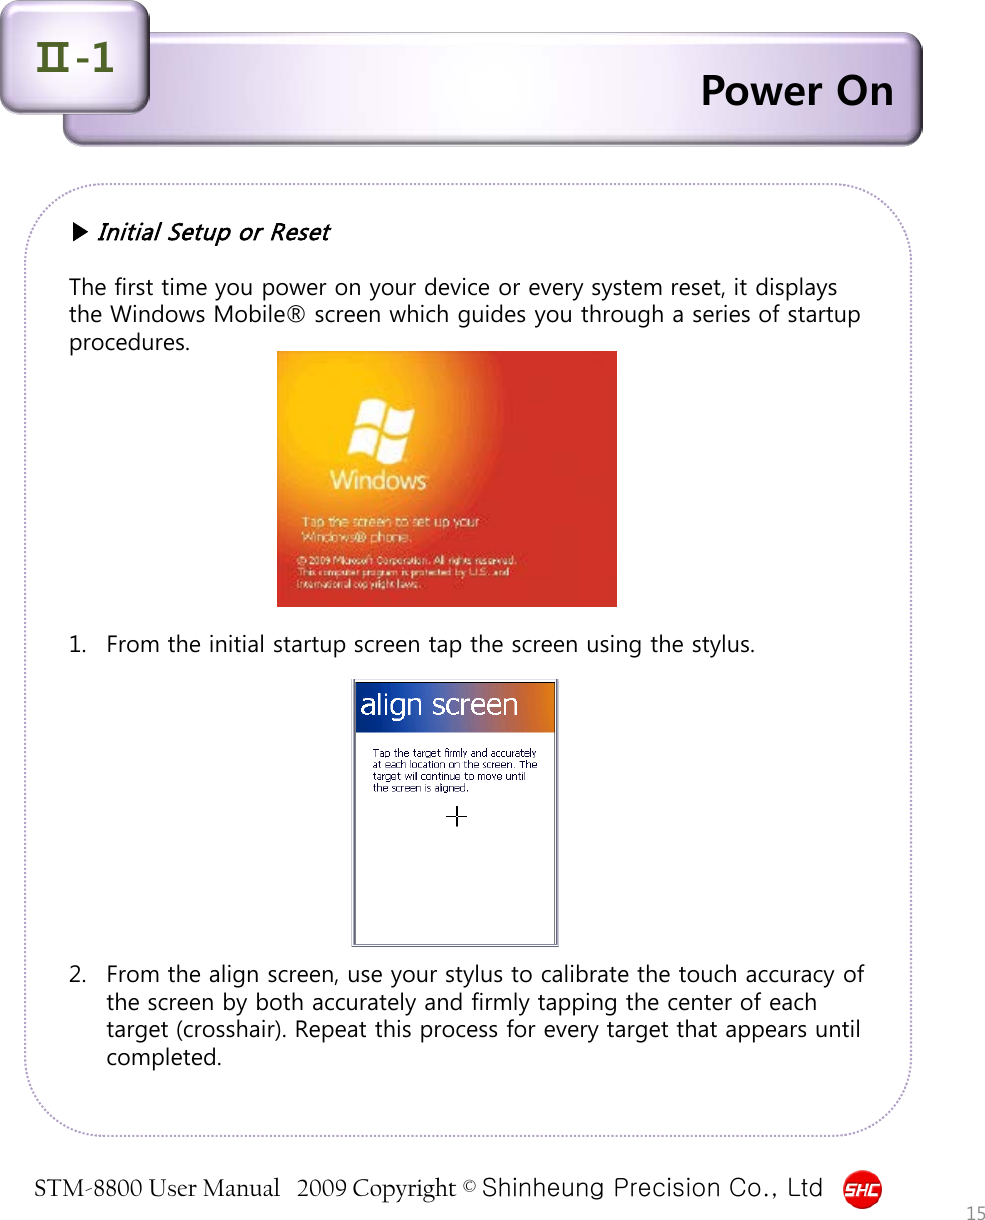
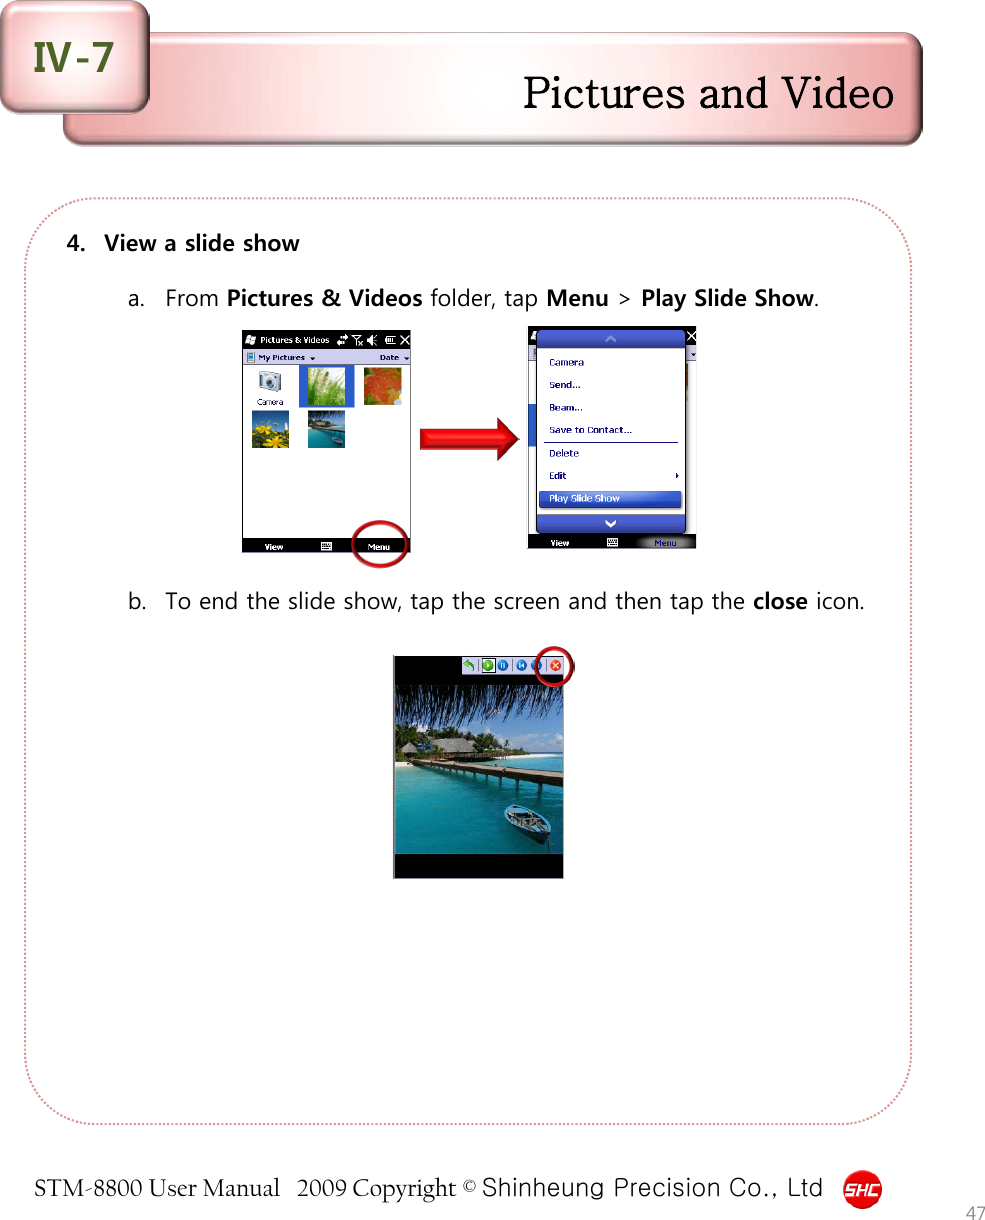
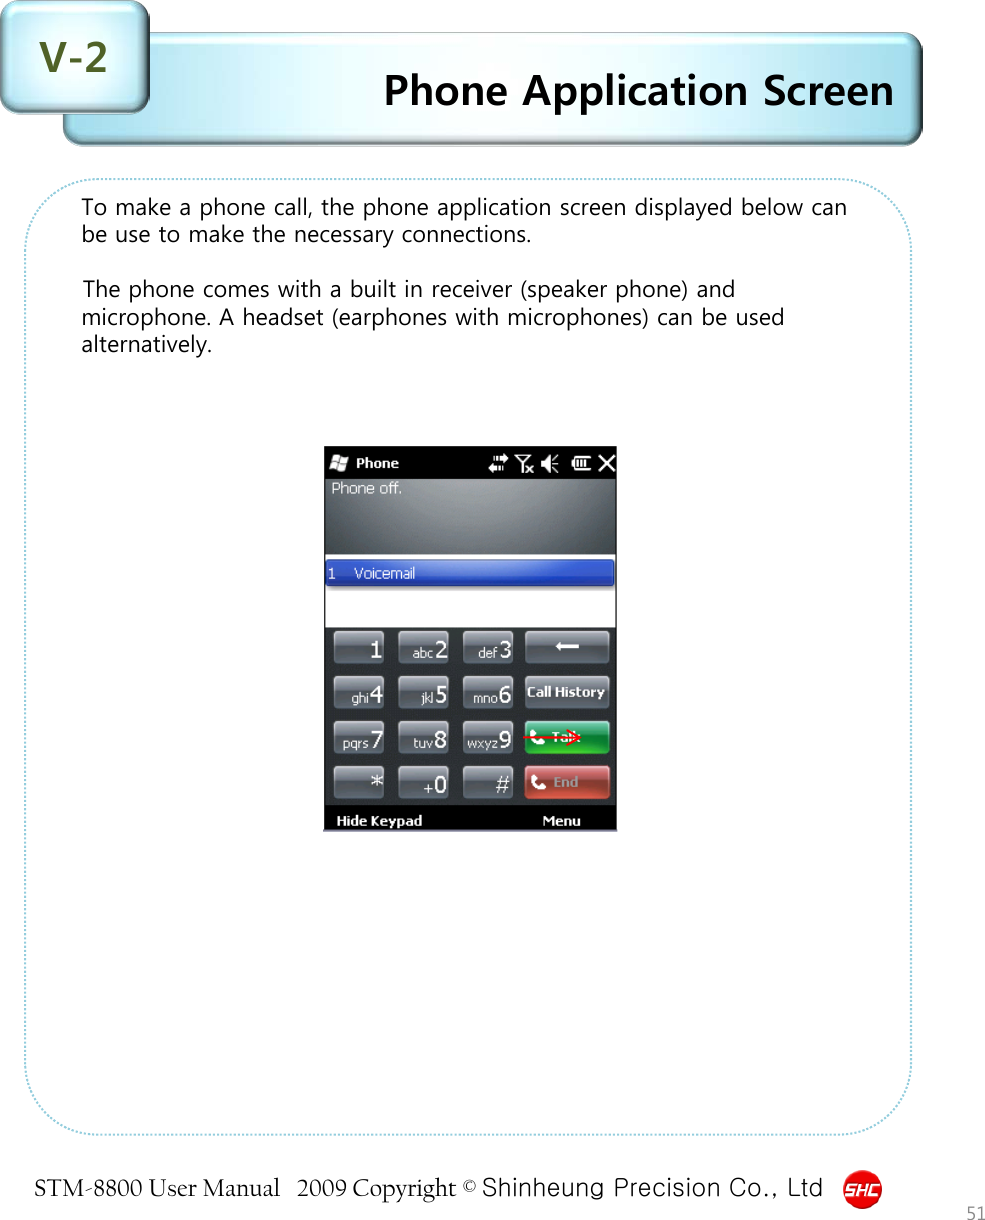
![STM-8800 User Manual 2009 Copyright © Shinheung Precision Co., Ltd Power On Ⅱ-1 •Insert the battery into the device and press the Power button while about 2sec to turn ON the power. •When the device is powered ON, short press the Power button again turns Sleep/Wakeup the power. If the device does not turn ON, check the battery for proper charging. Power button [Insert the battery] 14](https://usermanual.wiki/Shin-Heung-Precision/STM-8800/User-Guide-2033909-Page-14.png)
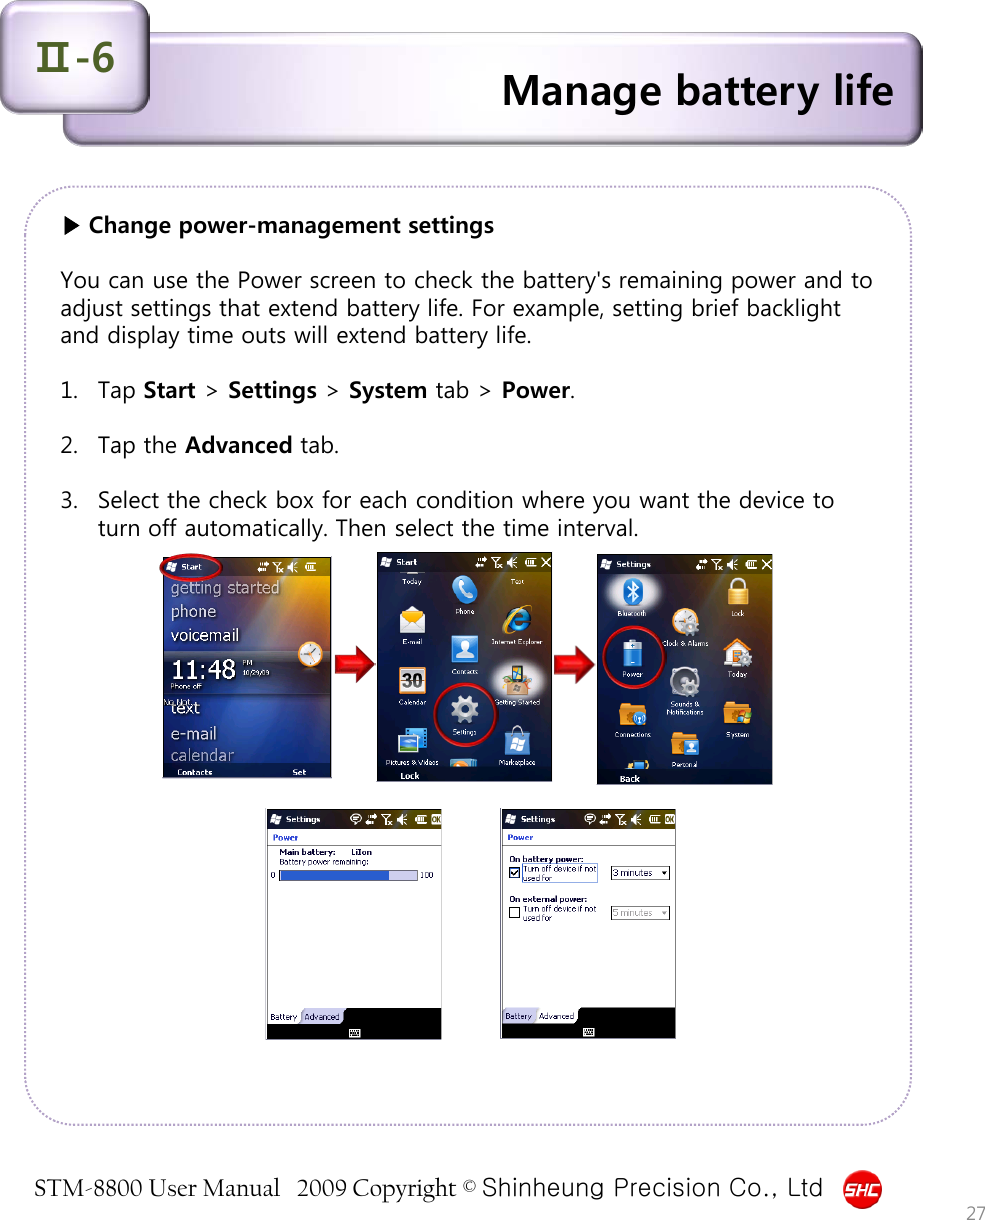

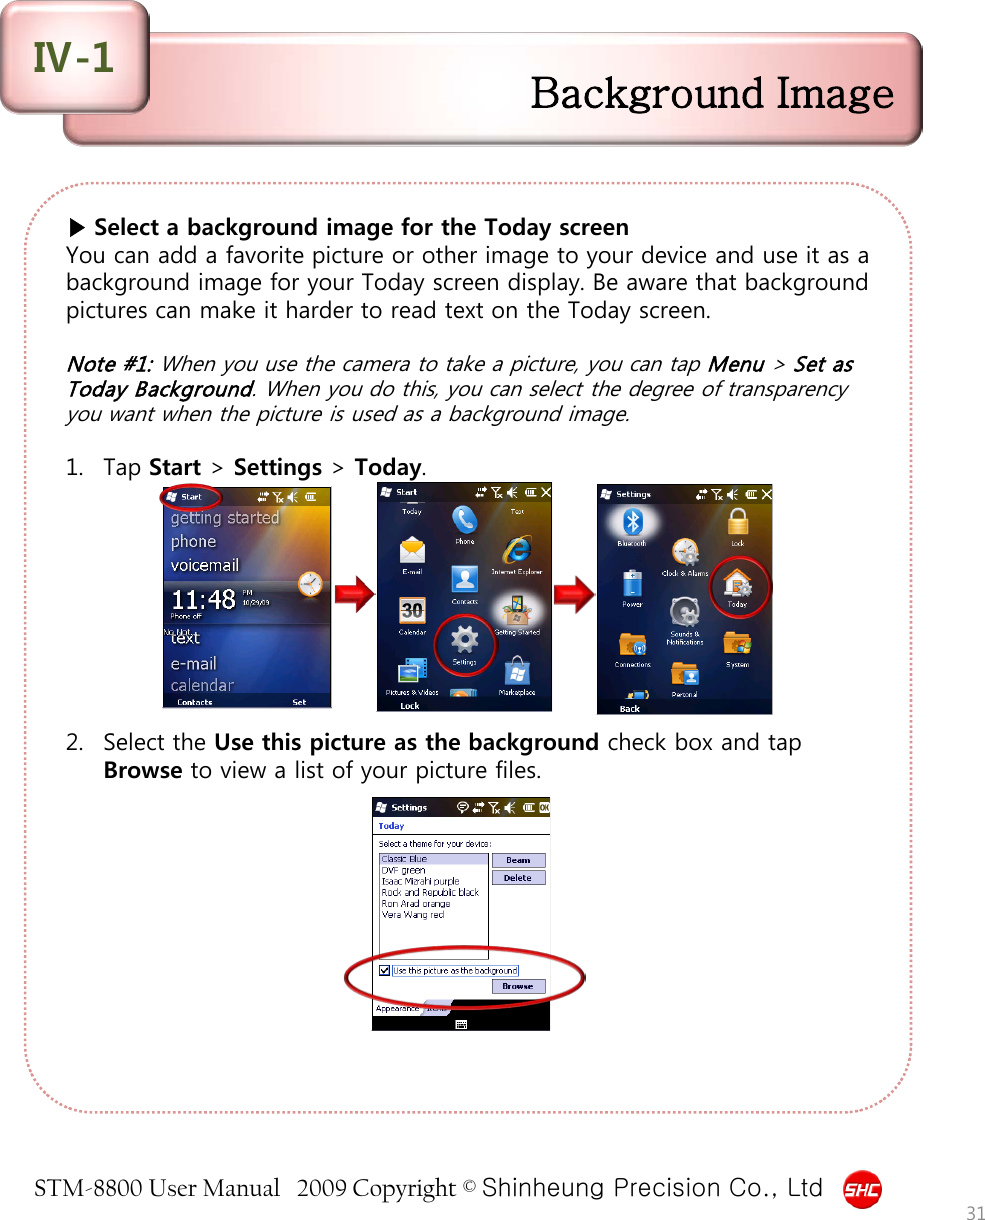
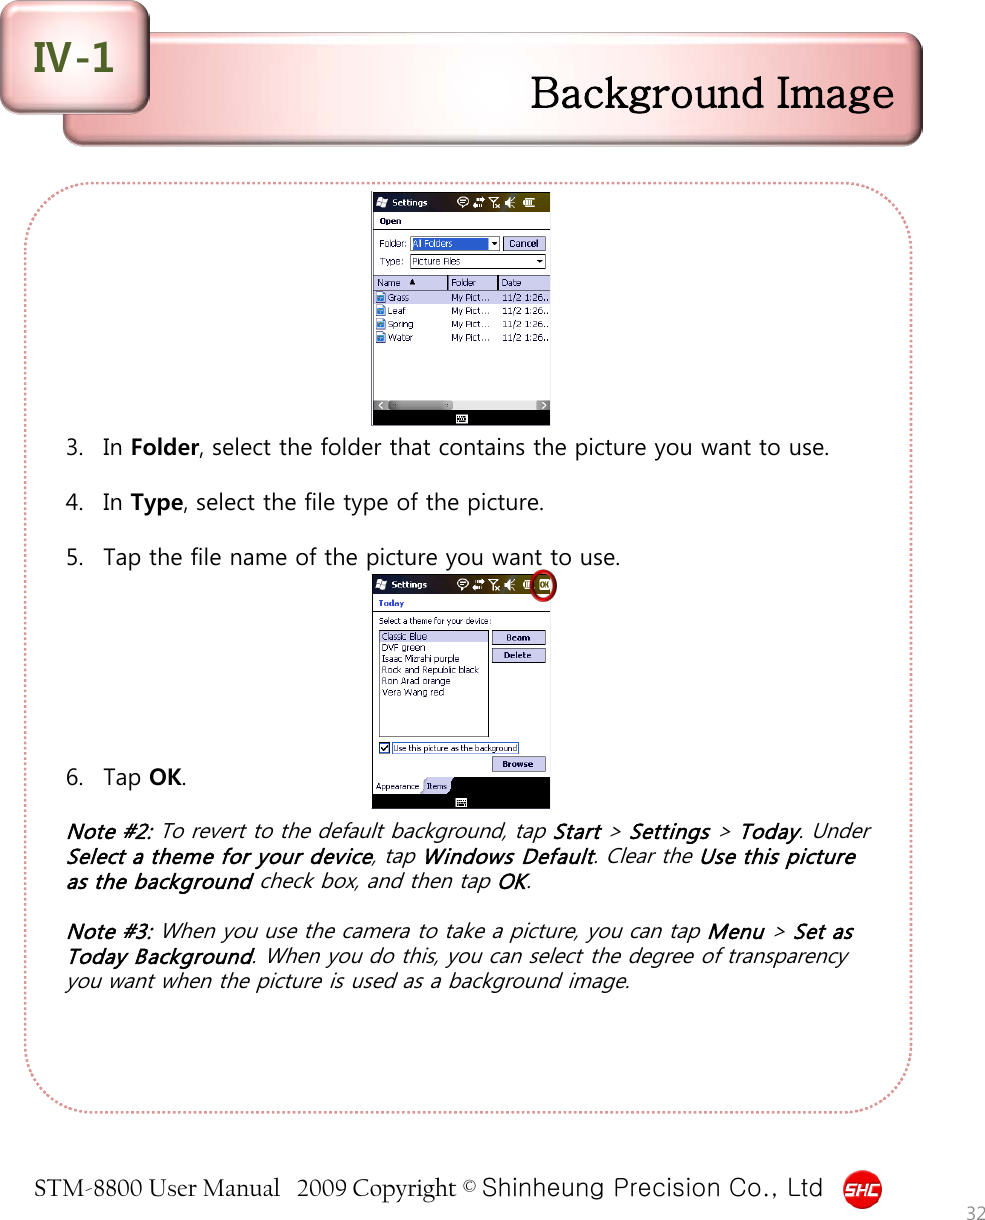
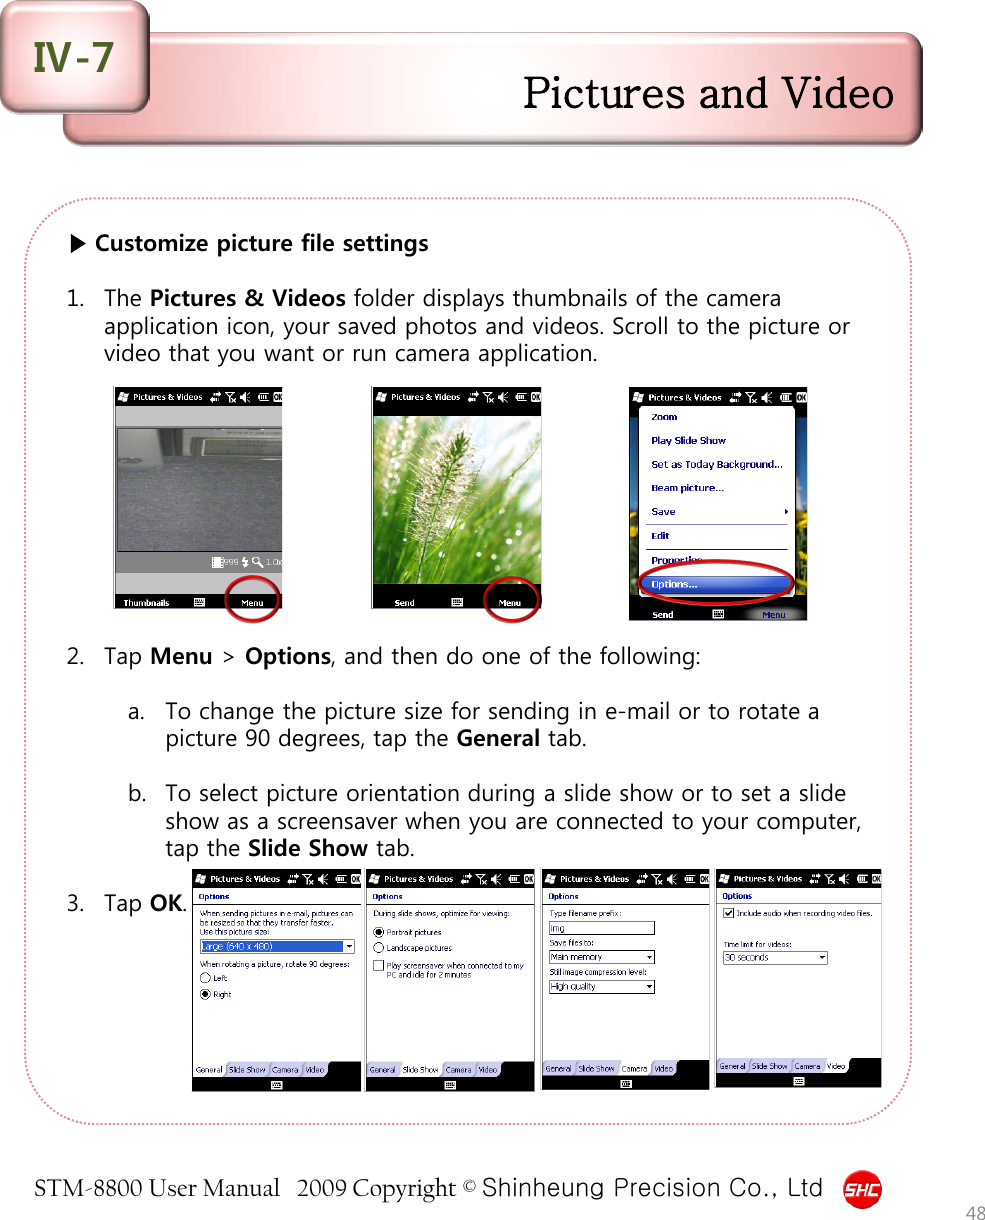
![STM-8800 User Manual 2009 Copyright © Shinheung Precision Co., Ltd Adjust power-management settings to decrease screen brightness and also how long the backlight and screen displays stay on. 1. Tap Start > Settings > System > Backlight. 2. In the Battery Power and External Power Tabs, specify how long the backlight will stay on. Also specify if pressing a button or tapping the screen turns on the backlight. 3. In the Brightness Tab, set the brightness level of the backlight when “On Battery” and on external power source (“On Power”). 4. When you are done, tap on the [OK] button to accept/save the changes made on the window. Brightness Ⅳ-2 33](https://usermanual.wiki/Shin-Heung-Precision/STM-8800/User-Guide-2033909-Page-33.png)


![STM-8800 User Manual 2009 Copyright © Shinheung Precision Co., Ltd Microsoft ActiveSync installation VI-1 1. Download and run the Active Sync installation program. Please click the [Next] button if you are ready to Set-up ActiveSync. 2. You’re prompted to select the installation folder for ActiveSync. Click the [Next] button to install ActiveSync to the default folder, or click the [Change] button to select a different destination for the program. 63](https://usermanual.wiki/Shin-Heung-Precision/STM-8800/User-Guide-2033909-Page-63.png)
![STM-8800 User Manual 2009 Copyright © Shinheung Precision Co., Ltd Microsoft ActiveSync installation VI-1 3. Click on the [Next] button. 4. ActiveSync installation is finished. Please turn on and put the STM-8800 unit on to the cradle with USB cable connected to the PC. (use USB 2.0 or higher) 64](https://usermanual.wiki/Shin-Heung-Precision/STM-8800/User-Guide-2033909-Page-64.png)
![STM-8800 User Manual 2009 Copyright © Shinheung Precision Co., Ltd ▶ Initializing the Mobile Device back to the factory default settings (Hard Reset) There are many possible reasons why the Mobile Device has to be reinitialize back to the factory default setting, like, when the device would not respond even after performing a reset or the user forgets the password set on the system. This process is called “Hard Reset.” When performing hard reset, all information in the RAM (files, system settings, installed programs) will be cleared. To insure the safety/integrity of the information, make a backup or make a copy of it in the SD card before performing a hard reset. Restore the information after the hard reset process to recover the information. As said earlier, all information stored in the Mobile Device’s RAM will be cleared after performing a hard reset. However, it is possible to recover information backed up to the PC, SD card or the Web folder To perform a Hard Reset: 1. Remove the Mobile Device form the cradle. 2. While holding down the [Left Up]-[Left-Down]-[Right-S] buttons, poke the reset key using the Stylus pen. 3. Wait until the Mobile Device re-starts. Initialize to factory default VII-2 71](https://usermanual.wiki/Shin-Heung-Precision/STM-8800/User-Guide-2033909-Page-71.png)