Shinano Kenshi PTP1 Plextalk Pocket User Manual PTP1 ENG Manual080820
Shinano Kenshi Co., Ltd. Plextalk Pocket PTP1 ENG Manual080820
UserManual.wiki
>
Shinano Kenshi
>
PTP1 User Manual
Users Manual
Navigation menu
Upload a User Manual
Namespaces
Wiki Guide
HTML
PDF
Info
Views
User Manual
Discussion / Help
Navigation

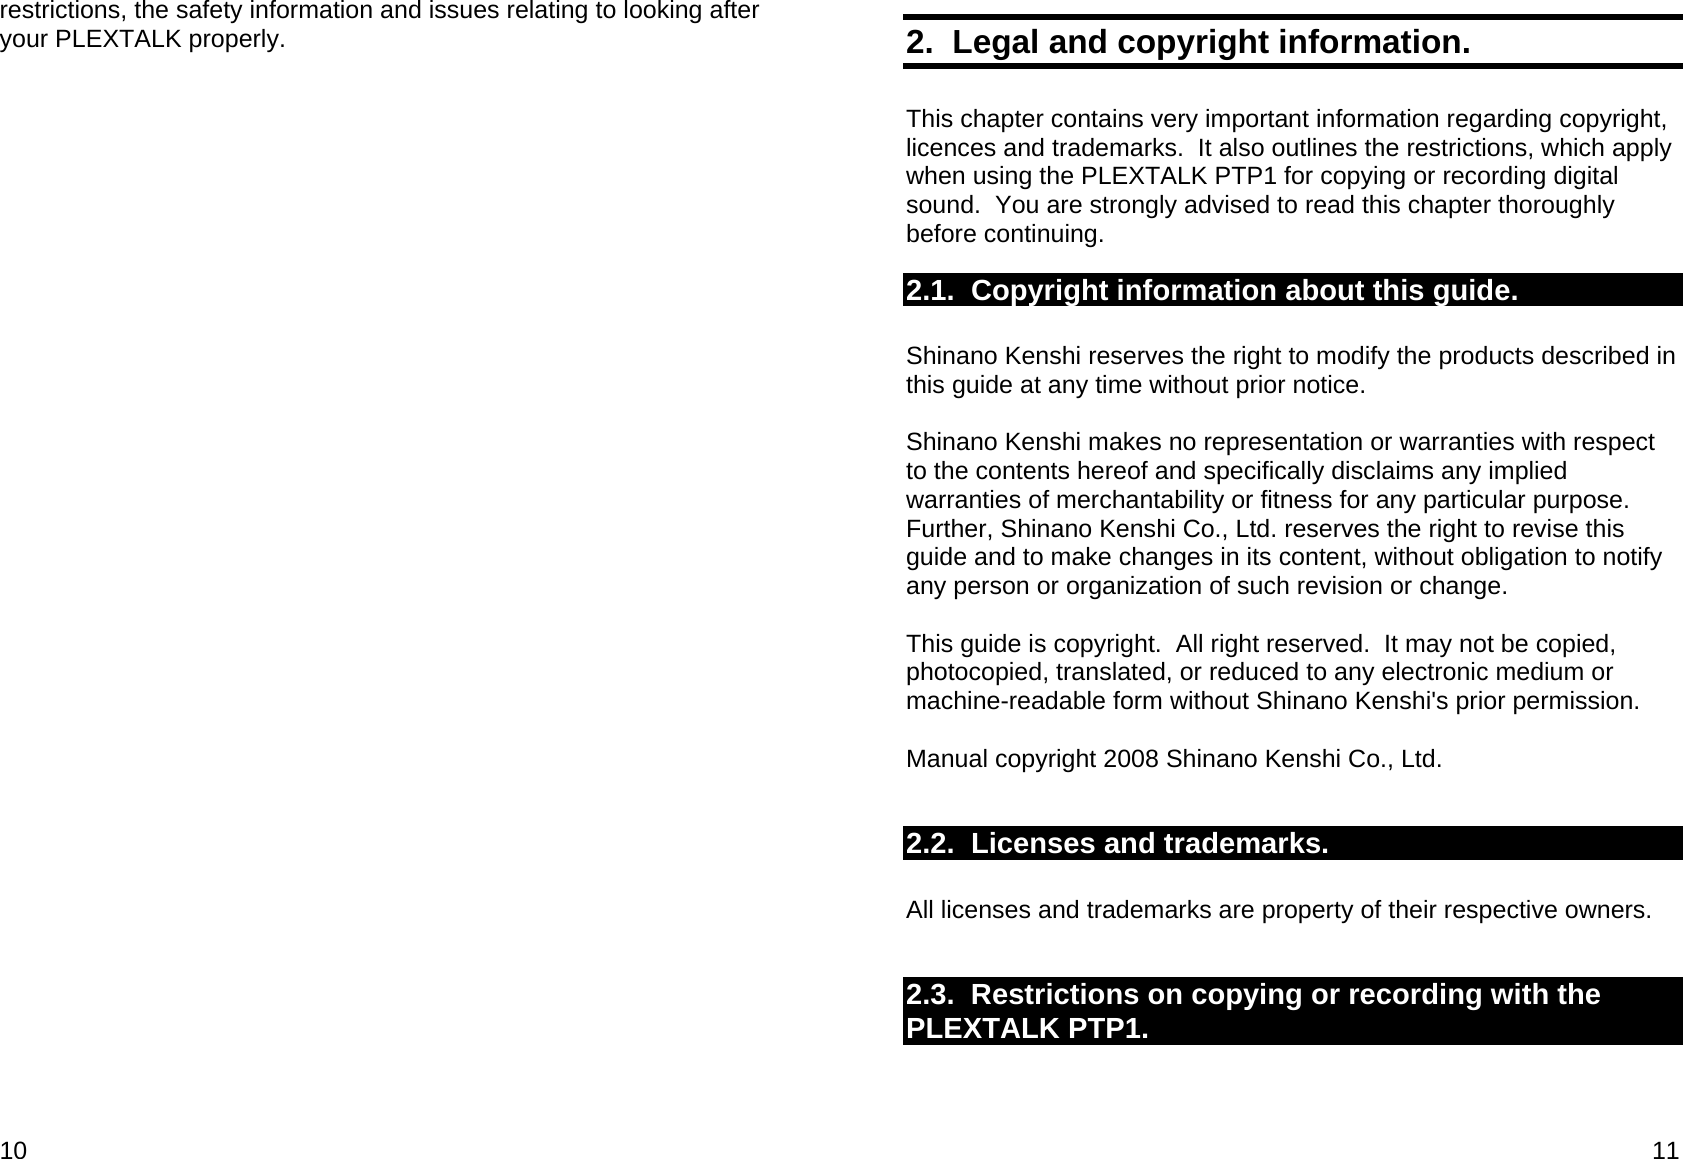
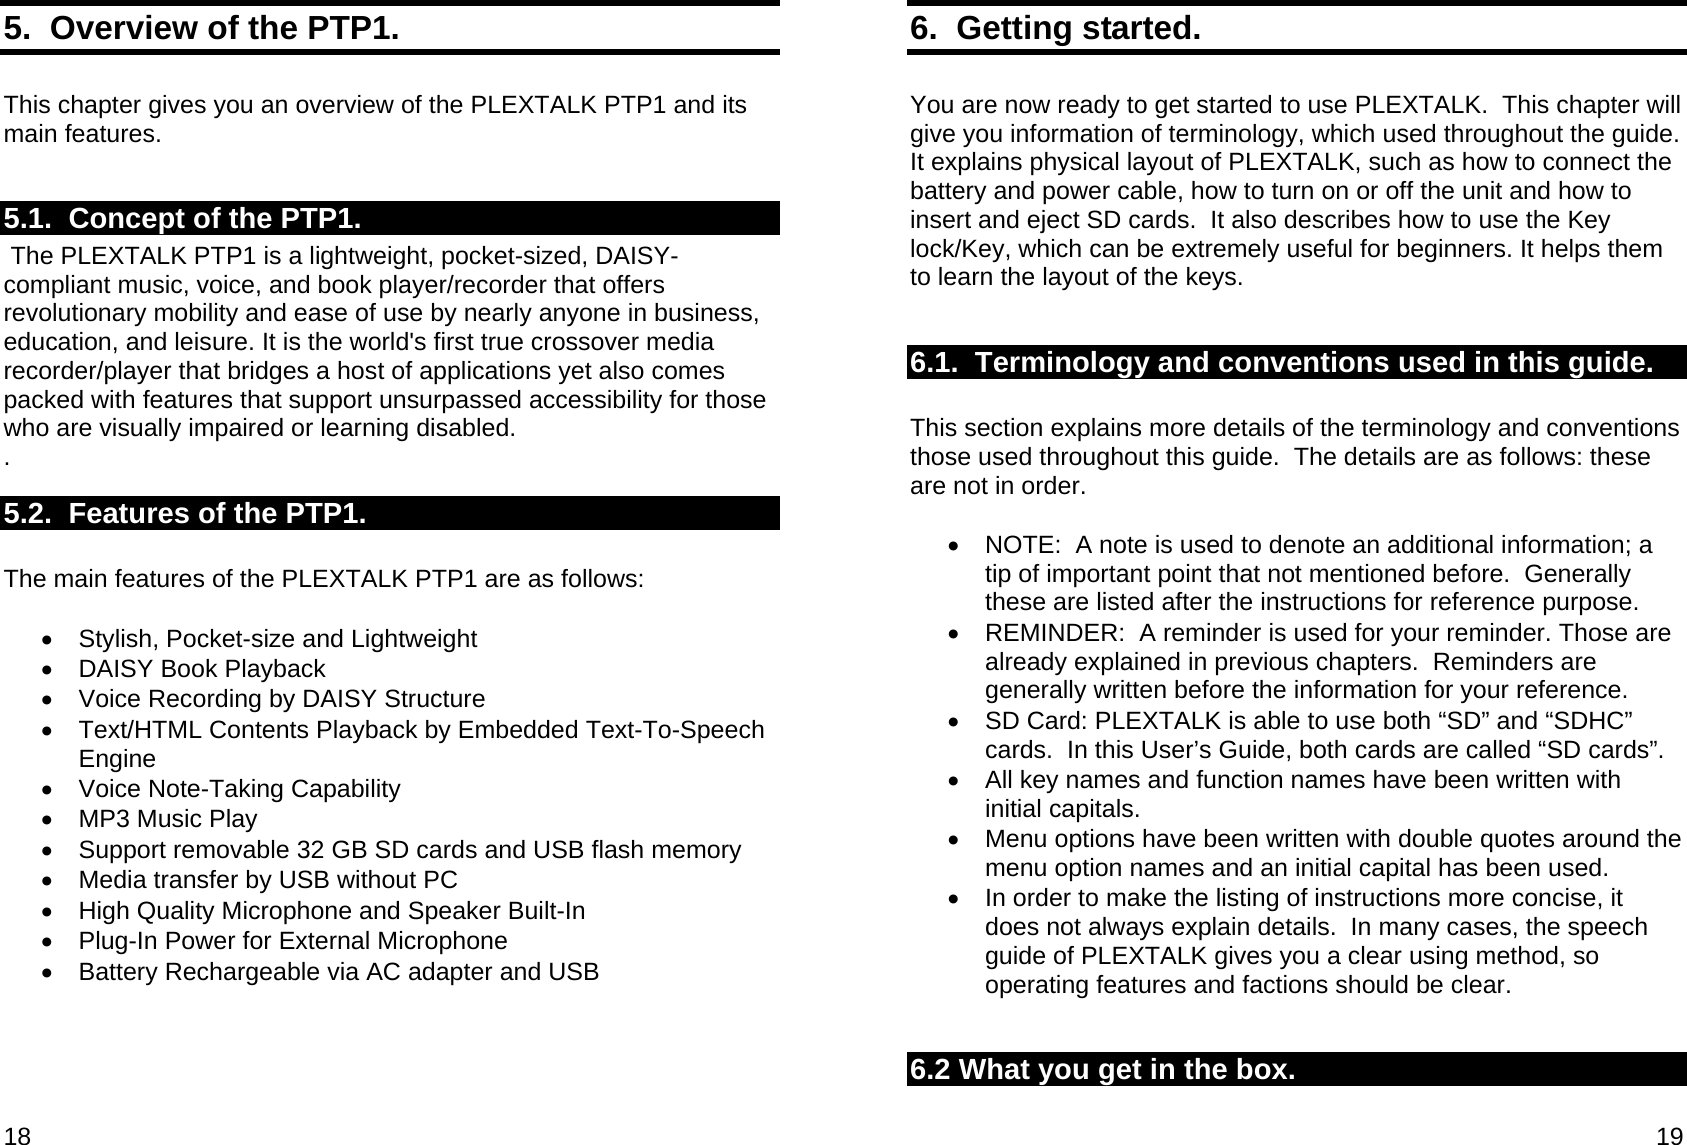
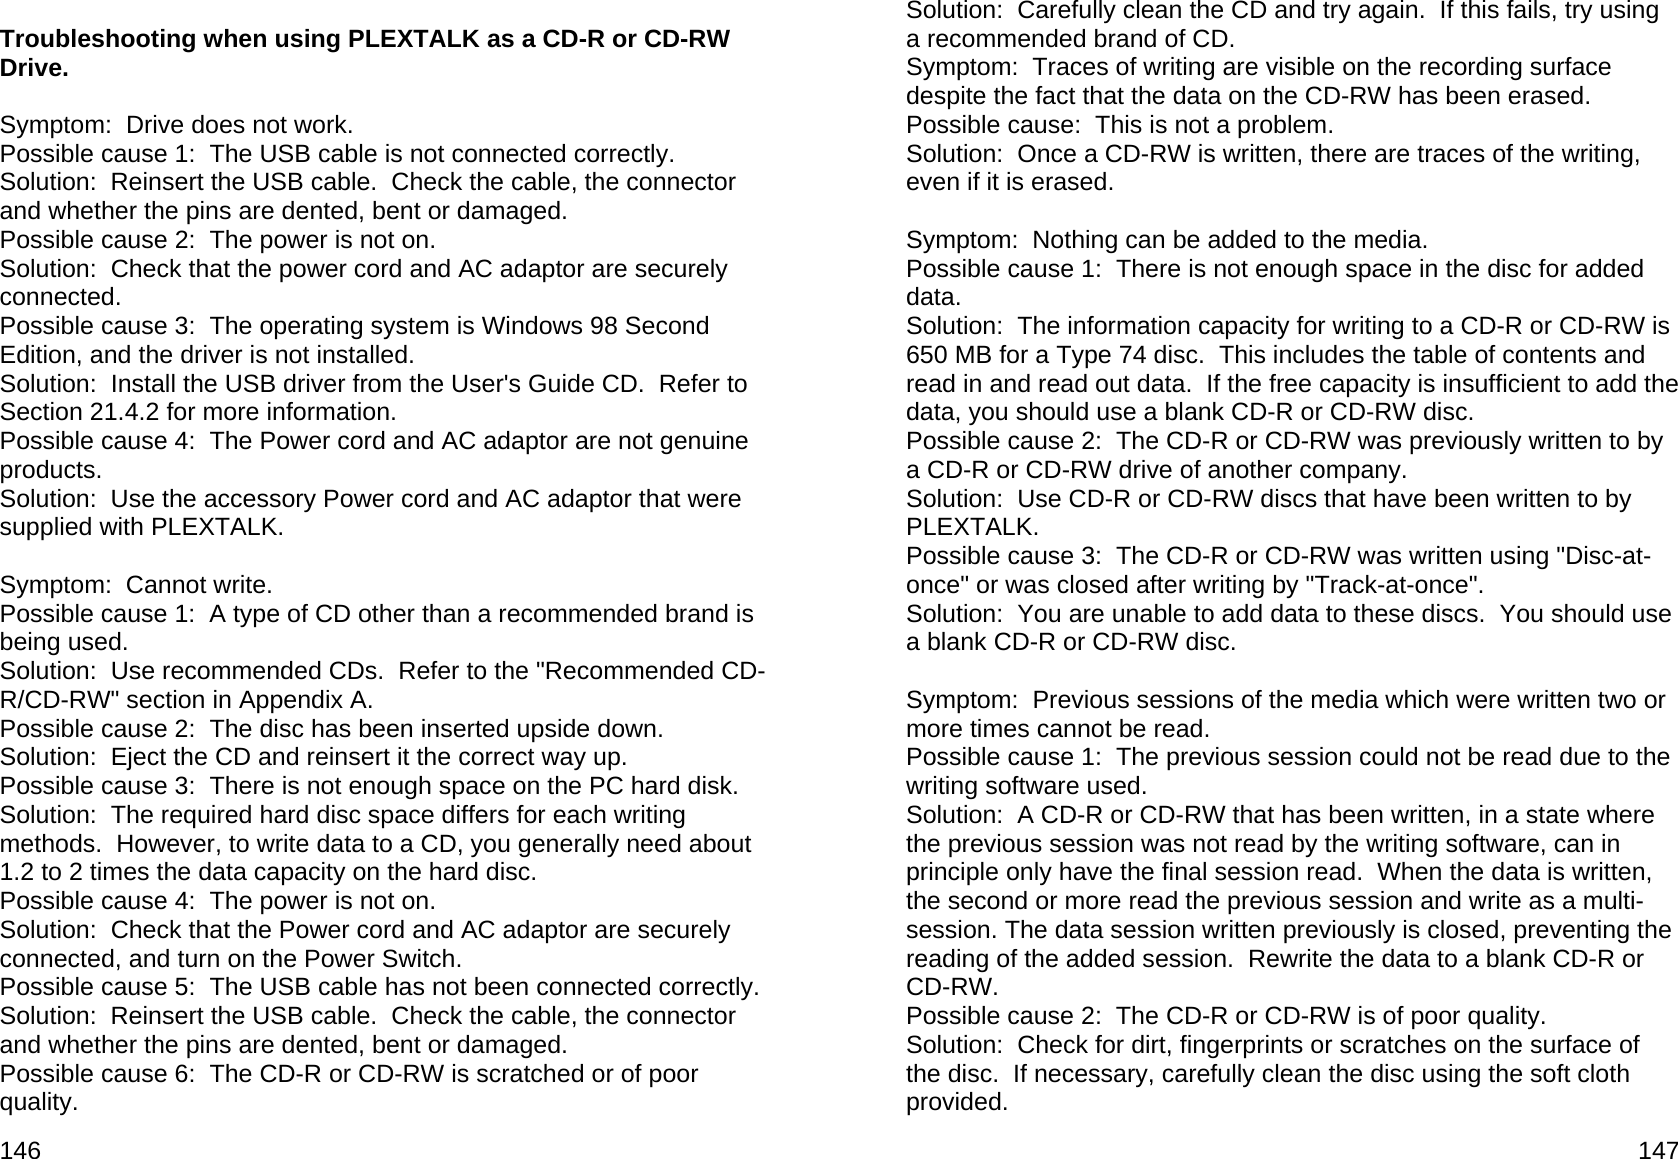
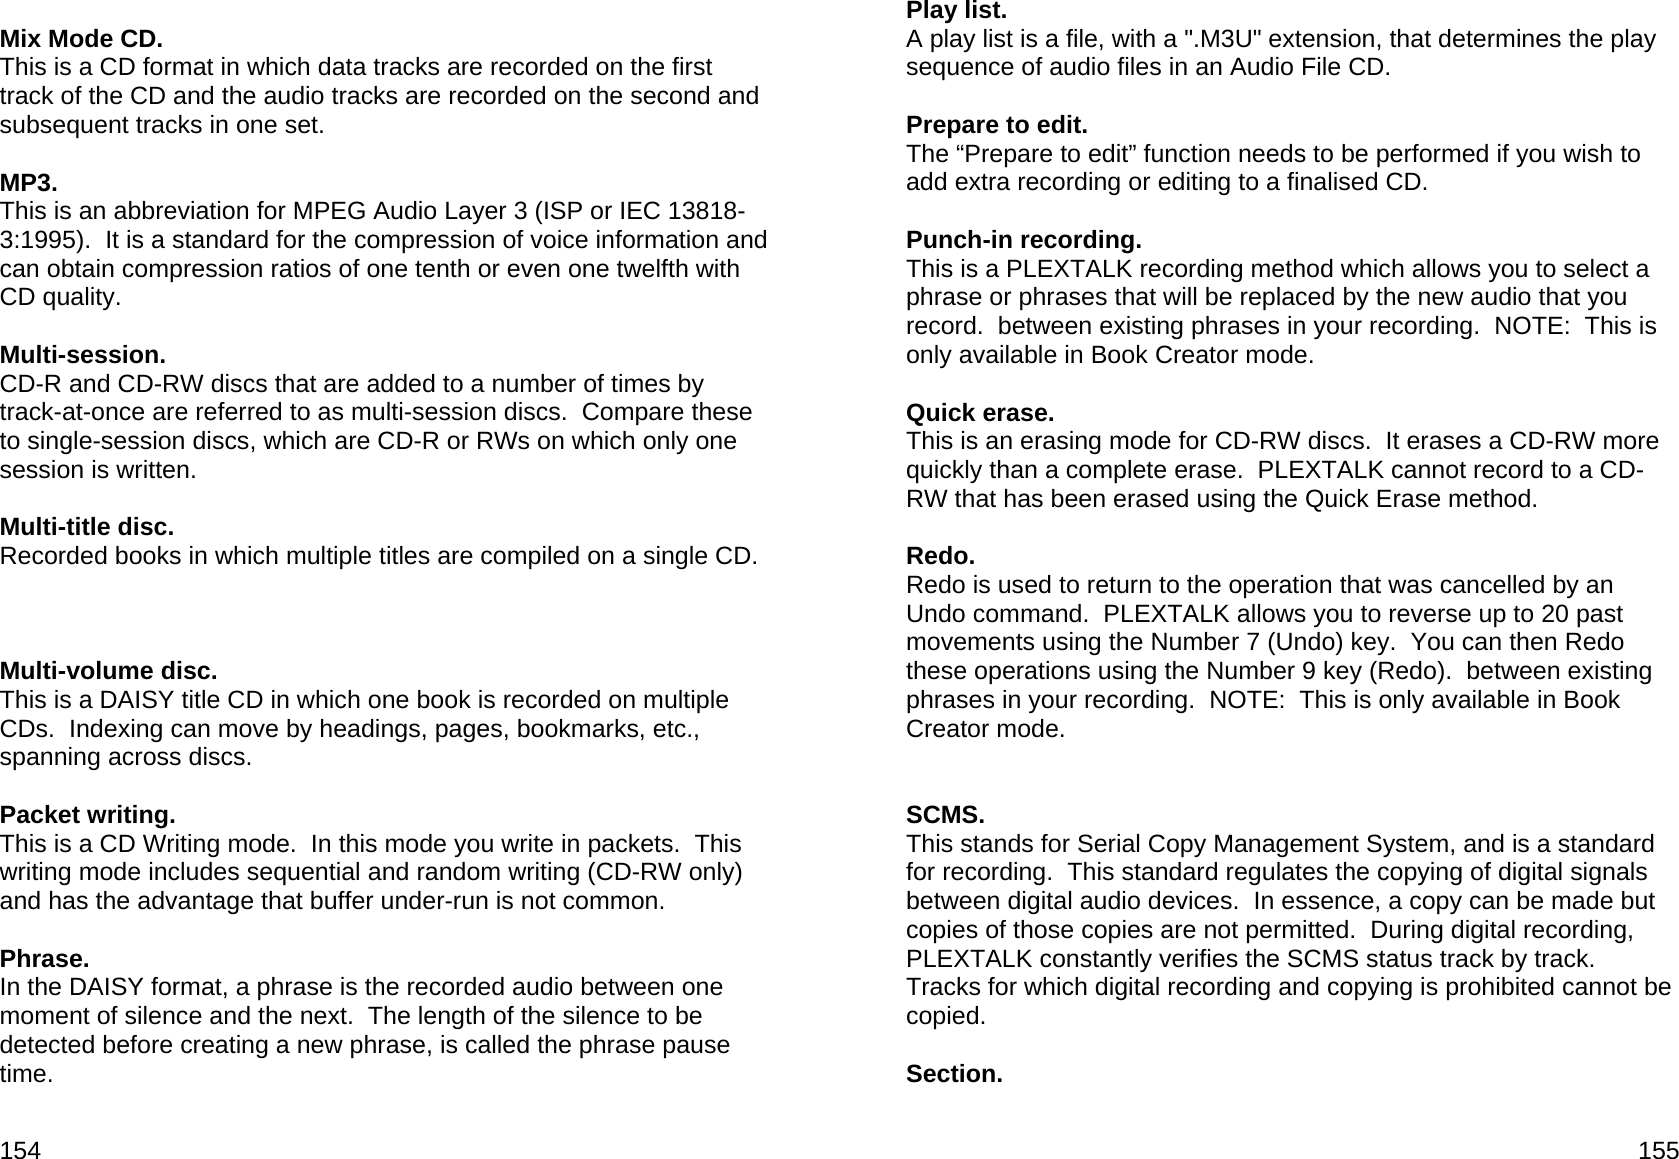
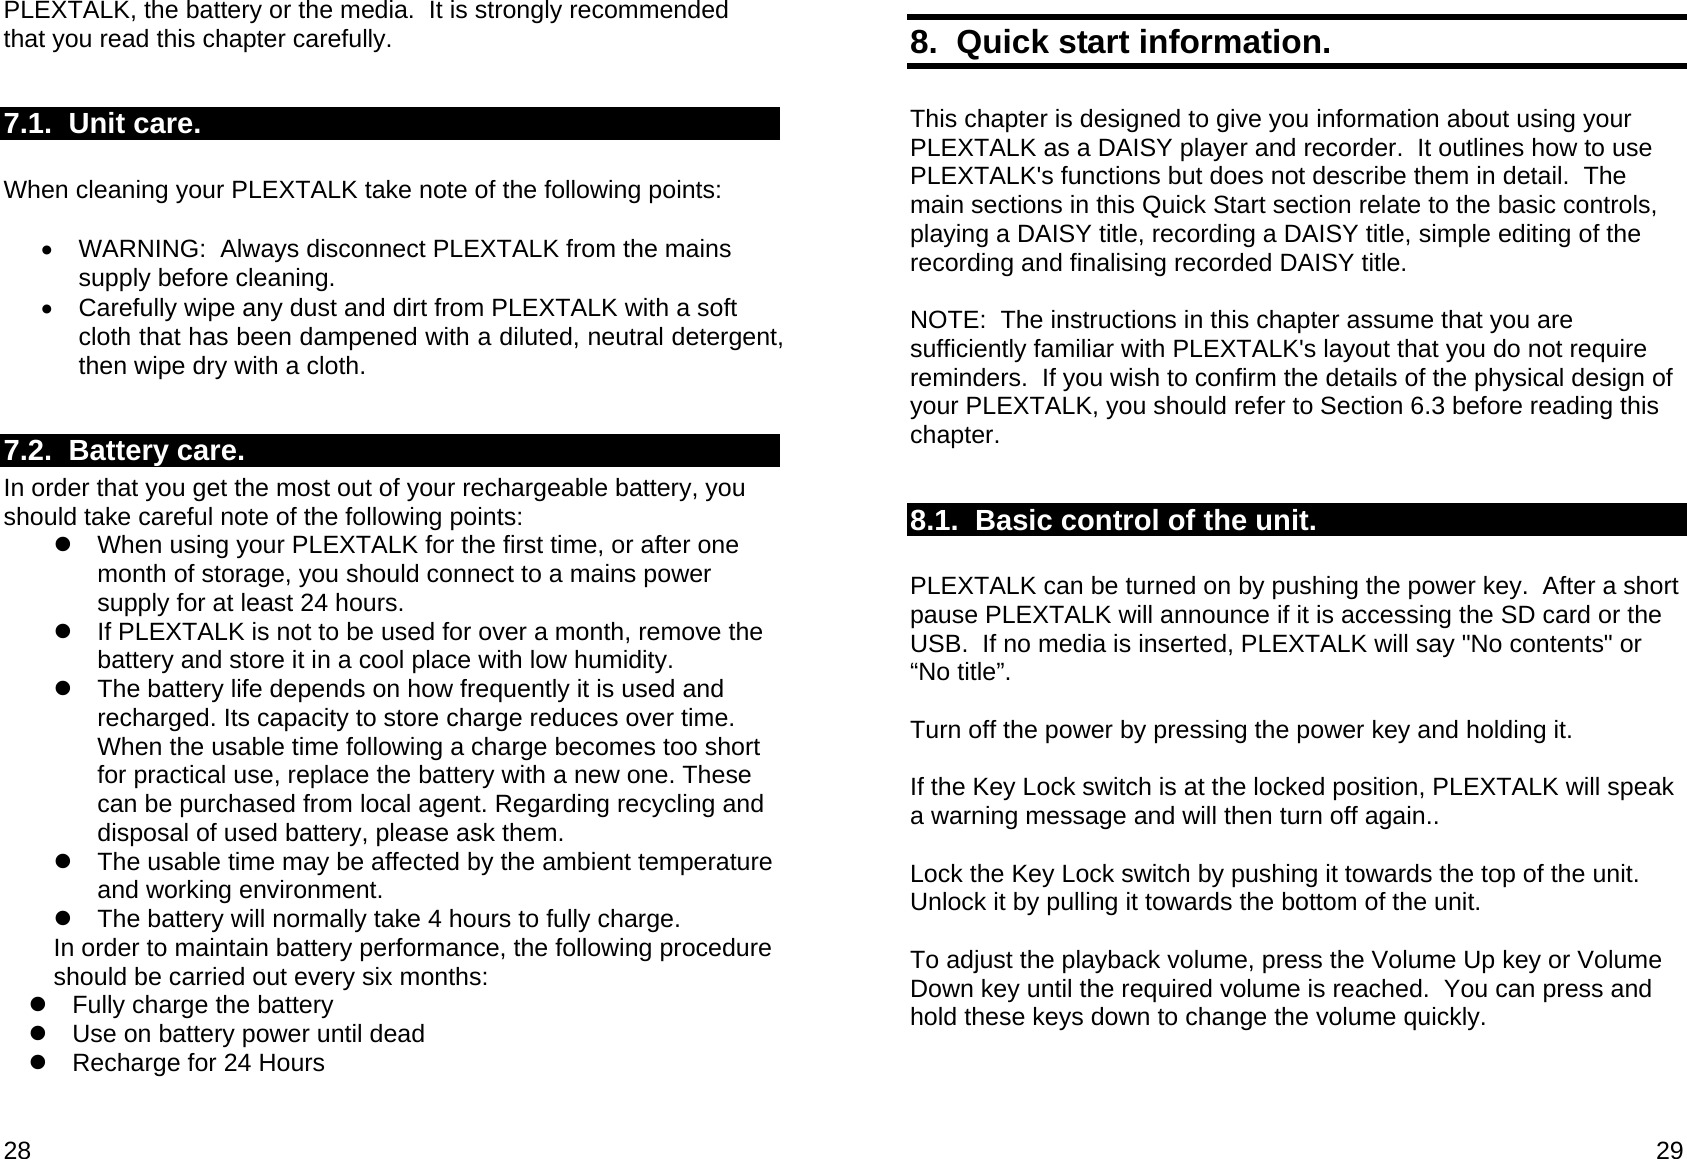
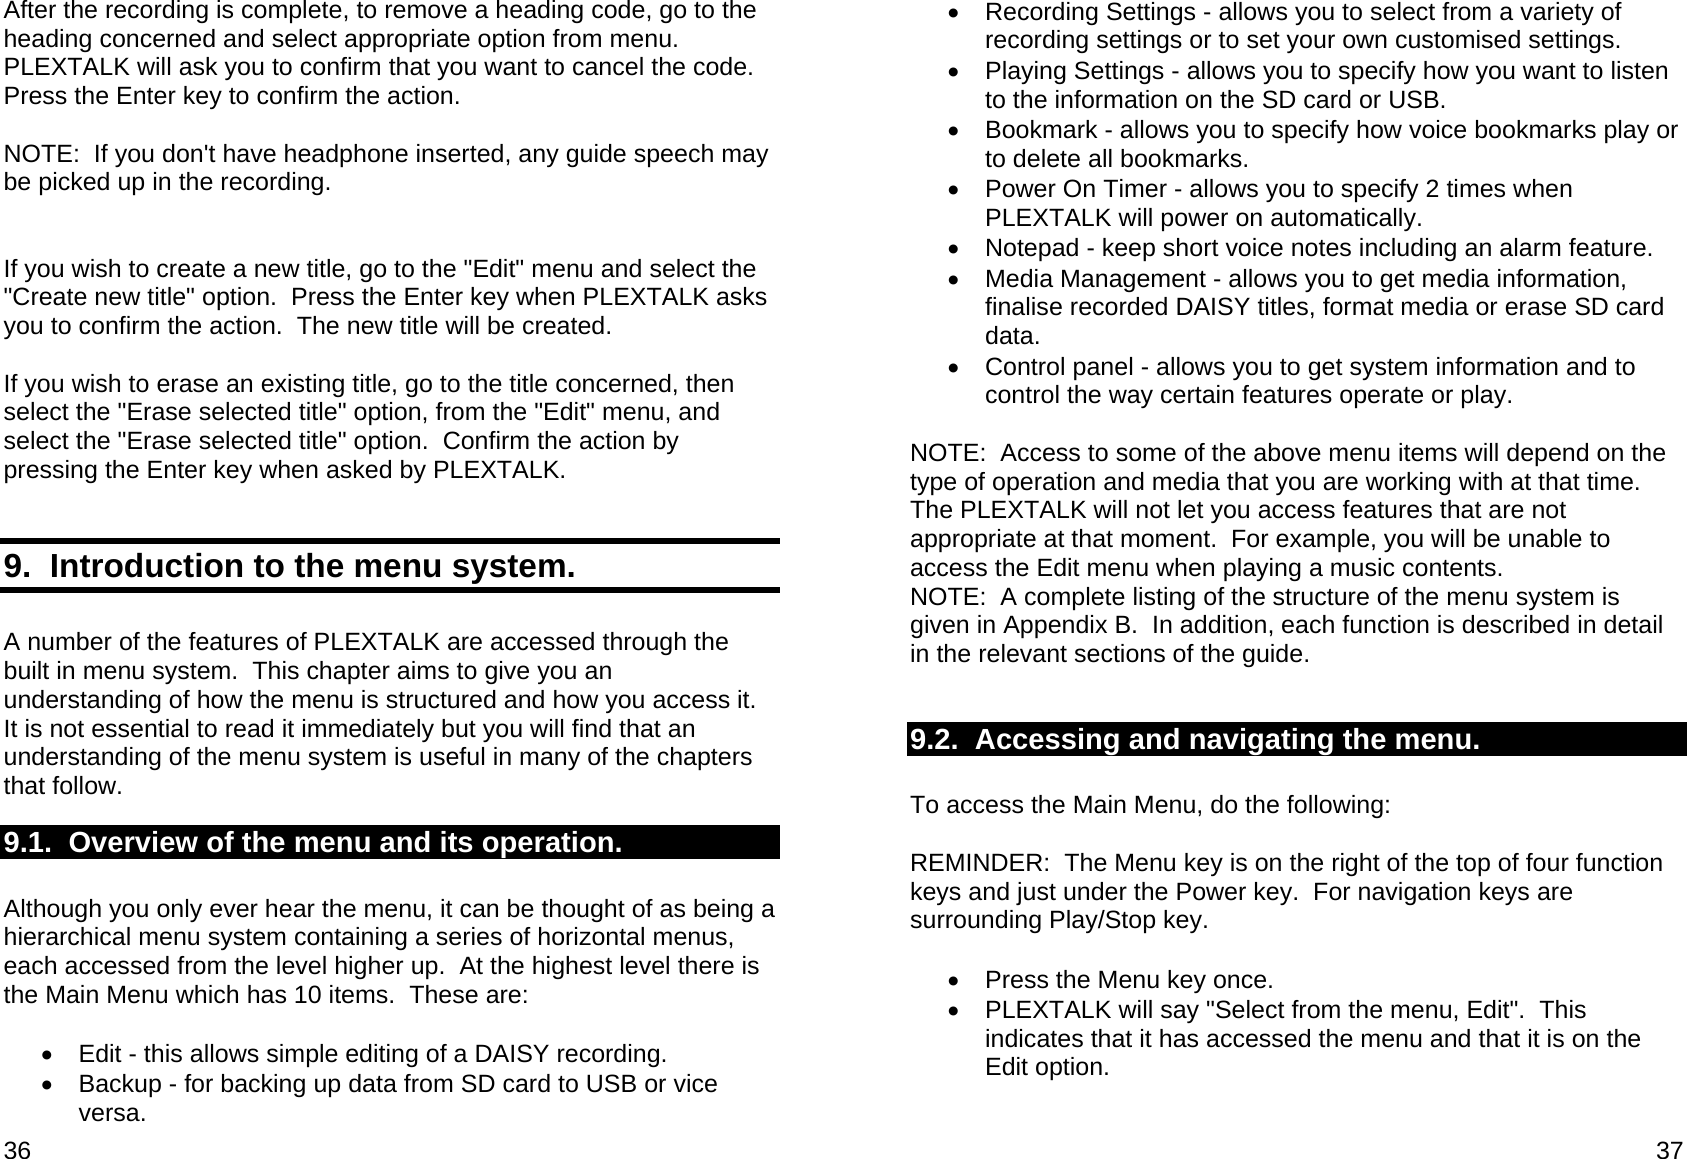
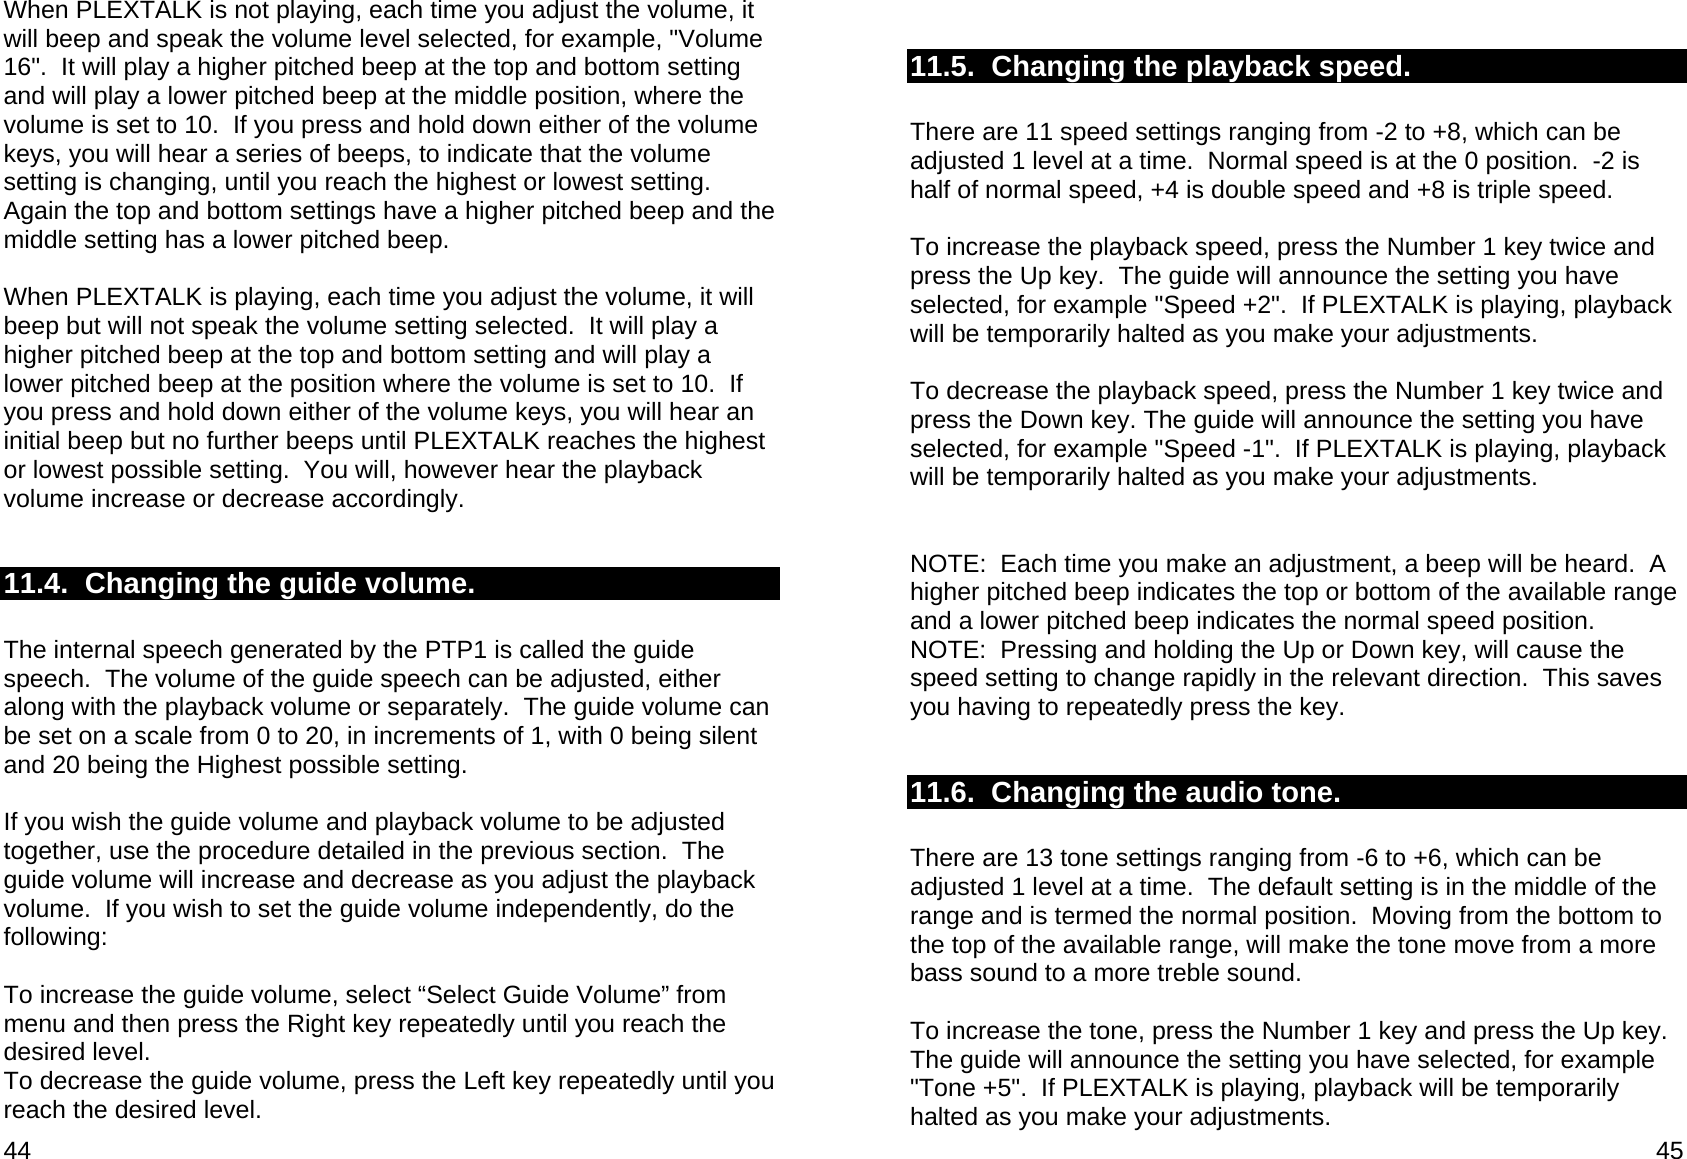
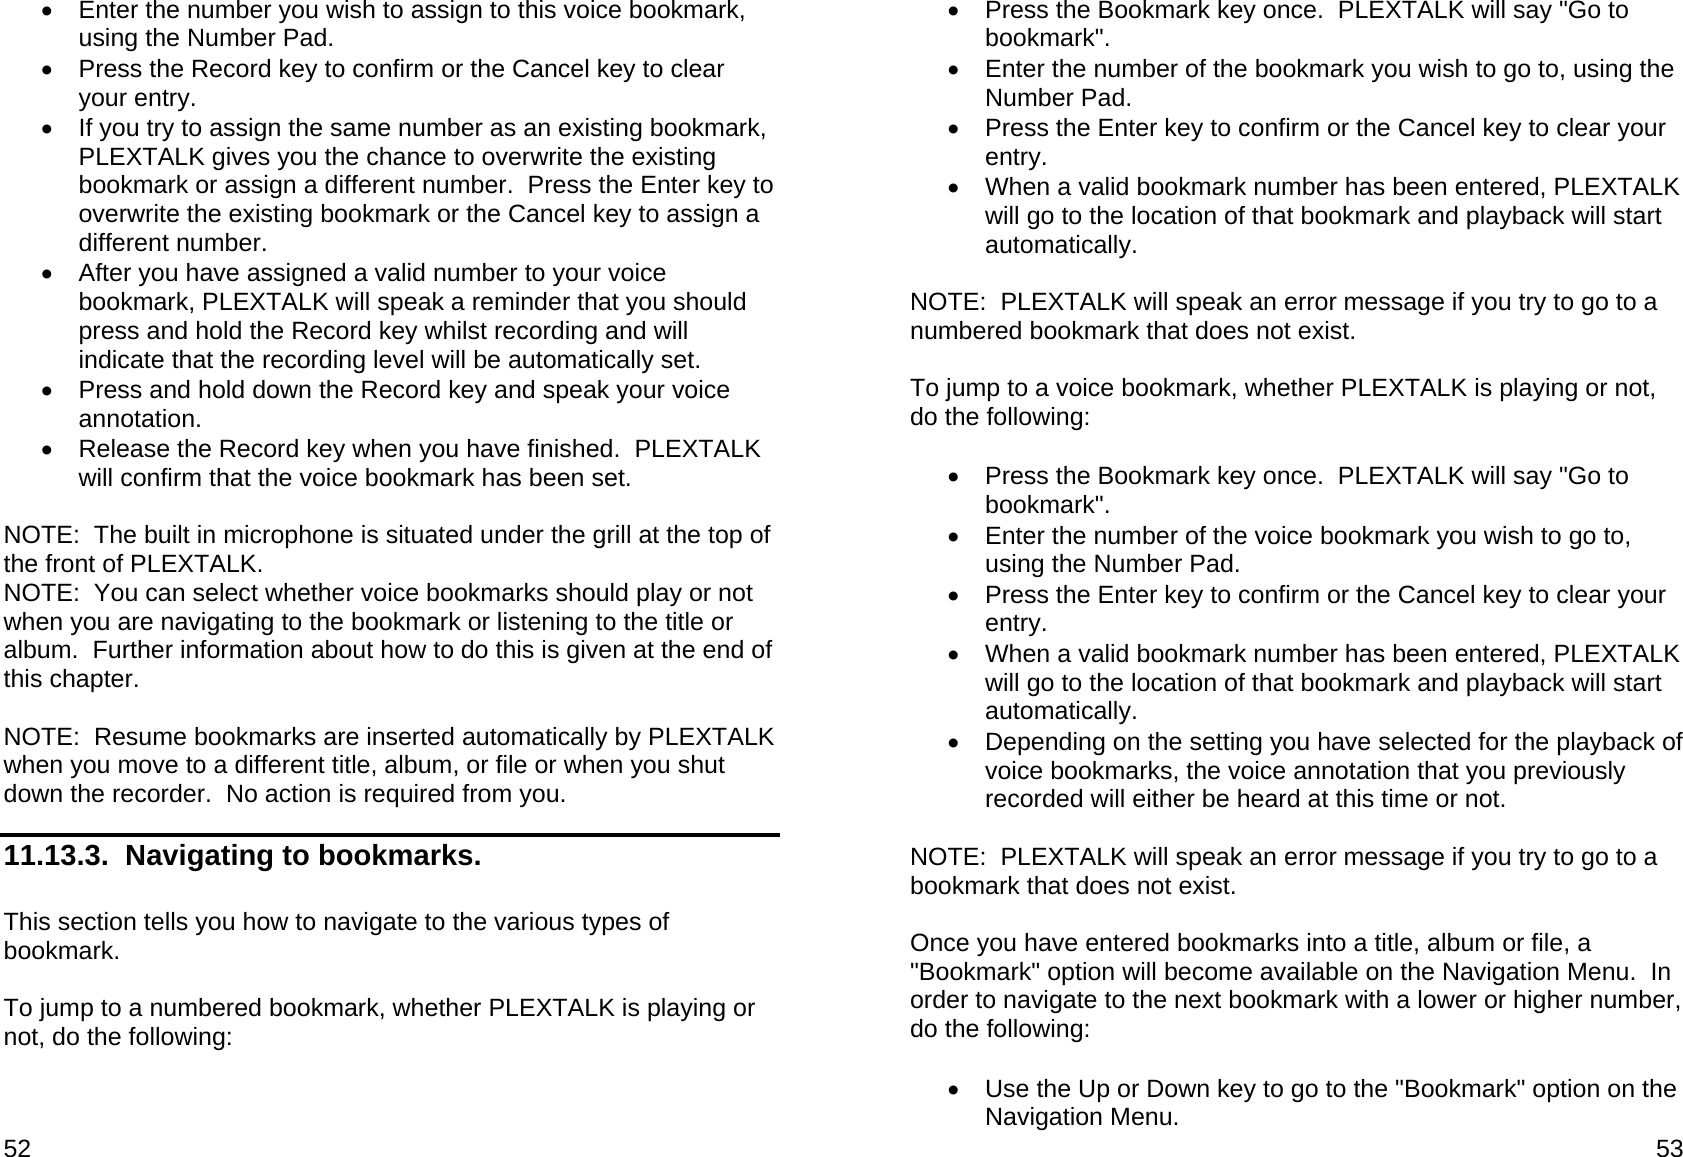
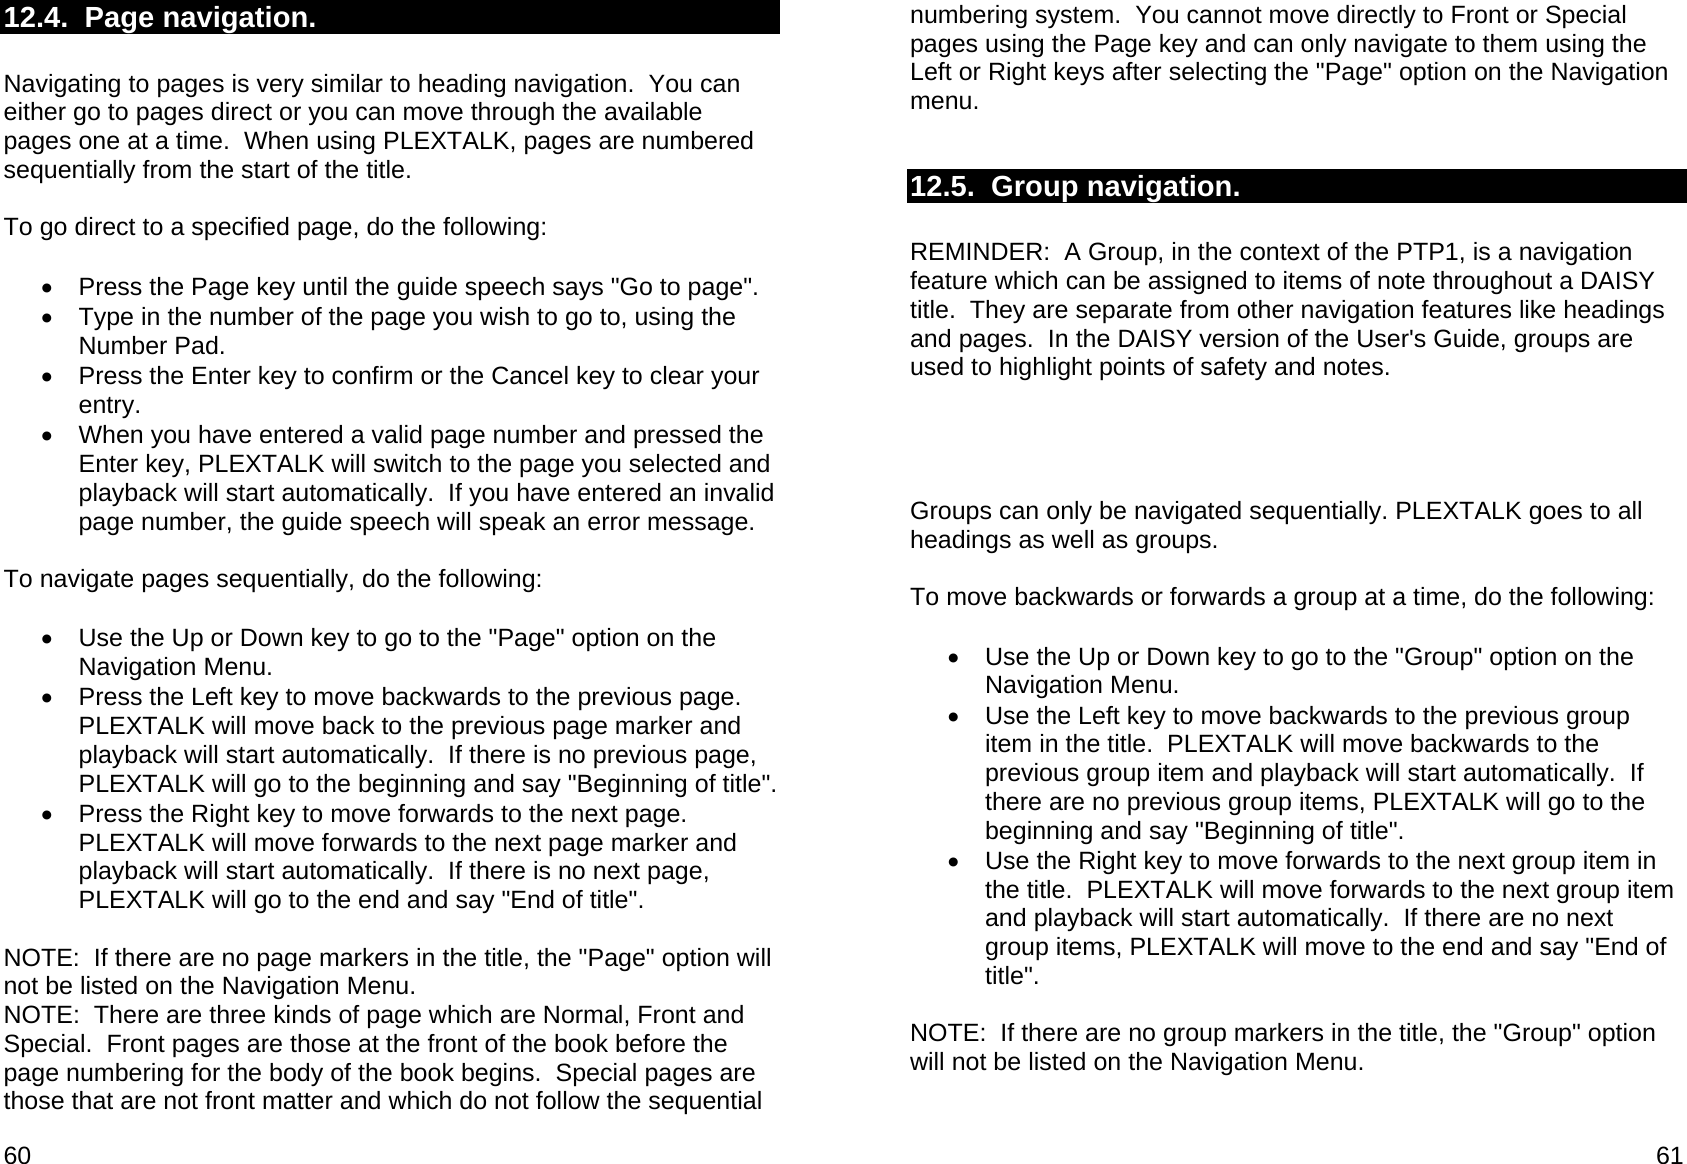
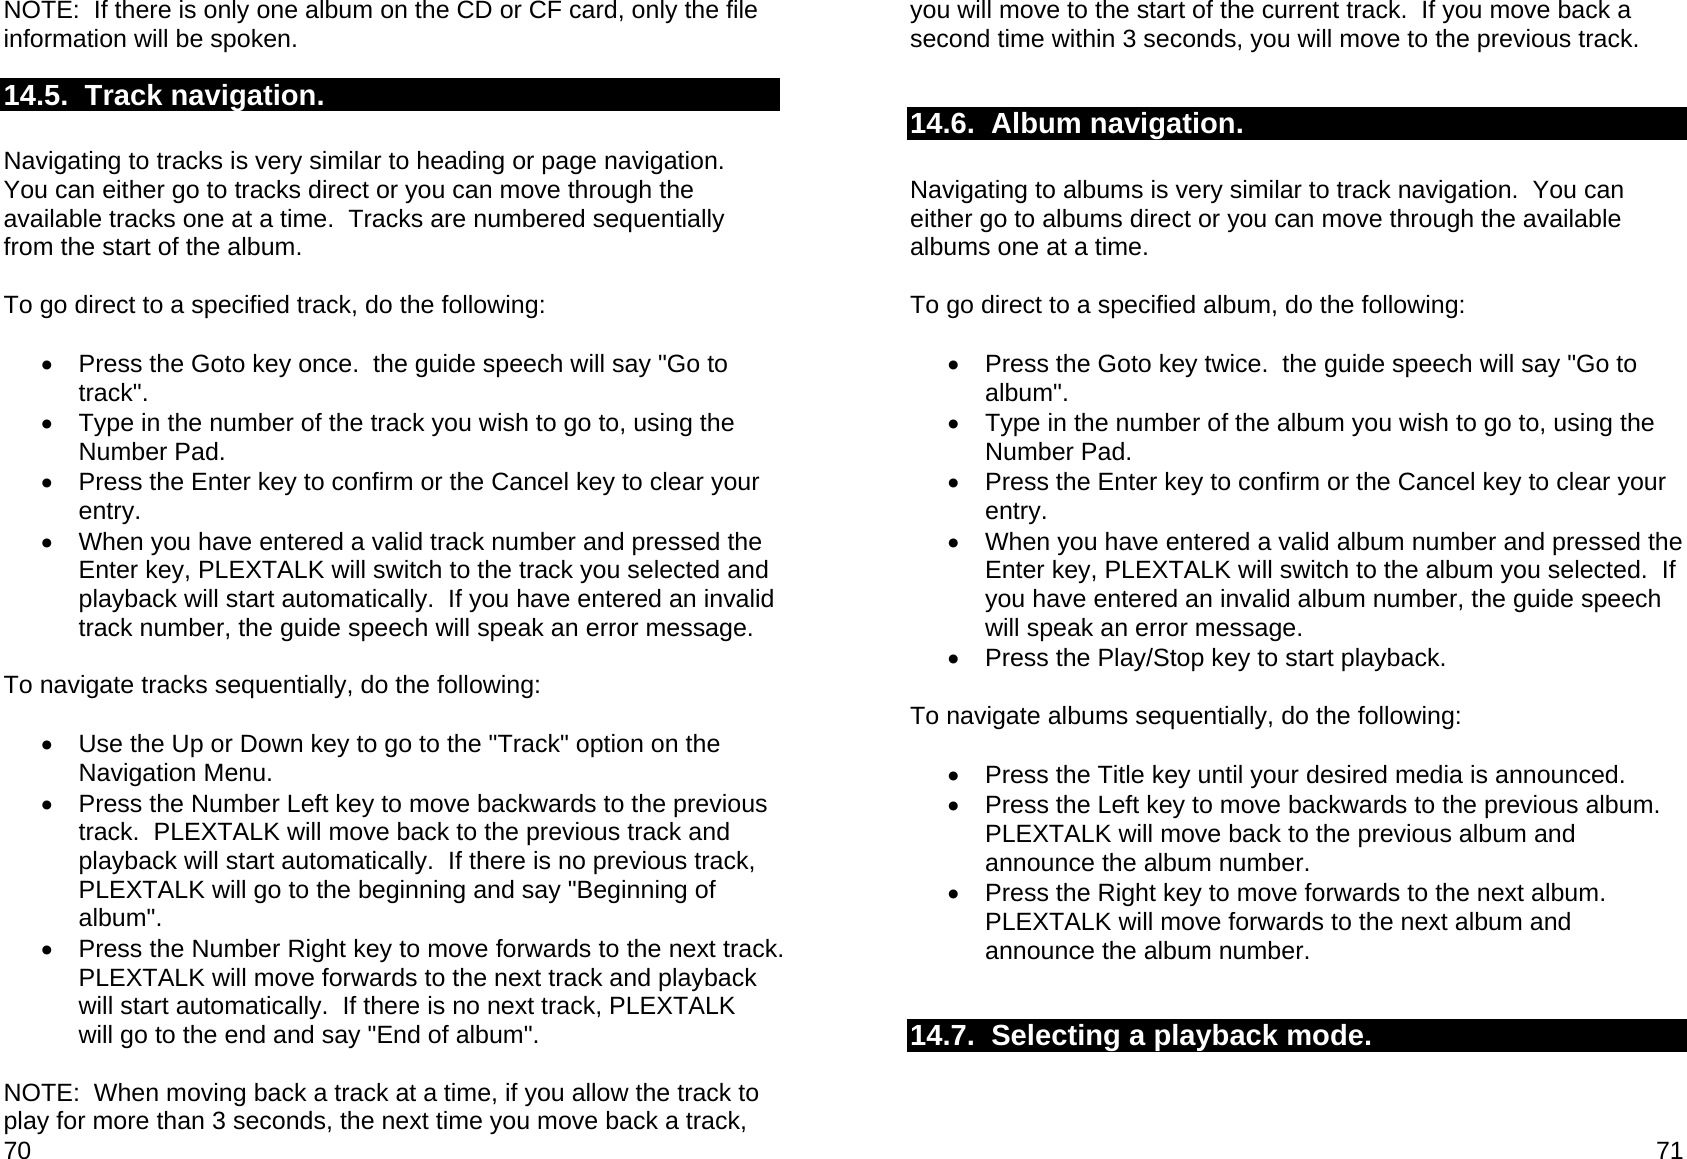
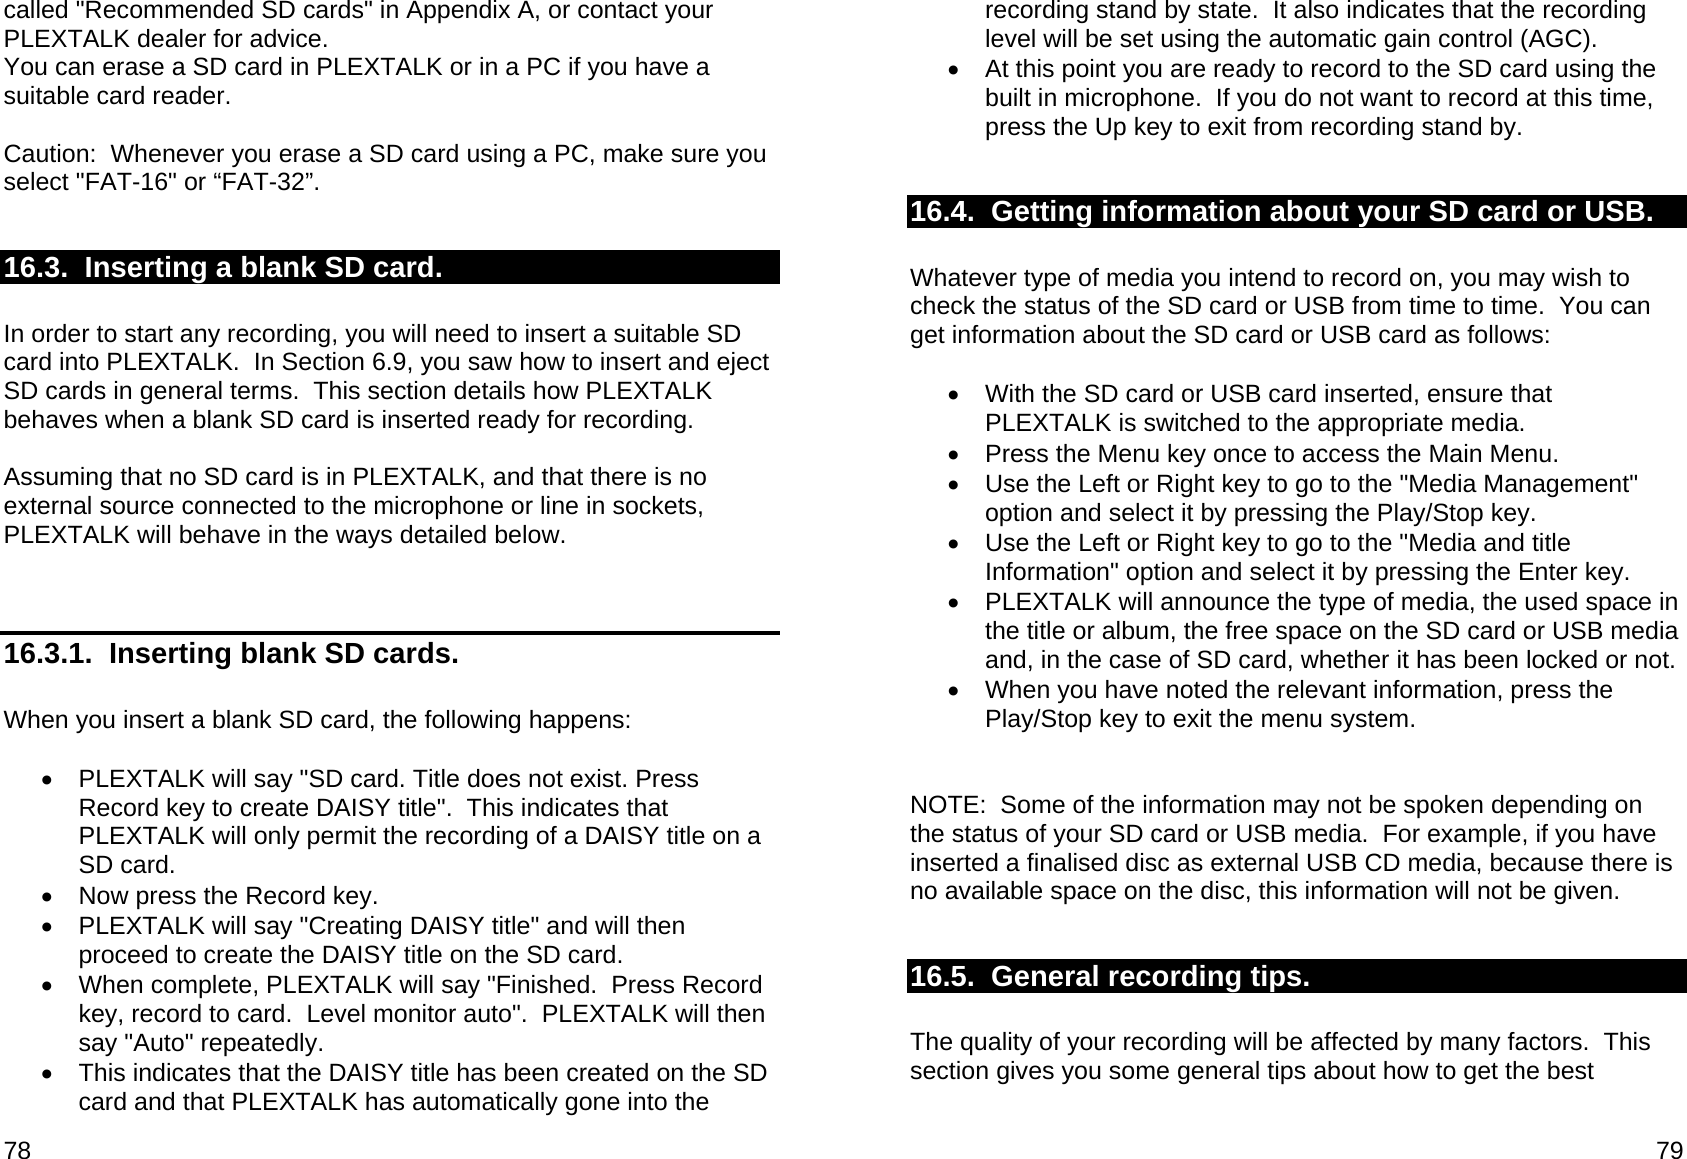
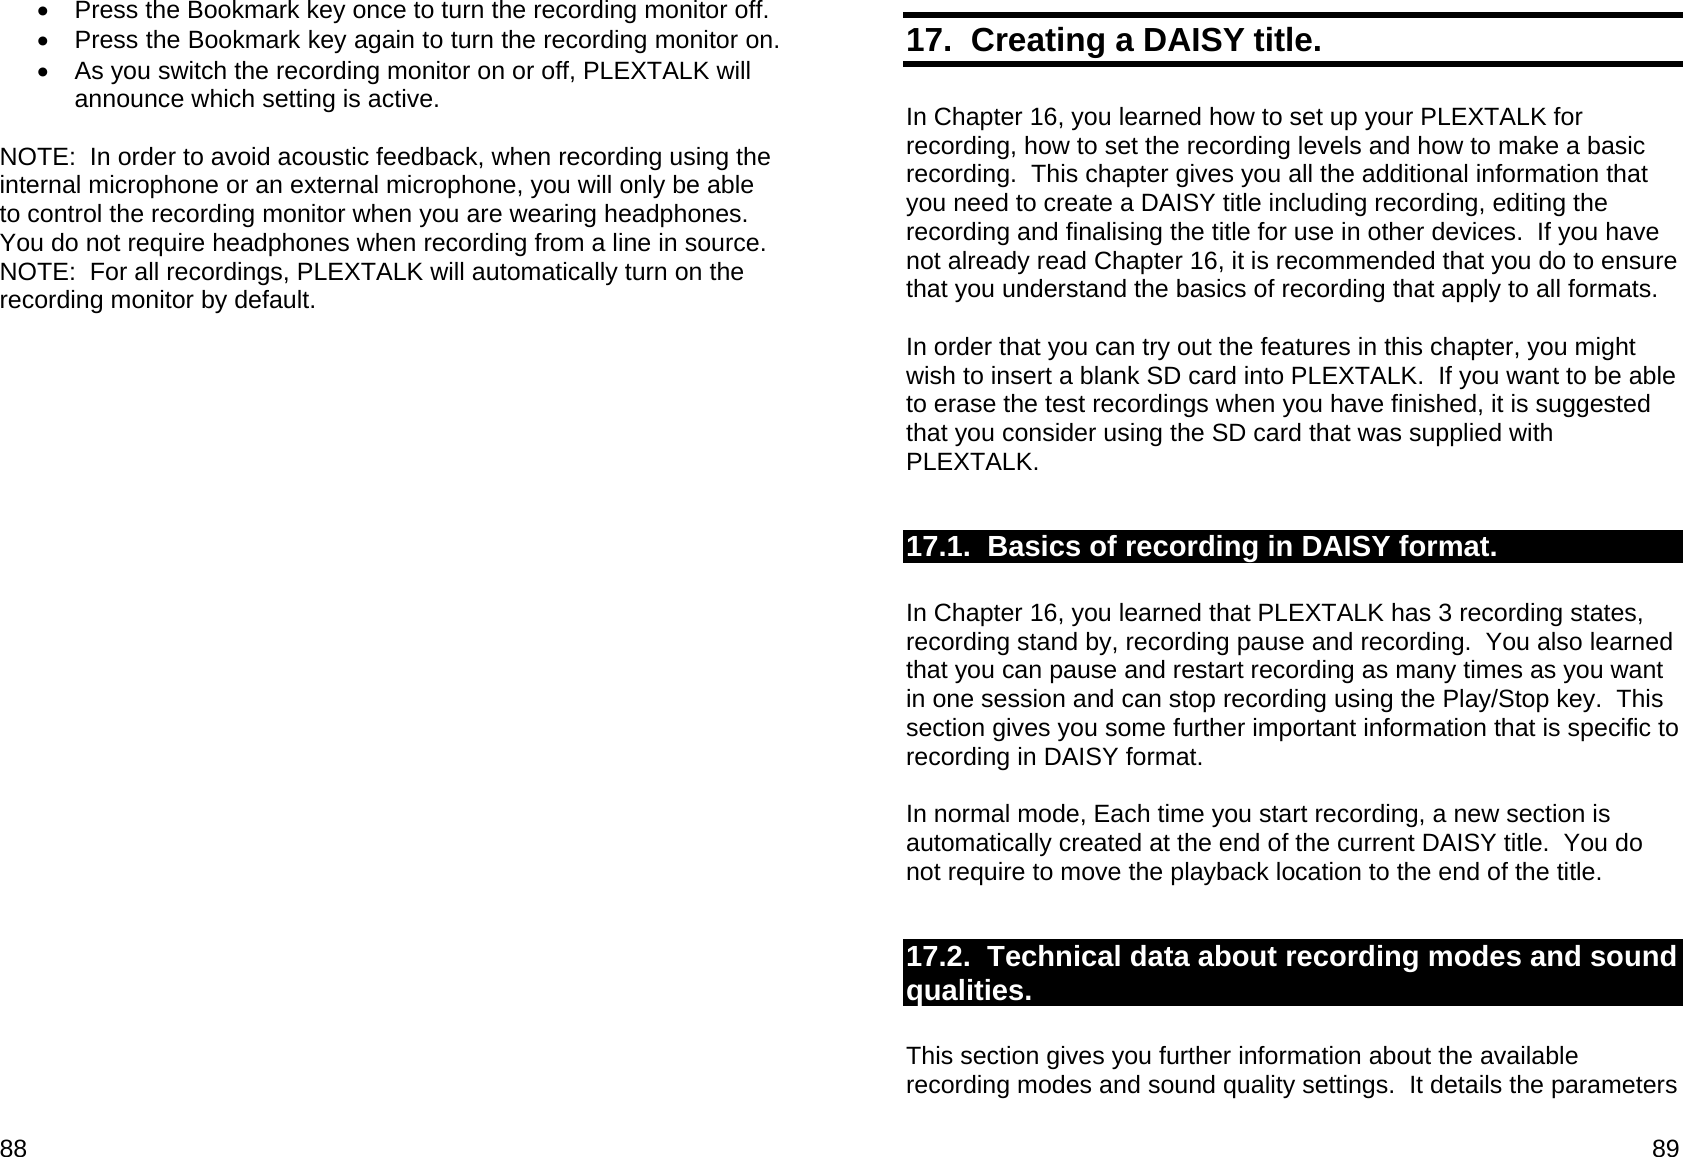
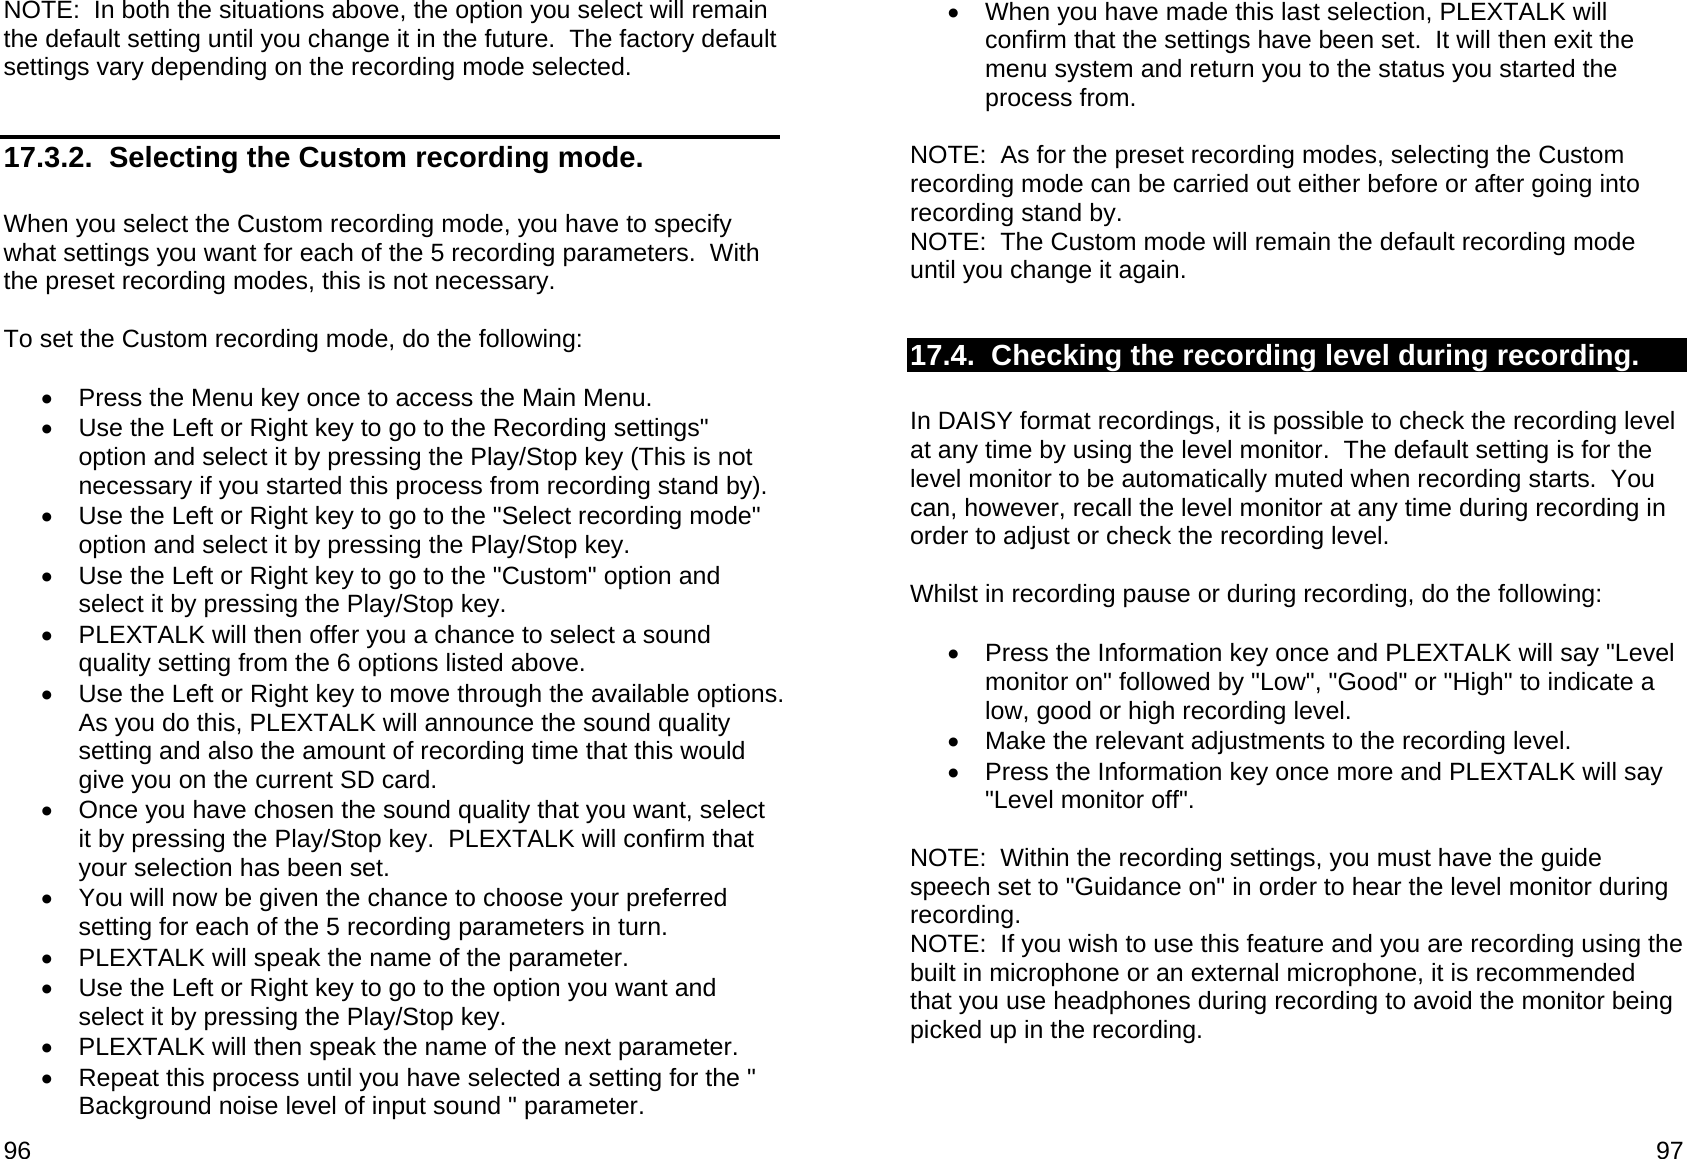
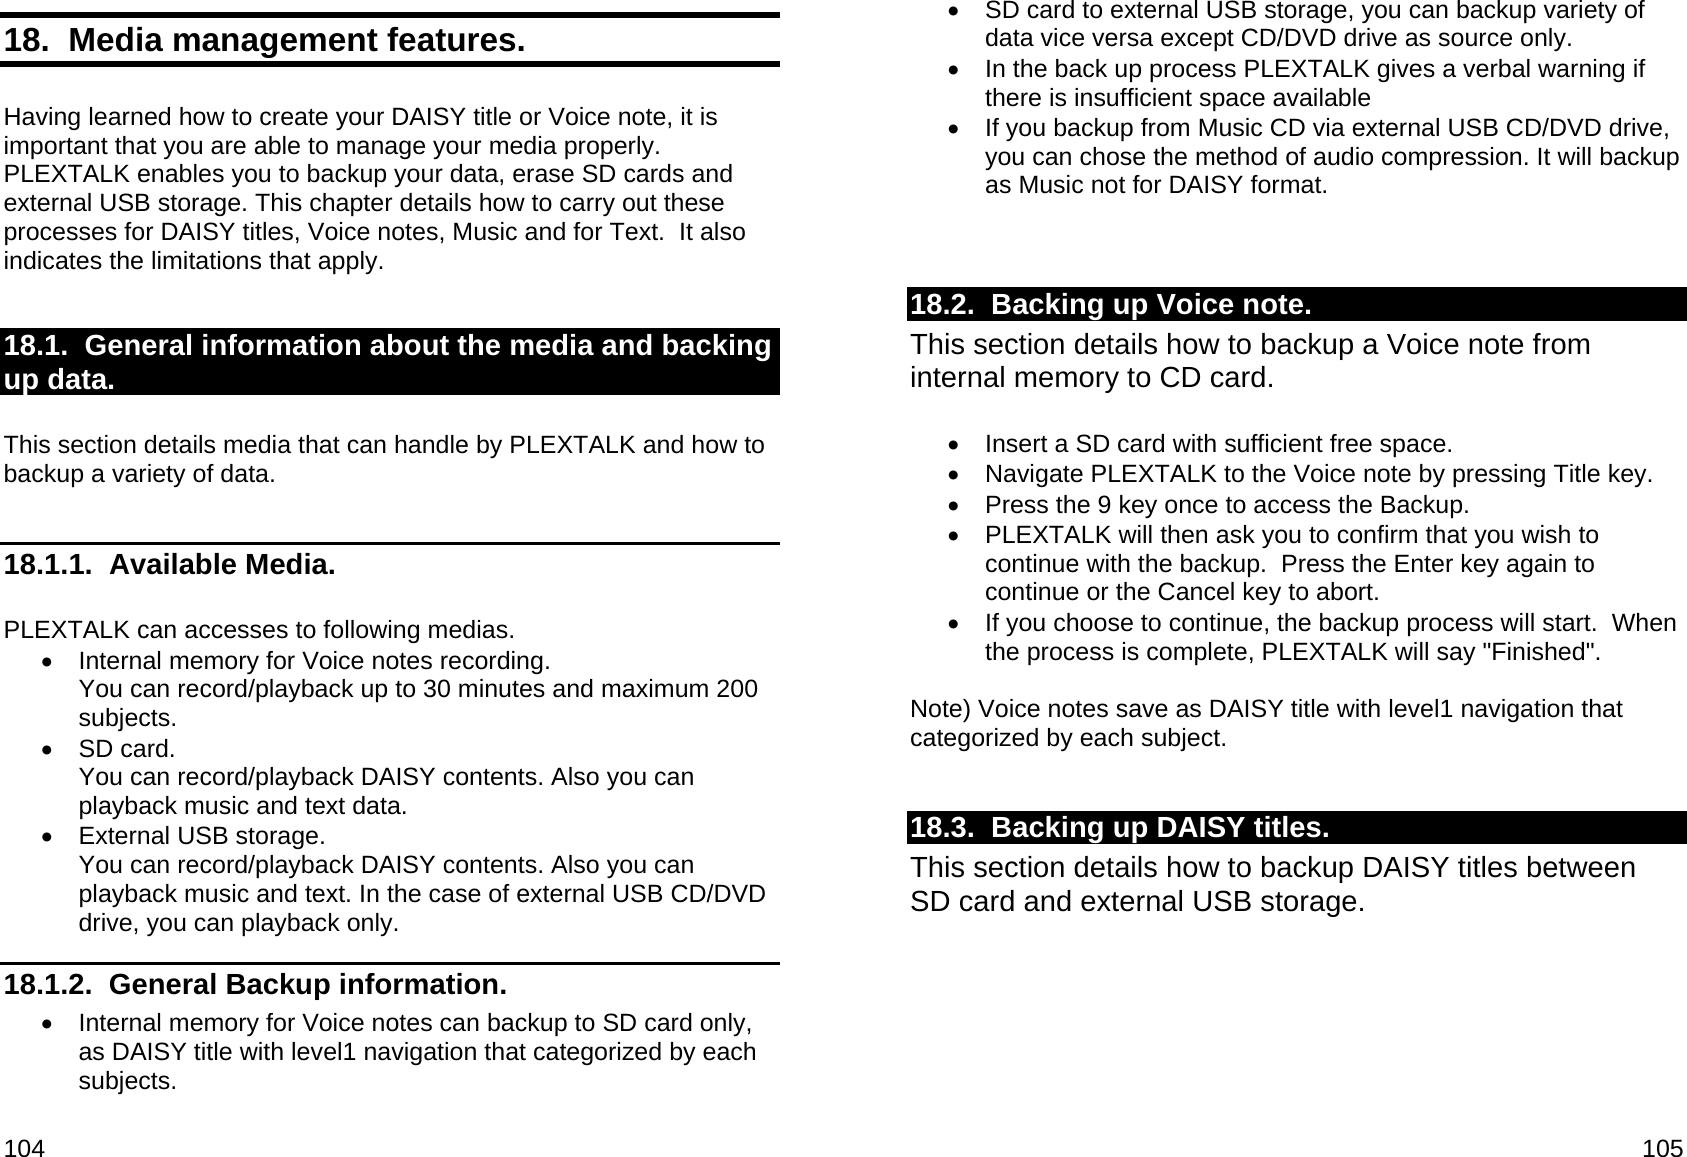
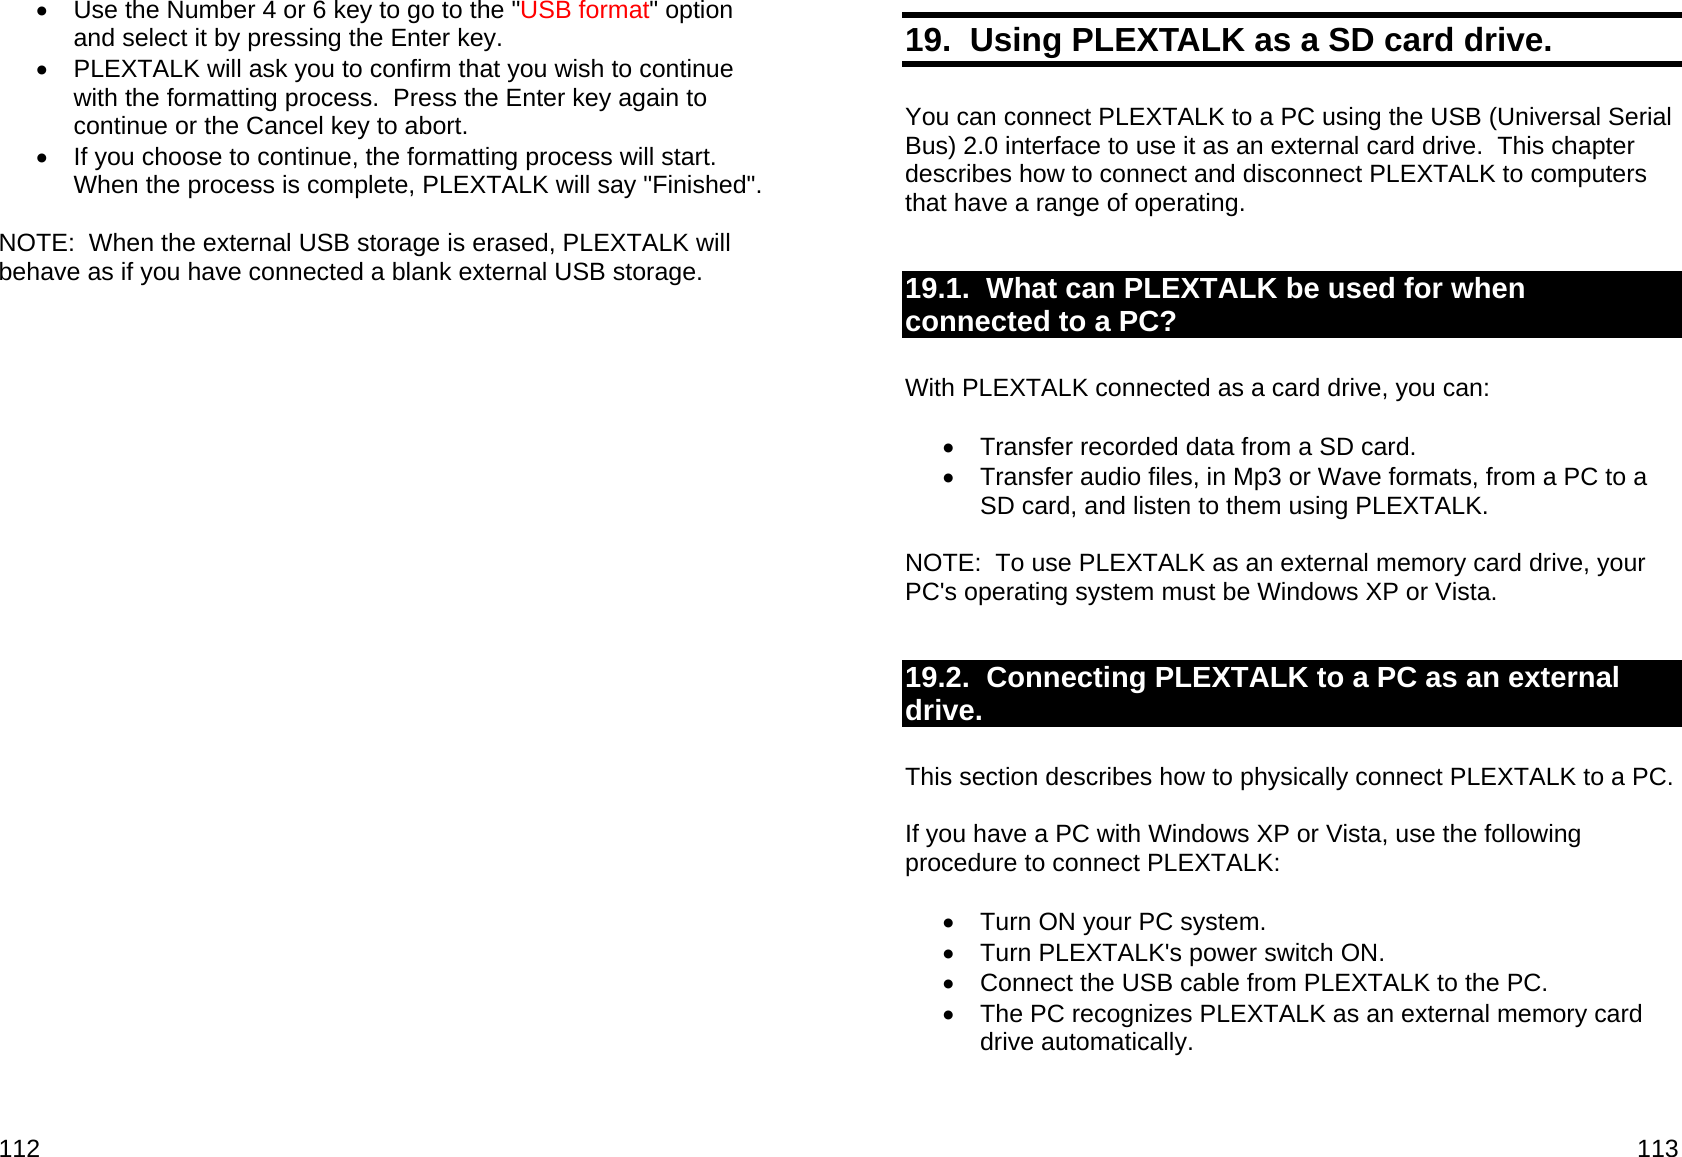
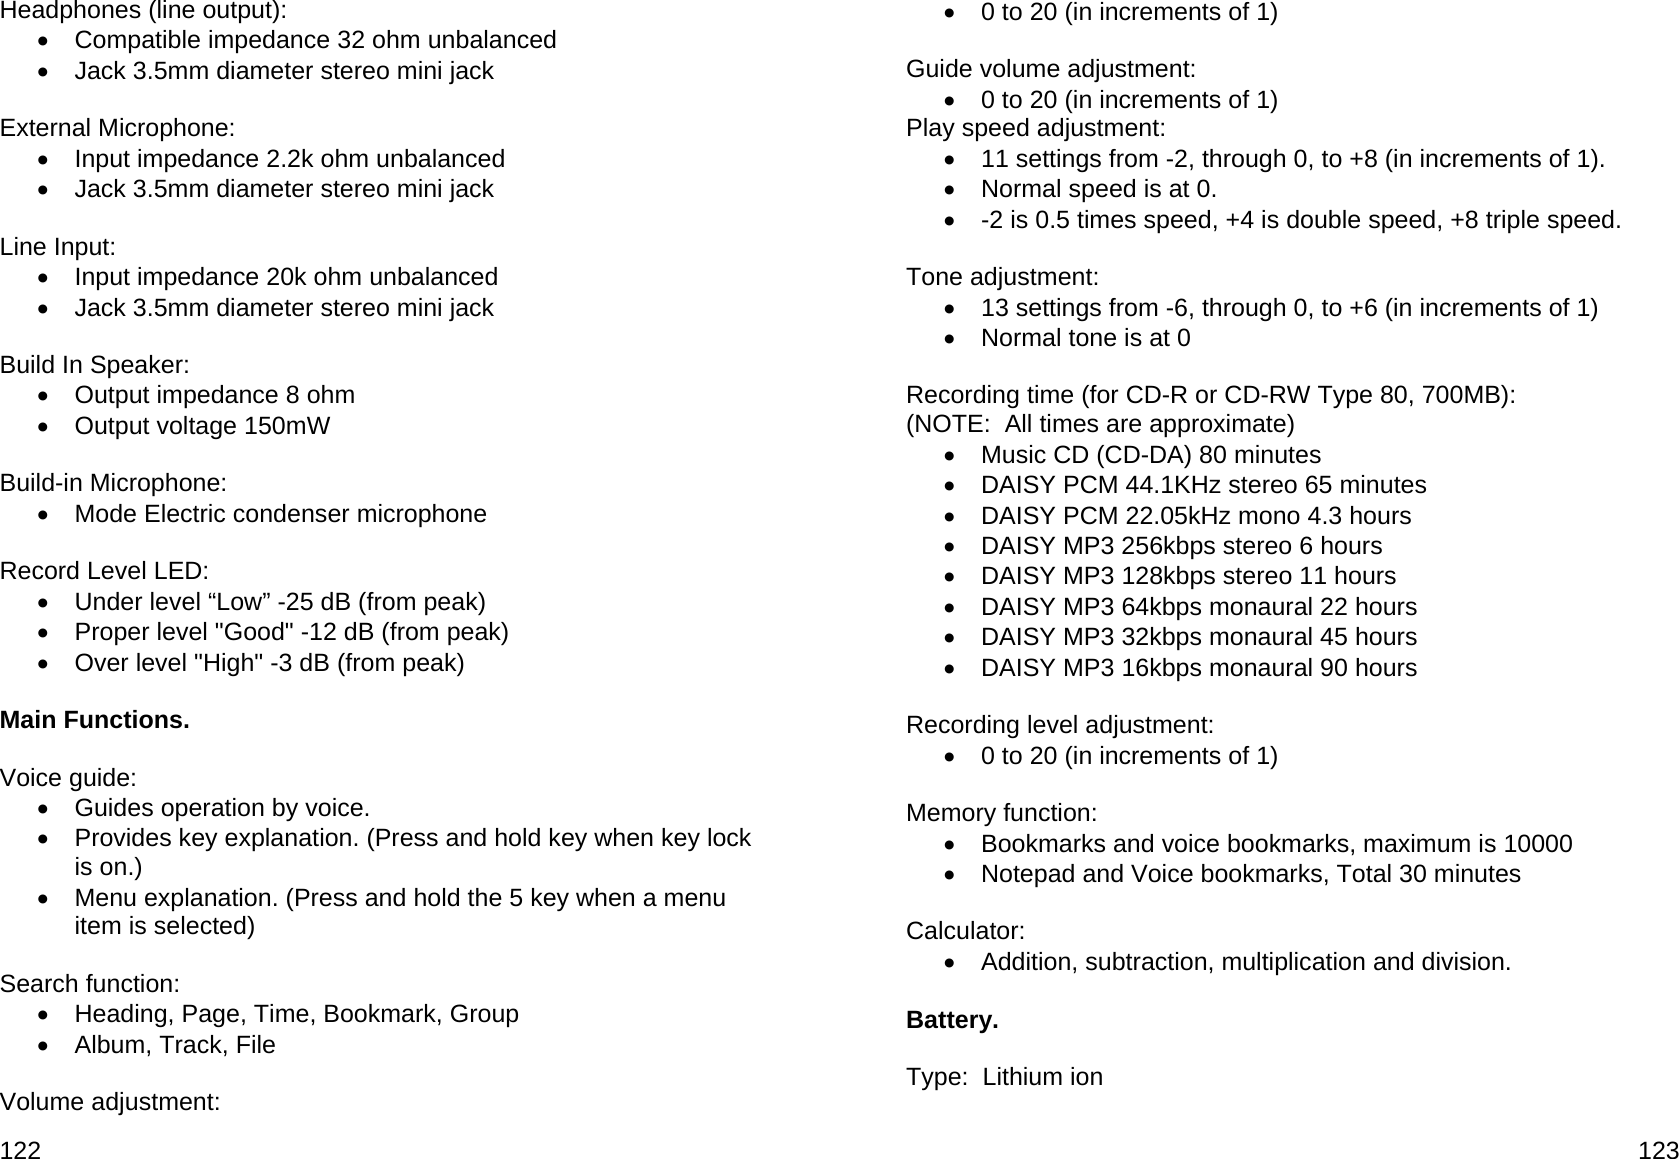
![20 Please make sure thee items are included. If there is missing items, please contact local agent immediately. • 1 PLEXTALK Pocket PTP1 • 1 SD Card 2GB (NOTE: The specification of the supplied card may differ from the one specified in the guide) • 1 AC adaptor • 1 Rechargeable battery • 1 Stereo headphone • 1 USB cable (long) for connecting to a computer • 1 USB cable (short) for connecting to a USB peripheral • 1 Poach • 1 User's Guide CD • 1 Quick guide • 1 Safety Instruction guide 21 NOTE: It is strongly recommended that you retain your box and other packages. You may use for the return of your PLEXTALK. 6.3. Description of the unit. This section describes the physical look of the PTP1 and the layout of the keys and other controls to allow you to locate them when referred to in later chapters. The names and main purposes are given here. The PTP1 body has two types of colours. One is black and other is white. Black body PTP1 has white keys and white body has black keys. Holding the unit carefully, take a few moments to locate the top and bottom surfaces. The grill is located on top of the unit. The top has 20 keys. The PTP1 should now be set up in its normal operating position. Keep the unit in this position as the physical layout is described. 6.3.1. Front surface ] The grill that you used to orientate the unit is where the internal speaker and the built in microphone are located. The speaker is on the right and the microphone is the centre. Just in front of the grill, on the centre, you should find 2 small bumps. These are LEDs. The one on the left is green and indicates when the unit is switched on or off. It becomes orange while recording and booting up. It flashes when the unit is shutting down. The one on the right indicates charging status. If the battery is charging, it will show a orange light. When the battery is fully charged, it turns green. Under the grill there are two oval buttons. Left side is Record key, used for DAISY recording, Note taking and Voice bookmark. Right side is Power key, used for power on/off and sleep timer setting.](https://usermanual.wiki/Shinano-Kenshi/PTP1/User-Guide-1003733-Page-10.png)
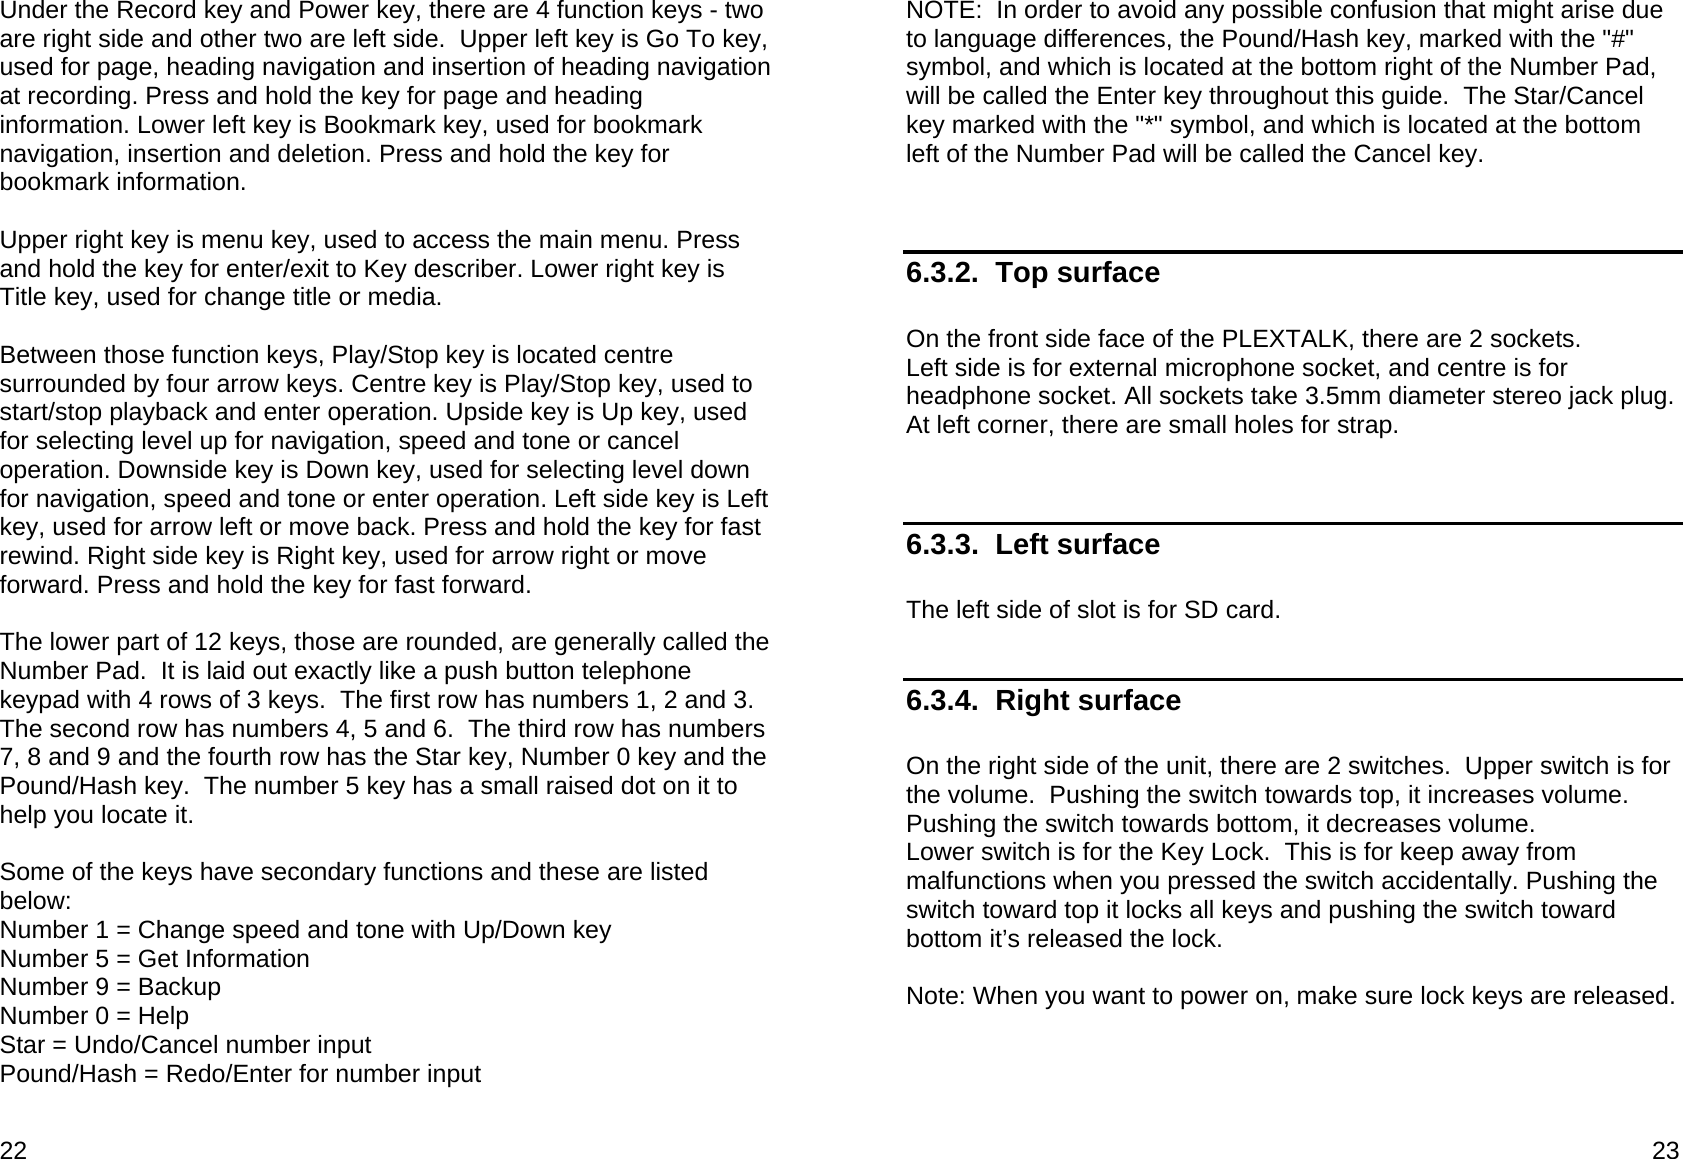
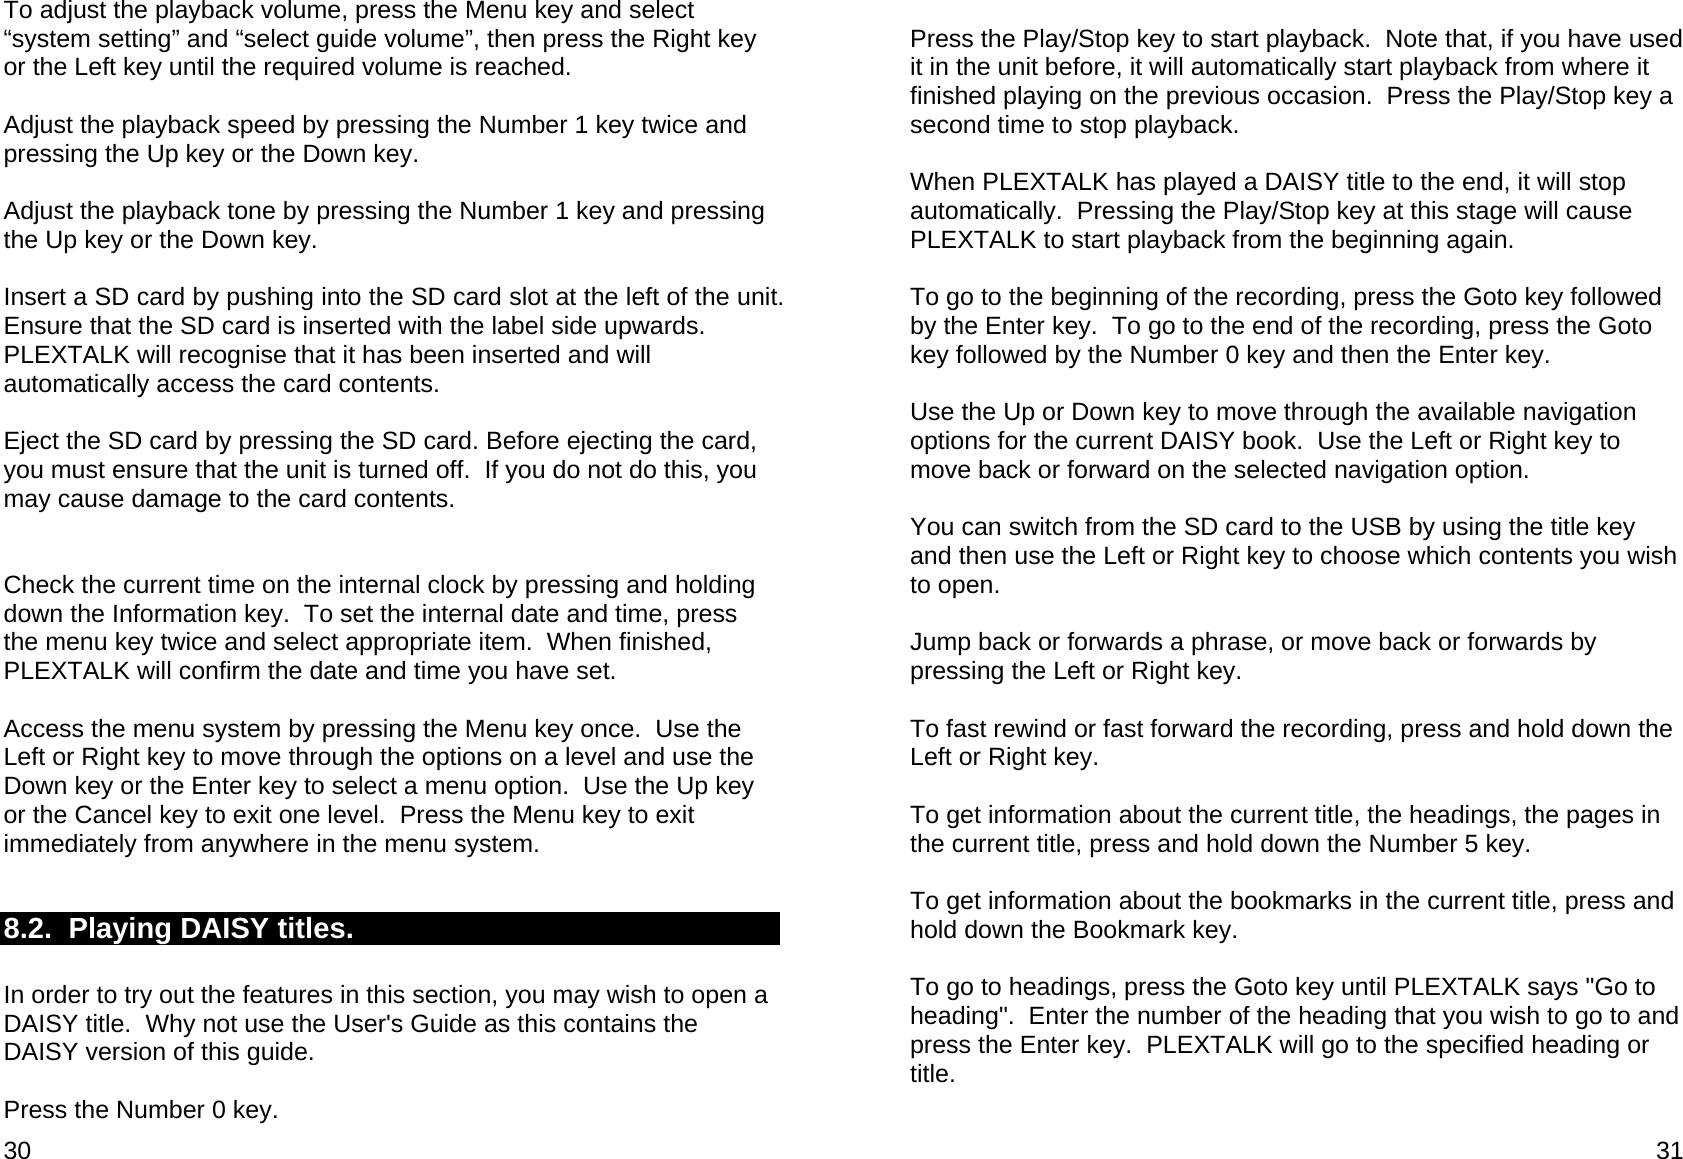
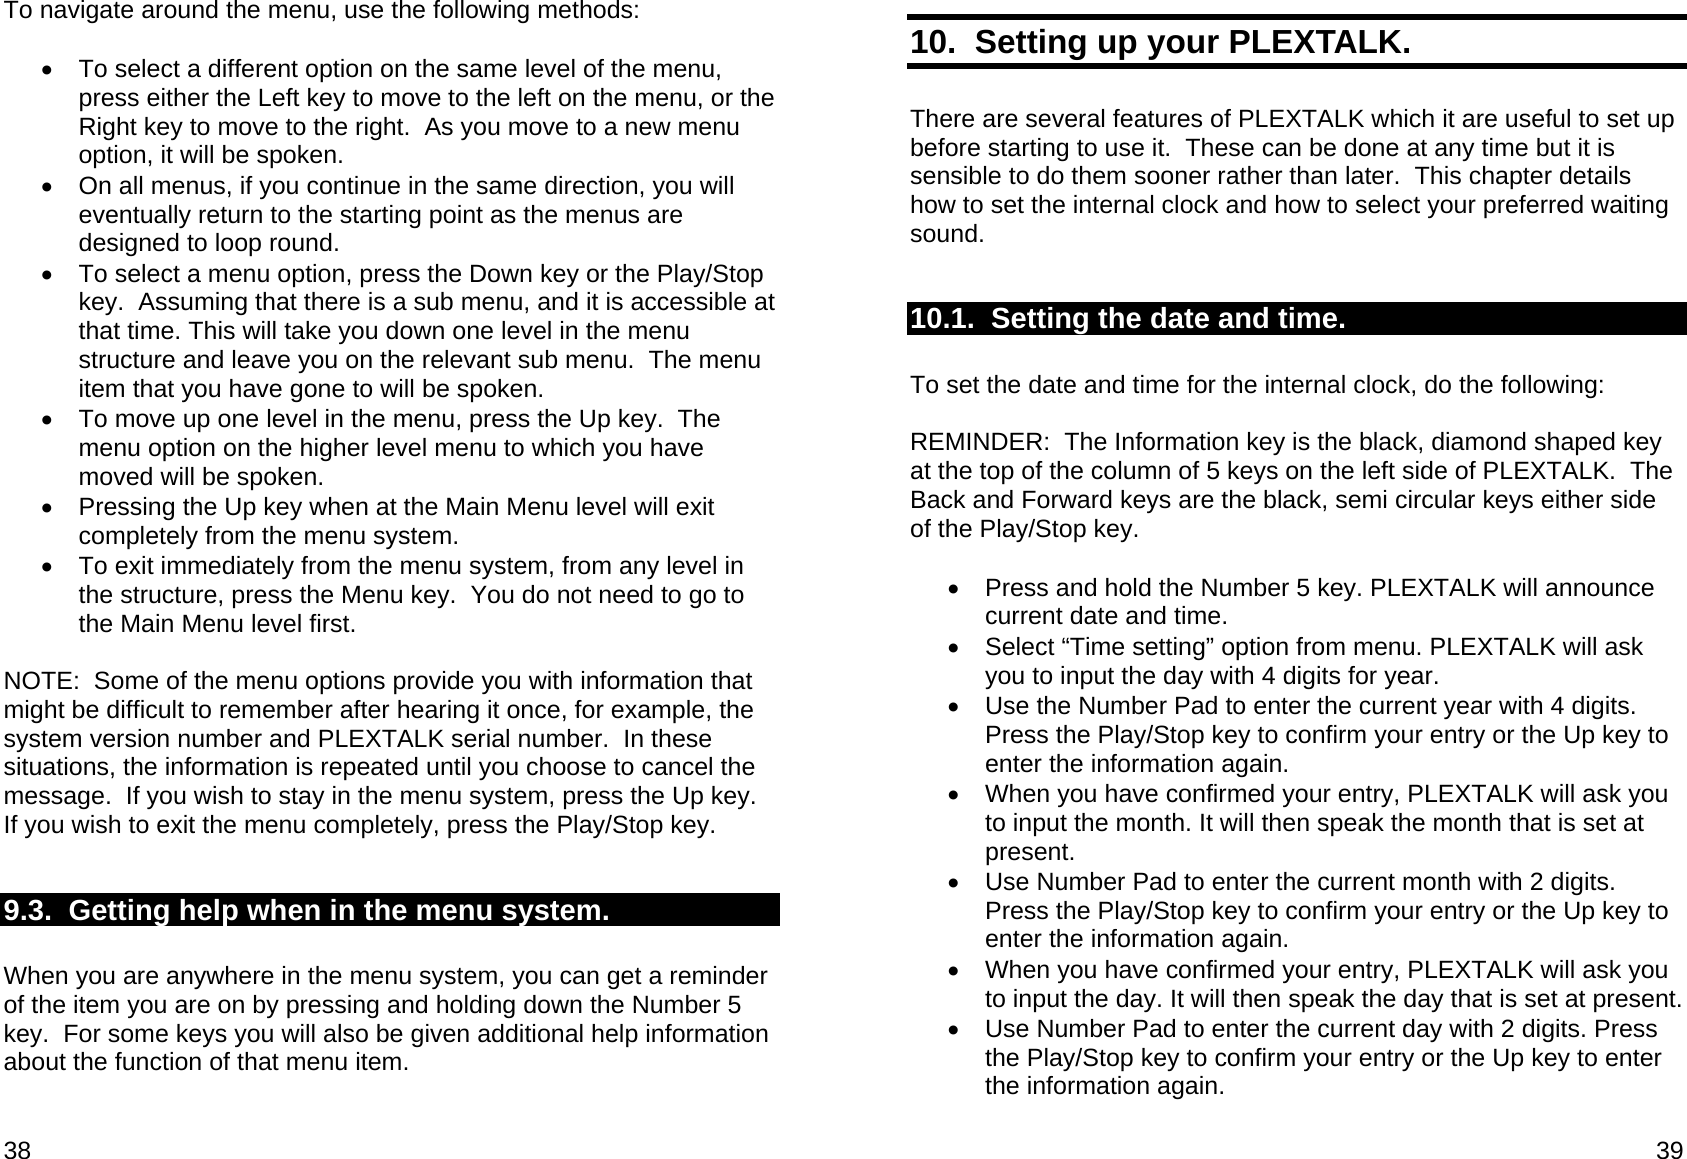
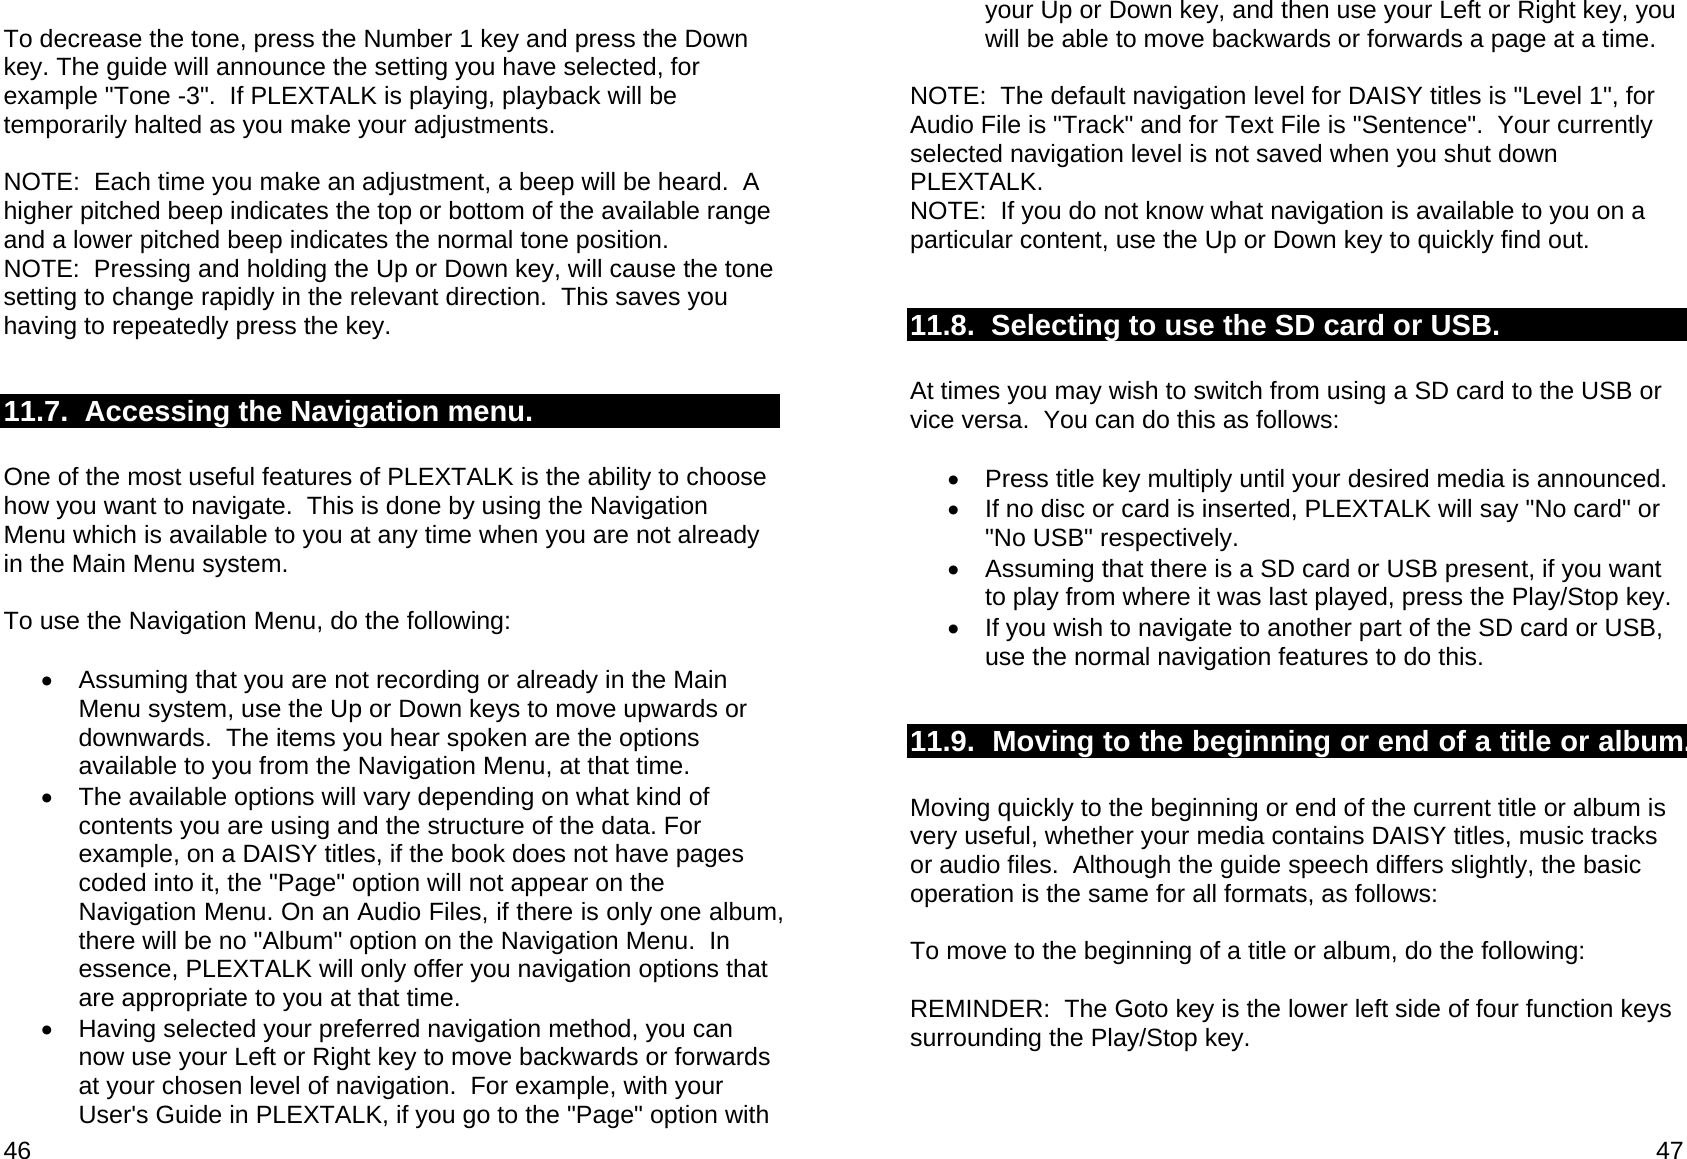
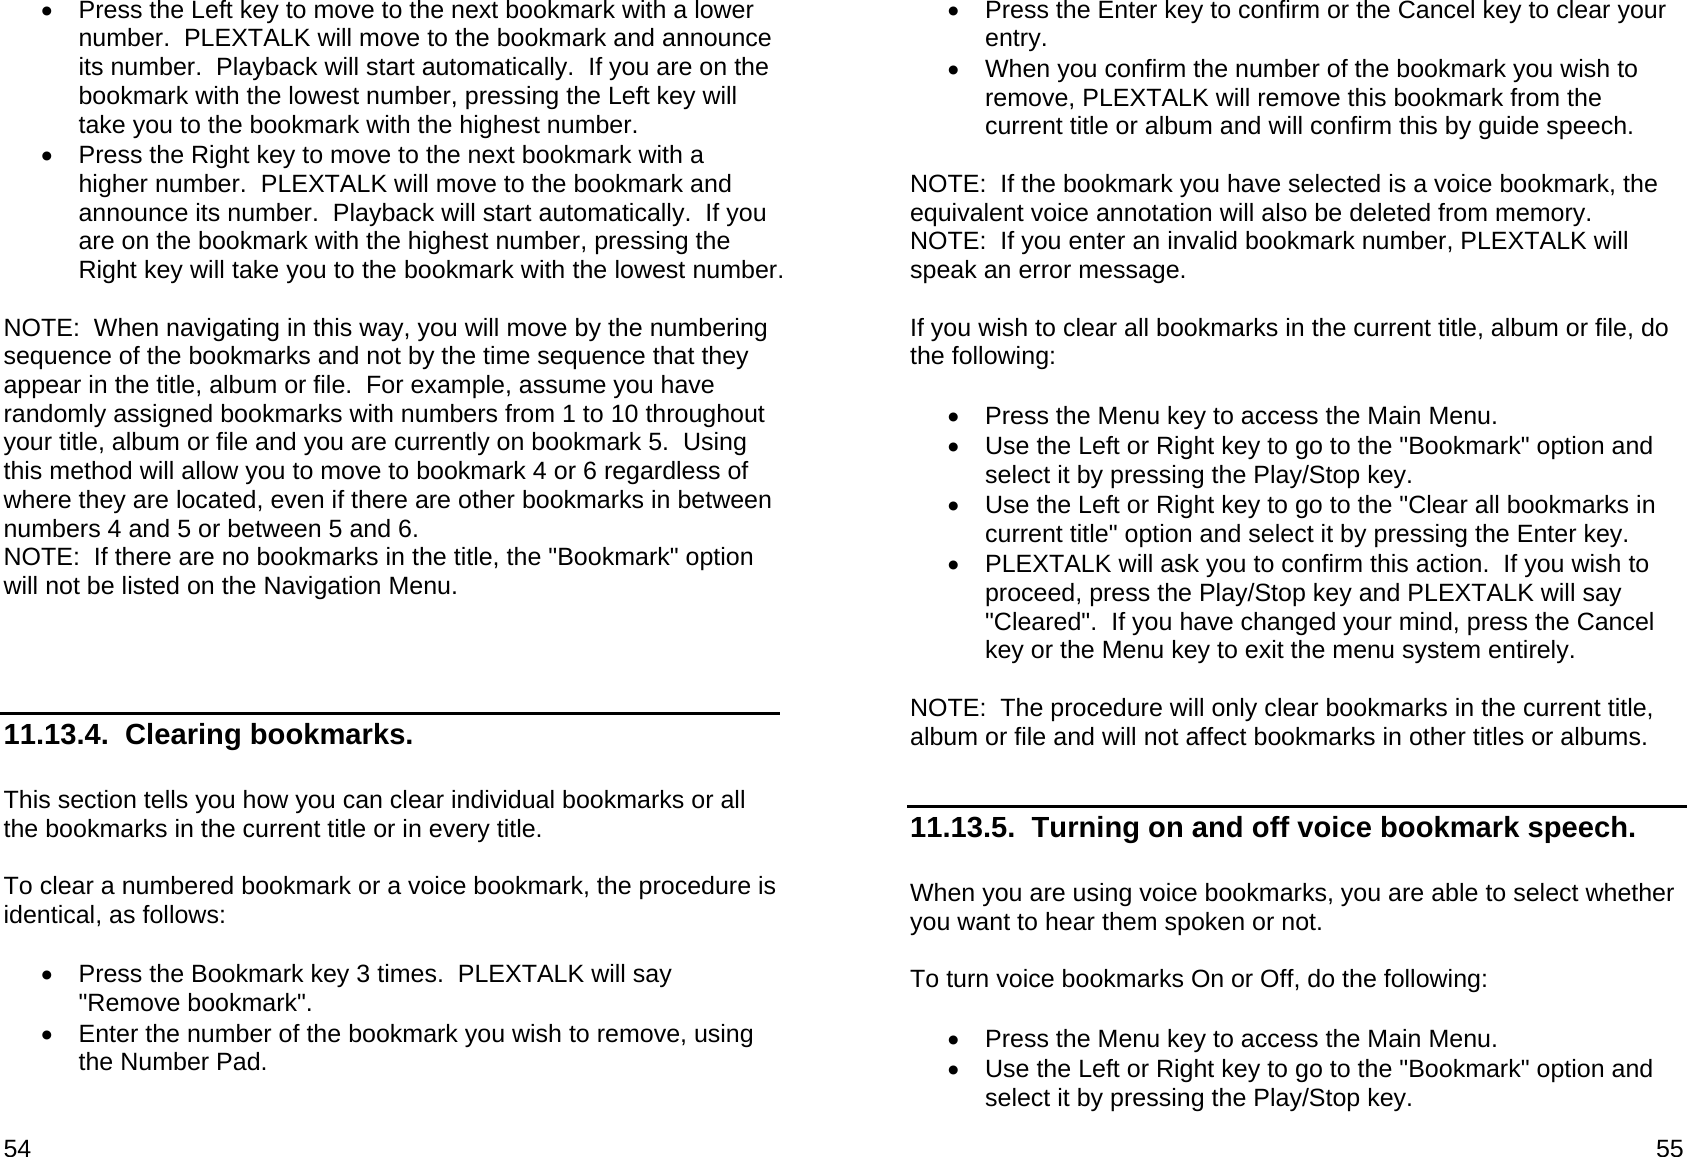
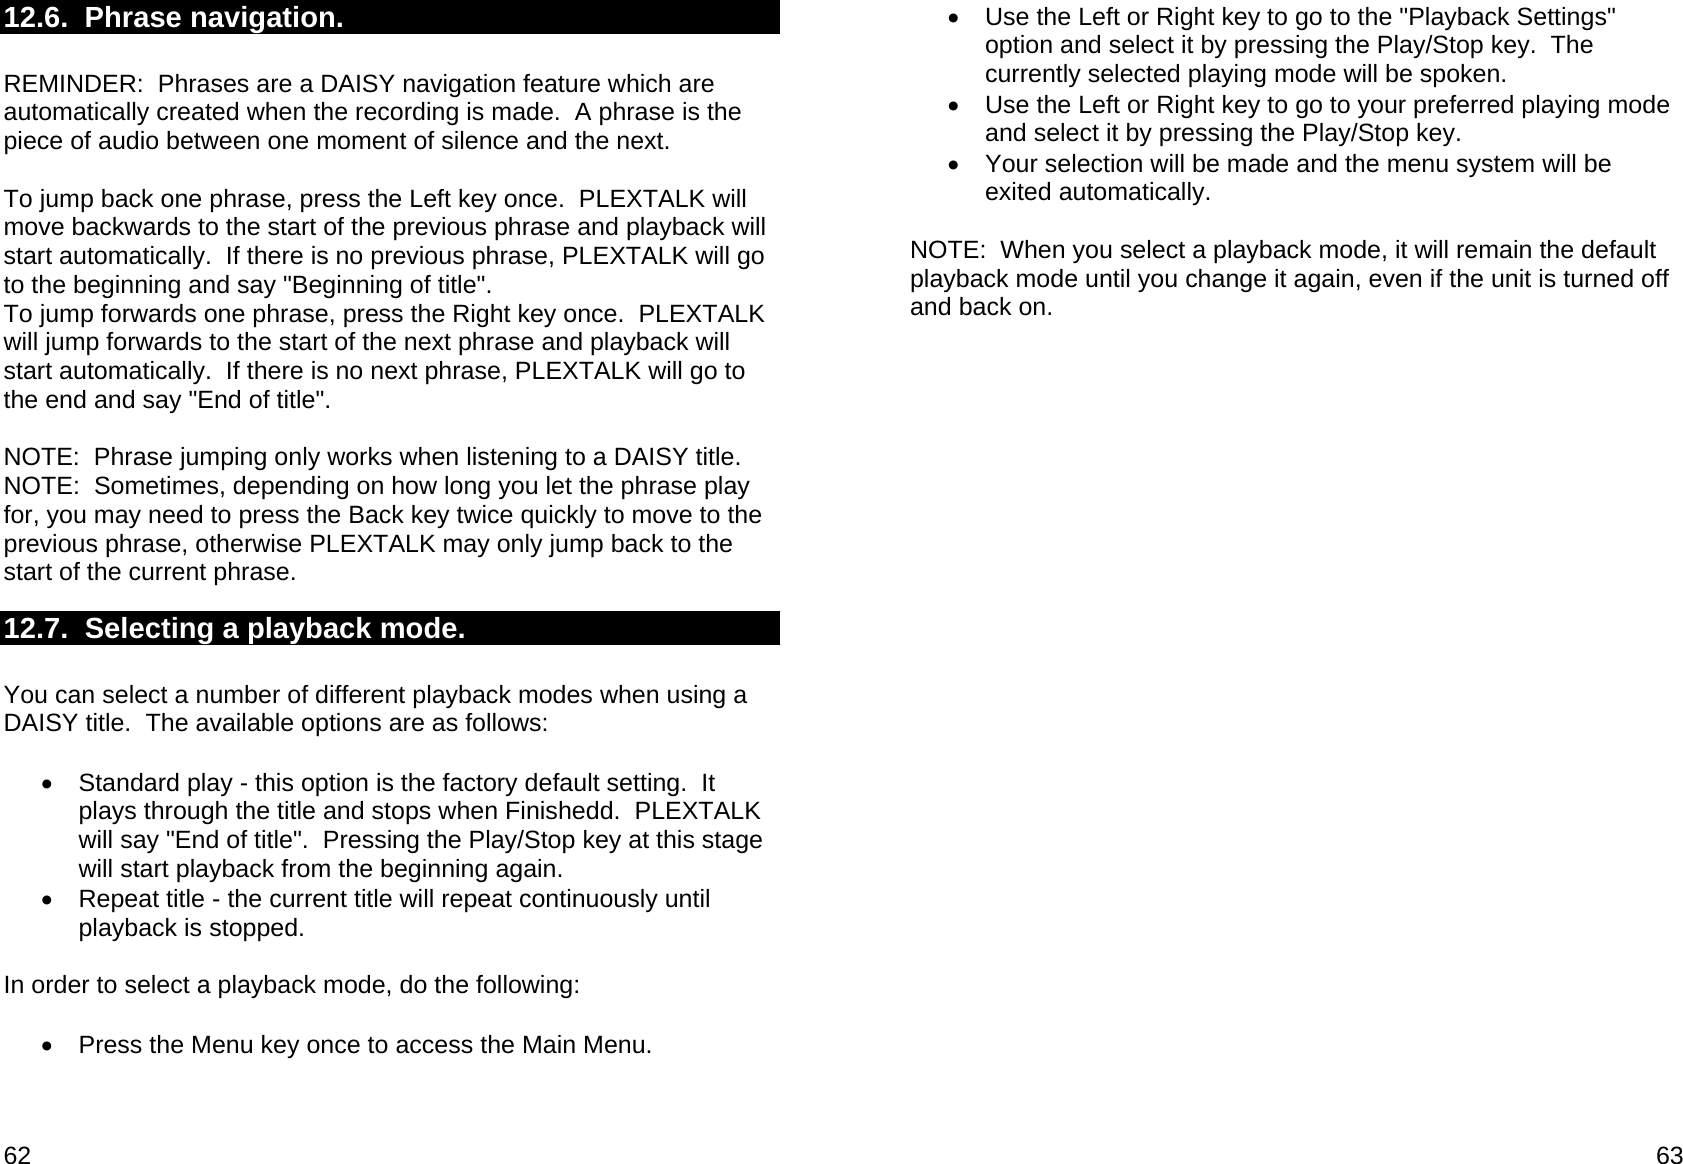

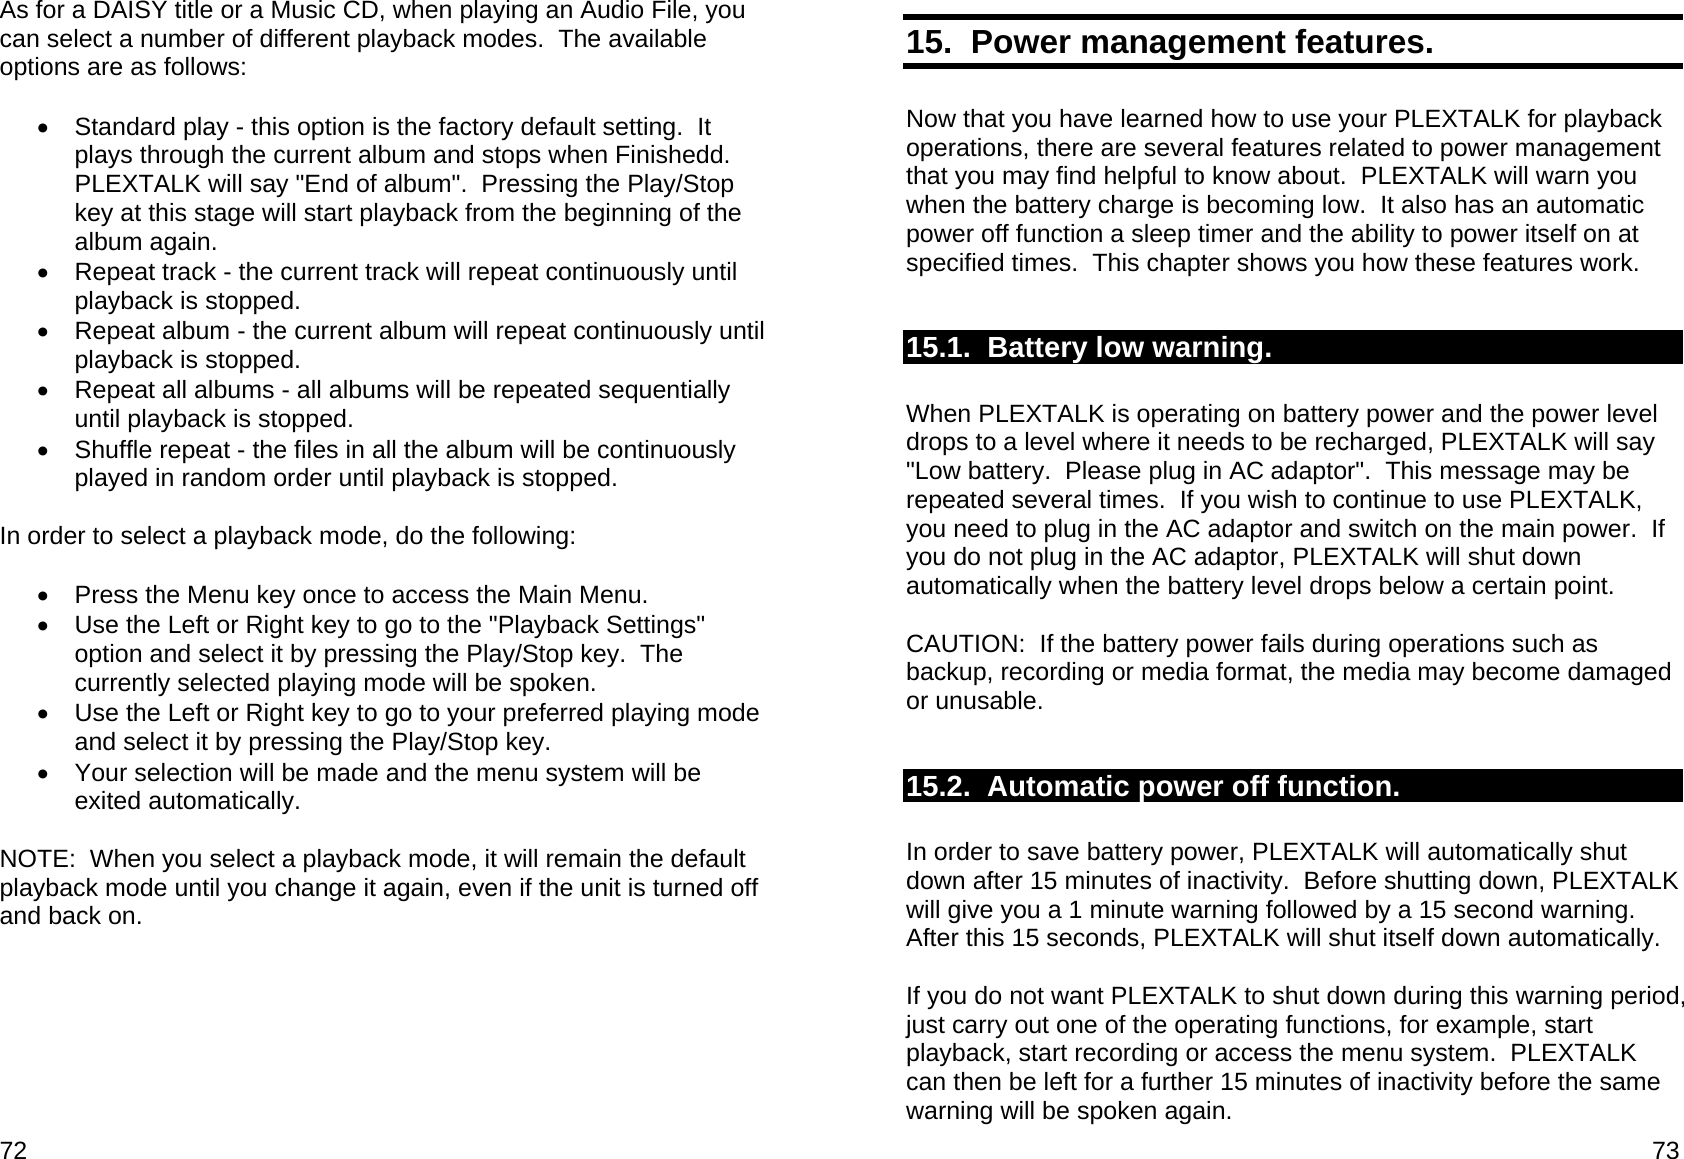
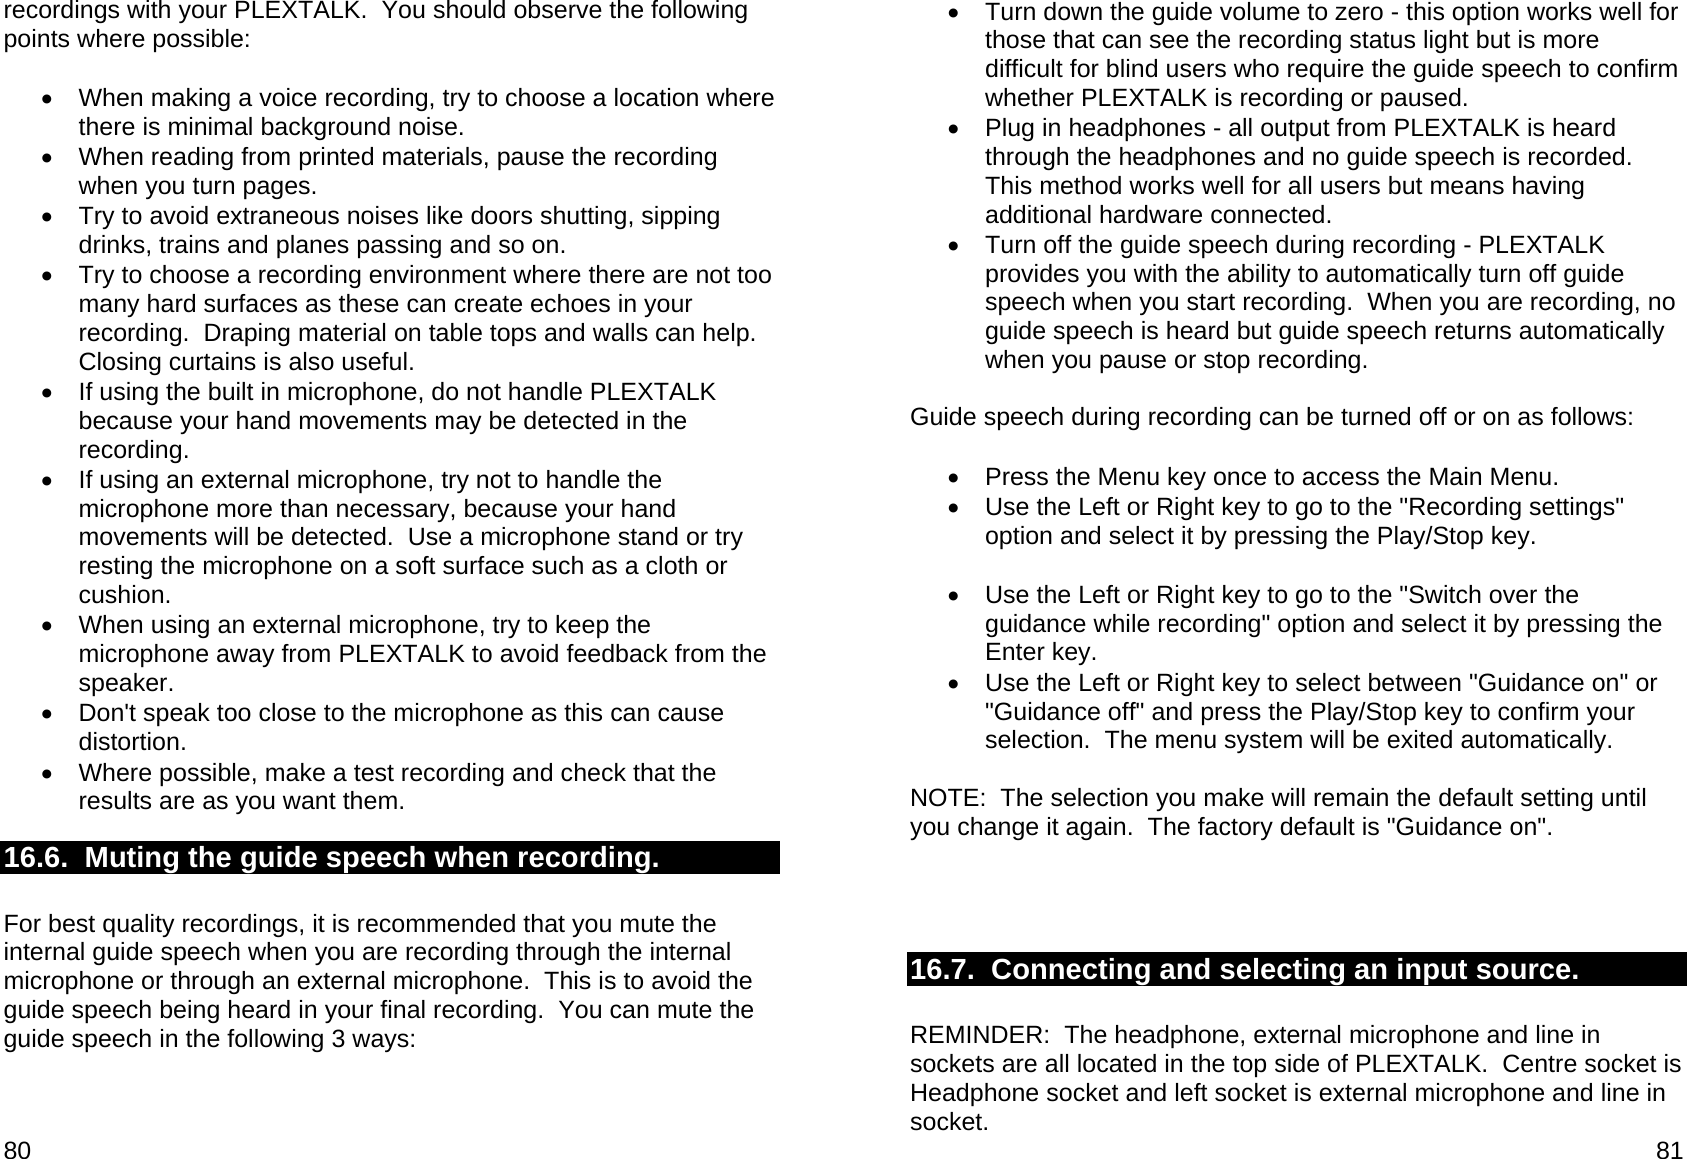

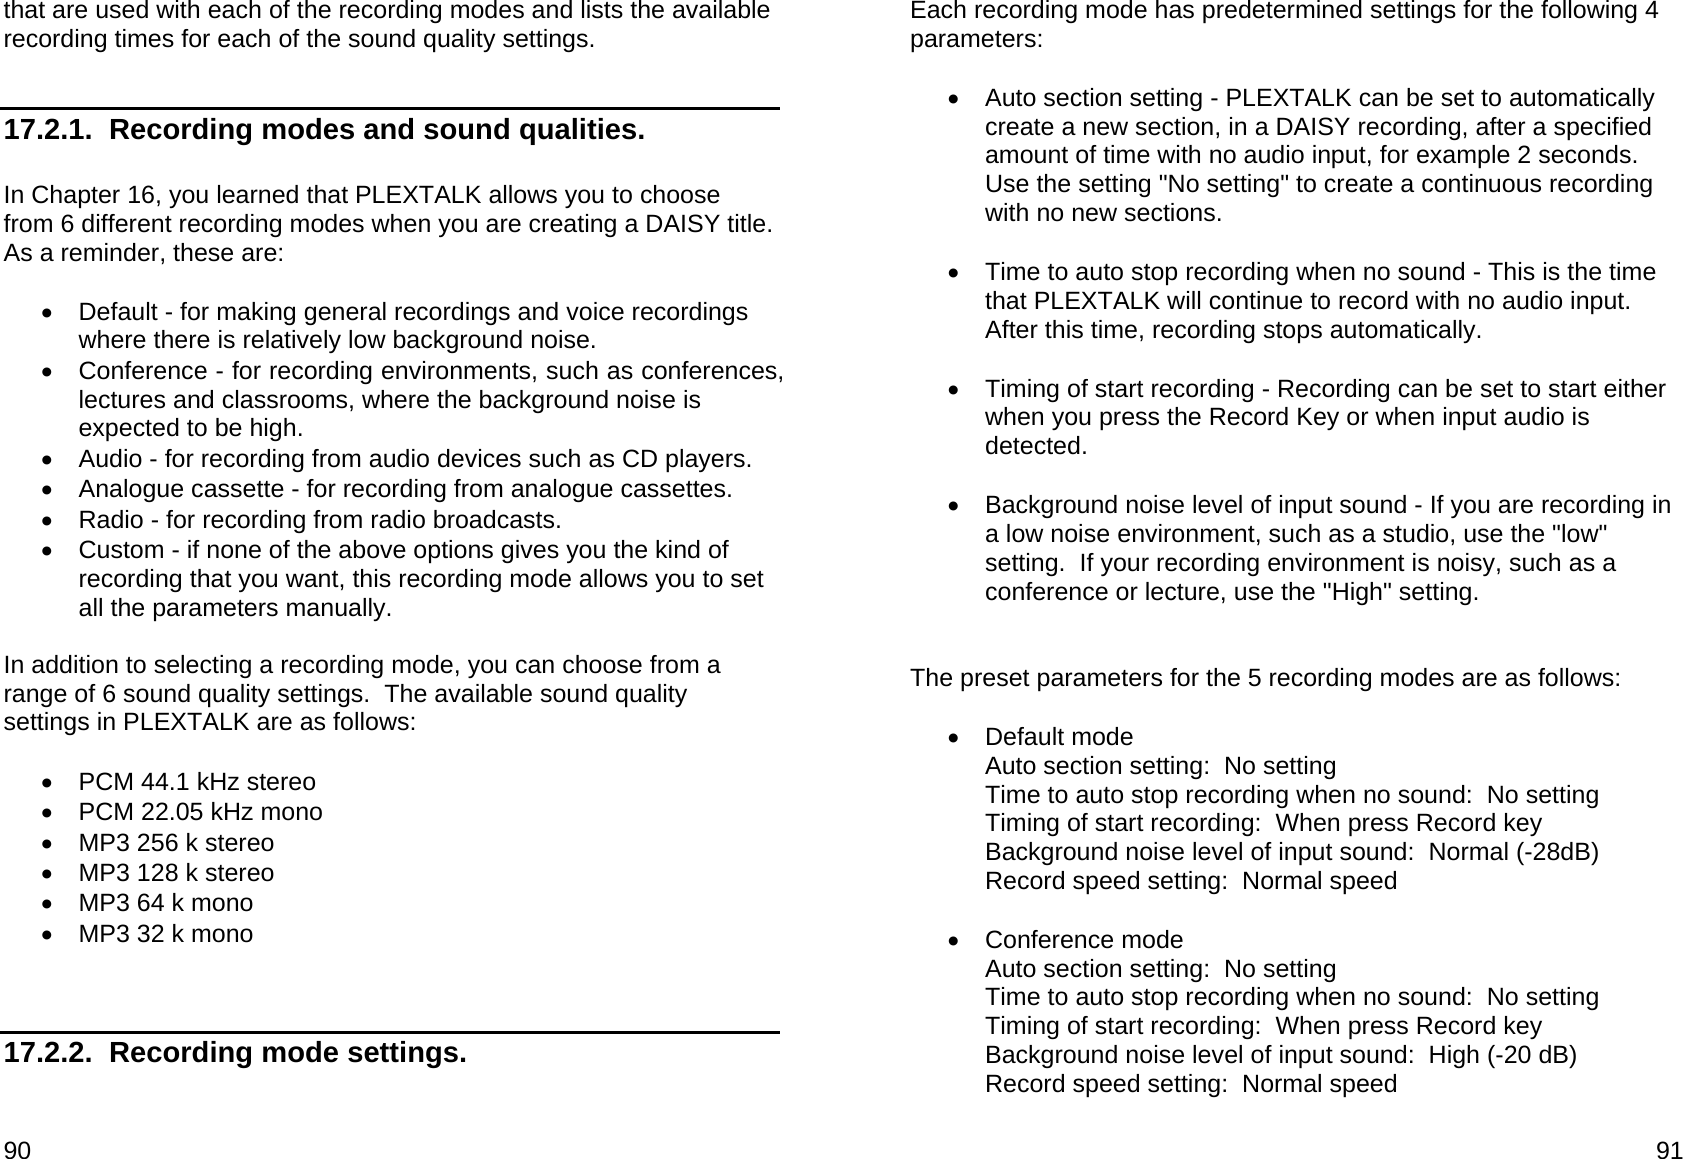
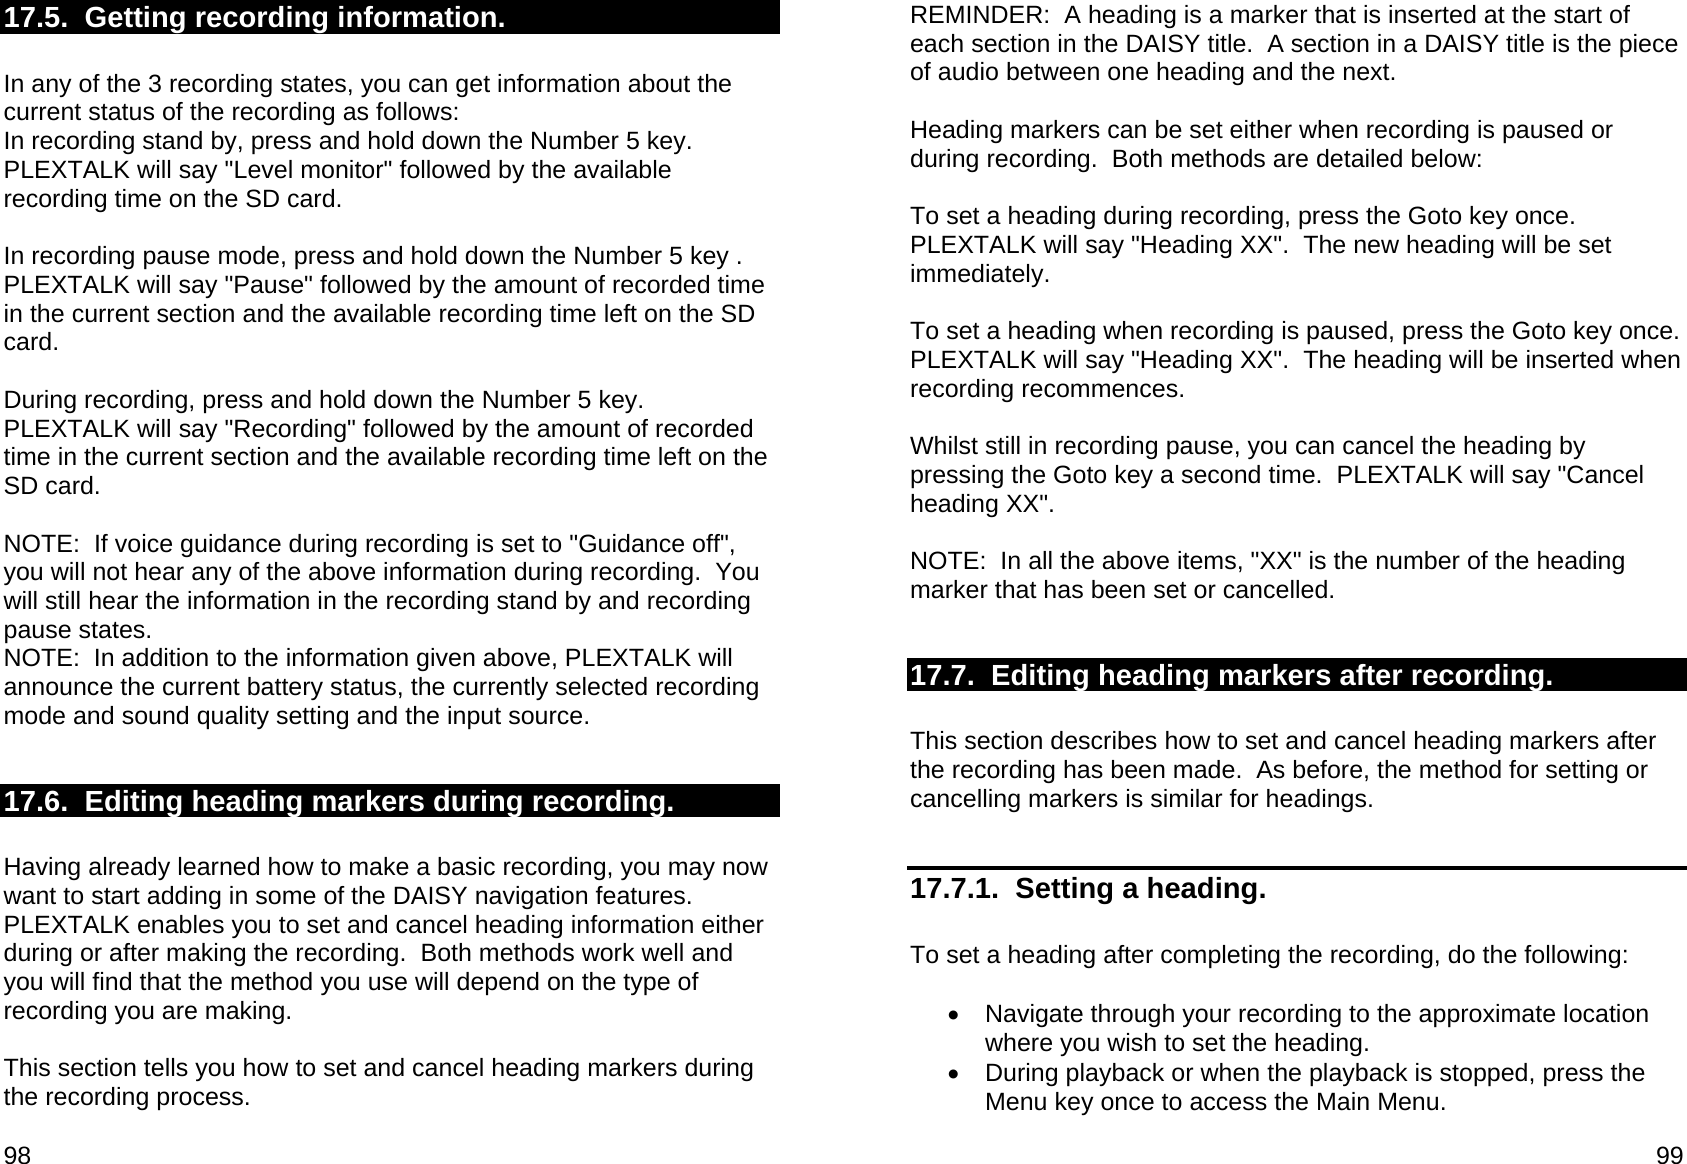
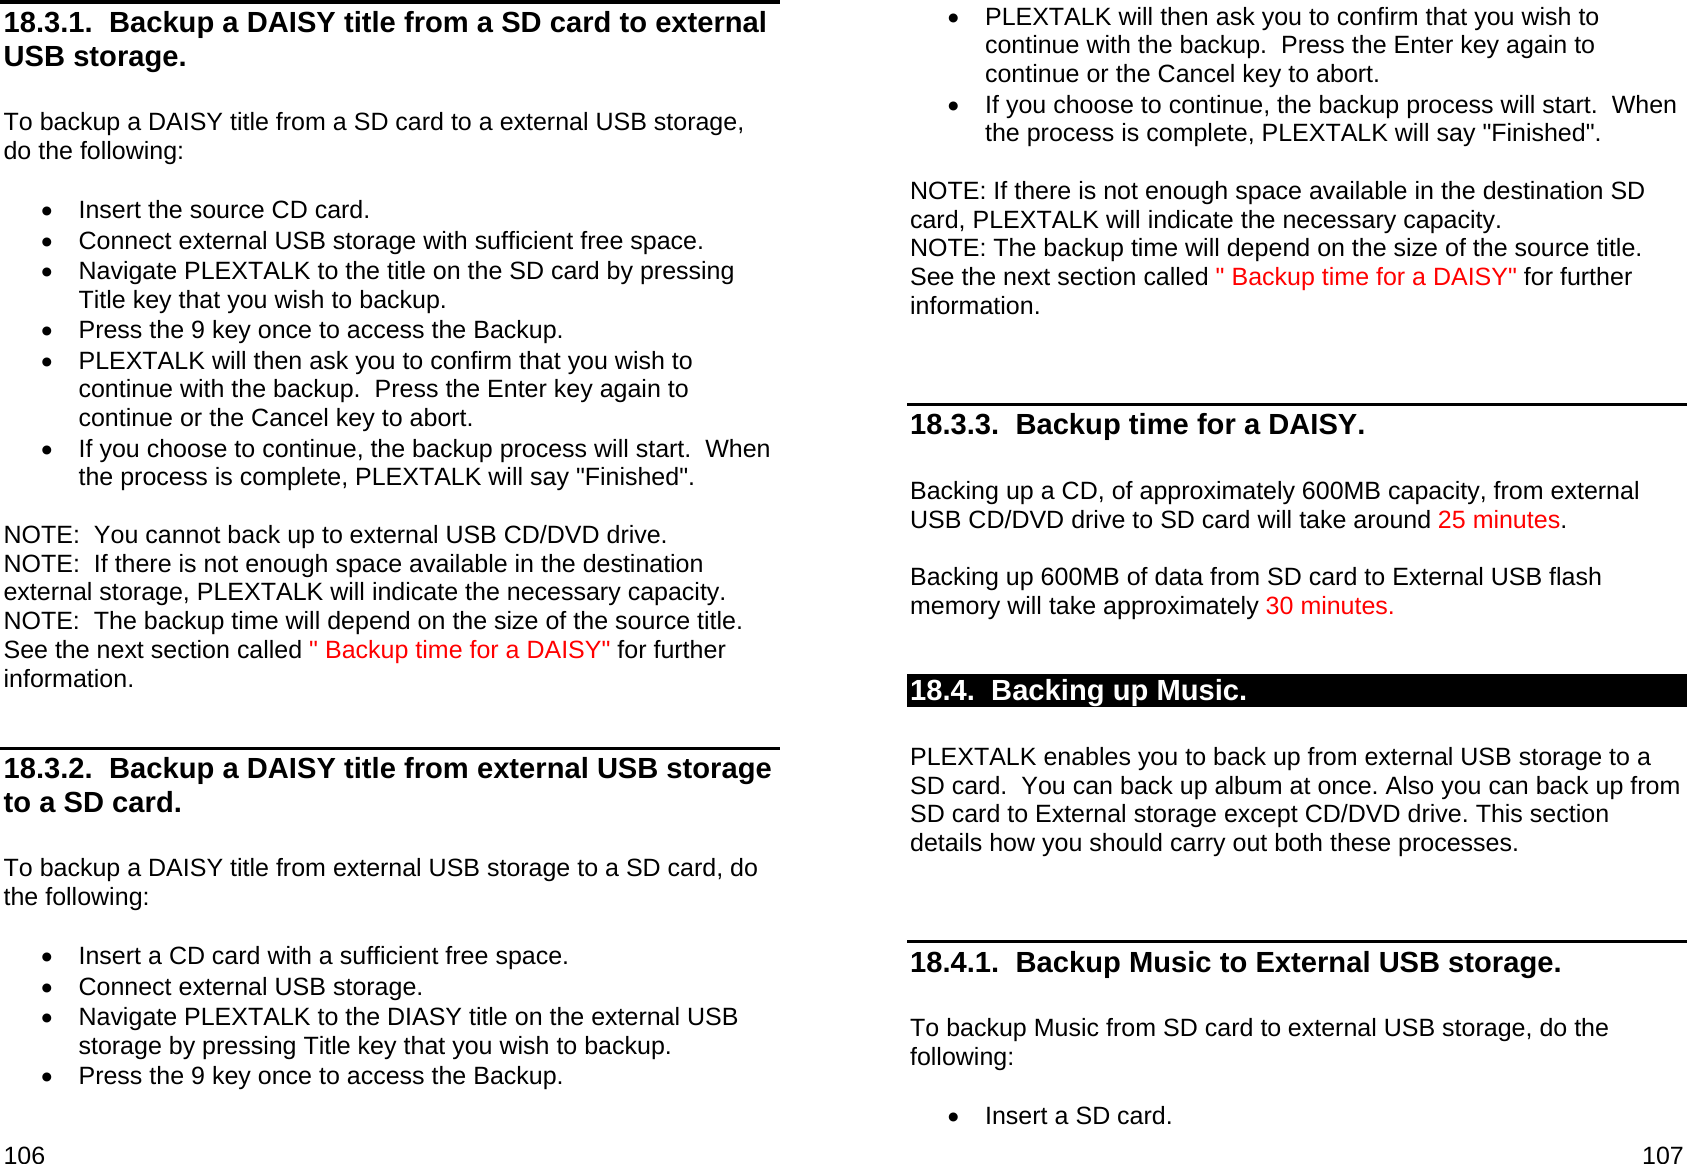
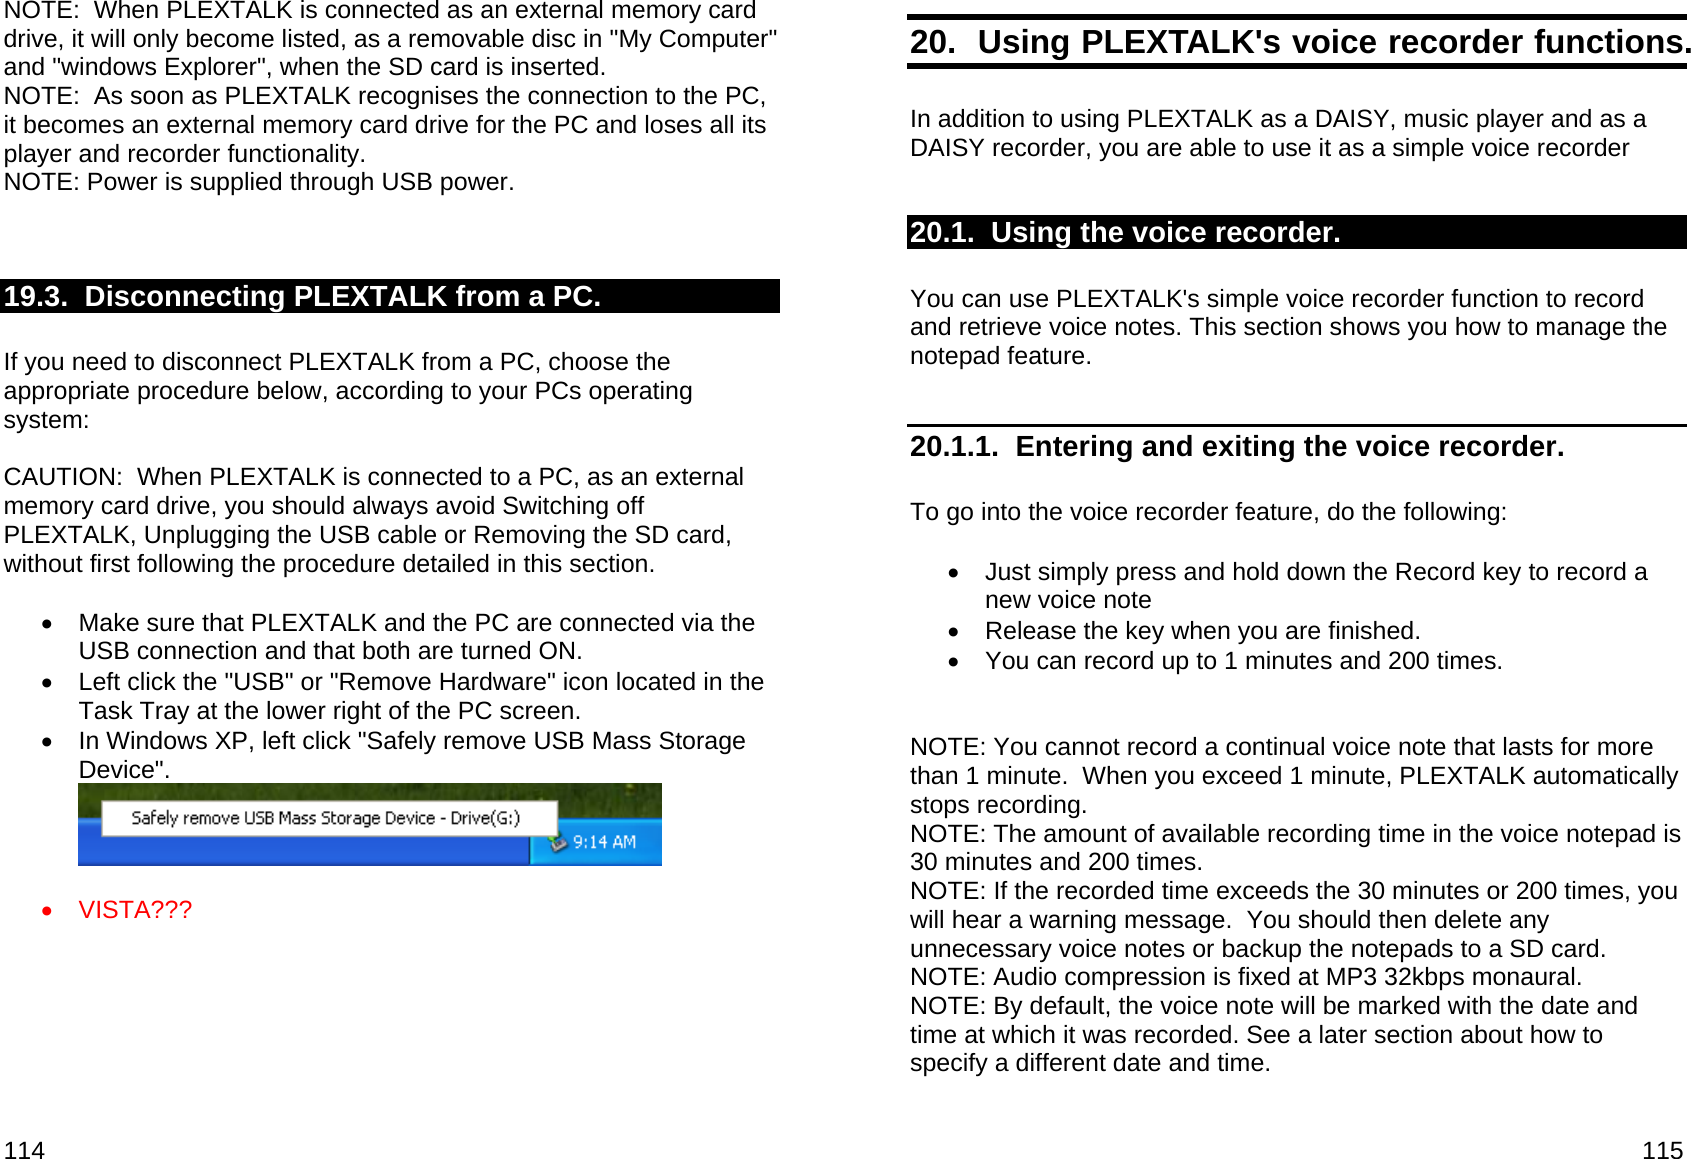

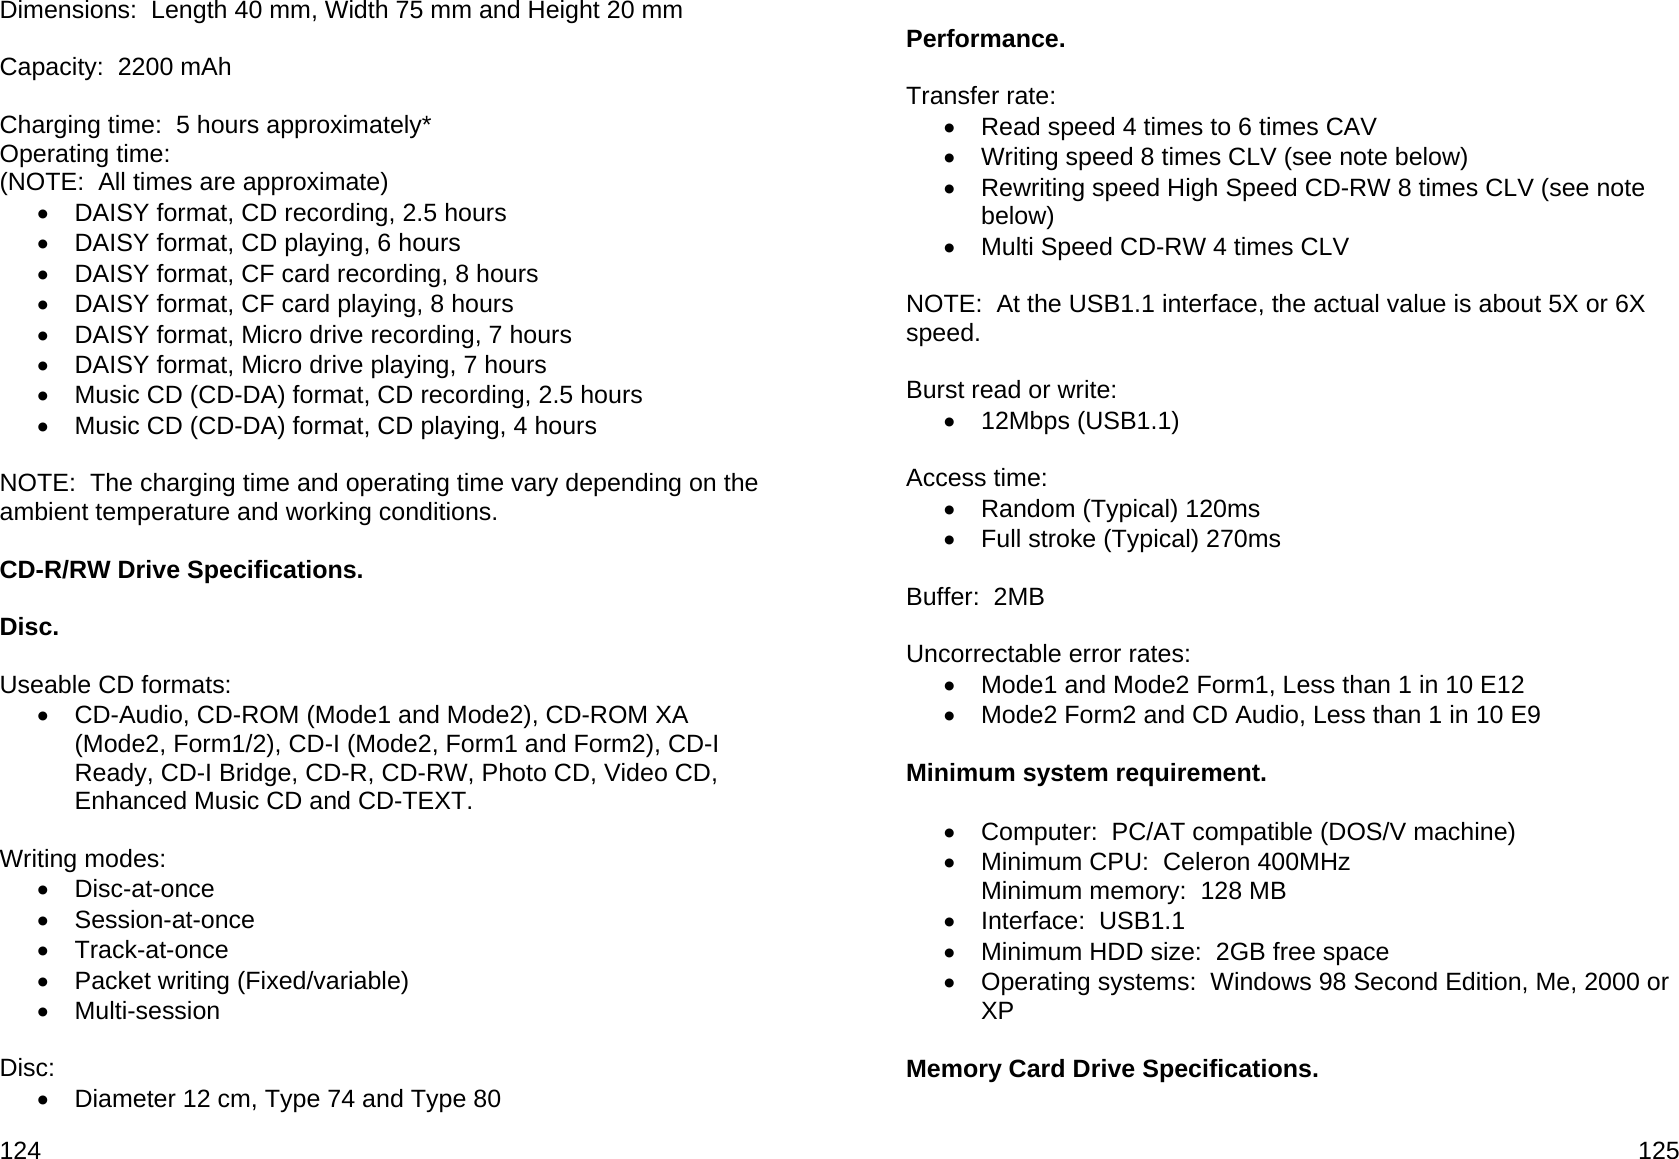
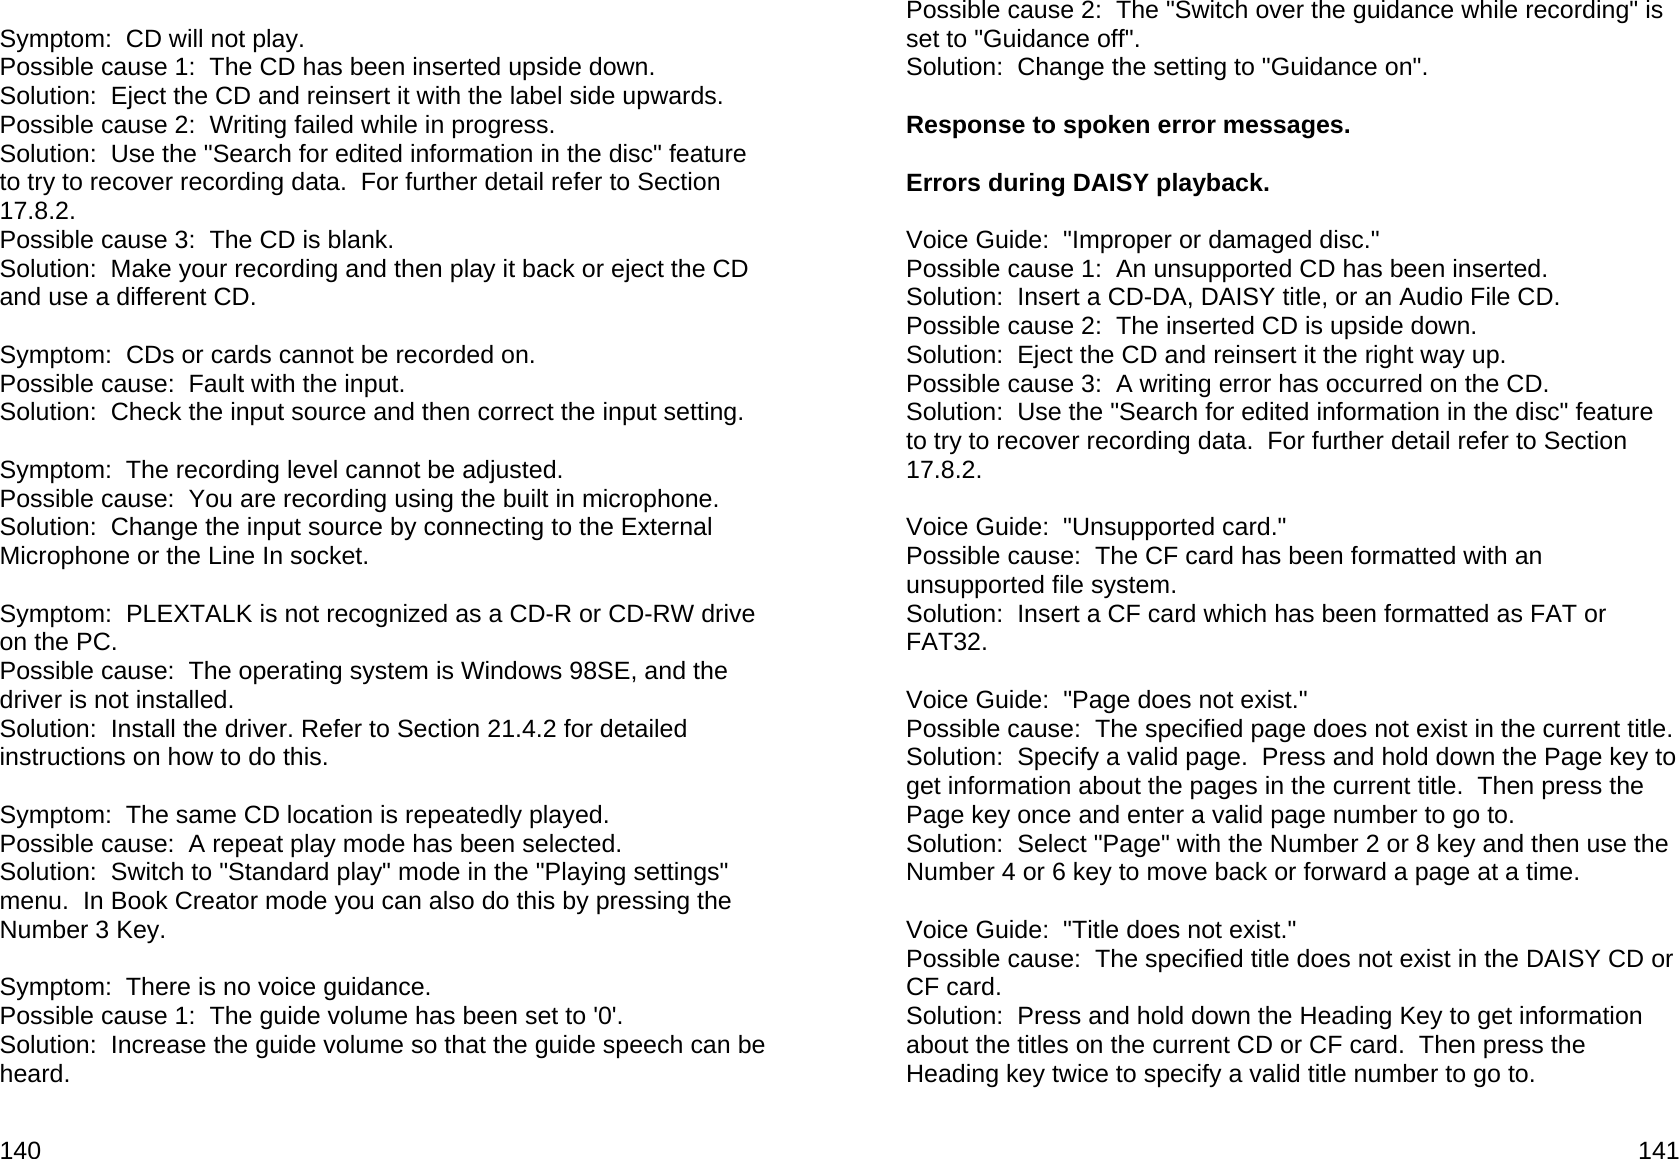
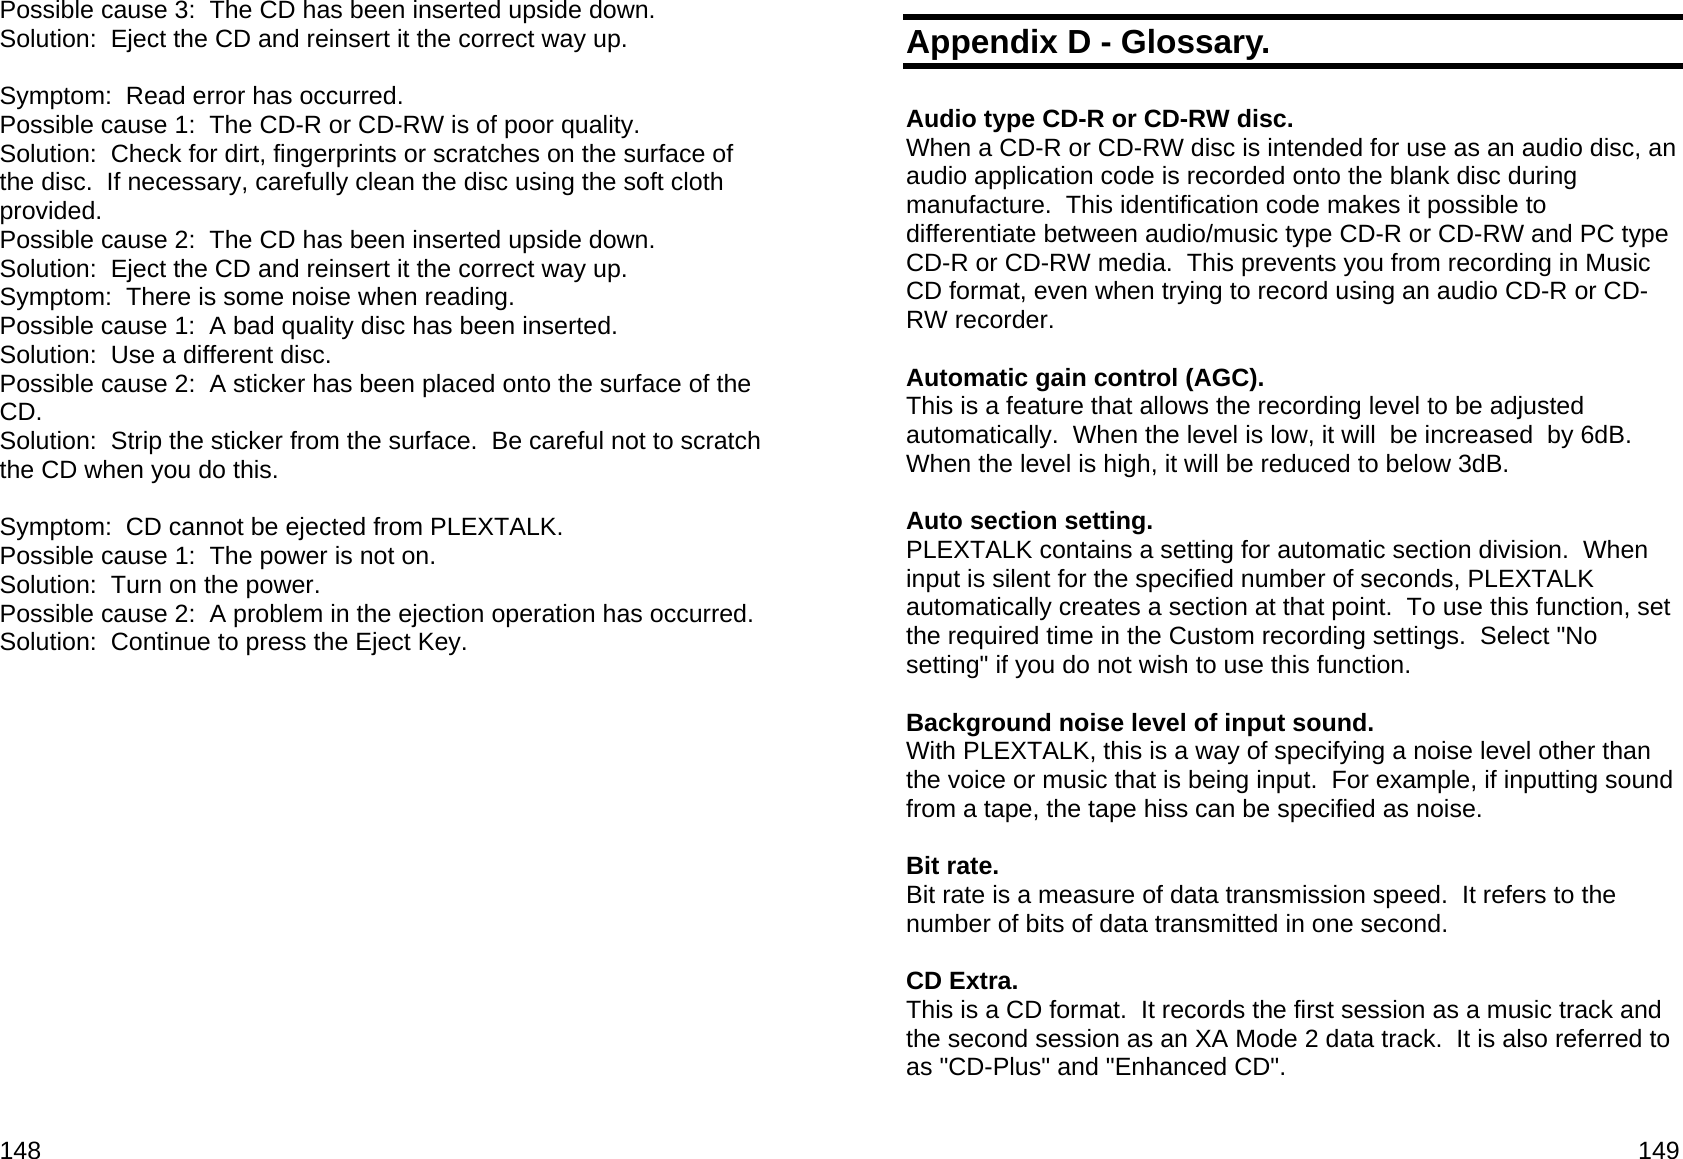
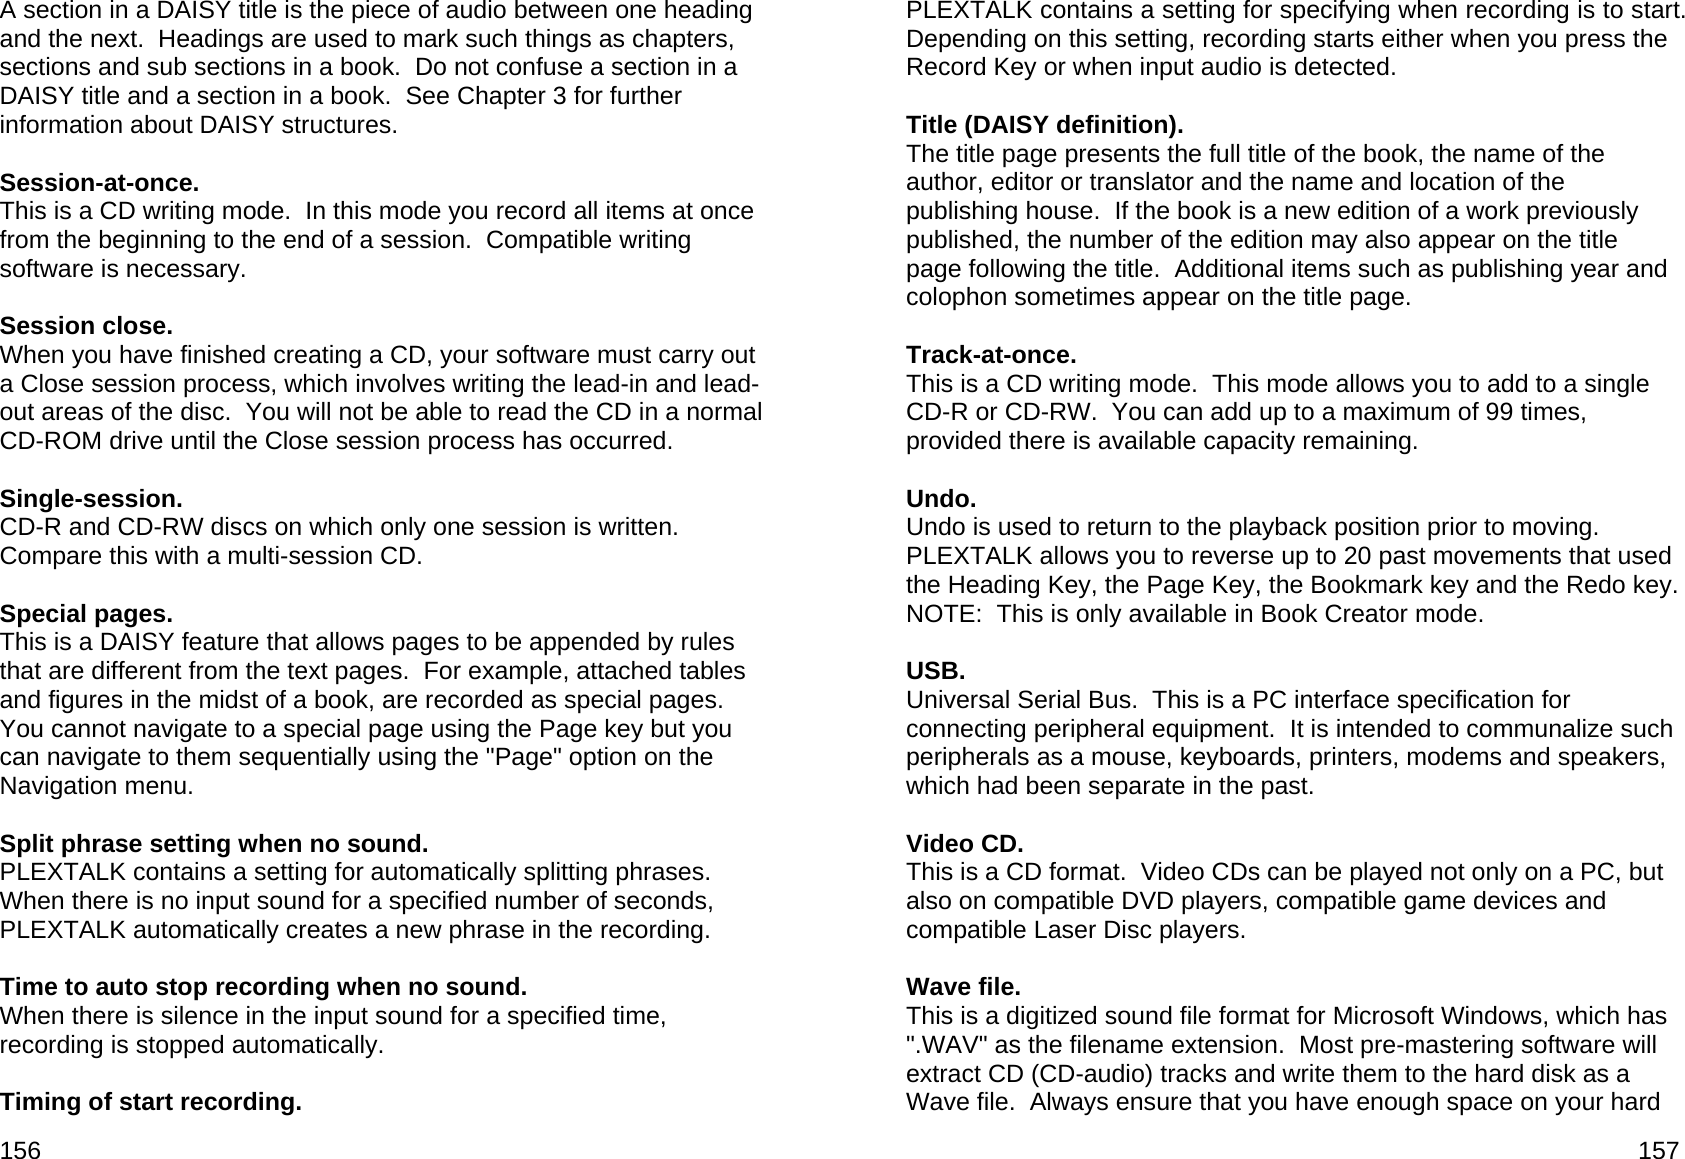
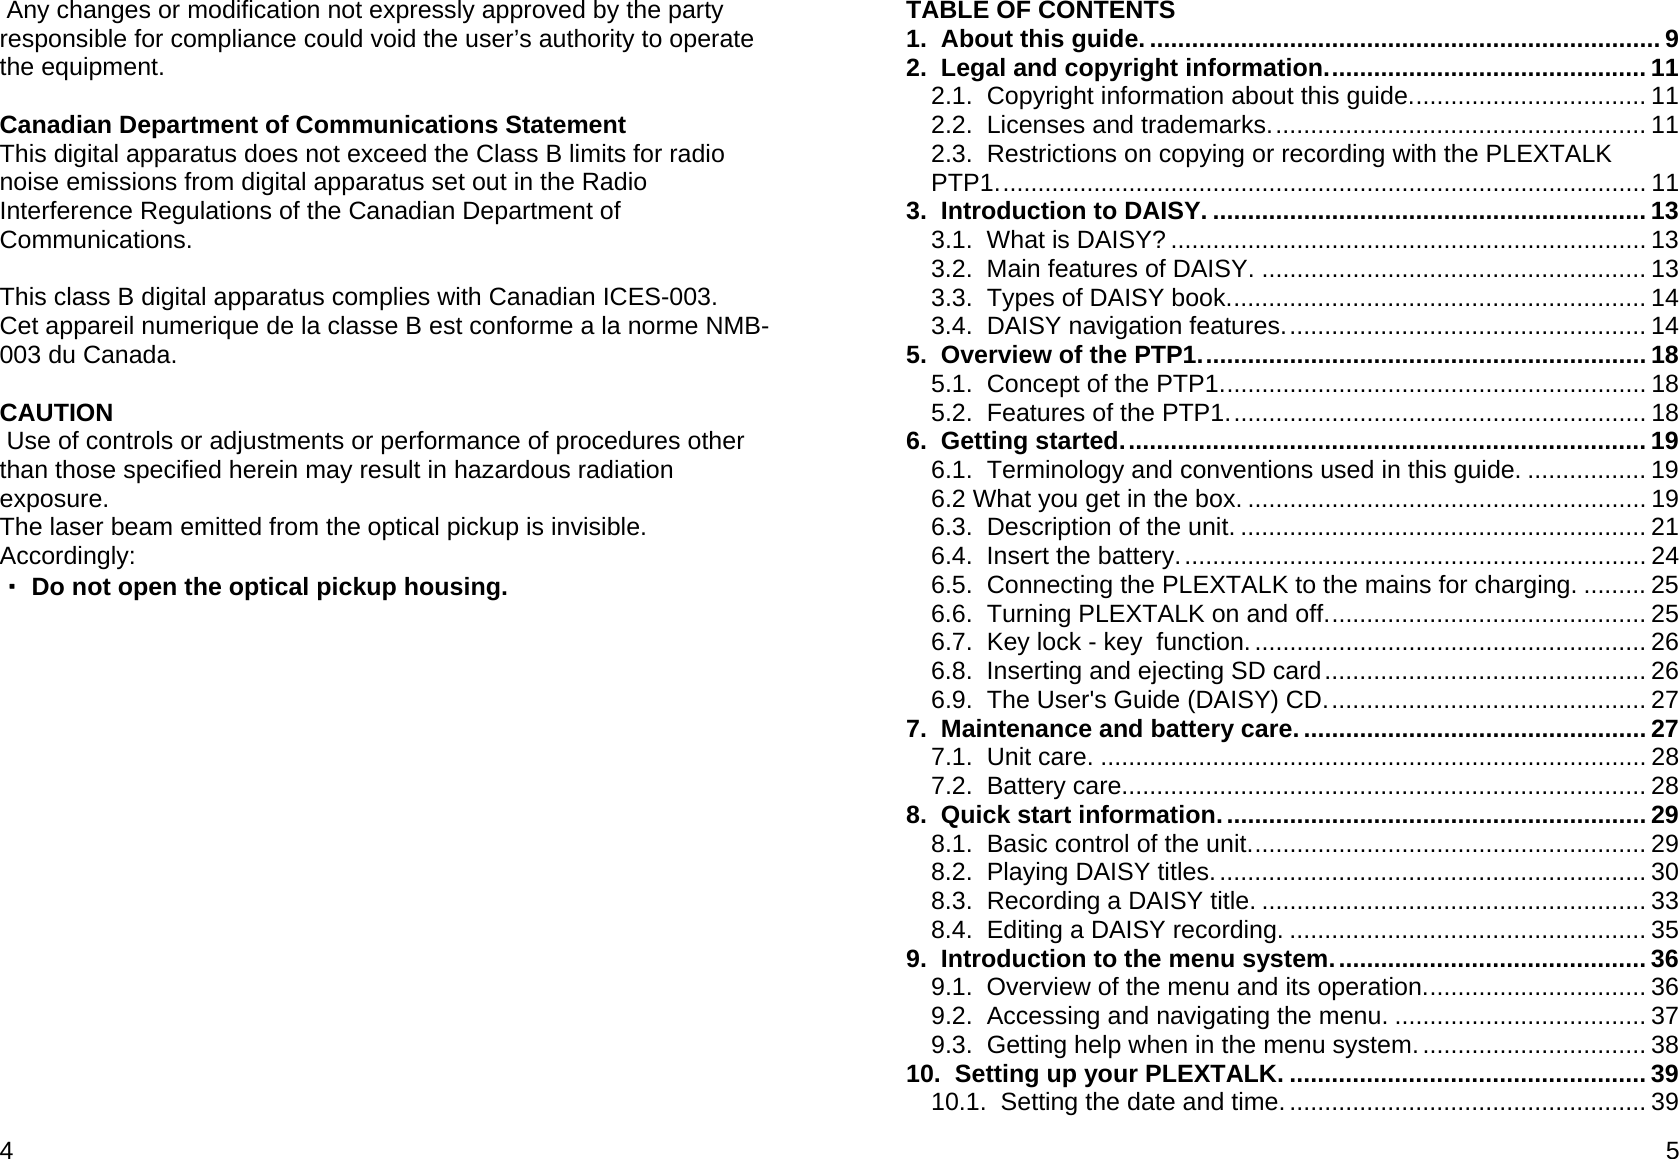
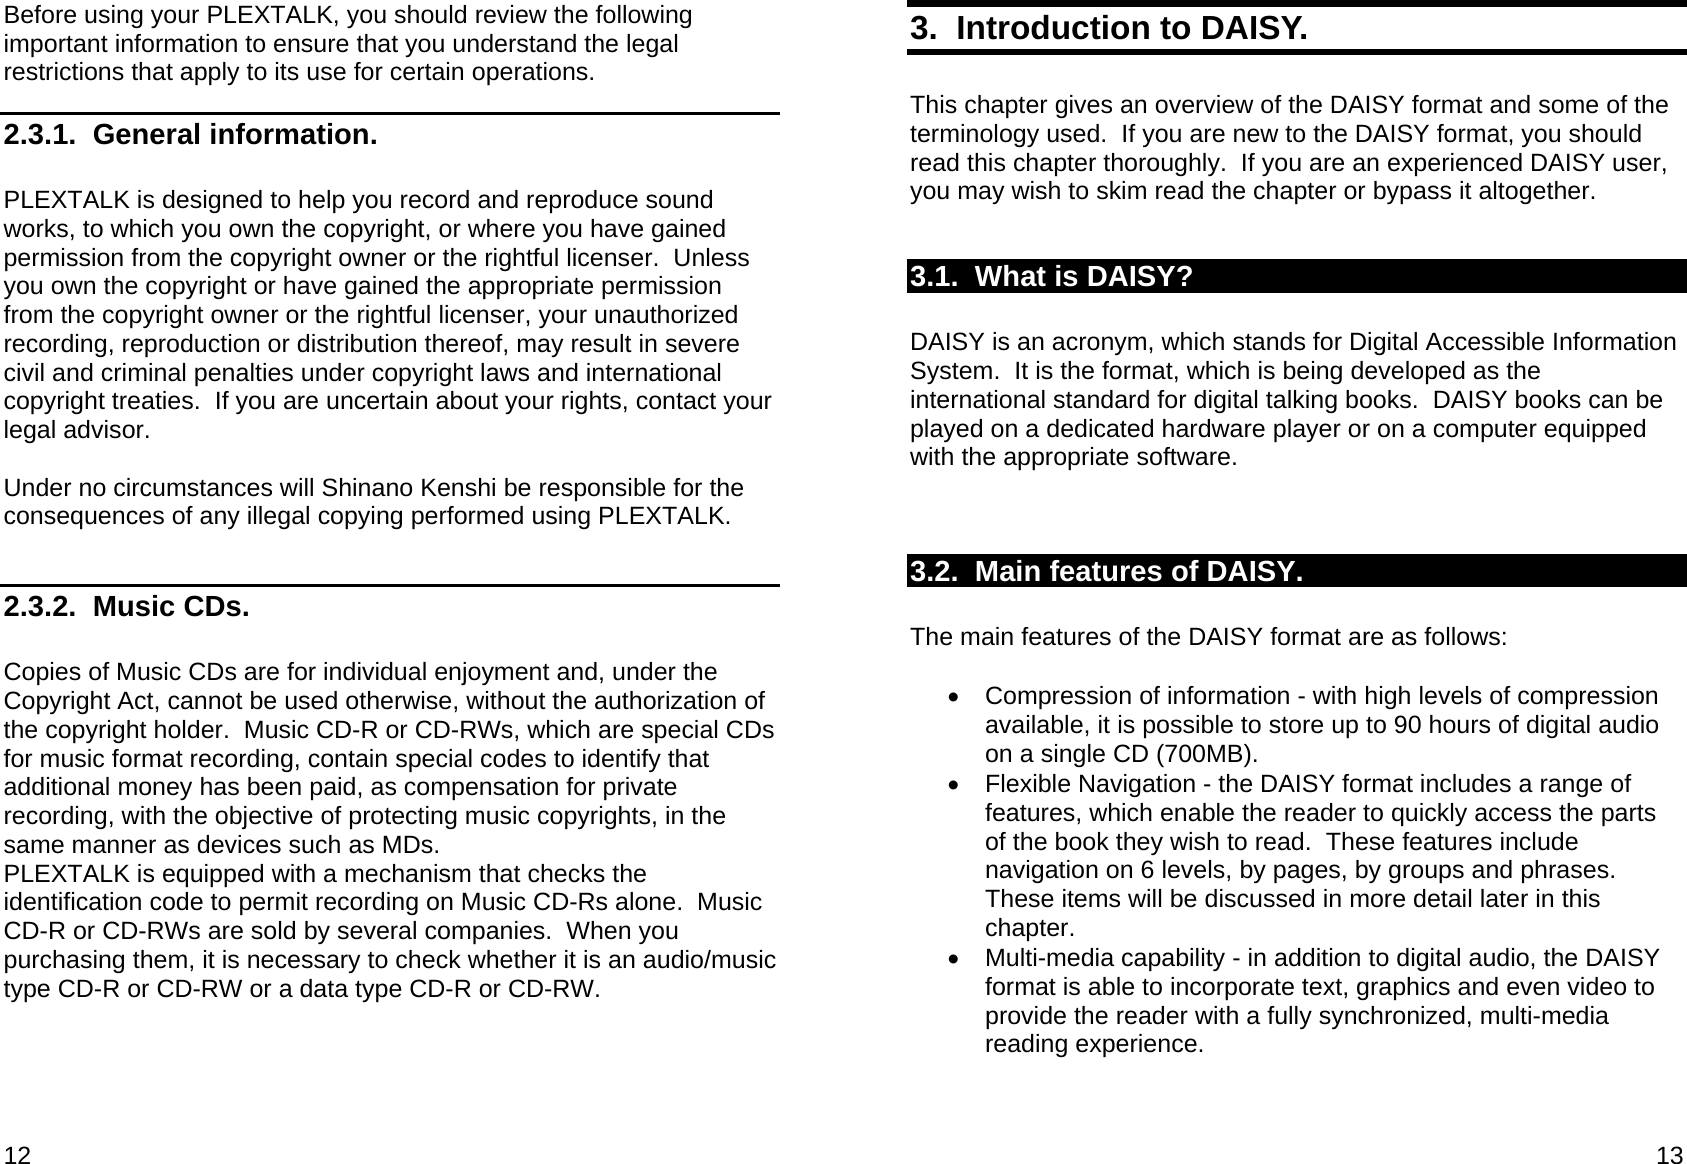
![128 Appendix B - Menu hierarchy. This appendix lists all menu items in the Main Menu along with their corresponding sub menu hierarchy. In order to help you quickly find items when using the electronic file versions of this User's Guide, the following convention has been used: • Main menu items are written in block capitals, they have been marked with a leading greater than sign ">" and are justified to the left margin. In the DAISY version of the User's Guide, you can navigate to each Main Menu item on Level 2. • Sub menu items are marked with a plus sign "+" and are justified to the left margin. • Third level menu items are marked with a dash sign "-" and are indented once from the left margin. • Fourth level items are marked with a less than sign "<" and are indented twice from the left margin. • Voice prompts that are spoken by PLEXTALK are indented one indent more than the menu option from which they were initiated. These are often prefixed by "[Enter key]" to indicate that the voice prompt will be spoken once the Enter key has been pressed. >EDIT +Save editing information [Enter key] Save editing information: Are you sure? +Cut phrase (Book creator mode only) [Enter key] Select beginning of a cut [Enter key] Select end of a cut [Enter key] Cut phrase: Are you sure? [Enter key] Finished +Copy phrase (Book creator mode only) [Enter key] Select beginning of a copy. [Enter key] Select end of a copy. [Enter key] Copy phrase: Are you sure? 129 [Enter key] Finished +Paste phrase (Book creator mode only) [Enter key] Select position of a paste. [Enter key] Paste phrase: Are you sure? [Enter key] Finished +Split phrase (Book creator mode only) [Enter key] Select the phrase. [Enter key] Press enter key to select the position to split. [Enter key] Split phrase: Are you sure? Adjust the position by 4 and 6 key. [Enter key] Finished +Join phrase (Book creator mode only) [Enter key] Select the phrase. [Enter key] Join phrase: Are you sure? [Enter key] Finished +Cut section [Enter key] Select beginning of a section. [Enter key] Select end of a section. [Enter key] Cut section: Are you sure? [Enter key] Finished. +Copy section [Enter key] Select beginning of a section. [Enter key] Select end of a section. [Enter key] Copy section: Are you sure? [Enter key] Finished. +Paste section [Enter key] Select position of paste. [Enter key] Paste section: Are you sure? [Enter key] Finished. +Join section [Enter key] Select beginning of a section. [Enter key] Select end of a section. [Enter key] Join section: Are you sure? [Enter key] Finished. +Set the section level (Book creator mode only) [Enter key] Use the 4 and 6 keys to move through headings and 2 and 8 keys to up or down the section level. [Enter key] Set the section level: Are you sure?](https://usermanual.wiki/Shinano-Kenshi/PTP1/User-Guide-1003733-Page-64.png)
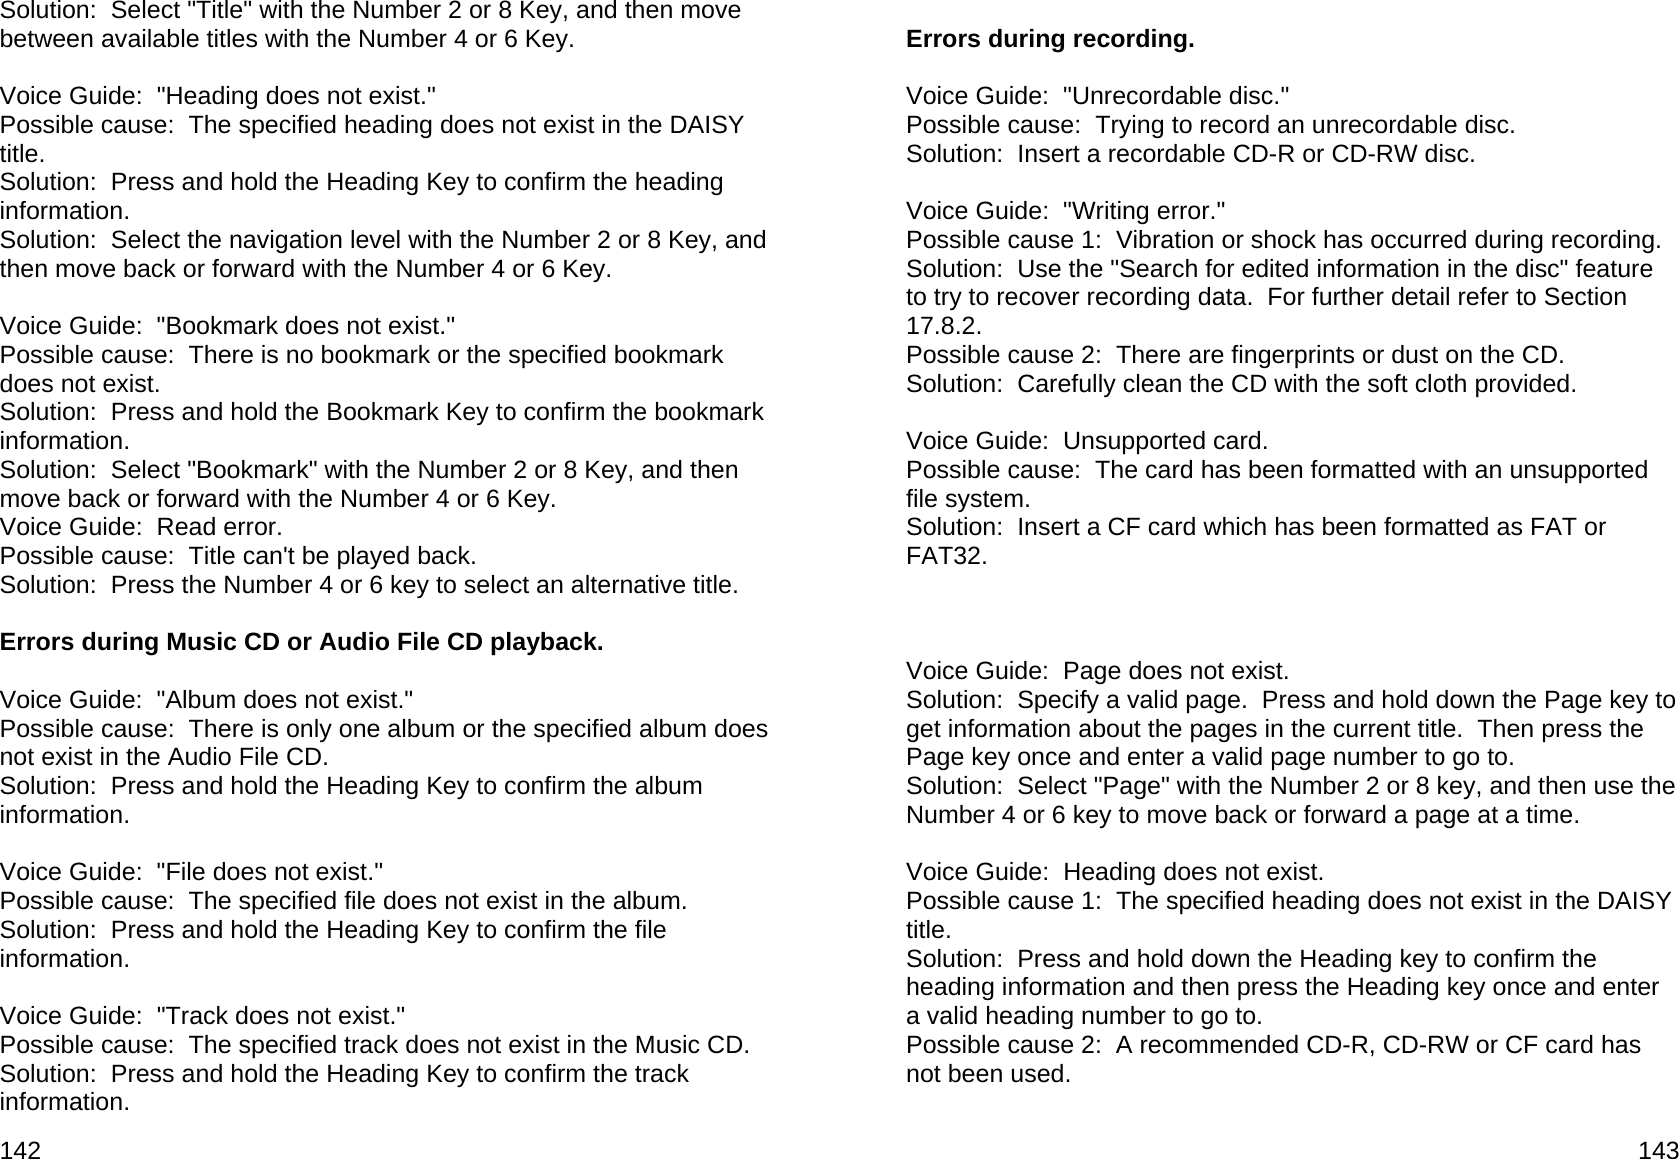
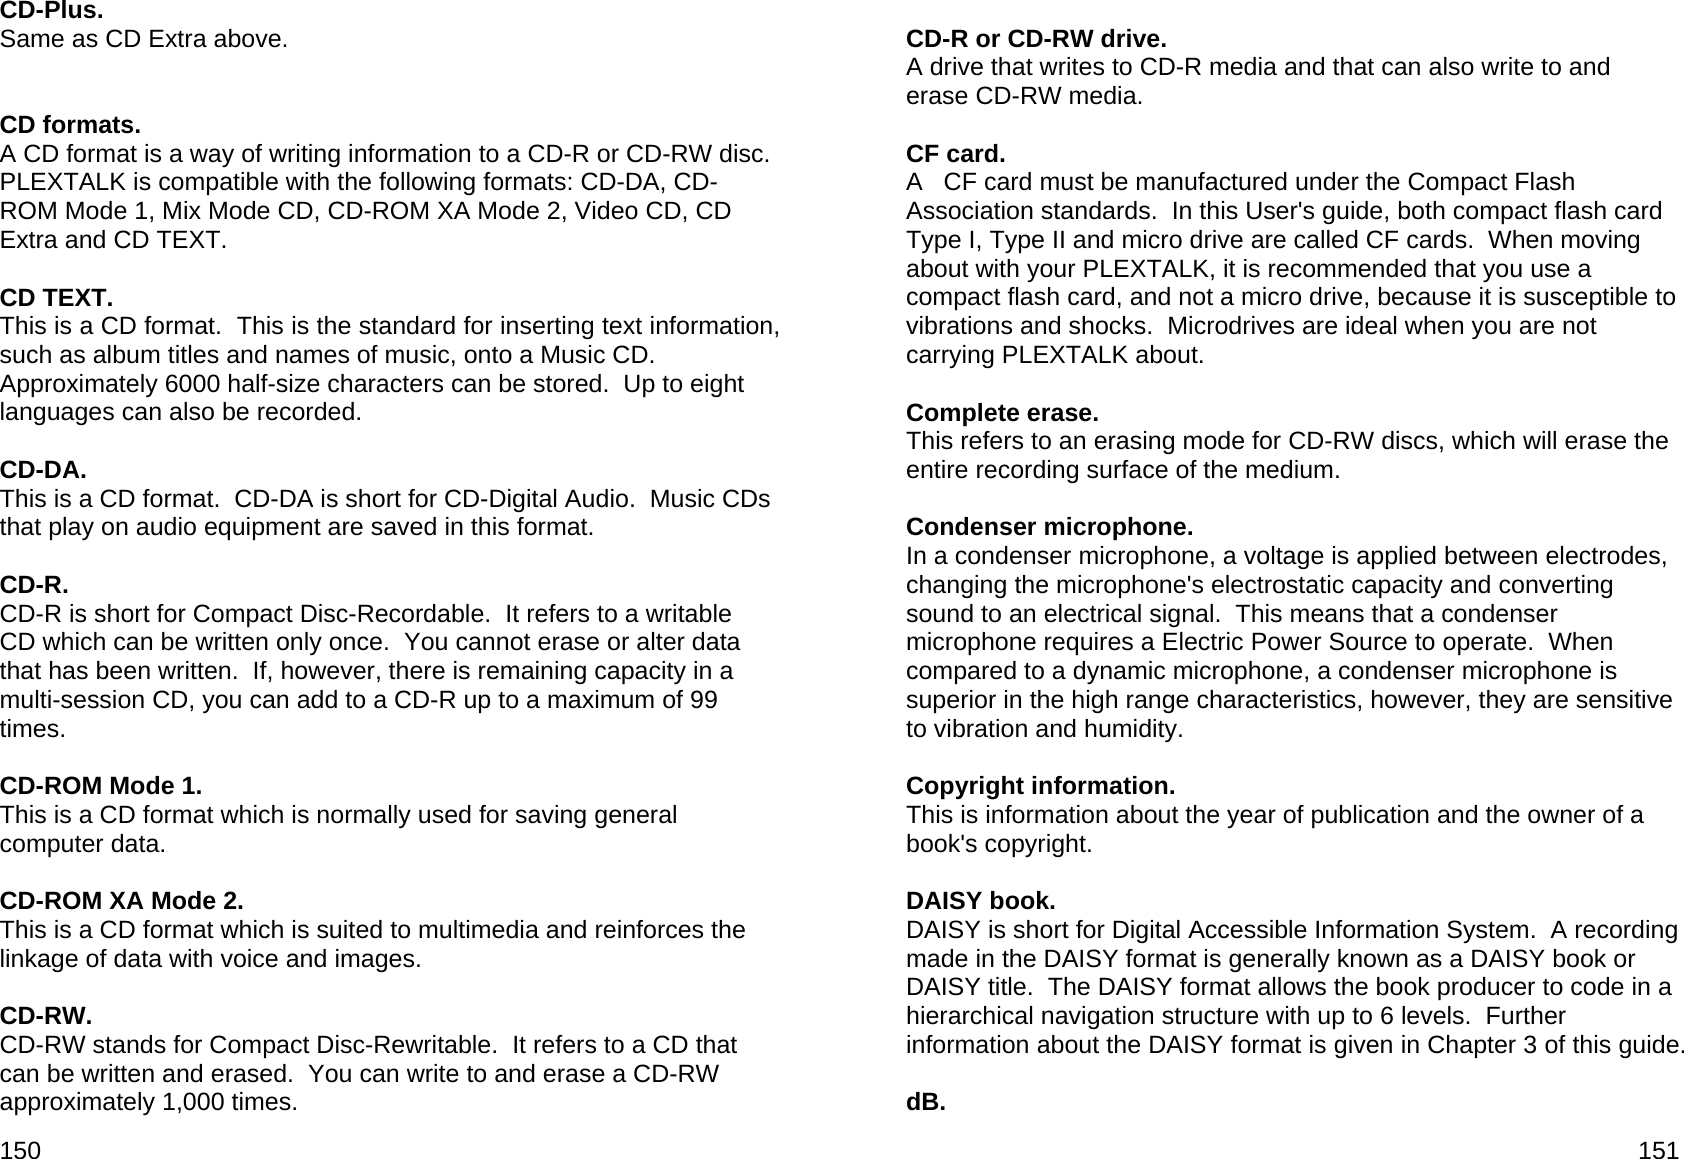
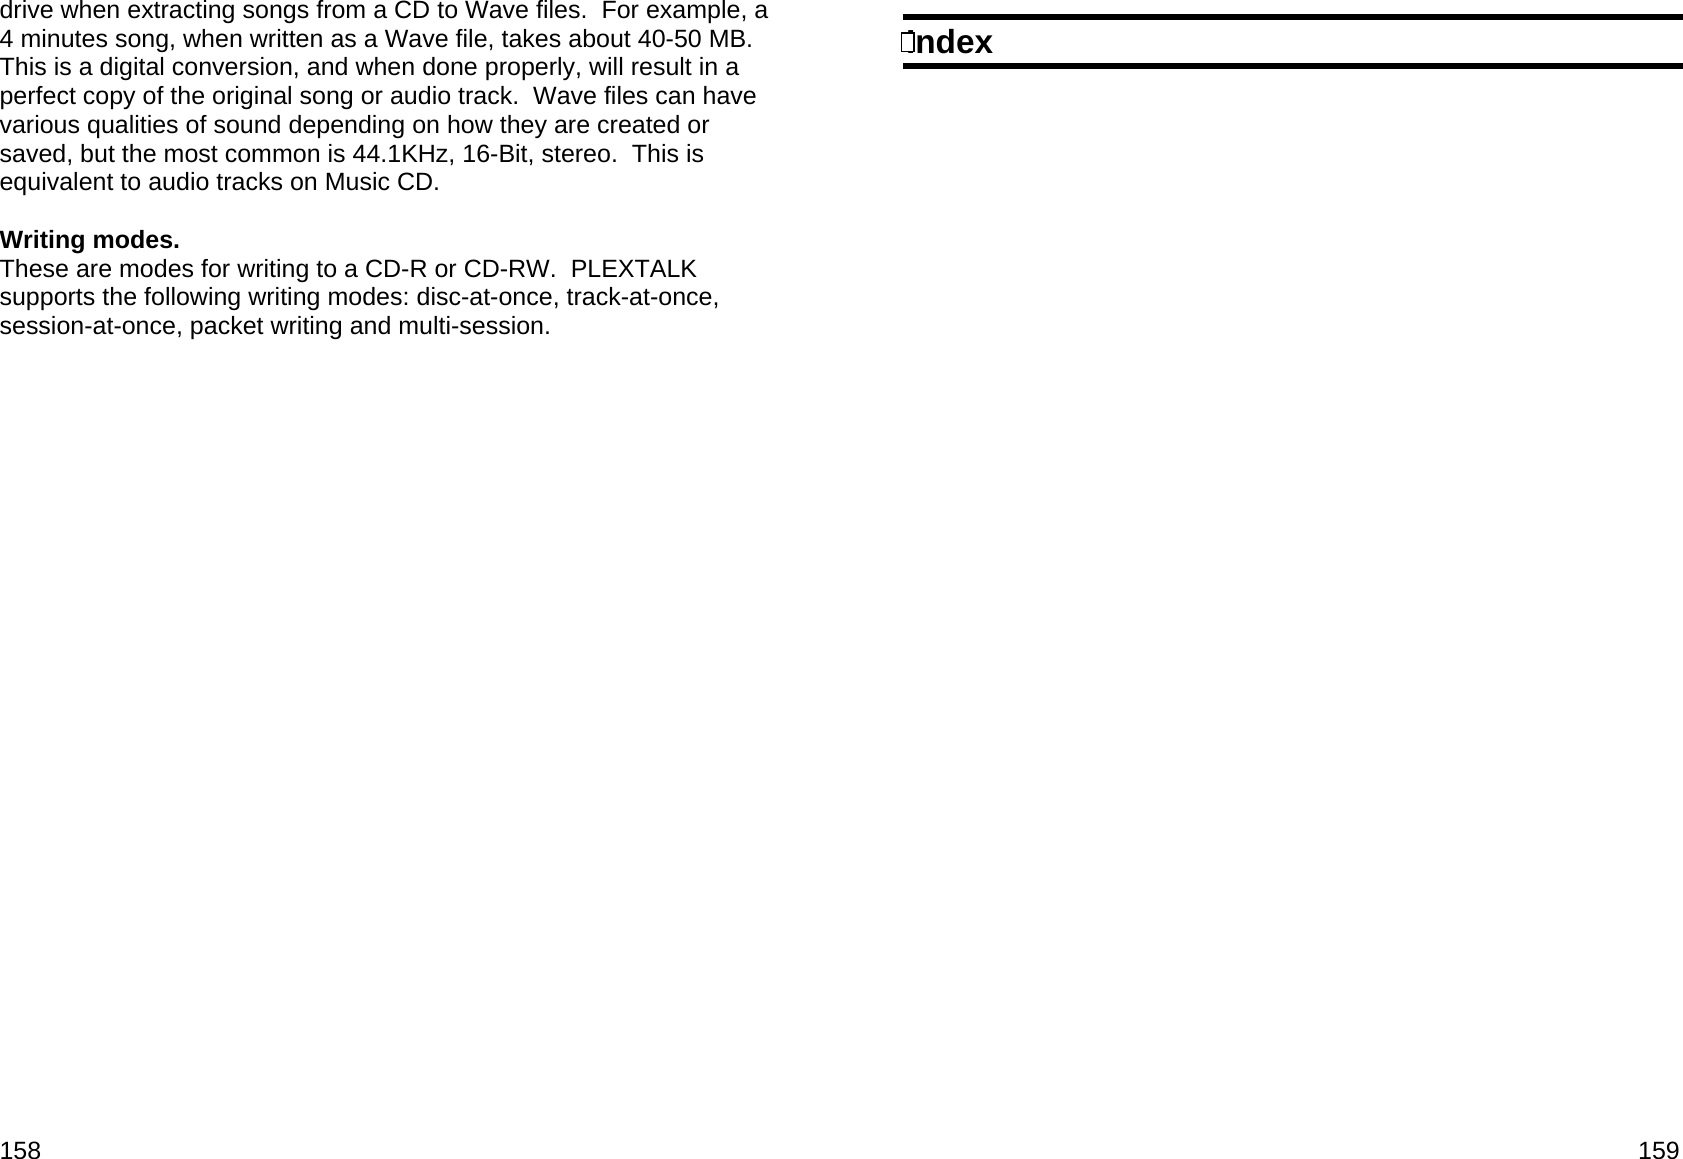
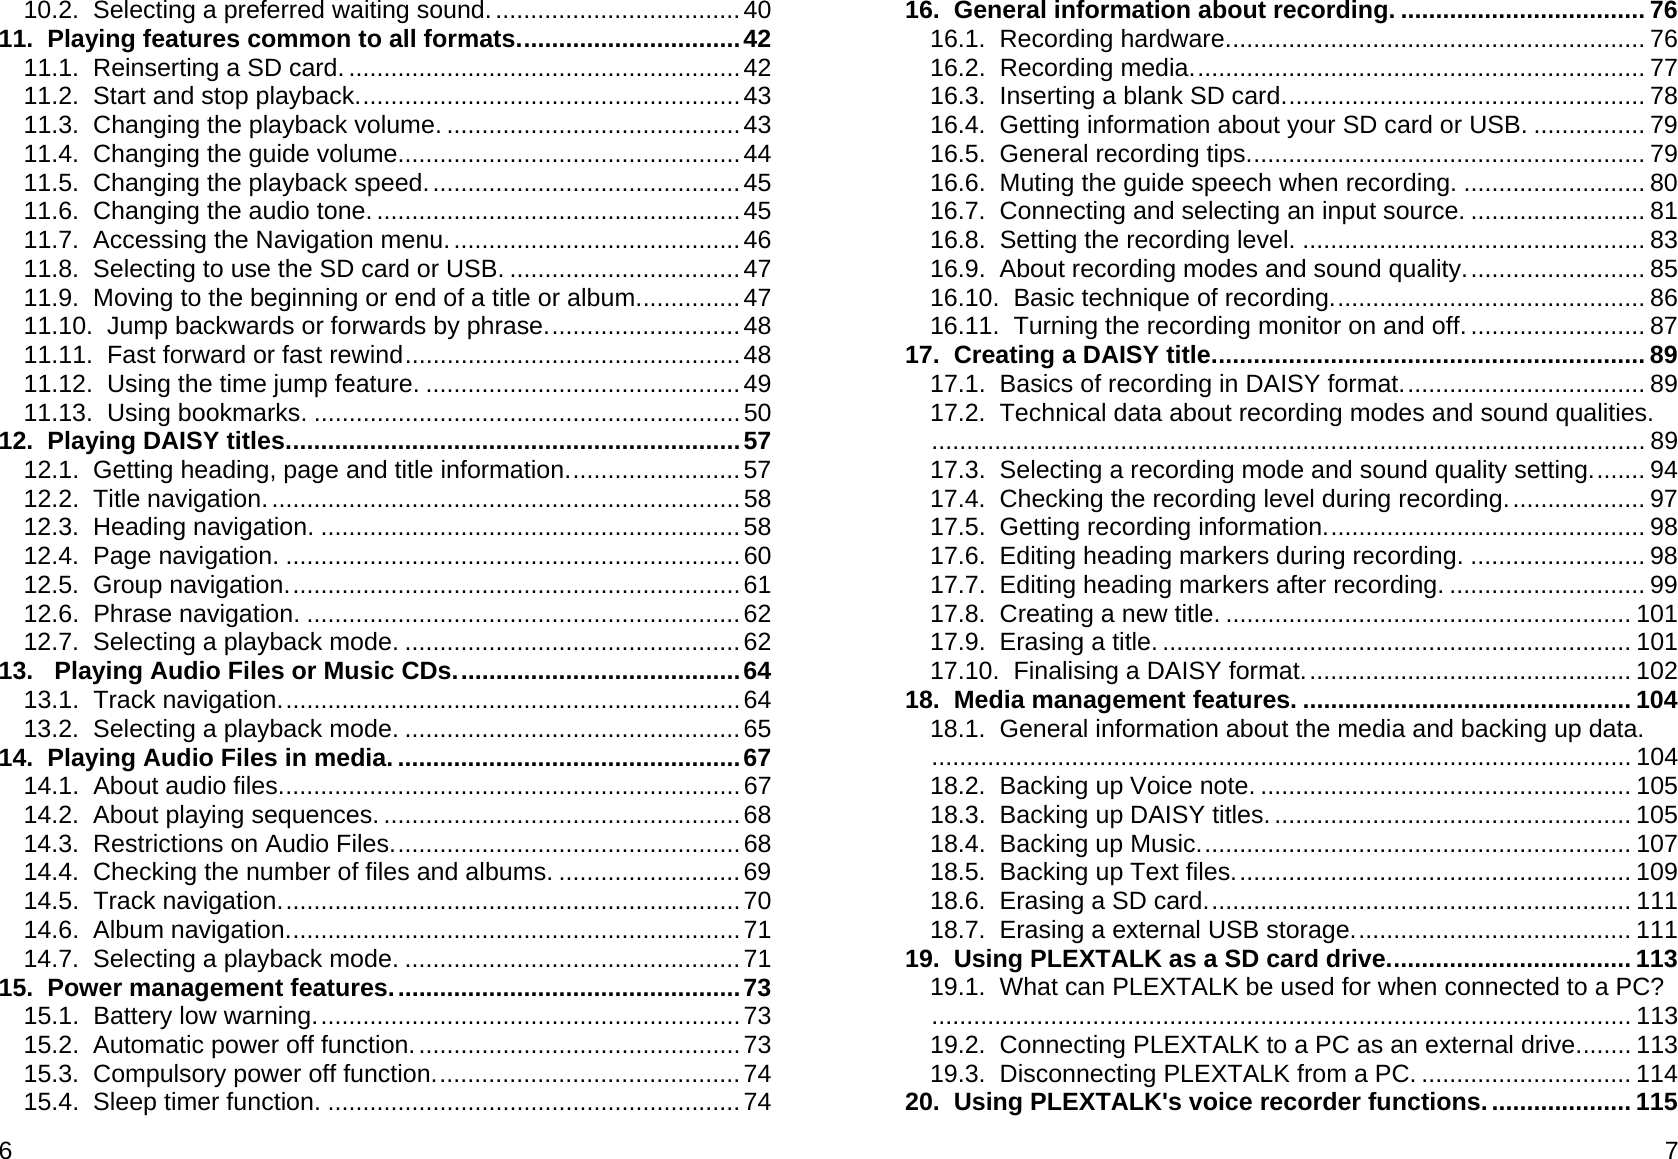
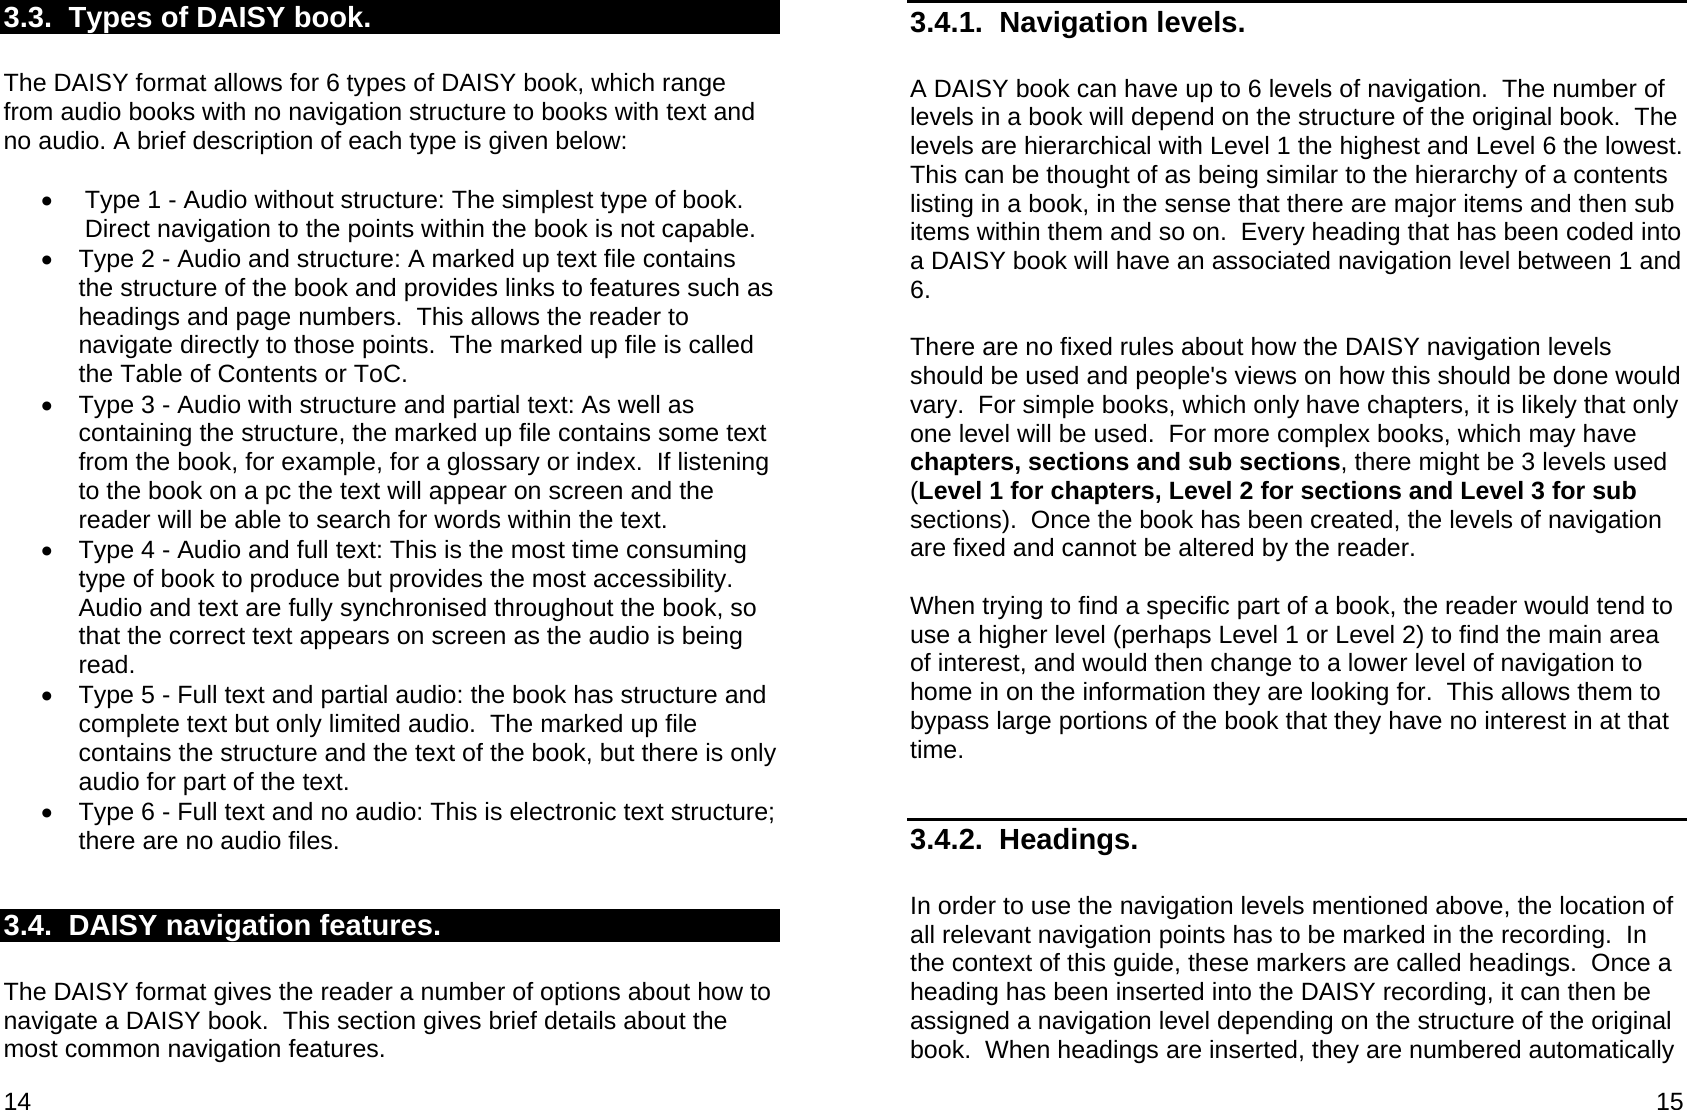
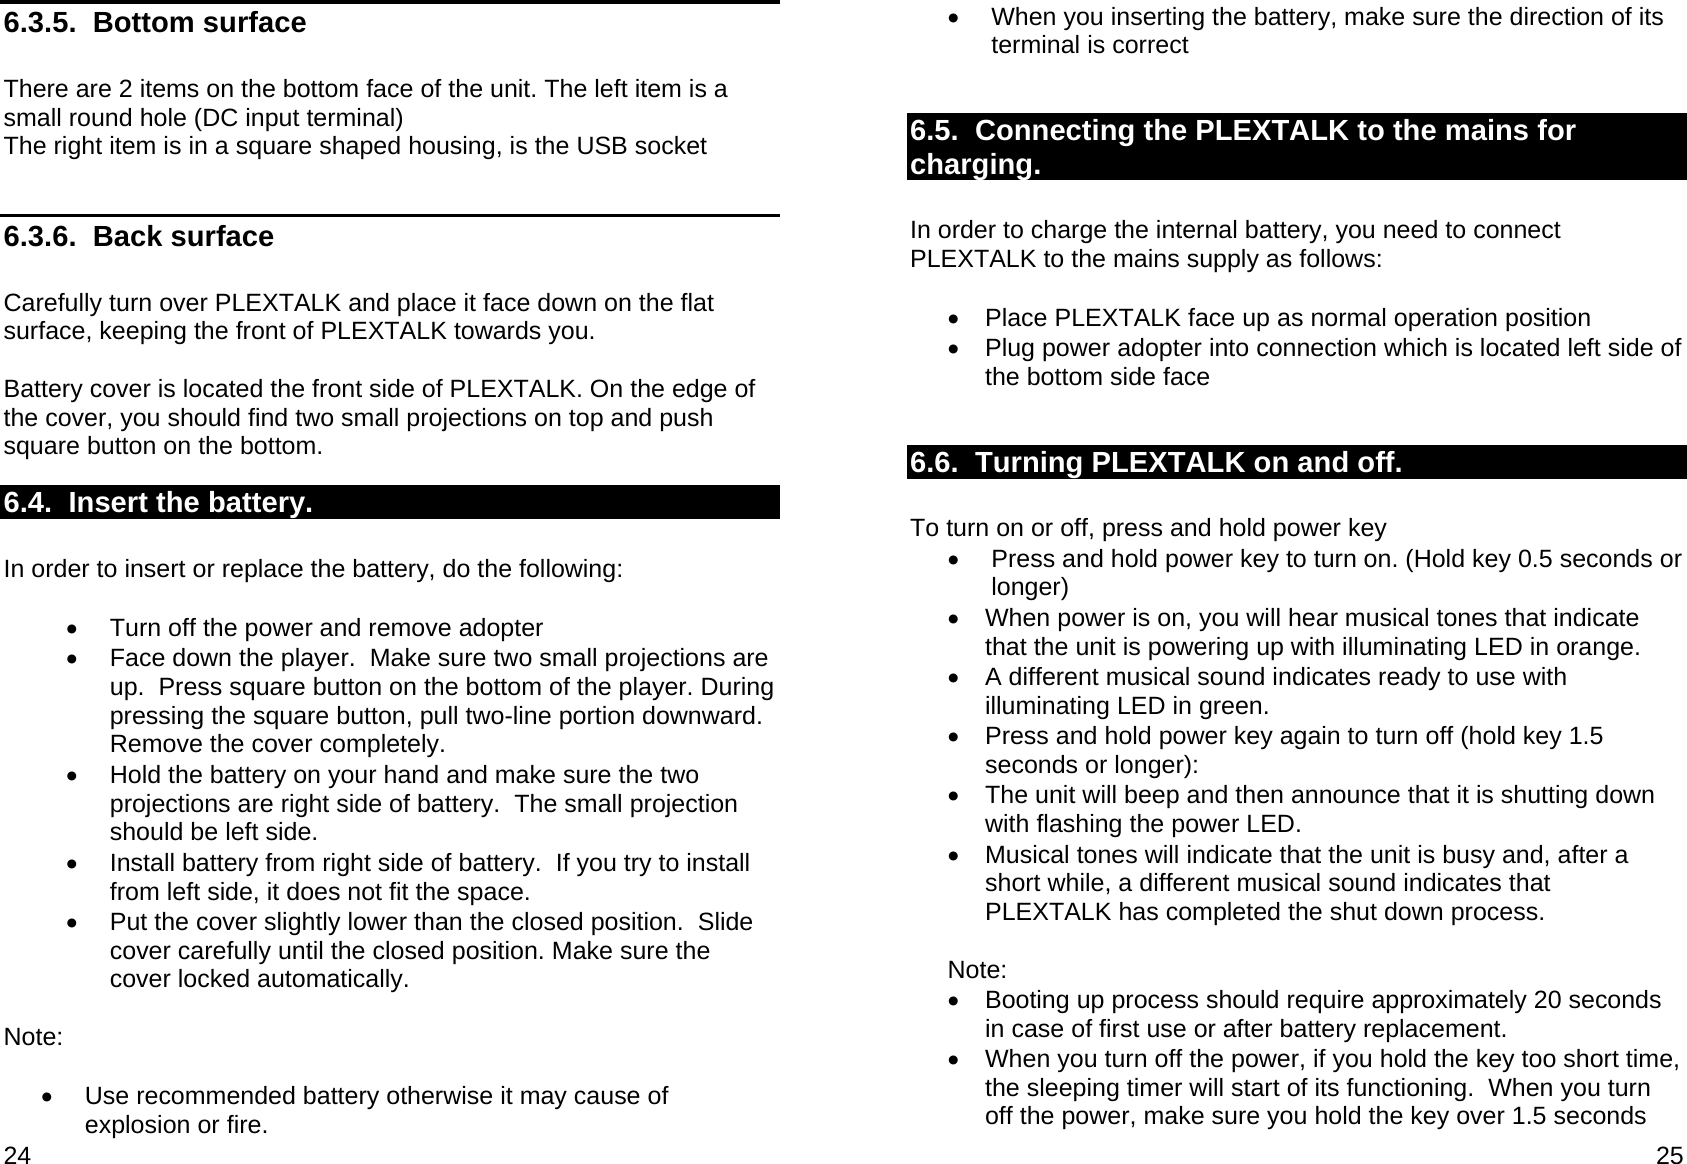
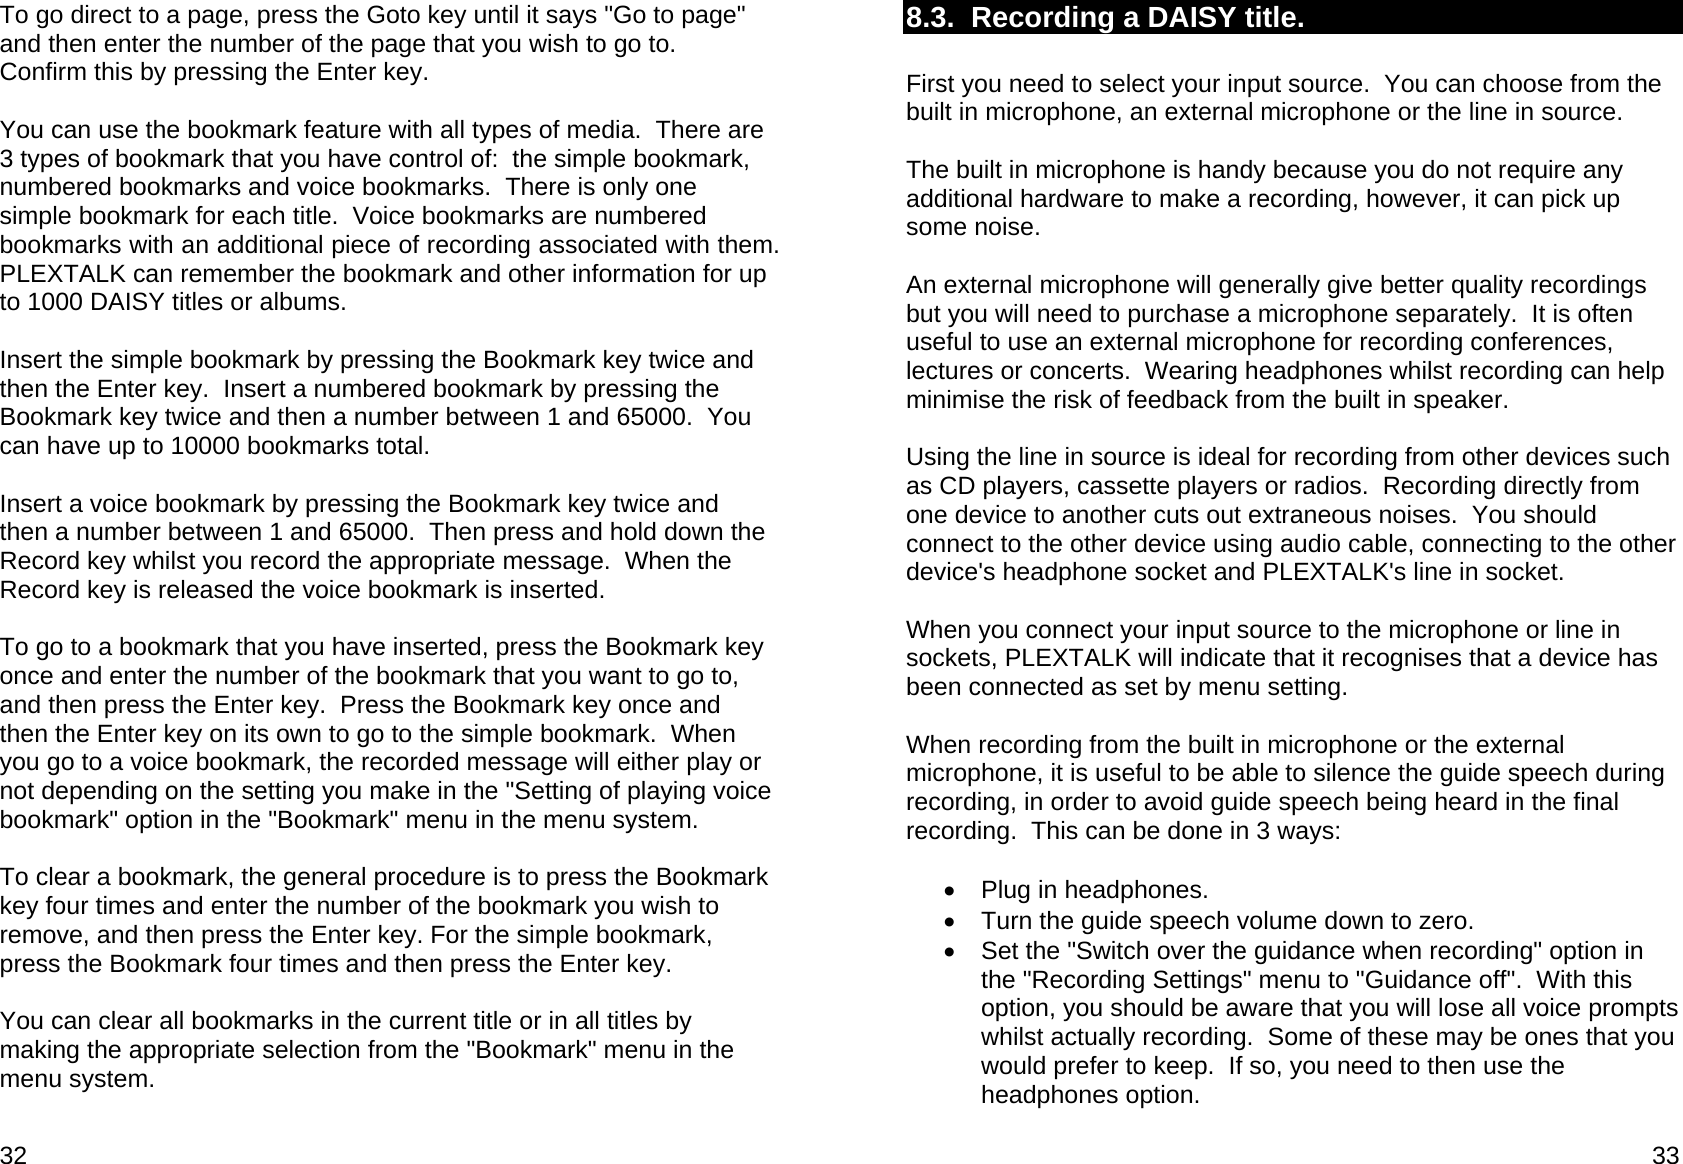
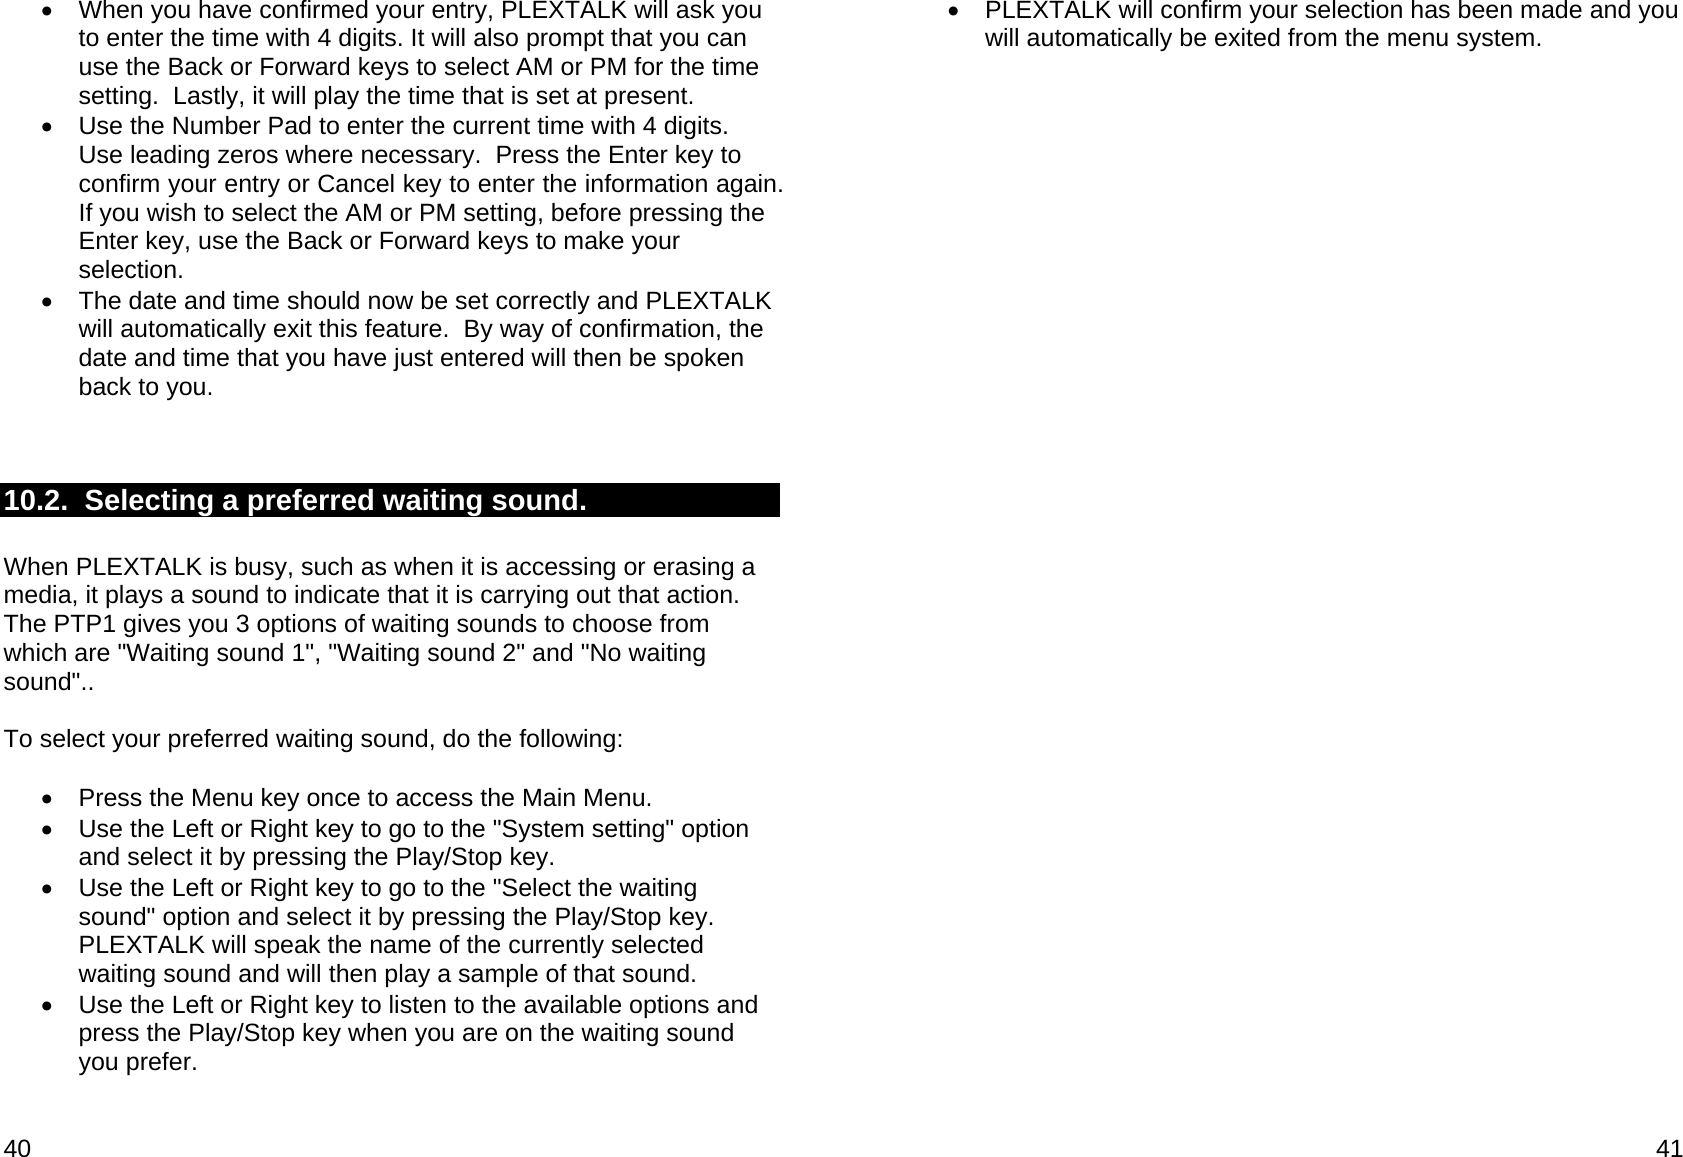
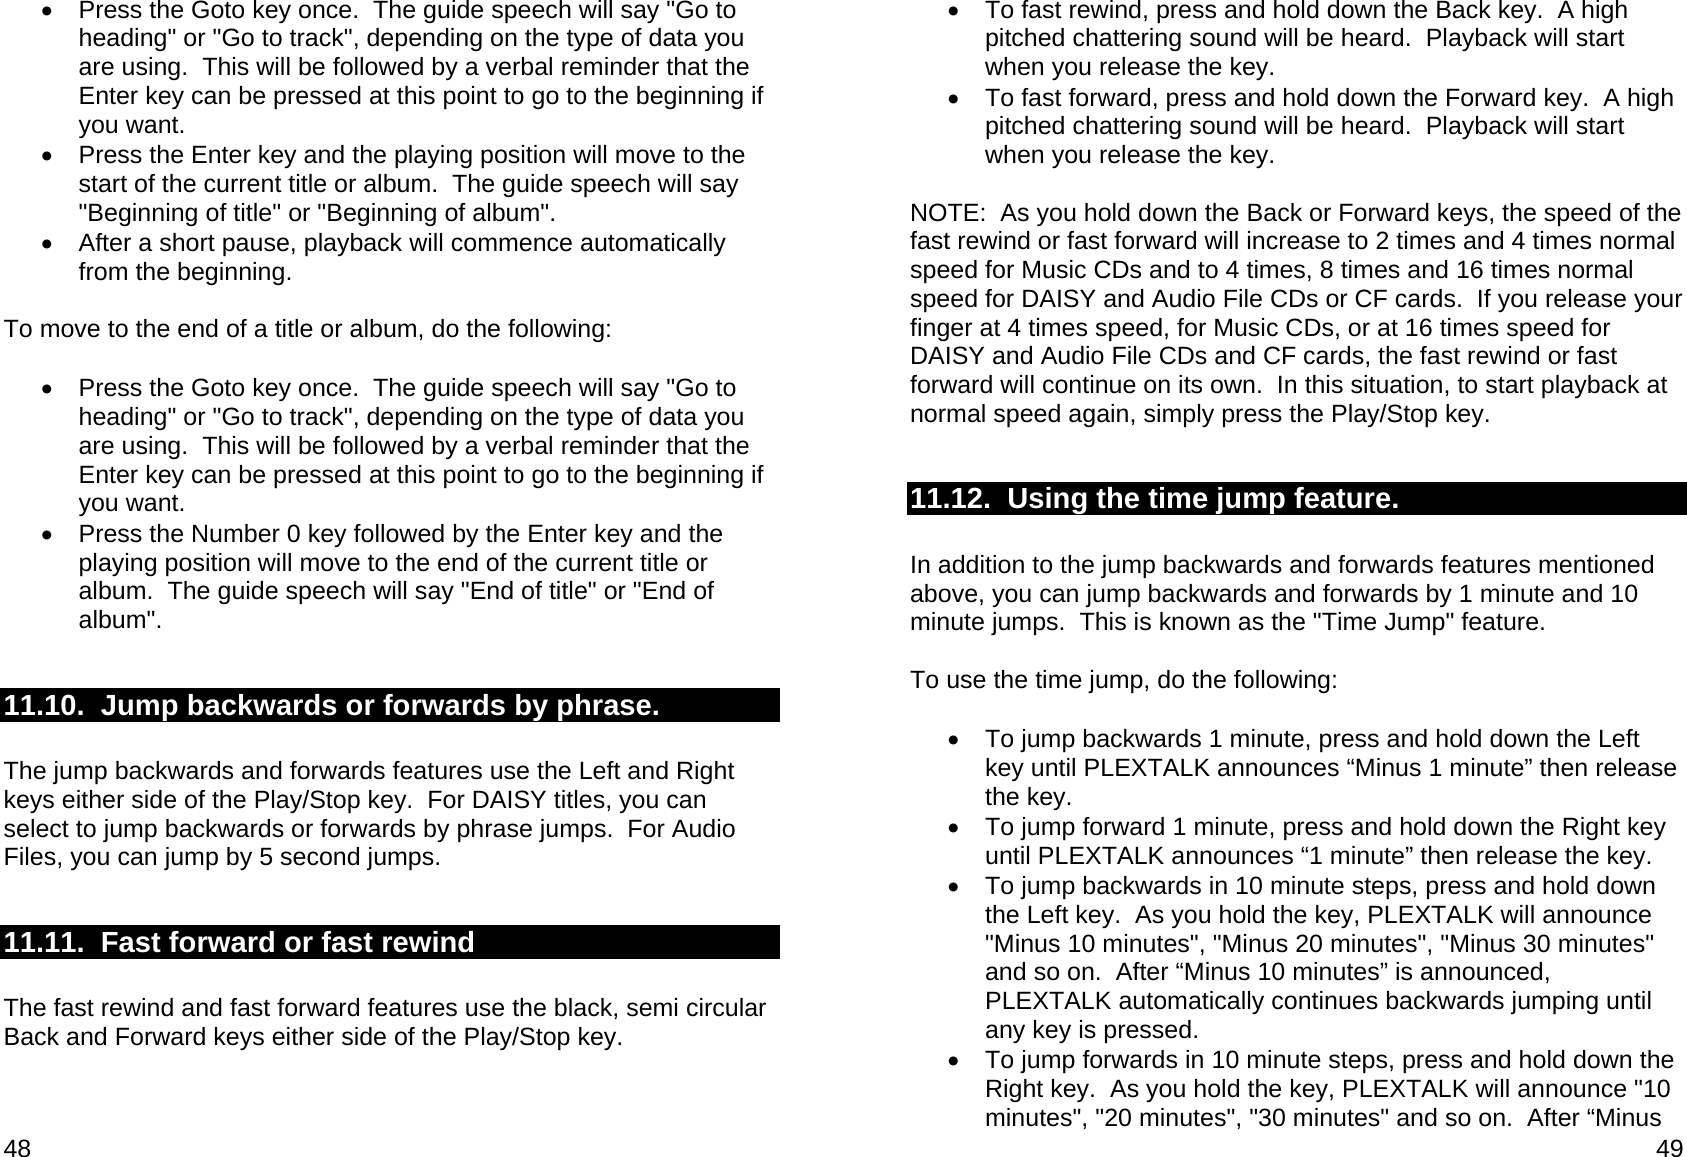
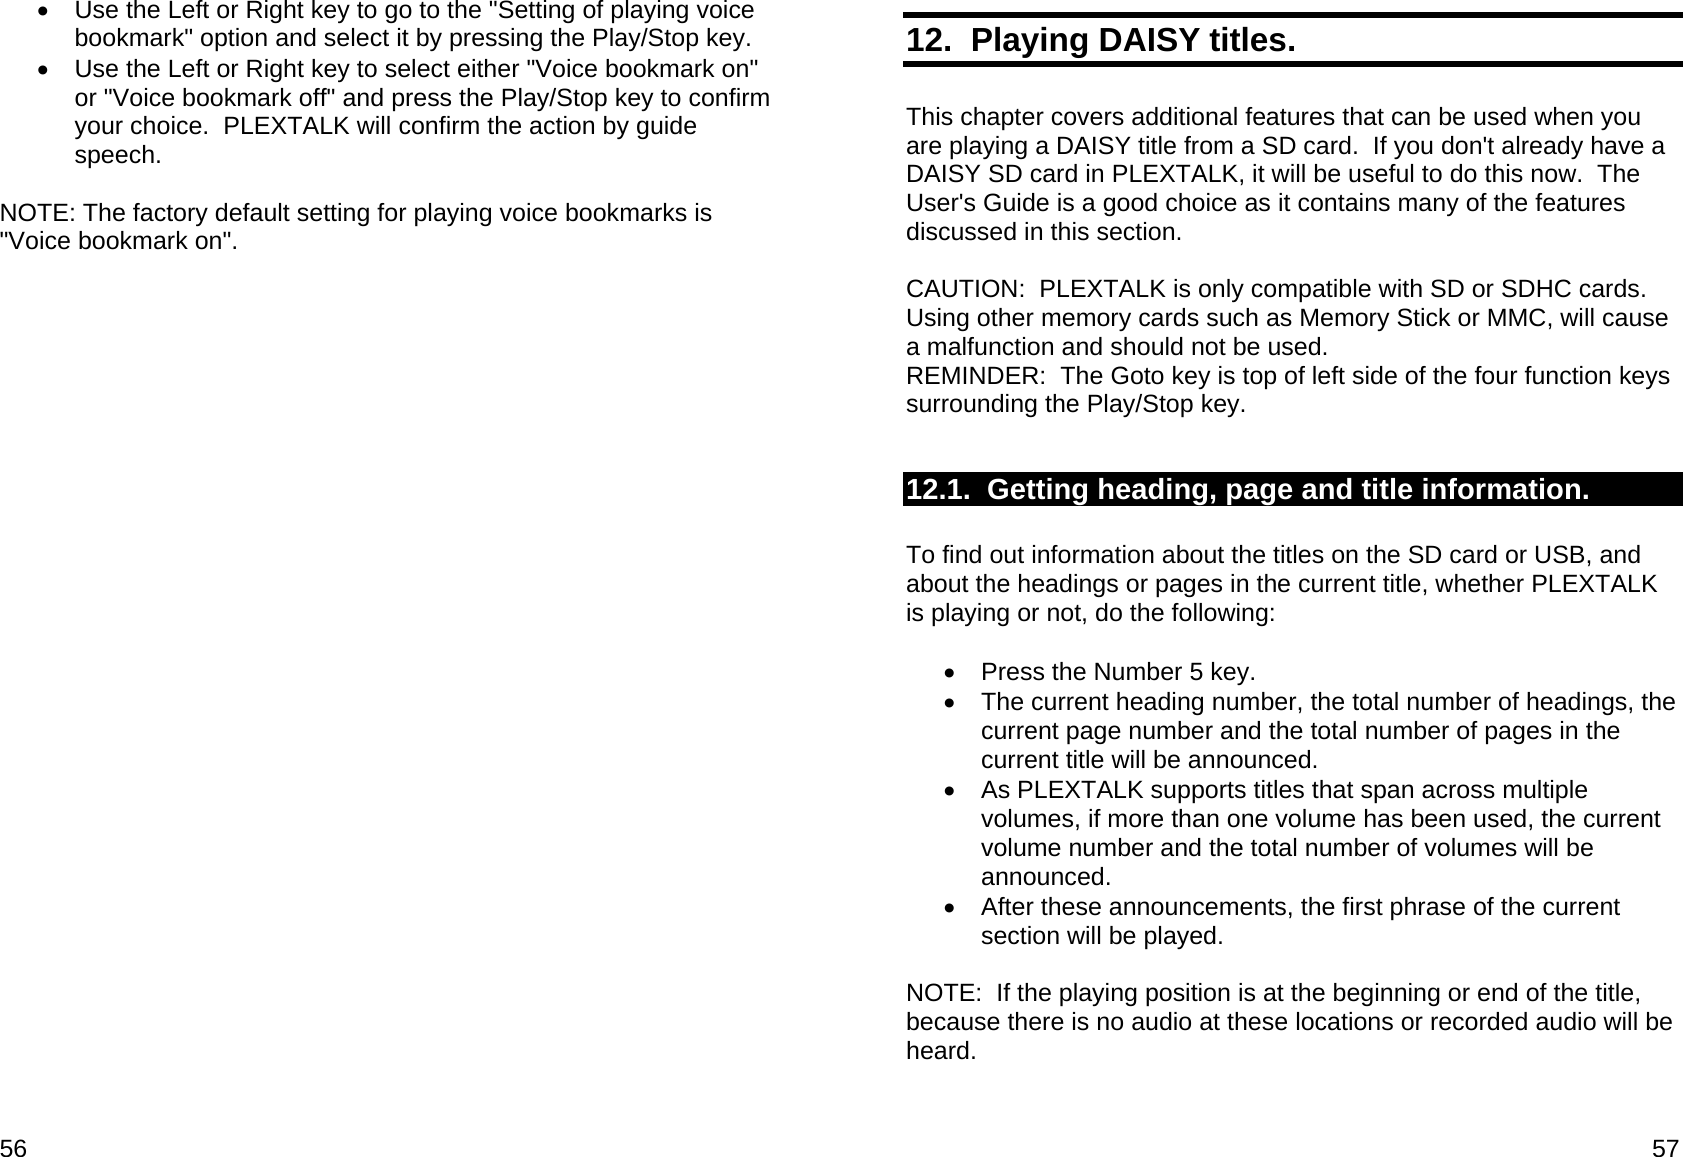
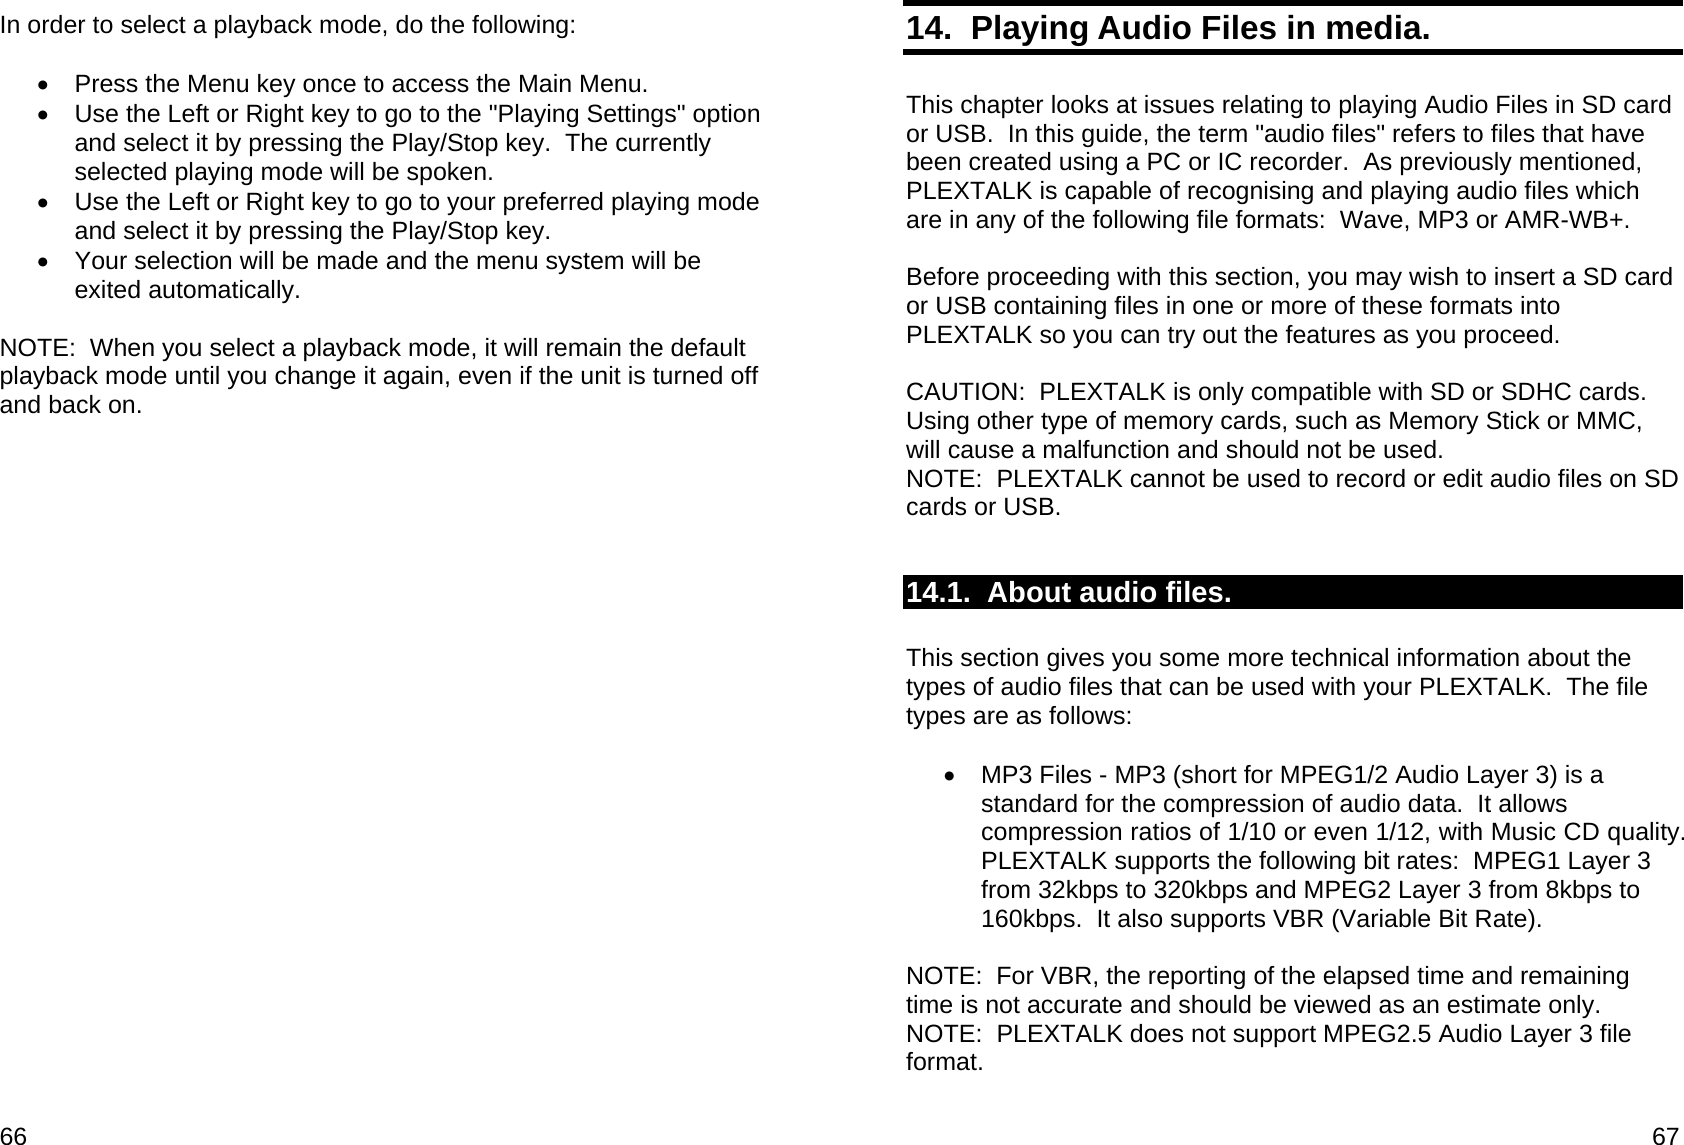
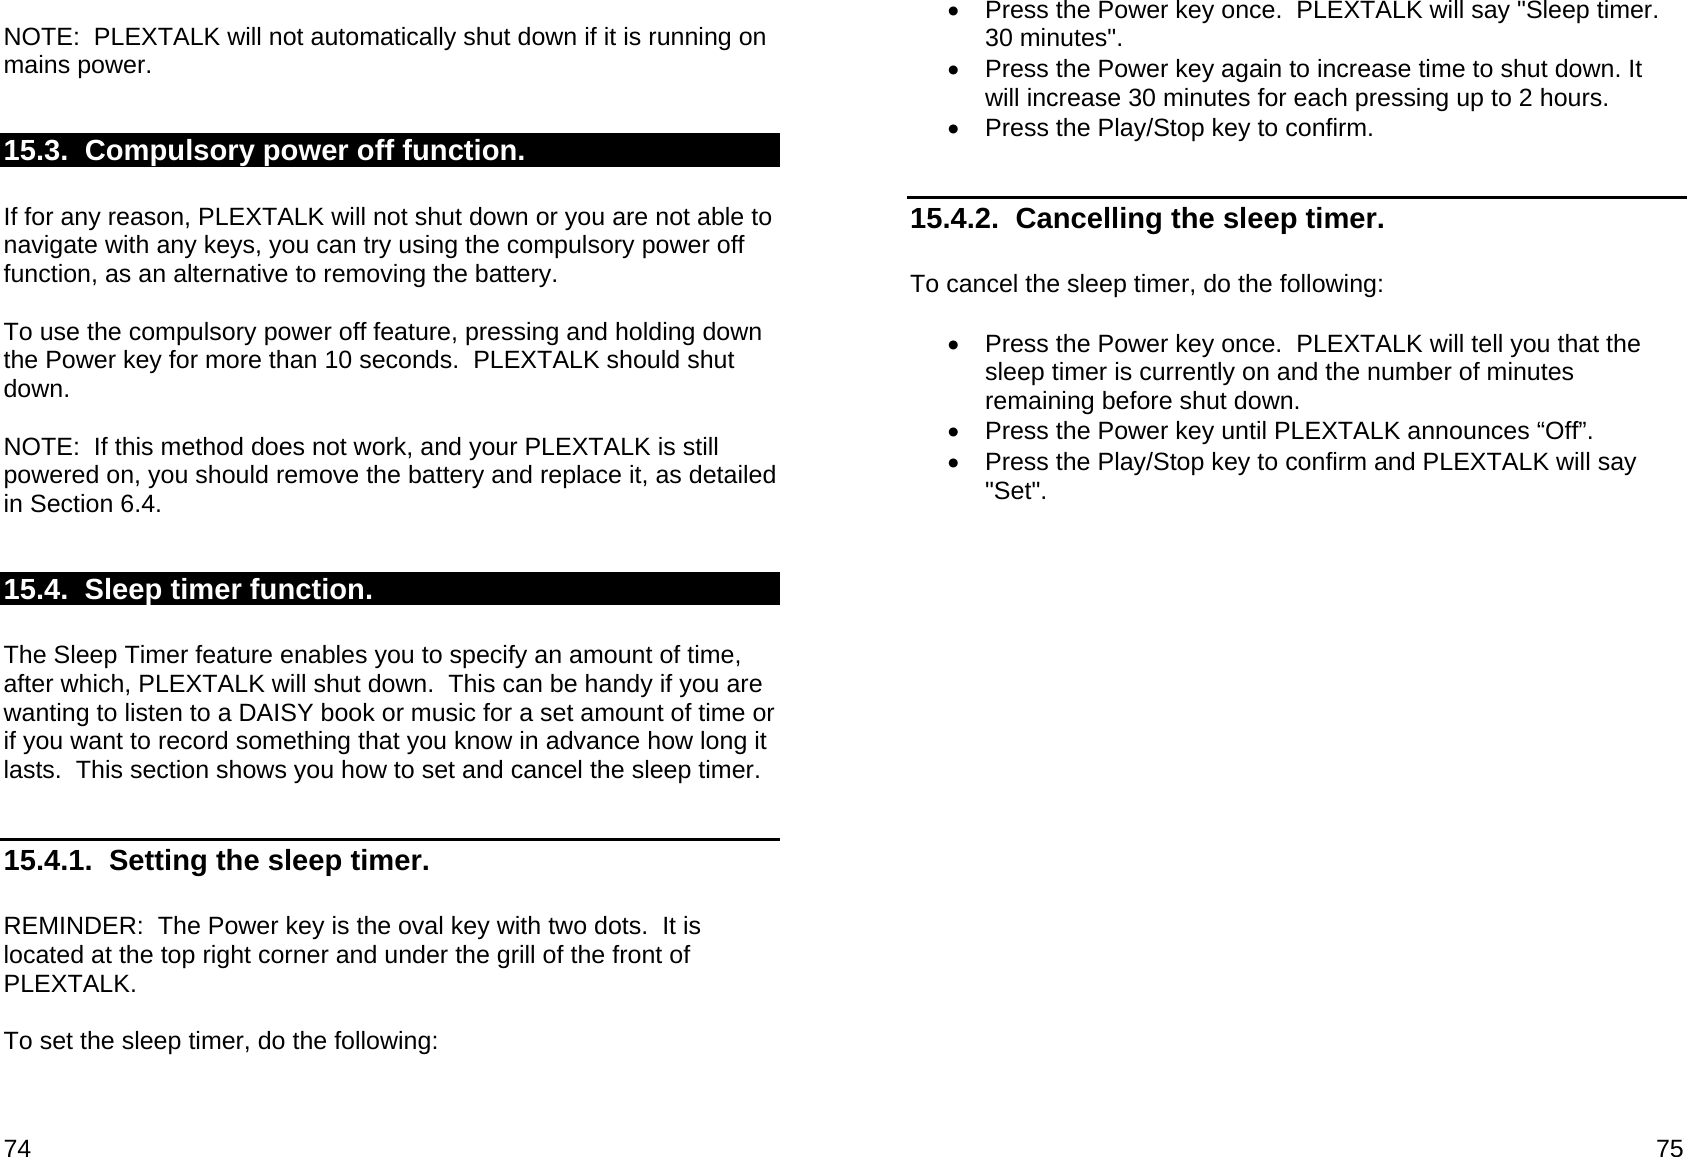
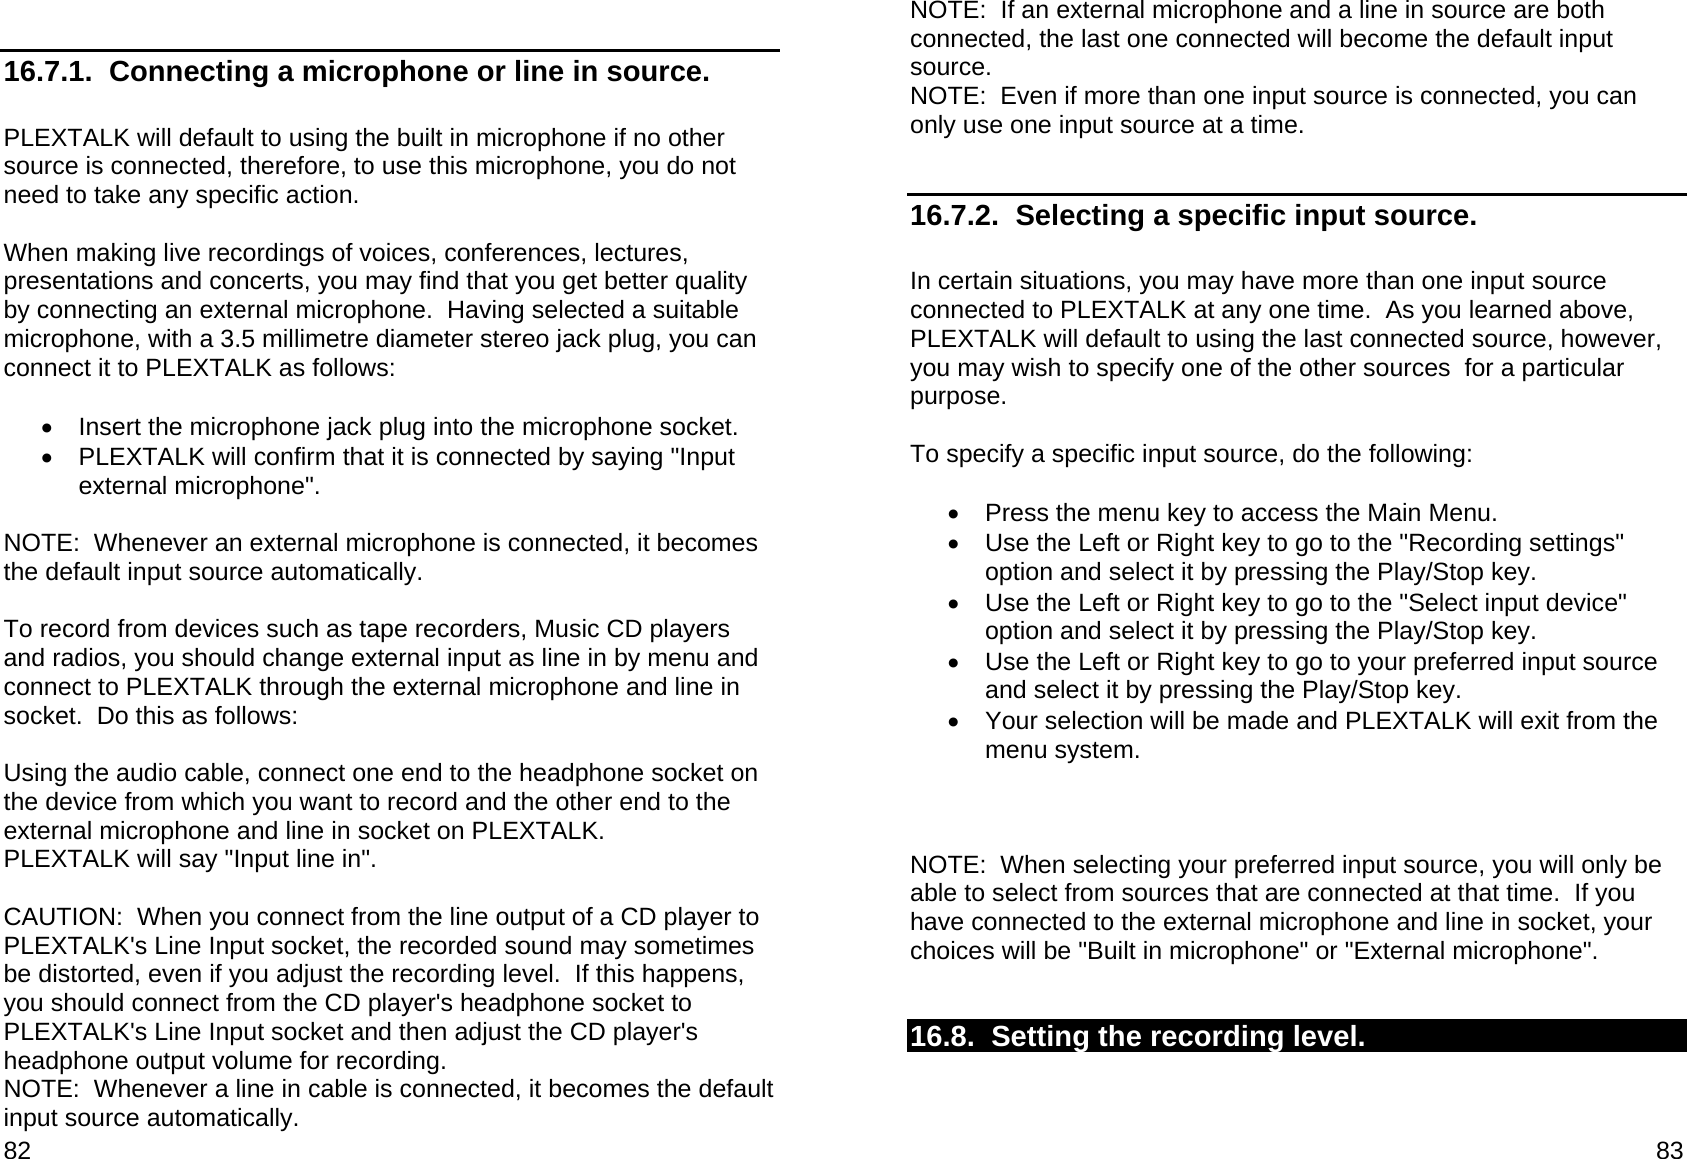
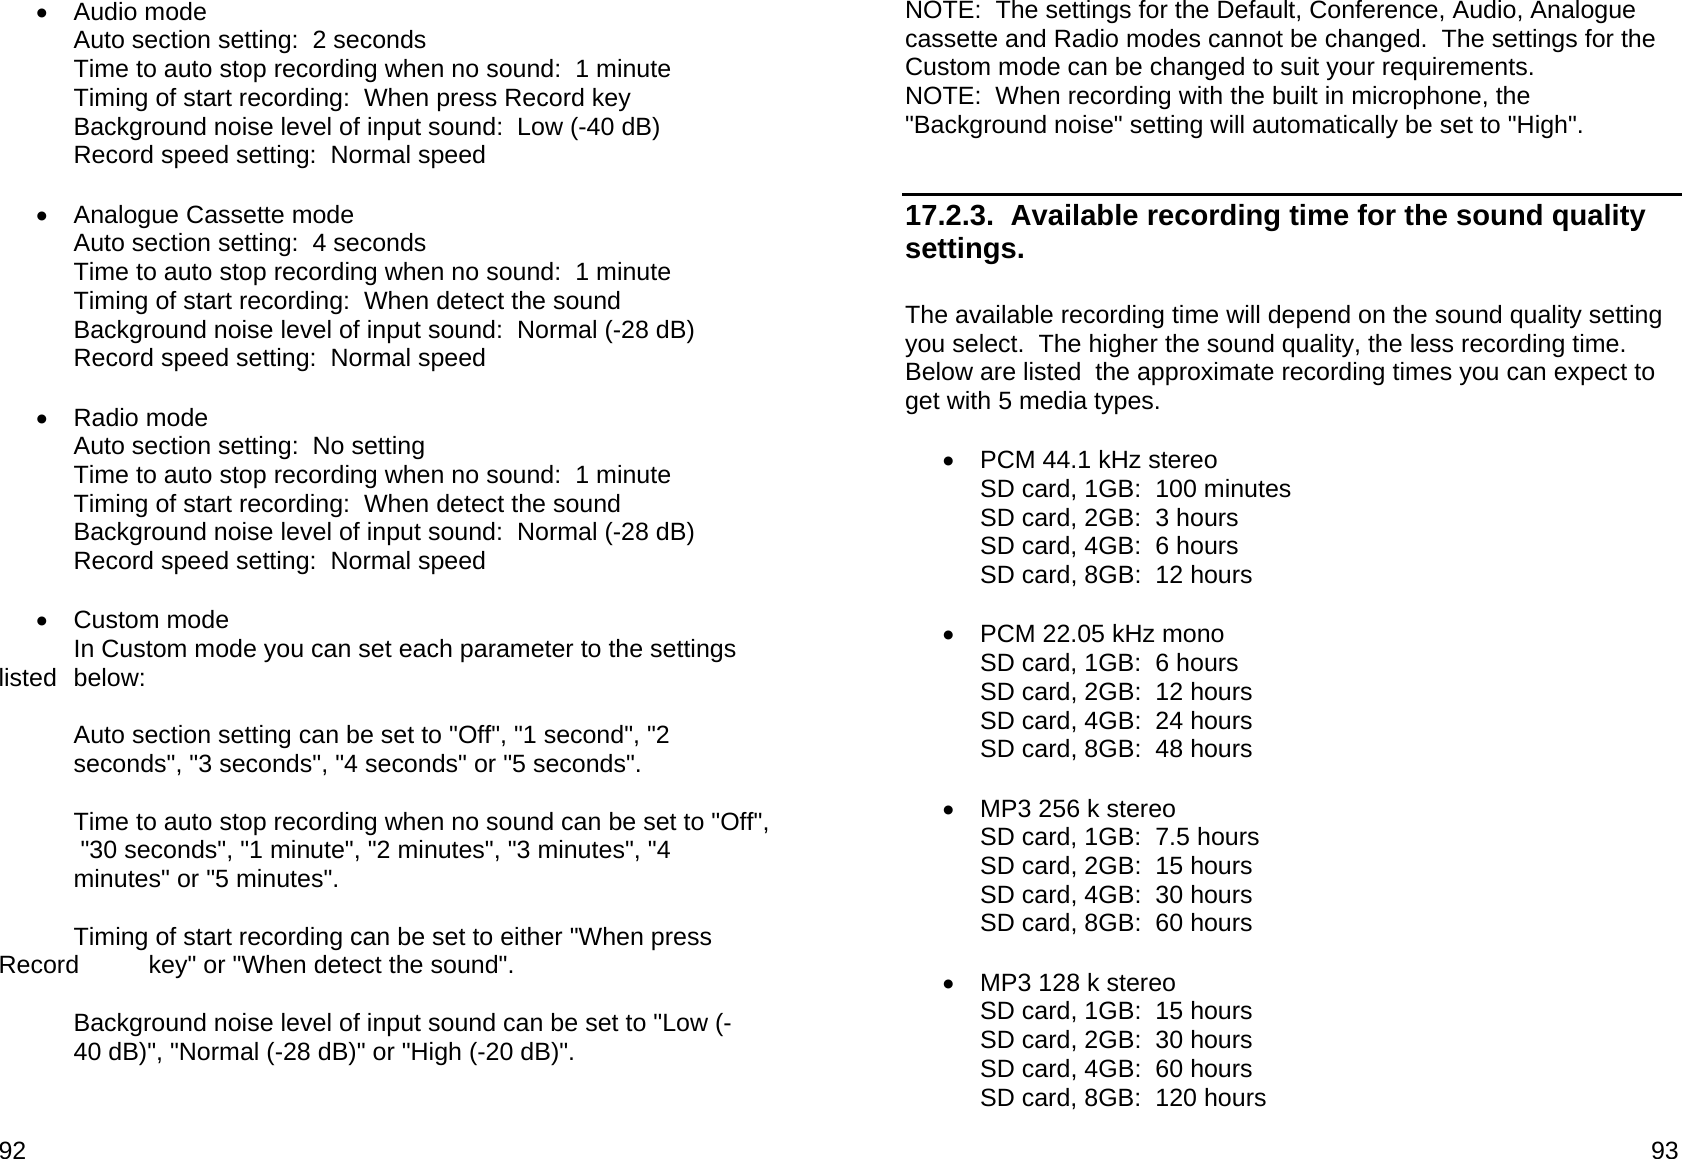
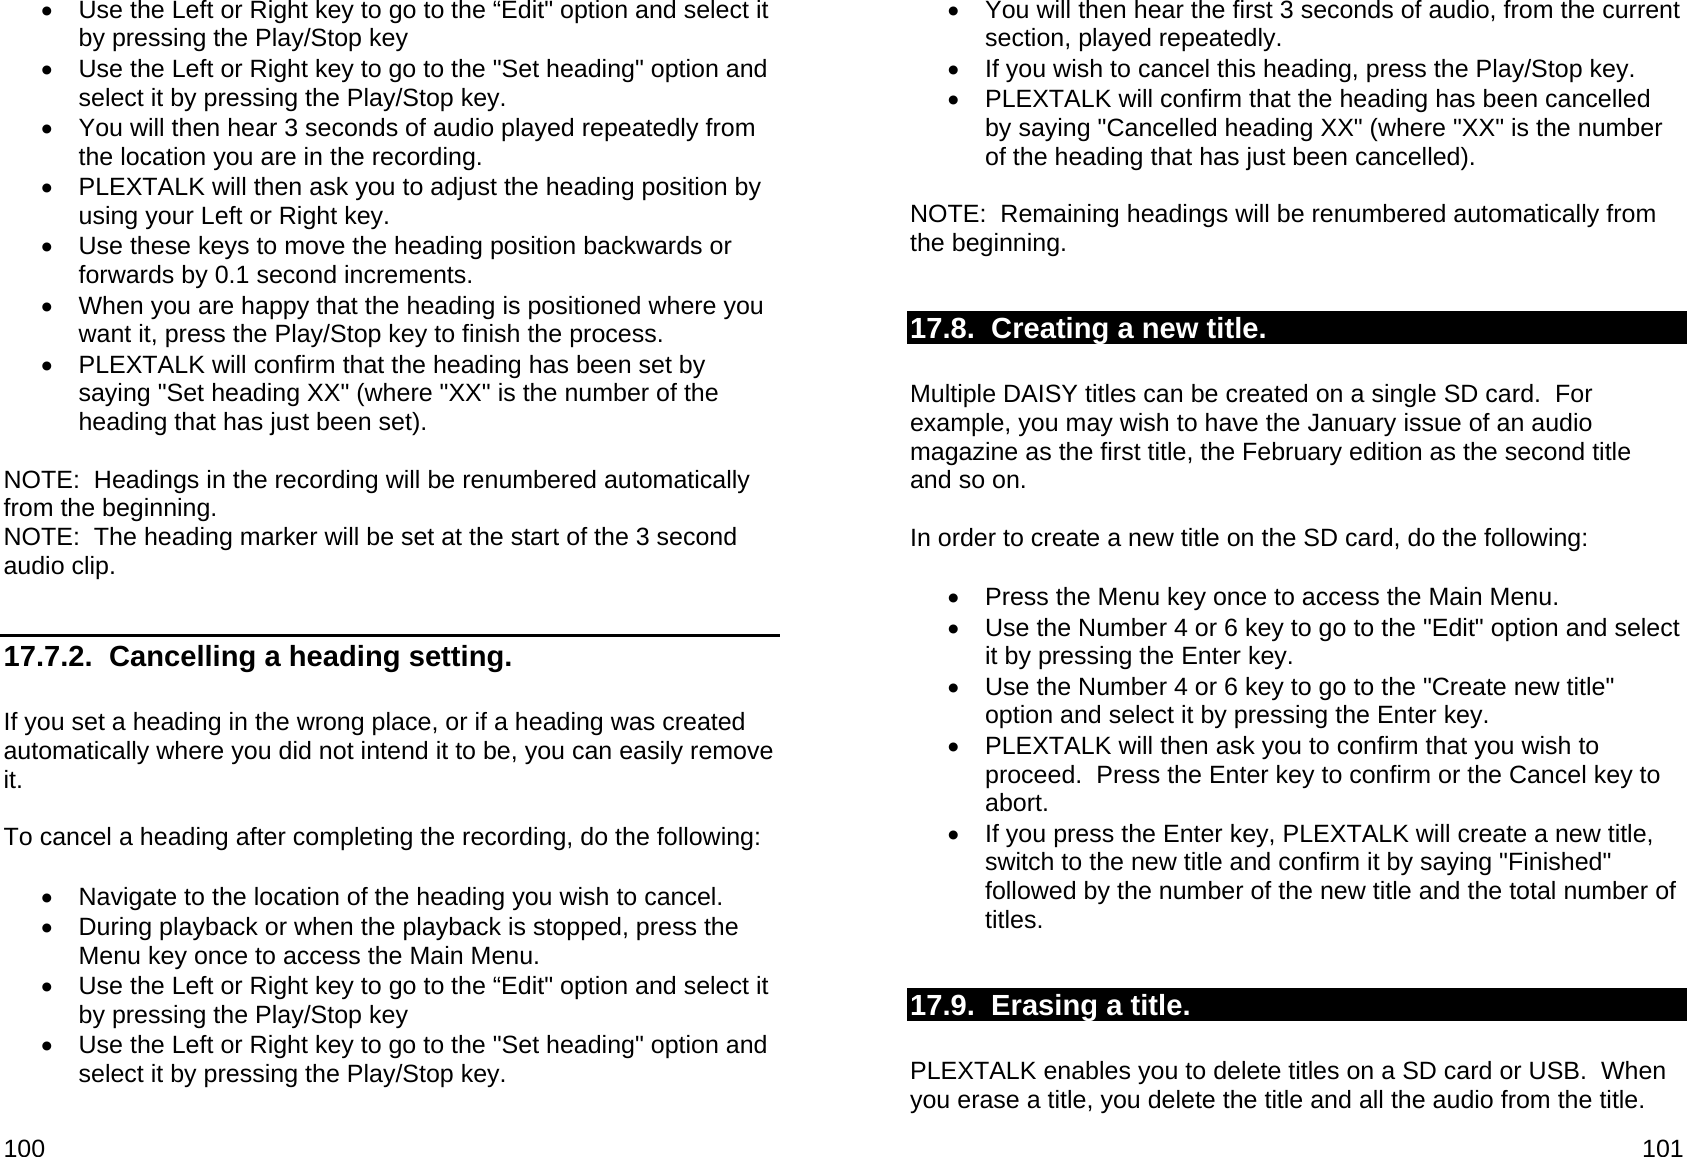
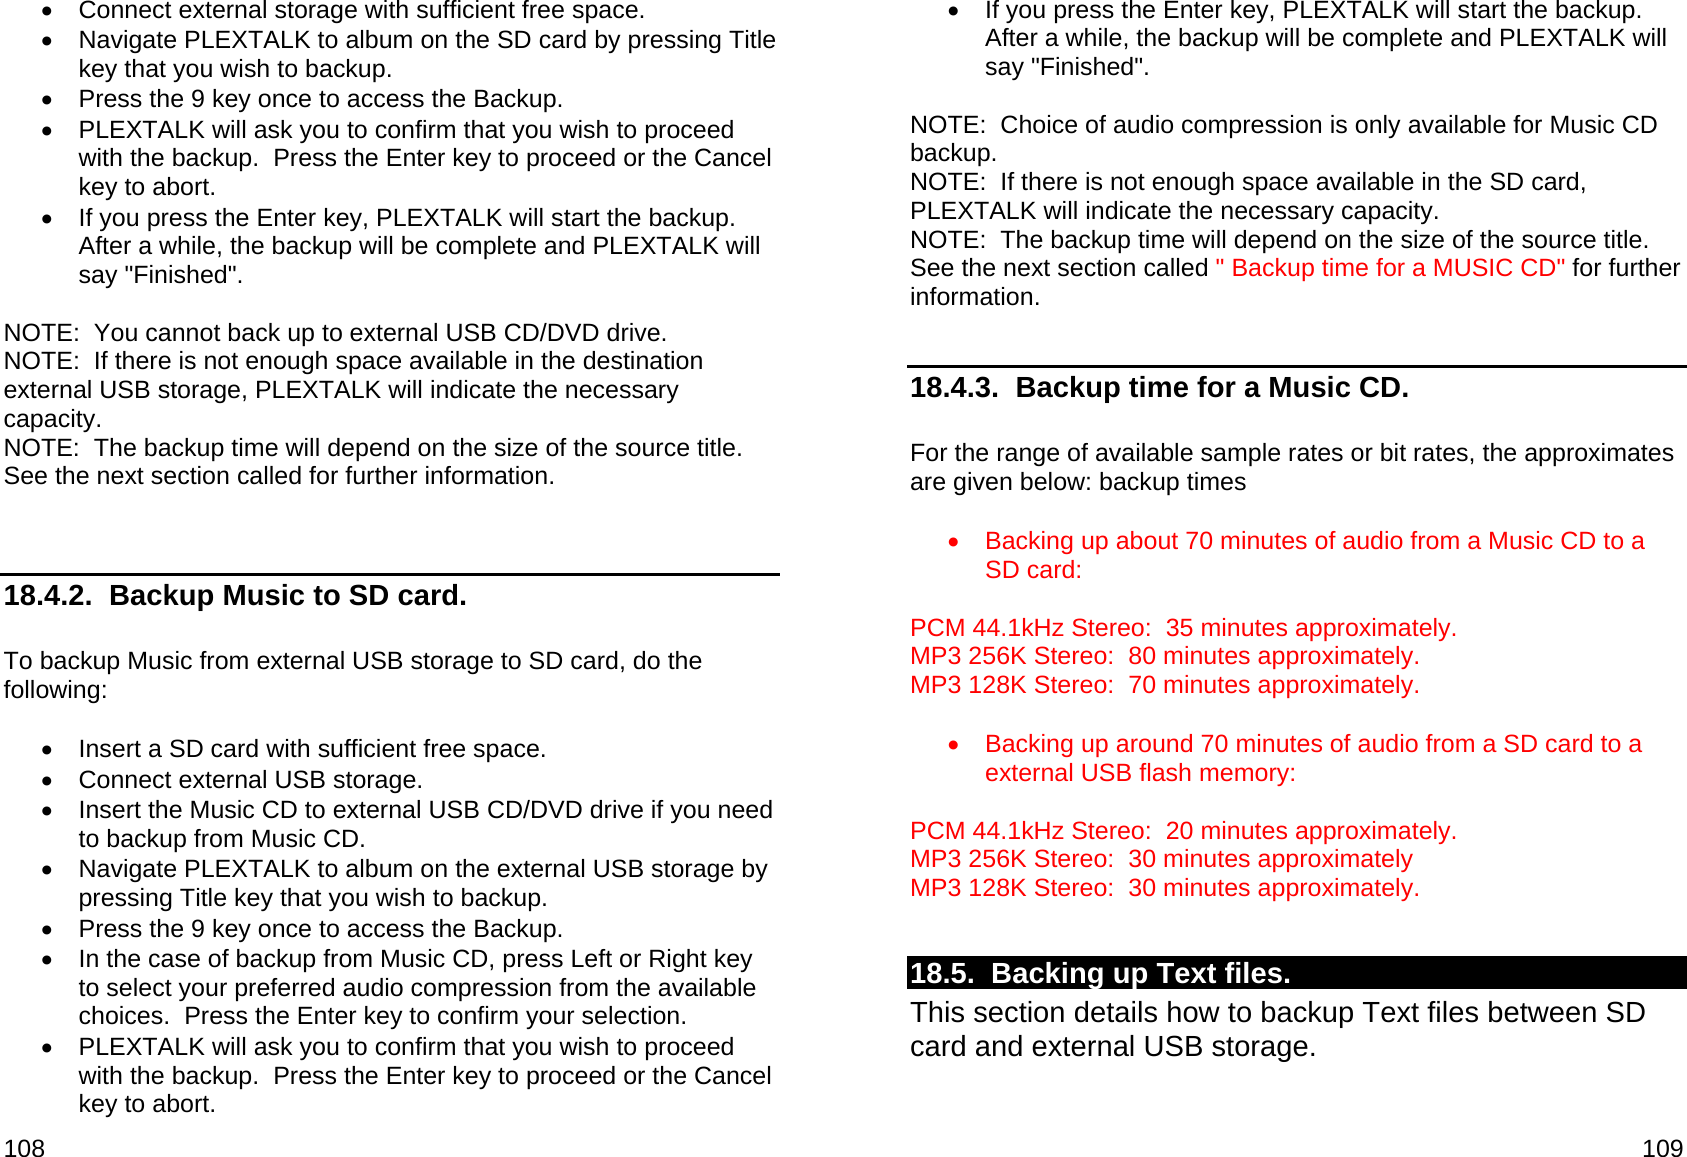
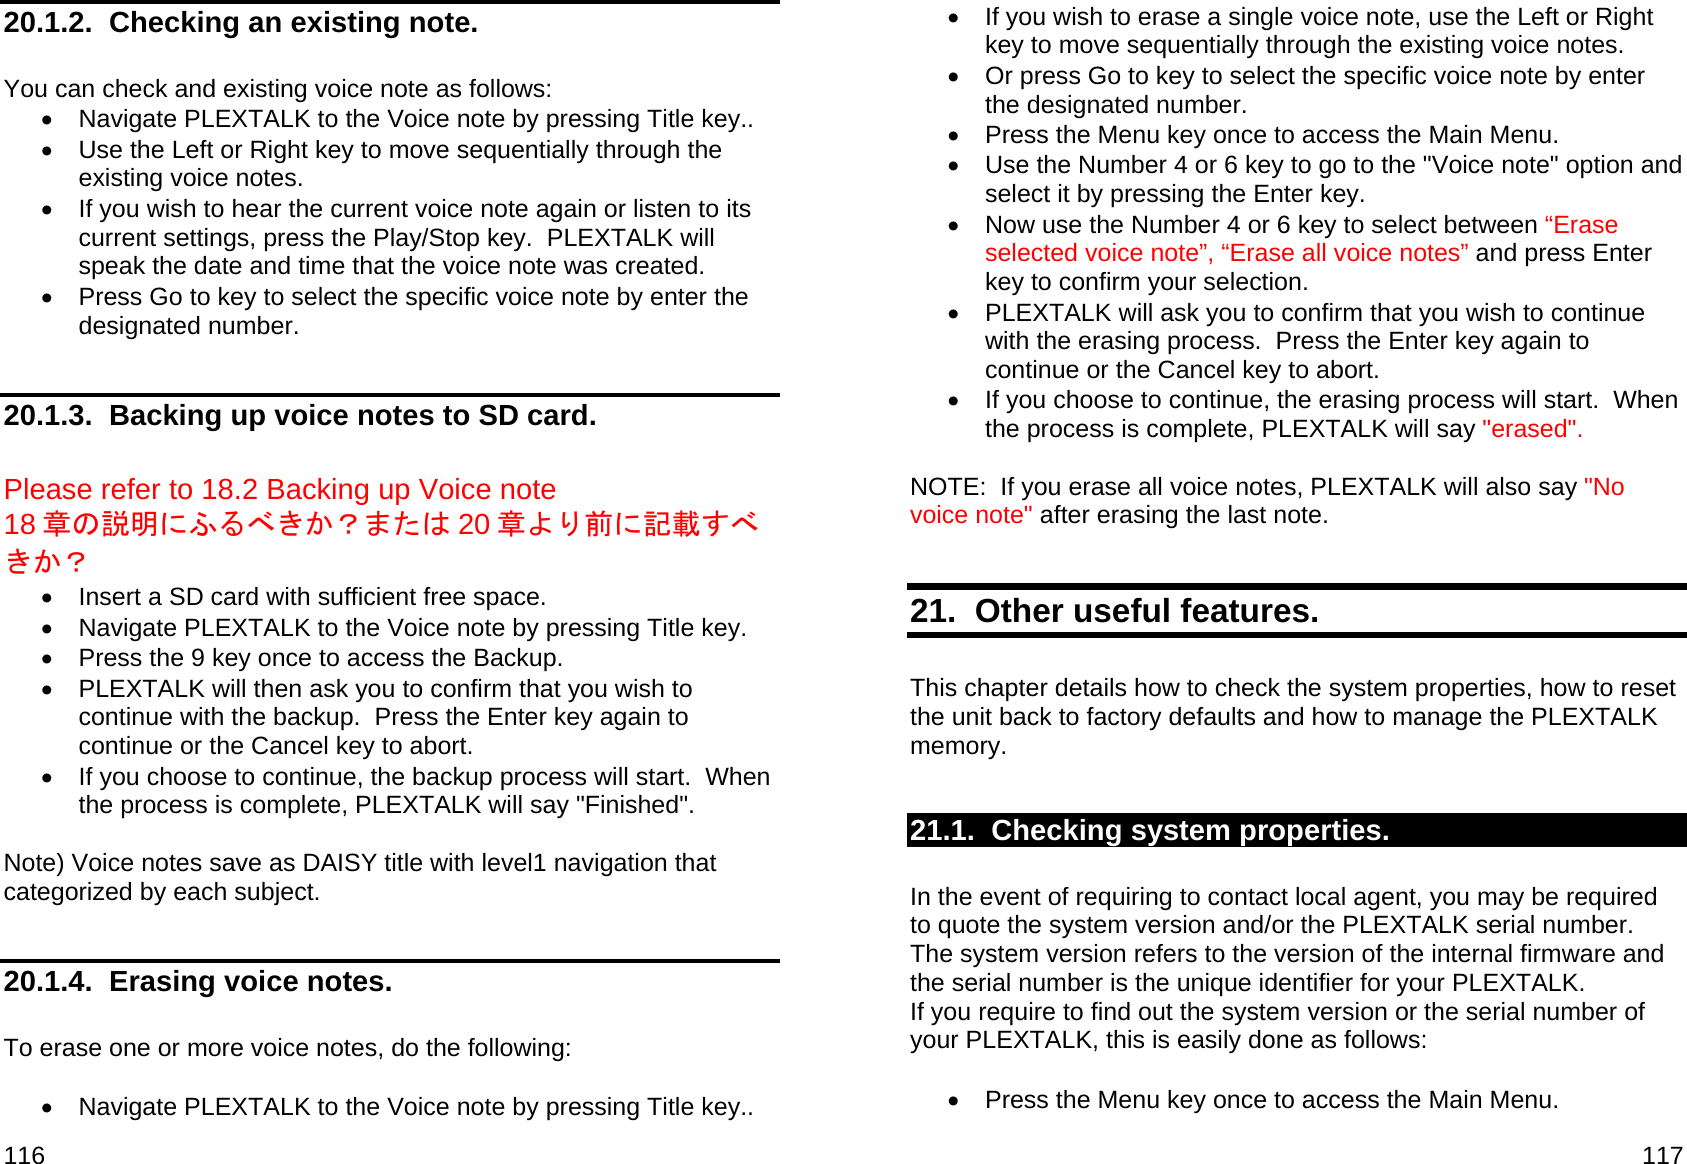
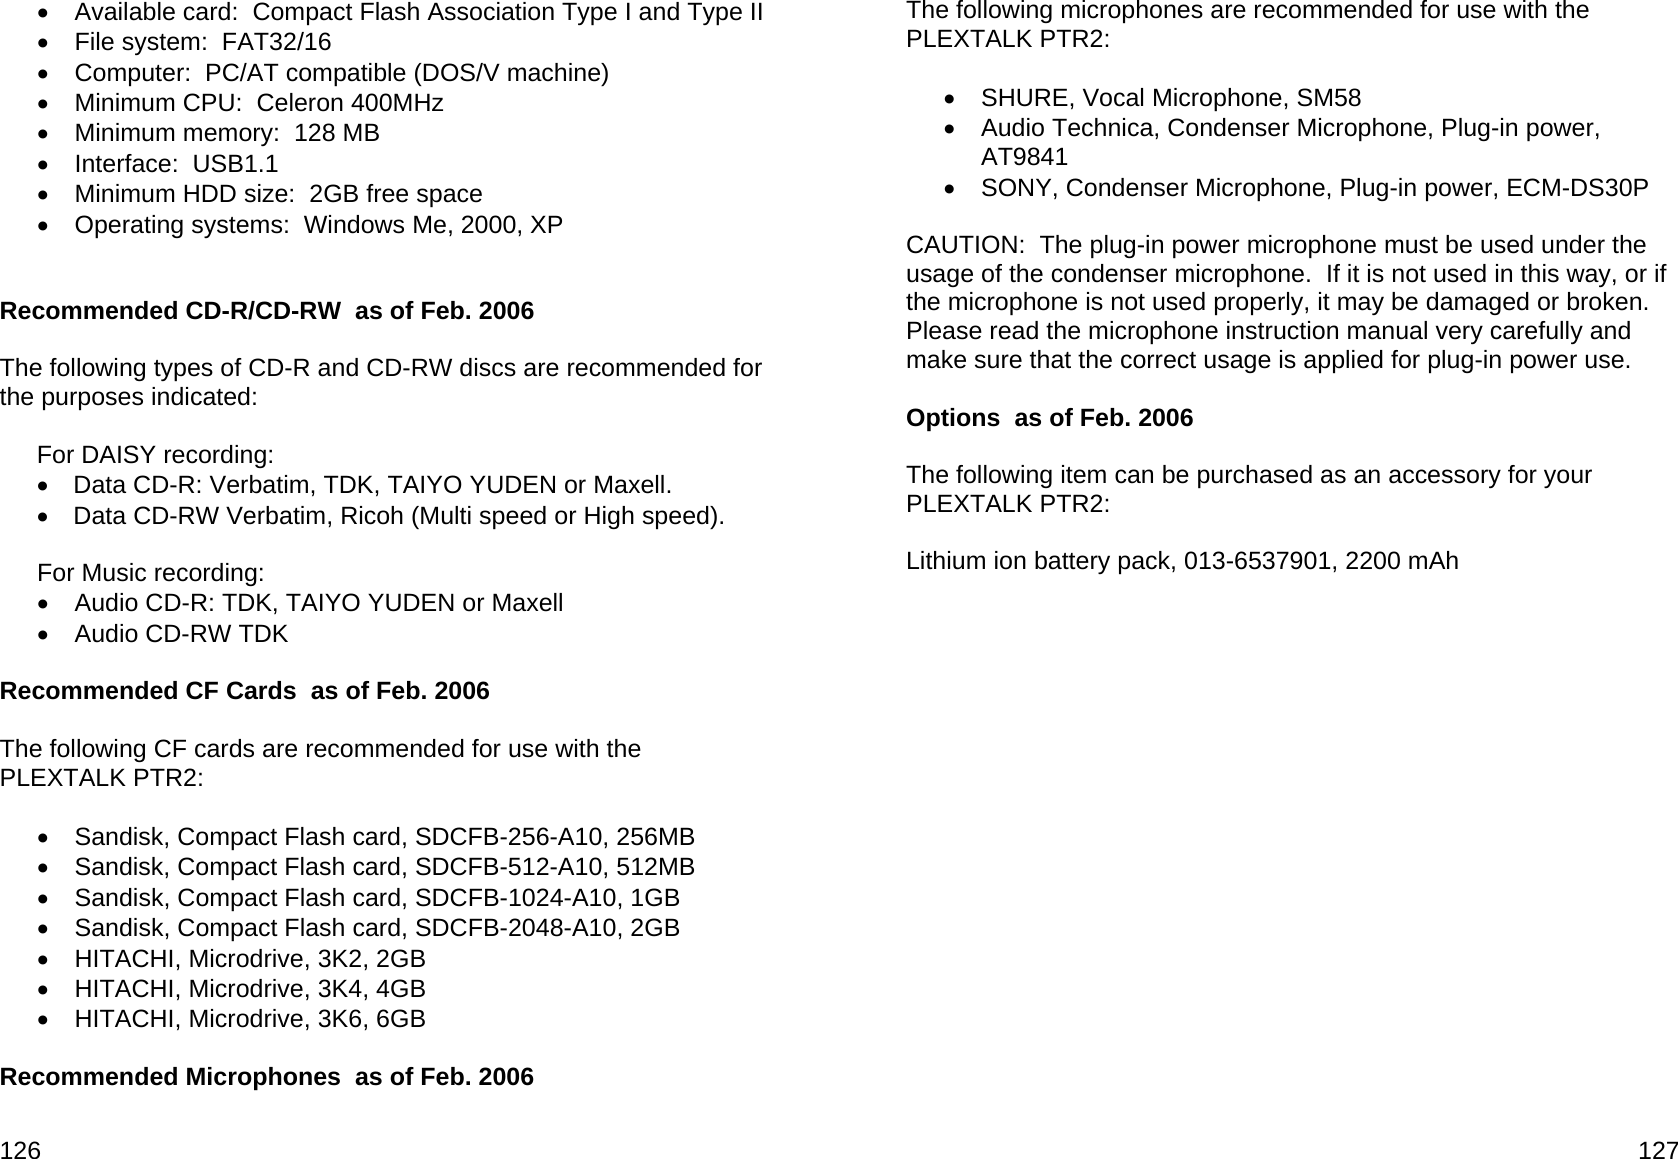
![130 [Enter key] Set +Cancel previous editing [Enter key] Cancel previous editing: Are you sure? [Enter key] Finished. +Prepare to edit [Enter key] Prepare to edit: Are you sure? [Enter key] Finished. +Create new title [Enter key] Create new title: Are you sure? [Enter key] Finished. +Erase selecting title [Enter key] Erase selecting title: Are you sure? [Enter key] Finished >BACKUP (CD-DA to CF card when CD selected) +Back up the selected album -PCM 44.1kHz stereo [Enter key] Back up the selected album: Are you sure? [Enter key] Finished. -MP3 256k stereo. [Enter key] Back up the selected album: Are you sure? [Enter key] Finished. -MP3 128k stereo. [Enter key] Back up the selected album: Are you sure? [Enter key] Finished. +Back up the selected track +Back up to new title -PCM 44.1kHz stereo [Enter key] Back up the selected track to new title. Are you sure? [Enter key] Finished -MP3 256k stereo [Enter key] Back up the selected track to new title. Are you sure? [Enter key] Finished -MP3 128k stereo [Enter key] Back up the selected track to new title. Are you sure? 131 [Enter key] Finished + Back up to Title XX -PCM 44.1kHz stereo [Enter key] Back up the selected track to title XX: Are you sure? [Enter key] Finished -MP3 256k stereo [Enter key] Back up the selected track to title XX: Are you sure? [Enter key] Finished -MP3 128k stereo [Enter key] Back up the selected track to title XX: Are you sure? [Enter key] Finished >BACKUP (DAISY format CD to CF card when CD selected) [Enter key] Back up desired title from disc to card: Are you sure? [Enter key] Finished >BACKUP (CF card to disc when CF card selected) +DAISY Format [Enter key] Back up the selected title: Are you sure? [Enter key] Finished +Music CD Format -Back up the selected title [Enter key] Back up the selected title: Are you sure? [Enter key] Finished -Back up the selected section [Enter key] Back up the selected section: Are you sure? [Enter key] Finished >RECORDING SETTING (when inserting and selecting digital audio recordable CD) +Select recording mode -Music standard](https://usermanual.wiki/Shinano-Kenshi/PTP1/User-Guide-1003733-Page-65.png)

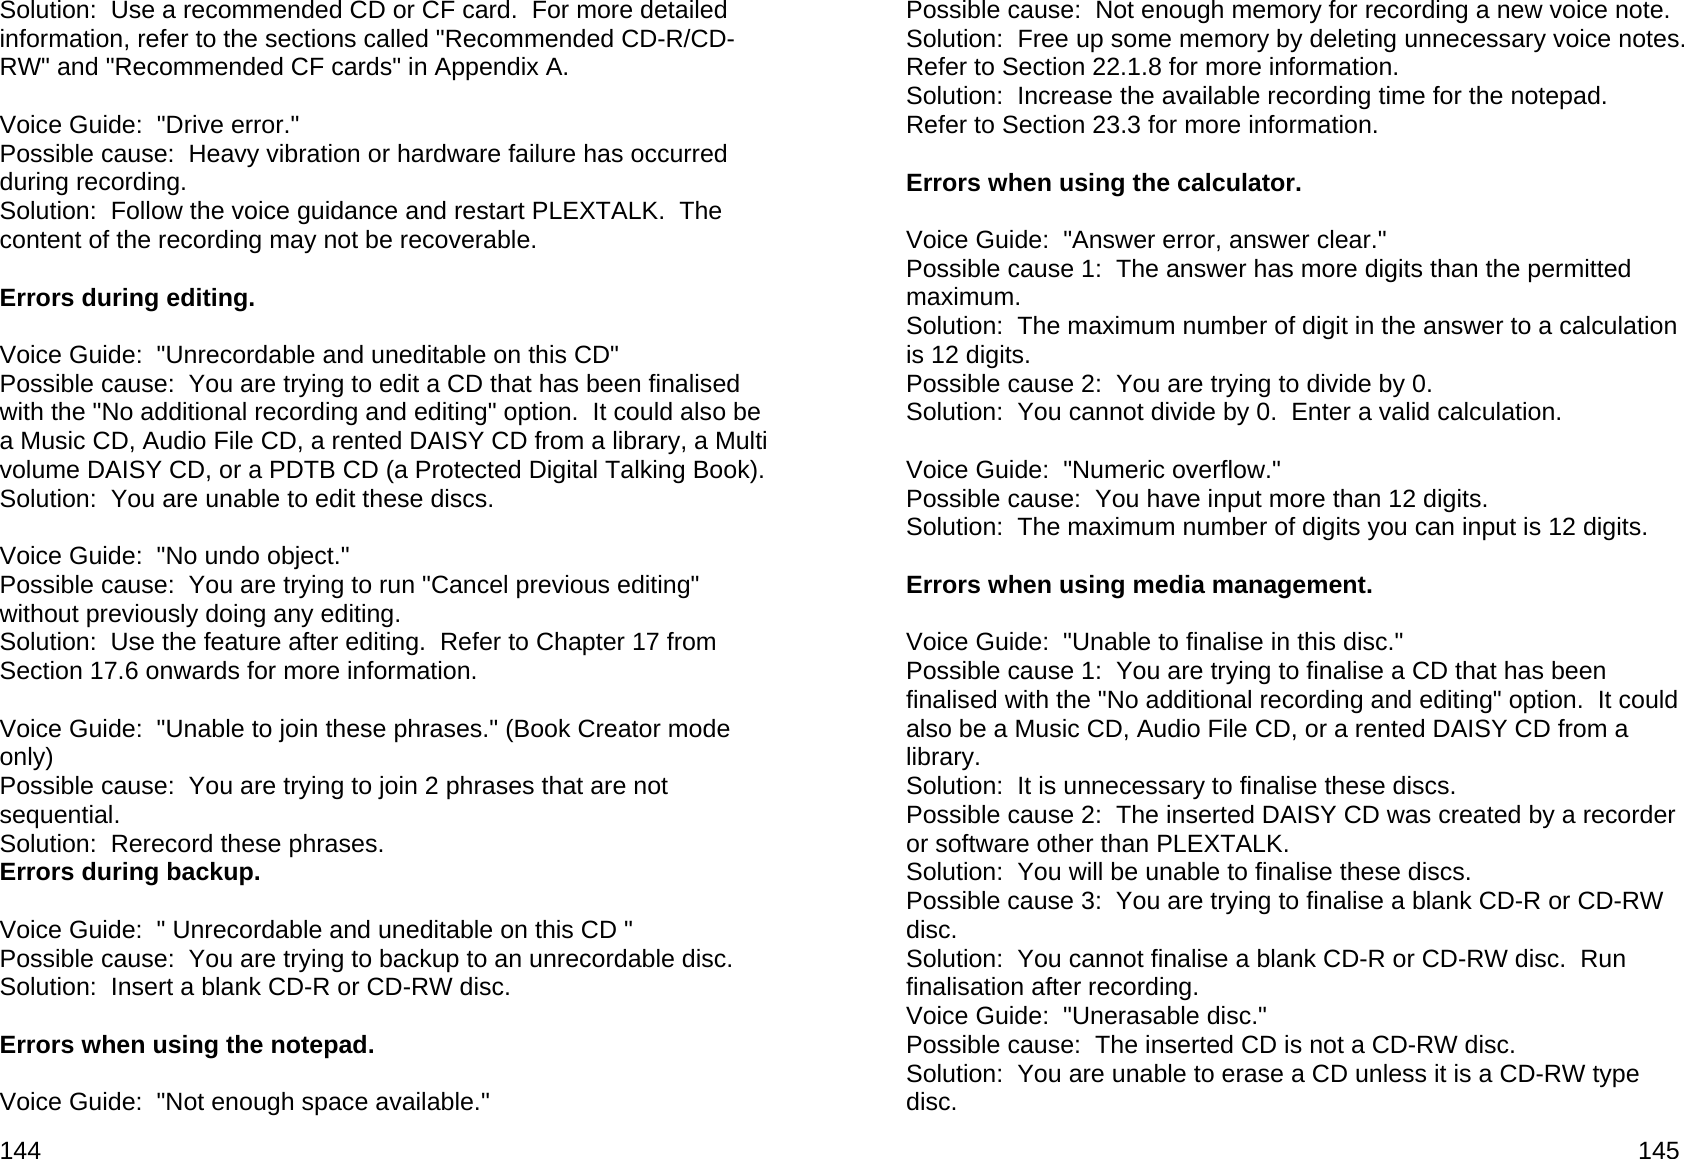
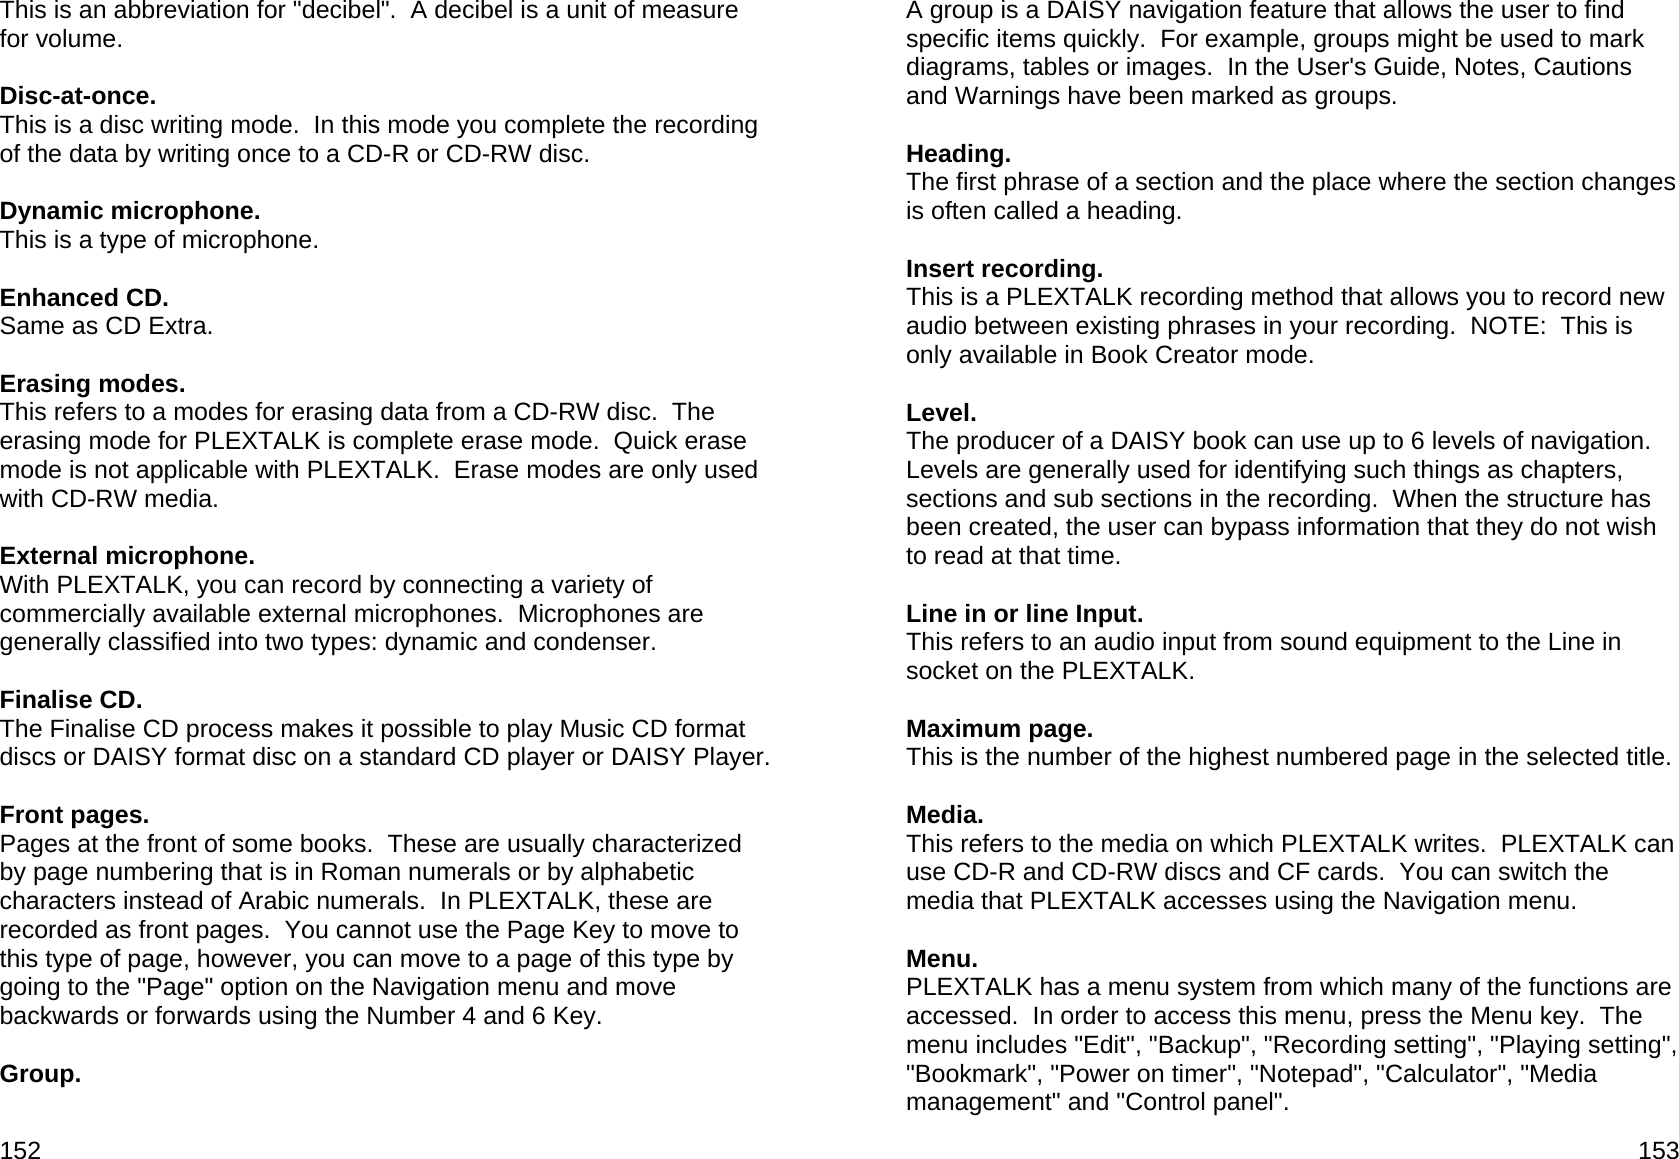
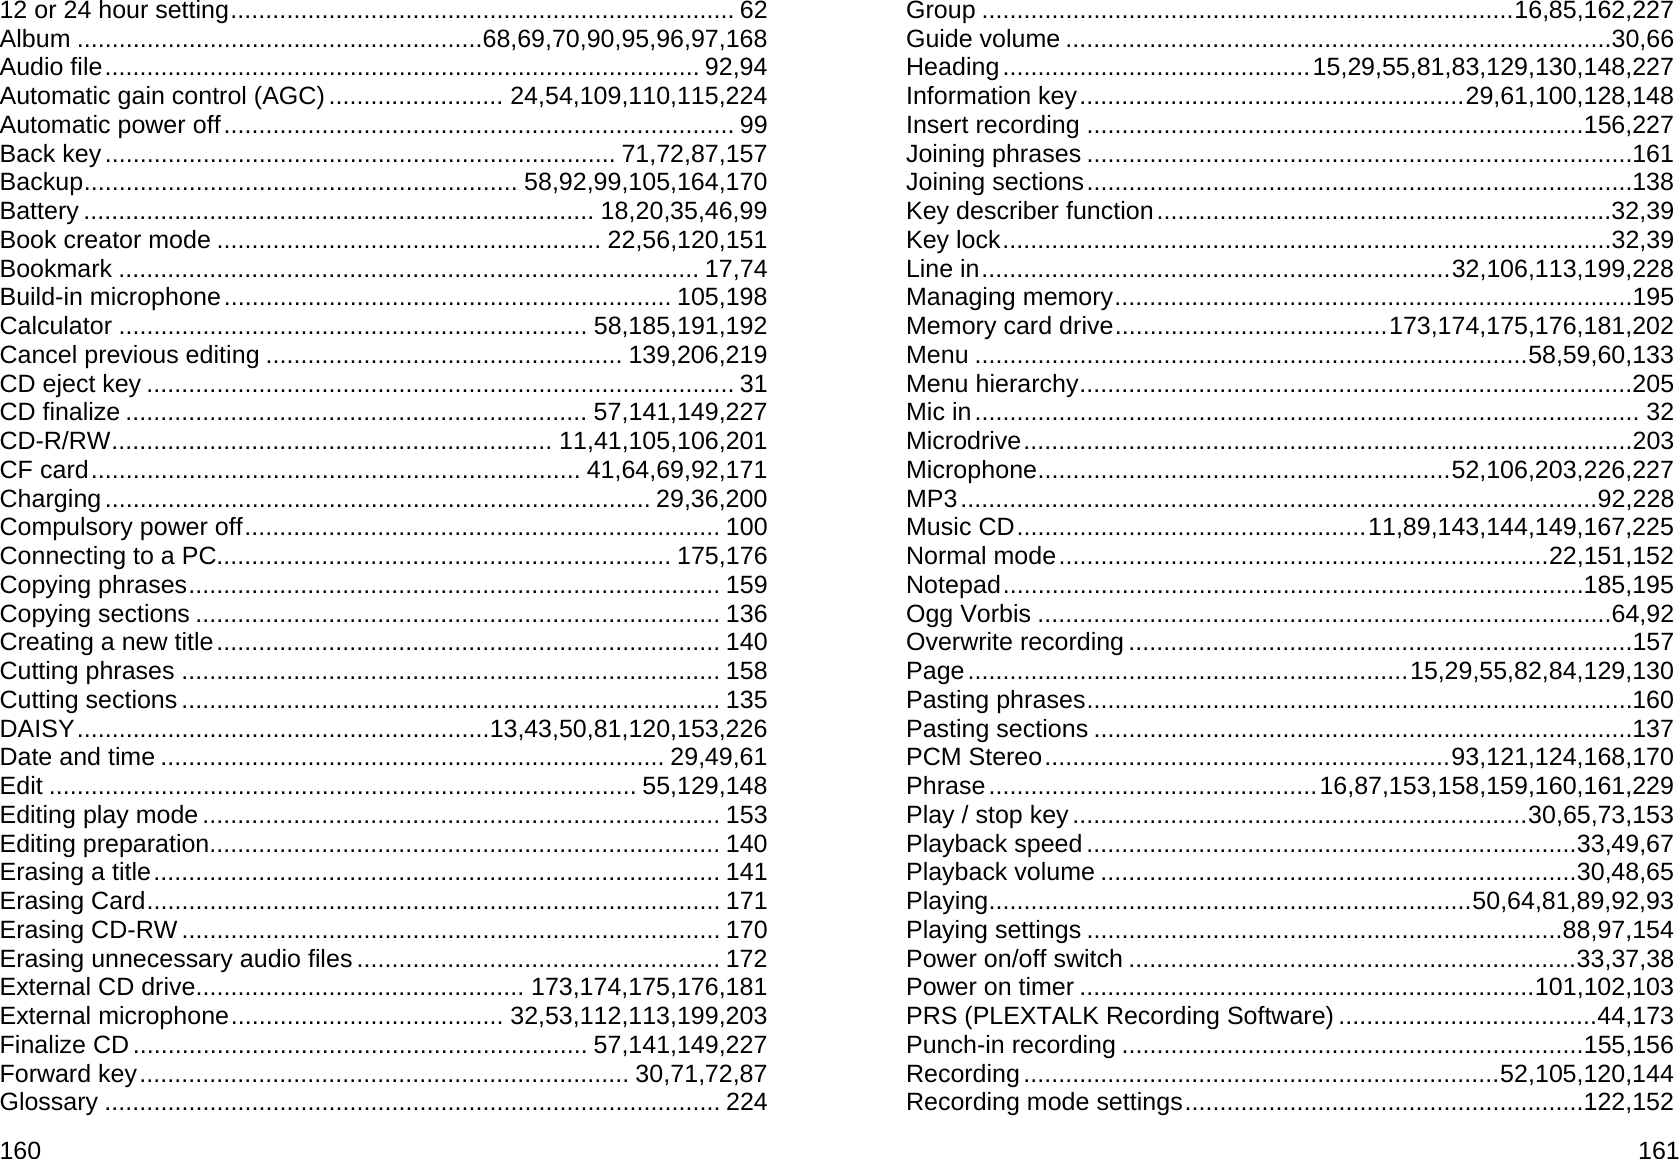
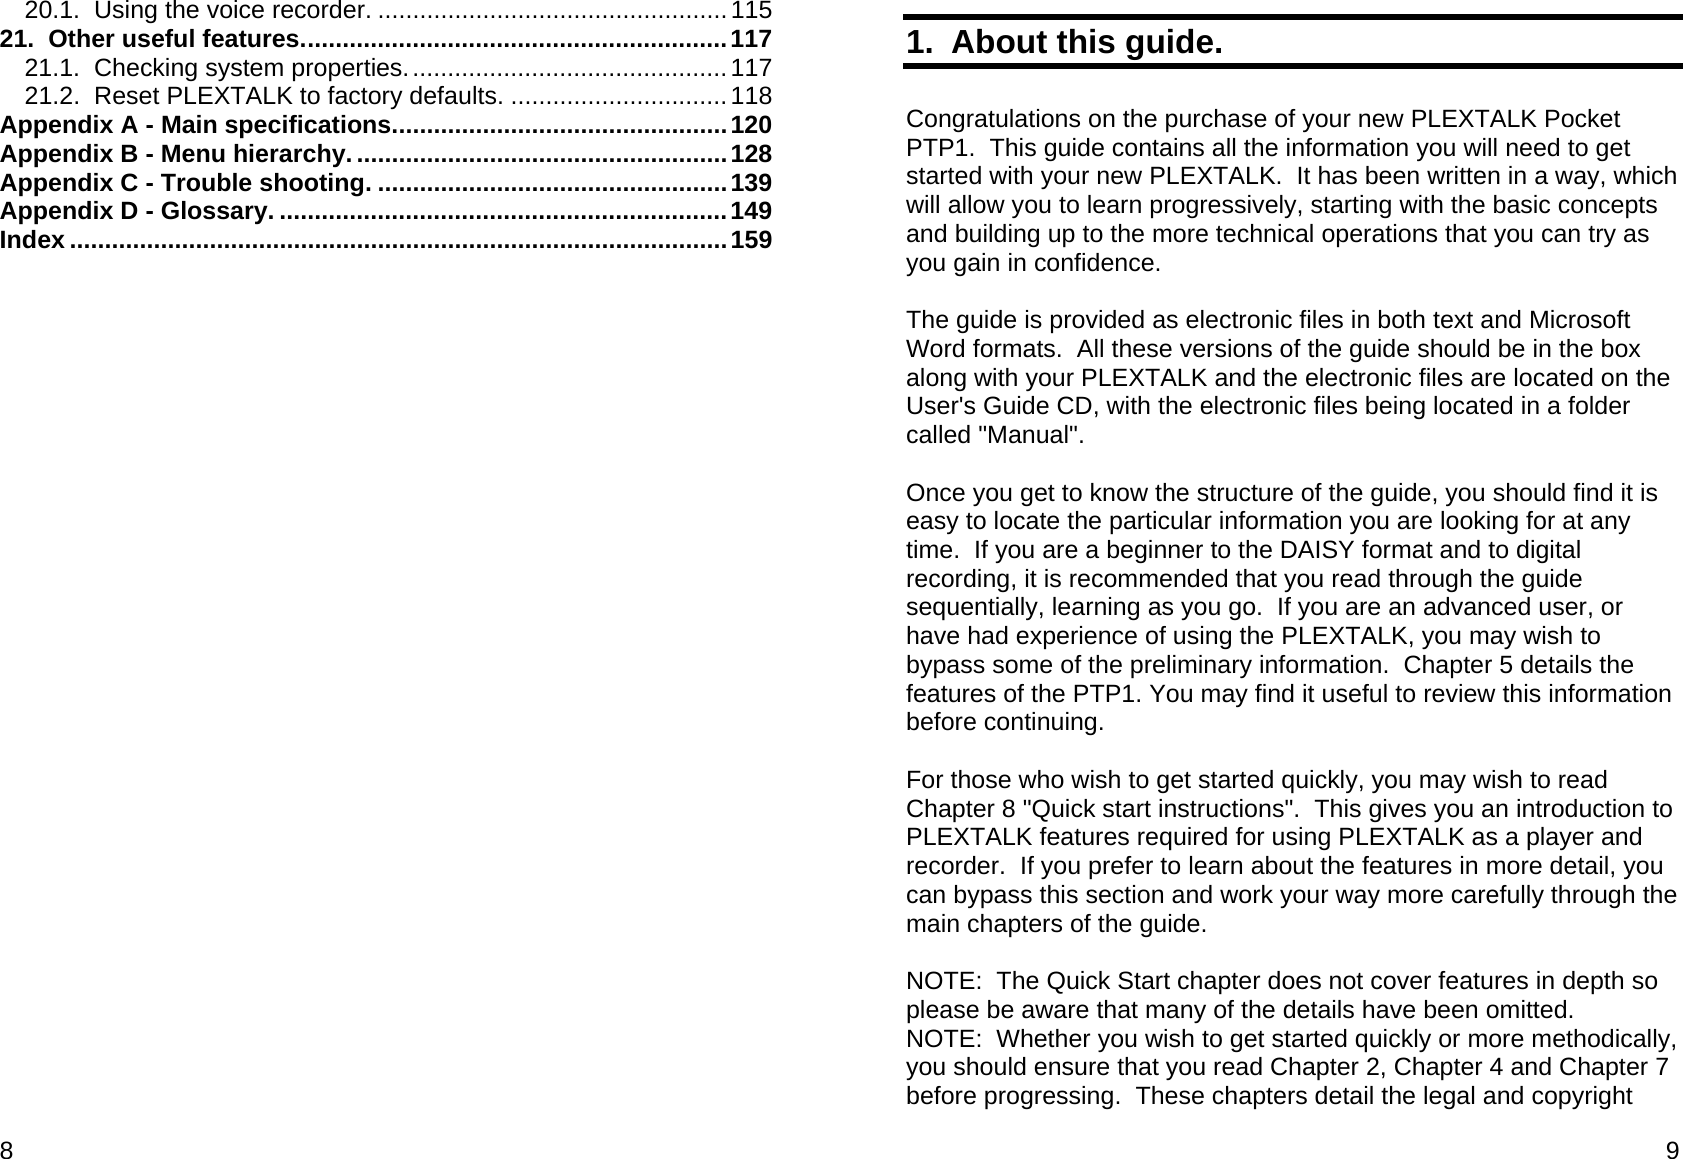
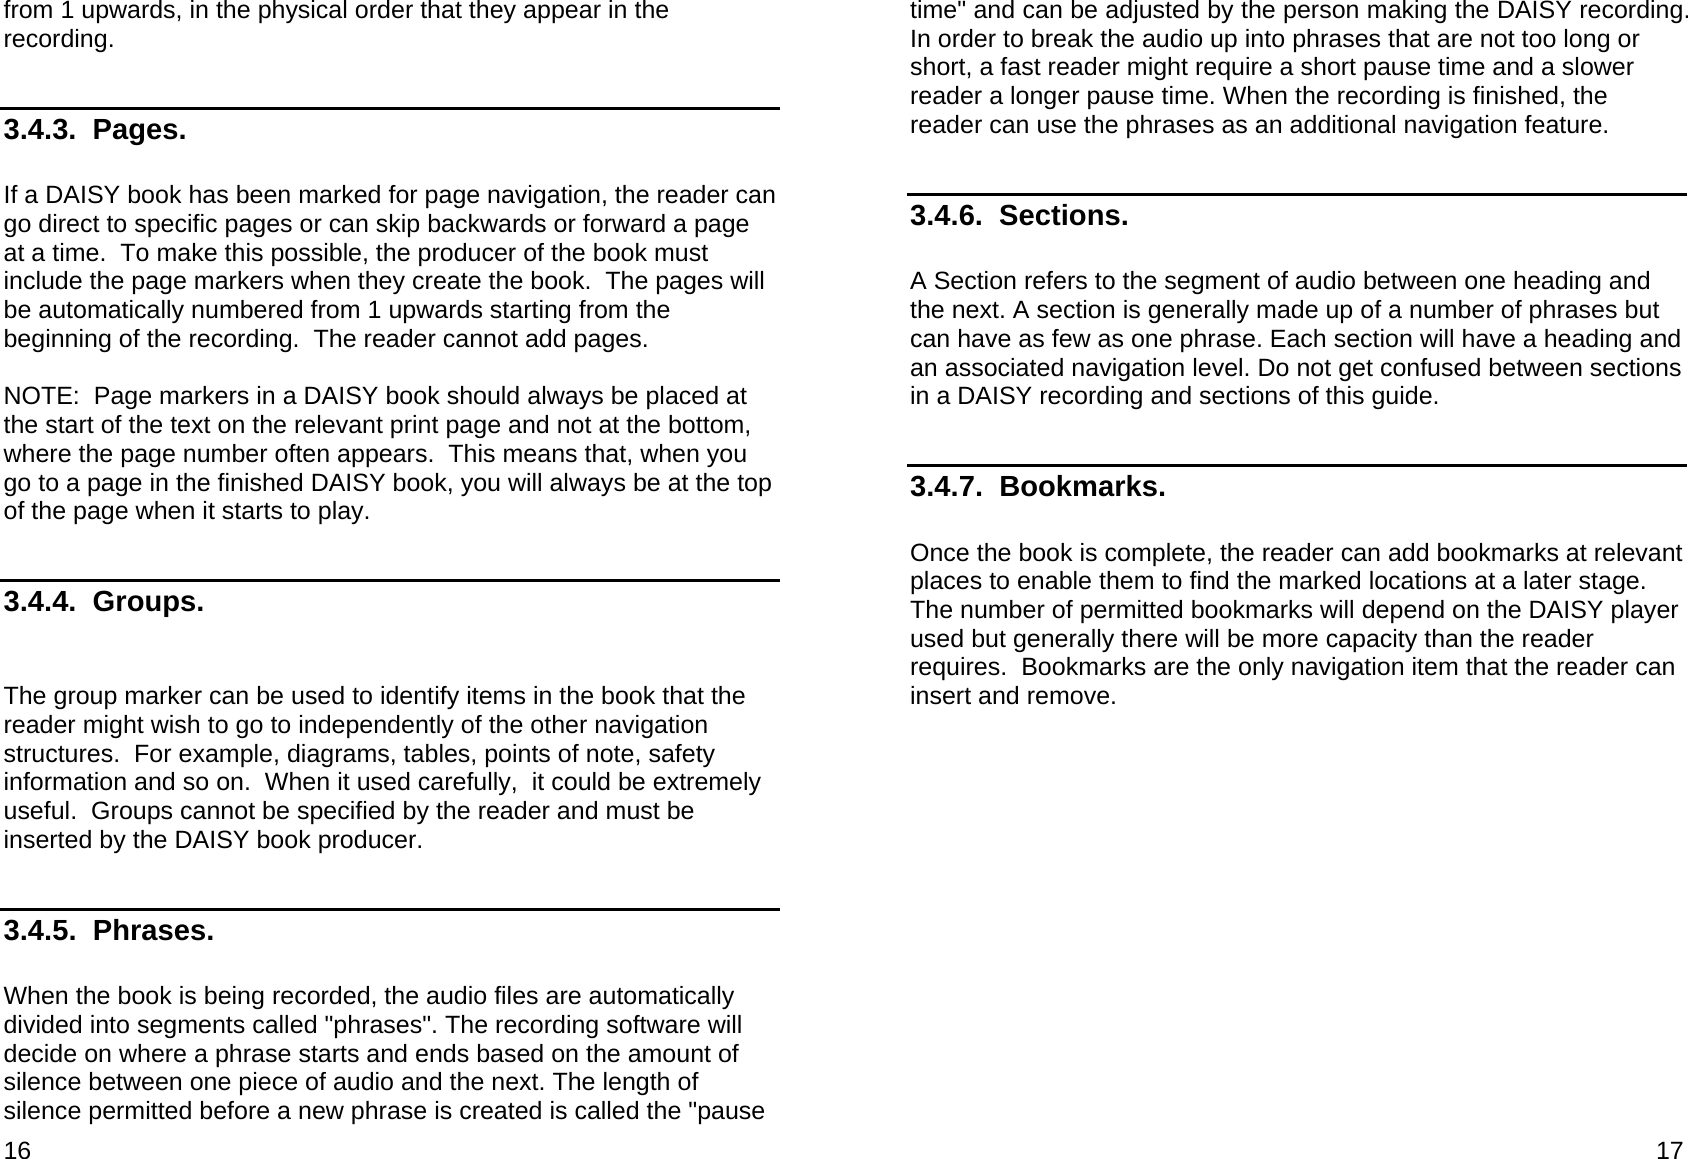
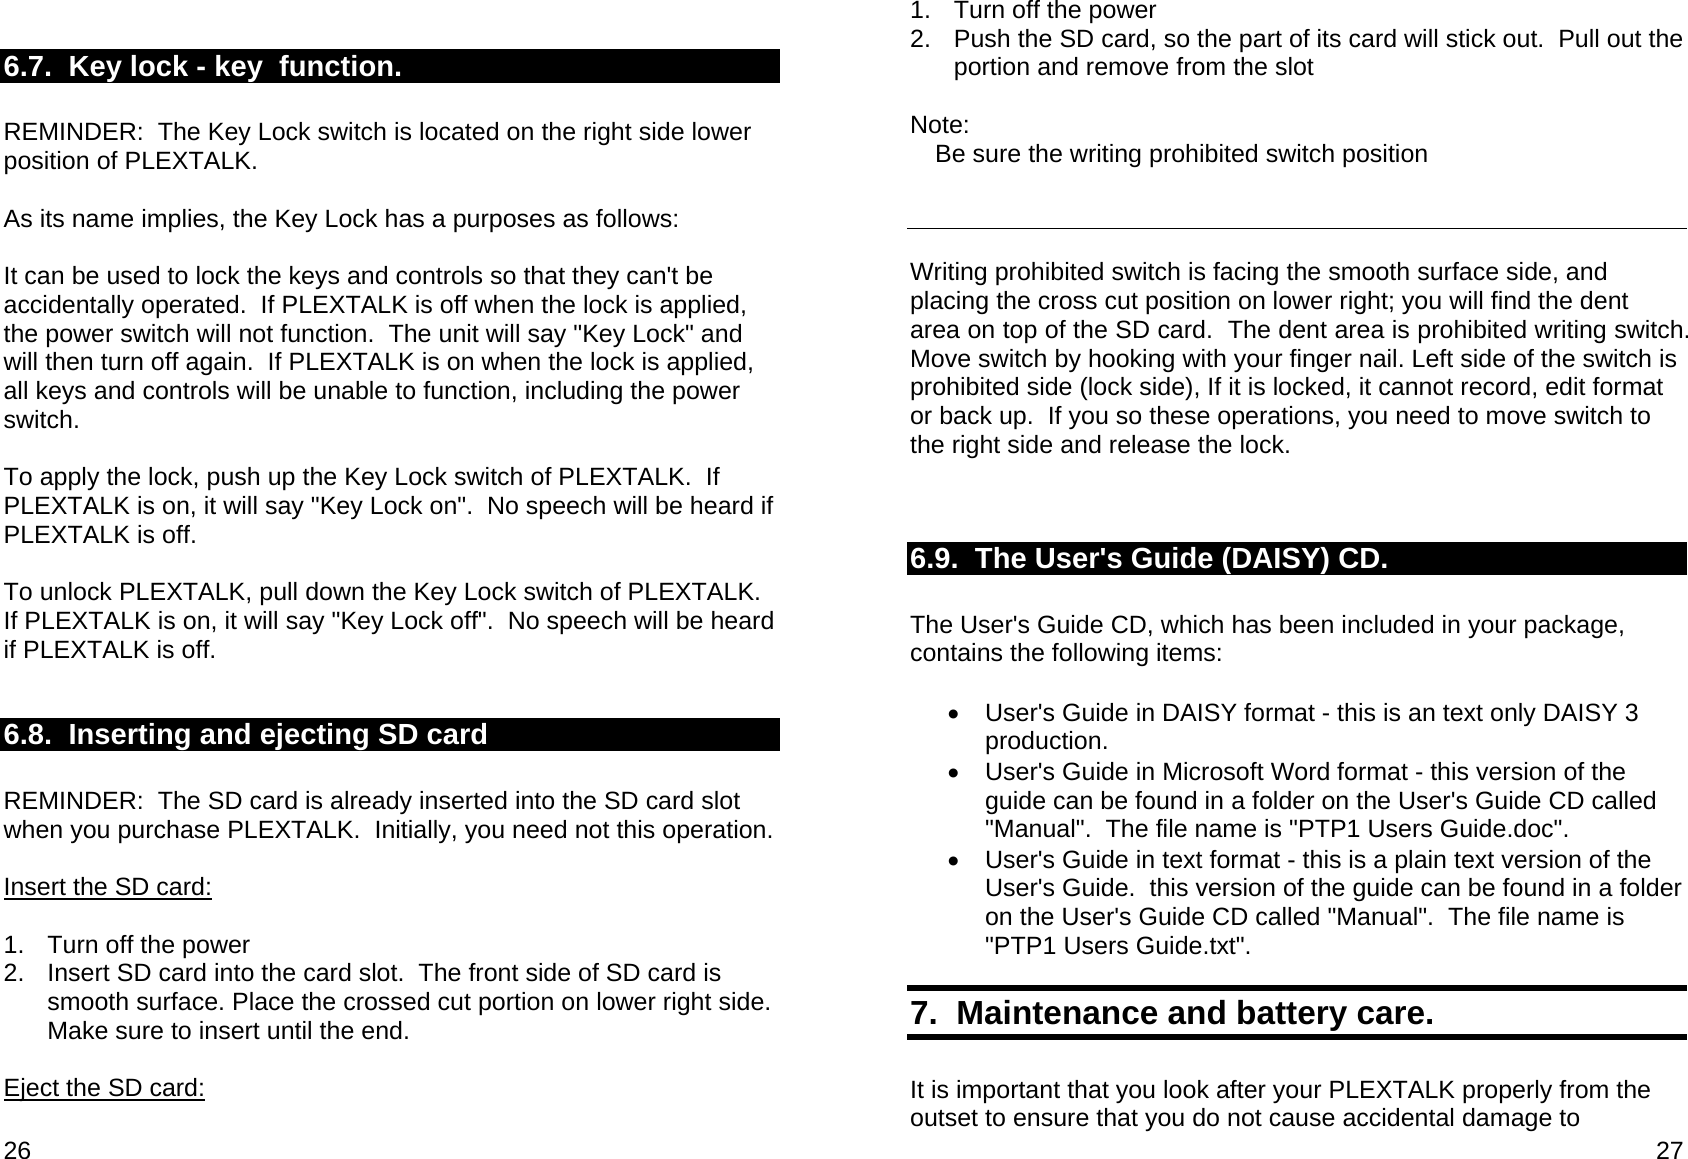
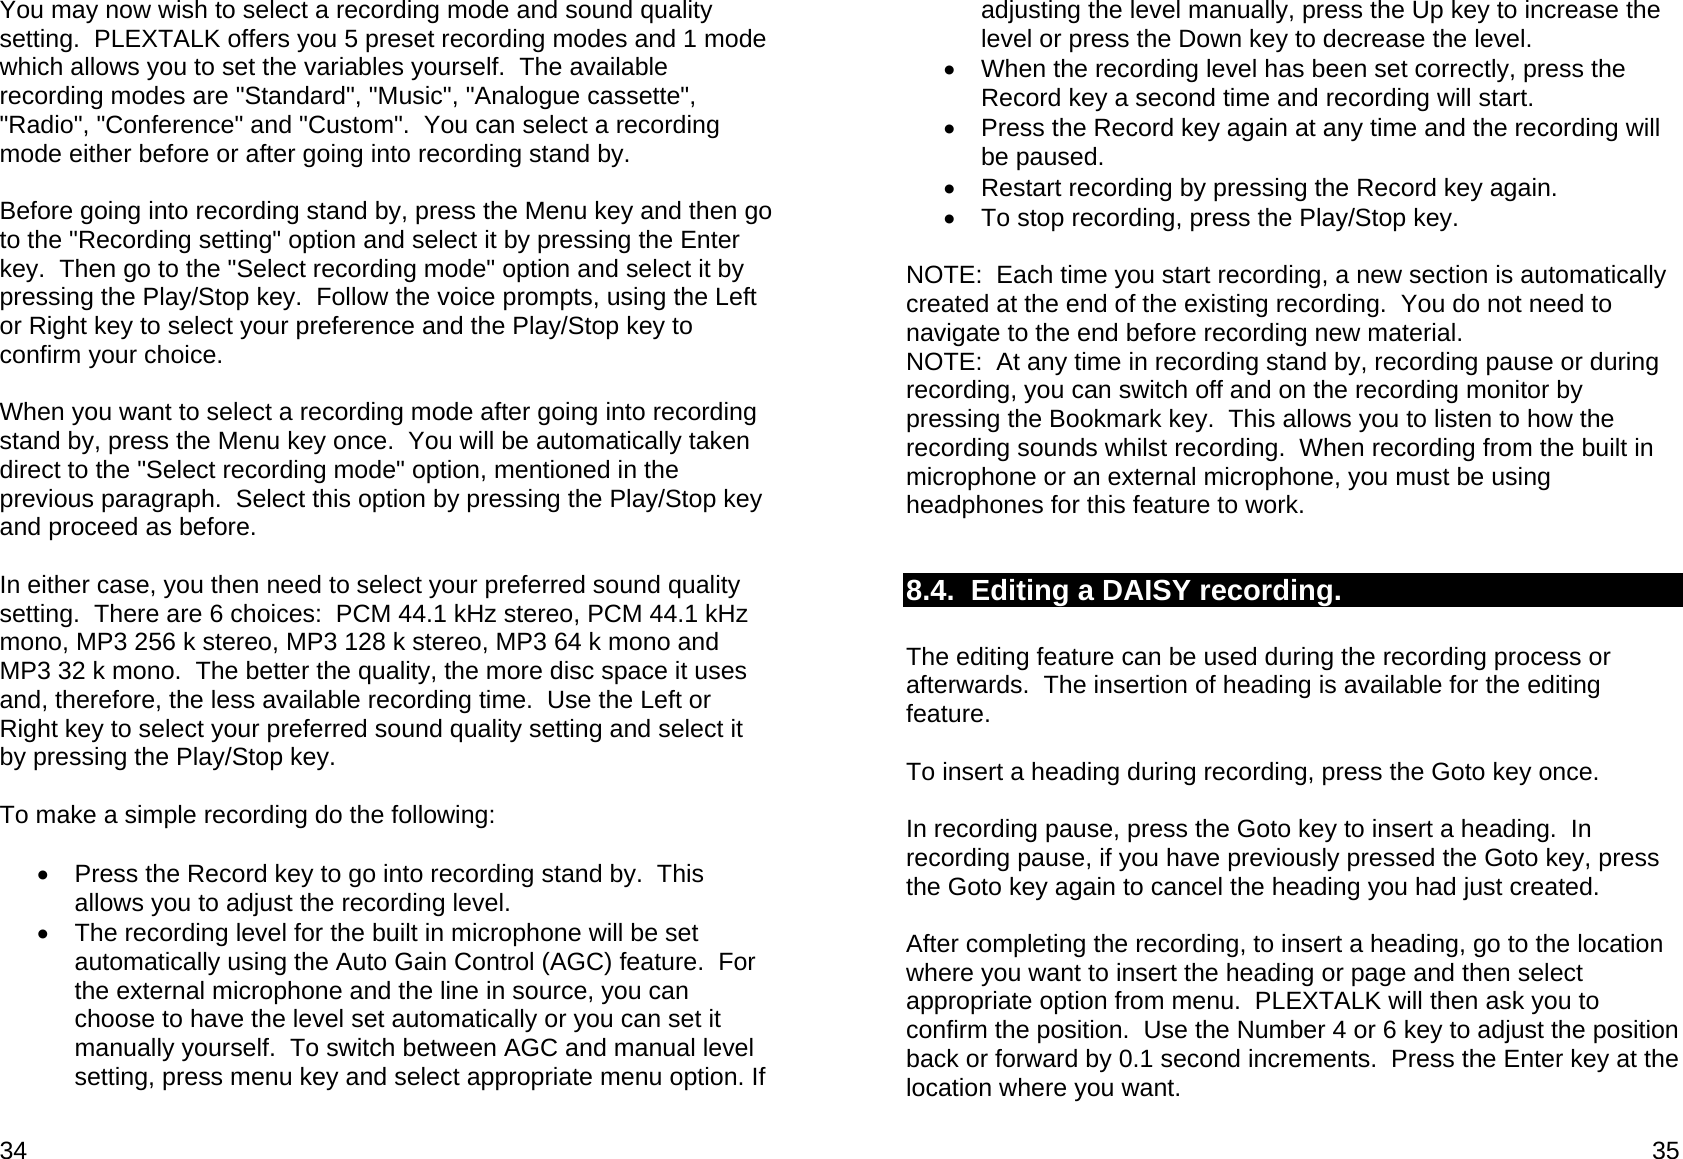
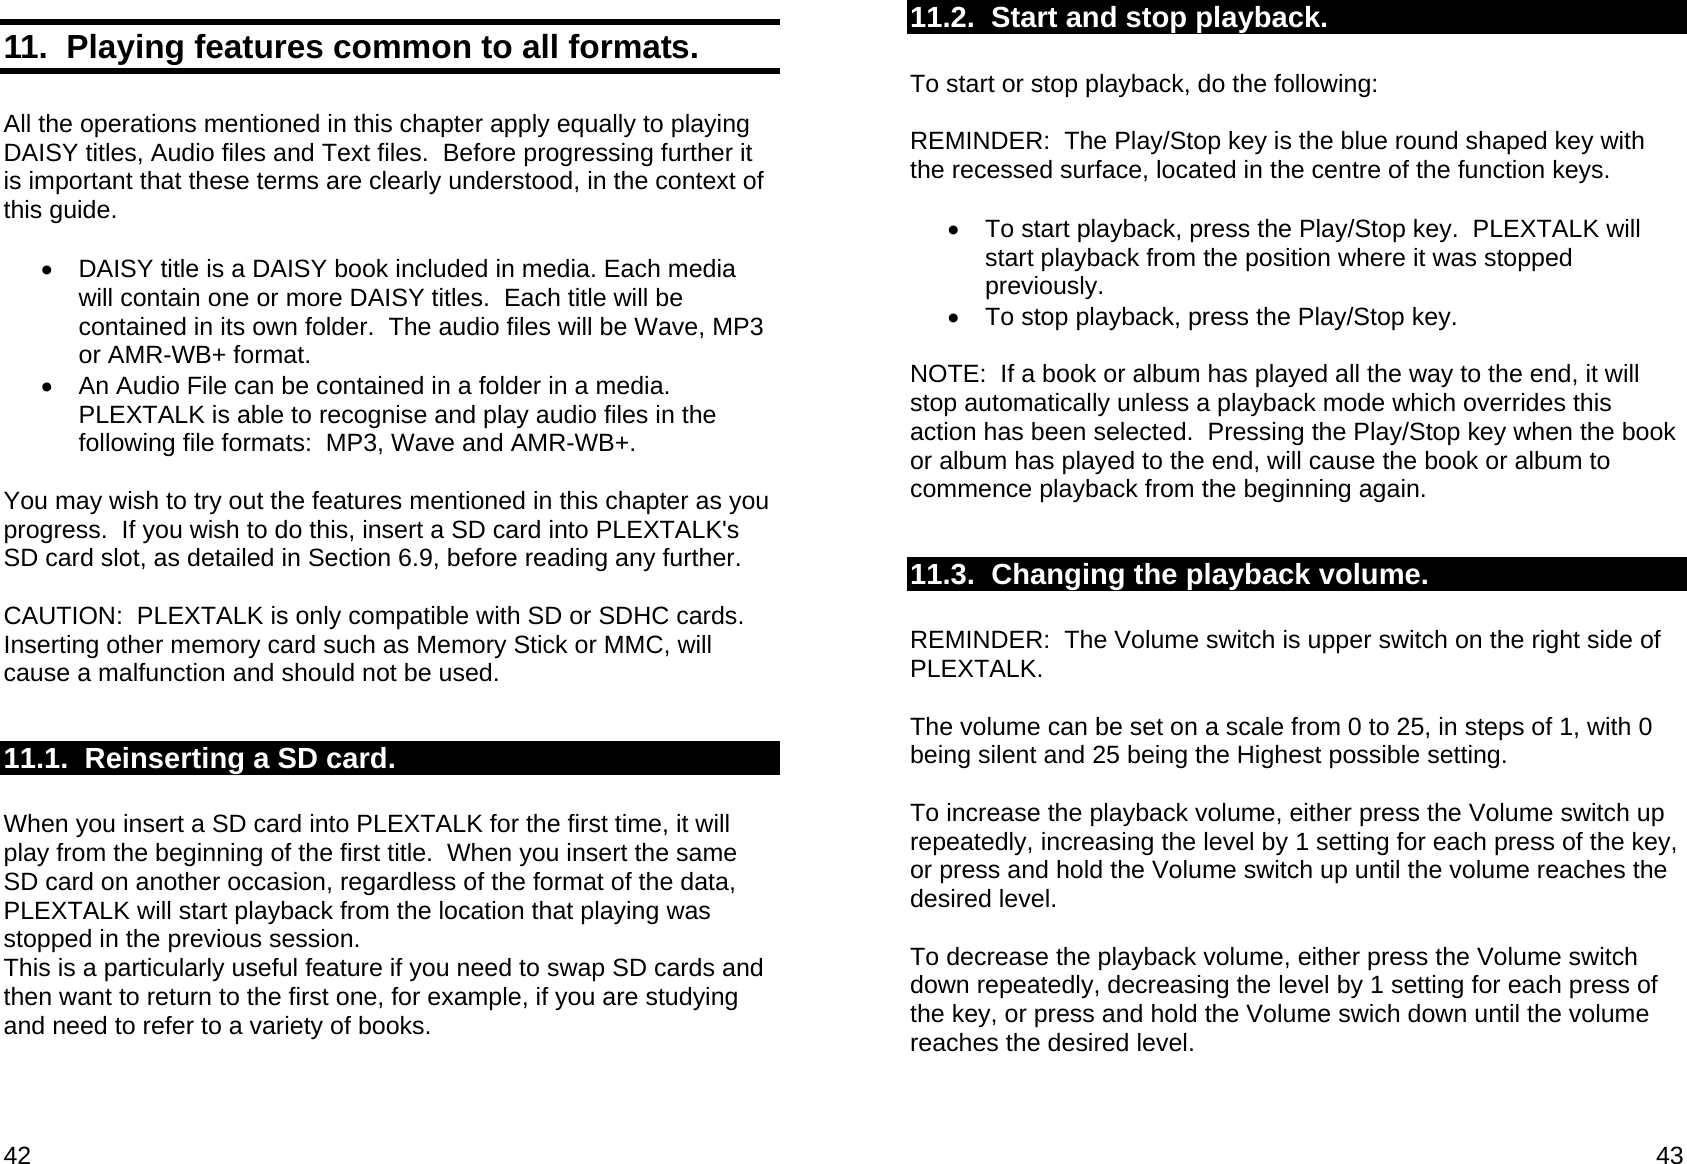
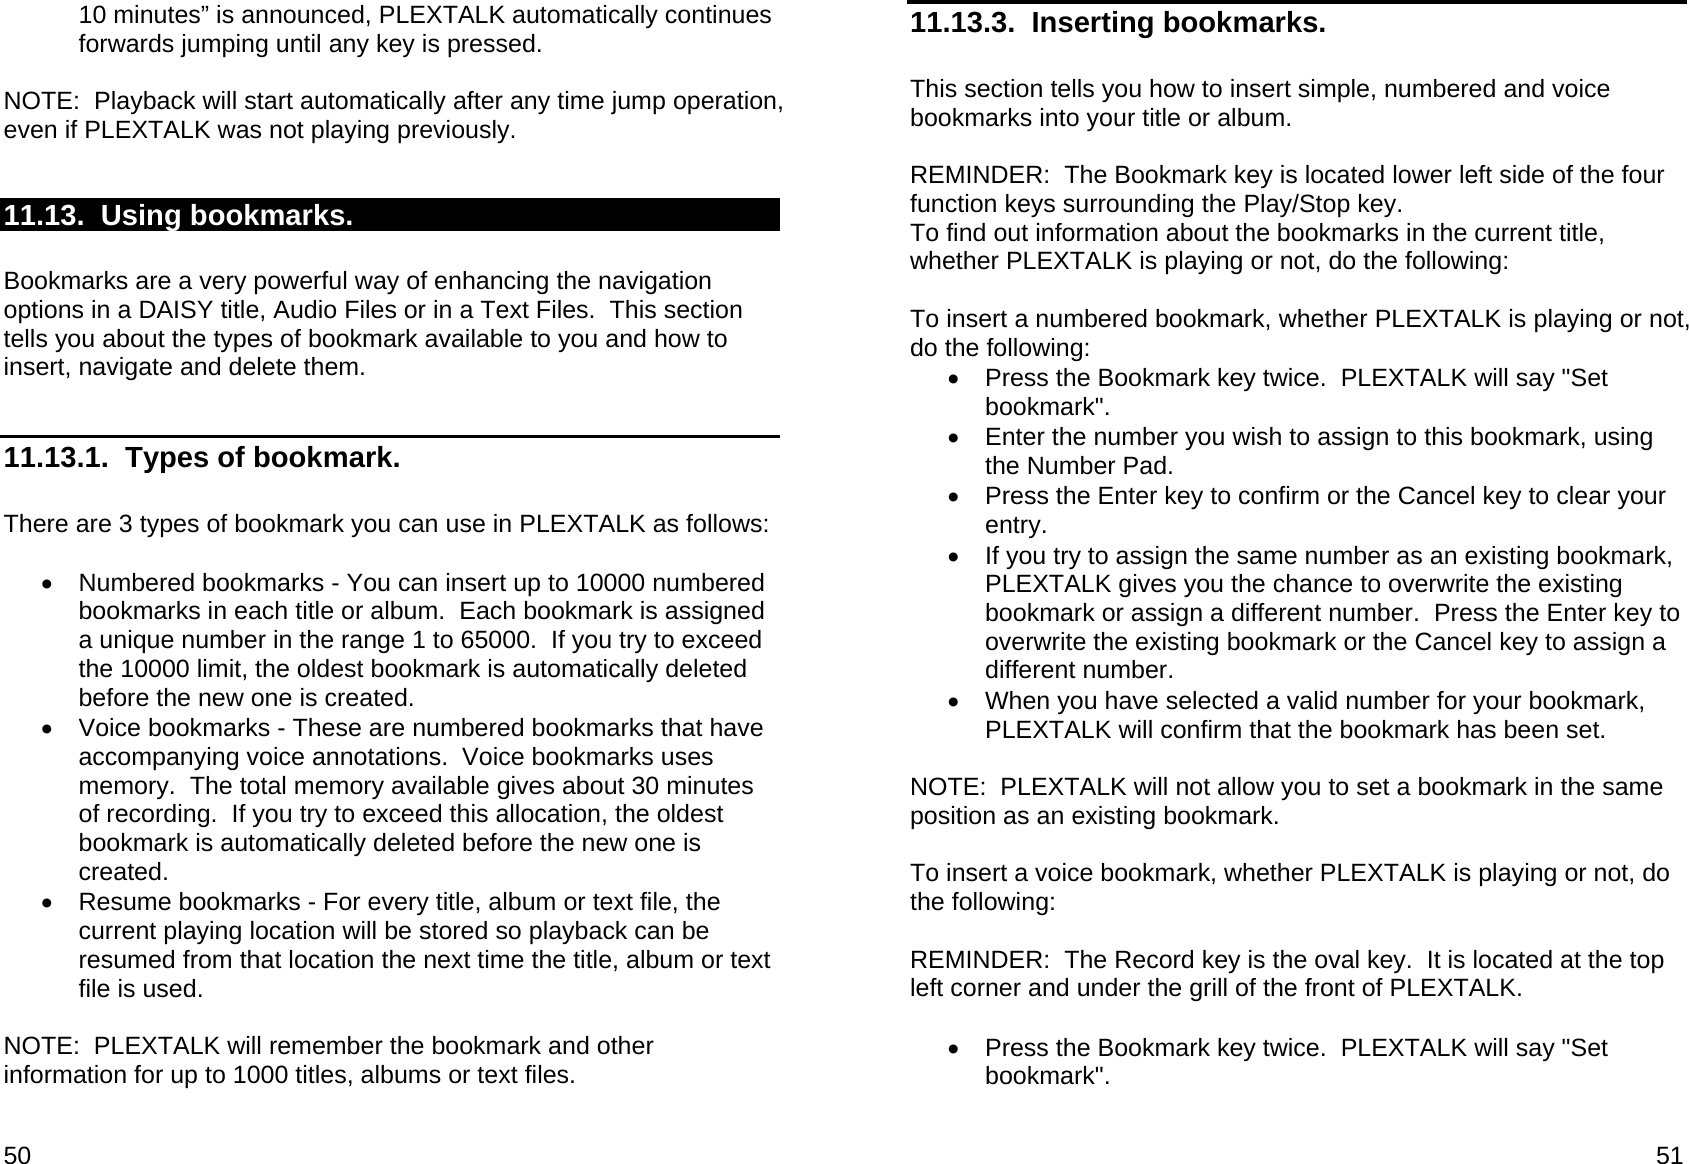
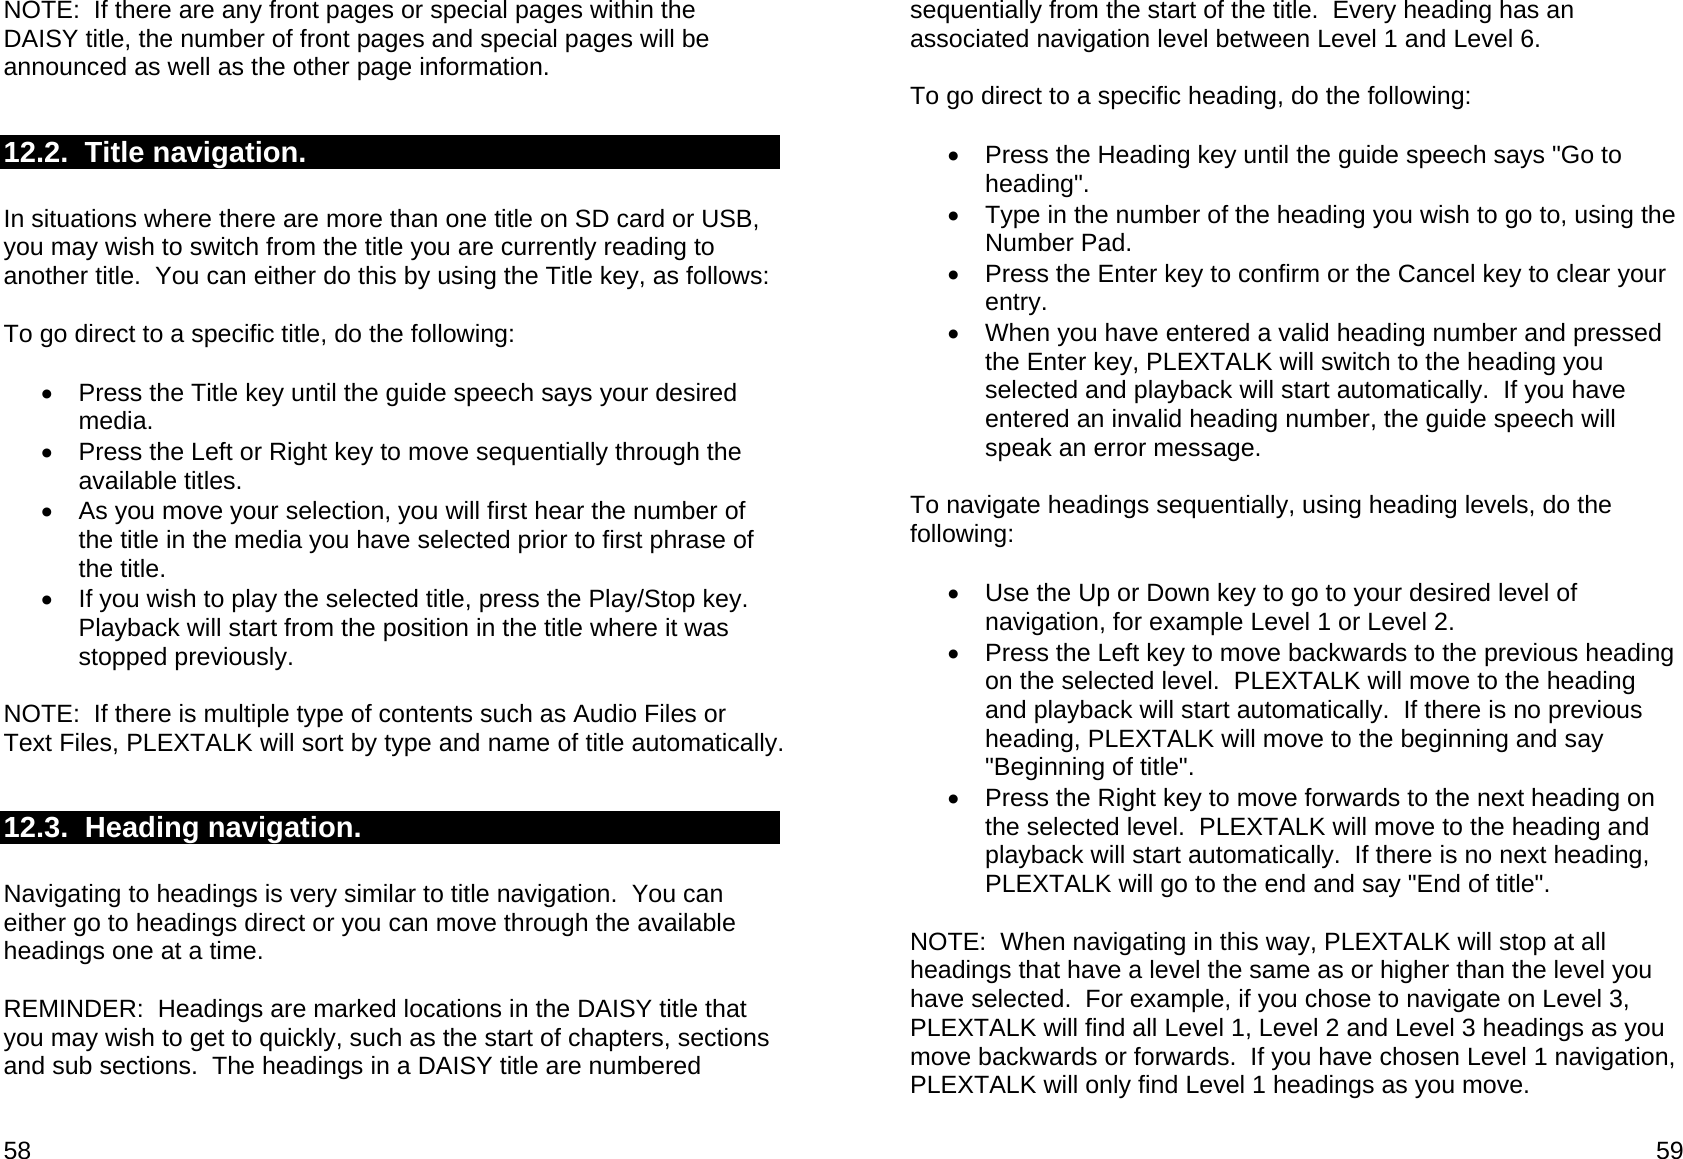
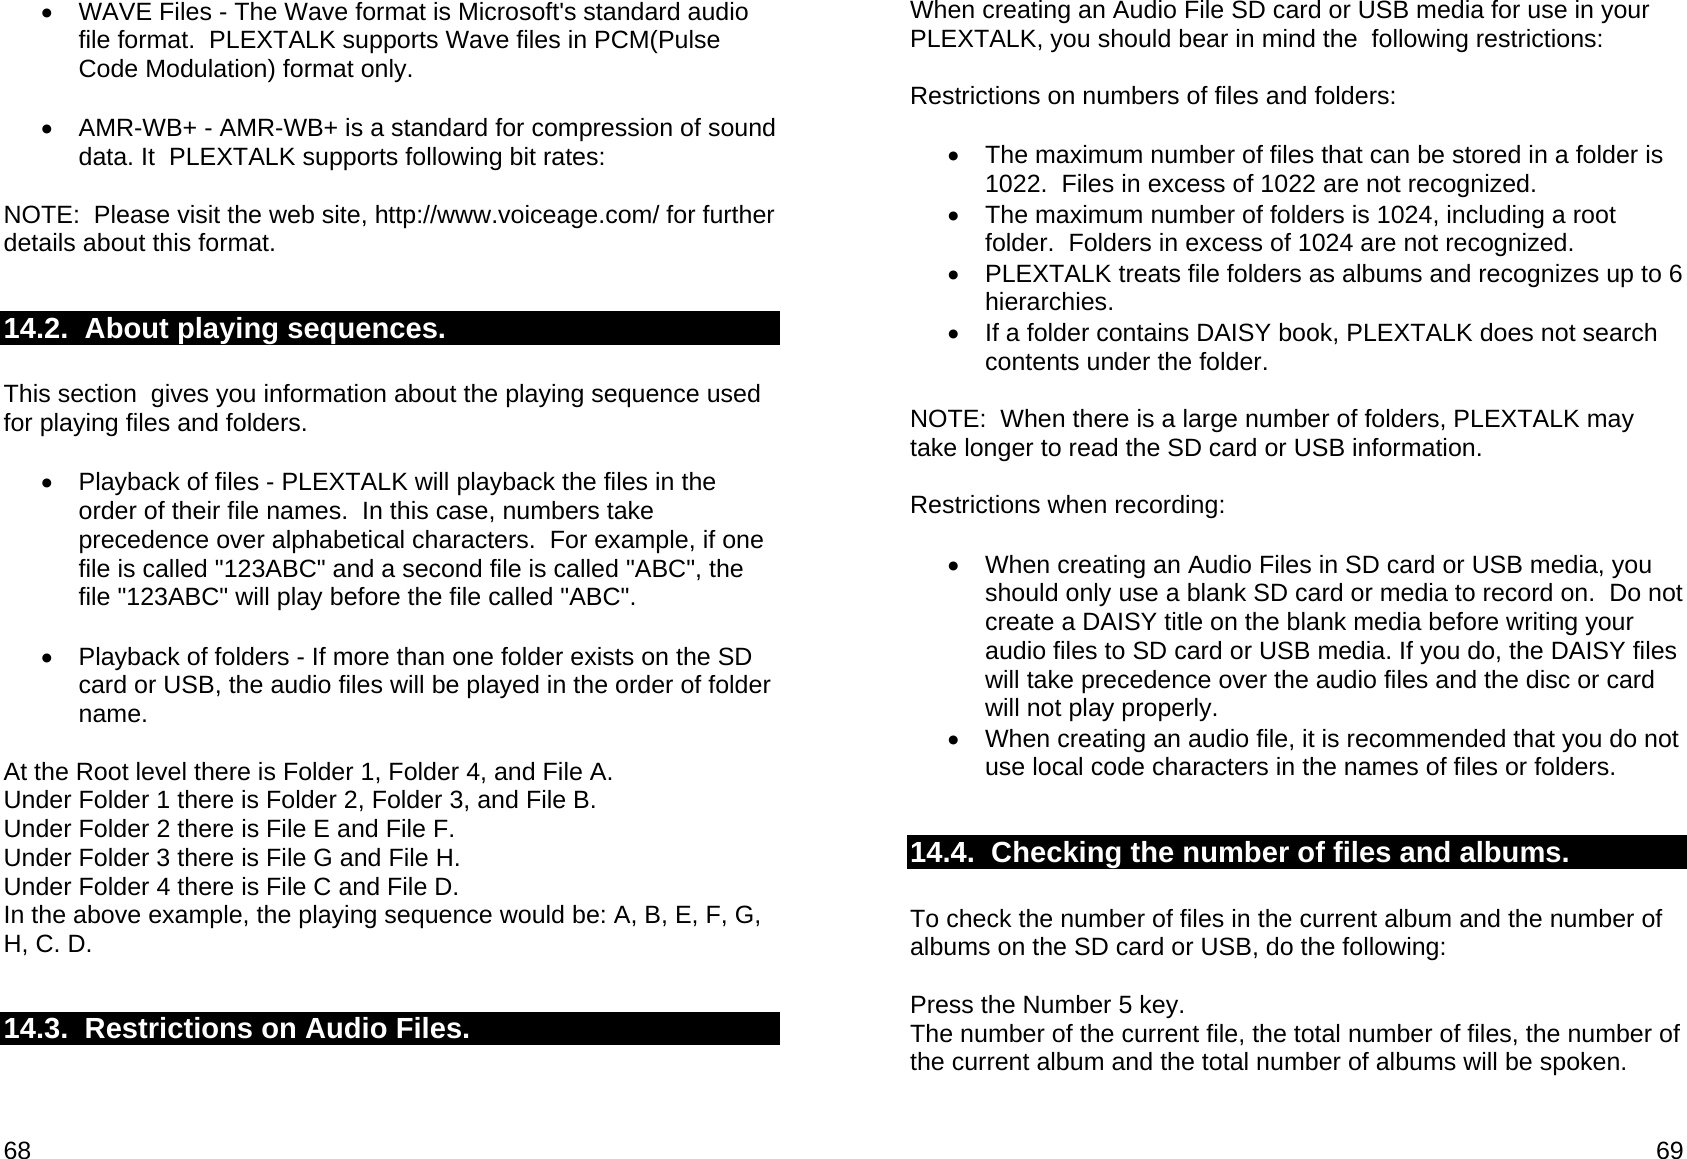
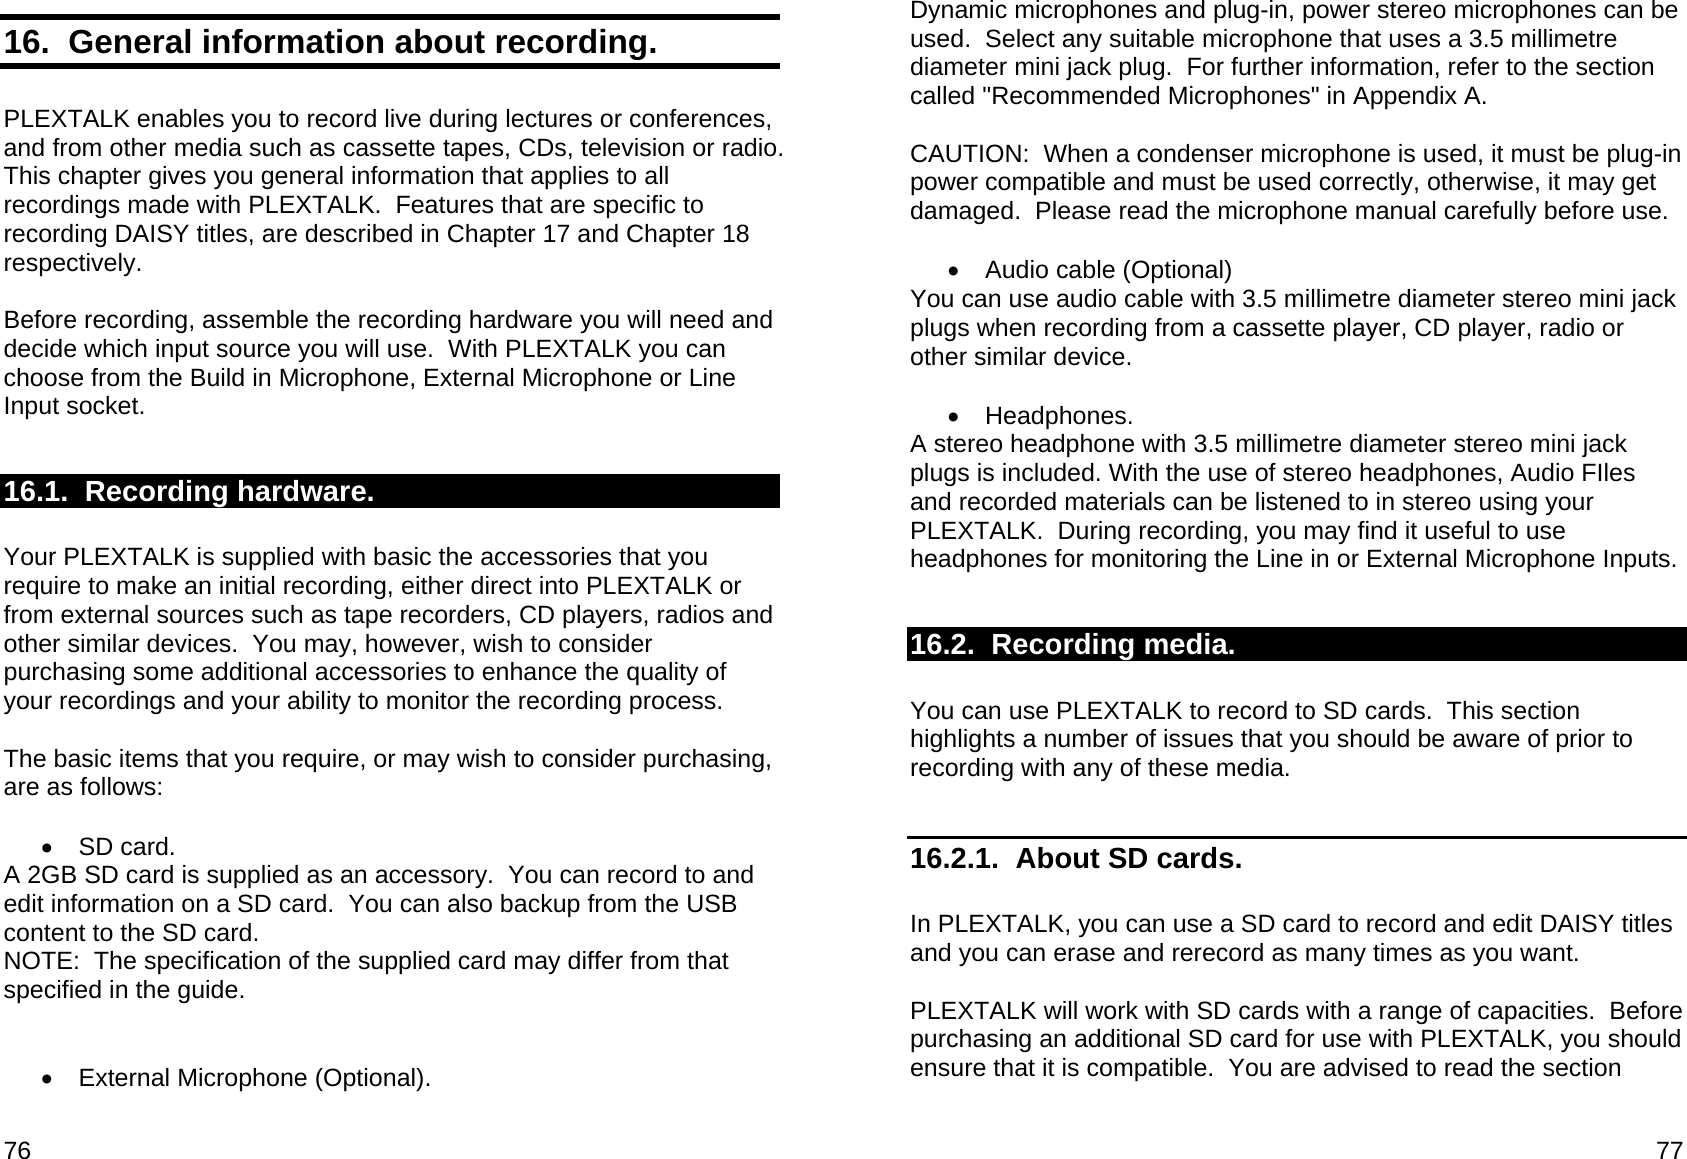
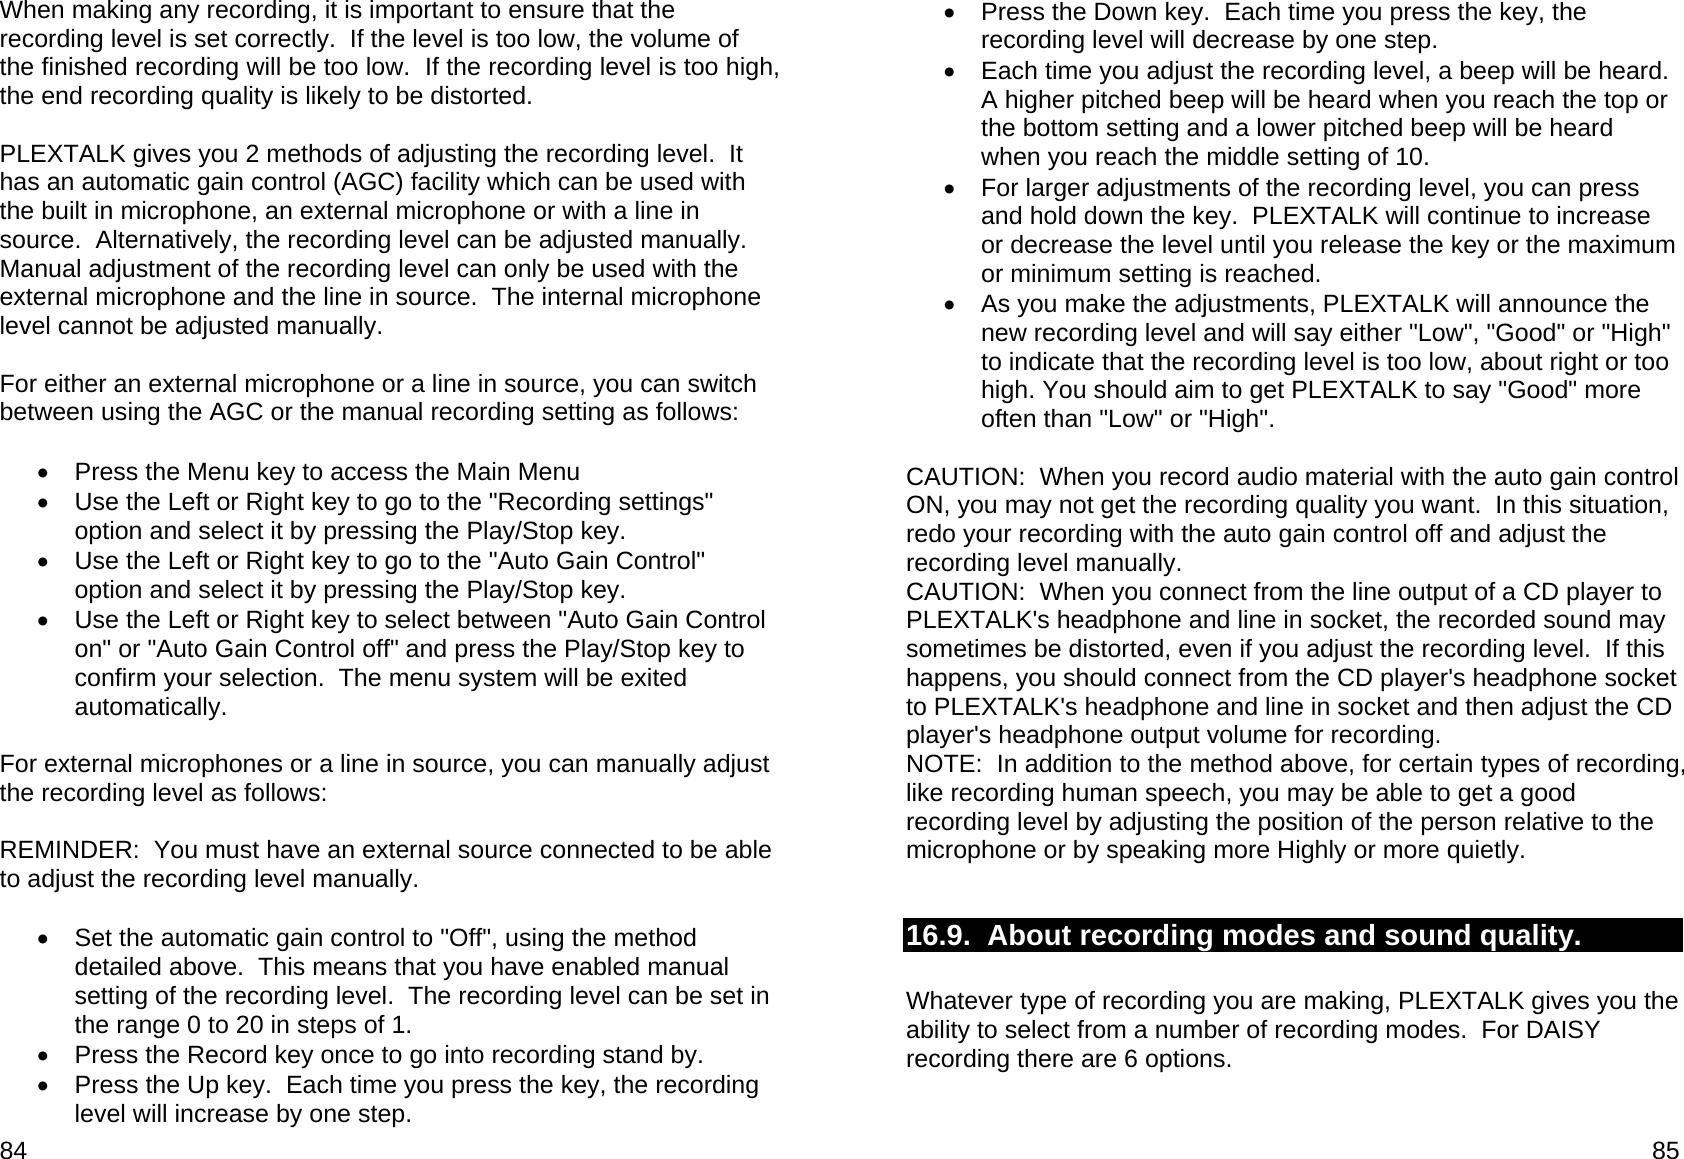
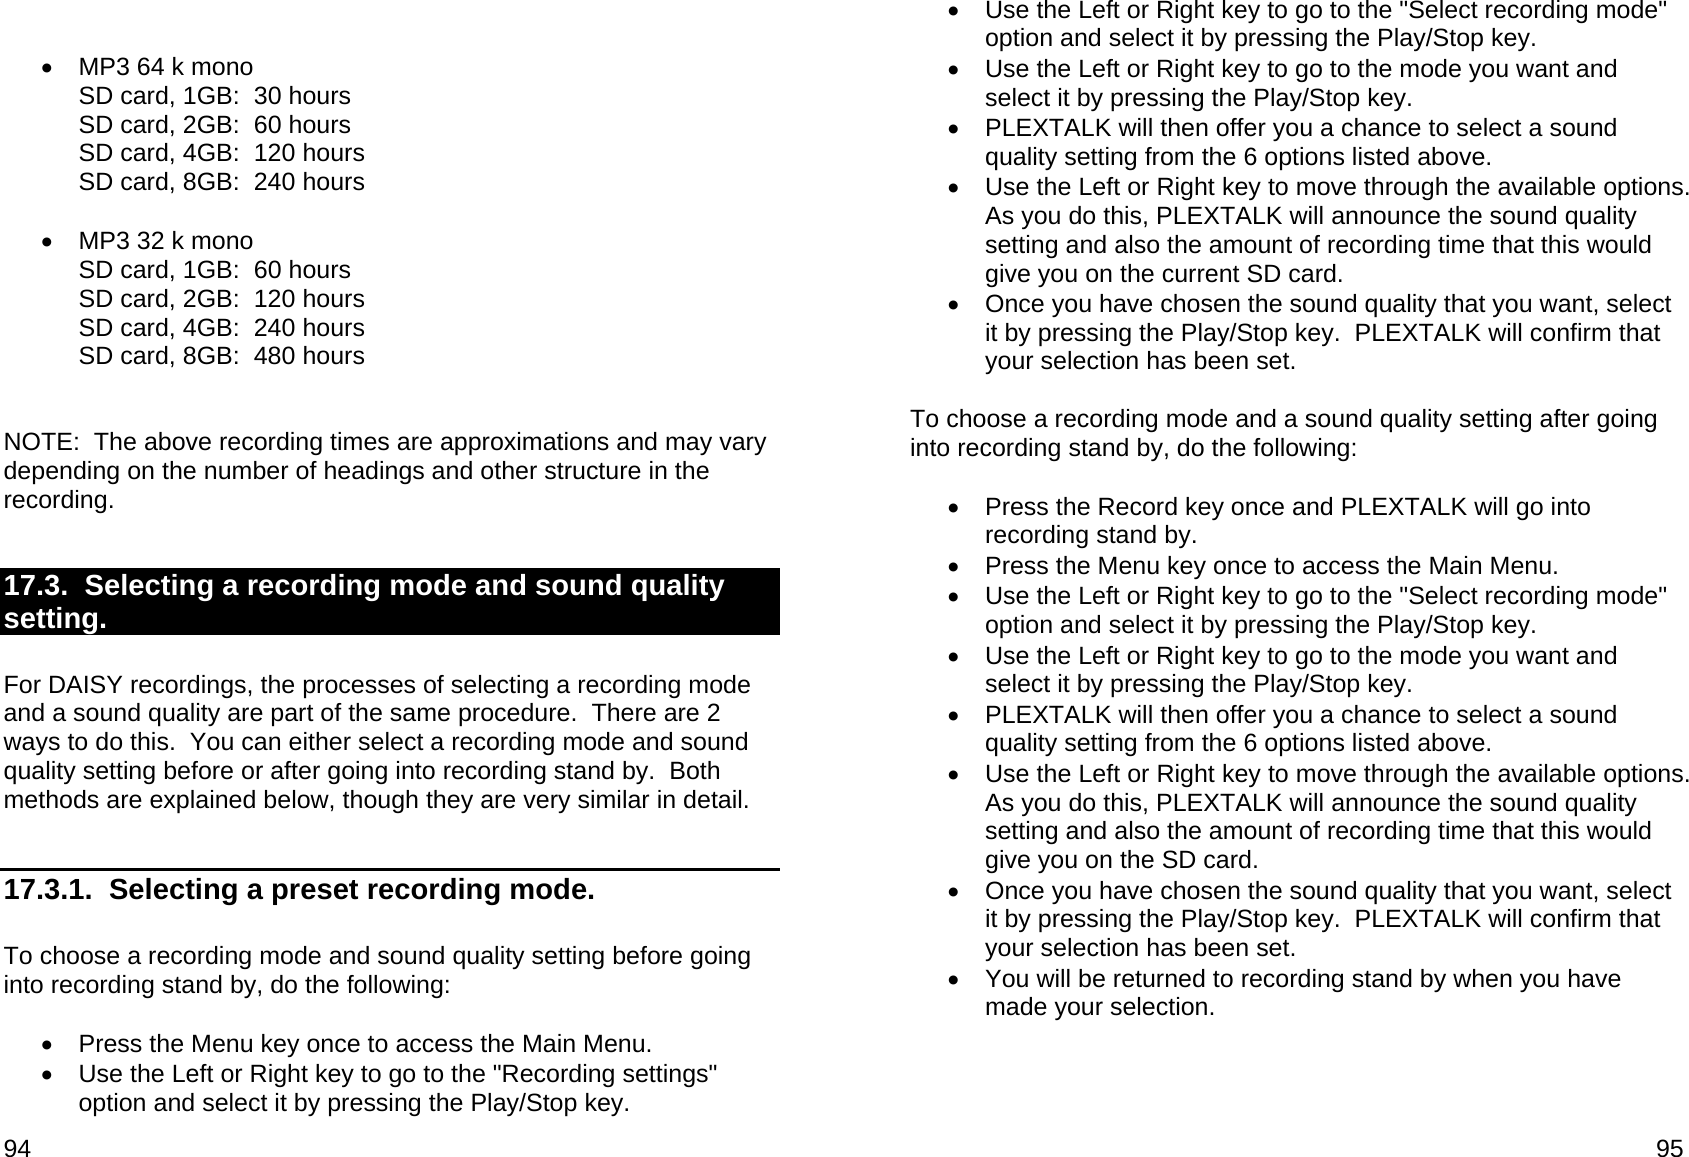
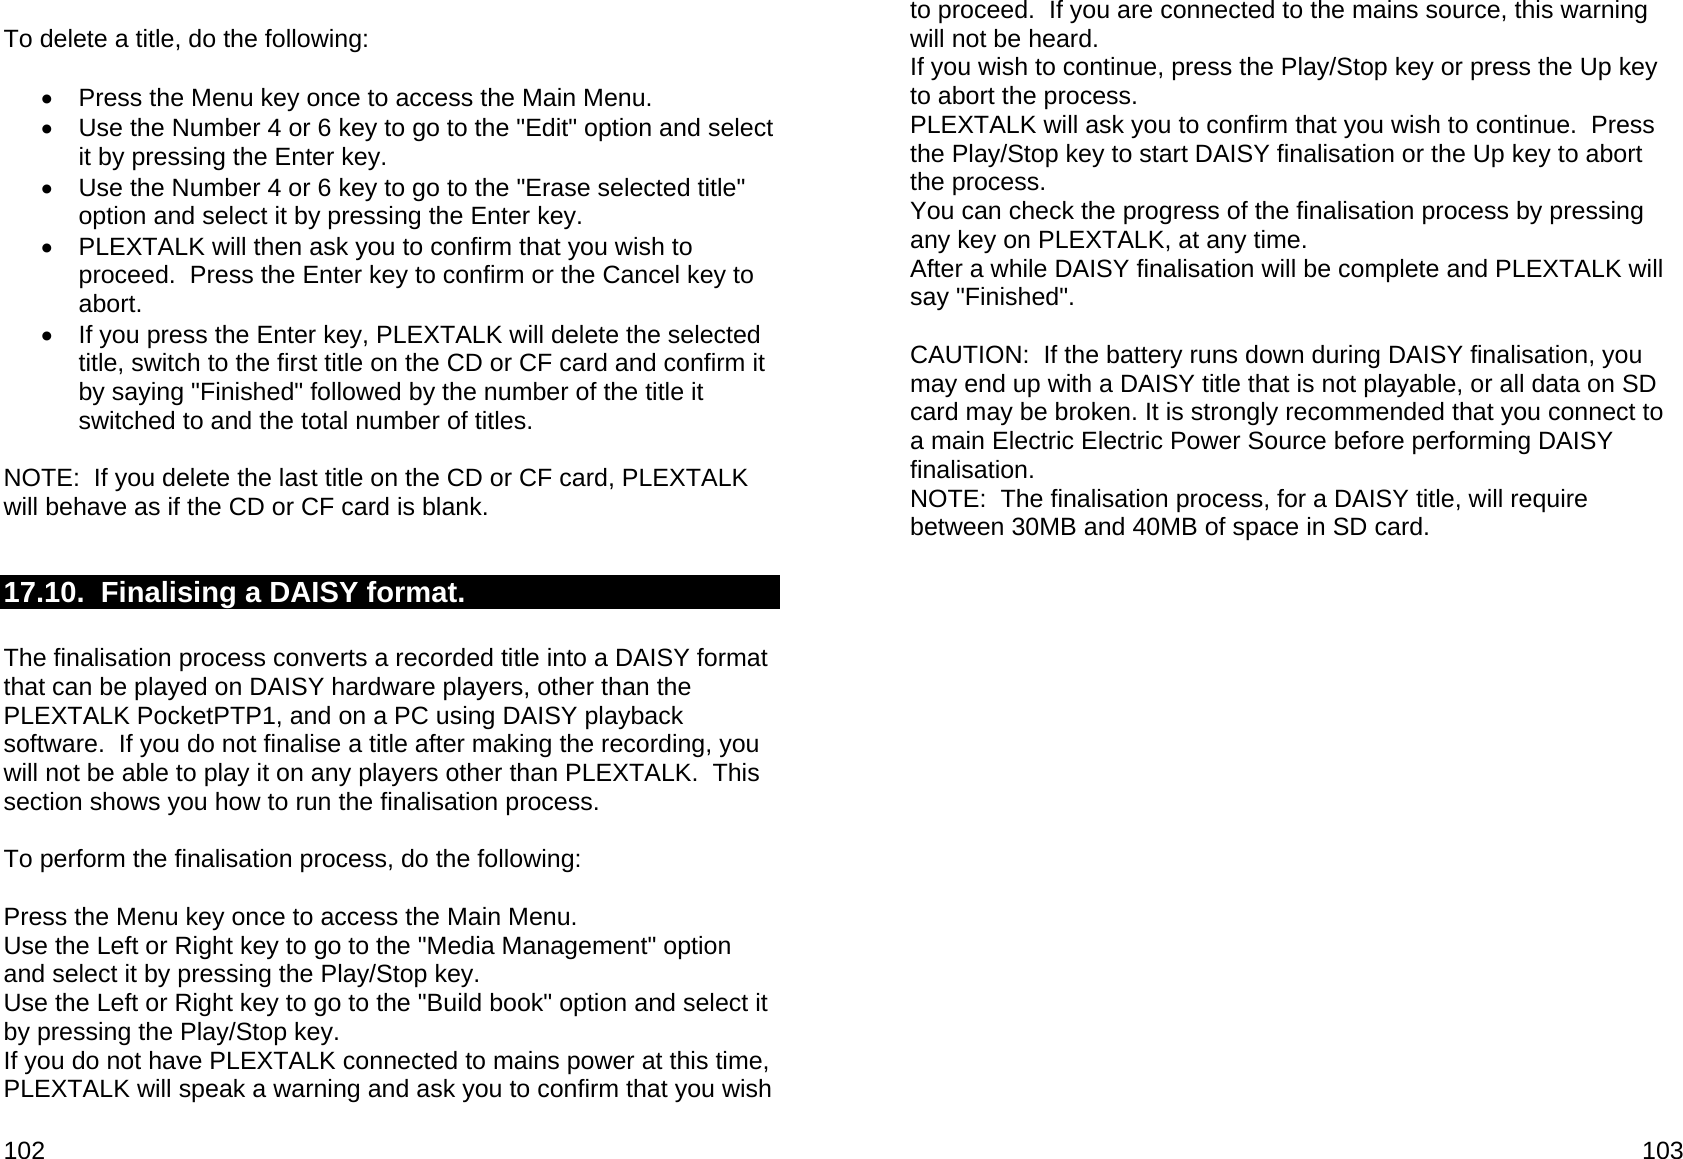
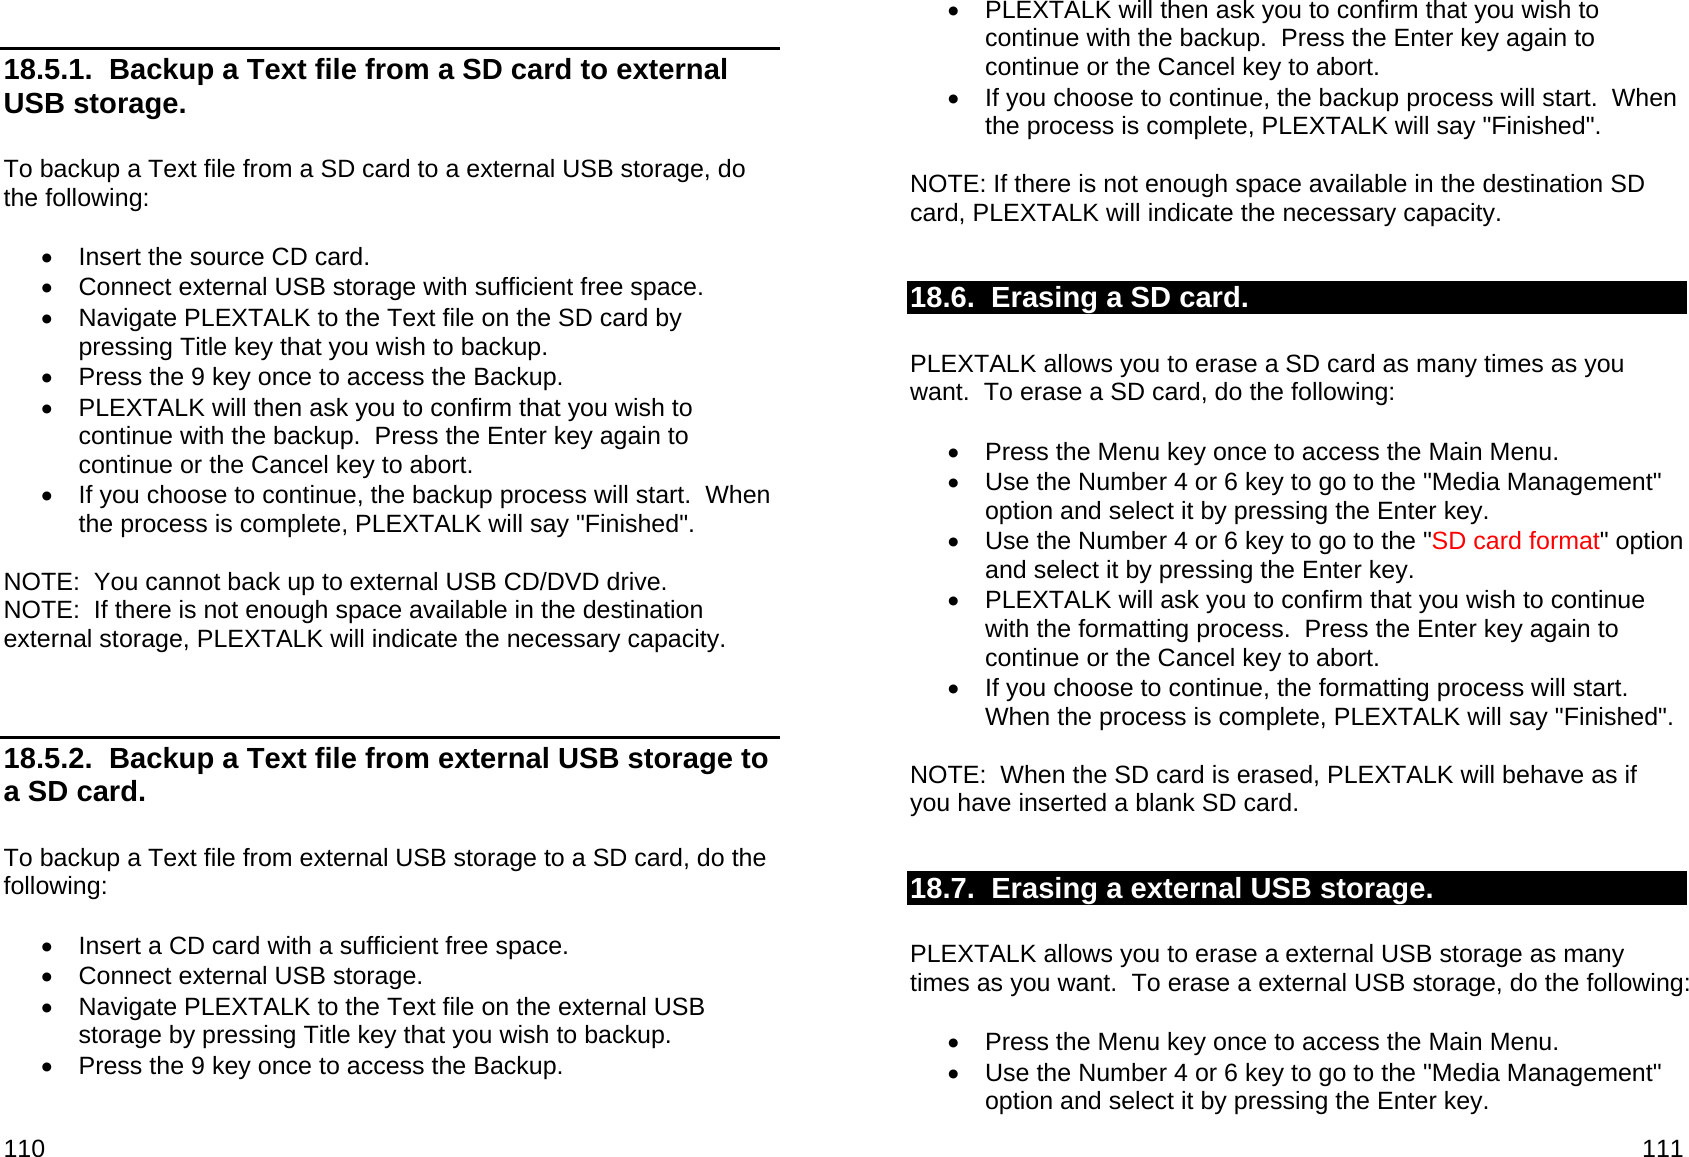
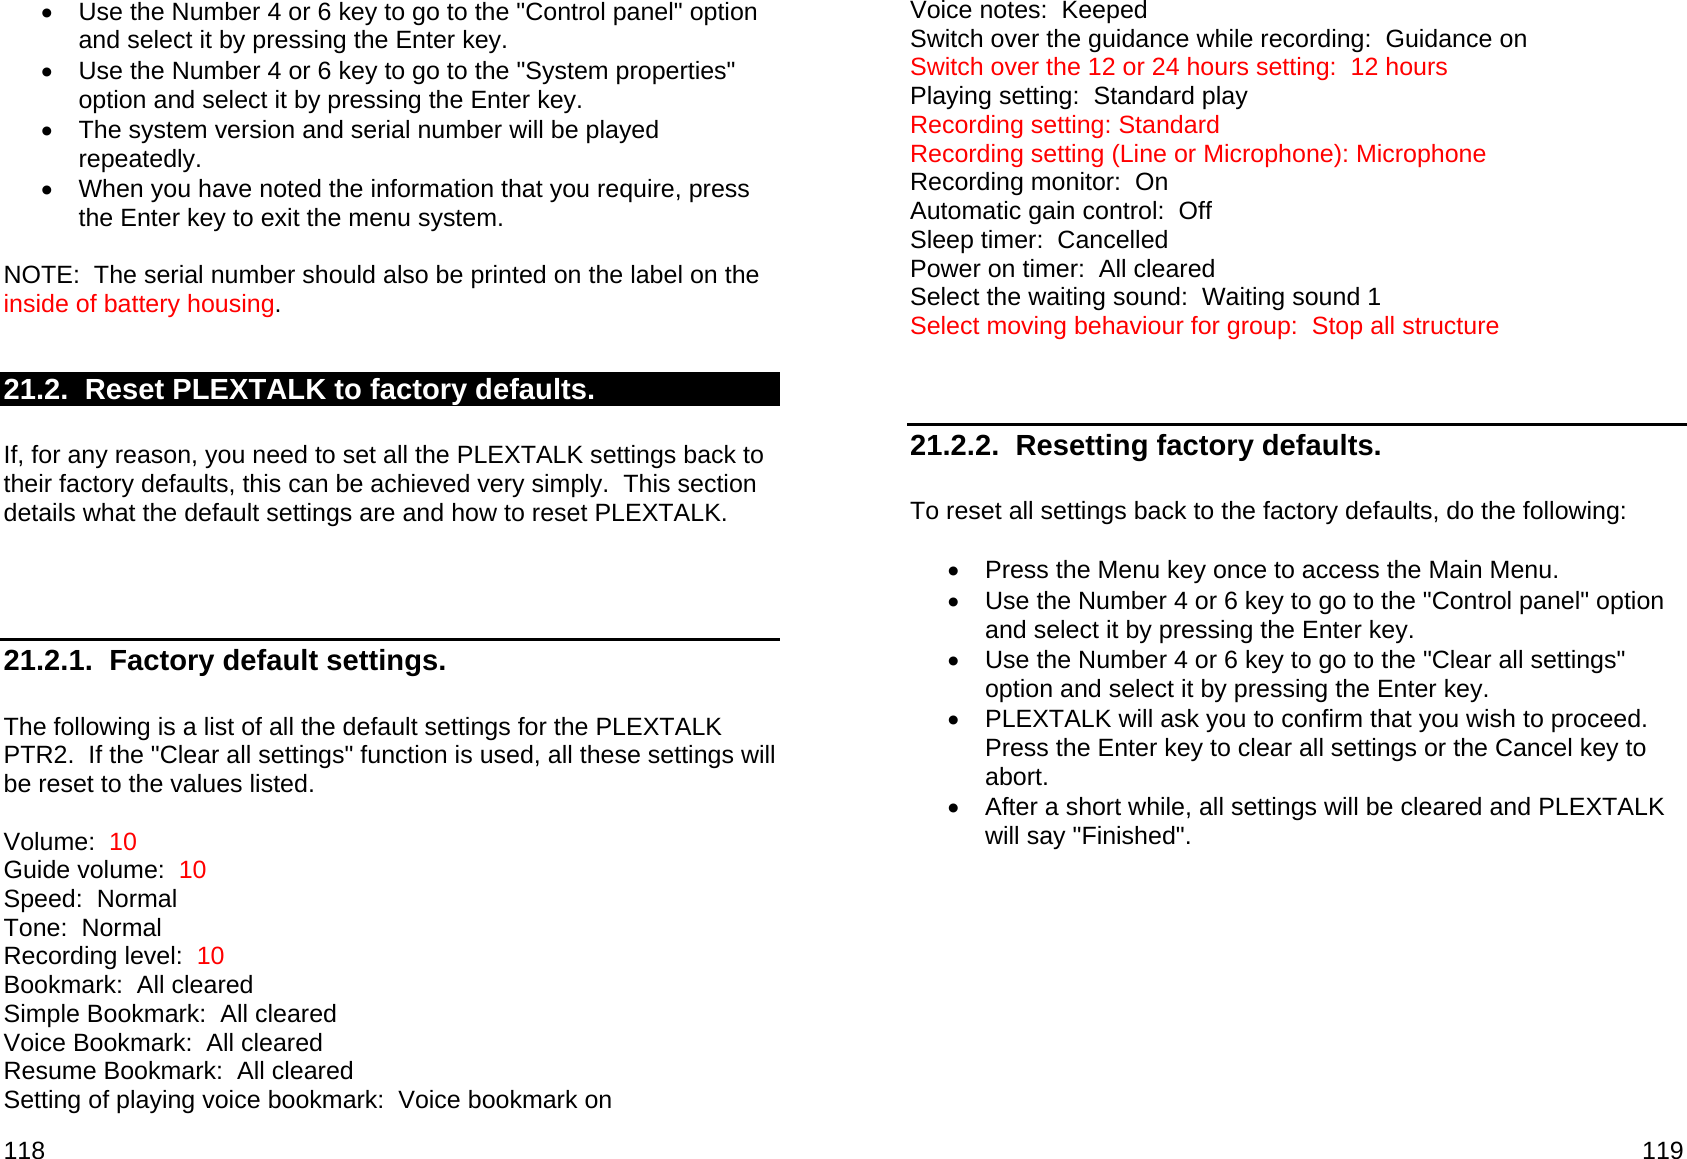
![134 Low Normal High <Change the record speed setting Normal speed Double speed <Split phrase setting when no sound (Book creator mode only) 0.2 seconds 0.4 seconds 0.6 seconds 0.8 seconds 1 second +Switch over the guidance while recording Guidance on Guidance off +Select input device Build-in microphone External microphone Line in **NOTE: If you select “PCM 44.1KHz stereo”, "MP3 256k stereo” or “MP3 128k stereo” as the sound quality, you will be unable to record at double speed. >PLAYING SETTING (when DAISY title is selected) Standard play Repeat between bookmarks Repeat section Repeat title Repeat all titles Repeat random >PLAYING SETTING (when Music CD is selected) Standard play Repeat track Repeat album 135 Repeat random Repeat between bookmarks >PLAYING SETTING (when Audio File CD or Card is selected) Standard play Repeat file Repeat album Repeat all albums Repeat random Repeat between bookmarks >BOOKMARKS +Setting of playing voice bookmark Voice bookmark on Voice bookmark off +Clear all bookmarks in current title [Enter key] Clear: Are you sure? [Enter key] Cleared + Clear all bookmarks [Enter key] Clear: Are you sure? [Enter key] Cleared >POWER ON TIMER +Power on timer 1 -(When Power on timer is not set.) [Enter key] Input time with 4 digits [Enter key] Set -(When Power on timer is already set.) <Switch the timer whether on or off Activate[Enter key] Set Deactivate[Enter key] Set <Setting time of day [Enter key] Input time with 4 digits [Enter key] Set <Clear the time [Enter key] Clear the time: Are you sure?](https://usermanual.wiki/Shinano-Kenshi/PTP1/User-Guide-1003733-Page-67.png)
![136 [Enter key] Cleared +Power on timer 2 (Same as Power on timer 1.) >NOTEPAD (For starting to record a voice note) [Record Key] Adjust the recording level. [Press and hold Record Key] Record the note. (For changing the notepad setting) [Information key] +Set date select type of notepad -Setting date Input date with 4 digits Input year Input time with 4 digits -Yearly Input date with 4 digits Input time with 4 digits -Monthly Input date Input time with 4 digits -Daily Input time with 4 digits -Set each day Press 4 or 6 key to select the day of week. Press 2 or 8 key to set ON or OFF. Input time with 4 digits [Heading key] +Reminder On Off [Page key] +Select erase notepad Erase selected notepad Erase all previous notepads. Erase all notepads. [Bookmark key] +Export into DAISY 137 -Select target media. Disc Card >CALCULATOR Addition (Plus): Information Key Subtraction (Minus): Heading Key Multiplication (Multiply): Page Key Division (Divided by): Bookmark Key Equal: Enter Key Clear: Cancel Key >MEDIA MANAGEMENT +Media information Type of media, Used space +Finalize CD Additional recording and editing enabled No additional recording and editing +Erase CD-RW +Erase Card +Search for edited information in the disc +Erase unnecessary audio file >CONTROL PANEL +Clear all settings +System properties System version: XX, Serial number: XX +Select the waiting sound Waiting sound 1 Waiting sound 2 No waiting sound +Switch over the 12 or 24 hours setting 12 hours 24 hours +Allocation of the memory Voice bookmark: 30 minutes. Notepad: 0 minutes.](https://usermanual.wiki/Shinano-Kenshi/PTP1/User-Guide-1003733-Page-68.png)