Shinano Kenshi WNAS Giga NAS Landisk User Manual Possible NAS
Shinano Kenshi Co., Ltd. Giga NAS Landisk Possible NAS
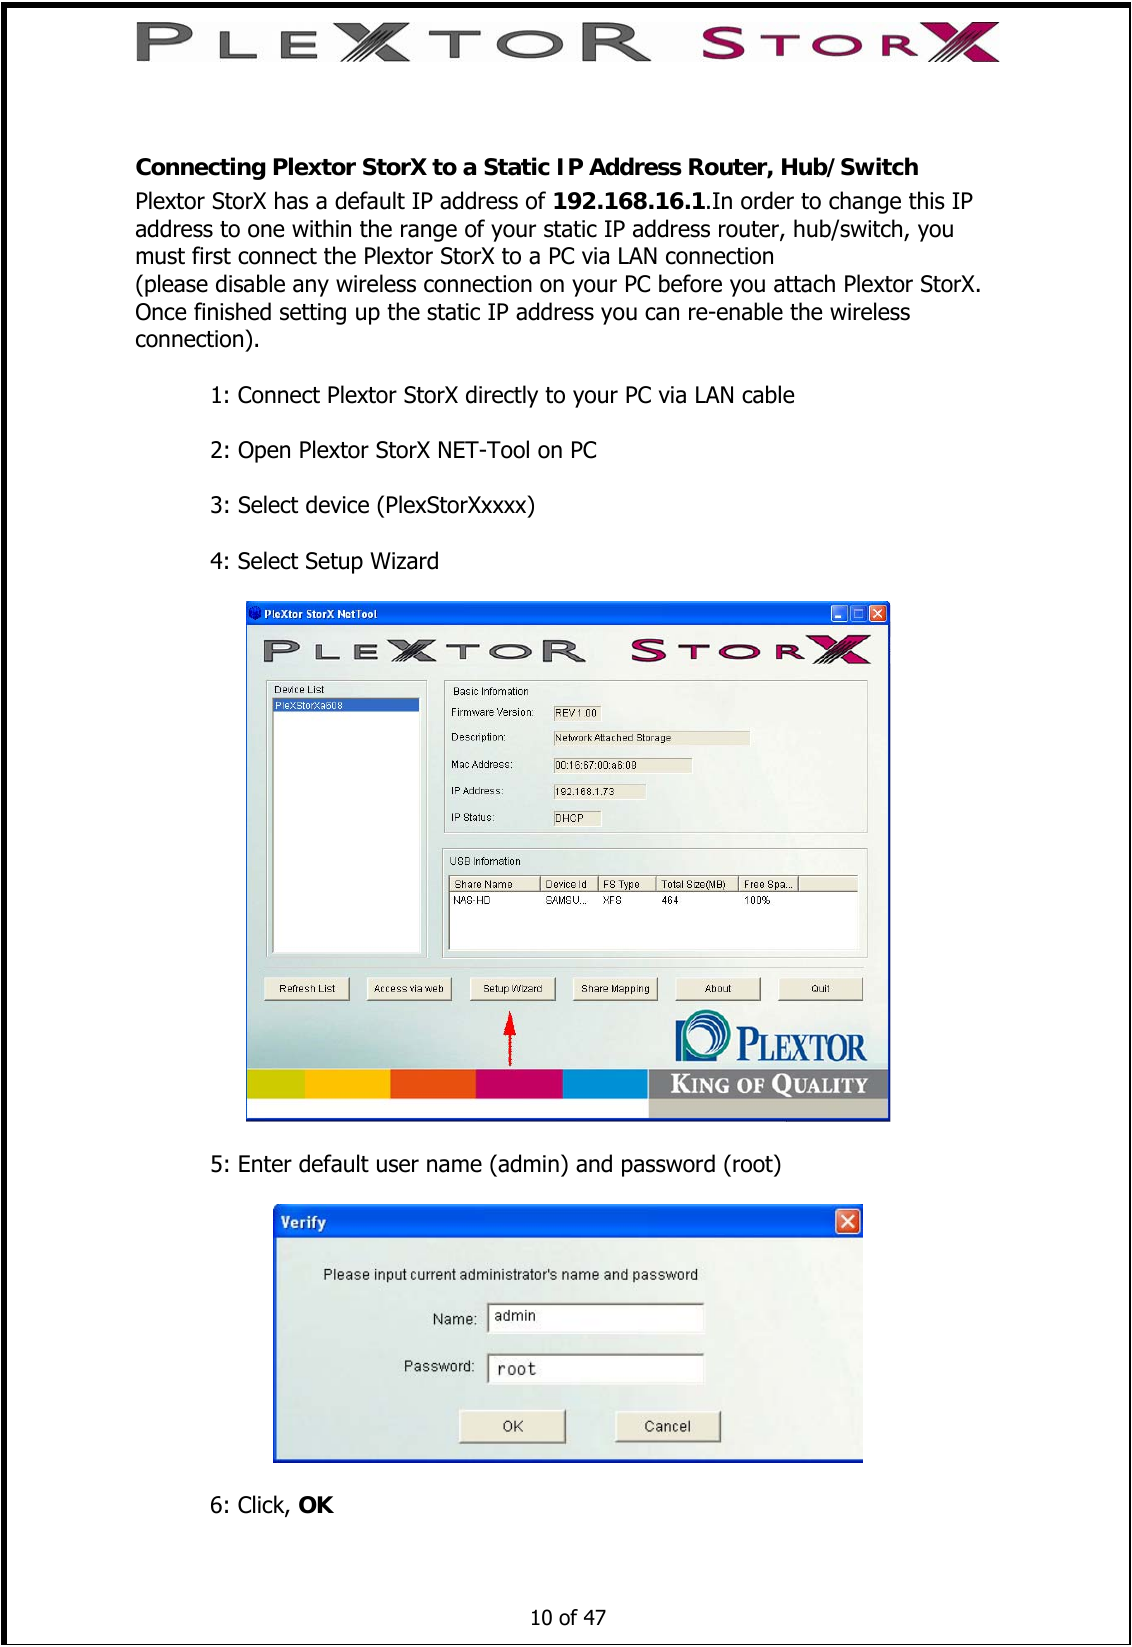
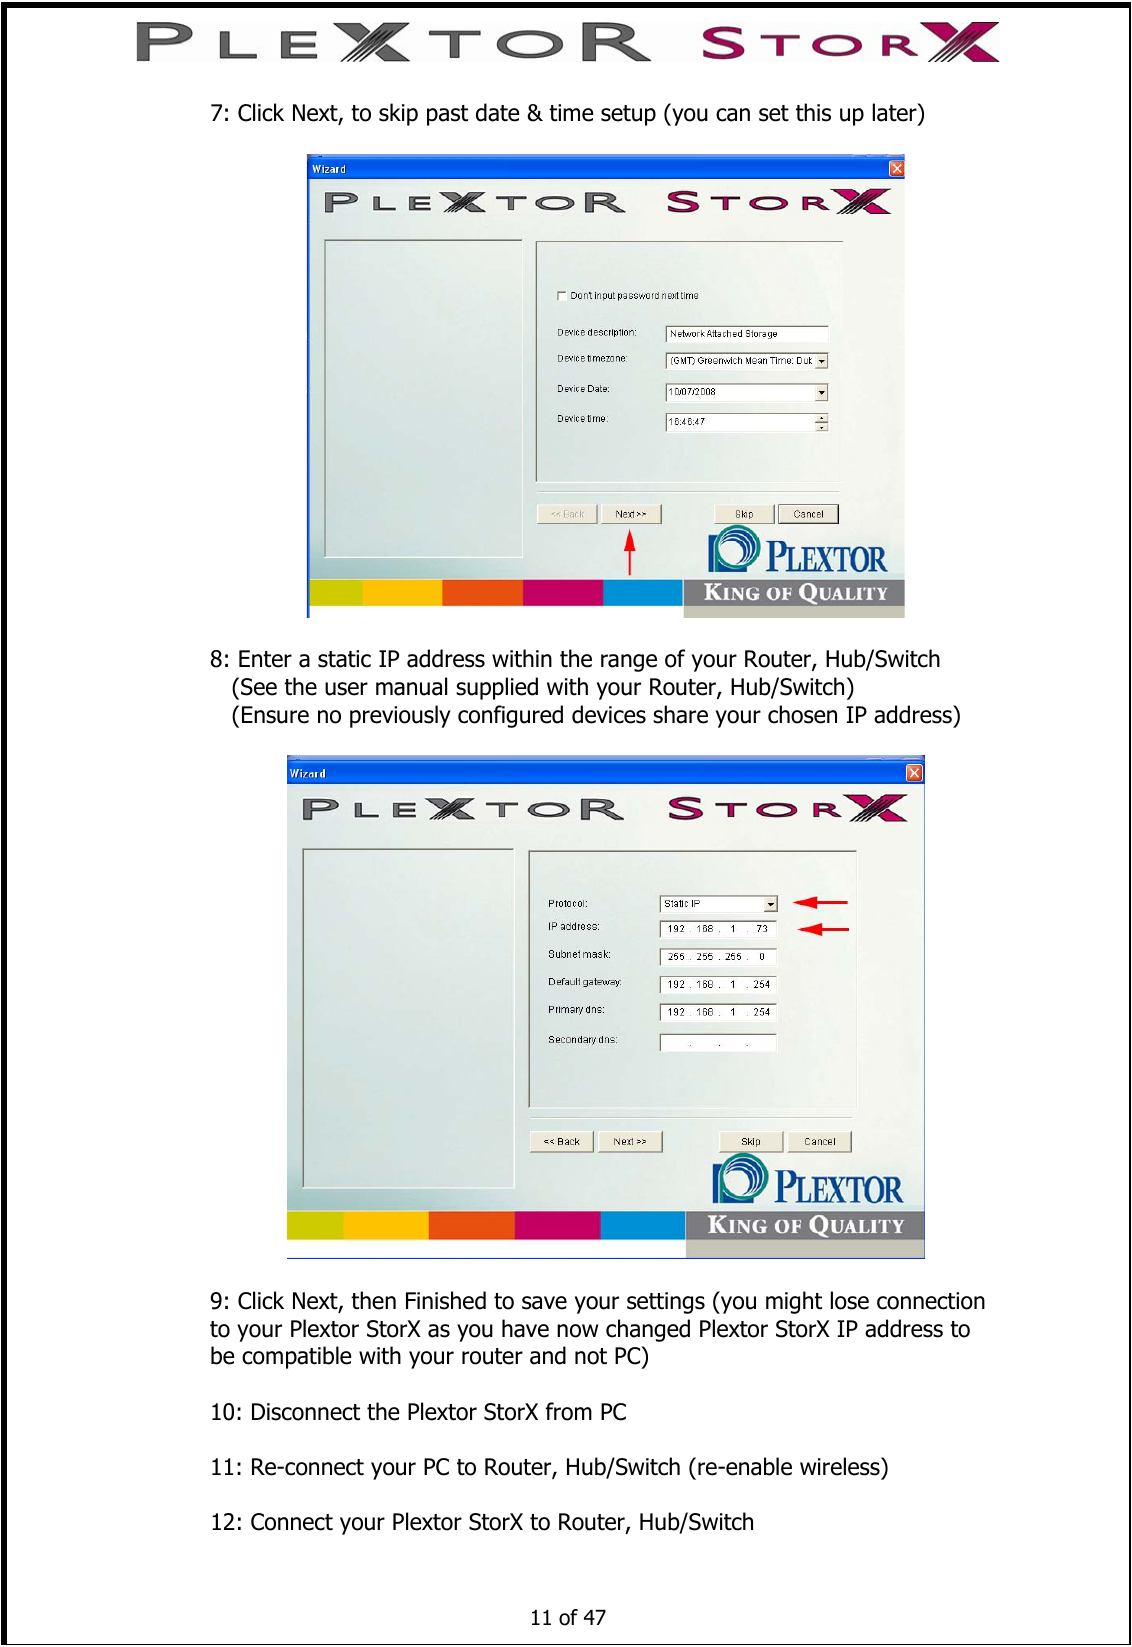
UserManual.wiki
>
Shinano Kenshi
>
WNAS User Manual
manual
Navigation menu
Upload a User Manual
Namespaces
Wiki Guide
HTML
PDF
Info
Views
User Manual
Discussion / Help
Navigation
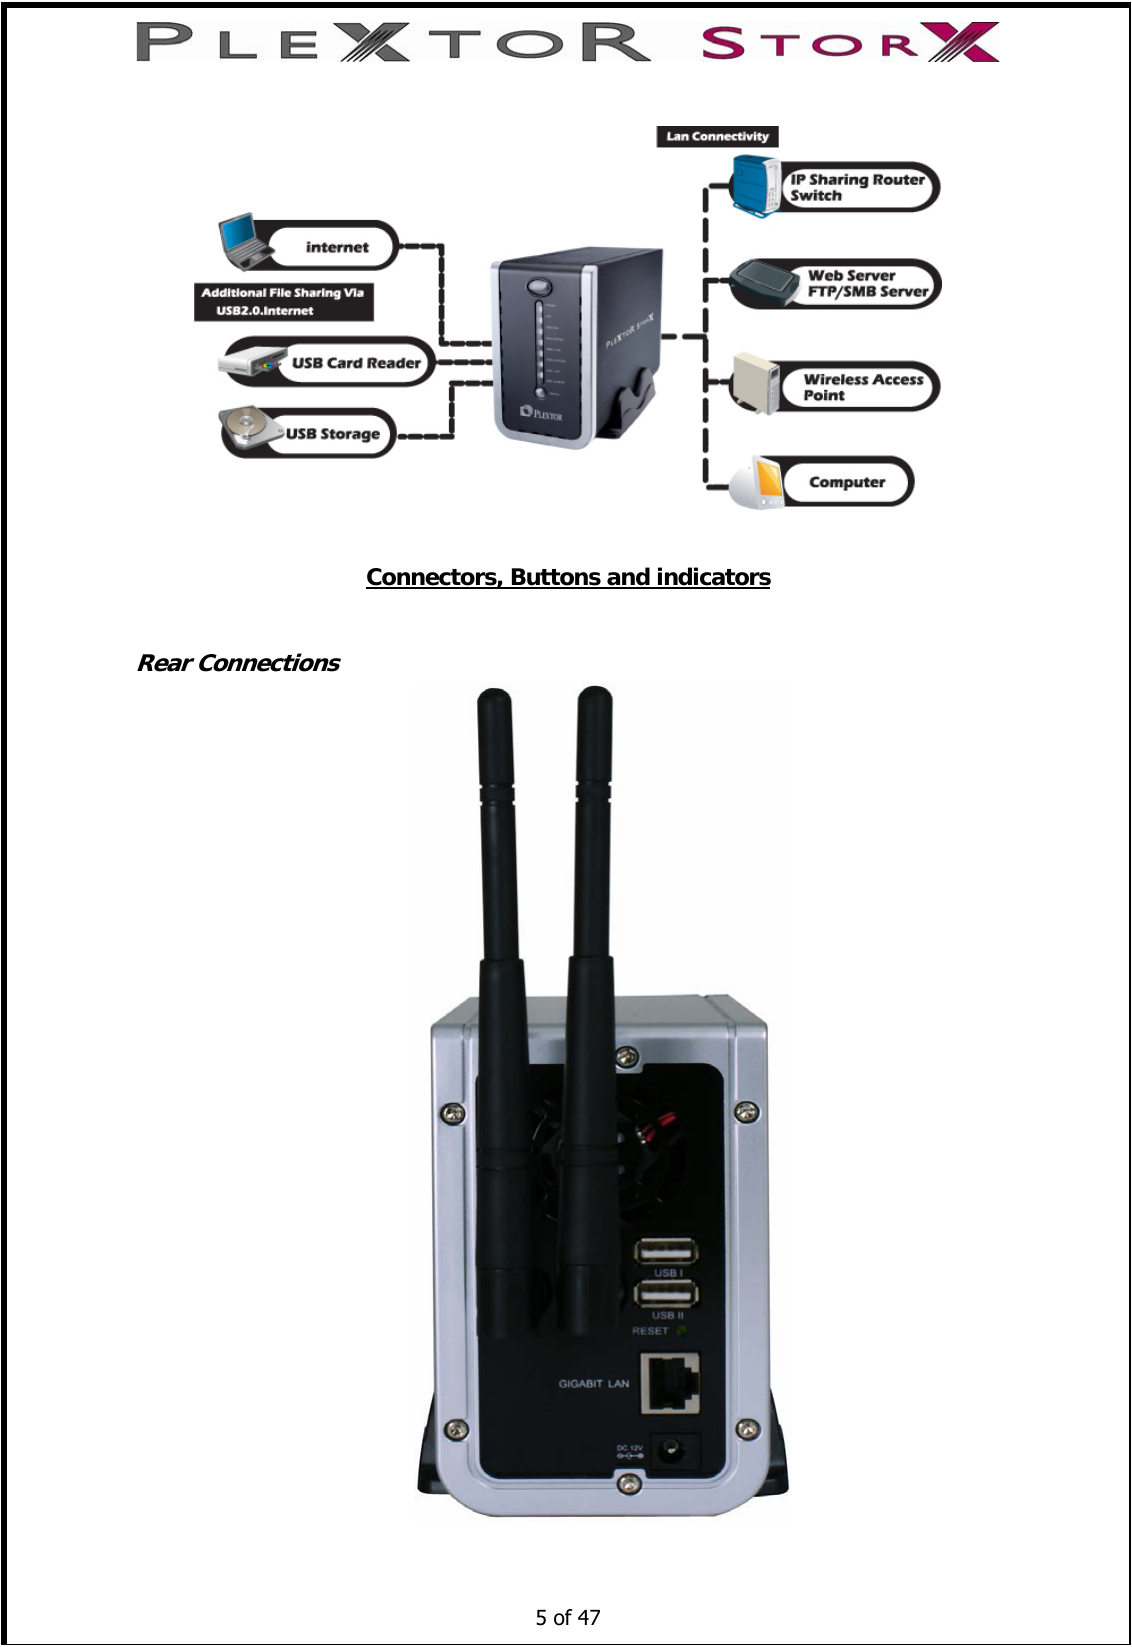
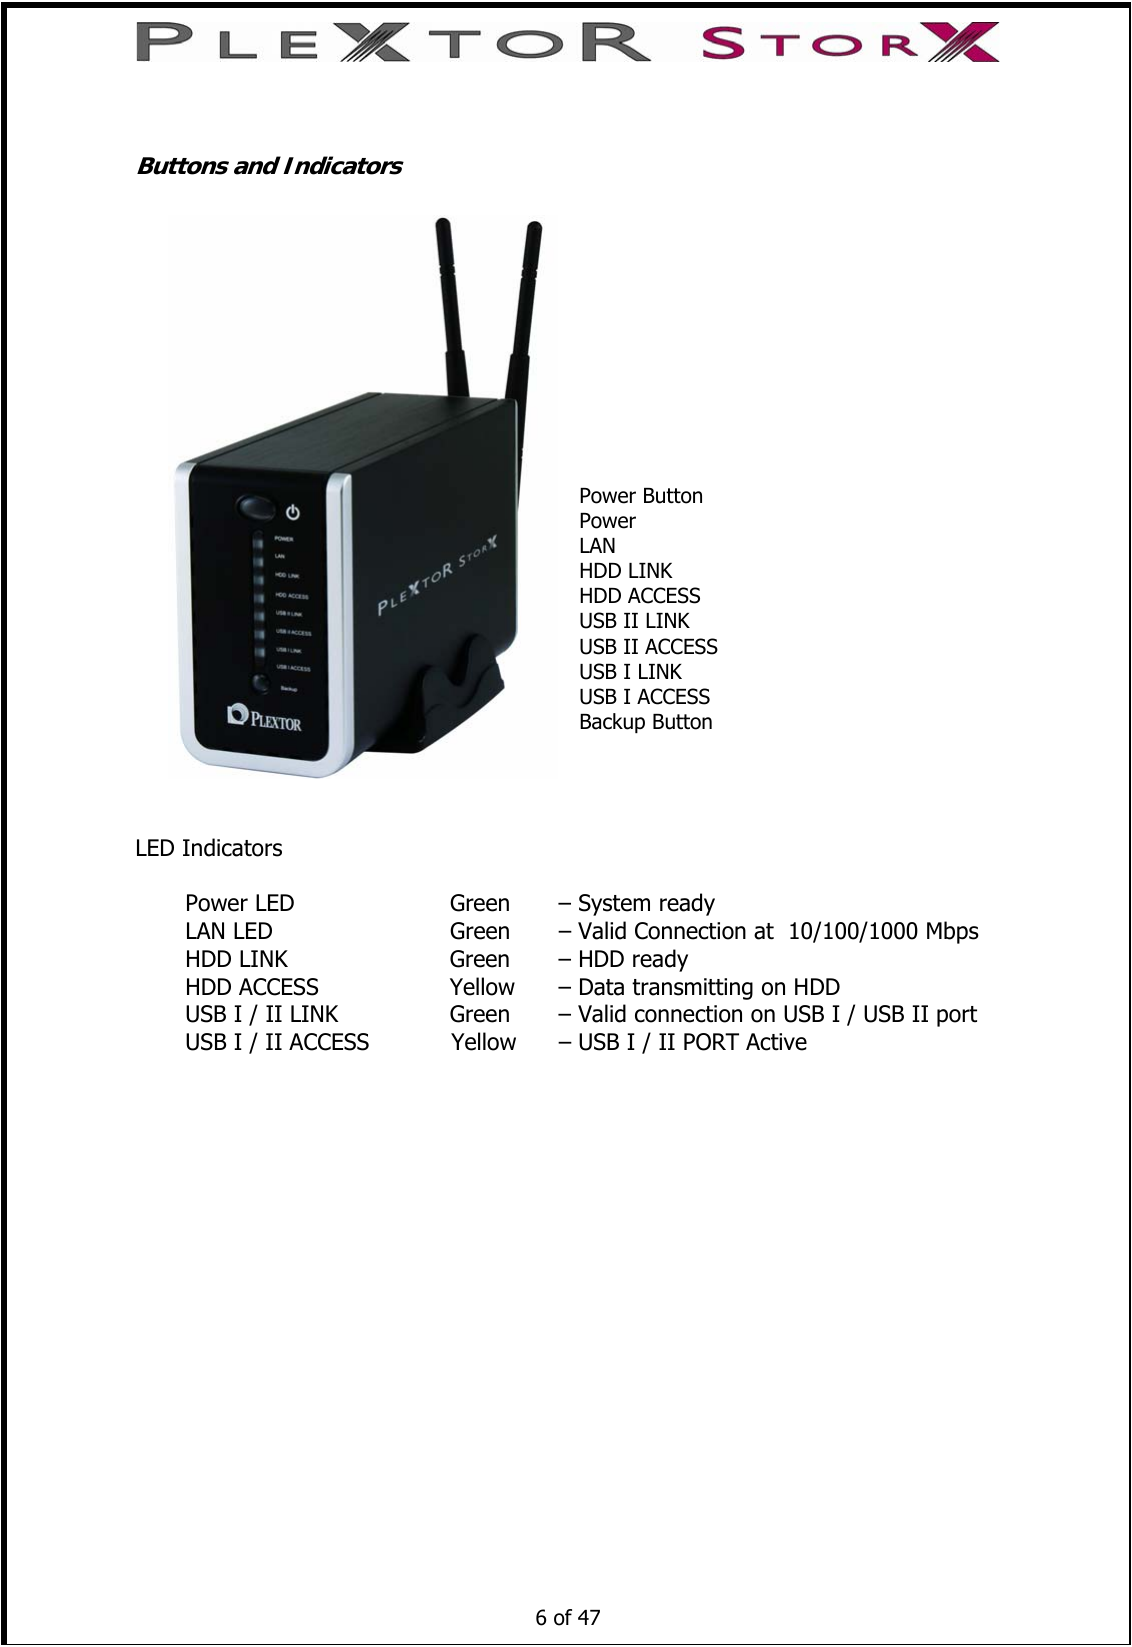
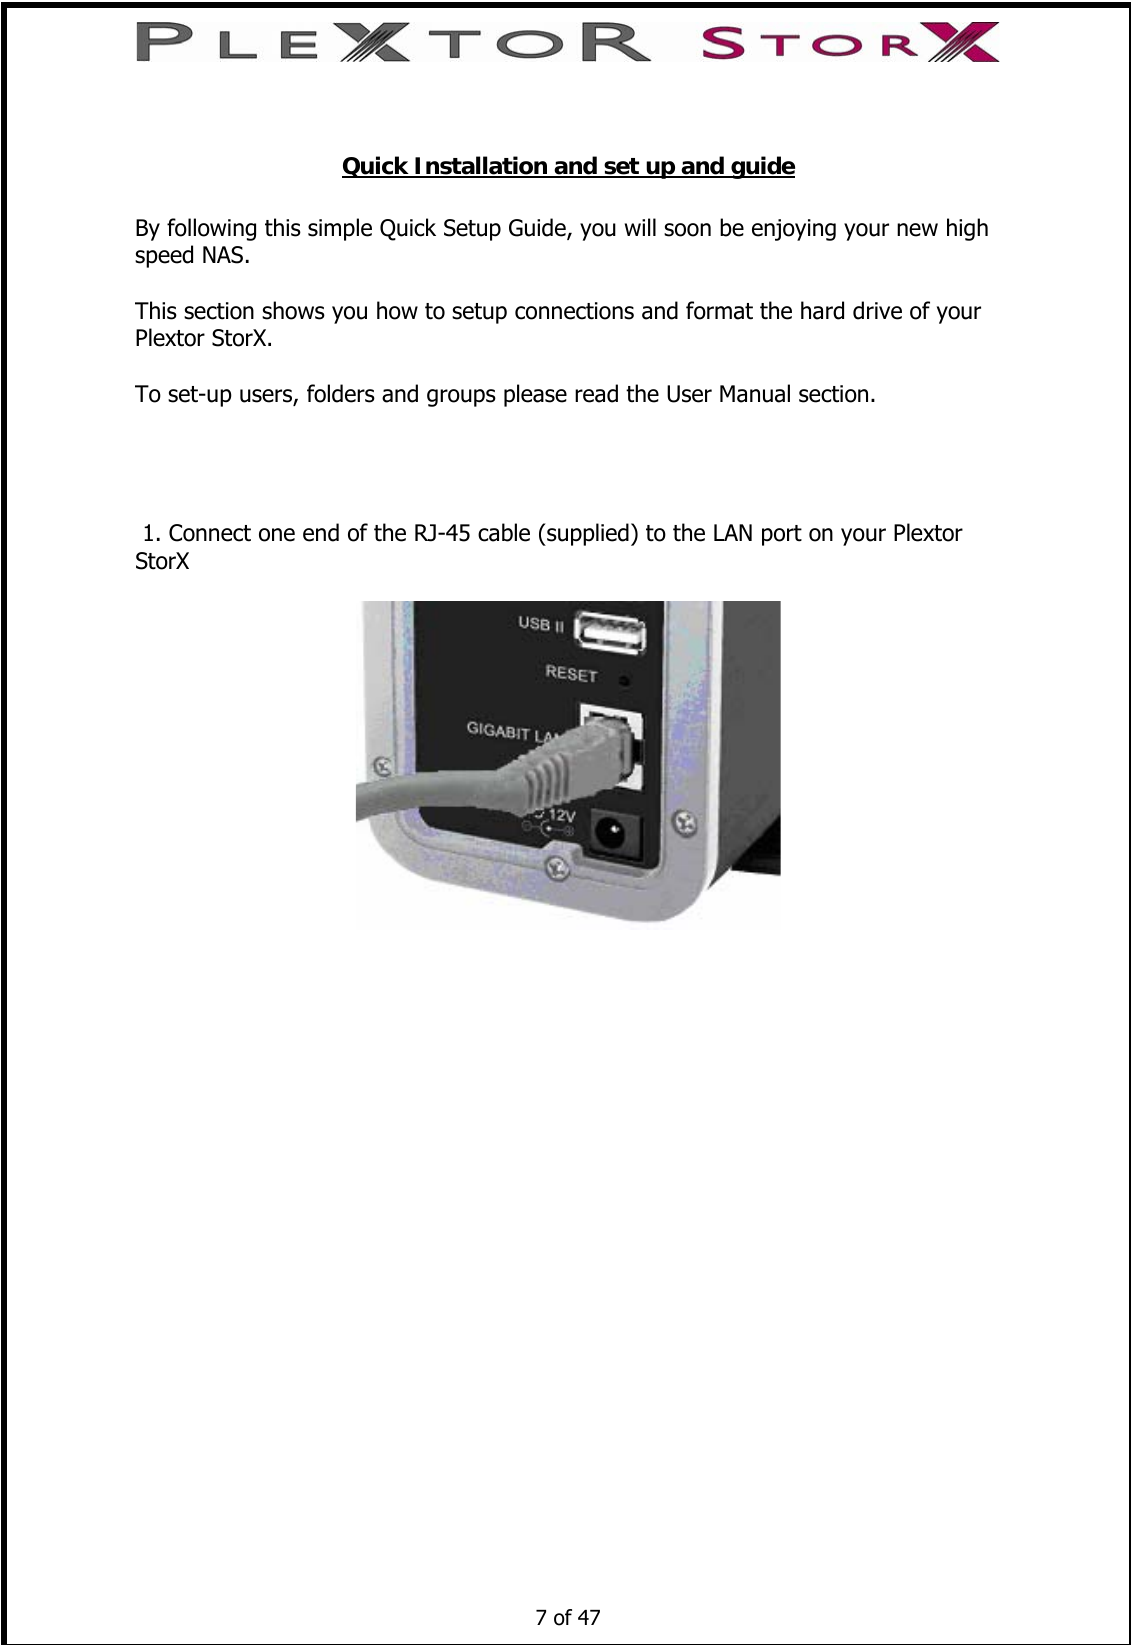
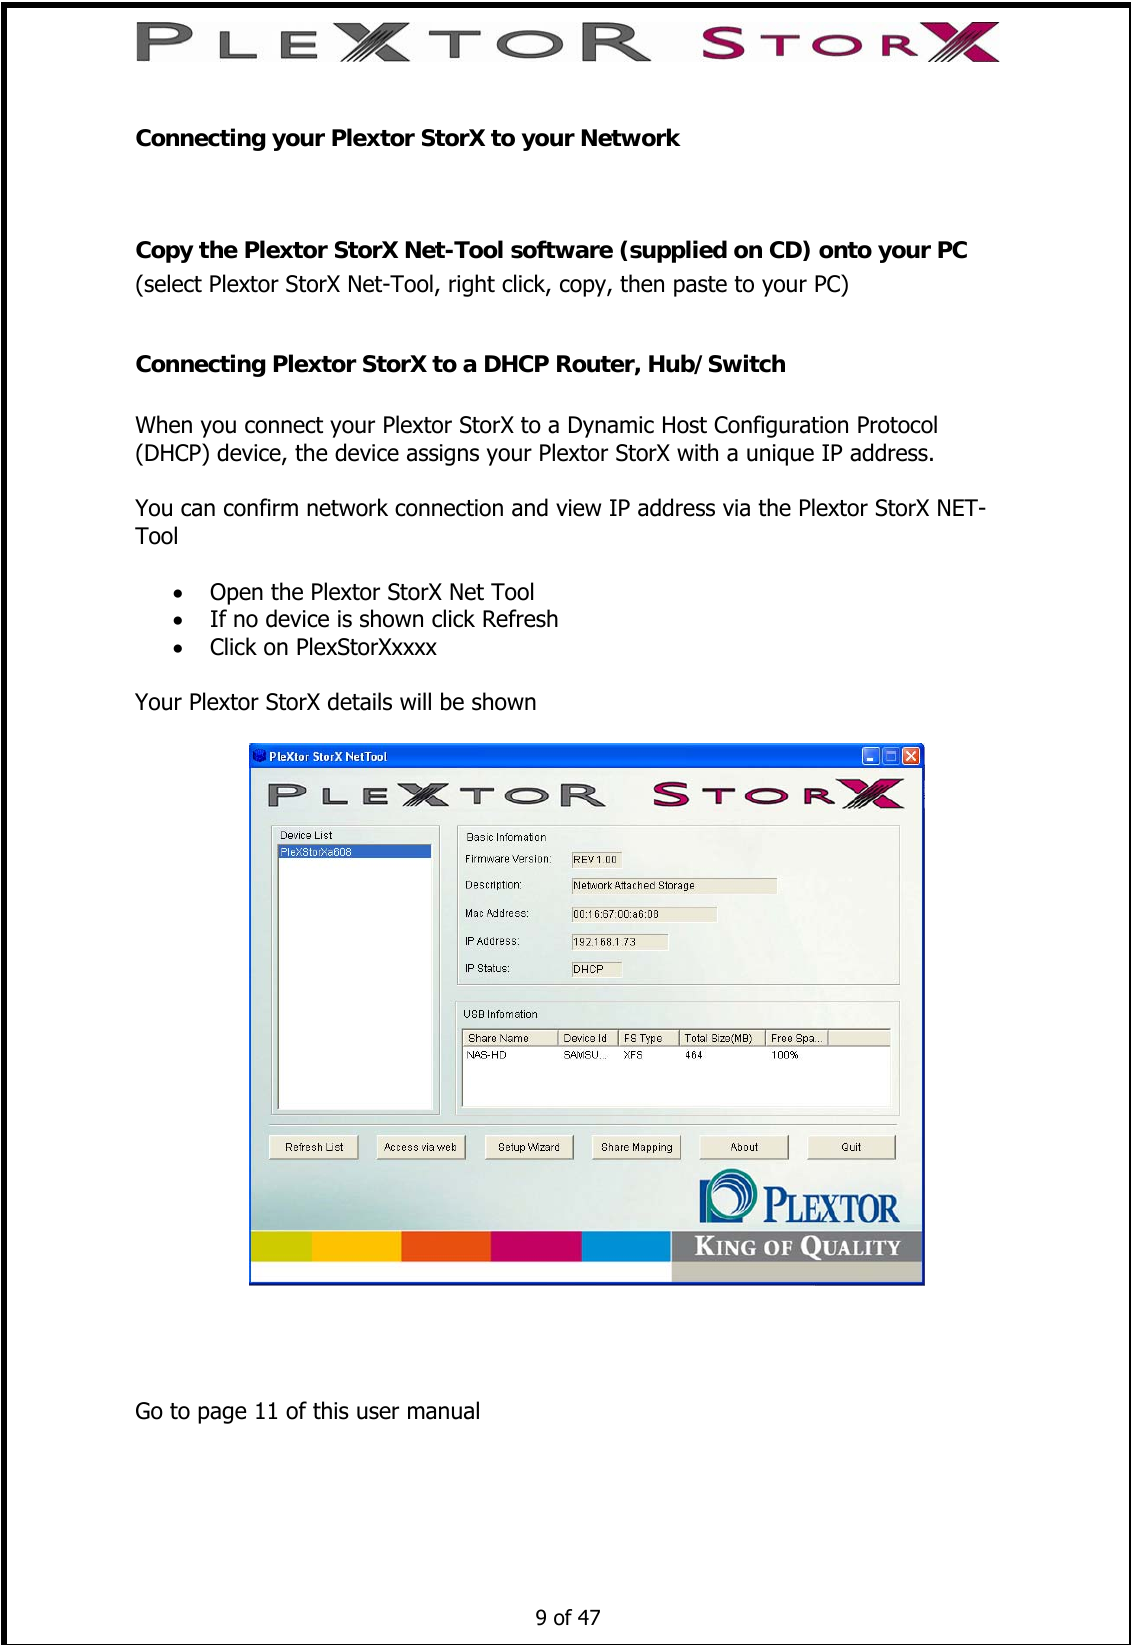
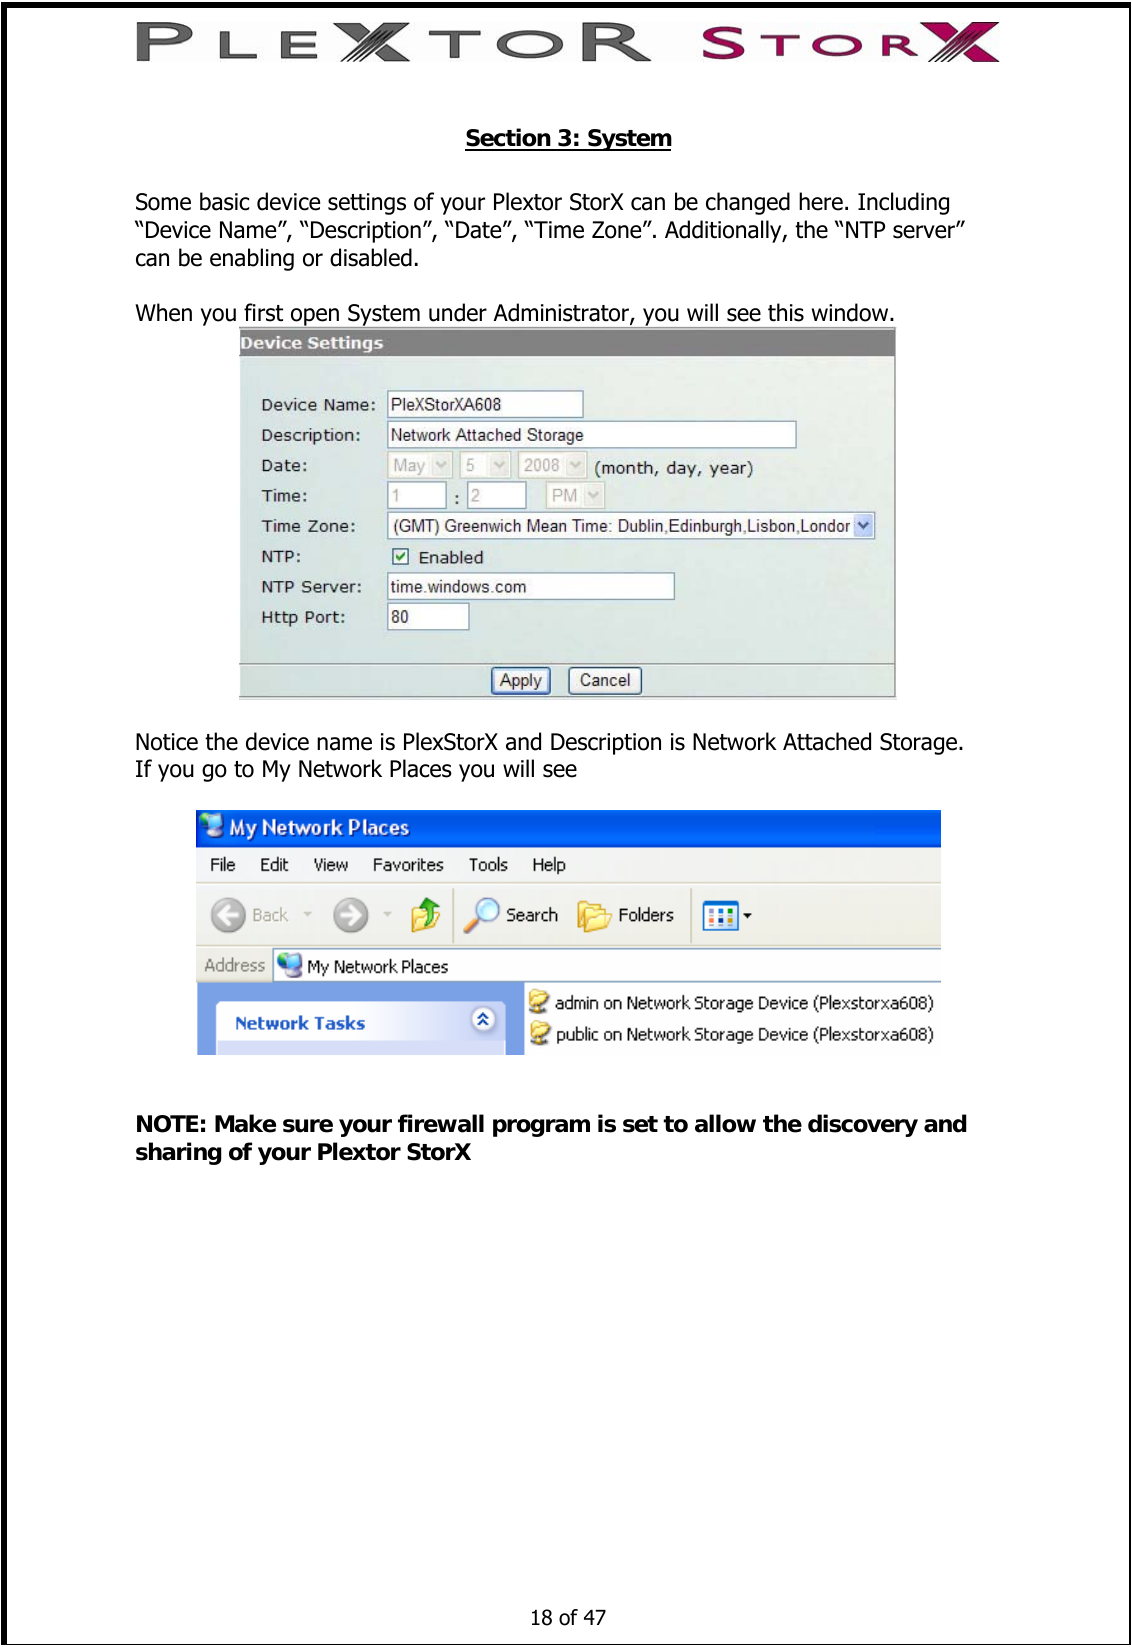
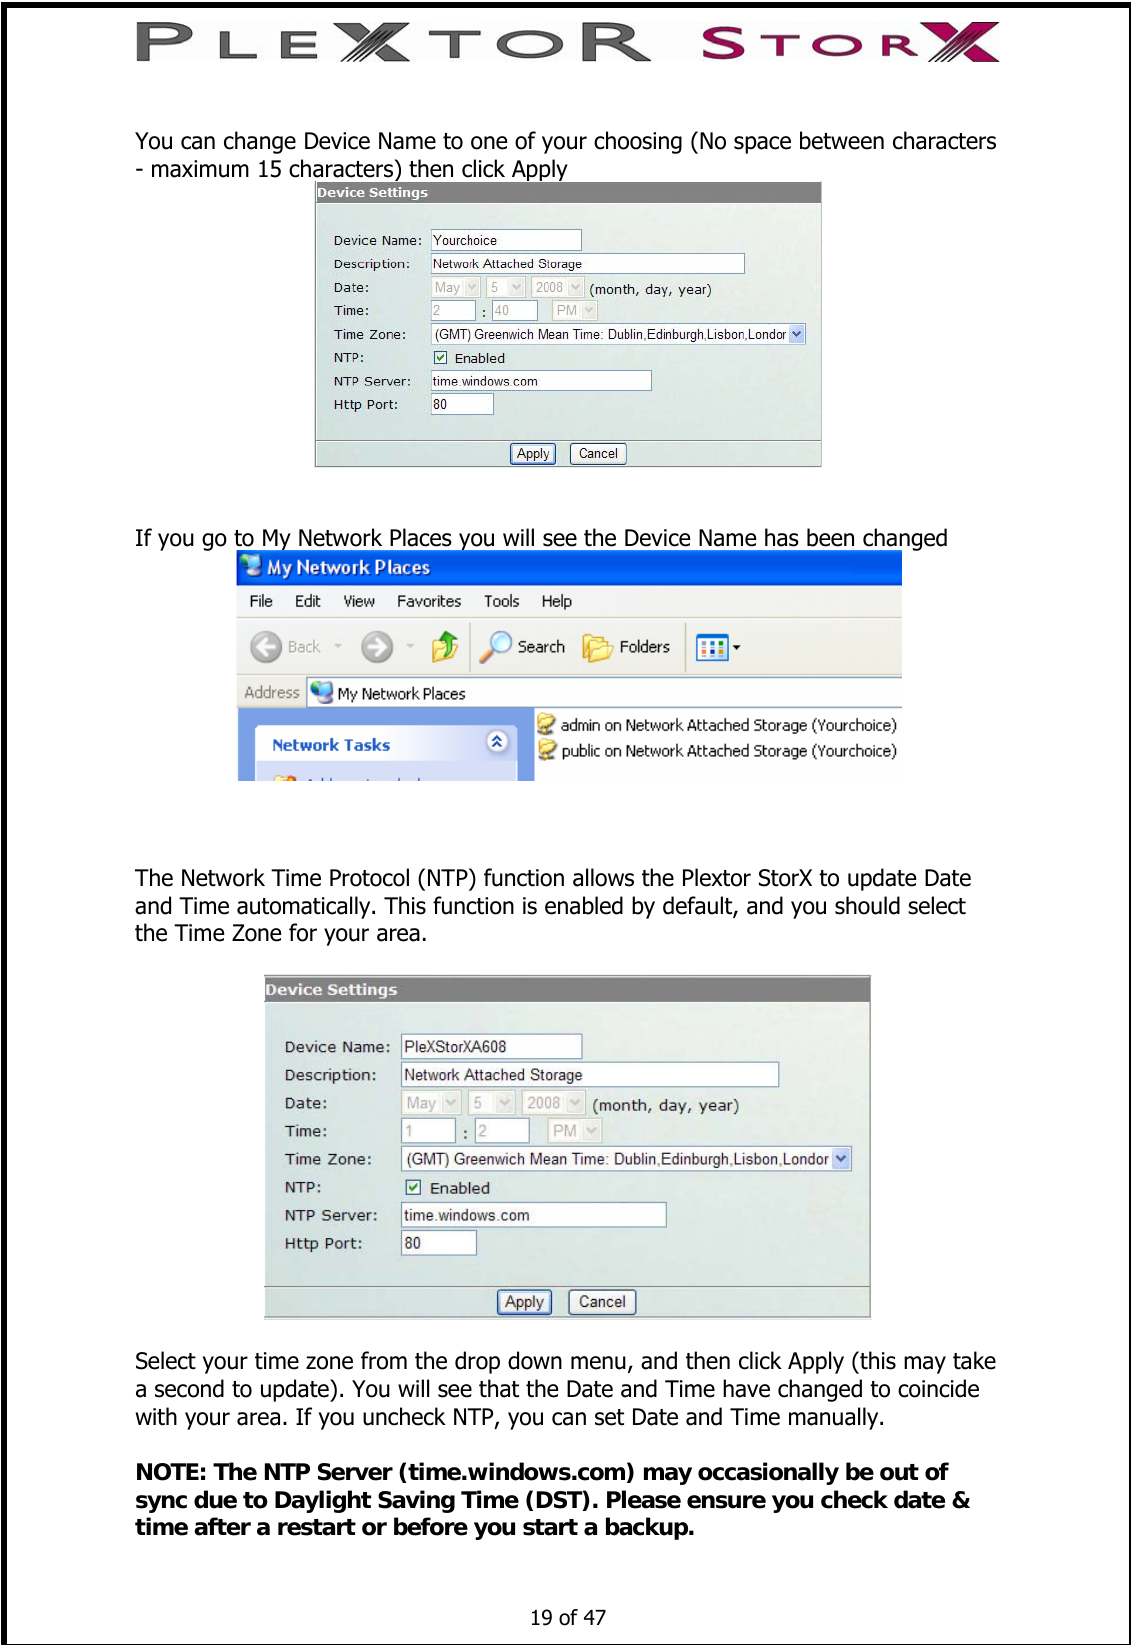
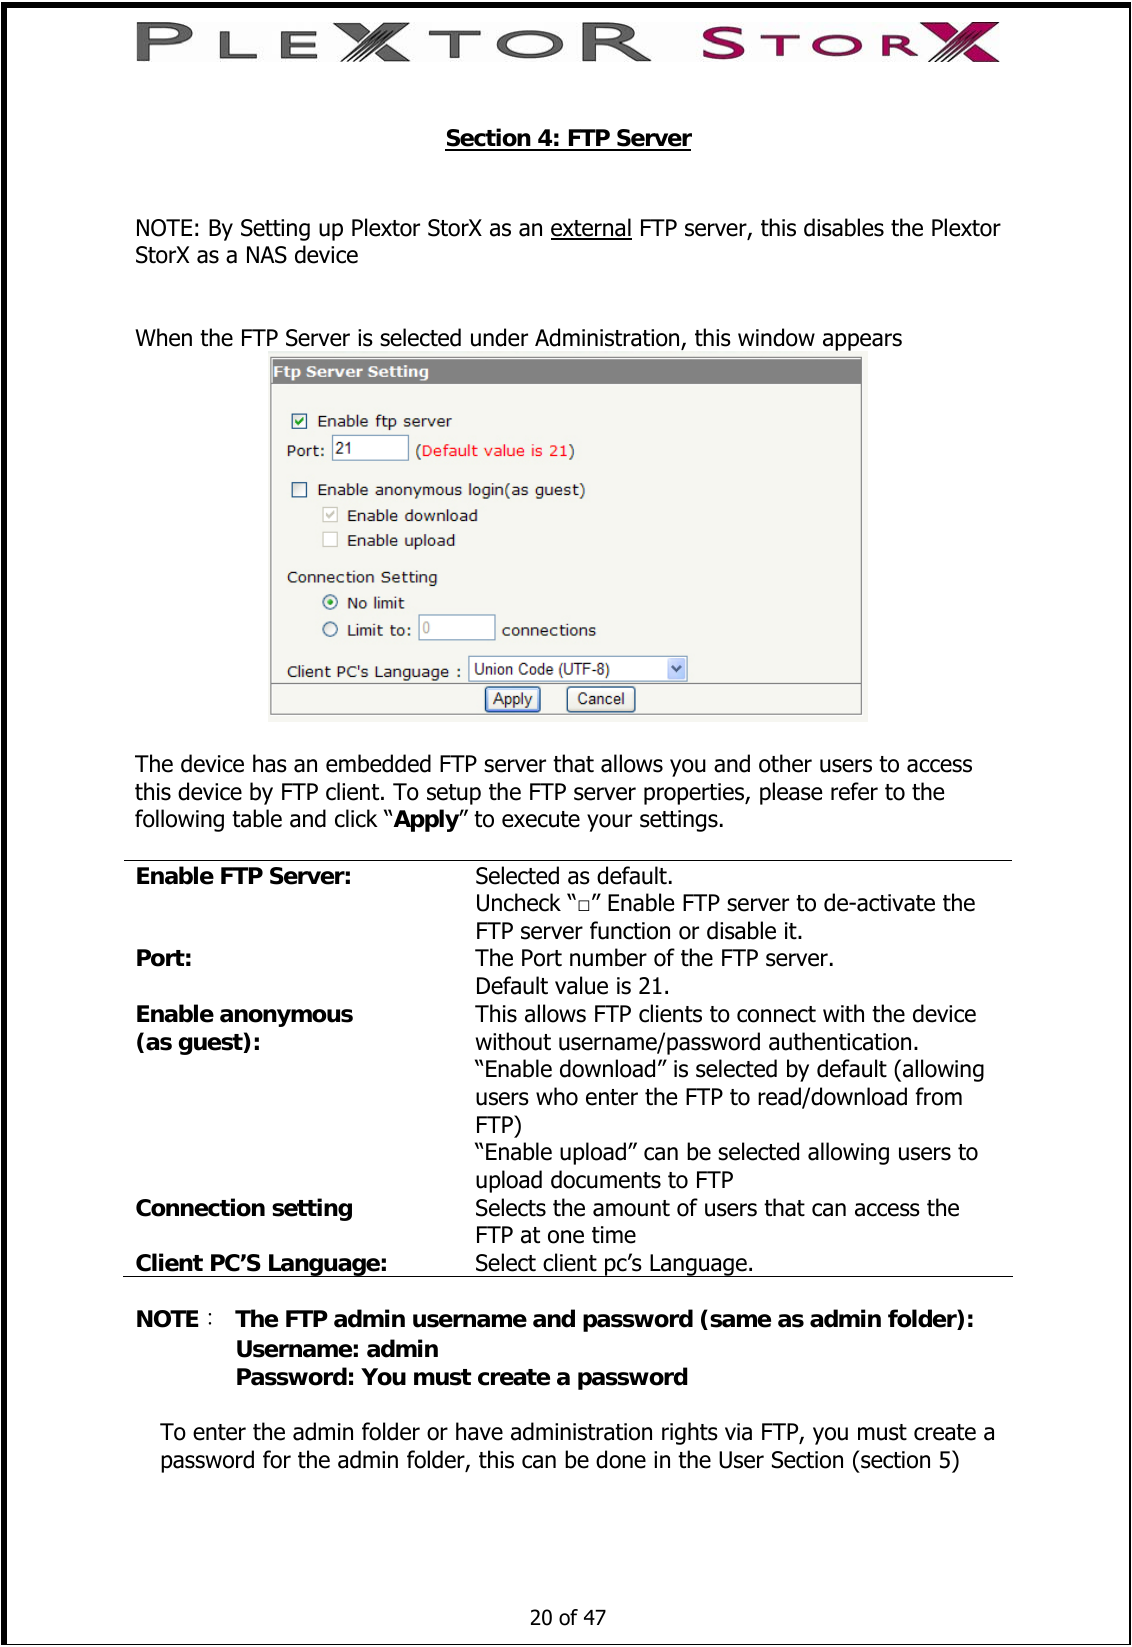
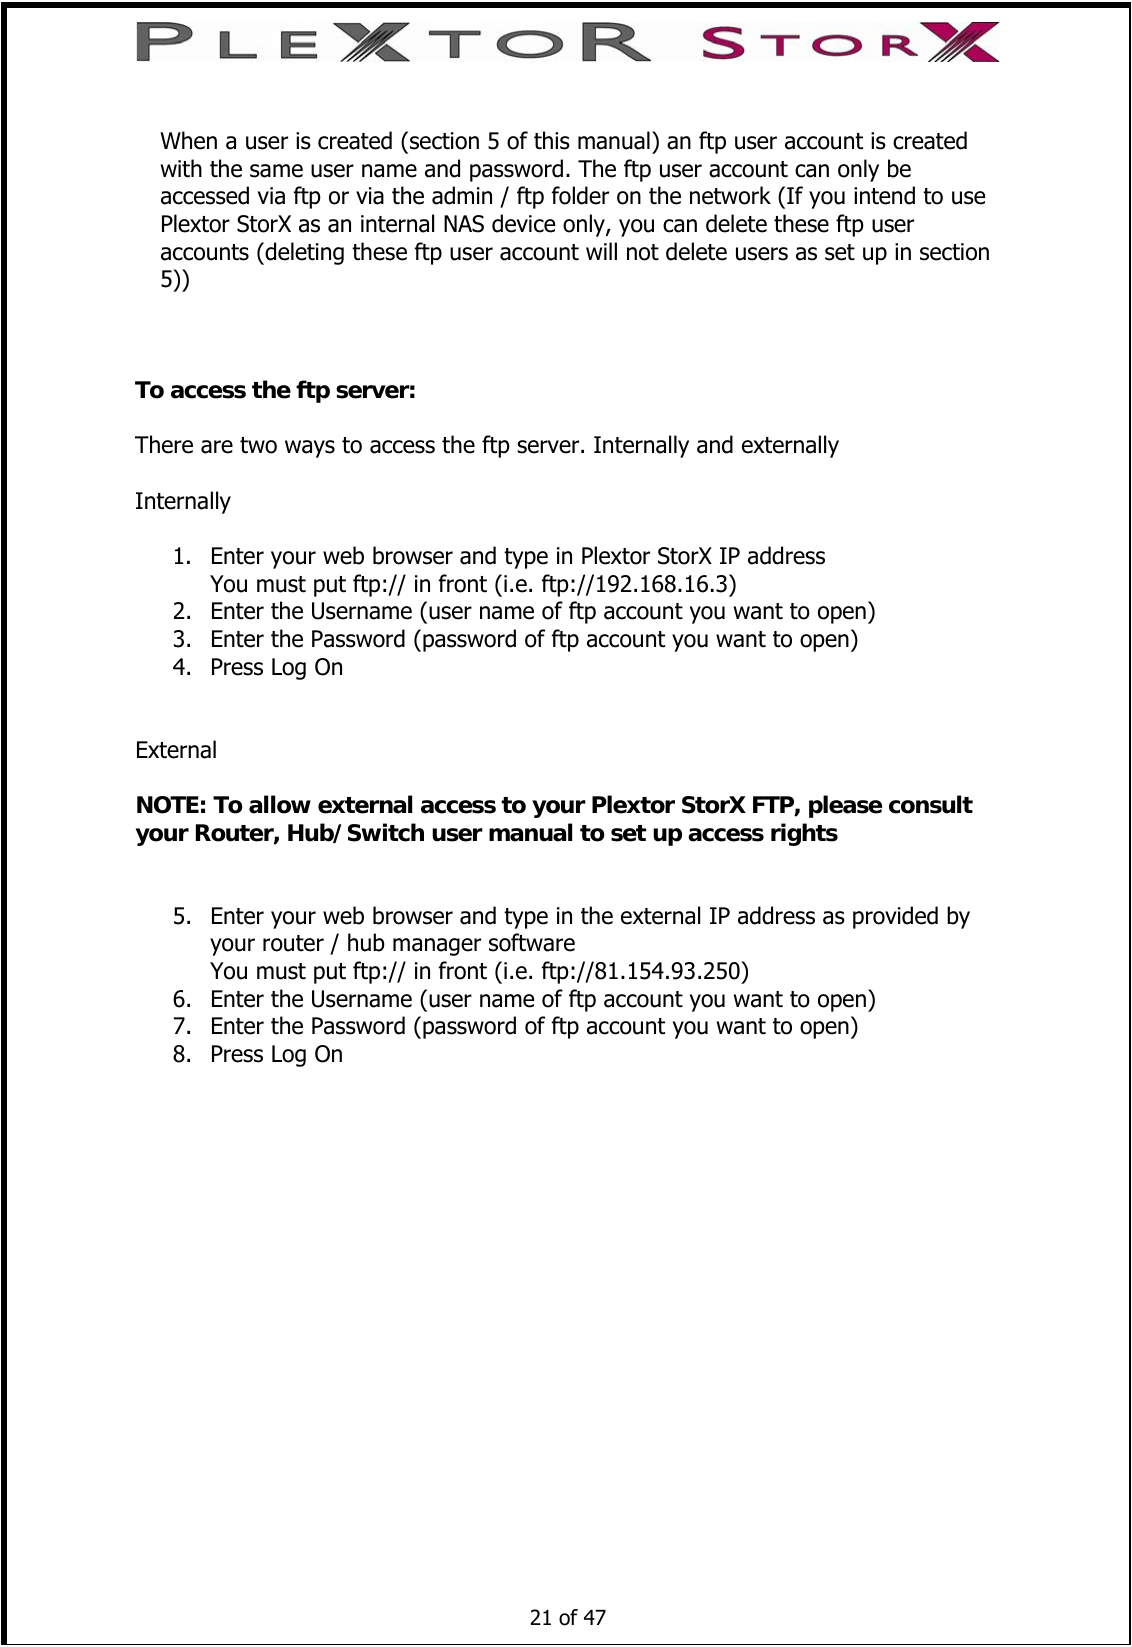
![[ WirelessNetwork Attached Storage (NAS) From Plextor ]V1.02Includes☆ Features Description ☆ Quick Install ☆ Detailed Setup Guide ☆ Tools Guide 1 of 47 Giga NAS Landisk](https://usermanual.wiki/Shinano-Kenshi/WNAS/User-Guide-1069984-Page-1.png)

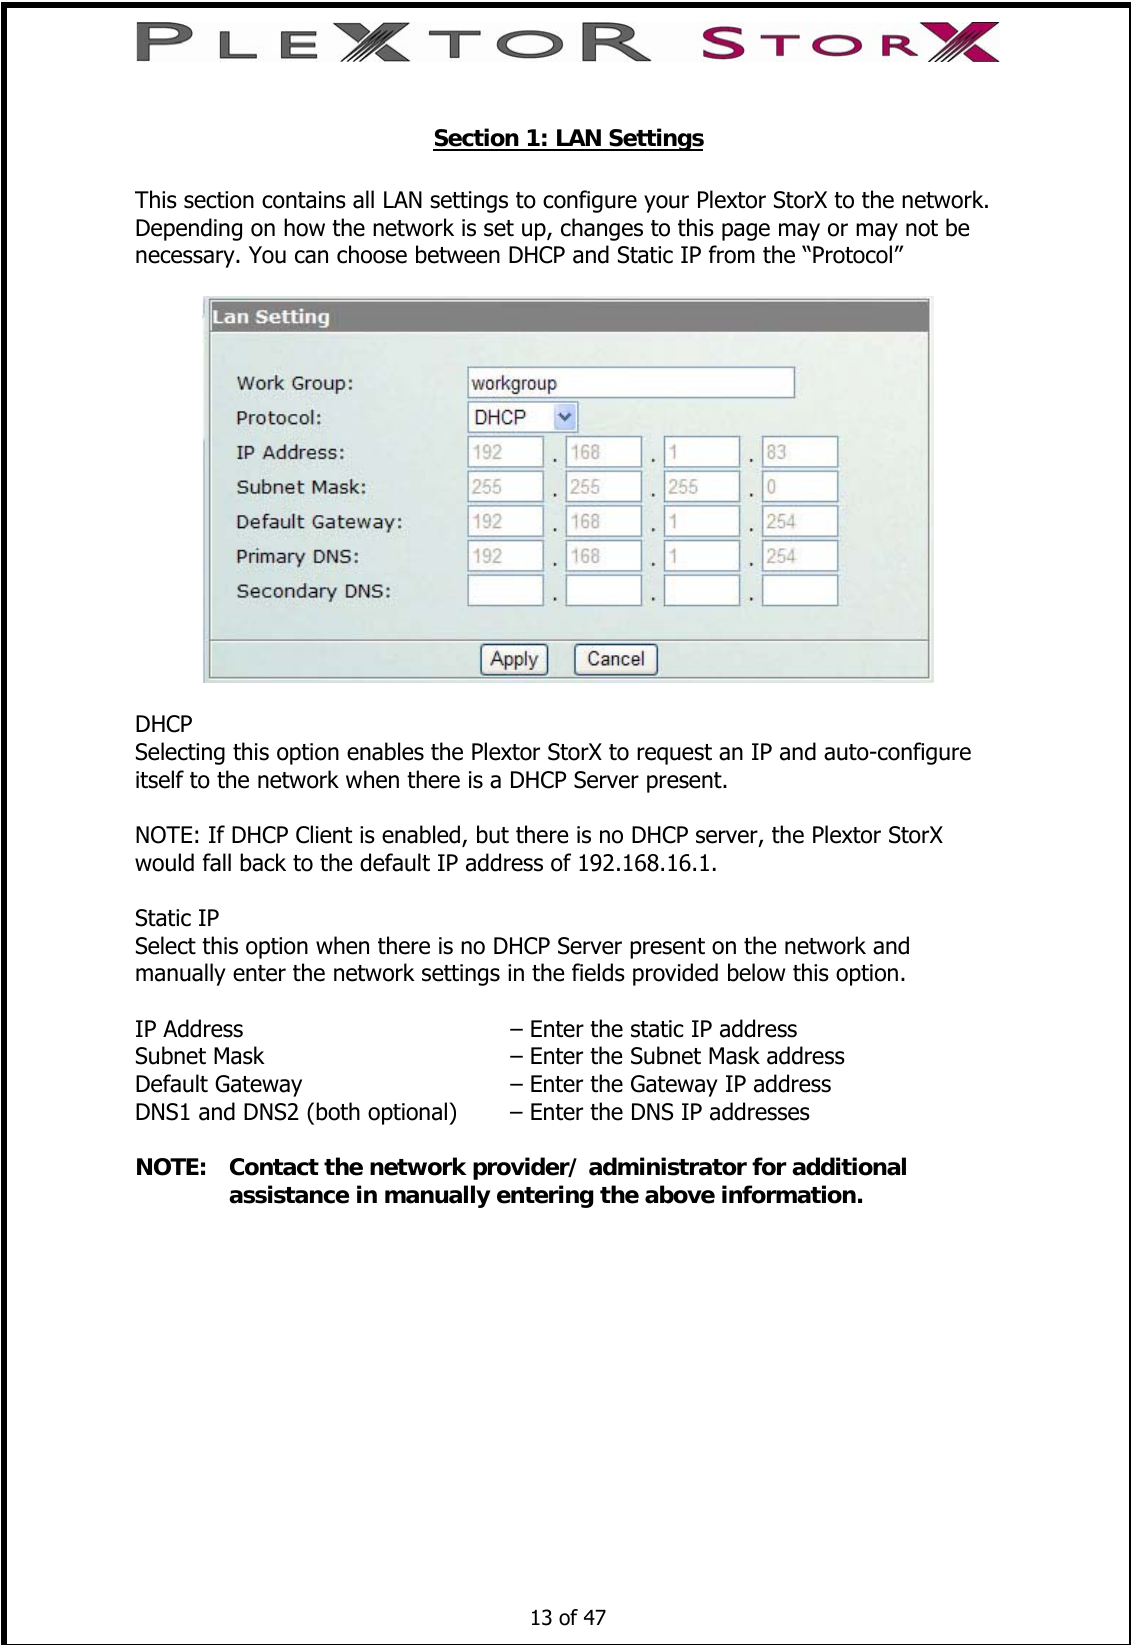
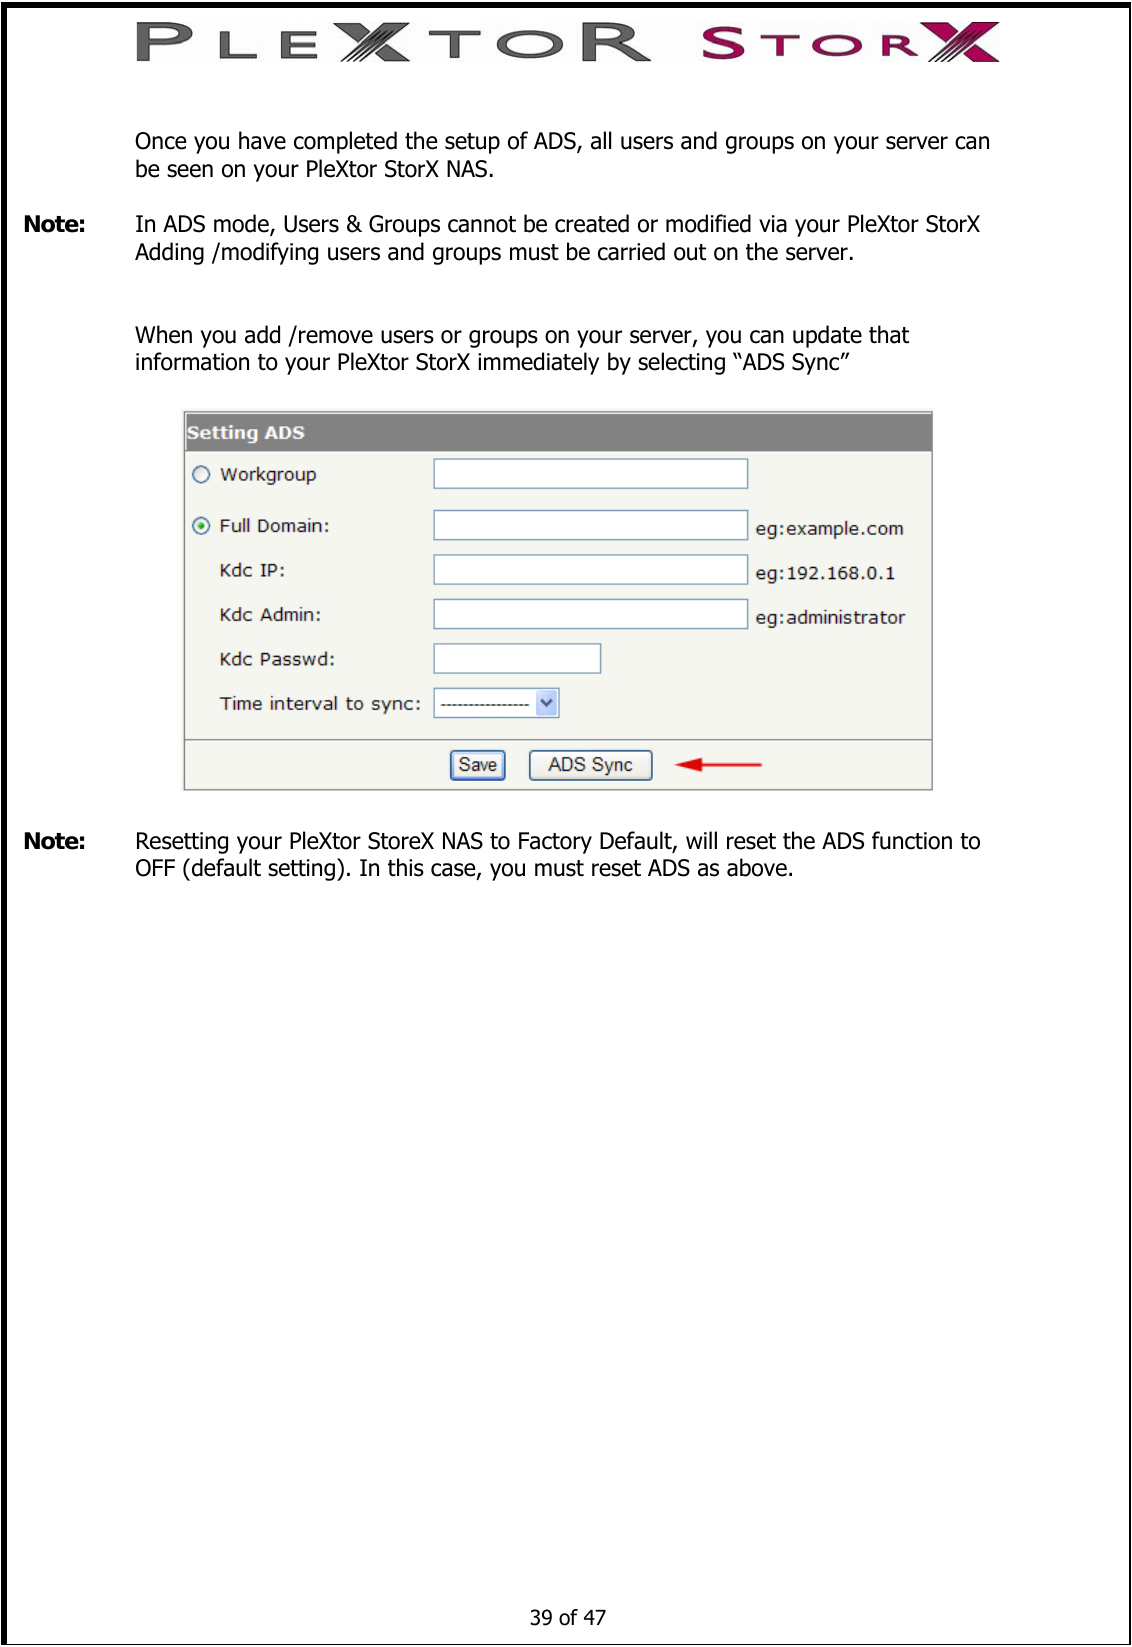
![ADS (Active Directory Service) Please note, ADS is an administrative tool. Only select this option if you have an understanding of ADS (Active Directory Service). First, ensure that the date and time settings on your PleXtor StorX NAS (In System) are in sync with your server. 2) Select, Full Domain [enter the domain name of your server] 3) Kdc IP [enter the IP address of your server] 4) Kdc Admin [enter administrator] 5) Kdc Passwd [enter your administrator password] 6) Time interval to sync [from pull down menu, select a scheduled sync time] 7) Save and confirm settings 38 of 47 1) In Tools section, select ADS](https://usermanual.wiki/Shinano-Kenshi/WNAS/User-Guide-1069984-Page-38.png)