Shinsei BP000002 Mobile Printer User Manual DP 2E Instruction Manual 3rd edition April 20 2010 CS 4 indd
Shinsei Industries Co., Ltd. Mobile Printer DP 2E Instruction Manual 3rd edition April 20 2010 CS 4 indd
Shinsei >
DP-2E Instruction Manual 4th edition. April 20. 2010.CS.4.
* Read this manual thoroughly, and do not perform installation, operation,
maintenance, or inspection unless you fully understand all of the contents.
* Keep this manual in a safe place where you can refer to it easily while
installing, operating, and carrying out maintenance or inspections.
Mobile Printer
DP-2E
Mobile Printer
E
Instruction Manual
IMPORTANT
2
■Preface...
Thank you for selecting our model DP-2E.
This product does not contain toxic substances specied by
the RoHS and WEEE Directives.
This machine is a mobile printer developed based on a state-
of-the-art electronics technology and accumulated experiences.
For proper and safe use of this machine, read this instruction
manual thoroughly to become aware of the machine and the
related precautions before working for the installation and
operation.
After the installation, keep this manual at the place where
you can refer to whenever it is necessary.
SHINSEI INDUSTRIES Co., Ltd., 2010
All rights are reserved. No part of this publication may be reproduced,
stored in a retrieval system, or transmitted, in any form, or by any
means, mechanical, electronic, photocopying, recording, or otherwise,
without prior written permission of SHINSEI.

3
FCC WARNING
Changes or modications not expressly approved by the party
responsible for compliance could void the user's authority to
operate the equipment.
NOTICE
This equipment has been tested and found to comply with
the limits for a Class A digital device, pursuant to part 15 of
the FCC Rules. These limits are designed to provide
reasonable protection against harmful interference when the
equipment is operated in a commercial environment.
This equipment generates, uses and can radiate radio
frequency energy and, if not installed and used in accordance
with the instructions, may cause harmful interference to radio
communications. Operation of this equipment in a residential
area is likely to cause harmful interference in which case the
user will be required to correct the interference at his own
expense.
This transmitter must not be co-located or operated in
conjunction with any other antenna or transmitter.
This equipment complies with FCC radiation exposure limites
set forth for controlled equipment and meets the FCC radio
frequency (RF) Exposure Guidelines in Supplement C to OET65.
The product is mobile device, the separation distance between
the user and the device's radiating element is greater than 20cm.
The maximum E.I.R.P of the device is 3.523mW, which is
less than RF Expo.
This device complies with Part 15 of the FCC Rules. Operation is
subject to the following two conditions: (1) this device may not cause
harmful interference, and (2) this device must accept any interference
received, including interference that may cause undesired operation.
4
IC
This device complies with Part 15 of FCC Rules and RSS-Gen
of IC Rules.
Operation is subject to the following two conditions: (1) this
device may not cause interference, and (2) this device must
accept any interference, including interference that may cause
undesired operaton of this device.
This equipment complies with IC radiation exposure limits
set forth for uncontrolled equipment and meets RSS-102 of
the IC radio frequency (RF) Exposure rules. The product is
mobile device, the separation distance between the user and
the device's radiating element is greater than 20cm.
The maximum E.I.R.P of the device is 3.523mW, which is
less than RF Expo.
Europe - EU Declaration of Conformity
We, Shinsei Industries Co., Ltd. hereby declare that this device,
model DP-2E is in compliance with the essential requirements
and other relevant provisions of the R&TTE Directive 1999/5/EC.
■ BluetoothTM Communications
This device with built-in wireless telecommunication equipment
conforms to the standards, required in the region where the
device is used. This device assumes an interference distance
of about ten meters or less. Using this device near microwave
ovens, wireless LAN equipment, etc. may signicantly reduce
the communication distance or make communication impossible.
Do not disassemble or modify this device.
This device is equipped with a Bluetooth module that obtained
product certication.
BluetoothTM is a trademark of Bluetooth SIG, Inc., U.S.A., and
is used herein under license.

5
1. Precaution Symbols ............................................................................ 7
2. For your longer use ............................................................................. 11
3. Conrmation of This Machine ............................................................. 13
3-1. Printer Unit .............................................................................. 13
3-2. Accessories ............................................................................. 14
4. Optional Accessories ..................... ................................................... 15
5. Names and Functions of Each Part .................................................... 16
6. When using this machine with the battery pack ................................. 20
6-1. Installing the battery pack .......................................................... 20
6-2. Removing the battery pack ........................................................ 22
7. Charging the battery pack ................................................................... 23
7-1. Battery charge is needed in one of the following cases ............. 23
7-2. Battery charging procedure ....................................................... 24
7-3. Before using the battery pack .................................................... 26
8. When charging the battery pack with
the charger adapter (sold separately) ................................................. 28
8-1. Installing the charger adapter ...................................................... 28
8-2. Removing the charger adapter .................................................... 29
9. Setting the media roll ........................................................................... 30
9-1. In the case of printing labels in the Tear-Off mode ...................... 30
9-2. In the case of printing labels in the Peel-Off mode ...................... 33
■ Table of Contents

6
10. Power ON-OFF ................................................................................... 37
10-1. Turn on the power ..................................................................... 37
10-2. Turn off the power ..................................................................... 37
11. Contrast adjustment of the liquid crystal display ................................. 38
12. Adjustment of the backlight lighting time ............................................. 40
13. Test Printing ........................................................................................ 42
13-1. Test printing method 1 .............................................................. 42
13-2. Test printing method 2 .............................................................. 44
14. Printing the Conguration List ............................................................ 45
15. Printer Info........................................................................................... 47
16. Conrmation of BluetoothTM communication set value ....................... 49
17. Automtic adjustment of the sensor ..................................................... 53
17-1. Automatic adjustment of the label sensor ................................ 53
17-2. Automatic adjustment of the peel sensor ................................. 56
18. Connecting the USB (mini-B) ............................................................ 57
19. Using the BluetoothTM communications .............................................. 57
20. Label issuing mode ........................................................................... 58
21. Error messages .................................................................................. 59
22. Daily Check and Cleaning Method .................................................... 61
22-1. Printing check (Test pattern printing) ....................................... 61
22-2. Execution of the head check ................................................... 62
22-3. Cleaning of the thermal print head .......................................... 62
22-4. Cleaning of the platen roller and the peel roller ...................... 64
22-5. Cleaning of each sensor .......................................................... 65
23. Specications of this machine .....,,..................................................... 66
24. Important Notices ............................................................................... 69
■ Table of Contents
7
This product is manufactured for use according to proper
procedures by a qualied operator and only for the
purposes described in this manual.
Precaution symbols in this manual are divided into two
categories, depending on the level of danger, or
seriousness of potential injury. The denition of each
precaution is shown below. Failure to heed these
precautions may result in bodily injury or damage to the
machine.
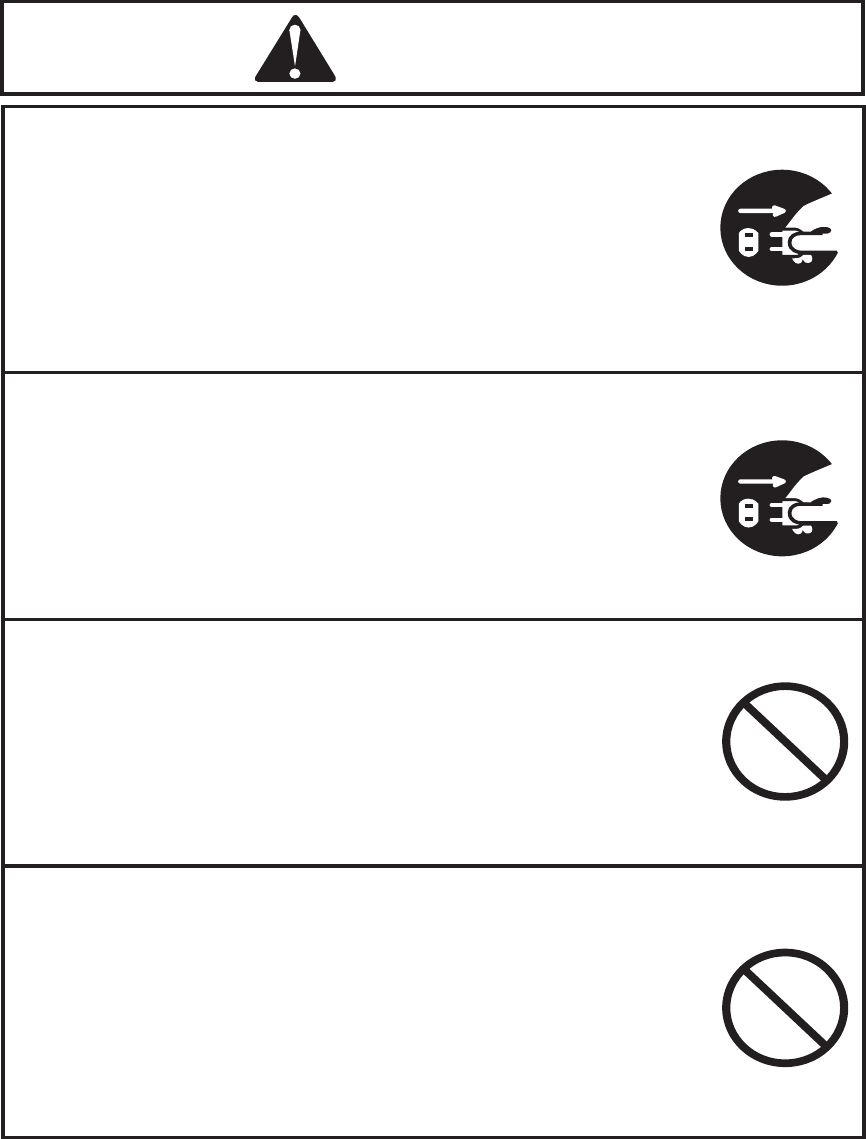
1. Precaution Symbols
This machine is manufactured for use according to proper
procedures by a qualied person and only for the purposes
described in this manual. The following symbols are used
in this manual.
Always heed the information provided in this manual.
Failure to heed precautions can result in personal injury or
property damage.
Heed the following precautions information provided in
this manual for your safety.
Indicates information that, if not heeded,
could possibly result in loss of lie or serious
injury.
Indicates information that, if not heeded,
could result in relatively serious or minor
injury, damage to the machine, or faulty
operation.
CAUTION
WARNING

8
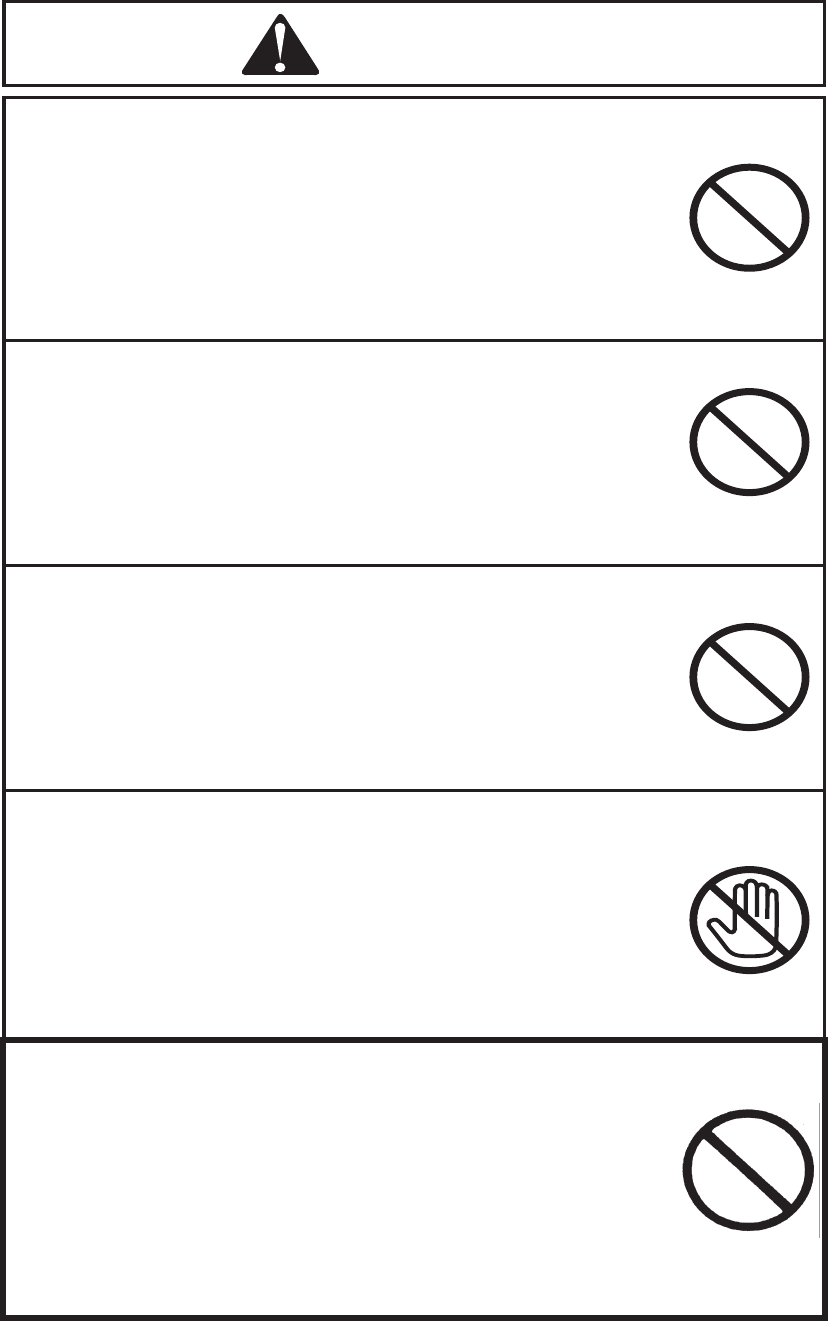
Do not disassemble or modify the printer unit,
battery pack, battery charger, charger adapter, etc.
Doing so may result in injury or cause the machine
to break down.
∑ Doing so may cause damage, short-circuit, or
ignition, and may result in electric shock, burn, or re.
Do not keep the battery pack with metals.
∑ Doing so may cause a re or electric shock due to
short-circuit.
Do not allow the printer unit, battery pack, battery
charger, or charger adapter to come in contact
with water or get accumulation of dust.
Doing so may result in re or cause the machine to
break down.
∑ Continued use may cause a re or electric shock.
Do not give strong shock such as dropping and
throwing the printer unit.
∑ Doing so may cause damage, short-circuit, or
ignition, and may result in electric shock, burn,
or re.
Do not charge anything other than the specied
battery pack with the battery charger.
∑ The battery pack may cause heat, burst, or
ignition.
WARNING
・
・
・
・
Do not charge anything other than the specied
battery pack with the battery charger.
・ The battery pack may cause heat, burst, or ignition.
・
Risk of explosion if battery is replaced by an incorrect
type. Dispose of used batteries according to the instructions.
9
Do not touch the thermal print head because it will
be exposed when the cover is opened.
∑ When replacing labels immediately after using the
machine, be careful not to get burned due to
overheating of the thermal print head.
∑ Do not touch the thermal print head as your hand
oil may cause the deterioration.
Do not leave the battery pack charged for a long
time.
After the charge, make sure to pull out the plug
of the power supply cord of the battery charger or
the charger adapter from the AC outlet.
The operation time may become less because the
battery pack is naturally discharged and the power
decreases. (It is not a breakdown).
CAUTION
・
・
Change or modications not expressly approved by
the party responsible for compliance could void the
user's authority to operate the equipment.
10
After using this machine or when not using it for a
long time, take out the battery pack and pull out
the power plug of the charger adapter from the AC
outlet for safety.
Do not charge anything other than the specied
battery pack (lithium-ion battery).
∑ Follow the local regulation when disposal.
Do not place this machine on an unstable place.
∑ Doing so may fall and injury.
Remove dusts regularly after pulling out the power
plug of the charger adapter from the AC outlet.
∑ If dusts are accumulated around the AC outlet,
it may cause leak current and re.
CAUTION
・
・
・

11
2. For your longer use
Precautions for use
1. Do not print the paper with the paper not installed.
2. Issue labels after conrming the print contents are correct,
as set values of a built-in program might be changed or
destroyed by an excessive power supply noise.
3. Avoid use of this machine under the conditions of extreme
temperature or humidity.
4. Do not leave or keep the machine in the place where an air
conditioner is installed near the machine or direct sunlight is
received.
[Environment]
Operating environmental temperature:
+5o ~ +35oC
Operating environmental humidity:
25 ~ 80%RH (No condensation)
Storage environmental temperature:
-10o ~ +60oC
Storage environmental humidity:
10 ~ 80%RH (No condensation)
5. When glue or dust adheres to the label path, wipe it off with a
soft cloth wrung after being soaked in neutral detergent.

12
6. Use the battery pack after full charge when using it for the rst time.
7. In the case of using this machine with the battery pack, turn off the
power even when interrupting the use temporarily. This will save the
battery pack power.
8. Clean the thermal print head regularly and perform test printing.
Contact our dealer if a white line appears on the test pattern.
Normal pattern
Abnormal pattern
9. Inspection at the beginning of a working day
Perform test printing at the beginning of a working day.
Refer to Section 13 "Test Printing".
10. Use our specied media to maintain good print
quality and performance.
Contact our dealer if an abnormal pattern should be
printed.
CAUTION
13
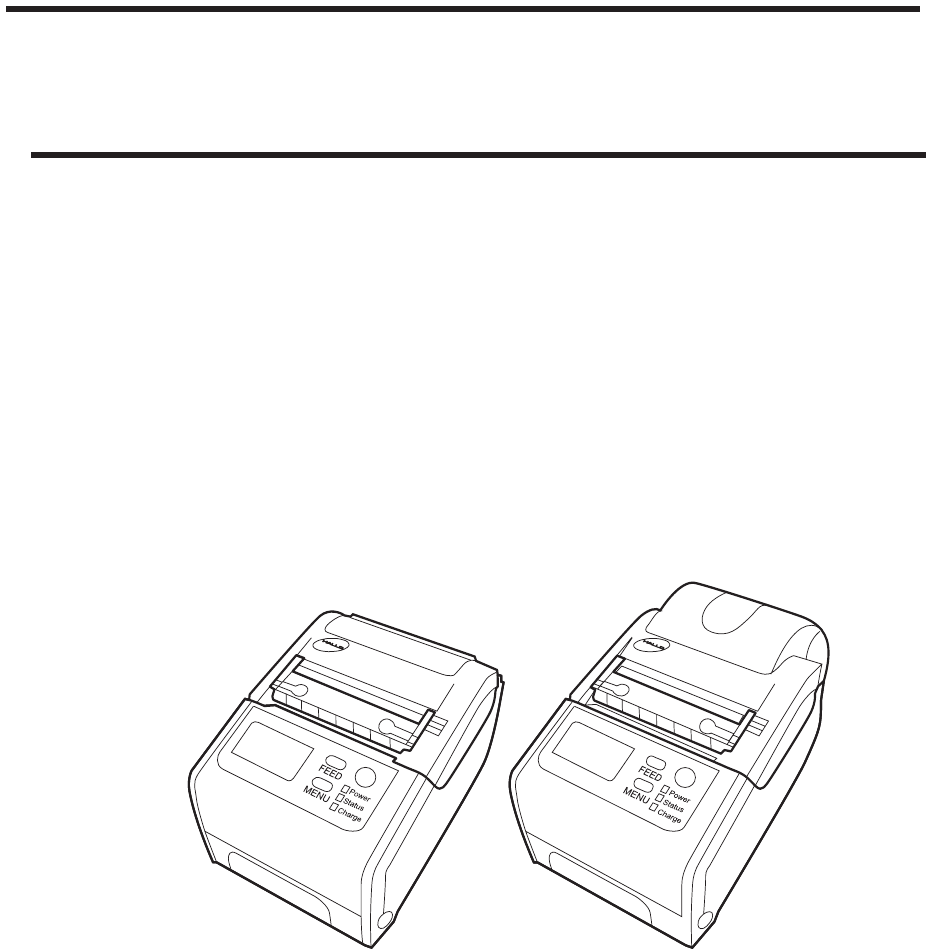
3. Conrmation of This Machine
This machine is composed of the printer unit and accessories.
3-1. Printer Unit
You can select one of two types, either DP-2E (for a small label roll)
that can contain the media roll with small diameter or DP-2E (for a large
label roll) that can contain the media roll with large diameter.
The following pages are described by using gures of the DP-2E
(for a small label).
(for a small label roll) (for a large label roll)
Mobile Printer
DP-2E
DP-2E
Mobile Printer
14
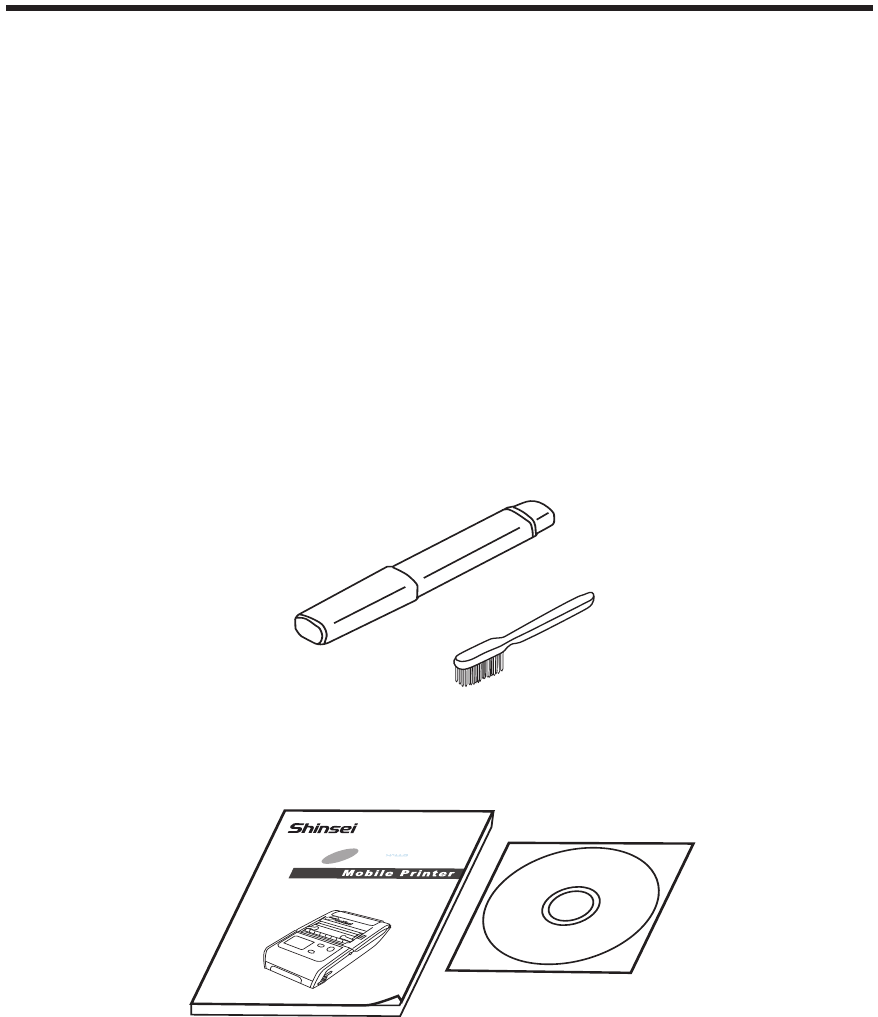
3-2. Accessories
Head cleaner
Brush
Instruction manual CD-ROM
They are attached to the printer unit.
Instruction manual
Mobile Printer DP-2E
15
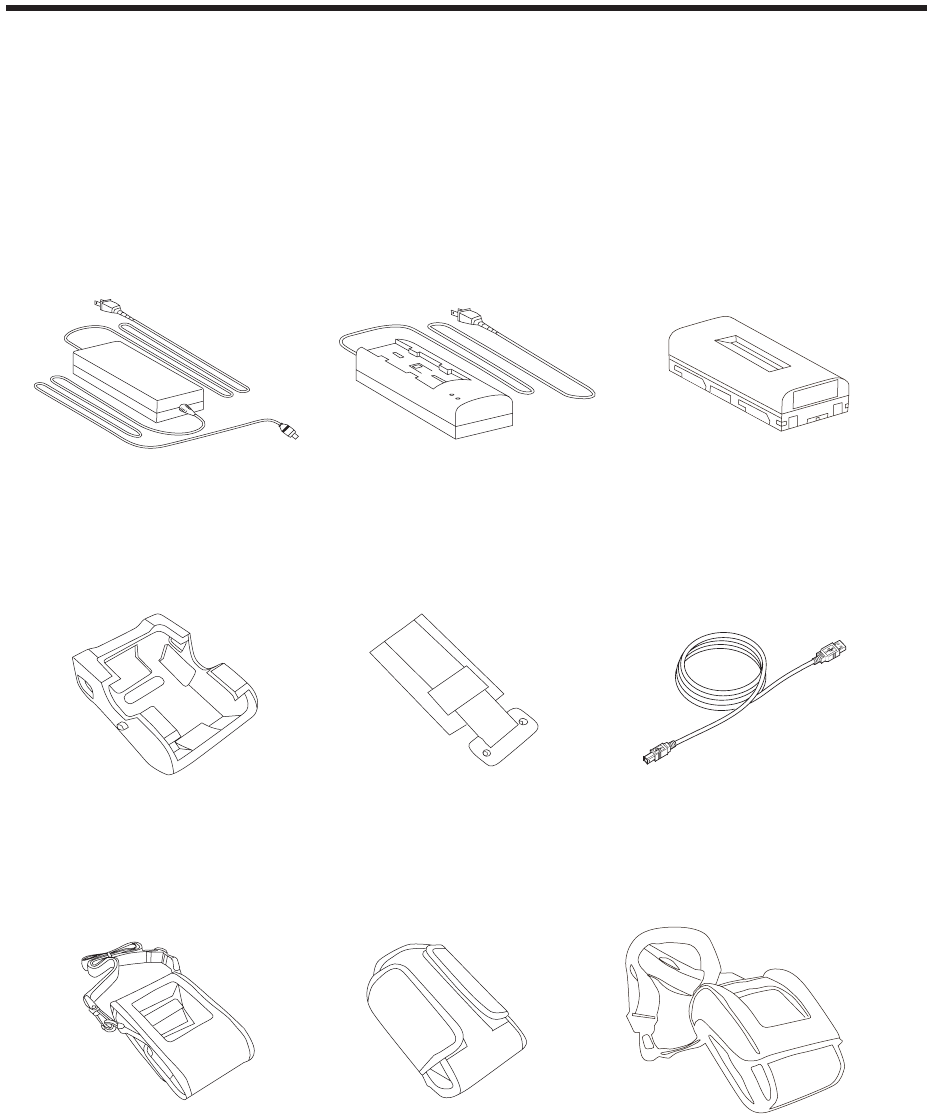
4. Optional Accessories
Following optional accessories need to be purchased separately.
*Contact our dealer for other optional accessories.
Charger adapter
(CV-74)
Battery pack
(BH-74)
Battery charger
(CH-74)
Protector
(DP-74)
USB cable
(mini-B)
Belt hook
(DH-74B)
Portable holster
(DH-74)
Rainproof case
(DH-74R)
Auxiliary case
(HH-74)
16
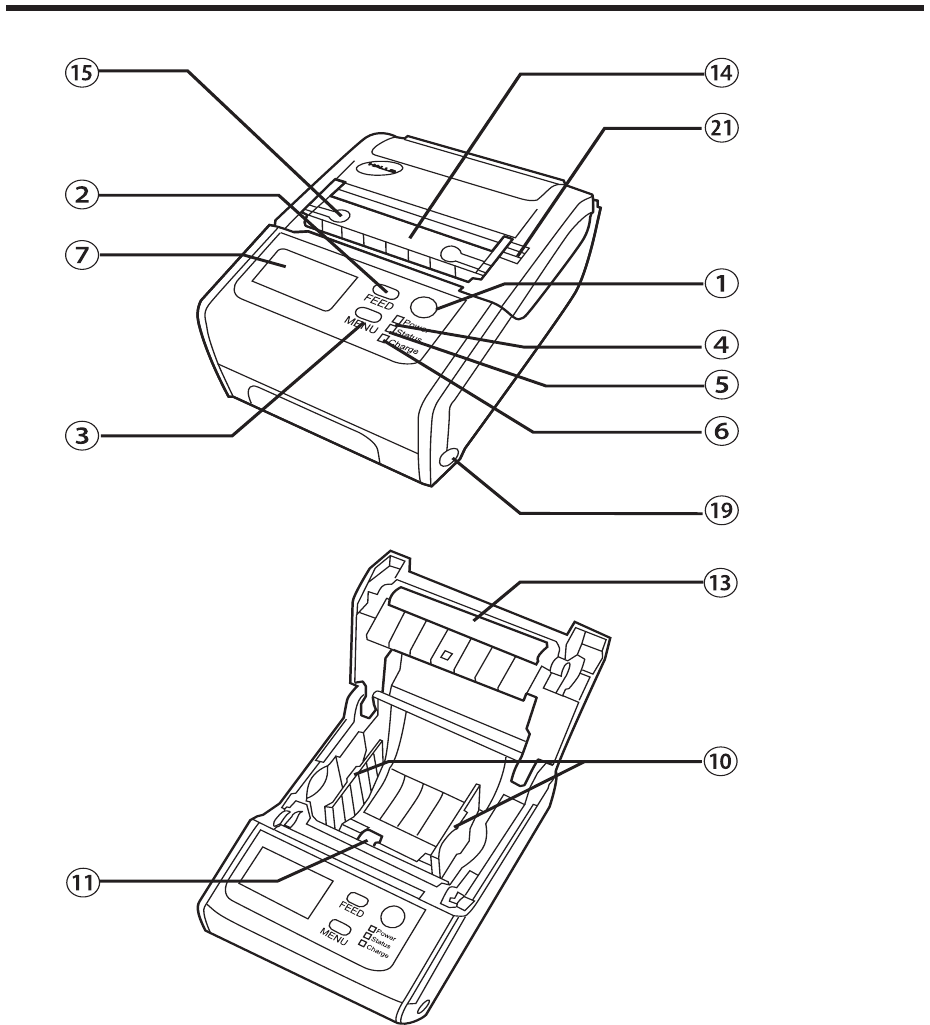
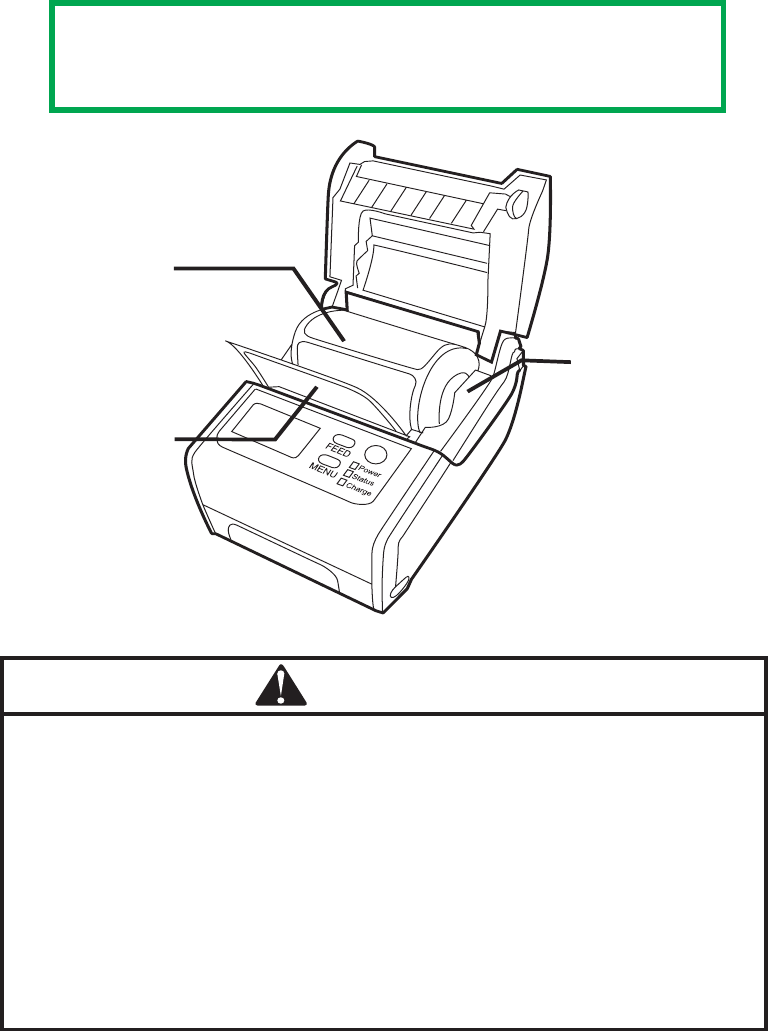
5. Names and Functions of Each Part
Mobile Printer DP-2E
17

18
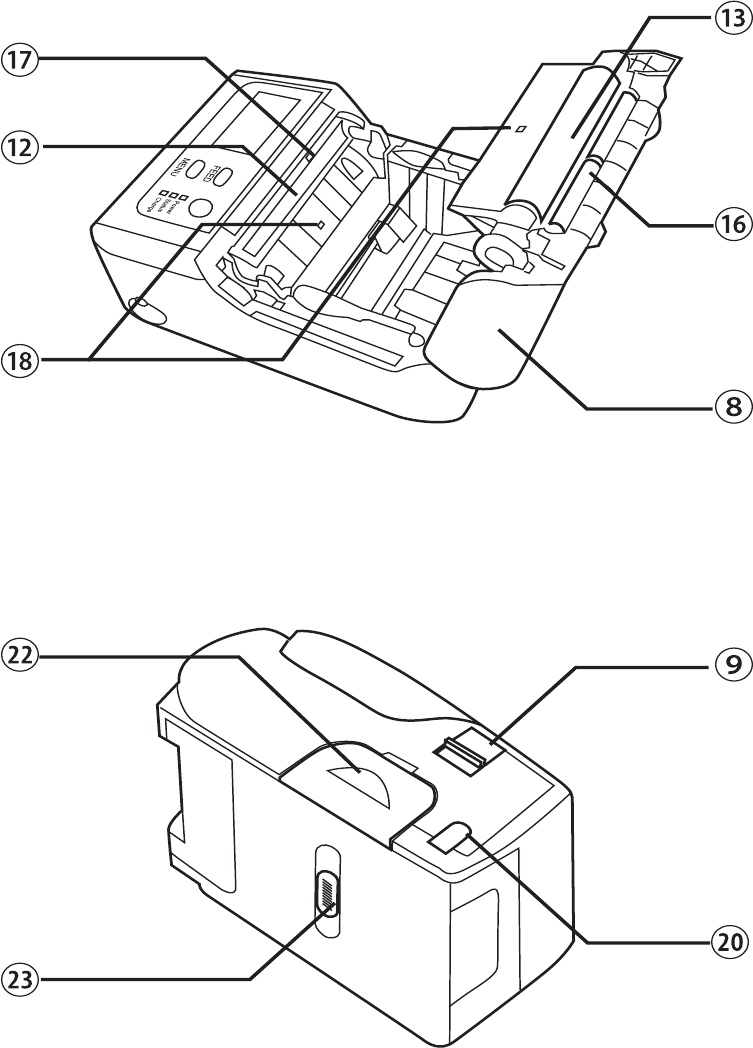
No. Name Function
① Power switch Turn on and off the power supply.
② FEED key Press this key when feeding paper or
moving the cursor on the menu screen.
③ MENU key Press this key when changing the screen.
④ Power LED The green LED lights up when the power
supply is turned on.
⑤ Status LED The red LED lights up if an error display
appears.
⑥ Charge LED This LED lights up while charging with
the charger adapter (option).
⑦ Liquid crystal display The remaining battery level and various
statuses are displayed.
⑧ Cover Open or close this cover when removing
or installing the media roll.
⑨ Cover lock release
lever
Press to release the cover lock when
opening the cover.
⑩ Label holder This holder guides the media.
⑪ Stopper This stopper keeps the label holder
opened.
⑫ Thermal print head This head performs printing on the media.
⑬ Platen roller This roller holds the media with the thermal
print head and transports the media.

19
No. Name Function
⑭ Peeling frame This frame peels off labels from the backing
paper.
⑮ Peel frame release
lever
Open the peel off frame with this lever.
⑯ Peel roller This roller guides the backing paper to the
issuing slot.
⑰ Peel sensor This sensor detects a peeled label presence.
⑱ Label sensor This sensor detects a label transportation.
⑲ USB connector
cover
Open this cover to connect a PC with the
USB cable.
Use in a commercial, industrial or
business environment, exclusive of a
device which is marketed for use by the
general public or is intended to be used
in the home.
⑳ DC input terminal
cover
Connect the charger adapter (option).
Auto/Manual switch Press to select "auto issue" or "manual
issue" in the Peel-Off mode.
Battery pack cover This covers the storage unit of the battery
pack.
Battery pack release
lever
Use this lever when taking out the battery
pack.
㉑
㉒
㉓
20
6. When using this machine with the battery pack
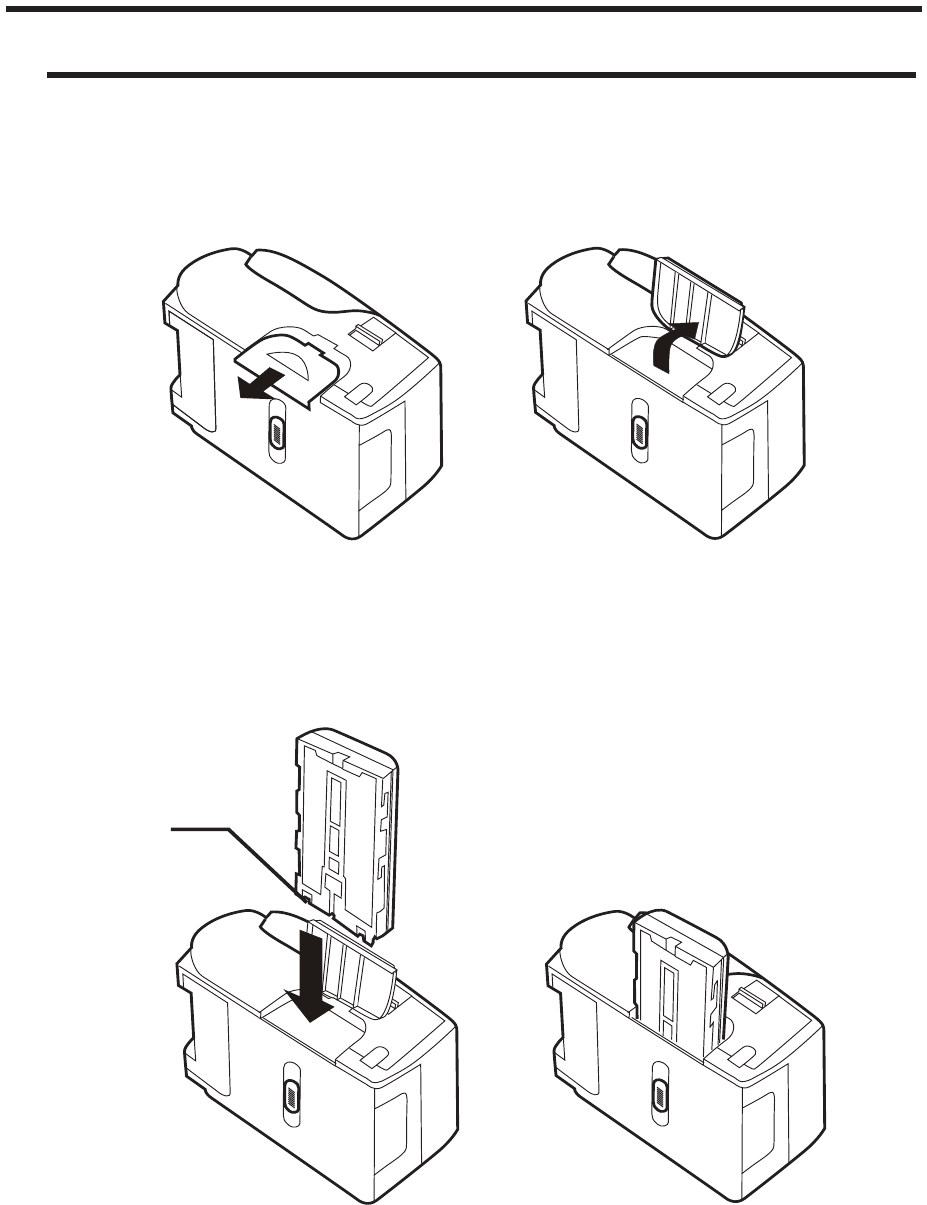
6-1. Installing the battery pack
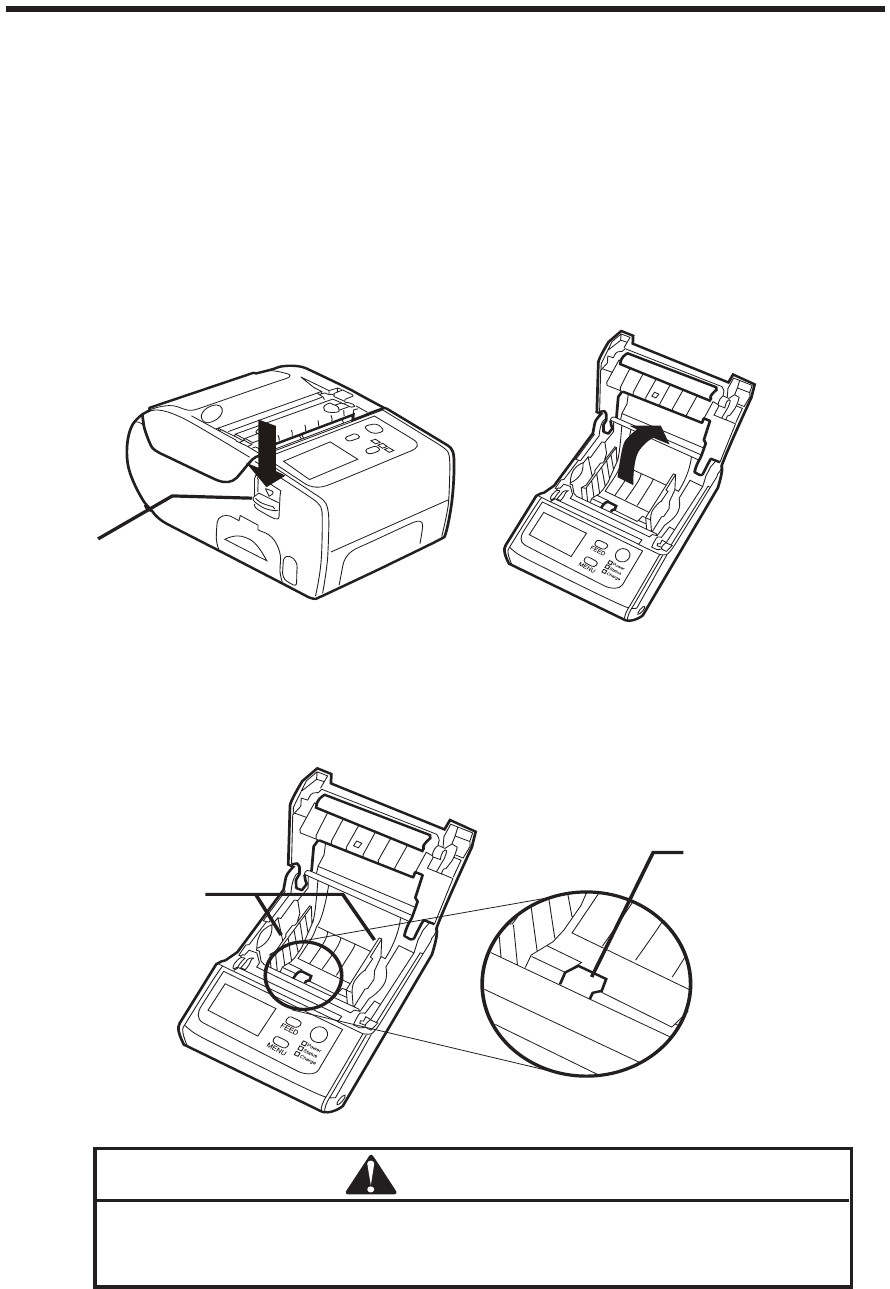
(1) Open the battery pack cover.
・ Slide the battery pack cover to the arrow direction.
(2) Insert the fully-charged battery pack into the battery pack
storage unit of this machine with its terminals inside until it
clicks.
Terminal
21
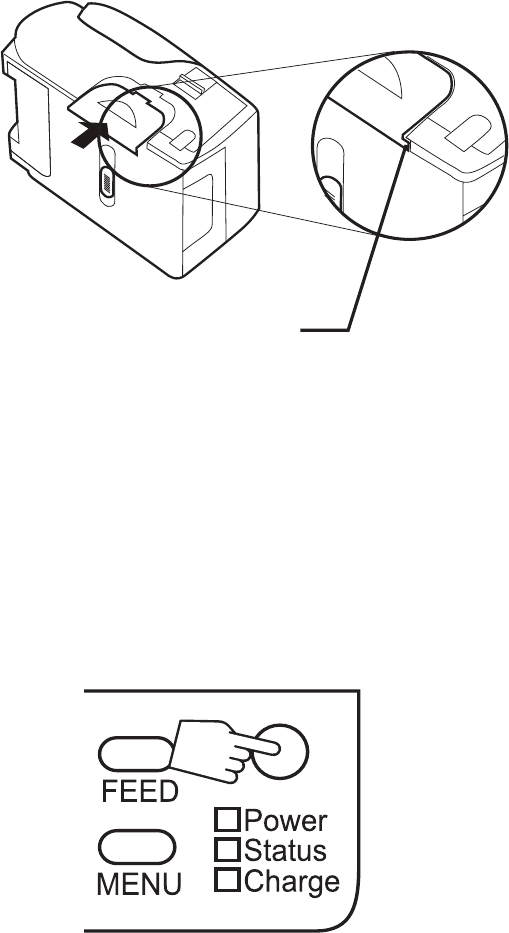
(3) Close the battery pack cover.
・ Push to slide the battery pack cover until it clicks so that the
protruding portions on both sides of the battery pack cover
can be inserted into the slit of this machine.
(4) Turn on the power.
The green Power LED lights up, and the power is turned on.
Protruding portion
22
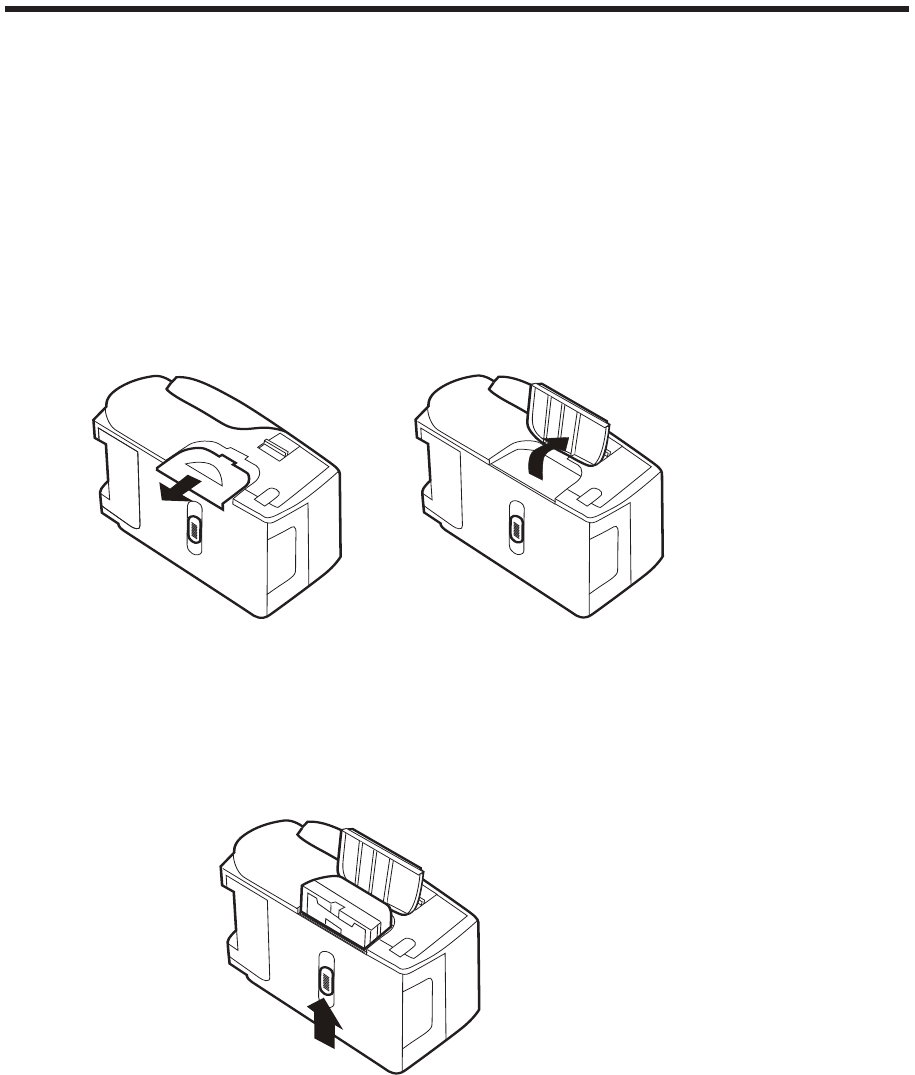
6-2. Removing the battery pack
(1) Turn off the power supply.
・ Conrm that the Power LED is turned off.
(2) Open the battery pack cover.
・ Pull to slide the battery pack cover in the arrow direction to
release the lock, and open the cover.
(3) Remove the battery pack.
・ Slide the battery pack release lever in the arrow direction
until the lock is released.
23
7. Charging the battery pack
7-1. Battery charge is needed in one of the following
cases
(1) When using the battery pack for the rst time, or not using
it for a long time.
(2) When nothing appears on the liquid crystal display at the
time of power-on, or when the display turned off soon
though the remaining battery level had been displayed
once.
(3) When the remaining battery level becomes 1/4 or less.
(4) When the display turned off while each item was being input.
(5) When operation stopped while printing and the "low battery"
message is displayed.
24
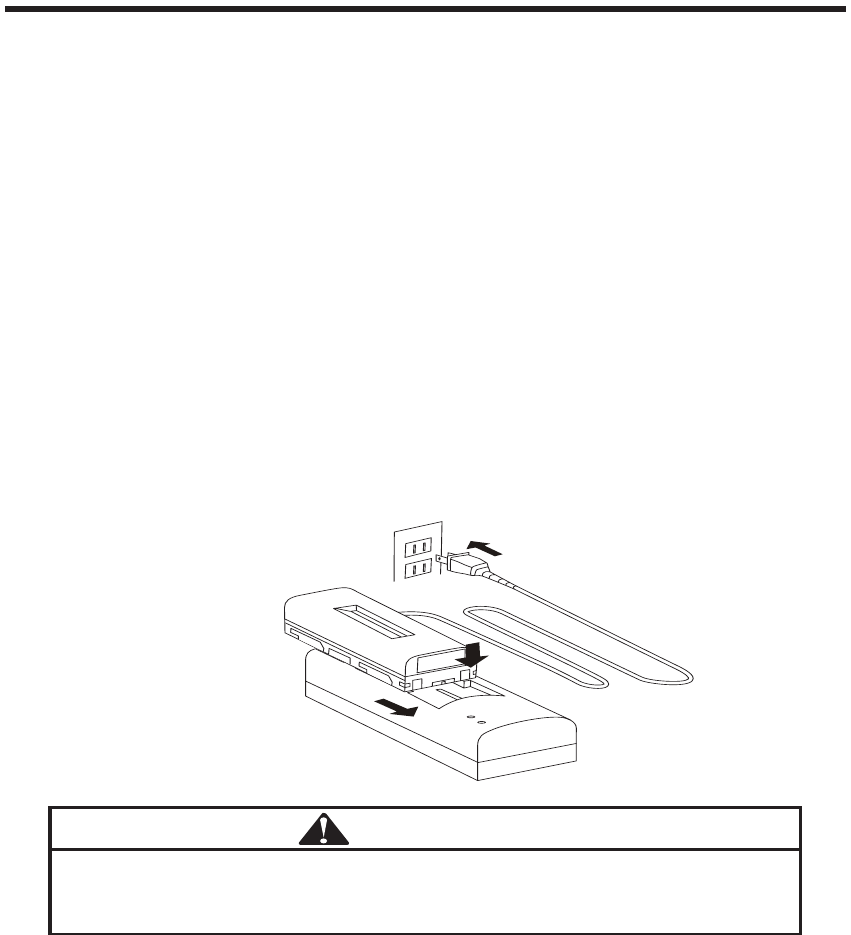
7-2. Battery charging procedure
(1) Insert the output side of the power cable into the input side of
the battery charger and insert the cable plug into the AC outlet.
・ The Power LED (red) lights up.
(2) Insert the battery pack and slide it in the arrow direction to lock
the pack until it clicks.
・ The Charge LED (red) lights up when the charge starts.
The Charge LED (red) turns off when the battery is fully
charged.
(3) Remove the battery pack when the charge ends.
・ Charge time: 3 hours
・ Number of charge times: 300 times
* Use the charge time and the number only as a guide.
They may vary according to status of use.
If the Charge LED blinks, stop charging because the
battery pack trouble is presumed.
CAUTION
25
・ Do not disassemble or modify the battery pack.
Doing so may cause a damage, short-circuit, or ignition,
and may result in an electric shock, burn, or re.
・ Do not allow the machine to come in contact with water or
get accumulation of dusts. Doing so may result in a re
or cause the machine to break down.
・ Do not keep the battery pack with metals. Doing so may
cause a re or electric shock due to short-circuit.
・Do not leave the battery pack charged for a long time.
・ After the charge, make sure to pull out the plug of the
power supply cord of the battery charger or the charger
adapter from the AC outlet.
・ The operation time may become less because the battery
pack is naturally discharged and the power decreases.
(It is not a breakdown).
・ Do not charge the battery pack when the pack is still high
in temperature.
・
Charge the battery pack after the temperature drops.
・ Caution should be exercised because the battery pack is
still in high in temperature immediately after the charge.
WARNING
CAUTION

26
7-3. Before using the battery pack
(1) About the battery pack
Note that the deterioration speed (life time) of the battery
pack depends greatly on overcharge and over-discharge.
・
Notes not to cause overcharge
Do not charge the battery pack many times in a short
period of time without discharging electricity.
・Notes not to cause over-discharge
Charge the battery pack promptly when the warning
appears on the display indicating that the remaining
battery level is low.
There is a possibility that the battery pack is in the
over-discharge state when the pack has been
connected with the machine over an extended time
period (The pack is discharged even in the power-off
state), or when the pack has been left for a long time.
・
Optimizing the change
It is the best to charge the battery pack when the
remaining battery level becomes 1/4 or less for
prolonging the battery life.
If the lithium-ion battery is over-discharged, it cannot be
normally charged.
CAUTION

27
(2) Others
・ The battery pack might be high in temperture shortly after
a large amount of printing has been made with this machine.
・ The lithium-ion battery capacity remarkably decreases under
the low-temperature environment. Early charging is
recommended.
・ Replace with a new battery pack when the pack cannot be
fully charged or the operating time decreases.
Charge the battery pack after the temperature falls.
CAUTION
28
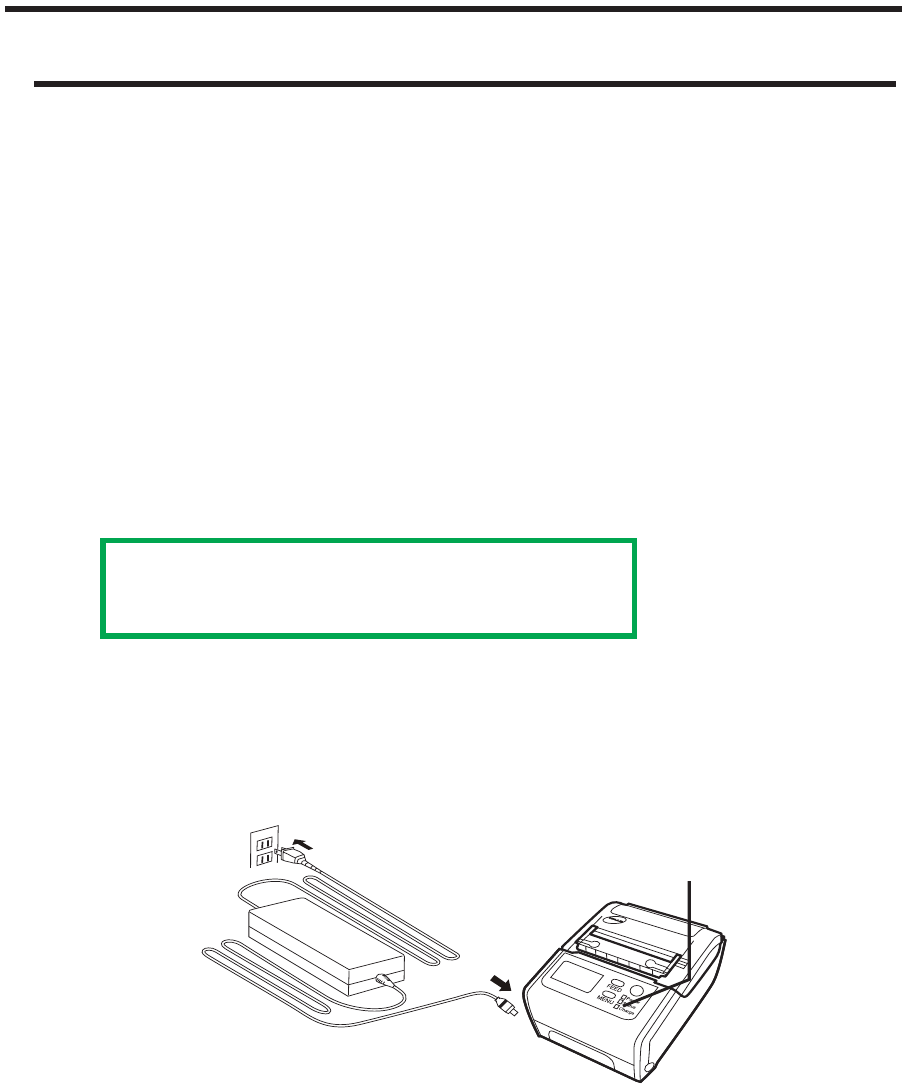
8. When charging the battery pack with the charger
adapter (sold separately)
8-1. Installing the charger adapter
(1) Install the battery pack in this machine.
(2) Remove the DC input terminal cover of this machine in
the power-off state, and connect the DC output terminal of
the charger adapter with the DC input terminal of this
machine.
(3) Connect the power plug of the charger adapter with the
AC outlet.
(4) The Charge LED lights up and the battery charge starts.
・ Charge time: 5 hours
・ Number of charge times: 300 times.
* Use the charge time and number only as a guide.
They may vary according to status of use.
(5) The Charge LED turns off when the battery pack is fully
charged.
・ Remove the charger adapter by using the method of
"8-2" on the next page.
Charge LED
Mobile Printer DP-2E
29
8-2. Removing the charger adapter
(1) Remove the power plug of the charger adapter from the
AC outlet.
(2) Remove the DC output terminal of the charger adapter
from the DC input terminal of this machine, and close the
DC input terminal cover of this machine.
Make sure to turn o the power of this device when
removing the DC output terminal of the charger adapter
from the DC input terminal of this machine, or removing
the plug of the charger adapter from the AC outlet.
CAUTION
30
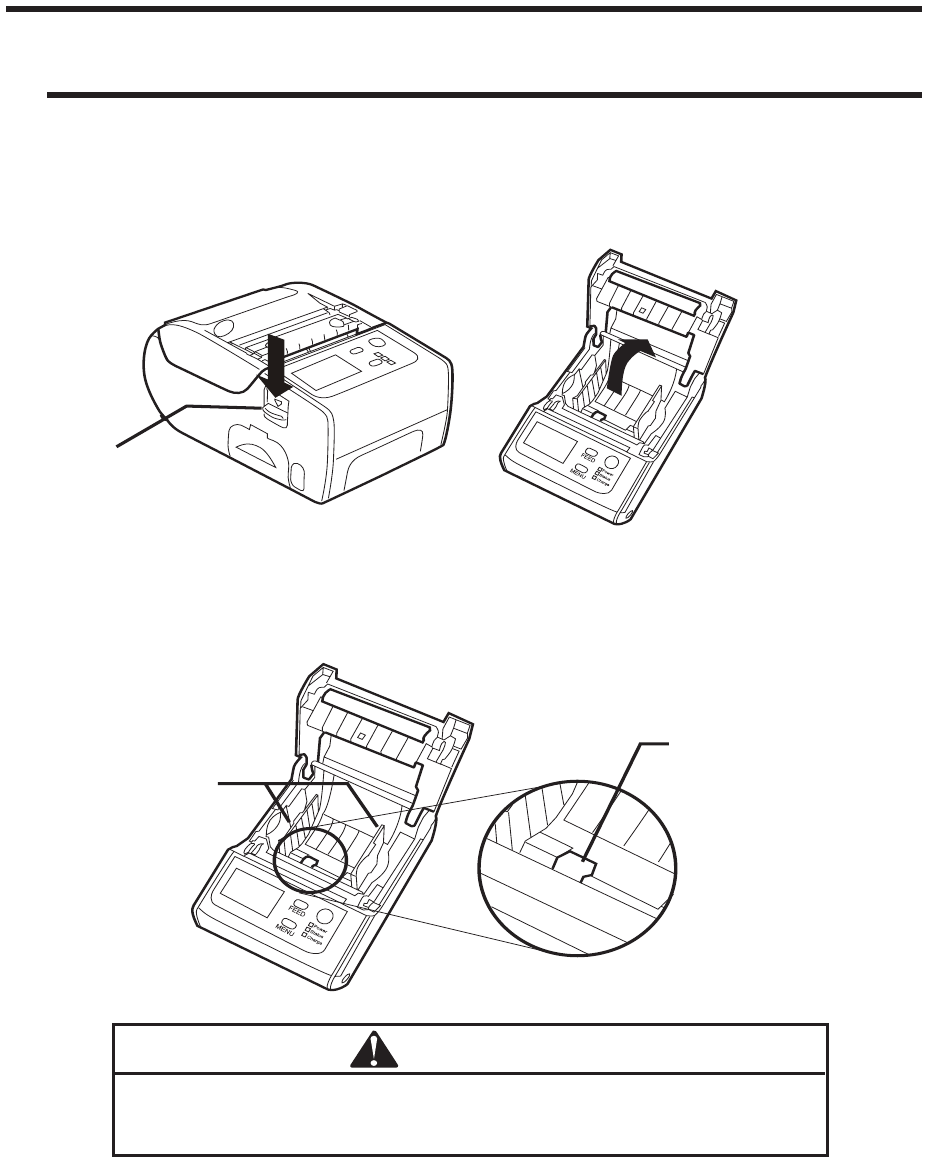
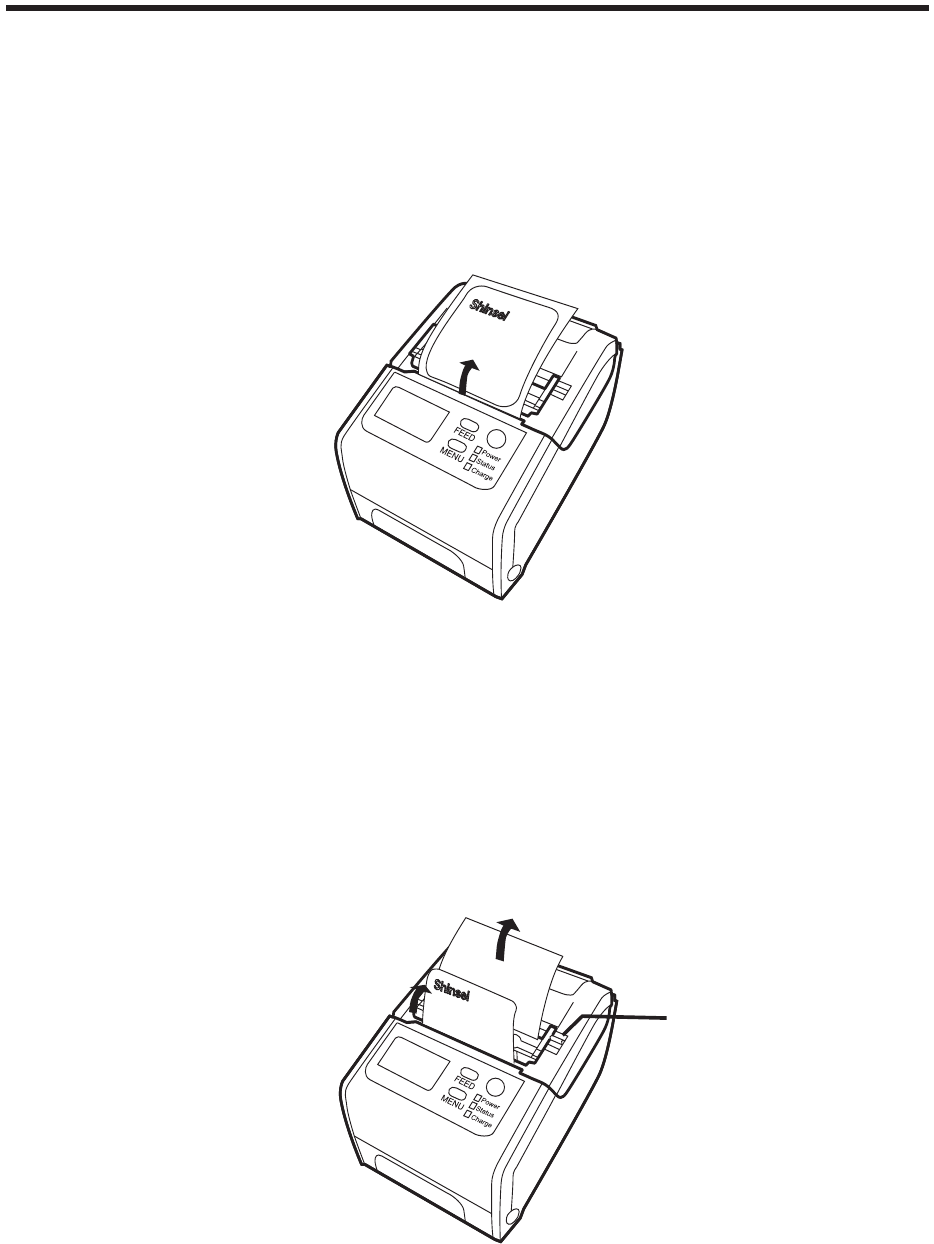
9. Setting the media roll
9-1. In the case of printing labels in the Tear-Off mode
(1) Open the cover by pressing the cover lock release
lever.
(2) Lift up the stopper and adjust the label holder to
the media width. After conrming that the holder
ts the media width, lower the stopper.
Cover lock
release lever
Label holder
Stopper
Moving the label holder without raising the stopper may
cause damage.
CAUTION
Mobile Printer DP-2E
31
・
(3) Place the label roll so that the print face directs
downward (thermal print head side).
See the machine specications about the size of
the label that can be placed.
∑ Do not touch the thermal print head because it
will be exposed when the cover is opened.
When replacing labels immediately after using
the machine, be careful not to get burned due to
overheating of the thermal print head.
∑ Do not touch the thermal print head as your
hand oil may cause the deterioration.
Print face
Label roll
Label holder
CAUTION
・
・
32
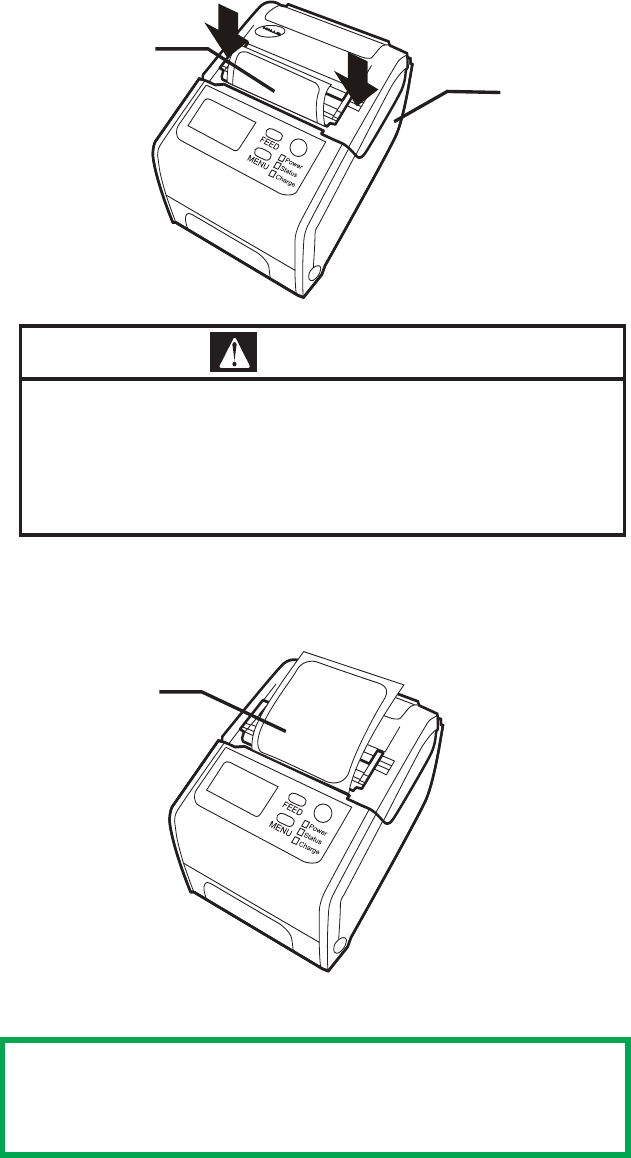
(4) Pull out the label roll and gently close both ends of the
cover until they click as indicated by an arrow.
(5) Press the FEED key.
The label is fed to the xed position.
A mark error will occur if the label size or the
sensor type is different.
∑ Closing the cover strongly may cause trouble or
damage.
∑ Caution should be exercised so as not to get your
hand caught.
Label roll
Cover
Label roll
Mobile Printer DP-2E
WARNING
・
・
33
9-2. In the case of printing labels in the Peel-Off mode
When issuing labels in the Peel-Off mode, it is necessary to
set the main body setting to the Peel-Off mode from a
personal computer etc. (not possible to set it with this machine
alone).
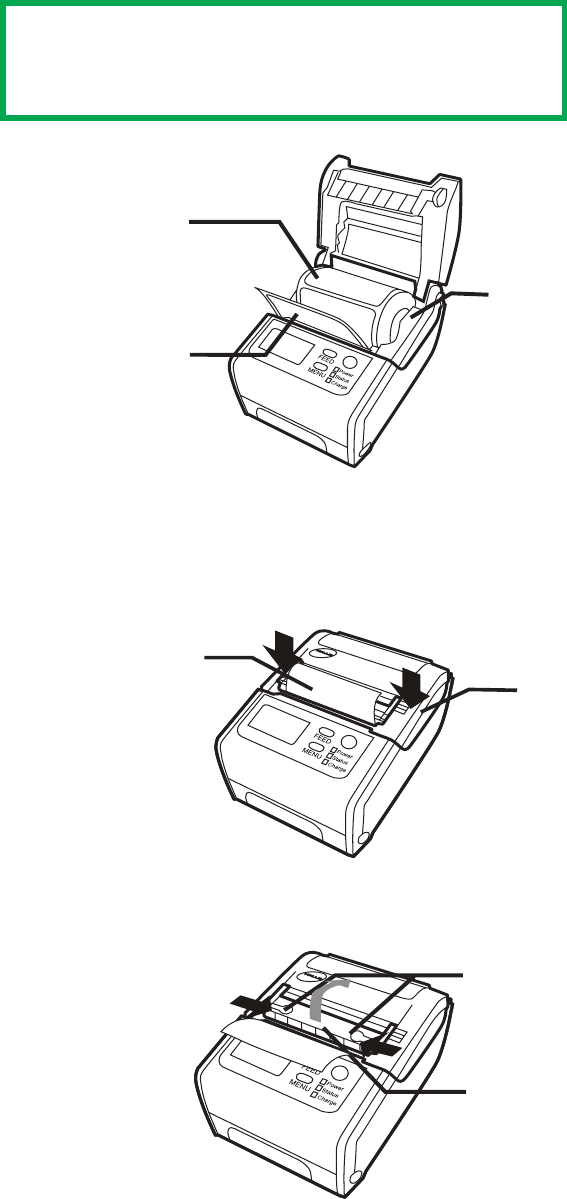
(1) Open the cover by pressing the cover lock release lever.
(2) Lift up the stopper and adjust the label holder to the label
width. After conrming that the holder ts the label width,
lower the stopper.
Cover lock
release lever
Label holder
Stopper
Moving the label holder without raising the stopper may
cause damage.
CAUTION
Mobile Printer DP-2E
34
(3) Place the label roll so that the print face directs downward
(thermal print head side).
See the machine specications about the
size of the label that can be placed.
(5) Slide the peel frame release levers on both sides inward
and lift it to open the peel frame.
Mobile Printer DP-2E
Mobile Printer DP-2E
Backing paper
Peel frame
Peel frame
release lever
Cover
Print face
Label holder
Label roll
(4) Peel off one label at the top of the label roll, pull the
backing paper to front, and gently close both ends of
the cover until they click as indicated by an arrow.
35
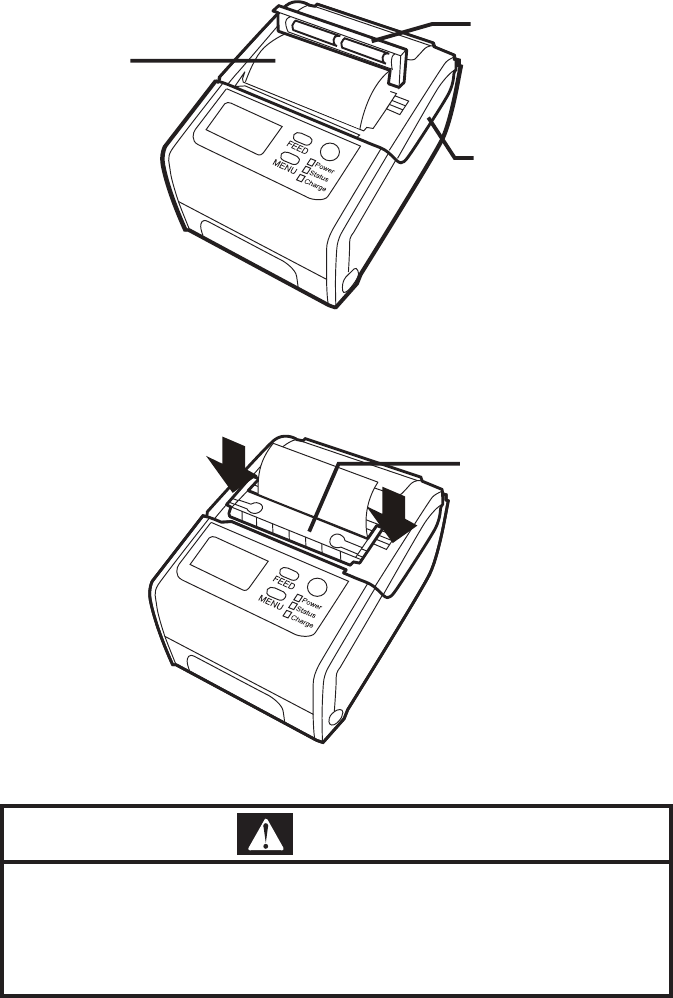
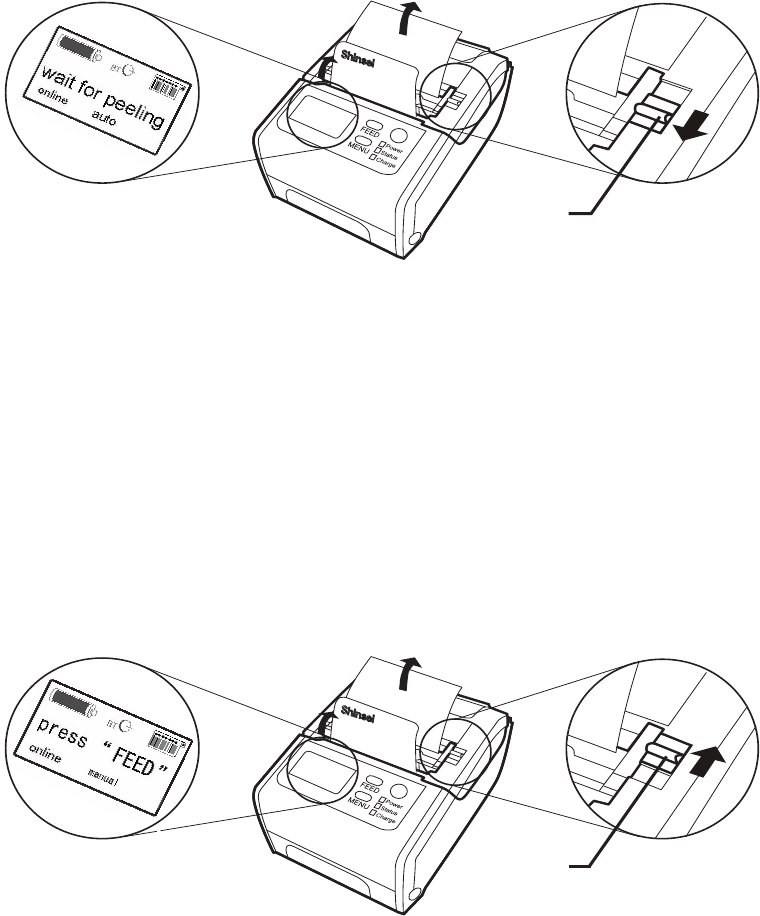
(6) Thread the backing paper from which one label
was peeled off between the peel frame and the
cover.
(7) Close the peel frame gently until it clicks.
The peel frame is xed.
Closing the peel frame strongly may cause
trouble or damage.
Backing
paper
Peel frame
Peel frame
Cover
WARNING
36
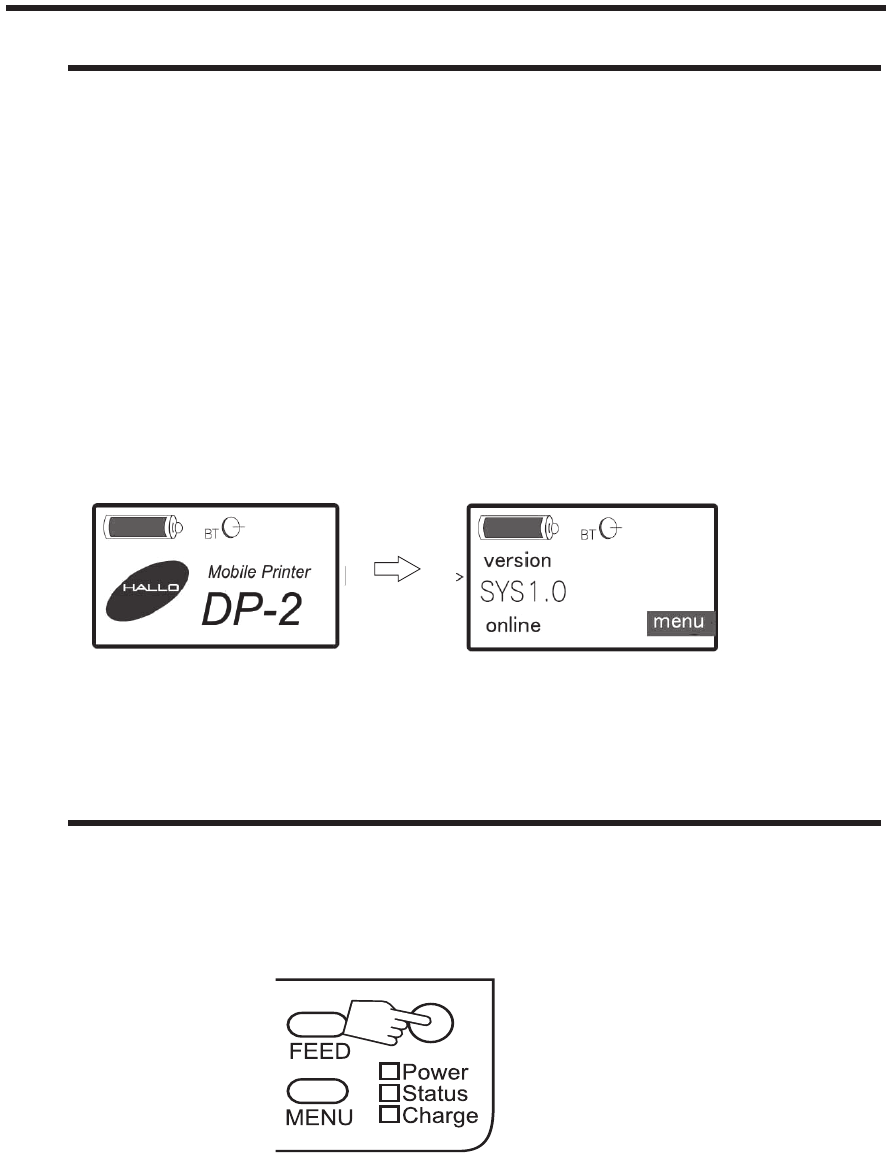
(8) Slide the switch to either "Auto issue" or "Manual issue"
position.
1. "Auto issue" setting
Slide the switch to front to set the automatic label
issuing mode.
・In "Auto issue" mode, the label's presence is detected
by the peel sensor. Therefore, the next label is
automatically peeled off from the backing paper, and
fed out of the label outlet every time current label is
removed.
2. "Manual issue" setting
Slide the switch to rear to set the manual label issuing
mode.
・
The next label is peeled off from the backing paper
and fed out of the label outlet every time the [FEED]
key is pressed.
Mode
change
switch
Mode
change
switch
37
10. Power ON-OFF
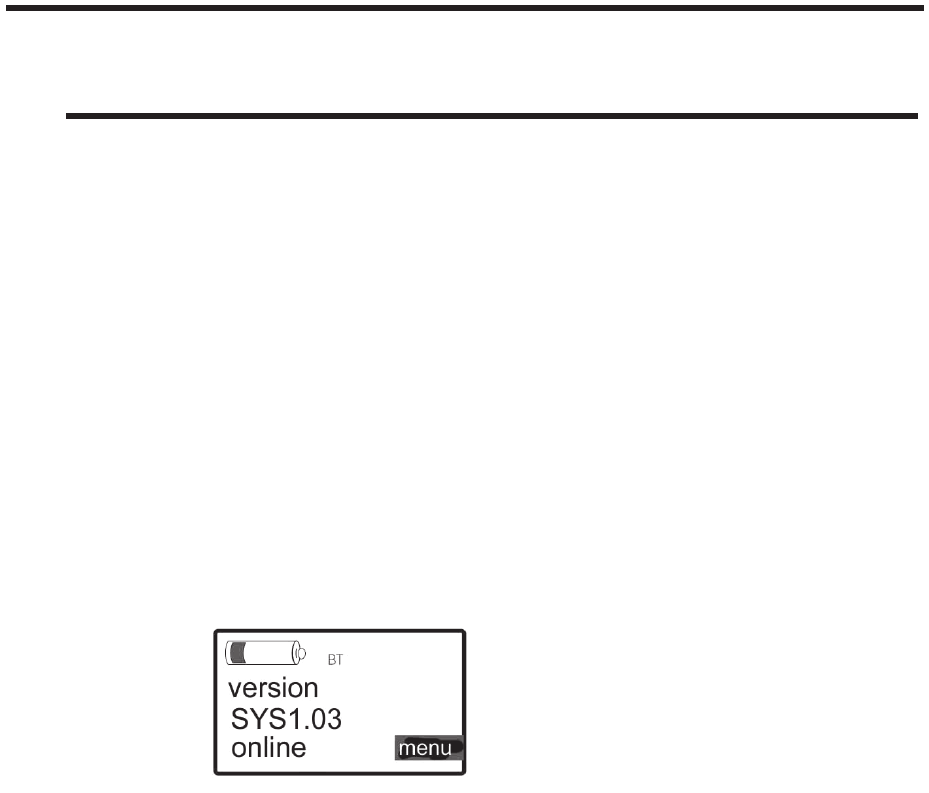
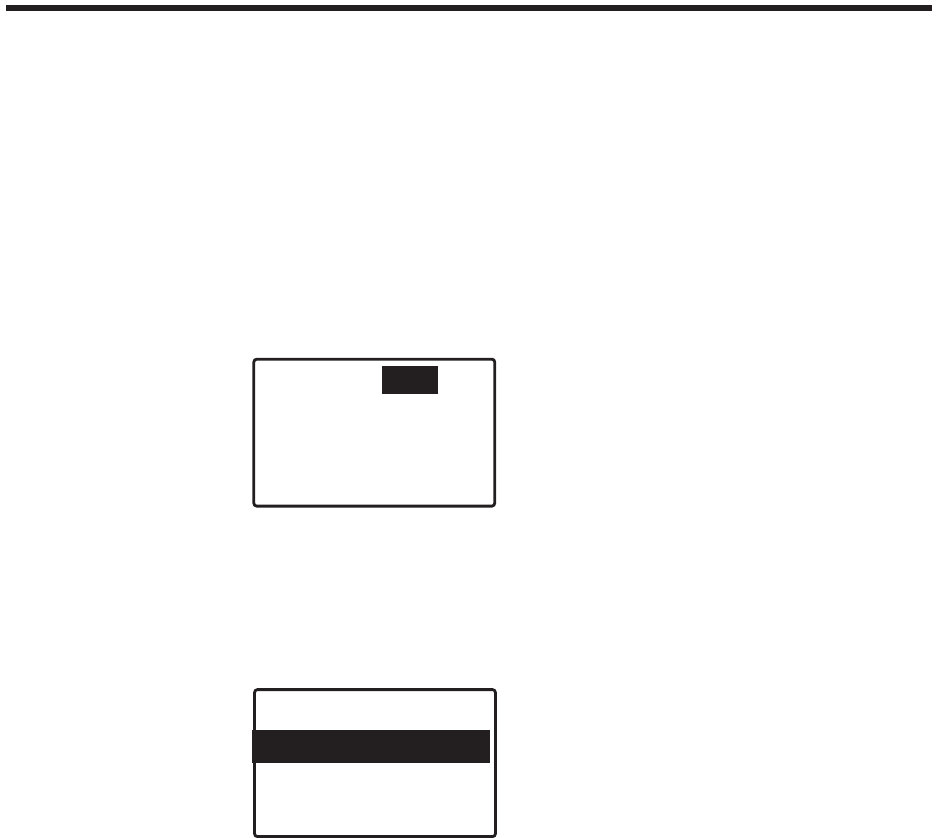
10-1. Turn on the power
Hold down the POWER key for about one second and release
it when the green Power LED lights up.
・ The following standby screen appears as shown in the gure
below after the logo mark is displayed for a few seconds,
and the version of the machine continues to be displayed till
the rst operation.
*Here, the remaining battery level is displayed to indicate the
charging state.
10-2. Turn off the power
Hold down the POWER key and release it after the
Power LED turns off.
38
11. Contrast adjustment of the liquid crystal display
(1) Turn on the power.
The standby screen appears.
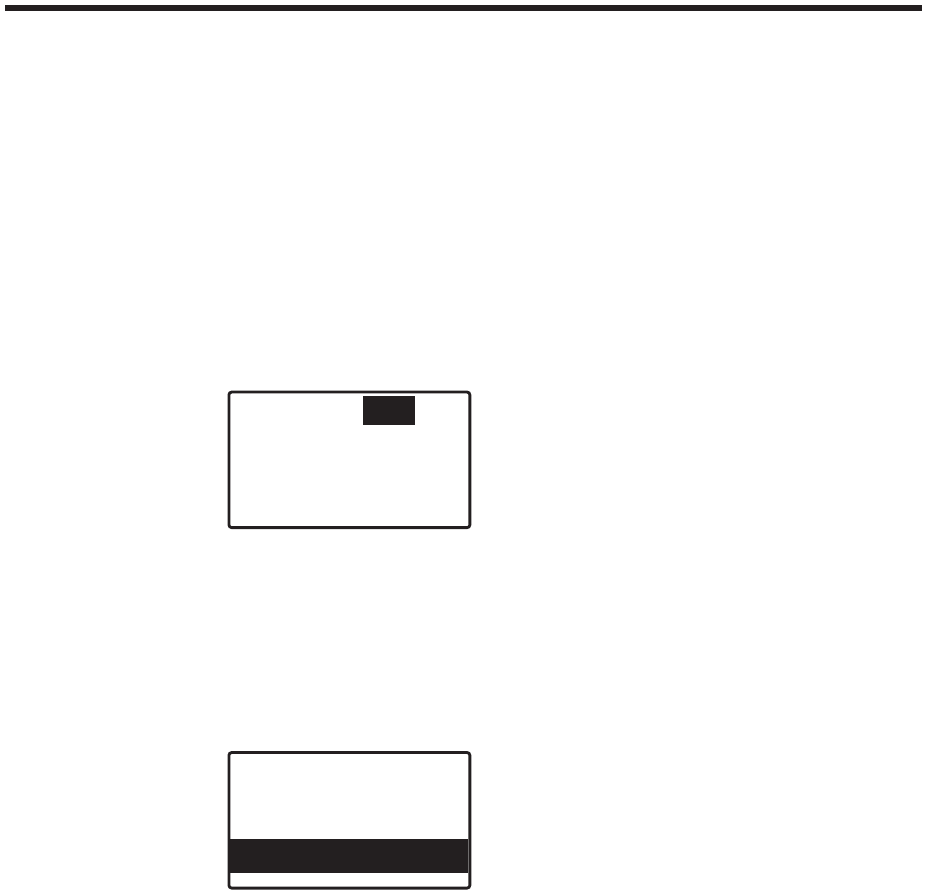
(2) Press the MENU key for about one second to display the
Menu 1/4 screen. Conrm the cursor is located on the
[next] button, and press the FEED key.
(3) Conrm that [1. contrast] is selected and press the MENU key.
menu 1/4 exit
1. contrast
2. backlight
next
menu 1/4 next exit
2. backlight
1. contrast
39
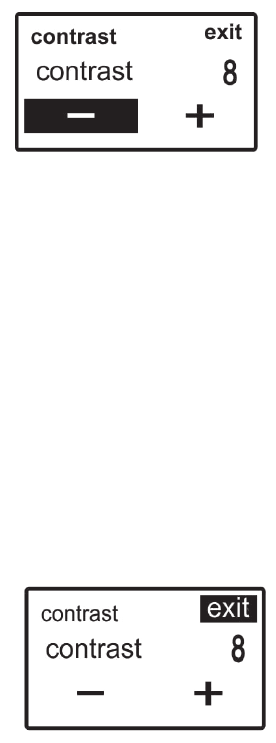
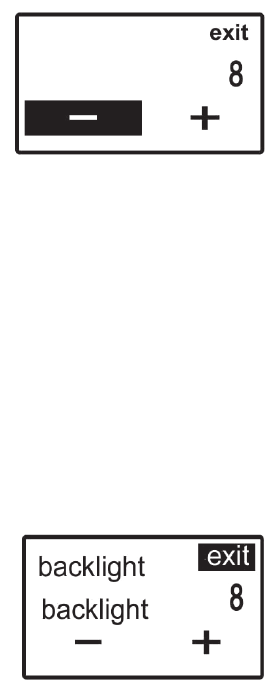
(4) Each time you press the FEED key under this condition,
[-], [+], or [exit] is selected in this order.
Select [+] to increase the contrast, or [-] to decrease the
contrast, and press the MENU key to change the numeric
value for changing the contrast. (1 ~16)
(5) After completing the setting, select [exit] by using the FEED
key and press the MENU key.
(6) The display returns to the Menu 1/4 screen.
Press the MENU key for about one second to return to
the standby screen.
40
12. Adjustment of the backlight lighting time
(1) Turn on the power.
The standby screen appears.
(2) Press the MENU key for about one second to display
the Menu 1/4 screen. Conrm the cursor is
located on the [next] button, and press the FEED key.
(3) Select [2. backlight] by using the FEED key, and press
the MENU key.
menu 1/4 exit
1. contrast
2. backlight
next
menu 1/4 next exit
1. contrast
2. backlight
41
(4) Each time you press the FEED key under this condition,
[-], [+], or [exit] is selected in this order.
Select [+] to lengthen the lighting time, or [-] to shorten the
time, and press the MENU key to change the numeric
value (0 - 90 seconds).
(5) After completing the setting, select [exit] by using the FEED
key and press the MENU key.
(6) The display returns to the Menu 1/4 screen.
Press the MENU key for about one second to return to
the standby screen.
backlight
backlight
42
13. Test Printing
13-1. Test printing method 1
(1) Turn on the power.
The standby screen appears.
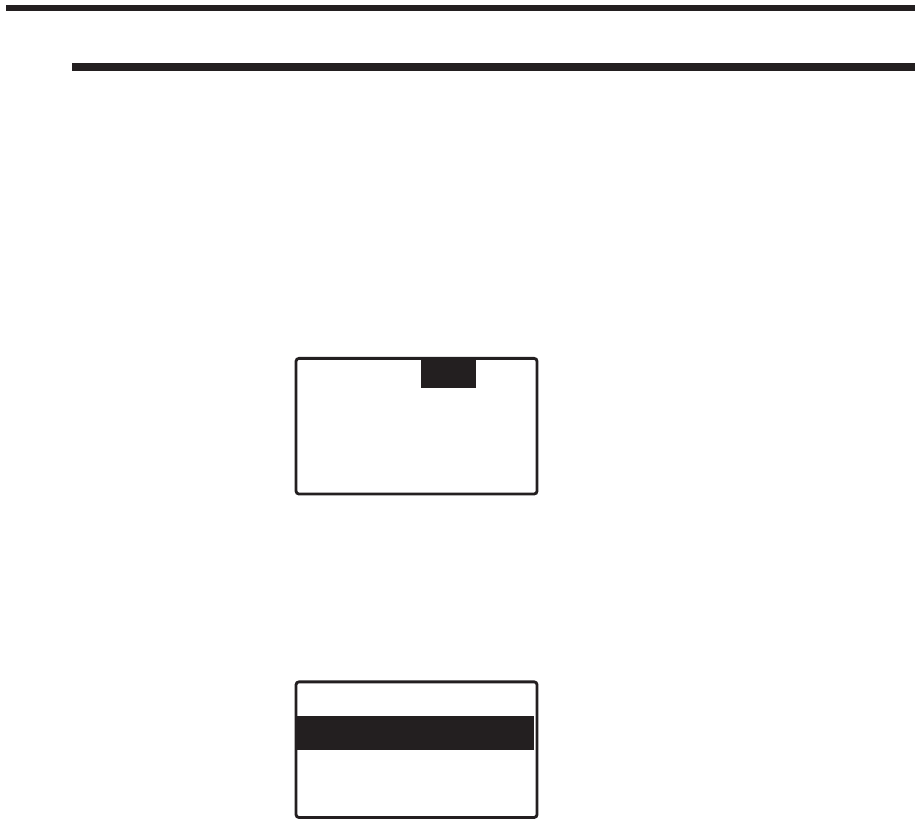
(2) Press the MENU key for about one second to display the
Menu 1/4 screen. Conrm the cursor is located on the
[next] button, and press the MENU key.
(3) The Menu 2/4 screen appears. Select [3. test print] by
using the FEED key, and press the MENU key.
menu 2/4 next exit
4. print setting
3. test print
menu 1/4 exit
1. contrast
2. backlight
next
43
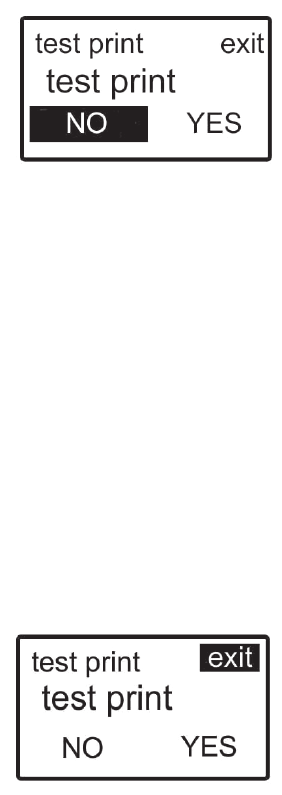
(4) Each time you press the FEED key under this condition,
[NO], [YES], or [exit] is selected in this order.
Select [NO] by using the FEED key for not printing, and
press the MENU key. Then, the Menu 2/4 screen appears.
Select [YES] by using the FEED key for printing, and press
the MENU key. Then, the test pattern is printed.
(5) When completing the operation, select [exit] by using the
FEED key and press the MENU key.
(6) The Menu 2/4 screen appears.
Press the MENU key for about one second to return to the
standby screen.

44
13-2. Test printing method 2
(1) Hold down the POWER key while holding down the FEED
key to turn on the Power LED, and release both FEED and
POWER keys when the test pattern is displayed.
(2) Conrm that the normal pattern is printed.
・ Contact our dealer if the abnormal pattern should be
printed.
Normal pattern
Abnormal pattern
45
14. Printing the Conguration List
・ The set value list is printed in 200mm long and 48mm wide.
The print might overow depending on labels.
Receipt paper of 48mm or more in width is recommended.
(1) Turn on the power.
The standby screen appears.
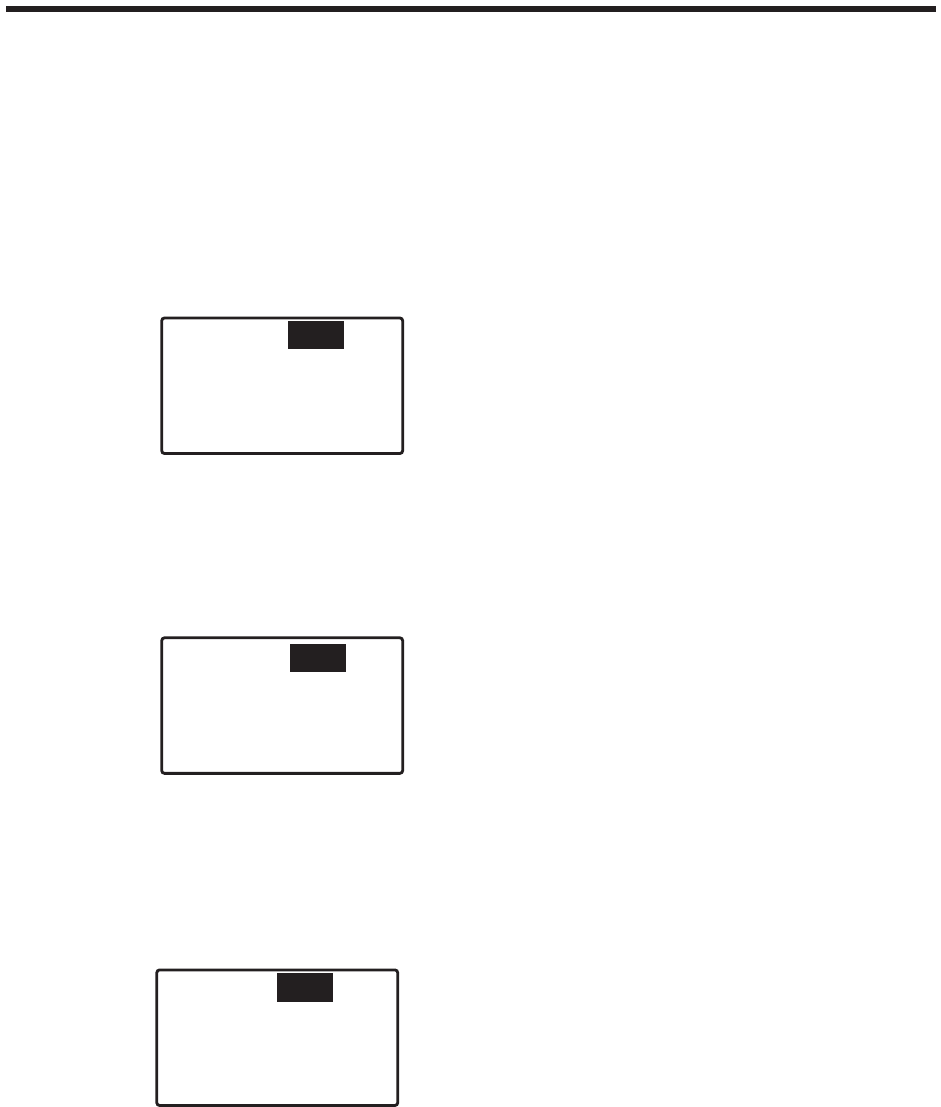
(2) Press the MENU key for about one second to
display the Menu 1/4 screen. Conrm the cursor is located
on the [next] button, and press the MENU key.
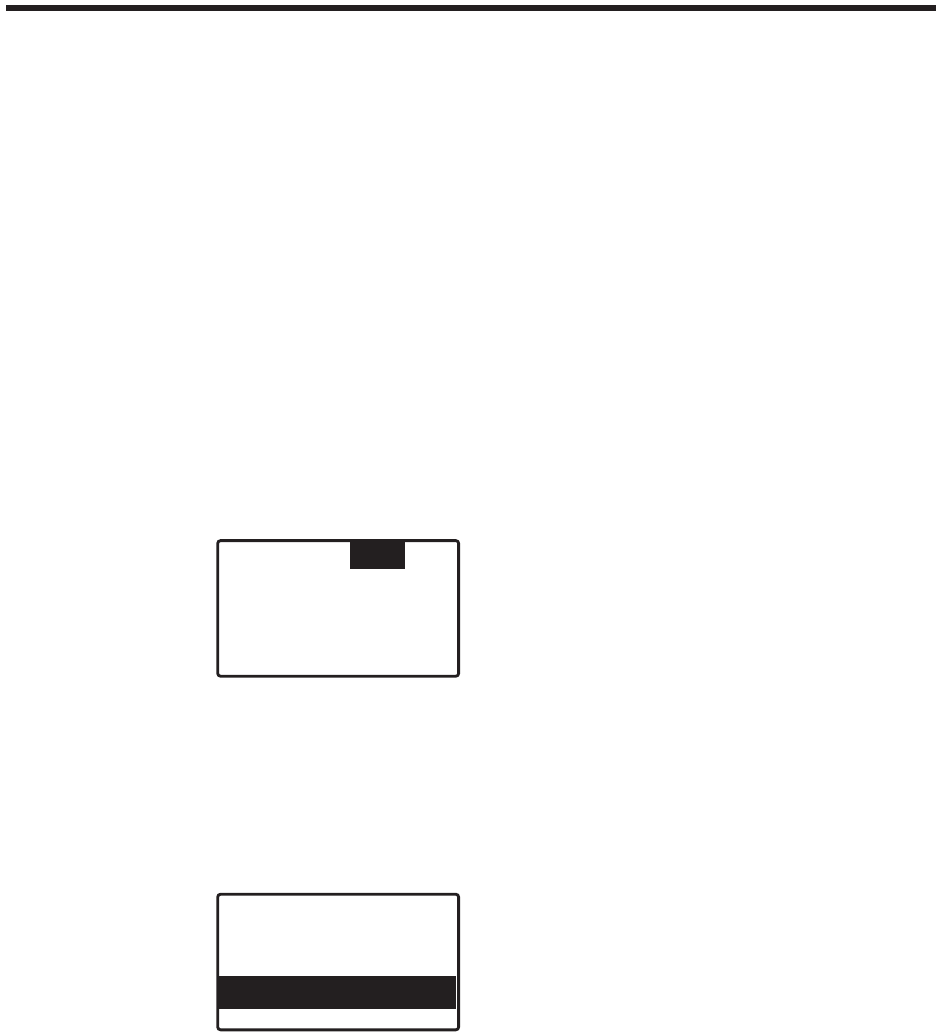
(3) The Menu 2/4 screen appears. Select [4. print settings]
by using the FEED key, and press the MENU key.
menu 1/4 exit
1. contrast
2. backlight
next
menu 2/4 next exit
3. test print
4. print settings
46
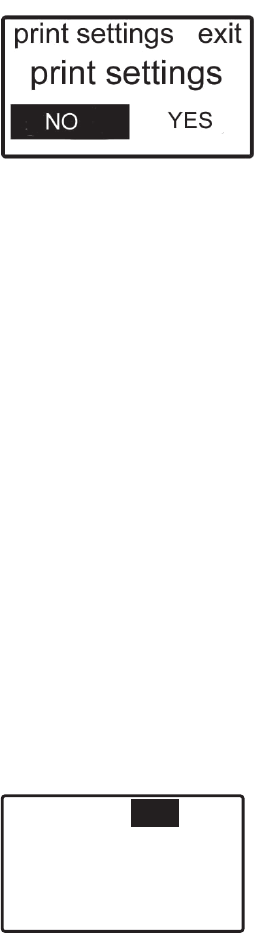
(4) Each time you press the FEED key under this condition,
[NO], [YES], or [exit] is selected in this order.
Select [NO] by using the FEED key for not printing, and
press the MENU key. Then, the Menu 2/4 screen appears.
Select [YES] by using the FEED key for printing, and press
the MENU key. Then, the test pattern is printed.
(5) When completing the operation, select [exit] by using the
FEED key and press the MENU key.
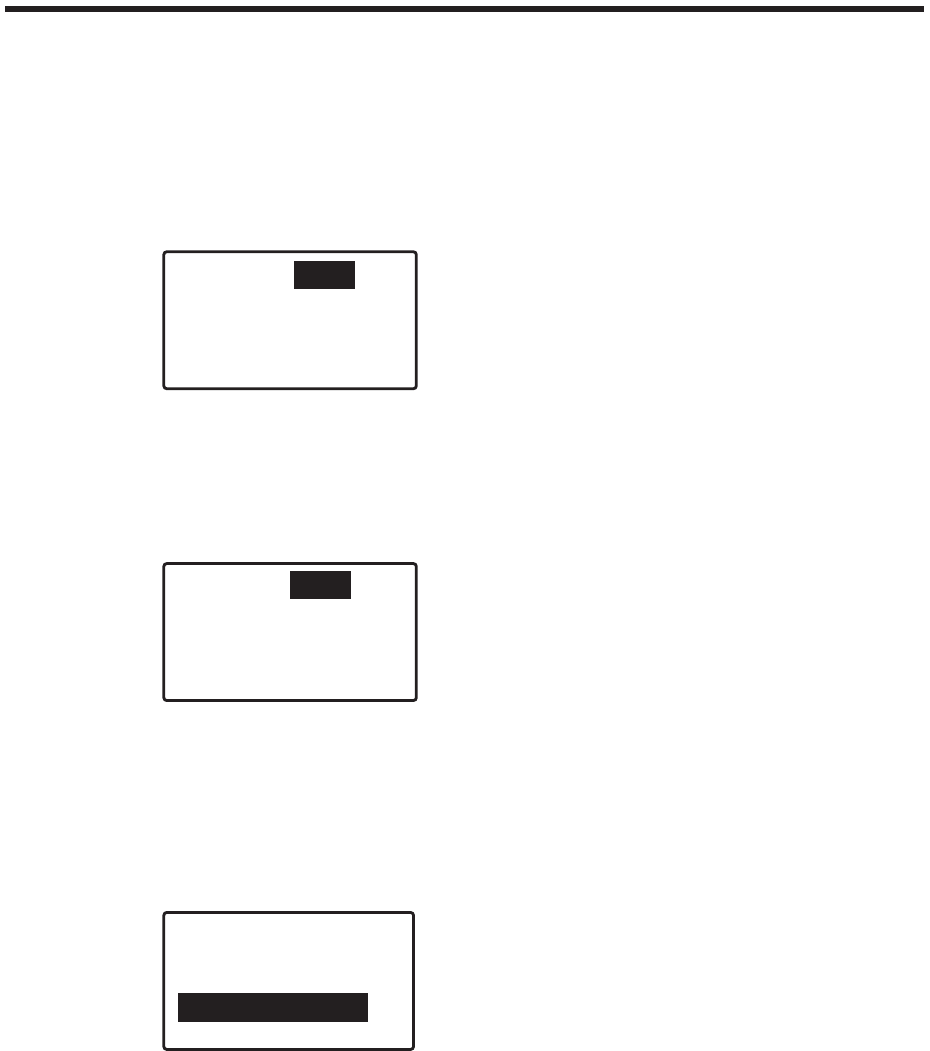
(6) The Menu 2/4 screen appears.
Press the MENU key for about one second to return to the
standby screen.
menu 2/4 exit
3. test print
4. print settings
next
47
menu 3/4 exit
5. Printer Info
6. bluetooth
15. Printer Info
menu 1/4 exit
1. contrast
2. backlight
next
menu 2/4 exit
3. test print
4. print settings
next
(1) Turn on the power.
The standby screen appears.
(2) Press the MENU key for about one second and the menu
1/4 screen appears.
(3) Conrm the cursor is located on the [next] button and press the
MENU key, the menu 2/4 screen appears.
(4) Conrm the cursor is located on the [next] button and press the
MENU key, the menu 3/4 screen appears.
next

48
Printer Info exit
SYSX. XX
IPL_DP2_X.XX
XXX.Xkm
next
Printer Info exit
English
ANSI Latin 1
next
(5) To display the Printer Info, move the cursor to " 5. Printer Info"
by using the FEED key.
menu 3/4 next exit
5. Printer Info
6. bluetooth
(6) Conrm the cursor is located on the " 5. Printer Info"
and press the MENU key.
The Printer Info screen below appears.
(7) Press the MENU key and the following screen appears.
To return to the menu screen
Press the MENU key for about one second.
49
(1) Turn on the Power.
The standby screen appears.
(2) Press the MENU key for about one second to display the Menu
1/4 screen. Conrm the cursor is located on the [next] button,
and press the MENU key.
(3) The Menu 2/4 screen appears. Conrm the cursor is located on
the [next] button, and press the MENU key.
16. Conrmation of BluetoothTM communication
setting value
(4) The Menu 3/4 screen appears.
Select [6. bluetooth] by using the FEED key, and press the
MENU key.
menu 1/4 exit
1. contrast
2. backlight
menu 2/4 exit
3. test print
4. print settings
menu 3/4 next exit
5. Printer Info
next
next
6. bluetooth

50
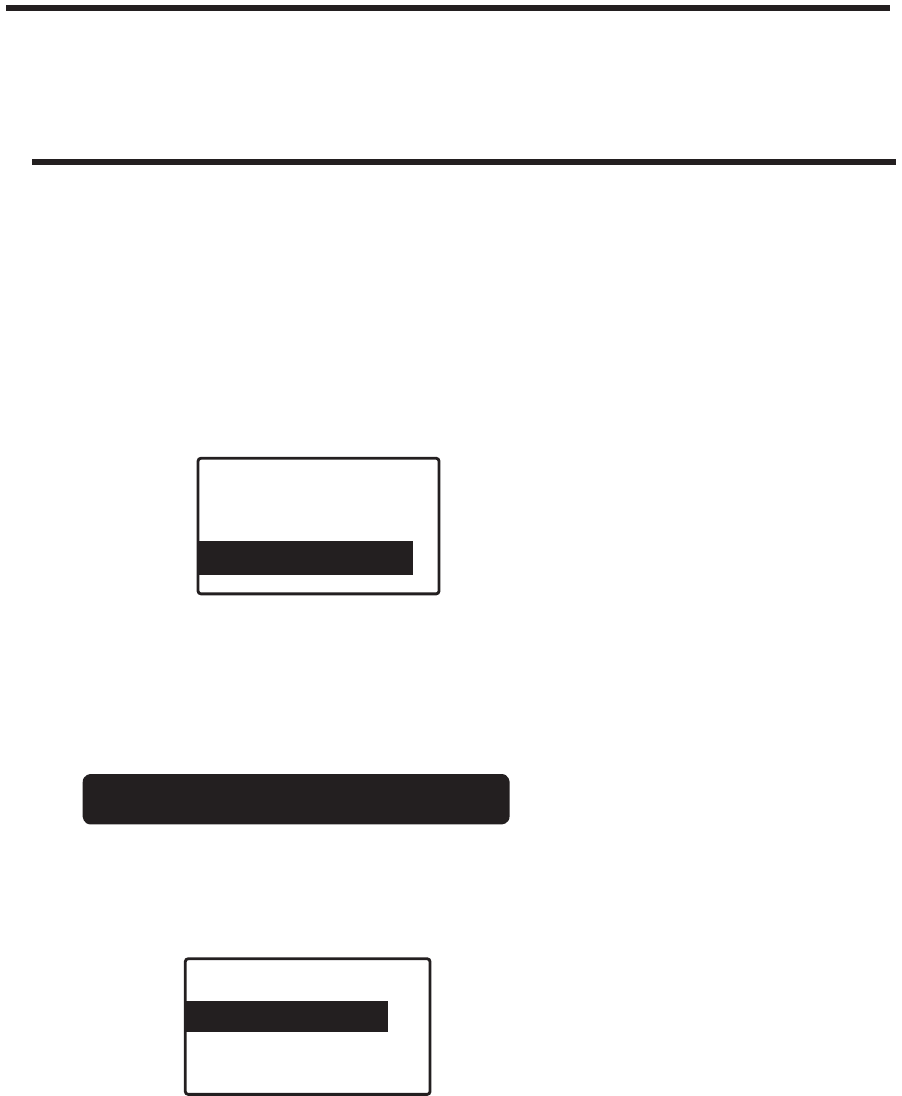
(5) The selection screen for [1. print BDA] and
[2. show settings] appears. Conrm the cursor is located on
the [1.print BDA] button, and press the MENU key.
bluetooth exit
2. show settings
1. print BDA
(6) The [print BDA] screen appears.
In case of [NO]
bluetooth
print BDA
YES
NO
●In case of [NO], conrm the cursor is located on the [NO],
and press the MENU key for about one second to return to
the standby screen.
※If the MENU key is pressed on this screen, the screen returns
to the previous selection screen.

51
●When printing BDA, select [YES] by pressing the FEED key,
and the Bluetooth authentication address (BDA) is printed.
●After printing BDA, press the MENU key for about one second
to return to the standby screen.
※If the MENU key is pressed on this screen, the screen returns
to the previous selection screen.
In case of [YES]
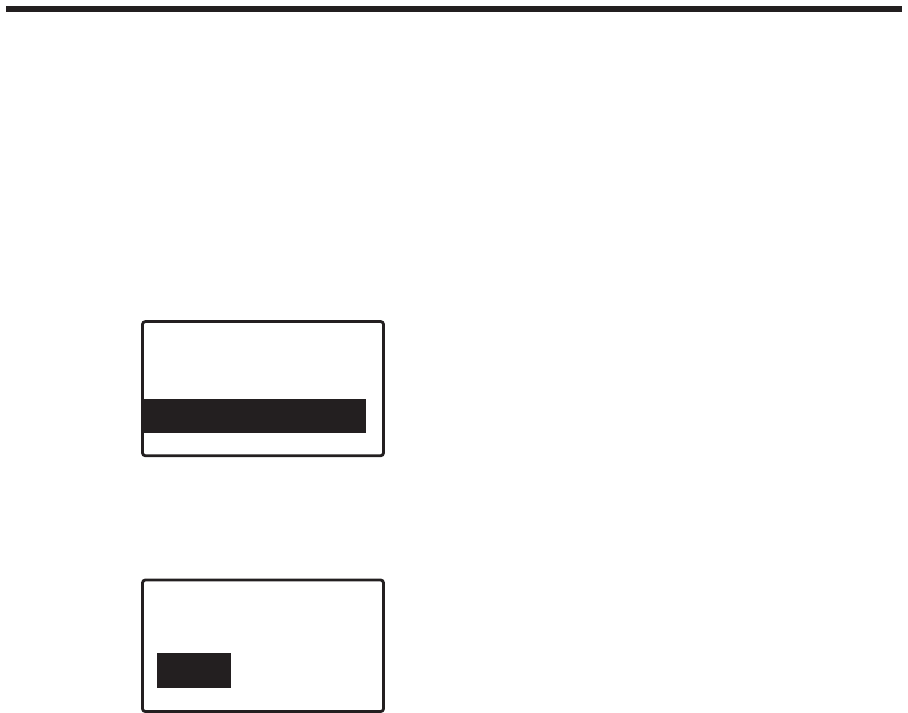
(7) Select [2.show settings] on this screen by using
the FEED key, and press the MENU key.
bluetooth exit
1. print BDA
2. show settings
①The initial set values are displayed.
bluetooth exit
BDA/Name:
000190E130A0
SHINSEI PRINTER
next

52
②Conrm the cursor is located on the [next] button, and press
the MENU key to display the next set value.
bluetooth exit
PIN:
0000000000000000
Auth:none
next
③Conrm the cursor is located on the [next] button, and press
the MENU key to display the last set value.
bluetooth exit
ModuleVersion:
0100
next
●Press the MENU key for about one second on this screen,
and the screen returns to the standby screen.
※Conrm the cursor is located on the [next] button and press
the MENU key to return to the initial set value screen.
※Selecting [exit] on this screen by using the FEED key and press
the MENU key to return to the Menu 3/4 screen.
53
17. Automatic adjustment of the sensor
Performs the automatic sensitivity adjustment of the label sensor
and the Peel sensor.
17-1. Automatic adjustment of the label sensor
(1) Conrm the cursor is located on the [next] button on the
Menu 3/4 screen and press the MENU key, and the
Menu 4/4 screen appears. To perform the automatic
adjustment of the label sensor to x the label position,
select [7. sensor Adjust] by using the FEED key and
press the MENU key.
menu 4/4 next exit
7. sensor Adjust
8. peel Adjust
(2) Selection screen for the label type appears.
Select the label type either [1. mark Label] or [2. gap Label]
by using the FEED key.
In case of mark Label
①Conrm the cursor is located on the [1. mark Label] and
press the MENU key.
autoSensor exit
2. gap Label
1. mark Label

54
② The mark sensor adustment screen appears.
Every time the FEED key is pressed,
[NO] ⇒ [YES] ⇒ [exit] appears.
mark exit
sensor Adjust
YES
NO
③If the sensor adjustment is not required, conrm the cursor
is located on the [NO] and press the MENU key to return
to the previous selection screen.
④ If the sensor Adjust is required, select [YES] by using the FEED
key and press the MENU key.
● If the sensor is adjusted normally, the following screen appears.
autoSensor
END
exit
● Press the MENU key for about one second on this screen to
return to the standby screen.
※ Conrm the cursor is located on the [exit] on this screen and
press the MENU key to return to the previous selection screen.

55
In case of gap Label
①Select [2. gap Label] on the label type selection screen by
using the FEED key and press the MENU key.
autoSensor exit
1. mark Label
2. gap Label
Hereafter, follow the procedure described in the mark Label
②⇒③⇒④ on the Page 54.
56
(1) Conrm the cursor is located on the [next] on the Menu
3/4 screen and press the MENU key to display the Menu
4/4 screen. To adjust the sensitivity of the Peel sensor
that detects label, select [8. peel Adjust] by using the FEED
key and press the MENU key.
17-2. Automatic adjustment of the Peel sensor
menu 4/4 next exit
7. sensor Adjust
8. peel Adjust
(2) The threshold setting screen for the Peel sensor appears.
+
Peel exit
threshold 119
-
● To lower the threshold, select [-] and press the MENU key.
The threshold is lowered one by one by pressing the
MENU key. The Peel sensor sensitivity becomes lower
if the threshold is lowered.
● To increase the threshold, select [+] by using the FEED key
and press the MENU key. The threshold is increased one
by one by pressing the MENU key.
The Peel sensor sensitivity becomes higher if the threshold
is increased.
(3) After setting the threshold, press the MENU key for about
one second to return to the standby screen.
※ Select [exit] by using the FEED key on this setting
screen and press the MENU key to return to Menu
4/4 screen.
57
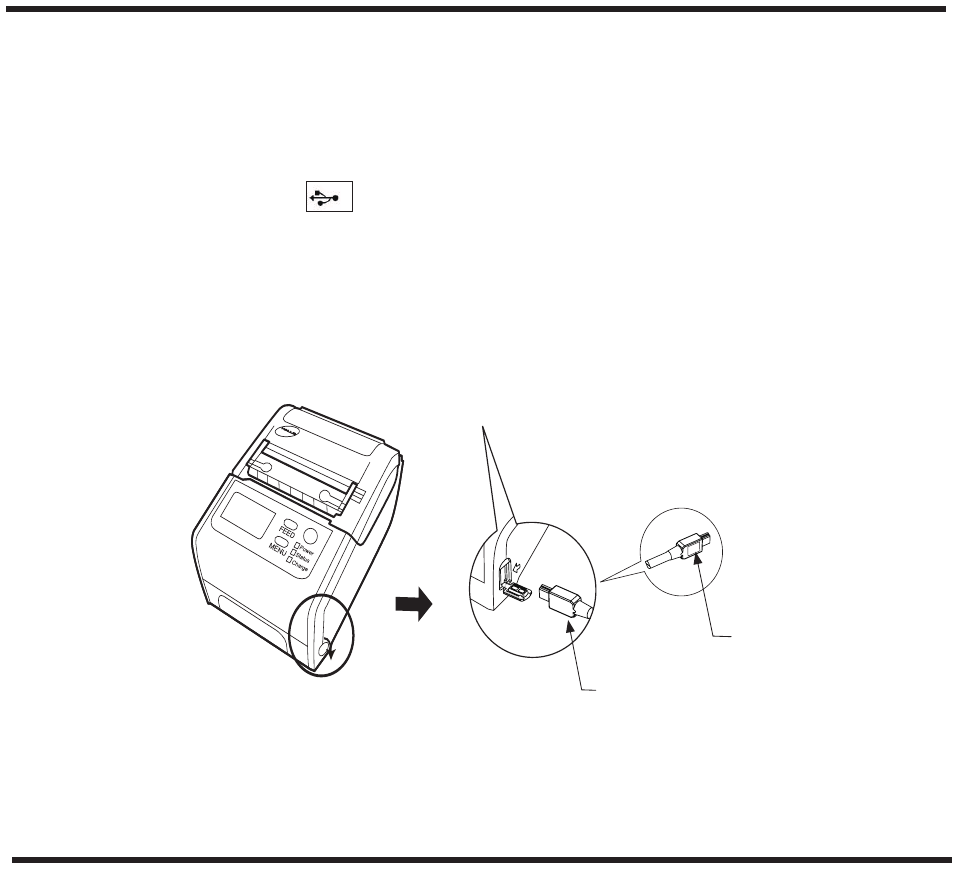
18. Connecting the USB (mini-B)
(1) Open the connector cover for USB.
(2) Connect the USB connection cable (option) with the connector
for USB.
・ The USB sign on the USB terminal (mini-B) must face
the arrow sign on the printer.
(3) This port is only used for data transfer, no supply function.
19. Using the BluetoothTM communications
When printing by the use of BluetoothTM communications, the use
distance is different according to the use environment or the hand-held
portable data terminal.
Caution should be exercised because communication distance
might shorten remarkably or communications might not be possible
particularly around microwave oven, place where interference occurs,
or wireless LAN equipment.
Mobile Printer DP-2E
USB terminal (mini-B)
USB sign
58
20. Label issuing mode
(1) Data is sent from the personal computer or the hand-held
portable data terminal.
(2) In the case of Tear-off mode
The specied number of labels is printed and fed.
(3) In the case of Peel-Off mode
You can select "Automatic issue" or "Manual issue" using
the change switch.
Slide the switch to either "Auto issue" or "Manual issue"
position.
* Refer to 9-2-(8) for more information about "Auto issue"
and "Manual issue".
Mode change
switch

59
21. Error messages
If an error occurs with this machine, the red Status LED lights up,
and the state is displayed. Take measures according to the dealing
process.
No. LCD LED Status Measures
1 cancel /
resume
printing
Off
This indicates a
suspended label issue
state.
Makes a
selection using
the FEED and
MENU keys.
2 cool
down
(count
down)
Off
This indicates a resting
state due to over-heated
motor at the normal issue.
The label will
be automati-
cally issued
after the motor
is cooled.
3 head
over
heated
Off
This indicates a resting
state for cooling due to
overheated head.
Intermittent operation:
about 5 min. ON/ 20 min.
OFF.
The label will
be automati-
cally issued
after the motor
is cooled.
4 paper
end
On (red)
This indicates a label end
detecting state.
Replace with
new labels.

60
No. LCD Status
LED Status Measures
5 Cover
open On (red)
This indicates
a cover opening
state.
Close the cover.
6 low
battery
On (red)
for about
10
seconds
This indicates a
battery low
detecting state.
The power will be
turned off in 10
seconds.
Charge the battery.
7 head
error Off
This indicates
a head failure
state.
Contact our dealer
8 label
error On (red)
This indicates
a mark un-
detectable
state.
Replace with a
correct label.
9 BT Off
This indicates
a built-in
Bluetooth
failure state.
Contact our dealer
No. LCD Charge
LED Status Measures
1(Nothing is
displayed) Blinking
This indicates a
battery
degradation
state.
Replace with a
new battery.

61
22. Daily Check and Cleaning Method
22-1. Printing check (Test pattern printing)
First of all, print the test pattern before issuing labels. Check
that the thermal print head works normally and the pattern is
printed correctly.
(1) Turn on the power of this machine.
(2) Print the test pattern according to the procedure described in
Section 13 "Test Printing".
(3) Check that there is no white line on the printed test pattern.
Normal pattern
Abnormal pattern

62
22-2. Execution of the head check
The head is automatically checked when the machine power
is turned on. If the messge "head error" is displayed,
contact our dealer.
・Use this head check as a guide. Test printing can be normal
if the message "head error" is displayed, or the message will
not appear if test printing is abnormal. In this case, prioritize
test printing.
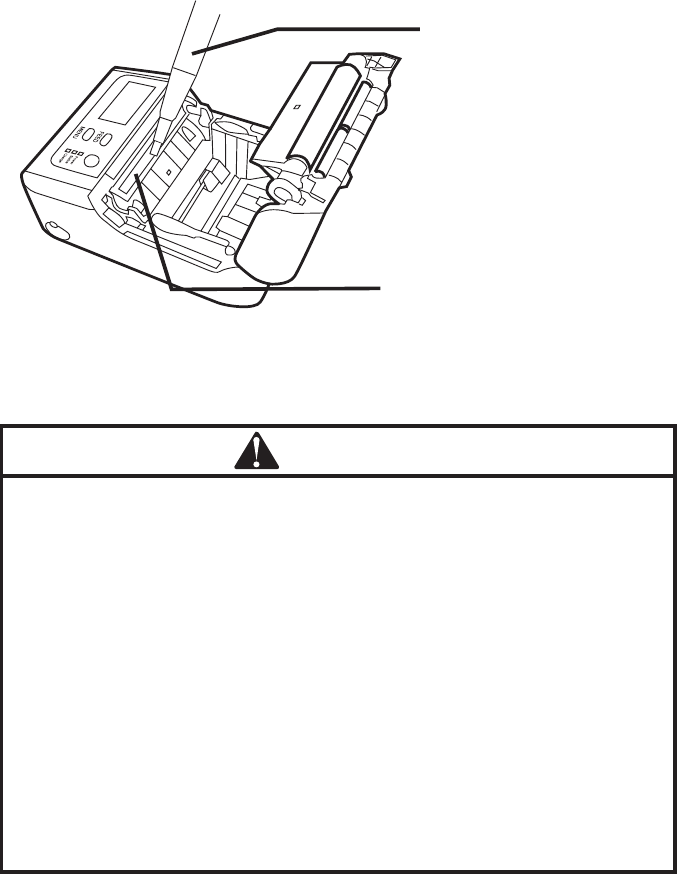
22-3. Cleaning of the thermal print head
Normal printing cannot be made when glue or dust adheres
to the print head, clean the thermal print head.
(1) Open the cover by lowering the release lever and take out
the media roll.
(2) Check that glue or dust does not adhere to the print head.
(3) Carefully wipe off extraneous objects if any with the attached
head cleaner.
63
(4) Use the head cleaner after cutting the dirty part when
the cleaner gets dirty.
∑ Do not use anything other than the specied
head cleaner.
∑ Do not remove extraneous objects with a
sti-pointed thing such as a driver or pencil.
Doing so may cause damage of the thermal
print head.
∑ Do not clean the machine when the thermal
print head is still high in temperature. Doing
so may cause a burn.
Head cleaner
Thermal print head
CAUTION
・
・
・
64
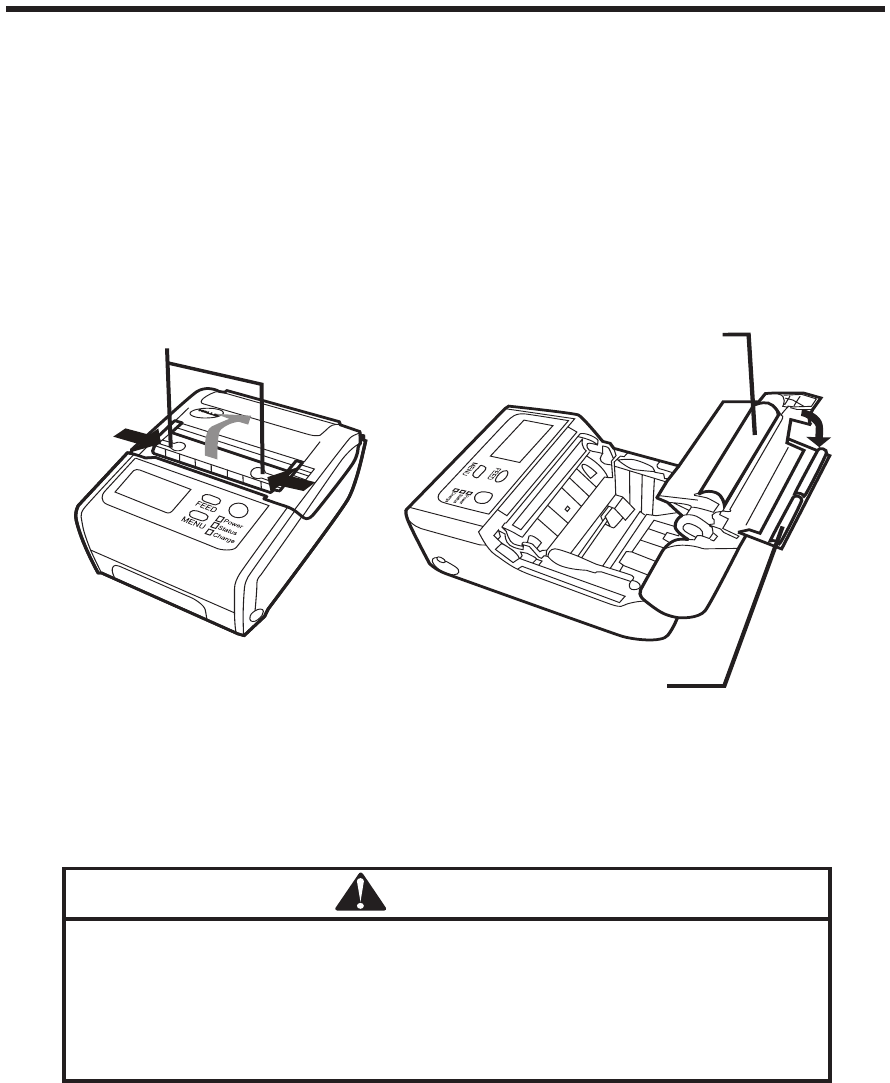
22-4. Cleaning of the platen roller and the peel roller
(1) Open the peel frame by sliding the peel frame release lever.
(2) Open the cover by pressing the release lever. Then, take
out the media roll.
(3) Clean the platen and peel rollers with a soft cloth wrung
after being soaked in neutral detergent.
Mobile Printer DP-2E
Platen roller
Peel roller
Peel frame release lever
Do not use organic solvents such as benzene and
thinner may dissolve the machine or platen roller.
Doing so may cause a trouble.
CAUTION
65
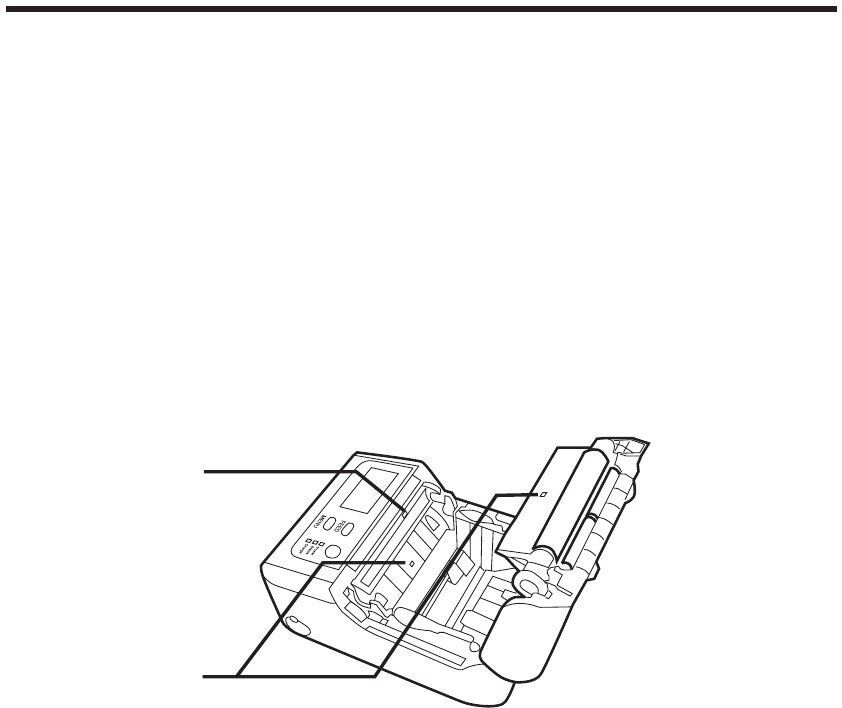
22-5. Cleaning of each sensor
(1) Open the cover by lowering the cover release lever, and
take out the media roll.
(2) Clean the label sensor and peel sensor with the attached
brush.
・There is a possibility that dusts adhere to the label sensor
if the red Status LED lights up even though labels are
correctly set.
Peel sensor
Label sensor
66
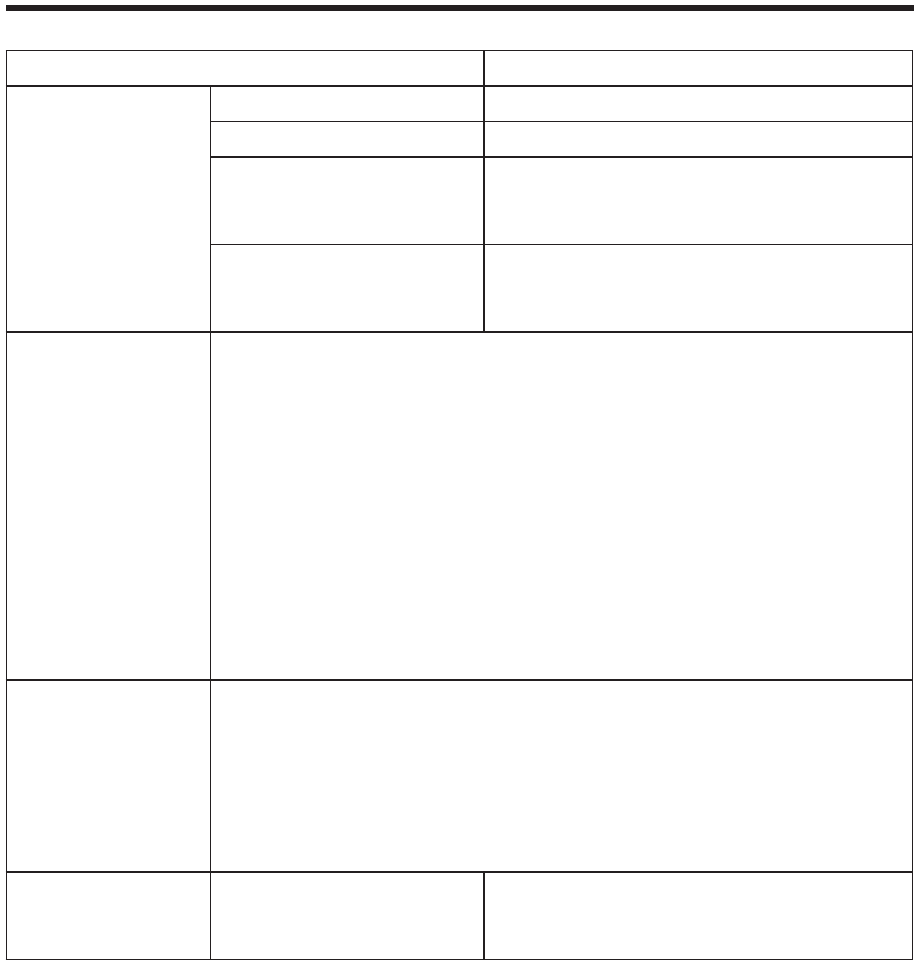
23. Specications of this machine
Specications/Model name DP-2E
Printer
unit
Print method Direct thermal
Resolution 8 dots/mm (203 dpi)
Print speed Max. 100mm/second
(standard printing)
Effective print
range
Width: 48mm
Length: 100mm
External
dimensions
・DP-2E (for a small label roll)
123mm(L) x 85mm(W)x 64mm(H)
(excluding protruding portions)
・DP-2E (for a large label roll)
146mm(L) x 85mm(W) x 76mm(H)
(excluding protruding portions)
Weight
・DP-2E (for a small label roll)
398g (including battery pack)
・DP-2E (for a large label roll)
411g (including battery pack)
Power
supply
Battery Special lithium-ion battery
(7.4V, 2500mAh)

67
Display unit
LCD
128 x 64 dots
Dot matrix liquid crystal display
(with backlight)
LED
3 LEDs
(Power, Status, Charge)
Operation
panel Buttons
3 buttons
(Power, MENU, FEED)
Interfaces BluetoothTM
BluetoothTM
Conforming to Ver. 1.2 (Class 2)
USB cable
(mini-B)
Use of exclusive use cable
Communication
method
SPLM
(command method using special protocols)
Label printing
mode
Tear-off, Peel-off
Label
(Outside
wound
label/paper
only)
Label
backing
paper width
24 - 58mm
Media roll
outside
diameter
58mm or less
(for a small label roll)
・DP-2E (for a large label roll)
70mm or less
(desk-top standard label)
Label mark
type
I mark/Black mark, Gap,
No mark

68
Barcode type EAN 8, EAN 13, JAN 8, JAN 13,
UPC-A, UPC-E, NW-7, Interleaved 2 of 5 (ITF),
CODE 39, CODE 128, EAN 128, RSS
Two-dimensional code QR Code, PDF 417
Font Bit map fonts:
SSF1: 16 x 24 dots
SSF2: 24 x 32 dots
Outline fonts (scalable):
A Gothic, F European, C European,
Gothic, MINCHO, OCR-B
Pop font
Bit map Kanji fonts (JIS Level 1 & 2):
Gothic: 16 x 16, 22 x 22, 24 x 24 dots
MINCHO: 22 x 22, 24 x 24 dots
Outline Kanji fonts (JIS Level 1 & 2):
Gothic (Scalable within 127 dots)
Functions
Self-
diagnosis
Error message is displayed on the LCD.
Power
saving
Sleep mode
Auto power off
Remaining battery level indication
Optional
accessories
Charger adapter (CV-74)
Battery charger (CH-74)
Battery pack (BH-74)
Protector (DP-74)
Belt hook (DH-74B)
USB cable (mini-B)
Portable holster (DH-74)
Auxiliary case (HH-74)
Rainproof case (DH-74R)

69
24. Important Notices
1. No part of this manual may be reproduced in any form, or
by any means, mechanical, electronic, photocopying,
recording, or otherwise, without prior written permission.
2. The information in this manual is subject to change
without notice.
3. The information in this manual has been carefully checked
and is believed to be accurate; however, no responsibility
is assumed for clerical, typographical or proofreading errors,
or omissions.
4. Please note neither is any liability assumed for damages
resulting from the use of the information contained in this
publication.

70
Shinsei Industries Co., Ltd.
Head ofce
〒114-0004 4-12-15 Horifune, Kita-ku, Tokyo
TEL: 81-3-3913-0395 FAX: 81-3-3913-9607
http://www.shinseiind.co.jp
MM0501-2 (04152010)
1st edition 2010.04