Siemens AYTERMINAL GSM telephone User Manual for AyCare
Siemens AG GSM telephone for AyCare
Siemens >
Contents
- 1. User manual AyAlarm
- 2. User manual AyCare
User manual AyCare

User Manual for AyCare
V2.1
AyTerminal
Issue February 2007
.
© Siemens AG Österreich 2007
Program and System Engineering
The reproduction, transmission, translation or exploitation of this document or its content is not permitted without express written
authority. Offenders will be liable for damages. All rights reserved, including rights created by patent grant or registration of a utility
model or design.
Right of technical modification reserved.

User Manual for AyCare AyTerminal
V2.0 Contents
Contents
1 Introduction................................................................................................................................. 6
1.1 Purpose of the document.................................................................................................... 6
1.2 Validity of the document..................................................................................................... 6
1.3 Definitions of abbreviations................................................................................................ 6
2 AyTerminal Device...................................................................................................................... 7
2.1 Device description............................................................................................................... 7
2.1.1 Hold-switch..................................................................................................................... 8
2.1.2 Status LED...................................................................................................................... 8
2.1.3 Lumberg connector........................................................................................................ 9
2.1.4 AySnapOn connector................................................................................................... 10
2.1.5 Navigation buttons....................................................................................................... 10
2.1.5.1 Navigation through the menu structure.................................................................... 10
2.1.6 Speaker......................................................................................................................... 11
2.1.6.1 Acknowledgment tones............................................................................................ 11
2.1.6.2 Ring tones................................................................................................................ 11
2.1.6.3 Alarm tone............................................................................................................... 11
2.1.7 Microphone................................................................................................................... 11
2.1.8 3D-Ego-motion sensor................................................................................................. 11
2.1.9 Temperature sensor..................................................................................................... 11
2.1.10 OLED display.............................................................................................................. 12
2.1.11 Battery charging ........................................................................................................ 12
2.1.11.1 Connecting a charger & AyTerminal switched off................................................... 12
2.1.11.2 Connecting a charger & AyTerminal switched on................................................... 12
2.1.11.3 Charger connected, AyTerminal running, shutting down........................................ 13
2.1.11.4 Connecting charger before shutting down AyTerminal........................................... 13
3 Installation and startup............................................................................................................. 14
3.1 Installation.......................................................................................................................... 14
3.2 Startup................................................................................................................................ 14
3.2.1 Loading screen............................................................................................................. 14
3.2.2 Emergency call mode................................................................................................... 14
3.2.3 PIN/PUK input............................................................................................................... 15
3.2.4 Boot screen................................................................................................................... 16
4 AyCare application.................................................................................................................... 17
4.1 AyCare menu structure..................................................................................................... 18
4.2 Modes description............................................................................................................. 19
4.2.1 Voice Call...................................................................................................................... 19
4.2.2 Panic Button................................................................................................................. 19
Page 3 / 50

AyTerminal User Manual for AyCare
Contents V2.1
4.2.3 Baby Phone................................................................................................................... 19
4.2.4 AyCare mode specific settings.................................................................................... 19
4.2.5 AyCare alarms and notifiers....................................................................................... 24
4.3 Selecting a mode............................................................................................................... 25
4.4 Configuring a mode........................................................................................................... 26
4.4.1 Activation Time............................................................................................................. 27
4.4.1.1 Examples................................................................................................................. 28
4.4.2 Auto start...................................................................................................................... 29
4.4.3 Notifiers......................................................................................................................... 29
4.4.3.1 SMS......................................................................................................................... 30
4.4.3.2 Voice Call................................................................................................................. 30
4.4.3.3 AyServer.................................................................................................................. 31
4.4.4 Triggers / Phone number............................................................................................. 32
4.4.4.1 Listen-in................................................................................................................... 33
4.4.4.2 Noise....................................................................................................................... 34
4.4.4.3 Activation delay........................................................................................................ 35
4.4.5 Duration......................................................................................................................... 35
4.4.6 Overview....................................................................................................................... 35
4.5 Activating/Starting a mode................................................................................................ 36
4.6 Deactivating a mode or triggered alarm........................................................................... 38
4.7 Emergency call.................................................................................................................. 38
4.8 Settings.............................................................................................................................. 38
4.8.1 AyServer Sync.............................................................................................................. 38
4.8.2 AySnapOn..................................................................................................................... 39
4.8.3 AyTerminal.................................................................................................................... 40
4.8.3.1 Setting the AyApplication to default settings............................................................ 40
4.8.3.2 Firmware Update..................................................................................................... 41
4.8.3.3 Info........................................................................................................................... 42
4.8.4 Audio............................................................................................................................. 43
4.8.5 Clock.............................................................................................................................. 43
4.8.6 Display........................................................................................................................... 44
4.8.7 Security......................................................................................................................... 44
4.8.7.2 PIN control............................................................................................................... 45
4.8.7.3 Changing the PIN.................................................................................................... 45
4.9 Turning off the AyTerminal............................................................................................... 46
4.10 Involved sensors in AyCare’s modes............................................................................. 47
4.11 Symbols on the AyTerminal............................................................................................ 47
5 Quick reference......................................................................................................................... 48
5.1 Device description............................................................................................................. 48
5.2 Getting started................................................................................................................... 48
5.3 Configuring the AyCare modes........................................................................................ 48
Page 4 / 50

User Manual for AyCare AyTerminal
V2.0 Contents
5.4 Activating a mode.............................................................................................................. 49
5.5 Deactivating a mode or a triggered alarm........................................................................ 49
5.5.1 Turning off the AyTerminal.......................................................................................... 49
Page 5 / 50

AyTerminal User Manual for AyCare
Contents V2.1
1Introduction
1.1Purpose of the document
The purpose of this document is to describe and specify in detail the GUI for the product AyCare,
an AyTerminal AyApplication.
It is based on the 1.0 version of the AyCare AyApplication.
1.2Validity of the document
This document is valid for the AyTerminal project, a subproject of AySystem.
The document describes how to use AyCare AyApplication.
1.3Definitions of abbreviations
Abbreviation Description
APN Access Point Name
AySnapOn additional devices to improve the functionality of the AyTerminal device
DNS Domain Name Server
EW East-West
GPRS General Packet Radio Service
GPS Global Positioning System
GSM Global System for Mobile Communications
GUI Graphical User Interface
IMEI International Mobile Equipment Identity
LED Light Emitted Diode
MSISDN Mobile Subscriber ISDN number
NET Network
NS North-South
OLED Organic Light Emitting Diode
PIN Personal Identification Number
PUK Personal Unblocking Key
SIM Subscriber Identity Module
SMS Short Message Service
URL Universal Resource Locator
Table 1-1 Abbreviations
Page 6 / 50
User Manual for AyCare AyTerminal
V2.1 AyCare application
2AyTerminal Device
2.1Device description
AyTerminal is device that enables phone calls; temperature, noise and acceleration measuring;,
sounding alarms; or notifying the user via web pages, siren, voice call and SMS. All this numbered
features are AyApplication specific.
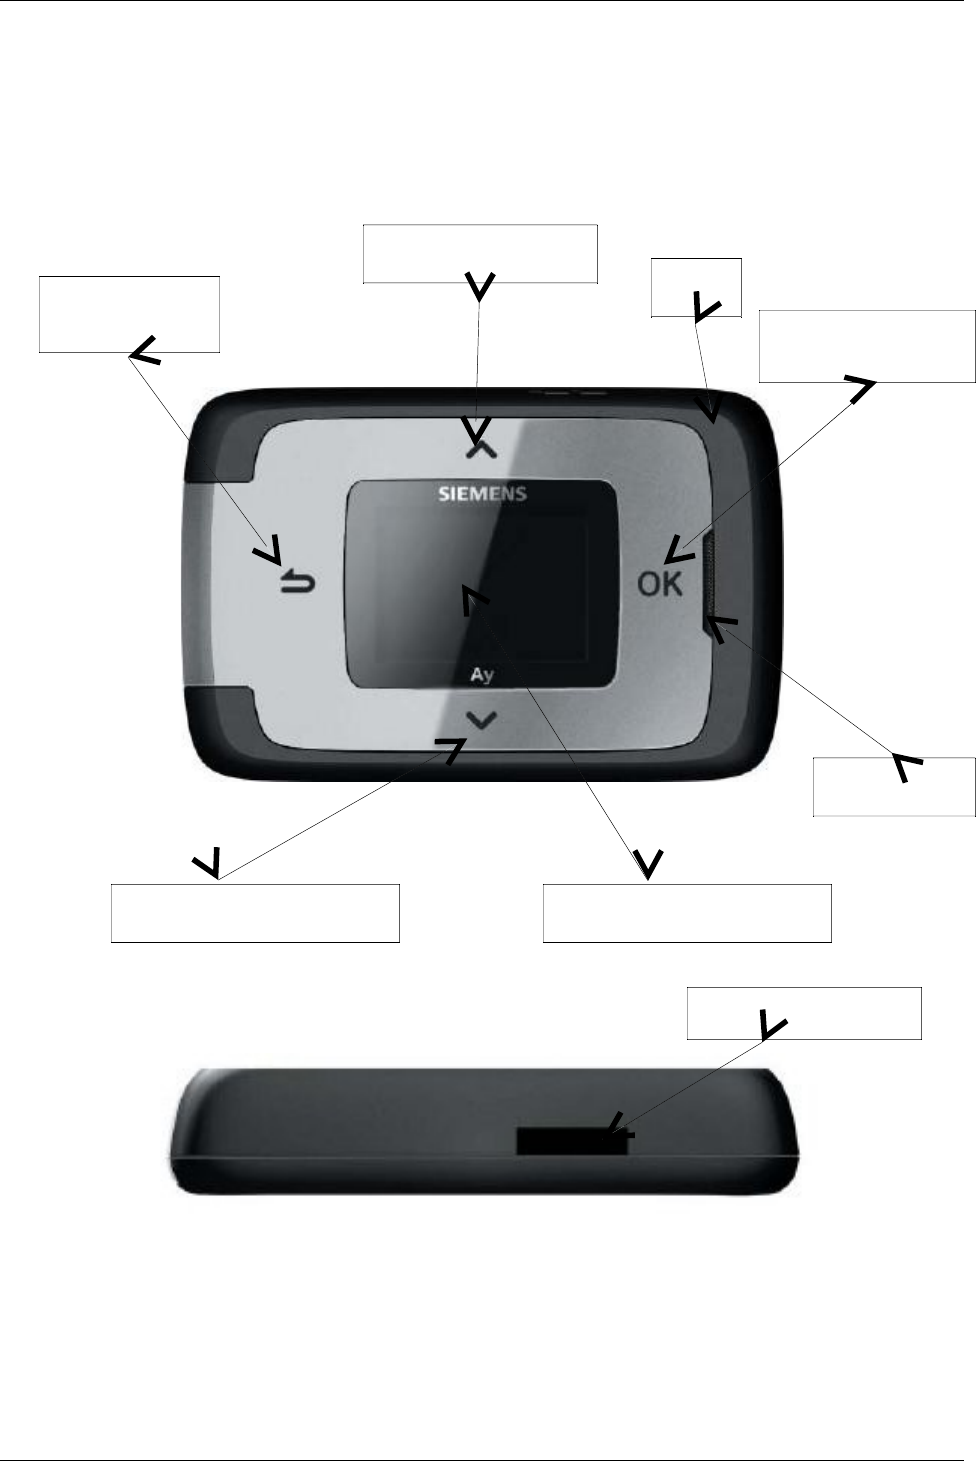
Figure 2-1 Front side of the AyTerminal
Figure 2-2 Lumberg connector
Page 7 / 50
Acceptance touch
button
Cancel tough
button
Up touch button
Down touch button
Display and central button
Loudspeaker
LED
Lumberg connector
AyTerminal User Manual for AyCare
Contents V2.1
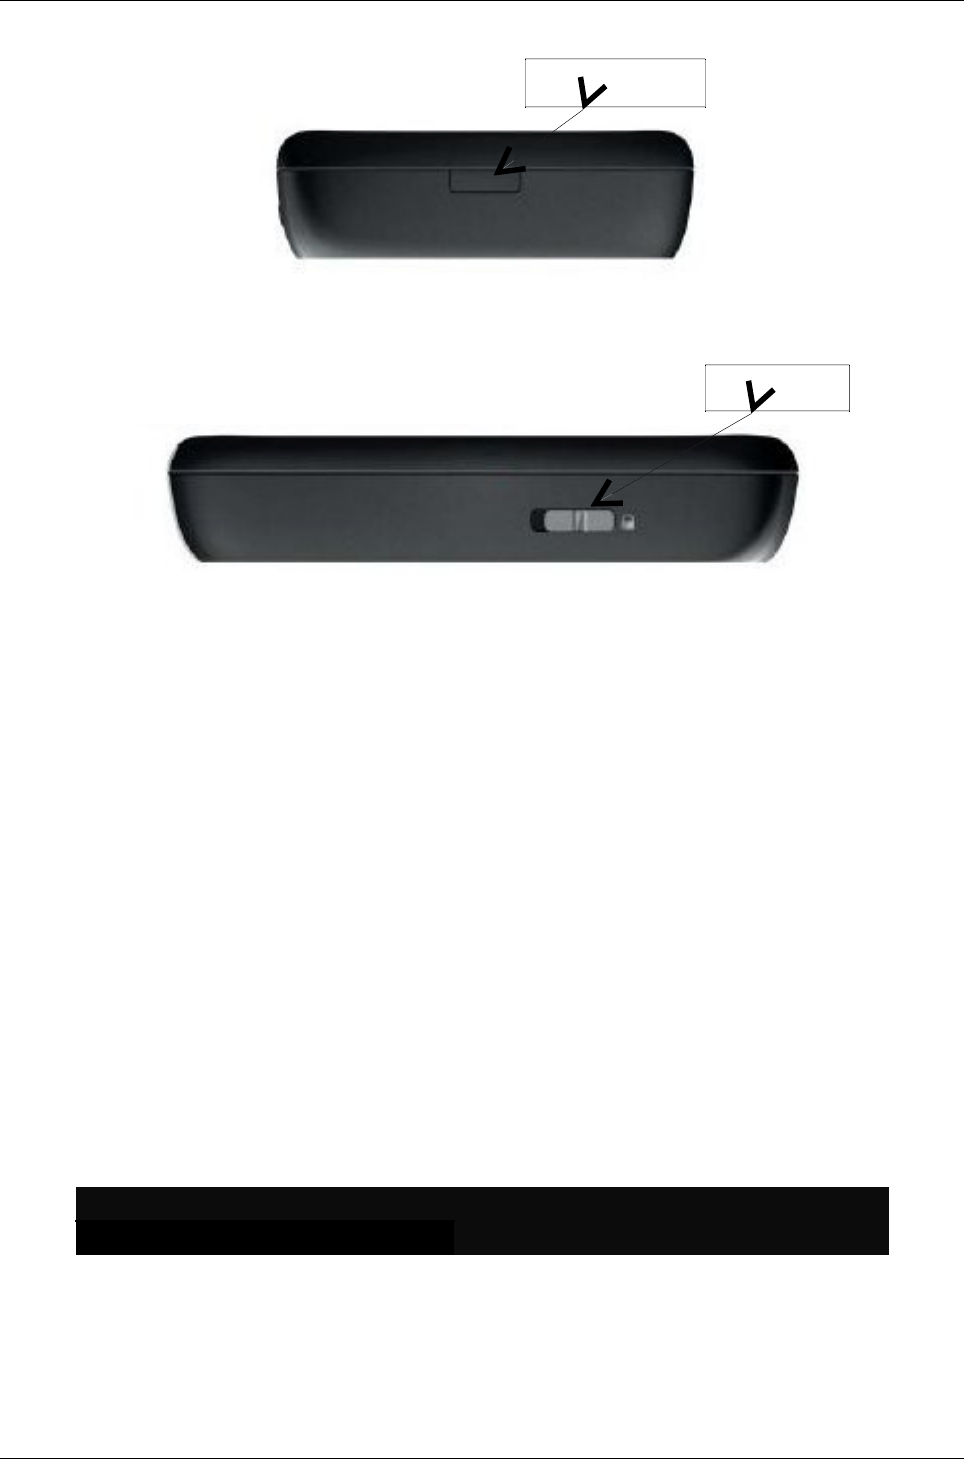
Figure 2-3 Release button
Figure 2-4 Hold-switch
2.1.1Hold-switch
This switch prevents unintended button presses, see Figure 2-4. A button press is accepted only in
case the switch is in position “unlock”. If the hold-switch is in position “lock“ the only accepted
action is the long-press onto the central button, if this is enabled by AyApplication e.g. to enable
emergency calls.
If the AyTerminal is off, the hold-switch on “lock” and long press is performed the AyTerminal will
NOT turn on.
2.1.2Status LED
This status LED is used to provide feedback to the end-user about the current AyTerminal status.
The dual-color LED is able to show the following colors:
•BLACK (off),
•GREEN,
•RED,
•ORANGE (mixture between red and green).
The LED is able to blink within the range from once per 25 seconds (0,04Hz) to 10 times per
second (10Hz).
Following table shows the status of the Status LED depending on the AyTerminal status.
Status LED
color type AyTerminal status
GREEN permanent AyTerminal OFF, charger connected,
battery charging mode
RED permanent AyTerminal OFF, charger connected,
battery charging error
ORANGE permanent AyTerminal OFF, charger connected,
battery charging finished
Page 8 / 50
Release button
Hold-switch

User Manual for AyCare AyTerminal
V2.1 AyCare application
GREEN permanent AyTerminal ON, startup phase
ORANGE /
GREEN
blinking (500msec
ORANGE, 500msec
GREEN)
AyTerminal ON, startup phase, firmware
update
GREEN /
BLACK
blinking (100msec
ON, 2000msec OFF)
AyTerminal ON, mode active or idle
ORANGE /
BLACK
blinking (100msec
ON, 2000msec OFF)
AyTerminal ON, shutdown phase
(selection of Turn OFF item)
GREEN /
BLACK
blinking (100msec
ON, 200msec OFF)
AyTerminal ON, GPRS/SMS/GSM
transmission
•
RED /
BLACK
blinking (300msec
ON, 300msec OFF)
AyTerminal ON, error indication like:
•low battery,
•to many AySnapOn´s connected,
no SIM inserted
ORANGE /
BLACK
blinking (300msec
ON, 300msec OFF)
AyTerminal ON, AyApplication alarm is
triggered
RED permanent AyTerminal ON, critical error, device
deactivation after 15min
Table 2-2 Status LED colors depending on AyTerminal status
In case of two or more simultaneous events that can trigger the change of Status LED color there
have been established priority rules.
These rules are:
1. If the Status LED color is blinking ORANGE or RED then the Status LED color can not be
changed to GREEN (permanent/ blinking slow/ blinking fast). In this case the status LED
ORANGE/ RED must be first stopped and after that the status can be changed to GREEN
(permanent/ blinking slow/ blinking fast) or the change request for GREEN can be
performed but the status will be changed only when ORANGE/ RED will be turned off.
2. Permanent/ Fast/ Slow RED LED status can be set no matter the current LED status
3. If the status LED color is blinking RED then the Status LED color can not be changed to
ORANGE (permanent/ slow/ fast). In this case the status LED RED must be first stopped
and after that the status can be changed to ORANGE (permanent/ blinking slow/ blinking
fast) or the change request for ORANGE can be performed but the status will be changed
only when RED will be turned off.
4. In case of turning off one status LED the previous status LED is set back (e.g. Previous
status is slow GREEN and current status permanent RED. When the status RED is
removed then the slow GREEN is again established as status of the LED)
Example of applying the rules:
In case of triggering an alarm it is defined that the status LED becomes fast blinking ORANGE.
In case of SMS it is defined that the status LED is blinking GREEN. If SMS is sent meanwhile
the alarm is triggered then the change request for status LED GREEN is stored but the status
is changed only when ORANGE is turned off (rule number 1).
2.1.3Lumberg connector
Using this 12 pin slim Lumberg connector is possible to:
Page 9 / 50

AyTerminal User Manual for AyCare
Contents V2.1
•connect a Siemens standard headset and use it for GSM voice calls.
•connect the AyTerminal charger for charging the AyTerminal battery.
2.1.4AySnapOn connector
This connector is used to connect up to four AySnapOns.
2.1.5Navigation buttons
The navigation buttons provide the input possibility for the AyTerminal user.
There are 4 touch sensor buttons around the display for the following navigation purposes:
•Arrow up – up button
•Arrow down – down button
•Back button – left button, Cancel button
•OK button – right button, Entry button
Additionally, the display itself is a mechanical button (startup the AyTerminal/application specific
purpose).
For the central button the AyTerminal can distinguish between single click, double click, and long
button press.
Figure 2-5 Current product design of the AyTerminal.
2.1.5.1Navigation through the menu structure
In a menu layout the first menu item is selected by default. Another item can be selected by
pressing the up or down buttons.
Depending on the type of the selected menu item, pressing the right button will:
Page 10 / 50
Acceptance touch button
Cancel tough button
Up touch button
Down touch button
Display and central button

User Manual for AyCare AyTerminal
V2.1 AyCare application
•Accept the selection
•Check/uncheck the item (if a radio button or a check box is displayed in front of the item)
To go back to the previous menu level the left button has to be pressed.
2.1.6Speaker
The speaker of the AyTerminal is used for GSM voice calls and for providing an acoustic feedback.
For the following use cases an acoustic feedback is provided:
•On navigation button click
•On AyApplication specific triggering of a predefined alarm tone/ ring tone
•On AyApplication specific triggering of predefined acknowledgment tones
•On Incoming voice calls with predefined ring tones
2.1.6.1Acknowledgment tones
There are positive and negative acknowledgment tones. One beep indicates a positive
acknowledgment, three beeps a negative acknowledgment. The table below lists acknowledgment
use cases
Event Positive
(one beep)
Negative
(two beeps)
FW download Yes, download accepted No, download rejected
To many AySnapOns No Yes
Entering PIN Yes, successfully No, incorrect PIN
Entering PUK Yes, successfully No, incorrect PUK
New AySnapOn connected,
Search item selected Yes, found No, not found
Table 2-3 Positive and negative acknowledgment for some events
2.1.6.2Ring tones
There are 7 available ring tones which can be used in AyApplications. With AyCare application
these ring tones can just be played from Settings/ Audio/ Ring tones.
2.1.6.3Alarm tone
Alarm tone is an internal alarm which is used in AyCare for playing siren in case of alarm (if the
mode is defined so).
2.1.7Microphone
The microphone is used for the GSM voice call or as noise sensor.
2.1.83D-Ego-motion sensor
The ego-motion sensor is used to detect AyTerminal movement.
2.1.9Temperature sensor
The temperature sensor provides the information about the AyTerminal environmental
temperature. The temperature range is defined by the operating range of AyTerminal with a
temperature-accuracy of +/-1,5°C @ 30°C without charger connected and OLED display off. In
case of a connected charger (OLED display always on), the internal temperature of the AyTerminal
will rise due to the charging process. The AyTerminal will counterbalance this internal heating but
Page 11 / 50
AyTerminal User Manual for AyCare
Contents V2.1
the temperature sensor will have lower environment temperature accuracy due to the battery
charging.
2.1.10OLED display
The AyTerminal has a white OLED display with 128x96 pixel resolution which is also the active
display area used for the screen layouts. In standard mode the used font is Tahoma 15x16
proportional and in jumbo mode the font Tahoma 23x24, each font consisting of maximum 128
characters. These fonts allow English and German user interfaces. All characters that are not
supported by the character set of the used font will be shown as ‘?’.
2.1.11Battery charging
The AyTerminal can be connected to a charger either when the device is switched on or off. It
takes approximately three hours to fully charge the battery.
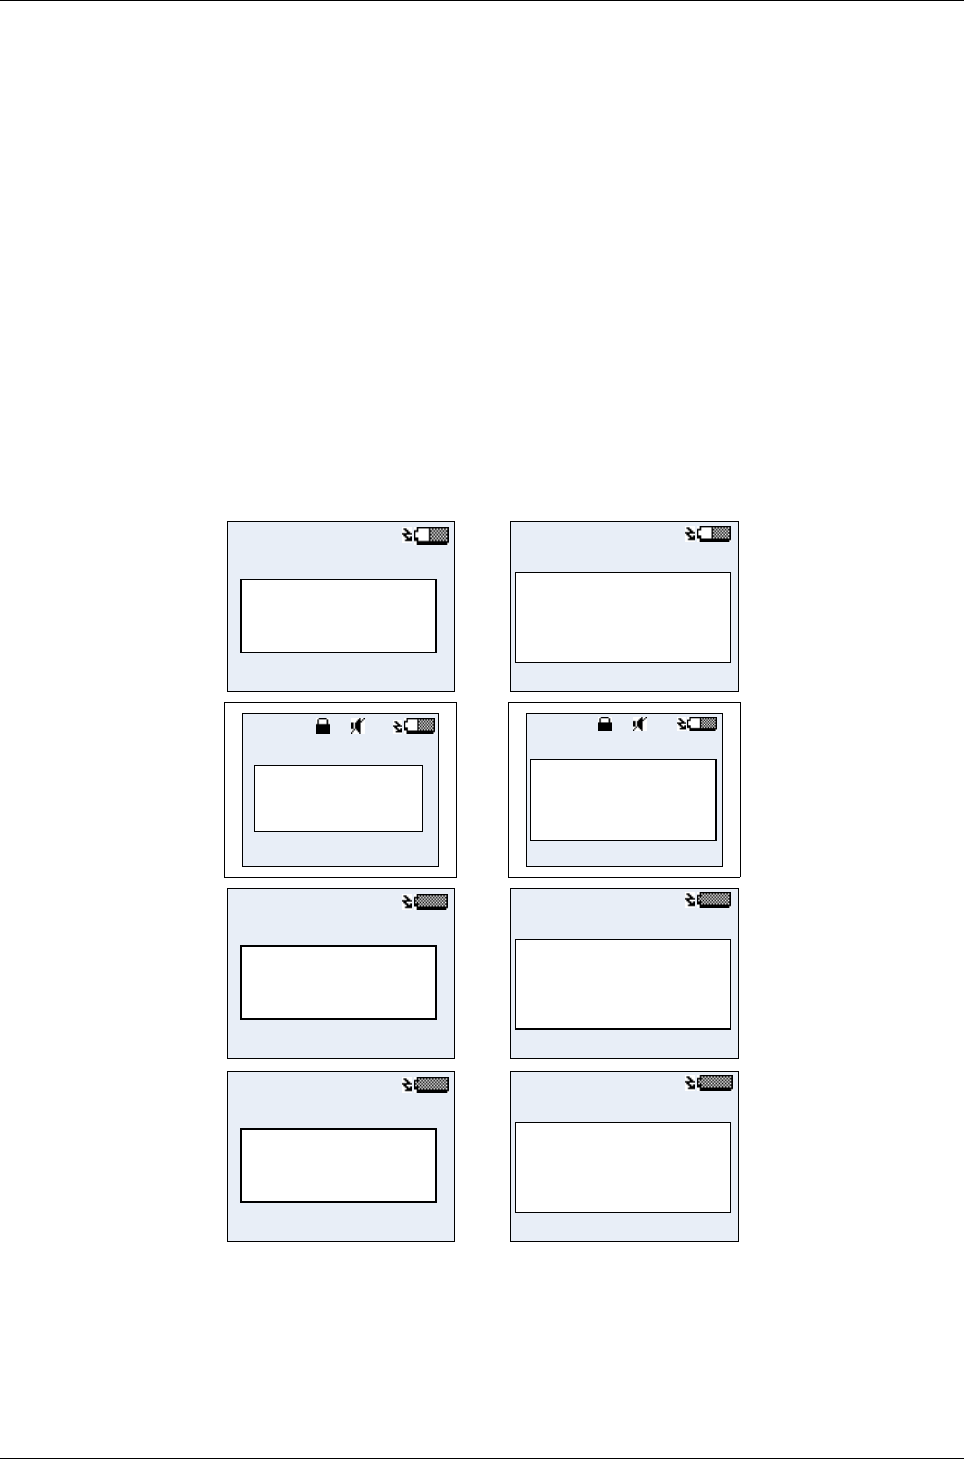
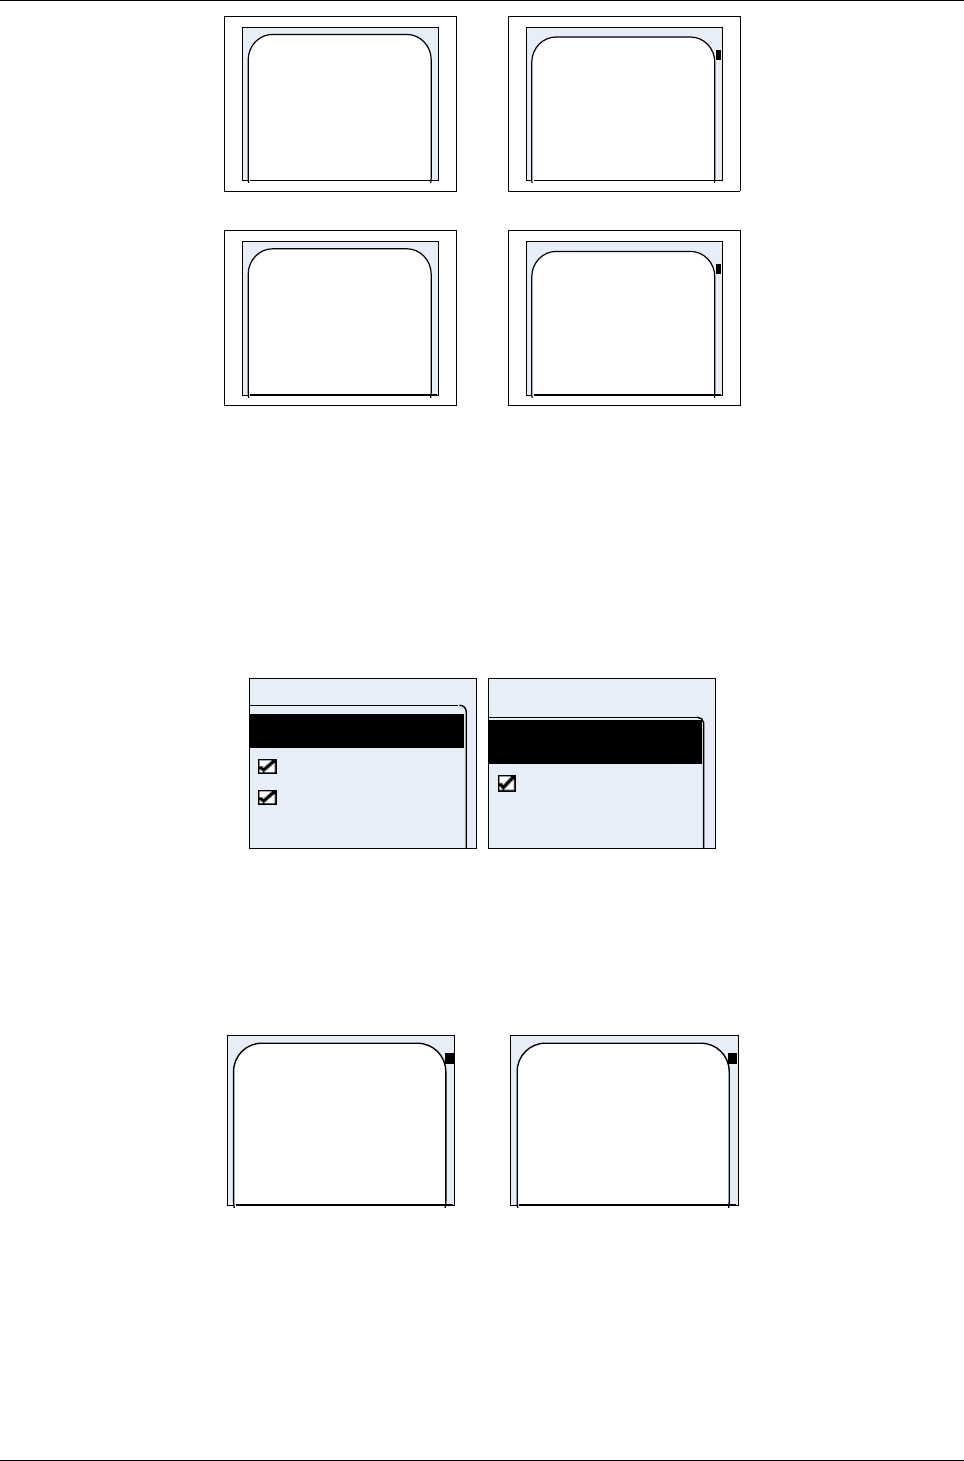
2.1.11.1Connecting a charger & AyTerminal switched off
If the device is switched off and a charger is connected then the charging battery symbol will be
shown on the display (see Figure 2-6). The AyTerminal can be turned on by pressing long the
central button.
Charger
Connected
Charger
Connected
Charging
Battery
Charging
battery
Charging
finished
Charging
finished
Charging
Interrupted
Charging
interrupted
Figure 2-6 Charging possible states of AyTerminal
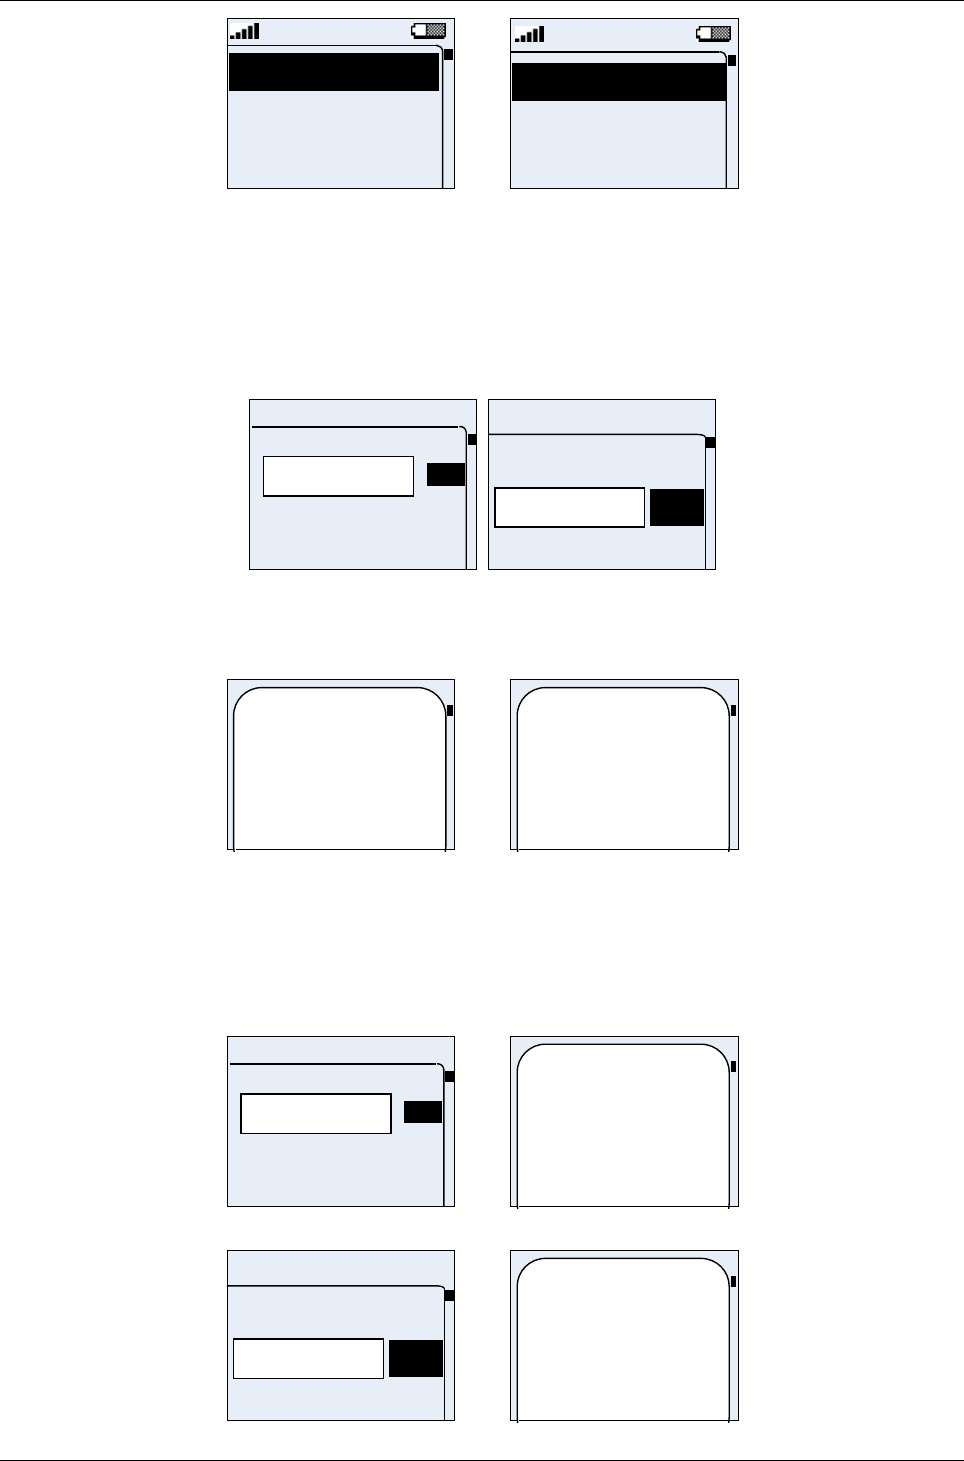
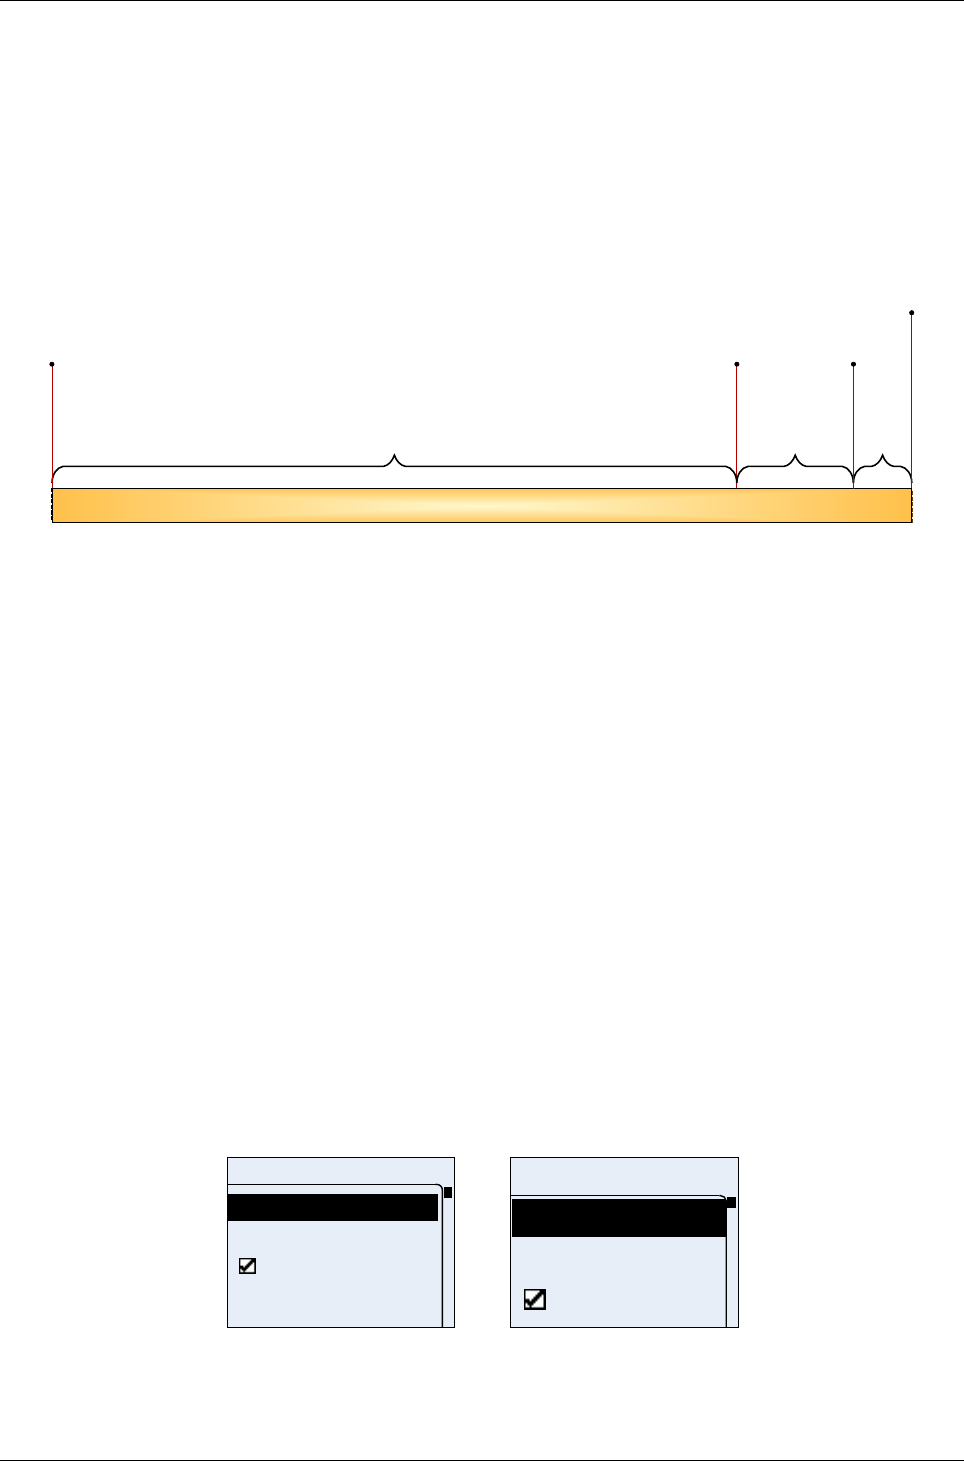
2.1.11.2Connecting a charger & AyTerminal switched on
If the device is switched on and a charger is connected, the charging battery symbol will be shown
while the status bar is shown, see Figure 2-7. The AyTerminal will work normally like it does
without charger connected.
Page 12 / 50

User Manual for AyCare AyTerminal
V2.1 AyCare application
Voice Call
Panic Button
Baby Phone
Emergency Call
Voice call
Panic Butto
Baby Phon
Figure 2-7 AyTerminal ON charging mode
2.1.11.3Charger connected, AyTerminal running, shutting down
If the changer is connected while AyTerminal is switched on and user selects Turn Off in main
menu, shutting down procedure is started – see the chapter 4.9, and the AyTerminal pass in
charging state. A screen like in Figure 2-6 is shown. If after this screen is shown the charger is
removed then AyTerminal is turned off. The AyTerminal can be turned on again by pressing long
the central button.
2.1.11.4Connecting charger before shutting down AyTerminal
If after connecting the charger Turn Off item is selected in main menu the AyTerminal is executing
a turning off procedure (see the chapter 4.9). While AyTerminal is turning off and the charger is
connected then AyTerminal will enter in charging state and a screen like in Figure 2-6 is shown.
NOTE: Do NOT connect charger while TURNING OFF the AyTerminal because the data that is being
saved might be corrupted!
Page 13 / 50
AyTerminal User Manual for AyCare
Contents V2.1
3Installation and startup
3.1Installation
Remove the battery cover by pressing the Release button (see Figure 2-3). Slide the SIM card into
its holder. Make sure that the gold contacts of the SIM are facing down and the cut off corner is
correctly aligned. Insert the battery side way into the AyTerminal and then press it downwards until
it clicks into position. Place the battery cover back.
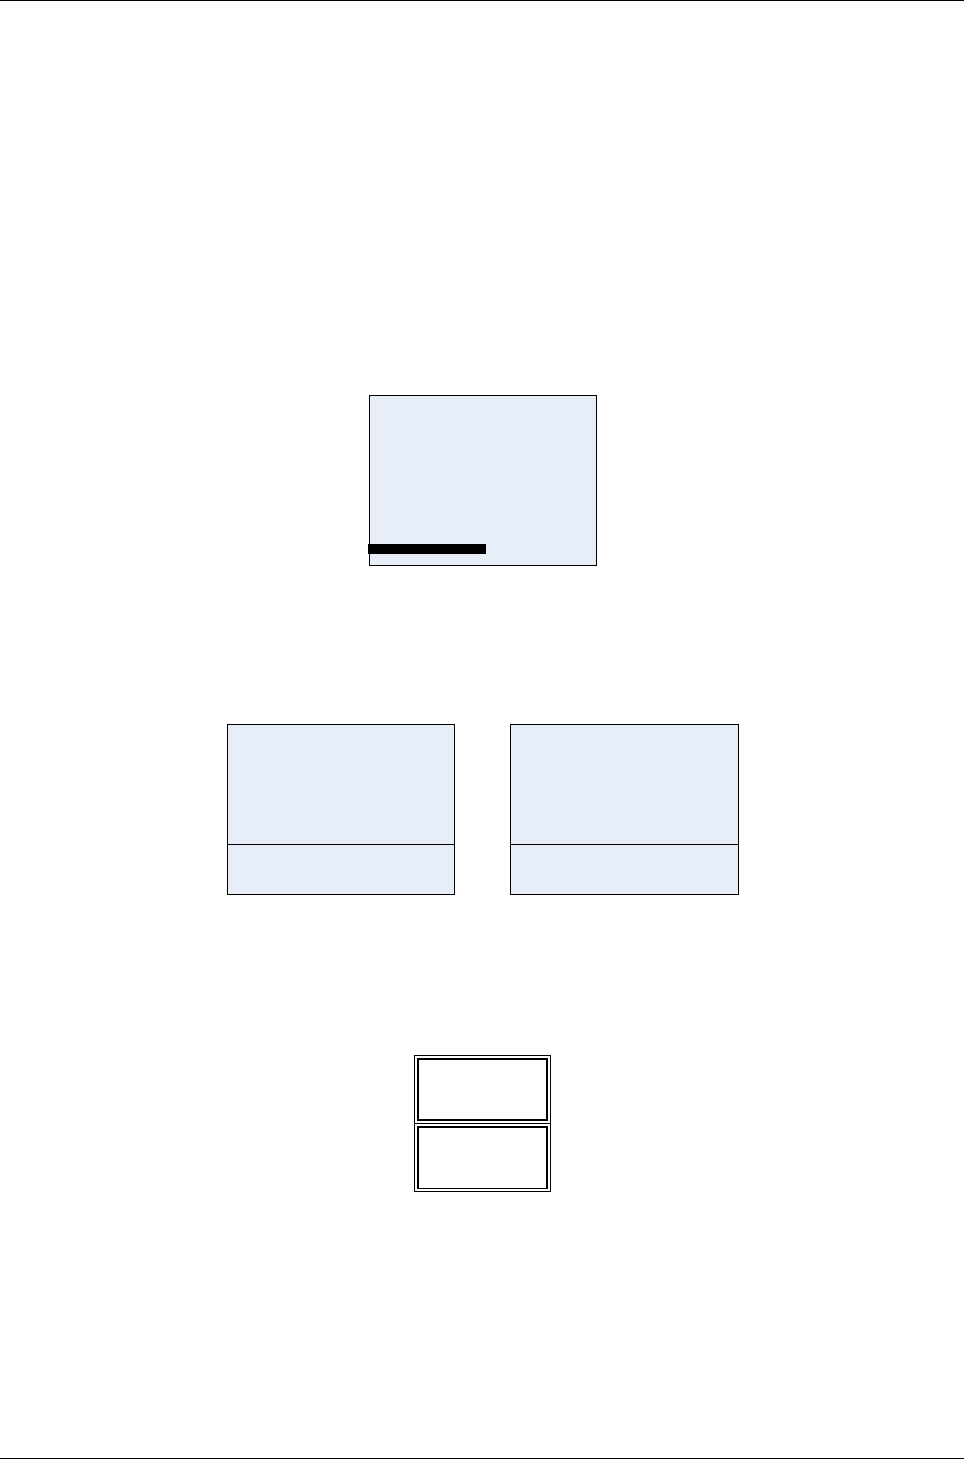
3.2Startup
Press the central button of the device for at least 2 seconds in order to turn on the AyTerminal. A
correct startup is indicated by the LED blinking green and a simple animation is shown on the
display Figure 3-8.
Figure 3-8 AyTerminal simple animation
3.2.1Loading screen
In a few seconds after the LED is ON the AyTerminal loading screen will be displayed, as
presented in Figure 3-9.
loading
...
...
loading
Figure 3-9 AyTerminal loading screen – standard and jumbo mode
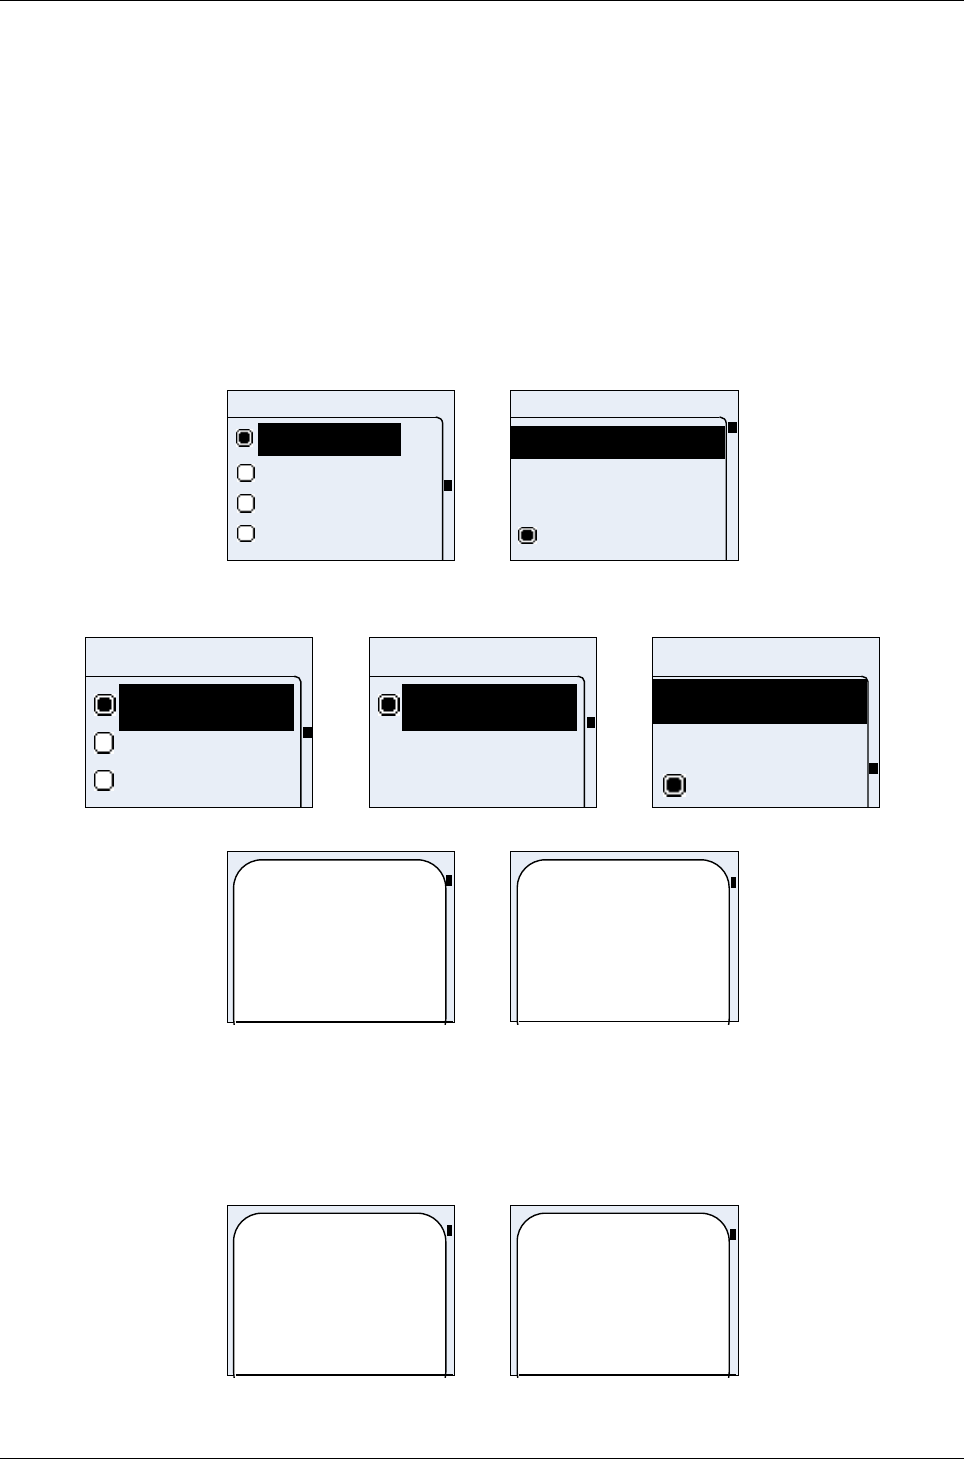
3.2.2Emergency call mode
During AyTerminal startup, if there is no SIM card inserted or the inserted SIM card is not locked to
the AyTerminal, only the following menu will be available:
Turn OFF
Emergency call
Figure 3-10 AyTerminal emergency call menu structure
Choosing the emergency call item by pressing the accept button, an emergency call is initiated.
The GSM mobile phone standard includes 112 as emergency number. In countries where 112 is
not the standard emergency phone number the emergency call will be redirected to the local
emergency phone number, if it exists.
Page 14 / 50
User Manual for AyCare AyTerminal
V2.1 AyCare application
Emergency call
Turn off
Emergenc
Turn off
Figure 3-11 Emergency call menu – standard and jumbo mode
3.2.3PIN/PUK input
If the SIM card was inserted correctly and the SIM PIN control is enabled the following screen will
be shown. The selected digit can be changed by using the up/down navigation buttons (digit range
is from 0 to 9). The PIN is requested to have between 4 and 8 digits. Because of this constraint the
OK option is shown and can be selected after the 4th digit was inserted.
***_
Enter PIN
9
2
1
0
***_
9
1
0
Enter PIN
Figure 3-12 PIN input screen – standard and jumbo mode
If the entered PIN is incorrect, then a message like in Figure 3-13 is displayed.
Incorrect PIN.
Try again!
<n> tries left.
Incorrect
PIN. Try
again! 2
tries left.
Figure 3-13 Incorrect PIN – standard and jumbo mode
If the PIN is entered false for 3 times then the PUK is required (see Figure 3-14). The PUK number
of digits is fixed to 8 digits. After entering the PUK the PIN will be set to “1234” and a message is
shown informing about the change of PIN. For changing the PIN please see chapter 4.8.7.3. If the
PUK is incorrect then a similar message like for a wrong PIN will be displayed.
***_
Enter PUK
9
2
1
0
The PIN is set to
1234.
Figure 3-14 PUK input screen – standard screen
***_
9
1
0
Enter PUK
The PIN is
set to 1234.
Page 15 / 50

AyTerminal User Manual for AyCare
Contents V2.1
Figure 3-15 PUK input screen and message shown after correct PUK – jumbo mode
If the PIN/PUK entry is canceled by pressing the Back button when the input line is empty, the
AyTerminal emergency call menu will be displayed (see 3.2.2).
3.2.4Boot screen
After the PIN/PUK is entered correctly, the AyTerminal boot screen will be displayed, as presented
in Figure 3-16.
Welcome
<Nickname>
to Ay
<AyApplication>
Welcome
<AyAppl.>
<Nickname>
to Ay
Figure 3-16 AyTerminal boot screen – standard and jumbo mode
If AyTerminal was not registered on AyServer then the default nickname (“John Doe”) will be
displayed.
Page 16 / 50

User Manual for AyCare AyTerminal
V2.1 AyCare application
4AyCare application
The AyCare application has three modes (see chapter 4.2 for more details). Each mode has its
own menu and functionality. Different notifiers can be chosen for each mode:
•Sending an SMS to a defined number
•Establishing a voice call to a defined number
•Informing the AyServer via GPRS
•Playing a siren using the AyTerminal loudspeaker.
Not all the notification types are available for each mode.
A mode can be configured by activating/deactivating or changing the configurable values of alarm
notifiers or alarms triggers and store them in the non-volatile memory.
These settings can be set locally via the AyTerminal menu or can be received from the AyServer,
synchronized via the AyServer interface.
This document describes the user interface displayed on the AyTerminal OLED display. The
described user interface is used to configure the AyCare modes.
Overall the AyCare AyApplication, when an alarm is triggered the status LED is blinking
orange/black with frequency of 3 Hz until the mode is deactivated or the alarm duration time has
expired. An alarm can be triggered only if a mode is started and active.
For one of the modes an activation period of time can be defined. Time period is on a daily basis,
and it’s telling when a certain mode will be activated (e.g.: For mode “Tracking mode” the activation
time is activated and set to start at 11:30 and end at 22:30).
Also one of the modes can be set to start automatically when AyCare starts.
Page 17 / 50
AyTerminal User Manual for AyCare
Contents V2.1
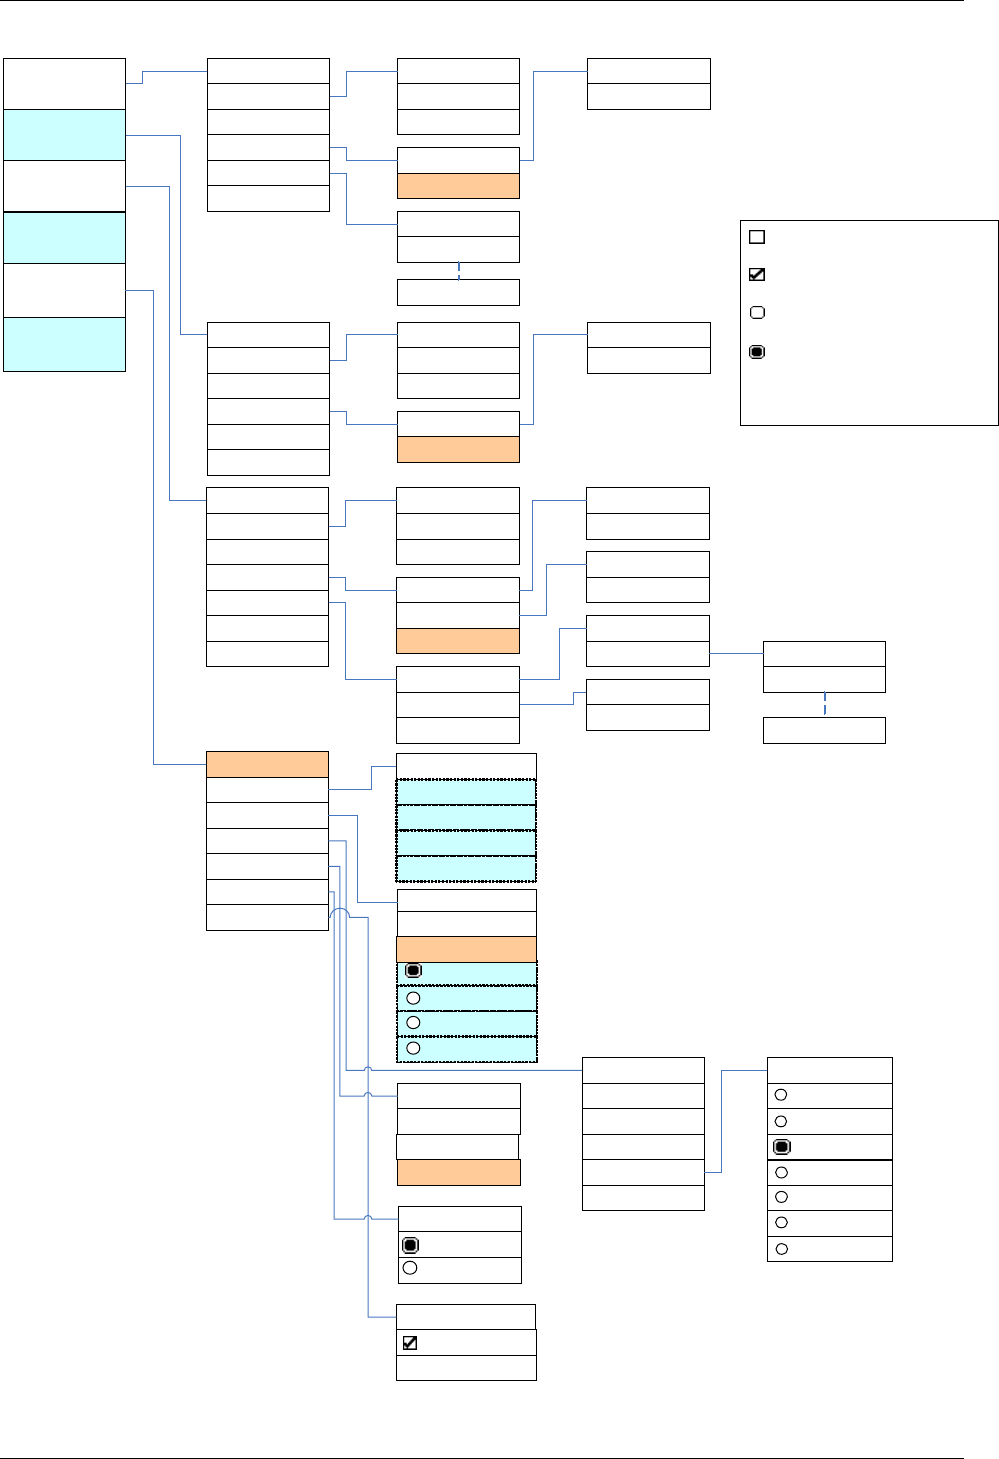
4.1AyCare menu structure
Start
Activation Time
Voice Call
Panic button
Baby phone
o
Autostart
Notifiers
Phone numbers
Overview
o
Active
Start
End
SMS
o
AyServer
<Phone nr. 1>
o
Active
<Phone number>
Start
Activation Time
o
Autostart
Notifiers
<Phone number>
Overview
Start
Activation Time
o
Autostart
Notifiers
Triggers
Duration
Overview
o
Active
Start
End
SMS
o
AyServer
o
Active
<Phone number>
o
Active
Start
End
SMS
Voice Call
o
AyServer
o
Active
<Phone number>
o
Active
<Phone number>
Listen-In
Activation delay Threshold
<Phone nr. 2>
<Phone nr. 10>
Noise
o
Active
Phone numbers
o
Active
<Phone nr. 1>
<Phone nr. 2>
<Phone nr. 10>
£
Unchecked checkbox in
front of the menu item
R
Checked checkbox in front
of the menu item
Unchecked radio button in
front of the menu item
Checked radio button in front
of the menu item
light brown color – item not
available
Legend
Emergency call
Settings
Turn OFF
AyServer Sync
AySnapOn
AyTerminal
Audio
Clock
Display
Security
Search
Info
o
Headset
Time/Date
Change Time
o
Auto time
o
JumboMode
PIN control
Change PIN
o
<AySnapOn 1>
o
<AySnapOn 2>
o
<AySnapOn 3>
o
<AySnapOn 4>
<AyApplication 1>
<AyApplication 2>
<AyApplication 3>
<AyApplication 4>
Deactivation code
Default settings
FW Update
Call
o
Mute All
Button
Alarm
Ring tone
English
German
Ring tone 3
Ring tone 4
Ring tone 5
Ring tone 6
Ring tone 7
Ring tone 2
Ring tone 1
Volume
Change Date
Figure 4-17: AyCare menu structure
Page 18 / 50

User Manual for AyCare AyTerminal
V2.1 AyCare application
4.2Modes description
All modes provide a similar menu structure. Navigation through menu structure is described in
chapter 2.1.5.1.
4.2.1Voice Call
This mode is used to establish a voice call to one defined phone number by pressing the central
button for minimum 2 seconds. In case there is only one phone number specified the VoiceCall will
be established automatically. If user specified more then one number, menu with saved numbers
will appear. One of the displayed phone numbers can be selected by using the up/down buttons
and then pressing the right/OK (accept) button. By default there will be no phone number defined.
If not at least one phone number has been defined, on pressing long the central button for
establishing a phone call a message will be displayed: “No phone number specified”. Calls can
only be established after defining the phone number to be dialled. Hanging up the call can be done
by pressing long (at least 2s) the central button.
4.2.2Panic Button
This mode can be used to establish a call to one defined phone number by pressing the central
button for at least 2 seconds. By default there is no phone number defined, so a call can only be
established after the phone number has been defined. Hanging up the call can be done by
pressing long (>2s) the central button.
4.2.3Baby Phone
This mode has the following functions:
•The AyTerminal can receive voice calls from a defined list of phone numbers. By default
this list is empty. To be able to use this feature (Listen-In) at least one phone number must
be defined before starting the mode. After the call is established it is possible to listen in
where the AyTerminal was placed (e.g. in the nursery – to hear what the child is doing).
•A call from a non-defined number will be rejected.
•The mode triggers an alarm if a defined (or default) noise level has been exceeded.
•If “Baby Phone” mode is active there is no button click activated (only "flash" indication
when pressing a button). This is planned so because e.g. baby will not been waken up
when pressing deactivation code.
4.2.4AyCare mode specific settings
configurable
value description format &
restrictions
default
value
Auto start flag if mode is
enabled to
automatically
start-up
Boolean
false – disabled
true – enabled
false
Activation time
active
flag if mode is
enabled to
automatically be
activated
Boolean
false – disabled
true – enabled
false
Activation start
time
time that
activates the
mode
Time format is
24h. hh:mm:ss
00:00
Activation end time that Time format is 12:00
Page 19 / 50

AyTerminal User Manual for AyCare
Contents V2.1
time deactivates the
mode
24h. hh:mm:ss
Table 4-4 AyCare– settings available for all modes
mode configurable
value description format & restrictions default
value
Page 20 / 50

User Manual for AyCare AyTerminal
V2.1 AyCare application
Voice Call SMS notifier
active
flag if SMS notifier
enabled
Boolean
false – disabled
true – enabled
false
SMS phone
number
target phone
number for SMS
Max. 15 characters.
If not defined SMS is
not send out
none
SMS text Text to be sent via
SMS in case of
alarm
Max. 160
characters.
“Voice
Call
Alarm”
AyServer
active
flag if AyServer
notifier enabled
Boolean
false – disabled
true – enabled
true
Phone nr. 1 Phone number that
can be dialled
Max. 15 numeric
characters. If not
defined voice call is
not started
none
Phone nr. 2 Phone number that
can be dialled
Max. 15 numeric
characters. If not
defined voice call is
not started
none
Phone nr. 3 Phone number that
can be dialled
Max. 15 numeric
characters. If not
defined voice call is
not started
none
Phone nr. 4 Phone number that
can be dialled
Max. 15 numeric
characters. If not
defined voice call is
not started
none
Phone nr. 5 Phone number that
can be dialled
Max. 15 numeric
characters. If not
defined voice call is
not started
none
Phone nr. 6 Phone number that
can be dialled
Max. 15 numeric
characters. If not
defined voice call is
not started
none
Phone nr. 7 Phone number that
can be dialled
Max. 15 numeric
characters. If not
defined voice call is
not started
none
Phone nr. 8 Phone number that
can be dialled
Max. 15 numeric
characters. If not
defined voice call is
not started
none
Phone nr. 9 Phone number that
can be dialled
Max. 15 numeric
characters. If not
defined voice call is
not started
none
Phone nr. 10 Phone number that
can be dialled
Max. 15 numeric
characters. If not
defined voice call is
none
Page 21 / 50

AyTerminal User Manual for AyCare
Contents V2.1
Panic
Button
SMS notifier
active
flag if SMS notifier
enabled
Boolean
false – disabled
true – enabled
false
SMS phone
number
target phone
number for SMS
Max. 15 characters.
If not defined SMS is
not send out
none
SMS text Text to be sent via
SMS in case of
alarm
Max. 160
characters.
“Panic
Button
Alarm”
AyServer
active
flag if AyServer
notifier enabled
Boolean
false – disabled
true – enabled
true
Phone number Phone number that
will be dialled
Max. 15 numeric
characters. If not
defined voice call is
not started
none
Page 22 / 50

User Manual for AyCare AyTerminal
V2.1 AyCare application
Baby Phone Duration * duration of
alarm/alarm state
( in case of alarm
triggered)
* time period for
activating again the
mode if no
deactivation code
after an alarm was
triggered
Time format is
hh:mm:ss.
Min. 15s.
Max. 30 minutes
0 is a valid value
and represents
alarm forever.
3
minutes
Noise flag if noise sensor
is enabled
Boolean
false – disabled
true – enabled
true
Noise noise value that
triggers the alarm
0% – 100% in 26
steps
24%
Sensor
activation
delay
time until the
sensors are armed
after activating the
mode
Time format is
hh:mm:ss.
Max. 255s.
30s
Listen-In flag if “Listen-In” is
enabled
Boolean
false – disabled
true – enabled
false
Listen-In nr. 1 phone number that
will be allowed to
call the AyTerminal
Max. 15 characters.
If not defined listen-
in is not started
none
Listen-In nr. 2 phone number that
will be allowed to
call the AyTerminal
Max. 15 characters.
If not defined listen-
in is not started
none
Listen-In nr. 3 phone number that
will be allowed to
call the AyTerminal
Max. 15 characters.
If not defined listen-
in is not started
none
Listen-In nr. 4 phone number that
will be allowed to
call the AyTerminal
Max. 15 characters.
If not defined listen-
in is not started
none
Listen-In nr. 5 phone number that
will be allowed to
call the AyTerminal
Max. 15 characters.
If not defined listen-
in is not started
none
Listen-In nr. 6 phone number that
will be allowed to
call the AyTerminal
Max. 15 characters.
If not defined listen-
in is not started
none
Listen-In nr. 7 phone number that
will be allowed to
call the AyTerminal
Max. 15 characters.
If not defined listen-
in is not started
none
Listen-In nr. 8 phone number that
will be allowed to
call the AyTerminal
Max. 15 characters.
If not defined listen-
in is not started
none
Listen-In nr. 9 phone number that
will be allowed to
call the AyTerminal
Max. 15 characters.
If not defined listen-
in is not started
none
Listen-In nr. 10 phone number that Max. 15 characters. none
Page 23 / 50

AyTerminal User Manual for AyCare
Contents V2.1
Figure 4-18 AyCare mode specific settings
4.2.5 AyCare alarms and notifiers
mode alarm name description available
notifiers default notifiers
Voice call Voice call1triggered if a
voice call is
triggered
SMS,
AyServer
AyServer
Panic Button Voice call triggered if a
voice call is
triggered
SMS,
AyServer
AyServer
Baby phone Noise triggered if
noise sensor
activated
SMS, Voice
Call, AyServer
AyServer
Voice call triggered if a
voice call is
triggered
SMS,
AyServer
AyServer
Figure 4-19 AyCare alarms and notifiers
1 Alarm is triggered after the voice call ends
Page 24 / 50

User Manual for AyCare AyTerminal
V2.1 AyCare application
4.3Selecting a mode
When turning on the AyTerminal and starting the AyCare AyApplication, and if no mode is set to
auto start, the main menu (see Figure 4-20) will be displayed. If a mode is set to auto start, the
defined mode will be started automatically.
Voice Call
Panic Button
Baby Phone
Emergency Call
Voice call
Panic Butto
Baby Phon
Figure 4-20 AyCare main menu
The available AyCare modes are listed in the AyCare main menu together with other available
options (Setup, Emergency Call and Turn Off). They are presented as a scrollable list of items
(Figure 4-20). The scroll position is updated when another item in the menu is selected. The items
of the main menu are:
•Voice Call
•Panic Button
•Baby Phone
•Emergency Call
•Settings
•Turn Off
By default the first menu item is selected. Everywhere in the AyApplication the menu is circular
which means that after the last item comes the first item and in front of the first item is the last item.
If Back button is pressed in a menu the previous menu is displayed with the proper selected item.
For example: The current screen is the main menu screen, and the “Voice Call” item is chosen by
pressing the right button (OK button). As next screen the “Voice Call” menu screen will be
displayed. If in this menu the cancel button is pressed (Back), the previous screen (main menu) will
be shown with “Voice Call” selected.
Searching a mode is possible in the main menu by using the up/down navigation buttons until the
desired mode is selected. The selection of a menu item is possible by pressing the right button. If
the left button is pressed in the main menu nothing will happen. Also, in the main menu the status
icons are displayed. No title is available for this screen. In the other menus a suggestive title is
displayed instead of the status bar.
The modes can be seen as different applications. Switching between these modes doesn’t require
restarting the AyTerminal.
Note! When the current AyApplication is changed the AyTerminal reboot is necessary.
In the main menu “ “Panic Button”, “Baby Phone” and “Voice Call” are considered modes. When
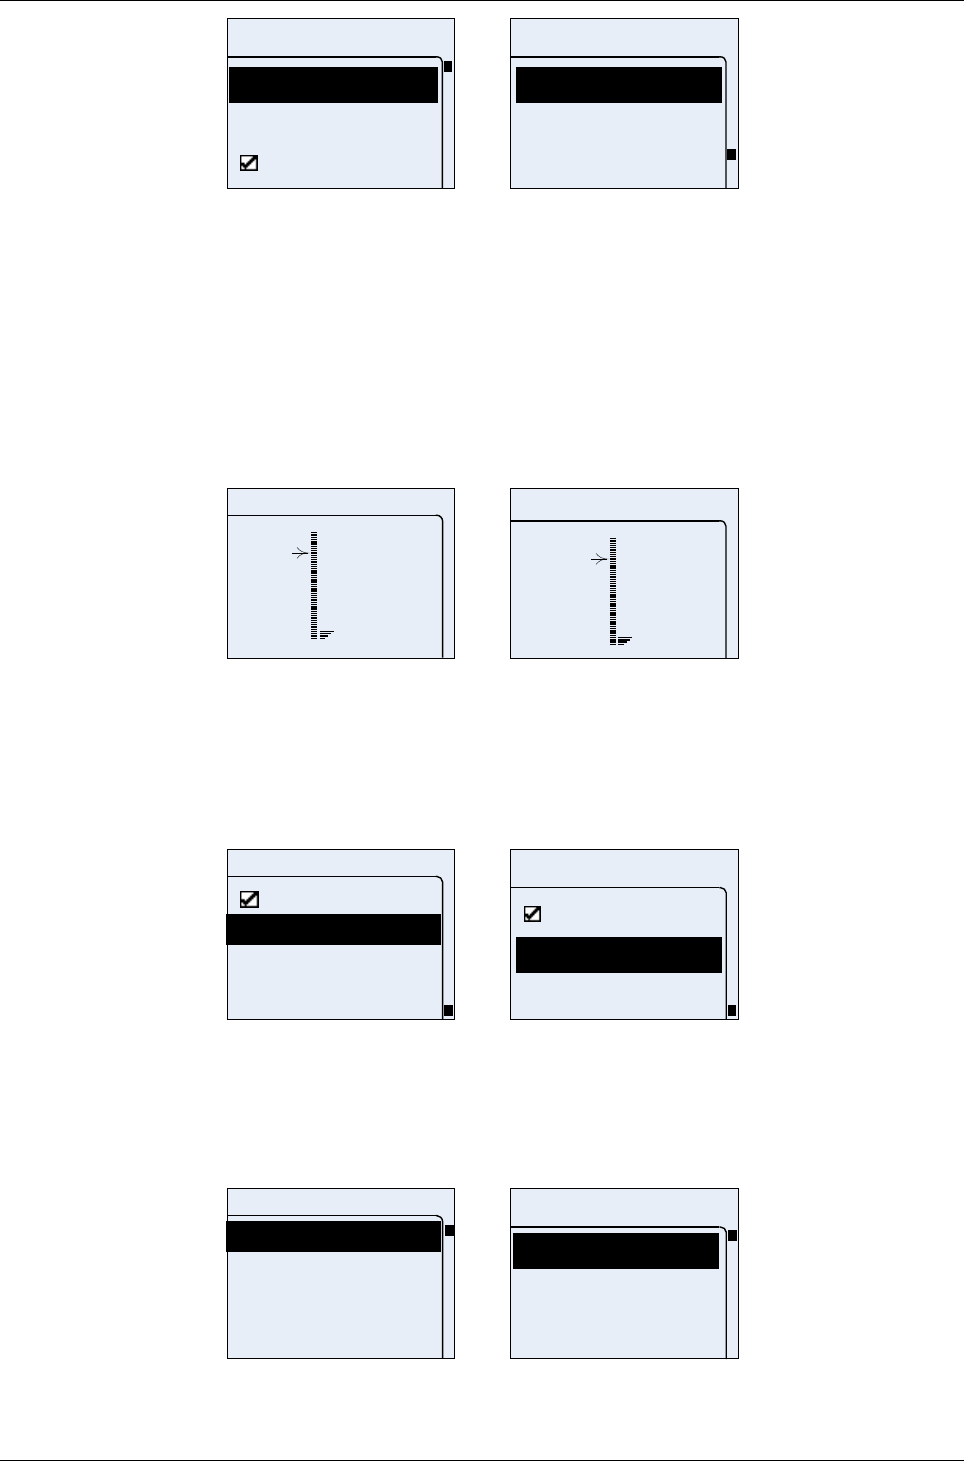
one of these items is selected the mode menu will be displayed in short time (see Figure 4-21).
Page 25 / 50

AyTerminal User Manual for AyCare
Contents V2.1
Baby Phone
Start
Activation time
Autostart
Notifiers
Baby Phone
Triggers
Duration
Overview
Start
Start
Activation t
Autostart
Baby Phon
Triggers
Duration
Overview
Baby Phon
Figure 4-21 “Baby Phone” menu in STANDARD and JUMBO modes
For each mode the mode menu contains the following options:
•Start
– Starts the mode.
•Activation time
– Enables to set activation start time and activation end time for this mode and to
activate it. For details refer to chapter 4.4.1.
•Autostart
-Configures whether the mode should start automatically on AyCare start-up. For
details refer to chapter 4.4.2.
•Notifiers
– Configure mode’s notifiers.
•Triggers / Phone number
– Enables to configure the alarm triggers of the current mode.
•Duration (only for “Baby Phone” mode)
– Enables to configure the time period after that the mode again can trigger an alarm
after a previous alarm was handled. If the duration is set to 0 then on alarm
triggered the AyTerminal remains in alarm state until the mode is deactivated with
the deactivation code.
•Overview
– Presents an overview of the current mode settings.
In the mode menu screen, the mode name is displayed as title. No status icons are displayed in
this screen. The scroll bar indicator is always shown.
As long as no mode is started the green LED will blink.
The available buttons and screen’s functionality are the same in all menu screens.
4.4Configuring a mode
All modes are configurable via AyTerminal. The AyCare AyApplication allows configuring when an
alarm should be triggered and which are the notifiers to be informed. In order to be able to start a
mode, at least one trigger must be activated. If no alarm trigger is activated, then a message box
will be shown with a proper message and the mode will not be started. All notifiers can be
deactivated. No warning message is shown in this case.
Page 26 / 50
User Manual for AyCare AyTerminal
V2.1 AyCare application
4.4.1Activation Time
The purpose of the “Activation time” menu (see Figure 4-22) is:
•Enable/disable the activation time. In case of activating the activation time the mode will be
active only for the defined time (e.g. 1 hour, between 12:00:00 and 13:00:00). When the
end time is reached the mode becomes idle.
•Defining an activation start time (see Figure 4-23) (e.g. 12:00:00)
•Defining an activation end time (see Figure 4-24) (e.g. 13:00:00) for a mode on a daily
basis.
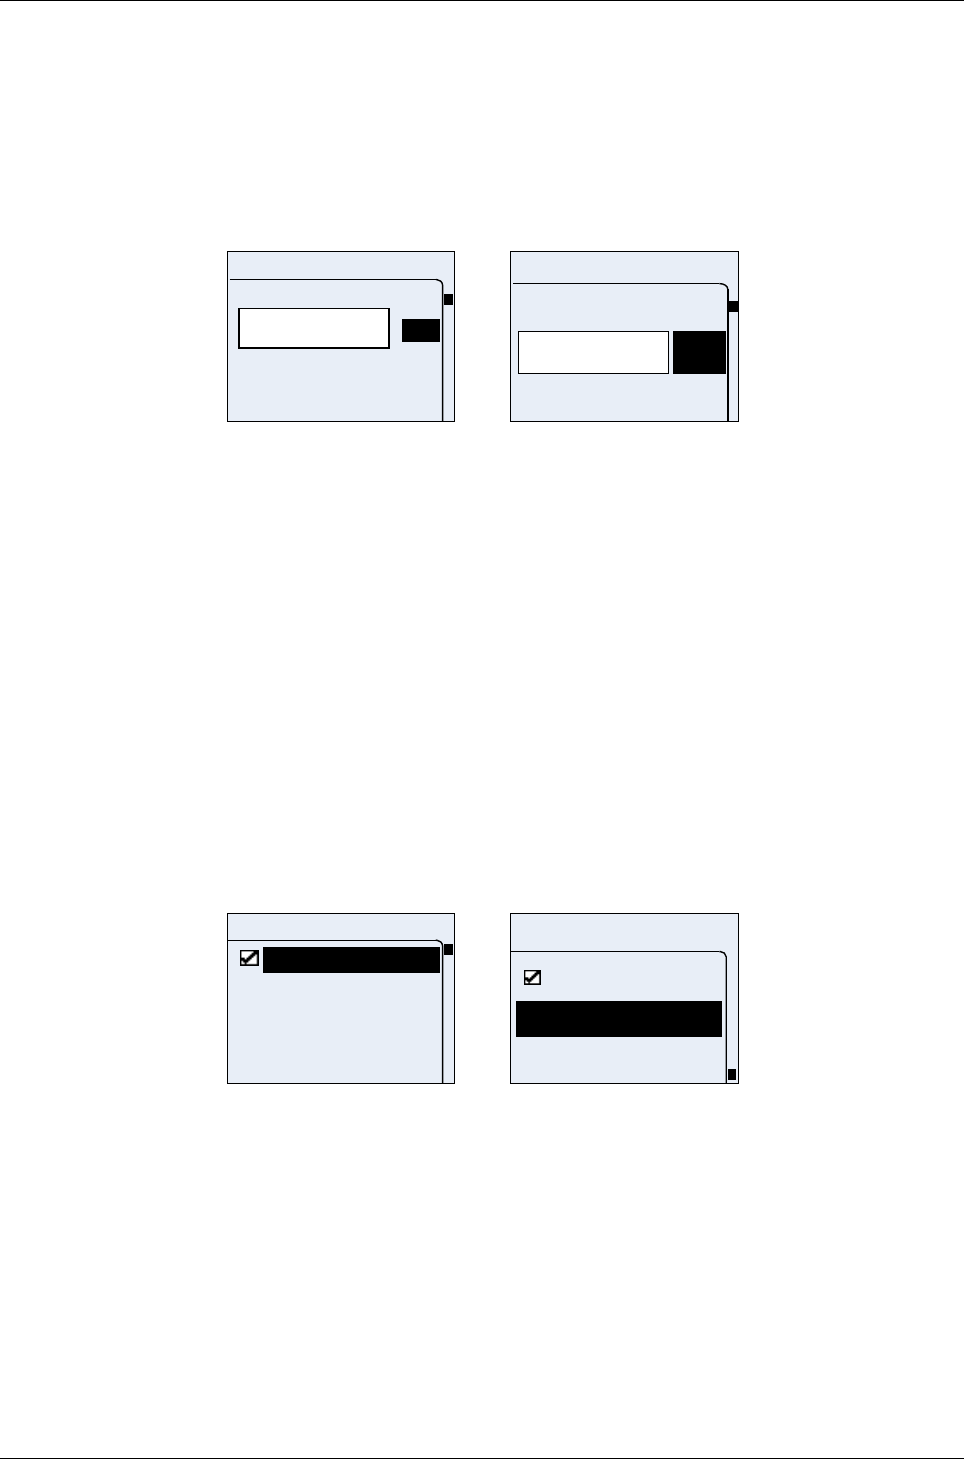
Upon selecting one of the “Start” or “End” menu items, the time can be entered in a time editor.
The time format is 24h (hh:mm:ss).
The colons will be displayed after the second and fifth digits.
Adding a new digit in the input area can be done by navigating through the displayed characters
(right side of the screen) by using the up/down navigation buttons until the needed character is
selected and then pressing the OK button (right button).
To leave one of the two previous screens and to set the value, OK item must be selected and the
OK button (right button) must be pressed.
Activation time
Start
End
Active
Start
End
Activation t
Active
Figure 4-22 Activation time menu
12:0_
Start time
9
2
1
0
12:0_
Start time
0
2
1
Figure 4-23 Activation time – Set start time screen
13:0_
End time
9
2
1
0
13:0_
End time
0
2
1
Figure 4-24 Activation time – Set end time screen
The activation time is applied to the mode as long as the “Active” menu item is activated. To
disable the activation time, the “Active” checkbox in the “Activation time” menu must be unchecked
(see Figure 4-22).
Note! Only one mode can have activation time active.
Page 27 / 50
AyTerminal User Manual for AyCare
Contents V2.1
4.4.1.1Examples
1. Start and end time for “Panic Button” mode: 11:00 and 15:00. The “Active” item in the menu
is checked (defined activation time is activated). “Baby Phone” mode is configured with
inactive activation time; so the mode will become immediately active when starting it. At
9:00 “Baby Phone” mode starts and its status is set to active. At 11:00 “Tracking Mode”
mode is becoming active and “Baby Phone” mode is stopped. “Panic Button” mode remains
active until 15:00 o’clock, when “Baby Phone” becomes active again and “Tracking Mode”
is stopped. If no change is made, the same scenario will be repeated the next day. In the
example at 16:00 the mode is deactivated using deactivation code/ sequence.
08:00 17:00
09:00 10:00 11:00 12:00 13:00 14:00 15:00 16:00
15:00 - 16:00
«Baby phone»
active
09:00 - 16:00
09:00
«Baby phone»
started
15:00
«Panic Button»
stopped
«Baby phone»
started
11:00
«Baby phone»
stopped
«Panic Button»
Started
16:00
«Baby phone»
Stopped
Via
Deactivation
Sequence
11:00 - 15:00
«Panic Button» active
09:00 - 11:00
«Baby phone» active
Figure 4-25 Activation time example 1
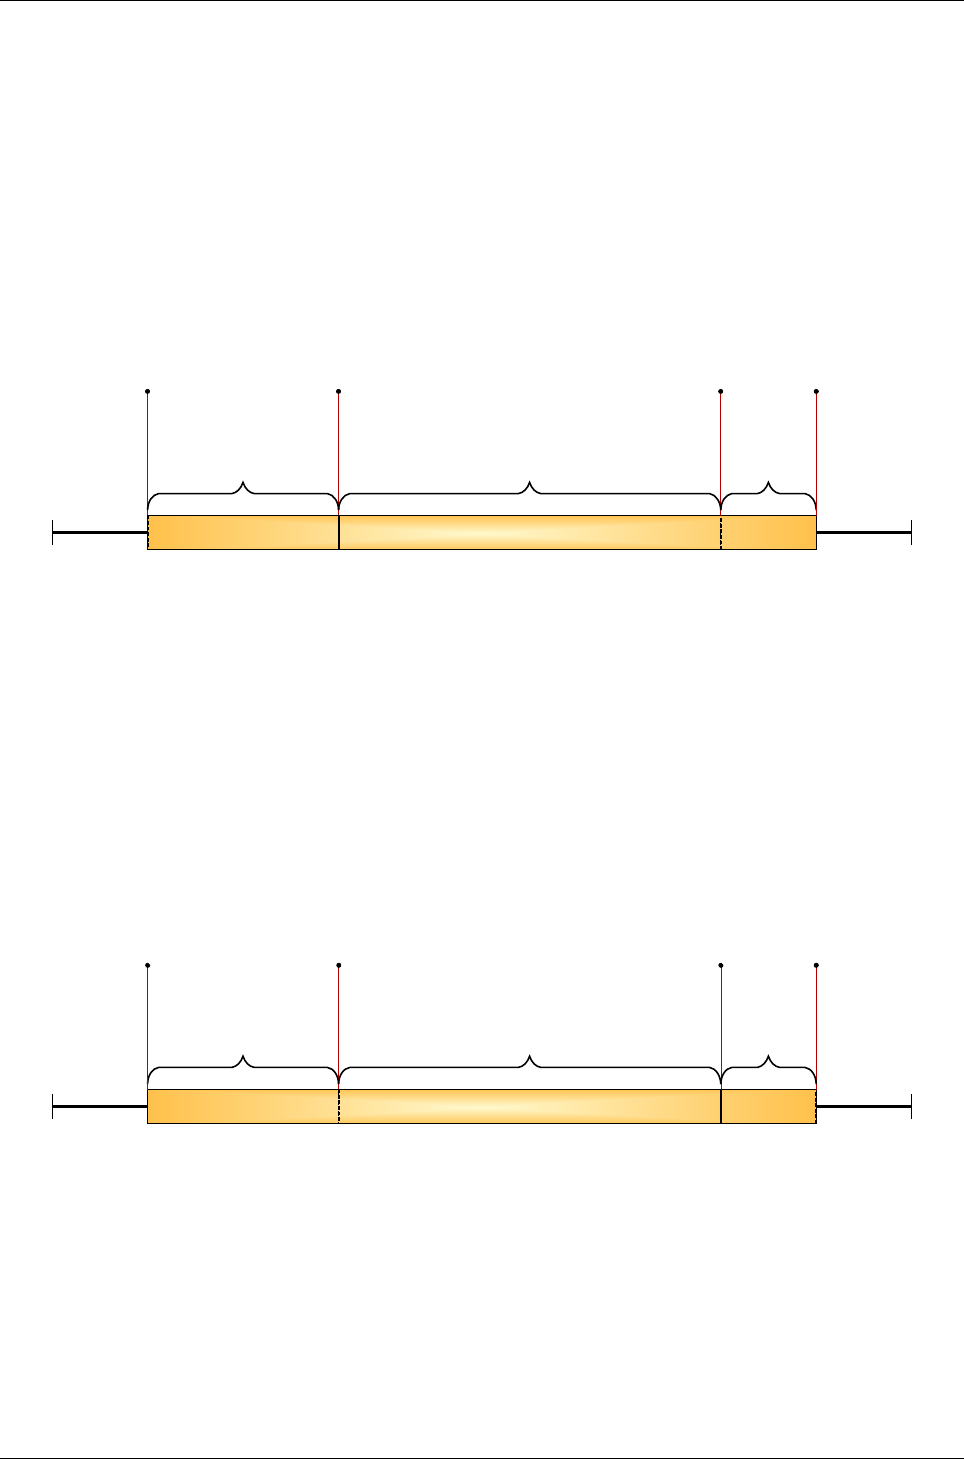
2. Start and end time for “Baby Phone” mode: 11:00 and 15:00. The “Active” item in the menu
is checked (defined activation time activated). At 9:00 the “Baby Phone” mode is started
manually. Because of the activated activation time the status of “Baby phone” is idle. At
11:00 the mode becomes active and the status on the display is updated. The mode
becomes idle again when the end time is reached (15:00 o’clock). If no change is made, the
same scenario will be repeated the next day. In the example at 16:00 the mode is
deactivated using deactivation code/ sequence.
08:00 17:00
09:00 10:00 11:00 12:00 13:00 14:00 15:00 16:00
09:00 - 11:00
«
Baby phone
» idle
11:00
«
Baby phone
»
activated
09:00 - 16:00
16:00
«
Baby phone
»
Stopped
Via
Deactivation
Sequence
11:00 - 15:00
«
Baby phone
» active
15:00
«
Baby phone
»
deactivated
09:00
«
Baby phone
»
started
15:00 - 16:00
«
Baby phone
»
idle
Figure 4-26 Activation time example 2
Page 28 / 50
User Manual for AyCare AyTerminal
V2.1 AyCare application
3. Current time on AyTerminal: 11:30. Start and end time for “Baby Phone” mode: 11:00 and
15:00. The “Active” item in the menu is checked (defined activation time activated). At
11:30 the “Baby Phone” mode is started manually. Because of activated activation the
status of “Baby Phone” is idle. At 11:00 next day the mode becomes active and the status
on display is updated. The mode becomes again idle when the end time is reached (15:00
o’clock). If no change is made, the same scenario will be repeated the next day. In the
example at 17:00 the mode is deactivated via the deactivation code/ sequence.
3.9.2006 4.9.2006
4.9.2006
15:00 - 17:00
«Baby phone»
idle
11:00
«Baby phone»
activated
17:00
«Baby phone»
Stopped
Via
Deactivation
Sequence
11:30 - 11:00
«Baby phone» idle
11:00 - 15:00
«Baby phone» active
11:30
«Baby phone»
started
11:30 - 17:00
15:00
«Baby phone»
deactivated
Figure 4-27 Activation time example 3
4.4.2Auto start
On AyTerminal it is possible to enable (check) or disable (uncheck) the auto start option mode. If
this option is enabled for a mode then this mode is automatically started when the AyTerminal is
turned on.
Note! Only one mode can have this option enabled. The other modes will have the auto start
option disabled.
4.4.3Notifiers
Each mode has its own list of notifiers and each one of them can be configured independently.
When an alarm is triggered, activated notifiers are the only ones to be informed. The availability of
the notifiers is mode dependent.
The notifiers will be informed in the following sequence:
1. The SMS is send to the defined phone number (if notifier activated).
2. A Voice Call to the defined phone number is established (if notifier activated).
3. The AyServer is informed (if AyTerminal is registered to AyServer and notifier activated).
In the mode menu (see Figure 4-21) the “Notifiers” item is available. After selecting it the “Notifiers”
menu screen will be displayed (see Figure 4-28).
Notifiers
SMS
Voice Call
AyServer
SMS
Voice Call
Notifiers
AyServe
Figure 4-28 Notifiers menu for Baby Phone mode
Page 29 / 50
AyTerminal User Manual for AyCare
Contents V2.1
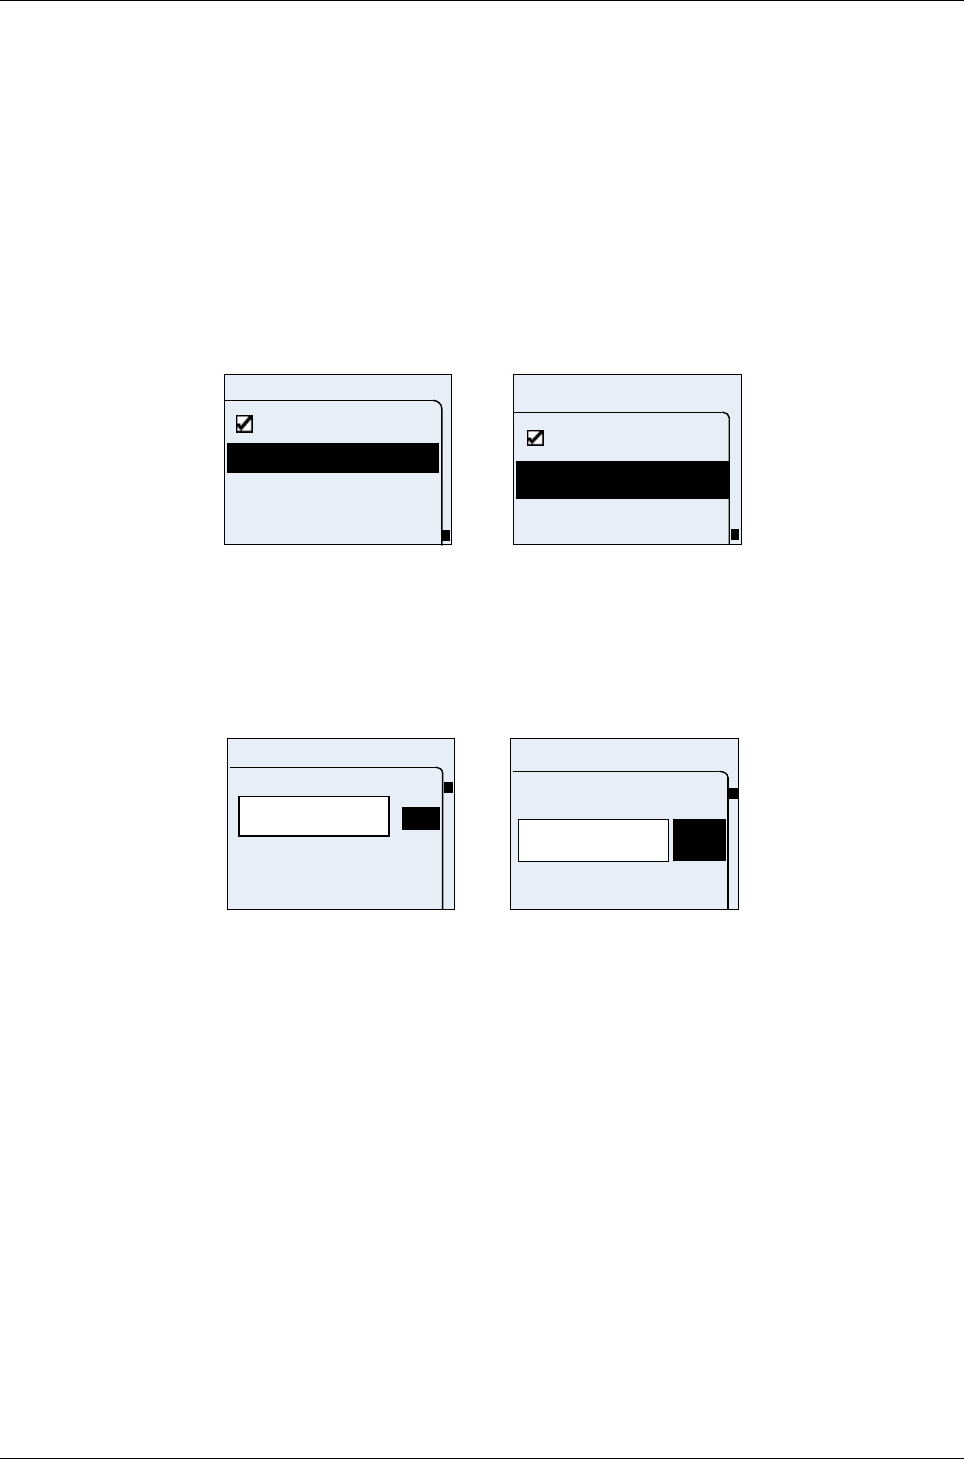
4.4.3.1SMS
The SMS data are: the phone number and the message text. The message text can not be
defined/ modified by the user on the AyTerminal. A default value for the SMS text of each mode is
defined, and can be changed only using the web GUI. The new SMS text is received from the
AyServer during synchronization. The default values for SMS text are defined in Figure 4-18
AyCare mode specific settings.
This notifier can be activated or deactivated. The phone number can also be changed.
If the highlighted item is “Active” then pressing the OK button (right button) checks or unchecks the
item.
If the highlighted item is “<phone number>” then pressing the OK button (right button) gives the
possibility to edit the phone number.
Pressing the Back button (left button) leads to the previous screen (Notifiers menu).
<Enter Nr .>
Active
SMS
+385000...
SMS
Active
Figure 4-29 SMS setup menu
As mentioned before, for the SMS notifier the phone number can be defined or changed. In this
case an input control is displayed like in Figure 4-30. If the phone number is not defined then in the
menu will appear “<Enter Nr.>”.
+385316_
Phone number
OK
1
0
+
+385_
Phone num
OK
0
+
Figure 4-30 Set phone number screen
The available characters are: + and 0…9.
By using the up/down navigation buttons it is possible to browse the digits, select them or select
OK. For adding a new digit it has to be selected first, and then the Enter navigation button has to
be pressed. To delete the last inserted digit use the left navigation button. When no digit is
available in the input area, press the Back button (left button) to cancel the editor and to display
the previous screen.
To save the set value select the OK option and then press the OK button (right button).
If the phone number is not in international format then a message is shown and the editor is
displayed again.
Only one phone number can be defined for SMS notification.
No acknowledgment tone will be played in the above screen.
4.4.3.2Voice Call
This notifier can be activated or deactivated. The phone number to be dialled can be changed. The
phone number must be in international format.
Page 30 / 50
User Manual for AyCare AyTerminal
V2.1 AyCare application
If the highlighted item is “Active” then pressing the OK button (right button) checks or unchecks the
item.
If the highlighted item is “<phone number>” then pressing the OK button (right button) gives the
possibility to edit the phone number.
Pressing the back button (left button) of the device leads to the previous screen (Notifiers menu).
<Enter Nr .>
Active
Voice call
+385000...
Voice Call
Active
Figure 4-31 Voice Call setup menu
The phone number can be added or modified on a one line editor screen (see Figure 4-32). If the
phone number is not defined then in the menu will appear “<Enter Nr.>”.
+385316_
Phone number
OK
1
0
+
+385_
Phone num
OK
0
+
Figure 4-32 Set phone number screen
The available characters are: + and 0…9.
By using the up/down navigation buttons you can browse the displayed digits, select them or select
OK. To add a new digit select it and press the OK button (right button). To delete the last inserted
digit use the Back button (left button). When no digit is available in the input area, press the Back
button (left button) to cancel the editor and to display the previous screen.
To save the set value select the OK option and then press the OK button (right button).
If the phone number is not in international format then a message is shown and the editor is
displayed again.
Only one phone number can be defined for Voice Call notification.
No acknowledgment tone will be played in the two screens above.
An established Voice Call can be ended by pressing long the central button (at least 2s).
4.4.3.3AyServer
This notifier can be activated or deactivated. If the AyServer option is checked then an alert will be
sent to the AyServer when an alarm is triggered. This item is only available if the AyTerminal is
registered to the AyServer and the initial SMS was received from the AyServer. When the item is
not available the AyServer text appears strikethrough.
Activating or deactivating the AyServer as notifier is done by checking or un-checking the option in
the “Notifiers” menu (see Figure 4-28). To check or uncheck the AyServer item, select it and press
the OK button (right button).
Page 31 / 50
AyTerminal User Manual for AyCare
Contents V2.1
Notifiers
SMS
Voice Call
AyServer
SMS
Voice Call
Notifiers
AyServe
Figure 4-33 AyServer available case
4.4.4Triggers / Phone number
Each mode has its own list of alarm triggers and each one can be configured independently.
At least one trigger has to be activated. If no trigger is activated then the mode can’t be started.
Each trigger can be activated or deactivated or its defined parameter values can be changed.
Each trigger has its own list of parameters to be set. At least one alarm trigger has to be activated.
Note: If a trigger is the only one for a mode then in the trigger’s setup menu the “Active” option is
missing and the trigger will be automatically activated.
The modes “Voice Call” and “Panic Button” have no triggers; instead of the “Triggers” menu the
“Phone numbers” menu item is displayed.
Only Baby Phone have trrigers:
Possible actions are:
•Navigating through the items using the up/down buttons.
•Selecting the highlighted item using the OK button (right button).
•Going back to the previous screen using the Back button (left button).
Noise
Listen-in
Triggers
Activation delay
Triggers
Listen-in
Noise
Activation
Figure 4-34 Setup triggers menu for Baby Phone mode
In case of the “Panic Button” mode one phone number can be defined. In case of the “Voice Call”
mode 10 phone numbers can be defined (see Figure 4-35). In the menu the actual set phone
number is shown (e.g. +407777773333). If the phone number is not defined then the “<Enter Nr.>”
line will be displayed in the menu.
Panic Button
Start
Activation time
Autostart
Notifiers
Panic Button
+3850000000
Overview
Start
Activation time
Page 32 / 50
User Manual for AyCare AyTerminal
V2.1 AyCare application
Panic Butt
Start
Autostart
Activation
Panic Butt
Notifiers
Overview
Start
Figure 4-35 Settings menu in Voice Call mode (standard and jumbo mode)
AyCare is using only the noise sensor from the three AyTerminal sensors. For setting the noise
threshold value the noise calibration screen is shown. This screen contains the following
information:
•Currently measured sensor value
•Current threshold value
•Additional text to describe the shown values (see Figure 4-20)
(see 4.4.4.2)
v1
curr.:
v2
Noise
72 curr.:
10
Noise
Figure 4-20 Noise adjustment screens
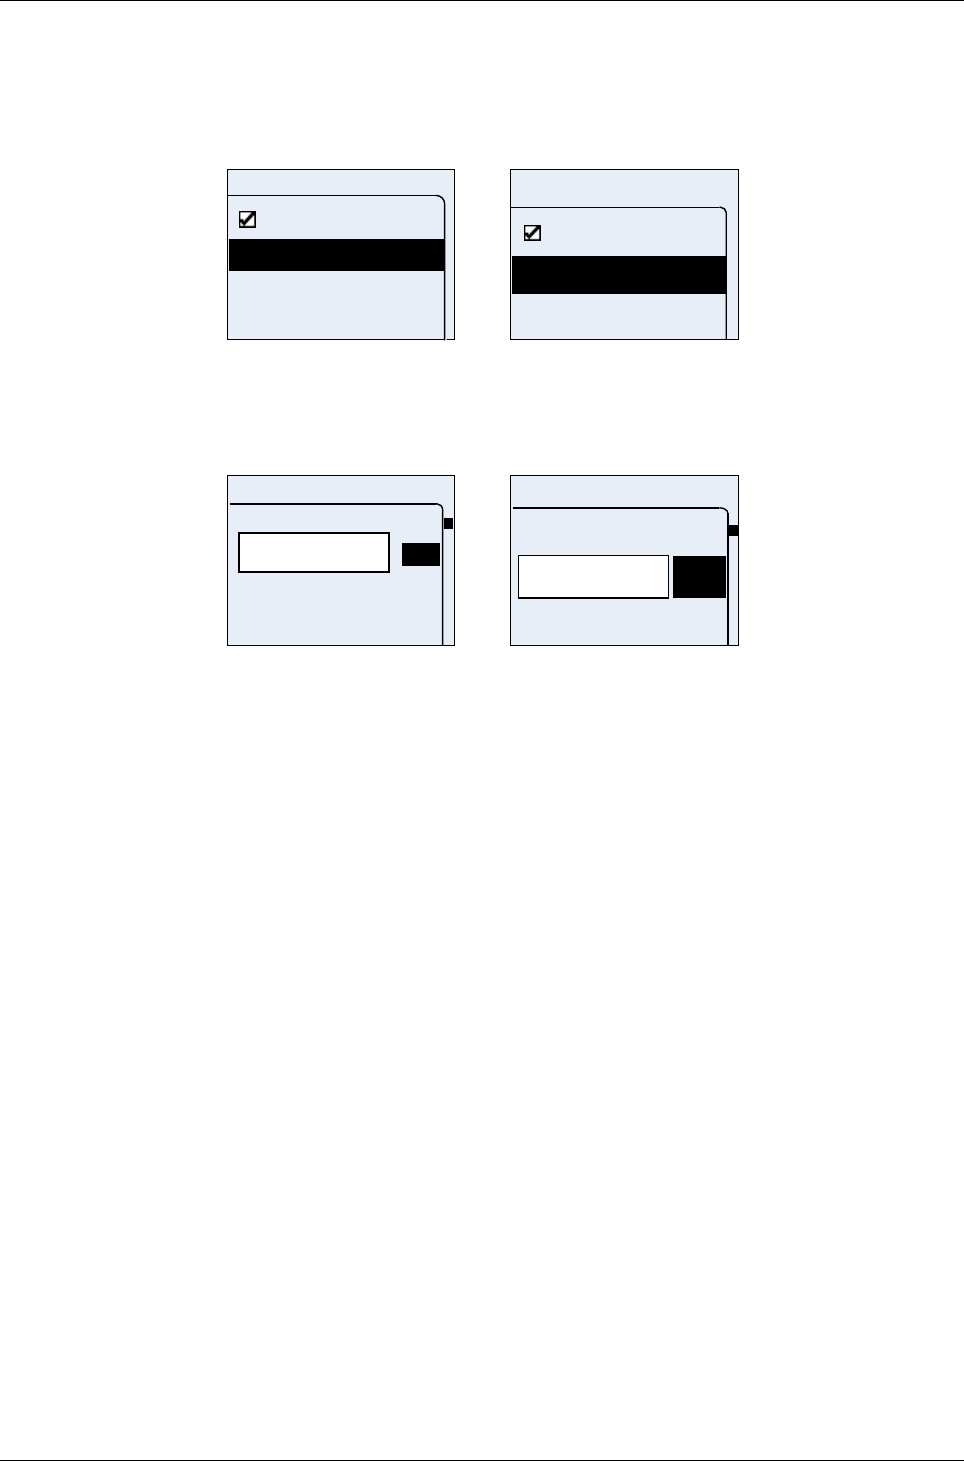
4.4.4.1Listen-in
Note! Listen-In is a feature not a trigger. It appears in triggers menu because it can be activated/
deactivated and its parameters can be changed.
The menu is provided for setting the Listen-In parameter values:
Listen-in
Active
Phone numbers
Listen-in
Phone nu
Active
Figure 4-36 Setup Listen-In trigger
The options in the Listen-in setup menu are: Active with a check-box in front, and Phone numbers.
After selecting the Phone numbers menu item a menu with all 10 defined phone numbers is
shown.
Phone numbers
<phone no1>
<phone no2>
<Enter Nr.>
<Enter Nr .>
Phone num
<phone no
<phone no
<Enter Nr.>
Figure 4-37 Phone numbers list
Page 33 / 50
AyTerminal User Manual for AyCare
Contents V2.1
One phone number is the currently set phone number (e.g. +407777773333). If the phone number
is not defined then the “<Enter Nr.>” line will be displayed in the menu.
The available buttons and screen’s functionality are the same as in all menu screens.
For Listen-in a phone number can be added/ modified through a phone editor screen (Figure 4-38).
If Listen-In is active then the phone with the specified number will be able to listen where the
AyTerminal is placed after establishing a voice call with the AyTerminal. The voice call in this case
does not trigger the AyTerminal to play any ring tone. The connection is made silently and
automatically.
+385316_
Phone number
OK
1
0
+
+385_
Phone num
OK
0
+
Figure 4-38 Set phone number screen (standard and jumbo mode)
The available characters are: + and 0…9.
By using the up/down navigation buttons you can browse the displayed digits, select them or select
OK. For adding a new digit it has to be selected and then the OK button (right button) has to be
pressed. To delete the last inserted digit press the Back button (left button). When no digit is
available in the input area, Back button (left button) can be used to cancel the editor; the previous
screen will be displayed.
To save the set value select the OK option and then press the OK button (right button).
If the phone number is not in international format then a message is shown and the editor is
displayed again.
No acknowledgment tone will be played in the screens above.
Only the defined phone numbers can listen in where the AyTerminal is placed.
4.4.4.2Noise
The following menu is provided for setting the noise parameters values:
Noise
Threshold
Active
Noise
Threshold
Active
Figure 4-39 Setup ego motion menu screen
Noise threshold can be changed in a noise adjustment screen (see Figure 4-40). Reaching or
exceeding this level will trigger the defined alarms.
For sensing the noise the AyTerminal microphone is used.
The alarm threshold can be defined in 100 steps of a range from 0 to 1000 dBA. On the screen the
threshold can be seen in percentages from 0 to 100%. Increasing step is 4%.
Page 34 / 50
User Manual for AyCare AyTerminal
V2.1 AyCare application
72
curr.:
10
Noise
72 curr.:
10
Noise
Figure 4-40 Noise adjustment screen
Possible actions in this screen are:
•Increasing or decreasing the threshold value by using the up/down buttons.
•Saving the threshold value using the OK button (right button).
•Going back to the previous screen without saving any changes using the Back button (left
button).
No validations are made when leaving this screen.
If any problem occurred while saving the noise threshold a message box containing a proper
message will be displayed (e.g. “The value could not be saved. Please try again.” for English
language selected). Otherwise the previous screen is shown without notification.
4.4.4.3Activation delay
Between the moment of activating the mode and activating the noise sensor there can be a delay.
This delay is called Activation delay; it is configurable. The Activation delay can take values
between 0 s and 255 s. This option is useful when some time is needed to place the AyTerminal in
the desired place (e.g. car) after activating the mode.
The activation delay is set using the hh:mm:ss format (255s => “00:04:15”).
00:01:00
Activation delay
OK
0:01:00
Activation d
OK
Figure 4-41 Set activation delay screen
To set the value, enter the time, select OK, and then press the OK button (right button). In this
moment the entered value is validated. If is greater than 255s then the device will play a negative
acknowledgment tone and a message box will be displayed (“Activation delay must be between 0s
and 255. New value denied.” for English language selected). Then the previous screen is
displayed. If the value is correct, a positive acknowledgment tone is played and the previous
screen is shown.
4.4.5Duration
This menu item is used to define the time, for which the mode is set into the alarm state if an alarm
is triggered. If duration is set to 0, the Alarm state is active until the deactivation code is entered.
For Baby Phone mode 0 is not acceptable for duration because there is no siren as a notifier.
4.4.6Overview
This menu item is used to overview the mode settings in a text screen with all set values (see
Figure 4-42).
Page 35 / 50

AyTerminal User Manual for AyCare
Contents V2.1
Baby phone
Triggers:
Noise-
Activation
delay:30s
Notifiers:
SMS
(+38531234998),
AyServer
Duration:180s
Baby
phone
Triggers:
Activation
delay:30s
Notifiers:
Figure 4-42 Overview screen
The overview screen contains the following data:
•List of active triggers. For each trigger the threshold value is displayed.
•List of active notifiers, separated by commas. If a phone number for SMS or Voice Call is
defined the phone number is displayed in brackets.
•Alarm duration (if mode is defined to have it)
•Activation delay (if mode is defined to have it)
Example of displayed data (“Baby Phone” menu with SMS and AyServer as active notifiers and
with defined time):
“Notifiers: SMS (+38531234998), AyServer”.
The text is wrapped and the screen’s content is scrollable using the up/down navigation buttons.
In case of “Voice Call” and “Panic Button” mode, the “Triggers” item is replaced by the “Phone
number” menu item. Therefore the Overview screen contains different data:
•The set phone number(s) where the voice call will be made
•List of active notifiers, separated by comma
Using the left button (Back) the previous screen is shown (Mode menu).
If the information is not fitting in one screen (one screen has 20 lines in standard and also jumbo
mode) then the text is split in more message boxes. Going from one message box to another is
possible by pressing the OK button.
4.5Activating/Starting a mode
A configured mode can be started by choosing “Start” in the mode menu. If the Activation time is
checked the mode is first going in idle status and will be activated at the user-specified time. Else
the mode is activated immediately after the “Start” option is chosen.
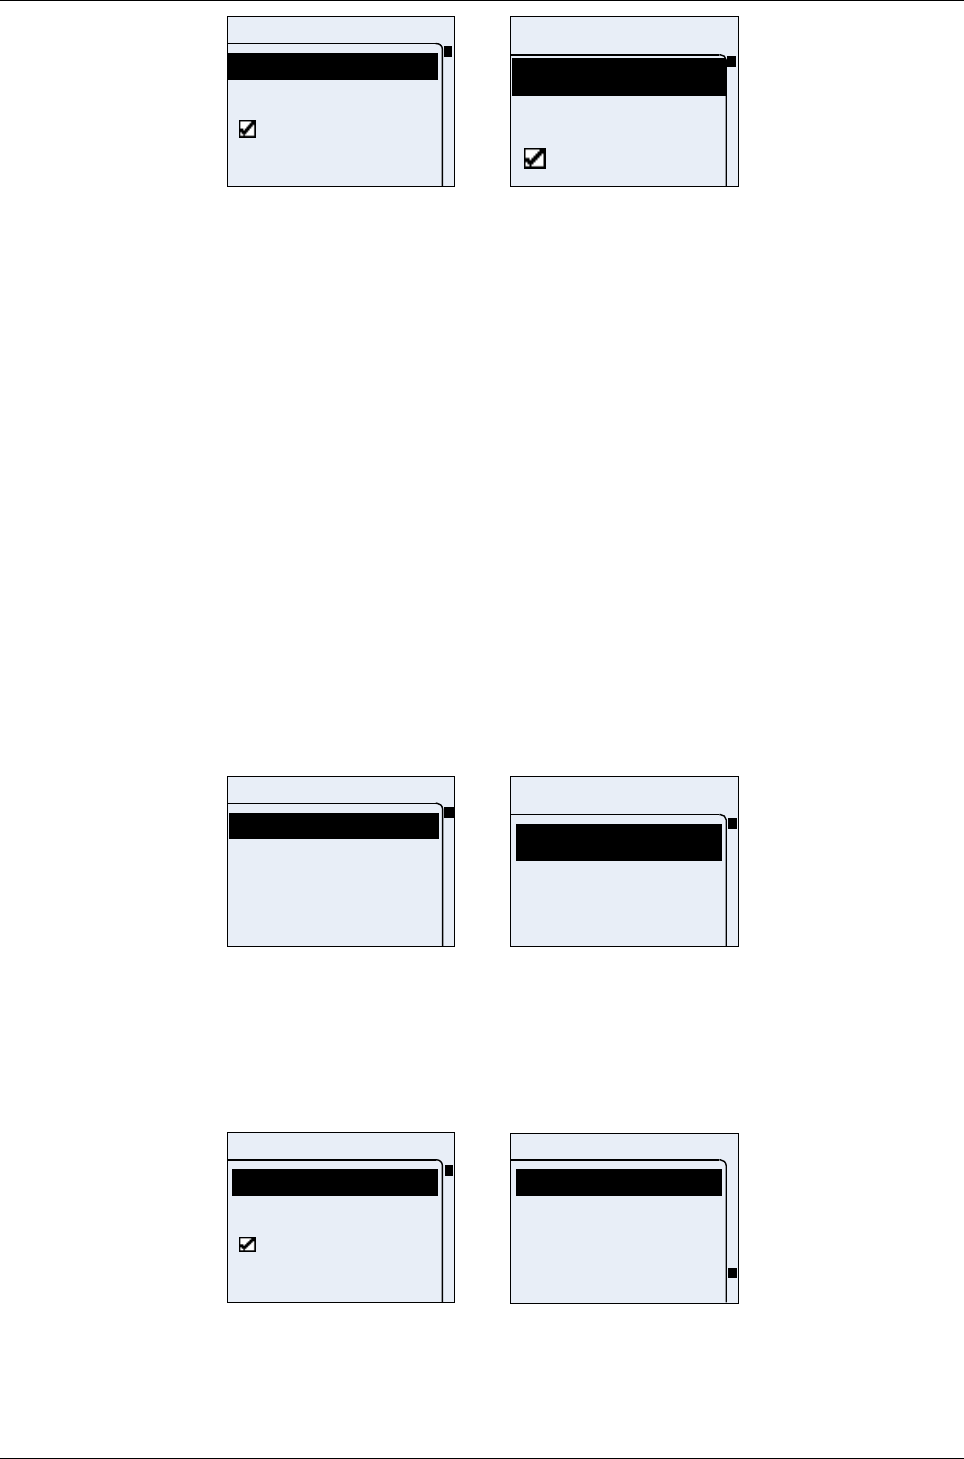
After starting a mode or starting the AyTerminal with the PIN of the SIM card disabled and the
mode set to auto start, a screen like in Figure 4-43 is shown in following cases:
•if the mode was started without activating the activation time option. In this case the mode
is started and also activated.
•if the mode was started and the activation time’s active option was checked and the start
time was encountered.
Page 36 / 50
User Manual for AyCare AyTerminal
V2.1 AyCare application
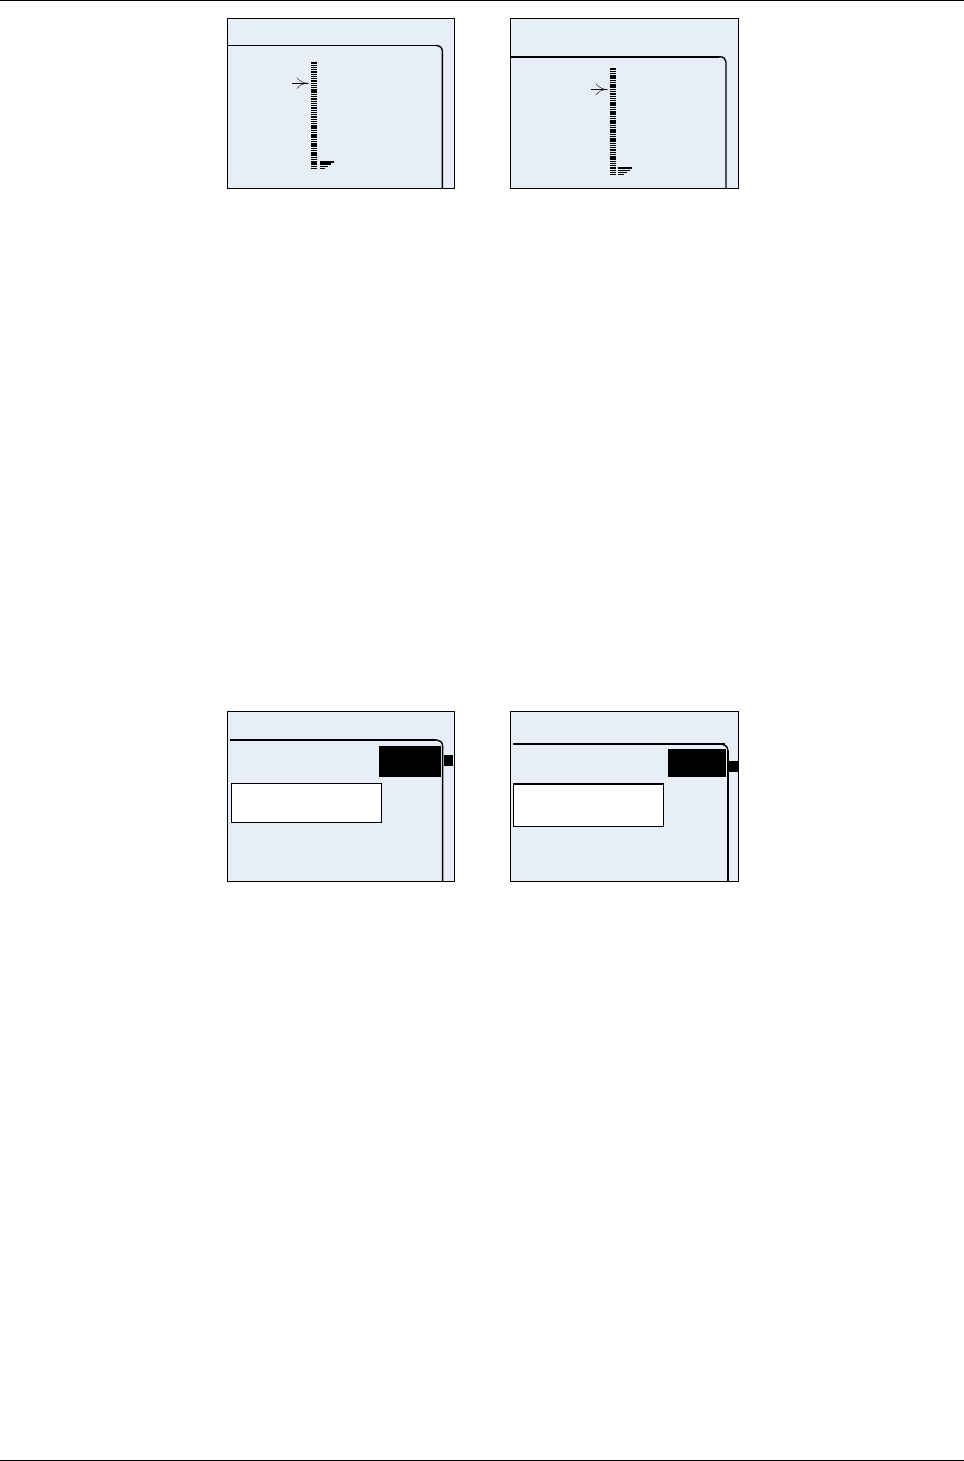
Baby Phone
Active
Baby Phone
Active
Figure 4-43 Active mode status screen for Baby Phone mode
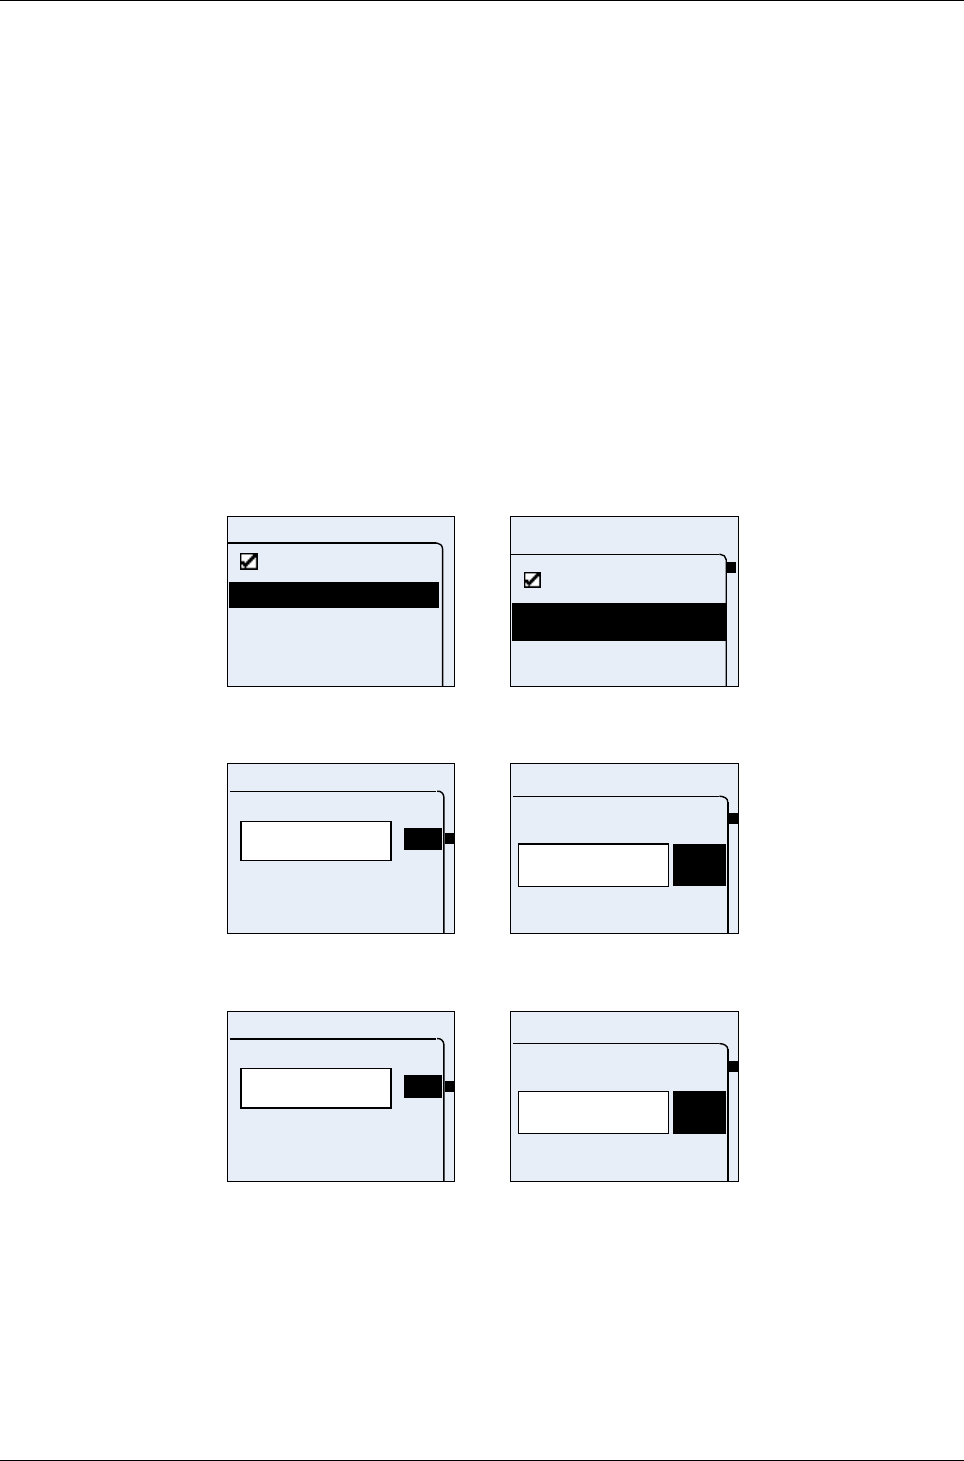
After starting a mode a screen like in Figure 4-44 is shown in following cases:
•if the mode was started and the activation time’s active option was checked and the start
time is not encountered.
•if the activation time is active but the end time has been reached.
Baby Phone
Idle
Baby Phone
Idle
Figure 4-44 Inactive mode status screen for Car Alarm mode
The following data are shown in this screen:
•AyTerminal Status bar
•Mode’s name
•Active/Idle status
While a mode is started the green LED will blink.
In these screens only the deactivation code is available.
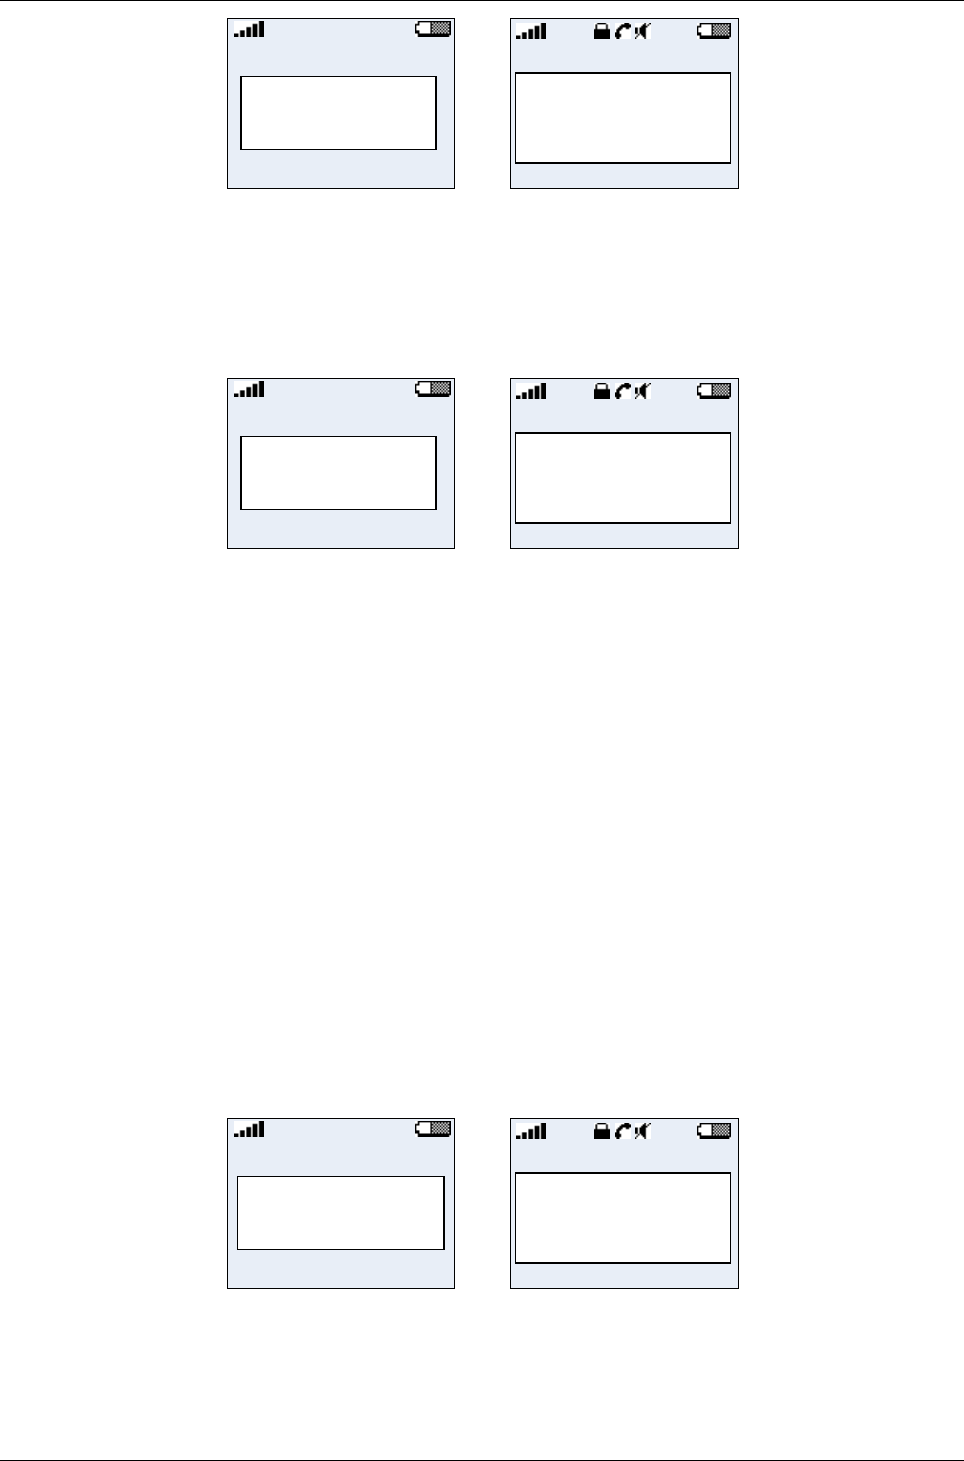
If an alarm is triggered a message will be displayed informing the user about the triggered alarm
(see Figure 4-45). In case that the alarm was triggered because the current value of a sensor
exceeded the set threshold the first displayed line contains the mode name and the second line the
pair sensor name – sensor value. The sensor name is the name of the sensor for which the value
was exceeded and the sensor value is the value of the sensor in the moment when the value was
exceeded. With the sensor value the measurement unit is also displayed (% for noise and ego-
motion sensors and °C for temperature sensor). This is the case of Baby Phone which has as
trigger noise sensor. If the alarm was triggered but no sensor was involved then the second
displayed line is replaced by the text “Alarm!”. This is the case of Leaving Location, Tracking Mode,
Voice Call and Panic Button where the alarm is not triggered by a sensor. The screen is updated
whenever something changes on AyTerminal (e.g call phone established, call phone ended). After
alarm duration the mode returns in Active state which is indicated on display.
<mode name>
<sensor>=<v
<mode nam
<s>=<valu
Page 37 / 50

AyTerminal User Manual for AyCare
Contents V2.1
Baby Phone
Noise=28%
Baby Phone
Noise=28%
Figure 4-45 Mode active and alarm triggered
4.6Deactivating a mode or triggered alarm
For stopping the triggered alarm the mode has to be deactivated.
Mode can be deactivated by pressing the deactivation code. After deactivating a started mode the
mode menu will be displayed. . If mode is started using “autostart”, after entering deactivation
code, main menu will be displayed.
For setting the deactivation code see chapter .
4.7Emergency call
The “Emergency call” menu item is used to make an emergency call.
<Mode n>
Emergency call
Settings
Turn OFF
Emergenc
Settings
Turn OFF
Figure 4-46 Main menu – standard and jumbo mode
4.8Settings
The “Settings” menu provides the possibility to configure general AyTerminal settings via its
submenus.
4.8.1AyServer Sync
This menu item gives the user the possibility to initiate synchronization with AyServer. While the
synchronization with AyServer is in progress on display the following screen will be visible:
Sync
In Progress
Sync
In Progress
Figure 4-47 Sync in progress
When the synchronization process is finished a message box is displayed informing about the
result of the synchronization. In case the synchronization failed the message box with the proper
message is displayed until right or left button is pressed. In case of success the message box with
the proper message will be displayed for 5 seconds. After 5 seconds the Settings menu is
displayed back.
Page 38 / 50
User Manual for AyCare AyTerminal
V2.1 AyCare application
Sync Now
successfully
completed.
Sync Now
successfully
completed.
Figure 4-48 Sync Now – message in case of successfully completed synchronization
Sync Now failed.
Sync Now
failed.
Figure 4-49 Sync Now – message in case synchronization fails
4.8.2AySnapOn
The “AySnapOn” menu provides the ability to:
•search for new AySnapOns that are connected to the AyTerminal
•view all found AySnapOns
In the list of found AySnapOns it is possible to:
•activate or deactivate each AySnapOn
AySnapOn
Search
AyCAMERA
AyGPS
AySnapOn
View
AyGPS
Figure 4-50 AySnapOn menu – standard and jumbo mode
If more than four AySnapOns are found during the search process a message is shown on the
display. Additionally the status LED will blink red and a negative acknowledgment is sounded. The
maximum four AySnapOns are allowed be connected to one AyTerminal. The list of connected
AySnapOns is not available if more than four AySnapOns are connected.
Too many
AySnapOns
connected!
Too many
AySnapOn
connected!
Figure 4-51 AySnapOn warning message – standard and jumbo mode
An AySnapOn can only be activated if the running application supports this AySnapOn.
It is forbidden to plug or unplug AySnapOn modules to/from AyTerminal while AyTerminal
is powered on. It needs to be powered off first.
Page 39 / 50
AyTerminal User Manual for AyCare
Contents V2.1
4.8.3AyTerminal
This menu provides the common settings for all AyApplications.
Using the:
•”Info” option allows the user to see FW and AyTerminal useful information. See 4.8.3.3.
•“Default settings” option allows user to reset all AyApplication configurable values to
default.
• “FW Update” option allows user to update the current FW (available only if user registered
to AyServer). See 4.8.3.2.
The currently running AyApplication is marked with a checked radio button. Selecting an
unmarked AyApplication in the menu initiates the change of the current running AyApplication. The
AyTerminal is restarted with the new selected AyApplication. Before restart, a message is shown
for five seconds, see Figure 4-54. . Changing the ayapplication it can take some time (around 3
minutes)..
AyTerminal
<AyApp 4>
<AyApp 3>
<AyApp 2>
<AyApp 1>
AyTerminal
Info
Default settings
FW Update
<AyApp 1>
Figure 4-52 AyApplication menu – standard mode
AyTerminal
<AyApp 1
<AyApp 2
<AyApp 3
AyTerminal
<AyApp 4
Info
Default sett
AyApplicati
Default set
FW Update
<AyApp 1
Figure 4-53 AyApplication menu – jumbo mode
AyApplication
changed.
REBOOTING!
AyApplicati
on
changed.
Figure 4-54 Rebooting message box in standard and JUMBO mode
4.8.3.1Setting the AyApplication to default settings
Selecting the “Default settings” item it is possible to set all settings of the running AyApplication to
theirs default values. A sequence of message screens is shown (see Figure 4-55). The AyTerminal
settings like time and date are not influenced by this action.
Setting to
default… Please
wait.
Setting to
default...Ple
ase wait.
Page 40 / 50

User Manual for AyCare AyTerminal
V2.1 AyCare application
Default settings
applied.
Rebooting...
Default
settings
applied.
Rebooting...
Figure 4-55 AyApplication warning message – standard and jumbo mode
The settings which are influenced by this reset to default are:
Setting Default value
Application version Current AyApplication version
All AySnapOns deactivated
Time Sync deactivated
AyServer Periodic Polling deactivated
AyServer Periodic Polling Interval 60s
Nickname John Doe
Deactivation code Up, Right, Down, Left
Audio - mute Deactivated
Audio – Voice Call volume Maximum (100)
Audio – Button Click volume Maximum (100)
Audio – Alarm volume Maximum (100)
Audio – Ring tone volume Maximum (100)
Audio – selected ring tone 3d in the list
Audi0 – headset Deactivated
Selected language EN
Display – jumbo mode deactivated
Table 4-5 AyTerminal settings – default values
For AyCare specific settings see chapter 4.2.4.
4.8.3.2Firmware Update
If registered to the AyServer the firmware update can be initiated. The AyTerminal will contact the
AyServer and if a newer firmware is found on the AyServer then the AyTerminal informs the user
that there is a new version available. The info is more a request for confirmation. To accept or
reject the download of the new firmware the right/ left button must be pressed. If the right button is
pressed then the new version of the firmware is downloaded on the AyTerminal and a positive
acknowledgment. is sounded. During the download a message screen is shown.
Before AyTerminal reboots a notifying message box is shown. If the left button is pressed in
confirmation screen then the firmware update is canceled and negative acknowledgment. is
sounded.
Page 41 / 50

AyTerminal User Manual for AyCare
Contents V2.1
New FW available.
Confirm update.
Downloading
...
FW 29
FW downloaded
successfully from
AyServer.
Rebooting!
Figure 4-56 Firmware update menu and messages – standard mode
New FW
avaible.
Confirm
FW 29
Downloading
...
FW
downloaded
successfully
from
Figure 4-57 Firmware update menu and messages– jumbo mode
In case of error following message box is shown and after enter/ back button is pressed the
Firmware menu is displayed.
Failed to download
new FW from
AyServer.
Failed to
download
new FW
from
Figure 4-58 Error FW download message
4.8.3.3Info
In the “Info” menu the user can see all the relevant information of the AyTerminal.
•Bootloader variant and version
•Main FW variant and version
•MSISDN
•IMEI
•SMS Center
•APN
•DNS
•NET username
•NET password
•AyServer URL
This information can not be changed via AyTerminal.
MSISDN:
+1234567890
APN:
www.htgprs.hr
MSISDN:
+12345678
90
APN:
Page 42 / 50
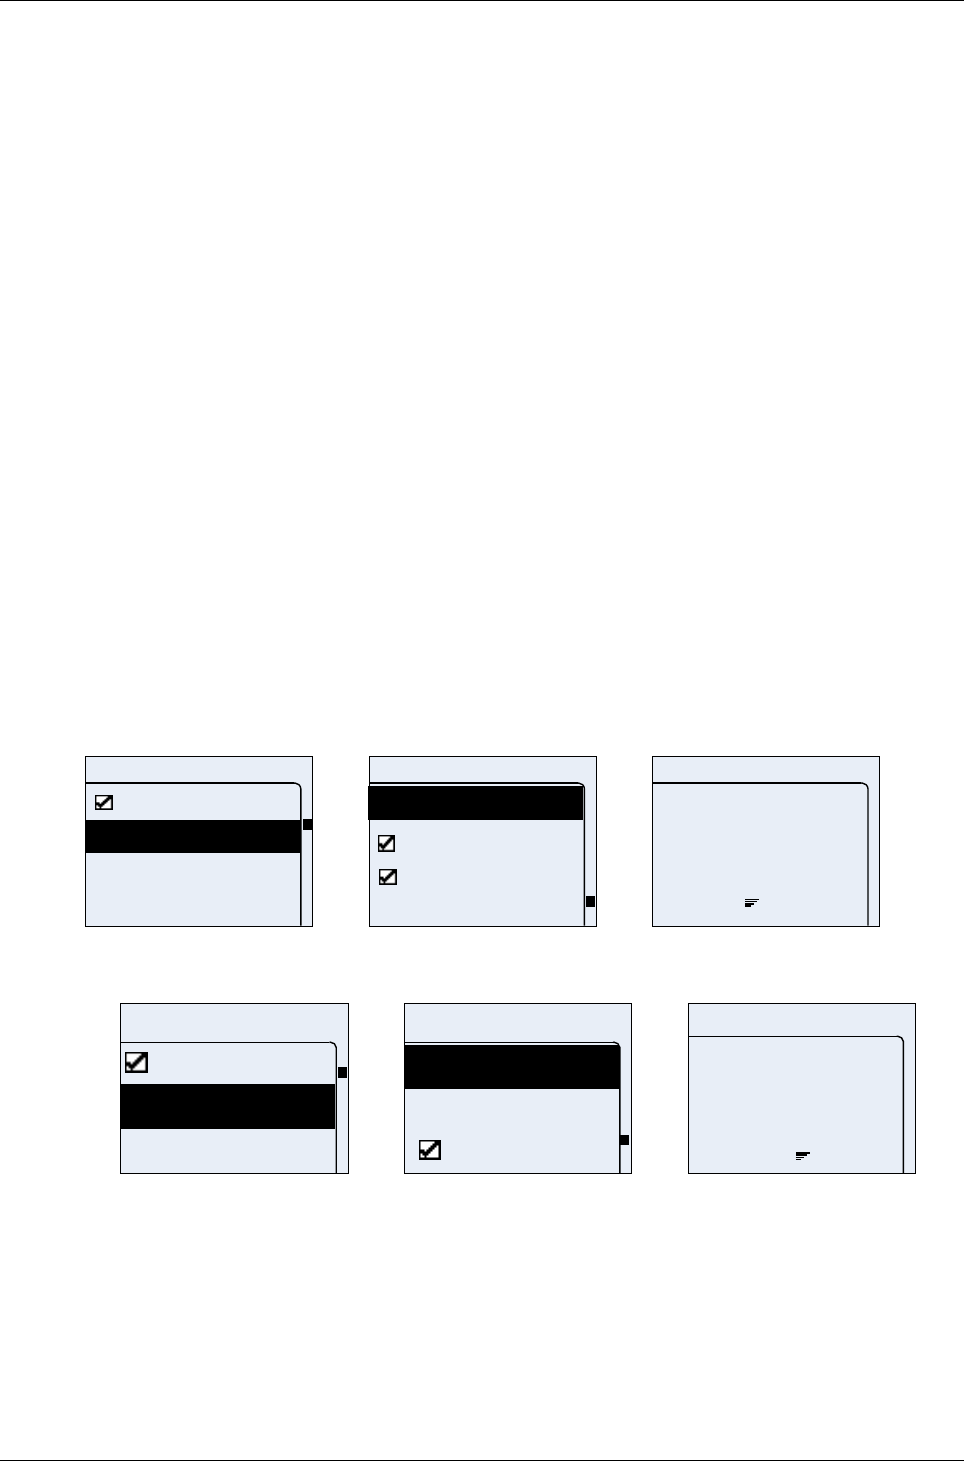
User Manual for AyCare AyTerminal
V2.1 AyCare application
Figure 4-59 Info message – standard and jumbo mode
If the information is not fitting in one screen (one screen has 20 lines in standard and also jumbo
mode) then the text is split in more message boxes. Going from one message box to another is
possible by pressing the OK button.
4.8.4Audio
In “Audio” menu AyTerminal audio settings can be changed.
Checking/ unchecking the “Headset” checkbox item the connected headset is activated or
deactivated.
Volume can be setup for:
•alarm siren
•button clicks
•voice calls
•ring tone
or to
•mute all sound feedback
The volume can be defined in five steps where the first step always means mute (0%, 20%, 40%,
60%, 80% and 100%). By default volume settings for call, siren and ring tone are set to 100% and
for button to 40%.
If the user activates the “Mute all” item, all sound feedback are muted, but the set values are still
stored on the AyTerminal.
For ring tones there is a submenu where the user can additionally choose the ring tone. “Ring tone
3” is set by default.
Audio
Call
Button
Siren
Mute all
Audio
Ring tone
Mute all
Call
Headset
Call
vol.:
25
Figure 4-60 Audio menu – standard mode
Audio
Mute all
Button
Call
Audio
Siren
Ring tone
Headset
Call
vol.:
25
Figure 4-61 Audio menu – jumbo mode
4.8.5Clock
This menu gives the possibility to:
•see current time and date
•set the time and date manually
•activate/deactivate automatic time synchronization with the AyServer
Page 43 / 50
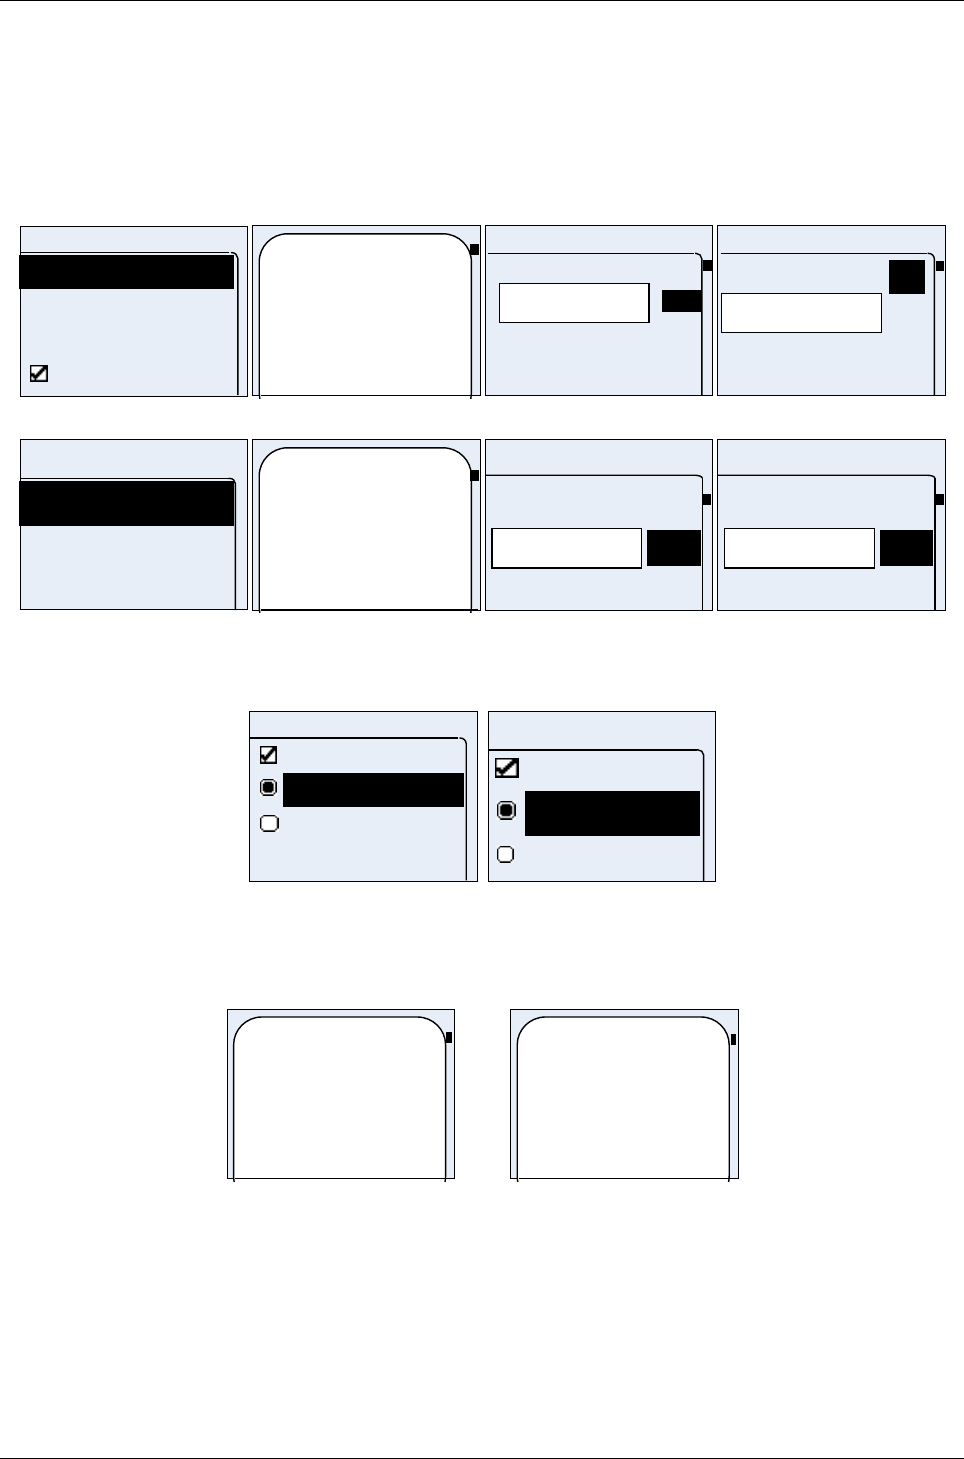
AyTerminal User Manual for AyCare
Contents V2.1
Time can be set manually on the AyTerminal, or – if registered to the AyServer – the time can be
automatically synchronized. Time synchronization is performed daily and also every time if
something changed on the AyTerminal that needs connection to the AyServer.
If the “Time/Date” item is entered the “Autotime” item is deactivated automatically.
The time input format is “hh:mm:ss” and the date input format is “DD.MM.YYYY” (European
format).
Clock
Time/Date
Change Time
Auto time
Change Date
Time: 23:59
Date: 31.12.2006
23:59:_
Change Time
9
2
1
0
10.12.2006
Change Date
OK
Figure 4-62 Clock menu – normal mode
Clock
Change Ti
Time/Date
Change Da
Time: 23:59
Date: 31.11.
2005
23:5_
OK
1
0
Change T...
.200_
OK
1
0
Change D...
Figure 4-63 Clock menu – jumbo mode
4.8.6Display
Display
Jumbo mode
English
German
Display
Jumbo
German
English
Figure 4-64 Display menu in standard and jumbo mode
The currently selected language can be seen and also changed in this menu. After user select
desired language AyTerminal will show message and it will reboot. It is done automatically. The
default language is English.
Language
changed.
REBOOTING!
Language
changed.
REBOOTIN
G!
Figure 4-65 Language message box
Using Jumbo mode menu item the user has the possibility to activate or deactivate the jumbo mode
of the display
4.8.7Security
4.8.7.1Setting the deactivation code
After the “Deactivation code” setup has been chosen an editor is displayed to enter the new
deactivation code. The deactivation code/ code consist of a combination of 4 buttons from the 5
Page 44 / 50
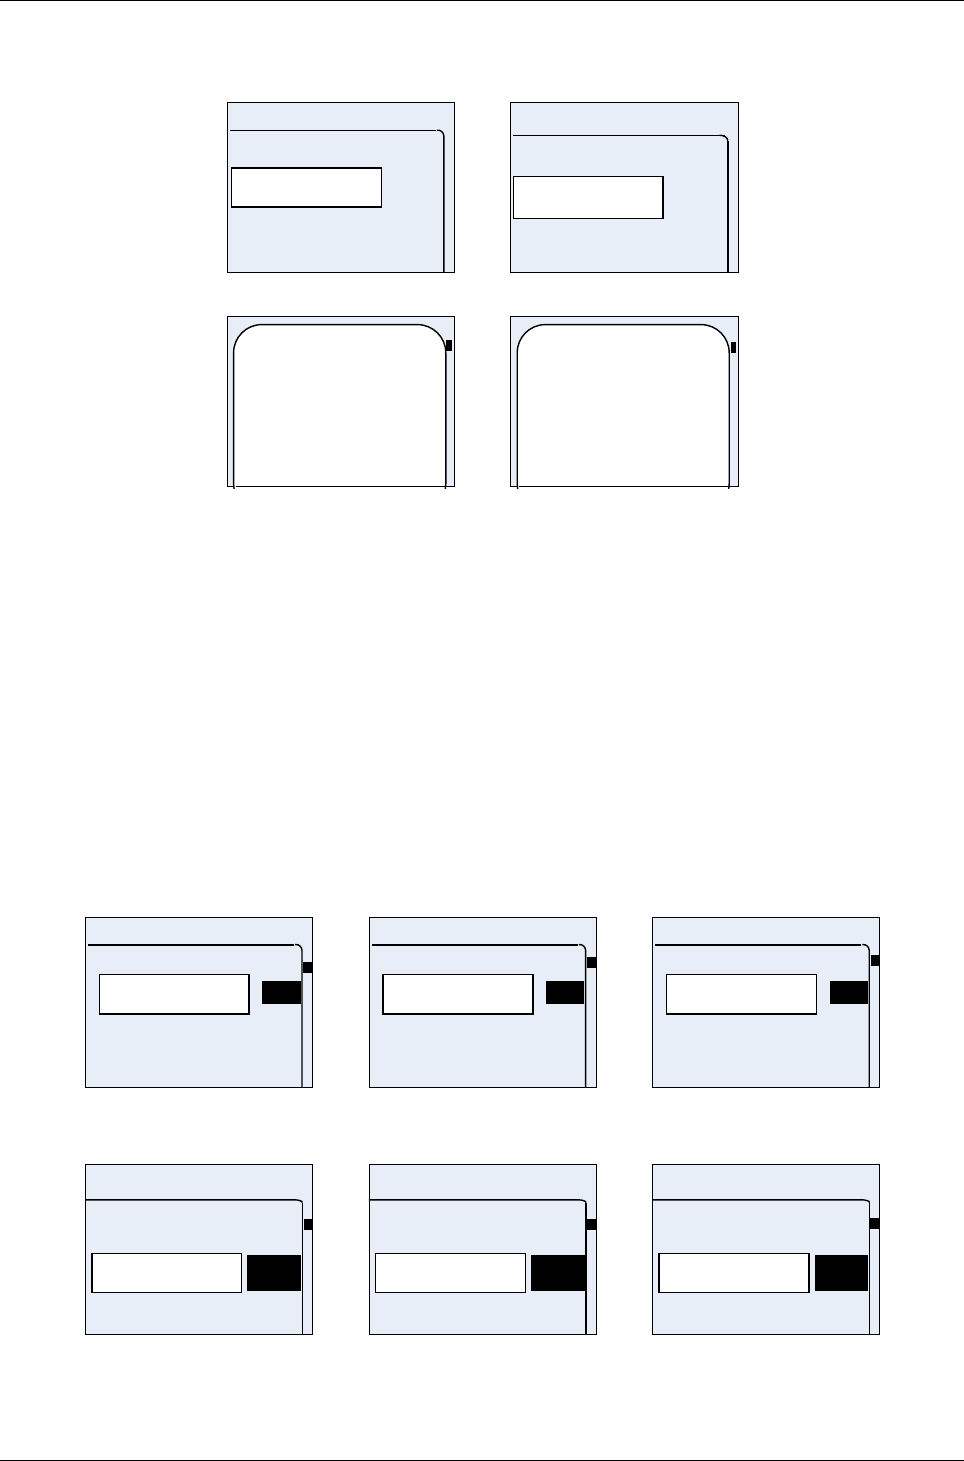
User Manual for AyCare AyTerminal
V2.1 AyCare application
available ones: up, right, down, left, central. After entering the new deactivation code (pressing a
code of 4 buttons) a message box is displayed informing about the new set deactivation code. The
new code can be accepted or rejected using the right or left button.
**
Code setup
**
Code setup
Figure 4-66 Code setup editor (standard and jumbo mode)
The deactivation
code is: up, right,
Down, left.
Confirm?
The
deactivation
code is: up,
right,
Figure 4-67 Confirmation request
If confirmation is rejected then the new deactivation code is not saved.
4.8.7.2PIN control
Using this menu item it is possible to activate or deactivate the SIM PIN request on start up. PIN
control is activated by default. For activating or deactivating the SIM PIN request, the PIN has to be
entered in the PIN editor screen first (see Figure 3-12).
4.8.7.3Changing the PIN
Using this menu it is possible to change the SIM PIN.
First the old PIN is requested, then the new PIN and re-enter it for security reasons is requested.
According to GSM specifications the PIN can be up to 8 digits long. The PIN must have at least 4
digits.
***_
Old PIN
9
2
1
0
***_
New PIN
9
2
1
0
***_
Re-enter PIN
9
2
1
0
Figure 4-68 Change PIN screens – standard mode
***_
9
1
0
Old PIN
***_
9
1
0
New PIN
***_
9
1
0
Re-enter PIN
Figure 4-69 Change PIN screens – jumbo mode
Page 45 / 50

AyTerminal User Manual for AyCare
Contents V2.1
If user enters wrong pin, user will receive message about wrong pin (Figure 4-70: Incorrect PIN
message). After entering wrong PIN three times user will receive message shown in Figure 4-71:
Message after entering wrong PIN three times.
Incorrect PIN.
Try again.
Incorrect
PIN.
Try again.
Figure 4-70: Incorrect PIN message
No tries left.
Option blocked.
No tries left
. Option
blocked.
Figure 4-71: Message after entering wrong PIN three times
4.9Turning off the AyTerminal
For turning off the AyTerminal, if there is a mode started then this mode has to be deactivated.
After deactivating the mode by entering the deactivation code, the last shown menu will be
displayed. For turning off the device go back to the main menu and select the “Turn Off” item.
Message box will appear asking to confirm turning off, see . After pressing accept button new
message will be shown, informing about saving Ay settings, see .
Do NOT connect charger while TURNING OFF the AyTerminal because the data that is being
saved might be corrupted!
Turning off
AyTerminal.
Confirm?
Turning off
AyTerminal.
Confirm?
Figure 4-72 Confirmation for turning off AyTerminal
Saving Ay
settings.
Saving Ay
settings.
Figure 4-73 Saving AyTerminal settings
Page 46 / 50
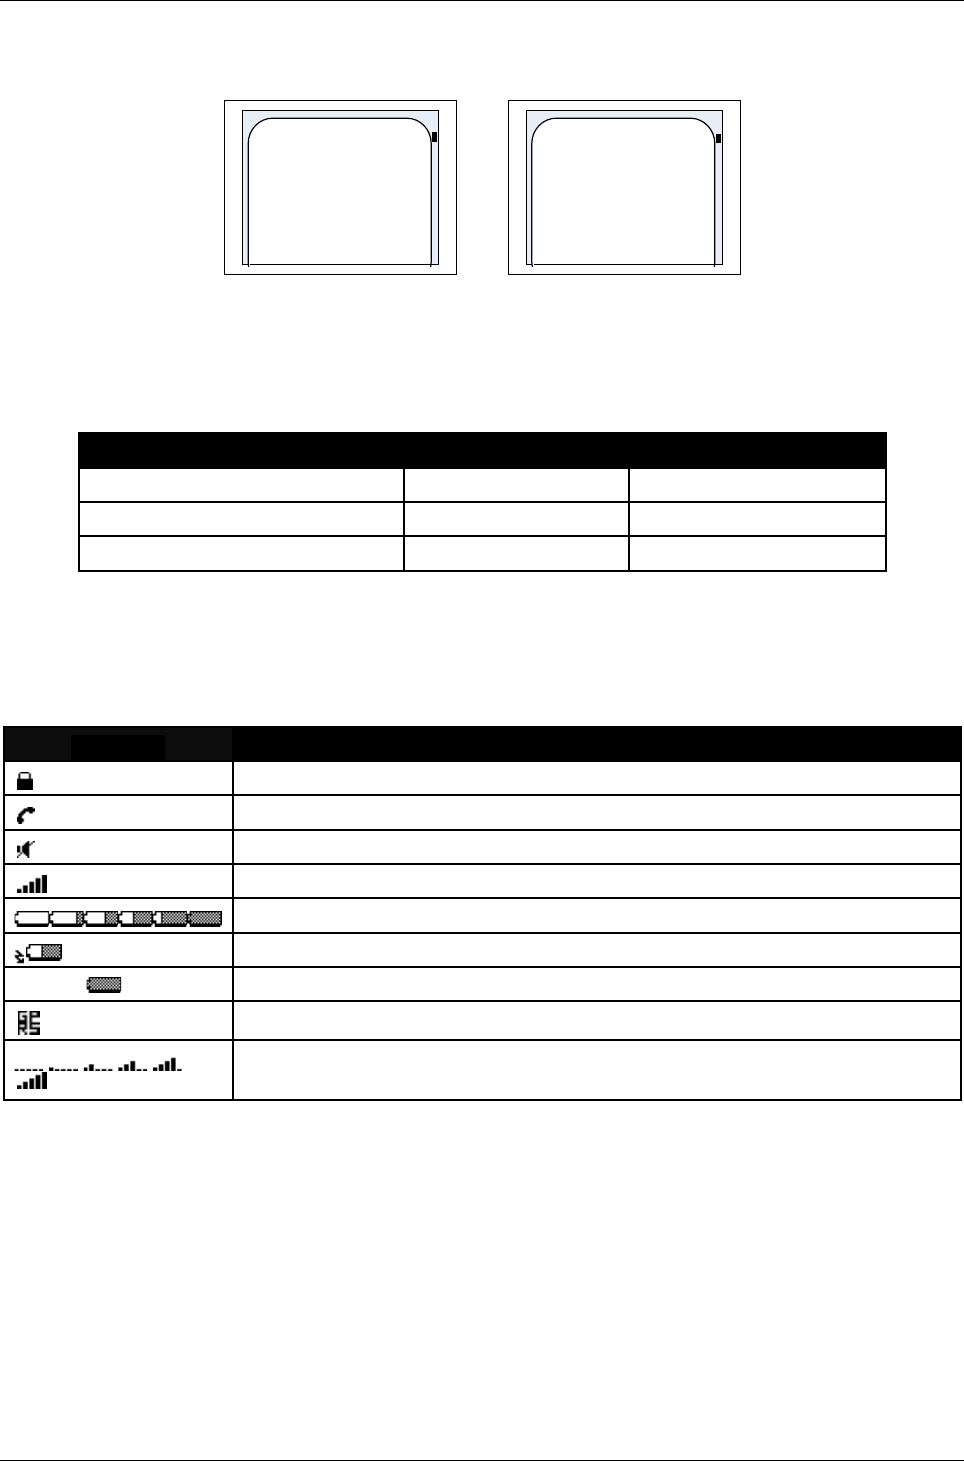
User Manual for AyCare AyTerminal
V2.1 AyCare application
After saving the settings, Ay is sending SHUTDOWN notification to AyServer, but only if Ay is
registered to AyServer. A message is shown on display informing about Ay intention (see Figure 4-
74 Sending SHUTDOWN notification to AyServer).
Sending
SHUTDOWN
notification to
AyServer. Please
wait.
Sending
SHUTDOW
N
notification
Figure 4-74 Sending SHUTDOWN notification to AyServer
4.10Involved sensors in AyCare’s modes
Mode Involved sensors Involved AySnapOns
Voice call - -
Panics button - -
Baby phone noise -
Table 4-6 Involved sensors in AyCare’s modes
4.11Symbols on the AyTerminal
SYMBOL Description
Hold-switch ON
Phone call in progress (Dialing/ Incoming call/ Connection established).
Mute ALL On
Signal strength (full, maximum)
Battery statuses (empty, 20%, 40%, 60%, 80%, full)
Battery charging
•Charger conected – Batteryy full
GPRS ON (Connection established with AyServer)
Signal strength – possible values (no signal, very very low, very low,
medium, normal, maximum)
Table 4-7 Symbols of AyTerminal
Page 47 / 50

AyTerminal User Manual for AyCare
Contents V2.1
5Quick reference
5.1Device description
The detailed device description you find in chapter 2.1.
The major parts are:
•Display (OLED display):
Used for information screens and for input screens.
There are 2 display modes: standard mode and jumbo mode (big-sized characters)
See chapter 2.1.10.
•Navigation buttons:
4 touch sensor buttons around the display:
- arrow up: up button
- arrow down: down button
- right button: Enter button
- left button: Cancel button
The display also represents a button (center button)
See chapter 2.1.5.
•Status LED:
provides feedback about the current AyTerminal status
See chapter 2.1.2.
5.2Getting started
•Insert SIM card and battery
See chapter 3.
•Turn on the device: press the central button for 2 seconds.
The loading screen will be displayed.
See chapter 3.2.1.
•Enter the PIN of the SIM card.
Select the OK option and press the Enter button (right button).
See chapter 3.2.3.
•Select the AyCare application and press the Enter button.
•Optional:
Define the deactivation code (sequence of 4 buttons, default: up button, right button, down
button, left button)
Definition via Settings > AyTerminal > AyApplication > Deactivation code
See chapter .
•Select the AyCare mode you want to start and press the Enter button.
If a mode is set to auto start, this mode will be started automatically.
See chapters 4.2 and 4.3.
5.3Configuring the AyCare modes
The detailed device description you find in chapter 4.4.
•Voice Call:
Activation Time (see chapter 4.4.1)
Autostart (see chapter 4.4.2)
Notifiers (see chapter 4.4.3)
Phone numbers (see chapter 4.4.4)
•Panics button:
Activation Time (see chapter 4.4.1)
Page 48 / 50

User Manual for AyCare AyTerminal
V2.1 AyCare application
Autostart (see chapter 4.4.2)
Notifiers (see chapter 4.4.3)
Phone number (see chapter 4.4.4)
•Babyphone:
Activation Time (see chapter 4.4.1)
Autostart (see chapter 4.4.2)
Notifiers (see chapter 4.4.3)
Triggers (see chapter 4.4.4)
Duration (see chapter 4.4.5)
•Emergency Call (see chapter 4.7)
If this mode is activated, pressing the Enter button initiates an emergency call to the 112
emergency number.
This mode is also available, if no SIM card is inserted.
•Settings (see chapter 4.8)
For all the modes also an overview of the current settings is available (see chapter 4.4.6).
5.4Activating a mode
•To start the configured mode, select the Start option in the mode menu.
See chapter 4.5.
5.5Deactivating a mode or a triggered alarm
•Press the buttons that form the deactivation code.
See chapter 4.6.
5.5.1Turning off the AyTerminal
•If a mode is activated, deactivate this mode (enter the deactivation code).
•In the AyCare menu, select the Turn off option and press the Enter button.
Page 49 / 50

AyTerminal User Manual for AyCare
Contents V2.1
Index
Acknowledgment tones............................... 11
Activating a mode....................................... 36
Activation delay........................................... 35
Activation Time........................................... 27
Audio.......................................................... 43
Auto start.................................................... 29
AyCare application...................................... 17
AyCare menu structure............................... 18
AyServe...................................................... 31
AySnapOn.................................................. 39
AySnapOn connector.................................. 10
AyTerminal.............................................. 7, 40
Baby Phone................................................ 19
Battery charging.......................................... 12
Boot screen................................................. 16
Changing the PIN........................................ 45
Charger...........................................................
connecting............................................... 12
Clock........................................................... 43
Configuring a mode..................................... 26
Deactivating................................................ 38
Deactivation sequence................................ 44
Default settings........................................... 40
Display........................................................ 12
Duration...................................................... 35
Ego-motion sensor...................................... 11
Emergency call........................................... 38
Emergency call mode................................. 14
Hold-switch................................................... 8
Info.............................................................. 42
Installation................................................... 14
Listen-in...................................................... 33
Loading screen........................................... 14
Lumberg connector....................................... 9
Menu structure............................................ 10
Microphone................................................. 11
Modes......................................................... 19
Navigation buttons...................................... 10
Noise.......................................................... 34
Notifiers....................................................... 29
Overview..................................................... 35
Panic Button............................................... 19
Phone number............................................ 32
PIN control.................................................. 45
PIN/PUK input............................................. 15
Security....................................................... 45
Selecting a mode........................................ 25
Sensors....................................................... 47
Settings....................................................... 38
SMS............................................................ 30
Speaker...................................................... 11
Starting a mode........................................... 36
Startup........................................................ 14
Status LED.................................................... 8
Symbols on AyTerminal.............................. 47
Temperature sensor.................................... 11
Triggers....................................................... 32
Turning off.......................................................
AyTerminal.............................................. 46
Voice Call.............................................. 19, 30
Page 50 / 50