Sierra Wireless ULC AC803S CDMA+WiMAX+WiFi+LTE Mobile Hot Spot User Manual users manual
Sierra Wireless Inc. CDMA+WiMAX+WiFi+LTE Mobile Hot Spot users manual
UserManual.wiki
>
Sierra Wireless ULC
>
AC803S User Manual
>
users manual
Contents
1.
user manual
2.
users manual
3.
Cradle Packaging - compliance info
users manual
Navigation menu
Upload a User Manual
Namespaces
Wiki Guide
HTML
PDF
Info
Views
User Manual
Discussion / Help
Navigation
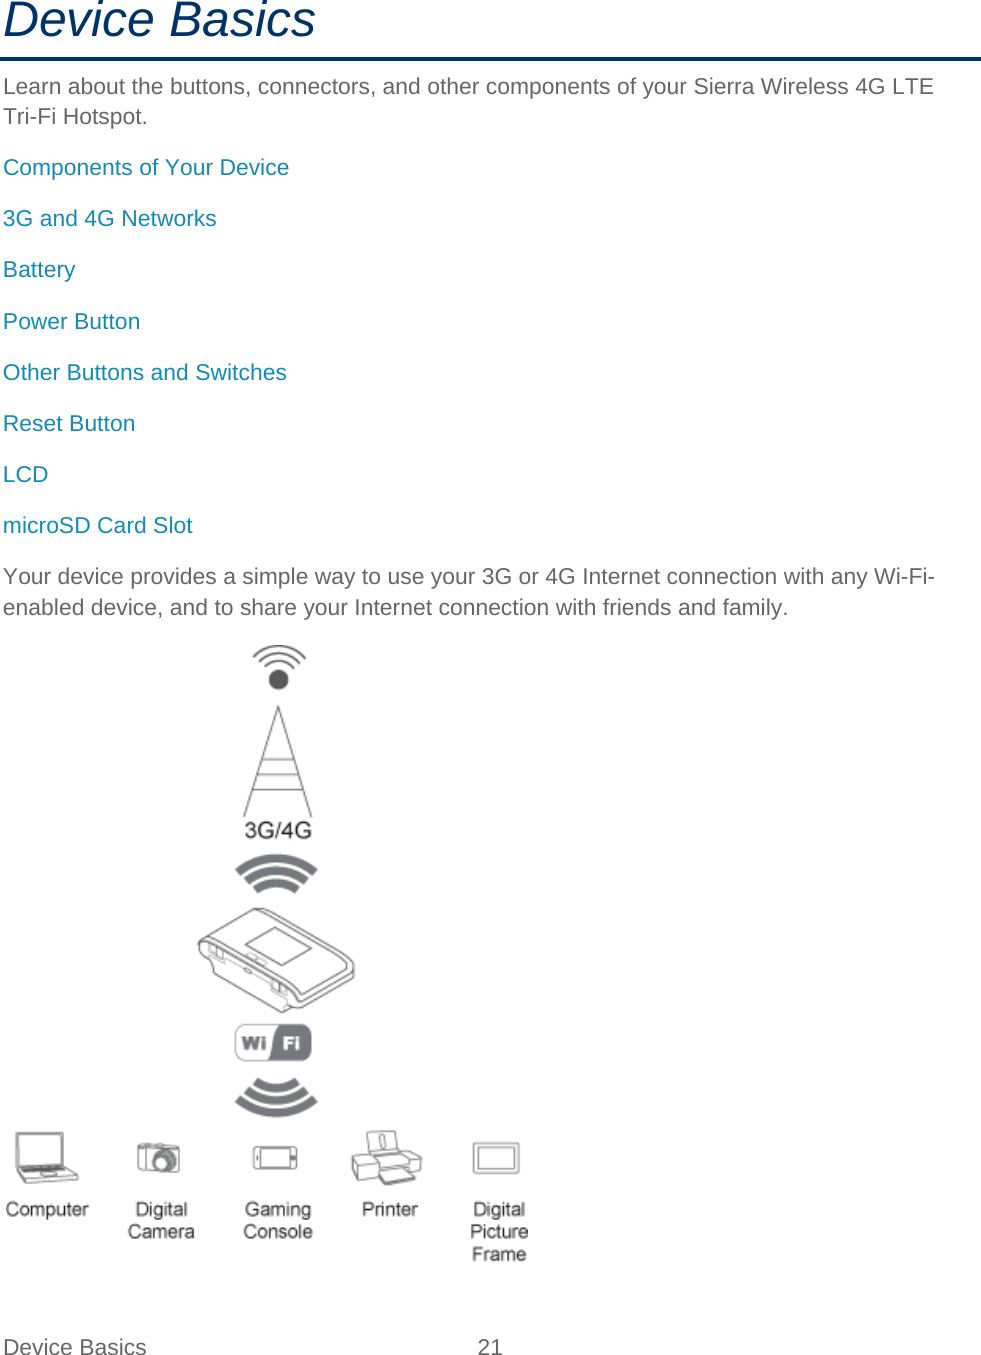
![Device Basics 23 4G (LTE) 20 Mbps [TBD] Mbps 4G (WiMAX) 10 Mbps 3–6 Mbps Battery The battery compartment is on the back of the device. The battery is replaceable. If you need a new battery, visit the Sierra Wireless online store at sierrawireless.com/eStore. Installing the Battery Before you use your device, install the battery. 1. Using slight finger pressure, slide the battery compartment cover towards you to remove it. 2. Insert the battery into the device, contacts end first. Make sure the battery contact points are aligned with those inside the battery compartment.](https://usermanual.wiki/Sierra-Wireless-ULC/AC803S.users-manual/User-Guide-1663247-Page-24.png)

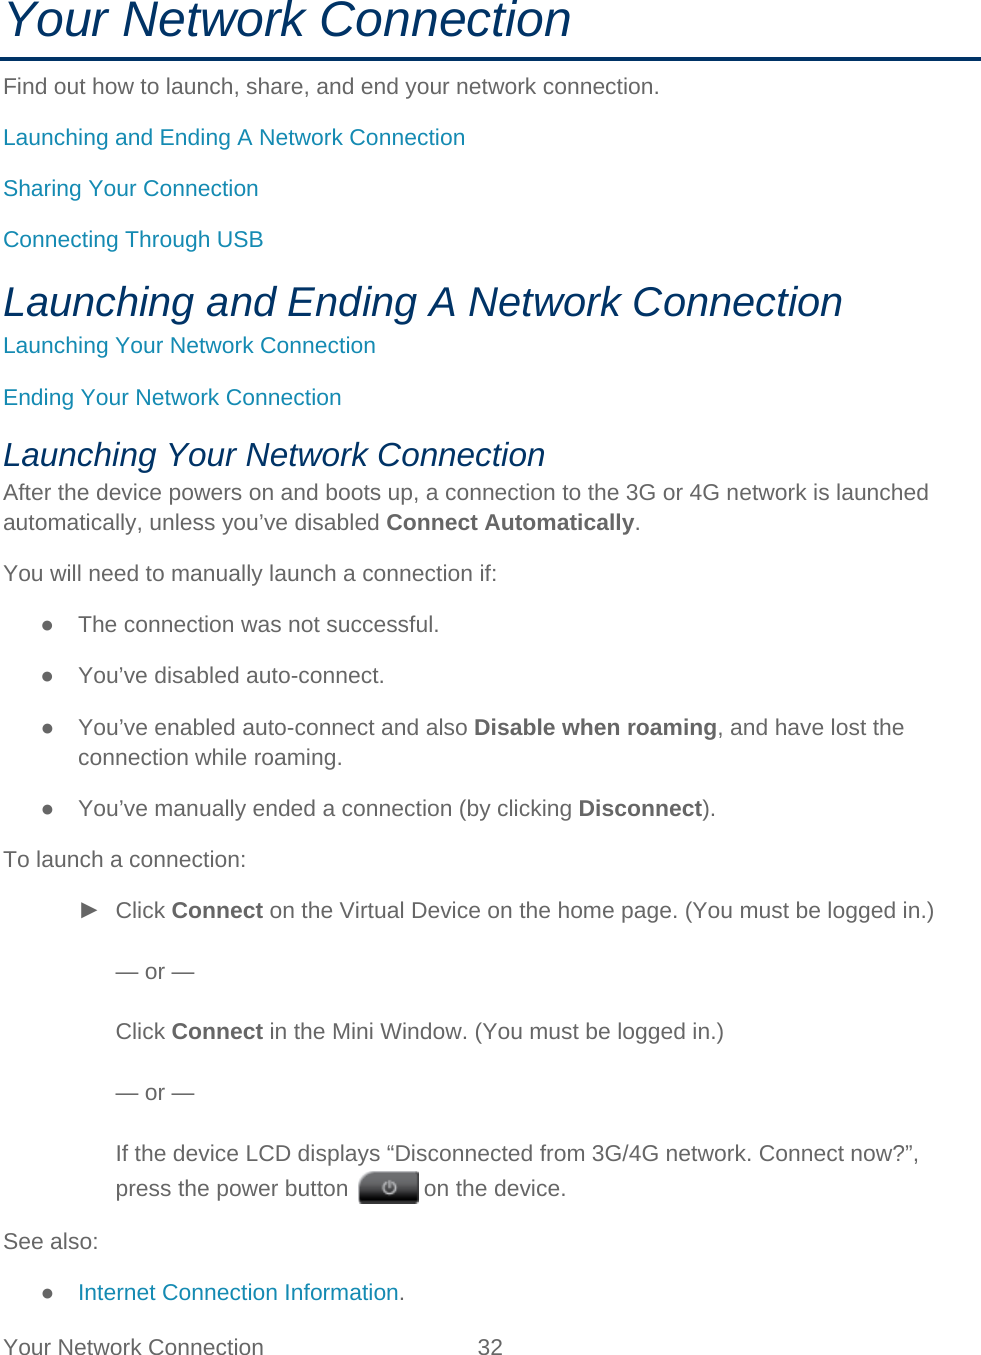
![Device Basics 31 7 Battery status 8 Device name. Message area. 9 Amount of data transferred; connection duration. Message area. Tip: Most of the LCD icons and messages are also shown on the Virtual Device and Mini Window. (See “Virtual Device” and “Mini Window” in Device Views, and Messages Displayed on the Device LCD.) The LCD can also display various information screens and messages, as described in LCD Information Screens and in Messages Displayed on the Device LCD. LCD Information Screens The LCD of the Sierra Wireless 4G LTE Tri Fi Hotspot can display, on separate screens, summary information. ● Connection information (the Wi-Fi network name [SSID] and password [if the Wi-Fi Password Reminder feature is enabled]) ● Alerts ● Data usage (displayed on the “Billing Info” LCD information screen) ● Network status ● Device information (for example, MEID or whether an update is available) (displayed on the “About...” LCD information screen) ● Software update status When more than one information screen is available, the upper right corner of the LCD displays “(x/y),” where x and y represent “screen x out of y screens.” For example, (1/6) means that the first of six LCD information screens is shown. To view the first LCD information screen or to go to the next screen, press the navigation button on the device. microSD Card Slot Your device supports a microSD™ card (not included) for file sharing and transfer or storage. The microSD slot is located on the same side of the device as the micro-USB port (to access the slot, you must remove the battery cover). Your computer recognizes the microSD card as a removable storage device. The device supports microSD cards up to 32 GB. Note: Using microSD cards larger than 32 GB can cause data loss and damage your device.](https://usermanual.wiki/Sierra-Wireless-ULC/AC803S.users-manual/User-Guide-1663247-Page-32.png)

![Browser Interface Home Page 42 Note: If you’re using the Google Chrome Web browser, after typing in the address bar, press the Down Arrow key and then the Enter key. (If you press only the Enter key, a Google search is started, using the information you typed in.) If your Web browser displays an error message, see Cannot Display the Home Page. Logging On as an Administrator You don’t need to log in to access and use the home page. However, logging in provides several benefits. When you log in: ● Additional information appears in the window that opens when you click an item on the left side of the home page. (See Icons and Text.) ● You can access the Advanced Settings window, where you can modify additional settings. ● You can rerun the device setup, if required (Admin Setup [ ]). ● You can install updates. To log in: 1. Make sure that nobody else is already logged in — other people can use the home page at the same time, but only one user can be logged in. 2. In the Admin Login section (in the upper left area of the home page), enter the administrator password (1–20 characters or numbers). (The default password is “password.” It’s recommended you change the password, if you haven’t already.) 3. Click OK. After a period of inactivity, you will be automatically logged off (timeout security feature), unless you select Remember me (below the password field). (For more information, see Automatic Login (“Remember Me”).) Device Views Virtual Device The right half of the home page contains an image of your device. This is a “virtual device” — it reflects most of the icons and text displayed on the real device.](https://usermanual.wiki/Sierra-Wireless-ULC/AC803S.users-manual/User-Guide-1663247-Page-43.png)

![Browser Interface Home Page 52 Roaming Information and Settings The roaming indicator shows whether you are roaming. The text near the icon may indicate additional details. Icon Description Not roaming Roaming [flashing] Enhanced roaming indicator Note: Roaming on 4G is not supported. Click the roaming indicator to display the Roaming Information window. The window displays: ● Roaming status. ● Allow 3G roaming field (if you’re logged in). If you select this field, you can roam and connect when outside of your service provider’s coverage, but additional charges may occur. If you do not select this field, you can connect only when you’re inside your service provider’s coverage area. Note: If you change the value of this field, the device restarts (after you click Save). ● Allow 3G international access field (if you’re logged in) — allows 3G roaming internationally. If this field is not displayed, select Allow 3G roaming. Alert Information The alerts icon indicates whether there are any alerts (situations that require your attention). Note: To view alert information, you must be logged in. New alerts are checked upon device power-up. That is, if an event occurs, you won’t be notified until the device is restarted. Icon Description No alerts are available. One or more alerts are available. The text next to the icon indicates the number of alerts.](https://usermanual.wiki/Sierra-Wireless-ULC/AC803S.users-manual/User-Guide-1663247-Page-53.png)
![Browser Interface Home Page 54 Get fix now — This button starts a one-time fix (not displayed if GPS Mode is Continuous or a GPS session is already in progress). If you change the value from Continuous to One-time, you must click Save before your changes take effect and the fix becomes possible. Mapping service — This determines the mapping service (for example, Google Maps or MapQuest) that displays the GPS results (in a separate browser window). Metric units — This setting specifies whether to use metric when displaying the GPS results (for example, the altitude, speed, HEPE). Note: Additional settings are available at Advanced settings > WAN > GPS. (See GPS Settings.) Wi-Fi Users Information and Settings The Wi-Fi users icon provides information about the status of Wi-Fi and the number of connected users. ● Number of Wi-Fi users are connected to the device — for example, shows that no (zero) users are connected. ● — Wi-Fi of the Sierra Wireless 4G LTE Tri-Fi Hotspot has been disabled through the browser interface. (To enable Wi-Fi, change the Disable Wi-Fi setting in the Wi-Fi Users window [see “Connected Users Information”, below].) The icon is on the left side of the home page. Click the icon to display the Wi-Fi Users window. Connected Users Information When you’re logged in, the Wi-Fi Users window shows a table with information on computers currently connected to the device. A row may show one or both of these icons: ● — The user of this computer is logged in as administrator. ● — This computer is connected to the device through the micro-USB cable. MAC Address — Each wireless device has a unique MAC address (assigned by its manufacturer). On Windows PCs, the MAC address is called the “physical address;” on a Mac computer, it is called the “Ethernet ID.” (See Finding the MAC Address.) Block — Use this to block a computer’s access to the device. You might want to do this if: ● You don’t recognize a listed computer.](https://usermanual.wiki/Sierra-Wireless-ULC/AC803S.users-manual/User-Guide-1663247-Page-55.png)
![Browser Interface Home Page 57 Data sent Session duration Data received Total transferred ● WWAN IP Address — This is the external IP address of the modem [3G or 4G] (that is, the IP address of the modem as seen from the Internet). ● More info — Click this link to display, when you’re connected to the network, the following information: WAN DNS Primary — This is the address of the Internet system used to translate names (for example, sierrawireless.com) into IP addresses. WAN DNS Secondary — This is the address of the Internet system used to translate names (for example, sierrawireless.com) into IP addresses. The secondary DNS is used when there is a problem with the primary DNS. Default Gateway — This is the address of the node on the computer network that the network software uses when an IP address does not match any other routes in the routing table (that is, when an IP packet’s destination address is outside of the local subnet). WAN MTU size — This is the size of the largest packet (“Maximum Transmission Unit”) that a network protocol can transmit. Viewing and Configuring Detailed Internet Connection Information When you’re logged in, the Internet Connection Information window displays a table showing data use: ● In the current cycle or since you last reset the data usage figures — whichever occurred more recently. These numbers get automatically reset to 0 on the day selected in the Starts on day list. ● Over the lifetime of the device. ● By network [3G, 4G, and 4G LTE], and by sent, received, and total. From this window you can: ● Reset the data usage figures for the current billing cycle. (Click Reset.) ● Change the start day of the billing cycle (in the Starts on day list). ● See the number of days left in the cycle.](https://usermanual.wiki/Sierra-Wireless-ULC/AC803S.users-manual/User-Guide-1663247-Page-58.png)

![Device Settings 83 ● Failover Wait-time — This setting specifies how long the device should wait, after it loses the connection with the preferred network, before it attempts to connect to the other network (not available if WAN Mode is “3G Only” or “4G Only”). ● Switchback Wait-time — This setting specifies how long the device should wait, when the less-preferred network is connected and the preferred network becomes available, before switching to the preferred network (not available if WAN Mode is “3G Only” or “4G Only”). ● Update 3G PRL — You can check whether an updated PRL is available. The PRL (Preferred Roaming List) is an account configuration item set by your service provider. It controls the radio channels and network carrier used by the 3G modem. An updated PRL may improve your 3G network service. Note: A 3G connection to the Internet won’t be available until the update is complete. (The 4G connection won’t be affected.) ● Update 3G Profile — You can check whether an updated profile for your 3G connection is available. An updated profile may improve your 3G network service. ● Active IP Addresses — These are the IP addresses of the 4G LTE connection. ● Channel UL — This is the channel that is used to upload data to the 4G LTE network. ● Channel DL — This is the channel that is used to download data from the 4G LTE network. ● Configure APN — Click the link to display the APN Settings window. You will be prompted to enter the Service Programming Code (SPC). (If you don't know your SPC, contact your service provider.) ● Channel List — These are the channels used by the 4G LTE radio. Enter two numbers, separated by a comma, only if instructed by your service provider’s representative, and then click the Save button. (When prompted, enter the MSL [Master Subsidy Lock].) WAN Tab: 3G Panel From the 3G panel of the WAN tab you can view various 3G information. 1. Log in to the home page. 2. Click Advanced settings ( ). 3. Click WAN > 3G. From this window, you can view this information:](https://usermanual.wiki/Sierra-Wireless-ULC/AC803S.users-manual/User-Guide-1663247-Page-84.png)

![Device Settings 99 1. Log in to the home page. 2. Click Advanced settings ( ). 3. Click Router > LAN. 4. Set DNS Mode to one of the following: Auto — The DNS server specified by your service provider is used. DNS Relay is enabled by default. Manual — The routing hardware assigns DHCP clients the DNS servers specified in the Manual DNS Server #1 and #2 fields. Use this option to access a DNS server that provides customized addressing or if you have a local DNS server on your network. If DNS Relay is disabled, the routing hardware rejects DNS requests targeting the internal DNS proxy. For information on DNS Relay, see LAN Panel: General. Port Forward Panel: General Normally, incoming traffic (from the Internet) is blocked. However, port forwarding lets you forward incoming traffic to specific ports and devices (per their local IP address) on your network. For example, you can configure port forwarding so that: ● You can access your Remote Desktop from the Internet (by specifying the WAN [public] IP address that the device is using). ● Internet users can access a Web, FTP, or email server, or gaming or Internet application hosted by your computer. Note: Port forwarding creates a security risk. When not required, port forwarding should be disabled. Note: Port forwarding does not apply to normal browsing, file downloading, running most online games or other applications hosted on the Internet. (Some online games require port forwarding.) Before you can use or configure port forwarding, you must enable it, as explained in Port Forward Panel: Enabling Port Forwarding. From the Port Forward panel of the Router tab of the Advanced Settings window, you can: ● Enable port forwarding for an application. (See Port Forward Panel: Enabling Port Forwarding for an Application.)](https://usermanual.wiki/Sierra-Wireless-ULC/AC803S.users-manual/User-Guide-1663247-Page-100.png)


![Legal 173 The licence and distribution terms for any publicly available version or derivative of this code cannot be changed. I.e. this code cannot simply be copied and put under another distribution licence [including the GNU Public Licence.] PPPD License Copyright (c) 1984-2000 Carnegie Mellon University. All rights reserved. Redistribution and use in source and binary forms, with or without modification, are permitted provided that the following conditions are met: 1. Redistributions of source code must retain the above copyright notice, this list of conditions and the following disclaimer. 2. Redistributions in binary form must reproduce the above copyright notice, this list of conditions and the following disclaimer in the documentation and/or other materials provided with the distribution. 3. The name “Carnegie Mellon University” must not be used to endorse or promote products derived from this software without prior written permission. For permission or any legal details, please contact Office of Technology Transfer Carnegie Mellon University 5000 Forbes Avenue Pittsburgh, PA 15213-3890 (412) 268-4387, fax: (412) 268-7395 tech-transfer@andrew.cmu.edu 4. Redistributions of any form whatsoever must retain the following acknowledgment: “This product includes software developed by Computing Services at Carnegie Mellon University (http://www.cmu.edu/computing/).” CARNEGIE MELLON UNIVERSITY DISCLAIMS ALL WARRANTIES WITH REGARD TO THIS SOFTWARE, INCLUDING ALL IMPLIED WARRANTIES OF MERCHANTABILITY AND FITNESS, IN NO EVENT SHALL CARNEGIE MELLON UNIVERSITY BE LIABLE FOR ANY SPECIAL, INDIRECT OR CONSEQUENTIAL DAMAGES OR ANY DAMAGES WHATSOEVER RESULTING FROM LOSS OF USE, DATA OR PROFITS, WHETHER IN AN ACTION OF CONTRACT, NEGLIGENCE OR OTHER TORTIOUS ACTION, ARISING OUT OF OR IN CONNECTION WITH THE USE OR PERFORMANCE OF THIS SOFTWARE. Copyright (c) 1999-2004 Paul Mackerras. All rights reserved. Redistribution and use in source and binary forms, with or without modification, are permitted provided that the following conditions are met:](https://usermanual.wiki/Sierra-Wireless-ULC/AC803S.users-manual/User-Guide-1663247-Page-174.png)