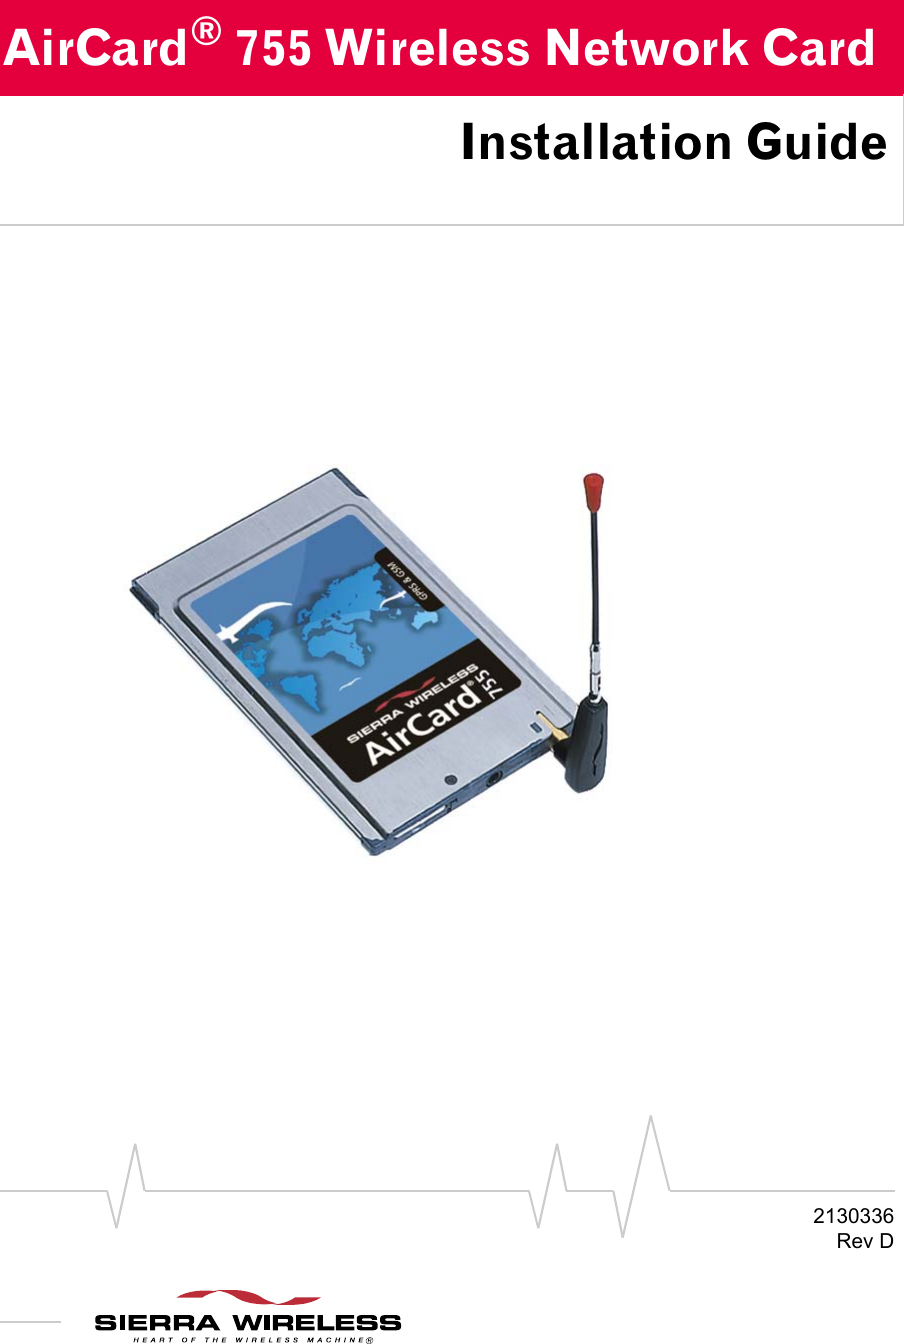
Sierra Wireless AC755 Tri-Band GSM/GPRS PC Card User Manual AC750 Installation Guide

Sierra Wireless Inc. Tri-Band GSM/GPRS PC Card AC750 Installation Guide

User Manual for Data Modem

2130336Rev DAirCard® 755 Wireless Network CardInstallation Guide
PrefaceRev D Dec.03 1Important Notice Because of the nature of wireless communications, trans-mission and reception of data can never be guaranteed. Data may be delayed, corrupted (i.e., have errors) or be totally lost. Although significant delays or losses of data are rare when wireless devices such as the Sierra Wireless network card are used in a normal manner with a well-constructed network, the Sierra Wireless network card should not be used in situations where failure to transmit or receive data could result in damage of any kind to the user or any other party, including but not limited to personal injury, death, or loss of property. Sierra Wireless, Inc. and its affiliates accept no responsibility for damages of any kind resulting from delays or errors in data transmitted or received using the Sierra Wireless network card, or for failure of the Sierra Wireless network card to transmit or receive such data.Safety and Hazards Do not operate the Sierra Wireless AirCard® wireless network card in areas where blasting is in progress, where explosive atmospheres may be present, near medical equipment, life support equipment, or any equipment which may be suscep-tible to any form of radio interference. In such areas, the Sierra Wireless network card MUST BE POWERED OFF. The Sierra Wireless network card can transmit signals that could interfere with this equipment.Do not operate the Sierra Wireless network card in any aircraft, whether the aircraft is on the ground or in flight. In aircraft, the Sierra Wireless network card MUST BE POWERED OFF. When operating, the Sierra Wireless network card can transmit signals that could interfere with various onboard systems.Note: Some airlines may permit the use of cellular phones while the aircraft is on the ground and the door is open. Sierra Wireless network cards may be used at this time.The driver or operator of any vehicle should not operate the Sierra Wireless network card while in control of a vehicle. Doing so will detract from the driver or operator's control and operation of that vehicle. In some states and provinces, operating such communications devices while in control of a vehicle is an offence.FCC RF Exposure InformationIn August 1996 the Federal Communications Commission (FCC) of the United States with its action in Report and Order FCC 96-326 adopted an updated safety standard for human exposure to radio frequency (RF) electromagnetic energy
AirCard 755 Installation Guide22130336emitted by FCC regulated transmitters. Those guidelines are consistent with the safety standard previously set by both U.S. and international standards bodies. The design of this wireless network card complies with the FCC guidelines and these international standards.Use only the supplied or an approved antenna. Unauthorized antennas, modifications, or attachments could impair call quality, damage the phone, or result in violation of FCC regulations.To comply with FCC RF exposure requirements (US) the AirCard 755 GSM/GPRS modem card must be operated with a minimum separation distance of 2.5 cm (1 inch) between the user/nearby persons and the antenna. Always place the antenna in the upright position (oriented vertically) when using the AirCard 755 in a laptop computer.For more information about RF exposure, please visit the FCC web site at www.fcc.gov.Limitation of LiabilityThe information in this manual is subject to change without notice and does not represent a commitment on the part of Sierra Wireless, Inc. or its affiliates. SIERRA WIRELESS, INC. AND ITS AFFILIATES SPECIFICALLY DISCLAIM LIABILITY FOR ANY AND ALL DIRECT, INDIRECT, SPECIAL, GENERAL, INCIDENTAL, CONSEQUENTIAL, PUNITIVE OR EXEMPLARY DAMAGES INCLUDING, BUT NOT LIMITED TO, LOSS OF PROFITS OR REVENUE OR ANTICI-PATED PROFITS OR REVENUE ARISING OUT OF THE USE OR INABILITY TO USE ANY SIERRA WIRELESS PRODUCT, EVEN IF SIERRA WIRELESS, INC.AND/OR ITS AFFILIATES HAVE BEEN ADVISED OF THE POSSIBILITY OF SUCH DAMAGES OR THEY ARE FORESEEABLE OR FOR CLAIMS BY ANY THIRD PARTY. NOTWITHSTANDING THE FOREGOING, IN NO EVENT SHALL SIERRA WIRELESS, INC. AND/OR ITS AFFILIATES’ AGGREGATE LIABILITY ARISING UNDER OR IN CONNECTION WITH THE SIERRA WIRELESS PRODUCT, REGARDLESS OF THE NUMBER OF EVENTS, OCCURRENCES OR CLAIMS GIVING RISE TO LIABILITY, BE IN EXCESS OF THE PRICE PAID BY THE PURCHASER FOR THE SIERRA WIRELESS PRODUCT.Patents Portions of this product are covered by some or all of the following US patents:5,515,013 5,617,106 5,629,960 5,682,602 5,748,4495,845,216 5,847,553 5,878,234 5,890,057 5,929,8156,169,884 6,191,741 6,199,168 6,327,154 6,339,405D367,062 D372,248 D372,701 D416,857 D442,170
PrefaceRev D Dec.03 3D452,495 D452,496 and other patents pending.Copyright ©2003 Sierra Wireless, Inc. All rights reserved.Trademarks AirCard® and Heart of the Wireless Machine® are registered trademarks of Sierra Wireless, Inc.Sierra Wireless, the Sierra Wireless logo, the red wave design, the red-tipped antenna, and Watcher are trademarks of Sierra Wireless, Inc.Other trademarks are the property of the respective owners.All product specifications are subject to change without notice.
AirCard 755 Installation Guide42130336
Rev D  Dec.03 5Table of ContentsIntroducing the AirCard® 755 Wireless Network Card   . . . . . . . . .9Supported operating systems   . . . . . . . . . . . . . . . . . . . . . . . . . . . . . . . . . . . . 9The AirCard as a network card . . . . . . . . . . . . . . . . . . . . . . . . . . . . . . . . . . . . 9The AirCard as a mobile phone  . . . . . . . . . . . . . . . . . . . . . . . . . . . . . . . . . .  10Supported GSM frequency bands  . . . . . . . . . . . . . . . . . . . . . . . . . . . . . . . .  10 Your account and coverage area . . . . . . . . . . . . . . . . . . . . . . . . . . . . . . . . . . . .  10AirCard software . . . . . . . . . . . . . . . . . . . . . . . . . . . . . . . . . . . . . . . . . . . . . . . . . .  11Before you can begin using the AirCard . . . . . . . . . . . . . . . . . . . . . . . . . . . . . .  11Package contents . . . . . . . . . . . . . . . . . . . . . . . . . . . . . . . . . . . . . . . . . . . . . . . . .  12The SIM Card and Your Account   . . . . . . . . . . . . . . . . . . . . . . . . . . .13Inserting a SIM card into your AirCard  . . . . . . . . . . . . . . . . . . . . . . . . . . . . . . .  14Removing a SIM card . . . . . . . . . . . . . . . . . . . . . . . . . . . . . . . . . . . . . . . . . . . . . .  14Installation on Notebook PCs  . . . . . . . . . . . . . . . . . . . . . . . . . . . . . .17System requirements . . . . . . . . . . . . . . . . . . . . . . . . . . . . . . . . . . . . . . . . . . . . . .  17Installation on Windows 95, 98, 2000, and Me  . . . . . . . . . . . . . . . . . . . . . . . . . 18Installation on Windows XP  . . . . . . . . . . . . . . . . . . . . . . . . . . . . . . . . . . . . . . . . 19Installation on Windows NT  . . . . . . . . . . . . . . . . . . . . . . . . . . . . . . . . . . . . . . . .  20Inserting the AirCard  . . . . . . . . . . . . . . . . . . . . . . . . . . . . . . . . . . . . . . . . . . .  21Installing the network card driver  . . . . . . . . . . . . . . . . . . . . . . . . . . . . . . . . 21Installing the modem driver  . . . . . . . . . . . . . . . . . . . . . . . . . . . . . . . . . . . . .  22Changing the interrupt   . . . . . . . . . . . . . . . . . . . . . . . . . . . . . . . . . . . . . . . . .  22Setting Internet Explorer to use the AirCard. . . . . . . . . . . . . . . . . . . . . . . . . . .  23Installation on Devices Running Windows CE   . . . . . . . . . . . . . . .25System requirements . . . . . . . . . . . . . . . . . . . . . . . . . . . . . . . . . . . . . . . . . . . . . .  25ActiveSync installation requirements  . . . . . . . . . . . . . . . . . . . . . . . . . . . . .  26
AirCard 755 Installation Guide62130336Flash card installation requirements   . . . . . . . . . . . . . . . . . . . . . . . . . . . . .  27Pocket PC and Handheld PC installation . . . . . . . . . . . . . . . . . . . . . . . . . . . . .  27Windows CE .NET device installation  . . . . . . . . . . . . . . . . . . . . . . . . . . . . . . . .  29Extracting the CAB file to the host   . . . . . . . . . . . . . . . . . . . . . . . . . . . . . . .  29ActiveSync installation  . . . . . . . . . . . . . . . . . . . . . . . . . . . . . . . . . . . . . . . . .  29Flash card installation  . . . . . . . . . . . . . . . . . . . . . . . . . . . . . . . . . . . . . . . . . .  30Inserting the AirCard into a Pocket PC . . . . . . . . . . . . . . . . . . . . . . . . . . . . . . .  31Inserting the AirCard into a Handheld or Tablet PC . . . . . . . . . . . . . . . . . . . .  31Configuring Your Account  . . . . . . . . . . . . . . . . . . . . . . . . . . . . . . . . . 33Setting up a profile . . . . . . . . . . . . . . . . . . . . . . . . . . . . . . . . . . . . . . . . . . . . . . . .  33The Advanced Profile window  . . . . . . . . . . . . . . . . . . . . . . . . . . . . . . . . . . .  35The Default Profile button   . . . . . . . . . . . . . . . . . . . . . . . . . . . . . . . . . . . . . .  36Care and Maintenance of Your Network Card   . . . . . . . . . . . . . . . 37Stopping and ejecting the AirCard on a notebook PC  . . . . . . . . . . . . . . . . . .  38Ejecting the AirCard on a Pocket PC . . . . . . . . . . . . . . . . . . . . . . . . . . . . . . . . .  38Ejecting the AirCard on a Handheld or Tablet PC . . . . . . . . . . . . . . . . . . . . . .  38Watcher™ Basics  . . . . . . . . . . . . . . . . . . . . . . . . . . . . . . . . . . . . . . . . . 41Launching Watcher. . . . . . . . . . . . . . . . . . . . . . . . . . . . . . . . . . . . . . . . . . . . . . . .  41The Watcher window . . . . . . . . . . . . . . . . . . . . . . . . . . . . . . . . . . . . . . . . . . . . . .  42Icons and indicators on the main Watcher window  . . . . . . . . . . . . . . . . . . . .  43View options (notebook PCs)  . . . . . . . . . . . . . . . . . . . . . . . . . . . . . . . . . . . . . . .  45 Status Icons  . . . . . . . . . . . . . . . . . . . . . . . . . . . . . . . . . . . . . . . . . . . . . . . . . . . . .  46Power Options . . . . . . . . . . . . . . . . . . . . . . . . . . . . . . . . . . . . . . . . . . . . . . . . . . . .  46Power Down and Up  . . . . . . . . . . . . . . . . . . . . . . . . . . . . . . . . . . . . . . . . . . .  46Transmit power consumption   . . . . . . . . . . . . . . . . . . . . . . . . . . . . . . . . . . .  47Frequency band and network selection. . . . . . . . . . . . . . . . . . . . . . . . . . . . . . .  47
Table of ContentsRev D  Dec.03 7Frequency band selection . . . . . . . . . . . . . . . . . . . . . . . . . . . . . . . . . . . . . . .  48Network selection   . . . . . . . . . . . . . . . . . . . . . . . . . . . . . . . . . . . . . . . . . . . . . 48Technical Specifications   . . . . . . . . . . . . . . . . . . . . . . . . . . . . . . . . . .49LED operation  . . . . . . . . . . . . . . . . . . . . . . . . . . . . . . . . . . . . . . . . . . . . . . . . . . . . 49Radio frequency and electrical specifications . . . . . . . . . . . . . . . . . . . . . . . . .  50Environmental specifications . . . . . . . . . . . . . . . . . . . . . . . . . . . . . . . . . . . . . . . 51AirCard 755 Regulatory Information   . . . . . . . . . . . . . . . . . . . . . . . . . . . . . . . . . . . . . . . . . . . . . .53FCC approval (US)  . . . . . . . . . . . . . . . . . . . . . . . . . . . . . . . . . . . . . . . . . . . . . . . .  53Information pertaining to OEM customers . . . . . . . . . . . . . . . . . . . . . . . . .  54
AirCard 755 Installation Guide82130336
Rev D  Dec.03 91: Introducing the AirCard® 755 Wireless Network Card• Your account and coverage area• AirCard software• Before you can begin using the AirCard• Package contentsCaution: Do not insert your AirCard into your PC Card slot before installing the software.The AirCard®755 wireless network card is an accessory for your PC that allows you to connect to the Internet, send and receive e-mail, and connect to a corporate network, without the need of a network cable or phone line. The AirCard 755 also allows you to use your PC as a mobile phone.The wireless technology used by the cards is called GPRS (General Packet Radio Service). This is a high-speed, data-only service that is an add-on to the GSM (Global System for Mobile Communications) cellular network—a type of network used to provide cellular phone service.The AirCard fits into the standard (Type II) PC Card slot available on most notebook, Handheld, and Tablet PCs. You can also use the AirCard with a Pocket PC provided you have the PCMCIA jacket accessory. Supported operating systemsThe AirCard 755 wireless network card works in:•Notebook PCs running Windows 95, 98 SE, Me, NT, XP, NT 4.0, and 2000•Tablet, Handheld and Pocket PCs running Windows CE 3 or CE .NET (CE 4)For more details, see the ‘System requirements” on page 17 (notebooks) and page 25 (CE devices).The AirCard as a network cardThe AirCard 755  can be configured to provide the “always-on” data connection that an Ethernet card or other wired LAN card provides. That is, you can set options in Watcher™ (a program that comes with the AirCard) that will cause the AirCard to establish a network connection whenever you
AirCard 755 Installation Guide10 2130336insert it, assuming GPRS service is available. Otherwise, you can configure Watcher to connect only when you select a button.The AirCard as a mobile phoneYou can use the AirCard 755 as a phone simply by connecting an approved headset. (See page 12.) The keypad for the phone is in the Watcher program.Supported GSM frequency bands Every GSM network operates on one set of radio frequency bands.  As a tri-band product, the AirCard 755  functions on networks operating on any of these three bands.•900 MHz band—used by some European service providers•850 MHz band—used by some North American service providers•1800 MHz band—used by some European and Asian service providers•1900 MHz band—(also called the PCS band) used by some North American service providers Your account and coverage areaNote: If you purchased the AirCard from a GSM service provider, you may already have an account. Otherwise, your retailer should be able to provide you with the names of companies that provide this service.Companies that operate GSM networks and provide access to those networks are called service providers. You must have an account with a GSM service provider that offers GPRS service to use the AirCard. When you obtain your account, you will be given a SIM card, otherwise called a “smart card” or “smart chip”. (Depending on how you purchased your AirCard, you may already have an account, and your SIM card may have been included in your package.)  The SIM card contains account information and must be inserted in the AirCard anytime you use it.Before you can use the AirCard, you must install the AirCard software and ensure that your AirCard is configured to use your account. Instructions on completing these steps are provided in the chapters that follow. Once installed and configured, you can connect to the Internet with the AirCard in any area in which you can obtain GPRS service. Your ability to obtain GPRS service depends on these factors:
Introducing the AirCard® 755 Wireless Network CardRev D Dec.03 11Note: The fee for service is usually higher when you are “roaming” (connected to a network other than the one belonging to your service provider).•Proximity to a GPRS/GSM network—You must be within the coverage area of a GSM network on which GPRS has been implemented, in order to use the AirCard. •Service provider—If you are within the coverage area of a network that is not operated by your own service provider, you can only obtain service if there is a roaming agreement between your service provider and the network operator.•Account provisions—Your account may restrict your usage to certain networks or limit the amount of time you can use the network.Most service providers have coverage maps on their web sites.AirCard softwareThe AirCard comes with this software (made by Sierra Wireless, Inc.):•The Watcher program that you use to manage the AirCard and monitor your connections •The driver software that forms the interface between the network card and your Windows operating system•For notebook PCs only, the Network Adapter Manager software that allows you to switch between the AirCard and other network cardsBefore you can begin using the AirCardBefore you can use the AirCard for the first time you must:1. Install the AirCard software: Watcher, the Network Adapter Manager (notebooks only), and the AirCard driver. 2. Attach the antenna, insert the SIM into the AirCard and insert the AirCard into your PC Card slot. (Do not insert the AirCard before installing the software.)3. Obtain a GSM/GPRS account (if this wasn’t done when you purchased the AirCard).4. Configure the AirCard to use your account (unless it was pre-configured.)5. If your Internet browser is configured to use a dial-up modem, you may need to set it to use a network card.
AirCard 755 Installation Guide12 2130336The next three chapters guide you through this process.Package contentsYour AirCard package contains the following:•AirCard 755 wireless network card•Antenna•Installation CD containing the AirCard software and anthis installation guide•Quick reference cardIf you want to use the AirCard 755 as a phone, a headset is necessary. Only a 4-wire headset with a 2.5 mm connector will work with the AirCard 755. Approved headsets are available on the  Sierra Wireless web site, www.sierrawireless.com.
Rev D  Dec.03 132: The SIM Card and Your Account• Inserting a SIM card into your AirCard• Removing a SIM card You require a GSM/GPRS account and a SIM (Subscriber Identity Module) card to use the AirCard. The SIM card is a small chip (about the size of a postage stamp) that you insert into the AirCard. The SIM contains account information used by the network to validate your access. Note: Without a valid SIM card and a valid account, your AirCard will not work.Depending on how you purchased your AirCard, you may already have an account. In this case, the SIM should be included in your package. Otherwise, your retailer should direct you to a local company that provides GSM service.To activate an account, the service provider needs from you:•Billing information (such as a credit card number) used to collect payment for your network usage•Possibly the IMEI (International Mobile Equipment Identity)—a number that identifies your device (AirCard model) on the GSM network. This number is printed on the AirCard box and on the AirCard label.Note: Keep a written record, in a secure place, of the account information that your service provider gives you. Instructions on creating a profile are in the section ‘Configuring Your Account” on page 33.Your AirCard must be configured to use your account. If purchased from a service provider, your AirCard may have been pre-configured. Otherwise, you must obtain the necessary information and set up a profile in Watcher. Depending on your service provider and account, some or all of this information must be entered in your profile:•Phone number •APN1•User name and passwordLess commonly you may need to specify:•An IP (Internet Protocol) address for your AirCard•A DNS2 address or addresses•That IP header compression is to be used1. APN (Access Point Name)—Name of the gateway between the wireless network and other networks such as the Internet or a corporate network (Example: internet.serviceprovider.ca).2. DNS (Domain Name Server)—a computer that converts web site names, such as www.sierrawireless.com, into IP addresses, such as 64.114.87.11.
AirCard 755 Installation Guide14 2130336Note:  If you change GSM service providers (such as if you move to a new city), you will need a new SIM card from your new service provider. You will also need to enter your new profile information into the Watcher software (see “Config-uring Your Account” on page 33).Inserting a SIM card into your AirCardTo install your SIM card into the AirCard network card, follow these steps:1. If your SIM is attached to a card, detach it and remove any fragments of the card stuck to the SIM.2. Hold the AirCard network card with the label on top and the antenna closest to you.3. Locate the thin SIM card slot on the left side of the AirCard PC Card’s antenna end.4. Orient the SIM card, as shown in the diagram on the bottom side of the AirCard.Note: To prevent the SIM from becoming jammed in the AirCard slot, ensure the edge of the SIM is smooth before inserting it. Do not attach labels to your SIM as this may also cause it to become jammed.5. Insert the end of the SIM card into the slot, and gently push it until it is fully inserted.Figure 2-1: Inserting the SIM card Into the AirCard SIM card slotOnce the SIM card is properly inserted, it should not extend beyond the end of the card. See Figure 2-2.Figure 2-2: A SIM card properly insertedRemoving a SIM cardTo remove the SIM card, you will need a narrow object, such as a pen or a straightened paper clip, to push into the eject hole.1. Place the AirCard PC Card on a smooth, hard surface such as a tabletop, as shown in Figure 2-3.
The SIM Card and Your AccountRev D Dec.03 15Figure 2-3: Positioning a pen to eject the SIM card2. Position your pen or paper-clip above the eject hole, which is on the top surface of the AirCard housing, just to the right of the SIM card slot. (See the photo above.)3. Press down gently (without excessive force) on the eject hole. The SIM card should pop out of its slot.Figure 2-4: Ejecting and removing the SIM card4. Gently pull the SIM card from the slot until it slides free.
AirCard 755 Installation Guide16 2130336
Rev D  Dec.03 173: Installation on Notebook PCs• System requirements• Installation on Windows 95, 98, 2000, and Me• Installation on Windows XP• Installation on Windows NT• Setting Internet Explorer to use the AirCardThis chapter guides you through the steps necessary to making the AirCard operational on a notebook PC. The basic steps are:1. Insert the AirCard CD into your CD-ROM drive and install Watcher and the Network Adapter Manager.2. Insert the AirCard into the PC card slot and install the AirCard driver from the CD.Note: Do not insert the AirCard into your PC card slot before installing the software.Before you begin the installation process, ensure your PC is running a supported operating system and meets the hardware requirements described below. System requirementsNote: Winsock is a component of the Windows operating system required by the AirCard. The version of Winsock shipped with Windows 95 OSR2 does not meet the AirCard requirements. If you are using Windows 95 OSR2 and have not yet upgraded to Winsock2 or later, you must do so before installing the AirCard. Winsock2 can be downloaded from the Microsoft web site, www.microsoft.com.The AirCard wireless network card is supported on:•Windows 95 OSR2 and higher with Winsock2•Windows 98 SE•Windows 2000 with Service Pack 1•Windows NT 4.0 with Service Pack 6a and Networking installed•Windows Me•Windows XP (Home and Professional versions)To install the AirCard, you require these system resources:Table 3-1: System resource requirementsCard slots 1 Type II PCMCIA (PC Card) slotDisk drive CD-ROMI/O resources 1 IRQ, 40 bytes I/O spaceMemory 32 MB
AirCard 755 Installation Guide18 2130336Installation on Windows 95, 98, 2000, and MeNote: Users of Windows 2000 must be logged in with adminis-trative privileges.Note: Users of Windows 95 must have Winsock2 installed. See the note in the margin above. You must also verify that your PC Card slots are enabled and that TCP/IP is installed. For instructions on installing TCP/IP and enabling your PC Card slots, see the Windows 95 online Help (available by selecting Start > Help).Note: You may require your Windows CD (particularly if you are using Windows 95). Ensure you have the CD before proceeding.1. If the AirCard CD is not already in your CD-ROM drive, insert it. The CD should autostart and display a menu.·If the CD does not autostart, select Start > Run and enter d:\launch.exe where d is the drive letter of your CD-ROM drive.2. From the CD start-up menu, select notebook installation and documentation and then notebook software installation to launch the InstallShield® Wizard.3. Use the Next and Back buttons to navigate through the wizard.Using the default settings for the Destination Location and Program Folder is recommended unless you have special requirements and an advanced understanding of PC con-figuration.4. If you are using Windows 2000, the Digital Signature Not Found window appears. (This may happen several times.) Click Yes (to continue the installation).5. When prompted to insert the AirCard:a. Attach the antenna.Note: Do not forcefully insert the AirCard. This may damage connector pins. If you have more than one PC Card slot, you may obtain better signal strength using the top slot.b. With the SIM card inserted into the AirCard (page 14) and  the label of the AirCard facing up, carefully insert the AirCard into your PC Card slot.c. Click OK in the window requesting you to insert the AirCard.Windows detects that a new device has been inserted and launches a wizard that guides you through the driver installation.6. If prompted to eject the card and restart the PC:a. Eject the AirCard.
Installation on Notebook PCsRev D Dec.03 19b. Click Yes to restart your computer.c. Only after your computer has restarted and Windows has finished launching, insert the AirCard.Watcher should launch automatically when the AirCard is inserted. If your AirCard has not yet been configured to use your account, you are prompted to do so. See “Configuring Your Account” on page 33.To close the CD start-up menu, click Demoshield on the Taskbar to restore the window, then use the exit option in the lower right corner of the window.Installation on Windows XPNote: Depending on the XP installation, you may require administrative privileges.1. If the AirCard CD is not already in your CD-ROM drive, insert it. The CD should autostart and display a menu.·If the CD does not autostart, select Start > Run and enter d:\launch.exe where d is the drive letter of your CD-ROM drive.2. From the CD start-up menu, select notebook installation and documentation and then notebook software installation to launch the InstallShield Wizard.3. Use the Next and Back buttons to navigate through the wizard.Using the default settings for the Destination Location and Program Folder is recommended unless you have special requirements and an advanced understanding of PC con-figuration.4. If the Software Installation window appears, you can safely ignore the warning. Click Continue Anyway, each time it appears.5. When prompted to insert the AirCard:a. Attach the antenna.Note: Do not forcefully insert the AirCard. This may damage connector pins.b. With the SIM card inserted into the AirCard (page 14) and  the label of the AirCard facing up, carefully insert the AirCard into your PC Card slot.c. Click OK in the window requesting you to insert the AirCard.The Found New Hardware wizard launches.Windows should detect that a new device has been inserted and launch a wizard that guides you through the driver installation.
AirCard 755 Installation Guide20 21303366. On the first window of the Found New Hardware Wizard, select Install the software automatically (Recommended) and click Next.7. If the Software Installation window appears, you can safely ignore the warning. Click Continue Anyway, each time it appears.8. Click Finish and repeat steps 6 to 8 as prompted.9. When you see a window with the message “AirCard® has been successfully installed.”, click OK.Watcher should launch automatically when the AirCard is inserted. If your AirCard has not yet been configured to use your account, you are prompted to do so. See “Configuring Your Account” on page 33.To close the CD start-up menu, click Demoshield on the Taskbar, then use the exit option in the lower right corner of the window.Installation on Windows NTNote: The AirCard driver requires that Windows Networking is installed. Also the PC Card slots must be enabled. If you are not certain that networking is installed and the slots enabled, see the Windows NT user documen-tation for instructions. You must be logged in with admin-istrative privileges.Note: You must re-install the Windows NT Service Pack after you install the AirCard driver. Ensure you have your Service Pack CD before you begin. (Version 6a is supported.)Note: Windows system files may also be required to complete the installation. These files are located on the Windows NT CD. 1. If the AirCard CD is not already in your CD-ROM drive, insert it. The CD should autostart and display a menu.·If the CD does not autostart, select Start > Run and enter d:\launch.exe where d is the drive letter of your CD-ROM drive.2. From the CD start-up menu, select notebook installation and documentation and then notebook software installation to launch the InstallShield Wizard.3. Use the Next and Back buttons to navigate through the wizard.Using the default settings for the Destination Location and Program Folder is recommended unless you have special requirements and an advanced understanding of PC con-figuration.On completion of the software installation, exit from the startup menu by clicking exit in the lower right corner.
Installation on Notebook PCsRev D Dec.03 21Inserting the AirCardNote: Your PC must be off whenever you insert or eject the AirCard.1. Close all Windows programs and turn your PC off.2. Attach the antenna.Do not forcefully insert the AirCard. This may damage connector pins.3. With the SIM card inserted into the AirCard (page 14) and  the label of the AirCard facing up, carefully insert the AirCard into your PC Card slot.4. Turn on your PC.5. Log on as Administrator.Note: Depending on how Windows NT is configured, the prompts and windows described here may not appear in the precise order indicated. Use these instructions as a guideline to the selections you should make. Installing the network card driver1. Open the Control Panel by selecting Start > Settings > Control Panel.2. Double click the Network icon to open the Network window.3. Click the Adapters tab in the Network window.4. Click the Add... button to open the Select Network Adapter window.5. Click the Have Disk... button to open the Insert Disk window.Note: The AirCard will not function with the default settings for the I/O Port , Interrupt, and Com port if any of these resources are allocated to another network card or other device. If you are familiar with the Windows NT Diagnostics window, you can check to see if these resources are available. Otherwise, leave the default settings and if the AirCard does not function following the driver installation, see the instructions on changing the interrupt on page 22.6. Enter d:\Drivers\WinNT where d is the drive letter for your CD-ROM drive and click OK to open the Select OEM Option window in which Sierra Wireless AirCard GPRS Adapter is selected.7. Click OK. A window opens showing the settings for the I/O Port (0x800), interrupt (10) and COM port (4).  8. If you are aware that these resources are in use by another device (see the note in the margin), change the settings and click OK. Otherwise, click OK to use the default settings. Windows then copies the driver files.9. Click Close to close the Network window and open the Microsoft TCP/IP Properties window.10. Select Sierra Wireless AirCard GPRS Adapter in the Adapter field and select Obtain an IP address from a DHCP Server radio button.11. Click Yes to confirm that DHCP is to be used.12. Click OK to close the TCP/IP Properties window.13. Click No if prompted to restart your PC. (You must restart your PC after the modem driver installation.)
AirCard 755 Installation Guide22 2130336On completion of this step, the network card driver is installed and you can proceed to install the modem driver. Follow the instructions in the next section.Installing the modem driver1. In the Control Panel, double click the Modems icon. If the Install New Modem wizard opens, skip to step 3. Otherwise, proceed to step 2.2. Click the Add button to open the Install New Modem wizard.3. Select Don’t detect my modem, I will select it from a list and click Next.4. Select the Have Disk button.5. Enter d:\Drivers\WinNT\ where d is the drive letter for your CD-ROM drive and click OK.6. Verify that Sierra Wireless AirCard GPRS Modem is displayed and click Next.7. Select the Selected Ports radio button and select the same communications port used for the network card driver (COM 4 unless you changed it). Click Next.8. Click Finish.9. Click Close to close the Network Properties window.Note: You must restart your PC to complete the installation.10. If you are prompted to restart your PC, click Yes. Otherwise restart your PC from the Start menu.11. When the PC restarts, re-install your Service Pack.On completion of this step, the modem driver is installed and you can proceed to configure the AirCard to use your account (if it was not preactivated). See the section “Account Configu-ration Procedures” on page 33.Changing the interruptIf the message, “Communication Failed!…” occurs when you start Watcher, a possible reason is that you have assigned an interrupt to the AirCard that has also been assigned to another device.To change the interrupt assigned to the AirCard:1. Open the Control Panel by selecting Start > Settings > Control Panel.2. Double click the Network icon.3. Select the Adapters tab.
Installation on Notebook PCsRev D Dec.03 234. Select Sierra Wireless AirCard GPRS Adapter and click the Properties… button.5. Use the drop-down list to change the Interrupt to another number and click OK.6. Close the Network window by clicking the Close button.7. Restart your PC.8. If the AirCard still does not function properly, repeat the procedure, selecting a different interrupt.Setting Internet Explorer to use the AirCardIf you are using Internet Explorer as your browser, and it is set to connect to the Internet through a dial-up modem, you must set it to use a LAN (local area network) card.To set Internet Explorer version 5 or 6 to use a LAN, follow these steps:1. In Internet Explorer, select Tools > Internet Options.2. Click the Connections tab.3. Click Setup to run the Internet Connection Wizard.4. Select the option "I want to set up  my Internet connection manually, or I want to connect through a local area network (LAN)." Click Next.5. Select "I connect through a local area network (LAN)". Click Next.6. Ensure no checkboxes are selected in the “Local area network Internet configuration“ window and click Next.7. Select No when prompted to set up an Internet mail account and click Next.8. Click Finish to exit the wizard.
AirCard 755 Installation Guide24 2130336
Rev D  Dec.03 254: Installation on Devices Running Windows CE• System requirements• Pocket PC and Handheld PC installation• Windows CE .NET device installation• Inserting the AirCard into a Pocket PC• Inserting the AirCard into a Handheld or Tablet PCThis chapter provides installation instructions for users of computers running the Windows CE operating system. The AirCard runs on Handheld, Pocket, and Tablet PCs running Windows CE 3.x and CE .NET.  (CE .NET is sometimes called CE 4.x).Before installing the AirCard software on your CE device, ensure you have the required hardware and software.  Since software cannot be directly installed to a CE device, you require a desktop or notebook PC to perform the installation. There are two methods of installation:•If you are running CE 3.x, you install the software to a desktop or notebook PC that functions as the “host”. The host connects to the CE device by a cable or infrared ports and the software is downloaded from the host to the CE device using the Microsoft ActiveSync®  application.•If you are running CE .NET, you download a CAB file (a compressed file containing the software) from the AirCard installation CD to either a host PC or a flash card. You then copy the CAB file to the CE device by inserting the flash card into your CE device or by establishing an ActiveSync connection between the host and the CE device.  System requirementsThese CE operating systems are supported: Pocket PCs:•Windows CE 3.0 MS Pocket PC•Windows CE 3.0 Pocket PC 2002•Windows CE 4.x Pocket PC 2003
AirCard 755 Installation Guide26 2130336Handheld PCs:•Windows CE 3.0 Handheld PC 2000CE .NET devices:•Windows CE .NET (Windows CE 4.1 or later)If you have a Pocket PC and do not know what version of Windows CE you are using, select Start > Settings, tap the System tab, and tap the About icon. The second line on the screen identifies your version of Windows CE as follows:•Version 4.20.1081 (Build...)—your operating systems is Windows CE 4.x Pocket PC 2003•Windows 3.0.11171 (Build…)—your operating systems is Windows CE 3.0 Pocket PC 2002•Windows 3.0.9348 (Build…)—your operating systems is Windows CE 3.0 MS Pocket PC Your CE device must have:•2.6 MB of storage memory•A PC Card slot or, if you are using a Pocket PC, the PCMCIA jacket accessory (If you are using a jacket with two slots, see the important note on page 31.)Note: ActiveSync is made by Microsoft and is included with PCs running Windows CE. (It is also available from the Microsoft web site.) ActiveSync 3.5 is supported on Windows 98, 2000,  XP, and NT 4.0 with Service Pack 6 or later. ActiveSync 3.7 is supported on Windows 98 SE, 2000, Me, NT, and XP.ActiveSync installation requirementsIf you are installing using ActiveSync, the host PC (the desktop or notebook PC to which you install the software) must have:•A CD-ROM drive• ActiveSync version 3.5 or 3.7 installed. Note: ActiveSync 3.5 is required if you are using:Windows CE 3.0 MS Pocket PC, or Windows CE 3.0 Pocket PC 2002. ActiveSync 3.7 is required if you are using:Windows CE 4.x Pocket PC 2003, or Windows CE .NET.You must also have the ability to establish a conection between the CE device and host. This could be:•An infrared connection (requiring that both the CE device and host have infrared ports).•A cable connection using either a USB or serial cable (requiring the cable and that the CE device and host have the necessary connectors)
Installation on Devices Running Windows CERev D Dec.03 27Flash card installation requirementsNote: This method of installation is only available to users of CE .NET (not including Pocket PC users).If  you are installing using a flash card, you require a flash card with at least 5 MB of available memory. You also require a PC that has both a CD-ROM drive and the appropriate flash card reader (and you must be able to read the flash card on your CE device).Pocket PC and Handheld PC installationFollow these instructions if your operating system is:•Windows CE 3.0 MS Pocket PC•Windows CE 3.0 Pocket PC 2002•Windows CE 4.x Pocket PC 2003•Windows CE 3.0 Handheld PC 2000There are two methods of installing and downloading the software using ActiveSync. You can either: •Connect the host and the CE device before you install the software to the host. (In this case, you are prompted to initiate the download as soon as the software installation is complete.)OrNote: Do not insert the AirCard into the CE device before downloading the software.•Install the software to the host and then connect the host and the CE device, as described here.This process installs Watcher and the AirCard drivers.Installing the software on the host1. If the AirCard installation CD is not in your CD-ROM drive, insert it. The CD should auto-start and display a menu. ·If the CD does not auto-start, select Start > Run and enter d:\launch.exe where d is the drive letter of your CD-ROM drive.2. From the CD start-up menu, select your language preference, and from the next menu, select Pocket PC and Handheld PC installation.3. From the next menu, select the installation option that corresponds to your version of Windows CE.
AirCard 755 Installation Guide28 2130336This launches the installation wizard that installs the soft-ware to the host.4. Use the Next , Back, and Finish buttons to navigate through the wizard.·Using the default settings for the Destination Location and Program Folder is recommended unless you have special requirements and an advanced understanding of PC configuration.·A dialog box displays this message, “On the next mobile device connection, the installed applications will be downloaded to the device.” Click OK.·Use the exit option in the lower right corner of the window to close the CD start-up menu. Downloading the software to the CE device1. Connect the CE device to the host in one of these ways:·Connect the CE device and the host PC, using the serial or USB cable provided by the manufacturer of the CE device, or·Place your CE device in its cradle and connect the cradle to the host PC using the serial or USB cable provided by the manufacturer of the CE device,  or·Align the infrared port on your CE device with the infrared port on your host PC  Note: If you are unable to establish a connection, launch ActiveSync from the Start menu and use the online help in ActiveSync. ActiveSync should launch automatically when the host and CE device are connected.2. If you are prompted to indicate whether you want to set up a partnership, click Yes or No and click Next. (For the purpose of downloading the AirCard software, it does not matter whether you have a partnership.) You should then be prompted that there is software to download.3. In the Installing Applications window, click Yes to start the download. When complete, you are prompted to check your mobile device screen to see if additional steps are required.4. Click OK. 5. Reset your CE device. ·If your device has a reset button (usually a circular indentation on the bottom of the device, or in the case of Handheld PCs, on the keyboard) press the stylus or pen into the reset button. ·If there is no reset button, you may need to run a software utility to reset the device.  (Consult the
Installation on Devices Running Windows CERev D Dec.03 29documentation that came with your PC if you do not know how to reset the device.)Windows CE .NET device installationNote: Do not insert the AirCard into the CE device before downloading the software.To install to a CE .NET device, you must first extract the .CAB file to a host PC, then copy the CAB file to the CE .NET device  using ActiveSync or using a flash card. Extracting the CAB file to the hostOn a notebook or desktop PC:1. If the AirCard installation CD is not in your CD-ROM drive, insert it. The CD should auto-start and display a menu. ·If the CD does not auto-start, select Start > Run and enter d:\launch.exe where d is the drive letter of your CD-ROM drive.2. From the CD start-up menu, select your language preference, and from the next menu, select CE .NET installation.3. From the next menu, select CE .NET software installation (CAB). This opens the installation wizard.4. Click Next to display the license agreement. 5. If you accept the terms of the agreement, click Yes to proceed. 6. Click the Browse button and select the location in which to place the CAB file. If the CAB file will be copied to the CE device using ActiveSync, select a folder on the host PC. If the CAB file will be copied to the CE device using a flash card, select the drive location of the flash card. 7. Click Finish to close the installation wizard, and close the start-up menu using the Exit option in the lower right corner of the window.To complete the installation, follow either the steps in the next section, “ActiveSync installation” or the section that comes after it, “Flash card installation”.ActiveSync installation1. Connect the CE device to the host in one of these ways:
AirCard 755 Installation Guide30 2130336·Connect the CE device and the host PC, using the serial or USB cable provided by the manufacturer of the CE device, or·Place your CE device in its cradle and connect the cradle to the host PC using the serial or USB cable provided by the manufacturer of the CE device,  or·Align the infrared port on your CE device with the infrared port on your host PC  Note: If you are unable to establish a connection, launch ActiveSync from the Start menu and use the online help in ActiveSync. ActiveSync should launch automatically when the host and CE device are connected.2. If you are prompted to indicate whether you want to set up a partnership, click Yes or No and click Next. (For the purpose of downloading the CAB file, it does not matter whether you have a partnership.) 3. Select the Explore button from the ActiveSync window to open the Mobile Device window.4. Copy the CAB file from the host to the CE device:·Open Windows Explorer, browse to the folder to which you copied the CAB file and drag the file (AC7X0_xxx_CENET.CAB, where xxx is a language abbre-viation) to the Mobile Device window.  5. Click OK at the file conversion warning.6. On the CE device (NOT the host), double tap the CAB file.7. If a warning occurs, indicating that the application is not supported for this device type, click Yes to proceed.8. Tap OK to install the software to the Program Files folder.9. When prompted to do a soft reset, tap OK and reset the device:·If your device has a reset button (usually a circular indentation on the bottom of the device, or in the case of Handheld PCs, on the keyboard) press the stylus or pen into the reset button. ·If there is no reset button, you may need to run a software utility to reset the device.  (Consult the documentation that came with your PC if you do not know how to reset the device.)Flash card installation1. Insert the flash card into the reader on the CE device.2. Open Windows Explorer (Start > Programs > Windows Explorer) and locate the CAB file that you copied to the flash card (AC7X0_xxx_CENET.CAB, where xxx is a language abbreviation).
Installation on Devices Running Windows CERev D Dec.03 313. Copy the CAB file to a folder on the CE device, if you do NOT want to install from the flash card. (The CAB file will be erased during installation.)4. Double-tap the CAB file to install the software. 5. If a warning occurs, indicating that the application is not supported for this device type, click Yes to proceed.6. Tap OK to install the software to the Program Files folder.7. When prompted to do a soft reset, tap OK and reset the device.·If your device has a reset button (usually a circular indentation on the bottom of the device, or in the case of Handheld PCs, on the keyboard) press the stylus or pen into the reset button. ·If there is no reset button, you may need to run a software utility to reset the device.  (Consult the documentation that came with your PC if you do not know how to reset the device.)Inserting the AirCard into a Pocket PCNote: The Pocket PC operating system doesn’t allow two network devices to be simulta-neously inserted into PC Card slots. If you are using a PCMCIA jacket that has two slots, ensure the second slot does not contain another network interface card when you use the AirCard.To insert the AirCard into a Pocket PC:1. If the PCMCIA jacket accessory is not already attached, slide the Pocket PC bottom first into the jacket. It should  click into place.2. Ensure the SIM card is inserted into the AirCard (described on page 14).3. Attach the antenna.4. With the label facing towards the front of the Pocket PC, insert the network card into the slot at the top of the jacket, as shown in the photo.5. Position the antenna so that it is vertical.Inserting the AirCard into a Handheld or Tablet PCTo insert the AirCard into a Handheld or Tablet PC:1. Ensure the SIM card is inserted into the AirCard (described on page 14).2. .Attach the antenna.
AirCard 755 Installation Guide32 21303363. With the label facing towards the top or front of the PC, insert the network card into the slot, as shown in the photo.4. Position the antenna so that it is vertical.5. If your PC is not plugged into a power supply, the prompt, “Do you want to use this PC card on battery power?” appears. Tap Yes.
Rev D  Dec.03 335: Configuring Your Account• Setting up a profile Unless your AirCard was pre-configured, you must set up a user profile before you can use the AirCard.  In most cases, one profile is all you require and your service provider should give you all the information you need to set up the profile that will allow you to make a GPRS network connection and access the Internet. Note: Your profile is stored on your AirCard—not on the SIM. This means that if you use your SIM in another device, you must create a profile on that device.If you want to use the AirCard with a specific application or network that requires settings different from those required to web browse, you may need to set up a separate profile. The AirCard allows you to create up to three profiles.Setting up a profileNote: You cannot set up a profile before installing the software. (See page 17 for notebook installation instruc-tions or page 25 for CE device installation instructions.)To create a profile:1. Insert the SIM into the AirCard if it is not already inserted. (See page 14.) 2. Insert the AirCard into the PC Card slot if it is not already inserted (See page 21 for notebook PCs, page 31 for Pocket PCs, or page 31 for Tablet and Handheld PCs).3. If Watcher is not running, start Watcher, by selectingStart > Programs > Sierra Wireless > AirCard 7X0 > AirCard 7X0 Watcher or double clicking the desktop shortcut.Select Start > Programs > AirCard 7X0 WatcherIf Watcher detects that no profile has been set up, you are prompted, “Would you like to configure a profile now?” Select Yes.If this prompt does not appear, your AirCard may have been preconfigured, or you may be outside the GPRS coverage area. Select Tools > Options to access the Profiles tab of the Options window. Notebook PCsCE devices
AirCard 755 Installation Guide34 2130336Note: You must have a valid SIM and be within a GPRS coverage area for Watcher to detect whether you have a profile.·If a profile is listed, your AirCard has likely been pre-configured and is ready for use. ·If there is no profile, follow the next set of steps to add one.  4. In the Profiles tab of the Options window, select Add. The User Profile window appears.Figure 5-1: User Profile window (notebooks)Figure 5-2: User Profile window (Pocket PCs)Figure 5-3: User Profile window (Tablet and Handheld PCs)
Configuring Your AccountRev D Dec.03 355. Enter your profile information as follows:Profile Name—enter any name that will help you remember the purpose/use of this account. This name appears in the main Watcher window and, if you later create more pro-files, you can use it to select this profile.User Name and Password—enter your username and/or password if assigned by your service provider. (Leave the fields blank if not assigned.)APN (Access Point Name)— enter the APN (see page 13) that the service provider gave you, if any. (Leave the field blank if no APN was provided). 6. If you want Watcher to automatically establish a GPRS connection when using this profile and whenever you are in GPRS coverage, then select Auto Connect.The Advanced Profile windowThe Advanced Profile window allows you to specify:•An IP address•Use of IP header compression•A DNS address or addresses•Quality of service parameters (depending on your AirCard configuration)If your service provider indicated that this information should be entered in your profile, follow the instructions below. Otherwise proceed to the section: See “The Default Profile button” on page 36.To use the Advanced Profile window:1. Select the Advanced button to open the Advanced Profile window displaying the TCP/IP tab.2. If your service provider specified an IP address for your AirCard, select “Use static IP address”, and enter the address. (“Use dynamic IP address“ is the default, and, in most cases, should be selected.)Note: The Use IP header compression field should not be checked unless your service provider is using this compression. The AirCard cannot maintain a connection if this is enabled but not supported on the network.3. If your service provider is using IP header compression, then select the checkbox(es) for the feature(s) that your service provider supports.4. If your service provider specified a DNS address or addresses, select the DNS tab. If one address was provided, enter it in the  Primary DNS field, and if a second address was provided, enter it in the  Secondary DNS field.5. If your service provider specified quality of service param-eters, enter these on the Requested QOS and Minimum QOS
AirCard 755 Installation Guide36 2130336tabs. (These tabs may not be present, depending on your configuration.)6. Select OK to close the Advanced Profile window and OK to close the User Profile window.The Default Profile buttonThe “default” profile is the one used to establish GPRS connec-tions if you click Connect without selecting a profile. If you only have one profile, it is the default. If you create more than one profile, you can use the Default Profile button to select which is the default.If the profile is set as the default and is set to auto connect, the AirCard automatically initiates a connection, using this profile, as soon as the AirCard is inserted in the PC Card slot.Once your profile is complete, click OK to exit the Options window. Your AirCard is ready for use.
Rev D  Dec.03 376: Care and Maintenance of Your Network Card• Stopping and ejecting the AirCard on a notebook PC• Ejecting the AirCard on a Pocket PC• Ejecting the AirCard on a Handheld or Tablet PCYou can ensure reliable operation and long life of your AirCard by adhering to these guidelines in storage and use: •Do not apply adhesive labels to the AirCard or SIM. This may cause the AirCard or SIM to become jammed inside the slot, or prevent it from being inserted properly.•When not installed in your computer, store the AirCard and SIM in a safe place.Note: Do not insert the AirCard before installing the software. See ‘Installation on Notebook PCs” on page 17 or ‘Pocket PC and Handheld PC installation” on page 27 for installation instruc-tions.•When storing or transporting your PC in a case (such as a notebook case),  remove the AirCard antenna and position the computer where the antenna tip cannot be crushed or broken.•Protect the card from liquids, dust, and excessive heat (see ‘Environmental specifications” on page 51 for details).•The AirCard should fit easily into your computer’s PC Card slot. Forcing the AirCard into the slot may damage the connector pins.When you insert the AirCard in a notebook PC, the following should happen:•The PC beeps (unless the effect is disabled).•The PC Card icon appears in the status area (usually located in the lower right corner of the screen) unless the feature is disabled.  •The Network Adapter Manager icon  for the AirCard also appears in the status area.•Watcher launches (unless the autolaunch option is disabled).Windows PC Card icons95/98 Me/2000 XP
AirCard 755 Installation Guide38 2130336Stopping and ejecting the AirCard on a notebook PCWindows NTIf you are using Windows NT, your PC must be off whenever you insert or eject the AirCard.Windows 95, 98, 2000, Me, XPTo remove the AirCard:1. Close Watcher if it is open.2. Click the PC Card icon in the status area to display the option to stop the card.3. Click “Stop Sierra Wireless AirCard GPRS Adapter Parent” (Windows 95, 98, 2000, or Me) or “Safely remove Sierra Wireless AirCard GPRS Adapter Parent” (Windows XP).4. If a dialog box appears notifying you that it is safe to remove the card, click OK.5. Push the PC Card eject button on your computer to eject the card.6. Grasp the AirCard and remove it from the slot.Ejecting the AirCard on a Pocket PC To remove the AirCard from your Pocket PC:1. Stop Watcher by selecting Start > Settings > System tab > Memory > Running Programs. In the “Running Program List”, select “AirCard 7X0 Watcher”, then tap Stop.2. Push the PC Card eject button on the Pocket PC to eject the card.3. Grasp the AirCard and remove it from the slot.Ejecting the AirCard on a Handheld or Tablet PCTo remove the AirCard from your Handheld PC:1. Close Watcher.
Care and Maintenance of Your Network CardRev D Dec.03 392. Push the PC Card eject button on your computer to eject the card.
AirCard 755 Installation Guide40 2130336
Rev D  Dec.03 417: Watcher™ Basics• Launching Watcher• The Watcher window• Icon and indicators on the main Watcher window• View options (notebook PCs)• Status icons• Power options• Frequency band and network selectionWatcher is the program you use to manage and monitor your AirCard connections. Watcher allows you to:•Create an account profile. (This is explained under ‘The SIM Card and Your Account” on page 13.)•Determine signal strength, roaming status, GPRS avail-ability, and other network connection parameters•Monitor the status of the AirCard and GSM service•Initiate data connections•Make and receive phone calls •Send and receive SMS messages•Enable or disable SIM security that prevents others from using your SIM card if it is lost or stolen•Set options related to battery power consumption•Set options related to notifications and the Watcher windowNote: It takes up to 20 seconds for Watcher to become fully functional after launch.  If you set your account profile to autoconnect, you do not need to run Watcher when you use the AirCard, but Watcher does provide useful status information.Launching WatcherOn notebook PCs, unless the feature has been disabled, Watcher launches automatically anytime you insert the AirCard. You can also launch Watcher by:Notebook PCs: •Double clicking the desktop shortcut, or•Selecting Start > Programs > Sierra Wireless > AirCard 7X0 > AirCard 7X0 WatcherTo launch Watcher on a CE device, select Start > Programs > AirCard 7X0 WatcherCE Devices
AirCard 755 Installation Guide42 2130336If the auto-launch browser feature is enabled, anytime you launch Watcher, your browser will open to a specified web page.The Watcher windowNote: To get help in Watcher on a notebook or Tablet or Handheld PC, select Help > Help Topics. You can also display help by pressing <F1> in most windows.Notebook / Handheld /Tablet PCs Figure 7-1: The Watcher window (on notebooks, Tablet and Handheld PCs)Note: To get help for Watcher on a Pocket PC, select Start > Help.Pocket PCsIndicator areaProfile drop-down listRoamingPacket modeCompact ViewSignal strengthDATA tab VOICE tabIndicator areaProfile drop-down listRoaming indicatorPacket modeSignal strengthDATA tabVOICE tab
Watcher™ BasicsRev D Dec.03 43Icons and indicators on the main Watcher windowThese icons are used on the main Watcher window::Table 7-1: Icons and indicators in WatcherIcon MeaningThe Signal Strength indicator uses bars to show the intensity of the radio signal. The number of bars increases as signal strength increases to a maximum of five bars. When the antenna and bars are dimmed, no connection is possible for one of these reasons:•No antenna is attached •You are outside the GSM/GPRS network coverage area•The signal strength is too weak•A network or account problem is preventing the AirCard from obtaining serviceA red flashing antenna icon indicates an antenna problem. If this occurs, try reorienting the antenna and ensure that there is nothing on or near the antenna that could be blocking the signal.A red thermometer icon indicates overheating. If this occurs, the AirCard suspends data transmission until the temperature drops, then normal operation is resumed. (This usually takes no more than 10 seconds.)Depending on your AirCard configuration, you may not have this indicatorThe GPRS indicator shows whether GPRS is available in this area. You can make data connections only in areas where GPRS is available.can make phone calls and receive SMS messages in areas where there is no GPRS service, provided you are within the GSM coverage area.
AirCard 755 Installation Guide44 2130336Depending on your AirCard configuration, you may not have this indicatorThe Roaming Status indicator shows whether you are roaming onto the network of a service provider other than your own.When the indicator is off, you are within the local coverage area of your service provider. When the indicator is on, you are roaming. Your coverage area and billing charges depend upon your service provider and the type of account you have. There may be surcharges for roaming service. When the SMS message indicator is on, you have one or more unread messages. When the SIM becomes full (and you cannot receive any new messages) the indicator flashes for several seconds and then turns red. You can open the SMS Message window by double clicking (notebook PCs) or tapping (Handheld/Pocket PCs) the icon. When this indicator is on, a headset is attached.When this indicator is on, there is an incoming call. When the missed call indicator is on, you received one or more calls that you failed to answer. You can view the missed calls in the call log. When this indicator is on, call forwarding is enabled. (This icon is only shown if all calls are being forwarded.)When this indicator is on, you have unheard voice mail. You can connect to your voice mail by selecting this indicator. The phone number for your voice mail is shown on the My Numbers tab of the Options window. Table 7-1: Icons and indicators in WatcherIcon Meaning
Watcher™ BasicsRev D Dec.03 45View options (notebook PCs)On notebook PCs, you have these options concerning the Watcher window:•You can enable/disable always on top from the VIEW menu. When enabled, the Watcher window always appears in front of other application windows.•You can switch between the full Watcher window and the compact window from the VIEW menu or by using the Compact View button:•You can use the Minimize button to close the Watcher window but leave the program running. You can also control where the Watcher window appears when launched. •If you enable the Restore Previous Position On Startup option, Watcher opens in the same place you close it. Otherwise, Watcher opens in the center of the screen.•If you enable Remember Compact View Position option, the compact Watcher window opens in the last place you closed it.These options and the autolaunch feature (that causes Watcher to open automatically when you insert the AirCard) are enabled and disabled on the Display tab of the Options window (TOOLS > Options).When this indicator is on and neither circle is shaded, you have a connection but no data transmission is occurring.A shaded top circle indicates that data is being sent and a shaded bottom circle that data is being received.Table 7-1: Icons and indicators in WatcherIcon Meaning               Compact ViewMinimize                         Close
AirCard 755 Installation Guide46 2130336 Status IconsThese icons appear in the status area (usually in the lower right corner of your screen) on notebook, Tablet, and Handheld PCs, and on the lower right corner of the Today page on Pocket PCs.  Power OptionsThe AirCard draws power from your PC’s battery. There are two features of the AirCard that allow you to manage battery power consumption:•The power down/power up option•The transmit power consumption optionPower Down and UpThe  power down/power up option allows you to conserve your battery by powering the AirCard down when you’re not using it.To power down the AirCard:1. Select Tools > Power DownWhen powered down, the menu option switches to Power Up and the message, “Device powered down” is displayed on the Watcher window.You cannot maintain a connection when the AirCard is powered down.Table 7-2: Status IconsIcon MeaningYou have a GPRS connection. You do not have a GPRS connection. You have one or more unread SMS messages.
Watcher™ BasicsRev D Dec.03 47Transmit power consumptionNote: If you are using the AirCard in a CE device, it is recommended that you set the Transmit Power Consumption to low.The Transmit Power Consumption option allows you to choose between maximizing your data transmission speed or minimizing battery drain on your PC. The settings for this option are:•Normal (Notebook)•Medium•Low (PDA)If you select Normal (Notebook), the AirCard takes advantage of certain network resources (if they are available) to maximize the upload transmission speed. This increases peak battery consumption slightly but unless you are using a CE device, the increase has little effect. (The maximum possible data trans-mission speed with this setting is 56 kbps).If you select Low (PDA), the AirCard makes no attempt to take advantage of faster upload speeds that might be possible on some networks. This minimizes peak battery consumption and is the recommended setting for CE devices because they are unable to meet the peak power demands of the AirCard while operating at the highest upload transmission speeds. (The maximum possible data transmission speed with this setting is 14.4 kbps).The Medium setting has a maximum possible data transmission speed of 28.8 kbps.The change in data transmission speed or peak battery consumption that results from changing these settings is dependent on network conditions (such as the number of users in your area), and in some circumstances, may not be noticeable.This setting does not affect the speed of downloads (data transmissions from the network to the AirCard).Frequency band and network selectionWatcher has two options that affect your ability to obtain GPRS service in any given area. You can select:•The frequency band you want to use •The network you want to use, if you are within the coverage area of more than one network
AirCard 755 Installation Guide48 2130336Frequency band selectionThe AirCard 755 operates on the 900, 850, 1800, and 1900 MHz bands. (See ‘Supported GSM frequency bands” on page 10 for more information about frequency bands.) Generally, you need to select the 1900 MHz band in North America and the 900/1800 MHz bands outside of North America. Generally, you need to select the 900 or 1900 MHz band in North America (depending on your service provider) and the 1800 MHz band outside of North America. This option is set on the Network tab of the Options window (TOOLS > Options).Network selectionDepending on your location, you may be within the coverage area of several networks. Your ability to obtain service on each network is dependent on your account. Your options for network selection are:•automatic—the AirCard automatically selects a network based on your account and network availablility.•manual—the AirCard scans the area and displays a list of detected GSM networks. You can then choose from a list of available networks.If you select a network on which you cannot obtain service, the message, “Failed to register with network” appears. You should then choose a different network.This option is set on the Network tab of the Options window (TOOLS > Options).
Rev D  Dec.03 498: Technical Specifications• LED operation• Radio frequency and electrical specifications• Environmental specifications• Sending GSM commands to the networkThis chapter describes the operation of the LED and provides technical data for the755  wireless network card.LED operationThe AirCard has a single LED1 located on the antenna end of the card beneath the SIM slot. The color (red, green or amber) and state (off, on solid, or blinking) of the LED indicate the connection status as follows:1. LED—light emitting diodeTable 8-1: LED operationLED state How to interpretSolid amberaa. The LED is red/green. The amber color occurs when both red and green are lit.The AirCard is powering up, or a firmware download is in progress.Blinking amberThe AirCard is scanning for service.Blinking greenThe AirCard is in service and registered on the network.Solid green A voice call is in progress.Blinking red There is a hardware problem.Off The AirCard is powered down.
AirCard 755 Installation Guide50 2130336Radio frequency and electrical specificationsTable 8-2: Radio frequency & electrical specificationsApprovals FCC Parts 22, and 24Industry CanadaCompliance Compliant with:GPRS GSM Release 97 SMG 31 Phase 2+Voltage +5 VDC from PCMCIA SlotCurrent Typical requirement GSM Band:4 TX slots on 1.0 A peak, 0.70 A average2 TX slots on 0.8 A peak, 0.40 A average1 TX slots on 0.75 A peak, 0.30 A averageTypical requirement PCS/DCS Band:4 TX slots on 0.9 A peak, 0.60 A average2 TX slots on 0.7 A peak, 0.35 A average1 TX slots on 0.65 A peak, 0.25 A averageStandby:Handhelds: 12 mANotebooks: 16 mAMulti-slot class Class 12Transmit AirCard 755:PCS:1850 to 1910 MHzDCS1800:1710 to 1785 MHzGSM850:824 to 849 MHzReceive AirCard 755:PCS:1930 to 1990 MHzDCS1800:1805 to 1880 MHzGSM850:869 to 894 MHzChannel spacing 200 kHzFrequency stability0.1 ppm
Technical SpecificationsRev D Dec.03 51Environmental specificationsTable 8-3: Environmental specificationsOperating temperature-20 to +60 °C (ambient, outside PCMCIA enclosure)Storage temperature-30 to +85 °C Humidity 95%, non-condensingVibration 15 g peak 10 to 2000 Hz (non-operating)
AirCard 755 Installation Guide52 2130336
Rev D  Dec.03 539: AirCard 755 Regulatory InformationFCC approval (US)This device complies with Part 15 of the FCC Rules. Operation is subject to the condition that this device does not cause-harmful interference.CAUTION  This device has been tested for compliance with FCC RF exposure limits in a Compaq Armanda E500 notebook computer. This device is only authorized to be used in notebook computers that are the same as the one in the grant application.  When the AirCard 755 is in use, users should maintain a distance of at least 25 mm between the antenna and the user's torso, head or legs.  Always place the antenna in the upright position (oriented vertically) when using the AirCard 755 in a notebook computer.Where appropriate, the use of the equipment is subject to the following conditions:CAUTION Unauthorized modifications or changes not expressly approved by Sierra Wireless, Inc. could void compliance with regulatory rules, and thereby your authority to use this equipment.WARNING (EMI) - United States FCC Information - This equipment has been tested and found to comply with the limits pursuant to Part 15 of the FCC Rules. These limits are designed to provide reasonable protection against harmful interference in an appropriate installation. This equipment generates, uses, and can radiate radio frequency energy and, if not installed and used in accordance with the instructions, may cause harmful interference to radio communication. However, there is no guarantee that interference will not occur in a particular installation.If this equipment does cause harmful interference to radio or television reception, which can be determined by turning the equipment off and on, the user is encouraged to try to correct the interference by one or more of the following measures: •Reorient or relocate the receiving antenna•Increase the separation between the equipment and receiver•Connect the equipment into an outlet on a circuit different from that to which the receiver is connected
AirCard 755 Installation Guide54 2130336•Consult the dealer or an experienced radio/TV technician for helpIf you have purchased this product under a United States Government contract, it shall be subject to restrictions as set forth in subparagraph (c)(1)(ii) of Defense Federal Acquisitions Regulations (DFARs) Section 252.227-7013 for Department of Defense contracts, and as set forth in Federal Acquisitions Regulations (FARs) Section 52.227-19 for civilian agency contracts or any successor regulations. If further government regulations apply, it is your responsibility to ensure compliance with such regulations.Information pertaining to OEM customersThe AirCard 755 wireless network card has also been granted modular approval for mobile applications. Integrators may use the AirCard 755 card in their end products that can be catego-rized as Mobile Devices without additional FCC certification approvals if the following conditions are met.  Otherwise, additional FCC approvals must be obtained.  Note: The FCC defines a mobile device as being designed for use “in other than fixed locations and to generally be used in such a way that a separation distance of at least 20 centimeters is normally maintained between radiating structures and the body of the user or nearby persons.”1. At least 20 cm separation distance between the antenna and the user's body must be maintained at all times.2. To comply with FCC regulations limiting both maximum RF output power and human exposure to RF radiation, the maximum antenna gain in Cellular and PCS bands must not exceed 4.5 dBi.3. The AirCard 755 card and its antenna must not be collo-cated or operating in conjunction with any other trans-mitter or antenna within a host device.4. A label must be affixed to the outside of the end product into which the AirCard 755 is incorporated, with a statement similar to the following:This device contains TX FCC ID: N7NAC7555. A user manual with the end product must clearly indicate the operating requirements and conditions that must be observed to ensure compliance with current FCC RF exposure guidelines.Note: If this PC Card is intended for use in a portable device, you are responsible for separate approval to satisfy the SAR requirements of part 2.1093.
AirCard 755 Regulatory InformationRev D Dec.03 55Note: The FCC defines a portable device as being “designed to be used with any part of its radiating structure in direct contact with the user's body or within 20 centimeters of the body of a user or bystanders under normal operating condi-tions.”The end product with an embedded AirCard 755 card must pass the unintentional emission testing and properly autho-rized per FCC Part 15 requirements.
AirCard 755 Installation Guide56 2130336
Rev D  Dec.03 57IndexNumerics1800 MHz band 101900 MHz band 10900 MHz band 10AAccess Point Name (APN) 13, 35account 10administrative privileges 18, 19, 20aircraft, using the AirCard in 1"always on" connection 9antenna 12APN (Access Point Name) 13, 35approvals 50Auto Connect 35Ccare and maintenance 37CD contents 12CE devicesinstalling the software 27–31system requirements 25class, multi-slot 50Communication Failed 22compact view 45configuring a profile 33–36copyright information 3coverage area 10Ddestination locationHandheld/Pocket PCs 28notebook PCs (Windows 95, 98, 2000, Me) 18notebook PCs (Windows NT) 20notebook PCs (Windows XP) 19DNS 13primary 35secondary 35driver (AirCard) 11, 18, 19, 20Eejecting a SIM card 14ejecting the AirCard 38–??electrical specifications 50environmental specifications 51FFCC RF exposure information 1frequenciesreceive 50transmit 50frequency bands 10selection 47GGPRS 9indicator 43GSM networks supported 10GSM wireless networks supported 10HHandheld PCinserting the AirCard 31installing the software 27–31removing the AirCard 38system requirements 25Watcher window 42hazards 1headset 12humidity 51II/O space (input/output space) 17IMEI 13inserting a SIM card 14inserting the AirCardHandheld PC 31Pocket PC 31Tablet PC 31Windows 95, 98, 2000, Me 18Windows NT 21Windows XP 19installationHandheld/Pocket PCs 25–32notebook PCs 17–23 See also  software installationInternet Explorersetting to use the AirCard 23IP address 35IP header compression 35IRQ (interrupt request) 17
AirCard 755 Installation Guide58 2130336LLED operation 49liability, limitation of 2Mmaintenance 37memory required 17multi-slot class 50Nnetwork 9, 10networks supported 9notebook PCinstalling the software 18–23removing the AirCard 38system requirements 17Watcher window 42notebook PC  See also Windows.Oonline helpHandheld PCs 42notebook PCs 42Pocket PCs 42operating systems supported 9Ppackage contents 12password (service provider) 35patents 2PC Card slots required 17PCS frequency band 10platforms supported 9Pocket PCinserting the AirCard 31installing the software 27–31removing the AirCard 38system requirements 25Watcher screen 42Power 46power optionspower up/down 46primary DNS 35profileconfiguring 33–36Profile Name 35program folderHandheld/Pocket PCs 28notebook PCs (Windows 95, 98, 2000, Me) 18notebook PCs (Windows NT) 20notebook PCs (Windows XP) 19Rradio frequency specifications 50receive frequencies 50regulatory information 53–??removing a SIM card 14removing the AirCard 38–??Handheld PCs 38Pocket PC 38Tablet PCs 38Windows 95, 98, 2000, Me, XP 38Windows NT 38RF exposure information 1RF specifications 50roaming 11indicator 44Ssafety and hazards 1secondary DNS 35service pack 20signal strength 43SIM cardinserting 14removing 14SMS messagesindicator 44software See Watcher.software installationHandheld/Pocket/Tablet PCs 27–31notebook PCsWindows 95, 98, 2000, Me 18–19Windows NT 20–23Windows XP 19–20specifications 49–51electrical 50environmental 51radio frequency 50starting Watcher 41storagetemperature 51when not using AirCard 37system requirementsHandheld/Pocket/Tablet PCs 25notebook PCs 17TTablet PCinserting the AirCard 31installing the software 27–31removing the AirCard 38system requirements 25Watcher window 42TCP/IP 18technical specifications 49–51
IndexRev D  Dec.03 59temperature 51trademarks 3transmit frequencies 50tri-band 10Type II PC card 9UUser Name 35Vvibration 51Wwarningsafety and hazards 1Watcher 41–48screen areasnotebook PCs 42Pocket PCs 42starting 41window position 45Watcher screen areasHandheld /Tablet PCs 42Windowsoperating systems supported 9Windows 2000as a supported operating systemservice pack 17inserting the AirCard 18installation 18–19removing the AirCard 38Windows 95as a supported operating system 17inserting the AirCard 18installation 18–19removing the AirCard 38Windows 98as a supported operating system 17inserting the AirCard 18installation 18–19removing the AirCard 38Windows Meas a supported operating system 17inserting the AirCard 18installation 18–19removing the AirCard 38Windows NTas a supported operating system 17changing the interrupt 22inserting the AirCard 21installation 20–23removing the AirCard 38Windows XPas a supported operating system 17inserting the AirCard 19installation 19–20removing the AirCard 38Winsock 18wireless networks supported 9
AirCard 755 Installation Guide60 2130336

Navigation menu