Sierra Wireless AC875 Multi-Mode & Multi-Band Wireless Network Card User Manual AC875 Installation Guide
Sierra Wireless Inc. Multi-Mode & Multi-Band Wireless Network Card AC875 Installation Guide
Contents
- 1. User Manual
- 2. Quick User Guide
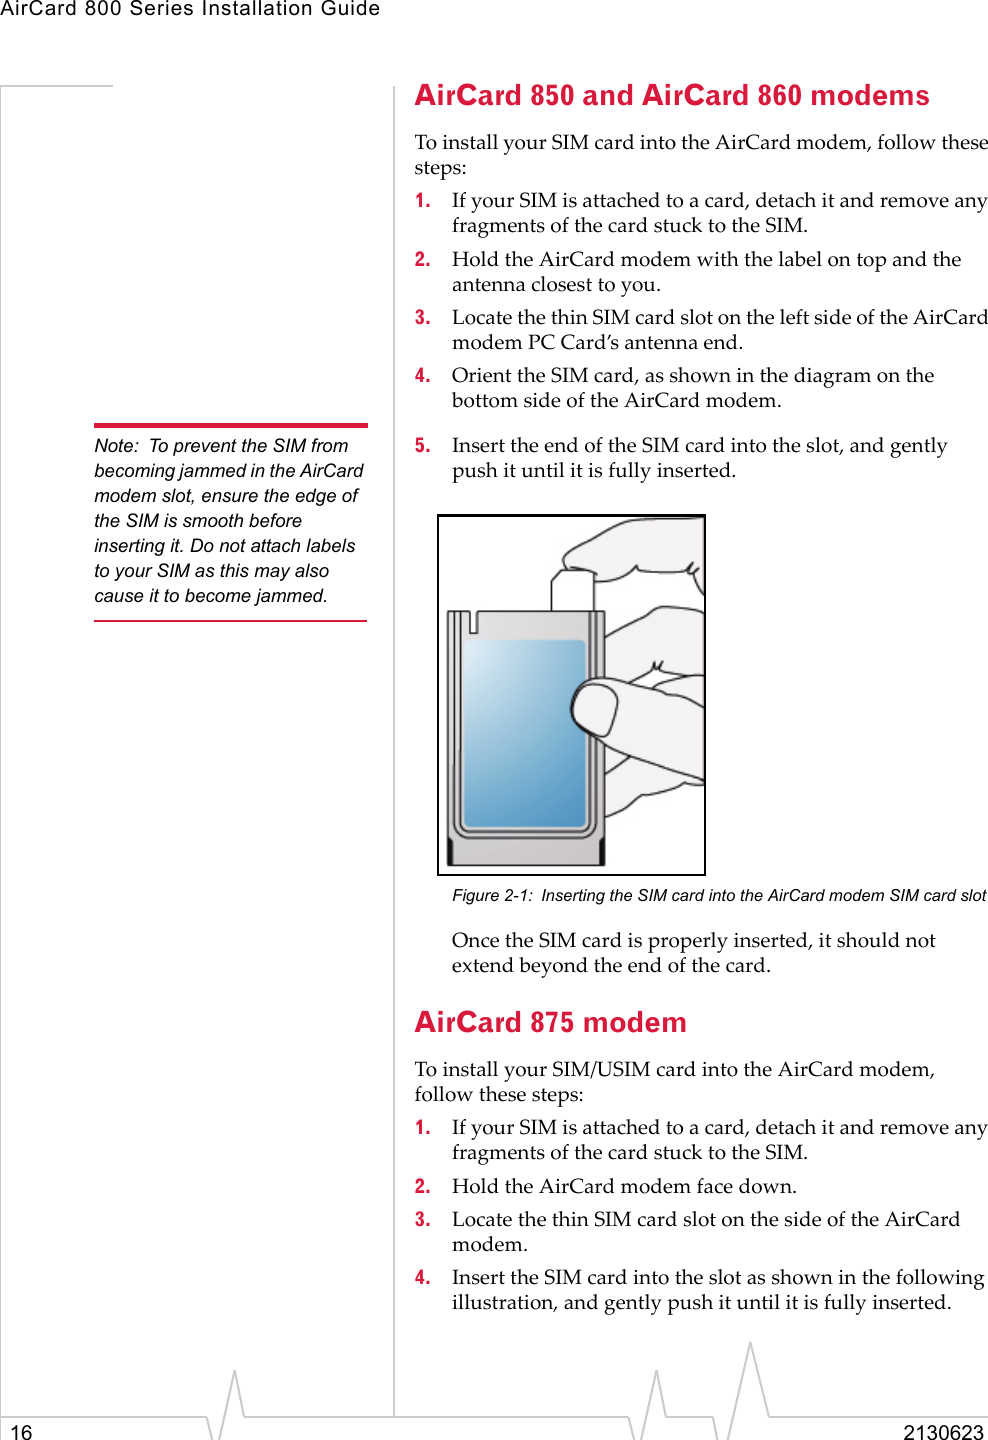
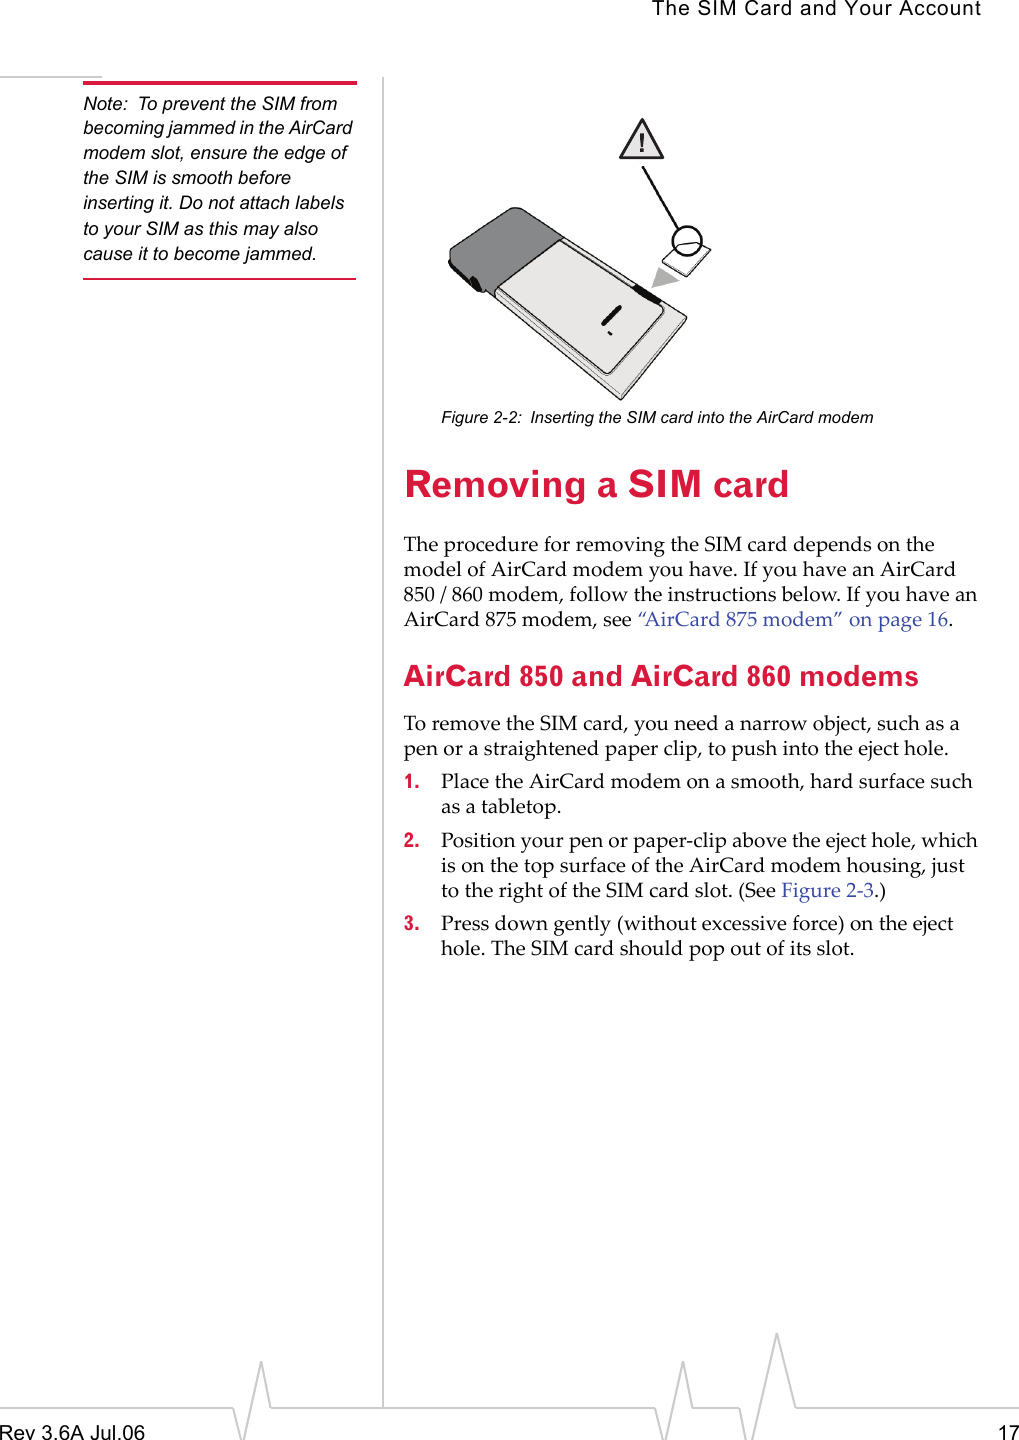
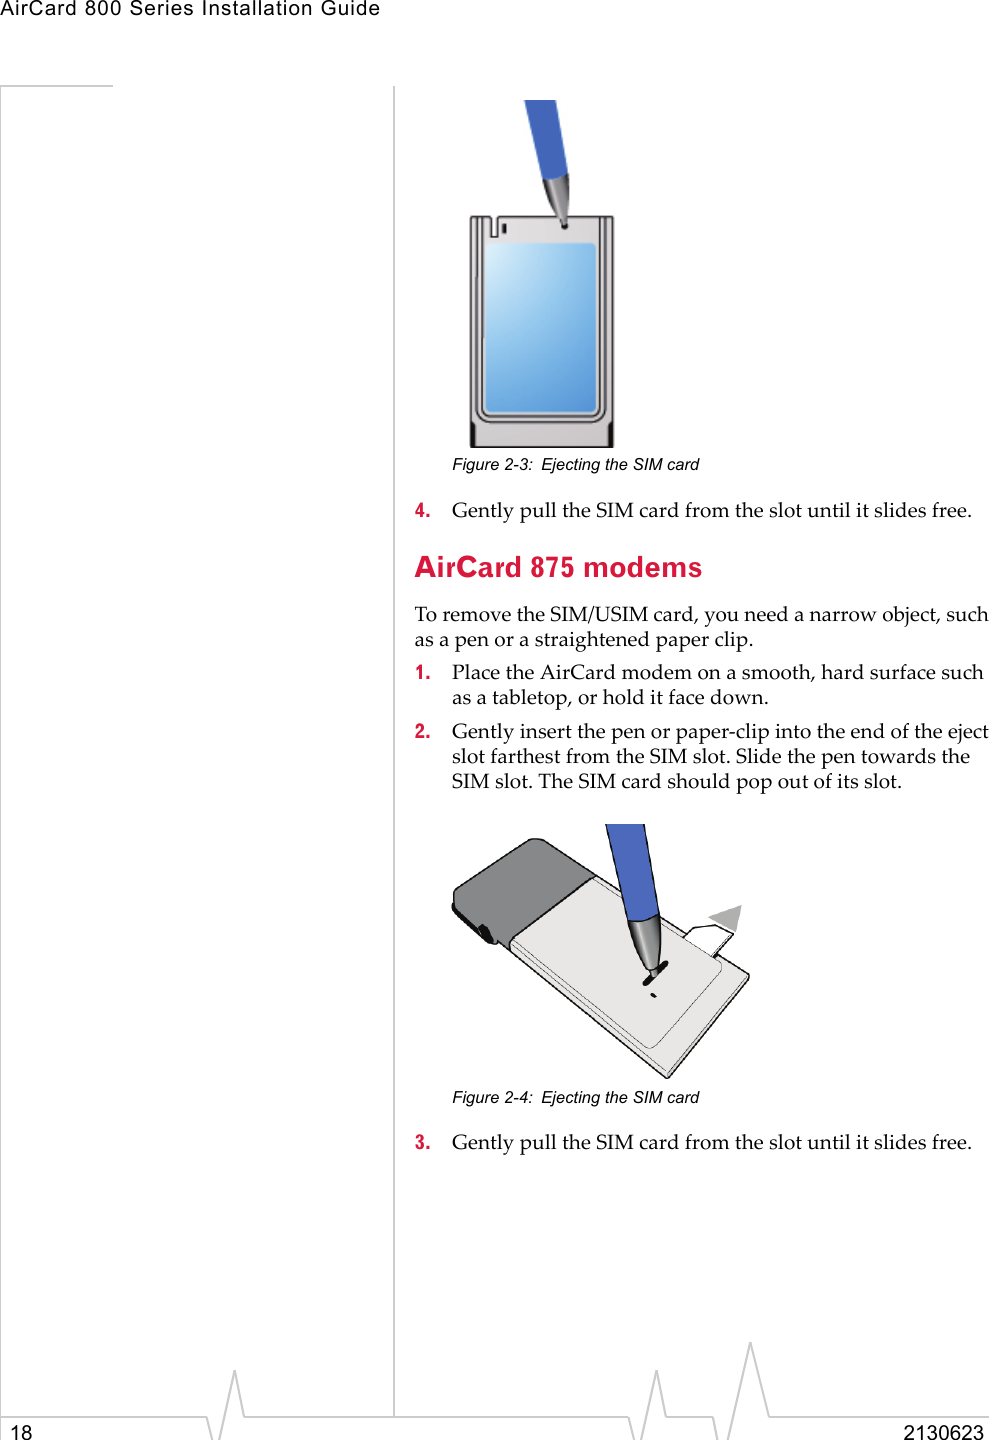
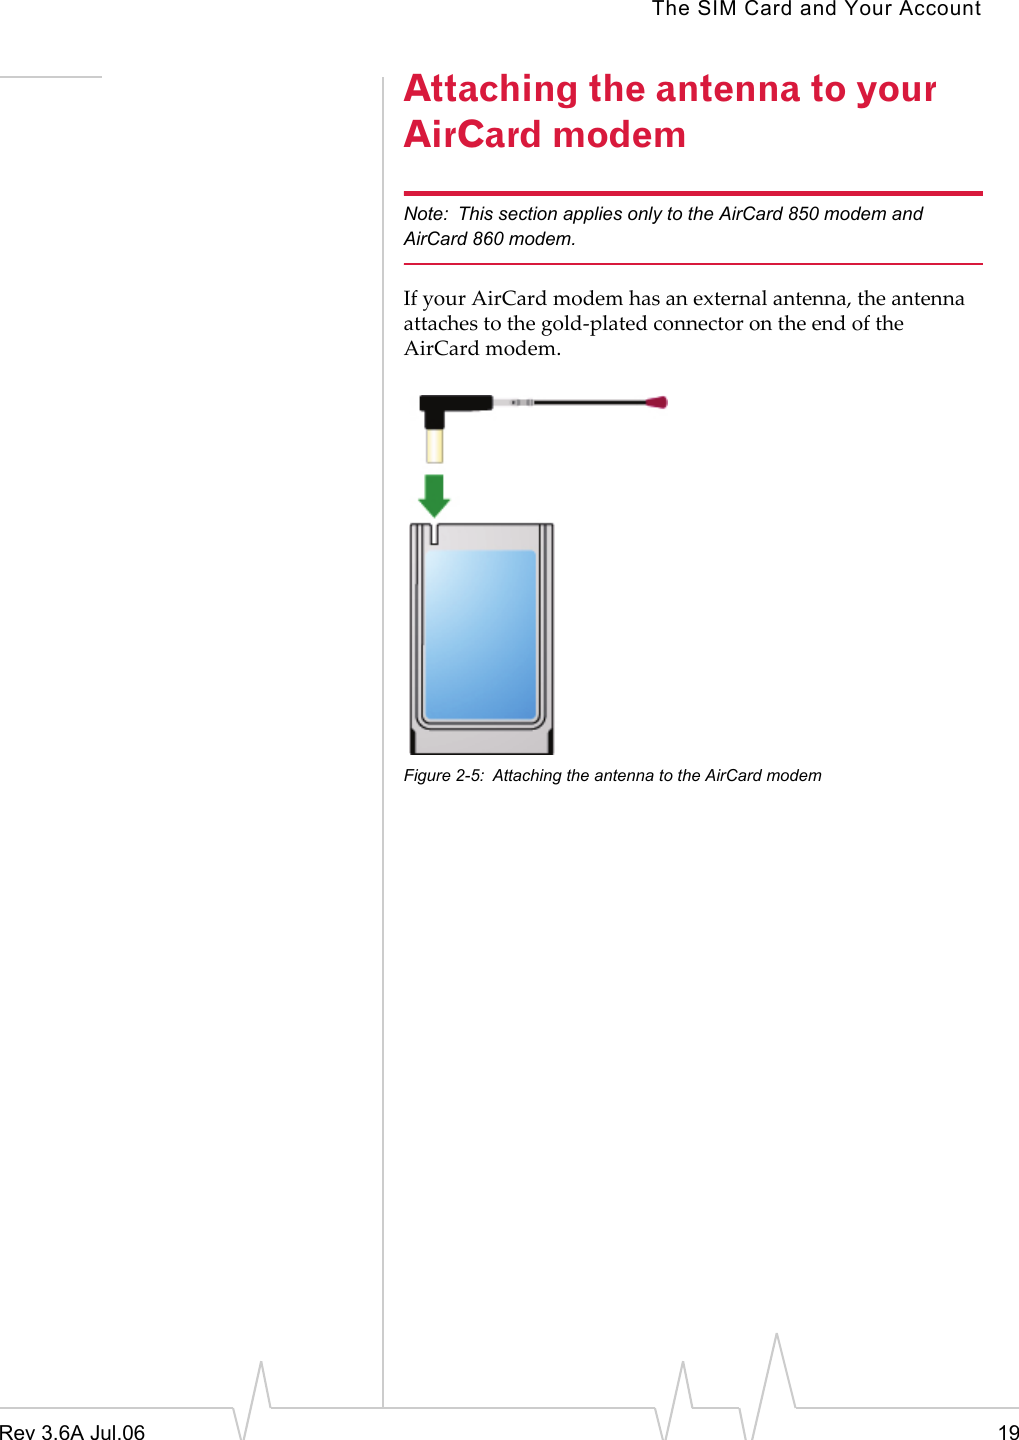
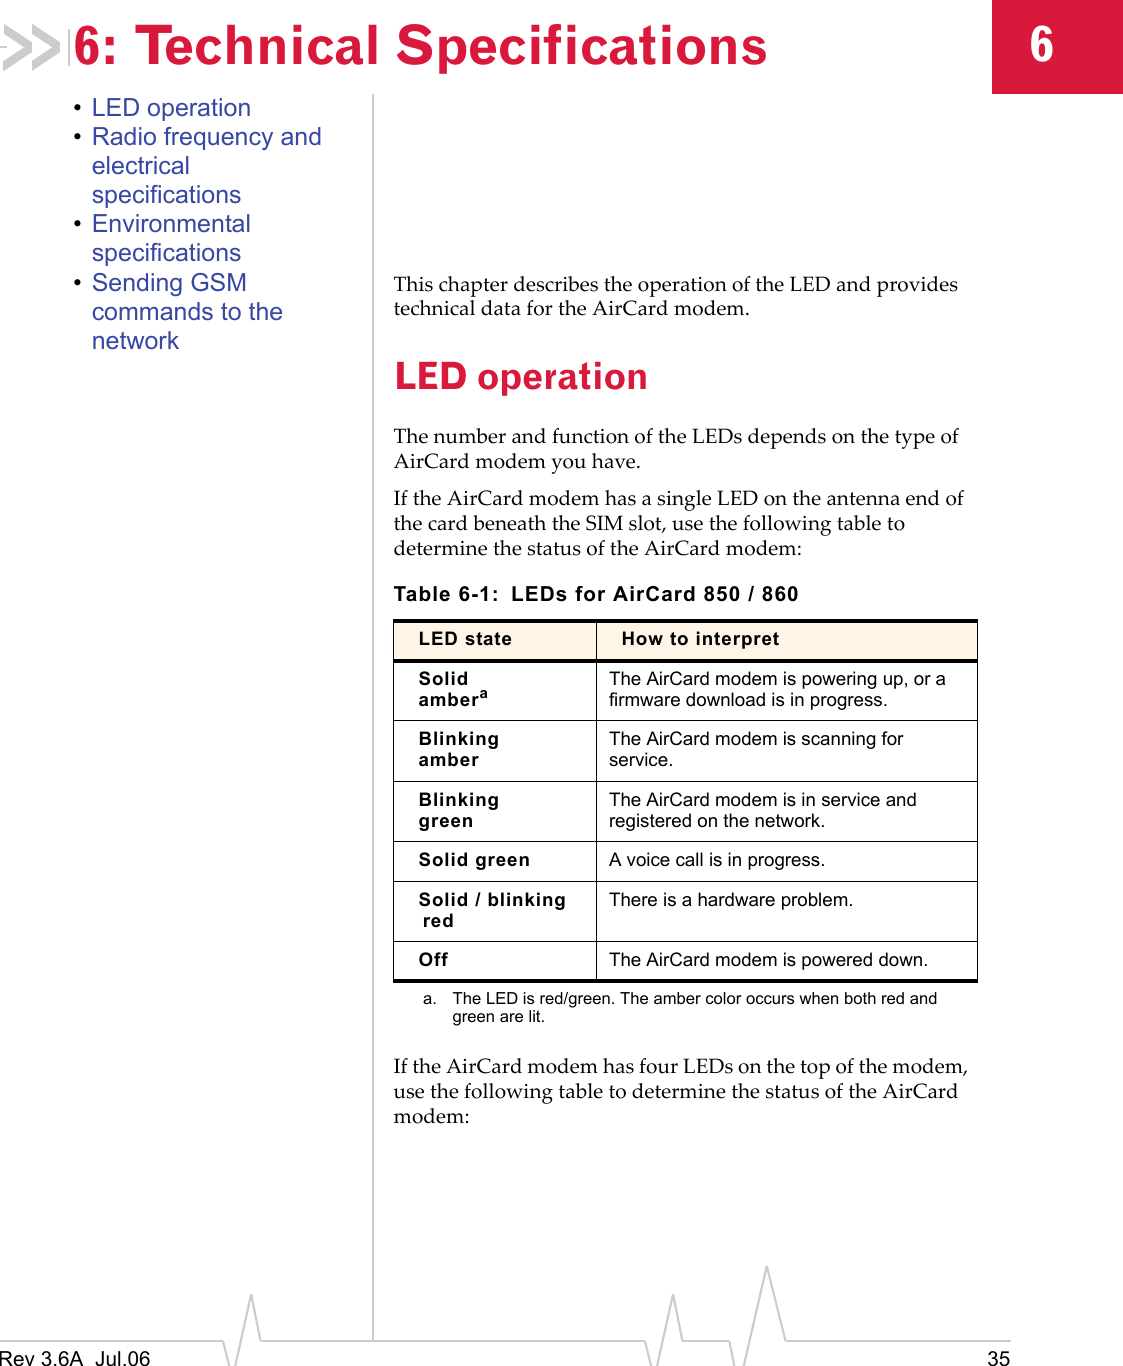
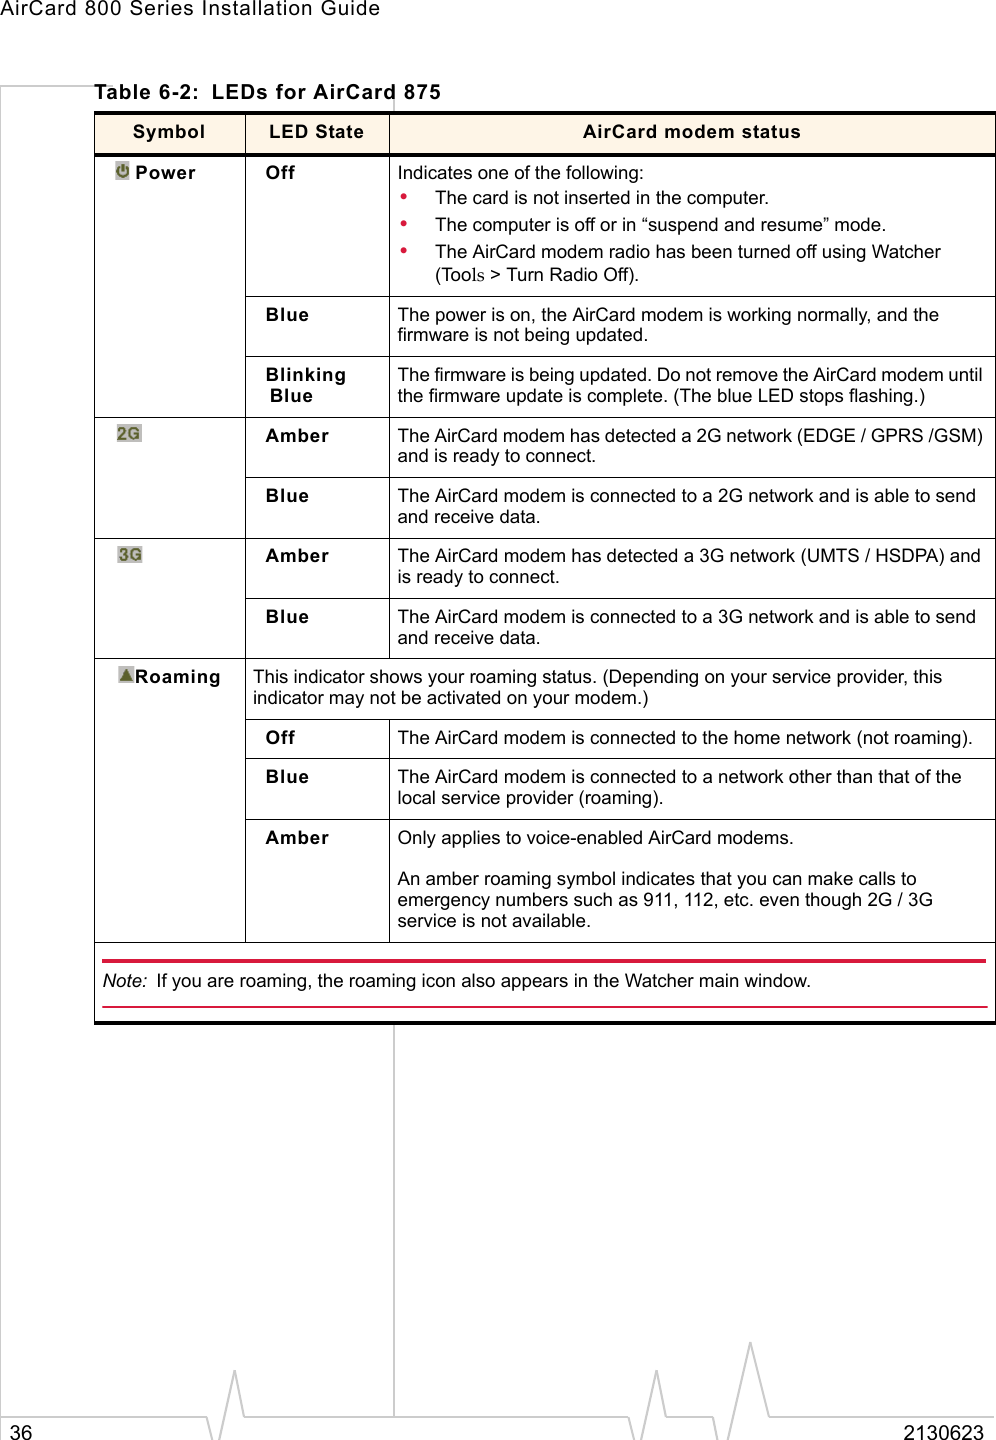
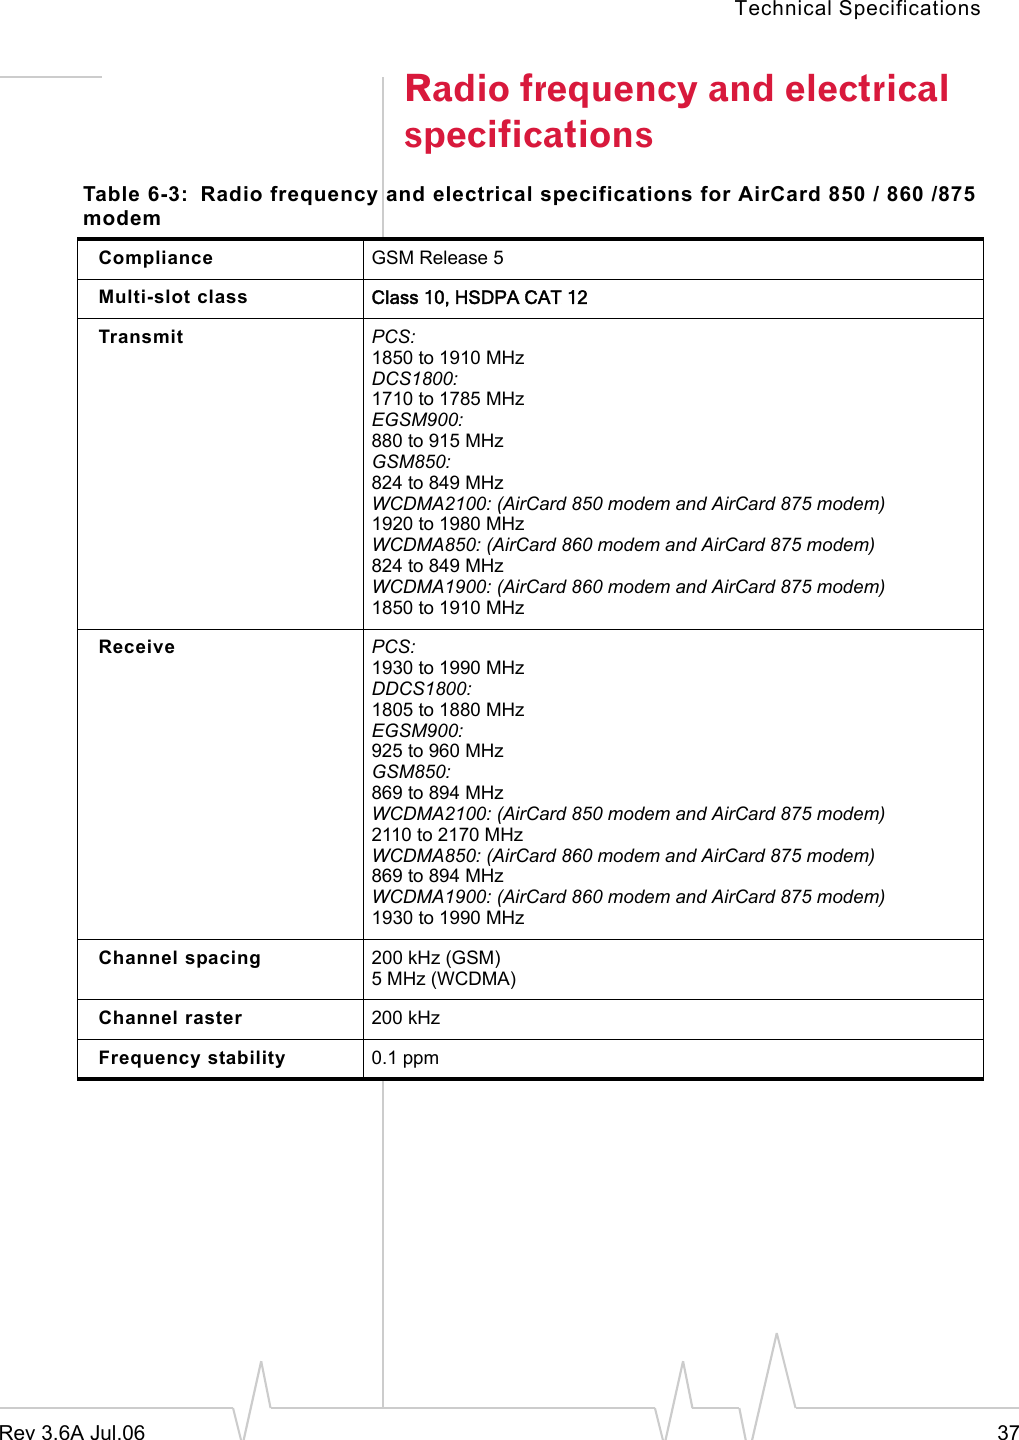
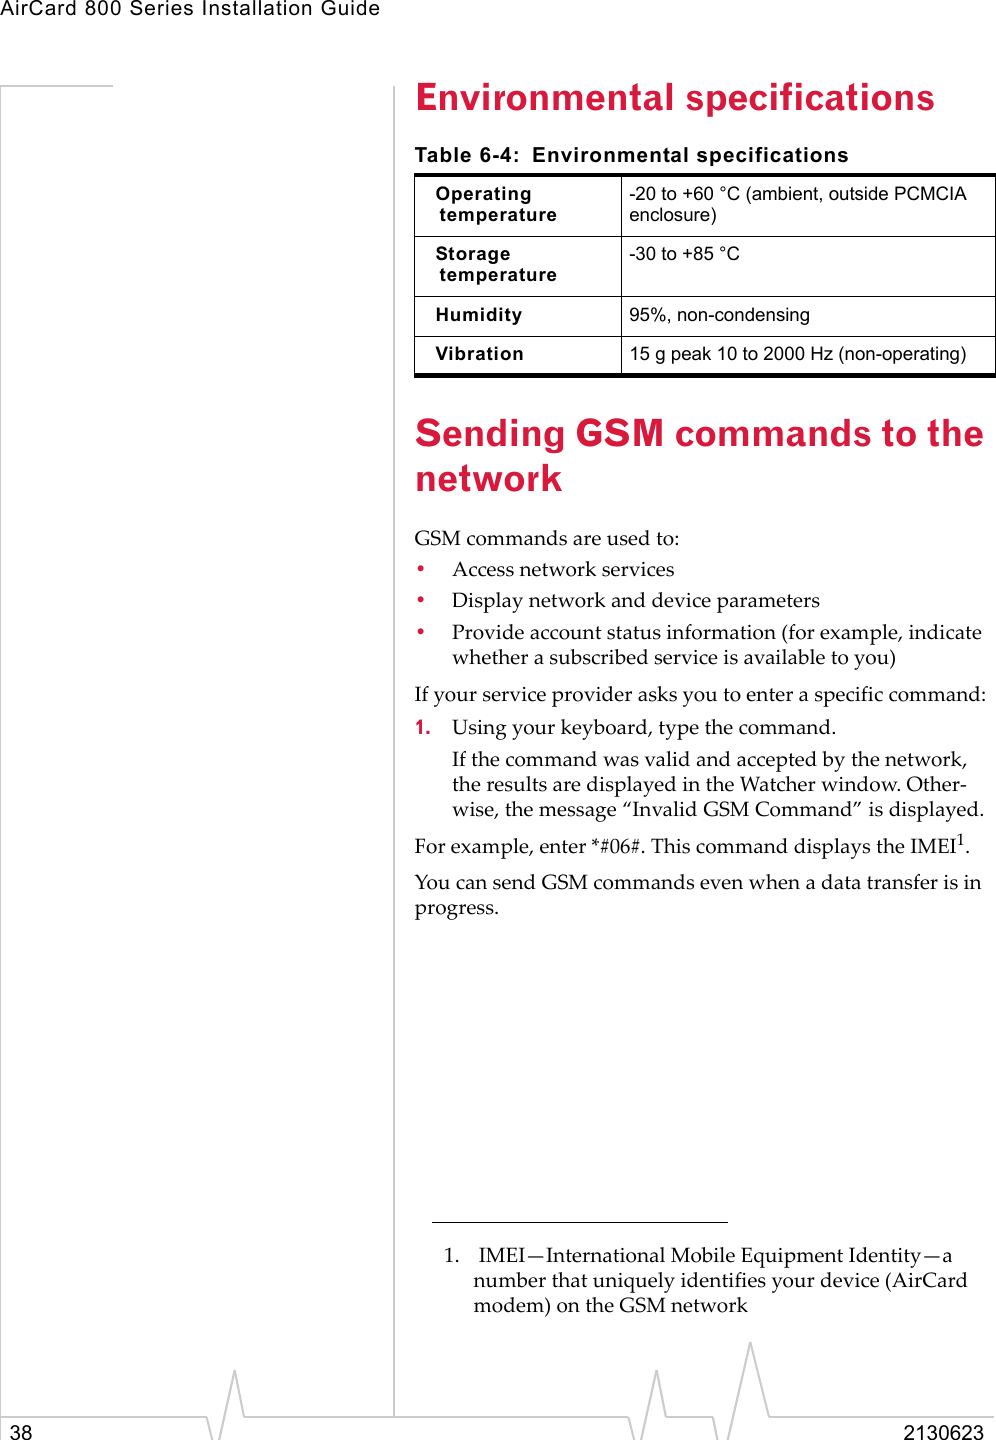
User Manual