Signal Golf 010417-0D Smart Pin User Manual Updated manual
Signal Golf International Pte. Ltd. Smart Pin Updated manual
Contents
- 1. Manual
- 2. Updated manual
Updated manual
YardDog Distance Measurement
System- Users Manual
USERS MANUAL
2
TABLE OF
CONTENTS
WELCOME 3
Important Operator Instructions and
Caution 3
Unpacking 3
Getting acquainted with your system 4
Smart Pins 4
YardDog Units 7
Smartpin Gang Charger 8
Batteries 9
YardDog Unit Gang Charger 9
Preparing for use 10
Charging the Smartpin batteries 10
Assemble Smartpins 11
Charging the YardDog Unit batteries 12
Testing and Installation 13
System Maintenance 13
YardDog Maintenance 13
SmartPin Maintenance
Changing Pin Address
Changing Batteries At the “Green”
14
16
17
Battery Charger Maintenance 18
Battery Maintenance 19
Storage 20
Trouble Shooting Checklist 20
Warranty 23
24
Claims Procedure
Welcome

3
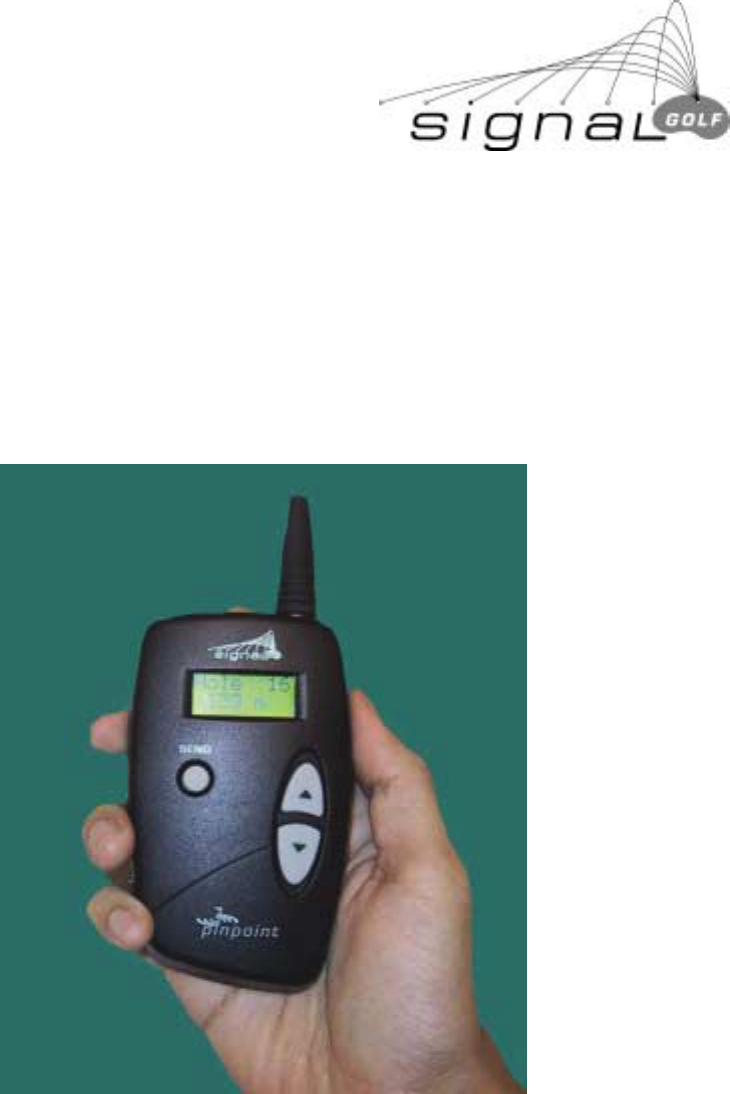
Note: The Handheld unit is referred to as a YardDog or a Pinpoint Unit depending on country of use.
Congratulations. You’re minutes away from becoming one of a growing number of
YardDog Systems enabled golf courses around the world. YardDog Systems by Signal
Golf produces immediate yardage calculations accurate up to the pin position on any
hole. These simple instructions will help you install the YardDog system and provide
operating instructions.
IMPORTANT OPERATOR INSTRUCTIONS
The Handheld YardDog Unit should be used in the following manner:
1. Operator should select correct hole number using up or down cursor.
2. Operator should hold handheld at arms length, with antennae pointing straight up. Ensure no
major obstructions or people are in direct line of sight with the pin.
3. Holding the Handheld steady, press send button and release immediately. Continue to hold
handheld steady until reading appears on the LCD display.
4. Additional information on changing LCD display readings can be found later in this manual.
Caution!
The YardDog and Smartpin distance measuring devices are required to comply with FCC RF
exposure requirements for mobile transmitting devices. A separation of 20 cm (8 inches) or more
must be maintained between the antennas and all persons during device operations to satisfy RF
exposure compliance.
FCC Notice
This device complies with part 15 of the FCC Rules. Operation is subject to the following two
conditions: (1) This device may not cause harmful interference, and (2) this device must accept
any interference received, including interference that may cause undesired operation.
Unpacking:
Conduct your component inventory.
1. Carefully remove all items from their boxes and discard packing
material.
2. Match items to your packing slip and order form to ensure you have
received the appropriate number of handheld YardDog units, Smartpins,
flags, batteries and charging units.
4
Getting Acquainted with your System
SmartPins
SmartPins are pre-coded at the factory and labeled 1-18. Spare pins are not labeled. Each
Smartpin 1-18 is identified with sticker indicating the hole number each Smartpin should be
placed in. The two spares are not marked, but can be adjusted to read which ever hole is desired.
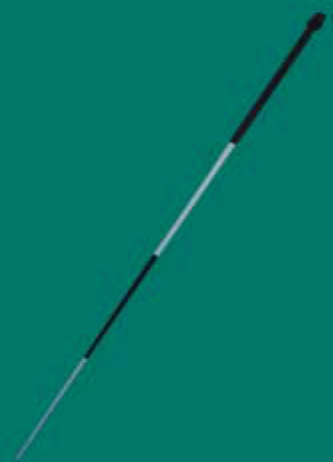
SmartPins consist of three distinct parts.
1. Base
The “base” is the bottom portion of the SmartPin. The base houses the battery pack.
5
2. Mast
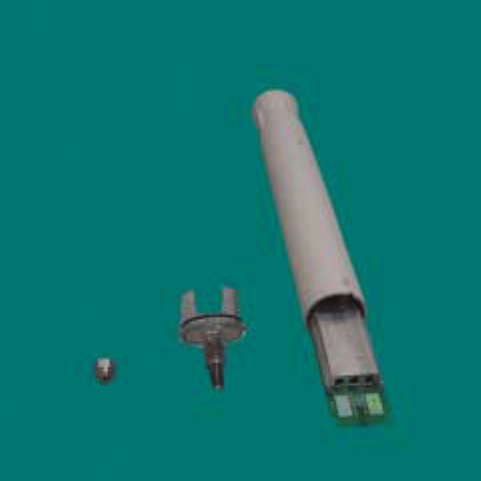
The mast is the top portion of the SmartPin. The mast houses the electronics of the flagstick. Do
not access the electronics inside the mast without good reason. The only reason to access the
electronics is to change the pin address, and this is done by removing the top cap. See section on
Changing Pin Address for instructions.
Smartpin mask with top cap removed and the electronics partially out
6
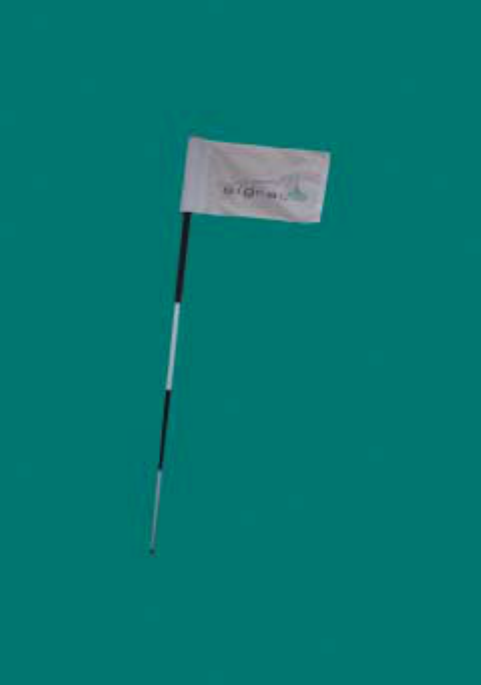
3. Flag assembly
The flag assembly is similar to the industry norm with a slightly larger diameter. The flag
assembly is fitted over the mast and secured with an acorn nut.
7
YardDog Units
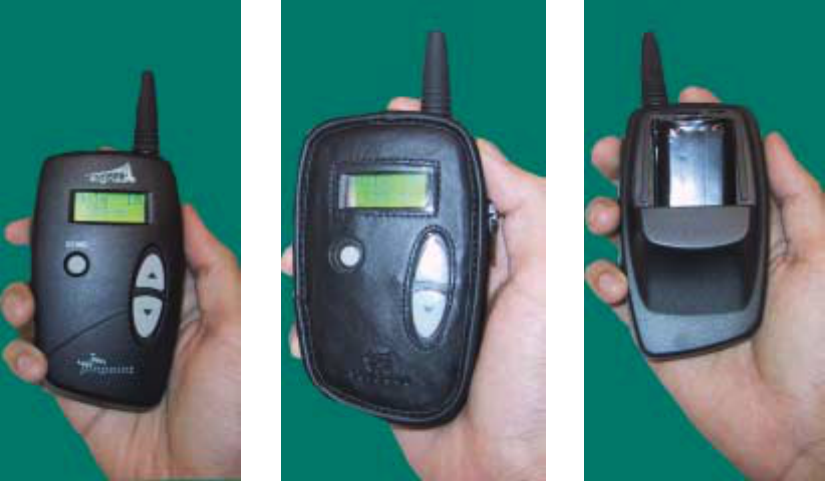
YardDog unit YardDog unit with leather case YardDog unit battery pack
YardDog units are the hand held “pager” like units that communicate with the SmartPins
to provide the distance in yards or meters to the golfer. Each YardDog comes complete
with a leather carrying case. YardDogs are powered by rechargeable batteries. They are
recharged by placing the YardDog units in the gang charger.
There are only 3 buttons on the YardDog. The arrow shaped buttons are used to “cursor”
up and down to the selected hole. Pressing the SEND button activates the yardage
calculation and the yardage then appears on the screen.
YardDog units are factory programmed to operate at golf courses with different numbers
of holes, from 9 to 54 holes and more, and to display distances in yards or metres.
To change display between Courses:
1. Press and hold the send button until the menu appears, then release the send button.
2. Use the up and down cursors to change to Course A, B, C and so on.
3. Press and release the send button twice to return to normal operation.
To change display units from metres to yards or vice versa:
1. Press and hold the send button until the menu appears, then release the send button.
2. Press send again. Use the cursor to select between yards and metres.
3. Press send again to return to normal operation.
8
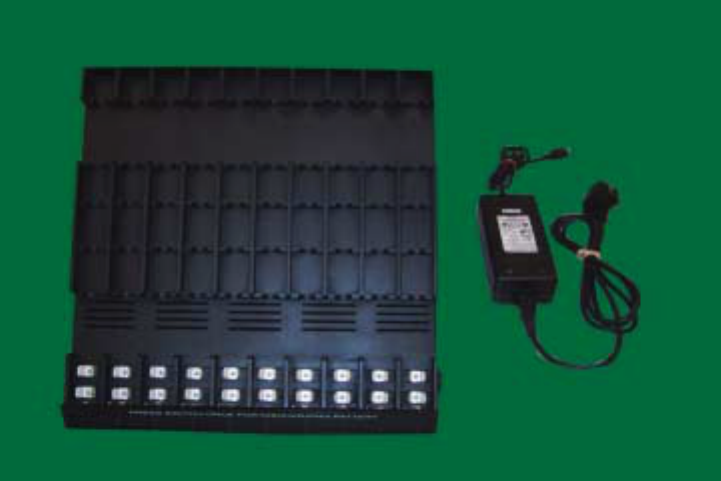
SmartPin Gang Charger
The battery gang charger has been specifically designed to charge 10 SmartPin battery packs. It is
to be placed on a flat surface and protected from excessive dust, dirt and other contaminants. A
minimum clearance of 5 cm (2 inches) must be maintained on both sides of the charging unit for
proper cooling and ventilation.
The battery gang charger includes 1 (one) desktop power supply that can be plugged into a
standard wall outlet. Power supply input voltage is from 100Vac to 240Vac and employs auto-
switching technology. Output voltage and current rating is 13Vdc ±5% regulation and 10Amps
respectively. Using another power supply beyond its rating would result to malfunction or
damage the charger.
A discharge button is provided on the gang charger to discharge the battery packs to minimize
“memory” effects. Once per week, fully discharge each battery by pushing the discharge
button. Discharging time is about six hours. Use care not to bend the packs unnecessarily as the
battery tube can be damaged. It is recommended to use two hands to insert and remove the
battery. This charger is configured to insert or remove any of the 10 packs being charged
independently (without having to remove other packs or covers to gain access, for example).
Smartpin gang charger and power supply unit
9
Batteries
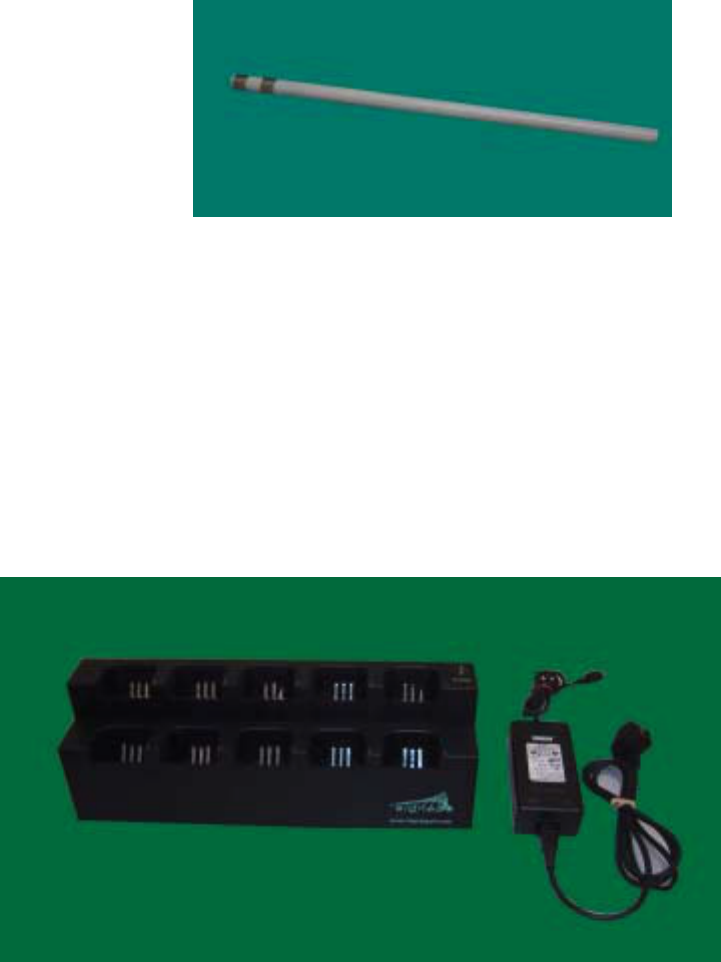
The battery packs have been specifically designed to fit both the SmartPins and the charger. They
consist of a pack of six-nickel-metal-hydride batteries that may be repeatedly charged for the life
of your system. The batteries have been shrink-wrapped into a tube that also houses the necessary
contacts. This battery pack has a capacity of 4500mAHr and must be carefully handled with care.
Smartpin battery pack
YardDog Unit Gang Charger
YardDog Unit battery packs are mounted inside the Handheld units. This gang charger is
designed to charge 10 YardDog units and to should be placed on a flat surface and protected from
excessive dust, dirt and contaminants. The gang charger also includes 1 (one) desktop power
supply that can be plugged into a standard wall outlet. Power supply input voltage is from
100Vac to 240Vac and also employs auto-switching technology. Output voltage rating is 13Vdc
±5% regulation and has a 6.15Amps of current rating. Using then power supply beyond its rating
would result in malfunction or damage to the charger.
YardDog unit gang charger and power supply unit
10
Handheld Batteries
The Handheld battery pack is designed to fit inside the back of the YardDog unit. It consists of a
pack of three-nickel-metal-hydride batteries that may be repeatedly charged for the life of your
system. The batteries have been shrink-wrapped into a tube that also houses the necessary
contacts. This battery pack has a capacity of 650mAHr and should be only charged with a
Signal Golf supplied charger. This charger is configured to insert or remove any of the 10
handheld YardDog units being charged independently (without having to remove other units or
covers to gain access, for example).
Preparing the system for use
Charging the Smartpin Batteries
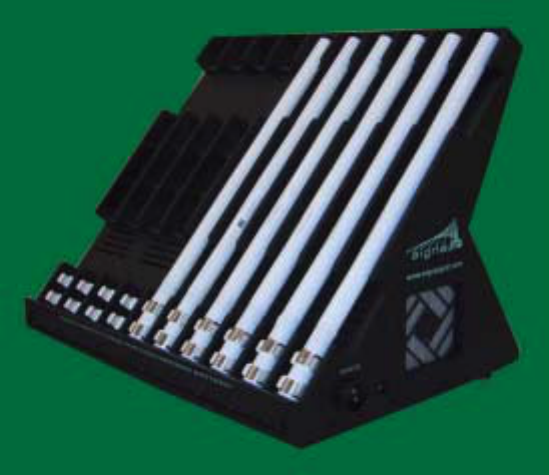
1. The Smartpin battery charger is ready for use when it is hooked up to the power supply unit
plugged on to a standard wall outlet (100vac to 240 vac).
2. Battery and charger contacts should be clean before charging the batteries in the gang
charger. When no battery pack is inserted, the LED indication is OFF.
3. When inserting the battery pack into the charger, its respective RED color LED will flash and
then glows steadily. The charging cycle is started. If RED color LED does not stop flashing,
it means that either there is no contact between the battery and the charger or the respective
battery pack is not within the allowable temperature limits.
4. For new a battery pack, press the discharge button to discharge the battery before new cycle
charging begins. Discharge buttons are provided on the charger and discharging time is about
2 - 4 hours depending on the state of battery. Orange color LED indicates that the battery is in
the process of discharging.
5. Green indication shows that the pack is fully charged. It takes about five hours to charge up
from a fully discharge state. Normal charging should be less than four hours.
6. The Smartpin batteries should be discharged, on the charger, once a week. This will
minimize the
“memory” effects and prolong the lifespan and efficiency of the battery.
7. Smartpin batteries are to be charged on a daily basis.
11
Charging Smartpin battery packs
Assemble Smartpins
1. Place charged battery packs into the top portion of the SmartPin “base” section
with the metal contact rings up.
2. Screw the “mast” section of the SmartPin onto the base. DO NOT
OVERTIGHTEN, the seal is watertight when hand tightened using just
moderate pressure.
3. Place the appropriate flag over the mast section. Screw the acorn nut to the
threading located at the top of the mast. Again DO NOT OVERTIGHTEN,
hand tighten using moderate pressure.
4. Repeat this procedure for all of the SmartPins.
5. Each time you insert a new battery pack, check that the Smartpin has power.
When screwing in the mask, look into the top cap, a red LED should light up
momentary when contact is made. Alternatively, you can also select the correct
pin number on a YardDog unit and while looking into the top cap of the
Smartpin, press send. The small red LED light should light up.
12
Charging YardDog Unit Batteries
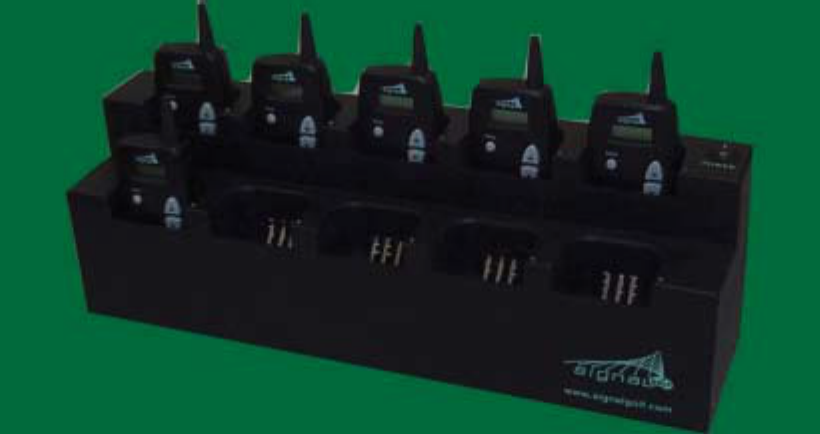
1. The YardDog unit batteries charger is ready for use when it is hooked up to the power supply
unit plugged into to a standard wall outlet (100vac to 240 vac).
2. Unlike the Smartpin batteries, the YardDog unit batteries are charged without having to
remove them from the handheld. Battery and charger contacts should be clean before
docking the units into the gang charger. When no YardDog unit is inserted, LED indication is
OFF.
3. When docking the units into the charger, its respective RED color LED will flash and then
glows steadily. Charging cycle is started. If RED color LED does not stop flashing, it means
that either there is no contact between the battery and the charger or the respective battery
pack is not within the allowable temperature limits.
4. Green indication shows that the YardDog unit battery pack is fully charged. It takes
approximately 2 hours or less to fully charge a handheld battery.
5. YardDog batteries should be charged when “LOW BATT” appears on the LCD, or every 2-3
days. Note: Fully charged handhelds will slowly discharge over time. It is advisable to fully
charge handhelds before issuing them whenever possible.
Charging YardDog units
13
Testing and Installation
Simply place the SmartPins in their corresponding holes, test and you are ready to go! There are
no on/off buttons on either the SmartPins or the YardDog. The SmartPin automatically activates
when a battery pack is inserted. The YardDog automatically activates when the “Send” button is
pressed and shut off once the yardage information has been transmitted and displayed.
1. Insert the correct Smartpin into the correct golf hole.
2. Be at least 75 metres away from the pin and, with the correct hole showing
on the display of the Handheld, push the send button.
3. You should get a reading displayed on the LCD display on the Handheld.
4. If you do not get a reading, ensure the handheld is selected to the proper
hole, that it is held upright and steady with the antennae straight up, all
batteries (Smartpin and Handheld) are charged and making proper contact
and try again. If you still do not get a reading, refer to the troubleshooting
section in this manual.
System Maintenance
YardDog Unit Maintenance:
The YardDog is an electronic device, not dissimilar to a portable phone, radio, or other
piece of electronic equipment. As such, it has been designed for ruggedness under
normal use and wear conditions. It is recommended that the YardDog unit be used and
stored in the leather pouch provided in order to receive the best possible protection and
longevity. Like any device it is potentially breakable and must be properly cared for. The
following care is recommended:
1. Cleaning the Exterior. The exterior may be cleaned periodically with a
soft damp cloth, if required. (DO NOT OVERWET). The use of
detergents is discouraged and should not be necessary. Special care
should be given to the LCD screen, which may be scratched or etched by
the use of rough cloths and/or detergents.
14
2. Water Resistance. The YardDog unit is designed to be water-resistant
if used with the leather pouch provided. This means that it may be used
in rainy or snowy conditions as long as it is reasonably protected from
the elements. Should the YardDog become wet, dry it off with a soft
cloth. Do not allow the YardDog unit to ever be completely immersed in
water.
Smartpin Maintenance:
The SmartPin is a durable unit that contains sensitive electronic components. It is
designed to stand up to conditions it will face on a golf course and most treatment it will
receive from golfers. However, like most electronic equipment, excessive jarring,
dropping on concrete, or exposure to extreme elements can damage it. The following
care is recommended:
1. Cleaning. The SmartPin may be cleaned occasionally by using a gentle
detergent and a soft cloth. Care should be taken to limit the amount of
moisture used in the cleaning process.
2. Water resistance. When assembled as a complete flagstick unit, the
SmartPin is designed to be virtually waterproof. It will withstand
continual exposure to the sun, rain, high-pressure sprinkler systems, as
well as a variety of temperature and humidity ranges. However, tt should
not ever be intentionally completely immersed in water.
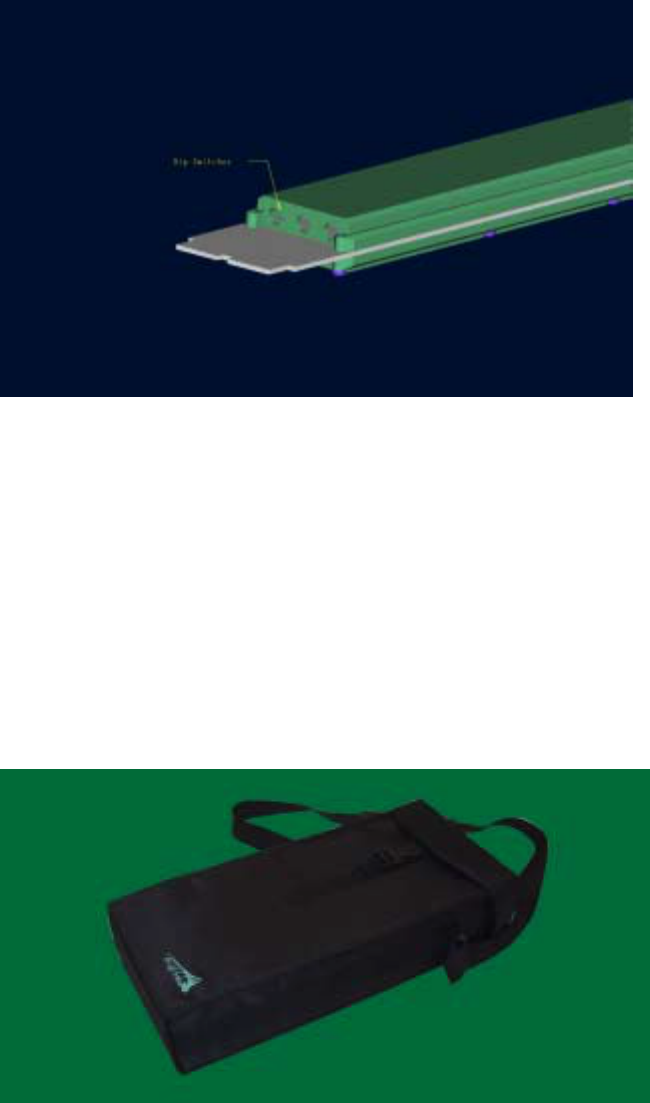
3. DIP switches. Each SmartPin is equipped with three white wheels
inside the mast called DIP switches. These DIP switches instruct
the SmartPin as to which hole number and course number it
represents. Care should be taken not to inadvertently jar or
change these switches or allow them to become misstated. This
will cause the SmartPin to respond incorrectly.
15
View of the Smartpin PCB showing the DIP switches
4. Mast/Base coupling. The coupling is designed using materials that
create a rugged waterproof seal when properly assembled. Care should
be taken to properly start the threading process when the mast is affixed
to the shaft. In addition the best waterproofing is achieved when the
coupling is moderately hand tightened. NEVER TIGHTEN WITH
TOOLS, OR OVERTIGHTEN BY HAND. The “softness of these
materials contributes to its weather resistance and can be damaged when
over-tightened or when the threads are stripped due to misalignment.
5. When changing out the Smartpin battery packs, use the battery pack
carry case to protect the batteries. Batteries may be color coded with
colored tape to help identify and keep separate a set.
Battery carrier case
16
Changing the Pin’s Address
All Smartpin addresses are pre-set at the factory prior to shipping. If for
some reason the address has to be changed or if using the spare units,
please follow the instruction below:
1. First remove the top nut on the mast, pull off flag sleeve and unscrew
the mast from the base.
2. Using a screw driver, remove the four screws at the side of the mast
housing and carefully remove clear plastic cap by pulling directly up.
3. Carefully pull the electronic board out of the mast housing and
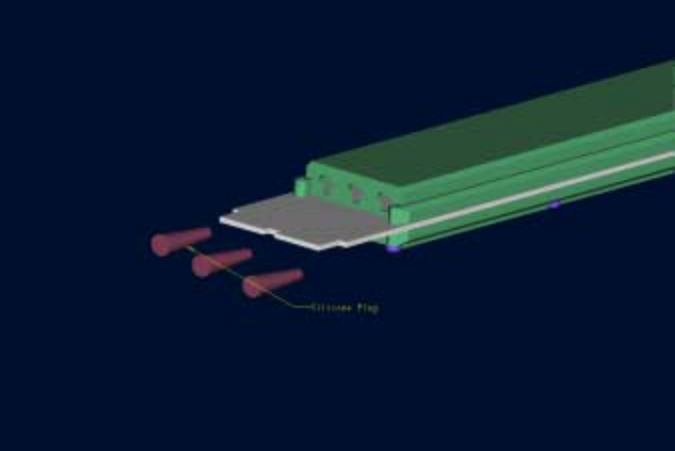
remove the three silicon plugs covering the dip switches.
4. Hold board so that the “0”s are facing upward. Set the dip switches
with a small screwdriver as follows:
For hole number one: 0 0 1
For hole number two: 0 0 2
And so on….
For hole number ten: 010
For hole number 18: 018
For more than 18 holes:
For Course B hole number one: 1 0 1
For Course B hole number two: 1 0 2
And so on…
For Course C hole number one: 2 0 1
For Course C hole number two: 2 0 2
And so on….
5. To reassemble, replace back the three silicon plugs by pushing firmly
on to the dip switches and carefully slide electronic board back on to
the housing. Note : The two bottom holes should fit nicely with the
housing screw holes if board is correctly seated.
6. Apply some clear silicon gel on to the bottom two holes and tighten
screws back.
7. Replace top plastic cap, apply clear silicon gel and put screws
back.
8. Reassemble the Smartpin on to the base together with flag assembly.
17
Silicone plugs are use to cover and sealed openings of DIP switches
Changing Smartpin Batteries at the “Green”
Care must be taken when changing Smartpin batteries at the green.
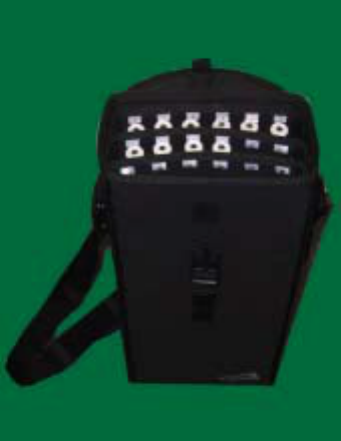
1. Use battery carrier case provided to transport newly charged batteries. Placed them in the
slots No. 1 – 18 in the case.
2. Please ensure that batteries are not dropped or bent in anyway to prevent internal damage.
3. At the green, remove the top nut and carefully unscrewed the mast from the base. Remove
spent battery and replace with newly charged battery.
4. Do not place batteries on the green grass as the chemical elements of the grass can be quite
corrosive. Do not bend the pack tubes as they can be damaged.
5. Put spent battery immediately back in the respective slot of the case. We recommend
that the case be brought along to the green when changing batteries out in the course.
6. After replacing with a fresh battery, assemble the Smartpin and check that there is power
(by checking for a flashing red LED in the top cap) and in working mode.
18
Carrier case with slots for batteries
Battery charger maintenance (Smartpin & YardDog Unit)
The battery charger is a durable unit that contains sensitive electronic components. It is
designed to be rugged but like most electronic equipment, can be damaged by jarring,
dropping, or exposure to extreme elements. The following care is recommended:
1. Location. The battery charger is intended to be located indoors. The
Handheld gang charger may be wall mounted or rest on its foot pegs on a
level surface. The Smartpin charger should be on a level surface with at
least 5 cm (2 inches) clearance on each side to ensure proper cooling and
ventilation.
Ensure dust, dirt, grass and other contaminants are kept out of the
charger contacts and housing.
2. Cleaning. The battery charger may be cleaned periodically to eliminate
dust. To clean, unplug the unit, then use a soft damp cloth to wipe away
any dust and/or dirt.
19
3. Battery Slots. When placing a Smartpin battery into a slot to be charged
do not press the middle of the battery. Apply pressure at the metal
connectors until the battery snaps into place. Pressing the middle of the
battery may cause warping and therefore an improper fit into the
Smartpin or damage the internal connections of the battery.
4. Spillage. Do not expose the battery charger to liquids. If liquid has been
spilled into the charging ports unplug the charger, wipe clean then allow
the area to dry before attempting to charge.
5. Battery Contacts. A clean electrical contact ensures proper power
transfer. Occasionally it may be necessary to clean the contacts gently
with steel wool or light grade sandpaper. Do not over clean the charger
contacts.
6. Primary Power. Charger should be operated within specification for any
AC input voltage in the minimum ranges 100V to 240VAC, with a line
frequency of between 47 and 63 Hz.
Battery maintenance
Both battery packs will provide an ample supply of consistent power to the Smartpin and
YardDog unit.
1. Battery Life. Under normal conditions a battery packs for the Smartpin
and YardDog unit will last a minimum of 500 charging cycles.
2. Memory. The battery packs are subject to the “memory” effect, but not
to the extent of other types of rechargeable batteries. To minimize
memory effect, Smartpin batteries should be discharged fully once per
week. Handhelds should be rotated occasionally to ensure that all battery
packs have approximately the same number of discharges and recharges.
This will add to the overall life of the battery.
3. Contacts. The battery contacts must be kept clean, dry and corrosion
free. If corrosion forms, you may need to clean them to restore their full
ability to transmit power. This may be done with steel wool, or VERY
light sandpaper. DO NOT OVERCLEAN THE TERMINALS.

20
4. Battery pack sleeves (Smartpin)). There are actually 6-batteries in
each battery pack. They are combined in a double shrink-wrapped
industrial sleeve. This adds the rigidity that makes replacement easy.
Care should be taken not to stress the battery pack horizontally, or the
sleeve may bend, break, or lose contact between batteries. The most
likely opportunity for the battery packs to be subjected to stress is during
transportation and changing of the batteries of the SmartPin between the
maintenance shop and on the “green”. Therefore it is highly
recommended that the Battery Carrier Case be used when performing
this task. Additionally, when inserting or removing battery packs from
the charger be sure to exert pressure near the ends of the battery packs,
not the center. DO NOT JAR or PLACE OTHER EQUIPMENT
WHERE IT MAY DAMAGE A BATTERY PACK.
Storage
Important: Do not store Smartpins and Handhelds and batteries in locations that will fall below
32 degrees Fahrenheit (0 degrees Celsius) and 120 degrees Fahrenheit ( 49 degrees Celsius).
Trouble shooting checklists
Scan the list below to find the area that best describes your problem
YardDog Unit
Occurrence Possible Cause Solution
YardDog not activated Press any of the buttons on the front of the
YardDog.
Blank Screen
Batteries Out of Power Recharge Handheld unit.
Check the battery contacts.
Incorrect
yardage feedback Holding the YardDog
Incorrectly
Make sure that the YardDog is held steady,
straight up and down (parallel to the SmartPin).

21
Incorrect Flagstick The flagpole may be in the wrong green. Notify
golf shop.
Incorrect Hole No. Change YardDog unit to read correct hole.
Interference Large object/objects directly in front of path of
measurement or radio interference. Step aside or
move a few feet left or right and try again.
SmartPin
Occurrence Possible Cause Solution
Battery sleeve drained
or battery lost contact
with Smartpin contacts
Remove and replace battery. Try again. If still no
response, replace battery pack with a fully charged
pack.
Dirt or corrosion on
battery contacts
Open SmartPin and gently clean battery contacts
with steel wool. Remove and reseat battery pack.
Handheld malfunction Try several YardDogs to ensure that the problem
is with the SmartPin
No Response
SmartPin identification
error
Check the Dip switch in the mast to make sure it is
set to the desired hole location

22
Battery Charger
Occurrence Possible Cause Solution
Not plugged in wall
outlet
Check to see that power cord is correctly inserted into
wall electrical outlet
Wall electrical Outlet
not working
Try plugging in another electrical appliance into the same
outlet to ensure power flow
Batteries inserted
incorrectly
Batteries must be inserted with the metal rings touching
the metal battery contacts of the charger.
Charger Slot
Malfunction
Try the same slot with several batteries. If the problem
remains only with one slot contact Signal Golf for an
immediate replacement.
Charger not turned on
There should be a red light illuminated to indicate that
the charger has been turned on and that there is power
flow.
Not Charging
Battery pack(s)
Bad Battery Try another Battery in the same slot. If the new battery
charges contact Signal Golf for a replacement battery.
23
Warranty YardDog Components
YardDog components including the SmartPins and battery chargers are subject to a full
Lifetime warranty under the yearly lease agreement. Signal Golf will repair or replace,
including related labor and travel, any of these components, which prove to be defective as to
workmanship or materials. Upon notification of inoperative product, Signal Golf will
immediately send replacement product to the customer at its own expense. The customer agrees
to return ship the defective product to Signal Golf, in the prepaid shipping container provided by
Signal Golf.
OWNERS RESPONSIBILITIES:
! Provide any defective part to Signal
Golf
! Provide proof of purchase
! Provide normal care and maintenance,
including cleaning as instructed by the
user manual
! Make product accessible for service
WARRANTY LIMITATIONS:
! Begins at date of purchase.
! Applies to product used within the
United States or Canada.
WARRANTY IS VOID IF:
! Serial plate is defaced
! Products are altered by customer
! Product is not installed or used according to
manufacturers instructions (see User
Manual)
ITEMS NOT COVERED:
! Consumables such as batteries and flags
! YardDog (see YardDog Warranty)
! Damages which occur in shipment
! Normal product maintenance and
cleaning
! Failures caused by:
! Unauthorized service
! Material buildup due to
improper cleaning or
maintenance (rust, dirt, etc.)
! Accidental or intentional
damage
! Acts of God
! Reception problems unless
related to materials or
workmanship
IN NO EVENT SHALL SIGNAL GOLF
PRODUCTS BE LIABLE FOR
INCIDENTAL OR CONSEQUENTIAL
DAMAGES
Signal Golf makes no other warranties or representations in terms of the YardDog components.
Signal Golf employees, agents or distributors my not amend the terms of this warranty agreement.
The remedies outlined in this agreement are the sole and exclusive remedies for breach of the
warranty.
For answers to questions regarding any part of this warranty or to locate a Signal Golf sales
representative contact:
For Europe:
Signal Golf International Pte. Ltd.
Abbey House Wellington Way
Weybridge Surrey KT13 OTT
24
United Kingdom
Tel: 01932 268335
Fax: 01932 268500
For USA :
Signal Golf International Pte. Ltd.
11043 E. 75th Street
Indianapolis, IN 46236
United States of America
Tel : 317 823 0814
Fax : 317 823 6894
For Asia Pacific:
Signal Golf International Pte. Ltd.
750D Chai Chee Road #03-03
Technopark@ Chai Chee
Singapore 469004
Tel: 65 244 5715
Fax: 65 242 4555
Or Visit our Website at:
www.signalgolf.com
Claims Procedure
This section will outline the steps that need to be taken to ensure that a defective unit is replaced.
Defective SmartPin
1. Refer the Trouble Shooting guide first to identify and then to confirm a defective unit.
2. Replace defective SmartPin with spare unit, changing address on DIP Switches.
3. Notify Signal Golf of the defective unit and arrange for replacement unit.
4. Return defective unit to Signal Golf.
25
Defective YardDog
1. Refer to the Trouble Shooting guide first to identify and then to confirm a
defective unit.
2. Notify Signal Golf of the defective unit and arrange for replacement unit.
3. Return defective unit to Signal Golf.
Battery Charger
1. Refer to the Trouble Shooting guide first to identify and then to confirm a defective unit.
2. Notify Signal Golf of the defective unit and arrange for replacement unit.
3. Return defective unit to Signal Golf.