Skylink Technologies ATOMS Residential Garage Door Opener User Manual MY5ATOMS UserMan R1
Skylink Technologies Inc Residential Garage Door Opener MY5ATOMS UserMan R1
MY5ATOMS UserMan R1

Quick Installation Guide
Recommended Tools
Step Ladder
Adjustable Wrench
Pliers
Flat and Phillips Screwdriver
Wire Stripper
Safety Glasses
WARNING !
IMPORTANT INSTALLATION INSTRUCTIONS
WARNING – To reduce the risk of severe injury or death:
1) READ AND FOLLOW ALL INSTALLATION INSTRUCTIONS.
2) Install only on a properly operating and balanced door. A door that is operating improperly could cause
severe injury. Have qualified service personnel make repairs to cables, spring assemblies, and other
hardware before installing the operator.
3) Remove all pull ropes and remove, or make inoperative, all locks (unless mechanically and/or
electrically interlocked to the power unit) that are connected to the door before installing the operator.
4) Install the door operator at least 8 ft (2.44 m) or more above the floor if the operator has exposed
moving parts. If the operator must be installed less than 8 ft (2.44 m) above the floor, then exposed
moving parts must be protected by covers or guarding, provided by the operator manufacturer.
5) Do not connect the door operator to the source of power until instructed to do so.
6) Locate the control station: (a) within sight of the door, and (b) at a minimum height of 5 feet so small
children cannot reach it.
7) Install the Entrapment Warning Placard next to the control station in a prominent location.
8) For products having a manual release, instruct the end user on the operation of the manual release.
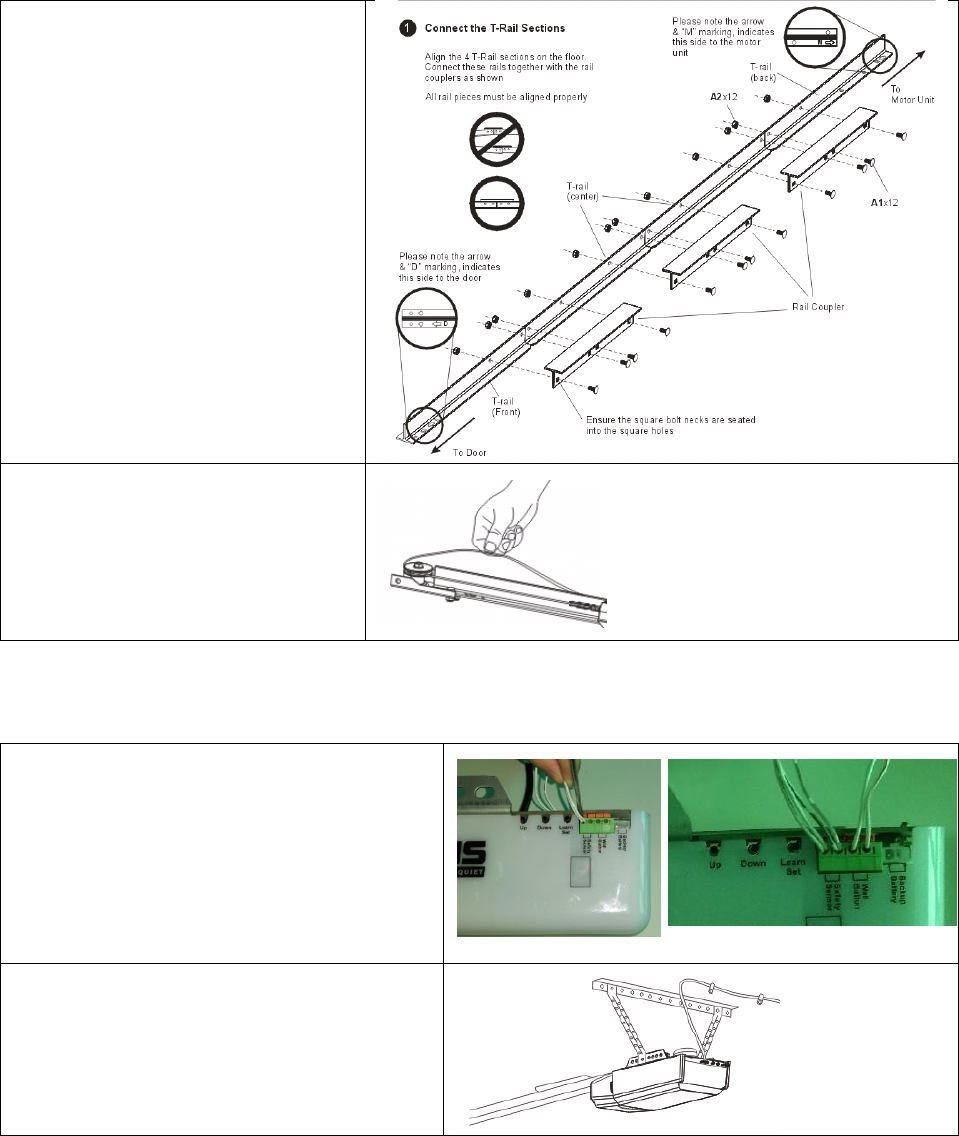
Step 1 – Installing the chain
1a. Assemble the T-rail
1b. Place the chain to the opener.
Step 2 – Install the safety beam and wall button.
2a. Connect the safety beam, wall button
wires to the opener.
2b. Install the opener to the hanging brackets.
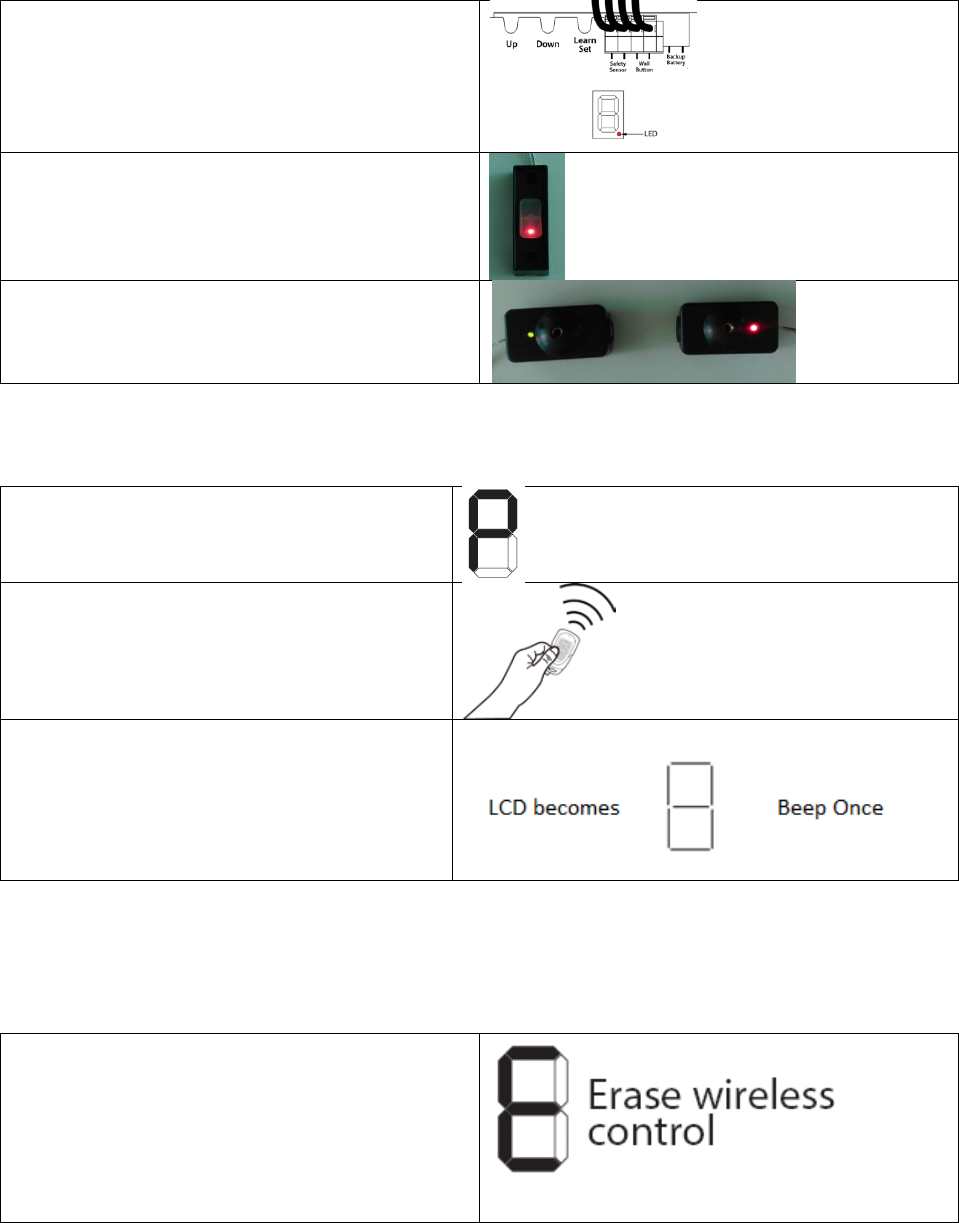
Step 3 – Indication
3a. When power up the opener. The dot in the LED
display stays on.
3b. When power up the opener. The red LED on
the Wall Button stays on.
3c. When power up the opener. The red and green
LEDs on the Safety Beam Sensors stays on once
aligned properly.
Step 4 – Programming the Remote Control
4a. Press and hold the [Set] button in the
opener for 1 second, the LED shown [P]
segments.
4b. Press the button on the remote.
4c. Once the button on the remote is
programmed. The LED segment will off and
emits one beep indicating the programming
successfully.
Step 5 – Erase all the Remote Control from opener
Note: To erase any unwanted remote control, first erase all remotes.
5a. Press the [Set] button for 15 seconds, when
the opener emits 4 beeps, release the Learn/Set
button. The LED display shows “E”.
5b. Press the [Set] button again to erase all the
programmed remotes.
5c. The LED segment will off indicating the erasing
successfully.
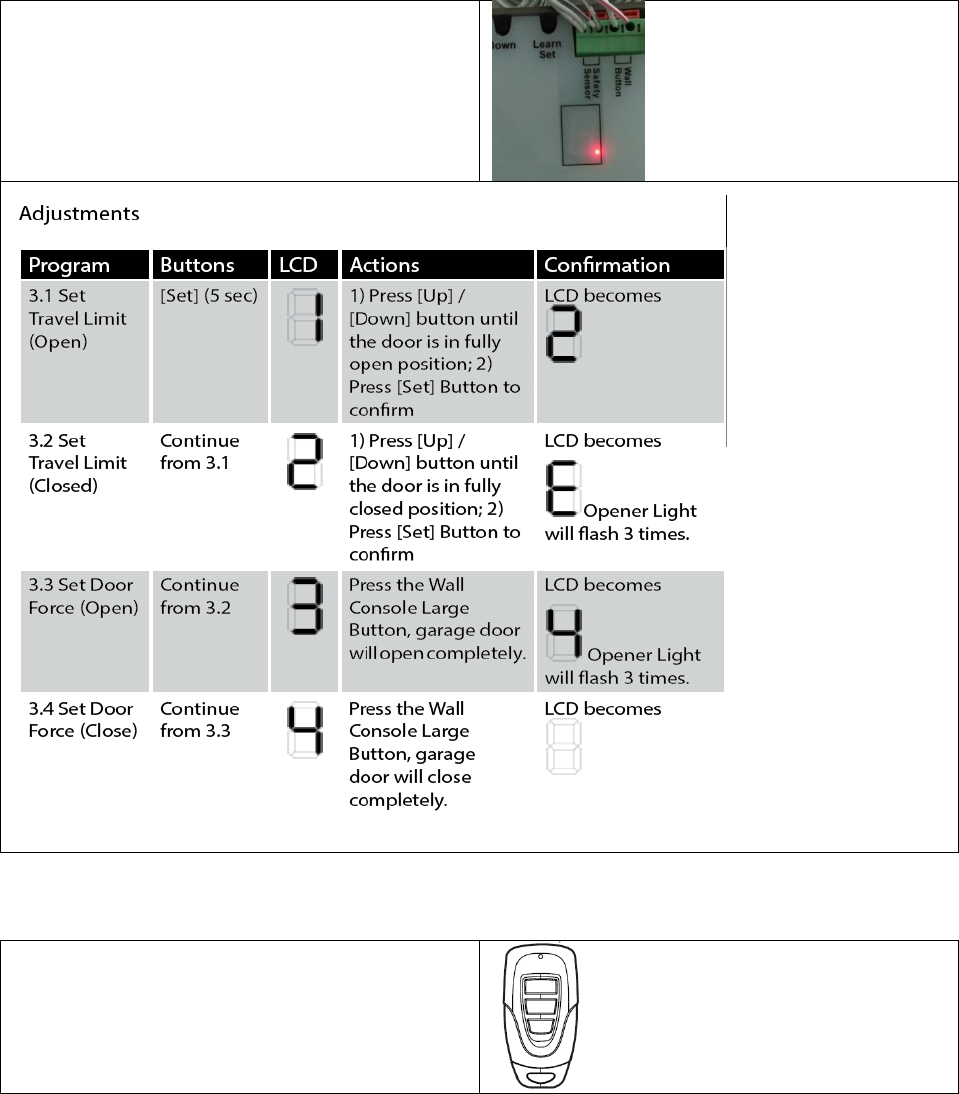
Step 6 – Adjust the Up and Down Limits
Warning: Trolley MUST be engaged before setting limits.
6a. Power up the opener. The dot in the LED
display stays on.
Step 7 – Operation
7a. To activate the opener with remote control,
press the button that is programmed to the
desired opener.

FCC
This device complies with Part 15 of the FCC Rules. Operation is subject to the following two conditions:
(1) This device may not cause harmful interference, and (2) This device must accept any interference
received, including interference that may cause undesired operation.
Warning:
Changes or modifications to this unit not expressly approved by the party responsible for compliance
could void the user’s authority to operate the equipment.
Note:
This equipment has been tested and found to comply with the limits for a Class B digital device,
pursuant to Part 15 of the FCC Rules. These limits are designed to provide reasonable protection against
harmful interference in a residential installation. This equipment generates, uses and can radiate radio
frequency energy and, if not installed and used in accordance with the instructions, may cause harmful
interference to radio communications.
However, there is no guarantee that interference will not occur in a particular installation. If this
equipment does cause harmful interference to radio or television reception, which can be determined
by turning the equipment off and on, the user is encouraged to try to correct the interference by one or
more of the following measures:
• Reorient or relocate the receiving antenna.
• Increase the separation between the equipment and receiver.
• Connect the equipment into an outlet on a circuit different from that to which the receiver is
connected.
• Consult the dealer or an experienced radio/TV technician for help.
Le présent appareil est conforme aux Partie 15 des règlements de la FCC et CNR d'Industrie Canada
applicables aux appareils radio exempts de licence. L'exploitation est autorisée aux deux conditions
suivantes :
(1) l'appareil ne doit pas produire de brouillage, et
(2) l'utilisateur de l'appareil doit accepter tout brouillage radioélectrique subi, même si le brouillage est
susceptible d'en compromettre le fonctionnement.
WARRANTY
If, within one year from date of purchase, this product should become defective (except battery), due to faulty
workmanship or materials, it will be repaired or replaced, without charge. Proof of purchase and a Return
Authorization Number are required.
CUSTOMER SERVICE
17 Shread Avenue,
Brampton, Ontario,
Canada L6Y 1J3
Email:support@skylinkhome.com
http://www.skylinkhome.com
©2015 SKYLINK GROUP
US Office
Securelink Inc.,
1180-D East Francis Street,
Ontario, CA 91761, USA
Tel: (909) 673-1778