Skyworth Digital Technology A6 Full HD Cloudio TV Set-Top Box User Manual 0740 HPM5RK10 00 305508
Shenzhen Skyworth Digital Technology Co.,LTD Full HD Cloudio TV Set-Top Box 0740 HPM5RK10 00 305508
user manual

User manual

Content
General information
Main features
For your safety
Unpacking
RCU
Front Panel
Real Panel
System wizard and activation
Update
Troubleshooting
1
1
2
3
3
4
4
7
10
11

GENERAL INFORMATION
Cloudio TV box will take you to the new and exciting world of , digital
sound and new services.
To make full use of your please take time to familiarise yourself with the
extensive features of the unit detailed in this user guide.
If you need help in setting up please call your dealer or a customer service adviser.
entertainment
interactive
new receiver
Main Features
Web browser and a multitude of applications
480i/p, 576i/p, 720p, 1080i, 1080p, with HDCP copy protection
Video player supporting MP4, AVI, MKV, FLV, MPEG TS
Music player supporting MP3, AAC, OGG, MPEG, MPEG Audio, Dolby AC-3
Photo viewer supporting JPEG, PNG, BMP, GIF
1
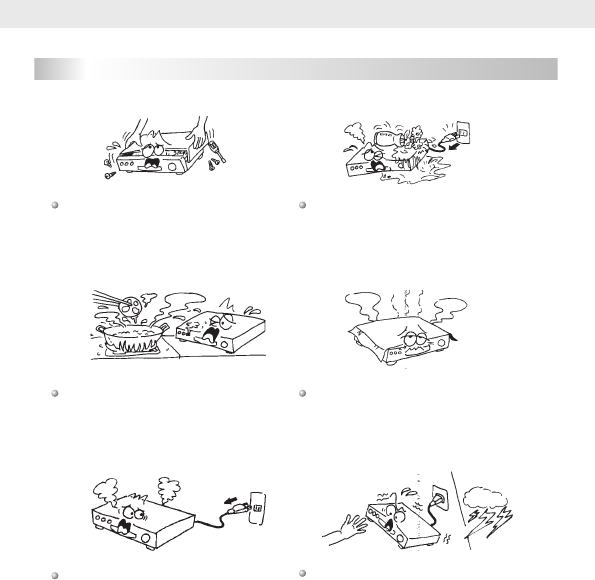
For Your Safety
Do not touch the receiver during
thunderstorms in case of electric
shock.
Do not block ventilation holes of the
receiver so that air can circulate
freely.
Do not expose the receiver under the
sunlight. And keep it away from the
heat source.
Keep the receiver away from flower
vases, tubs, sinks, etc., in order to avoid
damaging the equipment.
To avoid electric-shock hazards, do
not open the receiver, refer servicing
to qualified personnel only.
When an abnormal phenomenon
occurs, you should cut off the power
immediately.
2
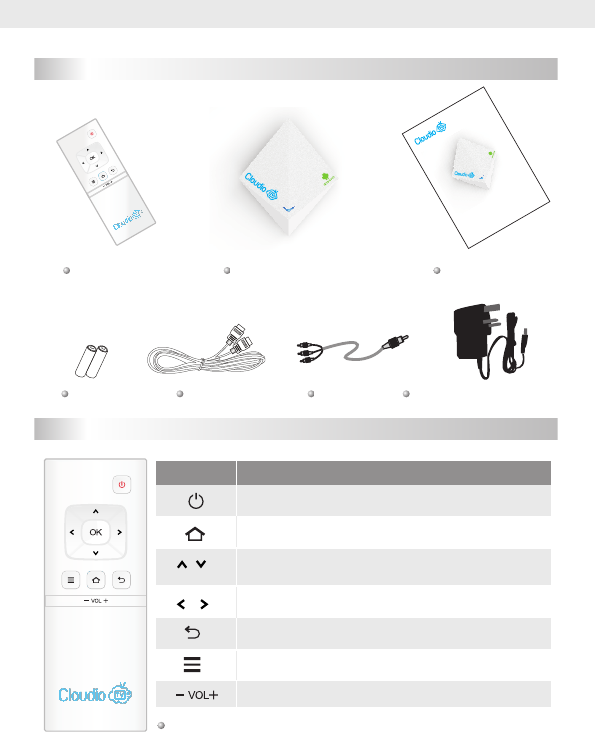
Unpacking
Remote Control User manual
External power supply
Receiver(Set-top box)
AV cable
Batteries
User manual
HDMI Cable
Key Function
Standby On/Off
Back to the previous menu on the menu
screen or escape from the menu
Enter main menu
Adjust the volume
Press for additional functions
The picture is only for reference, please make the object as the standard.
RCU
3
Navigate around the menu and change the
channels
Navigate around the menu and change the
channels
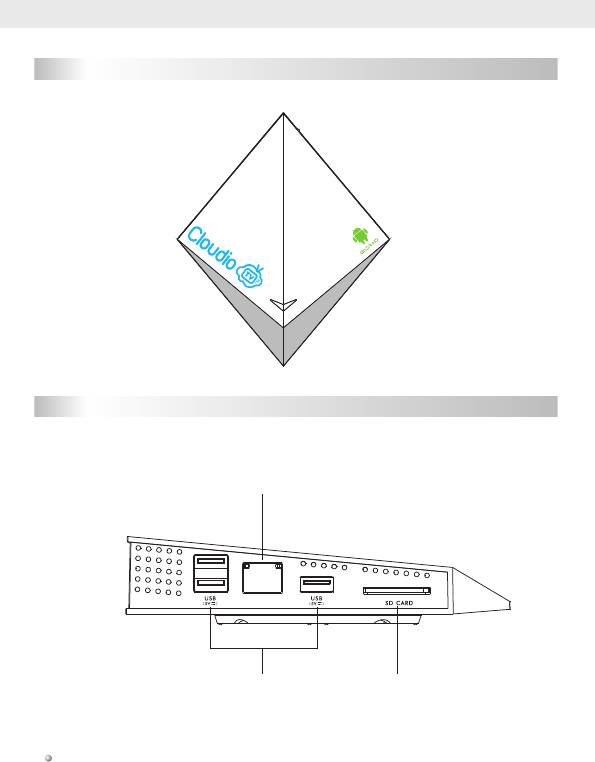
Front Panel
LAN
Real Panel
CONNECT TO USB DEVICE
CONNECT TO THE INTERNET VIA ETHERNET CABLE
CONNECT TO SD CARD
The picture is only for reference, please make the object as the standard.
4
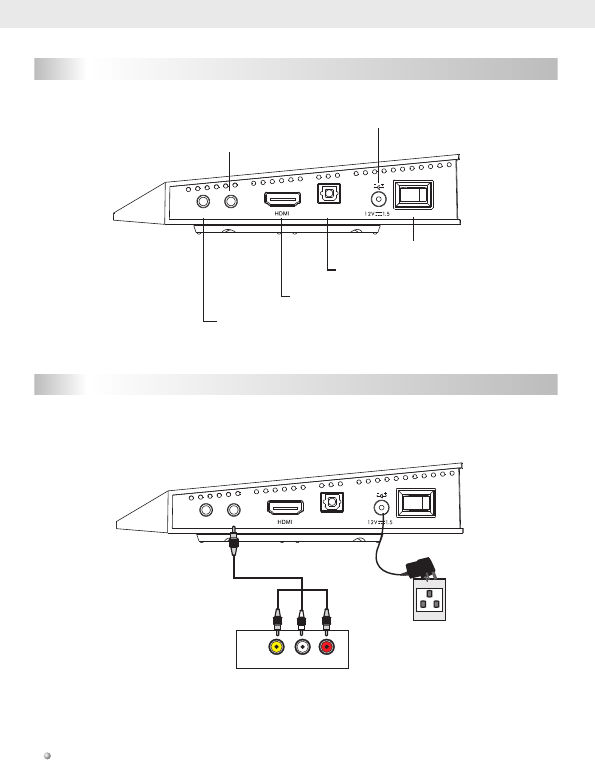
Real Panel
IR A V SP DI F Pow er
A
CONNECT TO INFRARED RECEIVER (optional)
CONNECT TO AV CONVERTOR
CONNECT TO TV SET HDMI INPUT
CONNECT TO A DIGITAL AMPLIFIER
CONNECT TO POWER SUPPLY
ON/OFF
Connecting to TV using AV cable
IR A V SP DI F Pow er
A
VI DE O AUD IO
LR
TV CONNECT TO
THE POWER SUPPLY
The picture is only for reference, please make the object as the standard.
5
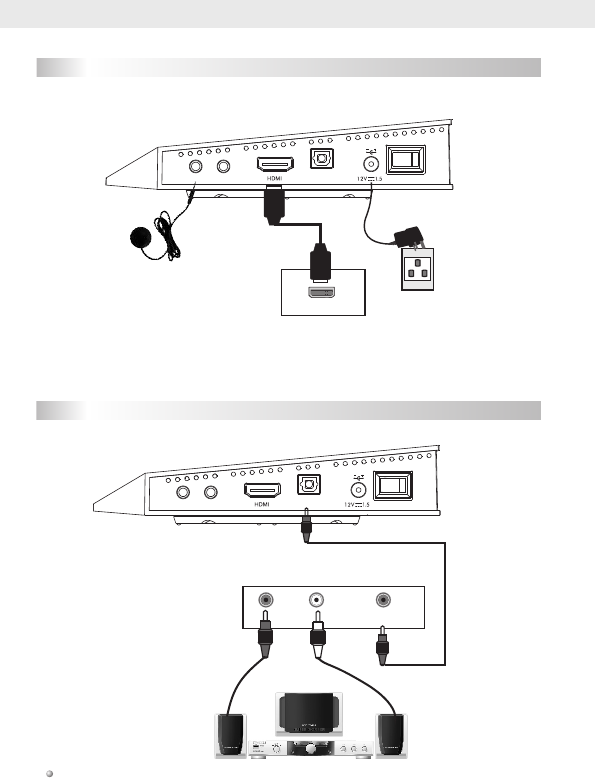
Connecting to TV using HDMI support
TV
HDMI
CONNECT TO
THE POWER SUPPLY
External IR-sensor
IR A V SPDIF Pow er
A
Connecting to Digital Amplifier
R L
SPEAKER
DIGITAL AUDIO
CONVERTOR OR
AMPLIFIER SPDIF
IR A V SP DI F Pow er
A
The picture is only for reference, please make the object as the standard.
6
System wizard and activation
Please follow step by step To activate the Box. Press Back button to change
settings any time.
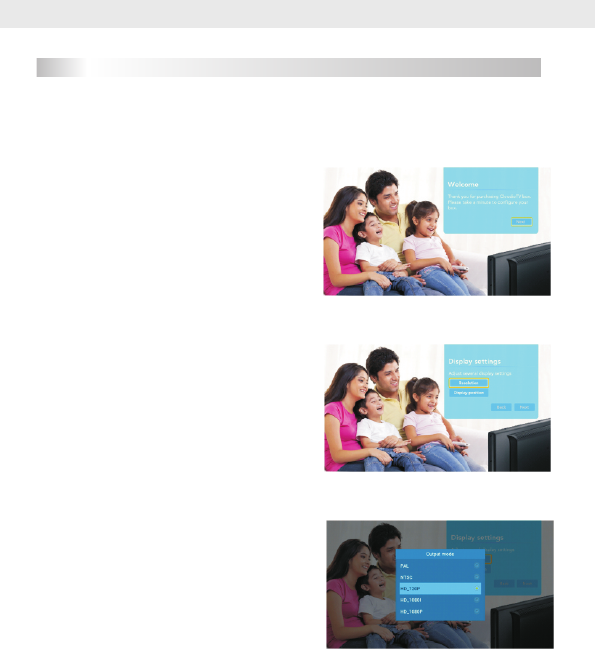
1. Welcome
When you first start up the Box it will start
in the welcome page.
2. Display Settings
Adjust display by resolution or position to
best effect.
2.1 Resolution Settings
Click Resolution button, select resolution
from the list, confirm resolution change
from dialog popup.
Press back to return to main menu.
7
2.2 Display Position
Click Display Position button, use arrows
up/down keys to adjust the zoom level,
adjusted results will take effect
immediately. Press Back key to save and
exit.
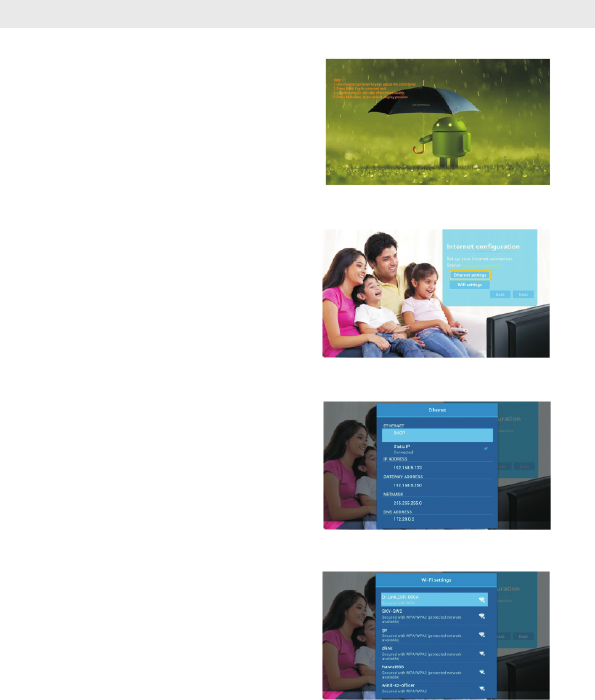
3. Internet configuration
Set up your internet connection by Ethernet
settings or Wifi settings.
3.1 Ethernet Settings
Connect the Ethernet cable to the box.
Click Ethernet settings button and select
DHCP to get IP address automatically or
select Static IP to connect internet by
entering the IP address,gate way
address,net mask and DNS address.
Press back to return to main menu.
3.2 Wifi settings
Click Wifi settings to select one
available point, and then input the
password to connect to the internet.
8

4. Date and Time configuration
Select date and time that suitable for your
place. The default time Zone is London,
Dublin, GMT+1:00.
5. Box activation
Follow the activation procedure in order to
activate the box. The code will be displayed
in this page if internet is available, just
remember it will be used in the following
steps.
6. Web Activation
Go to www.cloudio.tv/ activate and login
with your email address. If you forgot the
password,please click the “forgot
password”link.
7. Web activation Page
Login with your account successfully, input
the activation code in step 5.
9
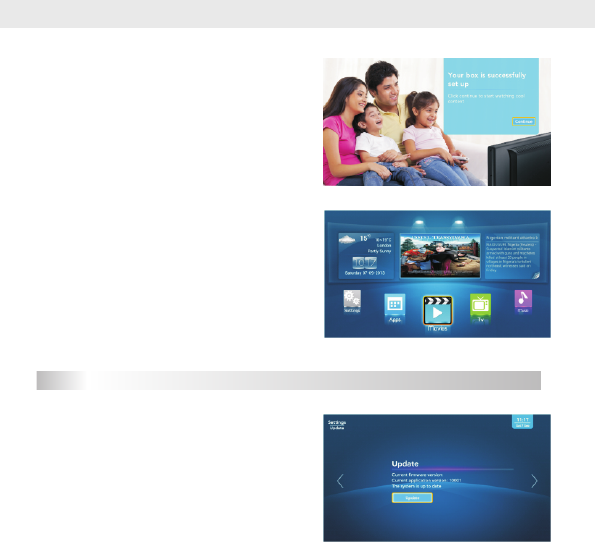
8. Box Activate Success
After completing web activation, the Box
will confirm automatically.
9. Home
The Home screen shows you weather and
news information and access to Movies, TV,
Music, Shows and Store.
Update
Keep your box with the latest version and
enjoy the latest features. Turn to the
update page in system settings. Clicking
the update button will upgrade system
automatically.
10

Troubleshooting
11
No power
1、Please check the main cable which is plugged into the power socket, when
the light shows blue which means is turned on and red means is on stand by.
2、If there is still no power, please retry to plug into the power socket.
No sound
1、Please check whether it is kept in the home menu, as there is no sound in the
home menu.
2、If music is playing press “Vol+”to see if the volume was too quite or in mute.
3、Please check if the connection for Audio cable is fine.
Blank Screen or Pictures showed abnormal
1、Please check whether the AV Cable connected is fine.
2、Please check whether the input mode of system or TV is set up correctly.
The RCU is not working
1、Battery might be empty or incorrectly aligned.
2、Please check whether adjusting the distance and angle improves signal
strength.
3、Please check whether there is a strong light source nearby as this might
conflict with the infrared signal.
The antenna used for this transmitter must be installed to provide a separation distance
of at least 20 cm from all persons and must not be co-located or operating in conjunction
with any other antenna or transmitter.