SmartPayTech COMPACTPLUS INDUSTRIAL PDA User Manual
SmartPayTech INC. INDUSTRIAL PDA Users Manual
UserManual.wiki
>
SmartPayTech
>
COMPACTPLUS User Manual
Users Manual
Navigation menu
Upload a User Manual
Namespaces
Wiki Guide
HTML
PDF
Info
Views
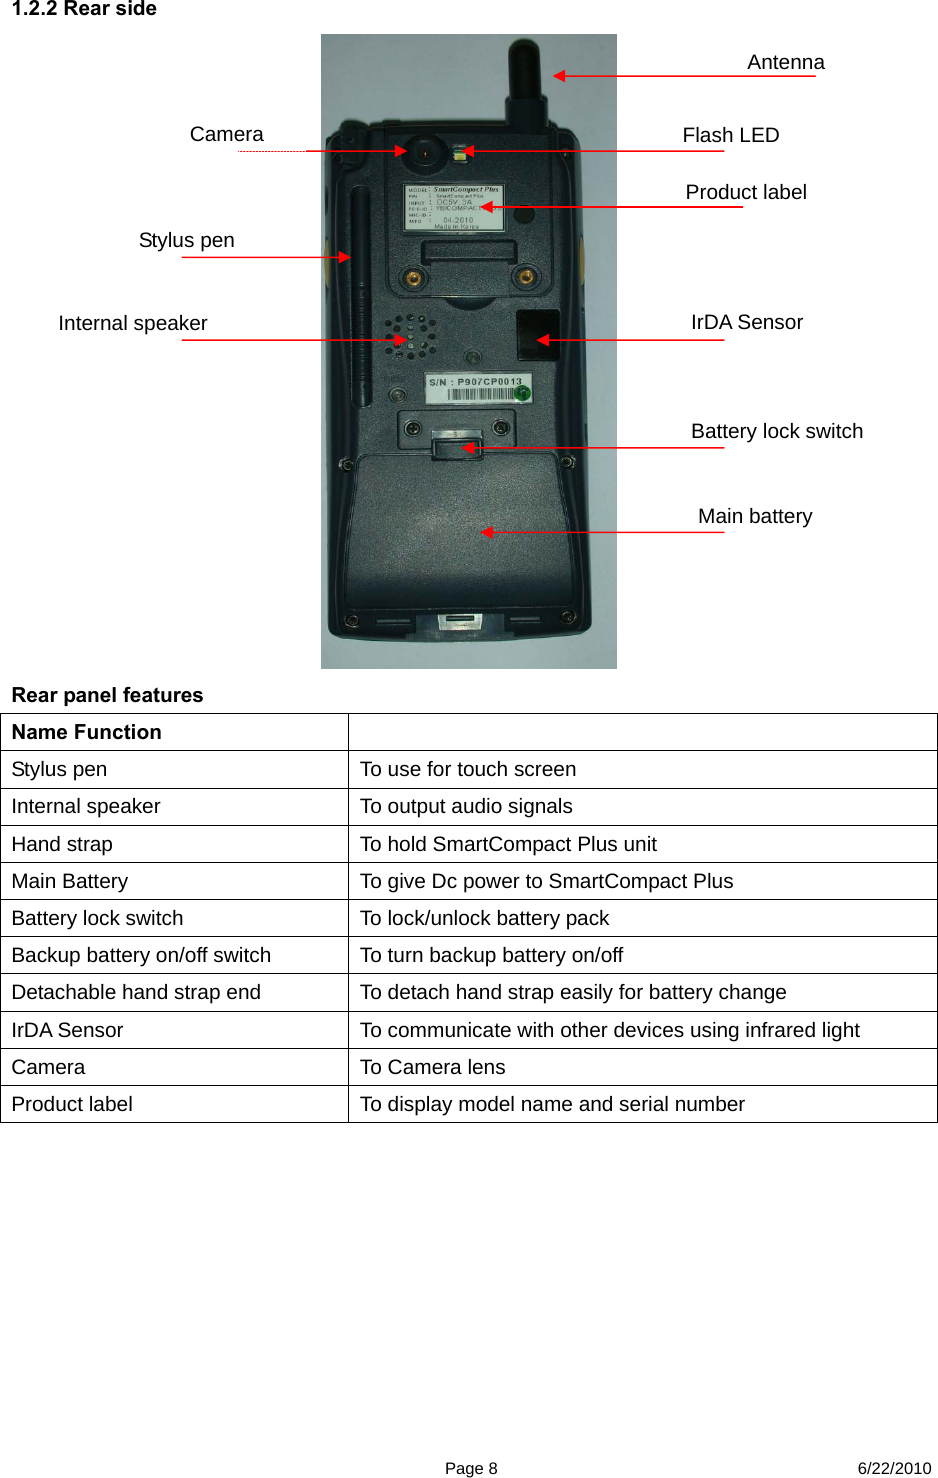
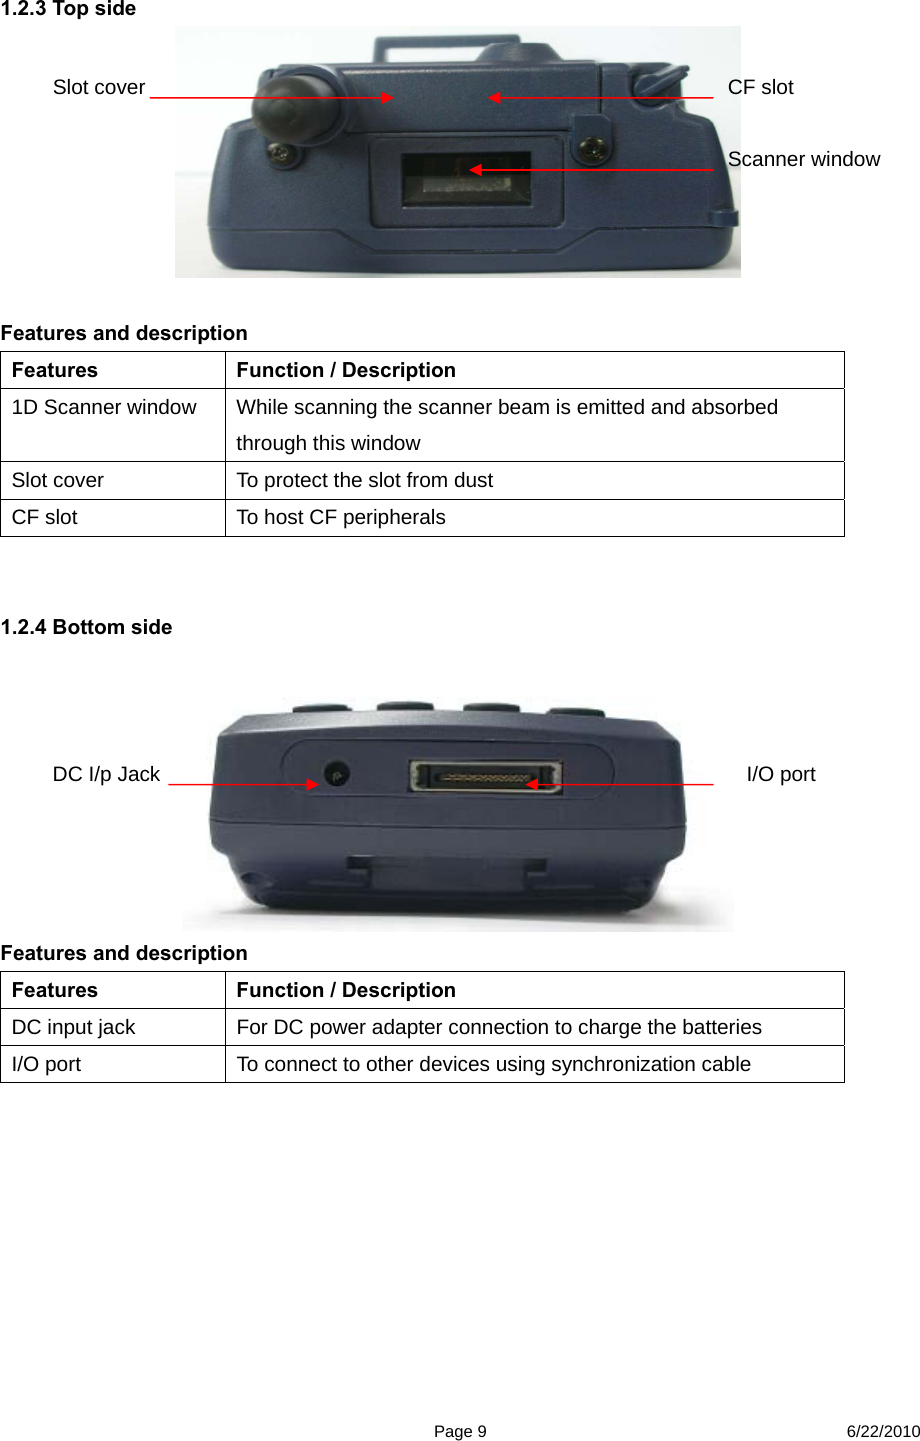
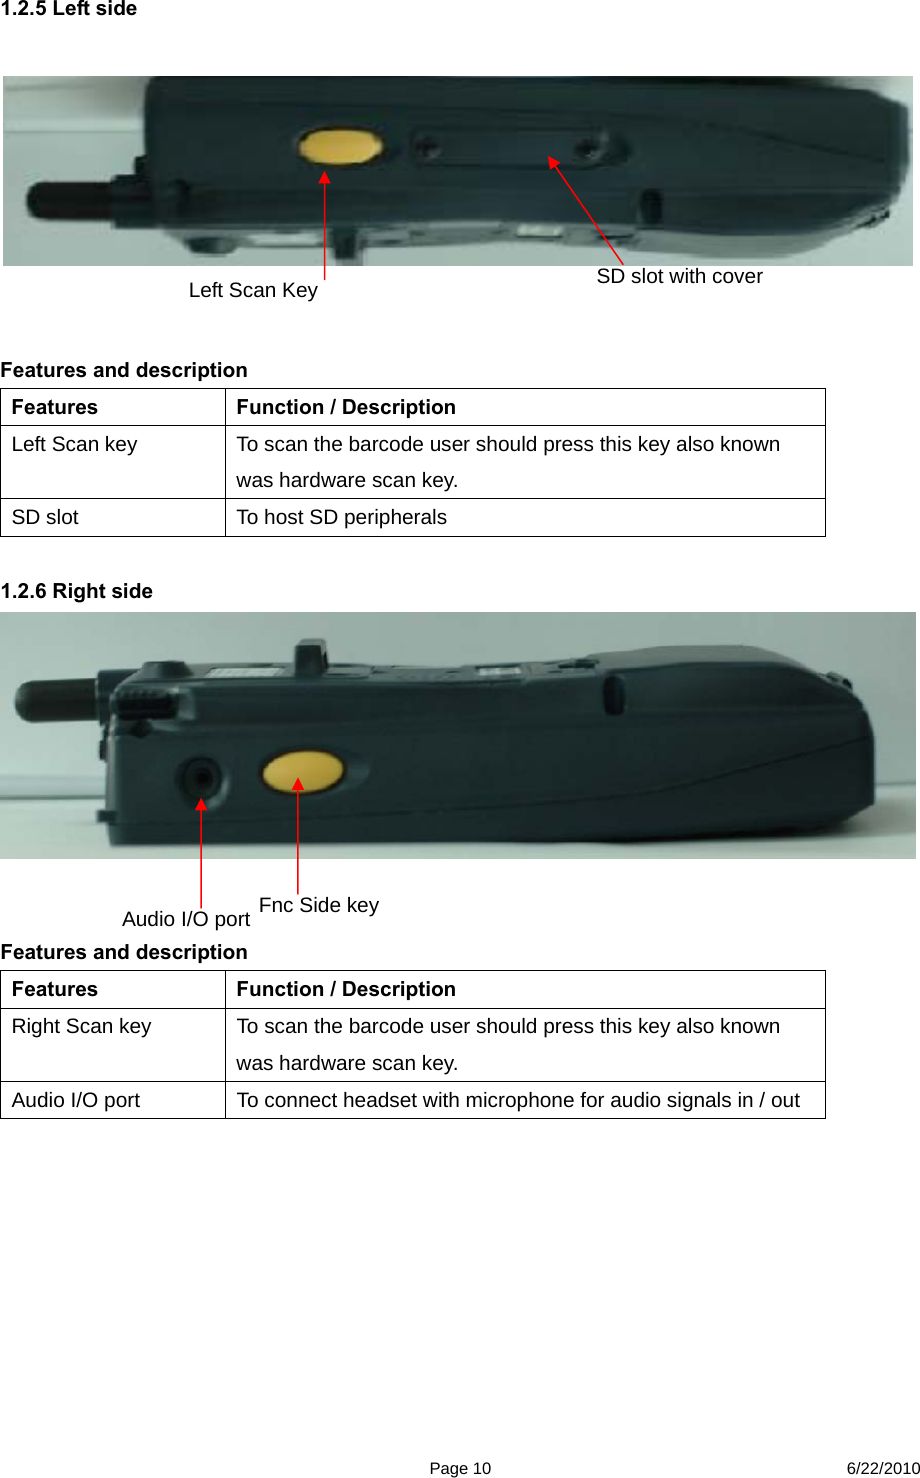
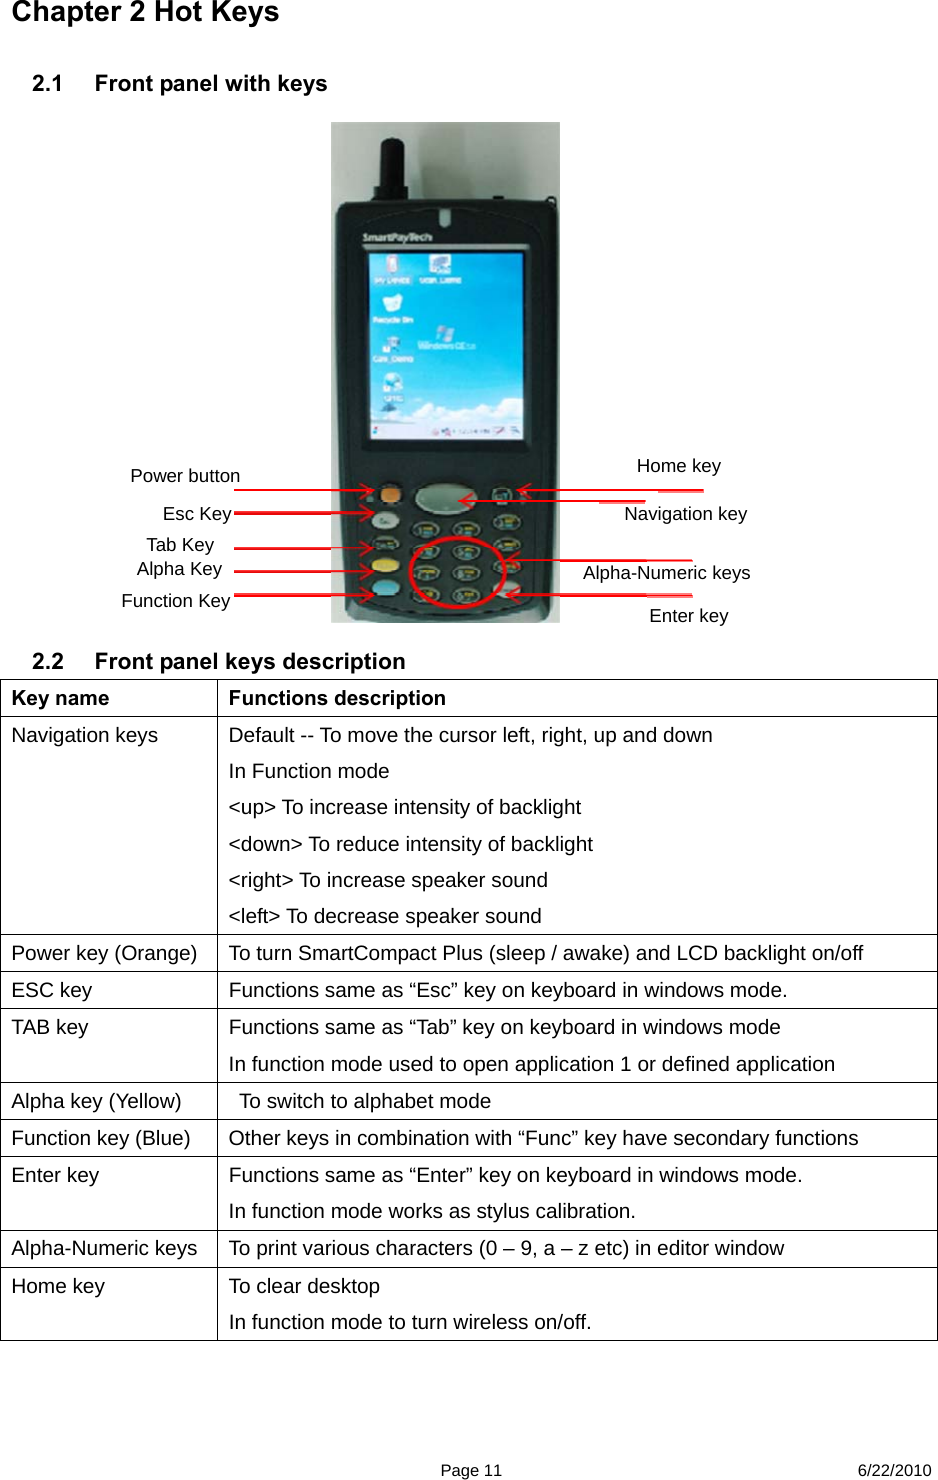
User Manual
Discussion / Help
Navigation


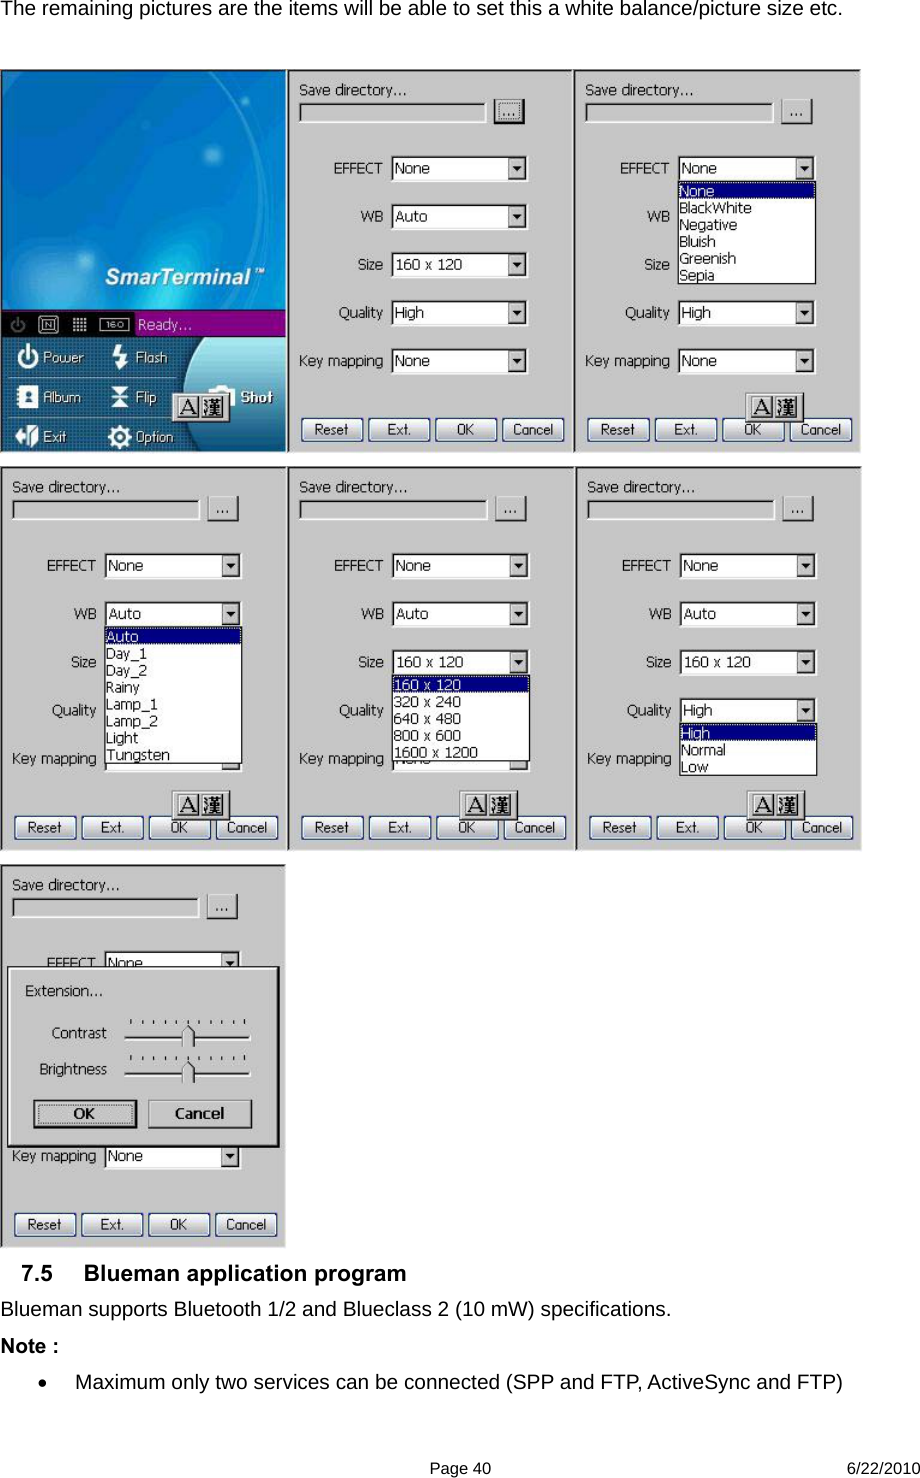
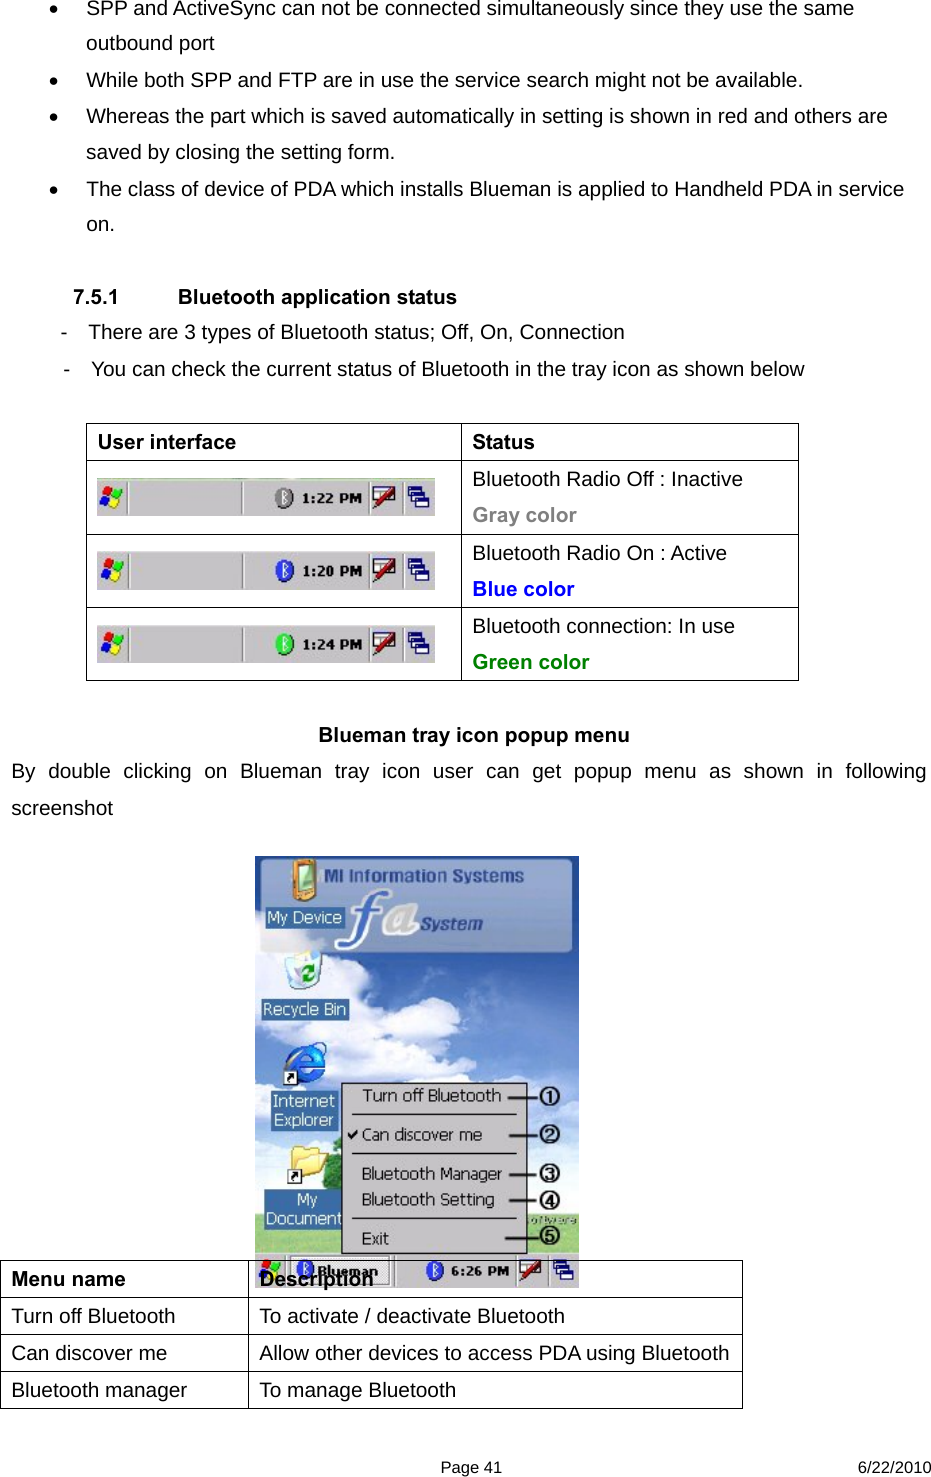
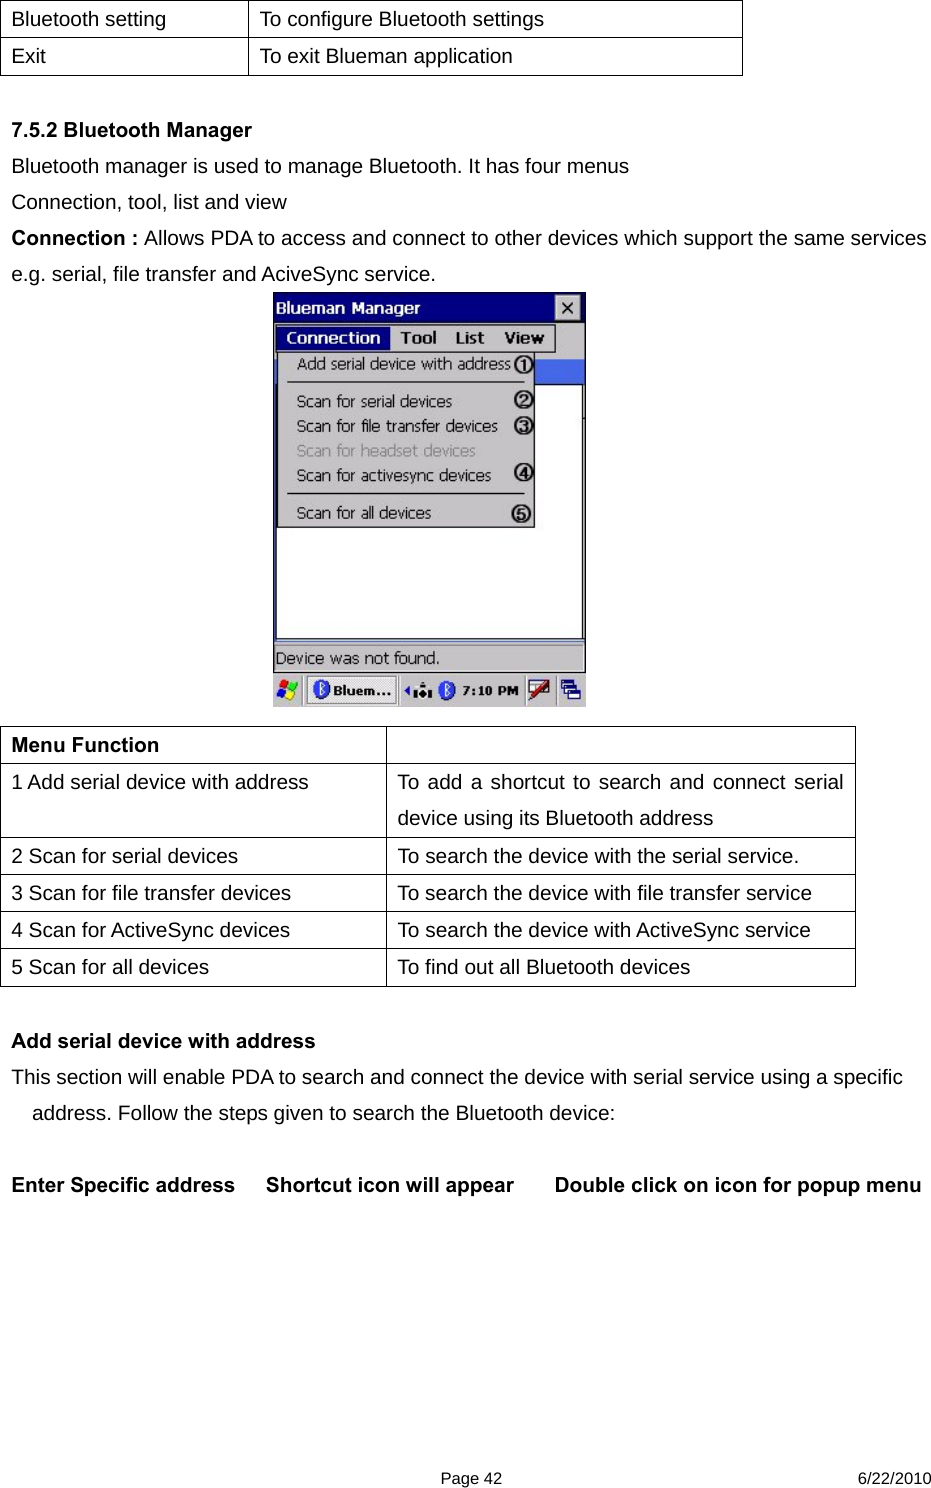
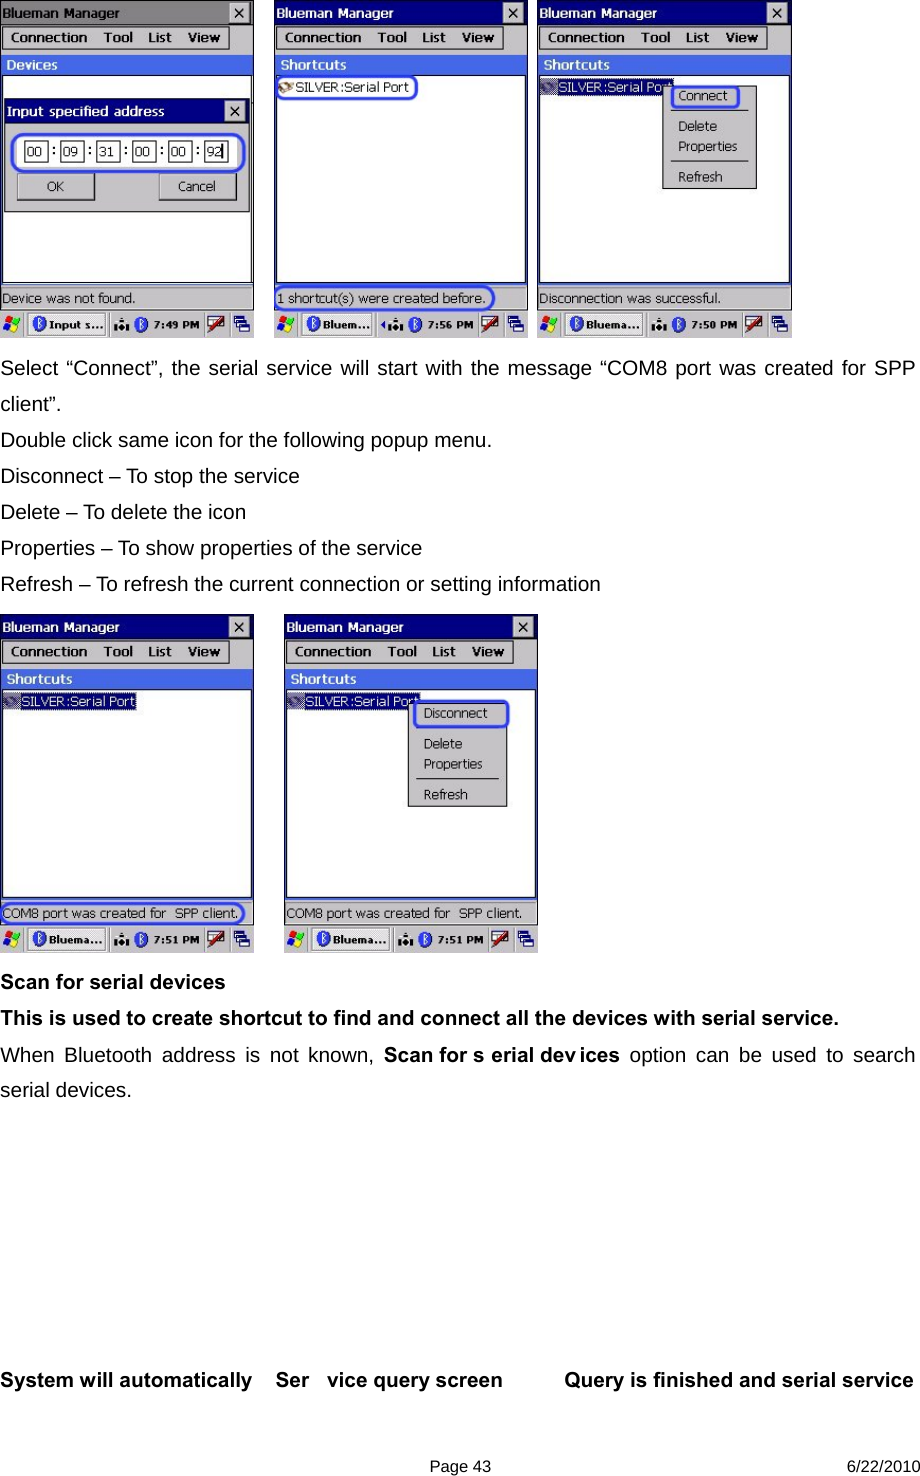
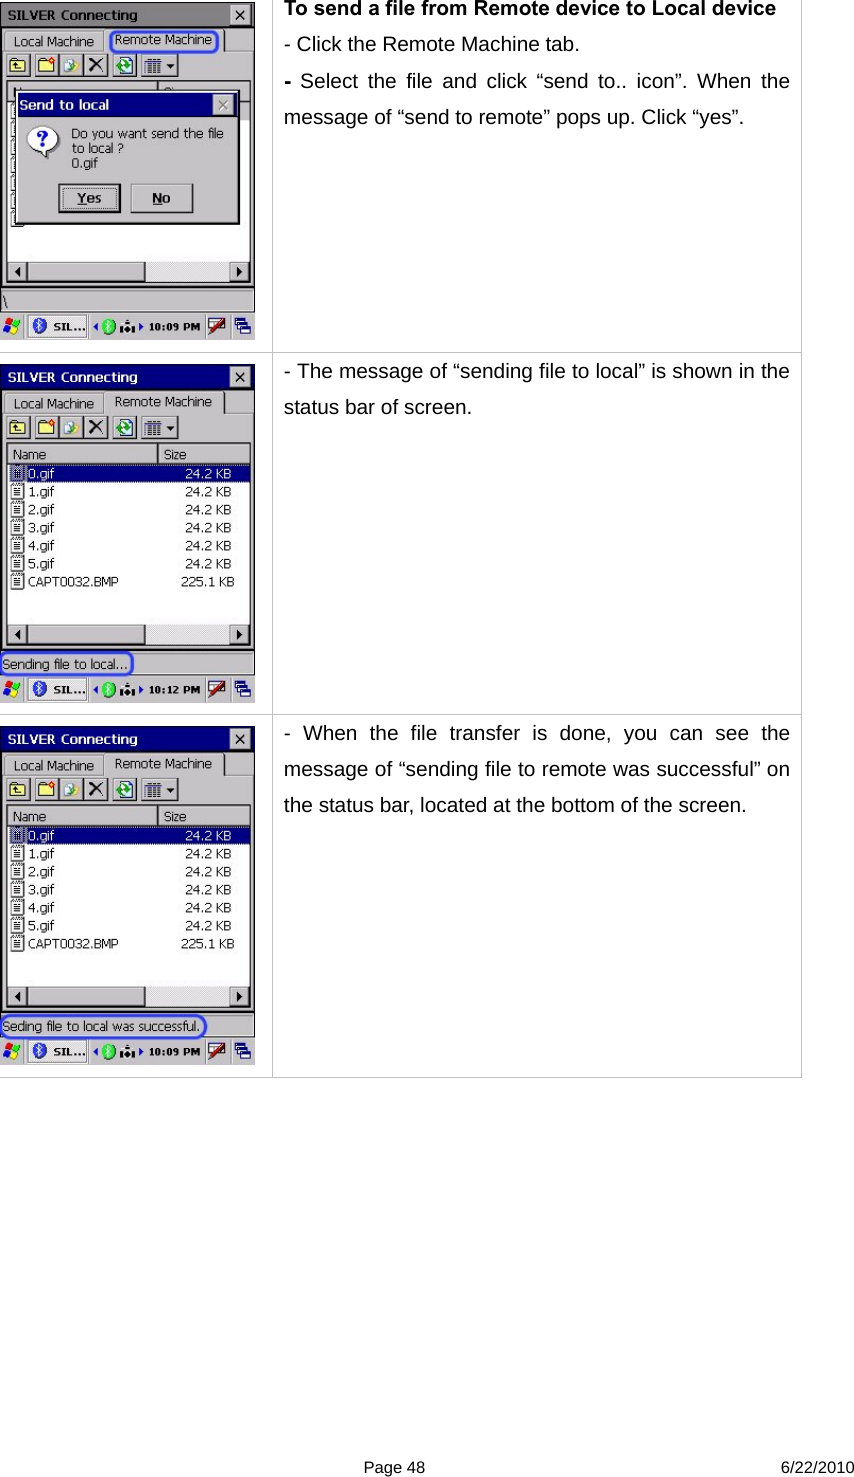
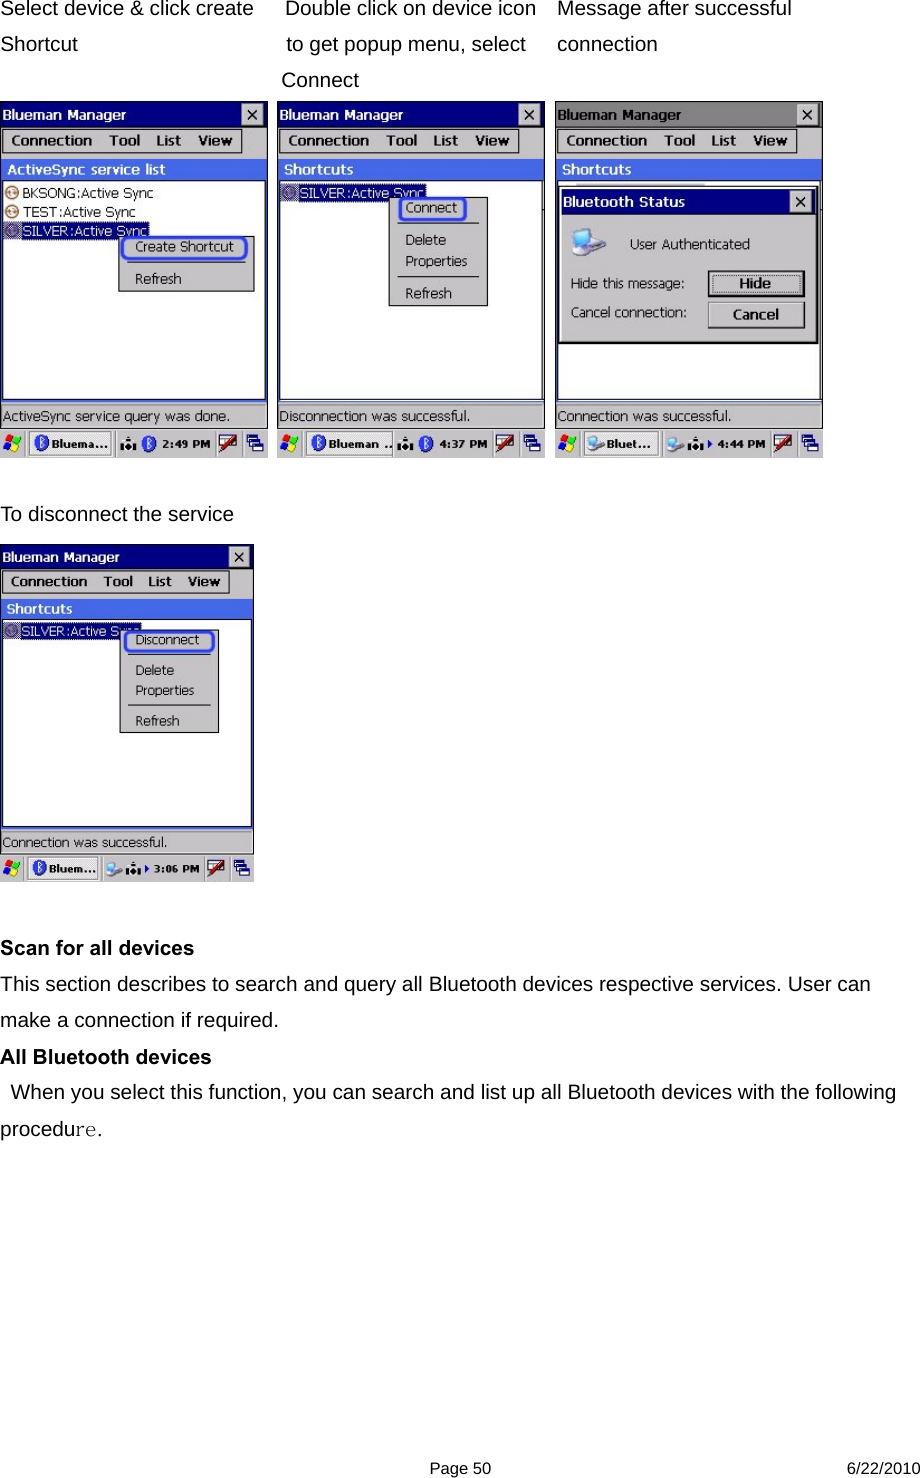
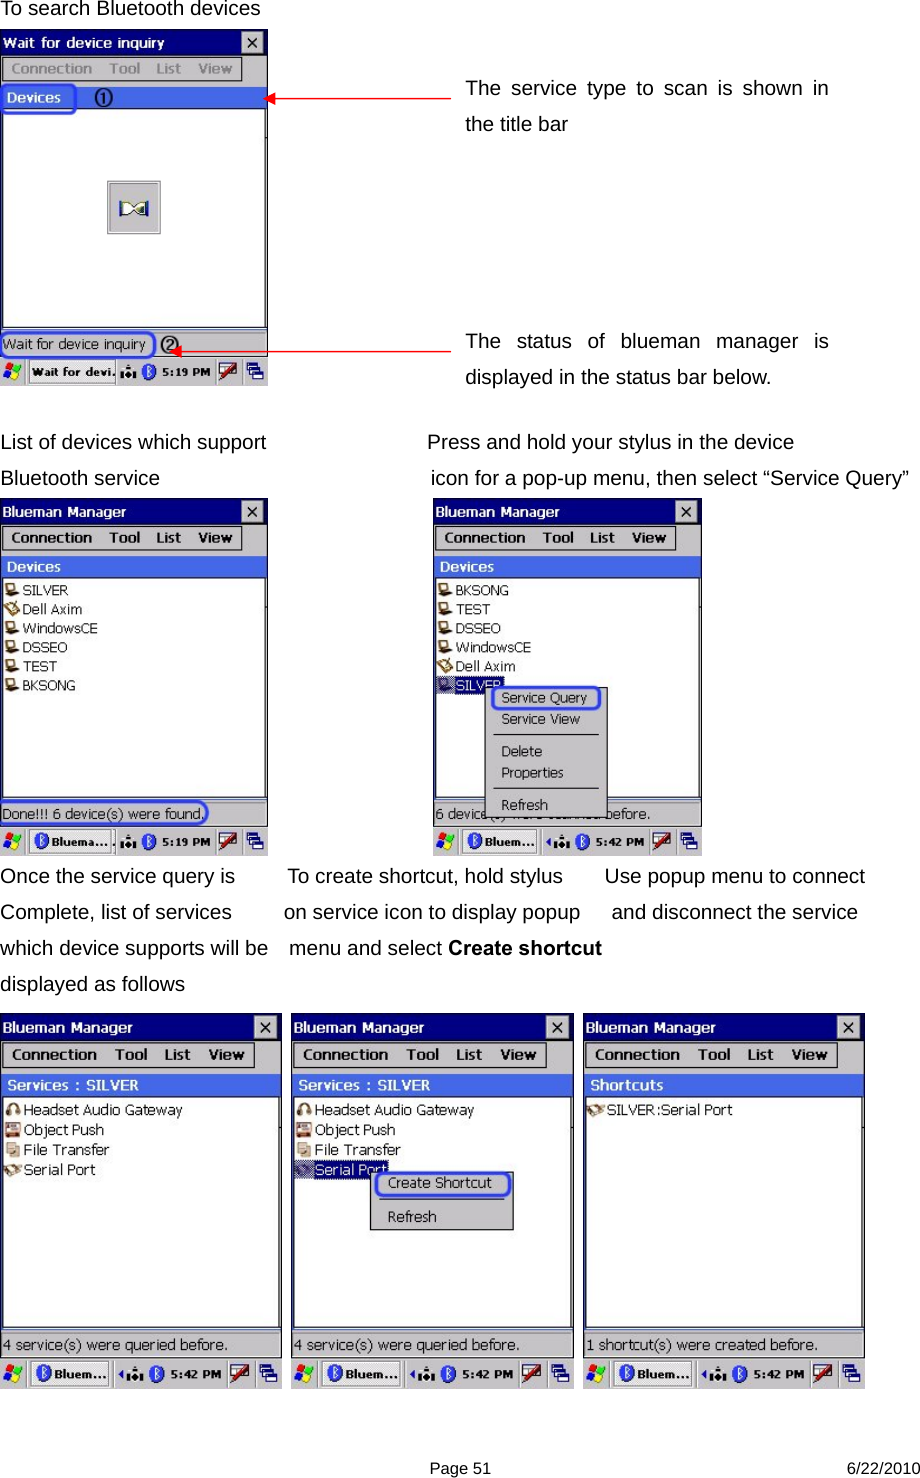
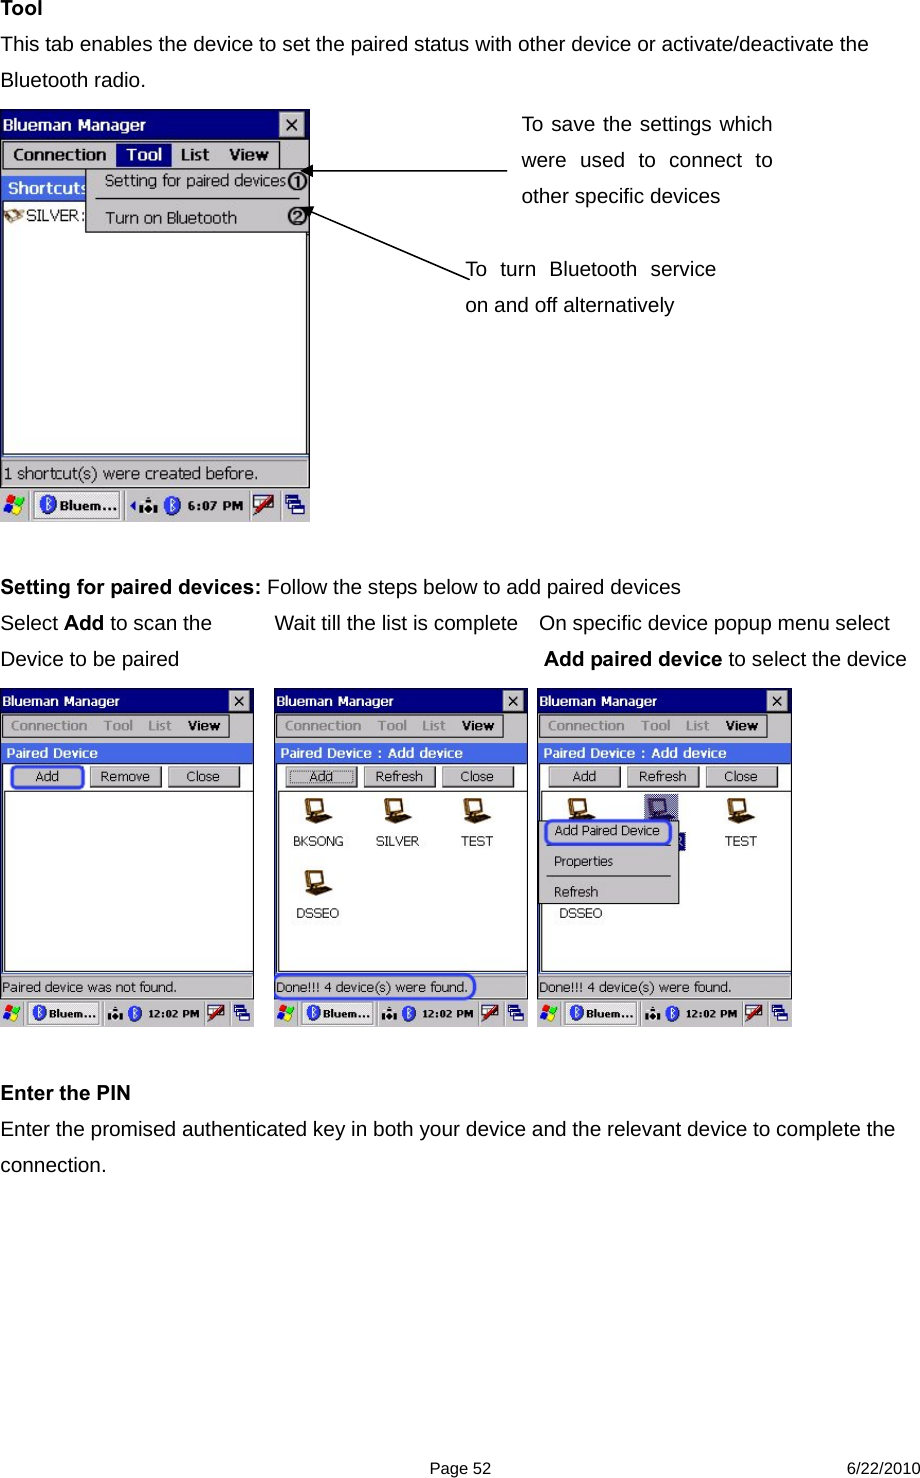
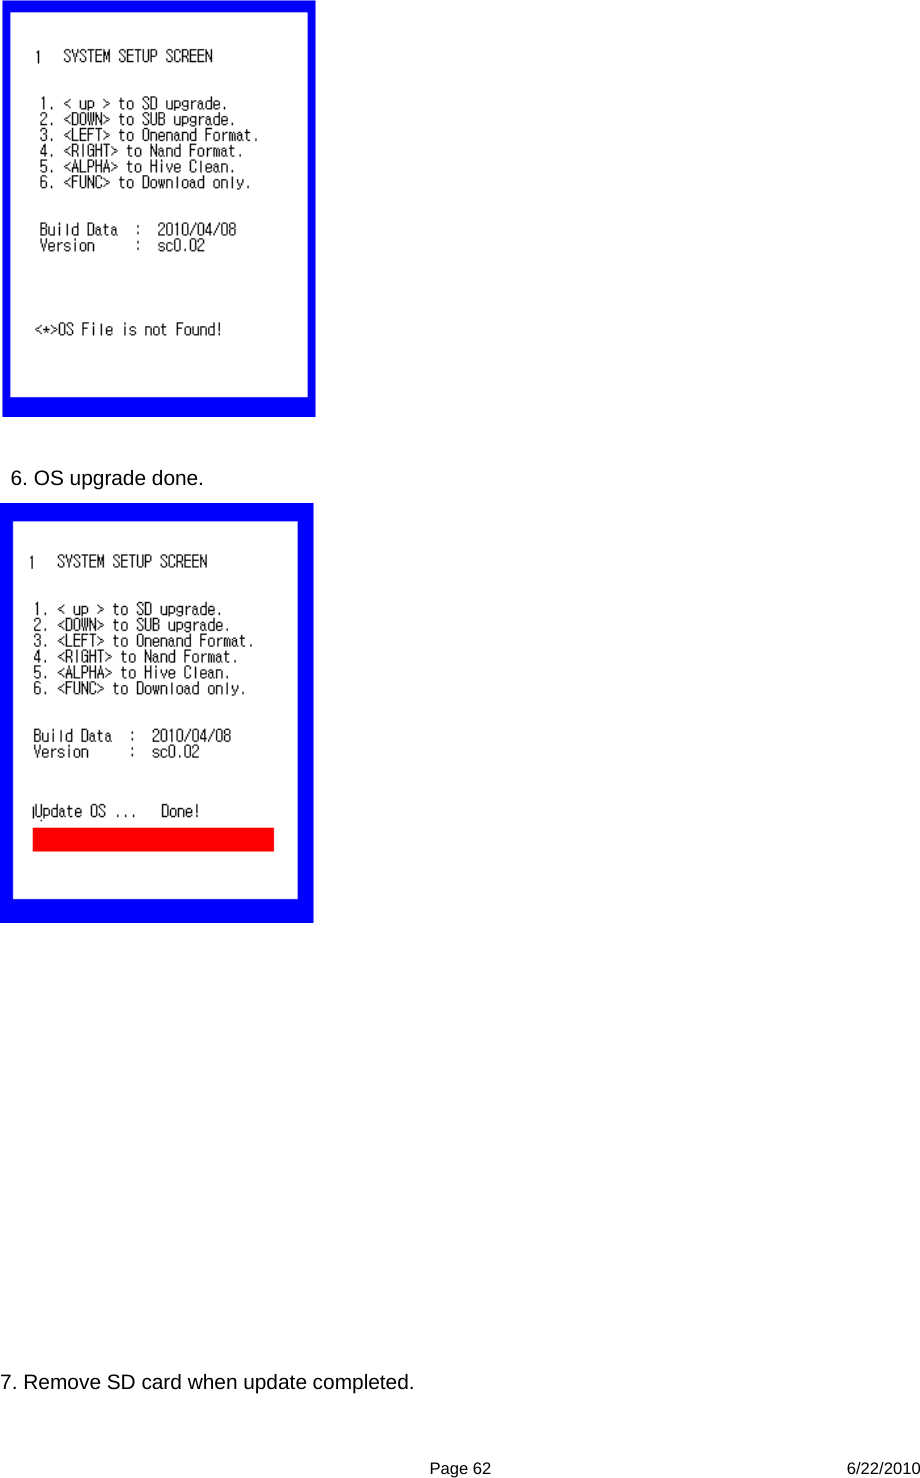
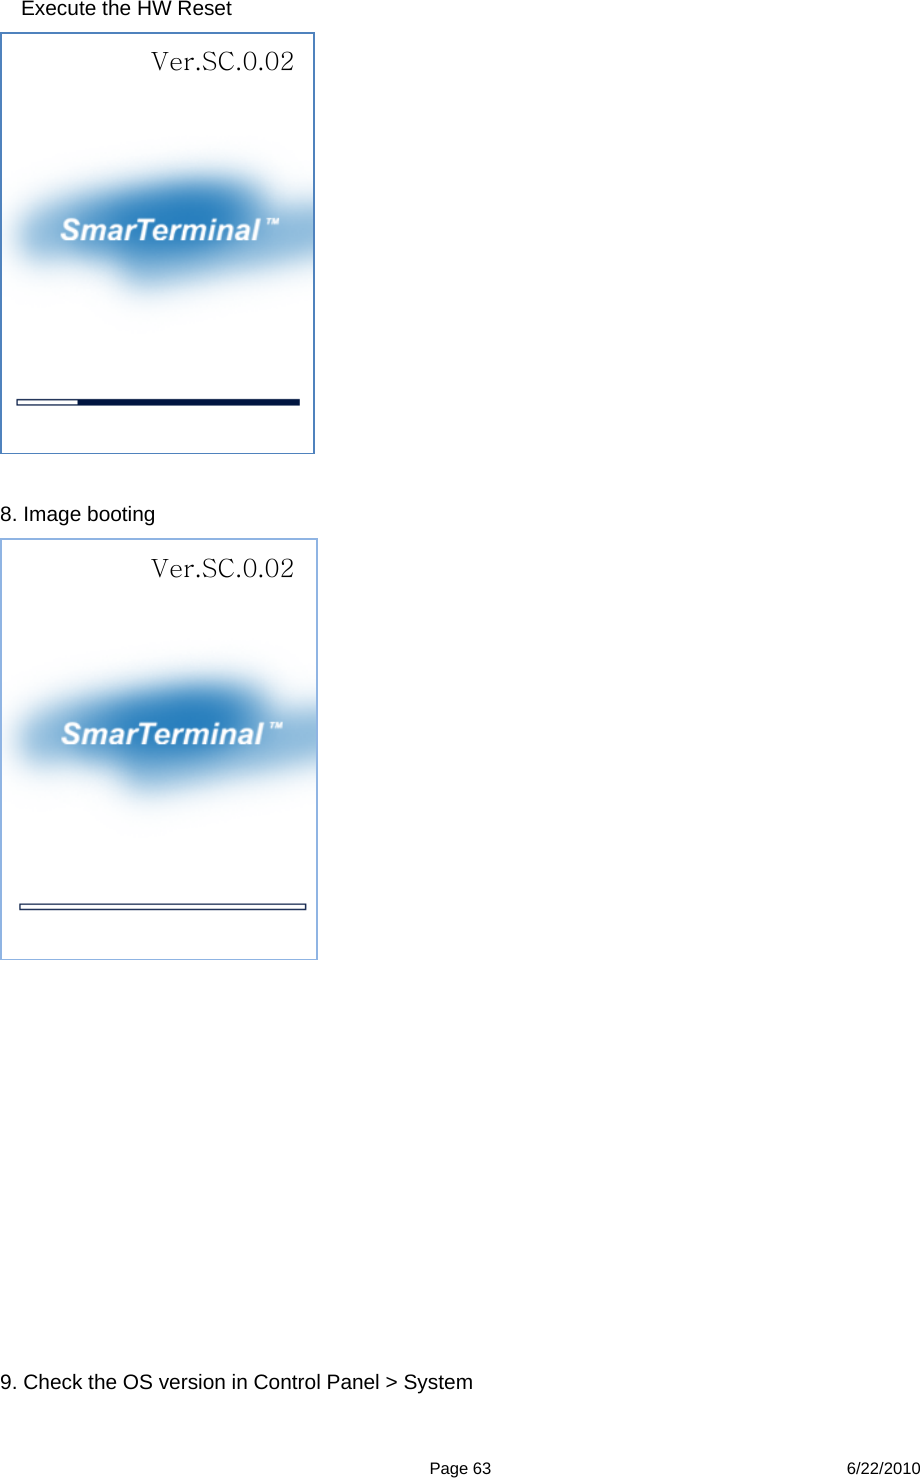
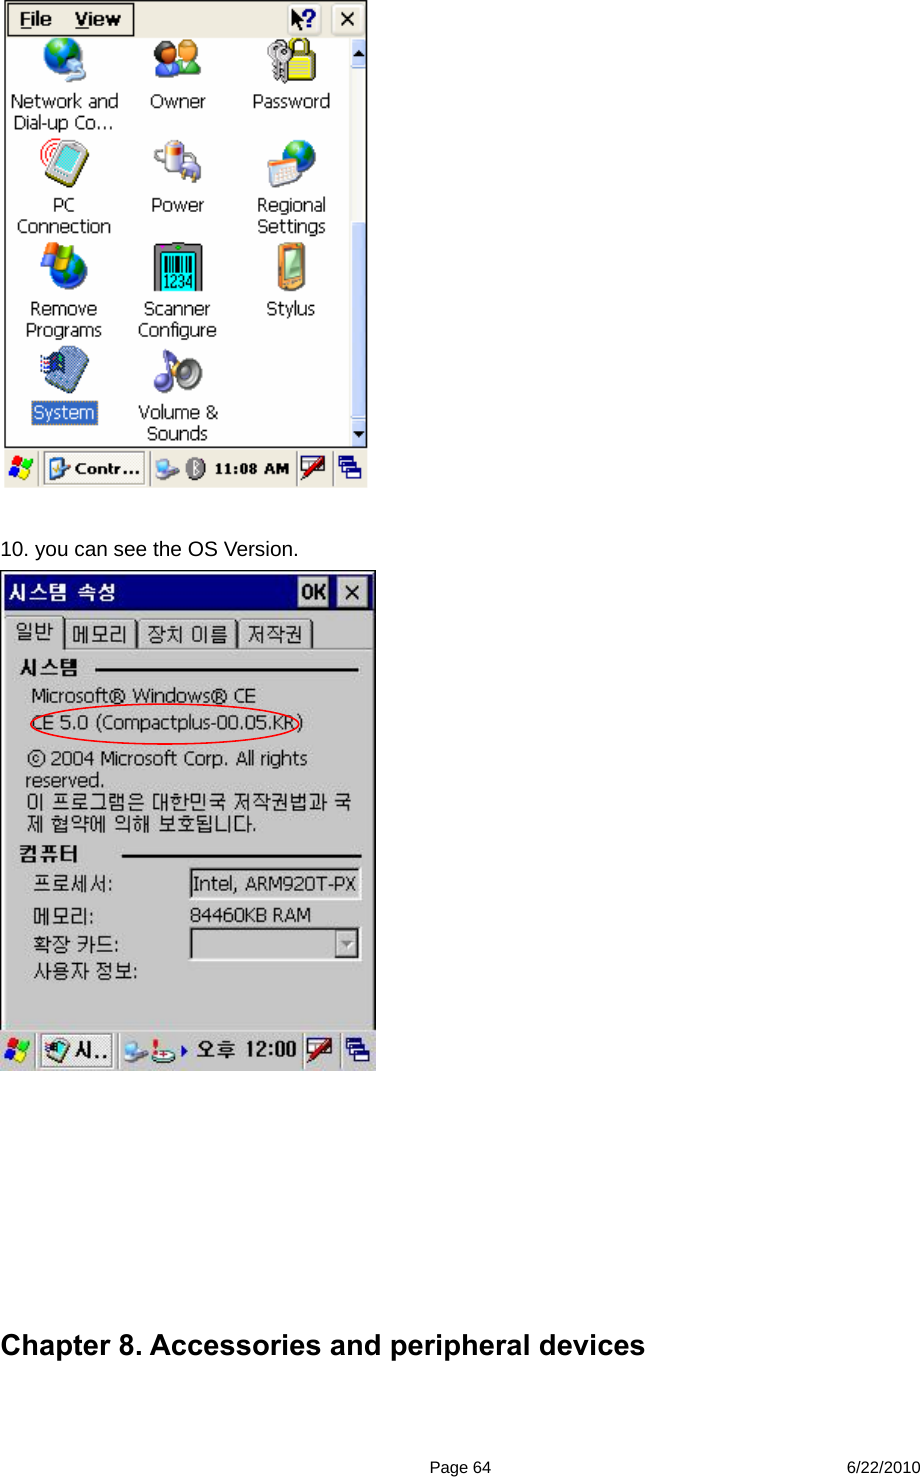
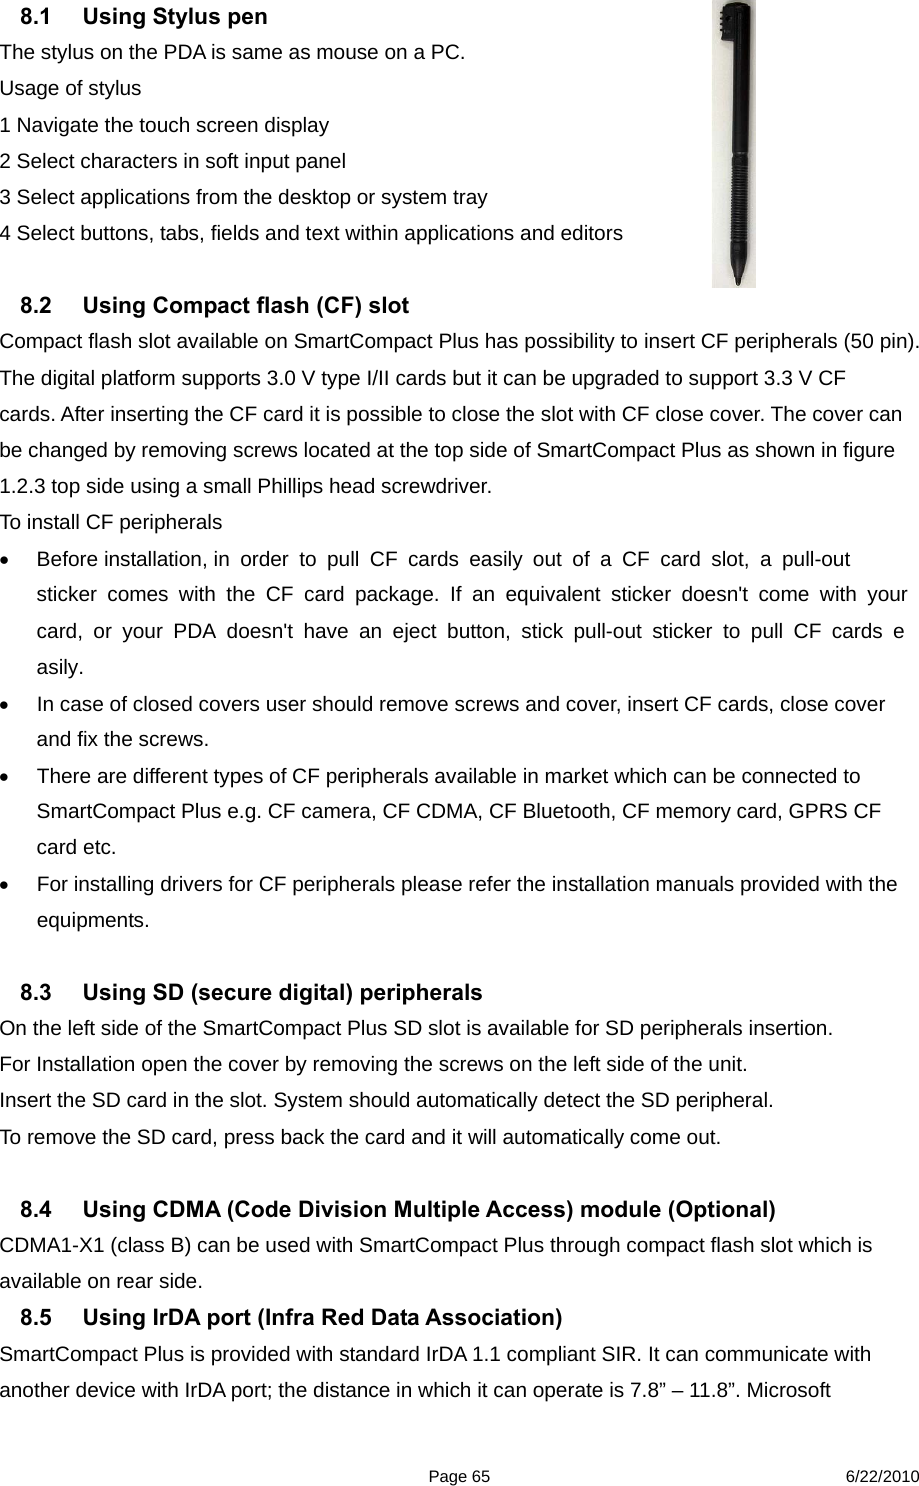
![Page 39 6/22/2010 7.4.3 Album Presses Album and like the second time picture and takes in existing and list of the picture files which puts to seem The third picture will be able to select the format which sees from the album. The second time picture the fact that shows the image and three re-pictures are the screen which list shows the name of file especially from the format which sees. 7.4.4 Camera Option The second time picture when pressing Option, is the initial screen. Will select Save Directory and will be able to select the location which will be stored. The location which is set a default is [within system].](https://usermanual.wiki/SmartPayTech/COMPACTPLUS/User-Guide-1305284-Page-39.png)