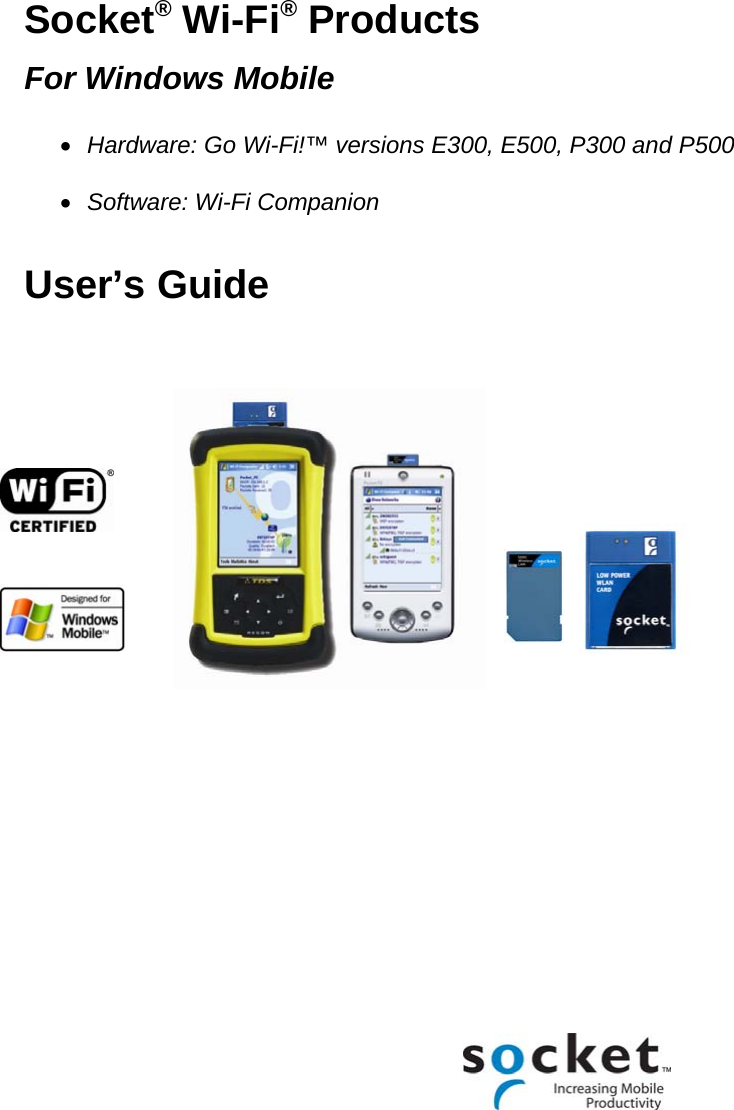
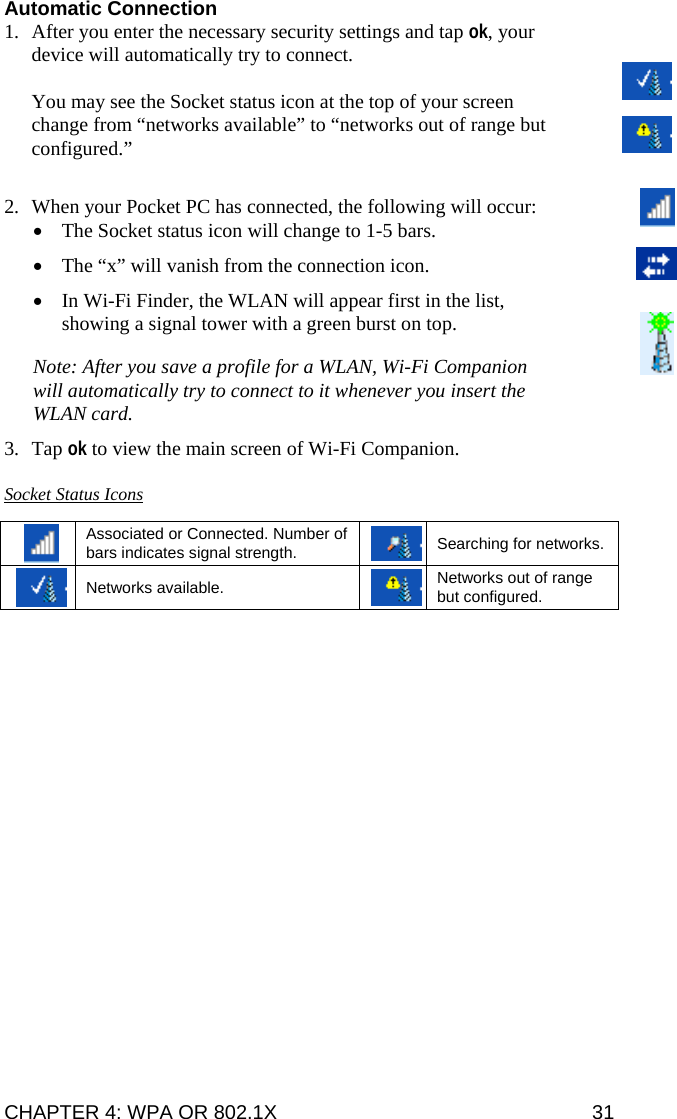
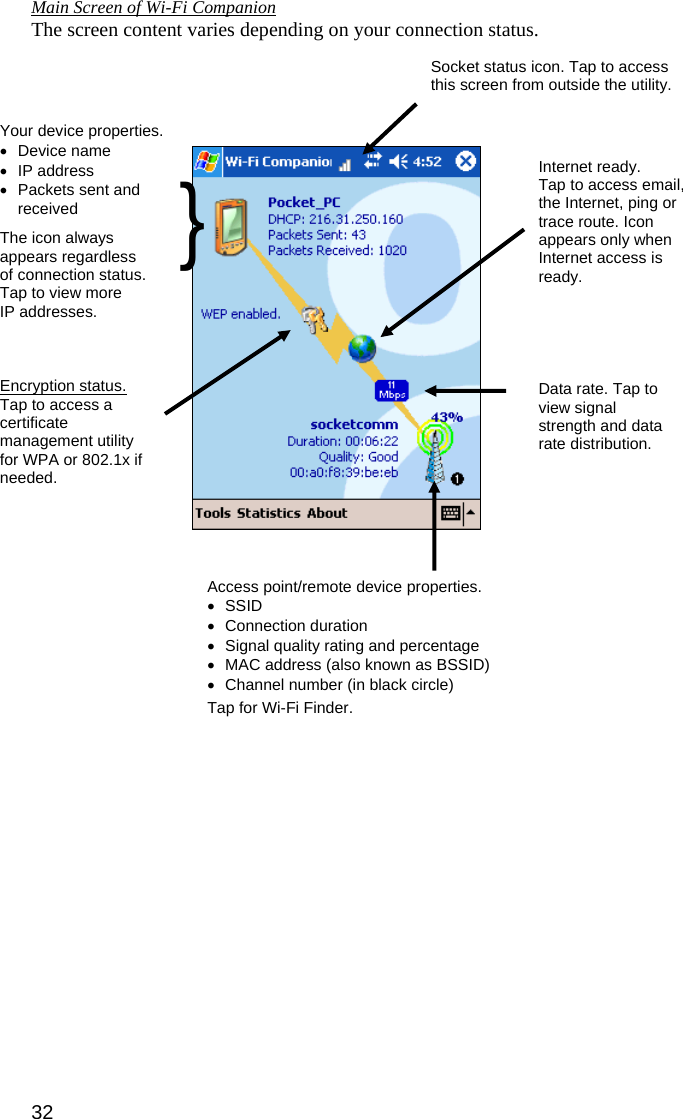
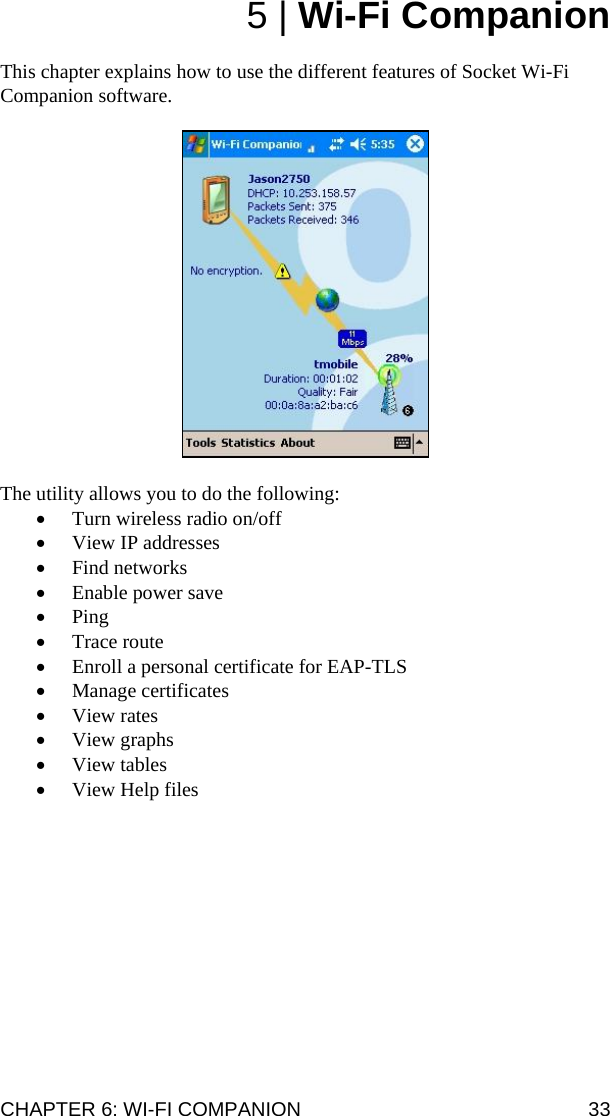
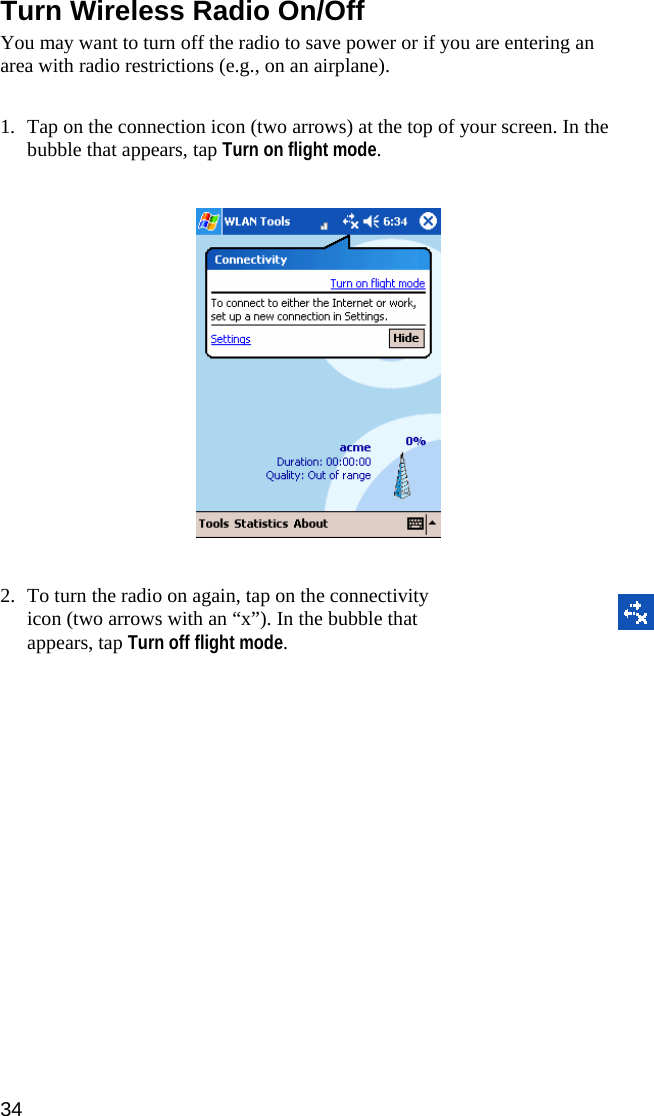
Socket Mobile 80211GCF Compact Flash Wi-Fi Card User Manual
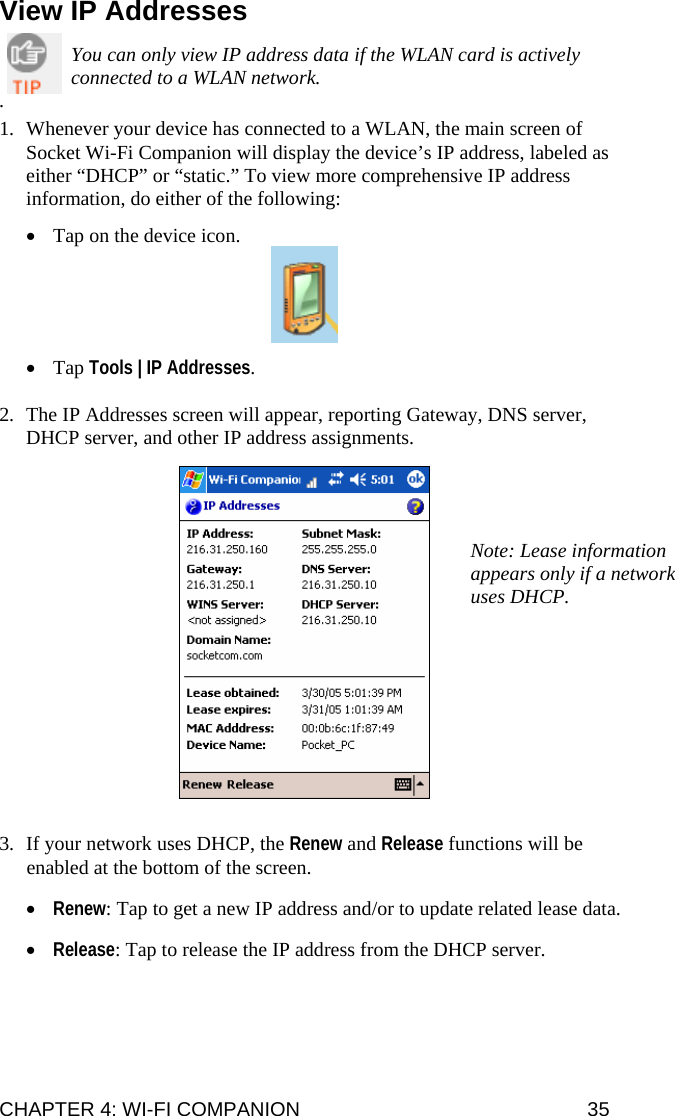
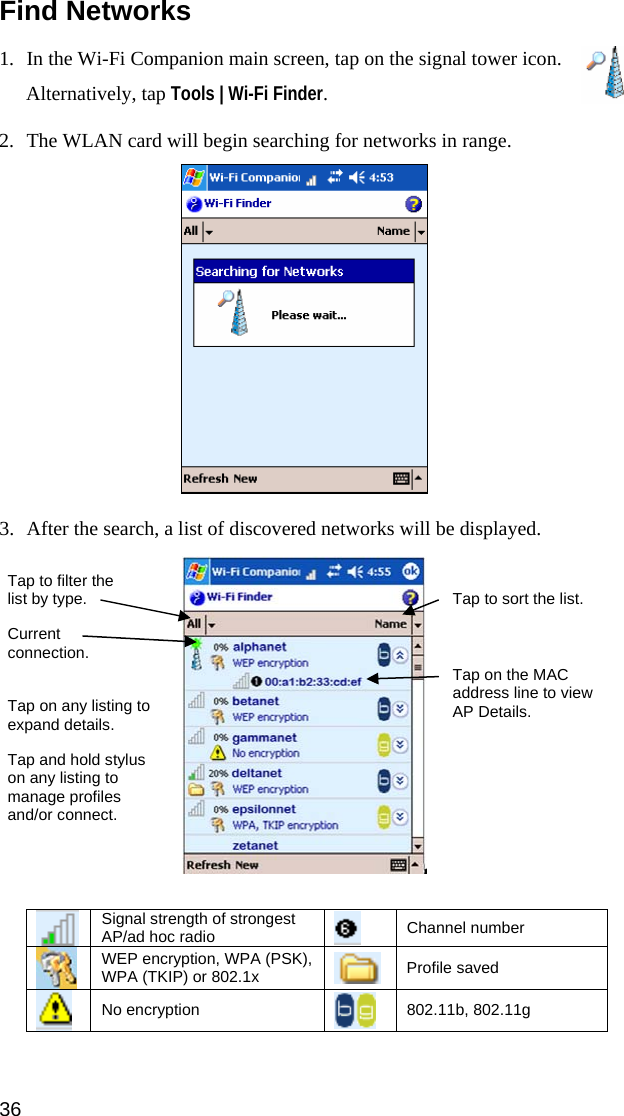
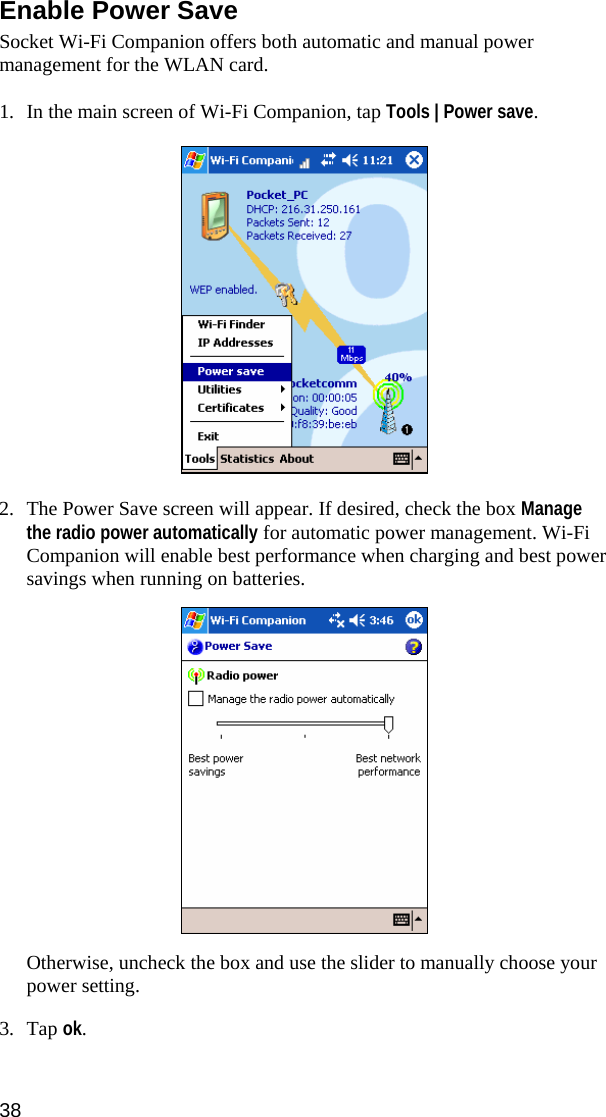
Socket Mobile, Inc. Compact Flash Wi-Fi Card
UserManual.wiki
>
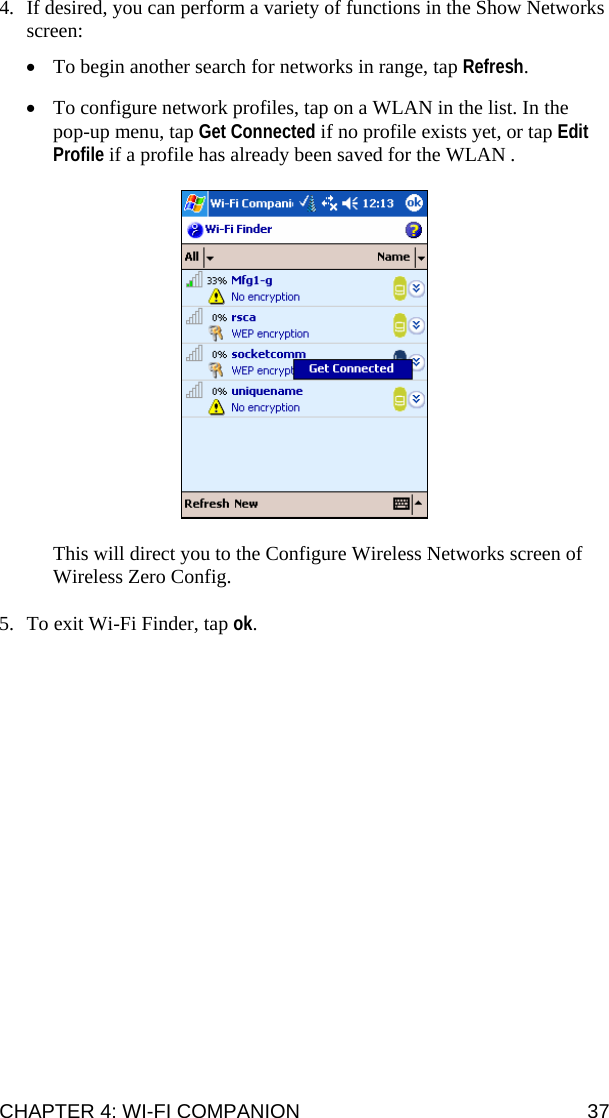
Socket Mobile
>
80211GCF User Manual
User Manual
Navigation menu
Upload a User Manual
Namespaces
Wiki Guide
HTML
PDF
Info
Views
User Manual
Discussion / Help
Navigation


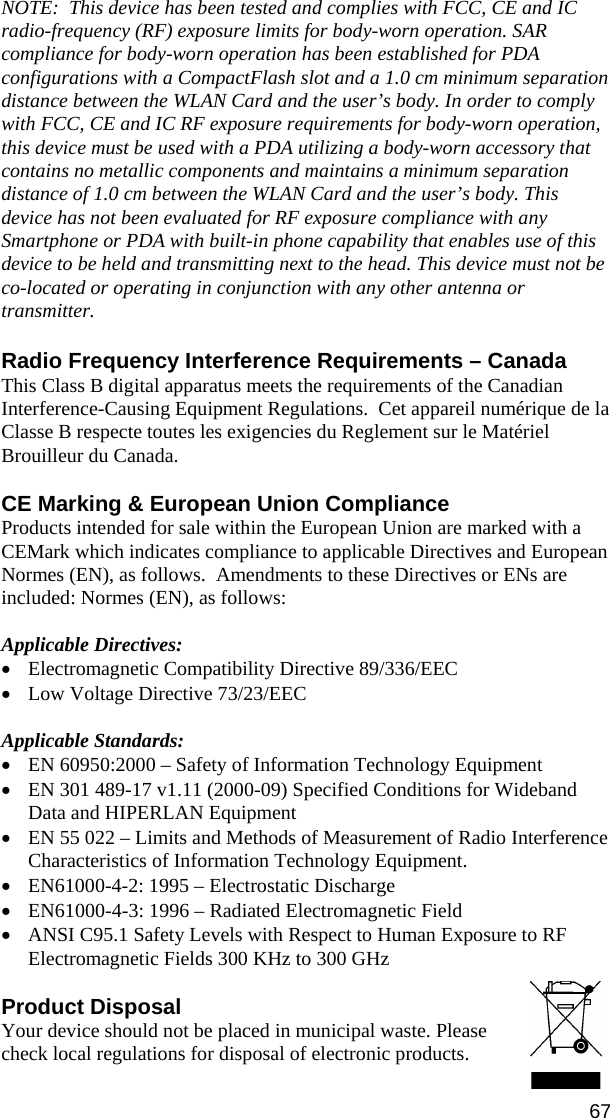
![APPENDIX C: NETWORK INFORMATION | 59 Appendix C Network Information Consult with your network administrator, or have them complete this form. 1. What is the network’s wireless network name, known as SSID? Note: The name is case-sensitive, maximum length 32 characters. 2. What type of security does your WLAN use? Check one of the boxes A-F below. A Open System (no settings needed, proceed to Question 4) B WEP-40 C WEP-128 D WPA-PSK E WEP-PEAP F WEP-EAP/TLS 3. If you checked B, C, D, E or F, please provide the necessary settings. [B] What is the WEP-40 key? 40-bit (10 characters): _ _ _ _ _ _ _ _ _ _ [C] What is the WEP-128 key? What is the key index? 128-bit (26 characters): _ _ _ _ _ _ _ _ _ _ _ _ _ _ _ _ _ _ _ _ _ _ _ _ _ _ Key index: 1, 2, 3 or 4 [D] What is the WPA-PSK key? What is the key format? Key: ____________________________________ Key Format: Hexadecimal. Key length must be 64 characters. ASCII. Key length must be 8-63 characters.](https://usermanual.wiki/Socket-Mobile/80211GCF/User-Guide-684850-Page-59.png)
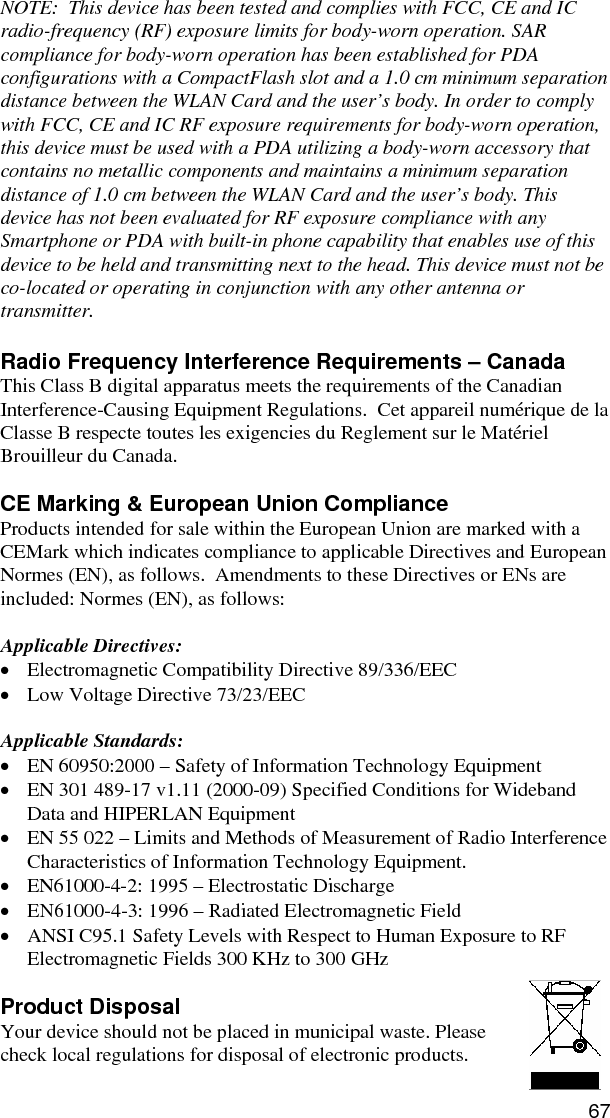
![60 | APPENDIX C: NETWORK INFORMATION [E-F] 802.1x Authentication only IMPORTANT! Get the required authentication certificate(s) from your network administrator! Specify the following 802.1x settings: WEP key: The WEP key is provided automatically I must enter the WEP key and key index WEP Key: _______________________ Key index: 1, 2, 3 or 4 Authentication: EAP-TLS May appear as “Smart Card or Certificate” in configuration menu. PEAP User name: ____________________Server:________________ (network login) (certificate server) Password: ____________________ Domain: ________________ 4. Does the network require that you use a static IP address? NO. If No, then you do not need any of the settings below. YES. If Yes, then please specify the following: (a) Mobile Computer IP address: _____ . _____ . _____ . _____ (b) Subnet Mask: _____ . _____ . _____ . _____ (c) Gateway: _____ . _____ . _____ . _____ (d) DNS: _____ . _____ . _____ . _____ (e) WINS*: _____ . _____ . _____ . _____ *For Remote ActiveSync Only: If your server does NOT have use WINS services, use the IP address of the host PC instead of a WINS address.](https://usermanual.wiki/Socket-Mobile/80211GCF/User-Guide-684850-Page-60.png)